Fab Zero: The Last Shangrila
The sixth iteration of the Fab Zero cycle is taking in Bhutan. Mentored by Fran Sanchez and Sibu Saman, the goal of this cycle is to set up 3 Fab Labs (Paro, Gelephu and Punkaha) & 1 Super Fab Lab (Thimphu) in Bhutan. Since I am taking both the Fab zero and Fab Academy at the same time, I thought of documenting for both cycles on this website.
Assignments
Final Project
The Fab zero gitlab page on final project has some really good documentation on the expectations of a final project and how to approach one.
I will be continuing with my project for fababademy. However, Fran said that my project needs a commercial name. Here are some options:
- Fab bag
- Smart purse
Vinyl Cutter
Vinyl Cutter Station requires:
- Vinyl roll, bits, and microscope for blade inspection
- Scissors
- Blade
- Tweezers
Setting up the cutter
- Ensure that the brake at the back of the cutter is open. This ensures that the vinyl roll slides smoothly into the cutter.

- Place the vinyl roll on the designated place and slide it into the cutter. Dust the roll if needed. Insert the vinyl roll into the cutter from the top side.

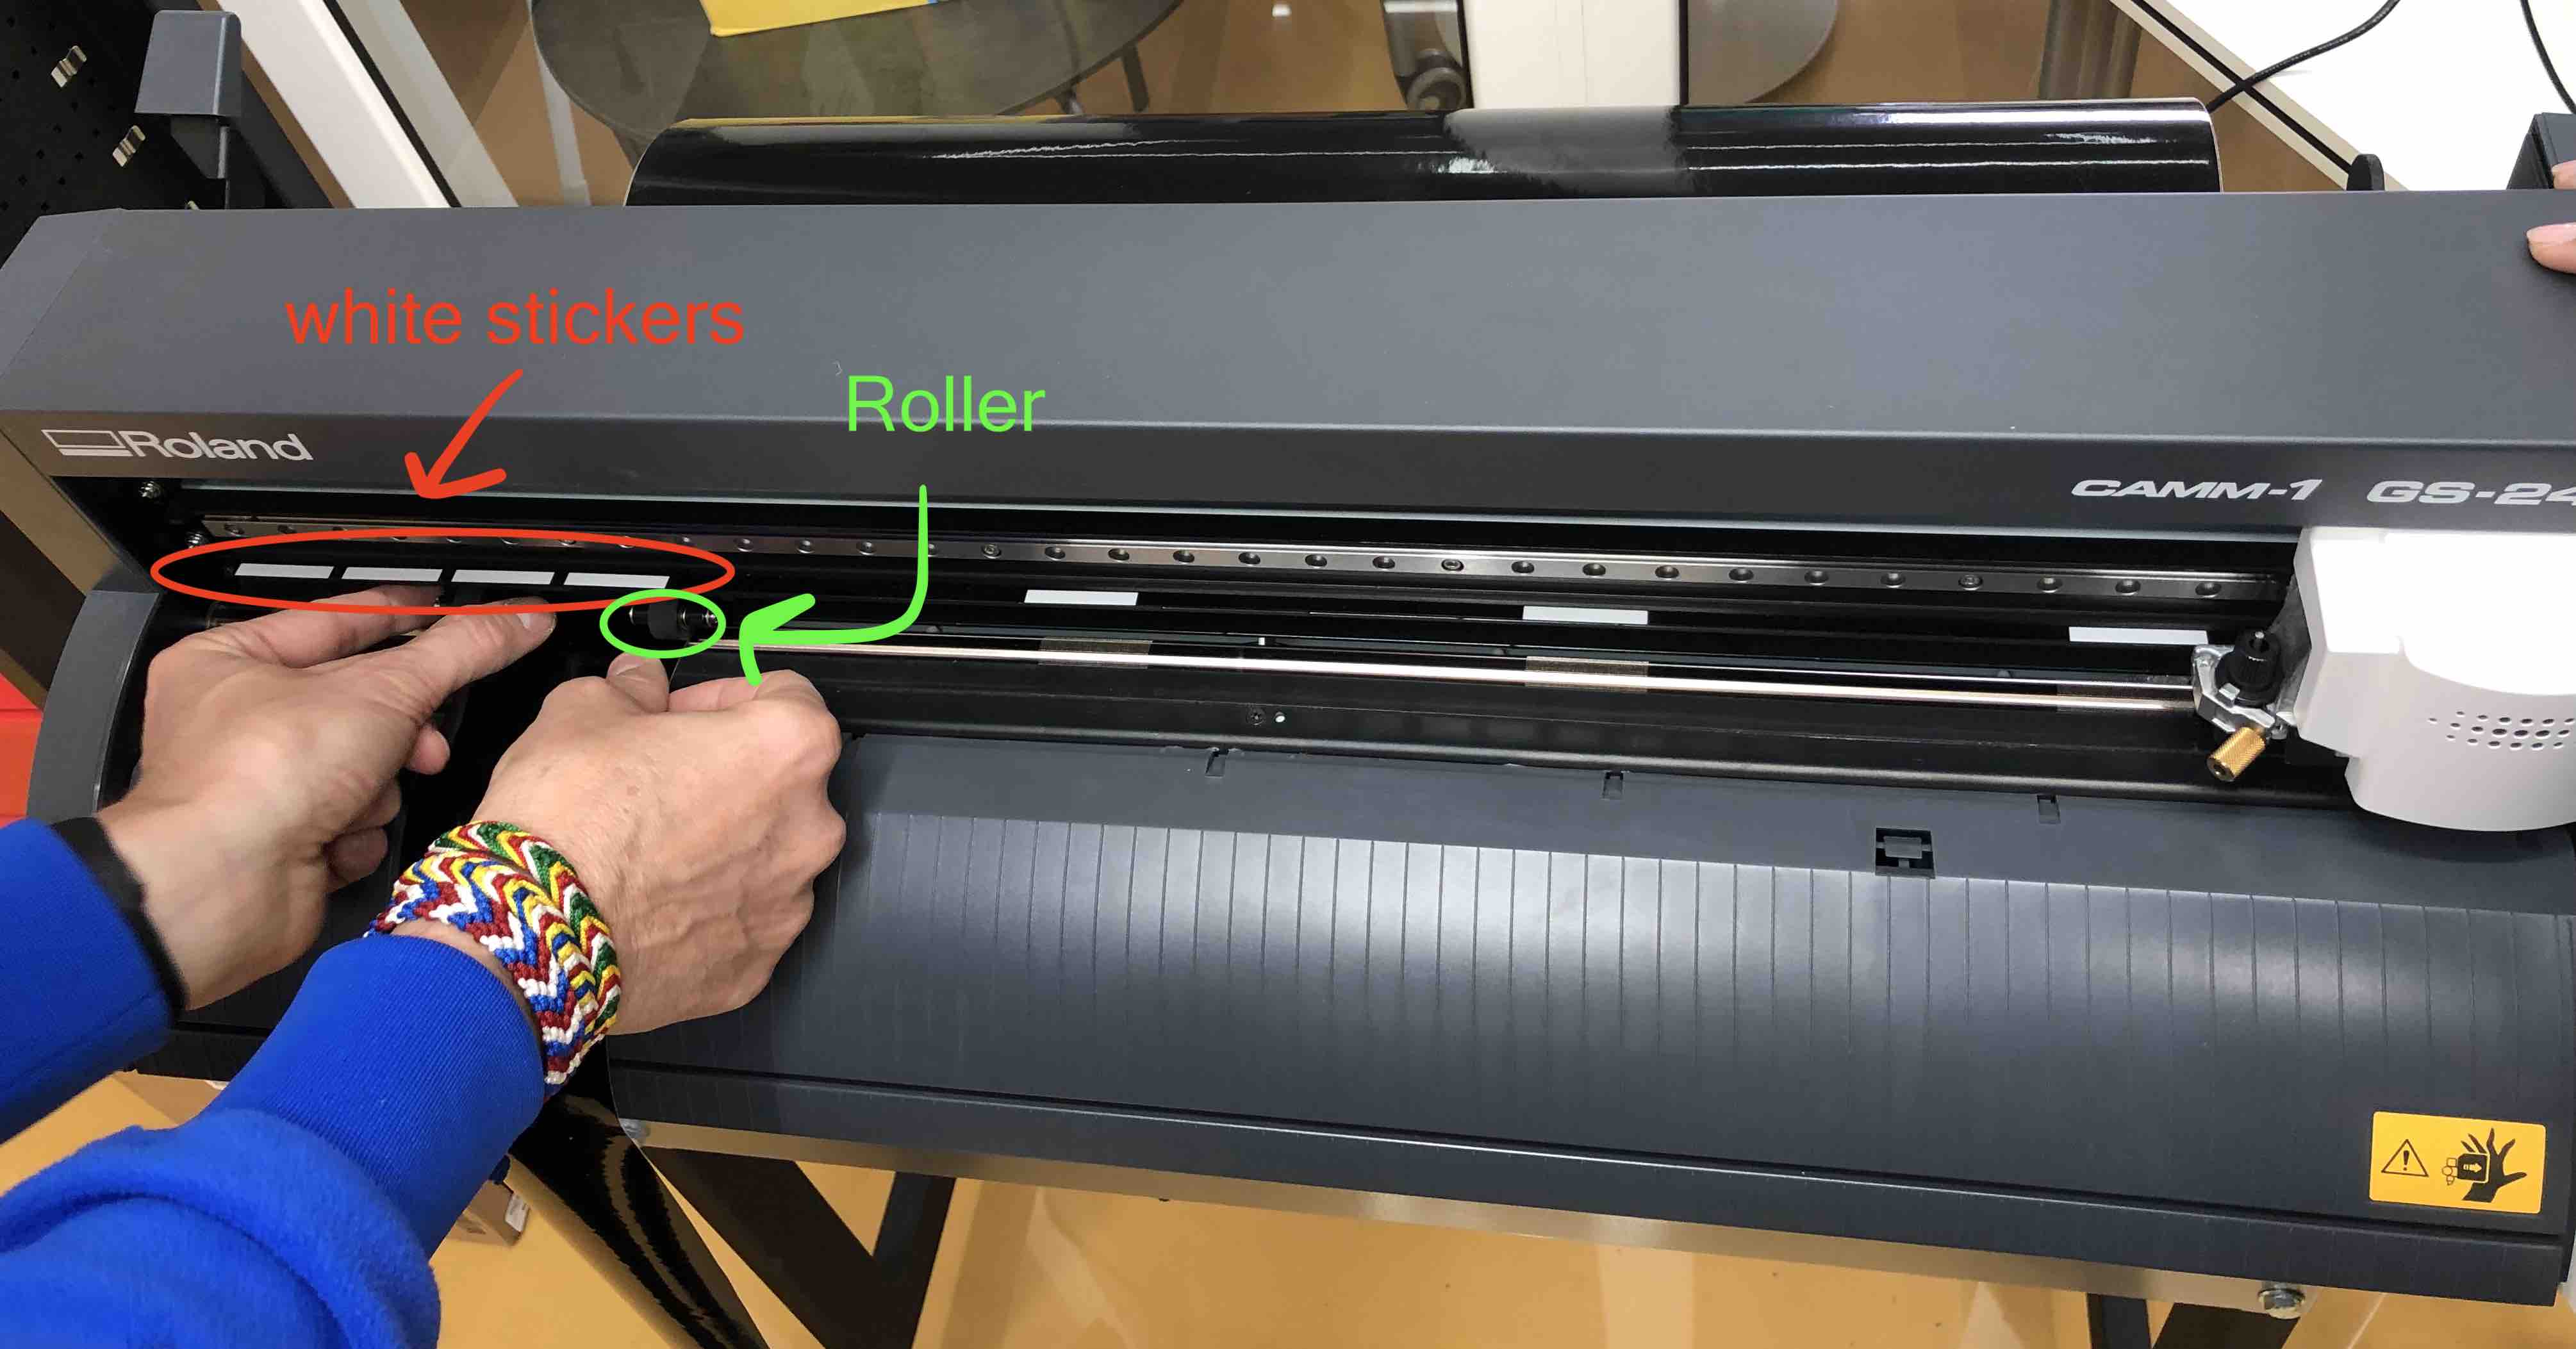
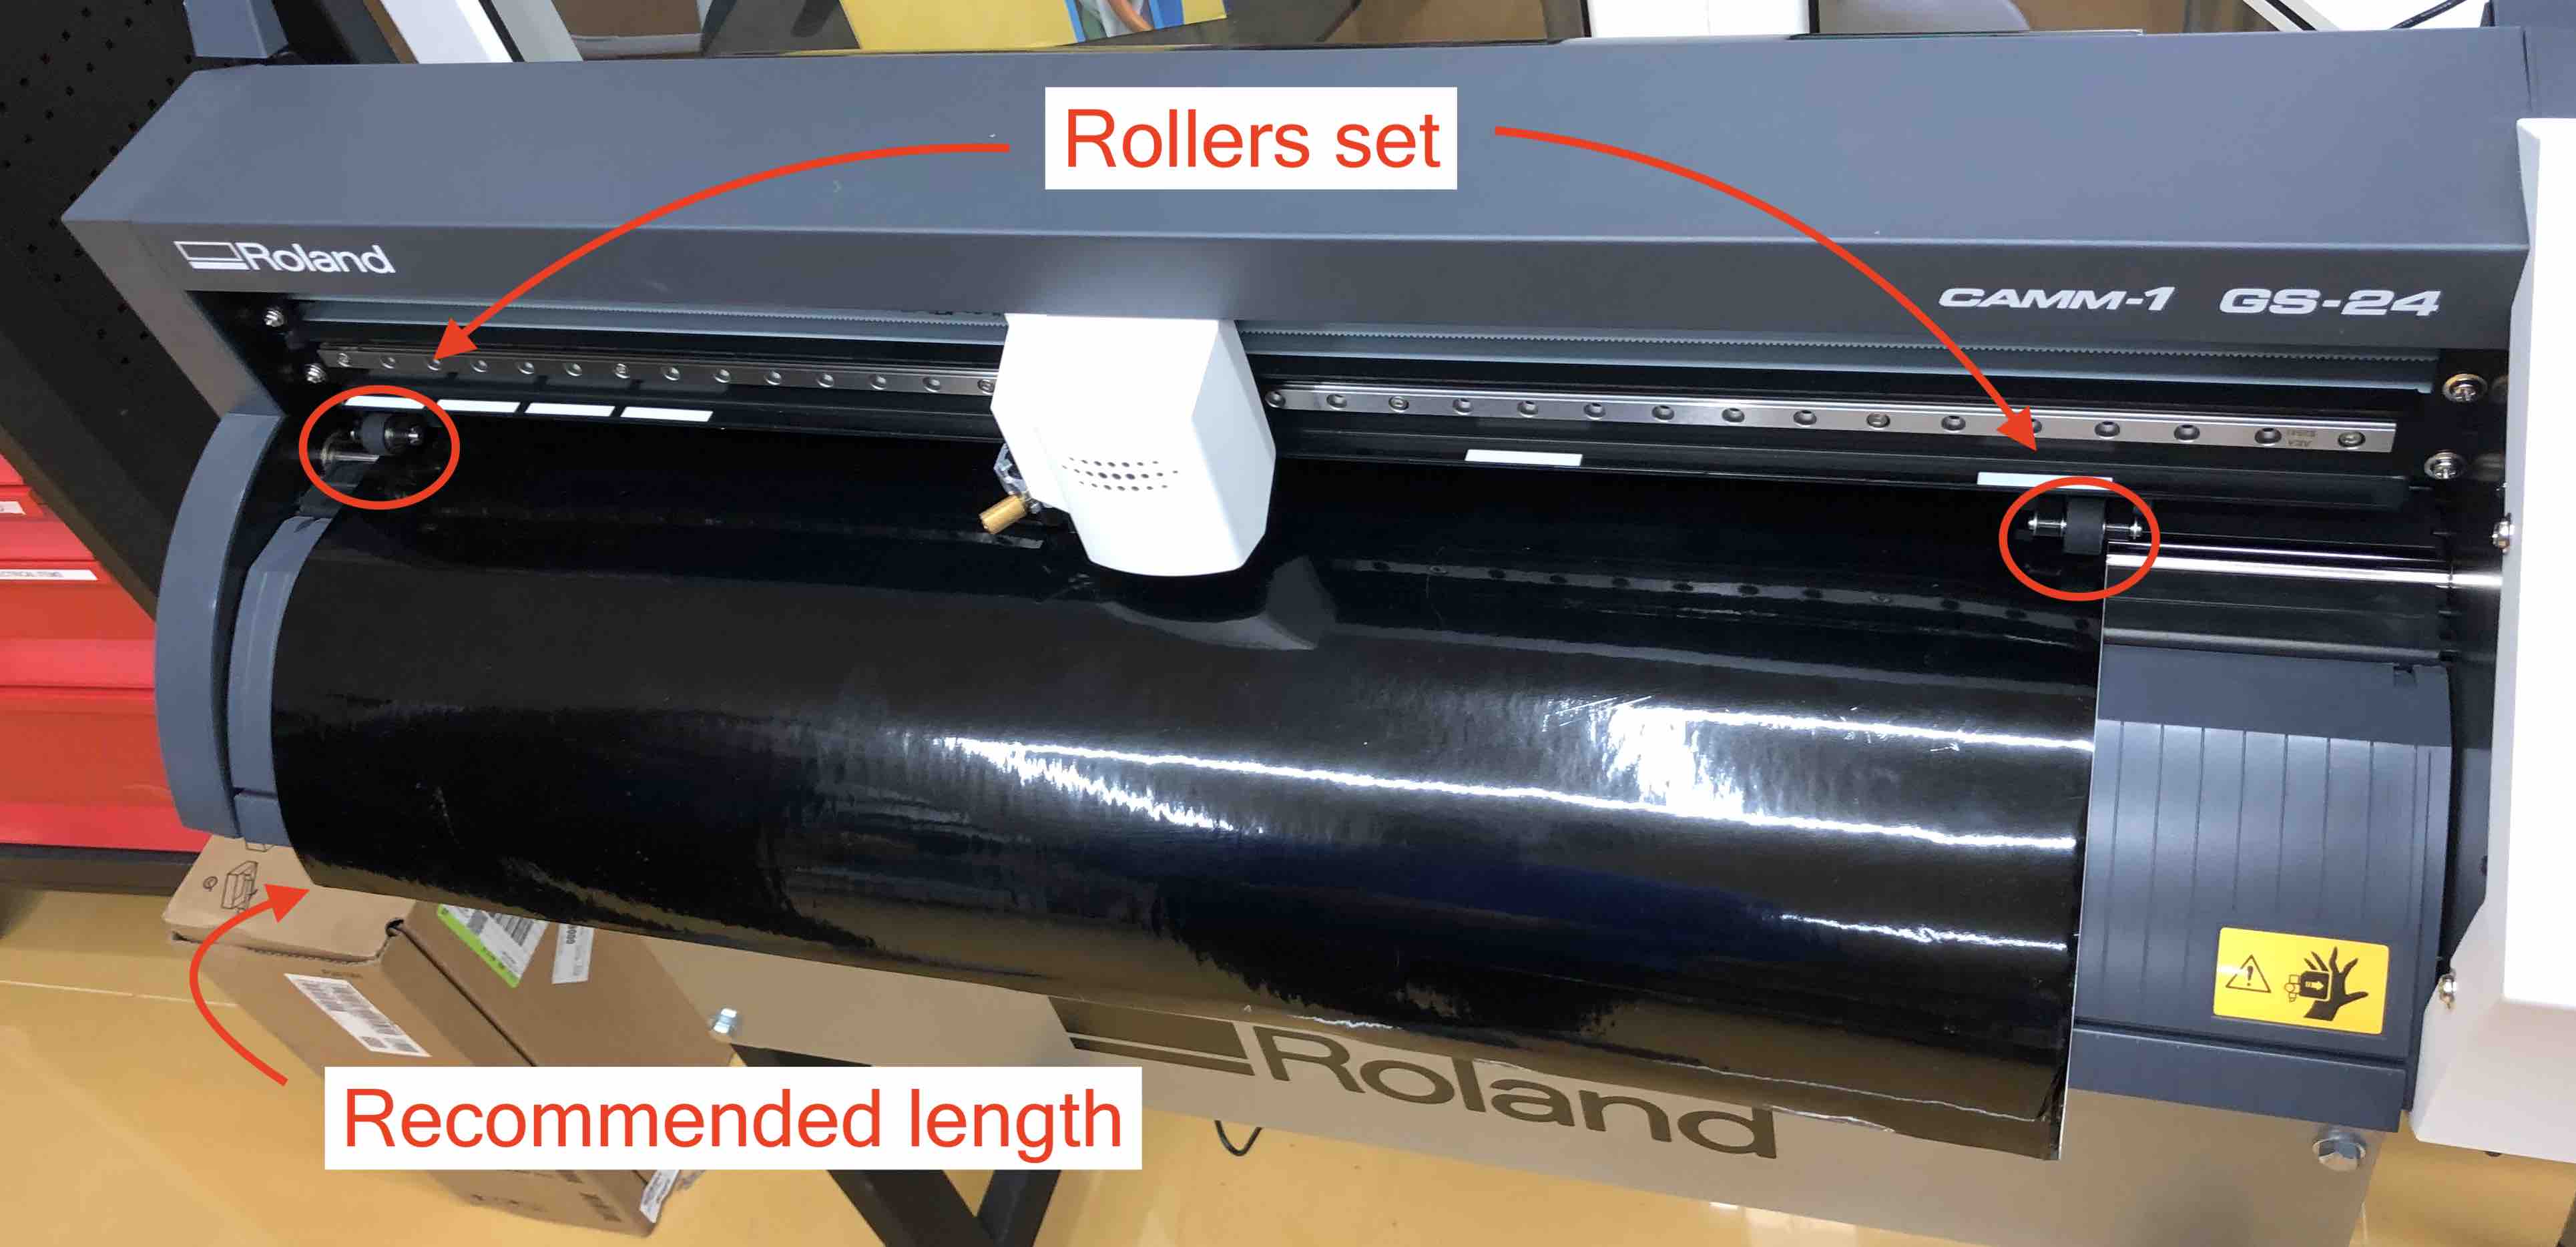
- Adjust the vinyl in the cutter from the front. The latch on the side releases the rollers so that they can be adjusted. The roller can only be placed on the white stickers. The vinyl should be pulled down to the reccommended length.
Recommended length of the vinyl:
Starting the machine
When you first start the machine, it gives you three options:
- Roll: Measures the width of the material. Used of if there is already a cut on the roll and you want to cut beside it.
- Edge: Measures the edges of material as well as the width. Good if you are using the roll from the beginning of the material.
- Piece: Measures the edge, width and lenth of the piece. Good if you want to cut on a specific and small piece of material.
Select the correct option for your job. To change the origin from the default, move to the desired option and press the origin button. Hold it till it says origin set. The new origin is now set.
Cutting Blade
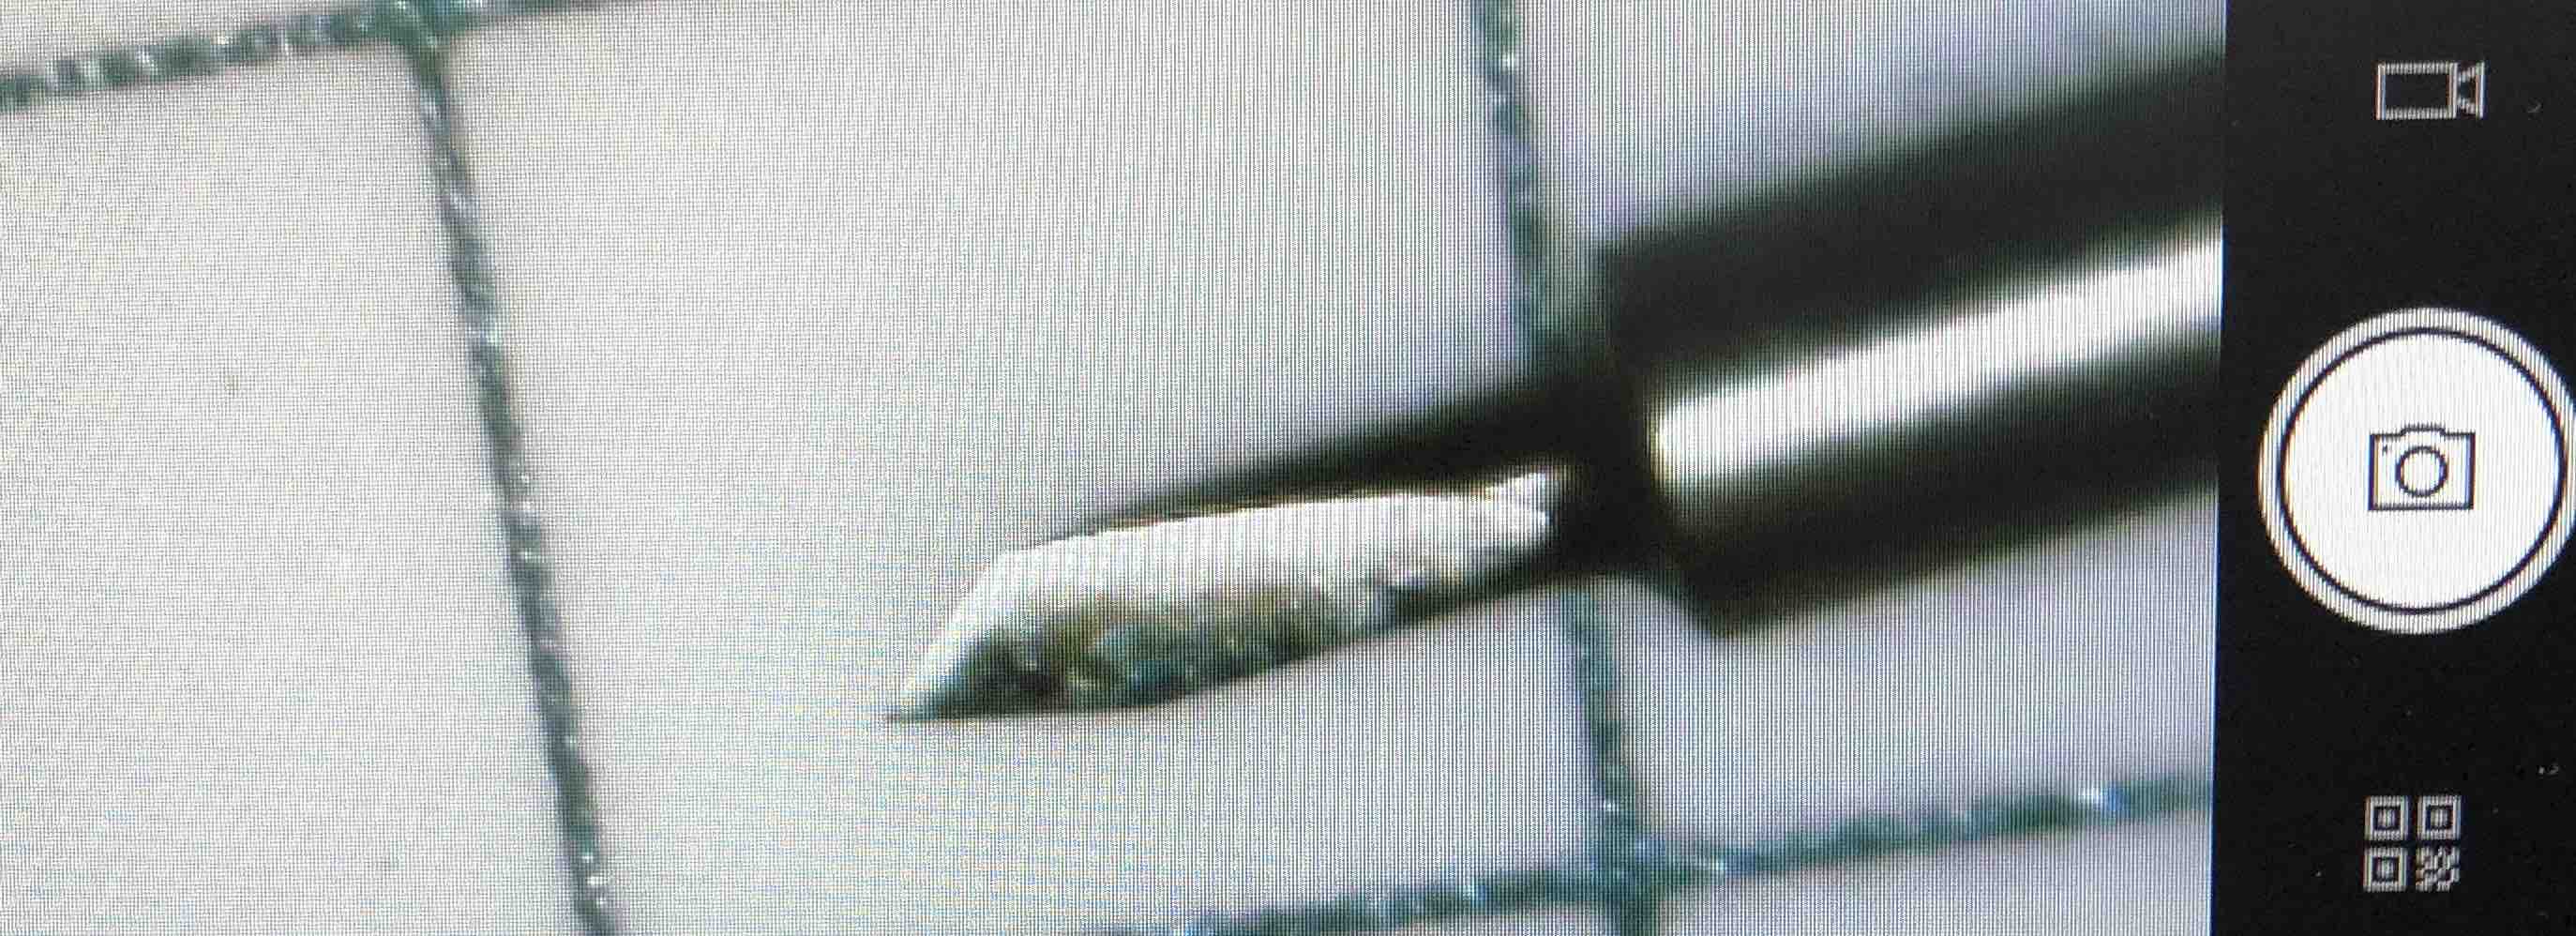
To inspect the cutting blade, unscrew the lock and take it out to check that the blade is sharp enough.

Inspect the blade under a microscope. A sharp blade will look like the picture below. Sharp blades are recommended for detailed cuts. Slightly duller blades can be used for making bigger cuts that are not very detailed.
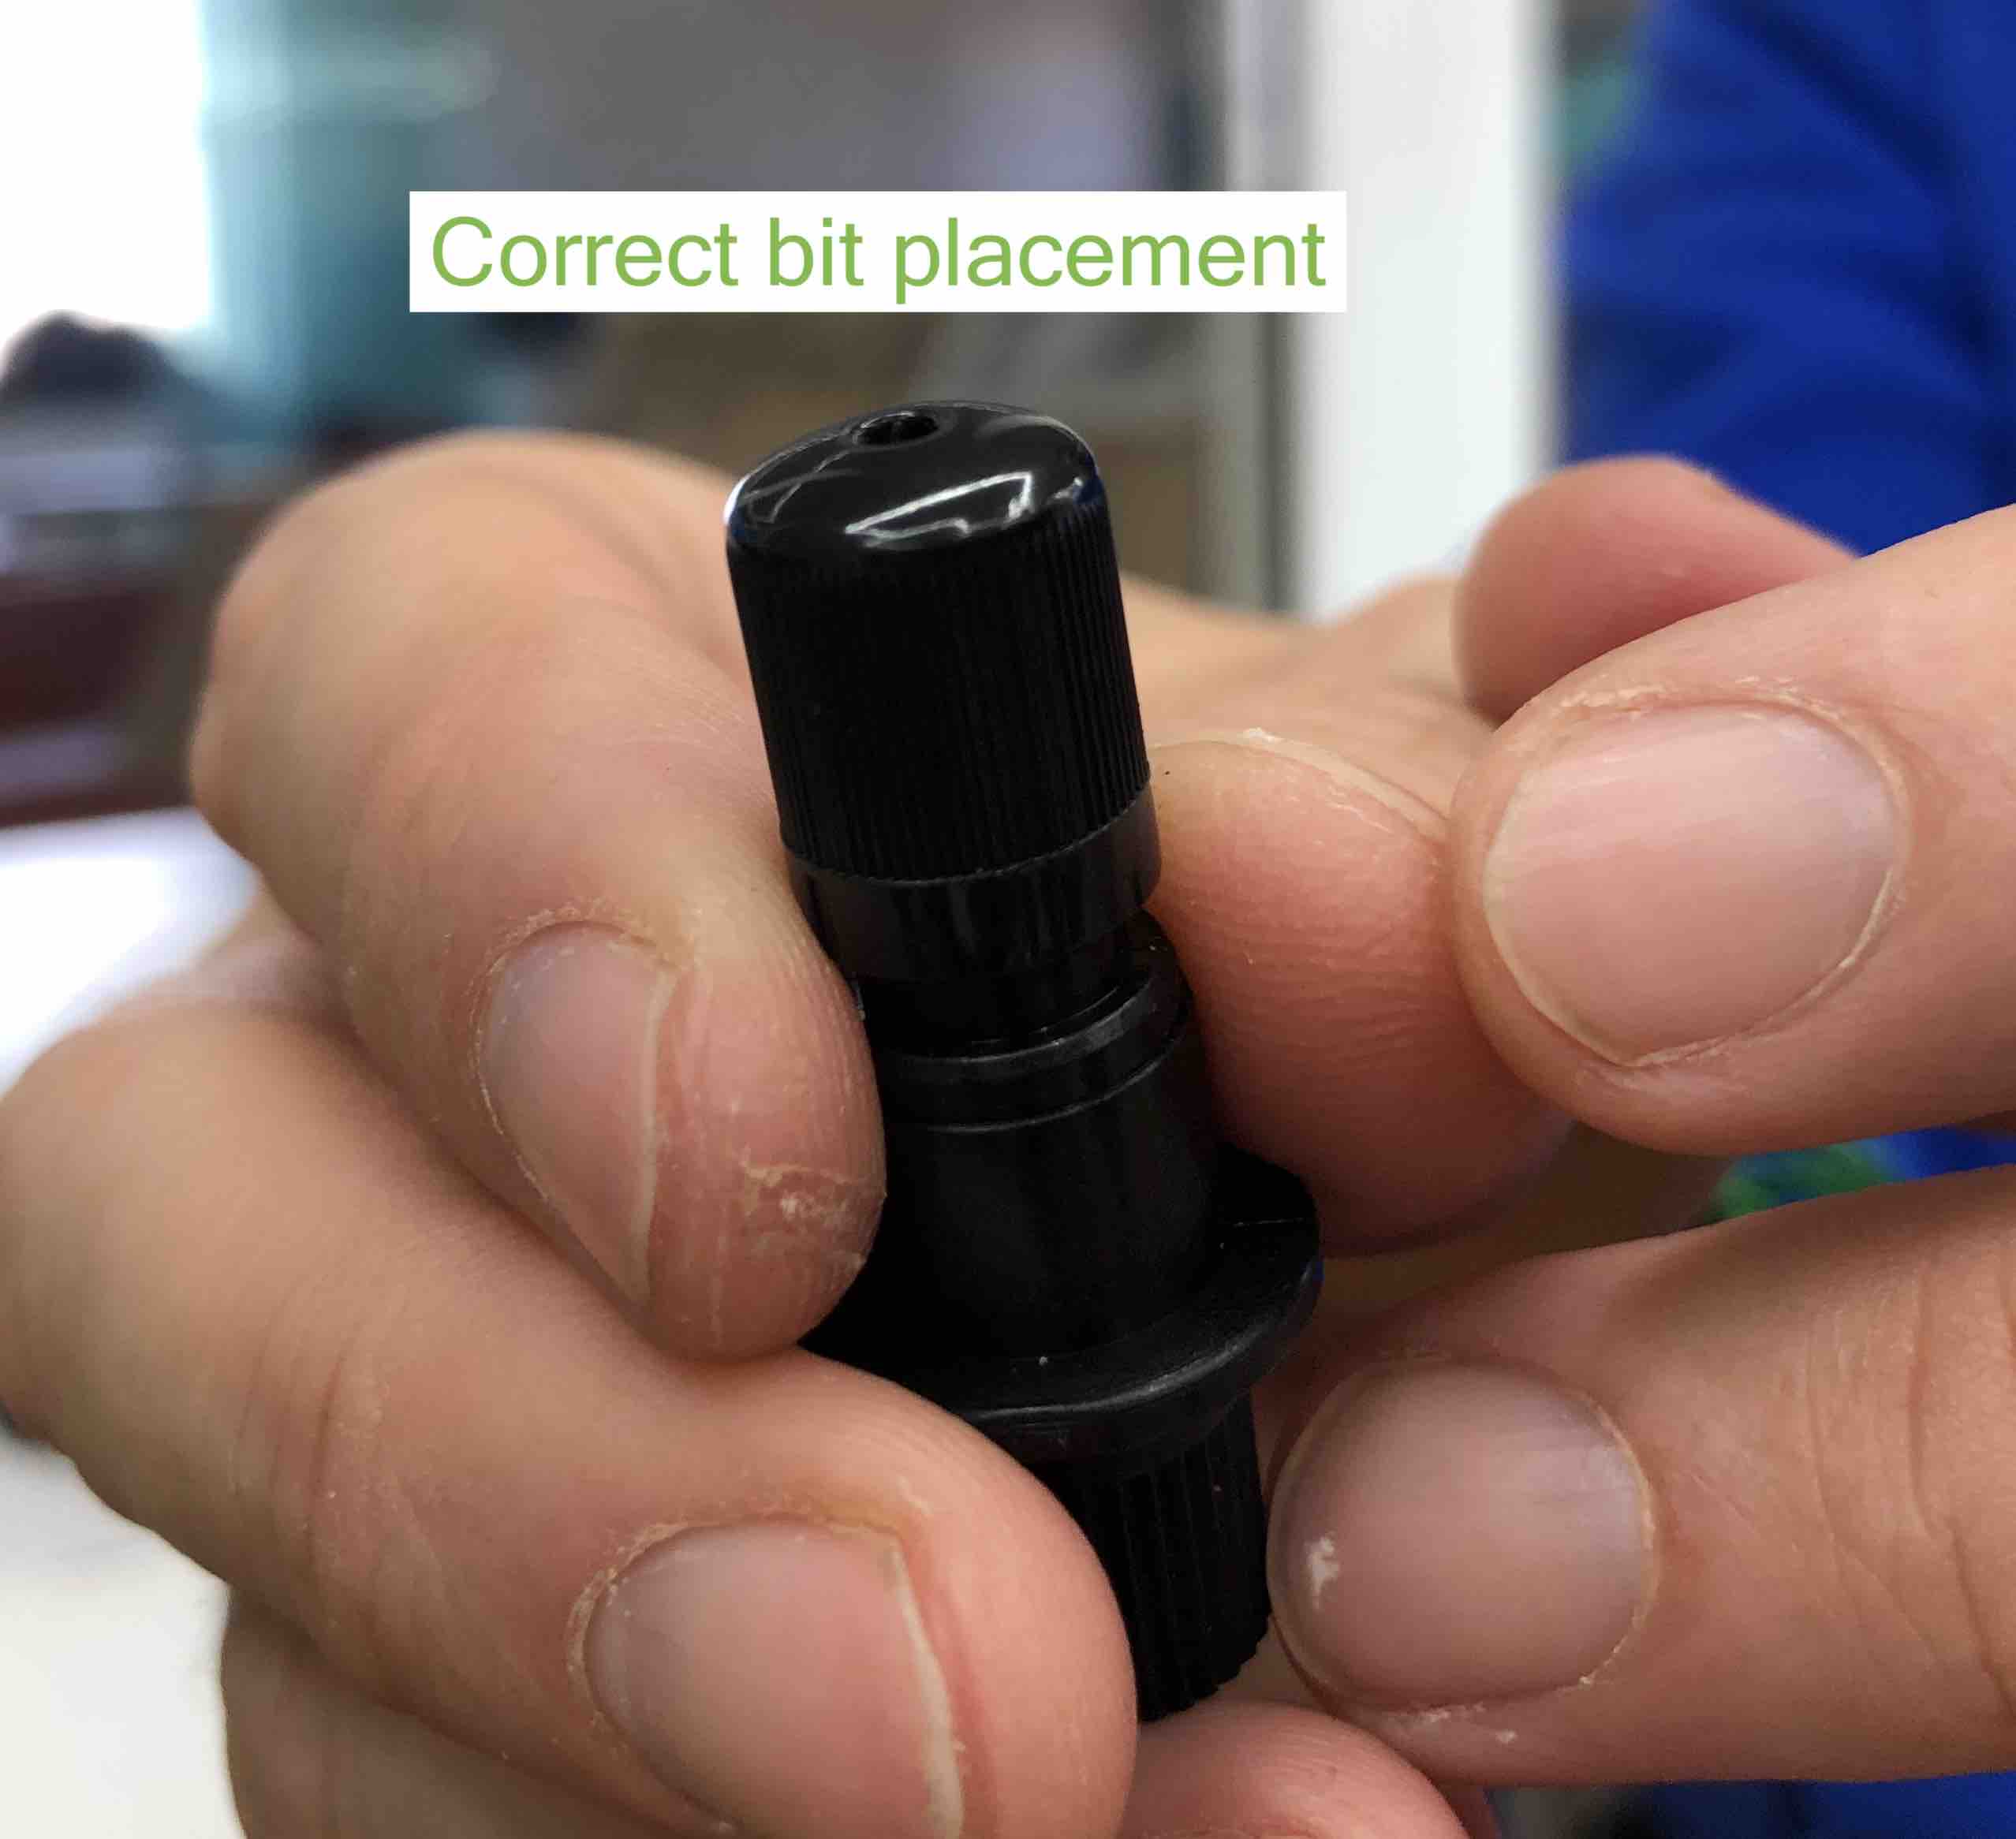
Put the blade back into the bearing. You should hear a click when it is placed since it is magnetic.
|

|
Put the blade back and tighten it. Take out the magentic rod from the top. This keeps people from pressing it down and damaging the bit. Keep it for future blade inspections.
Running a test print
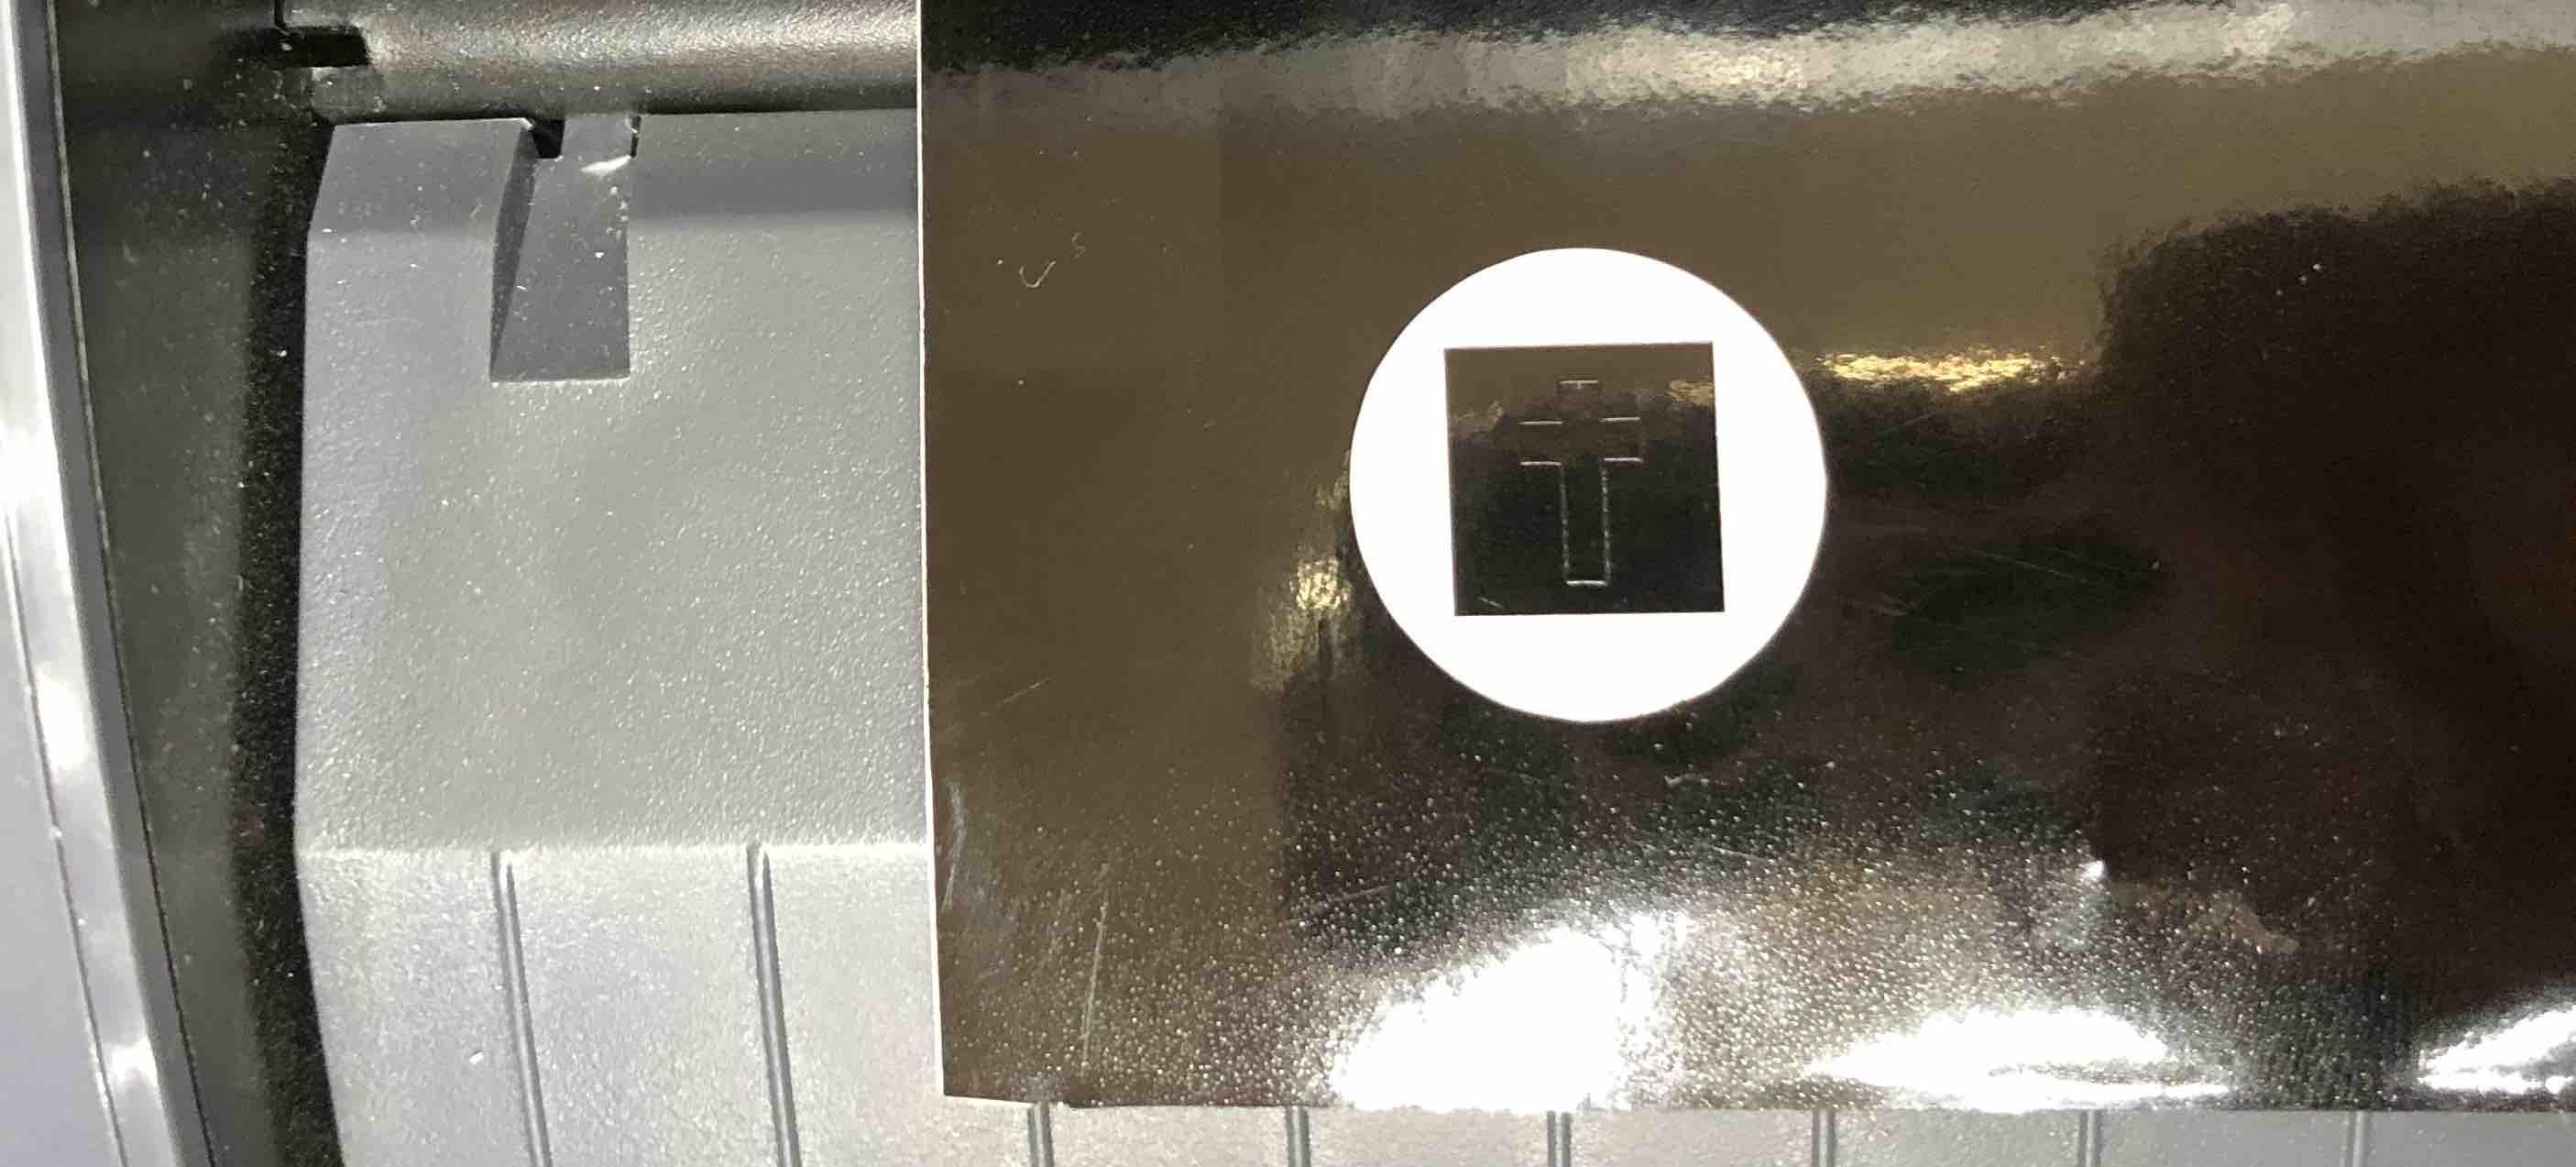
Once the vinyl roll is loaded, the sheet is inspected and the blade loaded, you can run a test print to ensure that everything is set up correctly. For this you just click the test button on the machine when you are ready. It prints out a cross inside a square inside a circle.

First inspect the circle. Next, take out the square and inspect the details on the cross. Ensure that the vinyl is cut all the way through. If not, this means that the blade length is too short. Adjust it. Check that the back paper has not been cut. If it is, the length is too long and needs to be adjusted.
To adjust the length of the blade, take it out from the cutter and turn it to match a groove on the blade holder.

Cutting a custom piece
To cut a custom piece, convert it to vector format (.svg) in a photoediting software. We chose inkscape.
Import file -> trace bitmap -> apply
Delete the png file and keep the vector picture. Change the size of the workpiece to fit the vector image.
(step to change workpiece size)
Now export the image to cutstudio
Send to machine
Processing the cut
Once the sticker is cut, pull out the vinyl roll till the cutting point and cut it with the blade. You usually want to do this when the entire width of the roll is used.
Weed out the extras from the sticker using a tweezer. If the sticker is detailed, stick it to a roll of transfer tape, cut it out and then remove any airbubbles.
Clean the surface where you want to paste the sticker with IPA or any other cleaning agent. Carefully peel out the sticker with the transfer tape. Stick it on the desired surface and press it down with the a card. Remove the transfer tape with shear postiion. You are done. Please clean up and keep the tools back in place.
3D Printer
Required list of parts for efficient use of 3D printers:
- Different nozzle sizes: 0.25mm, 0.4mm, 0.6mm, 0.8mm
- PVA support filament (water soluble)
- different types of filament: PETG, PLA, TPU, wood, carbon fiber…
- 7mm socket for changing the nozzle and for maintainence.
- SD card readers for Prusa
- filament clips (3D printed)
- dust remover for filament (3D printed)
- needle for nozzle cleaner. (acupuncture needle)
### Maintainence Schedule
Weekly:
- Check print bed
- Dust the printer
- Erase SD cards
- Grip check
Monthly:
- Check lubrication
- Check belt tension
- retighten screws
Half-yearly:
- check for rust
- check sensors
- check zip-ties / connnections
- check no plastic on the side
Shopbot
Intro
The Shopbot we have at Super Fab Lab is a 3 Axis milling machine. It has 2 motors for the x axis, 1 for the y axis and 1 for the z axis. It comes with 2 power supplies and 2 communcation cables, one each for control box and the spindle.
Safety
Some important safety points:
- Mask. Mandatory.
- Eye protection. Madatory and very important. There will be flying pieces of wood.
- Gloves recommended for protection against splinters.
- Ear protection reccommended for loud jobs.
- closed toe shoes.
- Sleeves folded up, no loose clothing, no hoodie strings, hair tied.
- Use clamps on the side to hold down the wood. Centre pieces need to be screwed.
- DONOT leave the machine unattended
- Always be in reachable distance to the E-stop button.
Important machine know hows
The shopbot needs to be powered on from two places to operate. Turning the red latch (labbelled On/off switch below) will turn on the control box. This does not turn on the spindle. Now that the control box is on, we can continue with setting up the machine.

The designated desktop for the shopbot has two softwares installed: Shopbot3 and Shoptbot Editor. Open the Shopbot3 software. Make sure to read all the pop-up boxes. Press the reset button when prompted. Ensure that the E-stop button is not pressed down.
- Shopbot needs a scrificial board. This is to protect the machine from the spindle cutting too low.
- A dust collector sucks up the saw dust from the job.
- THe spindle rotates the bit at a high rpm to cut through the wood. There are many different kinds of bits availible for different kinds of job.
- The drill bits go into a collet. The ones in the shopbot are high precision spring collets. Check the collet each time you change a bit. Clean the sawdust off them. They have a lifespan of about 400-500 hours so these are the most replaced parts.
- Good to have different size collets for different bits. Two of each is also advised incase one breaks.
Shopbot3 interface
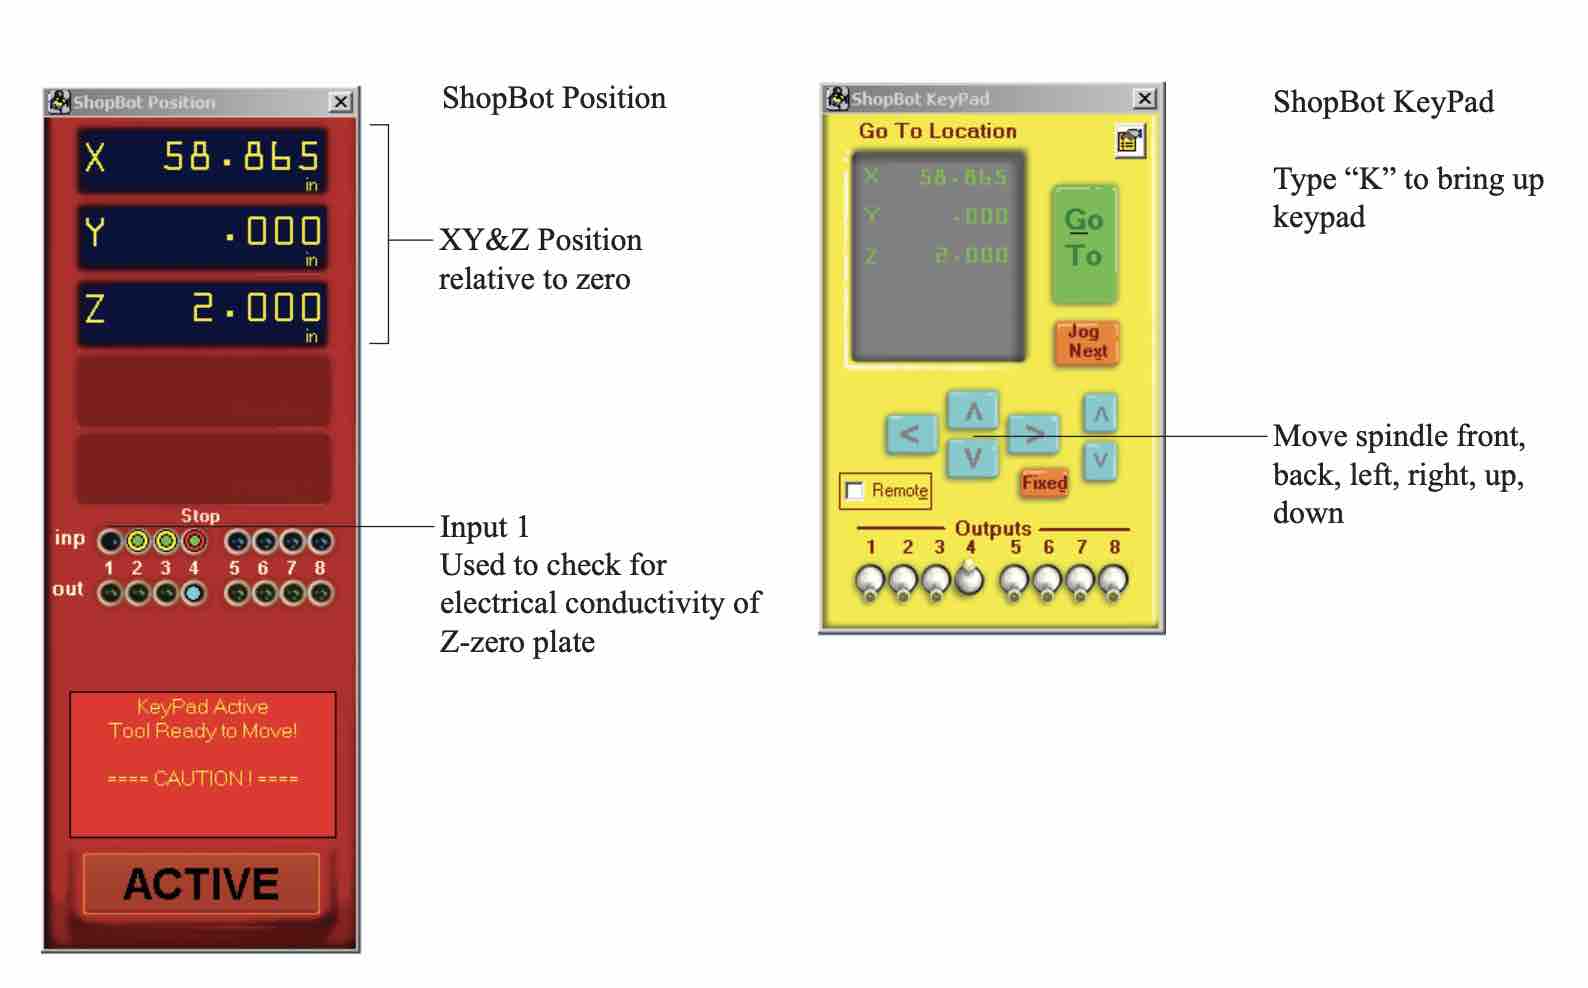
Shopbot3 has two main interfaces that we work with. The red window displays the position of the spindle relative to the zero. The inputs tell us what the error is. If the following numbers are flashing, the input lights flash. The numbers correspond to the below:
- 1: Z- level. The Z zero plate.
- 2: X limit switch.
- 3: Y limit switch.
- 4: fault. Error. Check the machines.
- 5: Z limit switch.
- 6,7,8: Not applicable for our shopbot.
When the machine starts, the co-ordinates could be wrong. Ensure to zero it before using the machine.
Zeroing XY

Zeroing Z
Checking collet
Changing Bit
Power Outage Situation
Laser Cutter
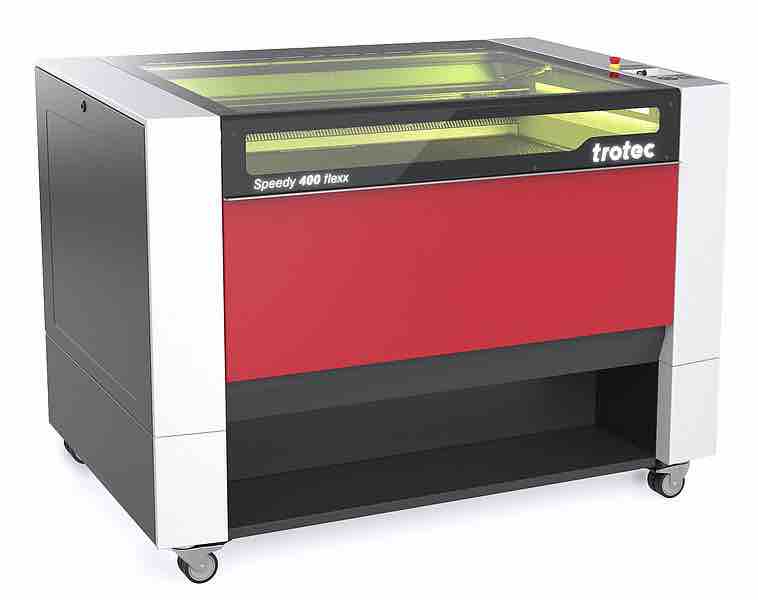
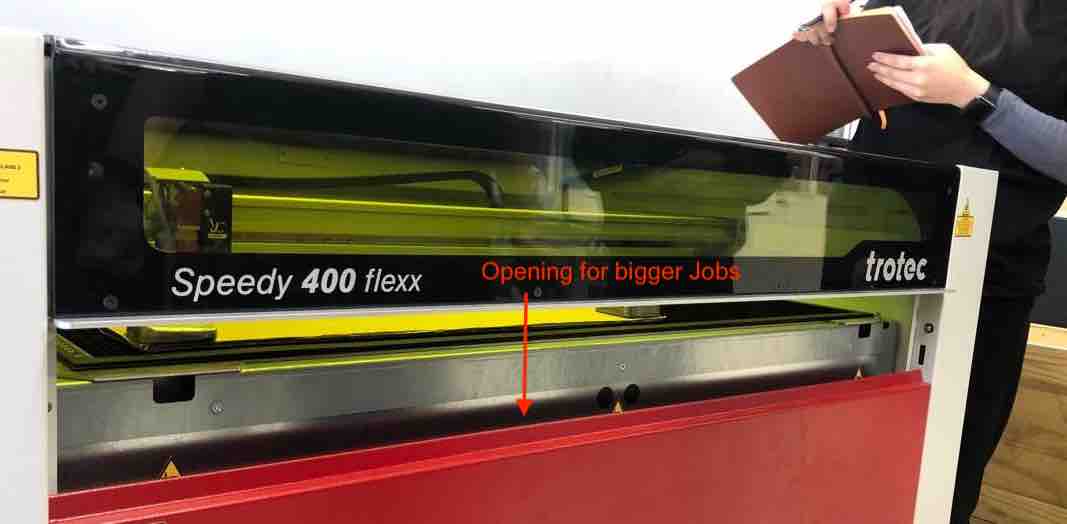
We have two laser cutters at the super fab lab: a speedy 400 and a speedy 100 from Trotec.
|

|
It is important to note that the laser cuts because it burns. Therfore, you can only cut things that you can burn. This means that most plastics cannot be lasercut since burning it releases harmful chemical fumes. The fumes are not only bad for health but it also corrodes the metal around the cutting area. Natural materials like wood, cardboard and acrylic are popular materials to use in a laser cutter. PLA sheets are okay as well. If you don’t know what the material is, DONOT LASER CUT IT.
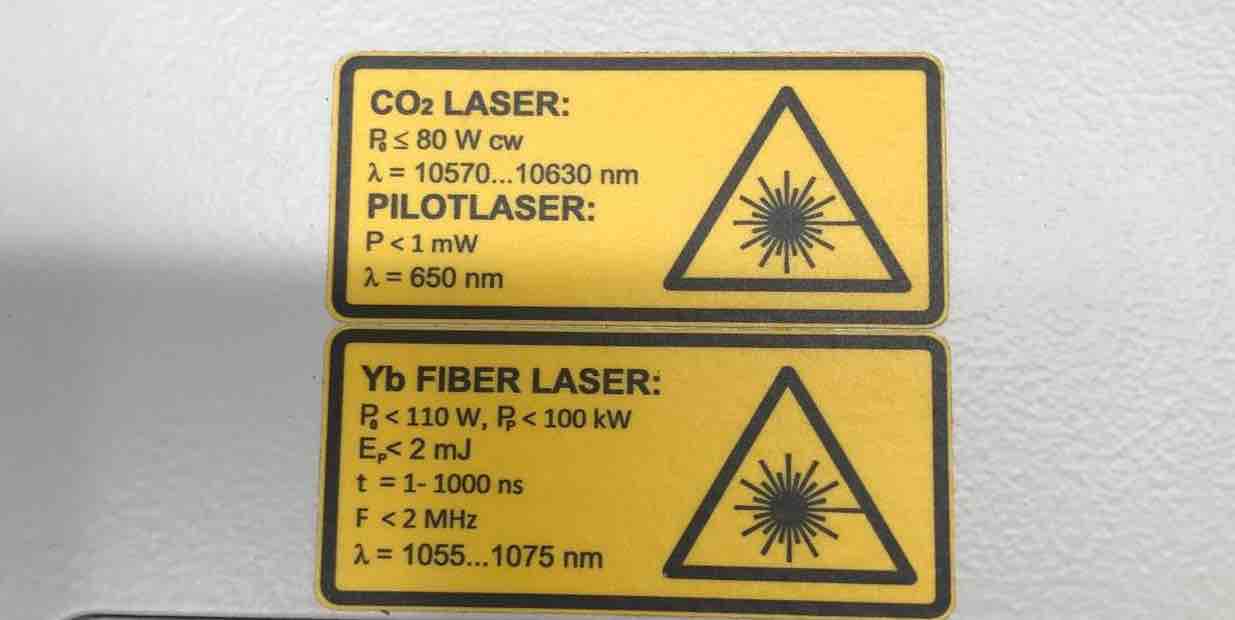
The speedy 400 has a carbon dioxide and fiber laser, while the speedy 100 has just the carbon dioxide laser. Carbon dioxide laser is usually used only for natural mateirals. The fiber laser can engrave on metal and glass in addition to cutting matural materials. Here is the specifics for the speedy 400:
How a laser cutter works
LASER is actually an acronym for Light Amplification by Stimulated Emission of Radiation. A laser cutter cuts material by focusing a laser beam of specified power and speed. The laser beam is reflected off several mirrors before it reaches the material. Therefore, it is critical to ensure that the mirrors are clean.

Image courtesy of CCI laser page.
To clean the mirror, take it out and wipe it using an IPA wipe. Ensure that you are wearing gloves while handling the mirror so that you dont get your fingerprint stain on it.

The beam passes through a focus lens before it hits the material. The lens is the most expensive replacable item for the laser cutter so ensure that good care is taken care of it. Smoke from jobs can fog the lens. Both the Speedy 400 and Speedy 100 have internal air assist that blows out the dust from the lens to protect it. It comes on automatically when the laser is operational. To check if it is working, press shift and the fan button at the same time. This blows air through the lens when there is no laser.
Operating the Laser Cutter
The first (obvious) thing to do to operate the laser cutter is to turn it on. Turn the key to “on” position.

The machine should go to its home position as soon as you turn it on.
(Rest of it will be filled once we have a functioning laser cutter.)
Avoid opening the lid as soon as the job is done. Give it a few seconds for the vent to take the fumes out.
Setting the focus
Before each job, you need to set the laser focus.
- Move the laser point to a point above the material.
- Take the focus tool from the deisgnated spot and place it on the widge.
- Once it is stable, move the material up step up step until it just touches the tool but doesnt drop it.

- This is the focus point for the job. Remove the tool and put it back to the designated spot.
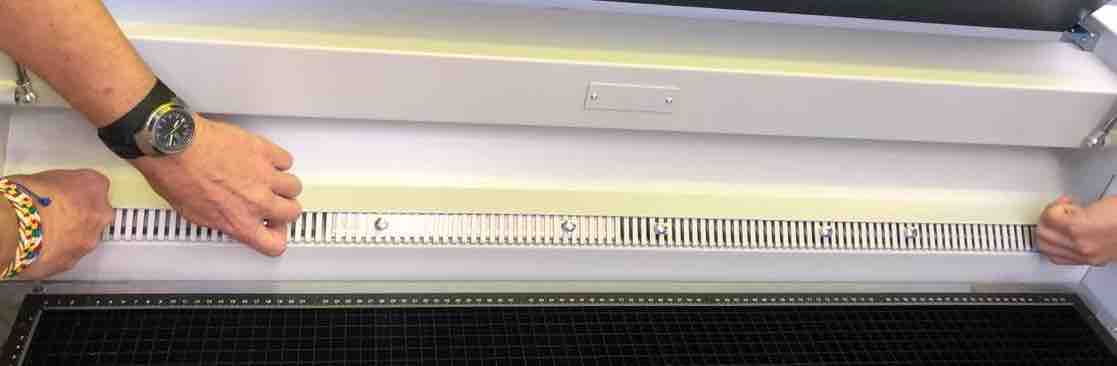
Using the laser cutter for special jobs.
For bigger jobs, you can slide down the lower part.
For jobs that may requires a lot of sunction in one area, you can close the vents from the other areas. This makes sunction stronger in the vents that are open. Rotate the knobs on the vents to open/close.
Event of Fire
Fire is very common where a laser cutter is used. It is commonly caused by bad design (copy, pasting jobs one on top of another) and wrong settings. There should never be fire, even a small spark. If you see one, change the settings.
In call cases of fire, press the ESTOP butoon and then proceed according to the fire intensity:
- Small flame: Press ESTOP. Open the lid, push the rail back and ectinguish the fire locally.
- Medium flame: Press ESTOP. Open lid and throw a fire blanket.
- Big flame: Press ESTOP. Open lid and use the fire extingusher. This is ruin the laser cutter but save the building.
- MASSSIVE FIRE: RUN
Maintainence
- Clean on the sides. Ashes can cause fire.
- Check and clean lens.
- Check and clean mirrors.
- Check settings.
- Clean from underneath the tray.
