15. Molding and Casting
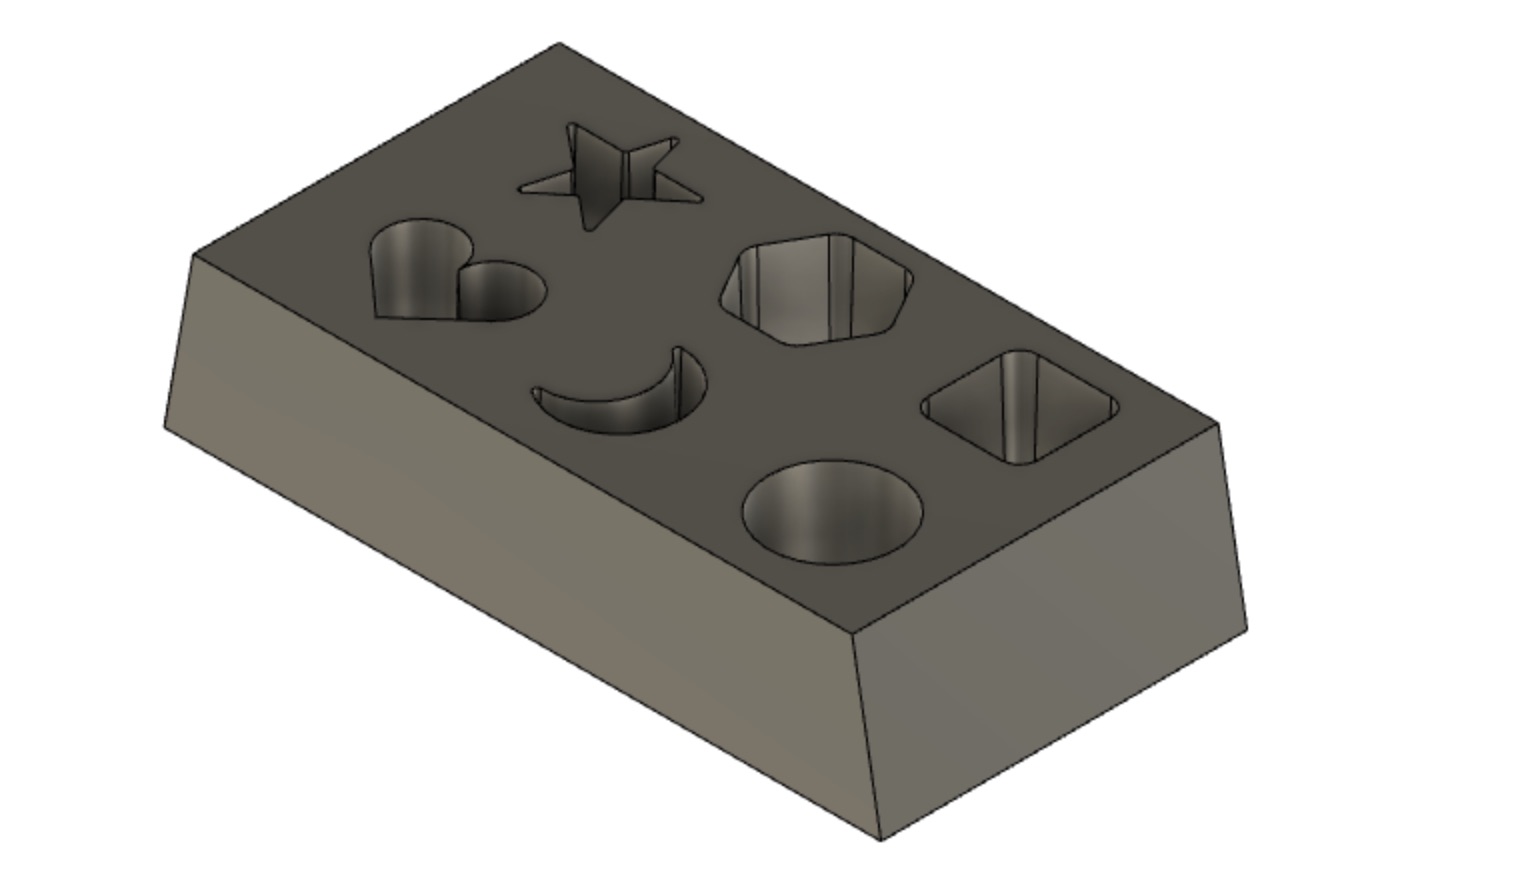
It was pretty difficult to work on this week from home. It was the most abstract week by far. After the lecture, I looked at how previous students in my lab had approached this week. All previous years had started with an introduction and a demostration to the different materials availible in the lab. Since we did not have this, it was pretty hard to choose what material I will use just by reading online. From the pages of previous students, I know that Smooth-On’s SORTA clear 37 is availible in our lab. It is also food safe, so I decided to choose this material. I chose to mold something simple initially so I designed a chocolate molder with different shapes. I want to try out a more complex design once I am comfortable with the process.
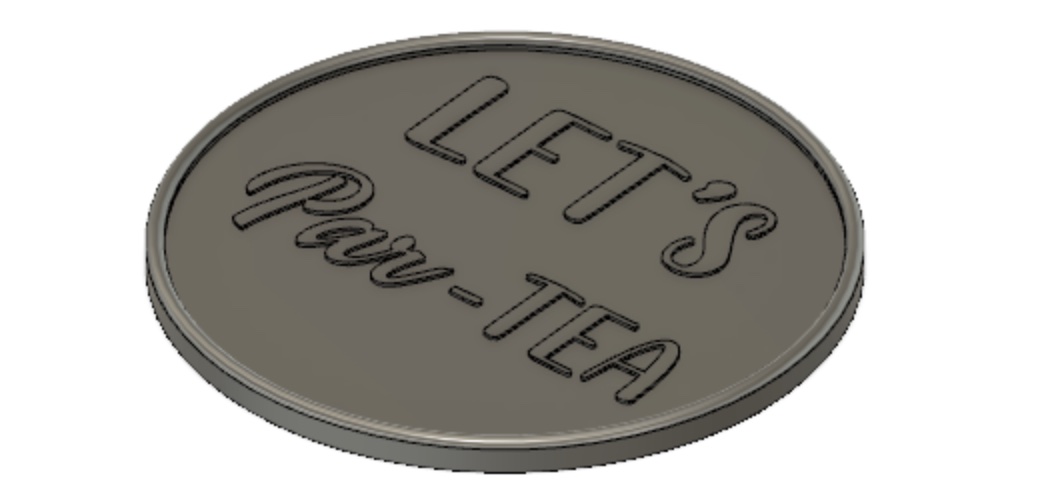
2022 continuation add on: As a continuing student at FabLab Mandela, I managed to design a coaster. I made the mold out of Smooth-Ons Silicone Rubber. I made the cast out of hydroxy stone.
Definations
Molding
Molding or Moldmaking is the act of creating the cavity / form that carries a negative or reverse impression of an original model. Molds can be made of a rigid material, such as plaster or plastic resin or more commonly, a flexible material such as rubber. The material to use should be chosen considering the material of the model, the material to be used to make castings, and whether there are any undercuts.
Casting
Casting is the act of pouring liquid material into the cavity of a mold. After a period of time, this liquid will cure via chemical reaction or cooling. The solidified part is also known as a casting, which is ejected or broken out of the mold to complete the process. Casting materials are usually metals or various cold setting materials that cure after mixing two or more components together; examples are epoxy, concrete, plaster and clay.
Materials
Smooth-On SORTA clear 37
SORTA-Clear™ Series rubbers are premium water white translucent silicone rubbers (platinum catalyst) which cure at room temperature with negligible shrinkage. Sorta Clear 37 features high tensile and tear strength. This product also offers the convenience of a 1A:1B by volume mix ratio.
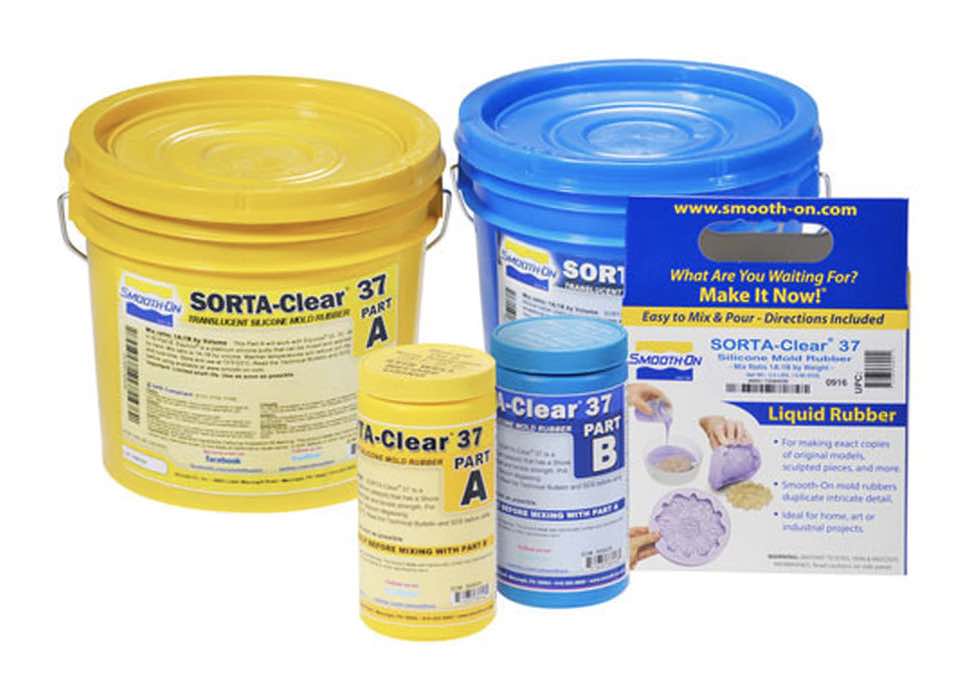
SORTA Clear™ 37 silicone rubber is FOOD SAFE and can be used for culinary applications including casting chocolate and other confections.
Instructions
Safety: Use in a properly ventilated area (“room size” ventilation). Wear safety glasses, long sleeves and rubber gloves to minimize contamination risk. Wear vinyl gloves only. Latex gloves will inhibit the cure of the rubber.
Store and use material at room temperature (73°F/23°C). Warmer temperatures will drastically reduce working time and cure time. Storing material at warmer temperatures will also reduce the usable shelf life of unused material. These products have a limited shelf life and should be used as soon as possible.
Cure Inhibition: Because no two applications are quite the same, a small test application to determine suitability for your project is recommended if performance of this material is in question.
Safety Data Sheet Takeaway
Health Hazards include skin irritation, eye irritation, harmful if inhaled, respiratory irritation and it is suspected of causing cancer. Therefore, it is vital to follow safety procedures.
First Aid Measures:
Inhalation: Remove source(s) of contamination and move victim to fresh air. If breathing has stopped, give artificial respiration, then oxygen if needed. Contact physician immediately.
Eye Contact: Flush eyes with plenty of water occasionally lifting the upper and lower eyelids. Check and remove any contact lenses if safe to do so. Continue to rinse for at least 15 minutes. If irritation develops, seek medical attention.
Skin Contact: In case of skin contact, wash thoroughly with soap and water. Continue to rinse for at least 15 minutes. Chemical burns must be treated promptly by a physician.
Ingestion: Do not induce vomiting unless instructed by a physician. Never give anything by mouth to an unconscious person. If material has been swallowed and the exposed person is conscious, give small quantities of water to drink. Stop if the exposed person feels sick as vomiting may be dangerous. if vomiting occurs, the head should be kept low so that vomit does not enter the lungs.
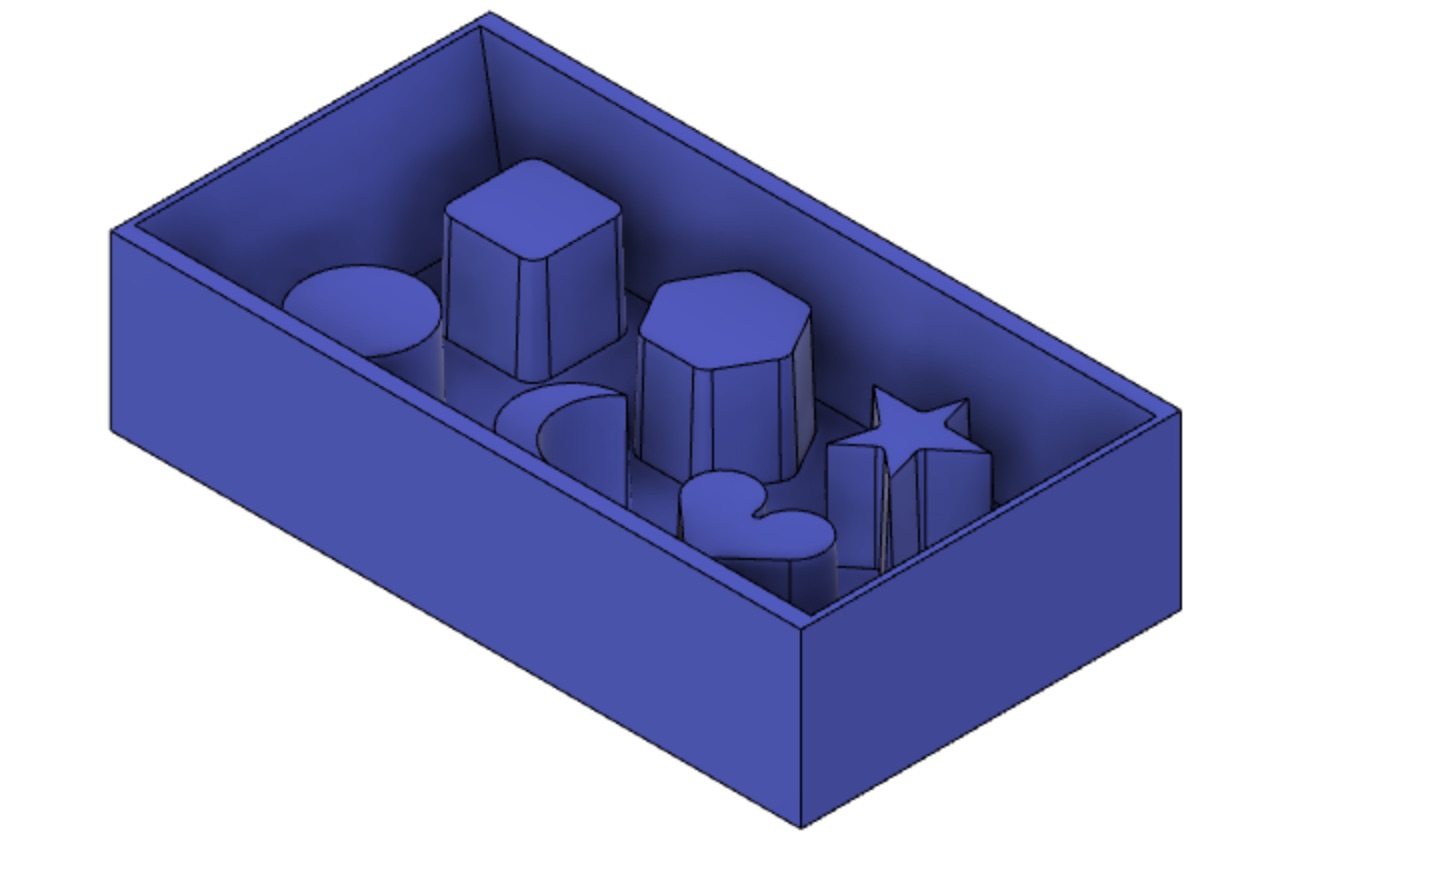
Mold Design
I decided to start with simple shapes to get started. I watched this youtube video to get an idea of where to start.
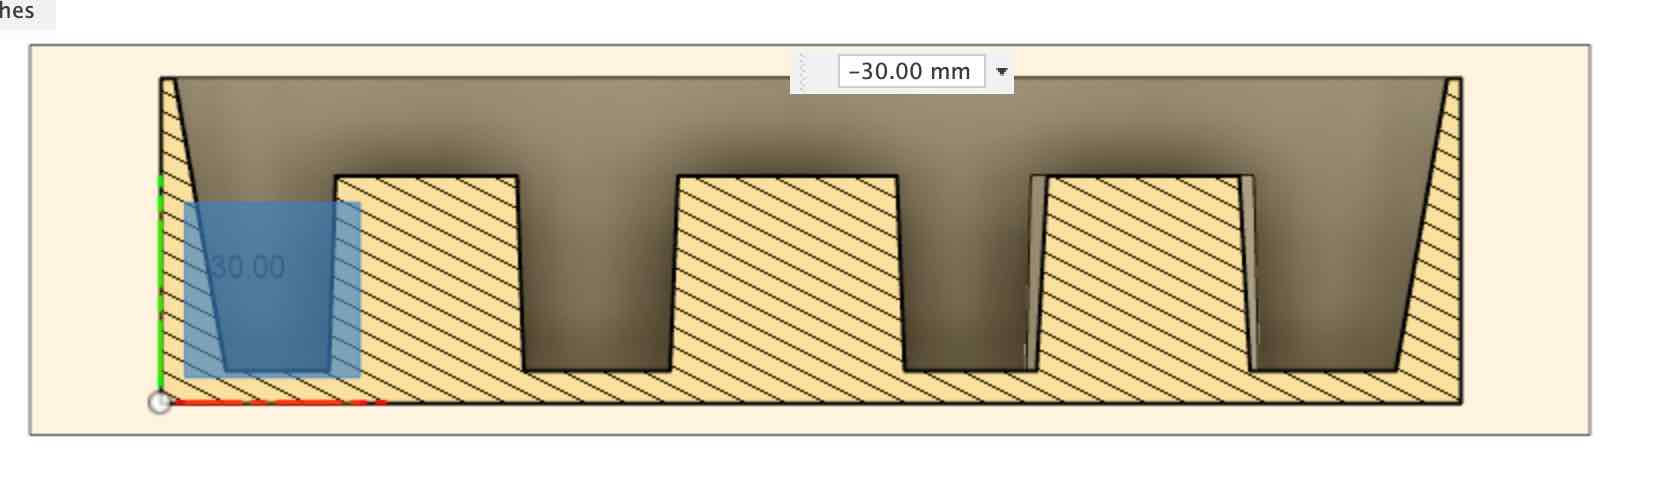
With some idea and inspiration from the video, I started to make a positive mold to mill from the machinable wax. I used Fusion 360 for this. I will need to fix the dimensions when I am back in the lab but here is the design:
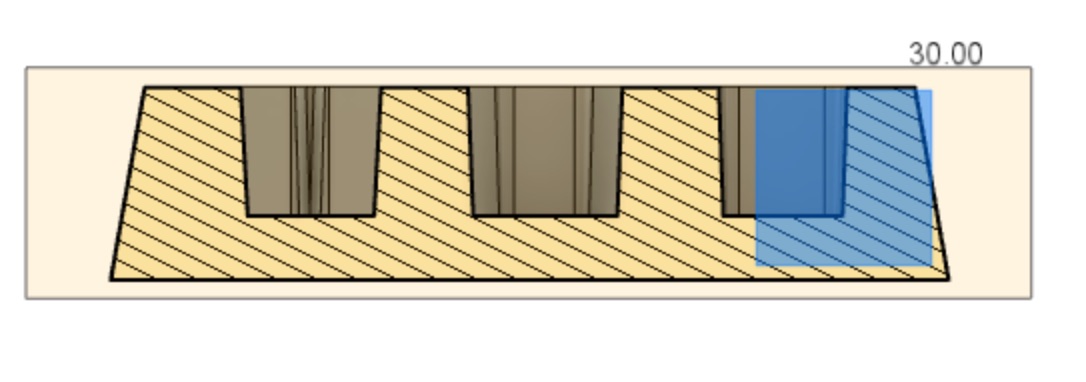
For a better idea on the deisgn, I looked at it from using the section view tool. It is accessible using the following steps:
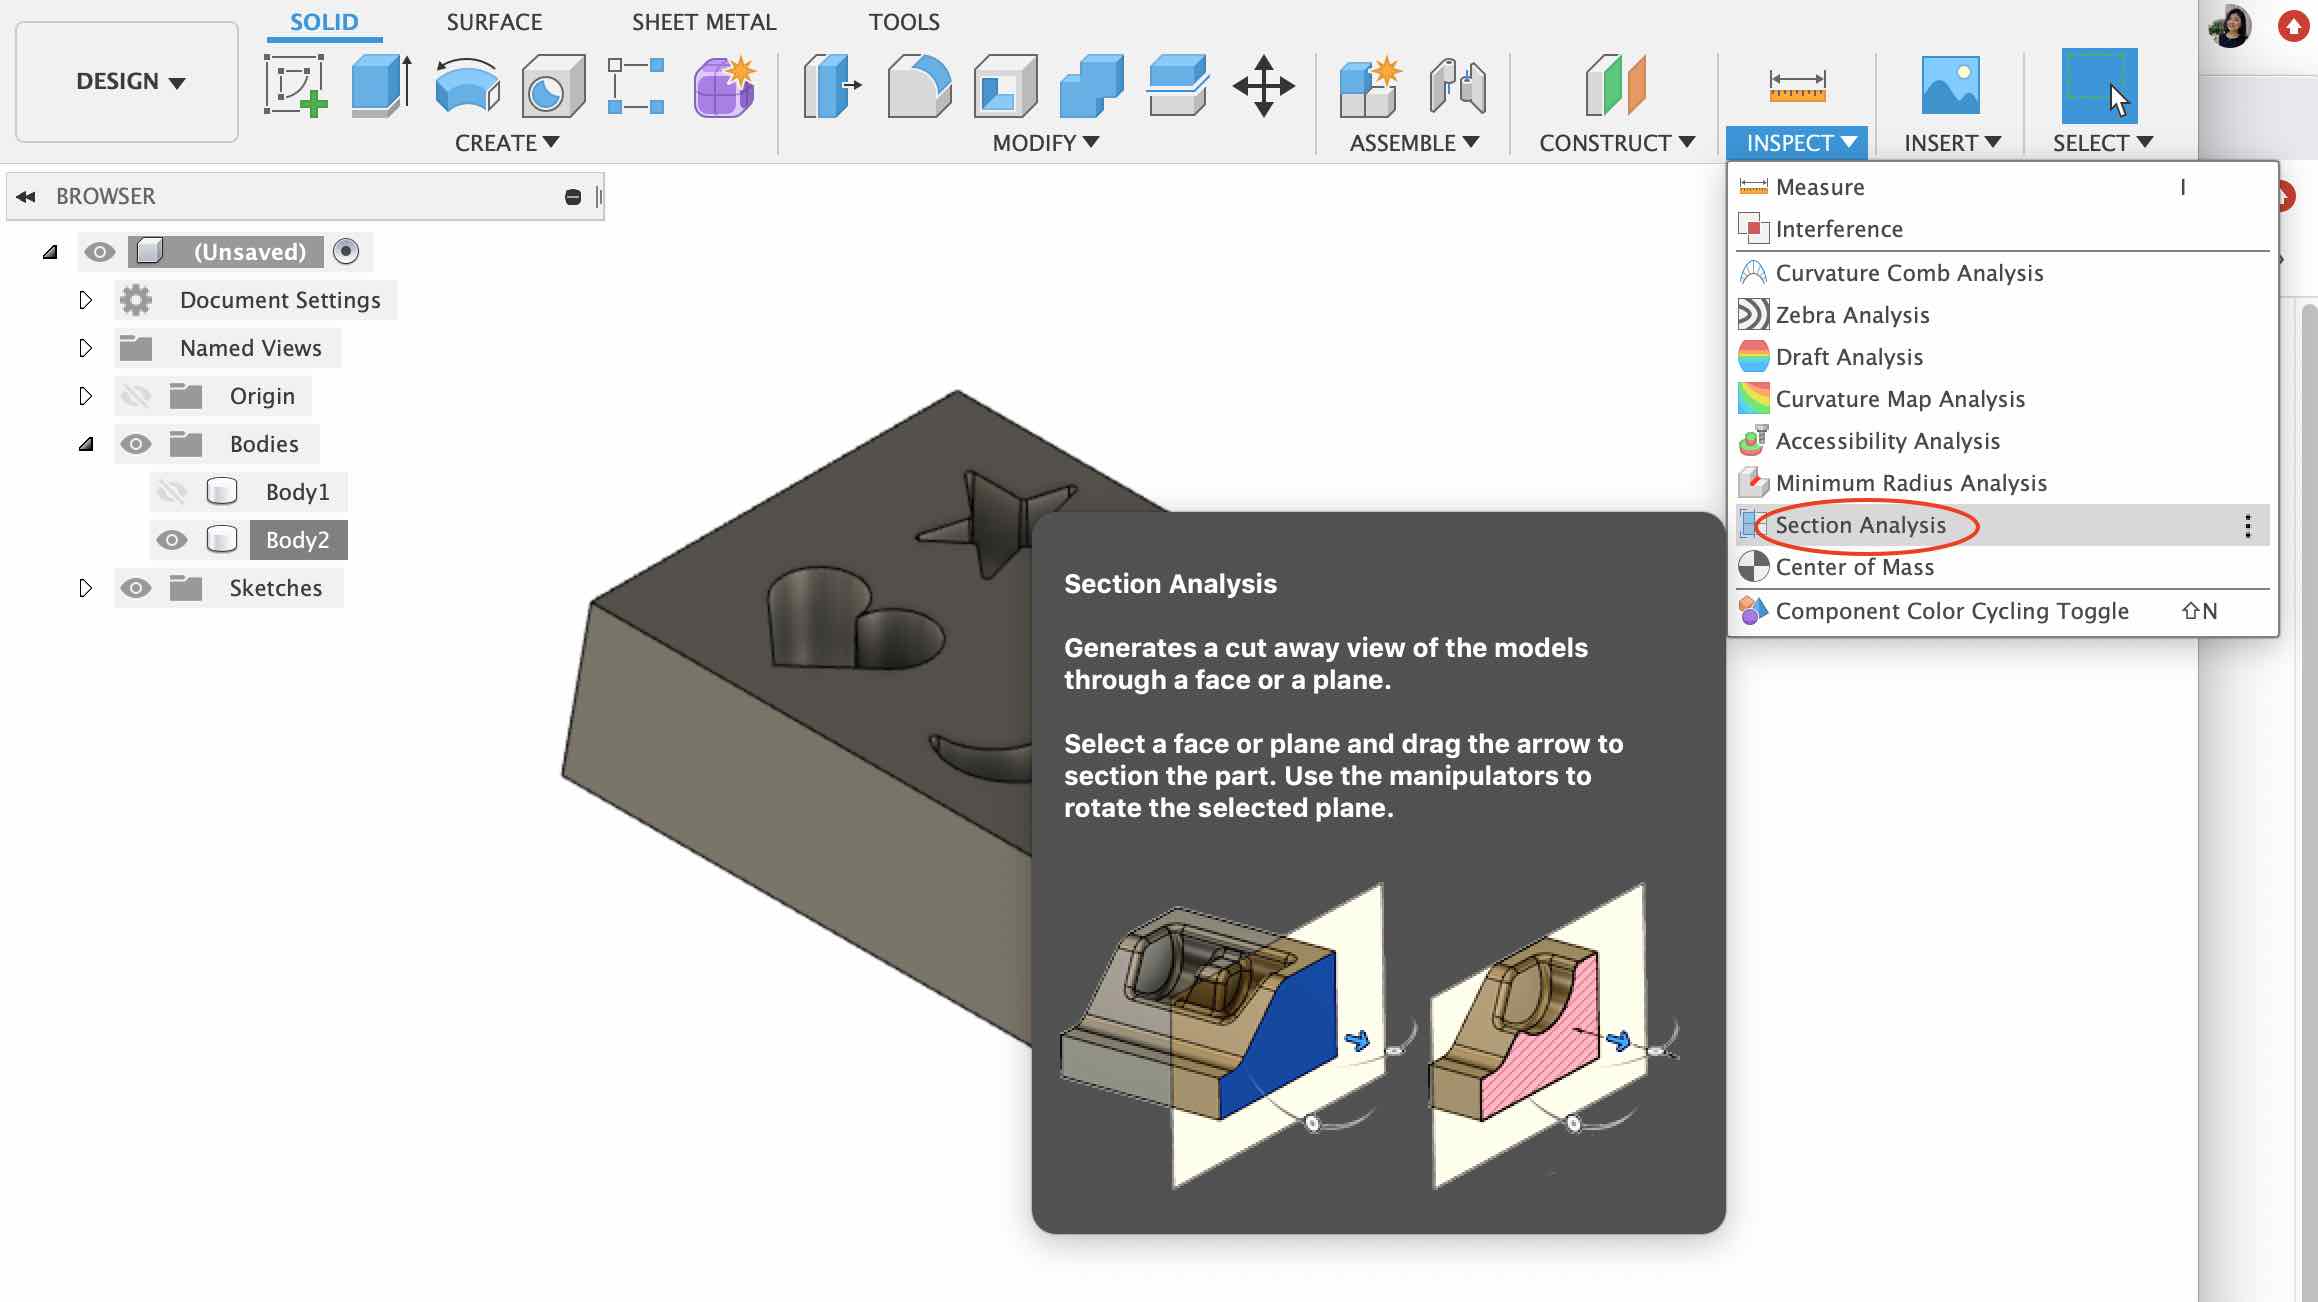
This is the section for the milled part:
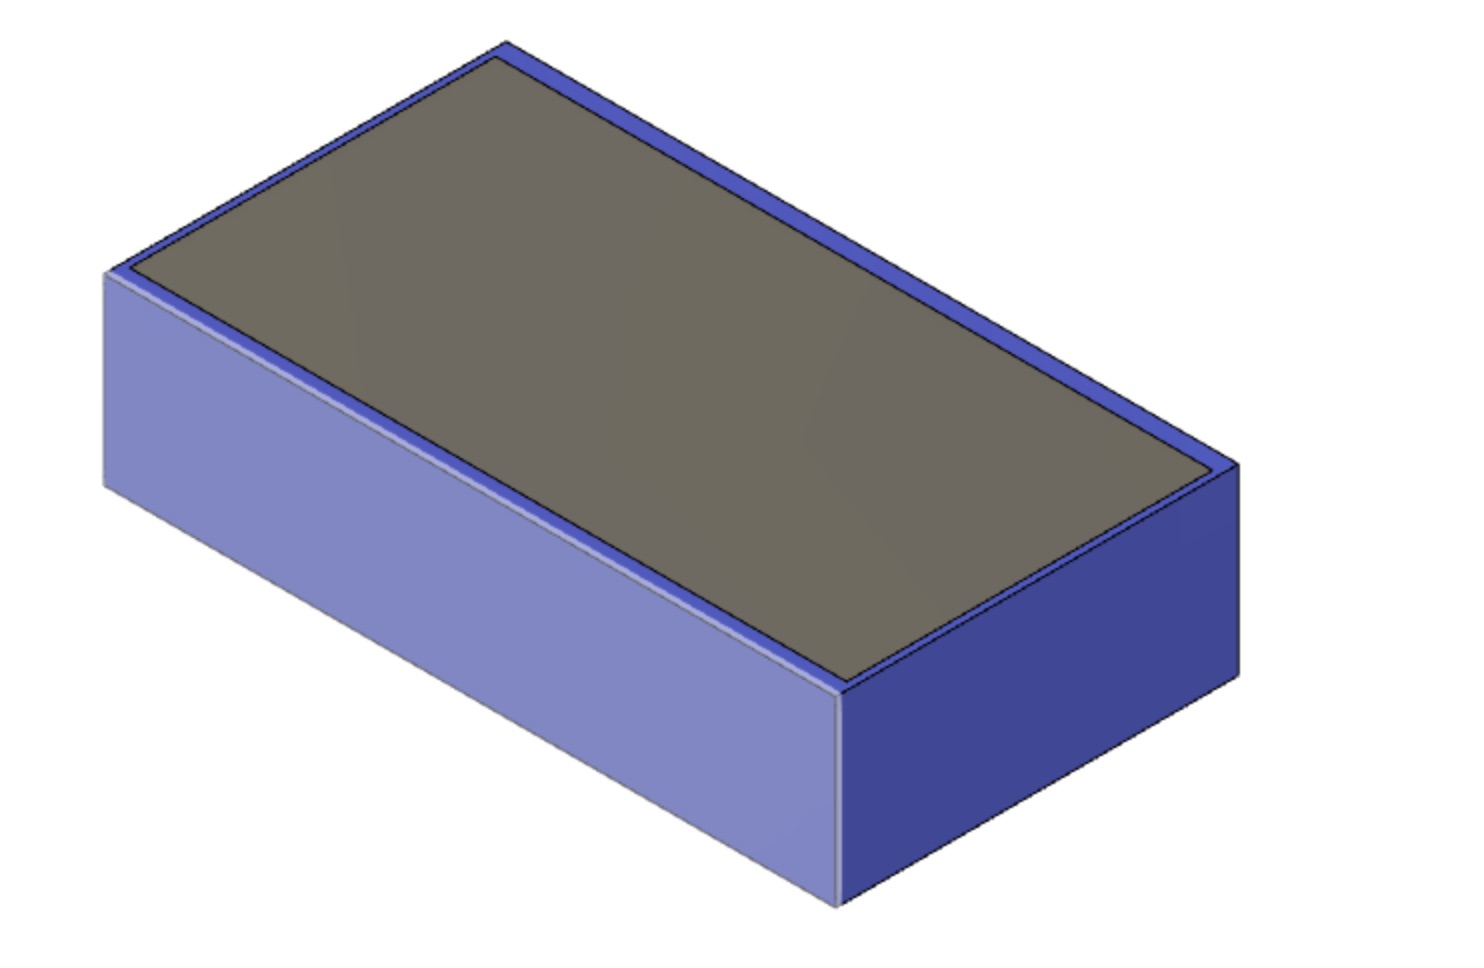
Once the mold is milled, I will pour some SORTA clear 37 into it to make the counter-mold. I tried to make a replica of it on Fusion. I did this by using the combine tool:
The final step in the process would be to pour melted chocolate into the cavity of the mold to make shaped chocolates. This will be done once the molds are made in the lab.
I wanted to be able to figure out the tool paths on Fusion this week but I was unable to do so. I will attempt this once again later this week.
2022 Molding and Casting
Design and tool path creation
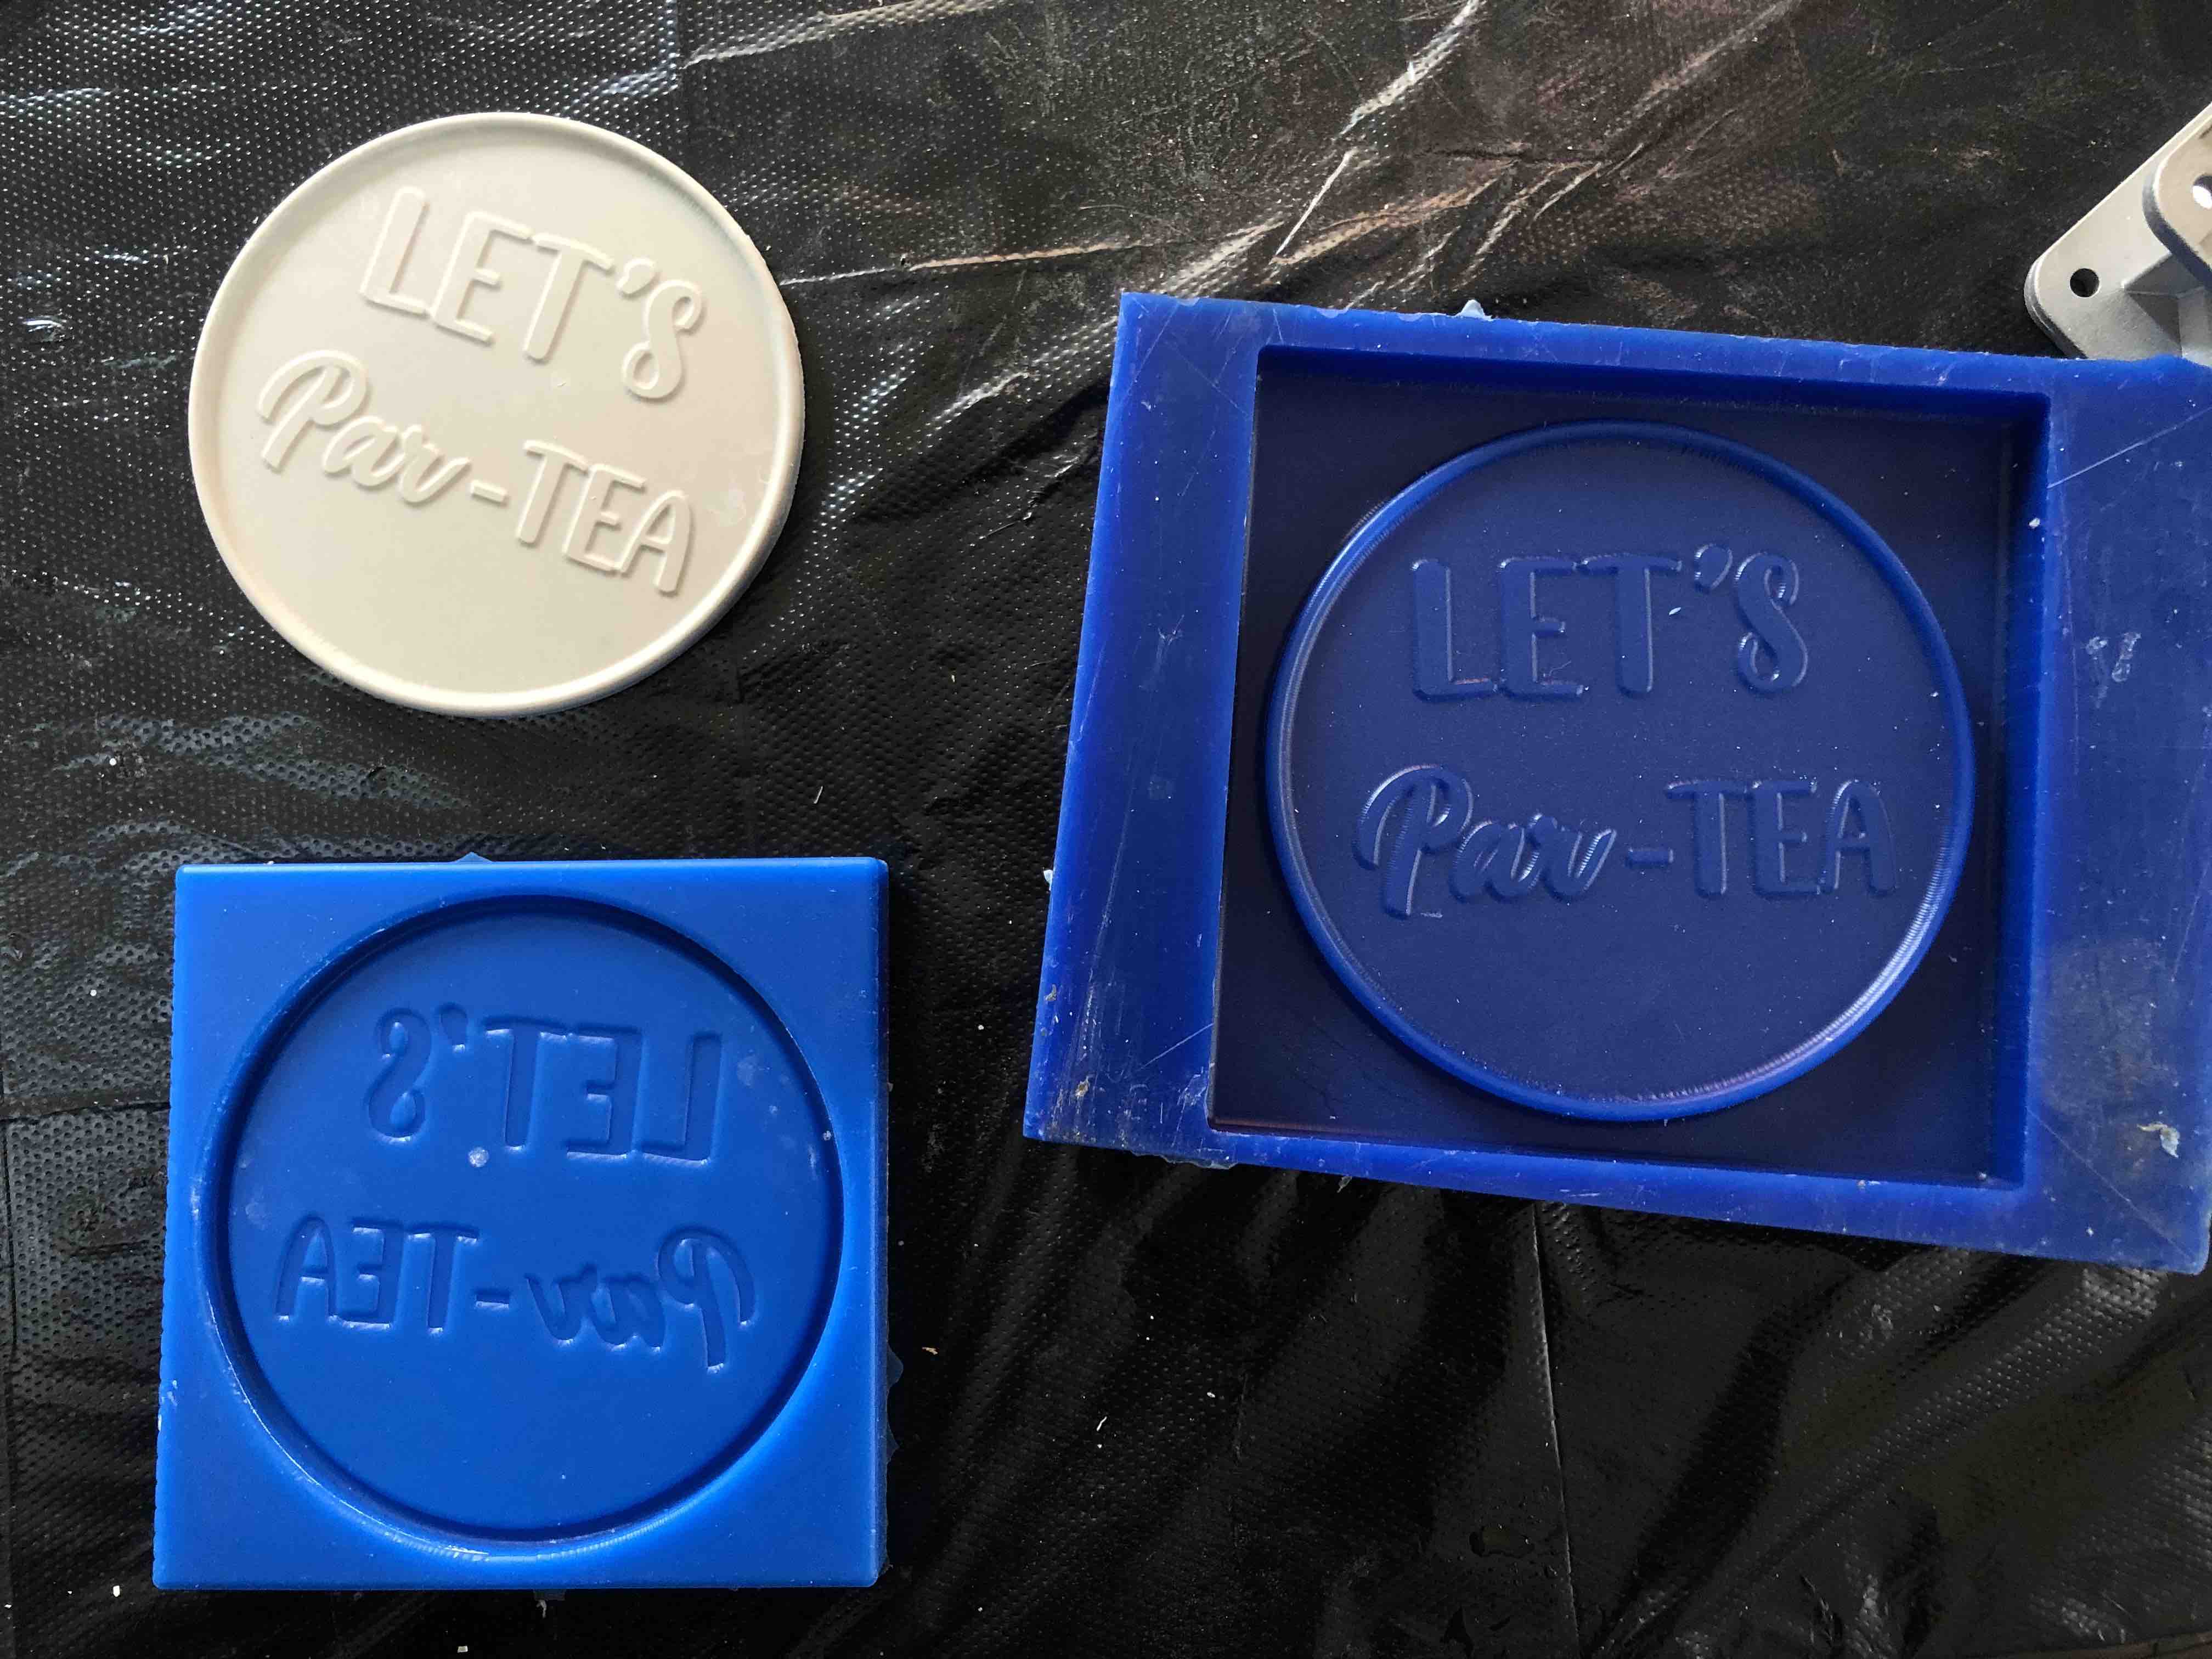
This week was limiting because of the mold size availible and the material for the mold. I initially wanted to make a chocolate mold design but later I found out that the mold material we have in the lab is not food safe and only hydro stone was availalbe for casting. Therefore I decided to go with a coaster. I wanted a design that would be fitting for tea and for beer so I designed this:
The design needs to be exported as a STL file and then we open it up in Modella.
First orient the model to how you want to cut it. You can also check the length, breadth, and height of your model in this window.
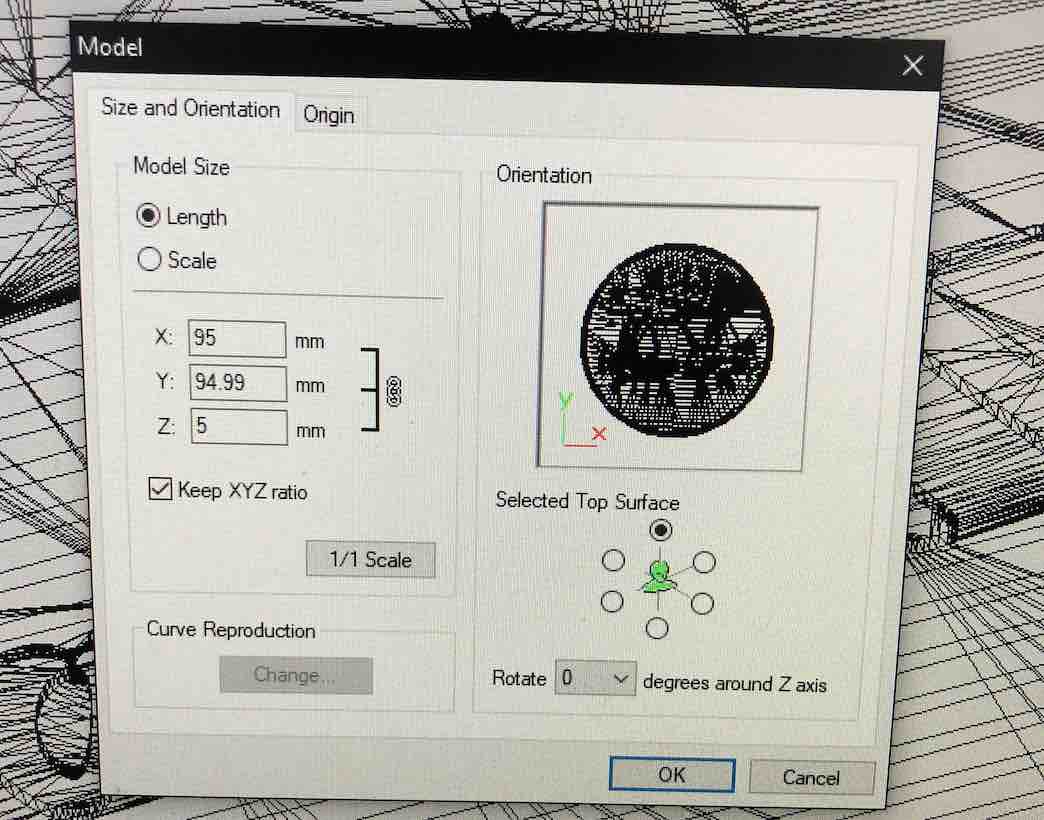
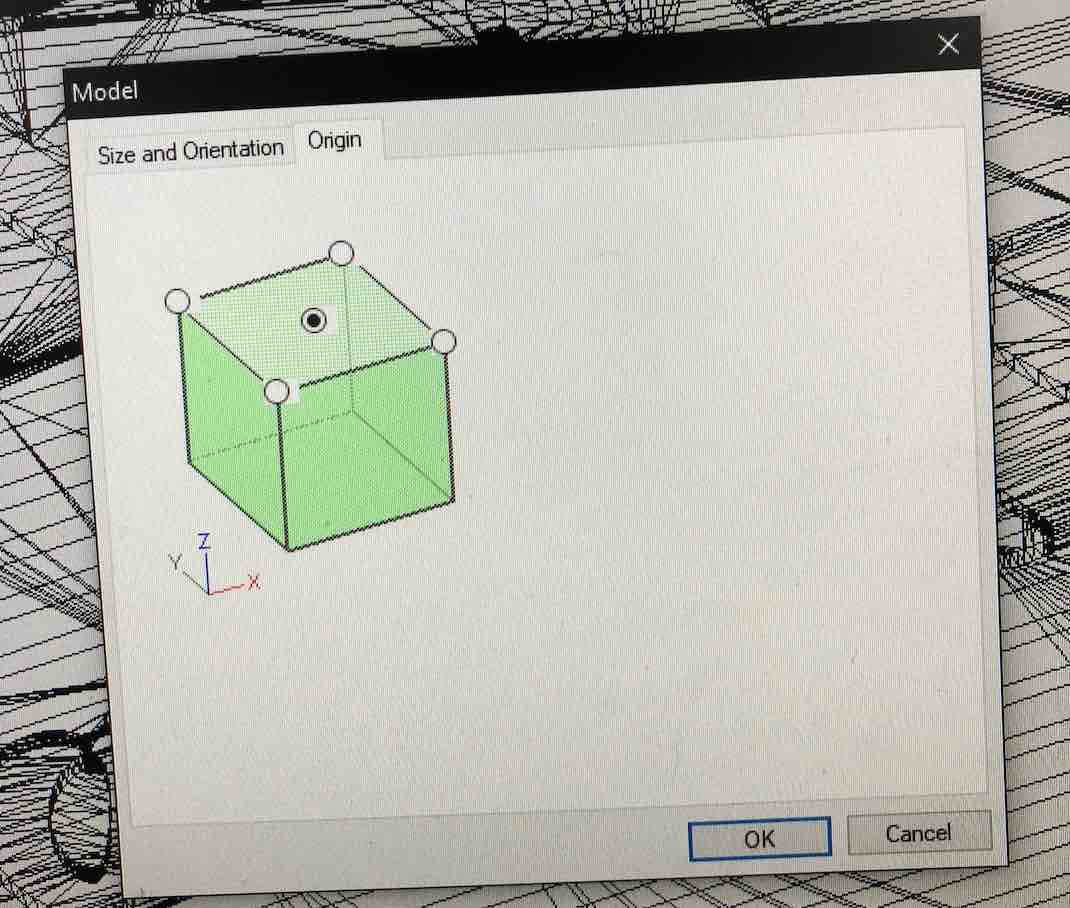
Next, select your origin. Since my model is round I selected the top face center.
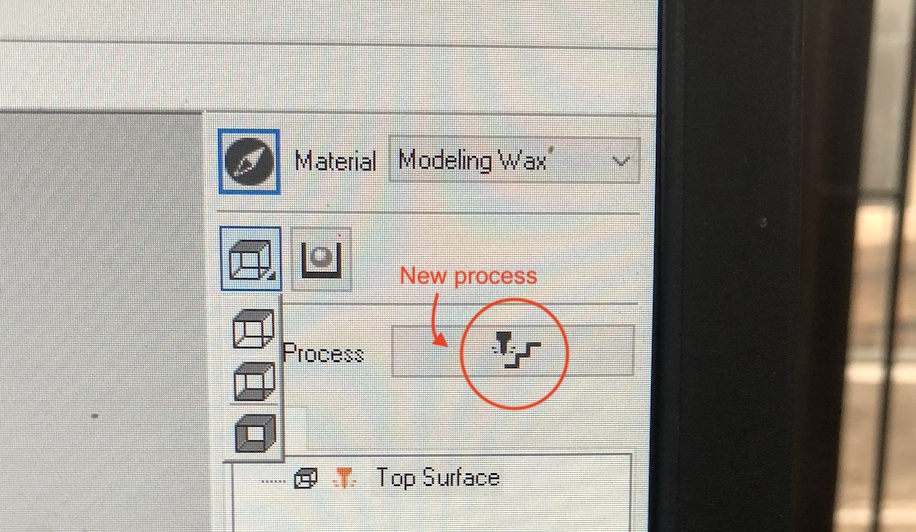
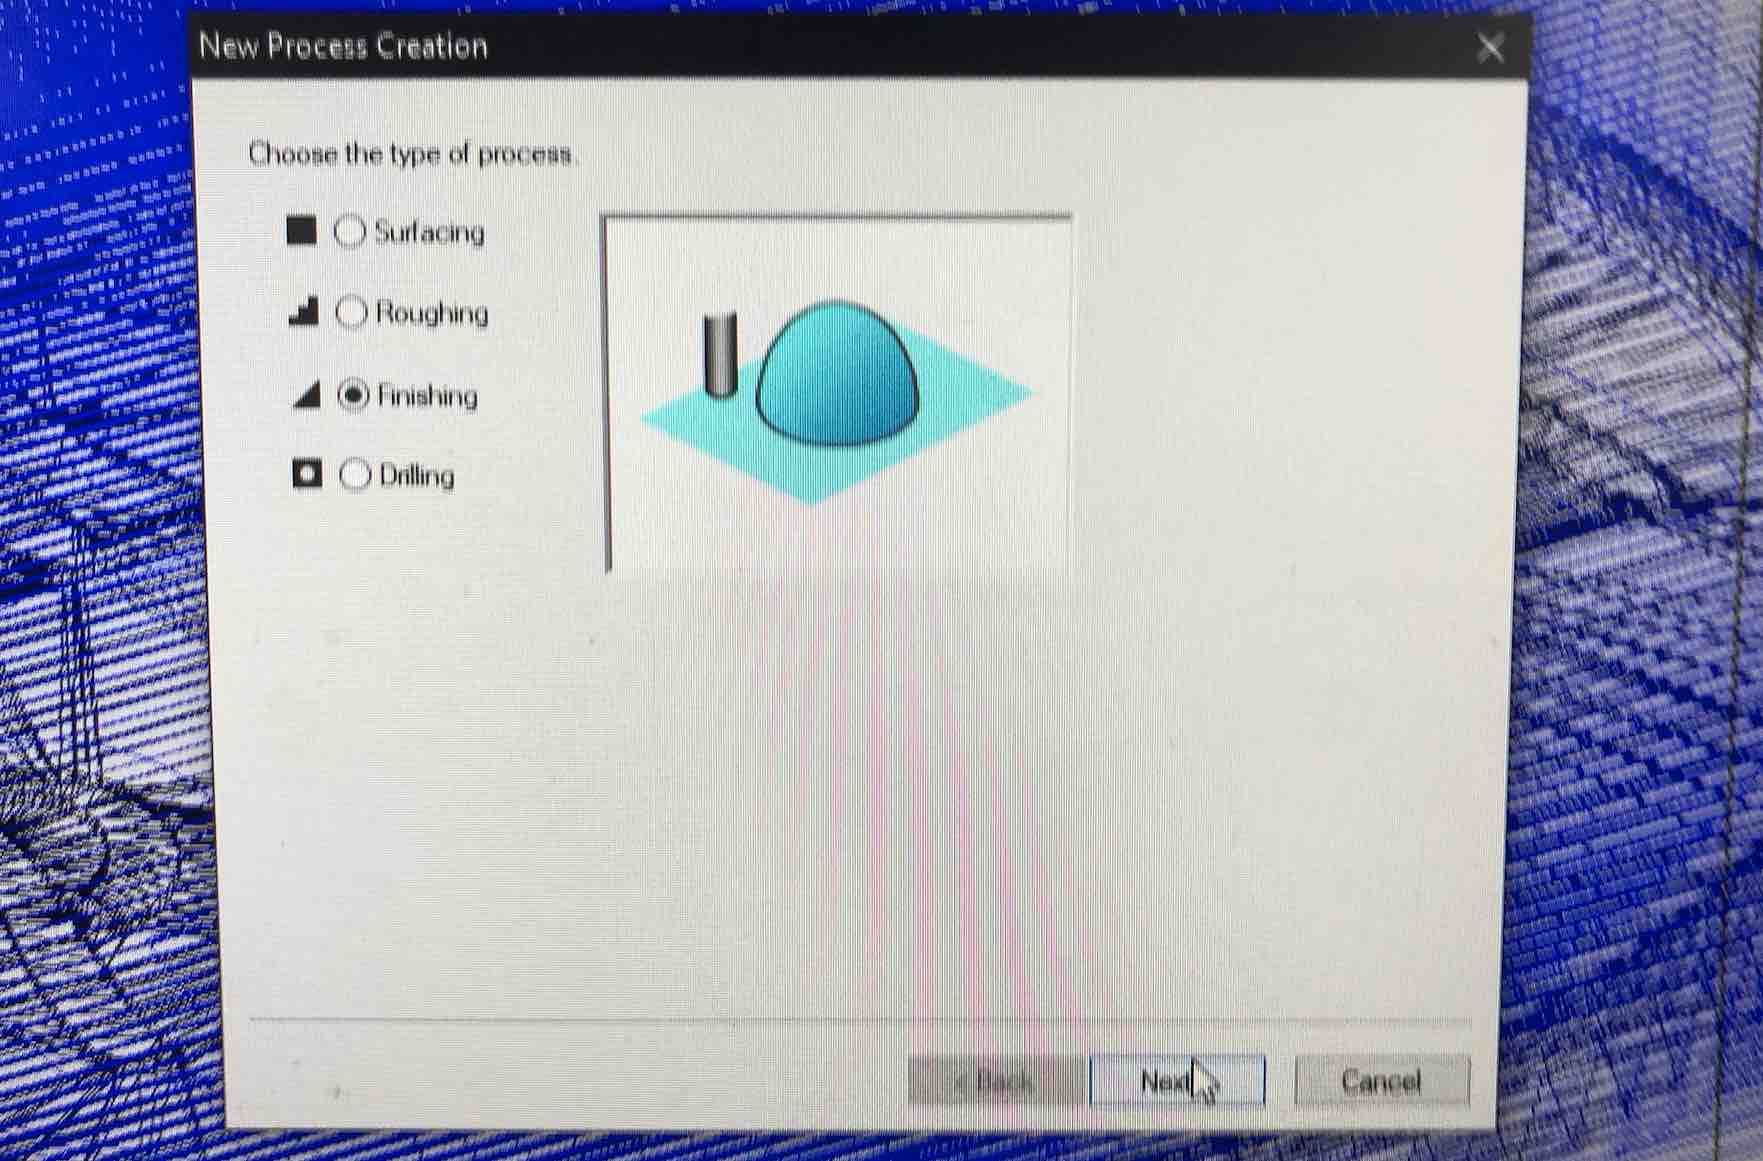
There is a button on the top right panel. Click this to create a new process.
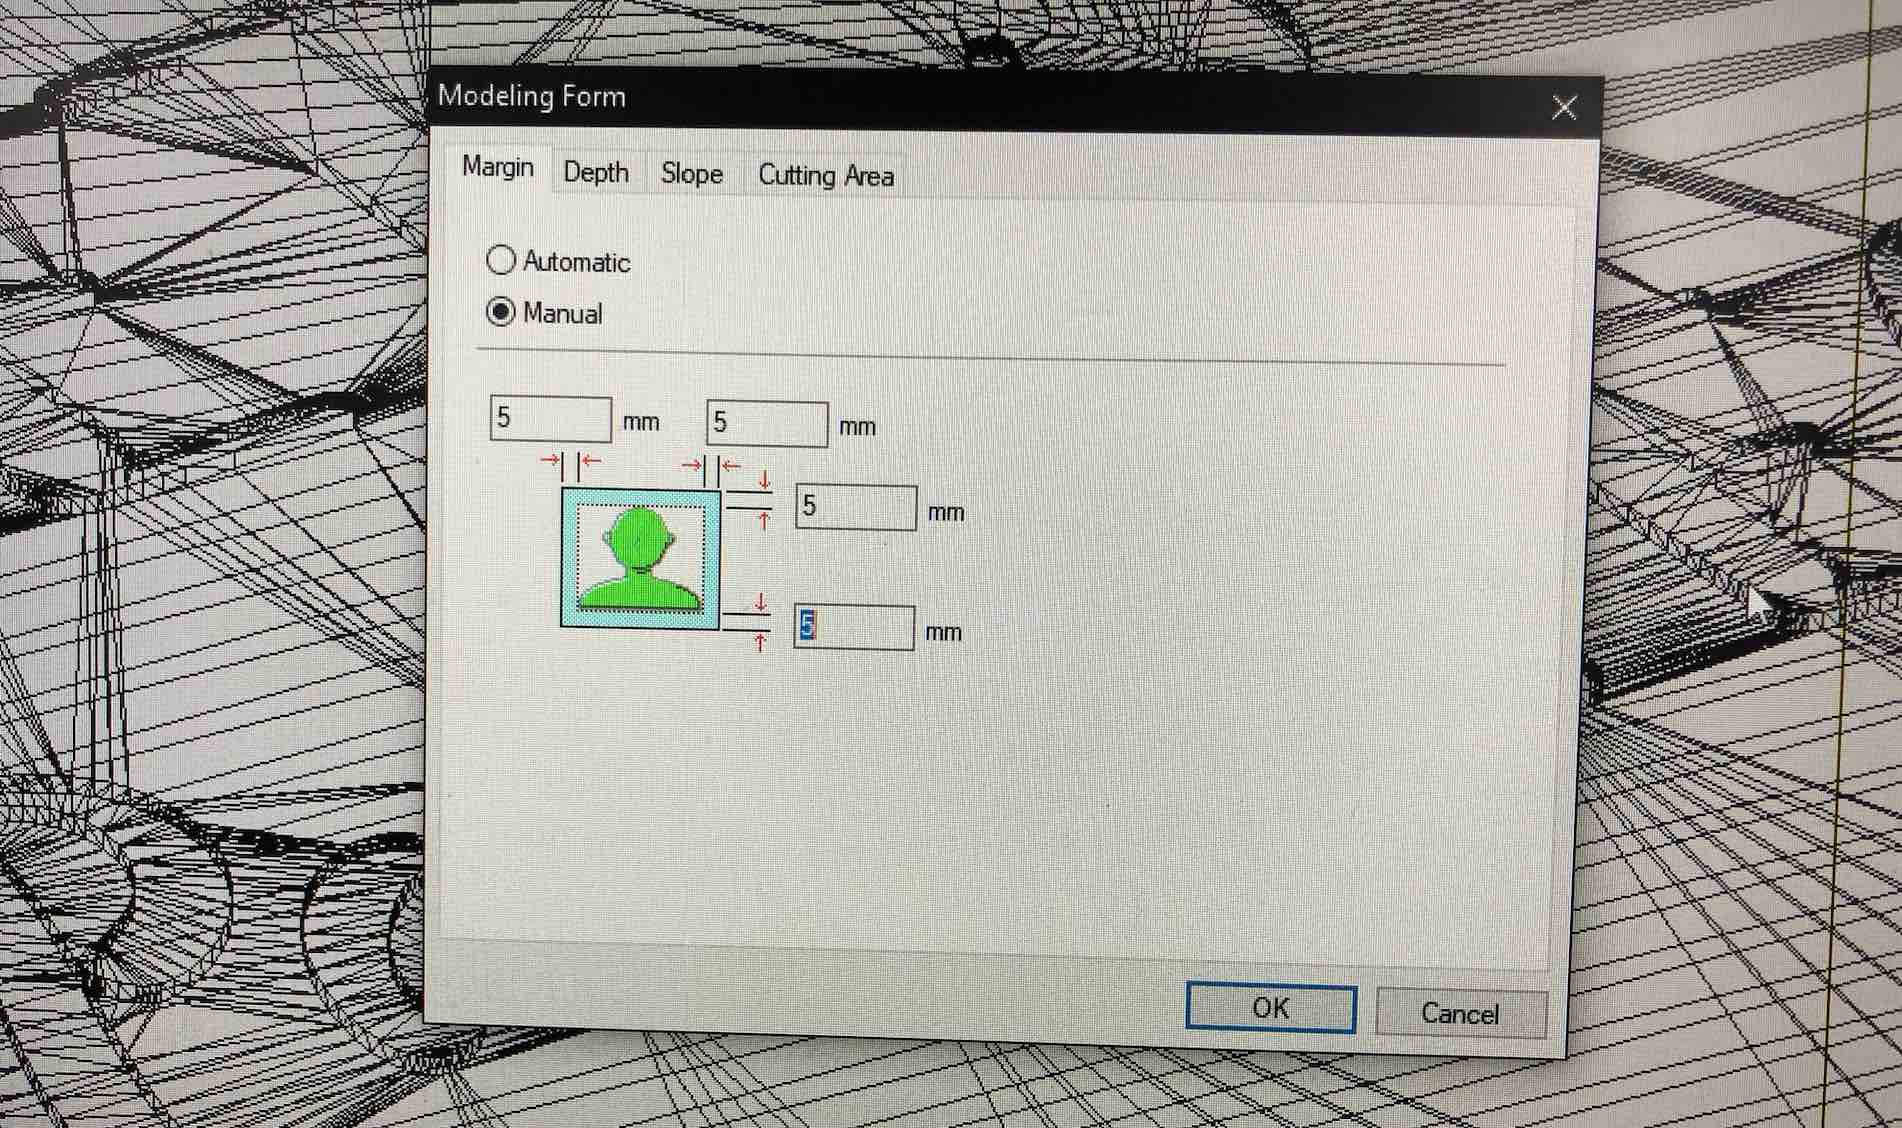
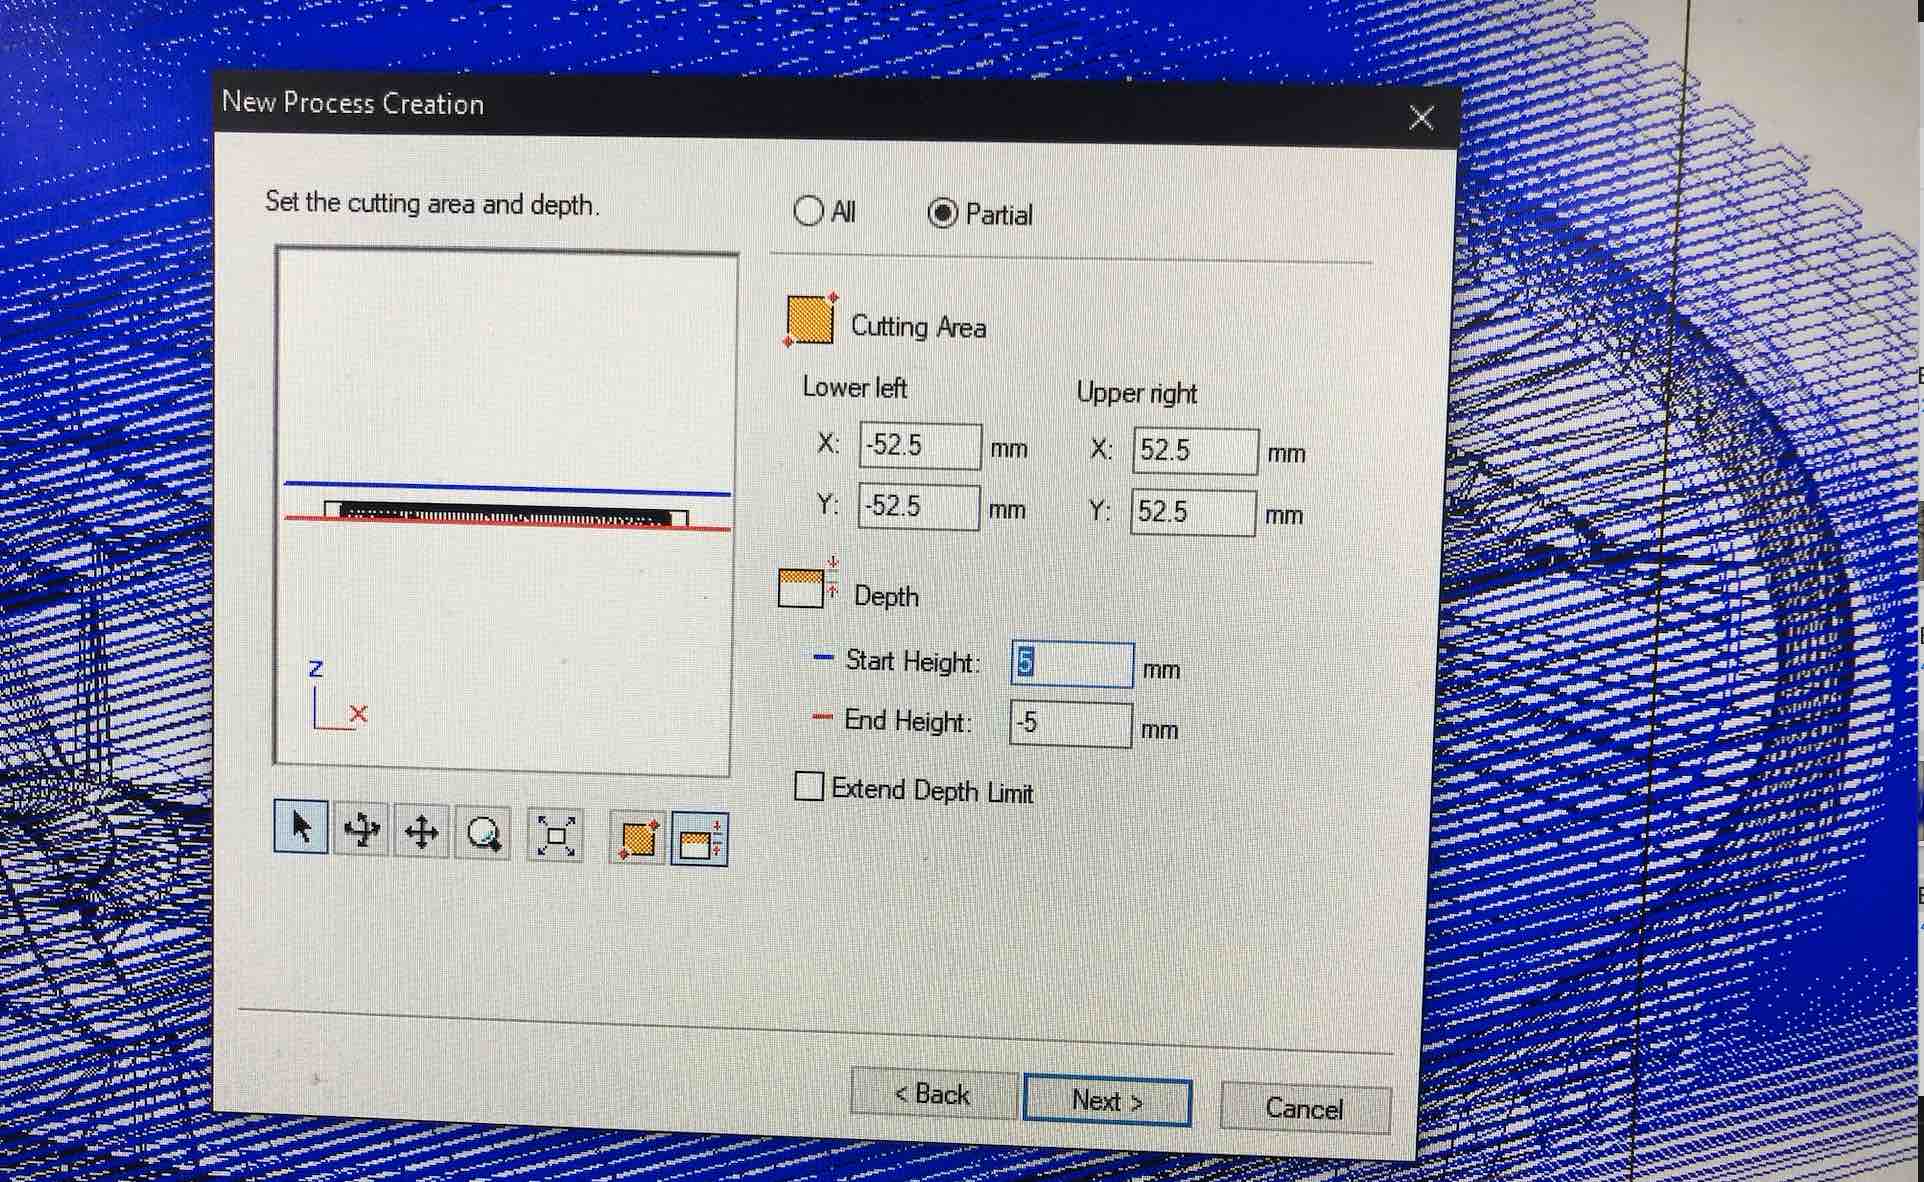
Next, you can select how much space you want between your model and mold walls. I chose 5mm.
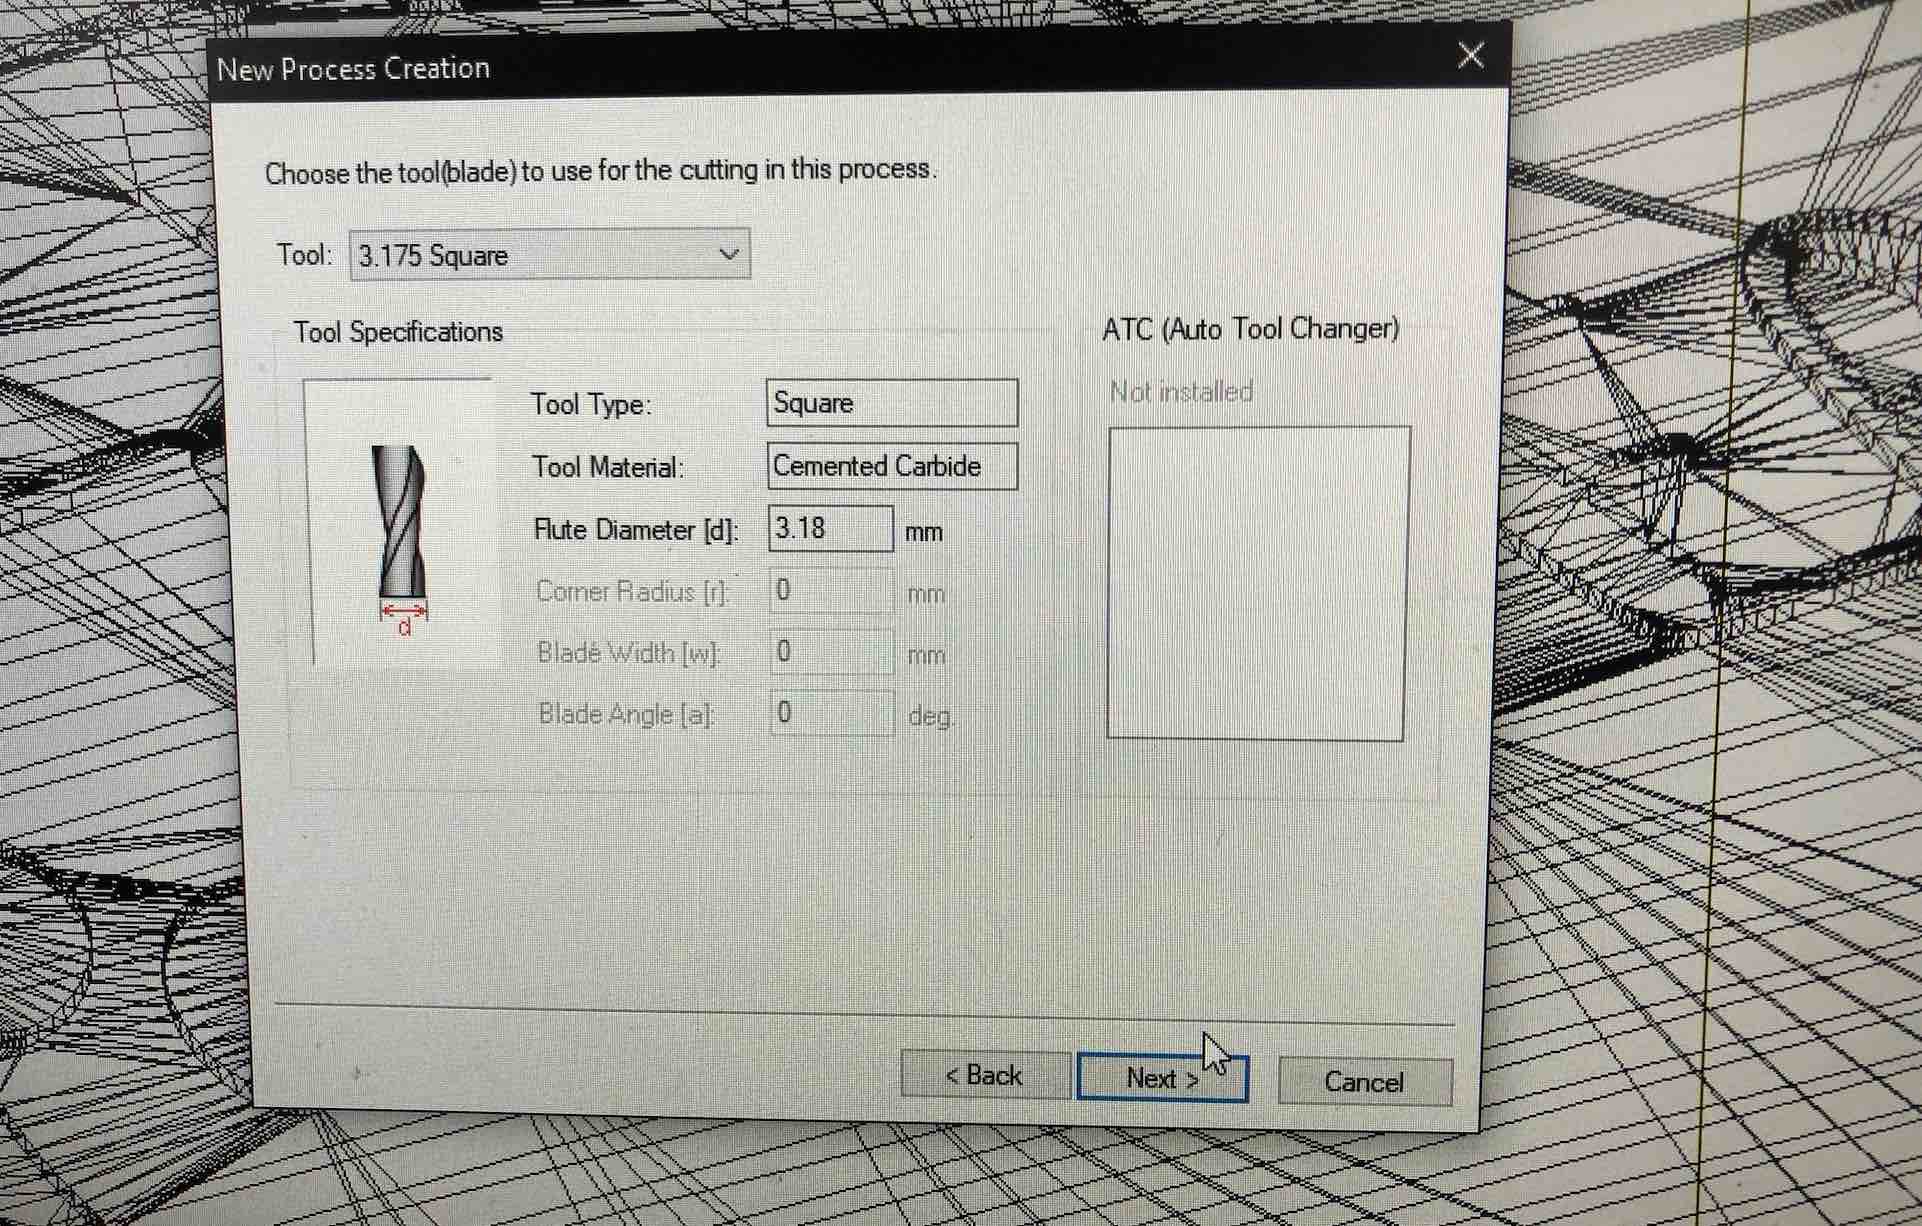
We will first do a roughing cut with a square end mill and then a finishing cut with the ball nose end mill. Select the roughing process here.

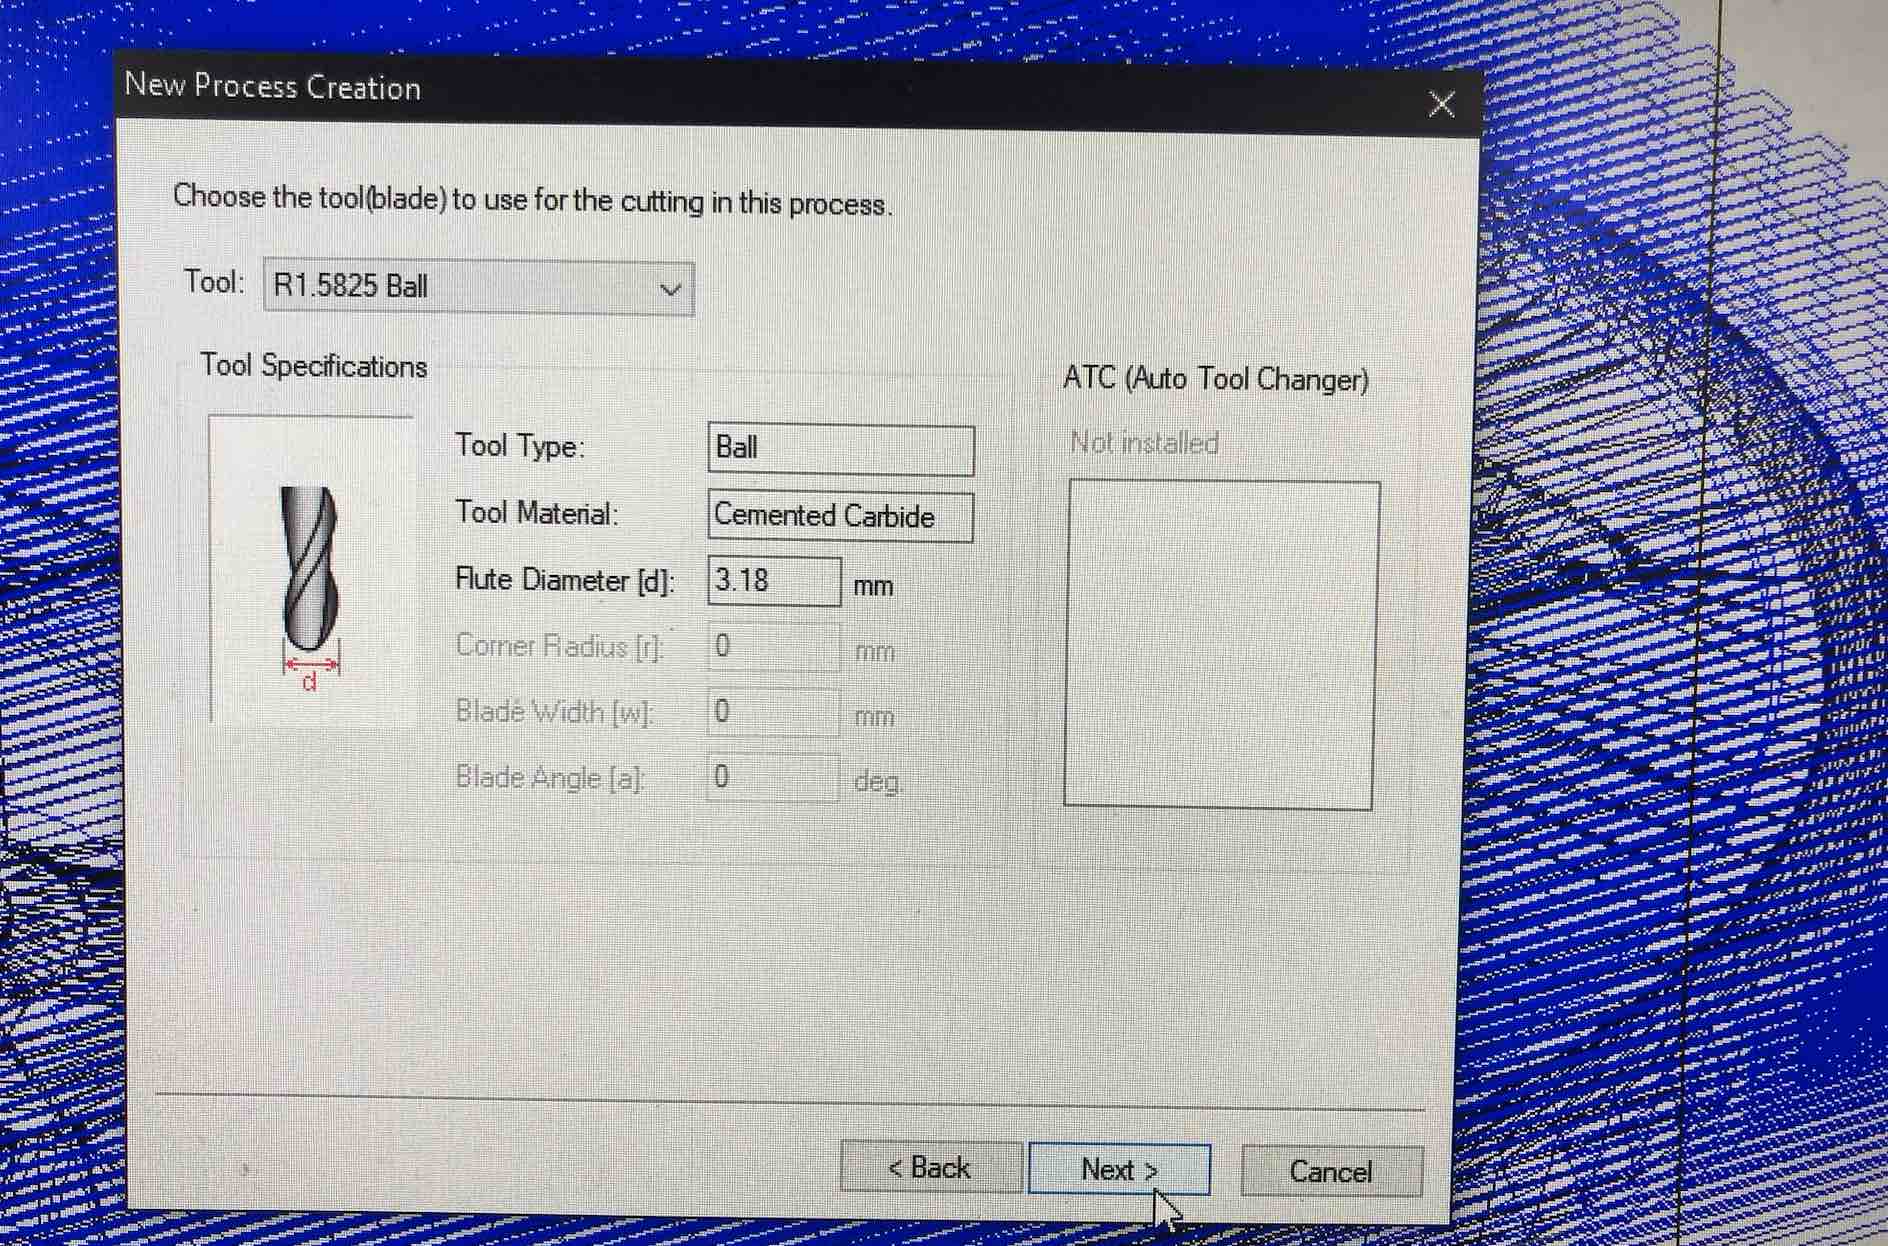
Put in the size of your bit and click next.
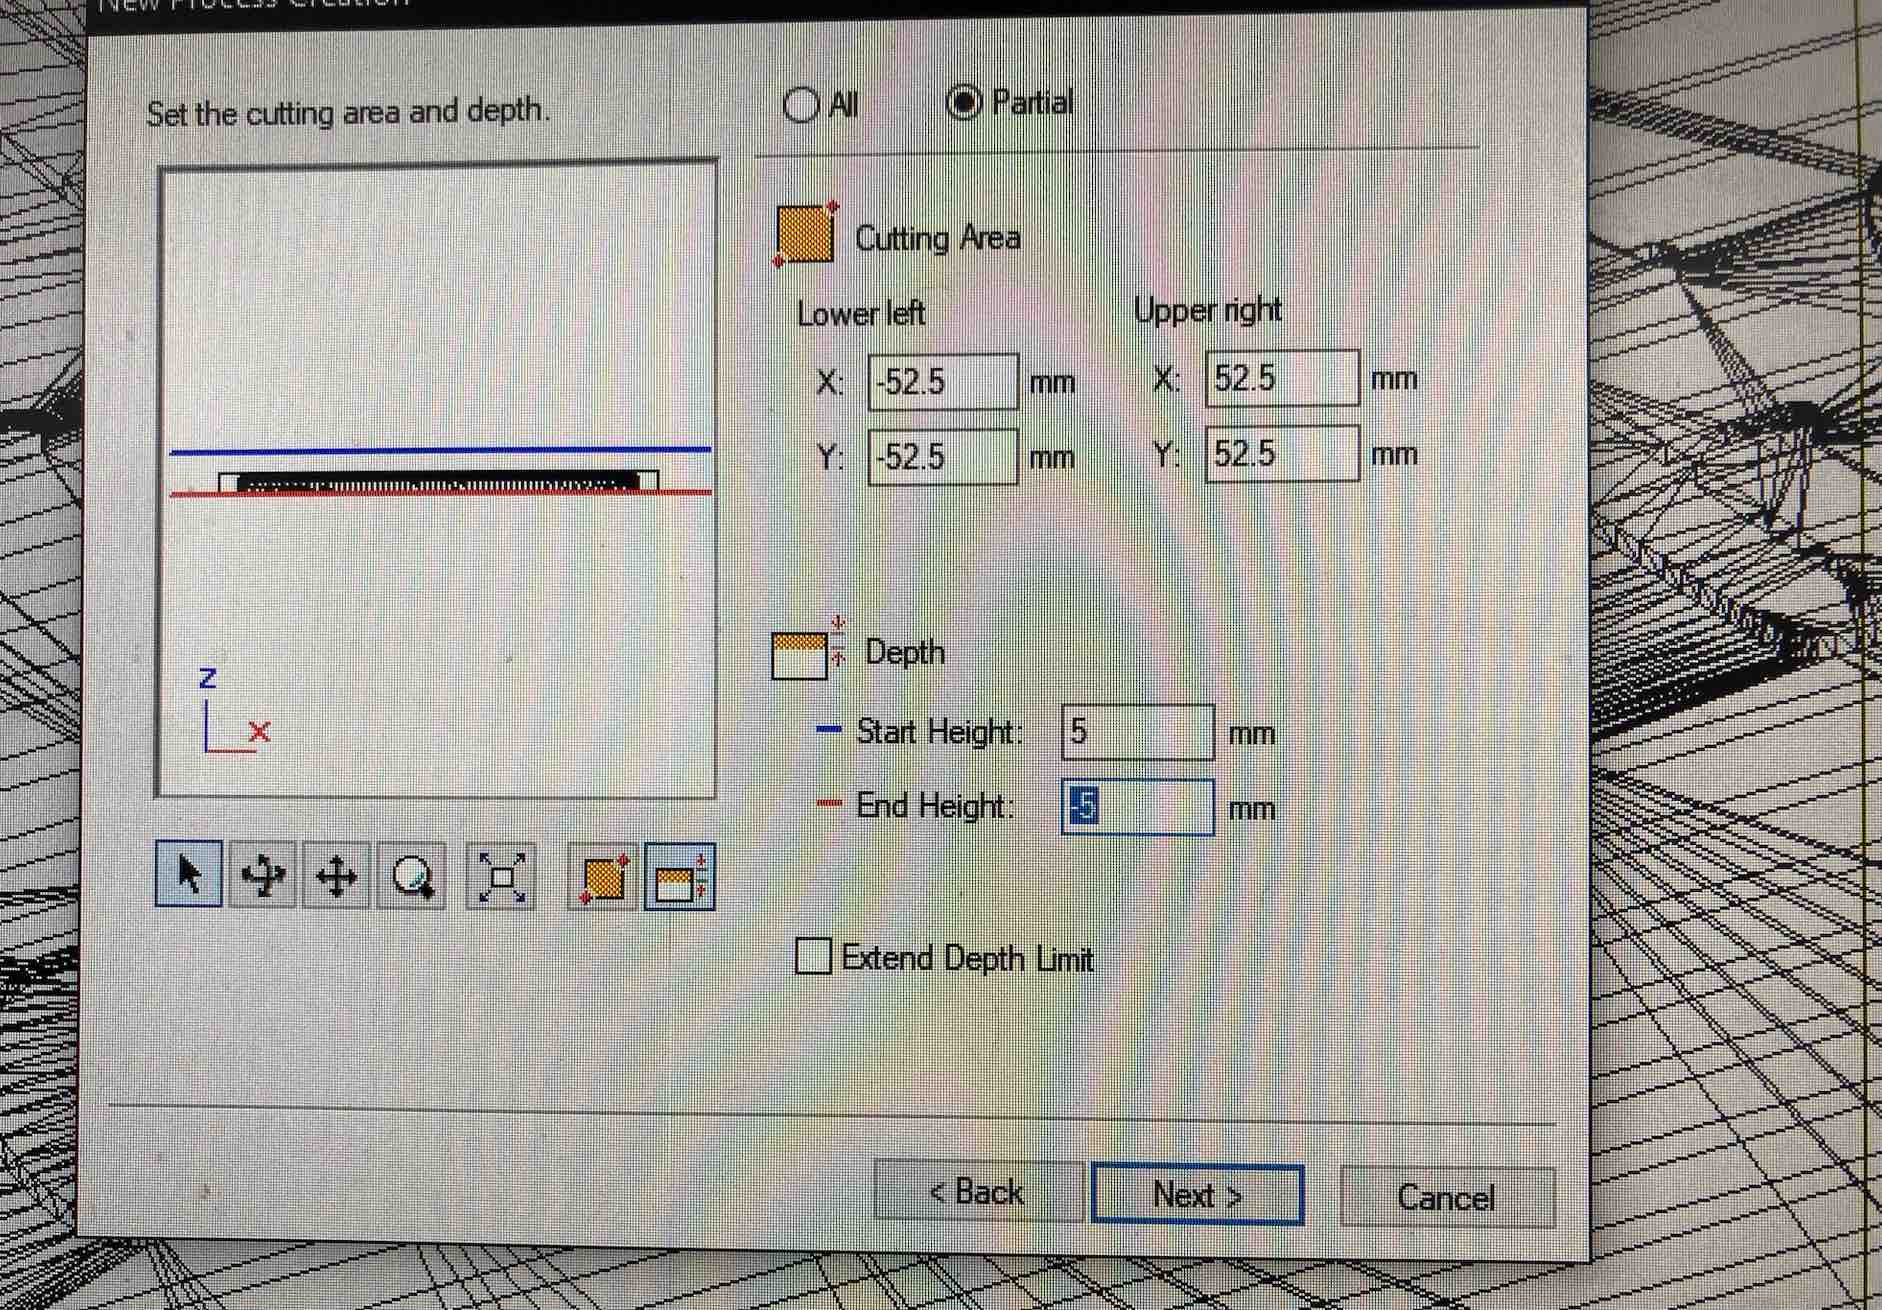
Put in a start height of about 5mm. This is how deep your model will be put down.
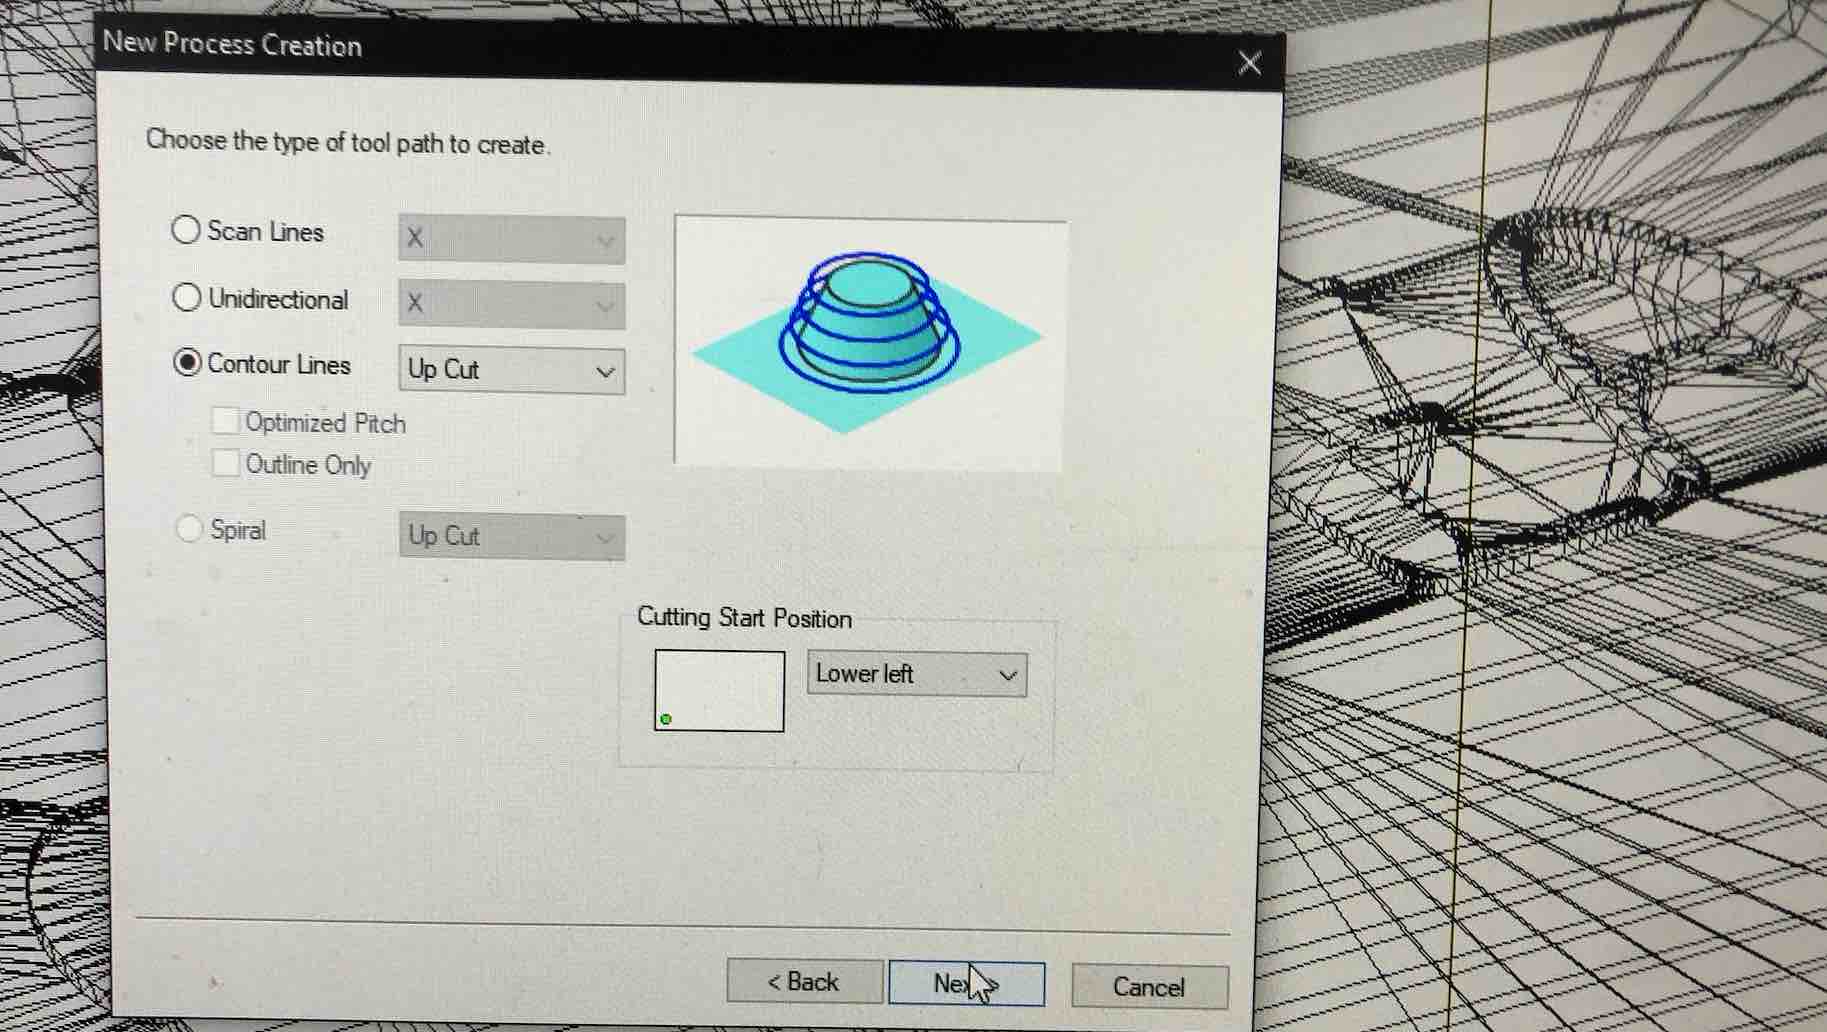
Select the type of tool path and the cutting start position.
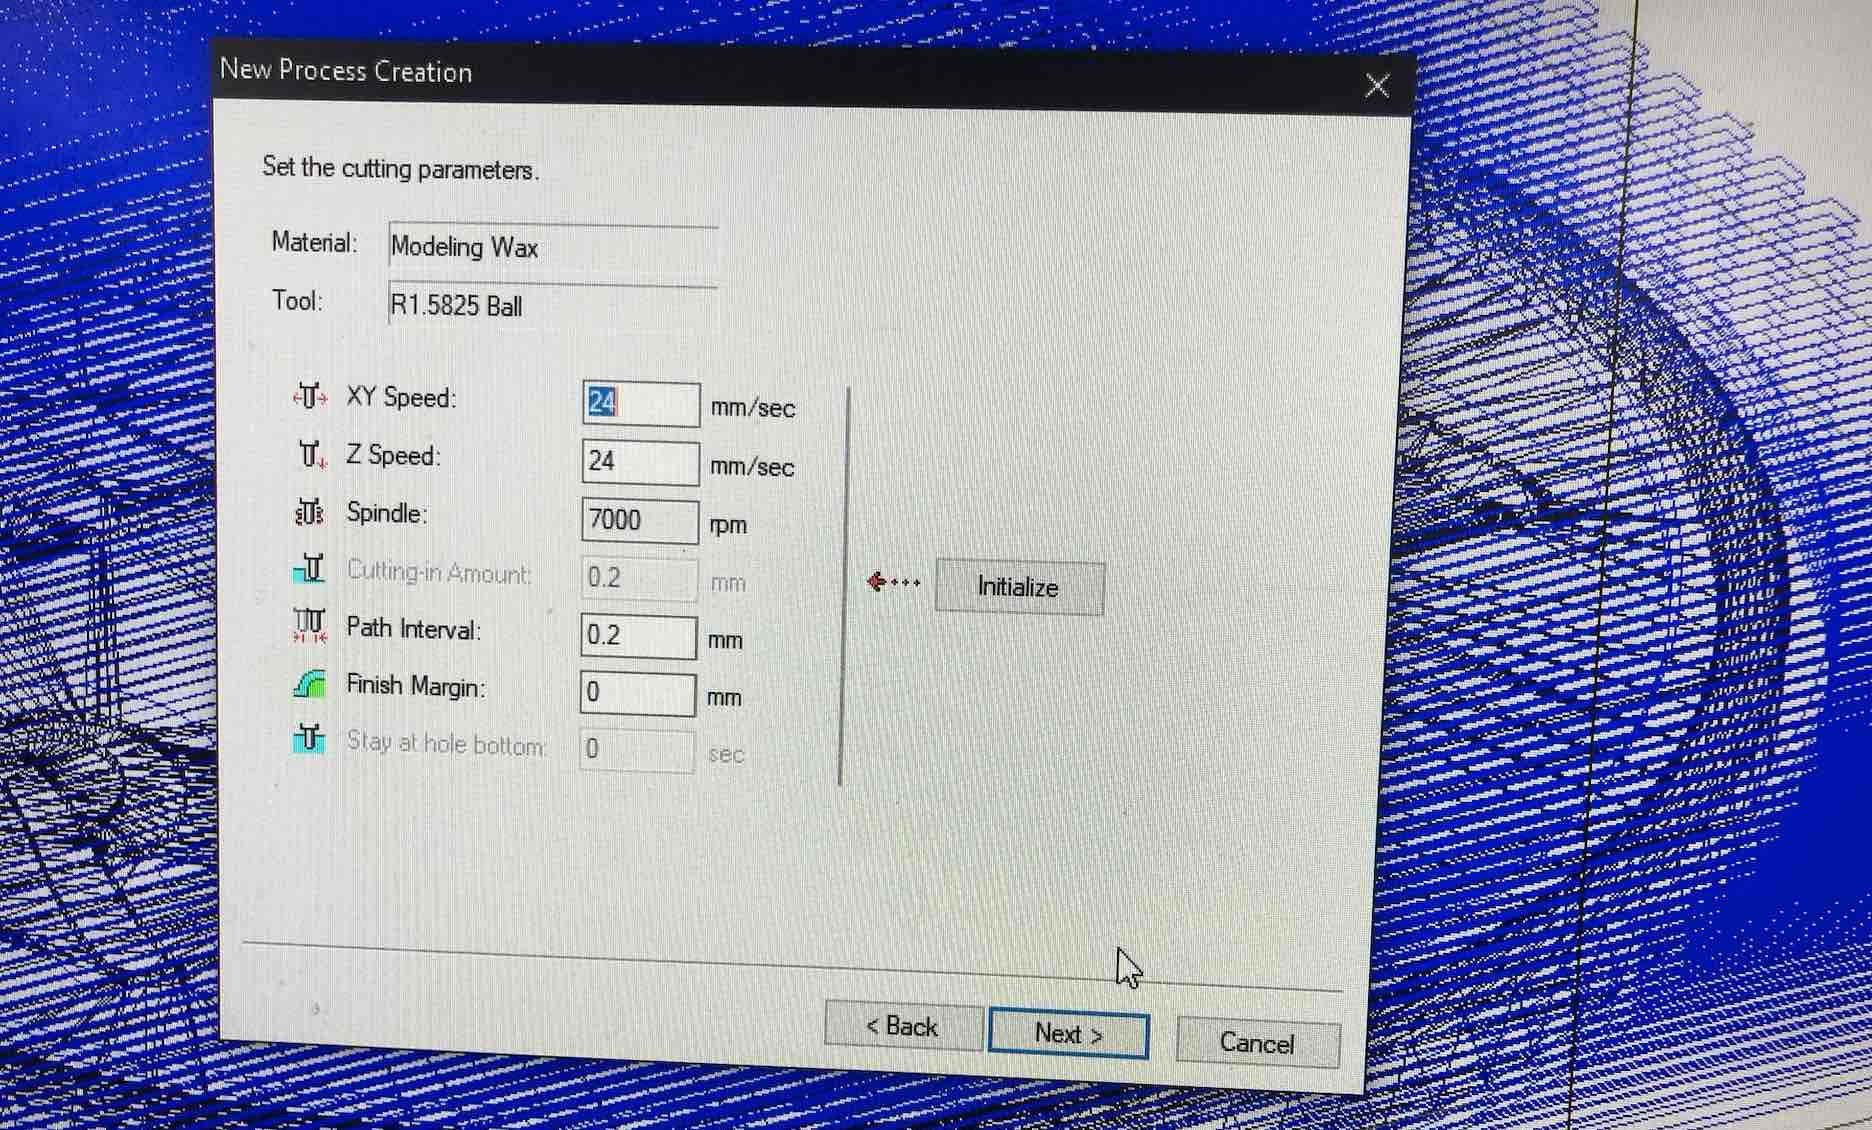
Select the material and put in the parameters. hit next.
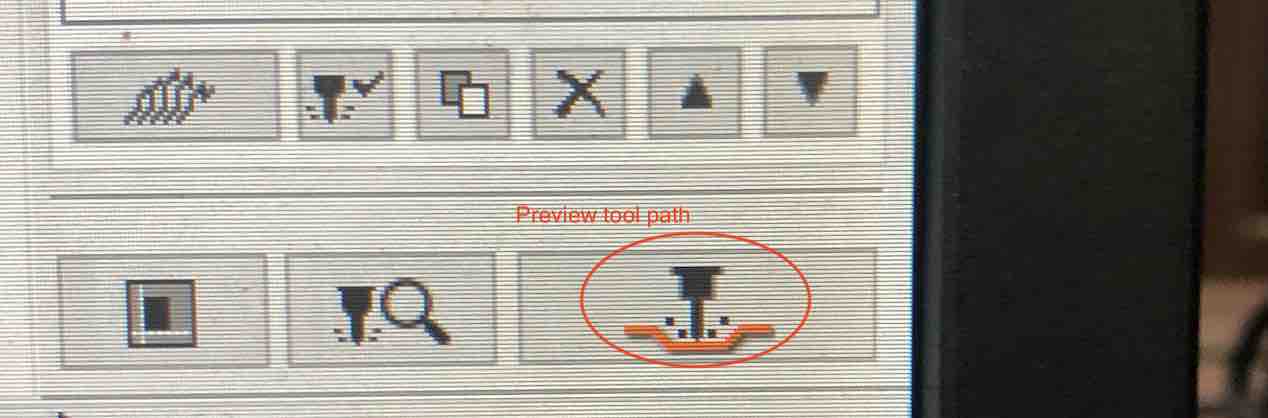
You can preview the job by clicking the preview button on the right bottom panel. If everything looks good, you can save the file in .prn format.
Now you can proceed with creating the finishing file. Create a new process and select finishing.
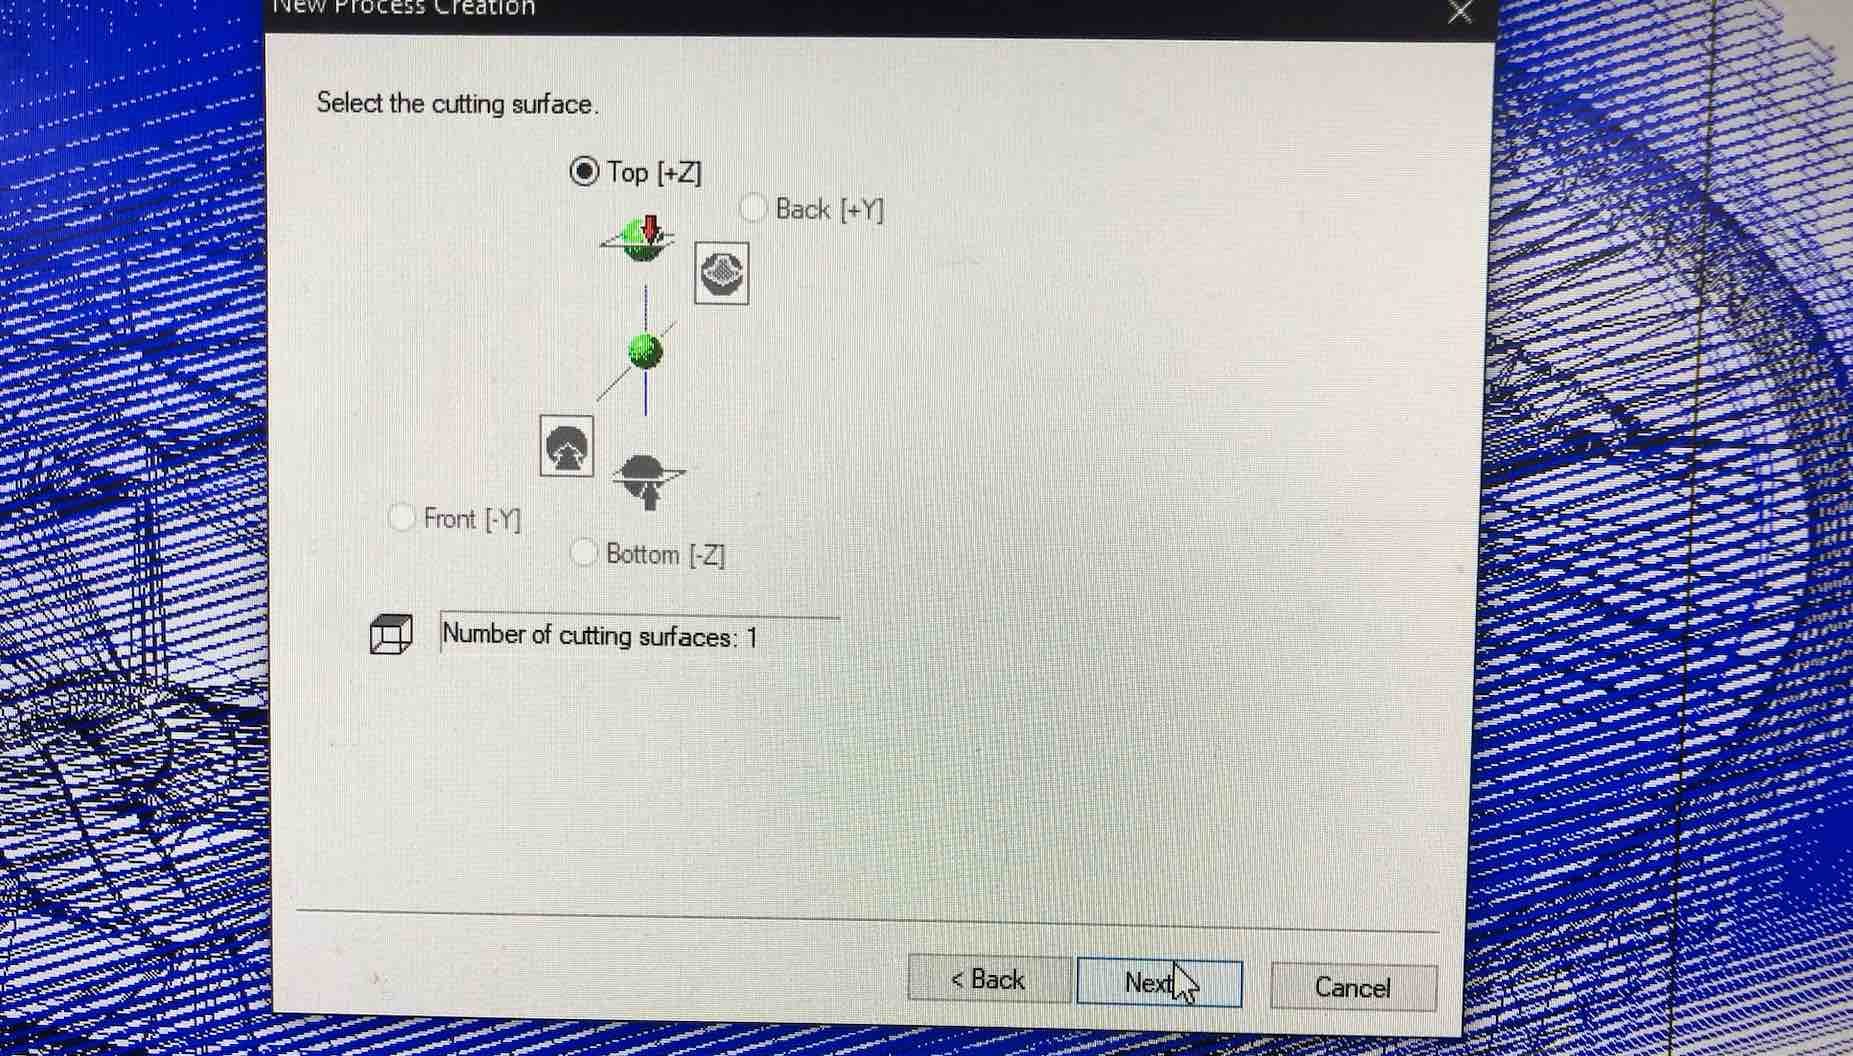
Select the same cutting surface.
Put in the tool type and size.
Change the start height and the put in the cutting parameter. Now finish the process and save the file.
Milling
For this assignment we need 2 types of bits. A square end mill for roughing and a ball nose for finishing.
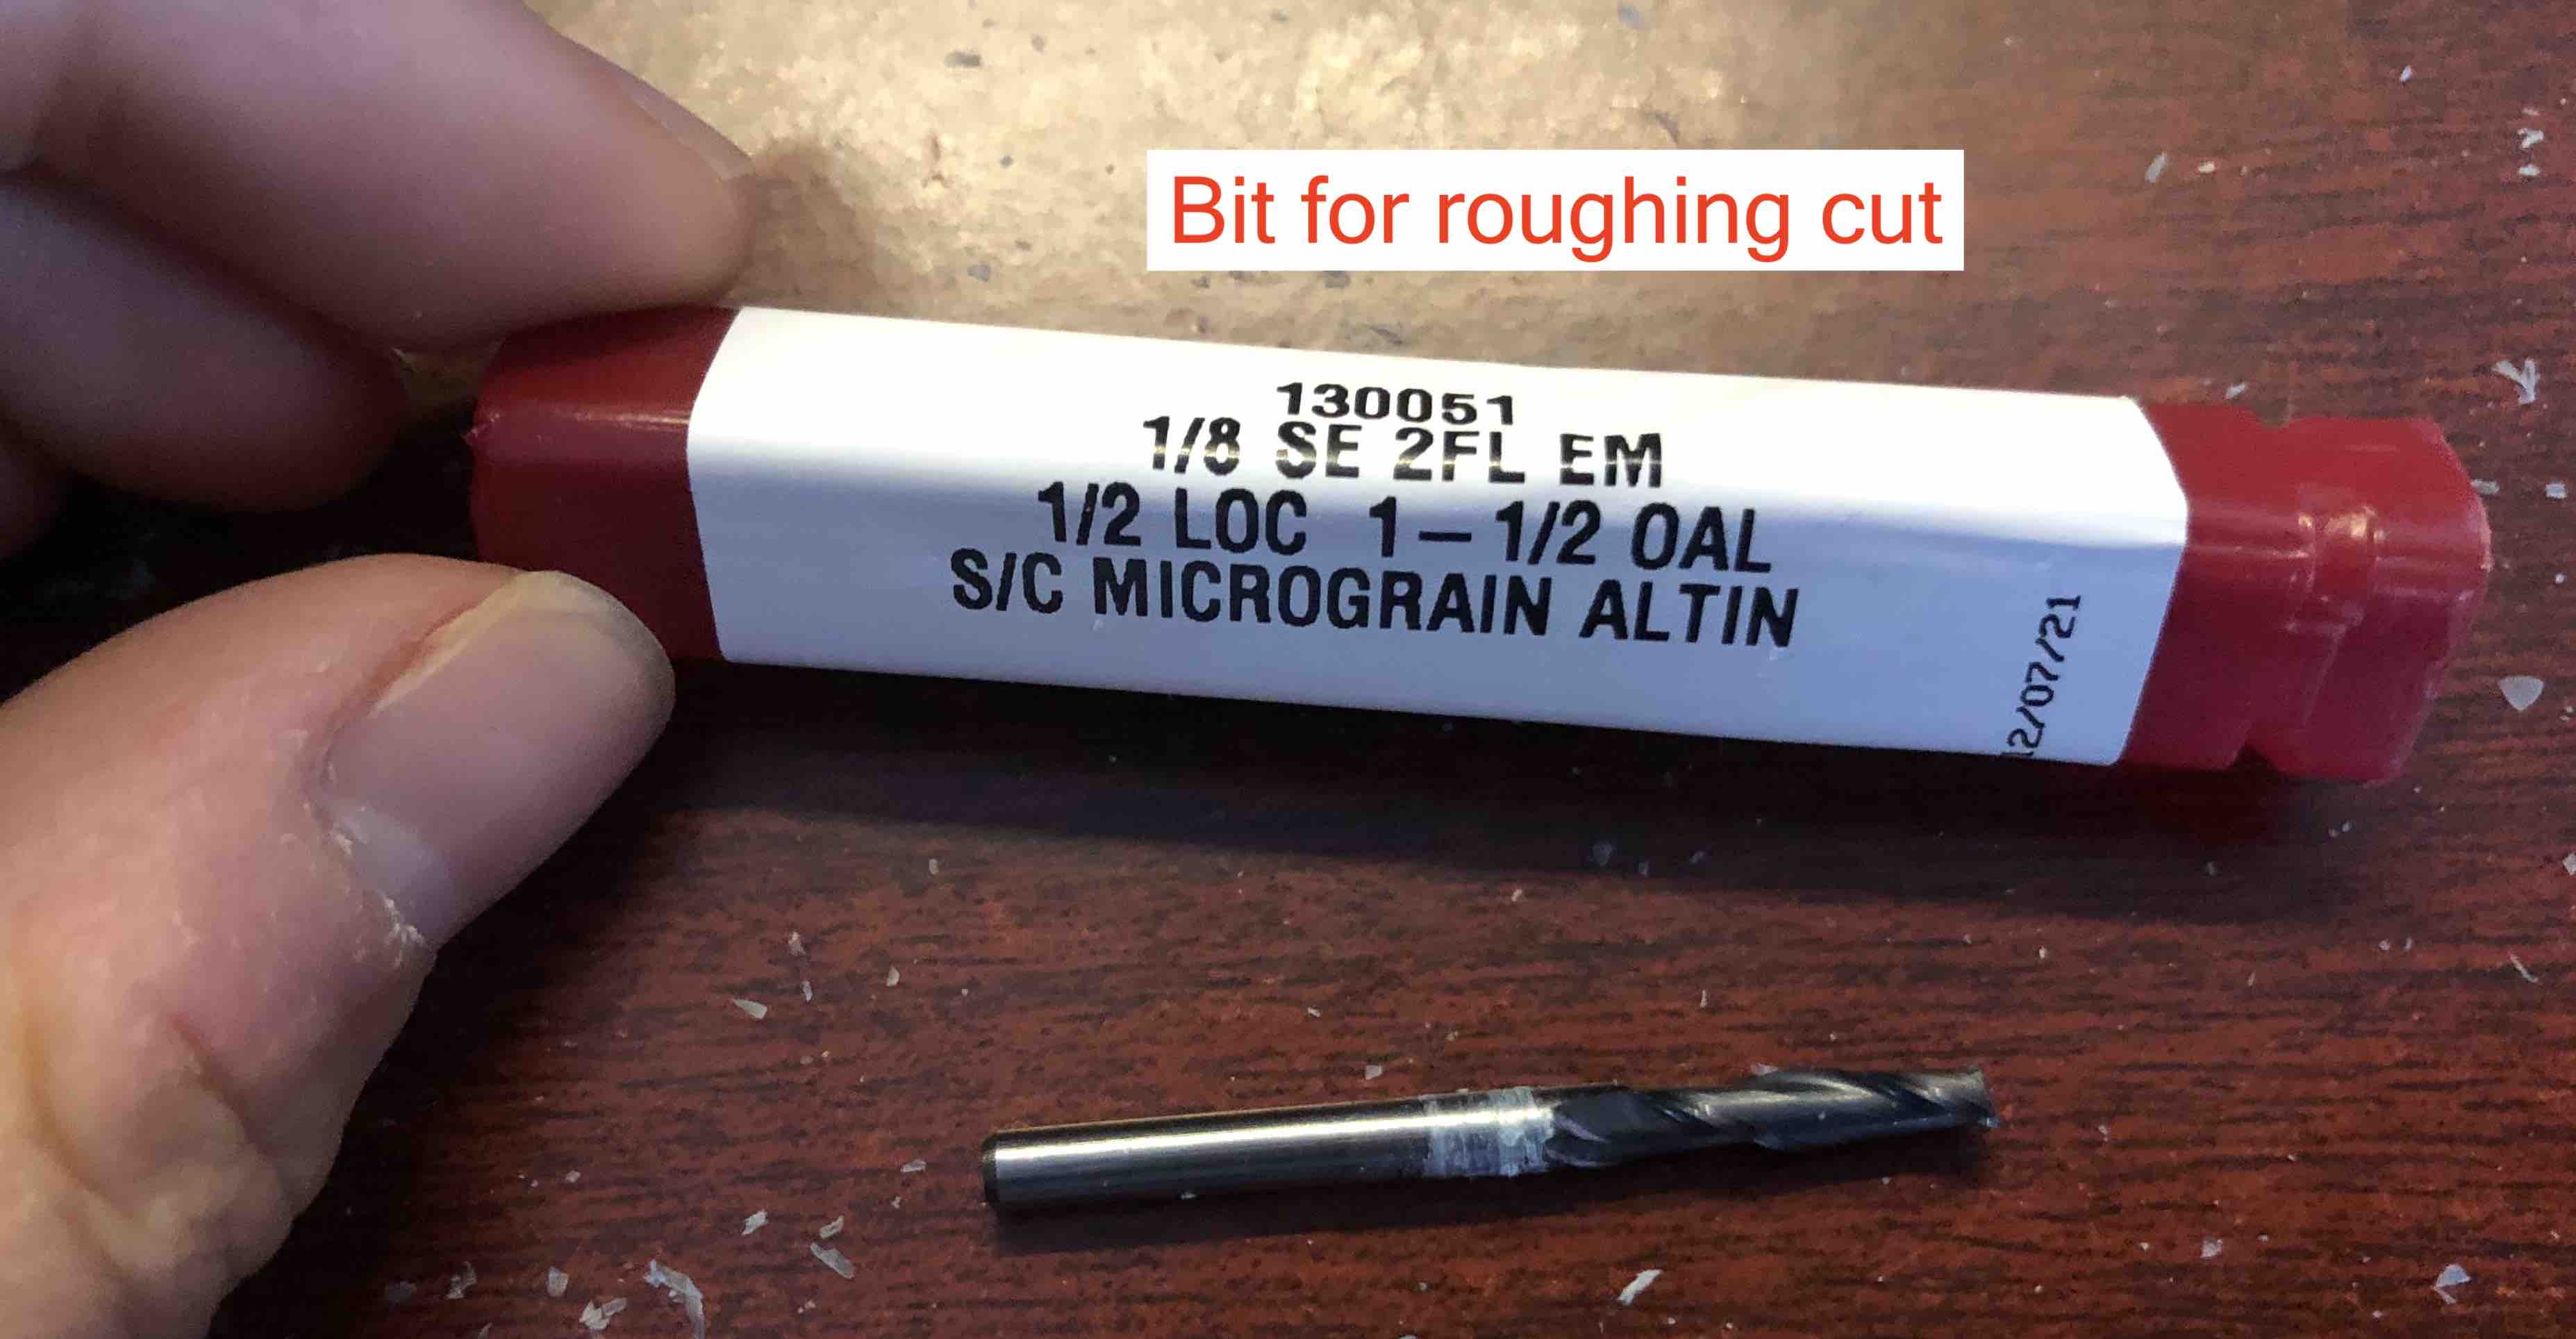
Put in the square end mill. Stick the wax block in with some double sided tape.
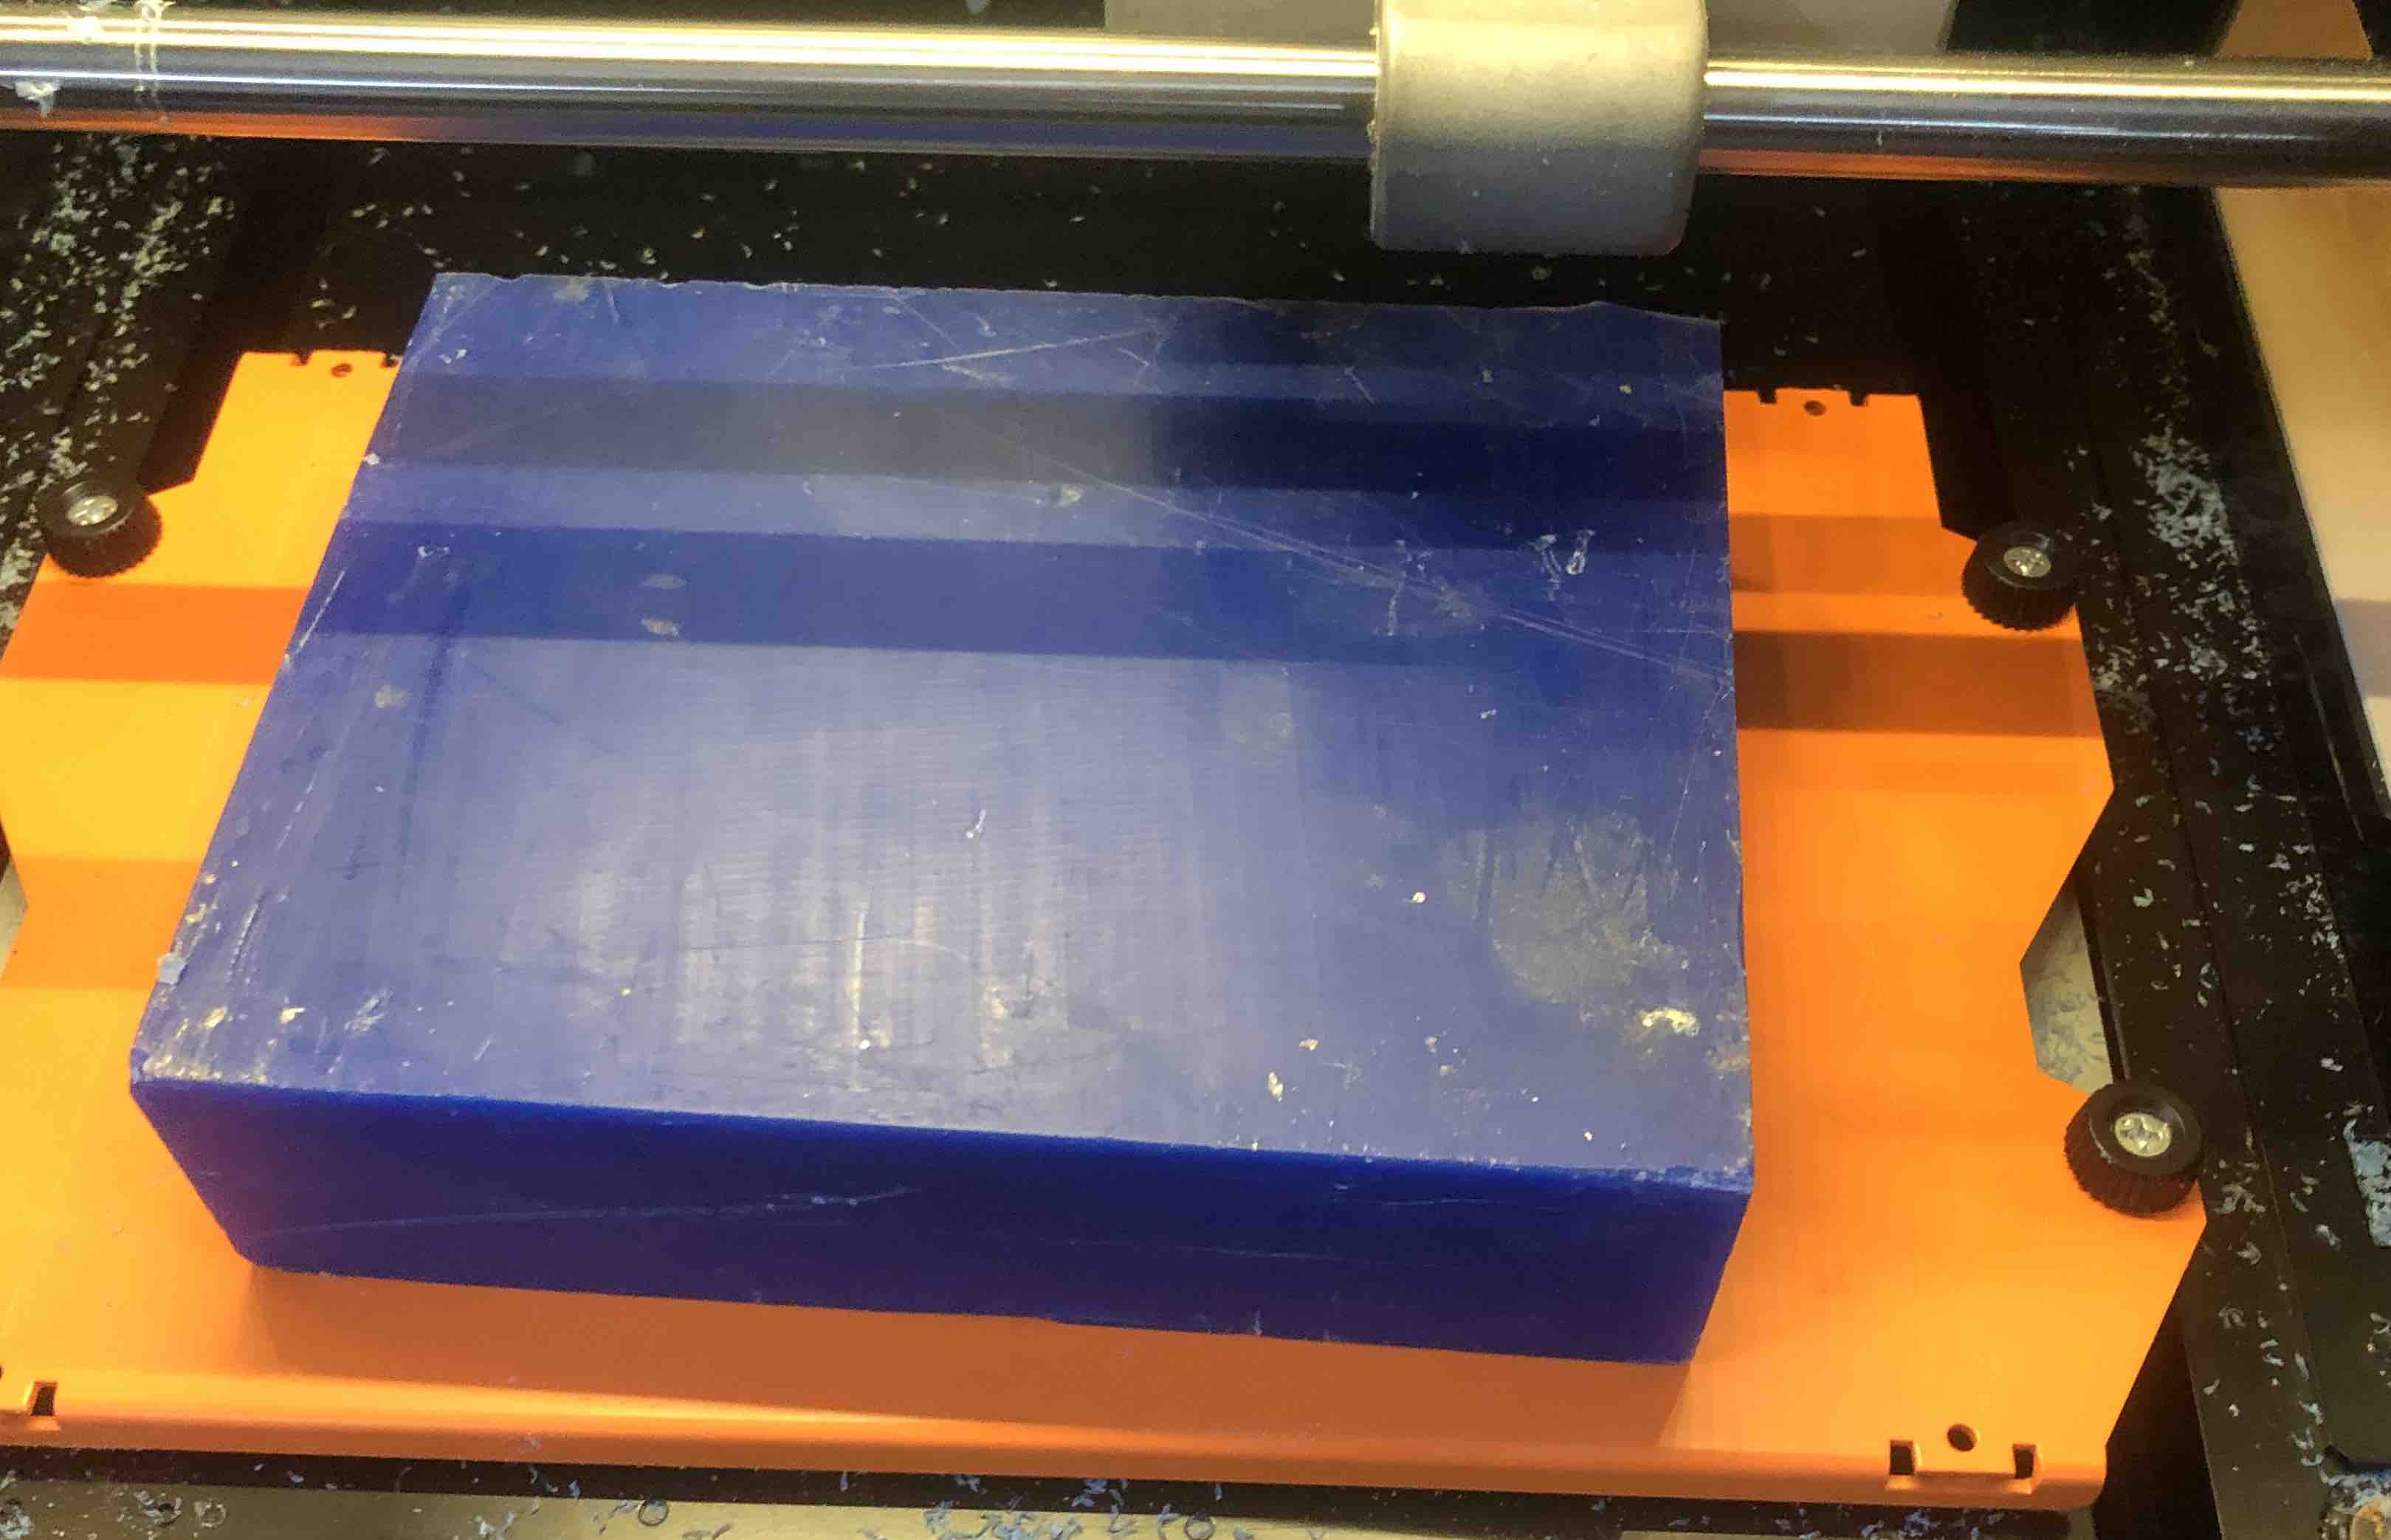
Open up the Roland sofware and zero the axes. Open the roughing file and run it. Next, take out the square end mill and put in the ball nose end mill. Do not change the X and Y zeros. Only change the Z zero. You can do this by moving the end mill to a point on the wax where it has not been cut yet. Run the finishing file. This is what is look like after the milling process is complete:
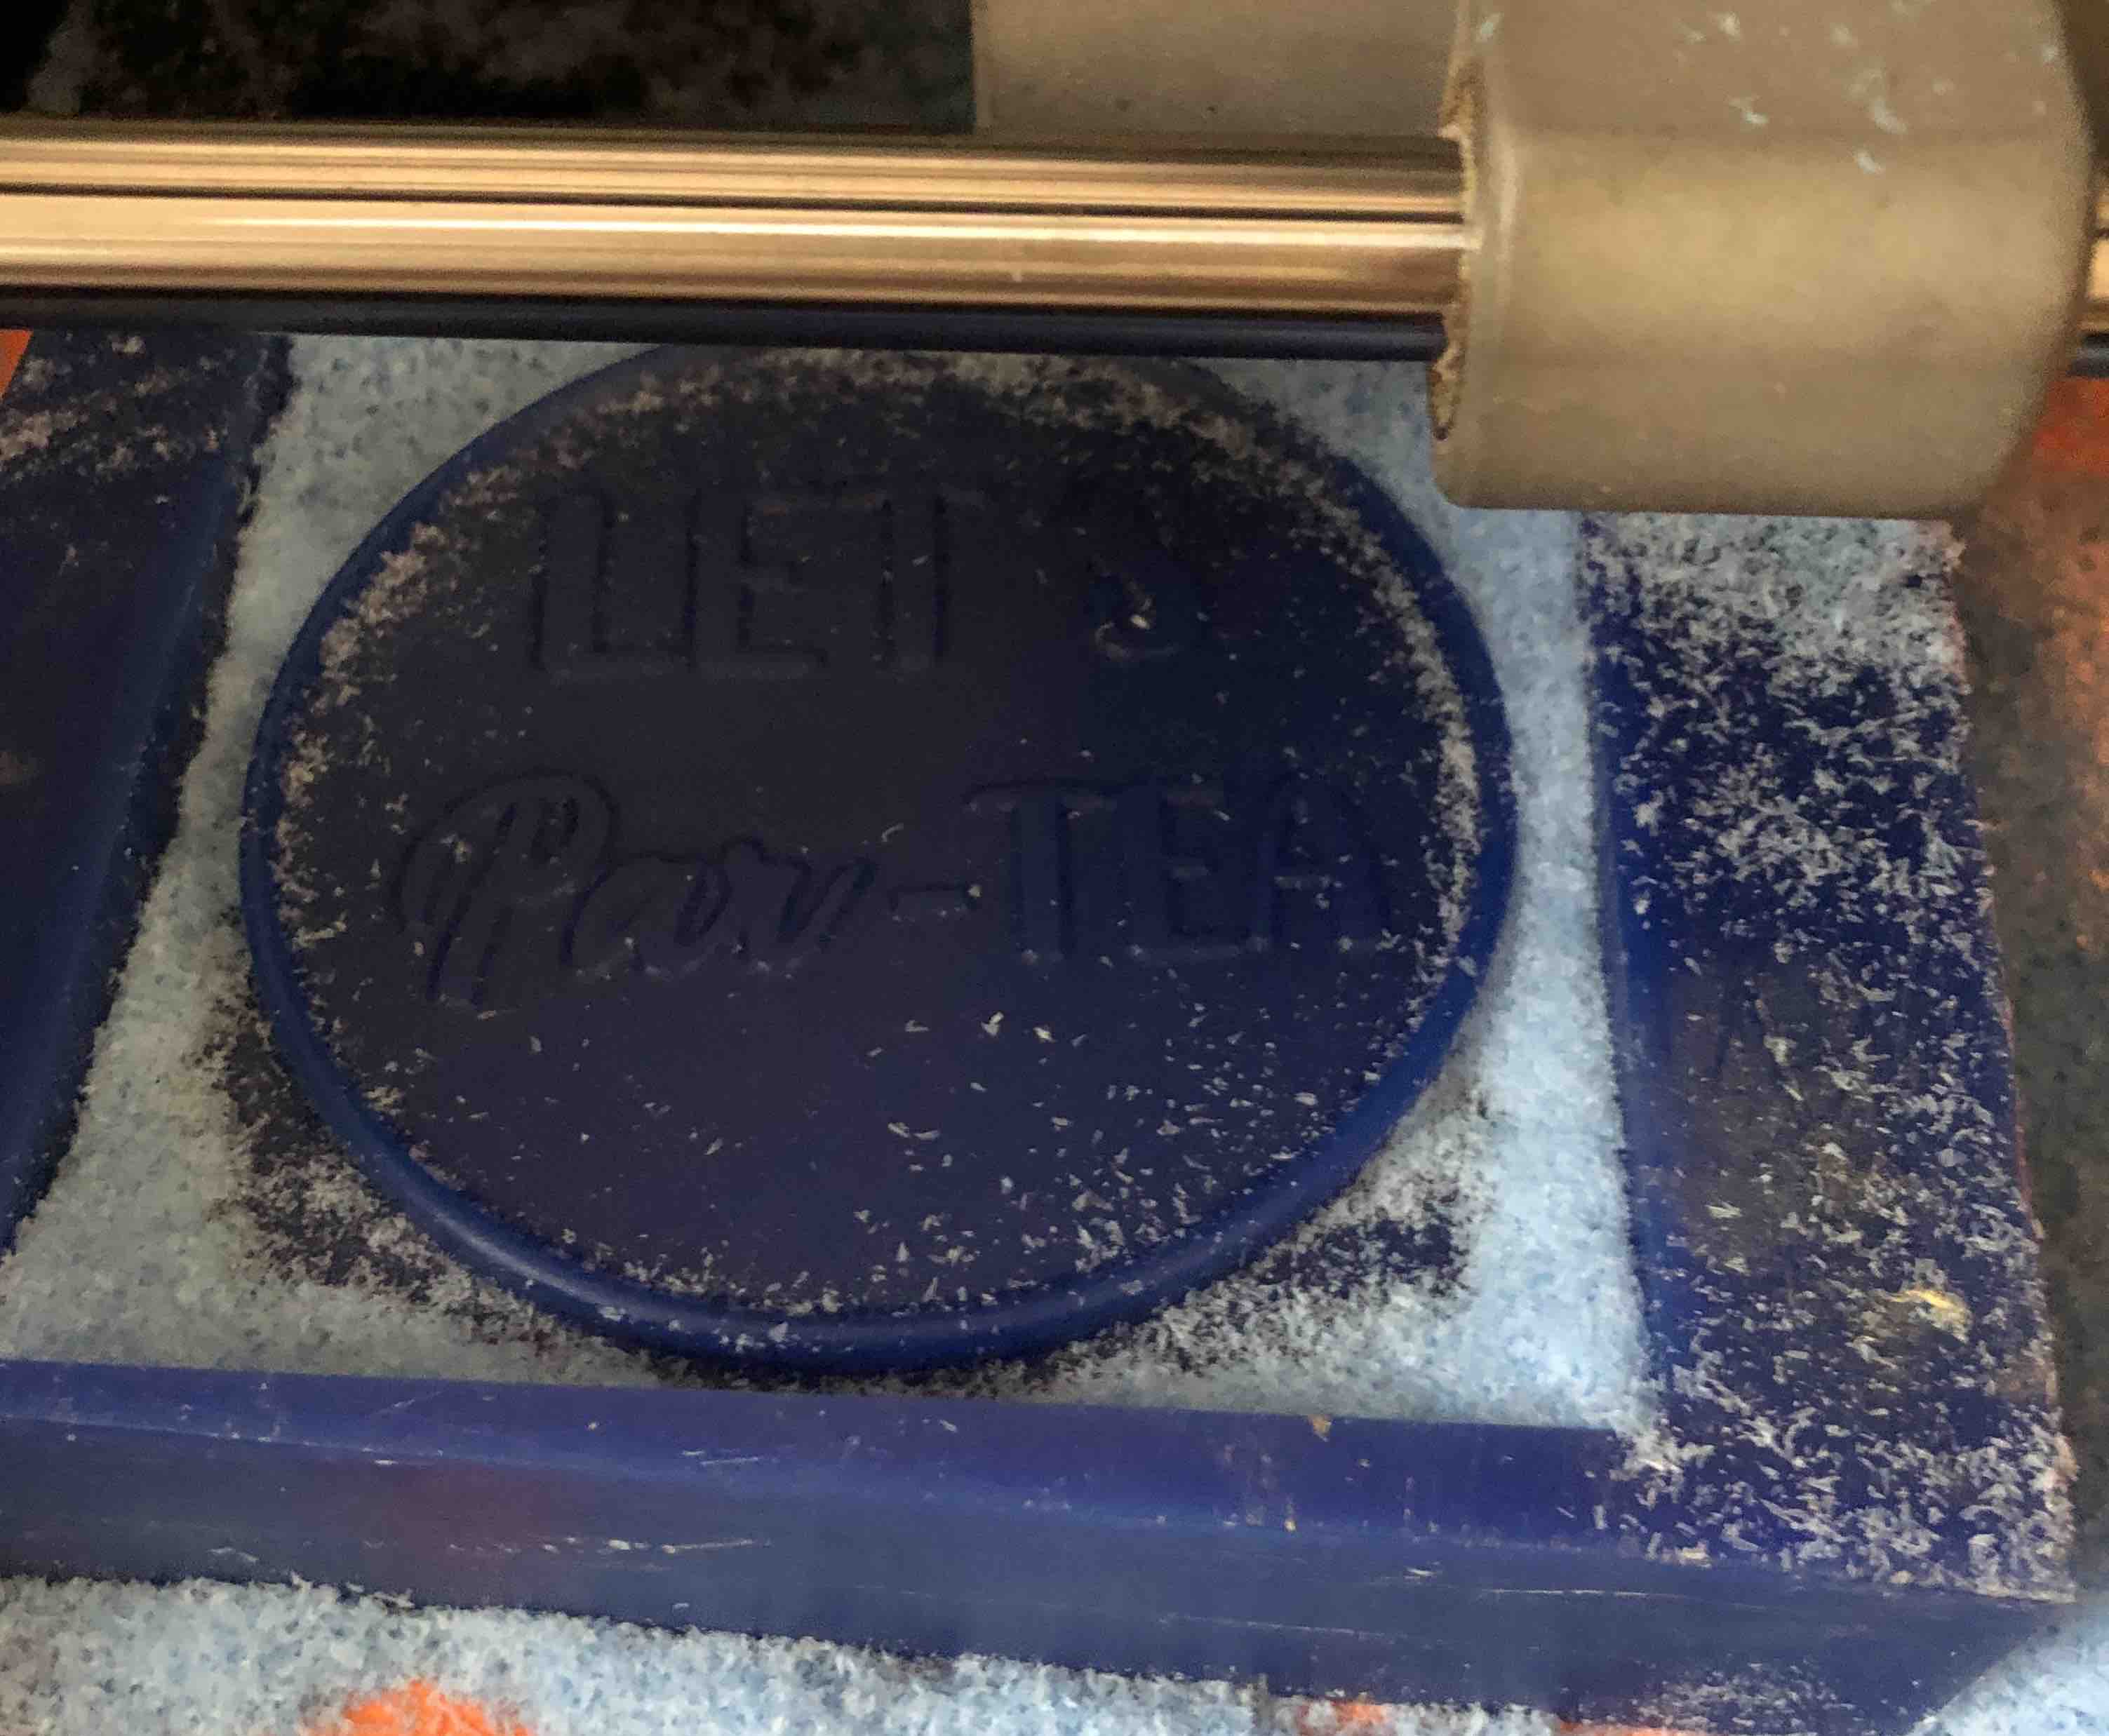
Take out the milled wax and proceed with molding.
Molding
The material that we have in the lab is the Smooth-On Mold Star 30.
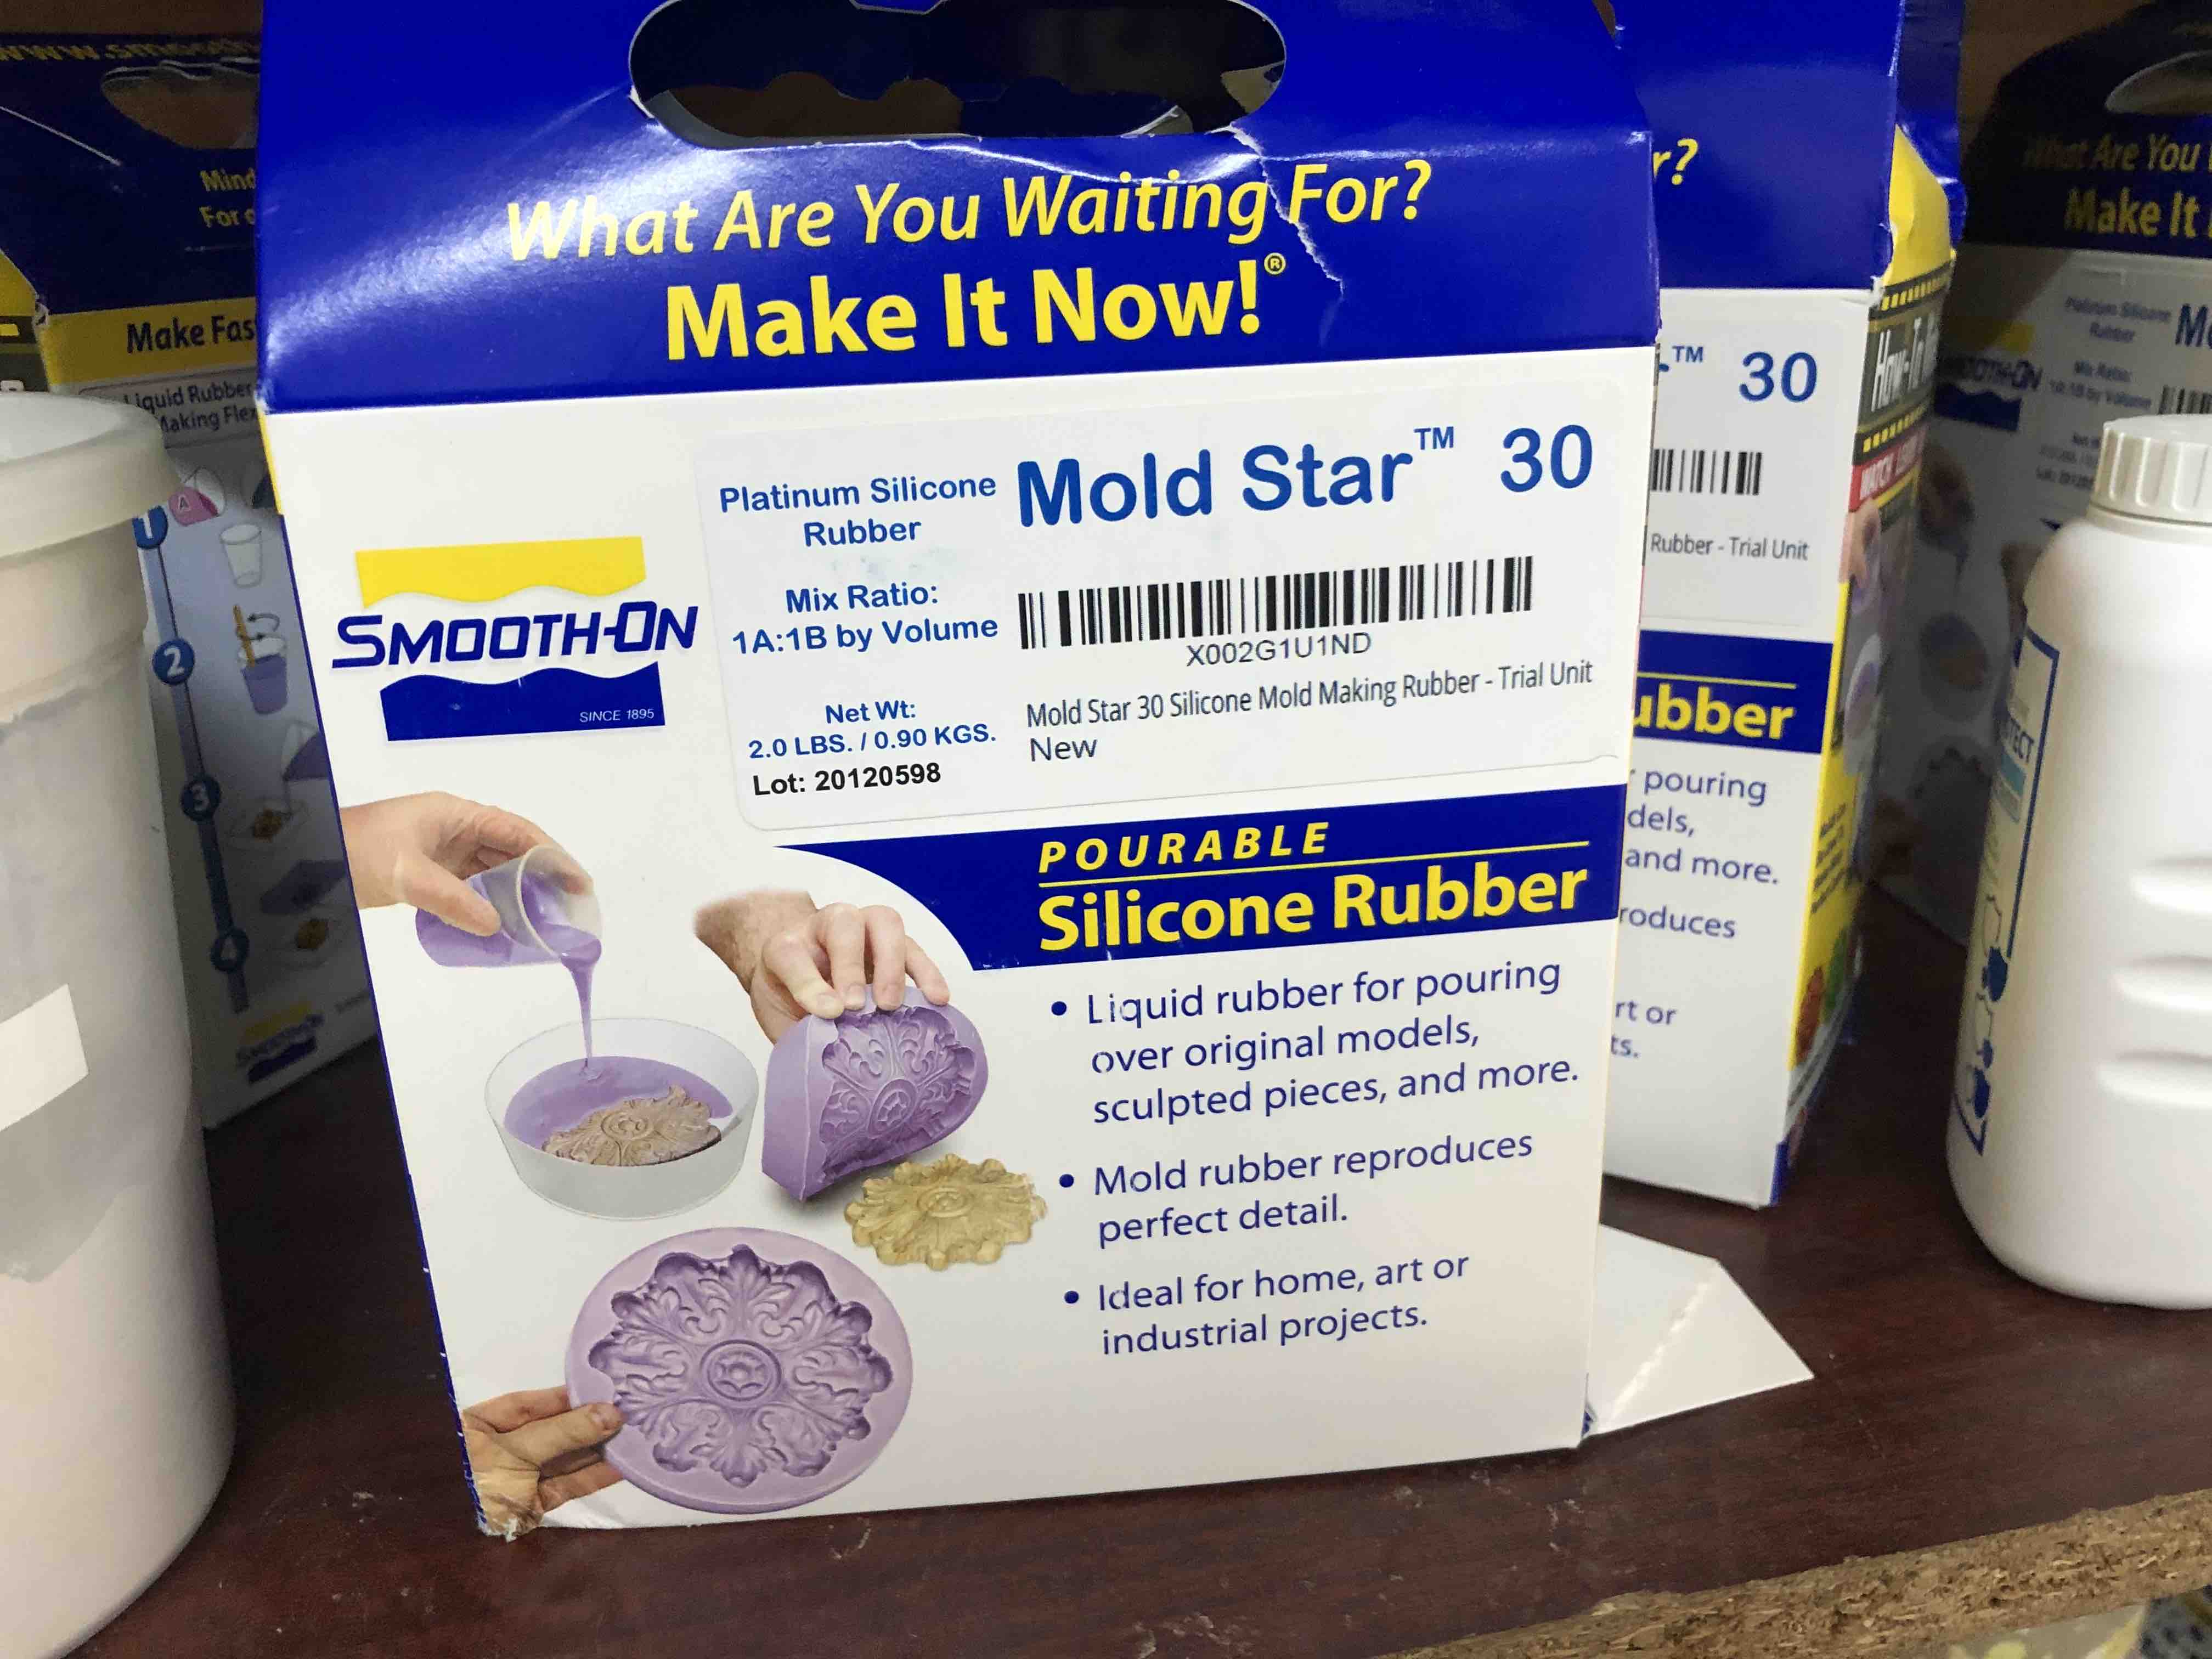
It is a pourable silicone rubber. To make the mold, we need to first mix equal parts of Part A and Part B.
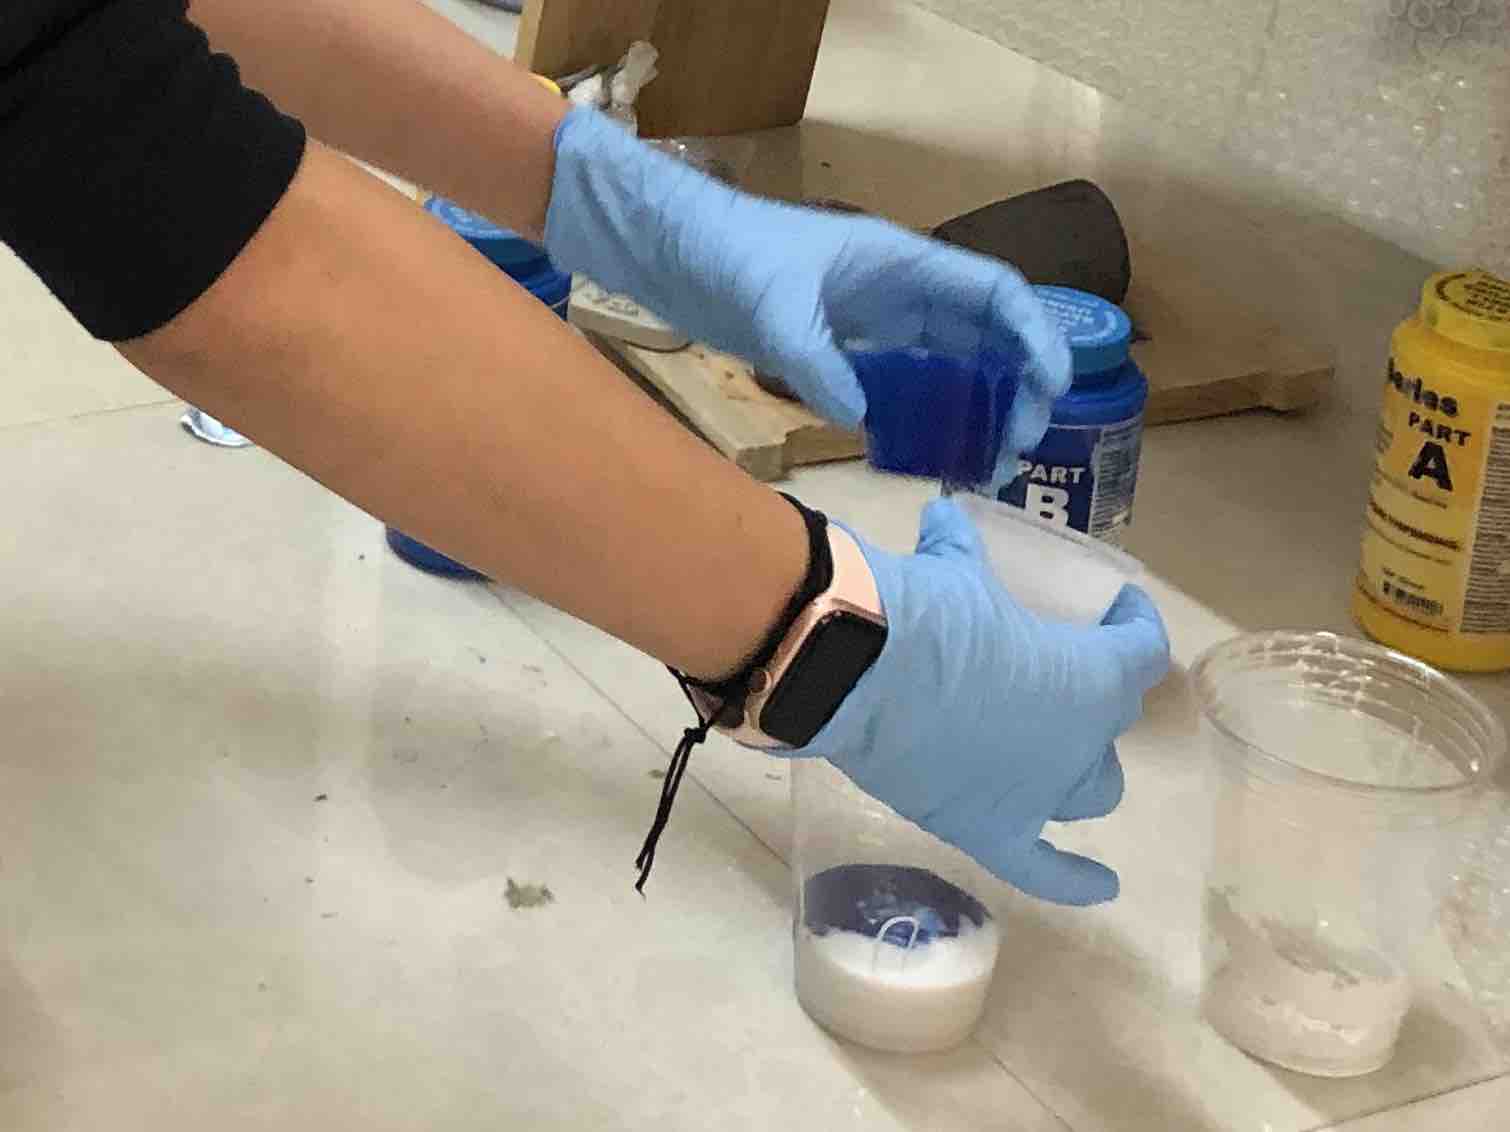
Mix it well and pour it into the wax cavity. Be sure to hit the wax block down a couple of times to release any trapped air bubbles. According to the datasheet, the curing time for Mold star 30 is 6 hours. I left it overnight.
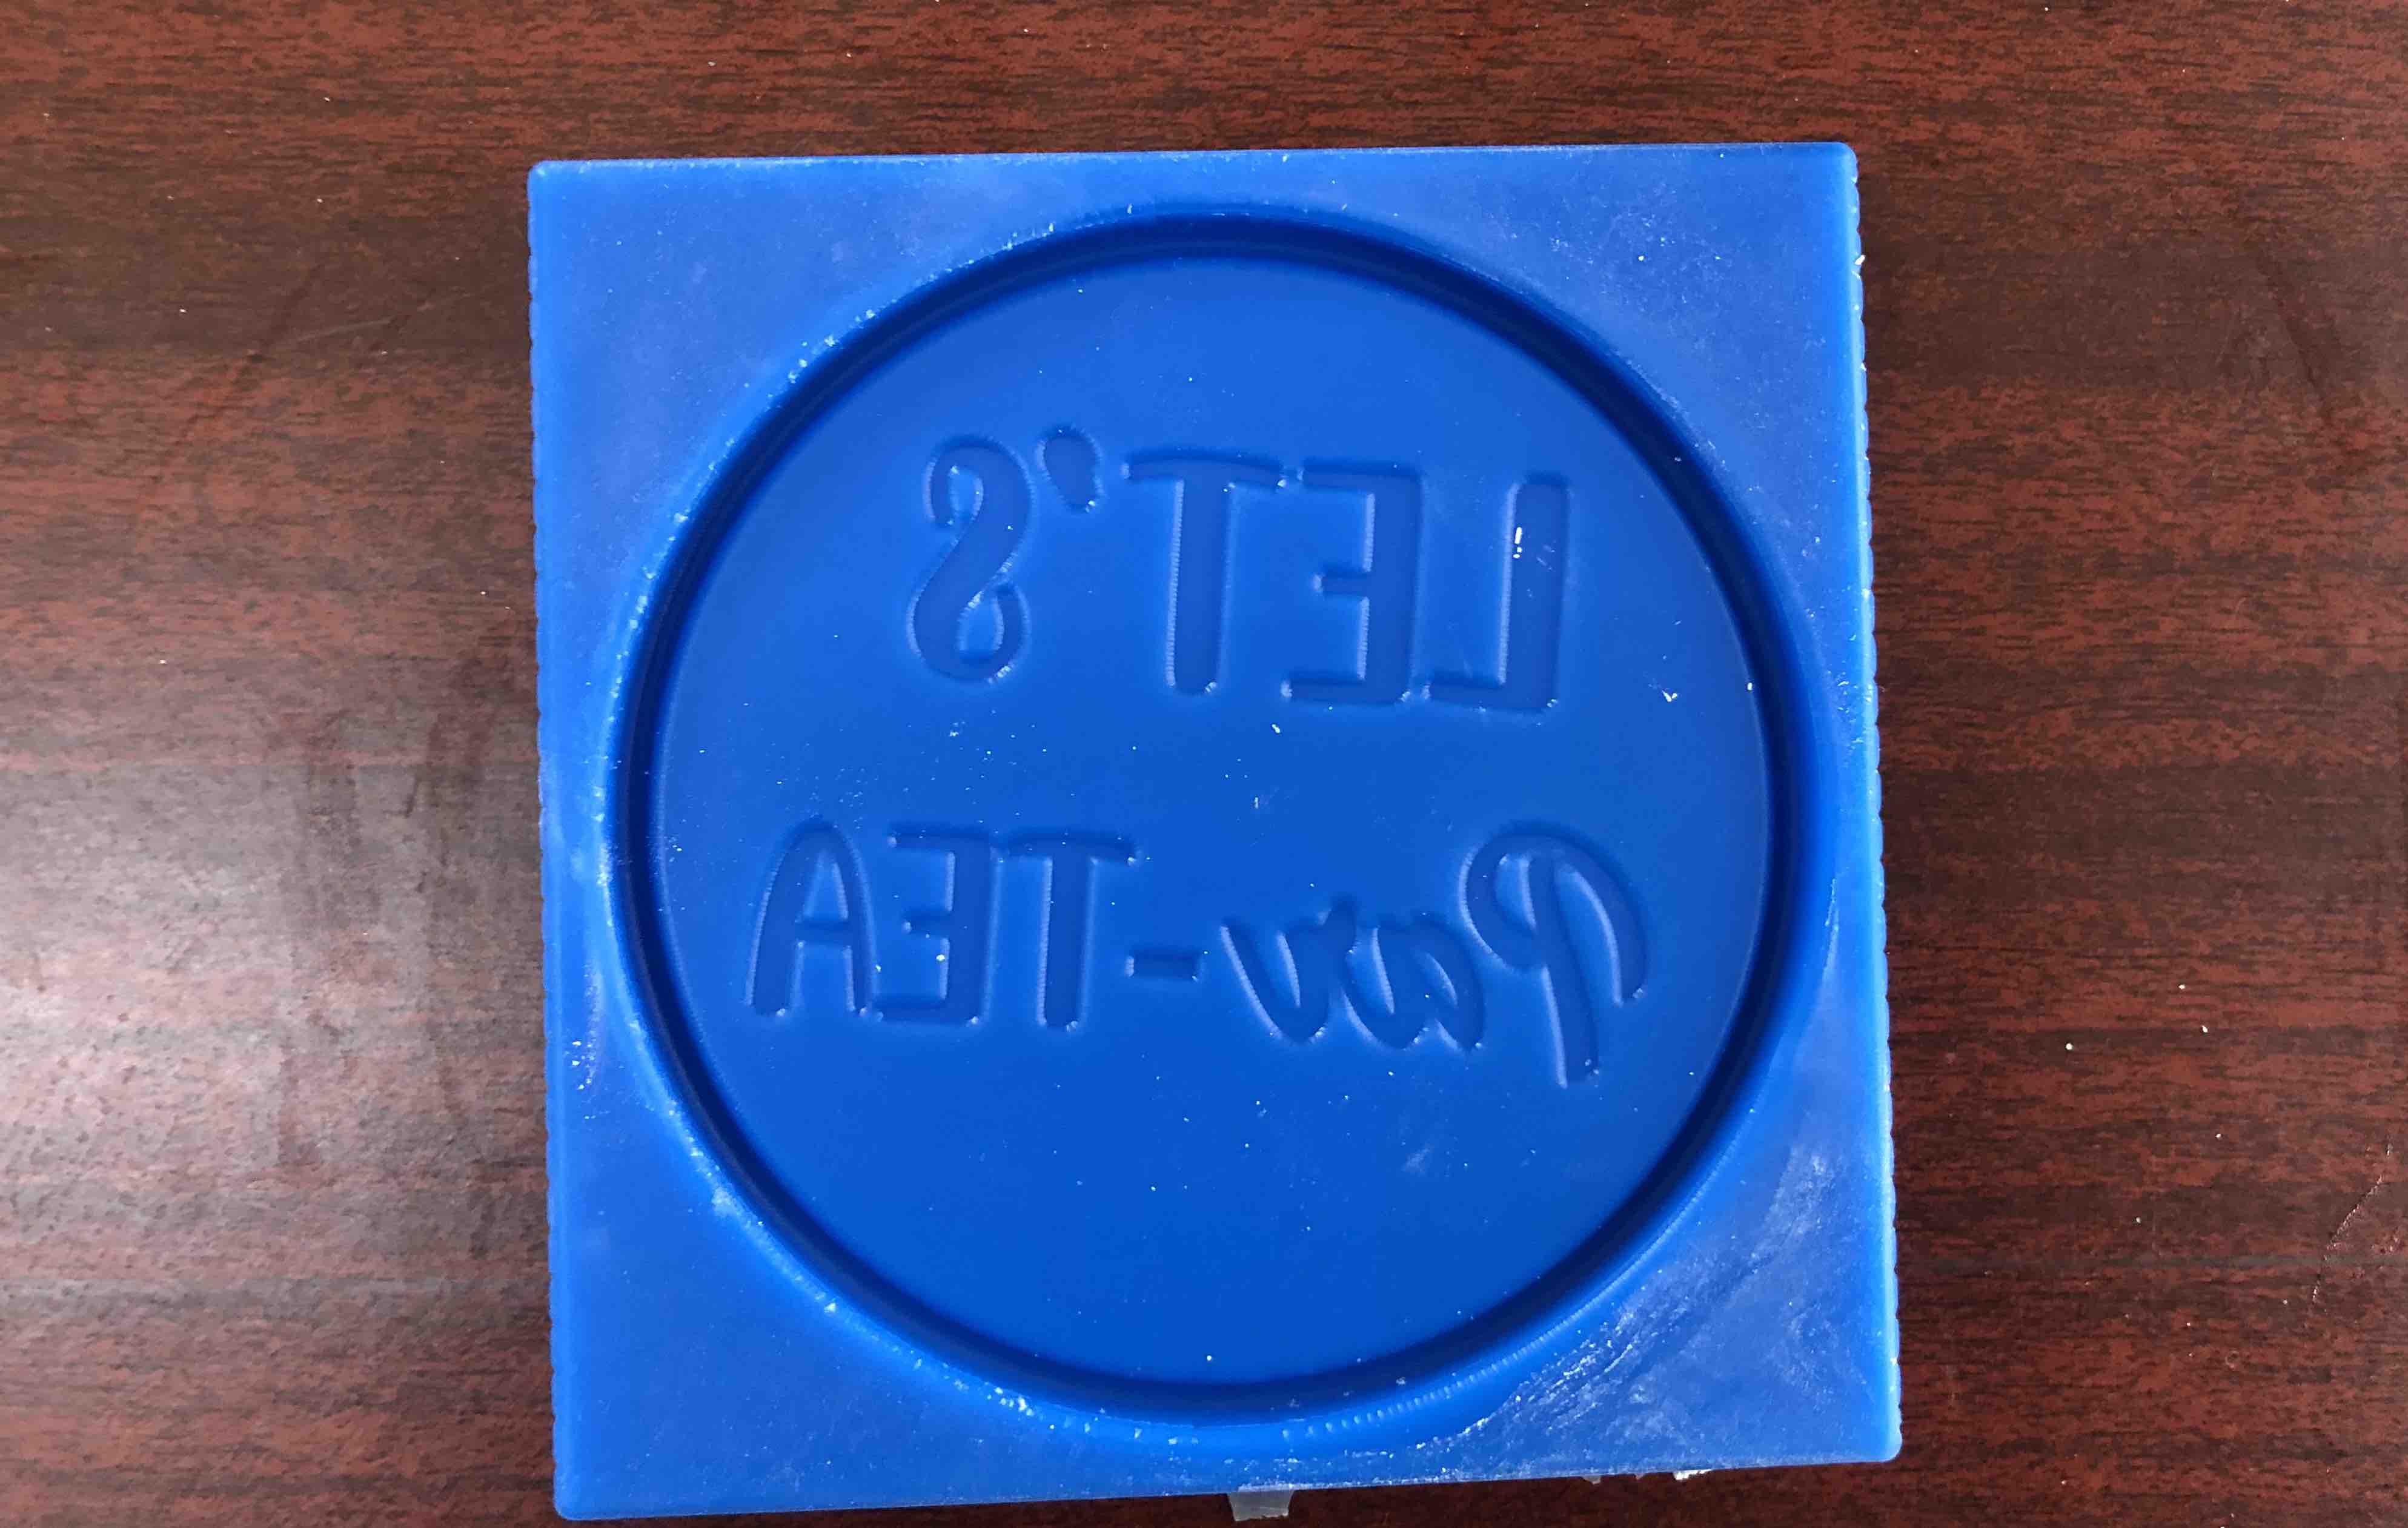
Taking the mold out of the wax was quite a challenge. Our instructor Rico said that it is probably because our material is from a bad batch.
Here is the final result:
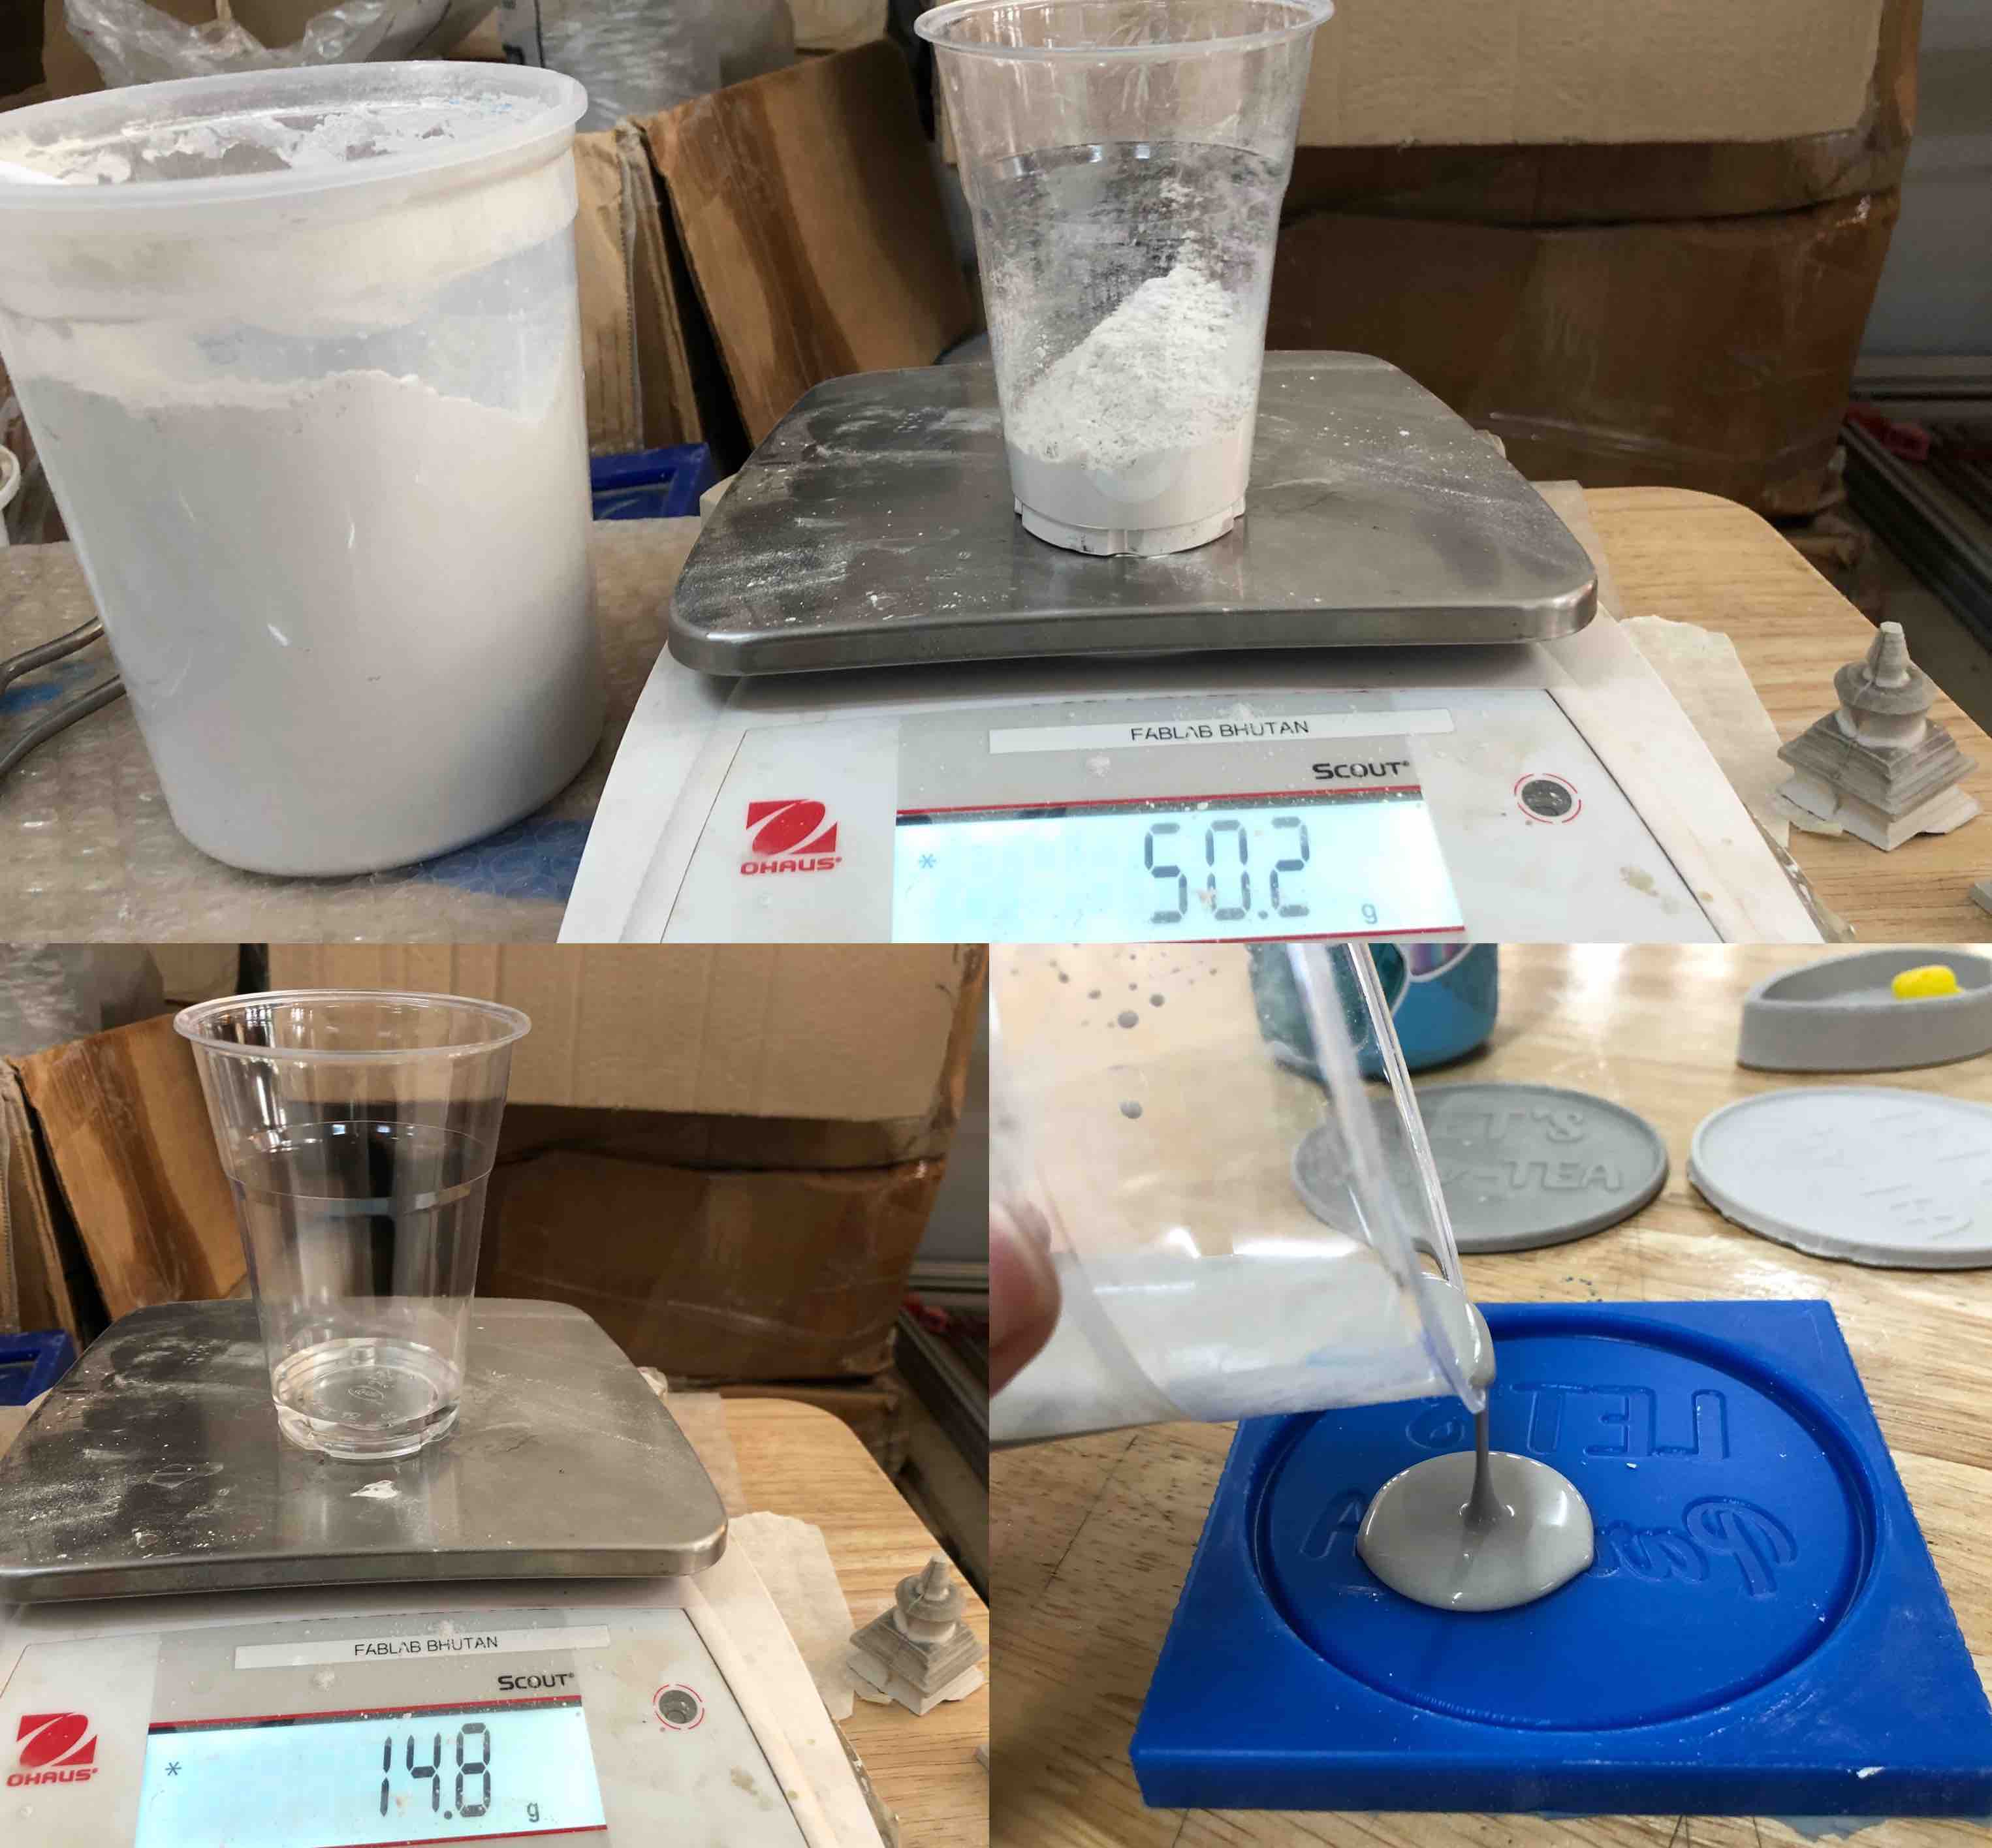
Casting
The casting material that is availible in the lab is Hydrostone. To make the mixtrure we need to mix 100g of hydrostone with 30g of water. Since my mold is pretty thin and doesnt need as much material, I cut the quantity in half and mixed 50g of hydrostone with 15 g of water. Then I poured the mixture into the mold. It set in about an hour.
Conclusion
This week opened my eyes to the how many different types of molding and casting materials there are. In the future, I want to try molding with edible friendly materials and casting with chocolate, resin etc.
Assessment Guide
Design a 3D mould around the stock and tooling that you’ll be using, mill it (rough cut + (at least) three-axis finish cut), and use it to cast parts.