16. Wildcard Week
During the 2020 cycle, I didnt have access to a lab so I decided something for embroidery but I was unable to do it. During the 2022 cycle, I cut acrylic on the zund machine in the Super Fab Lab for the second iteration of the PET bottle to filament machine.
2020
This felt like a very abstract week. With labs still shutdown, it was hard to decide what to work on. Wildcard week was introduced as a week where we work on something in our lab that makes it different rather than what makes all labs similar. Neil talked about all the possible things that we could look into including foldable furniture, different kinds and applications of composites, robots and different ways of automating electronics. I went over what previous students from my lab had done for this week. I found a lot of documentation on CNC embroidery so I decided to go with that. I managed to design something on Inkscape to sew on when I get back to the lab.
Design
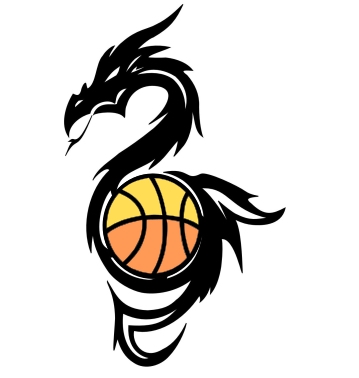
After looking over what previous students in my lab had done this week, I was able to get an idea on how to approach this week. From their documentation, I understand that Dassault has a PFAFF sewing machine that seems quite popular. Sal’s page has some good documentation. I took inspiration from his assignment and decided to do something similar, an embroidered t-shirt. I decided to use my quarantined time to design something to sew onto a t-shirt. Combining my love for basketball and a dragons symbolism in Bhutan, I came up with this:
PFAAF machine
I found the user manual for the machine that we have at Dassault and read up on it. It has great instructions on how to setup the machine and maintain it.
2022
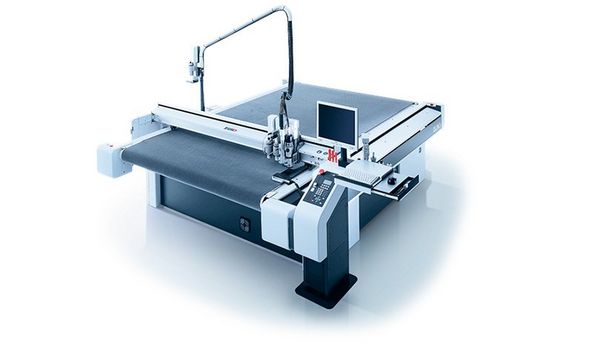
This week, have to use one of the machines that are not usually found in a standard fablab, one that we haven’t used in the previous weeks. I decided to try the zund that we have at the Super FabLab since it was just set up and we have to learn how to use it soon.
Zund G3
Thinley, one of my colleagues at the Super FabLab showed me how to use the zund and I was really amazed at all the capabilities of it. Here are some great features about the zund:
- Automatic Router Bit Changer (!! I was really amazed at this. Makes life so much easier!)
- Can cut up to 4.3inches (110mm) thick
- Can cut/engrave a range of materials: thin paper, fabric, acrylic, wood, aluminum sheets.
In conclusion, it make the laser cutter, shopbot, and vinyl cutter look dumb. This is probably going to be my favorite machine in the lab henceforth and I’m glad I chose to do this for wildcard week.
Design
To try out the zund, I wanted to make something that I needed. Thinley said that it was easiest to start with acrylic on the zund so I decided to make the base for the second prototype of the PET bottle to filament machine that we made for machine week. The sheet of acrylic that we had was the perfect size so I measured it and then designed around it on Fusion360.
The acrylic sheet measured to be 613mm by 302mm.
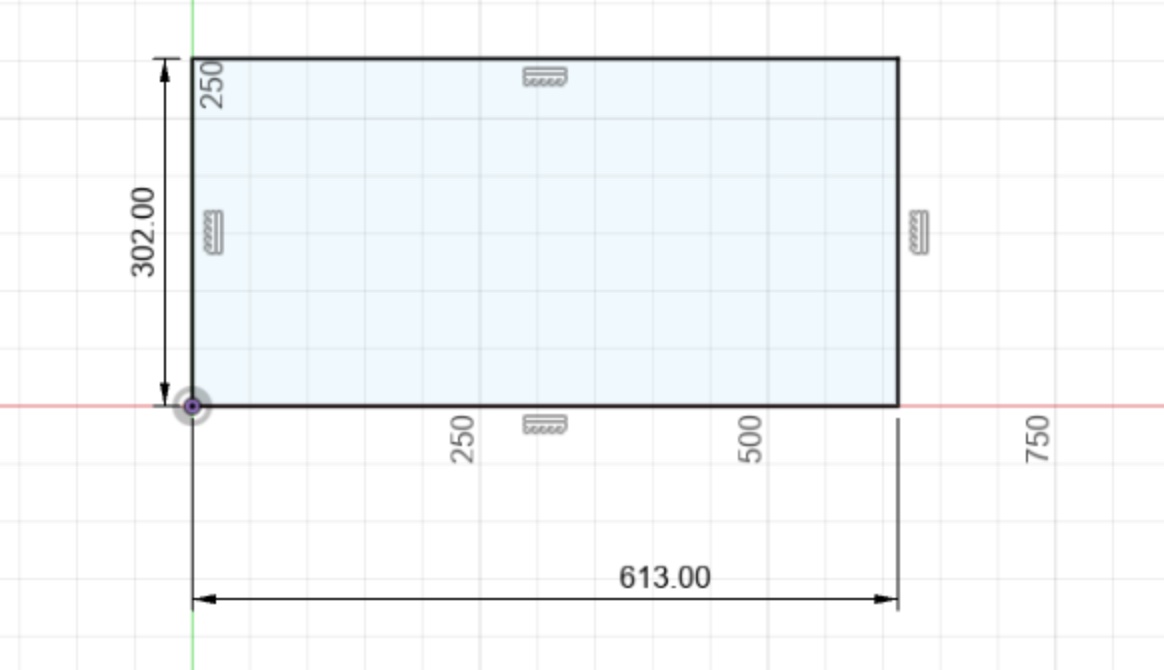
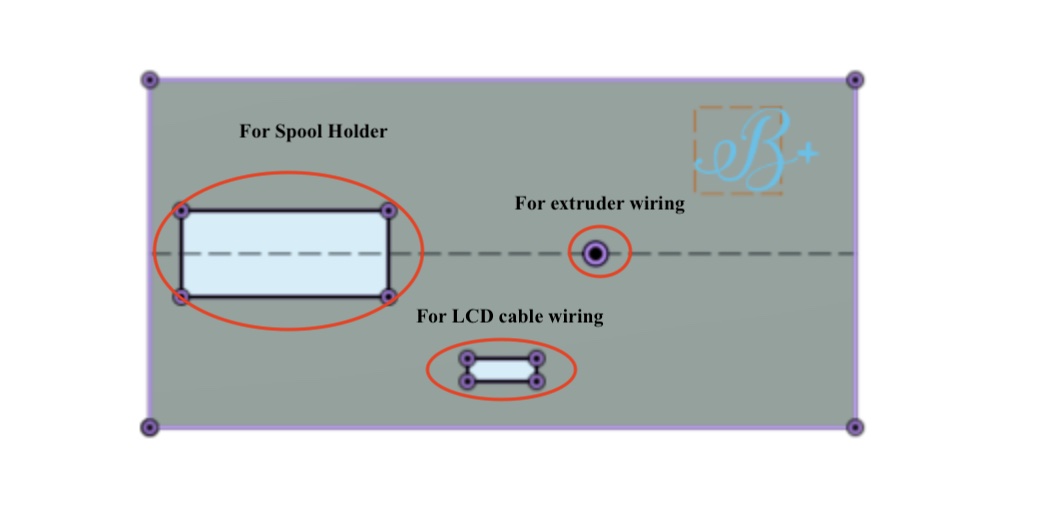
I measured that places that would need holes in it and then engraved a “B+” in the corner as our group and machine name.
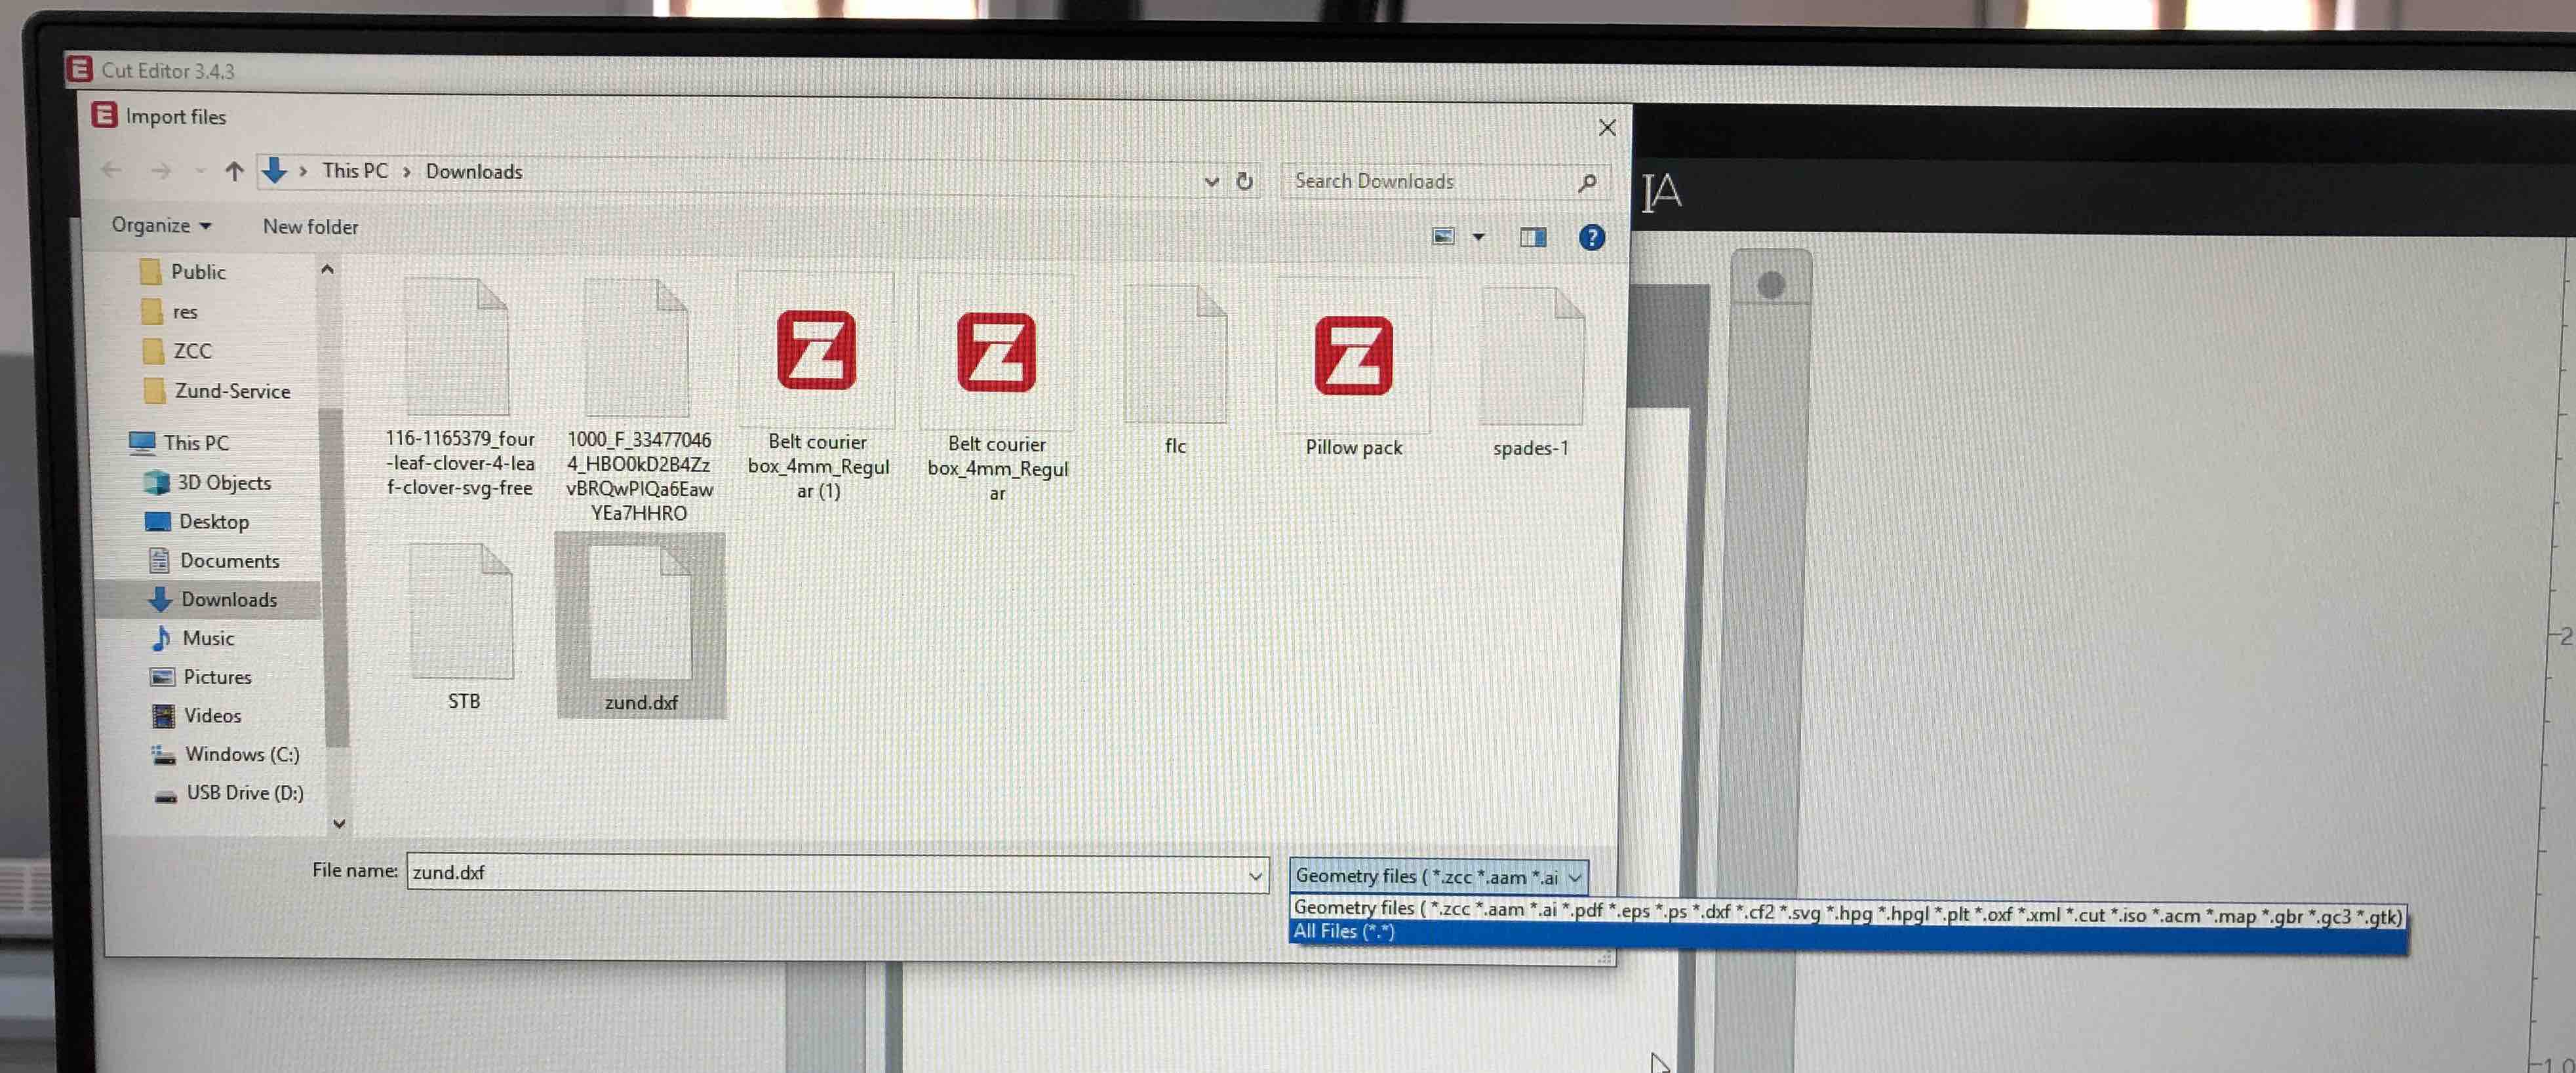
I exported the sketch in .dxf format and then opened it on the zund computer
Operating the zund
Log into the zund computer and open up the .dxf file on CutEditor.

There are options for other formats as well. They can be seen in the picture below.
My design in zund CutStudio:

In the top right panel, we need to select the material that we can to cut:
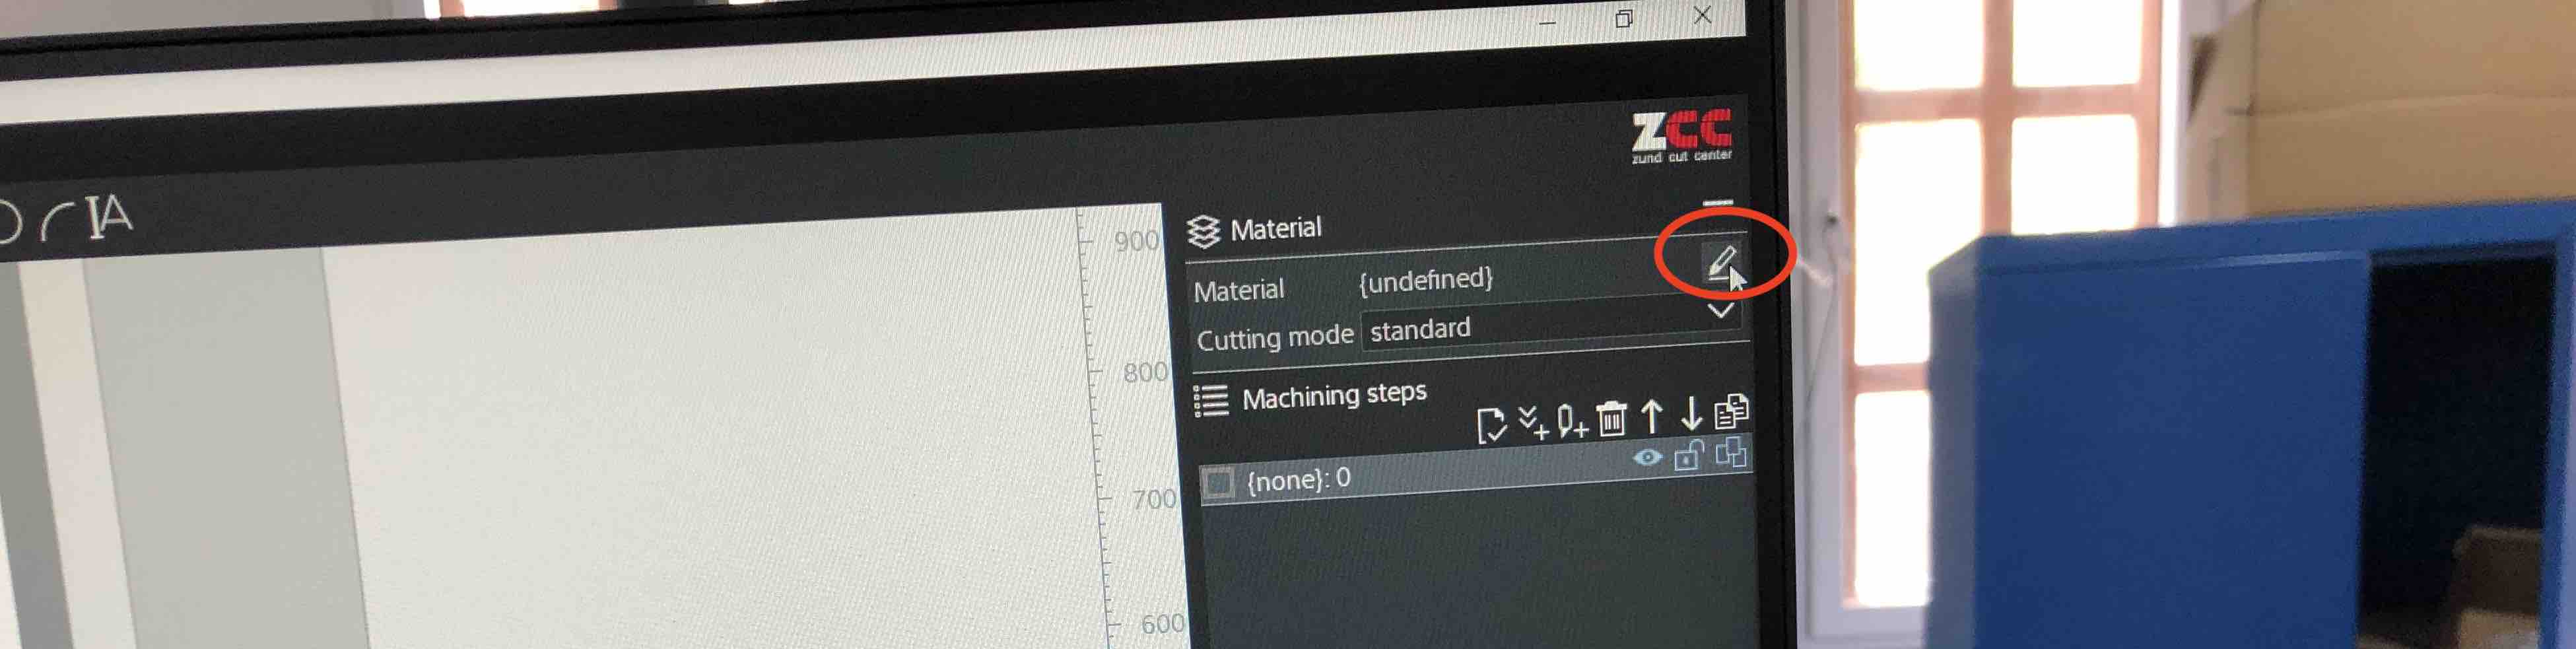
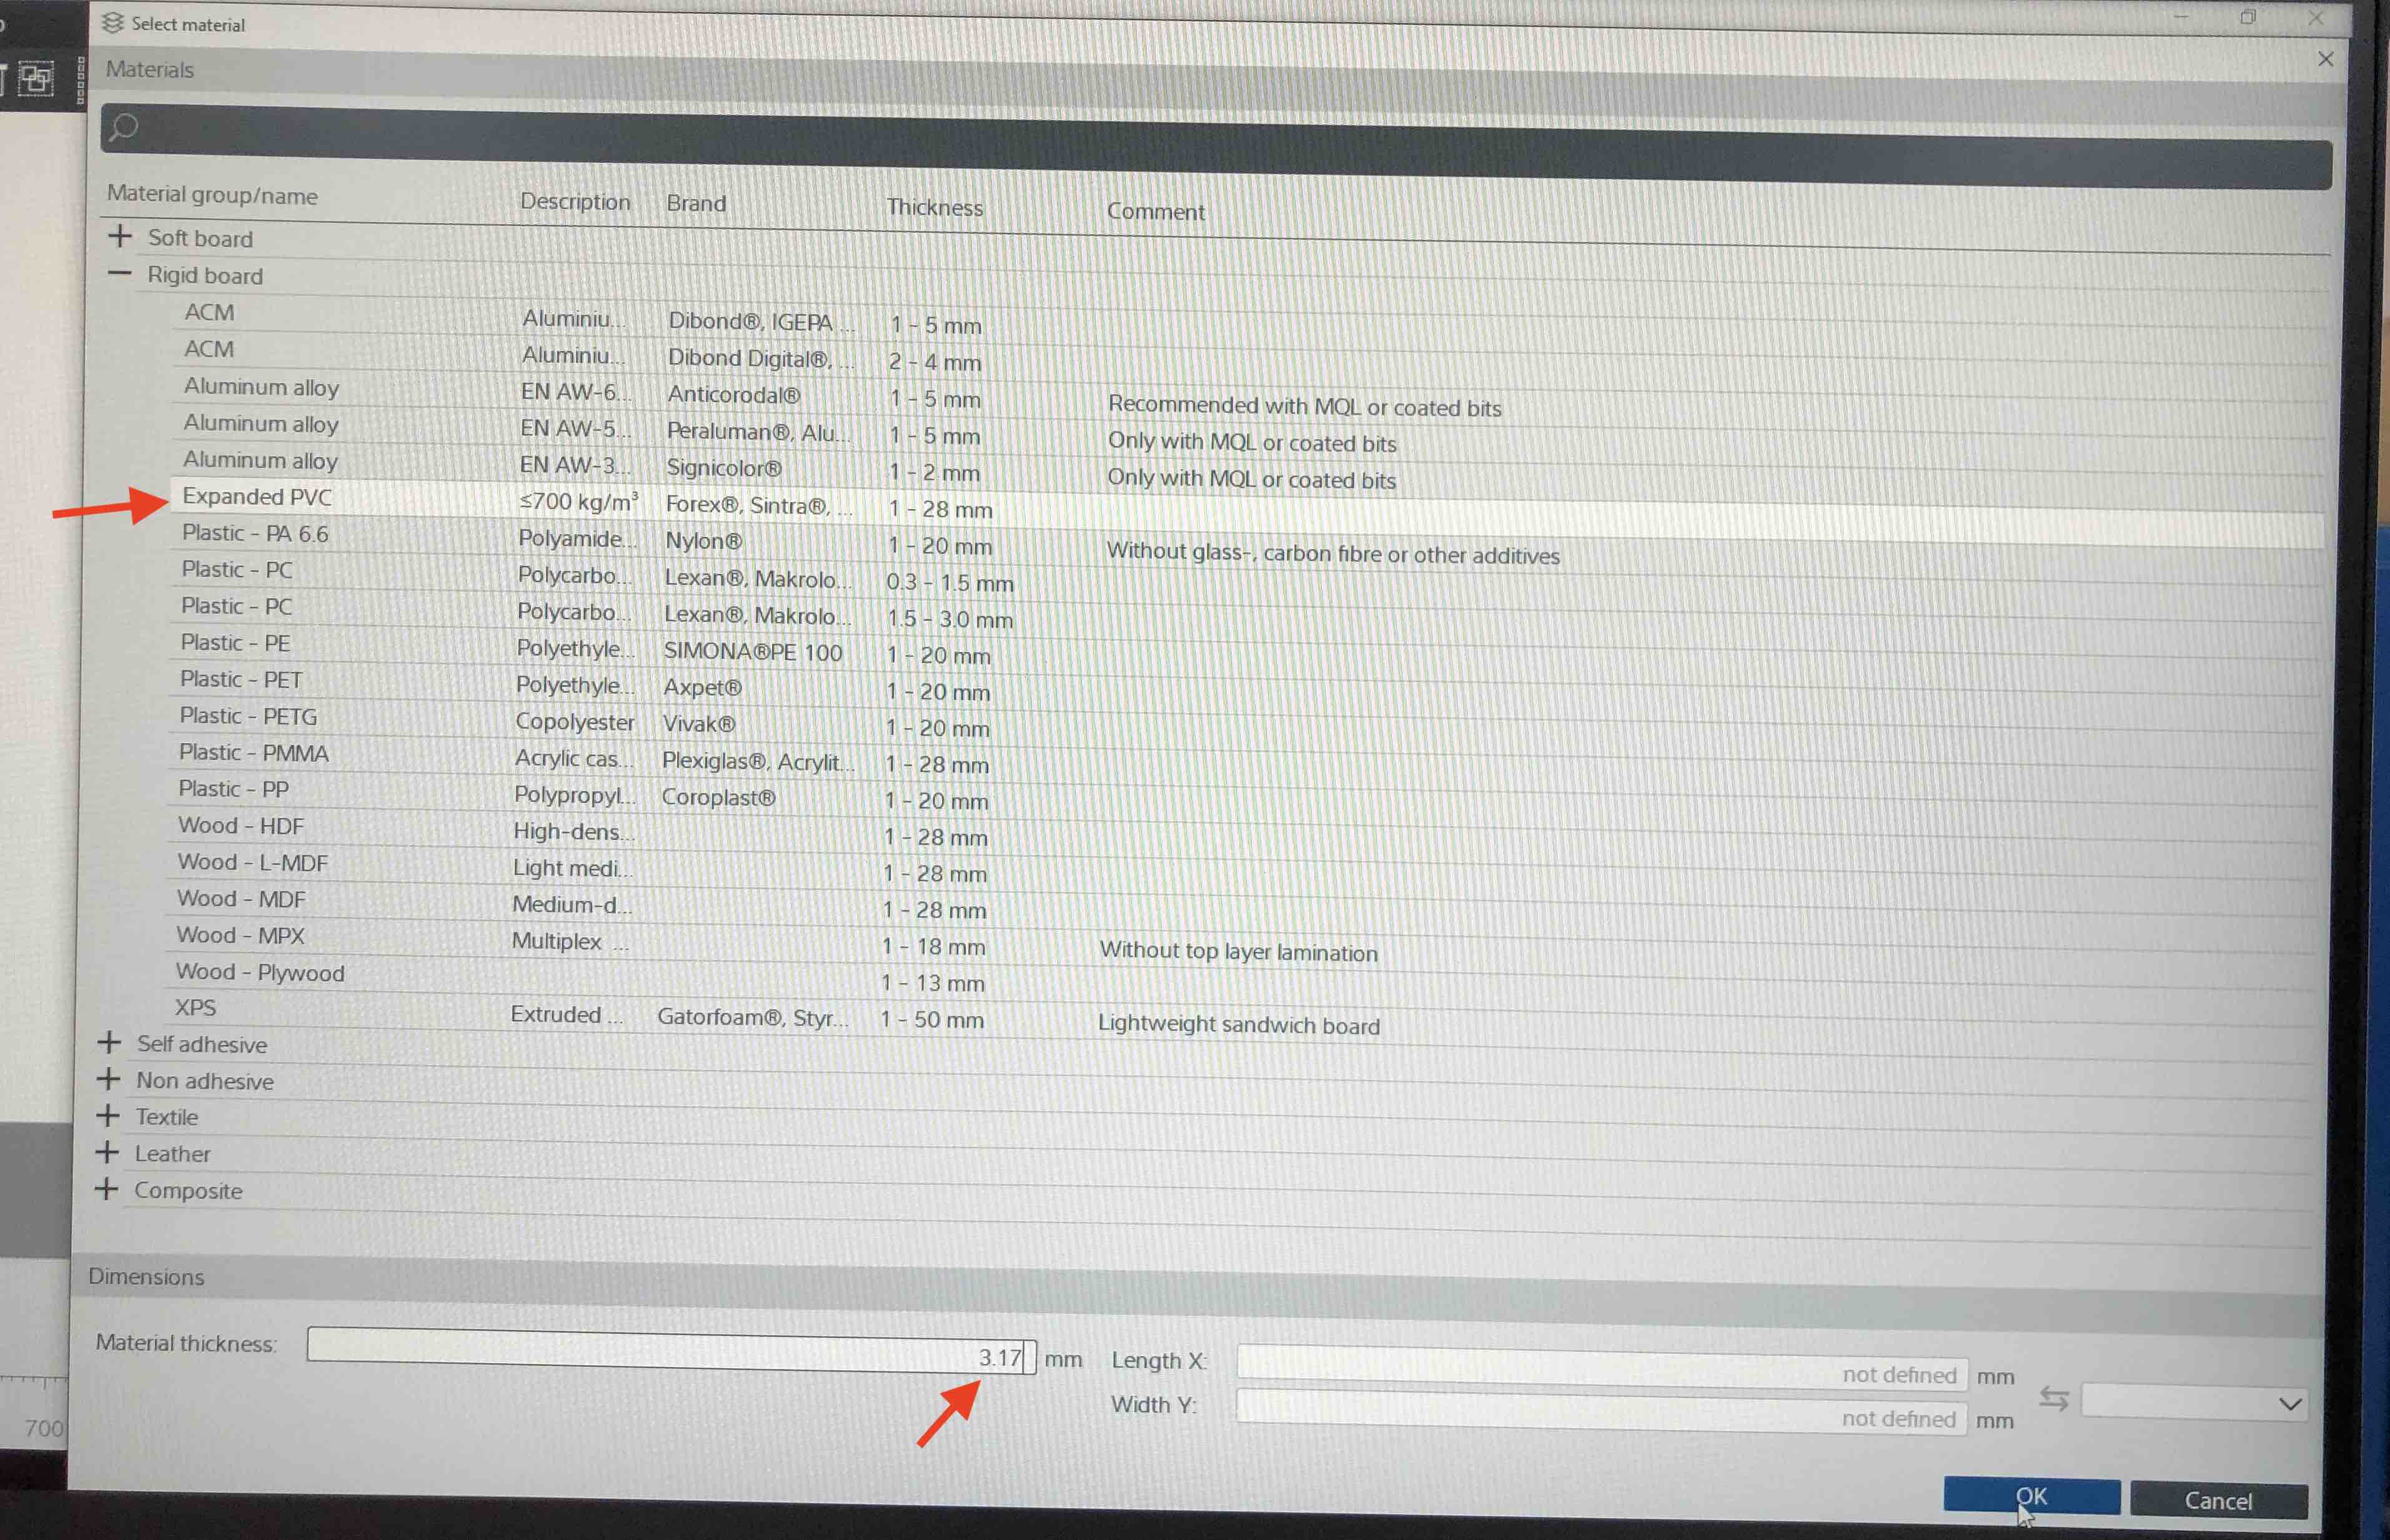
We need to know the thickness of the material so I measured it. Comes to about 3.17mm

Acrylic is also known as Expanded PVC so I selected that. We need to put in the material thickness here as well.
Select all the parts that need to be cut and right click. Select change method -> new method.
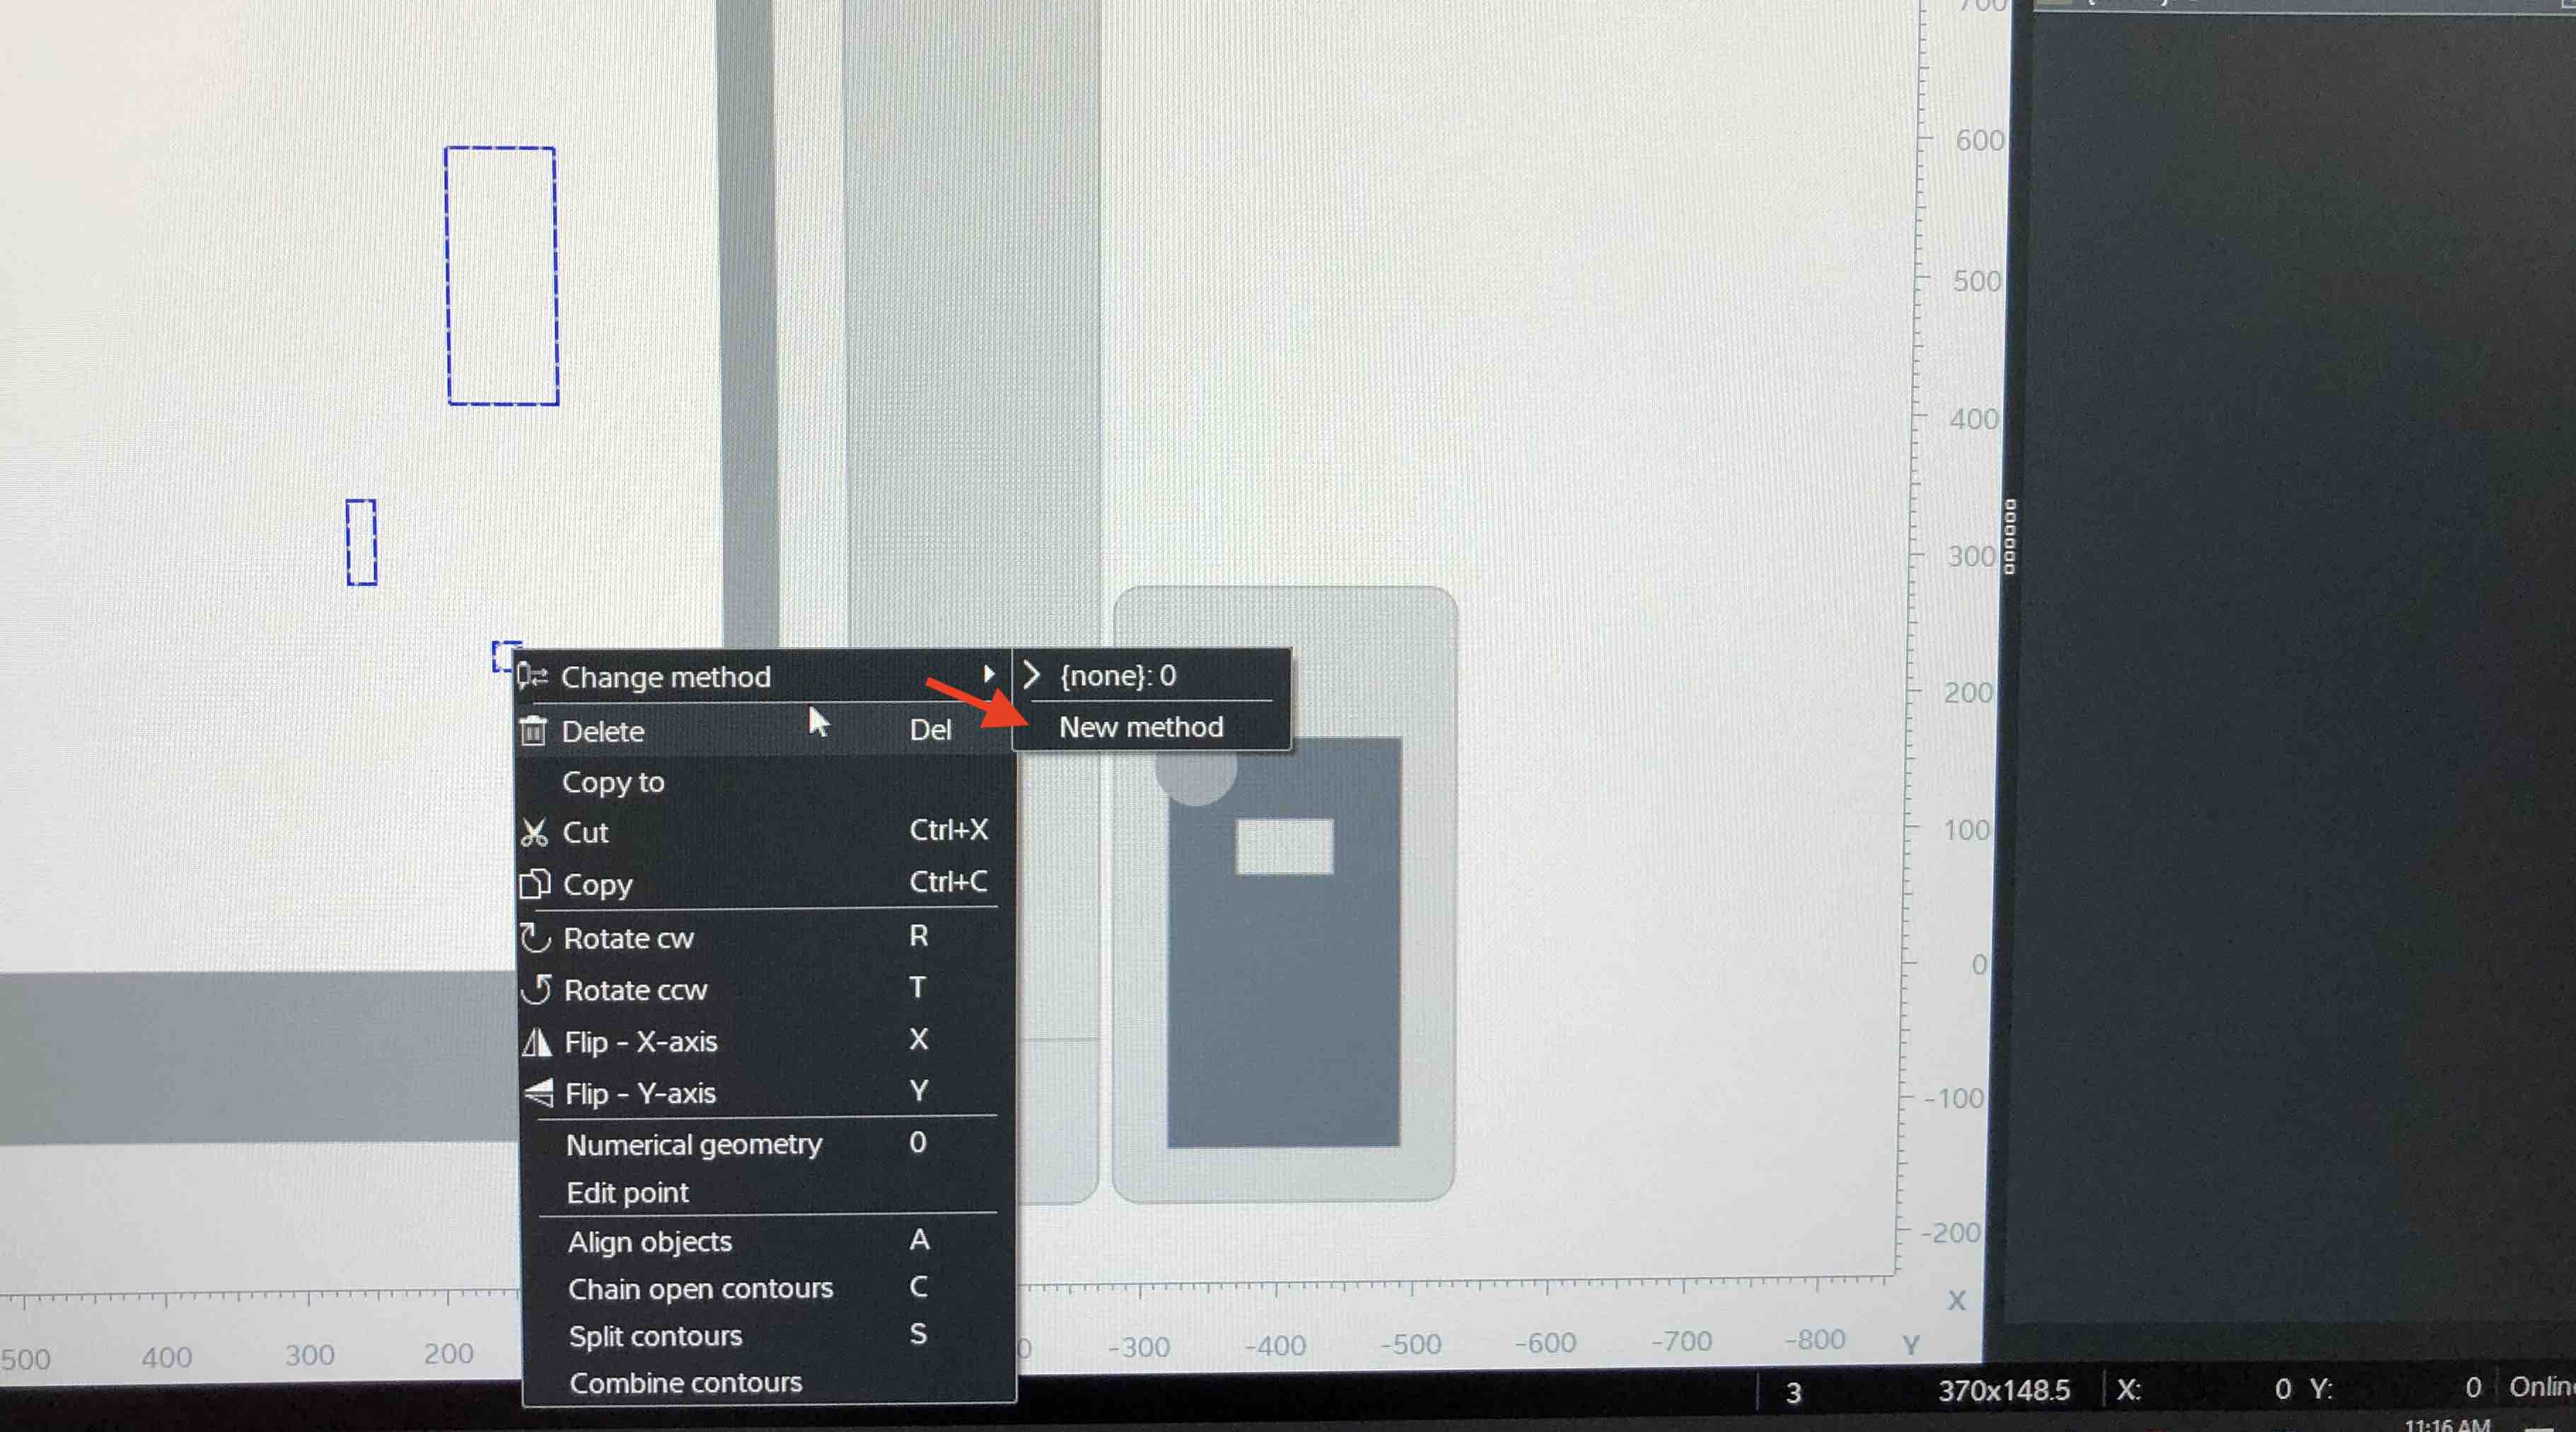
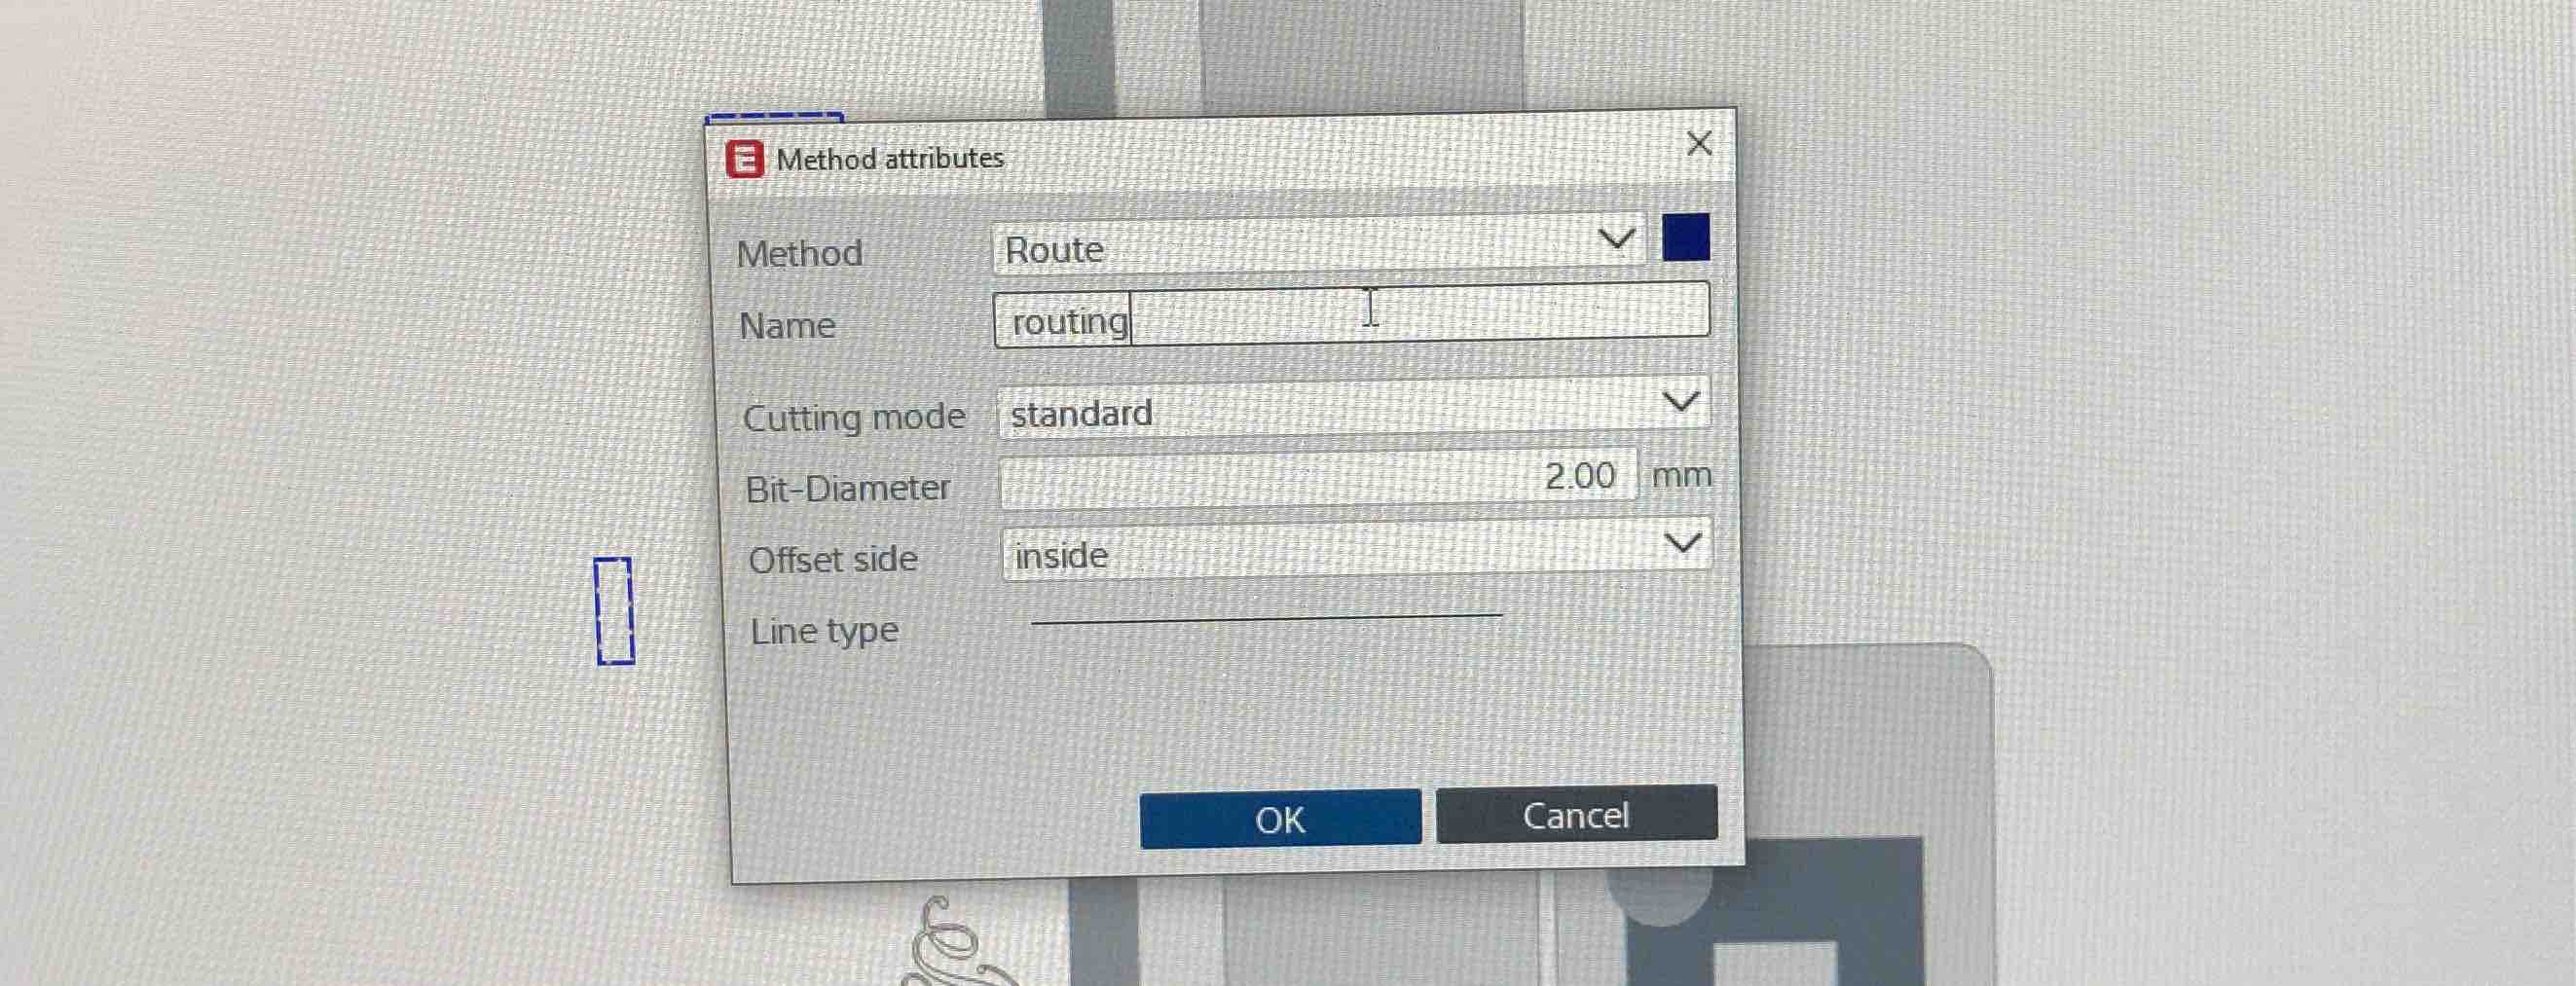
This brings up an entry box. Select “Route” as the method from the drop down.

Give the job a name, and put in the bit size. I chose the 2mm diameter bit since it is the smallest. Since the cuts will be made from the inside, I chose “inside” as the oddset side.
Now, select the part that you wnat to engrave and add a new method for that. Make sure to choose the engrave option from the dropdown menu.

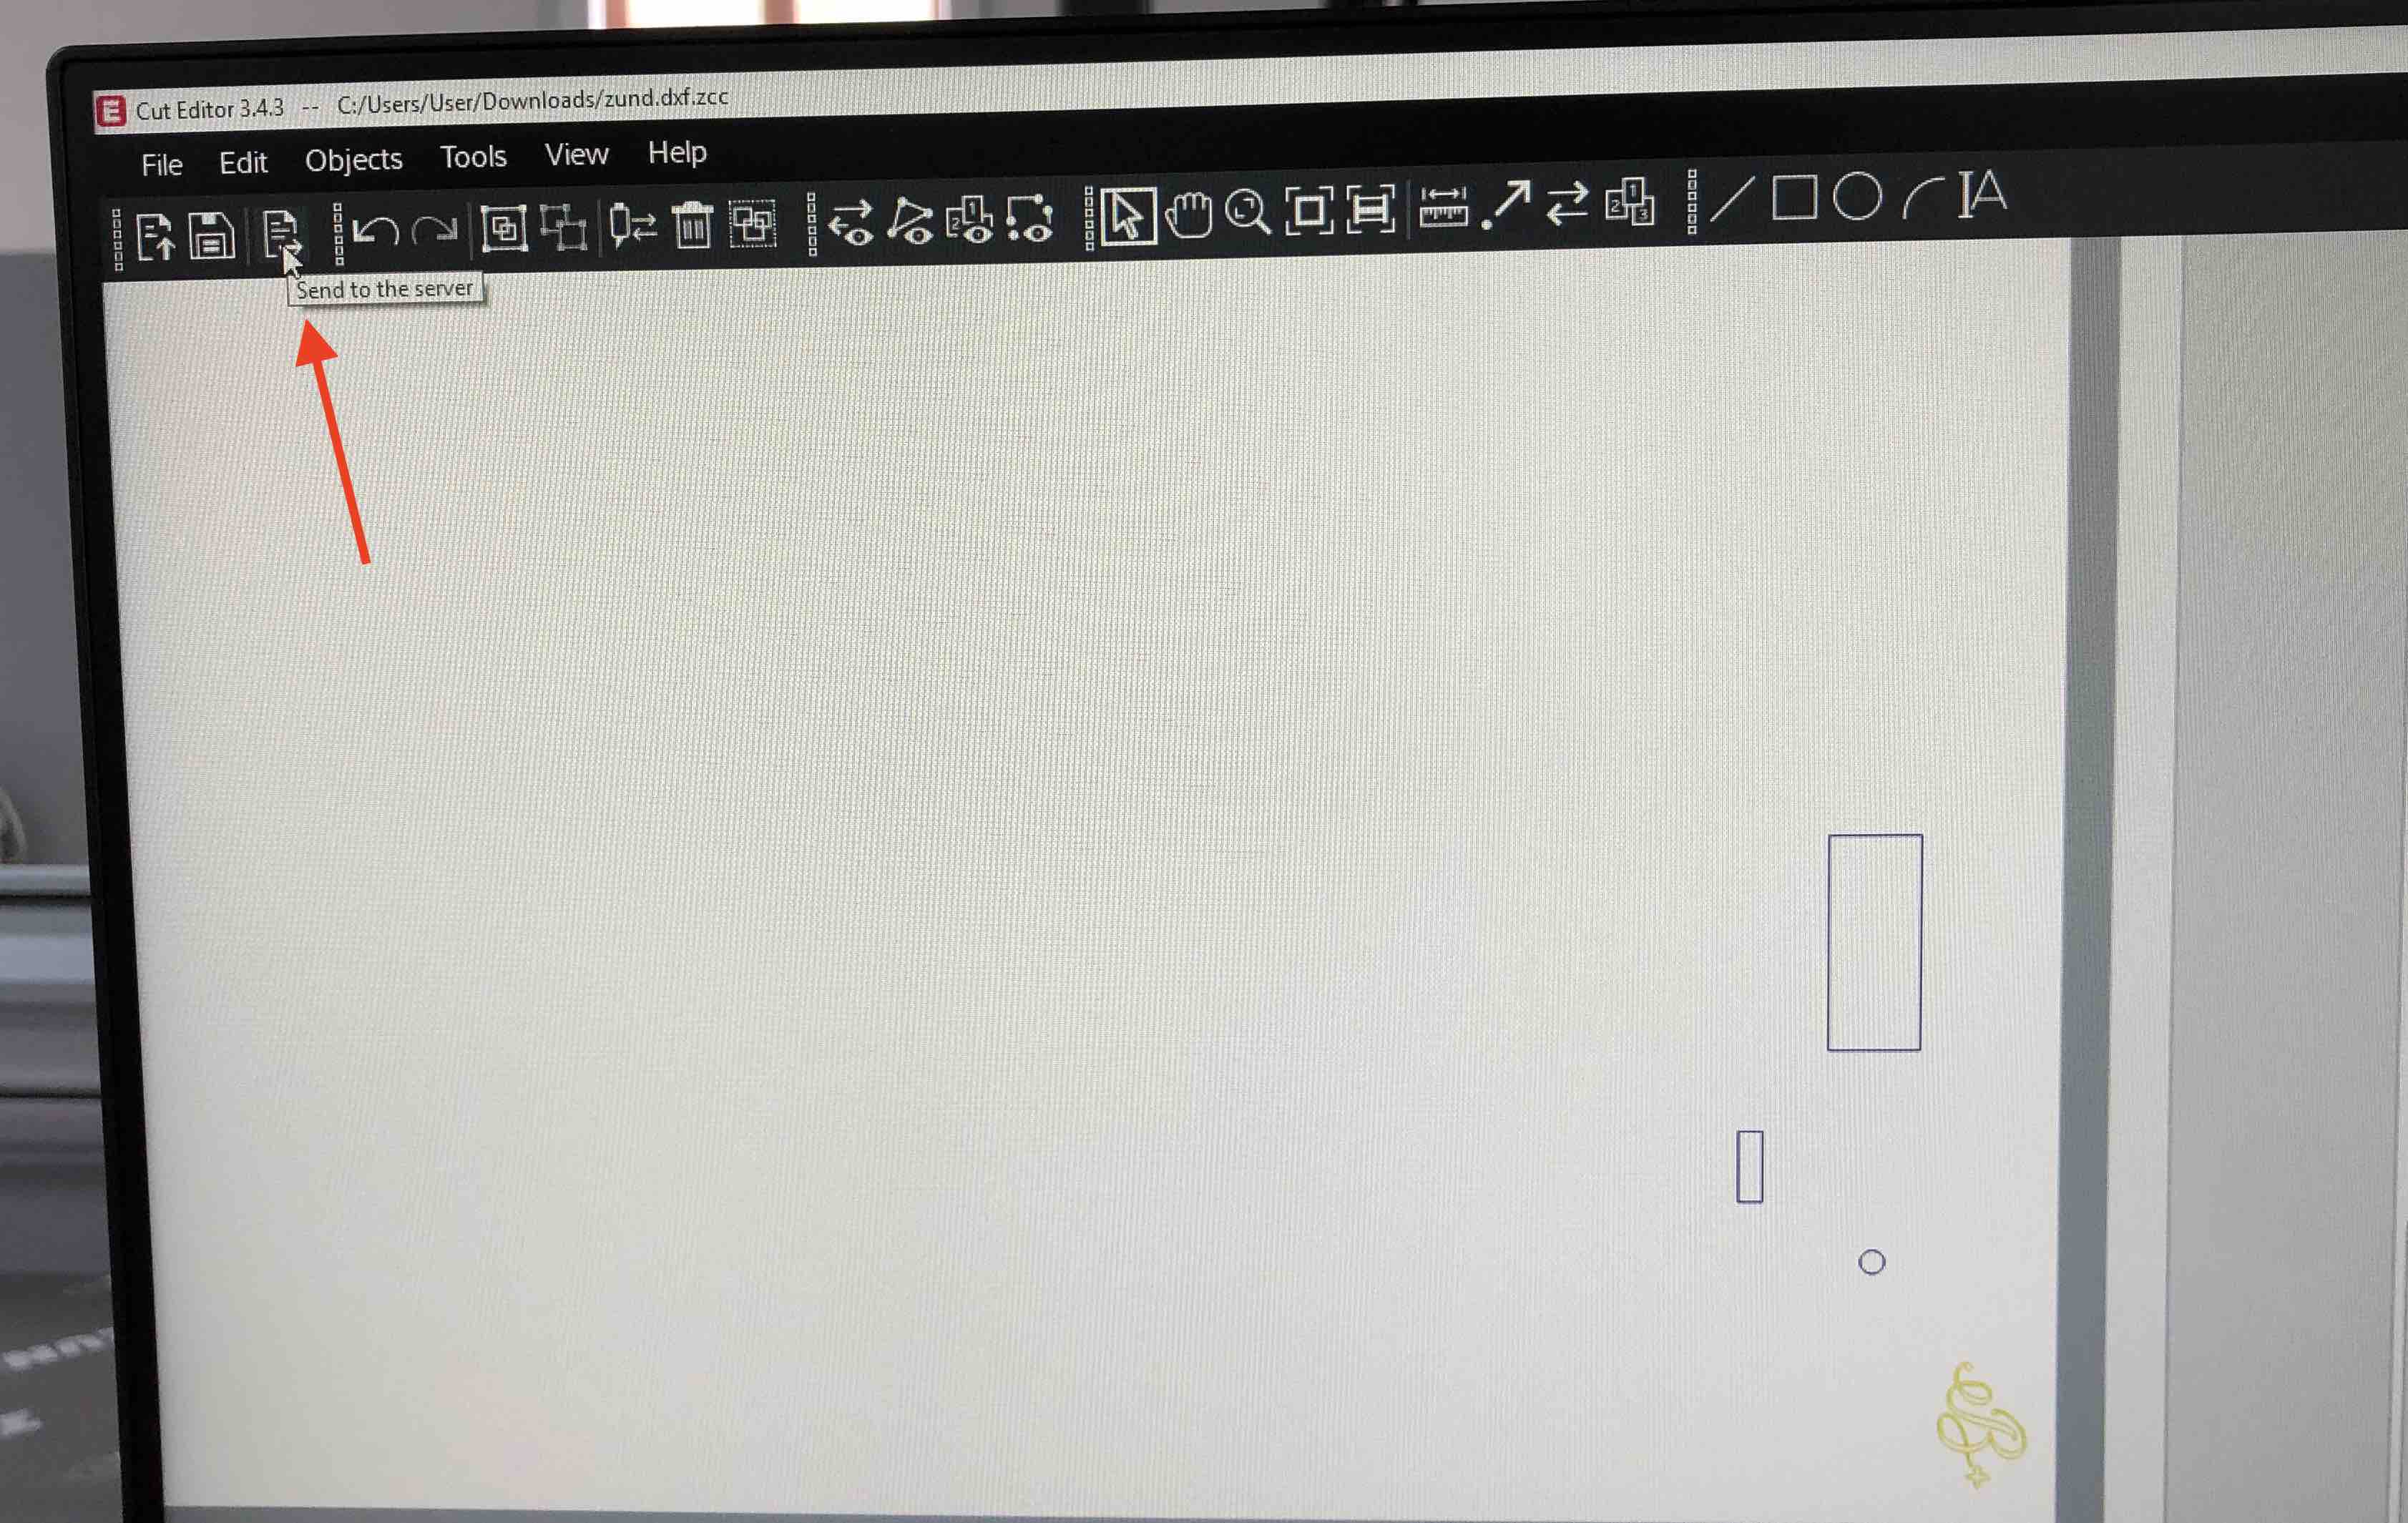
There should be two jobs on the right. With the zund, it runs both jobs together.

Select the jobs and click “send to server.”
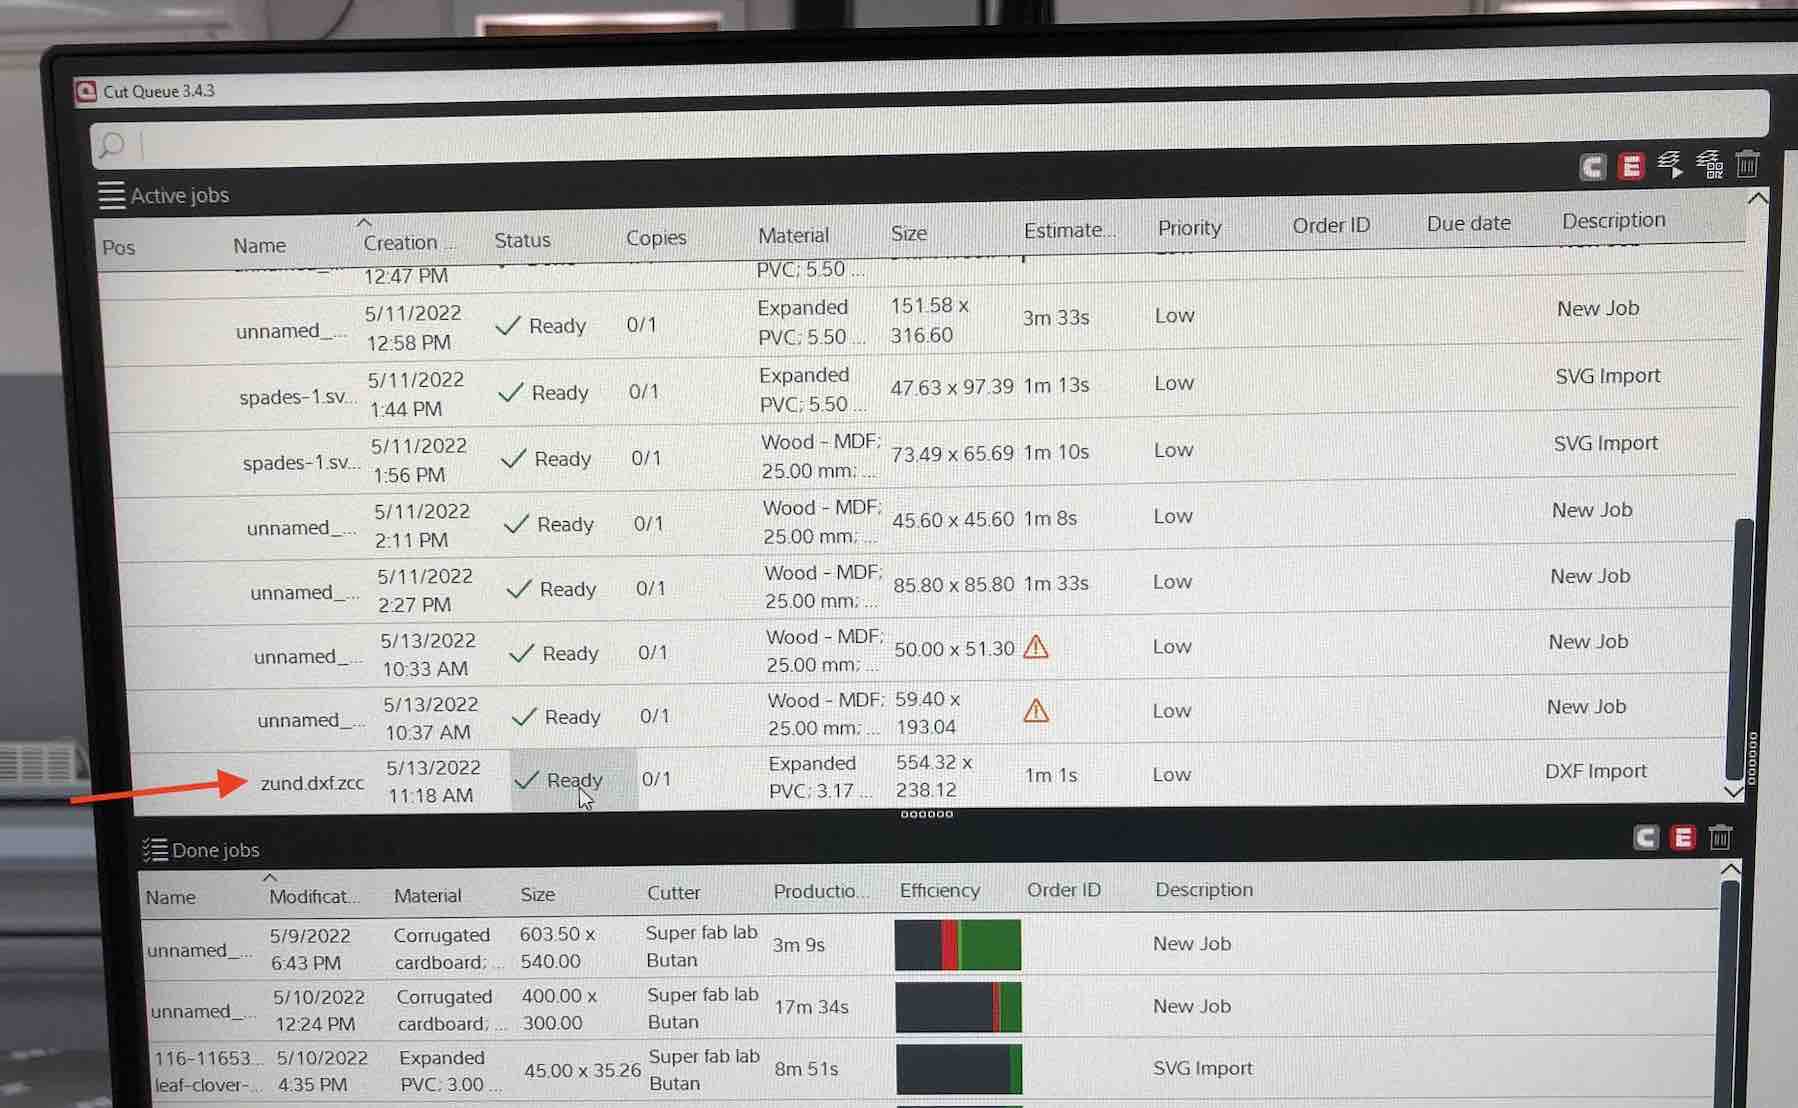
Now, open up Cut Queue.

All the jobs sent to the server will be listed here. Find your job and click on it. I found mine from the list. It says 3.17mm extended PVC material and the estimated time for the job is 1 minute 1 second.
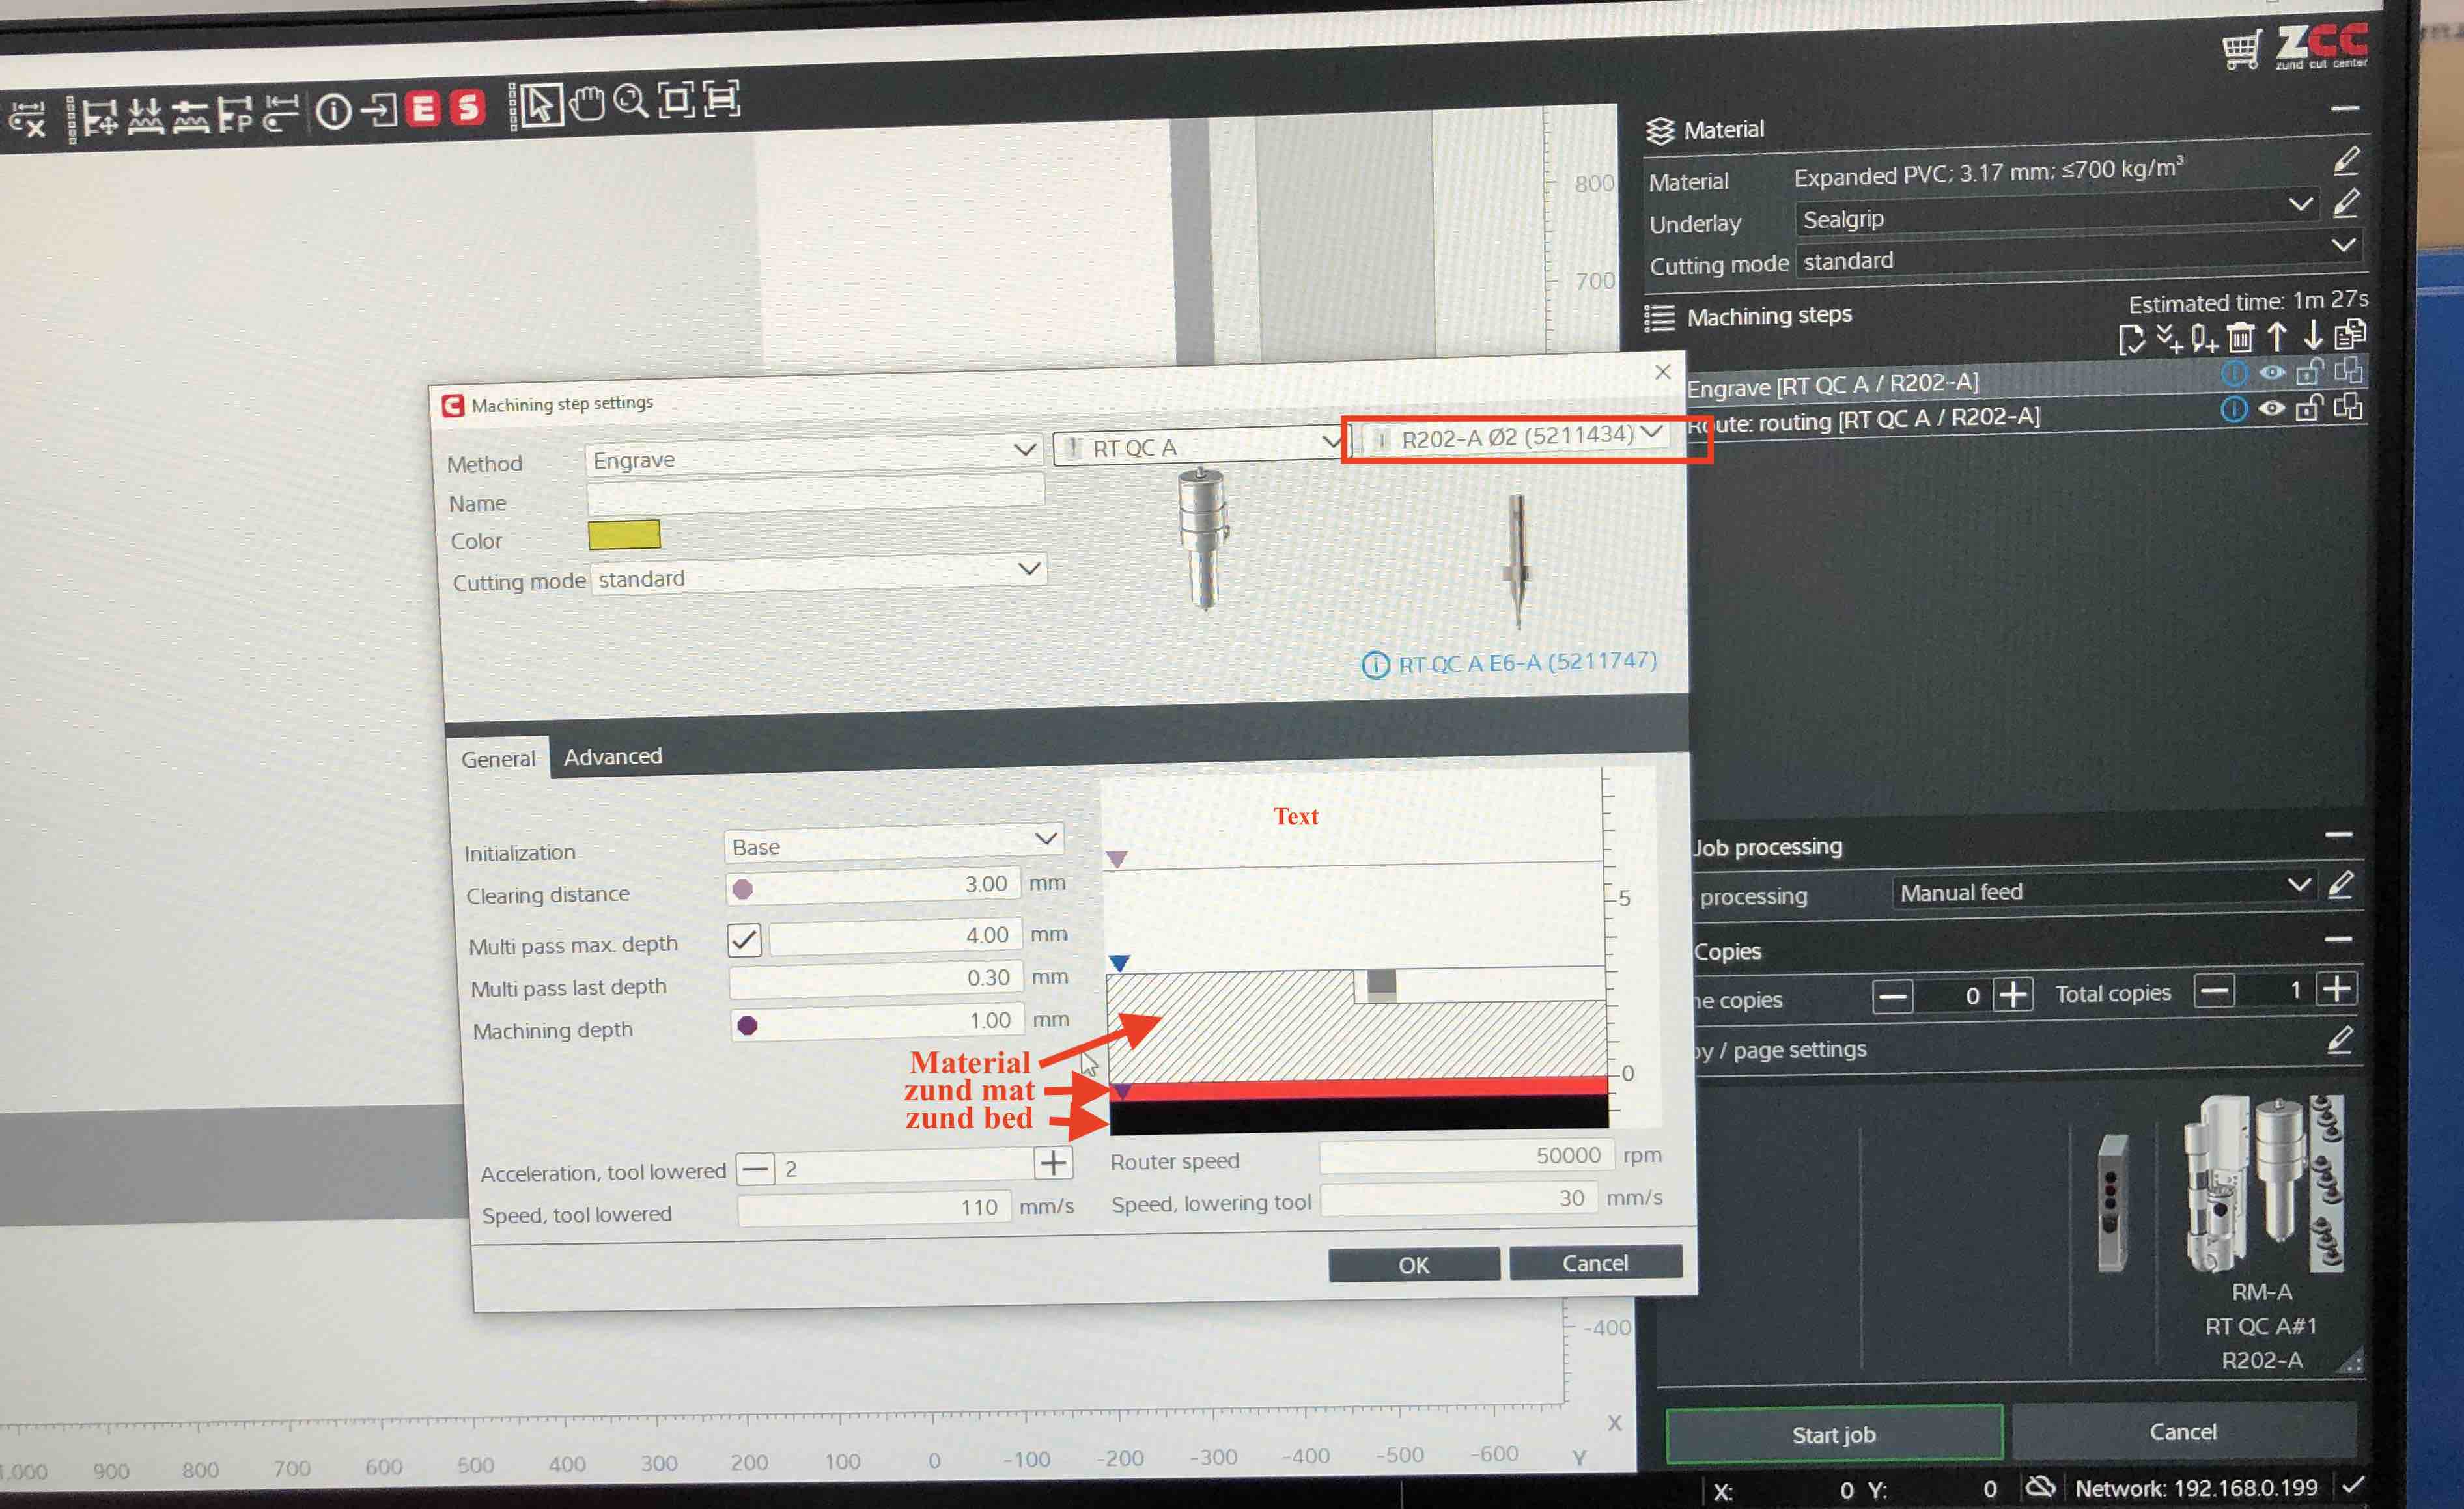
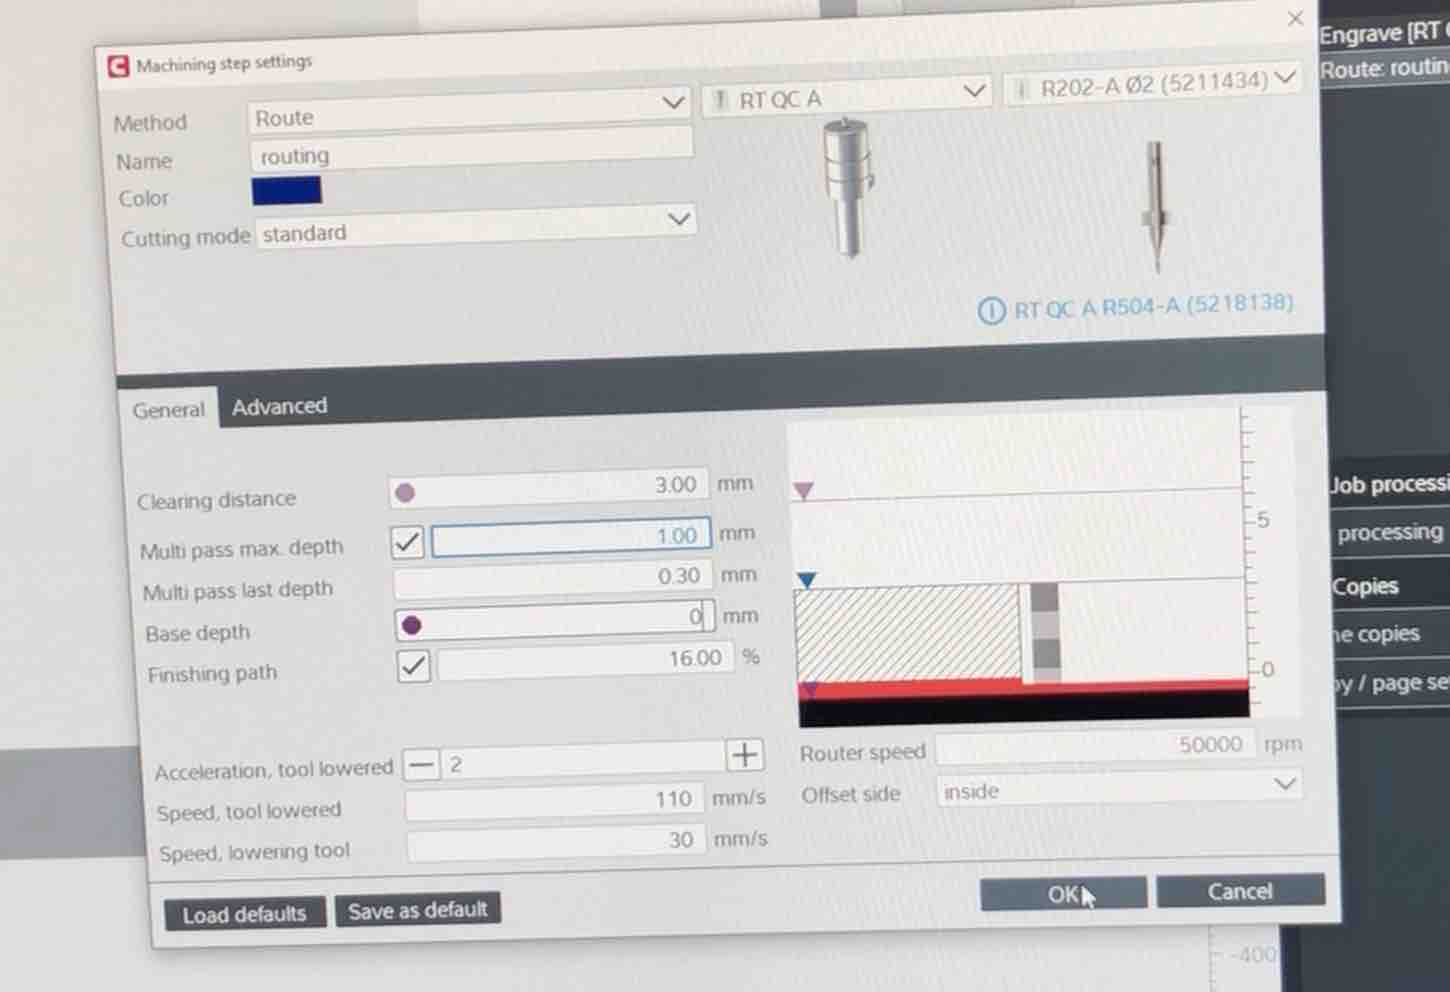
When you click on the job, it brings up the methods in the job. You can click on each method and change the specifications.
For the engrave method, I chose a engrave depth of 1mm and selected the 2mm toolbit. I didnt change the rest of the parameters.
Settings for the routing method:
Before running the job, we need to turn on the vacuum:

Now click on interactive mode. This will allow you to move the focus point manually.

Now, we need to set the reference point.The “R” on the screen is where it should be set. Move the laser point to where you what the reference point to be and then press “control + R”. This sets the reference point. Once this is set, you can start the job.
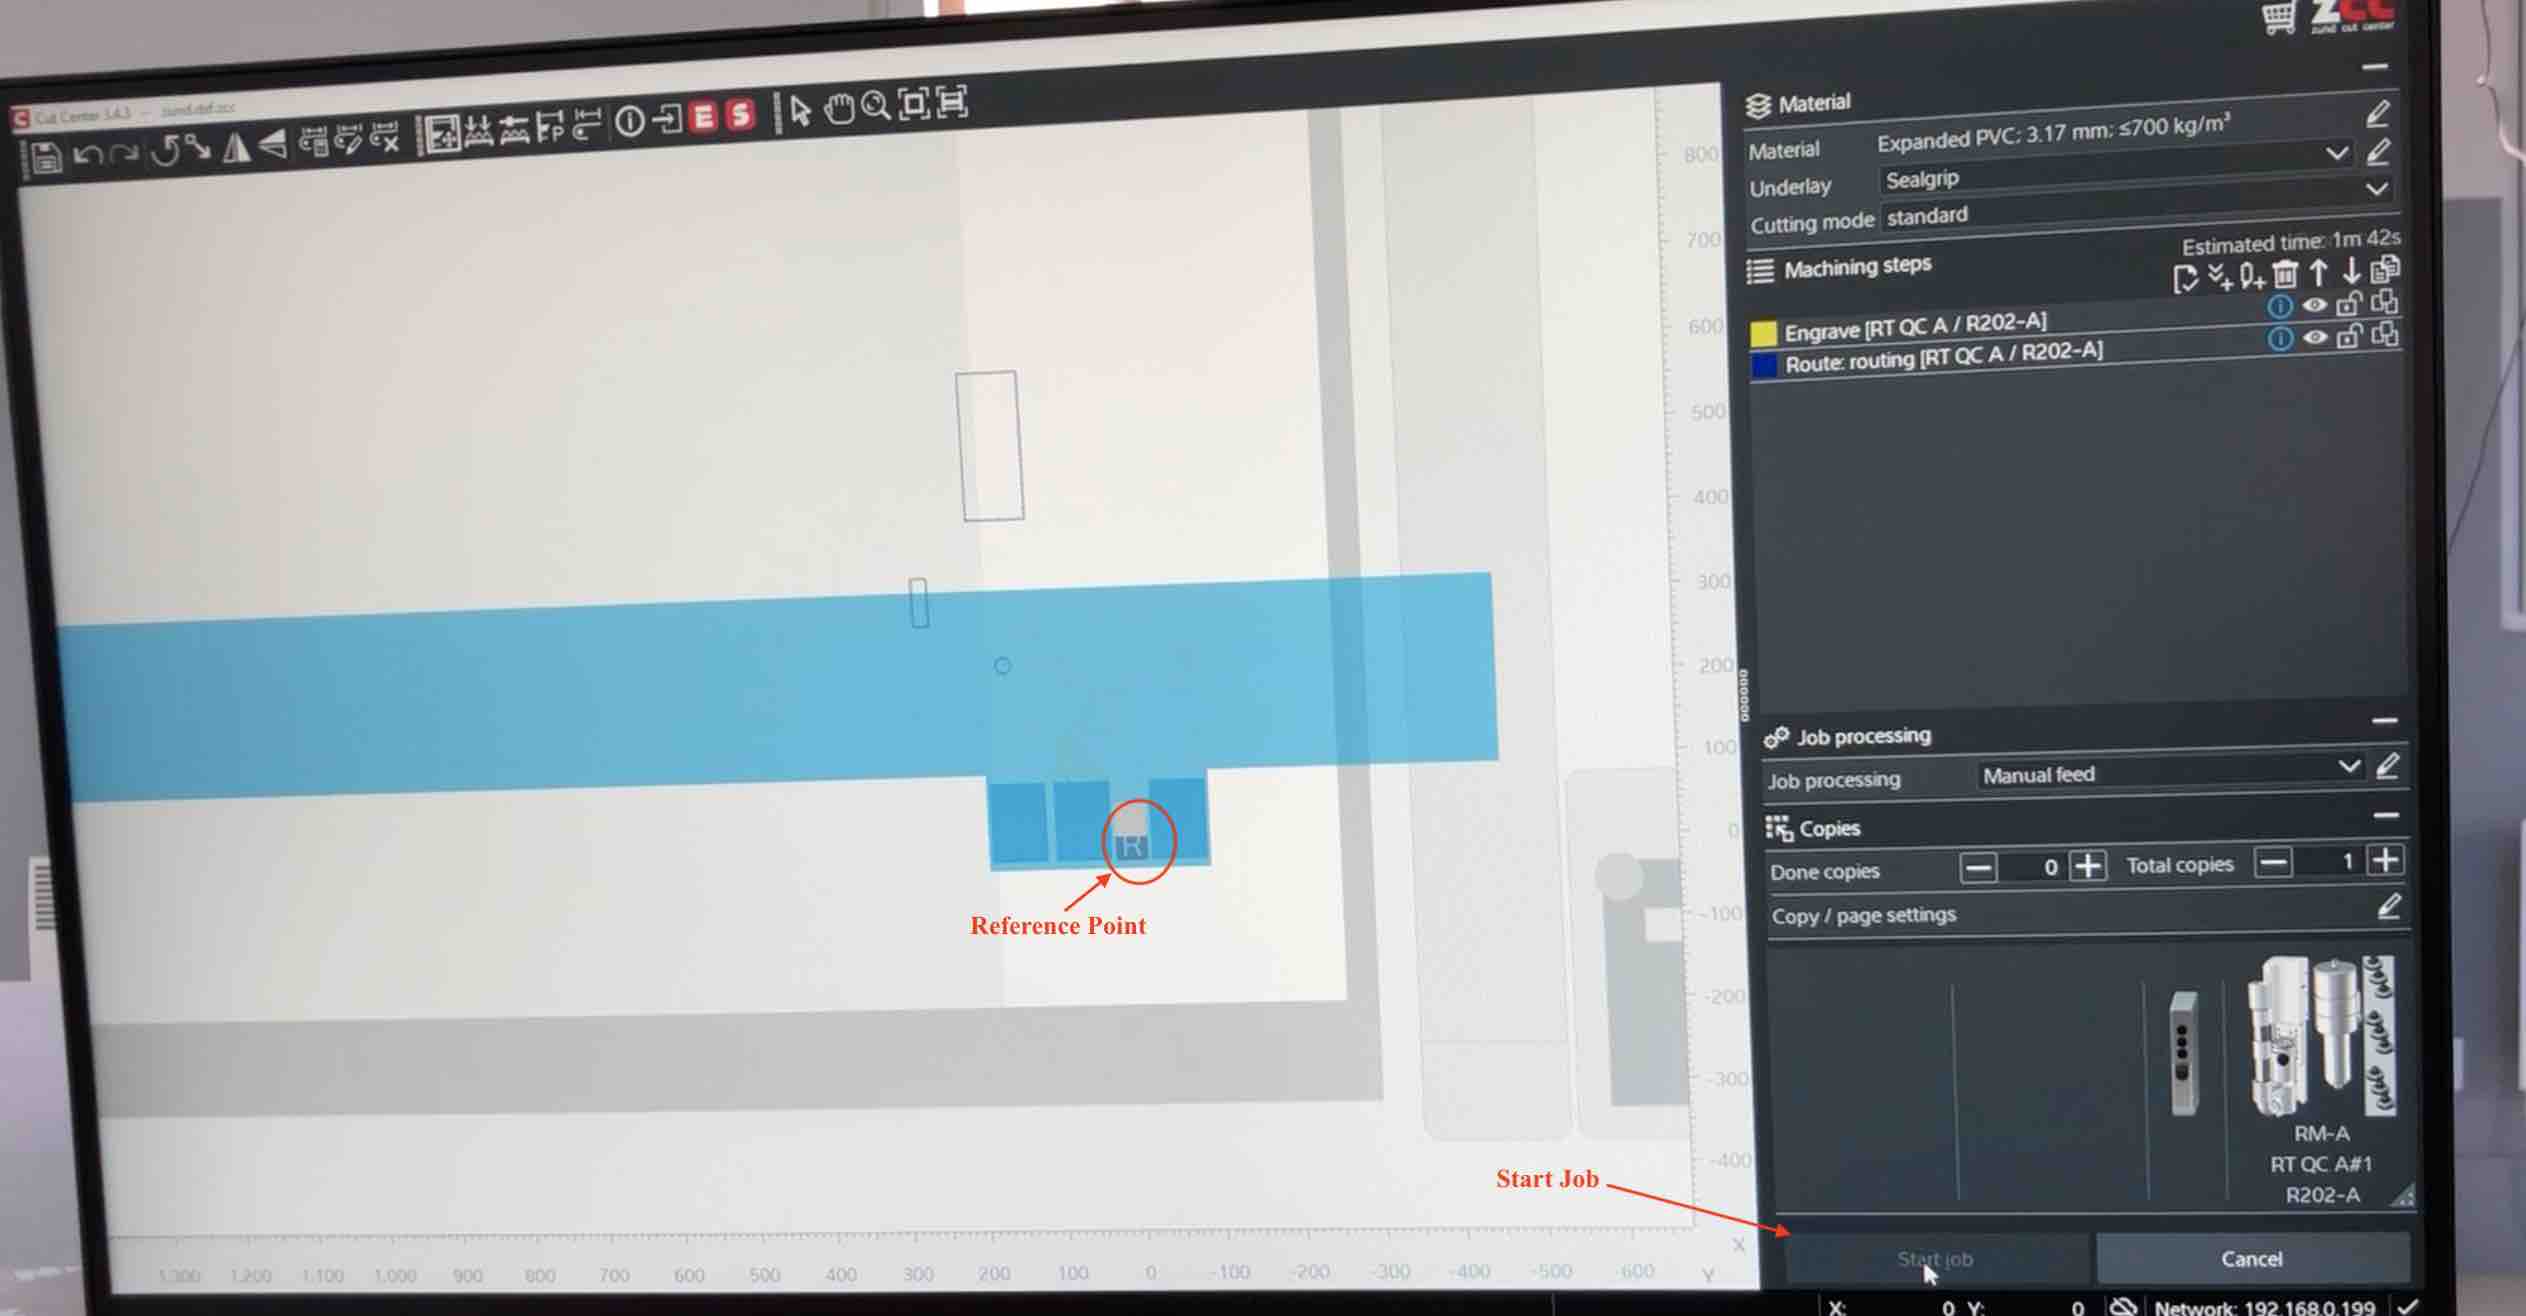
Here is the zund in action:
Here is the final product:
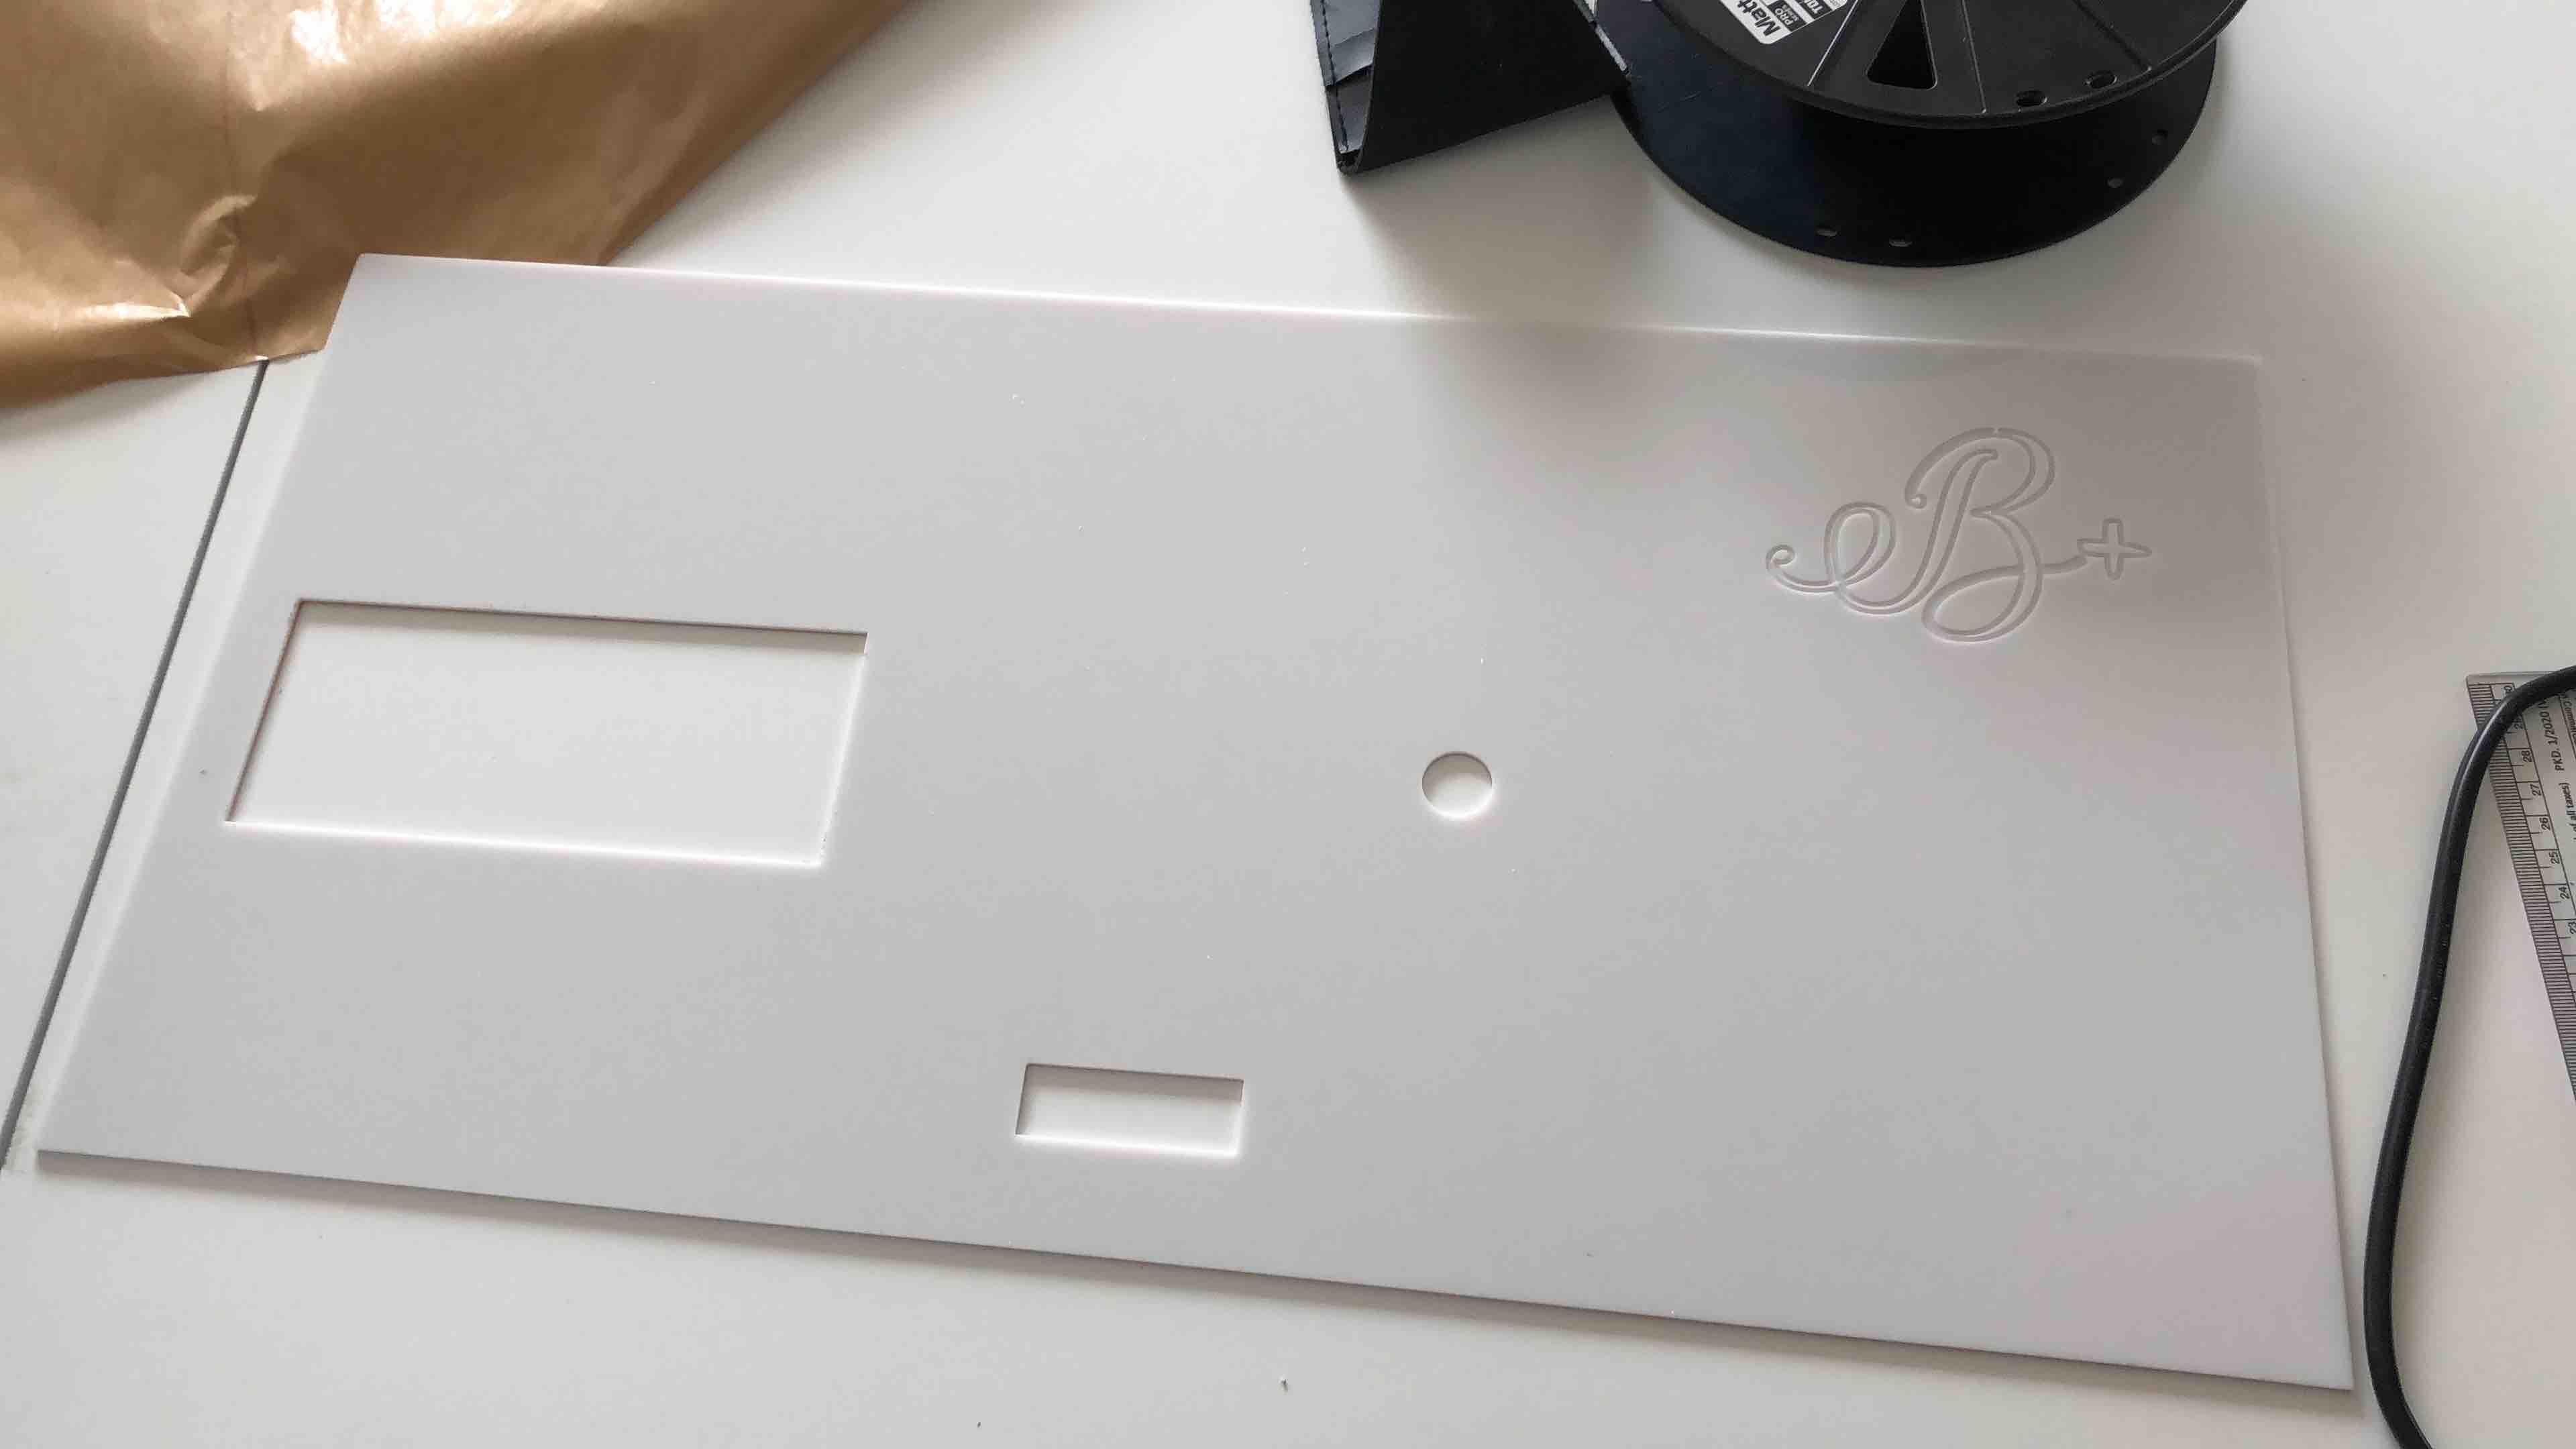
The base came out really nice. I think my machine will look much better now.
This was a great week and I thoroughly enjoyed using the zund. It was much easier and cleaner to use than the laser cutter. I want to try cutting my bag on it zund next.