Interface and Application Programming
1. Week Assignments
Group assignment:
- Compare as many tool options as possible.
- Document your work on the group work page and reflect on your individual page what you learned.
Individual assignment
- Write an application for the embedded board that you made. that interfaces a user with an input and/or output device(s)
2. Prior Knowledge
Yes. I build applications and interfaces for a living, mostly web-based.
3. Work!
3.1. Group Assignment
As all of us have prior experience building applications and interfaces, we discussed our work and the technologies we use. I shared some of my "I don't want to work" morning challenges and hoot stars, in which I challenged myself to build something I made up while cycling to work in the morning. These are applications based on ClojureScript and Hoot: Scheme on WebAssembly; my favorite platforms to build web-UIs.
Heleen showed us a game she made as part of a course she took, made using P5.js. The soundtrack was especially nice! After that, she showed some work she did in her Data Journalist job using Flourish. It looked very slick but is apparently very expensive to use.
She gave us a brief overview of Neo4J and the Cypher Query Language. Very cool! The ability to query over hops is impressive and very useful. I will definitely look into it after Fab Academy because it seems very useful.
Christian wanted to show us around in OutSystems, but unfortunately, he's only able to access it through his work laptop. It sounds a lot like the low-code and rapid application development tools, I've encountered in my career. Not my cup of tea.
Both Heleen and Christian have a lot of experience with Jupyter notebooks. I know about them but use Orgmode's Babel for my documentation, which is somewhat similar. I was surprised to find out, nobody had heard of Literate Programming, which is obviously an inspiration for these notebook-style systems.
3.2. Individual Assignment
My final project has a minimal interface, and not having a computer or phone interface is a deliberate choice; do not combine phones and computers with sleep! So, I'll keep this week as simple as possible.
However, I do have an opinion: avoid vendor lock-in at all costs. This means an interface should be accessible on a wide variety of platforms without the requirement to distribute it from "walled gardens" like the application stores of the big software / hardware vendors.
Web Serial seems like the best option. It allows serial access to a microcontroller using a USB cable. At the time of writing, this is implemented in Chromium-based browsers and Opera, but Firefox support will be released soon. So, I grabbed a board I made for Input Devices week and started coding.
3.2.1. Step Response Theremin?
In the input devices week I made a very basic board to play around with step response.
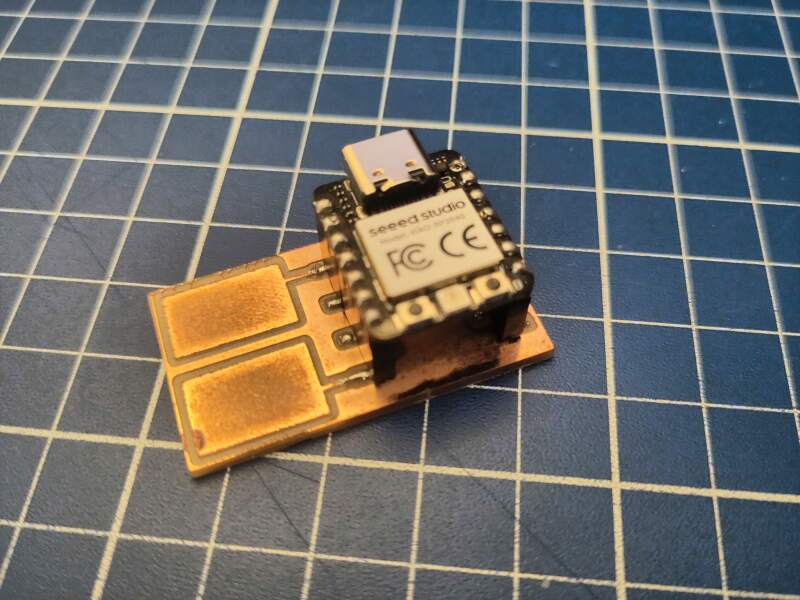
I was hoping to make a Theremin-inspired instrument by using the step response measurements to set the frequency on OscillatorNodes and connect them to an AudioContext. To make it a bit less minimal, I also wanted to allow setting the color / brightness of the RGB LED on the XIAO. Extra points for input and output? 🤞
To run the code below, I first installed MicroPython on the RP2040 and copied the steptime.py and ws2812.py libraries to it.
from machine import Pin
from ws2812 import WS2812

class Led:
    red = 0
    green = 0
    blue =  0
    brightness = 0

    def __init__(self):
        Pin(11, Pin.OUT).value(1) # power up RGB led
        self._led = WS2812(12, 1)
        self.show()

    def show(self):
        self._led.pixels_fill(self.color())
        self._led.pixels_show()

    def color(self):
        # color with brightness applied
        return tuple([round(v / 100 * self.brightness) for v in (self.red, self.green, self.blue)])

led = Led()

from steptime import STEPTIME

class Pad:
    # magic numbers from qpad code
    loop = 200
    settle = 20000

    def __init__(self, sm_id, pin):
        Pin(pin, Pin.IN, Pin.PULL_UP)
        self._steptime = STEPTIME(sm_id, pin)

        # determine base value
        self._steptime.put(self.loop)
        self._steptime.put(self.settle)
        self._base = self._steptime.get() # TODO take a bigger sample

    def get(self):
        self._steptime.put(self.loop)
        self._steptime.put(self.settle)
        return self._base - self._steptime.get()

pad0 = Pad(1, 26) # sm id 0 already taken by ws2812
pad1 = Pad(2, 0)

import sys, select, time

poll = select.poll()
poll.register(sys.stdin, select.POLLIN)

while True:

    if poll.poll(0):
        cmd =  sys.stdin.readline().strip()

        if cmd[:4] == "red:":
            led.red = int(cmd[4:])
            led.show()
        elif cmd[:6] == "green:":
            led.green = int(cmd[6:])
            led.show()
        elif cmd[:5] == "blue:":
            led.blue = int(cmd[5:])
            led.show()
        elif cmd[:11] == "brightness:":
            led.brightness = int(cmd[11:])
            led.show()

    else:
        print(pad0.get(), pad1.get())
The above code polls the USB serial port (by default connected through
stdin) for input and reads a line of text when something is
available. The line of text is expected to be a command to interpret,
like: red:128, green:255, etc. When no input is presented, the
values of both pads are sent over the serial port (using print to
stdout).
Running this with mpremote run blasts lines of two numbers to the
output terminal.
Next, I created the UI. A web page with some basic components: a button to trigger the connection and some sliders to manipulate the LED colors.
<html>
  <head>
    <title>Steptime osc</title>
    <link rel="stylesheet" href="steptime-osc.css" type="text/css"/>
    <script src="steptime-osc.js"></script>
  </head>
  <body>
    <button id="connect">Connect!</button>
    <div id="ui" style="display:none">
      <label>
        <span>Sound</span>
        <input type="checkbox" />
      </label>
      <label>
        <span>Red</span>
        <input name="red" type="range" value="0" min="0" max="255" />
      </label>
      <label>
        <span>Green</span>
        <input name="green" type="range" value="0" min="0" max="255" />
      </label>
      <label>
        <span>Blue</span>
        <input name="blue" type="range" value="0" min="0" max="255" />
      </label>
      <label>
        <span>Brightness</span>
        <input name="brightness" type="range" value="0" min="0" max="100" />
      </label>
    </div>
  </body>
</html>
Notice the script tag; below is the code for that. It does the
following:
- Sets up handlers for clicking the connect button and UI components.
- Sets up an audio context with oscillators for the pad data.
- Replaces the connect button with sliders for the LED.
- Waits for values from the microcontroller and feeds them to the oscillators.
window.addEventListener('load', () => {
  // setup audio
  const audioCtx = new AudioContext()
  audioCtx.suspend()

  const osc0 = new OscillatorNode(audioCtx, { type: 'sine' })
  osc0.connect(audioCtx.destination)
  osc0.start()

  const osc1 = new OscillatorNode(audioCtx, { type: 'sine' })
  osc1.connect(audioCtx.destination)
  osc1.start()

  //Raspberry Pi Pico with MicroPython installed
  const mp = {usbVendorId: 0x2E8A, usbProductId: 5}

  // setup connect button
  document.getElementById('connect')
    .addEventListener('click', async () => {
      const port = await navigator.serial.requestPort({filters: [mp]})
      await port.open({ baudRate: 115200 })

      // hide connect button and reveal UI
      document.getElementById('connect').style.display = 'none'
      document.getElementById('ui').style.display = 'block'

      // setup sliders
      document.querySelectorAll('input[type=range]').forEach(input => {
        input.addEventListener('change', async (e) => {
          const cmd = `${e.target.name}:${e.target.value}`
          const writer = port.writable.getWriter()
          await writer.write(new TextEncoder().encode(`${cmd}\n`))
          writer.releaseLock()
        })
      })

      // setup sound checkbox
      document.querySelector('input[type=checkbox]')
        .addEventListener('change', e => {
          if (e.target.checked) {
            audioCtx.resume()
          } else {
            audioCtx.suspend()
          }
        })

      // get data per text line
      const decoder = new TextDecoderStream()
      const streamClosed = port.readable.pipeTo(decoder.writable)
      const reader = decoder
        .readable
        .pipeThrough(new TransformStream(new LineTransformer()))
        .getReader()

      // keep listening for input
      while (true) {
        const { value, done } = await reader.read()
        if (done) {
          reader.releaseLock()
          break
        }
        console.debug(value)

        // translate received values into frequencies
        const [a, b] = value.split(' ').map(v => parseInt(v))
        if (!isNaN(a) && !isNaN(b)) {
          osc0.frequency.value = Math.max(Math.min(a, 800), 0)
          osc1.frequency.value = Math.max(Math.min(b, 800), 0)
        }
      }
    })

  // transformer to read from serial, line by line
  class LineTransformer {
    constructor() { this.container = '' }

    transform(chunk, controller) {
      this.container += chunk
      const lines = this.container.split('\r\n')
      this.container = lines.pop()
      lines.forEach(line => controller.enqueue(line))
    }

    flush(controller) { controller.enqueue(this.container) }
  }

})
Notes on the code:
- I set the baud rate to 115200 because the microcontroller is blasting values, and the default 9600 probably won't keep up (I have not tried).
- Getting lines of text from the serial port took a bit more effort because it is byte-based; hence the use of a TextDecoderStream.
- Sometimes the line of values is incomplete; the
LineTransformerneeds more work. - The connect action only shows the microcontroller by using a filter when requesting a port. See also Raspberry Pi USB product ID list.
I am quite impressed how easy this was. There are some quirks, but this is a doable approach to making a product accessible through a USB connection. The HTML and JavaScript can be hosted anywhere and do not need any form of state (unless the application requires it, of course).
But… The "Board in FS mode" identifier is quite ugly.
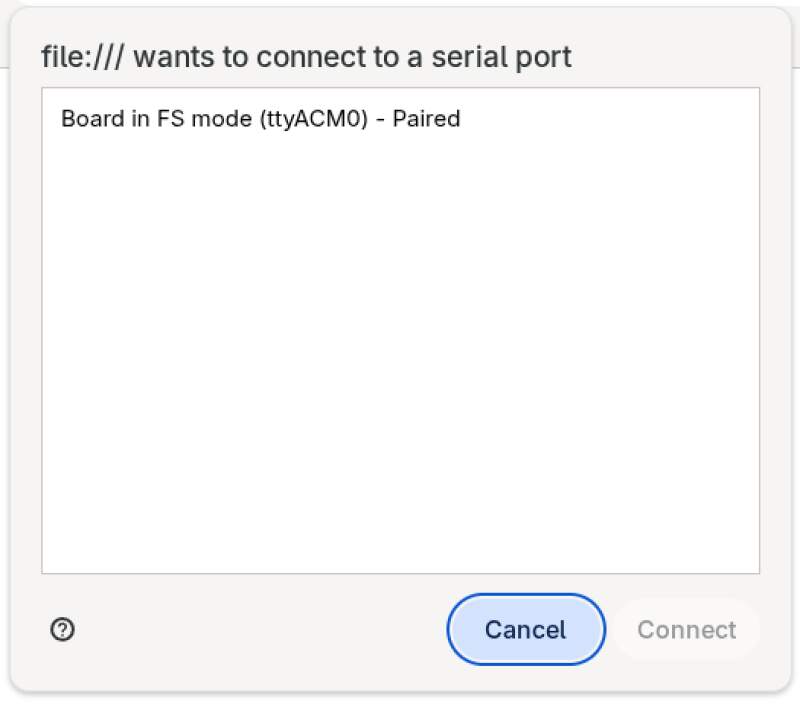
There are probably ways to change that (and when you're selling a product using this, you really should!), but that's a rabbit hole for some other time.
Here's a video of the result. Obviously, you'll need sound to fully "enjoy" it.
Well.. as you can see in the above video. It is noisy, but far from theremin-like. The biggest problem is the sensitivity of the step response setup. I needed to get very close with my fingers to be detected.
4. Reflection
I ran through this week's assignments, but learned some interesting stuff about the Web Serial standard.
4.1. Good
4.2. Bad
5. Source Files
Code:
Libraries:
