Principles and Practices / Project Management
1. Week Assignments
This week, we will have the following assignments:
- Principles and Practices (part 1)
- Plan and sketch a potential final project
- Project Management (part 2 of 2)
- Read, sign (add your name to) the student agreement and commit it to your repo
- Work through a git tutorial.
- Build a personal website in the class archive describing yourself and your final project. Refer to the lecture material for examples.
- Upload parts 1 and 2, to the class archive.
2. Prior knowledge
I'll be doing the assignments for this week with a lot of prior knowledge about building (static) websites using HTML, CSS, Version Control (git), SSH and Continuous Integration (CI) pipelines.
To make it a bit more challenging, I will use Org Mode instead of a site generator using Markdown to publish my website because I want to try and take advantage of the planning, tracking, and scheduling functionality it offers. It's is include with standard GNU Emacs, so no extra installation is needed. In some sense it is like Obsidian but more flexible.
It's also more challenging because the HTML publishing provided by Org Mode is much more bare-bones than, for example, MkDocs or Jekyll.
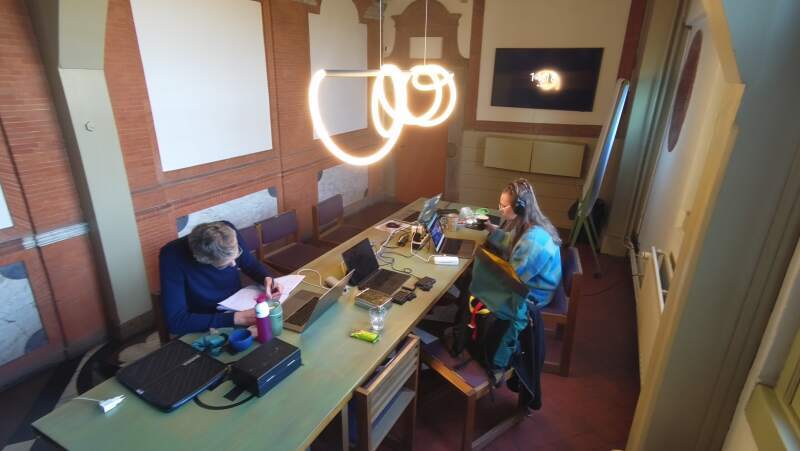
3. Let's get to work!
I am very eager to work on my website first, so I'll start with that.
3.1. Upload SSH keys and git clone
First, I need access to my personal FabAcademy website repository. To do that, I added the SSH keys of the computers I work with to the FabCloud GitLab instance, going from User settings to SSH keys.
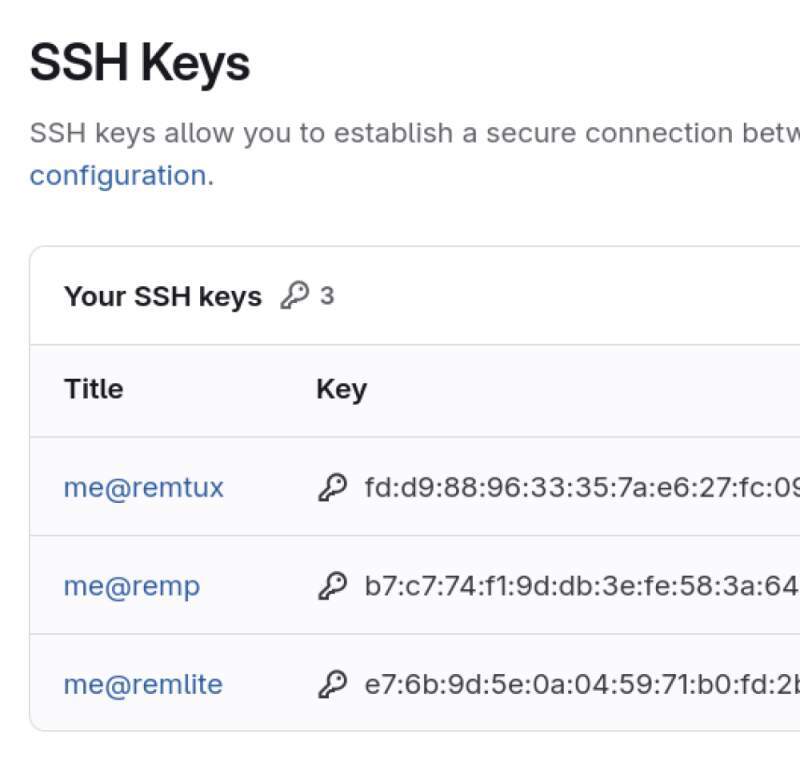
These are two laptops I use often and a desktop computer at home.
Now I can copy a clone of my repo to my computer (using the SSH URL otherwise I need to login each time).
git clone git@gitlab.fabcloud.org:academany/fabacademy/2026/labs/waag/students/remco-vantveer.git
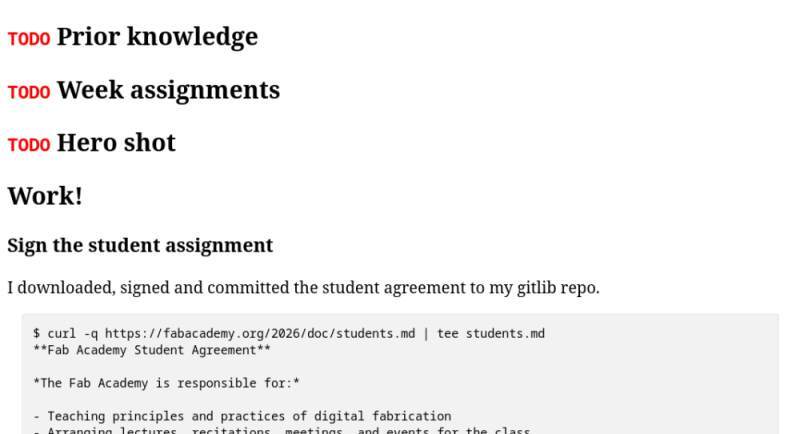
3.2. Sign the Student Agreement
I downloaded, signed, and committed the student agreement to my GitLab repository.
$ curl -q https://fabacademy.org/2026/doc/students.md | tee students.md
**Fab Academy Student Agreement**

*The Fab Academy is responsible for:*

- Teaching principles and practices of digital fabrication
- Arranging lectures, recitations, meetings, and events for the class
- Evaluating and providing feedback on student work
- Offering clear standards for completing assignments
- Certifying and archiving student progress
- Supervising class preparation
- Reviewing prospective students, instructors, and labs
- Providing central staff and infrastructure for students, instructors, and labs
- Fund-raising for costs not covered by student tuition
- Managing and reporting on the program's finances, results, and impacts
- Publicizing the program
- Promoting a respectful environment free of harassment and discrimination
- Encourage a diverse, accessible, and equitable community

*I am a Fab Academy student, responsible for:*

- Attending class lectures and participating in reviews
- Developing and documenting projects assigned to introduce and demonstrate skills, in enough detail to be able to reproduce them
- Honestly reporting on my work, and appropriately attributing the work of others (both human and machine, including AI prompts)
- Being prepared to answer questions about my work
- Allowing the Fab Academy to share my work (with attribution) in the class for purposes compatible with its mission
- Working safely
- Leaving workspaces in the same (or better) condition than I found them
- Participating in the upkeep of my lab
- Ensuring that my tuition for local and central class costs is covered
- Following locally applicable health and safety guidance
- Recognizing limits on lab and staff time
- Promoting a respectful environment free of harassment and discrimination

Signed by committing this file in my repository,

(your name goes here)

$ sed -i "s/(your name goes here)/Remco van 't Veer/" students.md
$ git add students.md
$ git commit -m "Signed student agreement"
[main a16d918] Signed student agreement
 1 file changed, 37 insertions(+)
 create mode 100644 students.md
And here's a link to the agreement in my repository.
3.3. Building the documentation framework
I'm a GNU Emacs user, so my digital life happens in Emacs. I am an avid user of Magit as a front end to Git and Org Mode for writing documents, planning, organization, and even literate programming (I may experiment with that later).
Magit is nicely integrated into Emacs and makes making commits, stashing changes, branching, pushing, etc., very easy. Most of what you can do on the command line can also be done through Magit.
Org Mode is huge and has many features. One of them is publishing, which can be used to generate websites. It uses a plain text file format very much like Markdown but has some extra features like tables and planning/scheduling. Here's a small example:
* Heading

Some text..

- first
- second
Note that headings start with * in Org Mode files and # in
Markdown files. At the lab we talked about a good structure for the
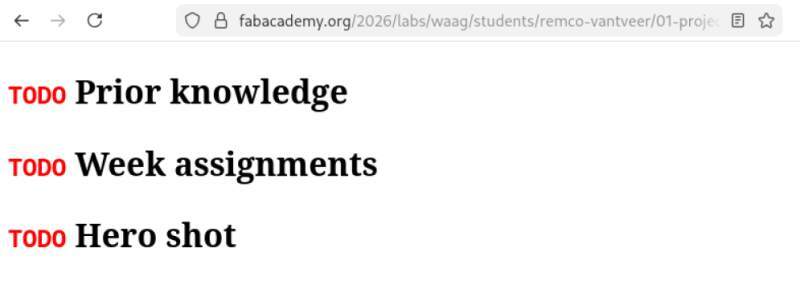
site, and Henk showed some examples. To start I think a template for a
week page should be (I will see if this evolves later):
* TODO Lecture            :noexport:
* TODO Prior Knowledge
* TODO Week Assignments
* TODO Hero shot
* TODO Work!
* TODO Reflection
** TODO the Good
** TODO the Bad
** TODO and the Ugly
* TODO Source Files
* TODO Review             :noexport:
Note the "TODO" prefixes on the section headers. They have a special meaning in Org Mode and help track which sections still need work.
Also note the :noexport: tags on the "Lecture" and "Review" sections
to prevent Org Publish from generating HTML for these. They are my
notes from live meetings and not suitable for the website.
I've added this file to my website repository: template.org.
3.3.1. Photo and Screenshot Importing
I have been using a couple of tools for over a year now to aid with note-taking in Emacs. Currently, the most important are:
-
Syncs photos, videos, audio and Org Mode To Do files from my phone to my laptop and desktop computers.
-
Allows me to edit the Org Mode To-Do files on my phone to record ideas on the go.
-
Conversion tools for images used by
rwf(see below) to scale down images for use in Org Mode files. -
To automatically transcribe voice notes from my phone. This is a work in progress. I don't feel comfortable taking many voice notes, so this may remain unused.
-
A home made (and open sourced) Emacs package to pull files into Org Mode based on a time range for the screenshots, synced phone camera and voice note directories. Image are automatically scaled down to a web friendly size using ImageMagick's convert with scaling set to
800x800, image quality to66%and stripping of meta data like Exif etc.
3.3.2. Publishing as a Website
To allow publishing without being inside Emacs (in the Gitlab CI
environment, for instance), I will need a publish.el file to define
where the Org files are and how to transform them into HTML using the
org-publish-project-alist variable.
;; load the Org Mode library to publish to HTML
(require 'ox-publish)

;; setup some variables to locate the files we are publish and where
(setq this-dir (file-name-directory (or load-file-name (buffer-file-name))))
(setq public-dir (concat this-dir "public"))

;; the publish configuration
(setq org-publish-project-alist
      `(("pages"
         :base-directory ,this-dir
         :base-extension "org"
         :recursive t
         :publishing-directory ,public-dir
         :publishing-function org-html-publish-to-html

         ;; turn off some features
         :with-toc nil
         :section-numbers nil)

        ("static"
         :base-directory ,this-dir
         :base-extension "css\\|txt\\|jpg\\|gif\\|png\\|svg"
         :recursive t
         :publishing-directory ,public-dir
         :publishing-function org-publish-attachment)

        ("site" :components ("pages" "static"))))
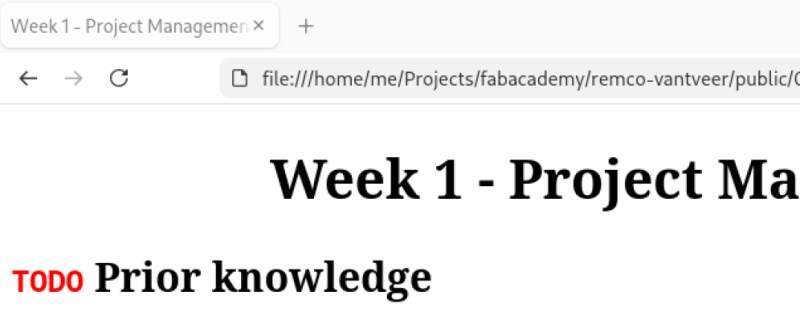
Now I can run the org-publish-project function in Emacs using M-x
org-publish-project and point my web browser to the public
directory, and hooray, it works in one go (see figure
2)!
Next step is to get GitLab CI to build and deploy it for me. To do so, I need to be able to build the website on GitLab CI using Emacs from the command line. After some trying, the following works:
emacs -Q --batch -l publish.el --eval '(org-publish-all t)'
Fortunately GitLab CI allows us to use Docker images as a base to run
scripts. I will use a Debian image because I know it will contain
Emacs packages. I chose the emacs-nox package because it is smaller
than just emacs as it does not have dependencies on libraries to
render a graphical user interface (nox stands for no X11).
Here's my .gitlab-ci.yml file:
image: debian:stable

pages:
  stage: deploy
  script:
    - apt-get update
    - apt-get install -y emacs-nox
    - emacs -Q --batch -l publish.el --eval '(org-publish-all t)'
  artifacts:
    paths:
      - public
The above works after some iterations due to the following reasons:
- Tried to force-push on a "WIP" commit until it works but the main branch is protected and GitLab rejects them.
emacs-noxnot found, need to doapt-get updatefirst.- Install failed again because it asks user to continue; add
-yonapt-get installcommand.
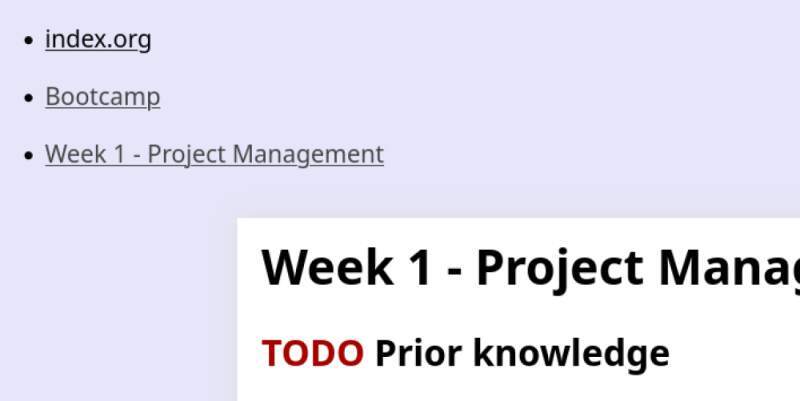
Pushing all my changes to GitLab and now it works! This file is published as HTML on my personal project website (see figure 3).
3.3.3. Style
Let's add some style to make it look "professional"!
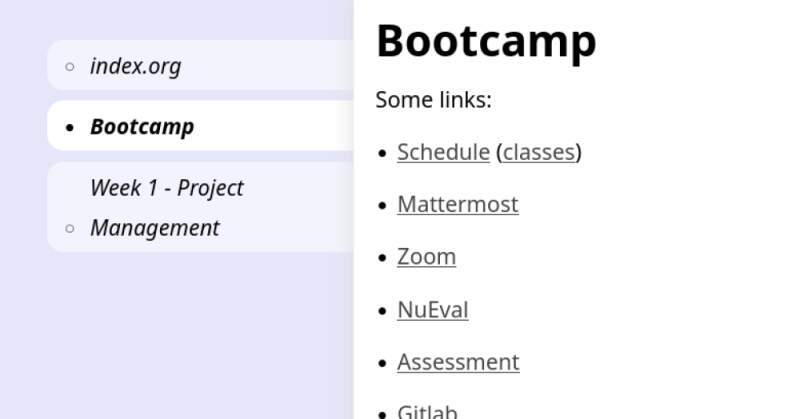
First, I want to have a title on every page (and a <title> tag!).
In Org Mode, you can add a preamble with some properties of the
document. One of them is "title" and you add them at the top of the
document as follows:
#+title: My page!
This immediately adds both a <title> tag (which looks nice on the
browser tab) and an <h1> title on top of the page. See figure 4.
Now, some basic styling. But first, remove all existing stuff and
point to my own style.css (this is a basic CSS I created for another
website some time ago). Also, include a <link> to have a pretty
site icon (Atari ST busy bee nostalgia).
:html-doctype "html5"
:html-html5-fancy t
:html-head-include-scripts nil
:html-head-include-default-style nil
:html-head "<link rel=\"stylesheet\" href=\"style.css\" type=\"text/css\"/>
            <link rel=\"icon\" href=\"atari-st-busy-bee.png\"/>"
3.3.4. Navigation
We also need some navigation block to find other pages on the website. Org Mode does not have a proper solution for this so, I will have to create my own functions to implement this. Fortunately, it's possible to provide a function to create the HTML pre- and postamble (HTML which goes on the top of the page and the bottom). It makes sense to use the HTML preamble to create the navigation block.
First, we will need to get a list of all the Org files we can navigate
into. Let's make them start with numbers, so they are easy to sort.
The index.org goes first and is the only exception to the "starts
with numbers" rule.
(defun page-files ()
  "Make a list of page files."
  (cons "index.org"
        (directory-files this-dir nil "^[0-9].*\\.org$")))
Then, we will need to be able to get the page title from the file to use for the navigation links.
(defun extract-title (file)
  "Extract title from orgmode FILE."
  (with-temp-buffer
    ;; insert text from file
    (insert-file-contents (concat this-dir file))
    ;; move to the top of the file
    (goto-char (point-min))
    ;; search down to the first occurrence of #+title:
    (if (re-search-forward "^#\\+title: *" nil t)
        ;; grab text after the title marker
        (let ((begin (point))
              (_ (end-of-line))
              (end (point)))
          (buffer-substring-no-properties begin end))
      ;; otherwise return the file name as a fall back
      file)))
Here, we open a temp buffer, pull in the data of a file, and try to find
the first occurrence of the #+title: notation and return whatever is
behind that on that line. Note: the file name is relative to
this-dir. Also note: when the page does not have a #+title:, the
given file name will be used.
Now we have everything we need to create our own navigation
function!
(defun navigation (x)
  "Generate site navigation for X."
  (let ((current-file (plist-get x :input-buffer)))
    (concat
     "<nav><ul>"
     (mapconcat (lambda (file)
                  (format "<li%s><a href=\"%s\">%s</a></li>\n"
                          (if (string-equal current-file file)
                              " class=\"current\""
                            "")
                          (string-replace ".org" ".html" file)
                          (extract-title file)))
                (page-files))
     "</ul></nav>")))
Here, we receive a page x, which is a plist describing the page being
rendered to HTML. We use this to determine if we need to add a
current class to the navigation item so we can highlight it
(:input-buffer points to the file the page comes from). The file
name needs to be translated from .org to .html, and here we use
extract-title to display the page title. The list of pages we get
from our page-files function.
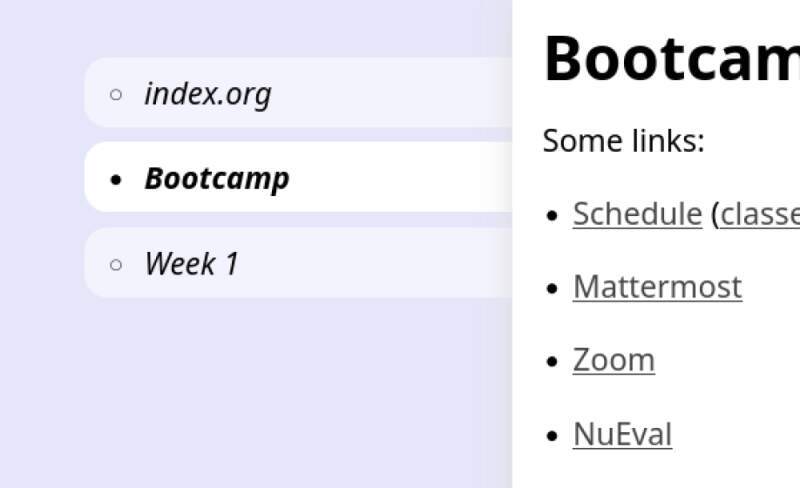
Now, add it to the org-publish-project-alist variable as follows:
:html-preamble navigation
Run org-publish-project and it works. See figure 5
for proof.
Note: org-publish-project only publishes pages when the content
changes and not when only the configuration of the project changes.
To force a complete re-render of the HTML pages, I run the following
in a terminal after every change:
rm -rf public ; emacs -Q --batch -l publish.el --eval '(org-publish-all t)'
I'm not sure how to fix this yet, but when this part is finished, only the content will change, so I am not going to investigate further.
Let's add some CSS to make the navigation prettier.
nav ul {
    padding: 0;
    line-height: 1.8;
    margin-left: 0;
}
nav ul ul {
    padding-left: 1rem;
}
nav li {
    list-style: circle inside;
    font-style: italic;
    padding: .25em .75em;
    margin-bottom: .5em;
    background: var(--sub-background);
}
nav a:link {
    text-decoration: none;
    color: black;
    display: inline-block;
    padding: 0 .25rem;
    width: calc(100% - 2rem);
}
nav a:visited {
    color: black;
}

nav .current {
    list-style: disc inside;
    background: white;
}
nav .current a {
    font-weight: bold;
}

3.3.5. Responsive Design
At this point, it will look fine on a small and a large screen, but let's take advantage of a large screen and put the navigation on the left side only when the screen is big enough.
@media (min-width: 82rem) { /* big screen */
    nav ul {
        margin-top: 0;
    }
    nav > label, nav > input {
        display: none;
    }
    nav li {
        border-top-left-radius: .75em;
        border-bottom-left-radius: .75em;
    }

    body {
        display: grid;
        grid-template-areas: ". preamble content postamble .";
        grid-template-columns: 1fr var(--menu-width) var(--content-width) var(--menu-width) 1fr;
    }
    #preamble {
        grid-area: preamble;
        padding-right: 0;
        padding-bottom: calc(var(--padding) + 1rem);
    }
    #content {
        grid-area: content;
        border-radius: 0 0 calc(var(--padding) / 2) calc(var(--padding) / 2);
        margin-bottom: var(--padding);
    }
    #preamble, #content {
        display: inline-block;
        vertical-align: top;
    }
}
I must admit, I copied the above from another project and tweaked it
for this project because I can't remember how CSS grid layouts work.
Note the use of var(..) to reuse values defined elsewhere. I put
most of the colors and sizes at the top of the CSS file for
convenience.
:root {
  --content-width: 50rem;
  --menu-width: 15rem;
  --padding: 1rem;

  --red: #a60000;
  --orange: #ff8800;
  --green: #006300;

  --background: lavender;
  --sub-background: rgba(255, 255, 255, 0.5);
}
This makes tweaking sizes and colors a lot easier. It's really
annoying that the min-width on the @media selector cannot use a
var. This has something to do with the "cascading" in CSS
(Cascading Style Sheets), I guess.
Oh, wait… that's ugly! A title can be way too long for a navigation
link. Let's allow setting a "nav-title" property in the page preamble
as an override for when it is used in the navigation block. We'll
replace extract-title with a more generic
extract-preamble-property.
(defun extract-preamble-property (file prop)
  "Extract some simple PROP from FILE."
  (with-temp-buffer
    (insert-file-contents (concat this-dir file))
    (goto-char (point-min))
    (when (re-search-forward (concat "^#\\+" prop ": *") nil t)
      (let ((begin (point))
            (_ (end-of-line))
            (end (point)))
        (buffer-substring-no-properties begin end)))))
Now, instead of using (extract-title file) in the navigation
function, we can do:
(or (extract-preamble-property file "nav-title")
    (extract-preamble-property file "title")
    file)
And:
#+title: Week 1 - Project Management
#+nav-title: Week 1
3.3.6. Time tracking
To track how much time I spend on assignments and the FabAcademy, I will experiment with the Clocking Work Time feature in Org Mode. I tried it before for clocking my professional work but did not have proper planning in Org Mode at the time. Since I will try and go full on Org Mode for FabAcademy this is a chance to clock and track time to help with scheduling. This first week is really messy and I hope to get into a slightly more stable grove in the coming weeks. Hopefully this way of time tracking will give me some insights.
Getting used to the workflow is going to be the hardest part. I works
as follows: when you start working on something you more the cursor to
the section you're going to be working on and run org-clock-in.
When stopping on a task run org-clock-out, the end time will be
recorded and the elapsed time calculated.
A :LOGBOOK: section is added (when not already there) containing
the times you clocked in and out of these sections. It looks as follows
but will not be published to the website:
:LOGBOOK:
CLOCK: [2026-01-24 Sat 13:32]
CLOCK: [2026-01-24 Sat 13:09]--[2026-01-24 Sat 13:32] =>  0:23
:END:
All these recordings can be aggregated using org-clock-report into a
table.
| Headline | Time | ||
|---|---|---|---|
| Total time | 20:25 | ||
| Let's get to work! | 20:25 | ||
| Building the documentation framework | 1:07 | ||
| Time tracking | 0:46 | ||
| Proofreading | 0:21 |
Note that I already recorded a lot of time on the 3 section. I have been moving the logbook section all over this file to find the right spot. It needs to be within a heading and can not go into the file preamble but, as you can seem above, will happily sum sub sections.
The coming weeks will tell if I can keep this up…
3.3.7. Proofreading
I have a subscription to Kagi search which also includes an LLM assistant. It turns out LLMs are very good at fixing spelling and other writing mistakes.
For proofreading feedback from within Emacs, I use the following functions:
(defun kagi-proofread (prompt)
  (interactive "sPrompt: ")
  (let ((text (buffer-string))
        (proofread-file-name (make-temp-file "/tmp/kagi-proofread")))
    (save-excursion
      (with-current-buffer (find-file-noselect proofread-file-name)
        (insert
         (kagi-fastgpt-prompt (concat prompt " " text)))
        (save-buffer)))
    (diff (buffer-file-name) proofread-file-name "-uw")))

(defun kagi-proofread-en ()
  (interactive)
  (kagi-proofread "Proofread the following text for spelling, grammar and stylistic errors."))
It shows a diff between my original version and whatever the Kagi Assistant proposes, so I have review and apply the changes I agree with. This is very convenient for a sloppy and dyslectic writer like myself.
3.4. About page
See About Me.
3.5. Final project page
See Final Project.
4. Reflection
4.1. Good
Finally!! I can finally start the FabAcademy I've been looking forward to for so long. There are nice people, a beautiful place and lots of interesting stuff to learn!
4.2. Bad
My preparations from before FabAcademy mean I have a lot of stuff I need to relive / re-implement to feel the pain again and document. The assignments this week seem like an easy ride but are quite a lot of work this way. Also, this "take along" writing style is a lot of work. I may need to tone it down a bit and be more factual instead.
4.3. Ugly
Being super excited makes me an annoying student. I have to bite my tongue to not interrupt Henk's instructions. It also means I do not sleep well and suffer from headaches. I hope my body will get used to the stress, and I'll feel better soon.
5. Source Files
Here are the most important source files I created in this week:
