Molding and casting
1. Week Assignments
Group assignment:
- Review the safety data sheets for each of your molding and casting materials
- Make and compare test casts with each of them
- Compare printing vs milling molds
Individual assignment:
- Design a mold around the process you'll be using, produce it with a smooth surface finish that does not show the production process toolpath, and use it to cast parts.
2. Prior Knowledge
I did a plaster cast when I was a kid using a rubber mold of a cat from a hobby store. It did not become a hobby.
3. Work!
3.1. Group Assignment
3.1.1. Smooth-on Mold Star 16 Fast
From the product page on the Smooth-on website, we found the Technical Bulletin and Safety datasheet.
This material is very safe to use. According to the safety datasheet: "Ingestion: rinse mouth". The technical bulletin says nothing about heat generated by the reaction of the components, so this seems to be a very easy material to apply. The only notes about heat are as a means to speed up curing.
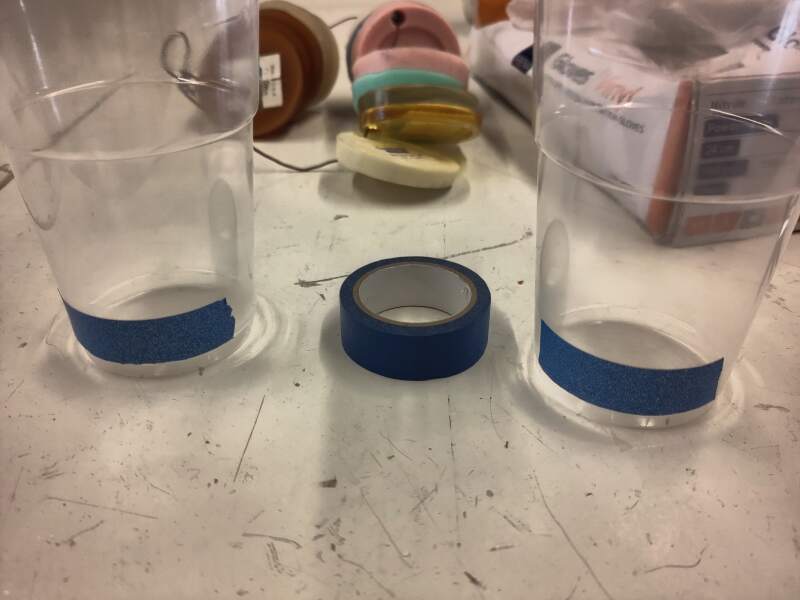

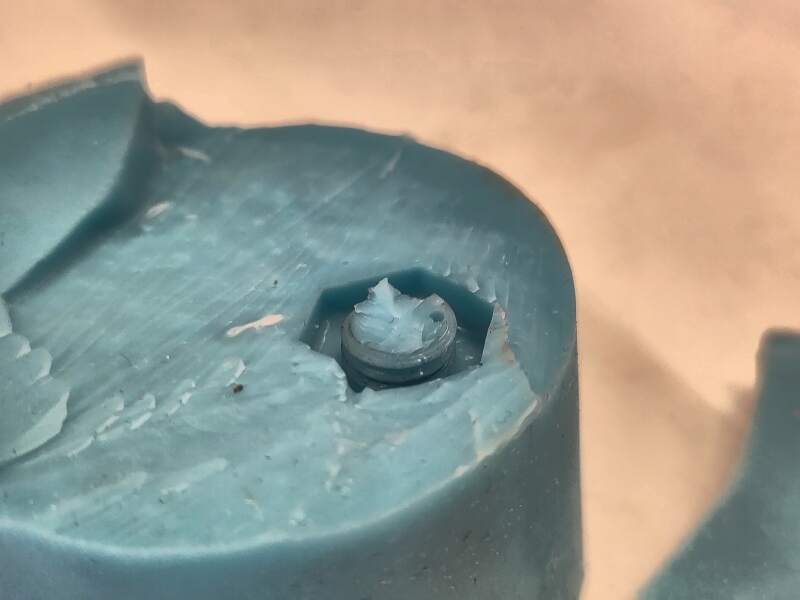
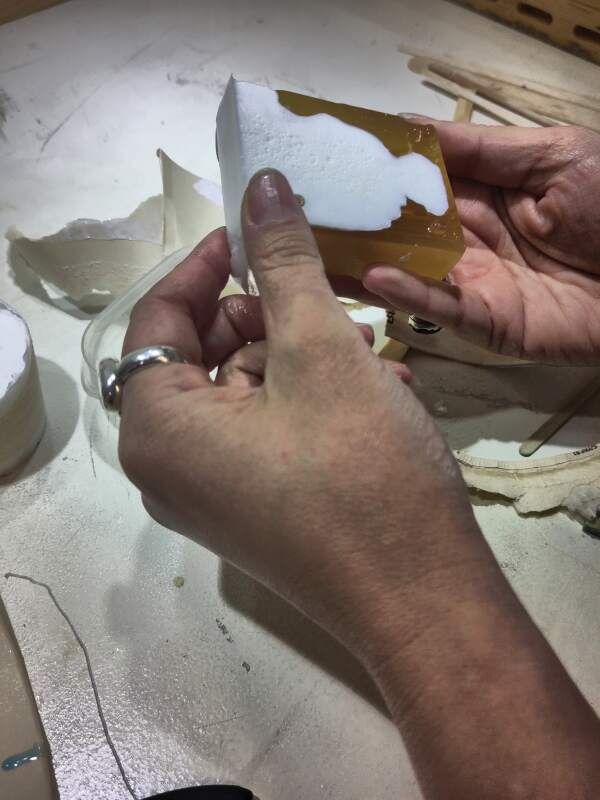
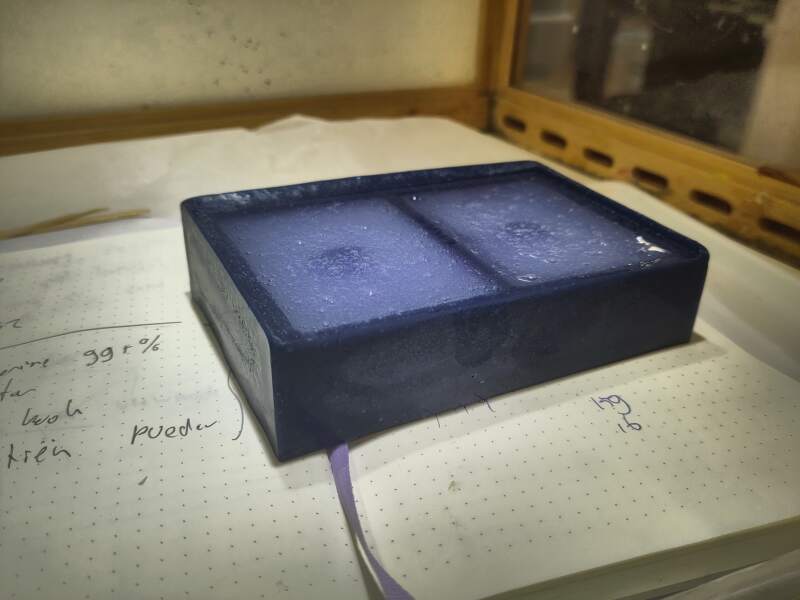
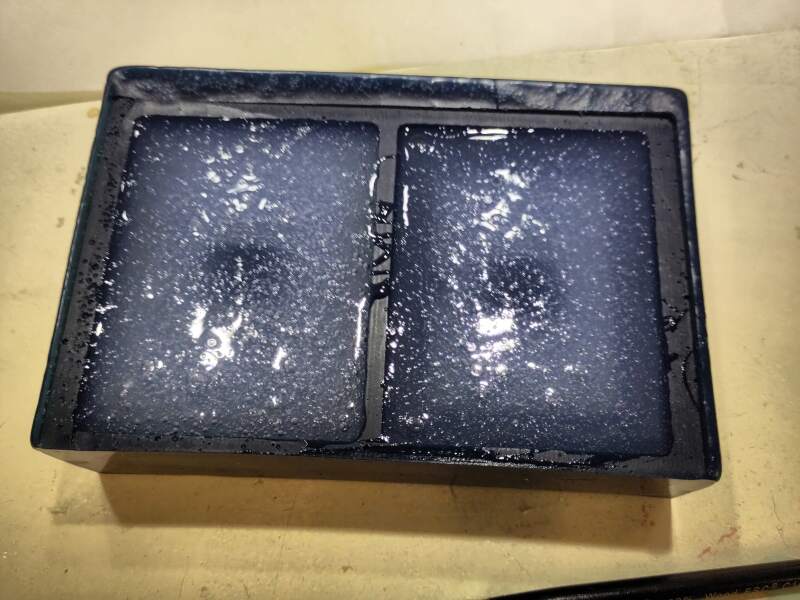
We used clear plastic cups with insulation tape on the side at exactly the same height to prepare equal volumes for both parts.
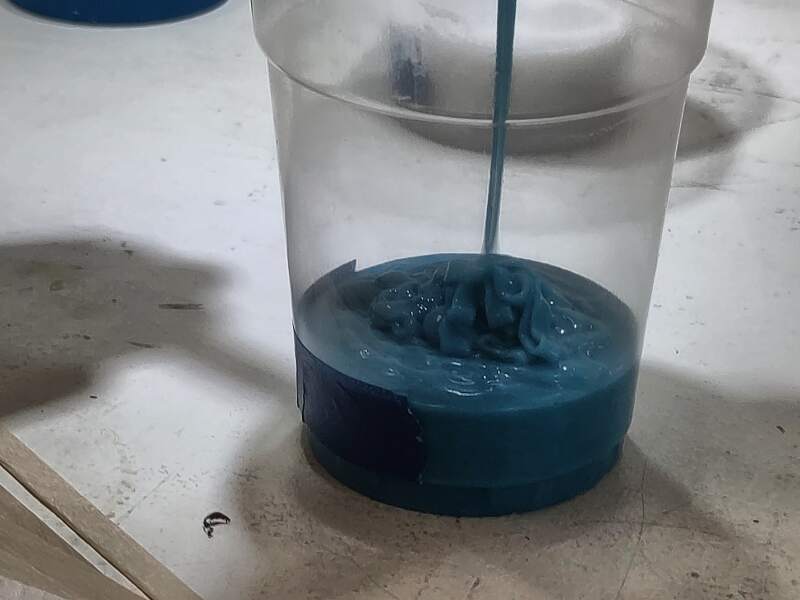
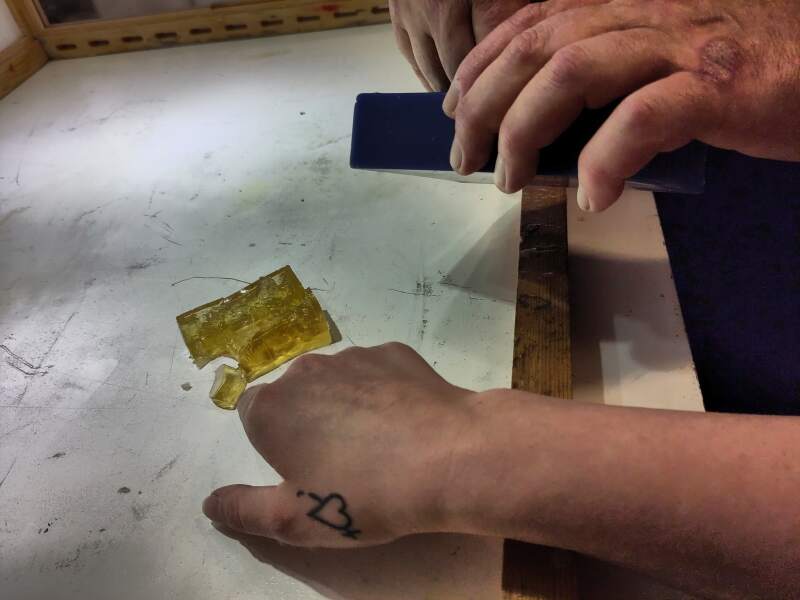
After stirring, I dropped a surprise into a paper cup. Heleen poured in the mix, and we let it cure for 30 minutes. We had 6 minutes to do this before curing starts, according to the datasheet (pot life).
The surprise was easy to remove and left a nice negative in the puck of silicon.
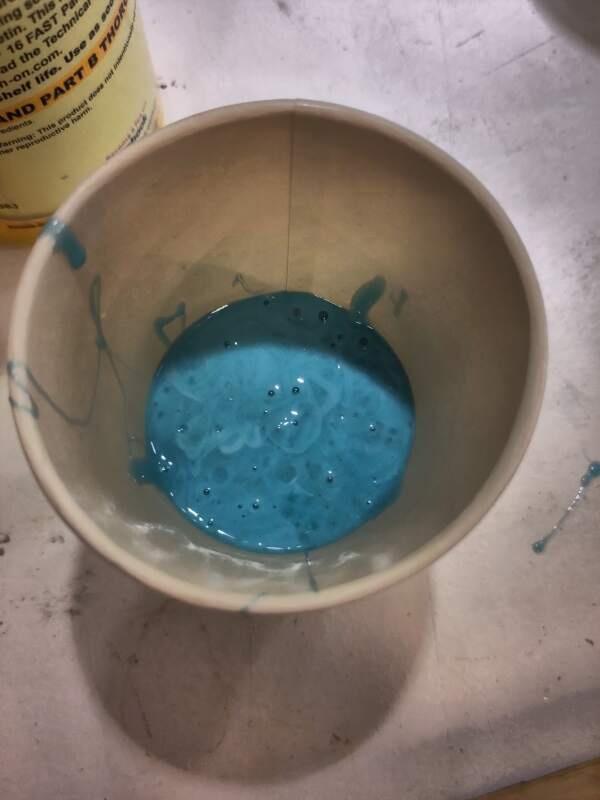
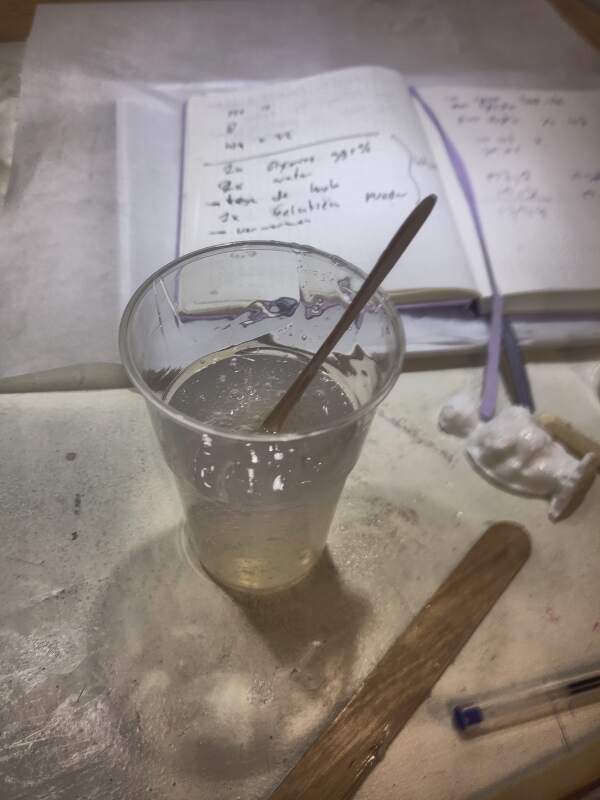
3.1.2. Bio based glycerin / Gelatin
Together with Henk, we created "bio-silicon". It's not really silicon, but it has similar hardness properties.
Ingredients (by volume):
- 1 part glycerin (99%)
- 1 part gelatin powder
- 2 parts water
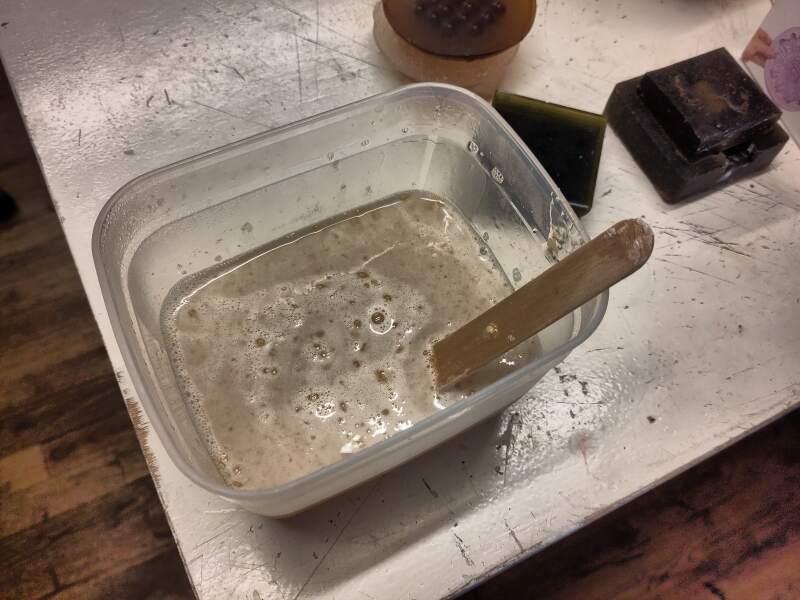
Put the glycerin and water in a container and heat in the microwave. Add the gelatin powder while stirring. Once fully mixed, reheat and stir again. Pour the mixture into a mold and cool it down.
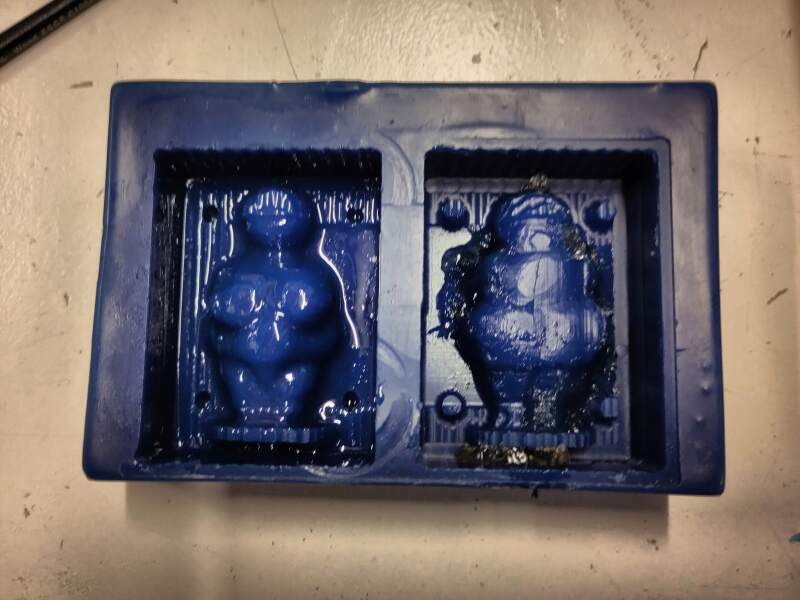
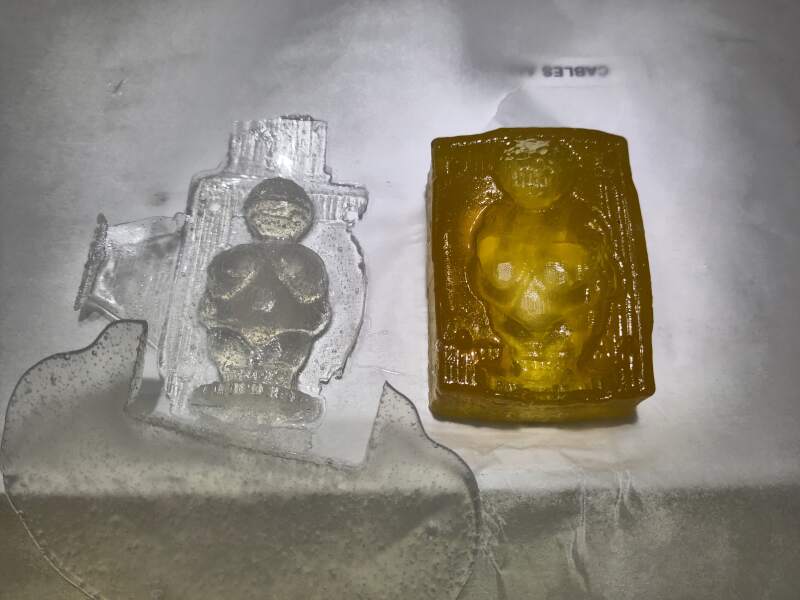
We poured the mixture into a machinable wax mold (of a fertility statue) made by someone in a previous year.
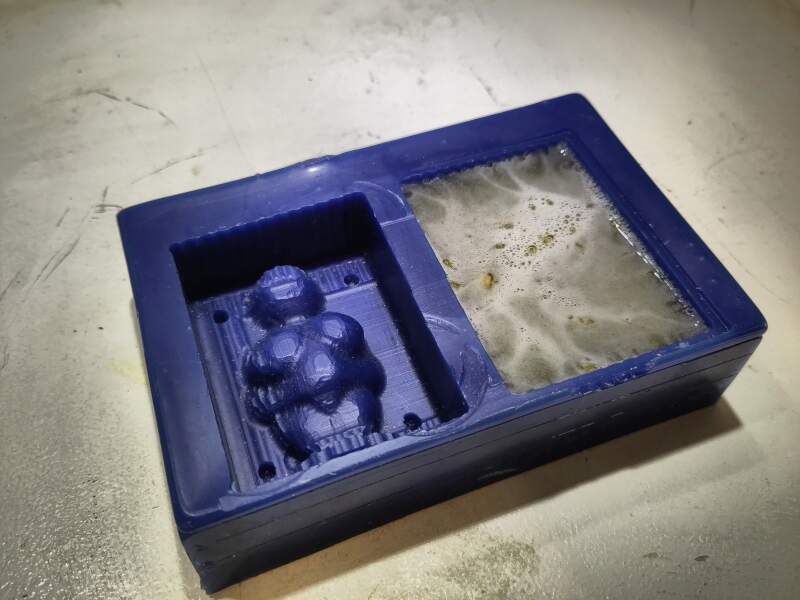
It did not come out very cleanly.
In a second attempt, we applied some sunflower oil to the mold and cast it again.
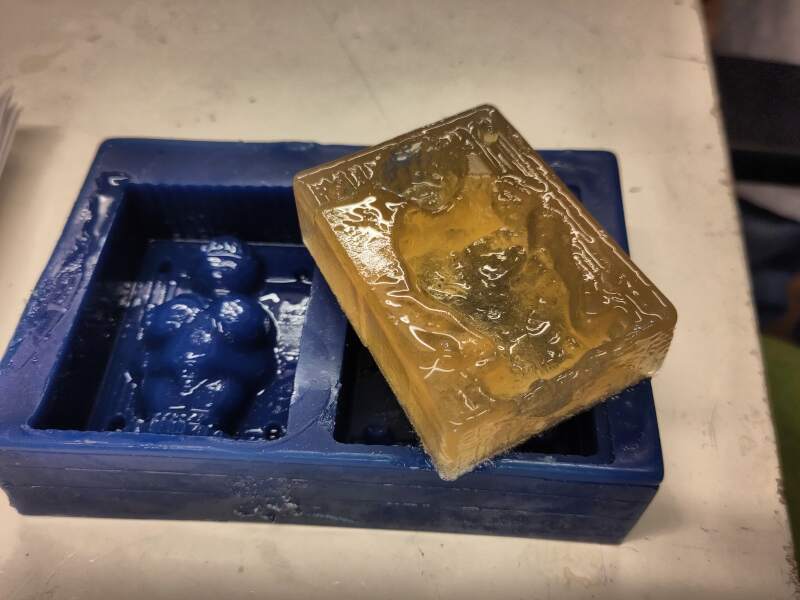
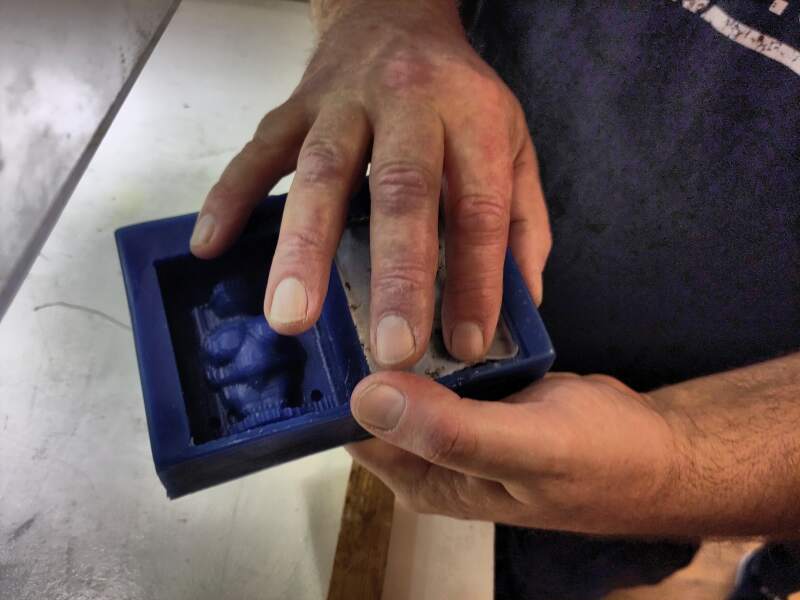
Next, happy with the result, we cast the remainder of the experiment Heleen did with a solid Smooth-on plastic into our new the glycerin / gelatin mold and removed it after 30 minutes of curing.
The result was quite good!
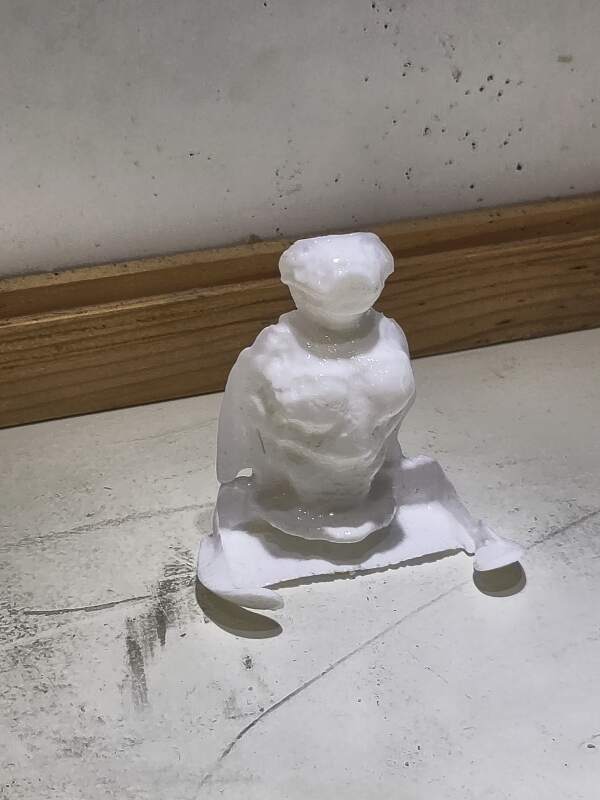

We cast Smooth-on Sorta-Clear-18 into the still usable mold, and the result was (after a weekend of curing) very good.
3.1.3. Printing versus Milling
Henk: "We're not doing that; we'll only use the ShopBot this week."
My guess:
- Filament printing
- Removing the layer lines is hard because most filaments do not sand very well or require toxic chemicals to smooth.
- SLA printing
- Will probably yield the best results.
- Machinable Wax milling
- Wax is soft and have be post process pretty easily.
3.2. Individual
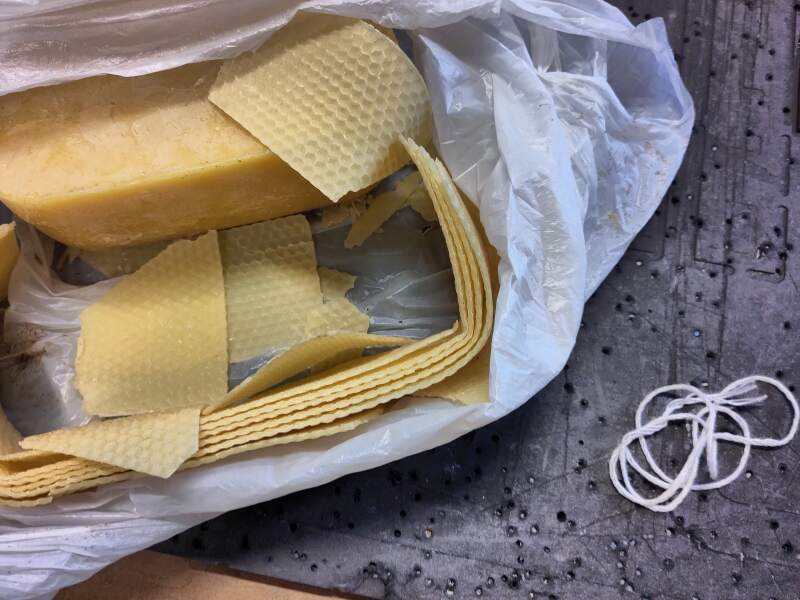
I wanted to find out if I could use a glycerin / gelatin mold to cast beeswax candles. The problem is that this mixture melts at a pretty low temperature, while beeswax needs at around 65°C to melt but probably needs more to flow freely.
To get some hints about raising the melting temperature of the mold, I consulted the Materiom chatbot (introduced in the lecture by Alysia Garmulewicz). After some false starts which led to answers with a lot of scientific references and information about cross-linking using materials I cannot source quickly enough, I just flat out asked for a recipe, and got a nice and straight answer to try out.
QUESTION:
recipe for gelatin based mold to cast beeswax
ANSWER:
Okay, let's explore a gelatin-based mold recipe suitable for casting beeswax. Here's a formulation and process, keeping in mind the need for thermal stability and mold release:
Gelatin Mold Formulation:
- Gelatin: 1 part (by weight) - Provides the mold structure. Use a high bloom gelatin for better strength.
- Glycerol: 0.25 part (by weight) - Acts as a plasticizer to improve flexibility and reduce brittleness.
- Water: 2 parts (by weight) - To dissolve the gelatin and create a pourable mixture.
- Castile Soap: 0.1 part (by weight) - Acts as a release agent to aid in demolding the beeswax.
Process:
- Hydrate the Gelatin: Bloom the gelatin in cold water for about 30 minutes. This softens the granules and ensures even dissolving.
- Dissolve: Gently heat the mixture in a double boiler or microwave in short intervals until the gelatin is fully dissolved. Avoid overheating, as this can degrade the gelatin's strength.
- Additives: Stir in the glycerol and castile soap until well combined.
- Pouring: Pour the gelatin mixture into your mold container, ensuring it replicates the shape you want to cast.
- Cooling: Allow the mold to cool and solidify completely, preferably in a refrigerator, for several hours or overnight.
- Casting: Once the gelatin mold is firm, carefully pour the molten beeswax into the mold. Ensure the beeswax temperature is not excessively high to prevent melting the gelatin mold.
- Demolding: After the beeswax has cooled and hardened, gently flex the gelatin mold to release the cast beeswax shape.
Directional Insights and Considerations:
- Gelatin Type: Higher bloom gelatin will result in a stronger, more durable mold.
- Glycerol Level: Adjust the glycerol level to achieve the desired flexibility. Too much glycerol can weaken the mold.
- Beeswax Temperature: Monitor the beeswax temperature to prevent the gelatin mold from melting or deforming.
- Mold Release: Castile soap aids in demolding, but you can also lightly dust the mold with cornstarch or use a thin layer of vegetable oil spray.
- Mold Life: Gelatin molds are not as durable as silicone molds and may only be good for a limited number of castings.
To further refine your approach, consider these questions:
- What is the size and complexity of the beeswax shape you intend to cast?
- What is the acceptable range of thermal stability for your application?
- Are there any specific processing constraints that might influence material selection?
Quantitative figure(s) are estimates and should always be empirically tested.
The above looked promising, but after I found the 2022 group assignment at the Waag, I was discouraged because I don't have time to do many experiments to make a candle (I don't even like candles!). Also, I learned about Agar from Christian, and that sounded even better (and is vegan too). This is a gaping rabbit hole; I will stay clear from it.
3.2.1. Molding
Dropping the bio experiments, I decided to go for a simple tealight candle from beeswax. Henk had prepared blocks of machinable wax, so I designed toward that, keeping in mind the examples here in the lab. The examples CNC mill a "positive" mold to cast a "negative" mold to cast the "positive" end result.
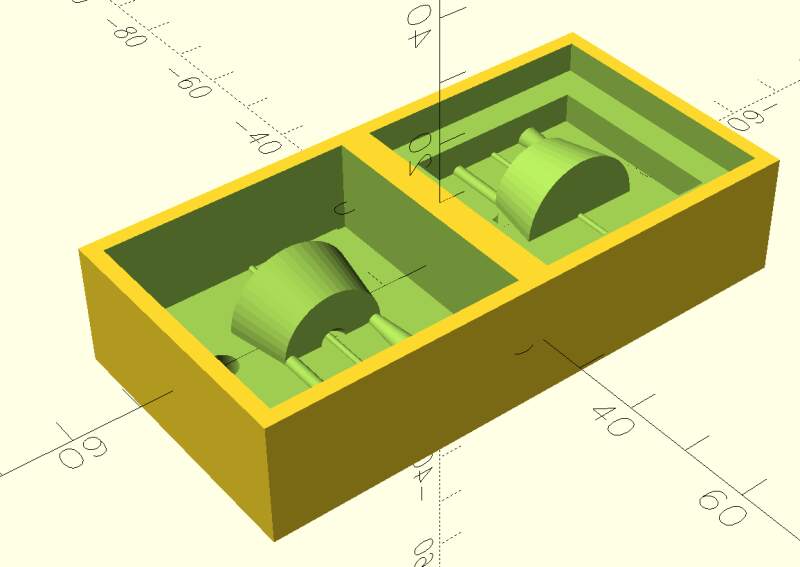
In the OpenSCAD program below, I created a "shape" and some support objects; "wick", "pouring" and "venting". These are subtracted from the "base" and that is "sliced" and negated to get the mold (of the mold). It was a bit of a puzzle but OpenSCAD made this manageable.
base_x = 70;
base_y = 90;
base_z = 40;

register_d = 10;
shape_d = 30;

$fn = 50;

module shape() {
  w = shape_d;
  translate([0, 0, w / -4]) difference() {
    cylinder(h = w / 2, d1 = w, d2 = w * .8);
    translate([0, 0, w / 2]) sphere(w / 10);
  }
}

module wick() {
  w = shape_d;
  d = 2;
  translate([0, 0, w / 2 - w / 4]) cylinder(h = shape_d * 2, d = d, center = true);
}

module pouring() {
  w = shape_d;
  d = 6;
  translate([-shape_d * .8 / 2 + d / 2, 0, w / 2 - w / 4]) cylinder(h = shape_d * 2, d1 = d, d2 = 10);
}

module venting() {
  w = shape_d;
  d = 3;
  translate([shape_d * .8 / 2 - d / 2, 0, w / 2 - w / 4]) cylinder(h = shape_d * 2, d = d);
}

module base() {
  cube([base_x, base_y, base_z], center = true);
}

module slice() {
  sep = 5;

  module register() {
    union() {
      difference() {
        cube([base_x, base_y, base_z / 2], center = true);
        cube([base_x - register_d * 2, base_y - register_d * 2, base_z / 2], center = true);
      }
    }
    translate([base_x / 2 - register_d, 0, 0]) cylinder(h = register_d, d = register_d, $fn = 200);
  }

  // bottom
  translate([base_x / 2 + sep / 2, 0, 0]) union() {
    difference() {
      children();
      m = base_x;
      translate([base_x / -2, base_y / -2, 0]) cube([base_x, base_y, base_z]);
    }
    register();
  }

  // top
  translate([(base_x / -2) - sep / 2, 0, 0]) rotate([180, 0, 0]) difference() {
    children();
    m = base_x;
    translate([base_x / -2, base_y / -2, -base_z]) cube([base_x, base_y, base_z]);
    register();
  }
}

module mold() {
  rotate([180, 0, 0]) difference() {
    cube([(base_x + register_d) * 2, base_y + register_d, base_z], center = true);

    slice() difference() {
      base();
      rotate([90, 0, 0]) {
        shape();
        wick();
        pouring();
        venting();
      }
    }
  }
}

mold();
3.2.1.1. Fabrication
Henk instructed us to use the standard 2-flute 5mm end mill bit from the inventory for milling wax this week.
- Import 3D Model
Importing the stl-file into V-Carve via (File → Import → Import Component / 3D Model) was very confusing. It scaled it to fit, but it did not really fit. To make it fit, I scaled it in the Z direction (because that was the limiting factor in my design).
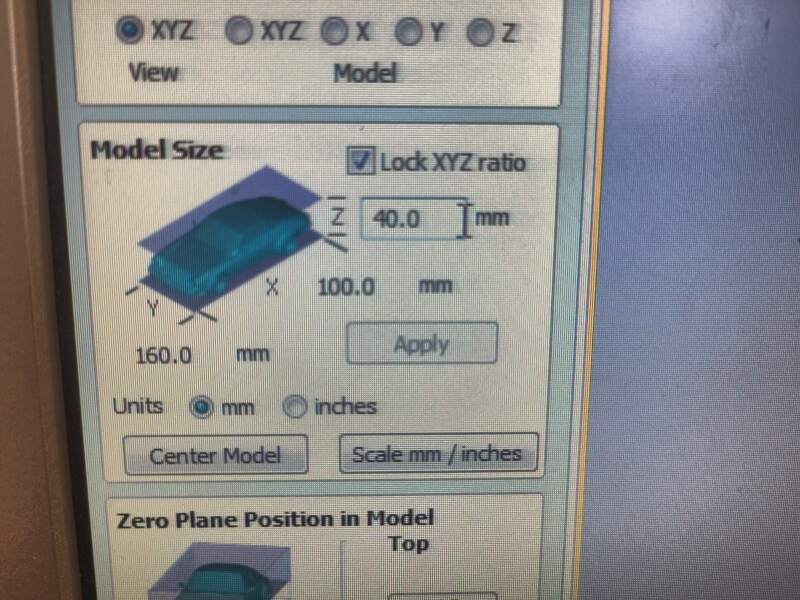
Figure 21: Fill in a value and click "Apply" 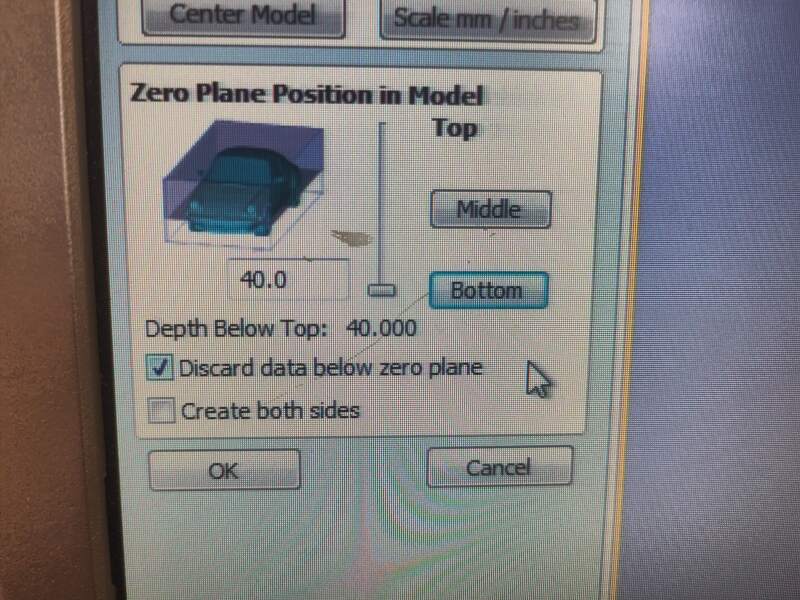
Figure 22: Set the Zero plane to the "Bottom" 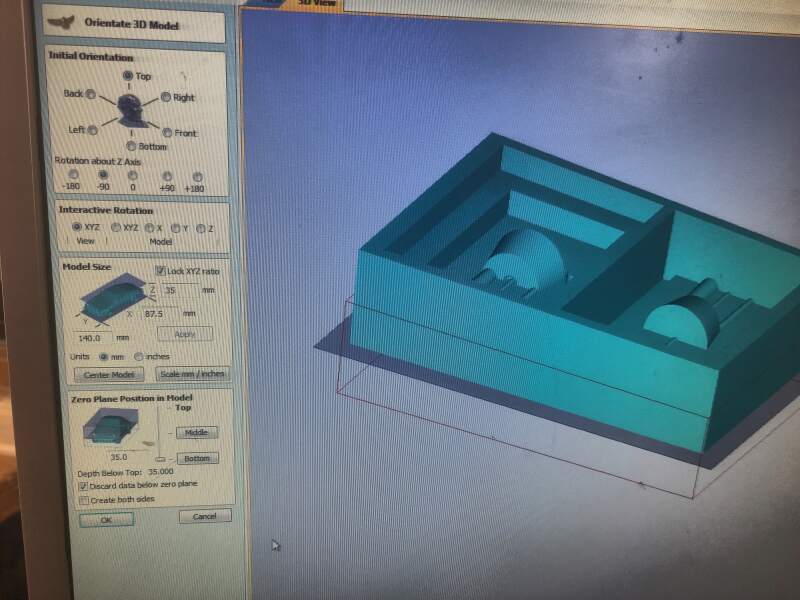
Figure 23: Import settings - Rough Path
Next, I created a Rough Machining Toolpath.
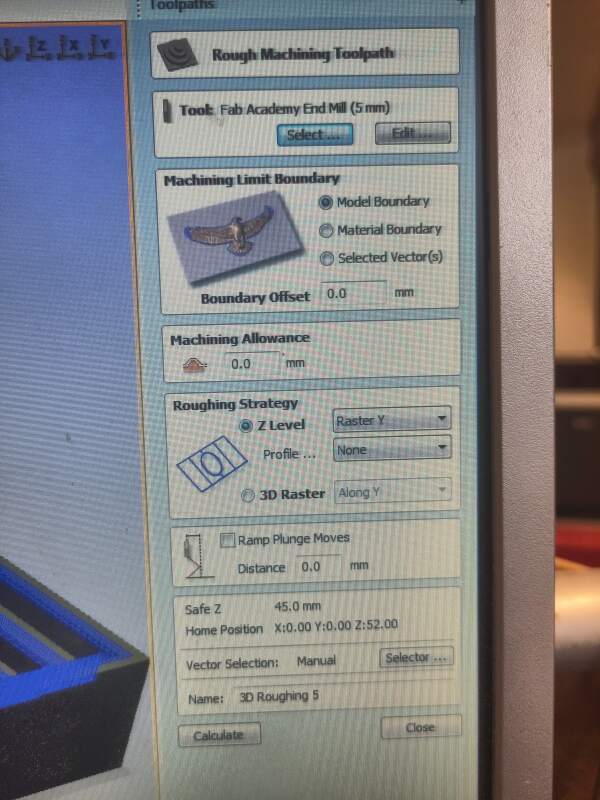
Figure 24: Rough Machining Toolpath settings 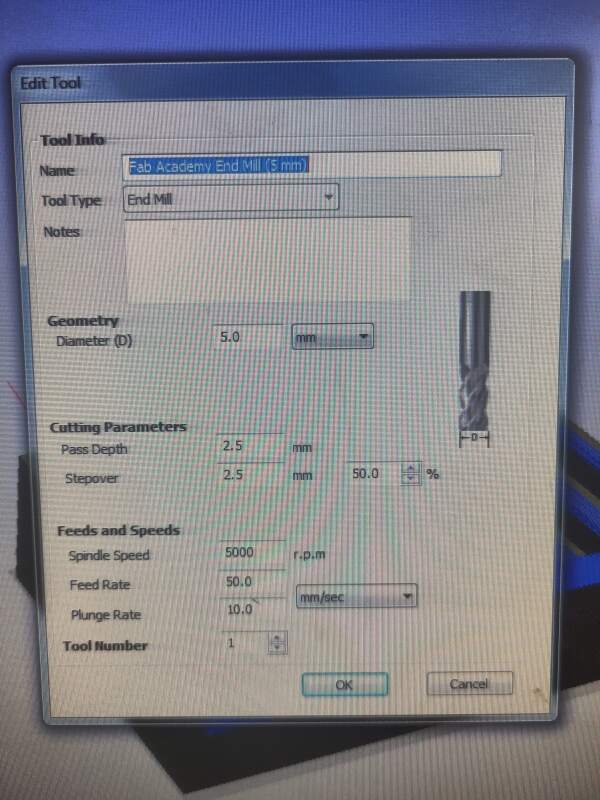
Figure 25: Tool settings for the rough path - Finish Path
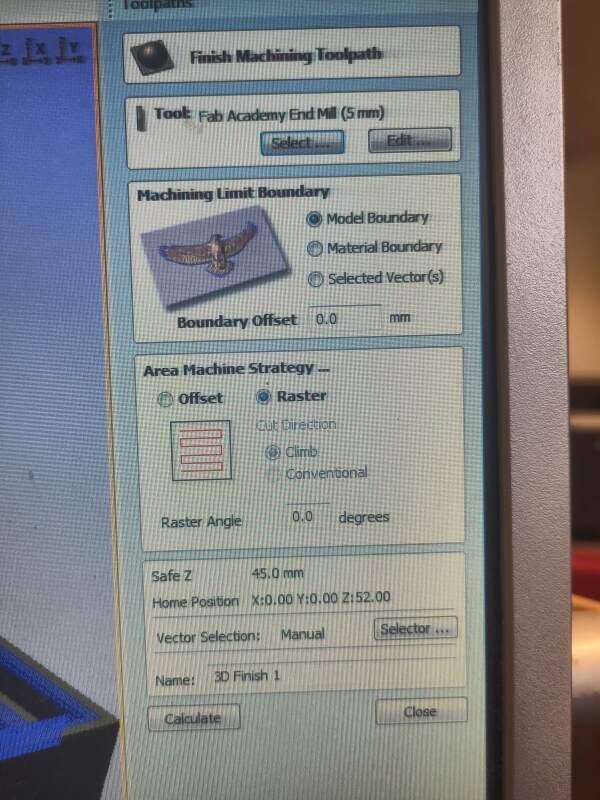
Figure 26: Finish Machining Toolpath 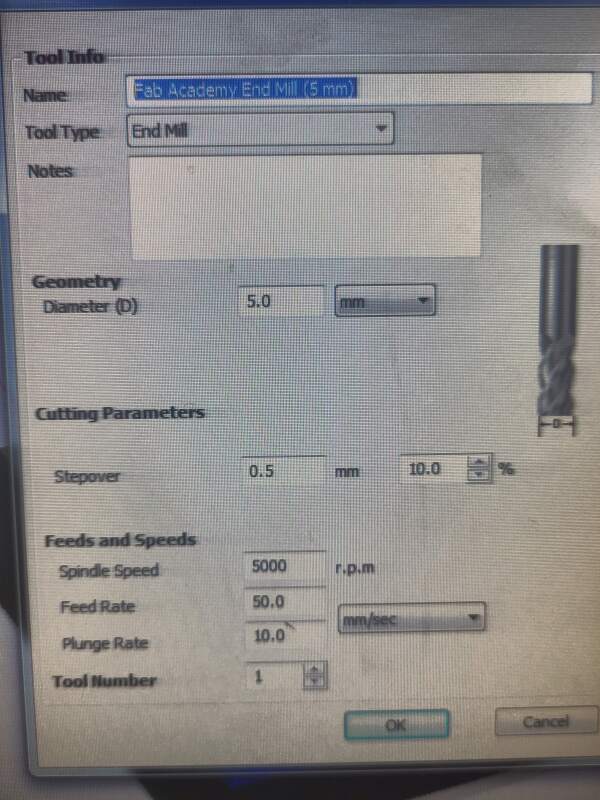
Figure 27: Tool settings for the finish path - Milling
I created one job file to run the job on the ShopBot, but at first it started to mill the air below the model. My mistake was not setting the XY Datum Position to bottom left.
On the second try, the bit plunged into the wax very deeply, and the wax block came loose, so I stopped it immediately. Looking at the toolpaths, it seemed like it started with the "finish" instead of the "rough" path. Annoyed by the V-Carve software, I made two separate job files to ensure I was in control of the order.
Then, I successfully milled the mold.
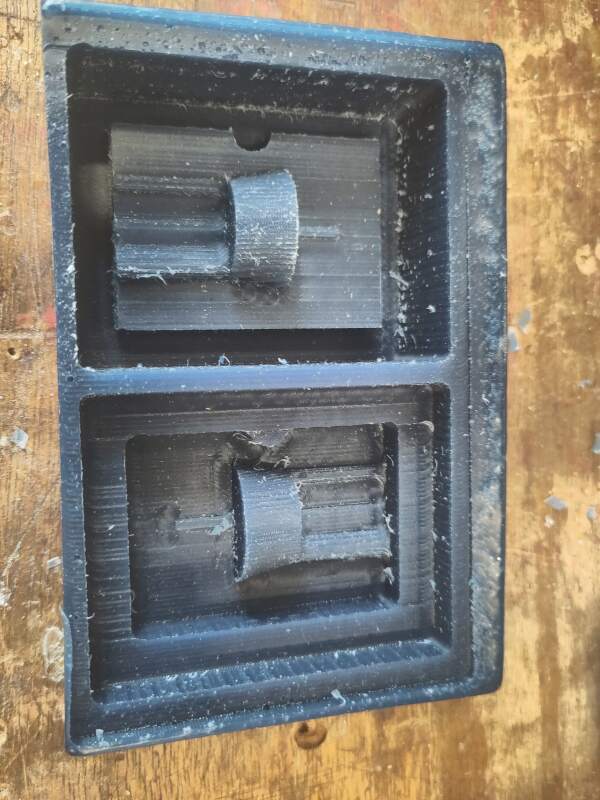
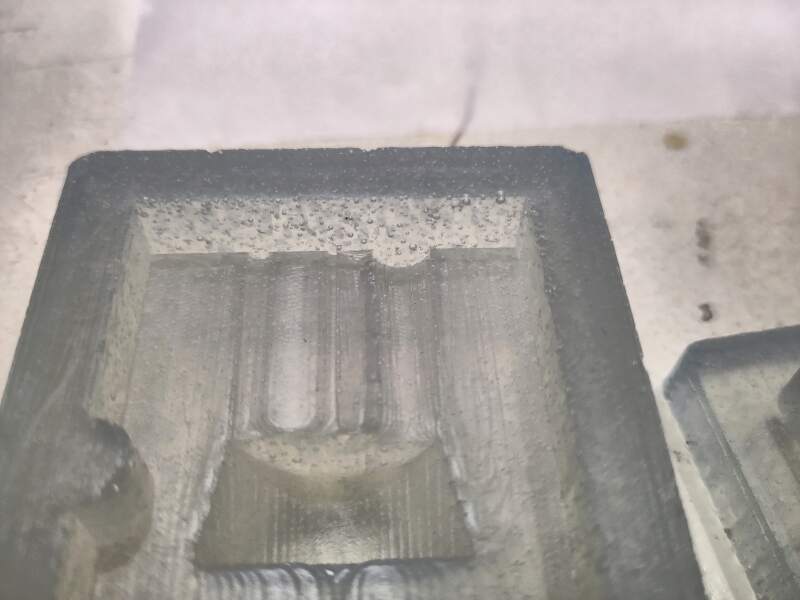
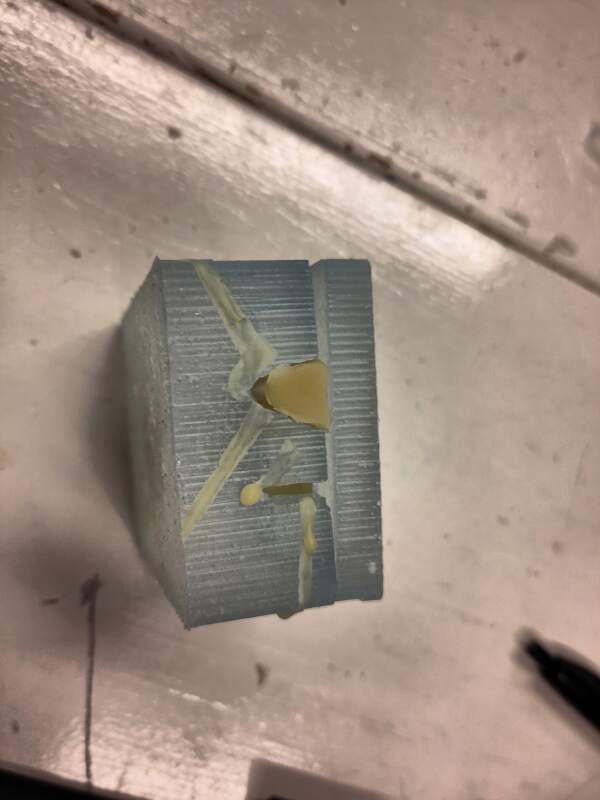
Figure 28: Result after milling Looking closer, I found that the part between the wick and the pouring hole was not as deep as the space between the wick and the vent. The reason is the width of the mill bit; it is wider than the space between the wick and the pouring hole. I corrected this with a knife.
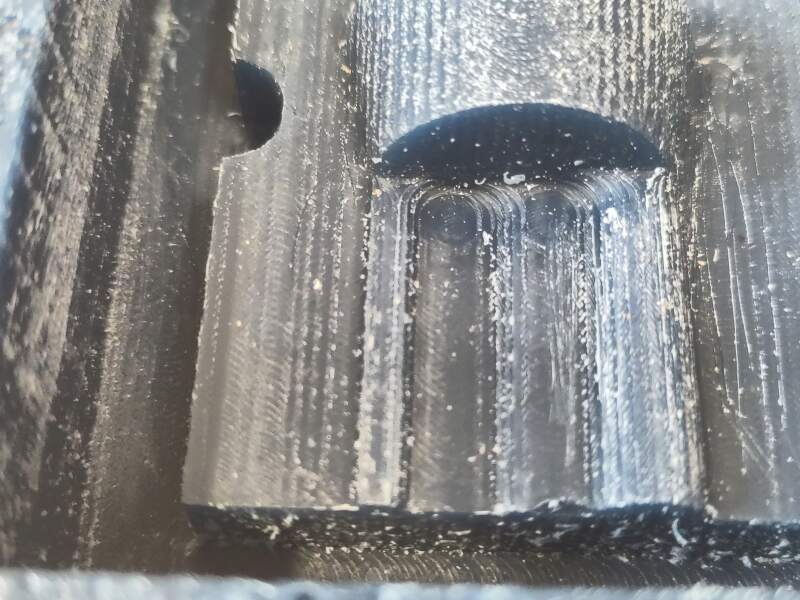
Figure 29: Not deep enough I mold is still quite rough because I used a 5mm end mill. Henk said "we're only using the 5mm end mill this week" but using a ball nose end mill would be a lot better to get a smoother finish. To make it a bit smoother I sanded it a bit.
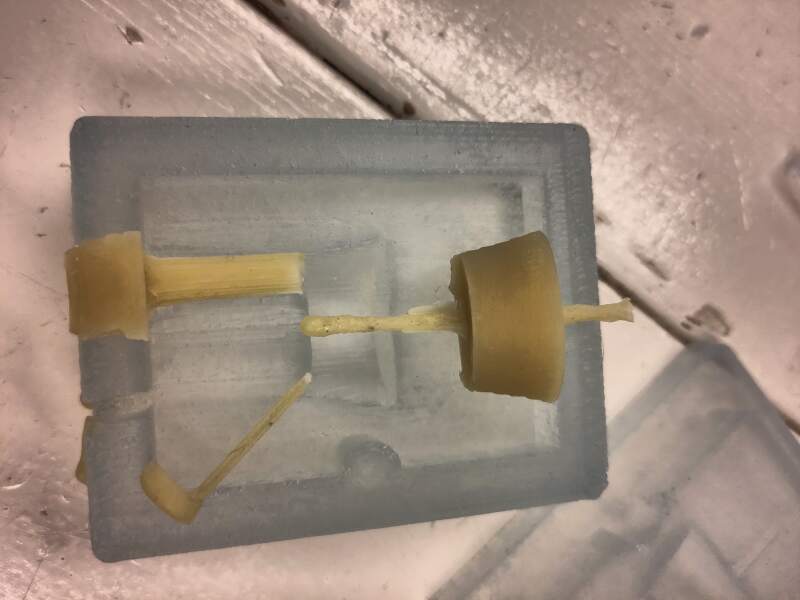
3.2.2. Casting the Mold
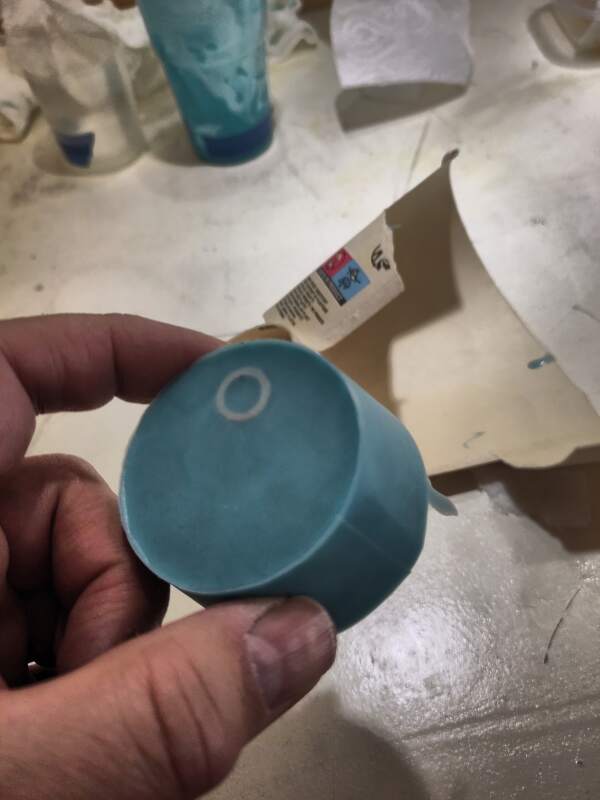
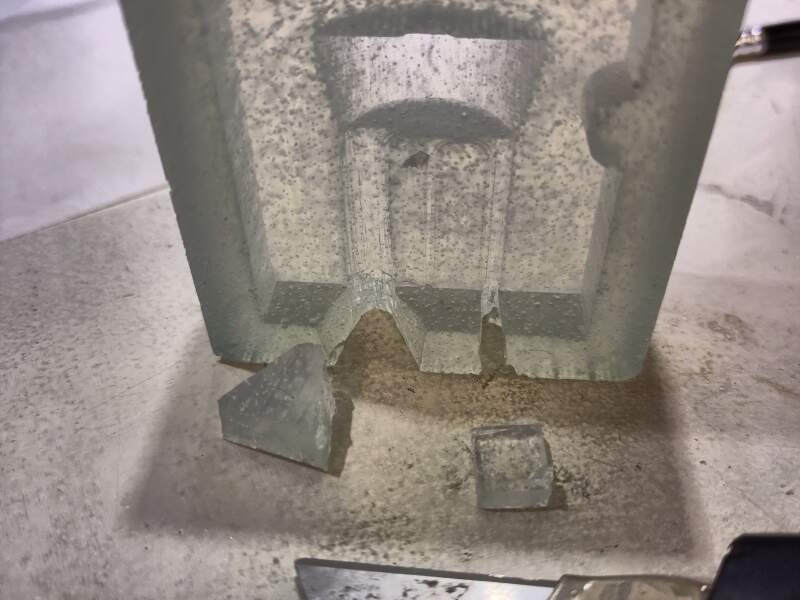
A not dangerous material at hand at the Waag is Smooth-on Sorta-Clear 18 (after ingestion: "rinse mouth"), so I decided to try using that for my beeswax candle mold. To find out how much material I needed, I measured the volume of the mold of the mold (yes, confusing!) using water.
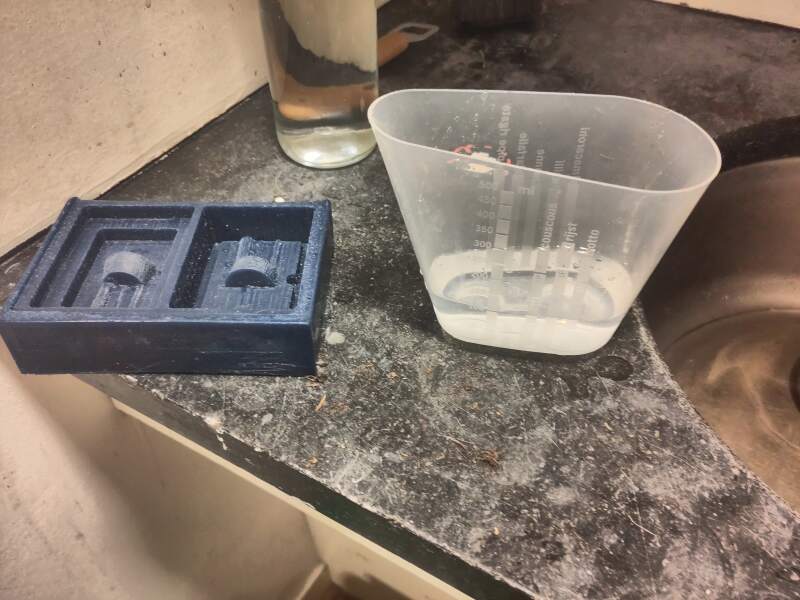

I needed 175ml.
Sorta-Clear has a density of 25.6 in³/lb and water has 27.68 in³/lb, so that's close enough for our purpose. As we are in a civilized region of the world, I measured in milliliters. One gram of water is 1 milliliter, so I'll be fine with 175 grams of Sorta-Clear for this job.
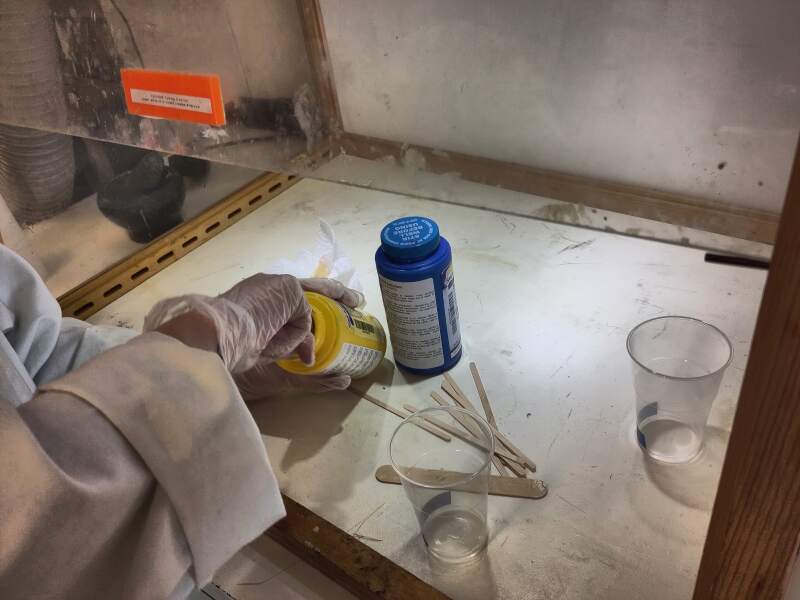
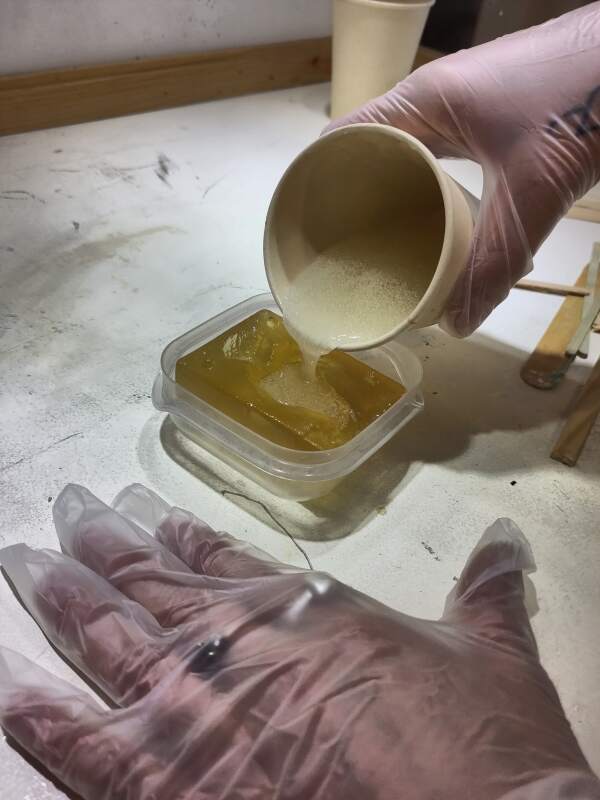
Mixture (100A:10B by weight):
- Part A : (100 / 110) * 175 = 159 grams
- Part B : (10 / 110) * 175 = 15.9 grams
No material left over!
3.2.3. Casting the Beeswax Tealight
After curing for two days (it needs 24 hours), it was tightly packed into the mold, and it took some strength to take it out. Fortunately, the cured Sorta-Clear is pretty strong.
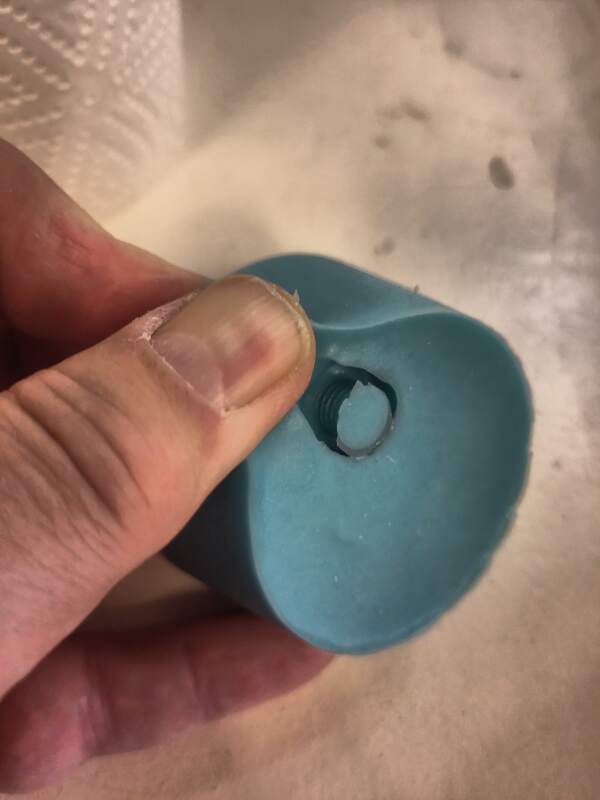
Oops, I discovered there was no entry for the pouring hole.
I used a box cutter to provide access to the pouring and venting holes.
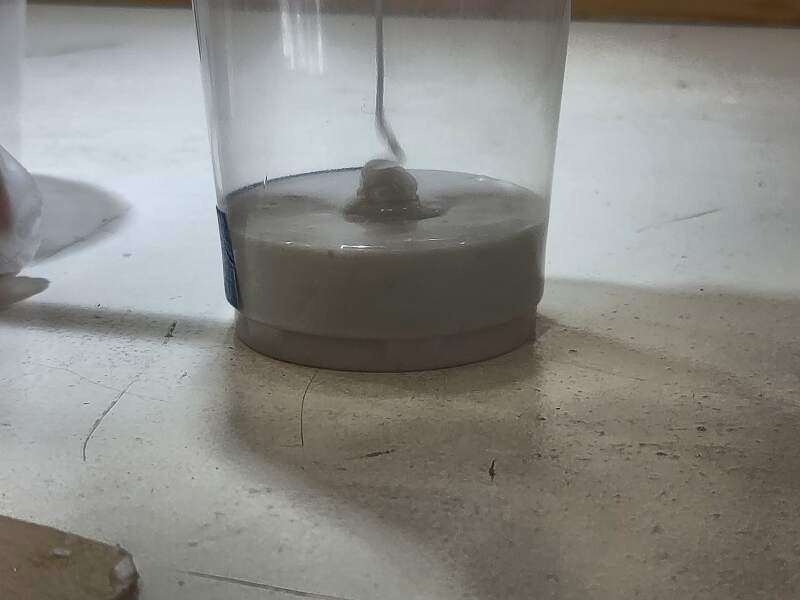
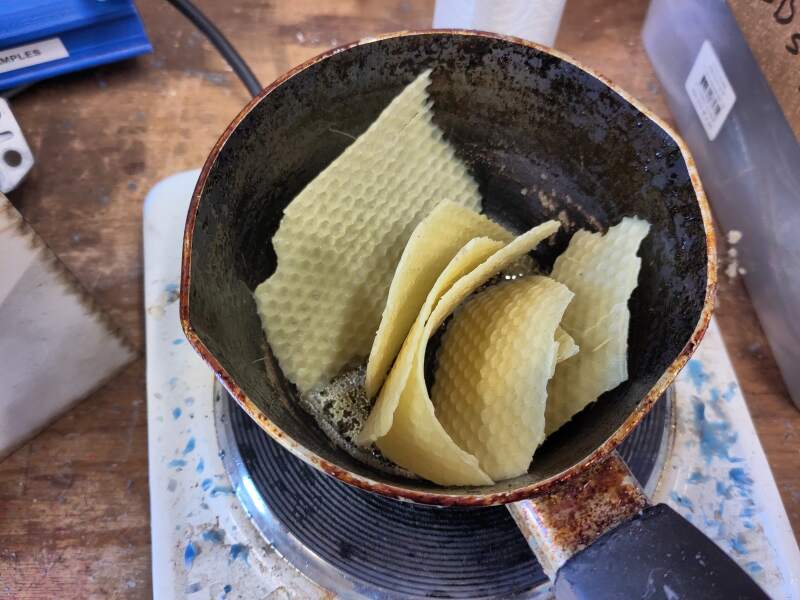
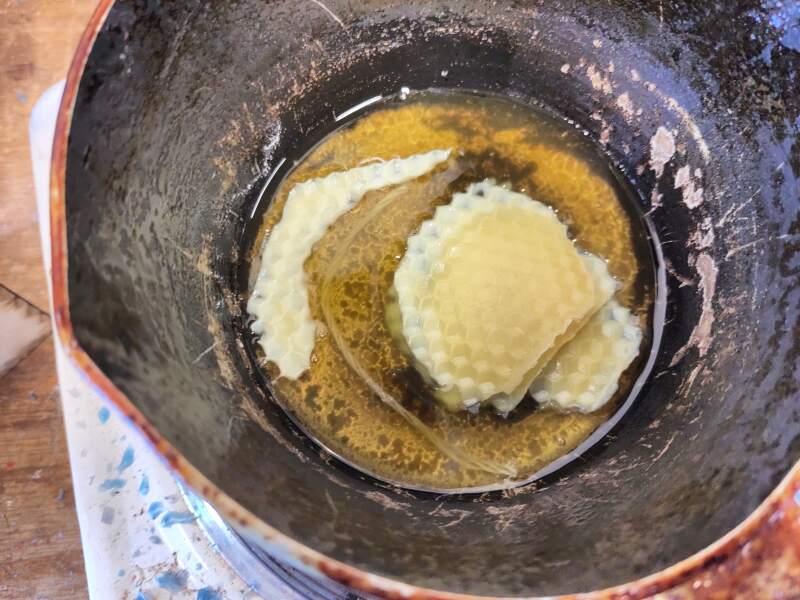
Henk has beeswax here, so I prepared the beeswax by heating it. It melts at 80°C.
The cotton wick needs to be primed to avoid it from burning without "wicking" the beeswax as fuel.
For casting, I clamped it between two pieces of triplex with a screw clamp, to ensure it does not come apart when casting the beeswax.

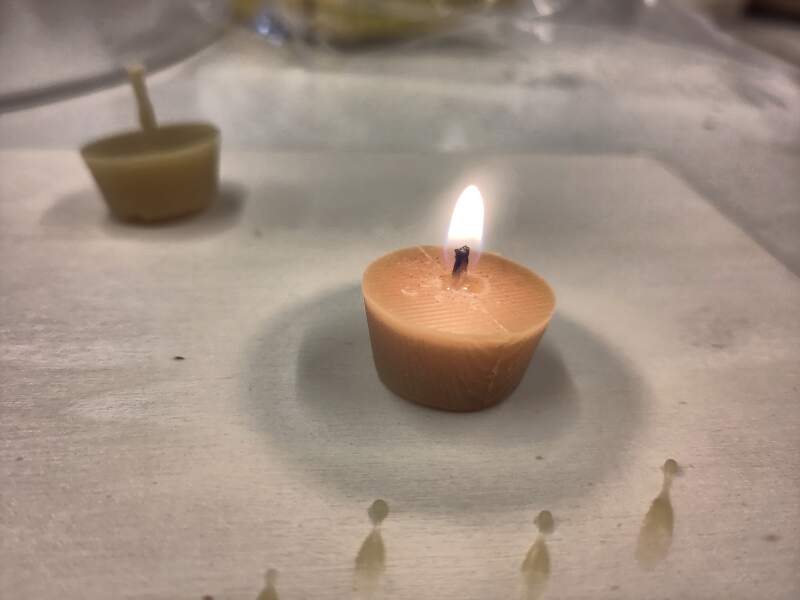
After cooling it in the fridge for a while, I took it out. To my surprise, it was (almost) perfect!
But I applied the clamp too tightly, so the candle is not round but an oval. The material used (Sorta-Clear) is very flexible (18A), so it might be a too flexible for this purpose. Although, the candle is very small and delicate, so the flexibility of the mold does help keep it intact.
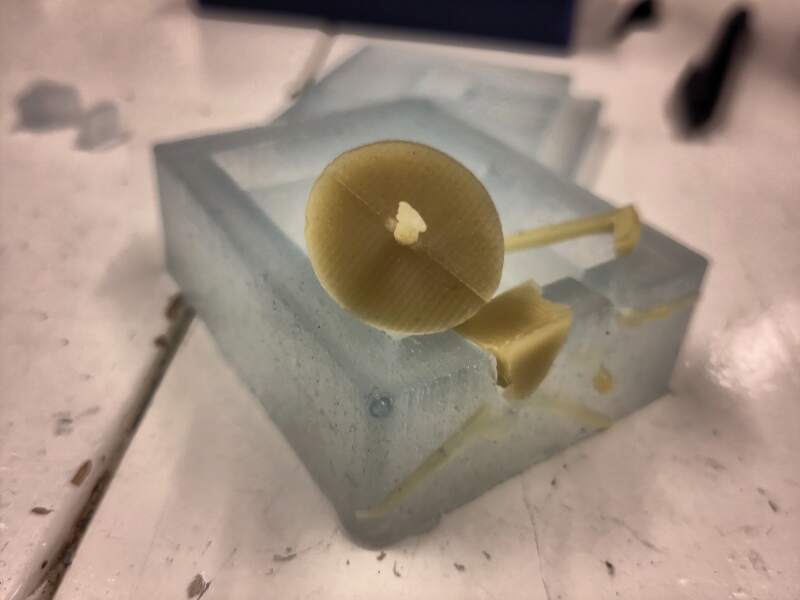
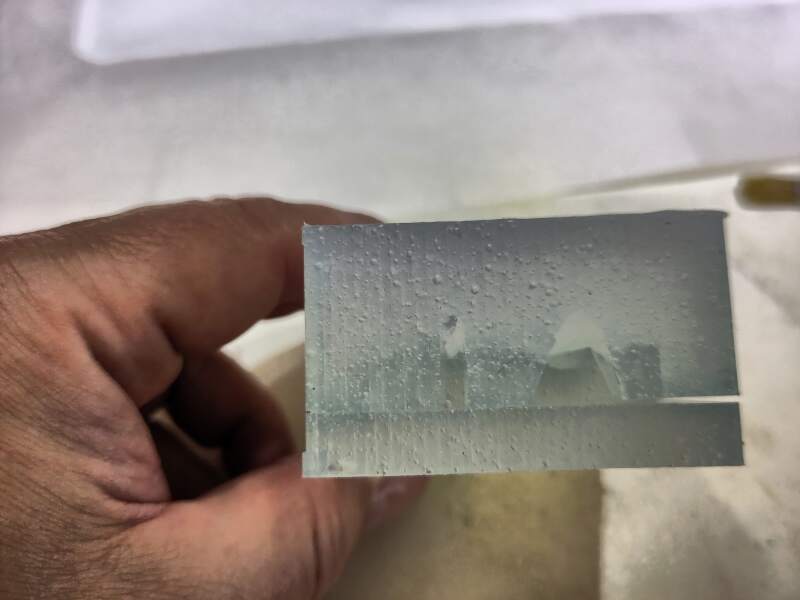
The tool paths are still visible, so I kinda failed on that this week. But it works!
4. Reflection
I have conflicting feelings about this week. On the one hand, I wanted to make it as simple as possible, and on the other, I want to go all-bio. The bio way was littered with rabbit holes, and I did not have time to go there. The result is not up to my standards, but it passes the checkboxes of the assignment.
4.2. Bad
5. Source Files
The only digital part of this week's fabrication:
