4. Embedded programming
Group assignment:
- Compare the performance and development workflows for other architectures.
To see our group assignment click here
Individual assignments:
-
Browse through the data sheet for your microcontroller
-
Program a microcontroller development board to interact and communicate
Programming the XIAO RP2040 with MicroPython
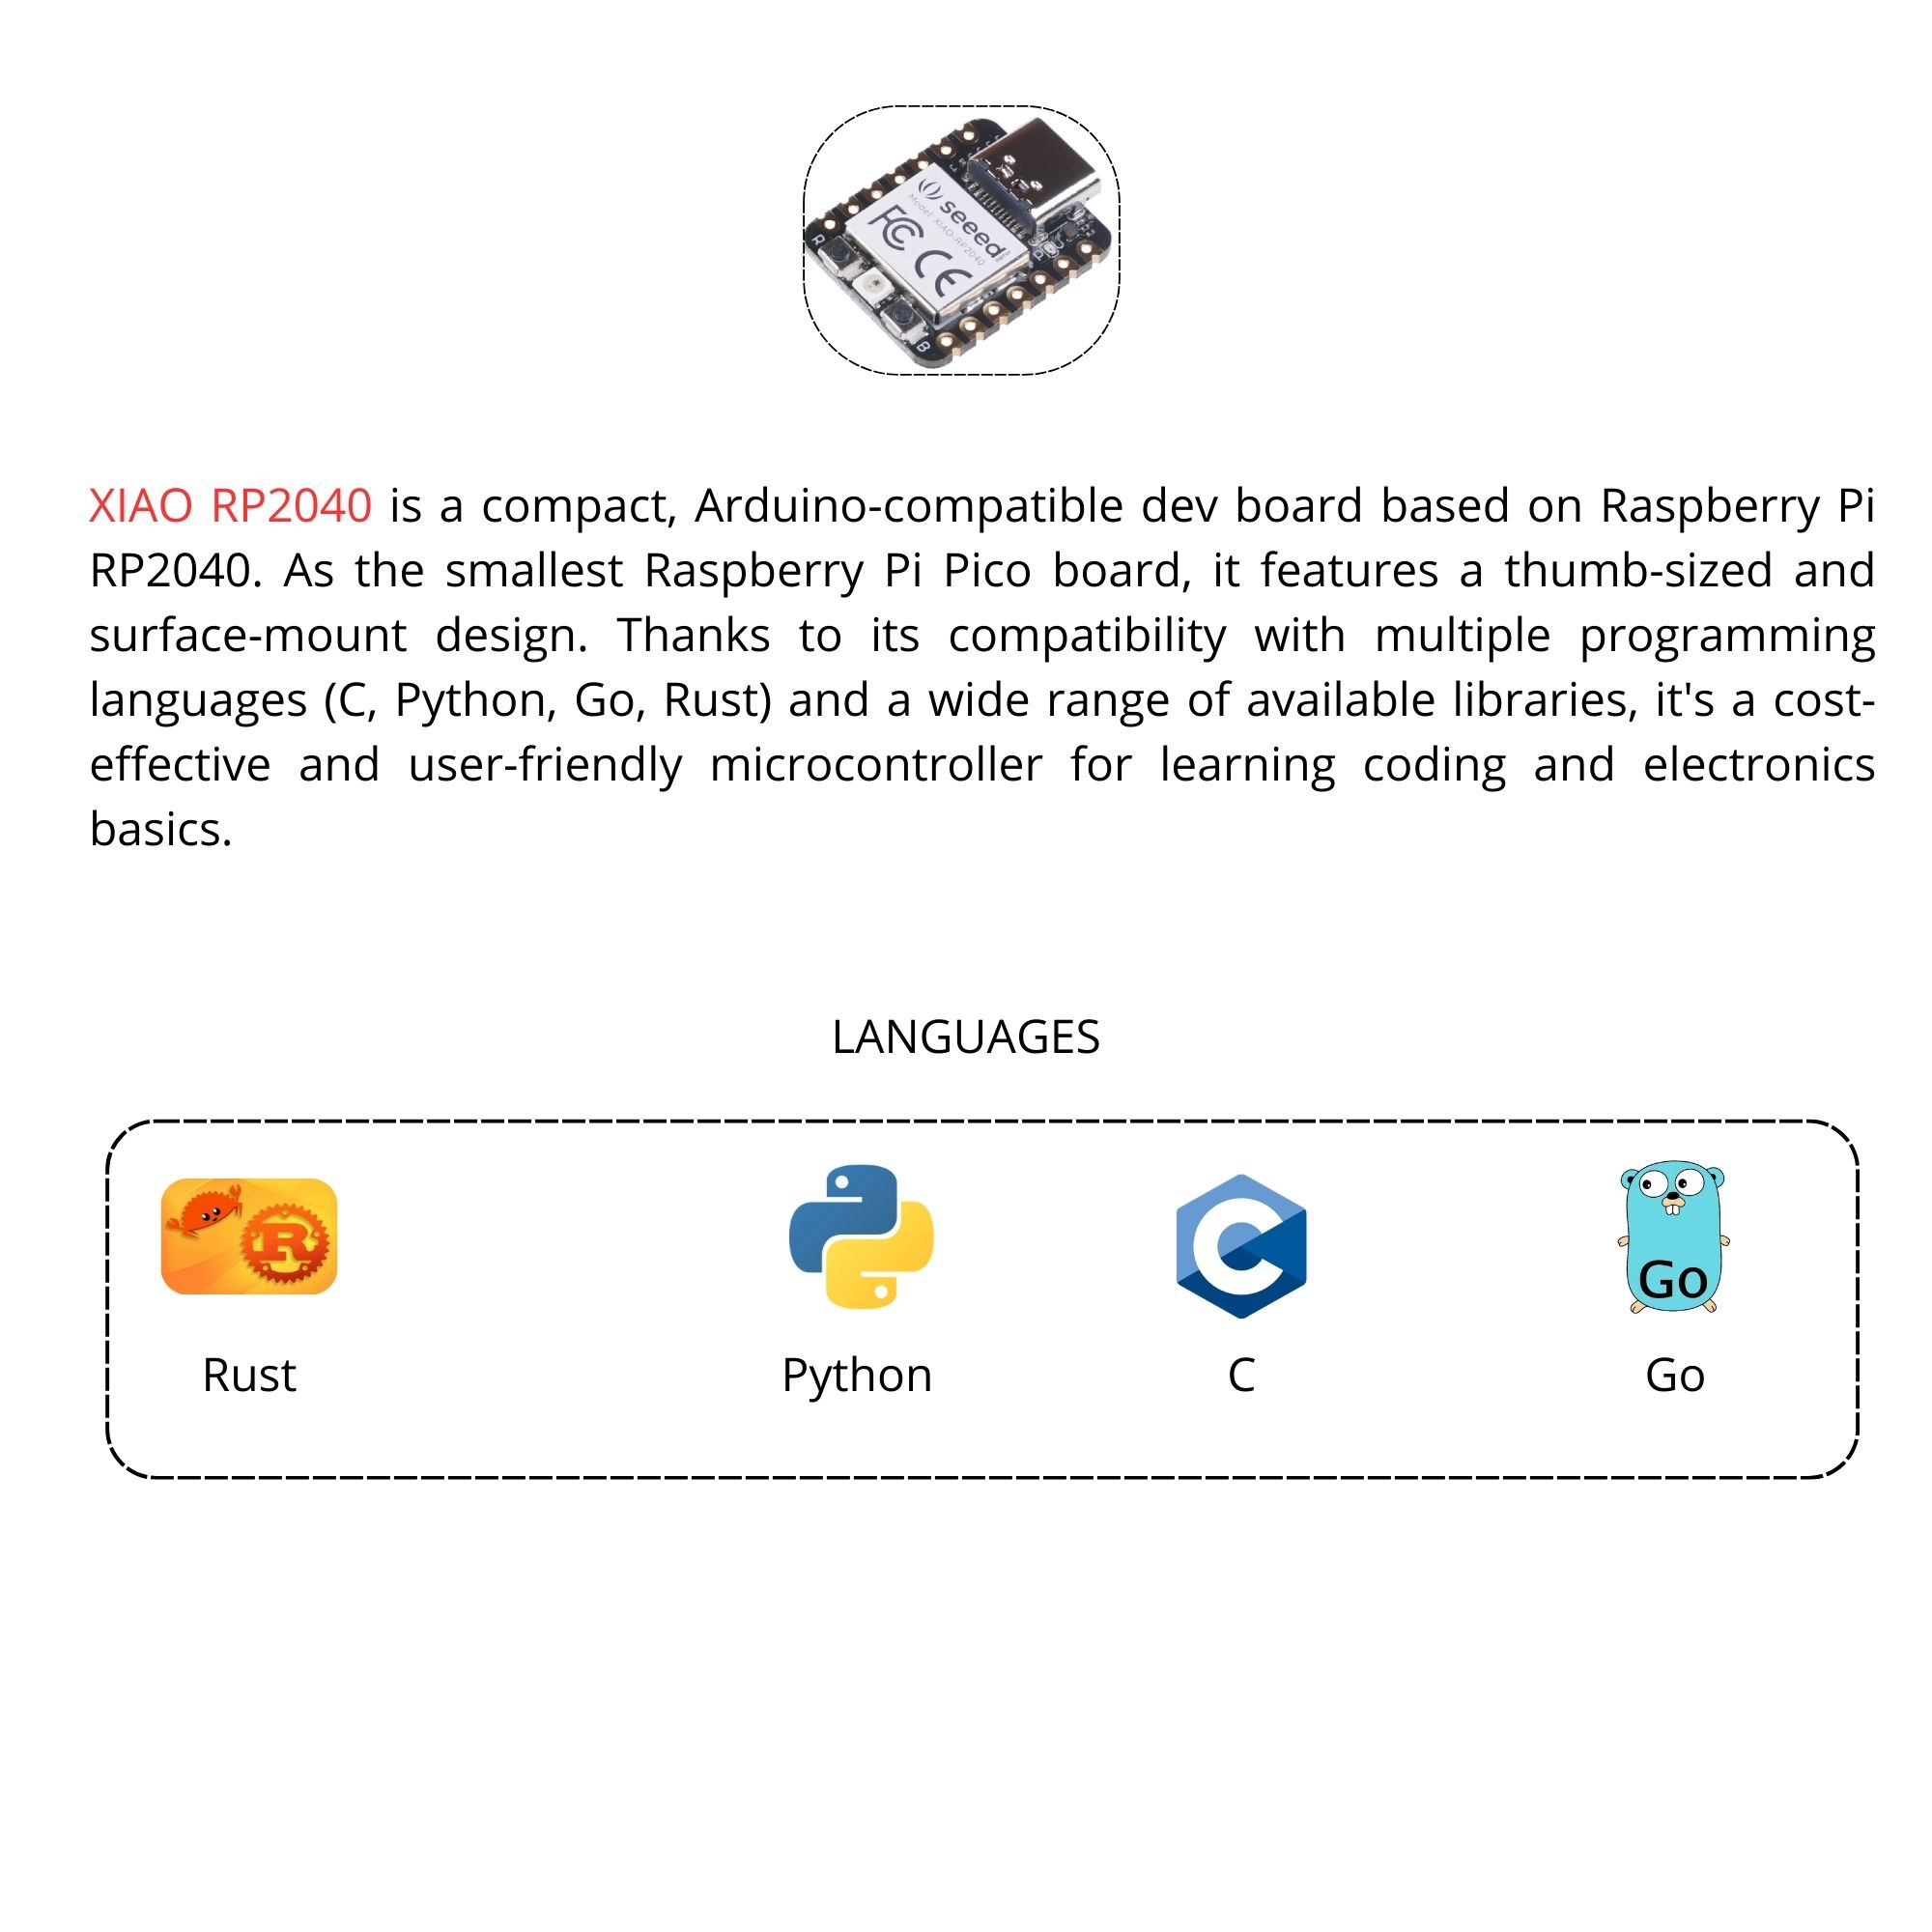
Goal
Set up and program the Seeed Studio XIAO RP2040 board using MicroPython on Windows, and complete a LED project: a simple LED blink
Hardware Used
| Component | Details |
|---|---|
| Board | Seeed Studio XIAO RP2040 |
| OS | Windows |
| IDE | Thonny |
| Language | MicroPython v1.27.0 |
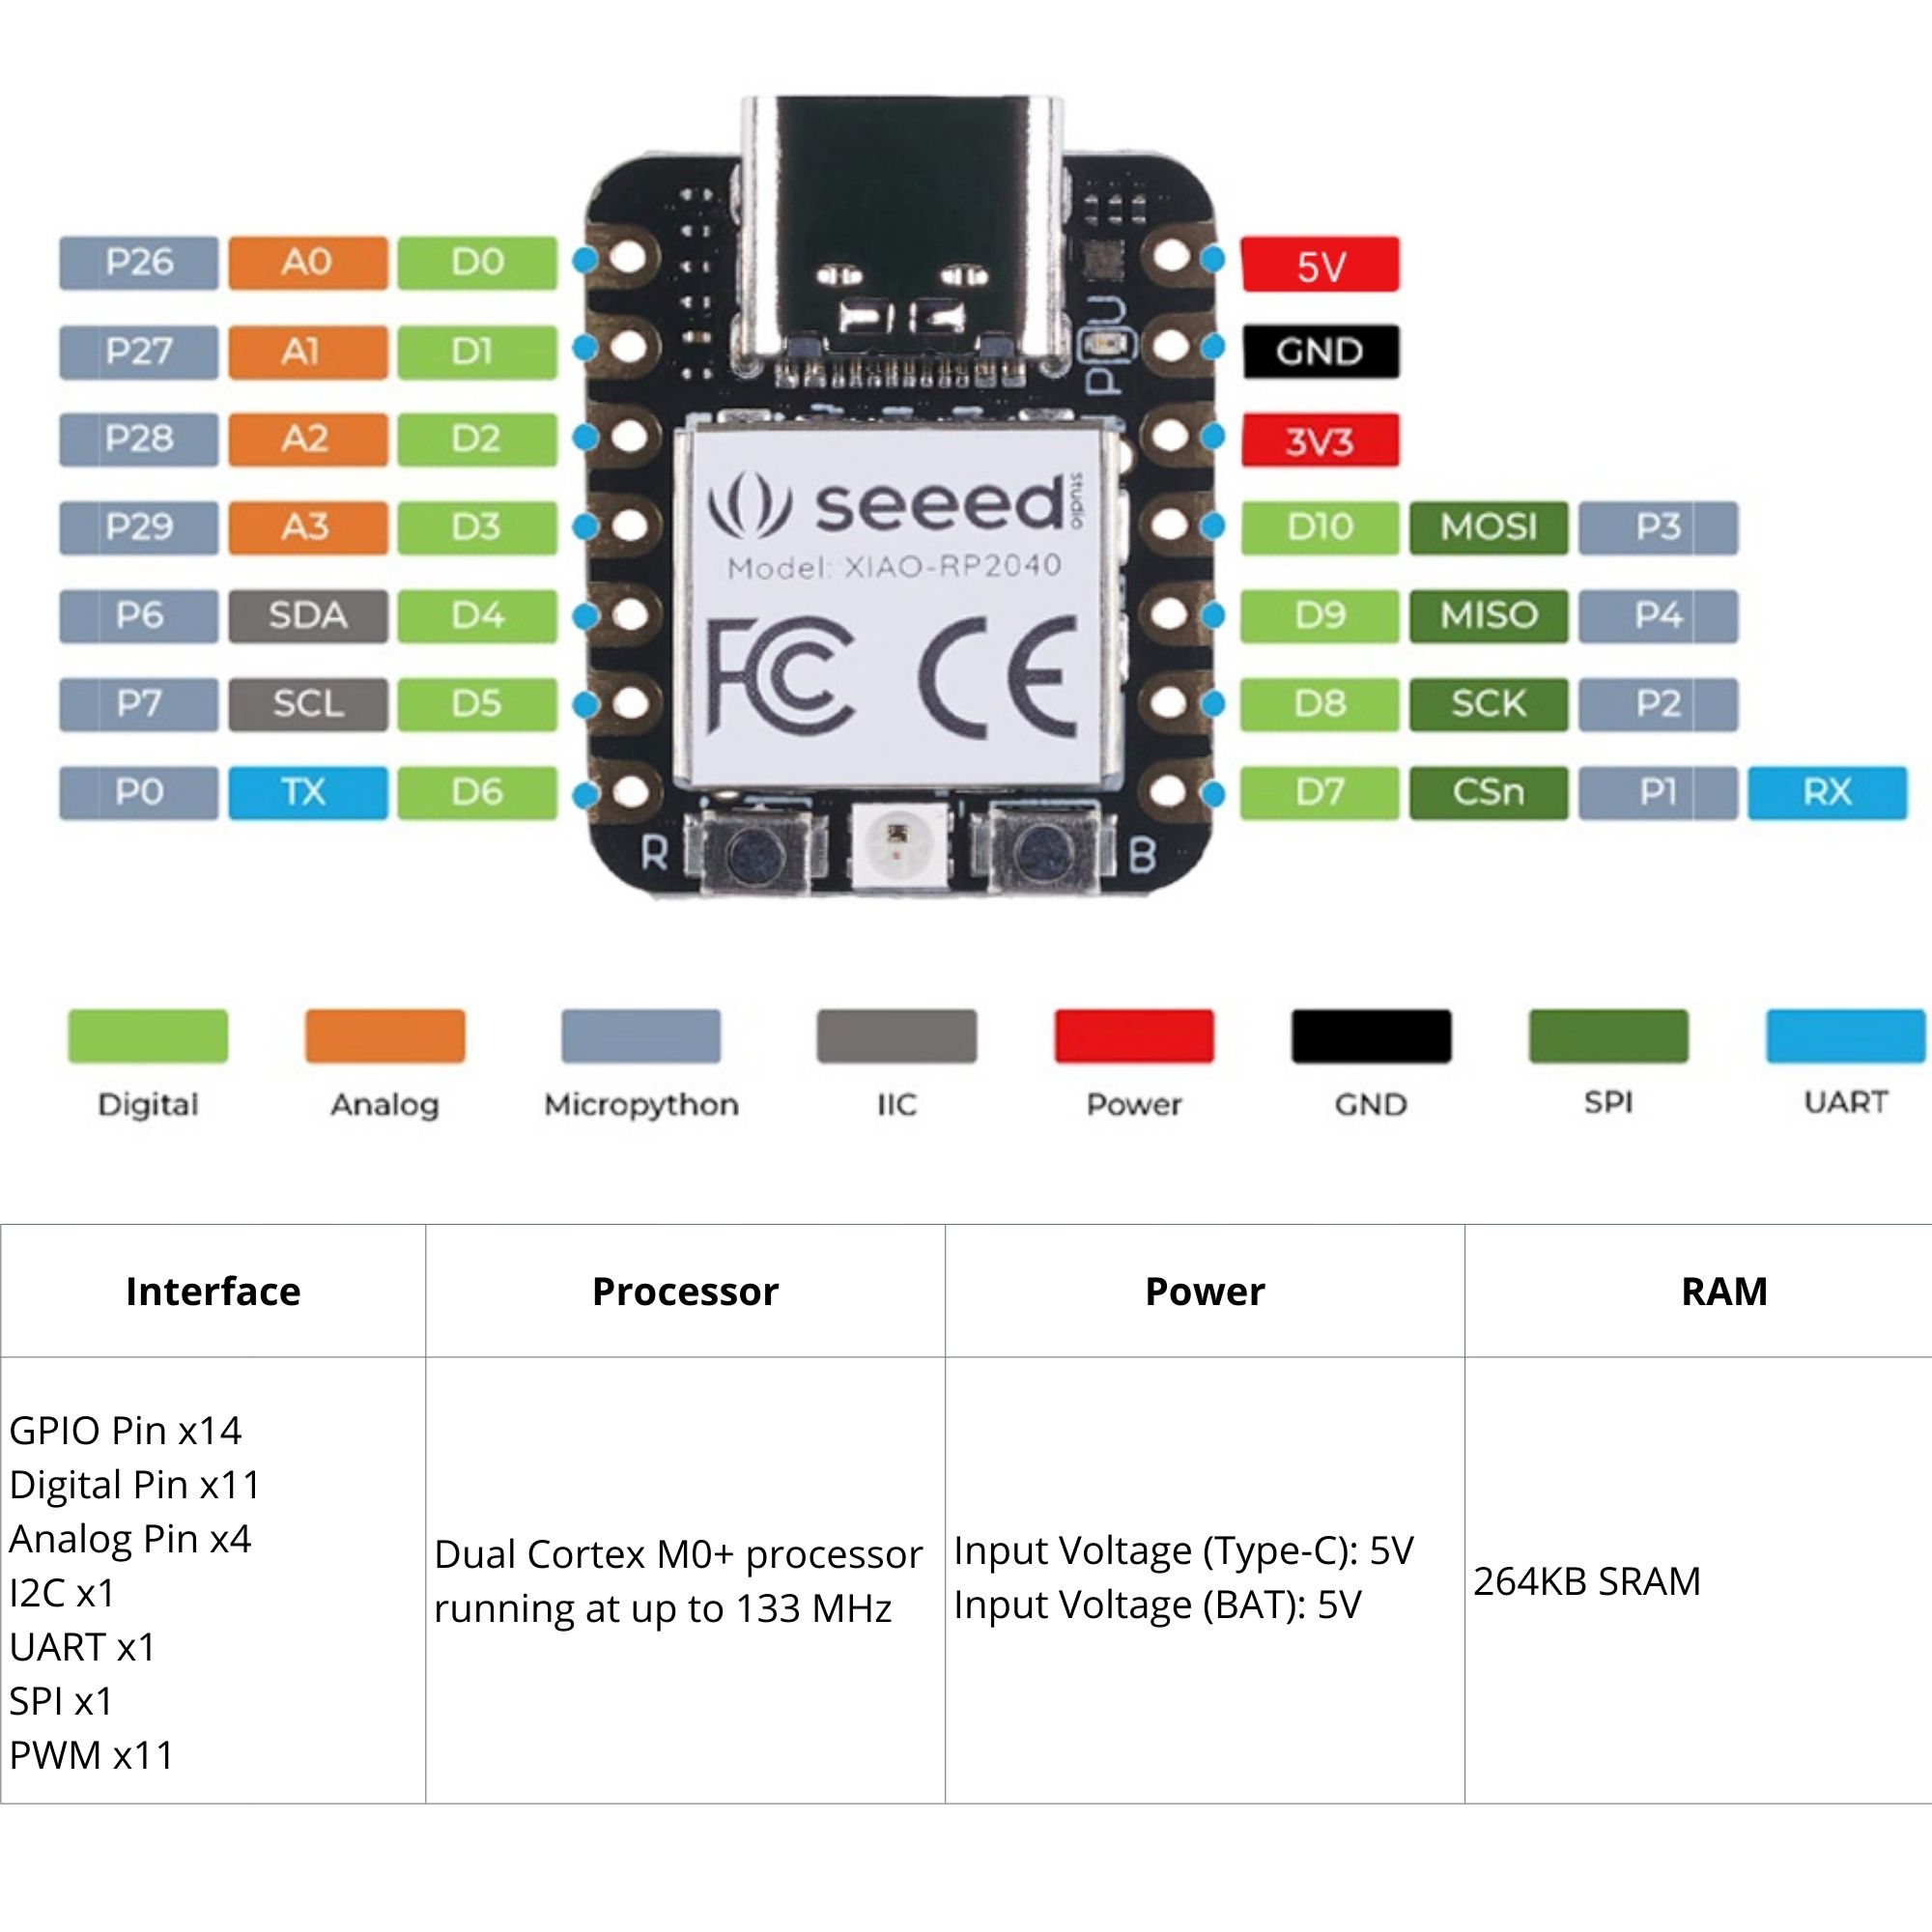
Setting Up the Environment
1. Installing the MicroPython Firmware
Before programming the board, you need to flash the MicroPython firmware onto it.
- Download the
.uf2firmware from: https://micropython.org/download/RPI_PICO/ - Hold down the BOOT button on the XIAO RP2040
- Plug the USB cable into your PC (while still holding BOOT)
- Release the BOOT button
- A drive named
RPI-RP2appears in Windows Explorer - Copy and paste the
.uf2file into that drive - The board restarts automatically with MicroPython installed
Good to know
The RPI-RP2 drive disappears after flashing — that is normal and means the installation was successful.
2. Installing and Configuring Thonny
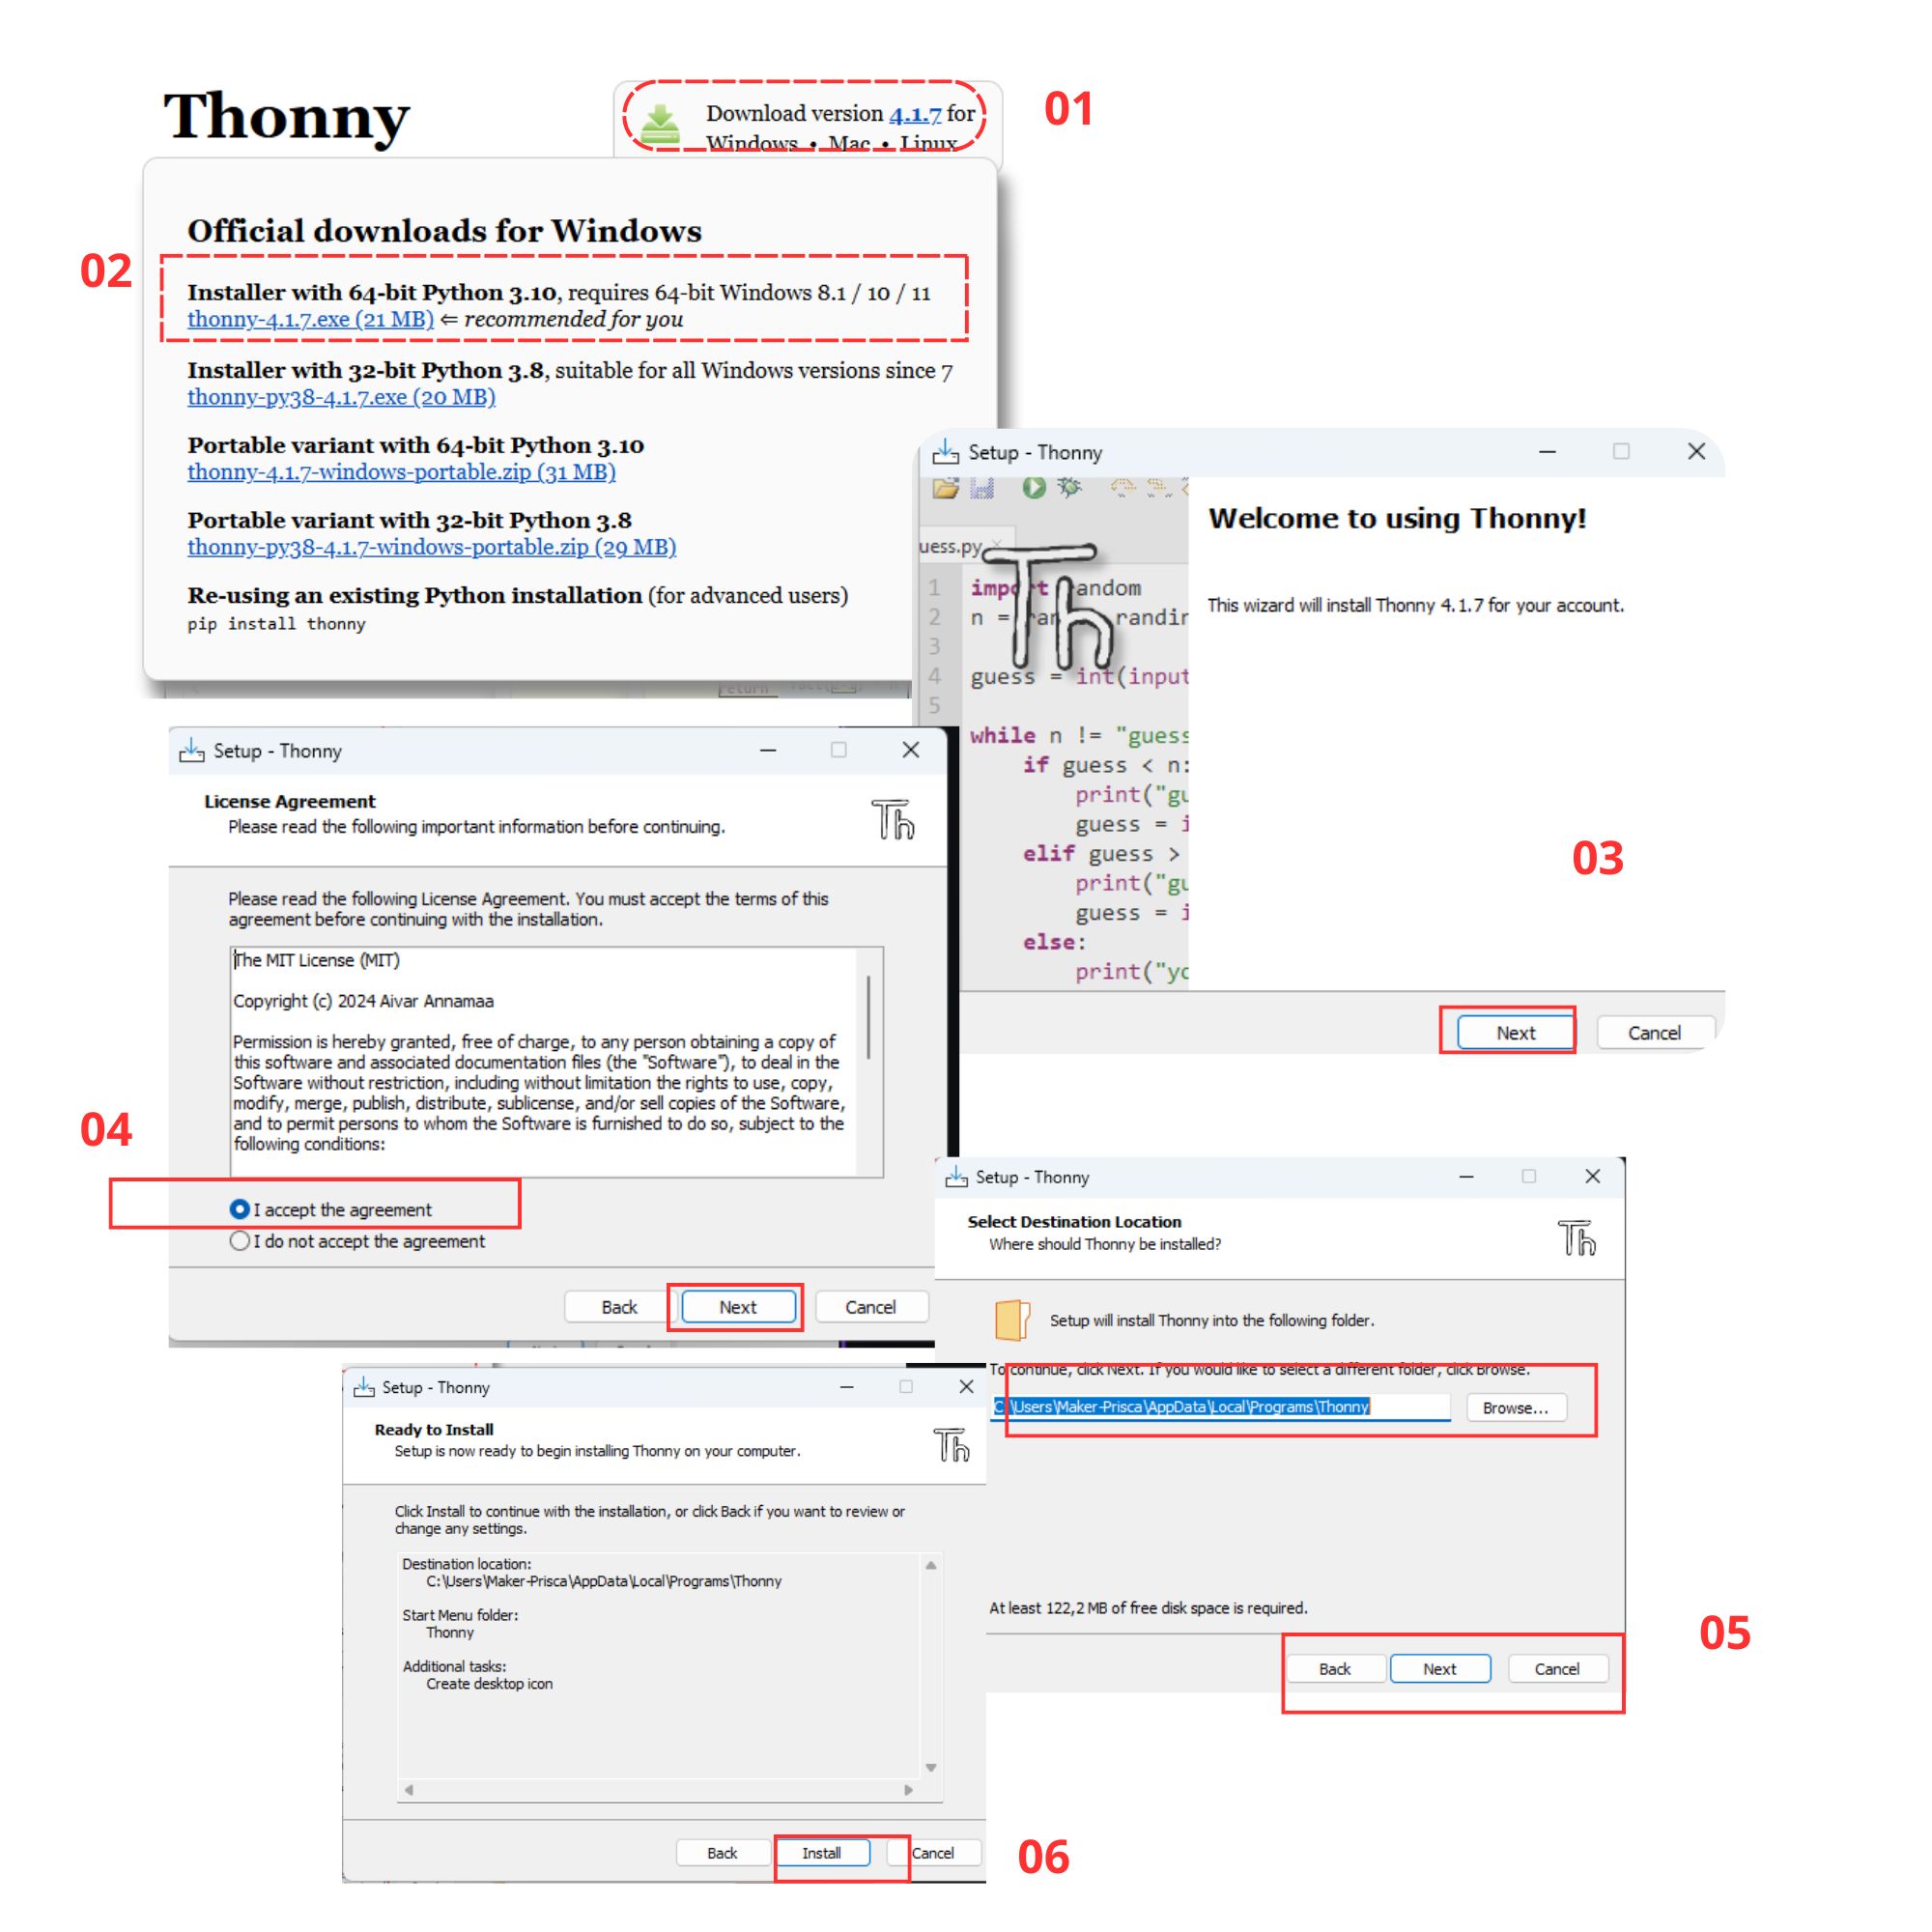
Thonny is the recommended IDE for MicroPython. It is easy to use and includes a built-in serial terminal.
- Download Thonny from: https://thonny.org (Windows
.exeversion) - Run the installer (default settings)
- Open Thonny
- Click on "Python 3 local" in the bottom-right corner → select "MicroPython (Raspberry Pi Pico)"
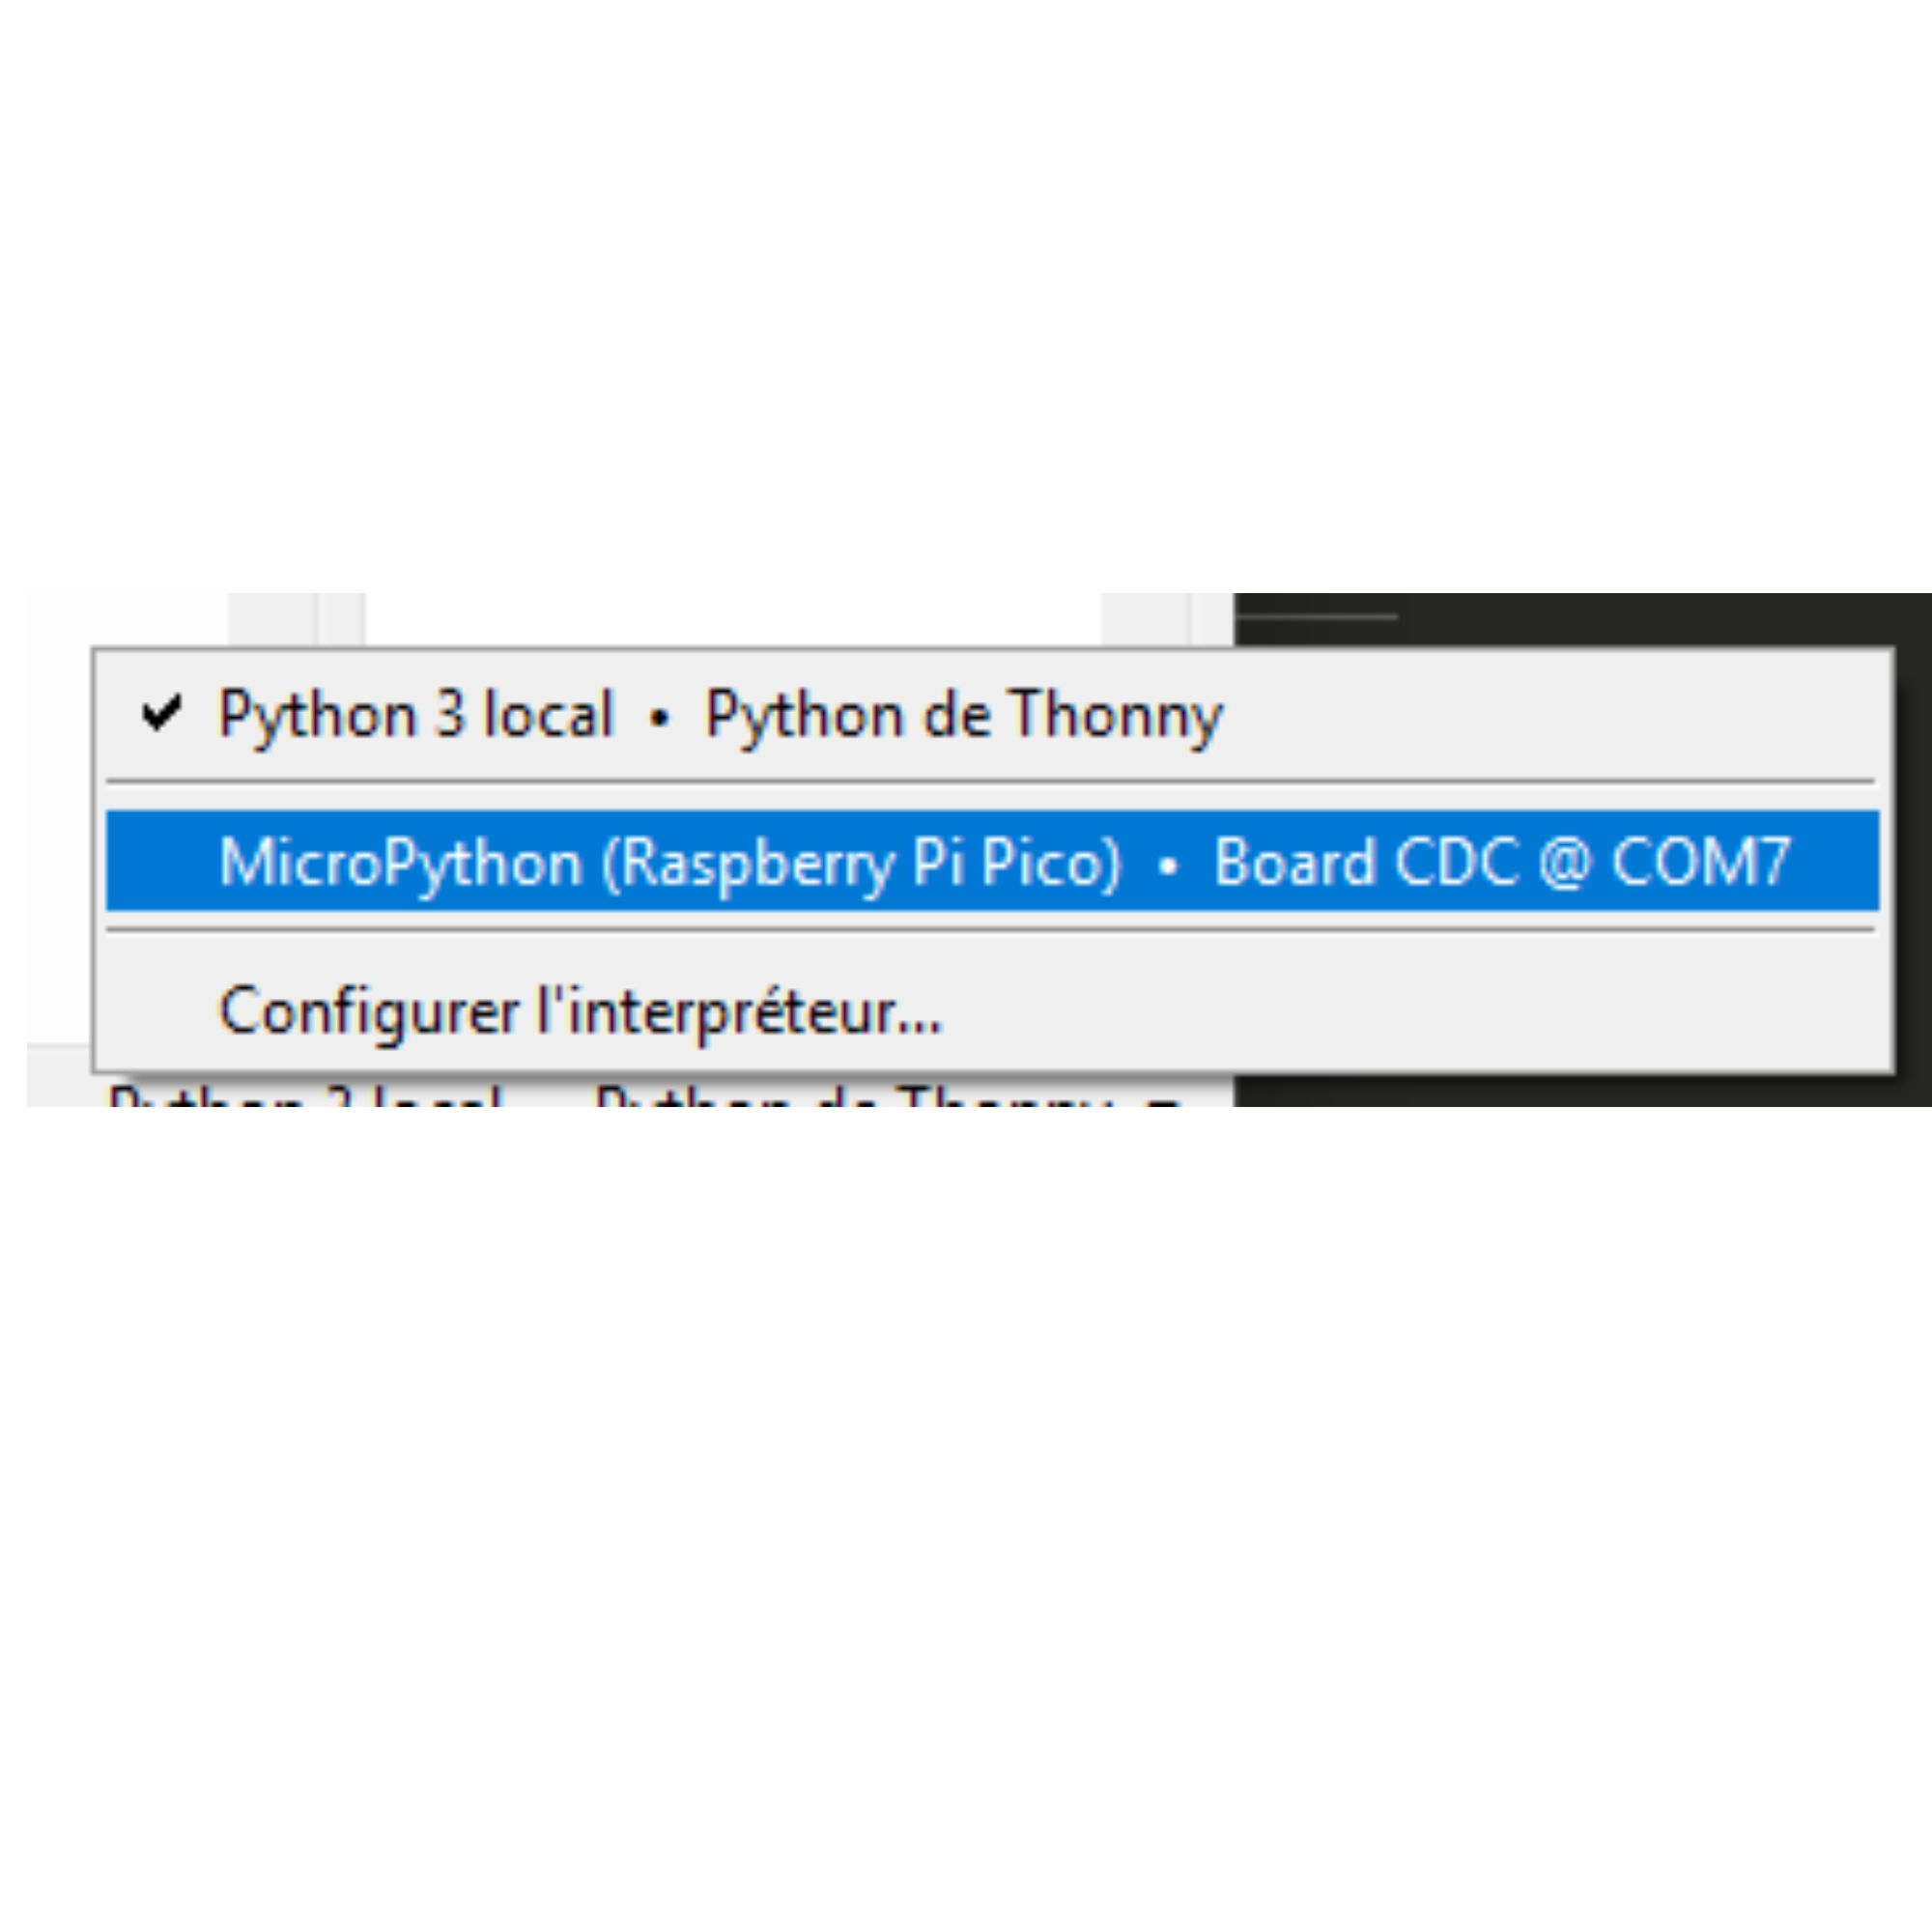
- Select the correct COM port from the list (e.g.
COM7) - Click OK
Verifying the connection
After configuration, the Thonny console should display:
The connection is successfully established ✅3. Issue Encountered: COM7 Error
During the first connection attempt, the following error appeared:
Unable to connect to COM7: Cannot configure port, something went wrong.
PermissionError(13, 'A device attached to the system is not functioning correctly.')
Possible causes and solutions:
- Another program was already using the COM port → close all other software
- The firmware had not been flashed yet → flash the
.uf2file first - Wrong port selected → check the Device Manager in Windows
- Unplug and replug the board to force detection
Resolution
After applying these fixes, the connection was successfully established.
Simple LED Blink
Goal
Make the built-in RGB LED on the XIAO RP2040 blink without any external component.
About the Built-in LED
Inverted logic
The RGB LEDs on the XIAO RP2040 use inverted logic:
value(0): LED ONvalue(1): LED OFF
| Color | Pin |
|---|---|
| 🔴 Red | Pin 16 |
| 🟢 Green | Pin 17 |
| 🔵 Blue | Pin 25 |
MicroPython Code
from machine import Pin
from time import sleep

# Built-in green LED (16=Red, 17=Green, 25=Blue)
led = Pin(17, Pin.OUT)

while True:
    led.value(0)   # Turn ON (inverted logic)
    sleep(1)
    led.value(1)   # Turn OFF
    sleep(1)
Result
✅ Project 1 complete
The green LED on the board blinks every second: 1 second ON, 1 second OFF.
Uploading the Program to the Board (main.py)
To have the program run automatically without Thonny or a PC, save it as main.py directly on the board.
Steps in Thonny
- File → Save as...
- Choose "Raspberry Pi Pico" (not "This computer")
- Name the file exactly:
main.py - Click OK
Why main.py ?
This is a core MicroPython convention. At startup, the board automatically looks for files in this order:
Filename is mandatory
If you name your file something else (led.py, project1.py...), the board will NOT run it automatically.
You will always need to be connected to Thonny and run it manually with F5.
Standalone Test
- Unplug the USB cable from your PC
- Plug the board into any USB power source (phone charger, power bank...)
- The program starts automatically within a few seconds ✅
Checklist and what i learned.
- MicroPython
.uf2firmware flashed onto the board - Thonny installed and configured on the correct COM port
- MicroPython v1.27.0 connection established in Thonny
- Project 1: LED blinking works
- Program saved as
main.pyon the board - Standalone startup (without PC) validated
Video
<
Conclusion
This session covered the fundamental steps of embedded programming with MicroPython on the XIAO RP2040 under Windows. Both projects provide a solid foundation for going further in digital fabrication.
References & Prompt Used
About this page
This page documents all resources used during the session, as well as the exact prompt that was used to generate this documentation. Anyone wishing to reproduce this work can use this prompt as a starting point.
Technical References
Hardware
| Resource | Link |
|---|---|
| XIAO RP2040 Official Wiki | https://wiki.seeedstudio.com/XIAO-RP2040/ |
| 🛒 Seeed Studio Product Page | https://www.seeedstudio.com/XIAO-RP2040-v1-0-p-5026.html |
Firmware & Language
| Resource | Link |
|---|---|
| MicroPython Firmware for RP2040 | https://micropython.org/download/RPI_PICO/ |
| MicroPython Official Documentation | https://docs.micropython.org/en/latest/ |
MicroPython machine.Pin reference |
https://docs.micropython.org/en/latest/library/machine.Pin.html |
IDE
| Resource | Link |
|---|---|
| Thonny IDE (Windows) | https://thonny.org |
| Thonny Documentation | https://github.com/thonny/thonny/wiki |
Website Documentation
| Resource | Link | | MkDocs Material Admonitions | https://squidfunk.github.io/mkdocs-material/reference/admonitions/ |
Prompt Used to Generate This Documentation
How to reproduce this work
The prompt below was submitted to Claude (Anthropic) to generate this entire session documentation. Copy it and adapt it to your own hardware and context.
Here i show how AI help me to programm this board : Full Prompt
https://wiki.seeedstudio.com/XIAO-RP2040/

I want to program this board using Python.

Project : Simple LED blink

Help me prepare the necessary tools (IDE, libraries).
I am on Windows.

---

Document this entire session from start to finish using MkDocs syntax.
Also provide an English version.
Give the references I should add to my documentation.
Organize the prompt that produced this result so that anyone
who wants to reproduce it can use the same prompt.
How to Adapt This Prompt to Your Project
If you want to reproduce this work with a different board or sensors, here are the elements to change in the prompt:
| Element to replace | Original example | Your version |
|---|---|---|
| Board wiki link | wiki.seeedstudio.com/XIAO-RP2040/ |
Your board's wiki link |
| Board name | XIAO RP2040 |
Your board (ESP32, Pico, Arduino...) |
| Project 1 | Simple LED blink | Your first project |
| Operating system | Windows | Windows / macOS / Linux |
Pro tip
The more detail you include in your prompt (wiki link, precise scenario, OS), the more accurate and directly usable the generated documentation will be.
Tools Used During This Session
Board        : Seeed Studio XIAO RP2040
Firmware     : MicroPython v1.27.0
IDE          : Thonny (Windows)
Documentation: MkDocs + Material Theme
AI Assistant : Claude (Anthropic) : claude.ai
- Extra credit: use different languages &/or development environments