9. Input devices
Group assignment:
- Probe an input device(s)'s analog and digital signals
- Document your work on the group work page and reflect on your individual page what you learned
To see our group assignment click here
Individual assignment:
- add a sensor to a microcontroller board that you have designed and read it.
Threshold
A threshold value is defined in the code to distinguish between "light ON" and "light OFF" states.
How the LDR Sensor Works
What is an LDR?
A Light Dependent Resistor (LDR), also called a photoresistor, is a component whose electrical resistance decreases as light intensity increases it can measure a few hundred ohms in bright light and several hundred kilo-ohms in darkness.
Since the ESP32 can only measure voltage, not resistance directly, the LDR is paired with a fixed resistor to form a voltage divider: the LDR sits between 3.3V and the analog input pin, while the fixed resistor pulls the same pin down to GND. As ambient light changes, the LDR's resistance changes, which shifts the voltage at this midpoint a value the ESP32 converts into a digital reading between 0 and 4095 using analogRead().
In this wiring, more light , lower LDR resistance , more voltage across the fixed resistor, a higher analogRead() value. Conversely, darkness produces a lower reading which is exactly the logic behind the THRESHOLD comparison in the code below.
GPIO choice matters on the ESP32
The ESP32 has two ADC blocks: ADC1 (GPIO32–39) and ADC2 (GPIO0, 2, 4, 12–15, 25–27). ADC2 cannot be reliably read while Wi-Fi is active, because the Wi-Fi driver uses it internally. Since this project runs a Wi-Fi access point continuously, the LDR must be read on an ADC1 pin (e.g. GPIO 34) to avoid unstable readings — not on an ADC2 pin like GPIO 2.
Sizing the Fixed Resistor & Voltage Divider Calculation
The voltage divider formula
The voltage divider formula
Vout = Vin × R_fixed / (R_LDR + R_fixed)
Where Vin = 3.3V (ESP32 supply rail).
Where Vin = 3.3V (ESP32 supply rail).
How to choose the fixed resistor
The goal is to place the fixed resistor close to the LDR's own resistance at the light level you want to detect most sensitively. At that point R_LDR ≈ R_fixed, which puts Vout near Vin / 2 — the region where the divider is most sensitive to small changes in light.
For a typical 5mm LDR (e.g. GL5528-type), resistance behaves roughly like this:
| Light condition | Approx. R_LDR |
|---|---|
| Bright daylight | ~1 kΩ |
| Lit indoor room | ~5–10 kΩ |
| Dusk / twilight | ~10–20 kΩ |
| Dark room | ~200 kΩ |
| Total darkness | ~1 MΩ |
A 5 kΩ fixed resistor was chosen here, centering the divider's sensitivity around the lit indoor room condition.
Resulting output voltage and ADC reading
| Light condition | R_LDR |
Vout |
analogRead() (approx., 12-bit) |
|---|---|---|---|
| Bright daylight | 1 kΩ | 2.75 V | ~3412 |
| Lit indoor room | 5 kΩ | 1.65 V | ~2048 |
| Dusk / twilight | 10 kΩ | 1.10 V | ~1365 |
| Dark room | 200 kΩ | 0.08 V | ~100 |
| Total darkness | 1 MΩ | 0.02 V | ~20 |
(ADC value ≈ Vout / 3.3 × 4095, assuming 11dB attenuation, required on the ESP32 to read the full 0–3.3V range.)
Practical takeaway
With THRESHOLD = 2000 in the code, the switch to Visitor Mode only happens once the room is genuinely lit (readings above ~2048), not merely at dusk (~1365) — matching the intended day/night behavior.
My Custom PCB
The sensor is connected to the custom PCB I designed during Week 06 — Electronics Design, based on an ESP32-WROOM microcontroller.
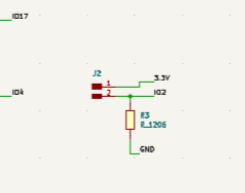
Custom ESP32-WROOM PCB with the LDR voltage divider circuit (J2 + fixed resistor) integrated on-board.
Wiring Diagram
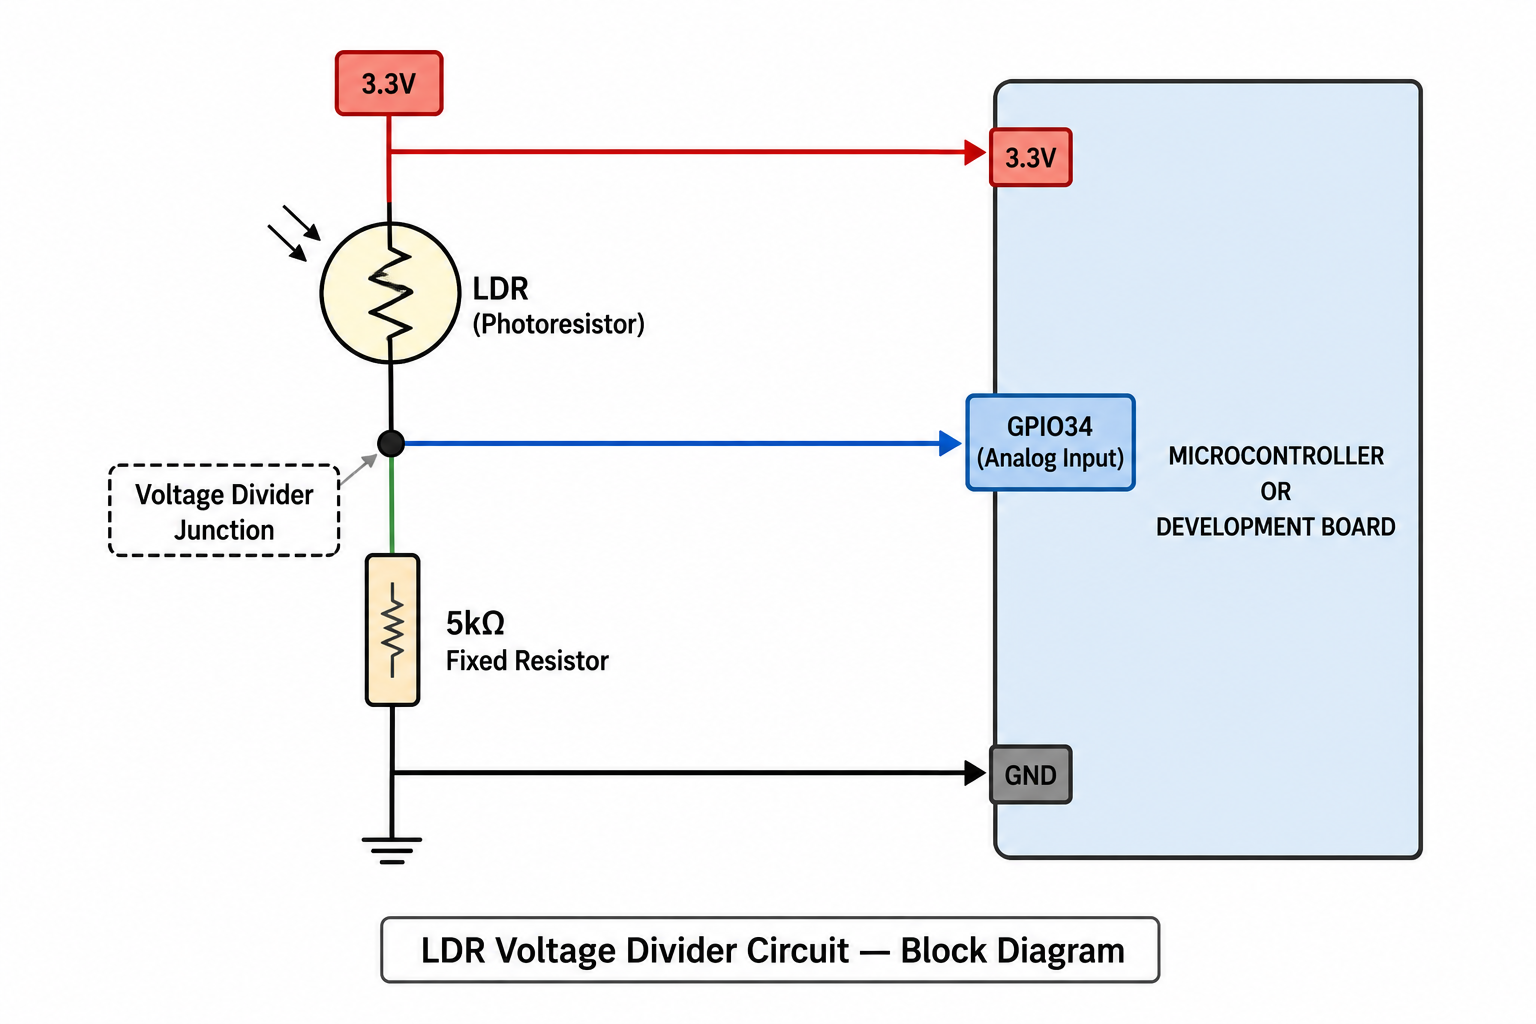
| LDR Pin | ESP32 Pin |
|---|---|
| One leg | 3.3V |
| Other leg | GPIO 34 (analog, ADC1) + 5kΩ to GND |
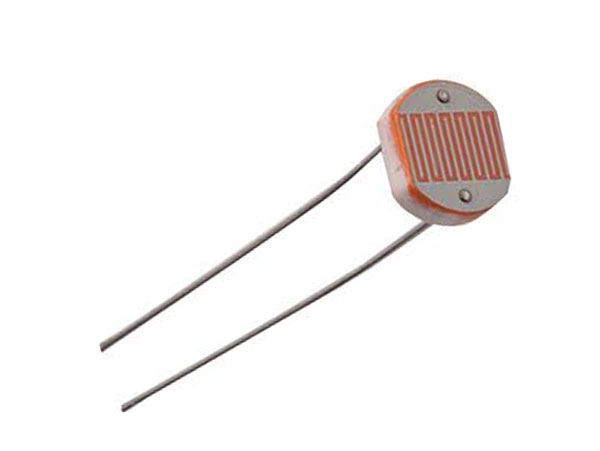
Schematic of the LDR voltage divider: 3.3V - LDR analog pin - 5kΩ resistor - GND.
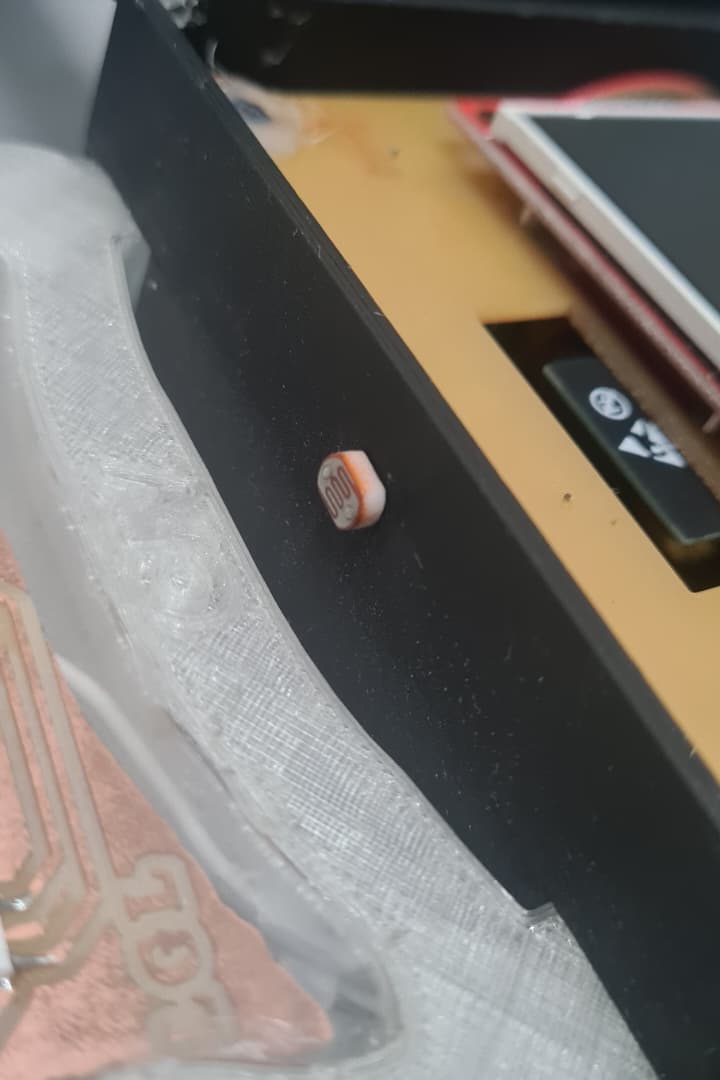
Physical wiring of the LDR sensor on the assembled board, matching the schematic above.
Code
The following code reads the LDR analog value and switches between the two modes:
#define LDR_PIN 34        // Analog pin connected to LDR (ADC1 — safe to use with Wi-Fi active)
#define THRESHOLD 2000    // Adjust based on your environment

void setup() {
  Serial.begin(115200);
  pinMode(LDR_PIN, INPUT);
}

void loop() {
  int ldrValue = analogRead(LDR_PIN);
  Serial.print("LDR Value: ");
  Serial.println(ldrValue);

  if (ldrValue < THRESHOLD) {
    // Room light is OFF → Night light mode
    Serial.println("Mode: Night Light");
    // Add your night light logic here
  } else {
    // Room light is ON → Visitor mode
    Serial.println("Mode: Visitor");
    // Add your visitor mode logic here
  }

  delay(500);
}
Calibration
Run the Serial Monitor first with the room light ON then OFF
to read the actual LDR values and adjust THRESHOLD accordingly.
Serial Monitor
The video below shows the Serial Monitor output as the light condition changes in real time:
Live Serial Monitor output as the room light is switched on and off, showing the LDR value and resulting mode.
Final Project Development: Smart Mode Management via LDR Sensor
This section details the development and implementation of the LDR (Light Dependent Resistor) sensor within the final project architecture.
System Dynamic Adaptation
The integration of this sensor enables the system to dynamically adapt its behavior based on ambient light level variations. By continuously monitoring the environment, the system automatically triggers seamless transitions between distinct operating modes.
Operational Modes
- Trigger: Activated during optimal ambient light conditions.
- Objective: Ensures full system responsiveness, maximum performance, and fluid user interaction.
- Trigger: Activated automatically when darkness is detected.
- Objective: Optimizes energy consumption by transitioning the system into a low-power state.
Demo of the system transitioning between Visitor Mode and Sleep Mode as ambient light changes.
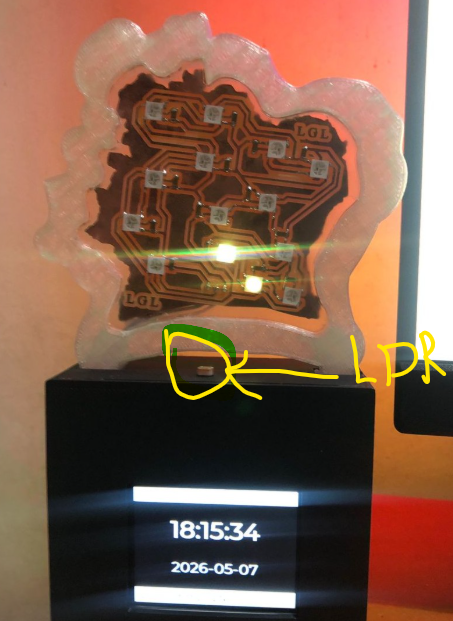 The LDR sensor integrated into the final enclosure, positioned to sense ambient room light.
Sensor Evolution: From LDR to Phototransistor
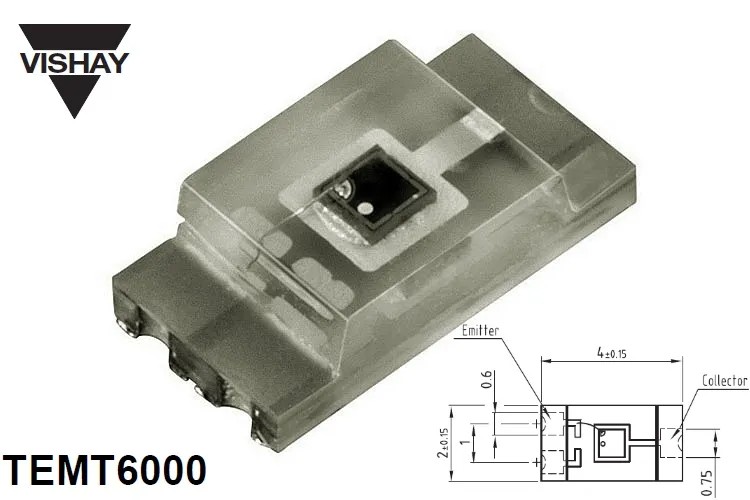
While the LDR-based system worked reliably for basic day/night detection, I wanted a more precise and repeatable sensor for the final version of this feature CdS-based LDRs age over time, respond slowly, and vary significantly from one unit to another.
TEMT6000 Phototransistor
Instead of adding correction filters to a photodiode, I switched to the Vishay TEMT6000, a phototransistor purpose-built as an ambient light sensor, with a spectral response close to the human eye and internal gain that removes the need for an op-amp entirely.
| Parameter | Value |
|---|---|
| Type | Silicon NPN phototransistor |
| Peak sensitivity | 570 nm (green, close to human eye response) |
| Spectral range | 440 – 800 nm |
| Dark current (ICEO) | 3 – 50 nA (VCE = 5V) |
| Light current @ 100 lx | ~50 µA (typ., VCE = 5V) |
| Light current @ 20 lx | 3.5 – 16 µA |
| Package | 1206 SMD (or TO-92 leaded variants) |
Circuit Design
Same simple voltage-divider topology as the original LDR :
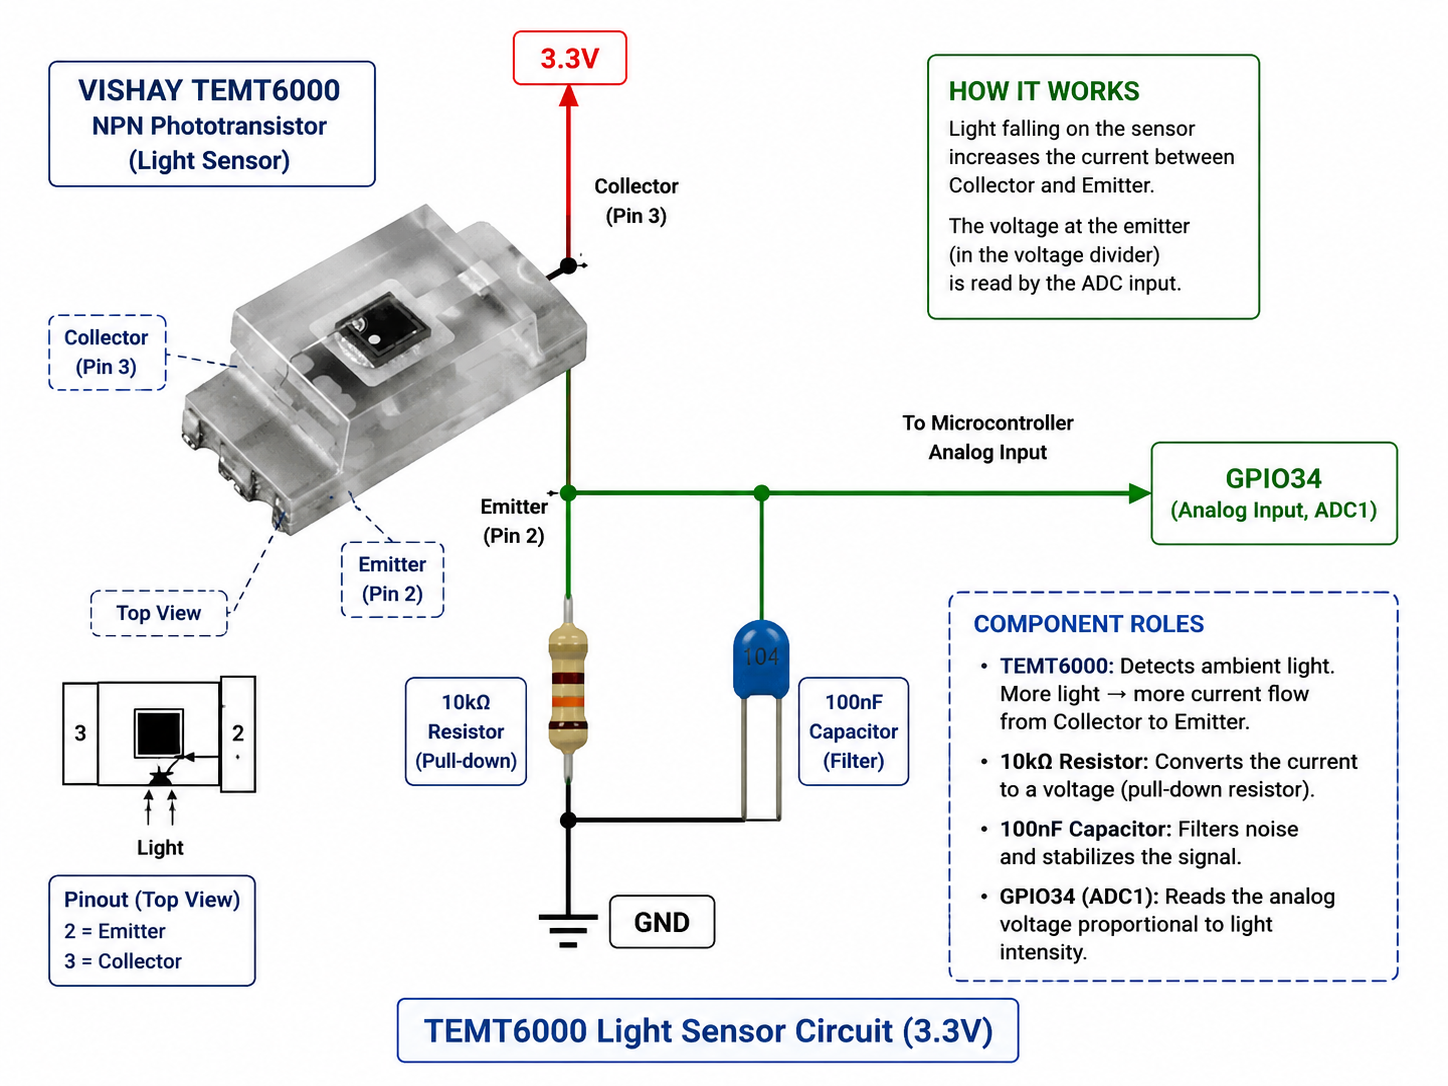
Component sizing
| Component | Value | Purpose |
|---|---|---|
| Phototransistor | TEMT6000 | Ambient light sensor |
| R (pull-down) | 10 kΩ | Sets the sensitivity / output swing |
| C (filter) | 100 nF | Reduces electrical noise on the reading |
| ESP32 pin | GPIO34 (ADC1) | Safe to read with Wi-Fi active |
With R = 10kΩ, the expected output swing is:
| Condition | Approx. current | Vout | analogRead() (12-bit) |
|---|---|---|---|
| Dark room (<10 lx) | ~5 µA | 50 mV | ~62 |
| Lit room (100–300 lx) | 50–150 µA | 0.5–1.5 V | ~620–1860 |
| Bright light (>1000 lx) | >500 µA | saturates ~3.2V | ~3970 (clamped) |
This gives a clean, well-separated range for the day/night threshold — with much better consistency across different light sources than either the LDR or the BPW34.
Preventing light contamination from the on-board RGB LEDs
Since the phototransistor sits on the same PCB as the 14 district RGB LEDs, unshielded placement risks the sensor picking up light from the board's own LEDs (especially during Auto or Walkthrough mode), falsely reporting "daylight" conditions. To prevent this, the TEMT6000 is mounted inside a small opaque light pipe / sleeve, facing only outward through the enclosure, isolated from the on-board LEDs.
Comparison: LDR vs. TEMT6000
| LDR (original) | TEMT6000 (final) | |
|---|---|---|
| Spectral match to human eye | Approximate | Purpose-built match (570nm) |
| Response speed | Slow (ms range) | Fast |
| Unit-to-unit consistency | Variable (analog CdS cell) | Consistent (semiconductor) |
| Aging / drift over time | Yes | Minimal |
| Sensitivity to light source type | Moderate | Low |
Files
| File | Description |
|---|---|
| LDR Code | Arduino sketch for the LDR sensor |