1. Principles and practices & Project management
Assignment:
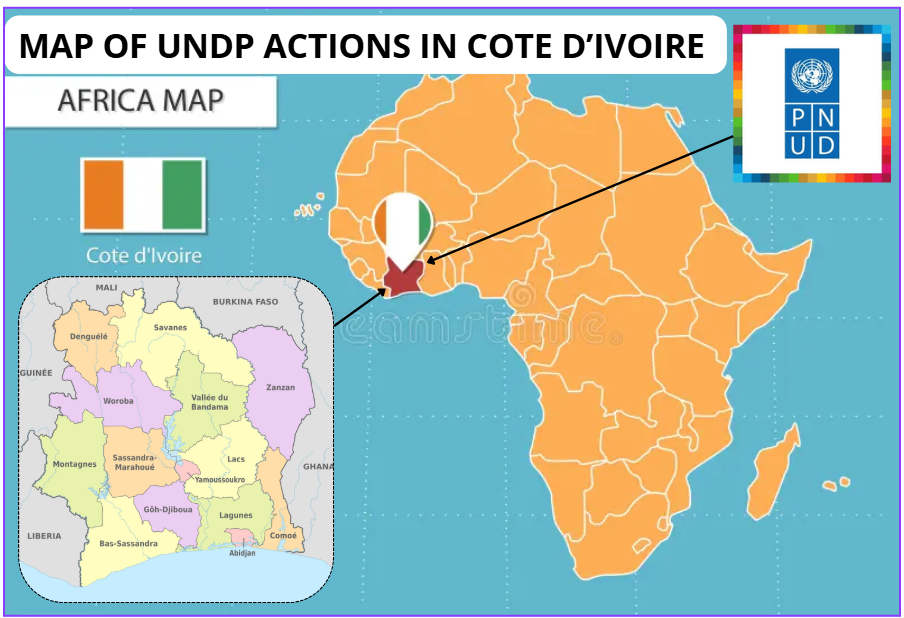
Final Project: UNDP Côte d'Ivoire Interactive Dashboard
I am Prisca Brou, working for UNDP Côte d’Ivoire and currently a Fab Academy student. My final project is an interactive physical dashboard shaped like the map of Côte d’Ivoire. Using electronics and digital fabrication, this device visualizes UNDP’s regional actions in real-time. It transforms complex data into a tangible, light-coded experience, showcasing our developmental impact across the country’s cities through innovation and technology.
What will it do?
The Interactive Physical Dashboard Map of Côte d'Ivoire is a connected, light-coded device that displays in real time the status of UNDP development projects across the regions of Côte d'Ivoire.
The device works as follows:
- Each WS2812B RGB LED soldered on the PCB represents a key UNDP intervention city
- The LED color encodes the project status at a glance:
- 🟢 Green Active project
- 🟠 Orange Project in planning phase
- 🔴 Red Region requiring urgent attention
- 🔵 Blue Completed project
- A TFT screen displays the real-time clock, the current date, and the name and status of the selected region
- Three push buttons allow physical navigation between regions
- A web dashboard (accessible via Wi-Fi) lets authorized staff update project statuses remotely — the LEDs update instantly
- A buzzer provides audio confirmation on user interactions
The result is a tangible, physical data visualization tool: instead of reading a spreadsheet or a PDF report, the user simply looks at the glowing map and immediately understands where projects are active, where attention is needed, and where goals have been achieved.
Who will use it?
This device is designed for three main user profiles:
1. UNDP Côte d'Ivoire Staff & Programme Officers
Programme officers and project managers can use the dashboard during internal meetings and briefings to present a live overview of field activities across the country. Rather than projecting slides, they place the device on the table it speaks for itself.
2. UNDP Country Directors & Senior Management
Senior leaders can use the device on their office desk as a permanent, always-on situational awareness tool. A quick glance at the map is enough to know which regions need attention without opening any software.
3. Event & Communication Teams
During public events, exhibitions, and donor meetings, the dashboard serves as an impactful communication object. It makes UNDP's presence and reach across Côte d'Ivoire immediately visible and understandable to external audiences, partners, and the general public — regardless of their technical background.
Why does it matter?
Development data is often locked inside reports, dashboards, and spreadsheets that are rarely consulted in real time. This project bridges the gap between data and decision making by making information physical, immediate, and accessible.
It demonstrates that digital fabrication and embedded electronics can serve not only engineering or manufacturing, but also humanitarian development, governance, and public communication.
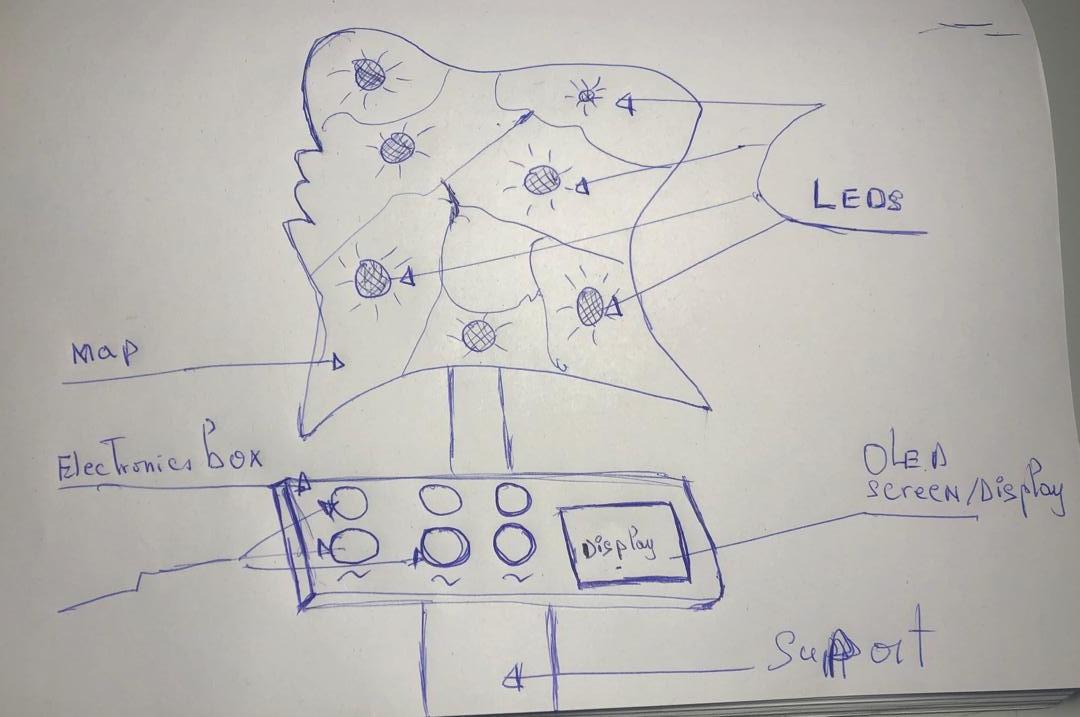
I have created an initial sketch for this project.
I used Gemini AI to create my virtual idear
Gemini Prompt
Design an interactive physical dashboard shaped like the map of Côte d’Ivoire to visualize and locate UNDP (United Nations Development Programme) projects and initiatives throughout the country. Generate a high-fidelity conceptual preview of this map, showcasing integrated LED indicators for specific regions and a digital control interface."
GEMINI video

-Project Management
Software Environment & Documentation Tools
| Software | Role | Technical Description |
|---|---|---|
| VS Code | IDE | The primary editor used for writing Markdown content and configuring the project. |
| Python | Language & Interpreter | The core programming language and interpreter required to run the Zensical framework. |
| Git Bash | CLI Terminal | The command-line interface used for installation via pip and version control with Git. |
| Zensical | Static Site Generator | A modern documentation tool used to build and maintain the project's website. |
1. Installing Python, VS Code, and Git
Installing Python
- Go to the website https://www.python.org/downloads/ Click on « Python 3.14.0 » (the version number may vary depending on the latest available version).
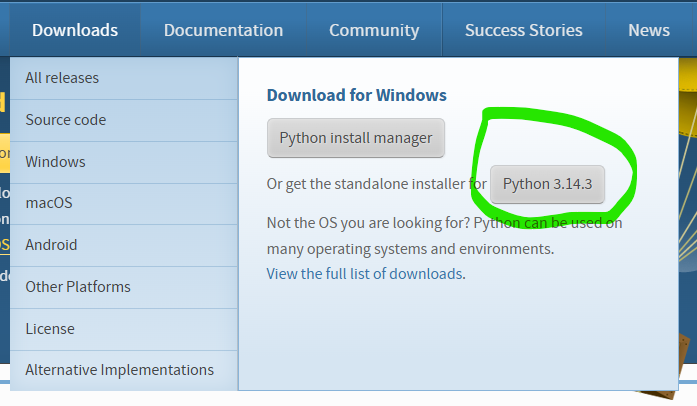
- Once the file is downloaded, open it. Check the two boxes highlighted in red, then click « Install Now ».
- Once the installation is complete, click « Close ».
Installing VS Code
- Go to the website https://code.visualstudio.com/download.
Click on « Windows ».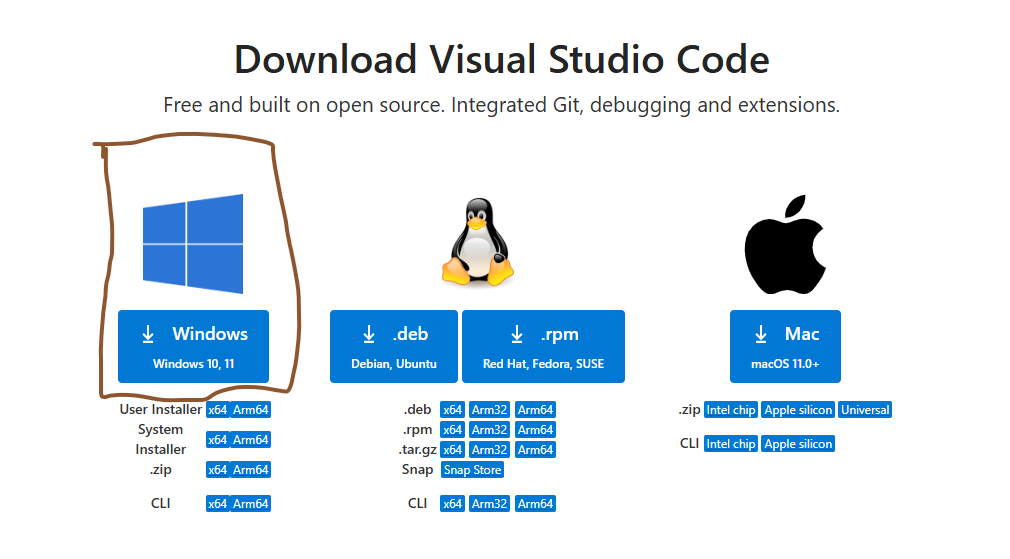 Once the file is downloaded, open it.
Once the file is downloaded, open it. « Next » Check all the boxes . - Click « Next », then « Install ».
Once installation is complete, click « Finish ».
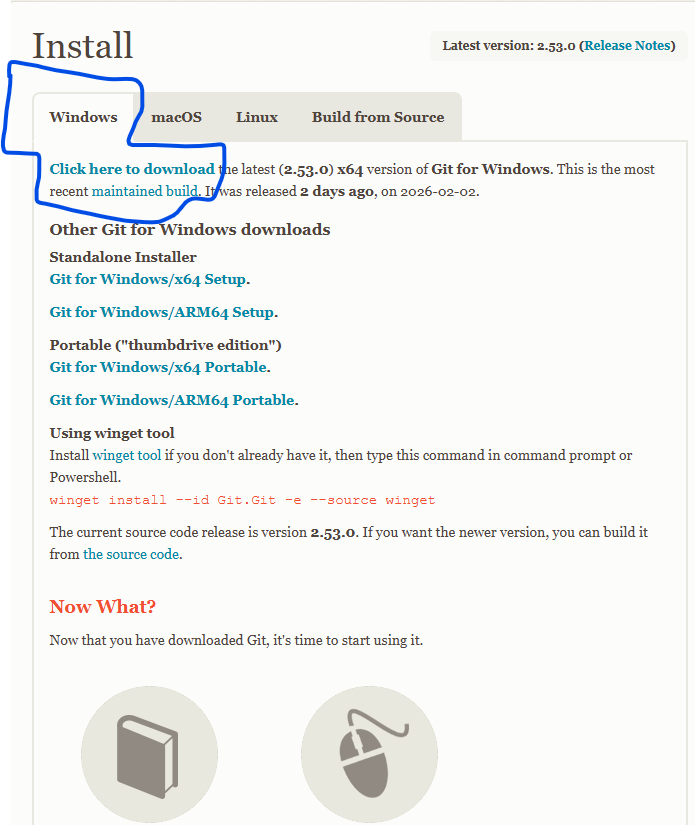
Installing Git
- Go to the website https://git-scm.com/install/windows.
Click « Click here to download ».
- Once the file is downloaded, open it. Click « Next » until the end of the installation. Leave all default options selected and confirm until installation finishes.
. Cloning Your GitLab Repository
-
Create an empty folder named « Fab26 » inside your Documents folder. Open the Git Bash application, hen type the command below and press Enter :

- Copy the commands below into a text editor and replace the information with your own:
git init git config --global user.name "Your_username" git config --global user.email "your_email@exemple.com" ssh-keygen -t ed25519 -a 100 -C "your_email@example.com" -f ~/.ssh/id_ed25519 -N "" cat ~/.ssh/id_ed25519.pub- Once you finish editing, right-click in the Git Bash window, select Paste to paste the commands, then press Enter.
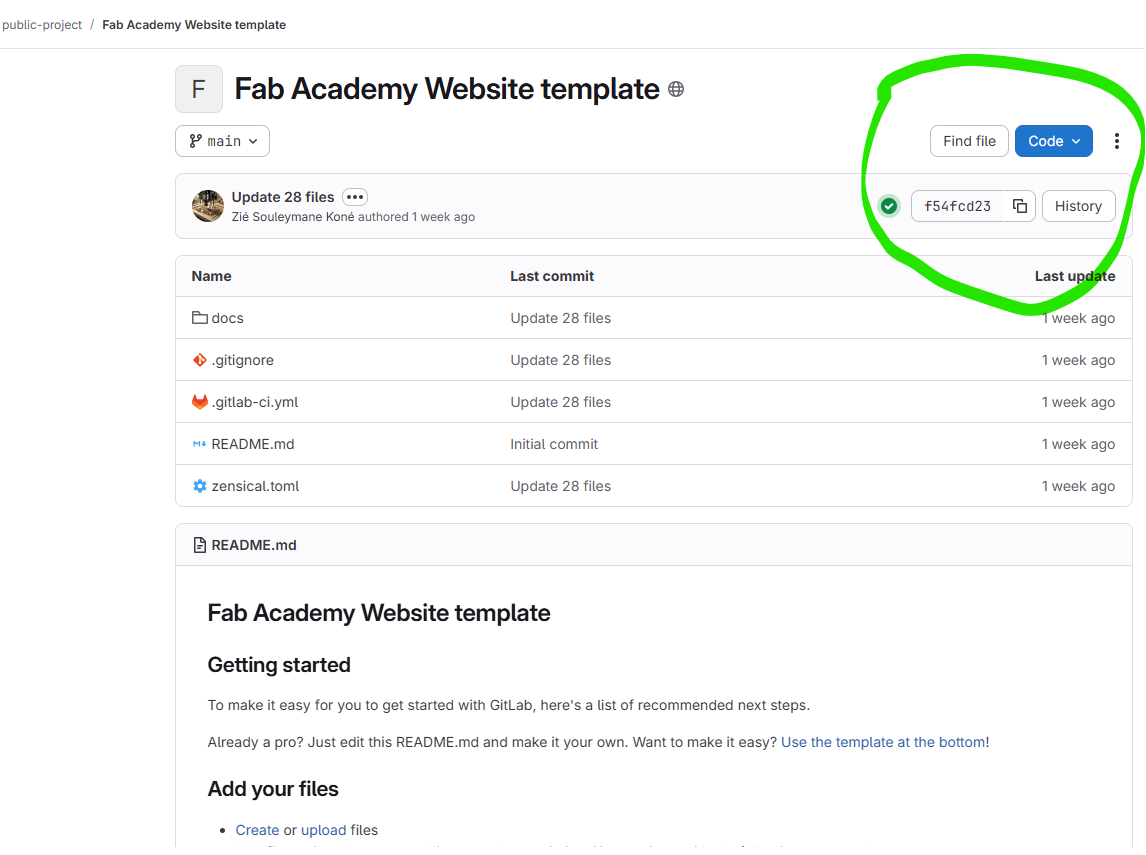
Downloading a Zensical Template for Fab Academy
For the design of our website, we used the template available at the following link: [https://gitlab.com/public-project6104612/fab-academy-website-template](https://gitlab.com/public-project6104612/fab-academy-website-template). This template was created by the instructors of our FabLab.
-
Once on the GitLab repository, click on the Code button, then select Download ZIP.
-
After downloading the template, we extracted it into the prisca-brou folder, first deleting all the files that were already inside that folder, as shown below.

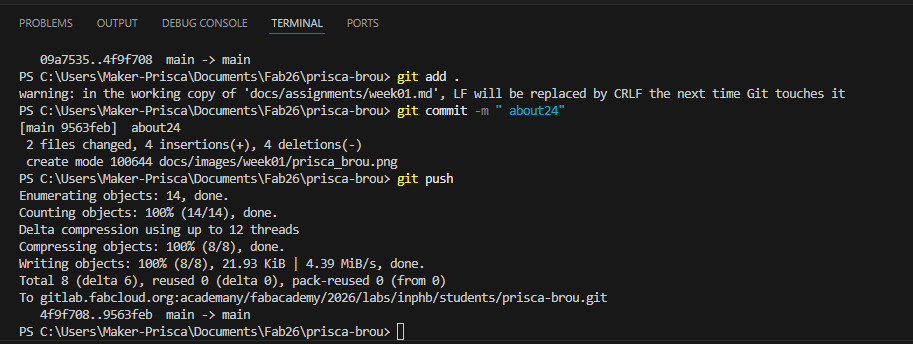
repository pushing
[x] To push your repository online, type the following commands in the terminal, pressing ++enter++ after each one:
Site and files are online