2. Computer Aided design
Assignment:
-
model (raster, vector, 2D, 3D, render, animate, simulate, ...) a possible final project
-
compress your images and videos, and post a description with your design files on your class page
A. 3D models SolidWorks :
1. Download
- Got to solidworks website and create the account and download it by using this link. click here
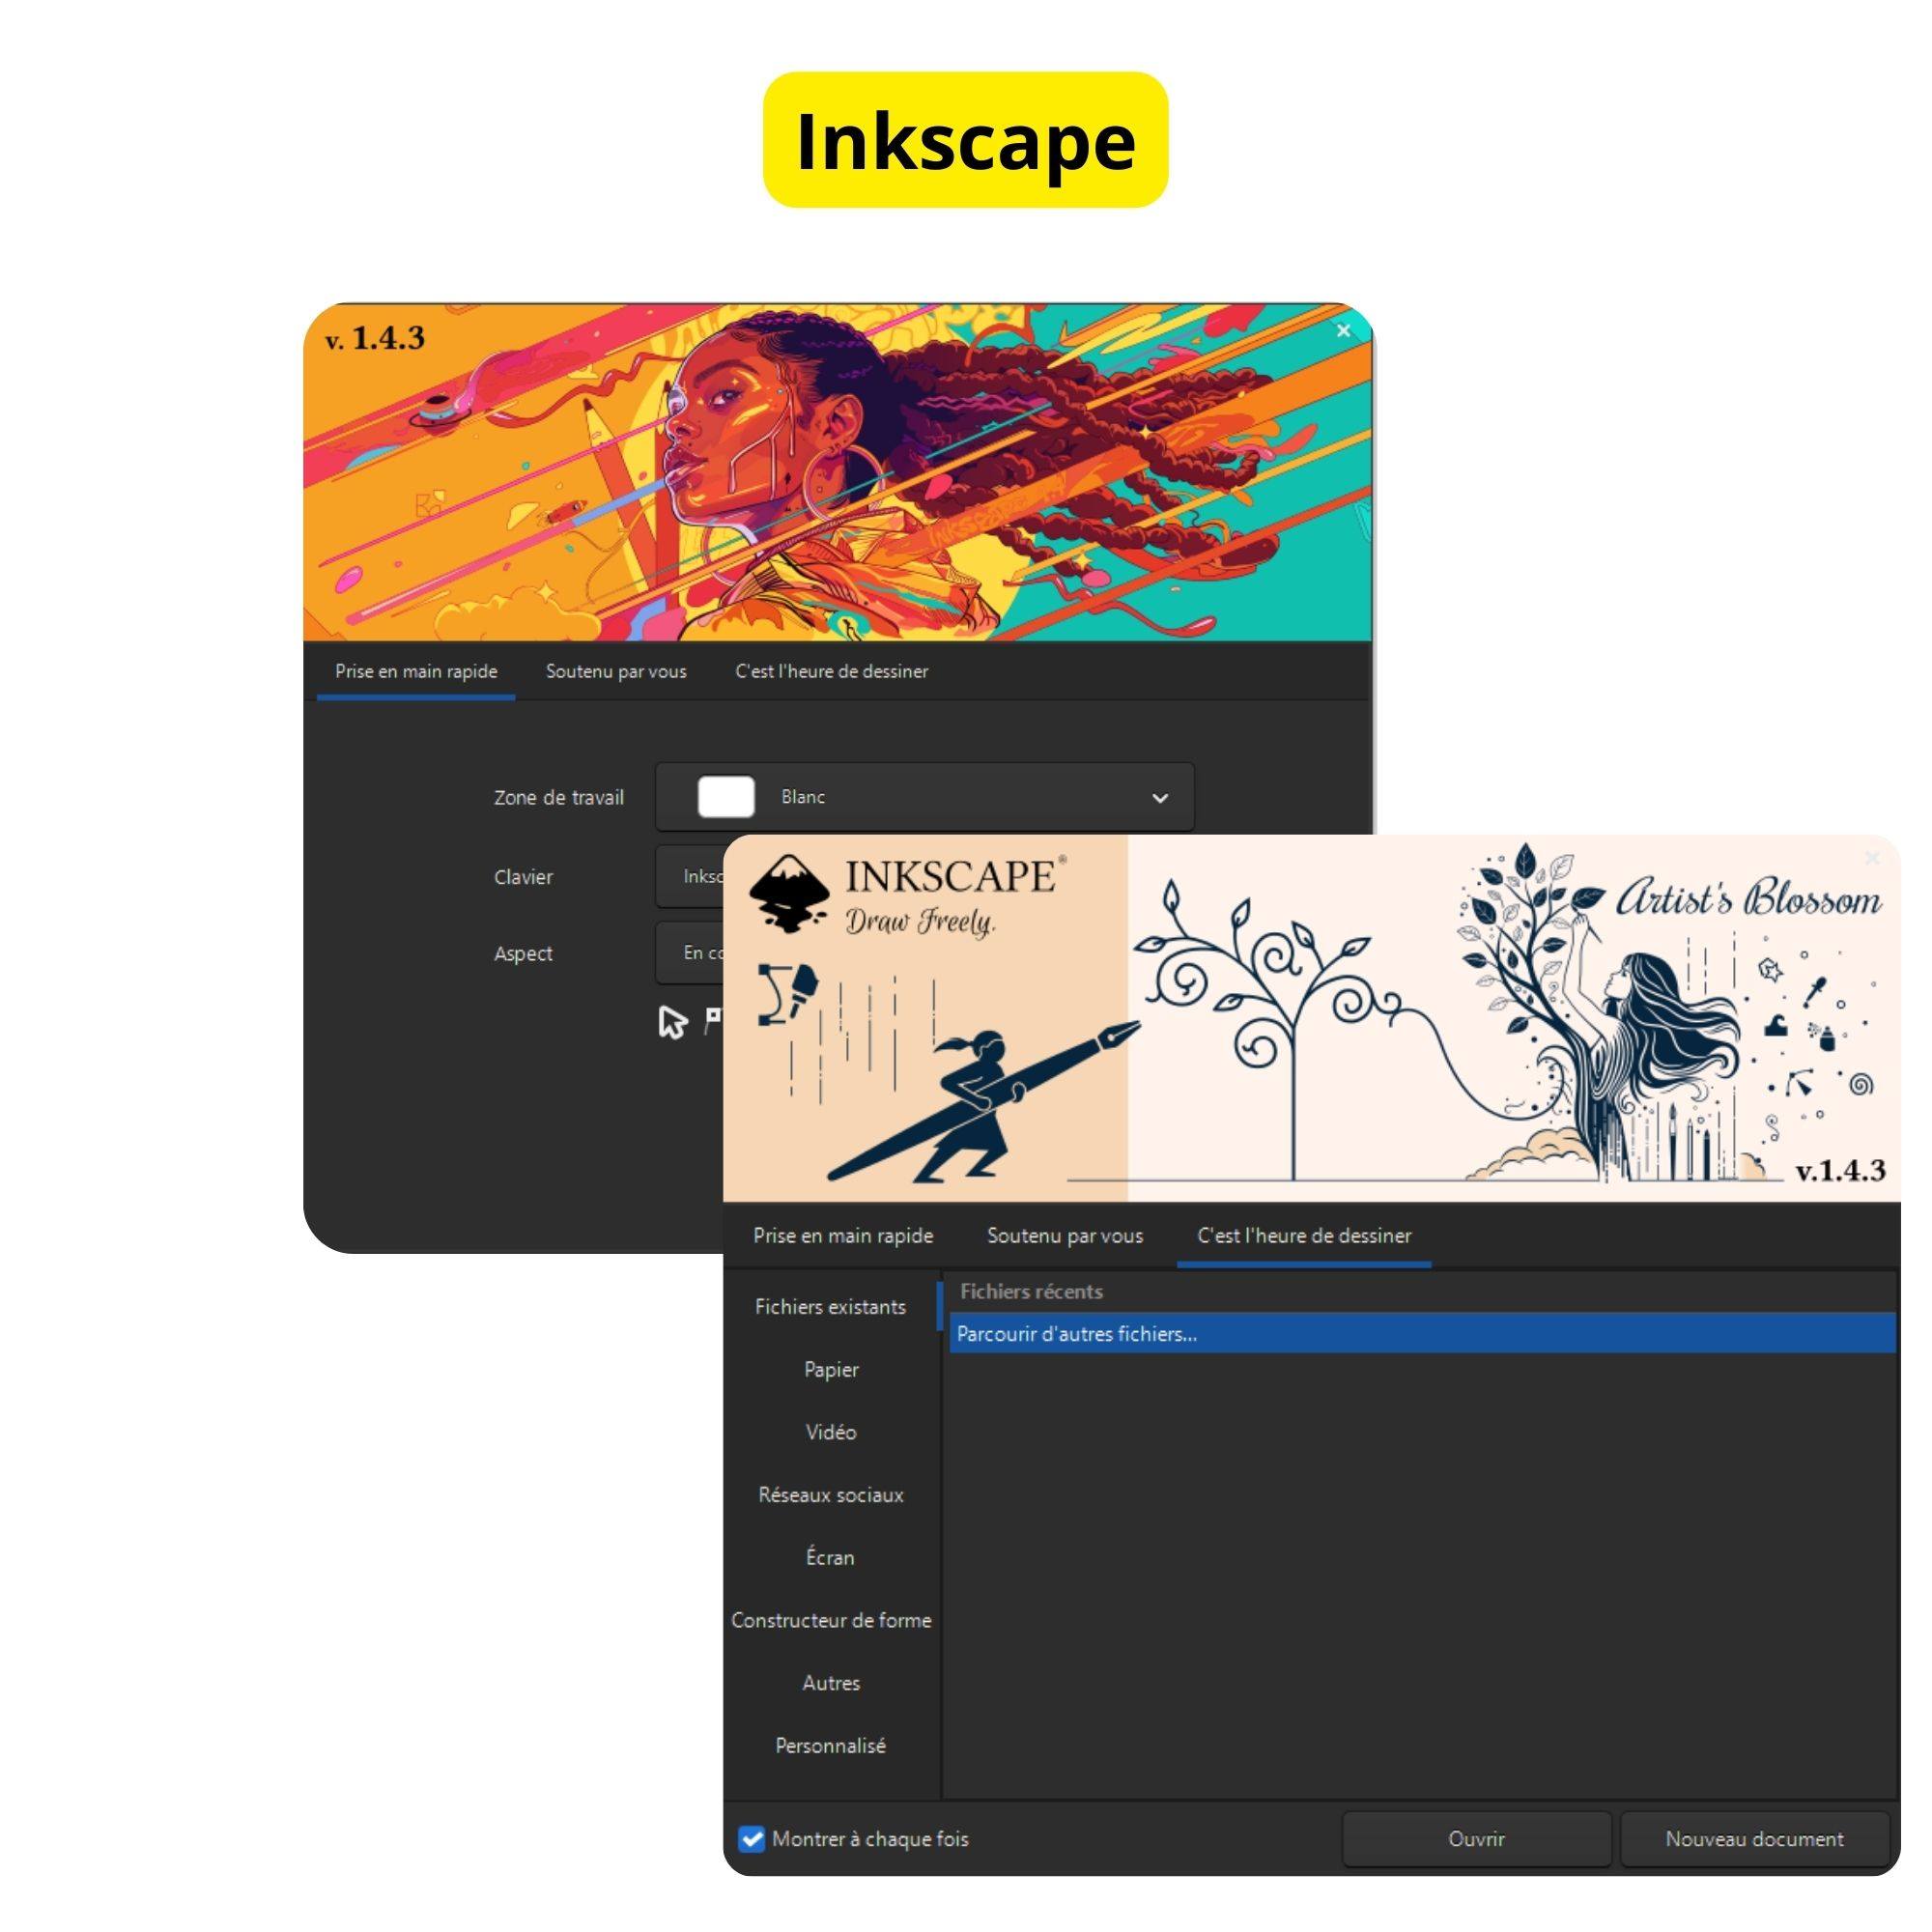
2D inkscape
- STEP1
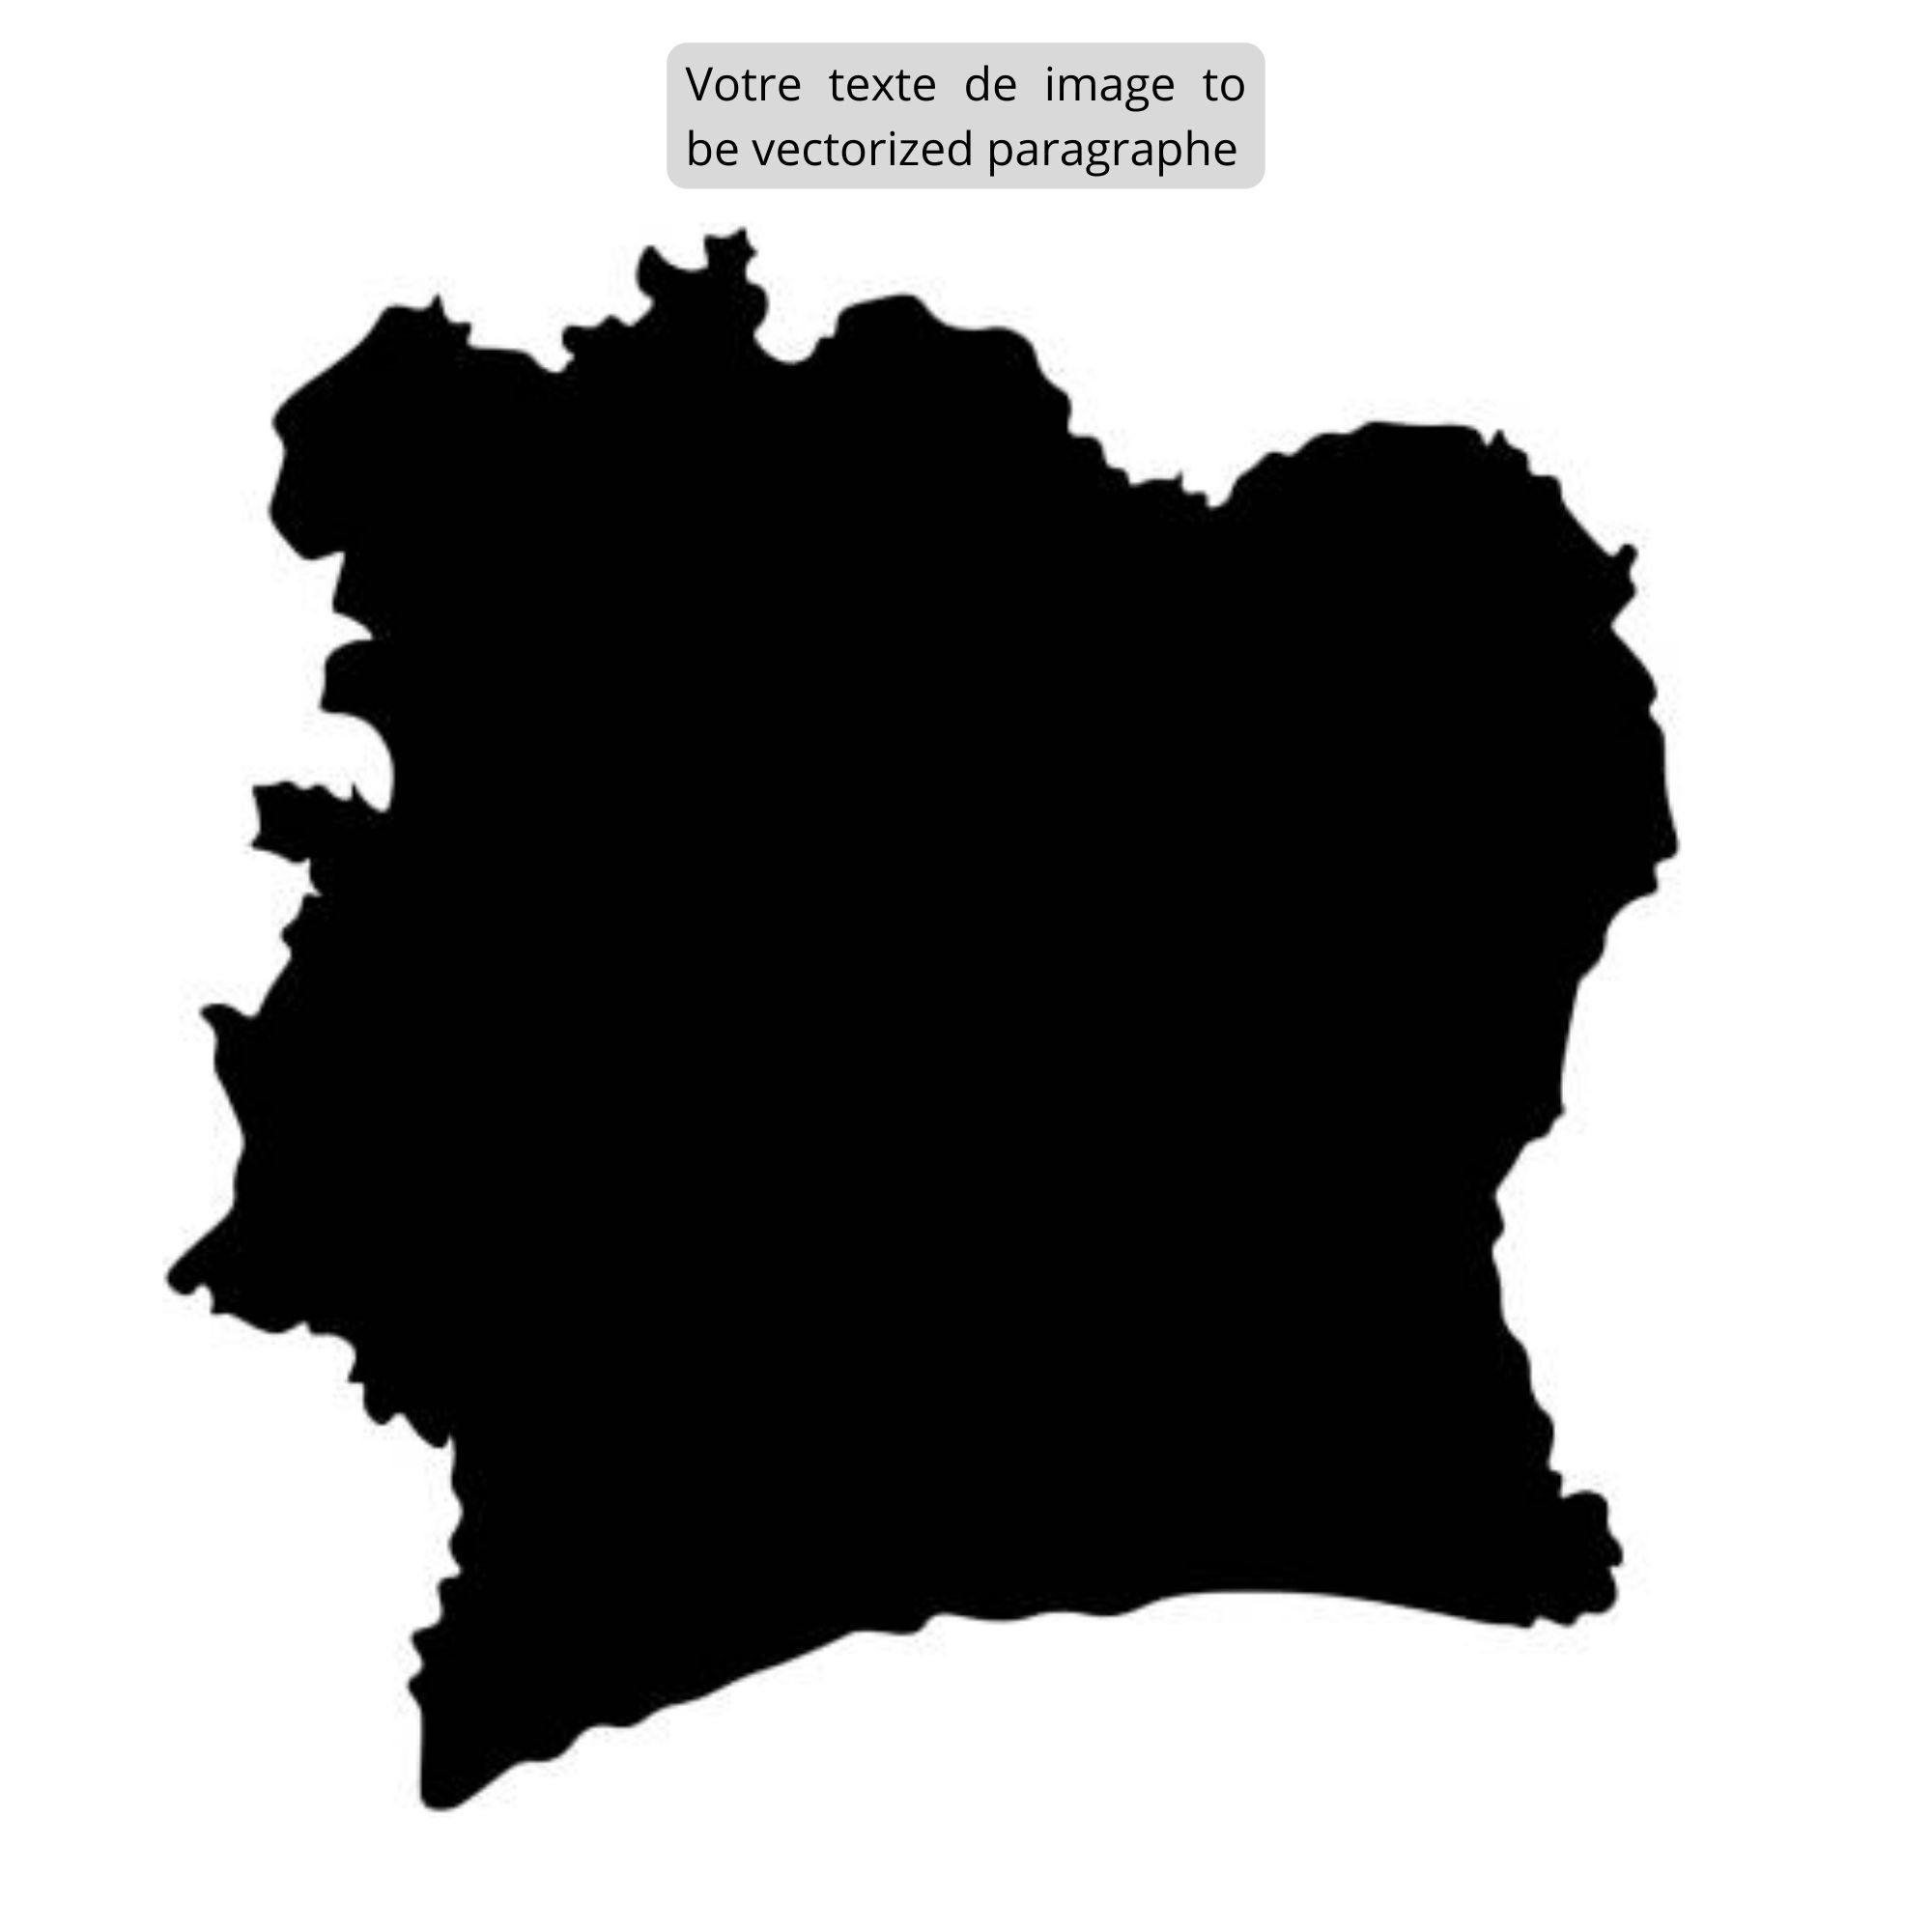
- STEP2
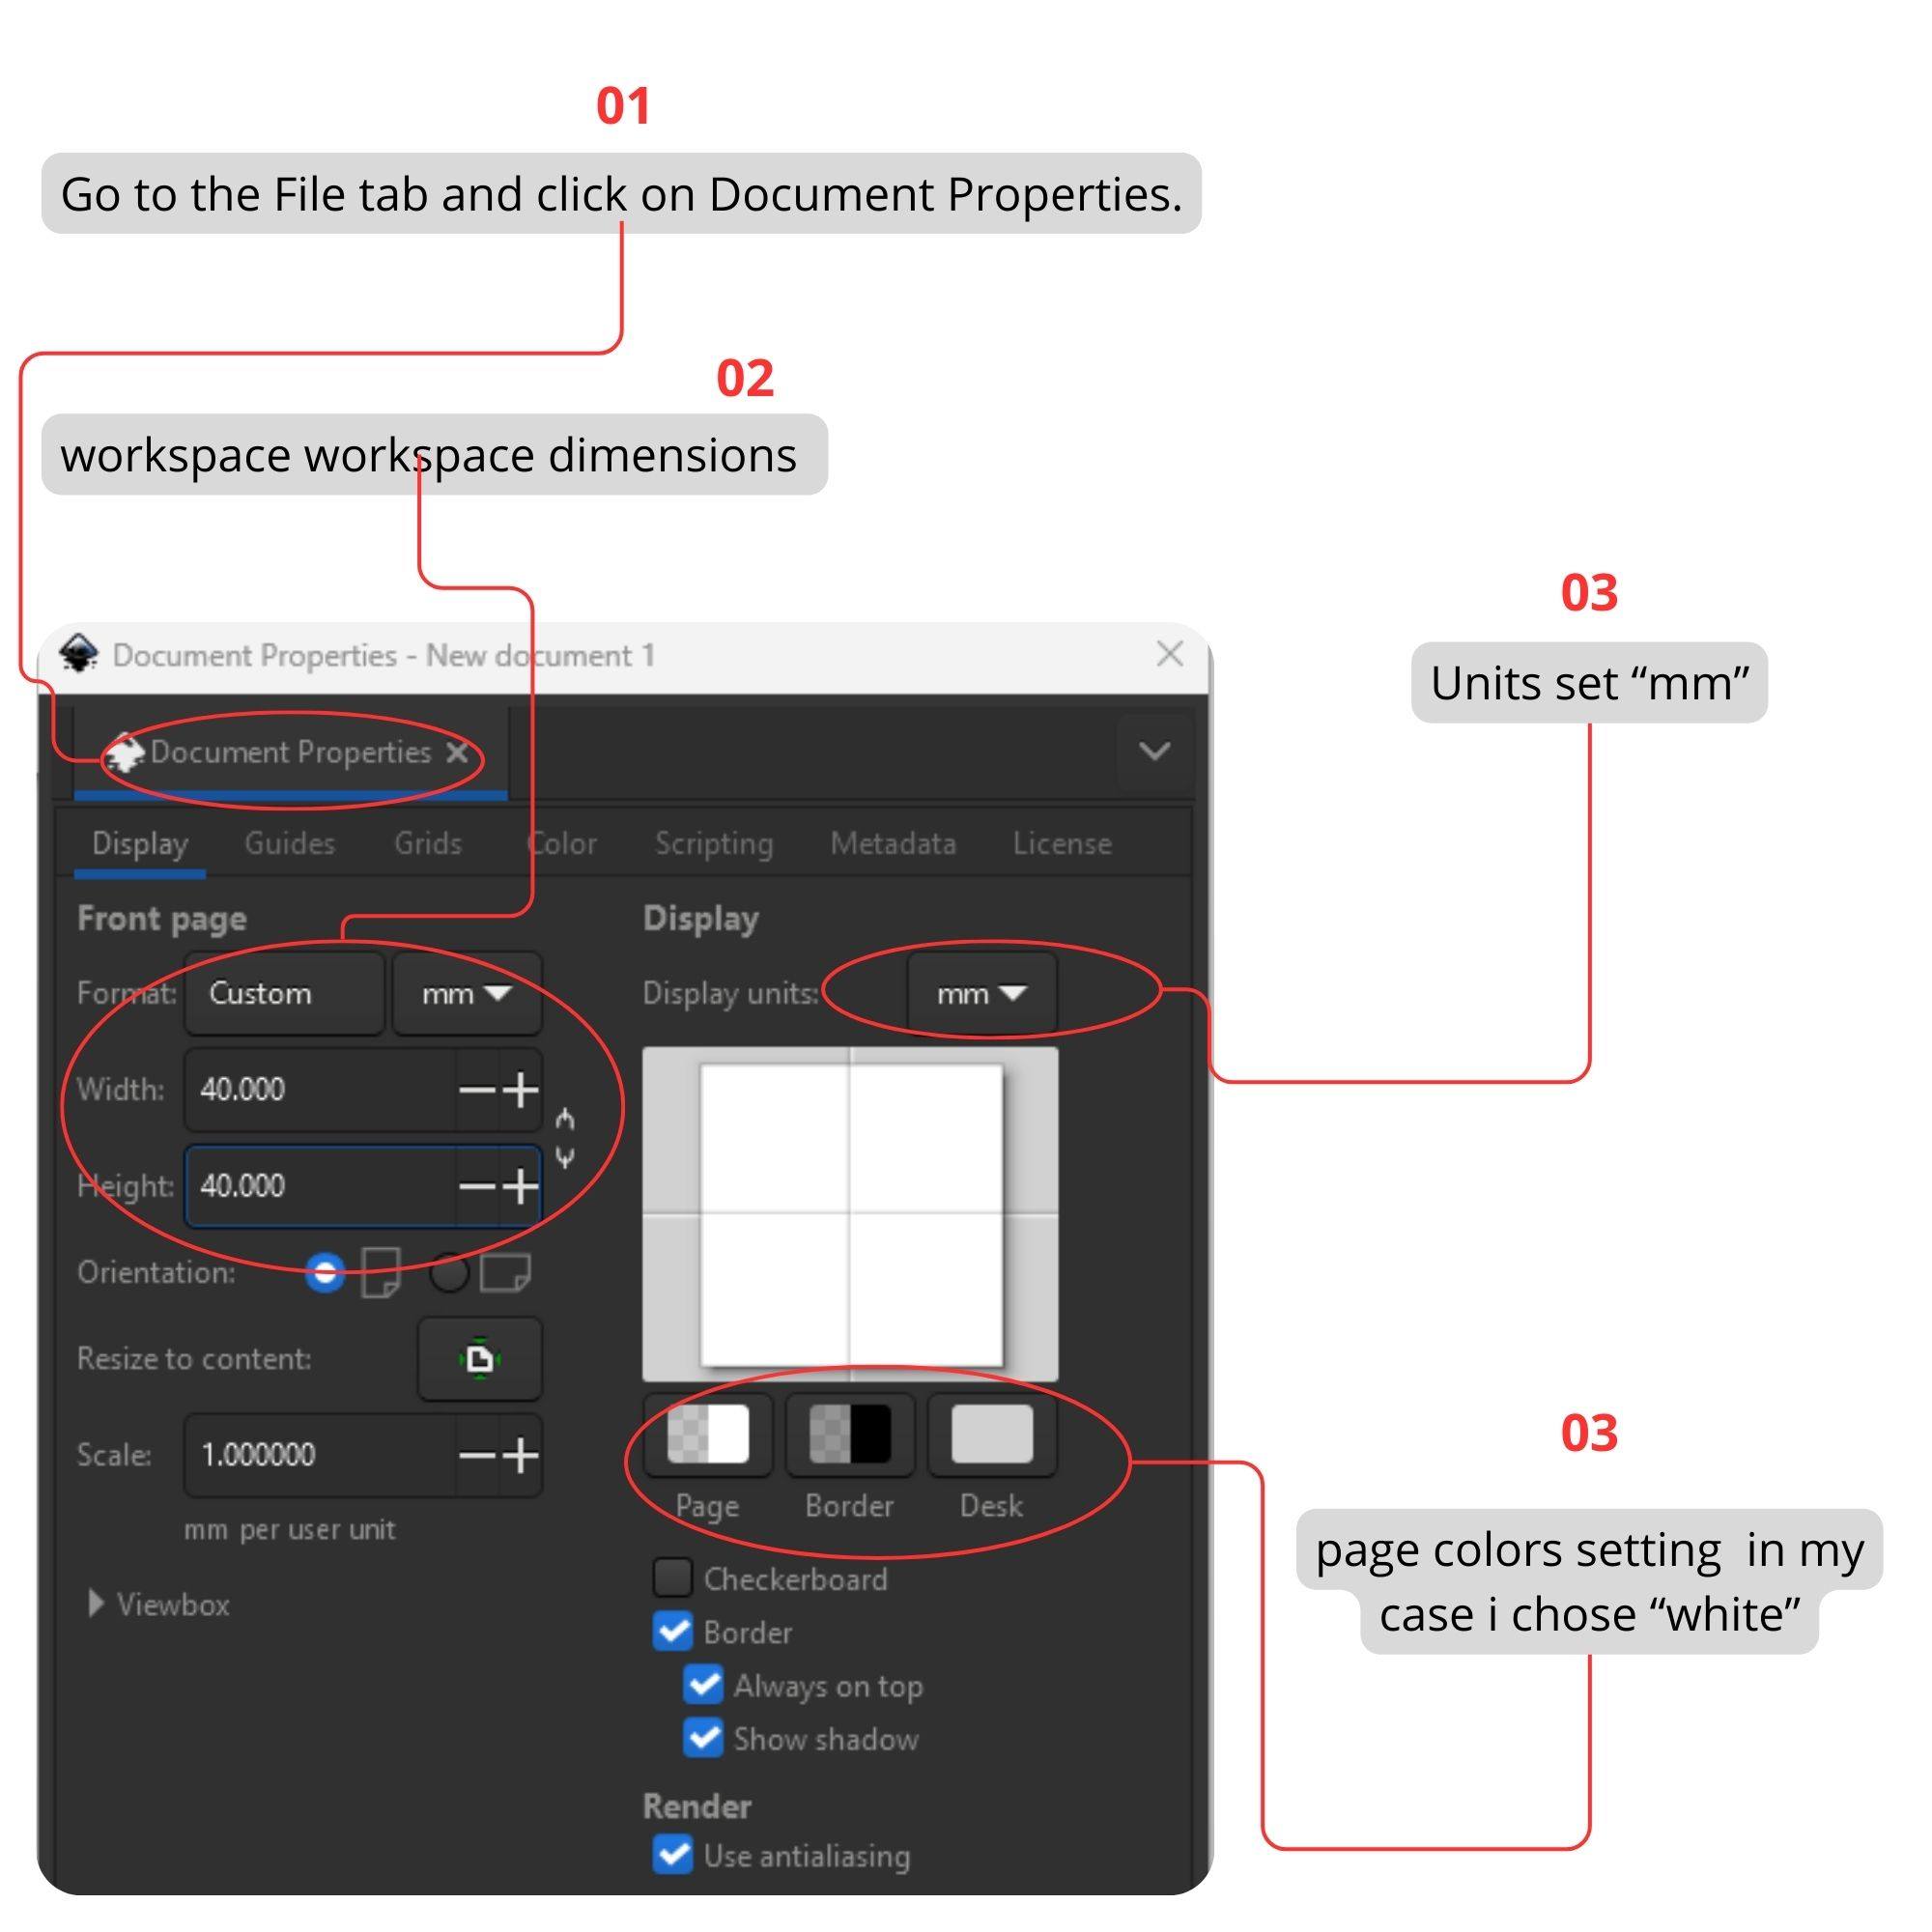
- STEP3
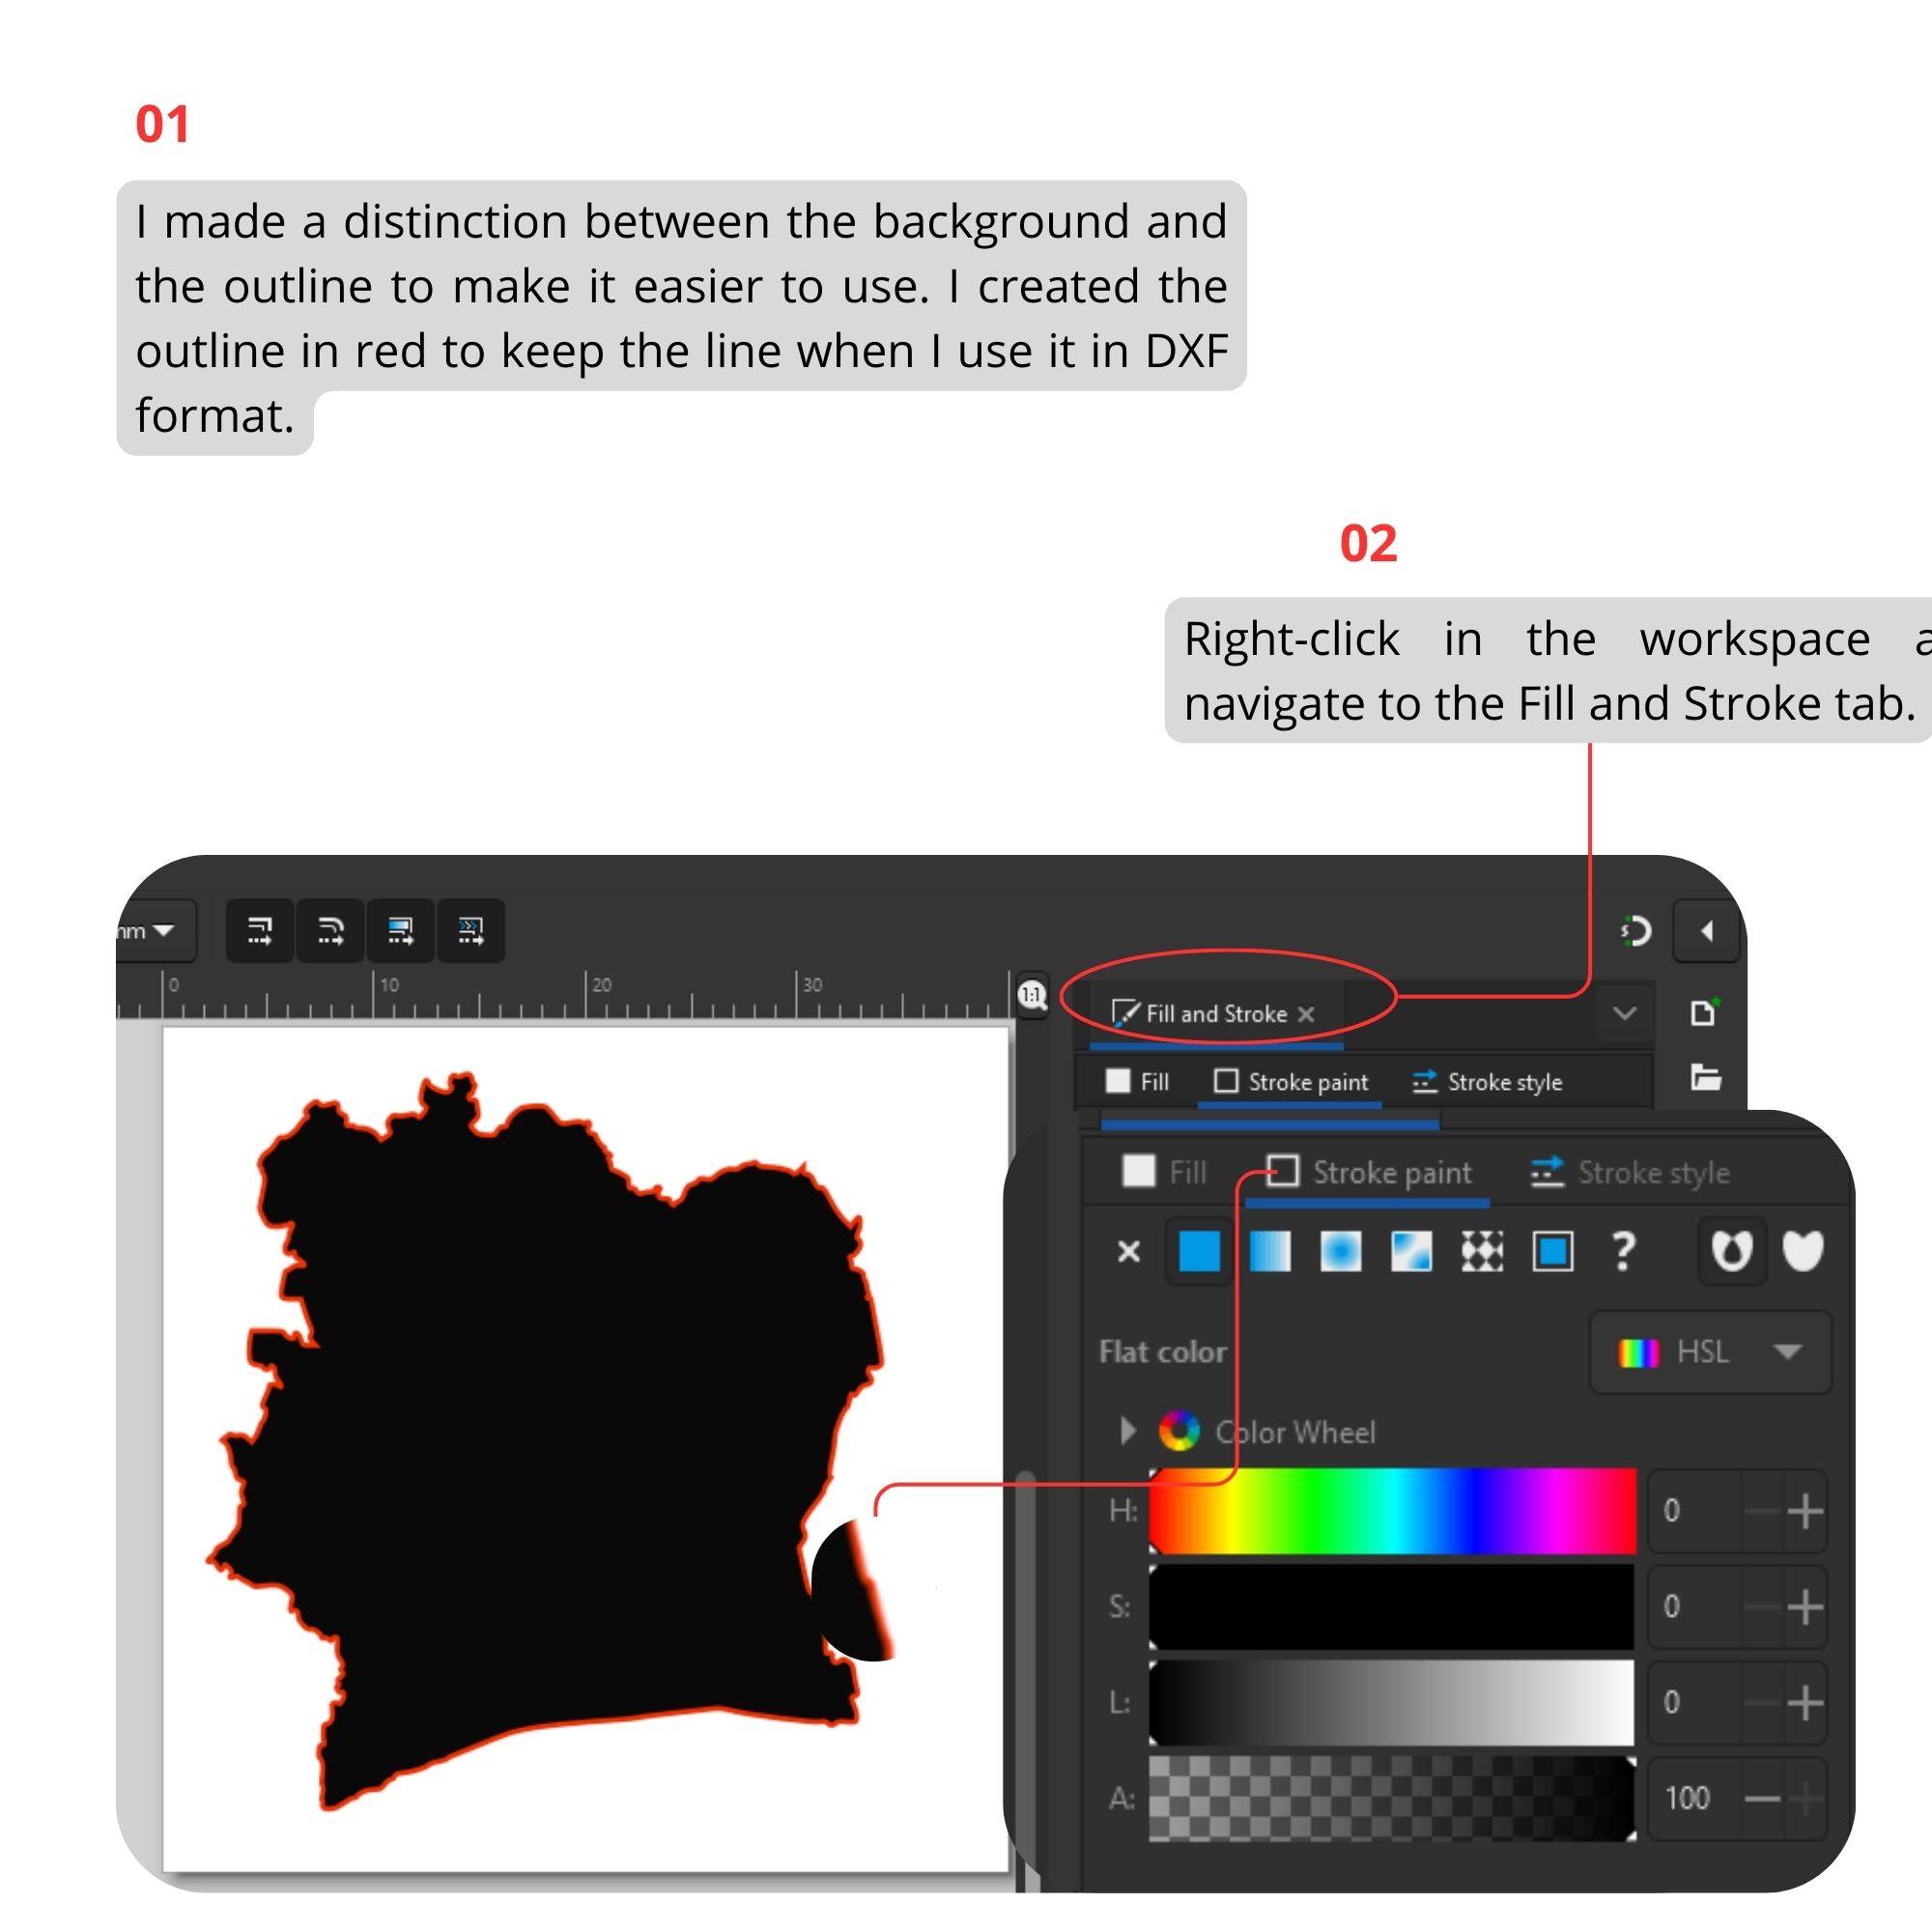
- STEP4
- STEP5
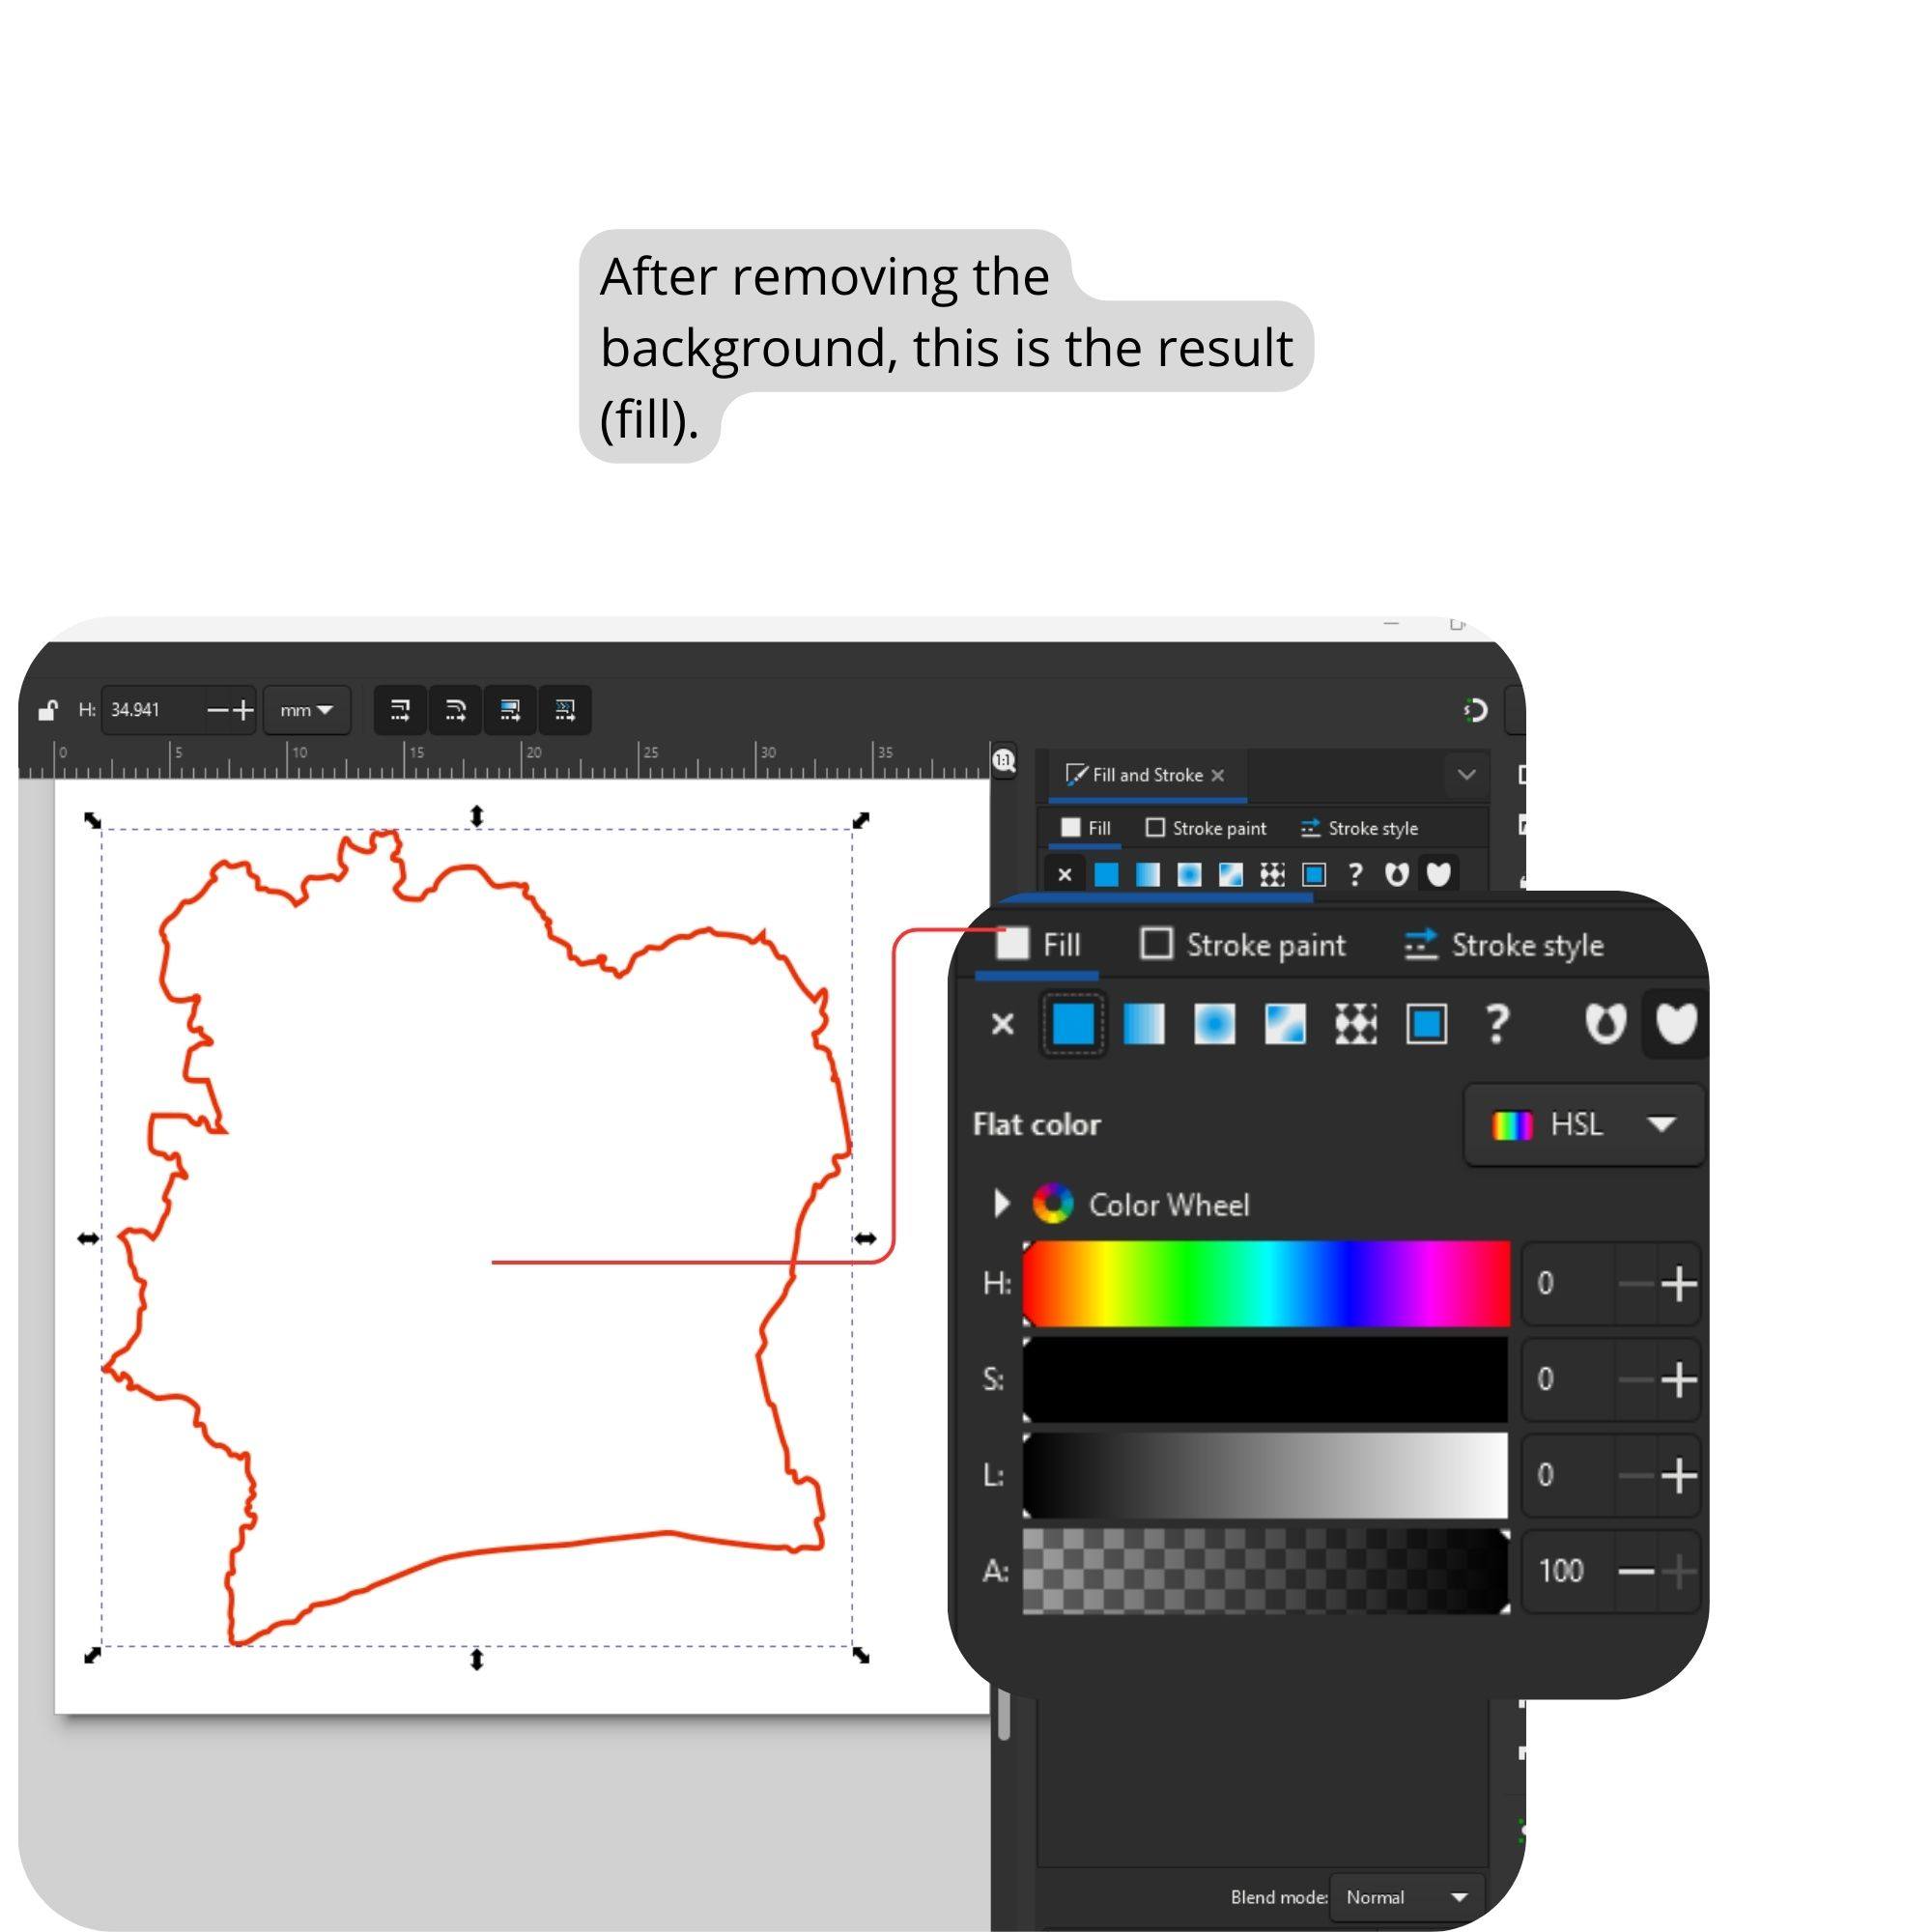
- STEP6
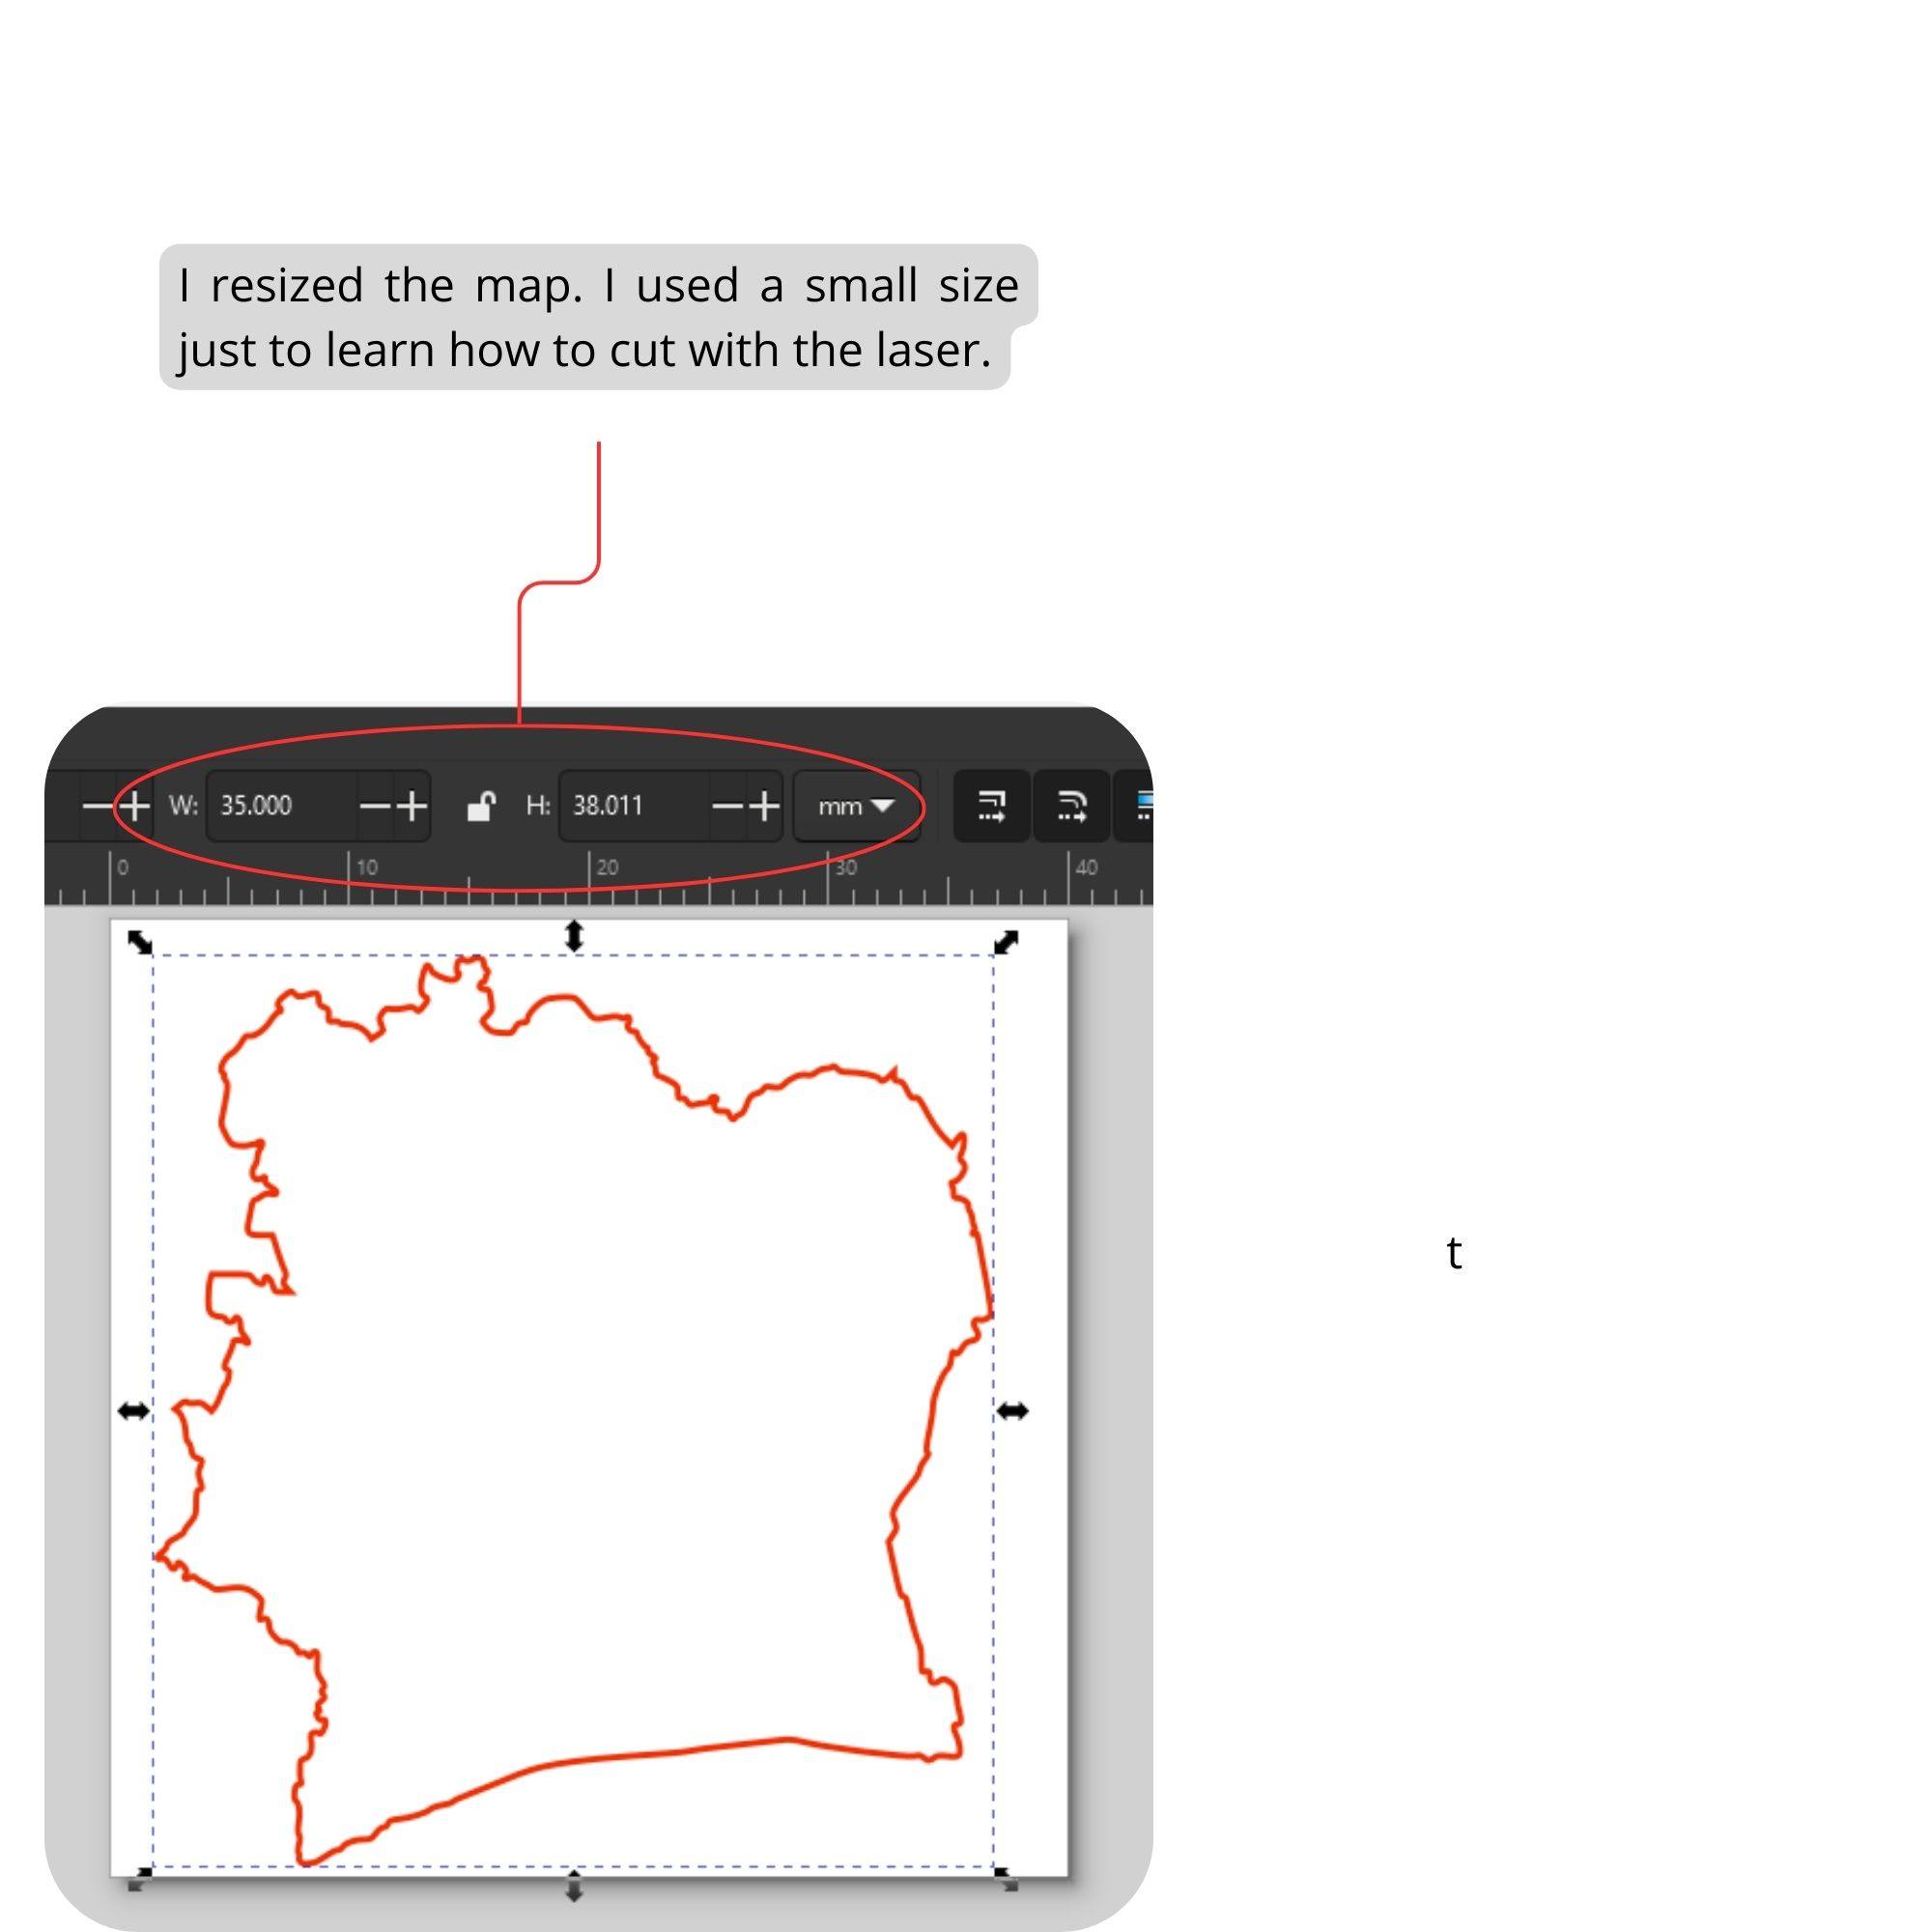
- STEP7
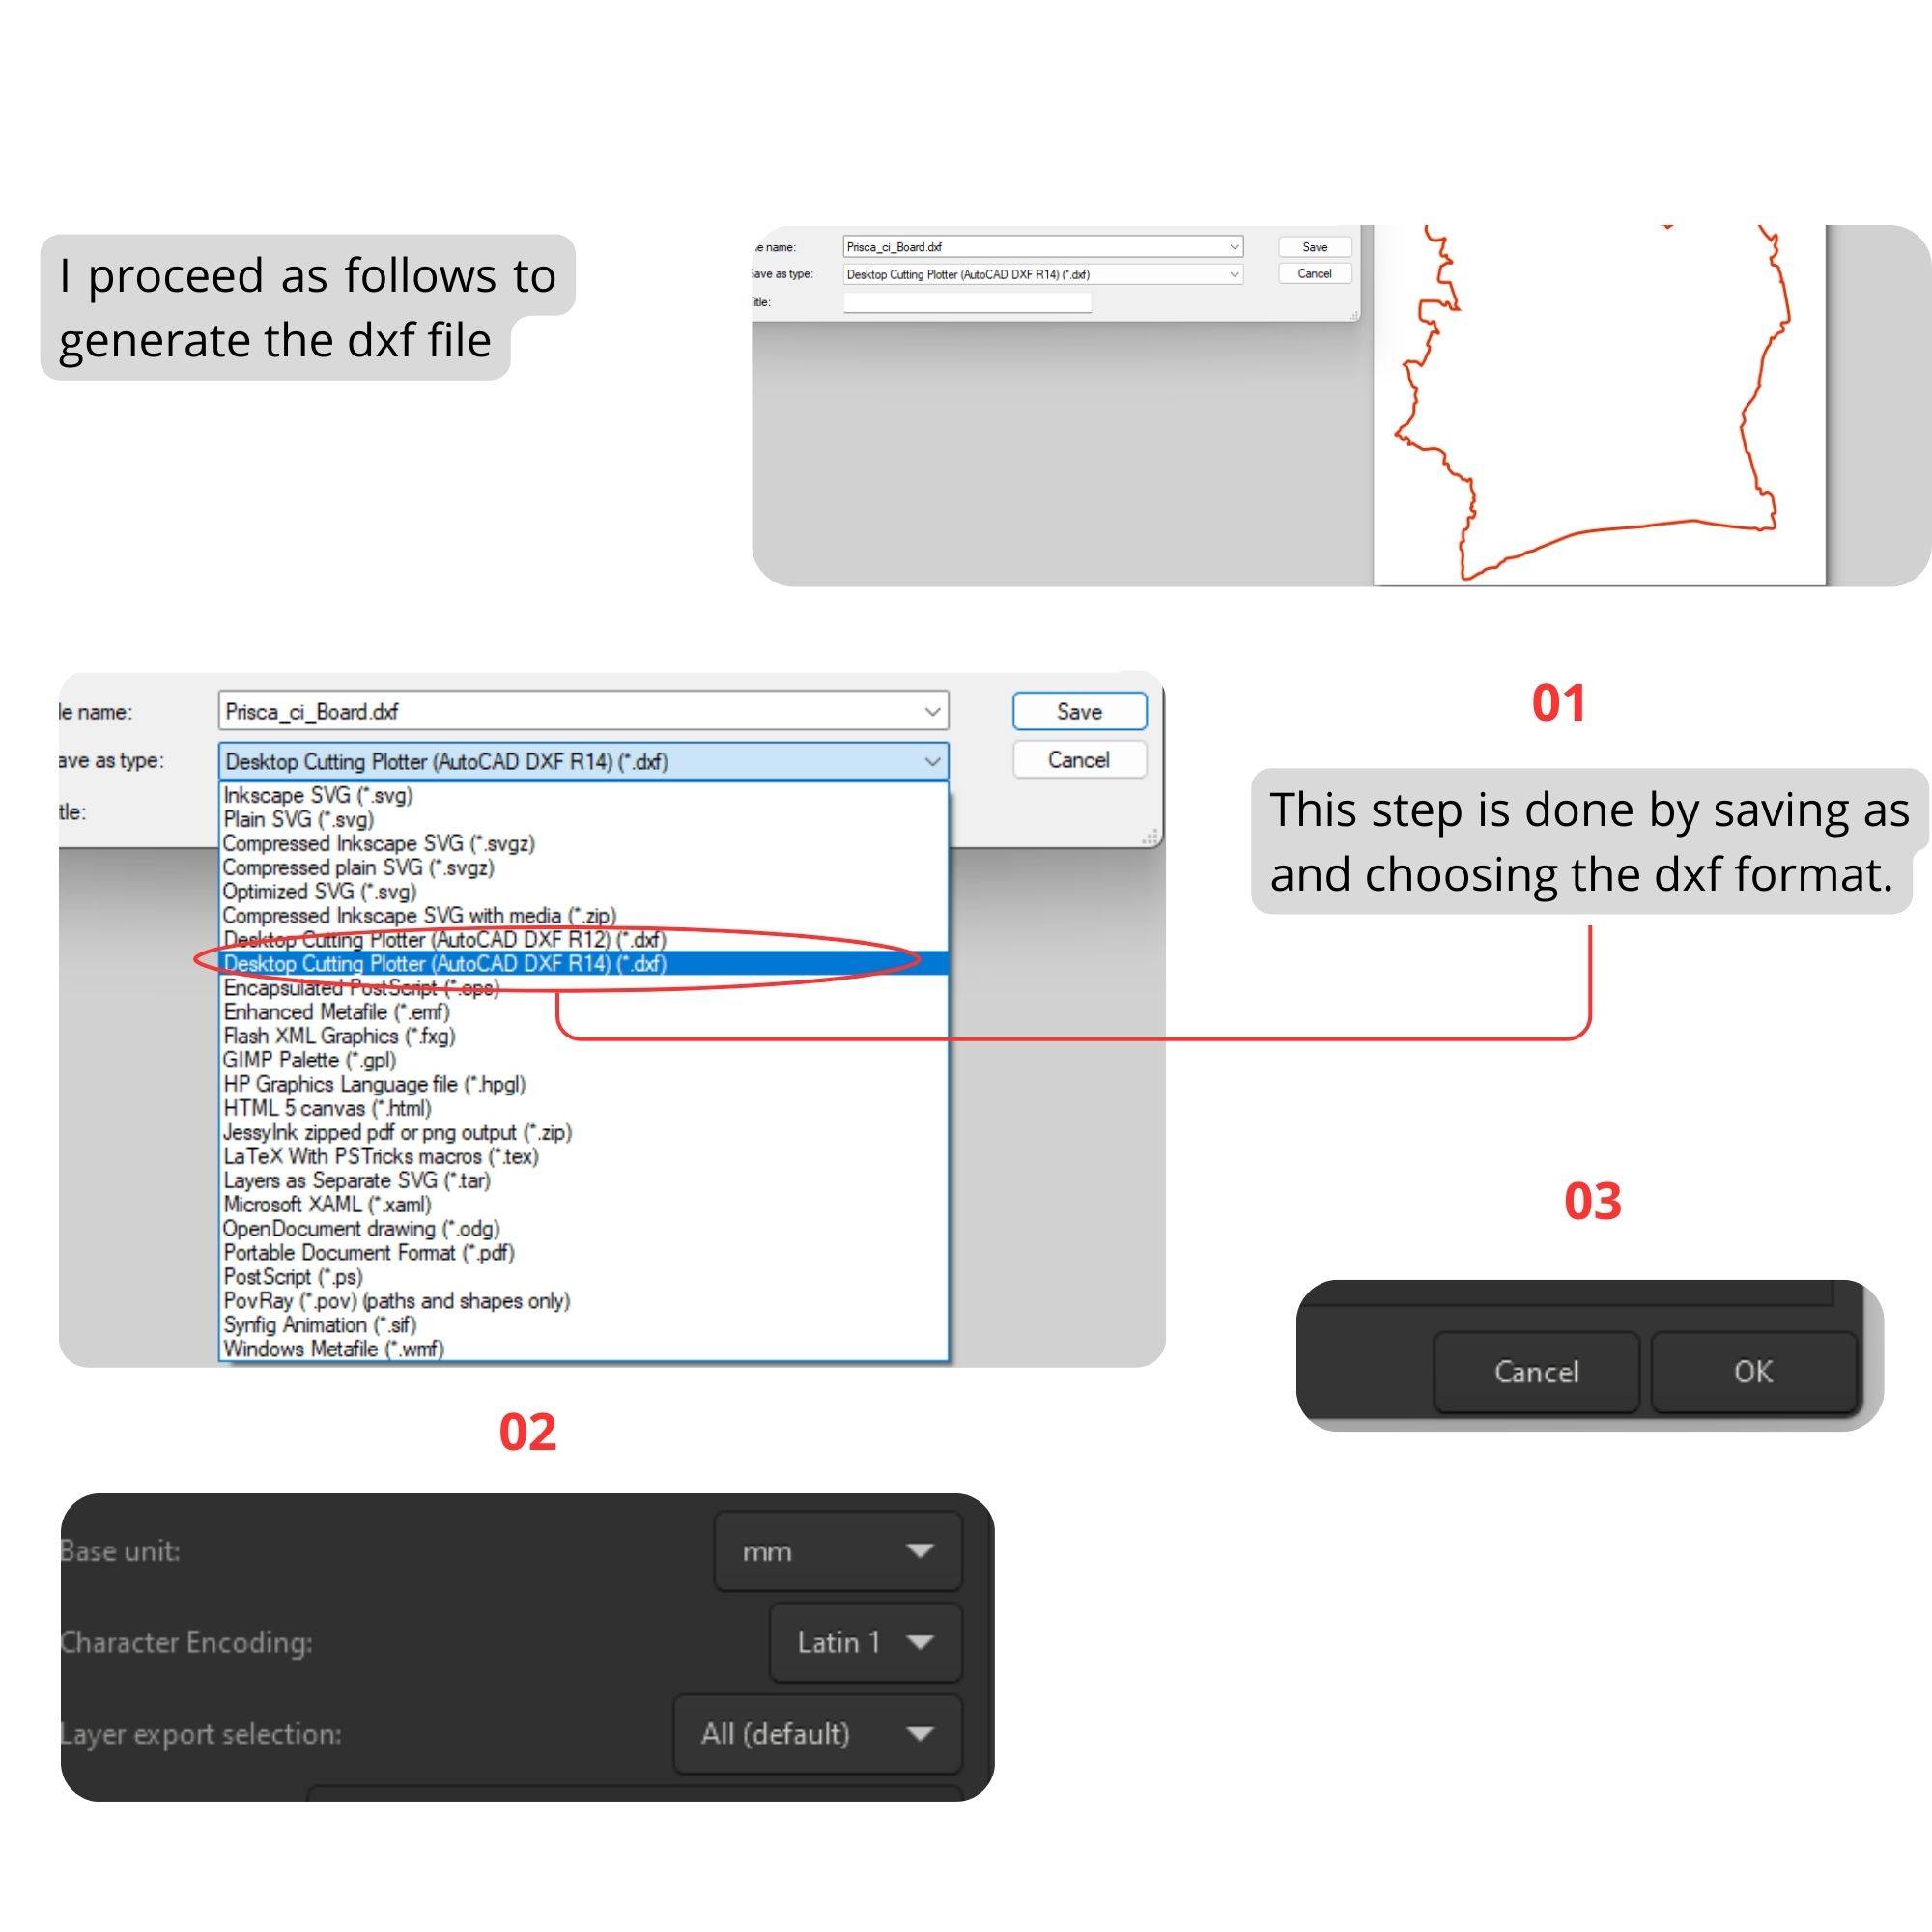
*3D Modeling
- STEP1
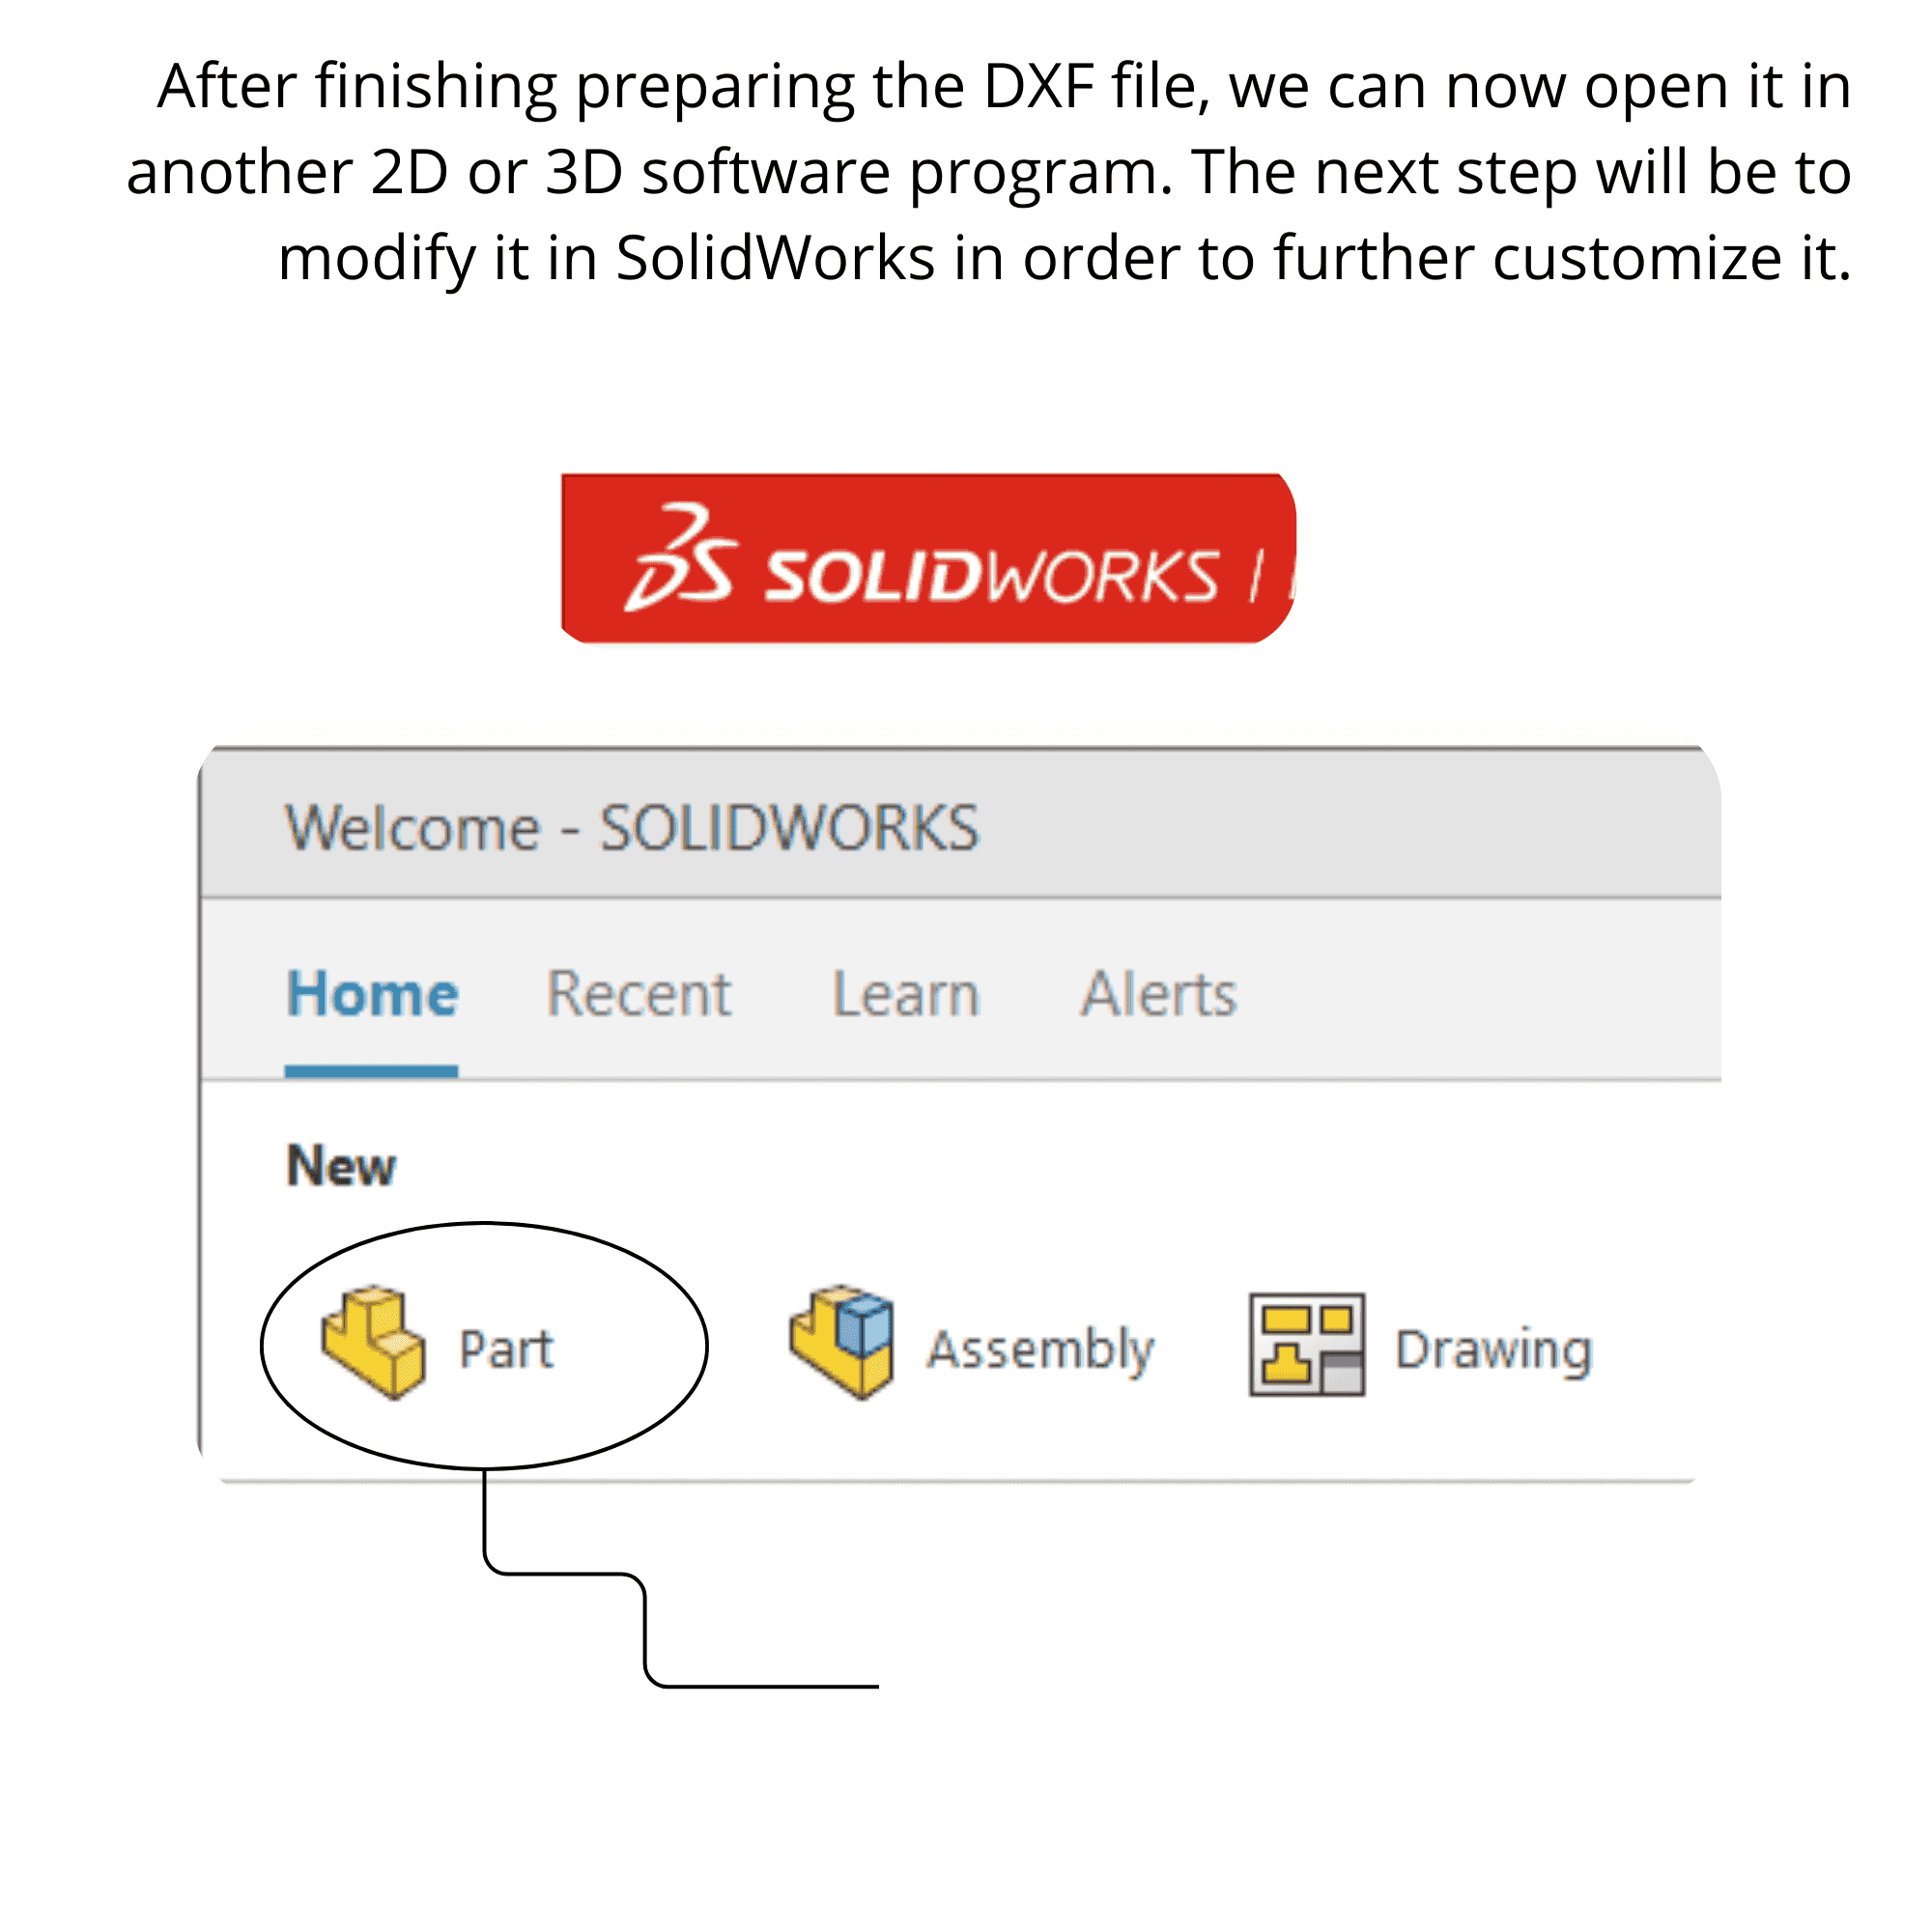
- STEP2
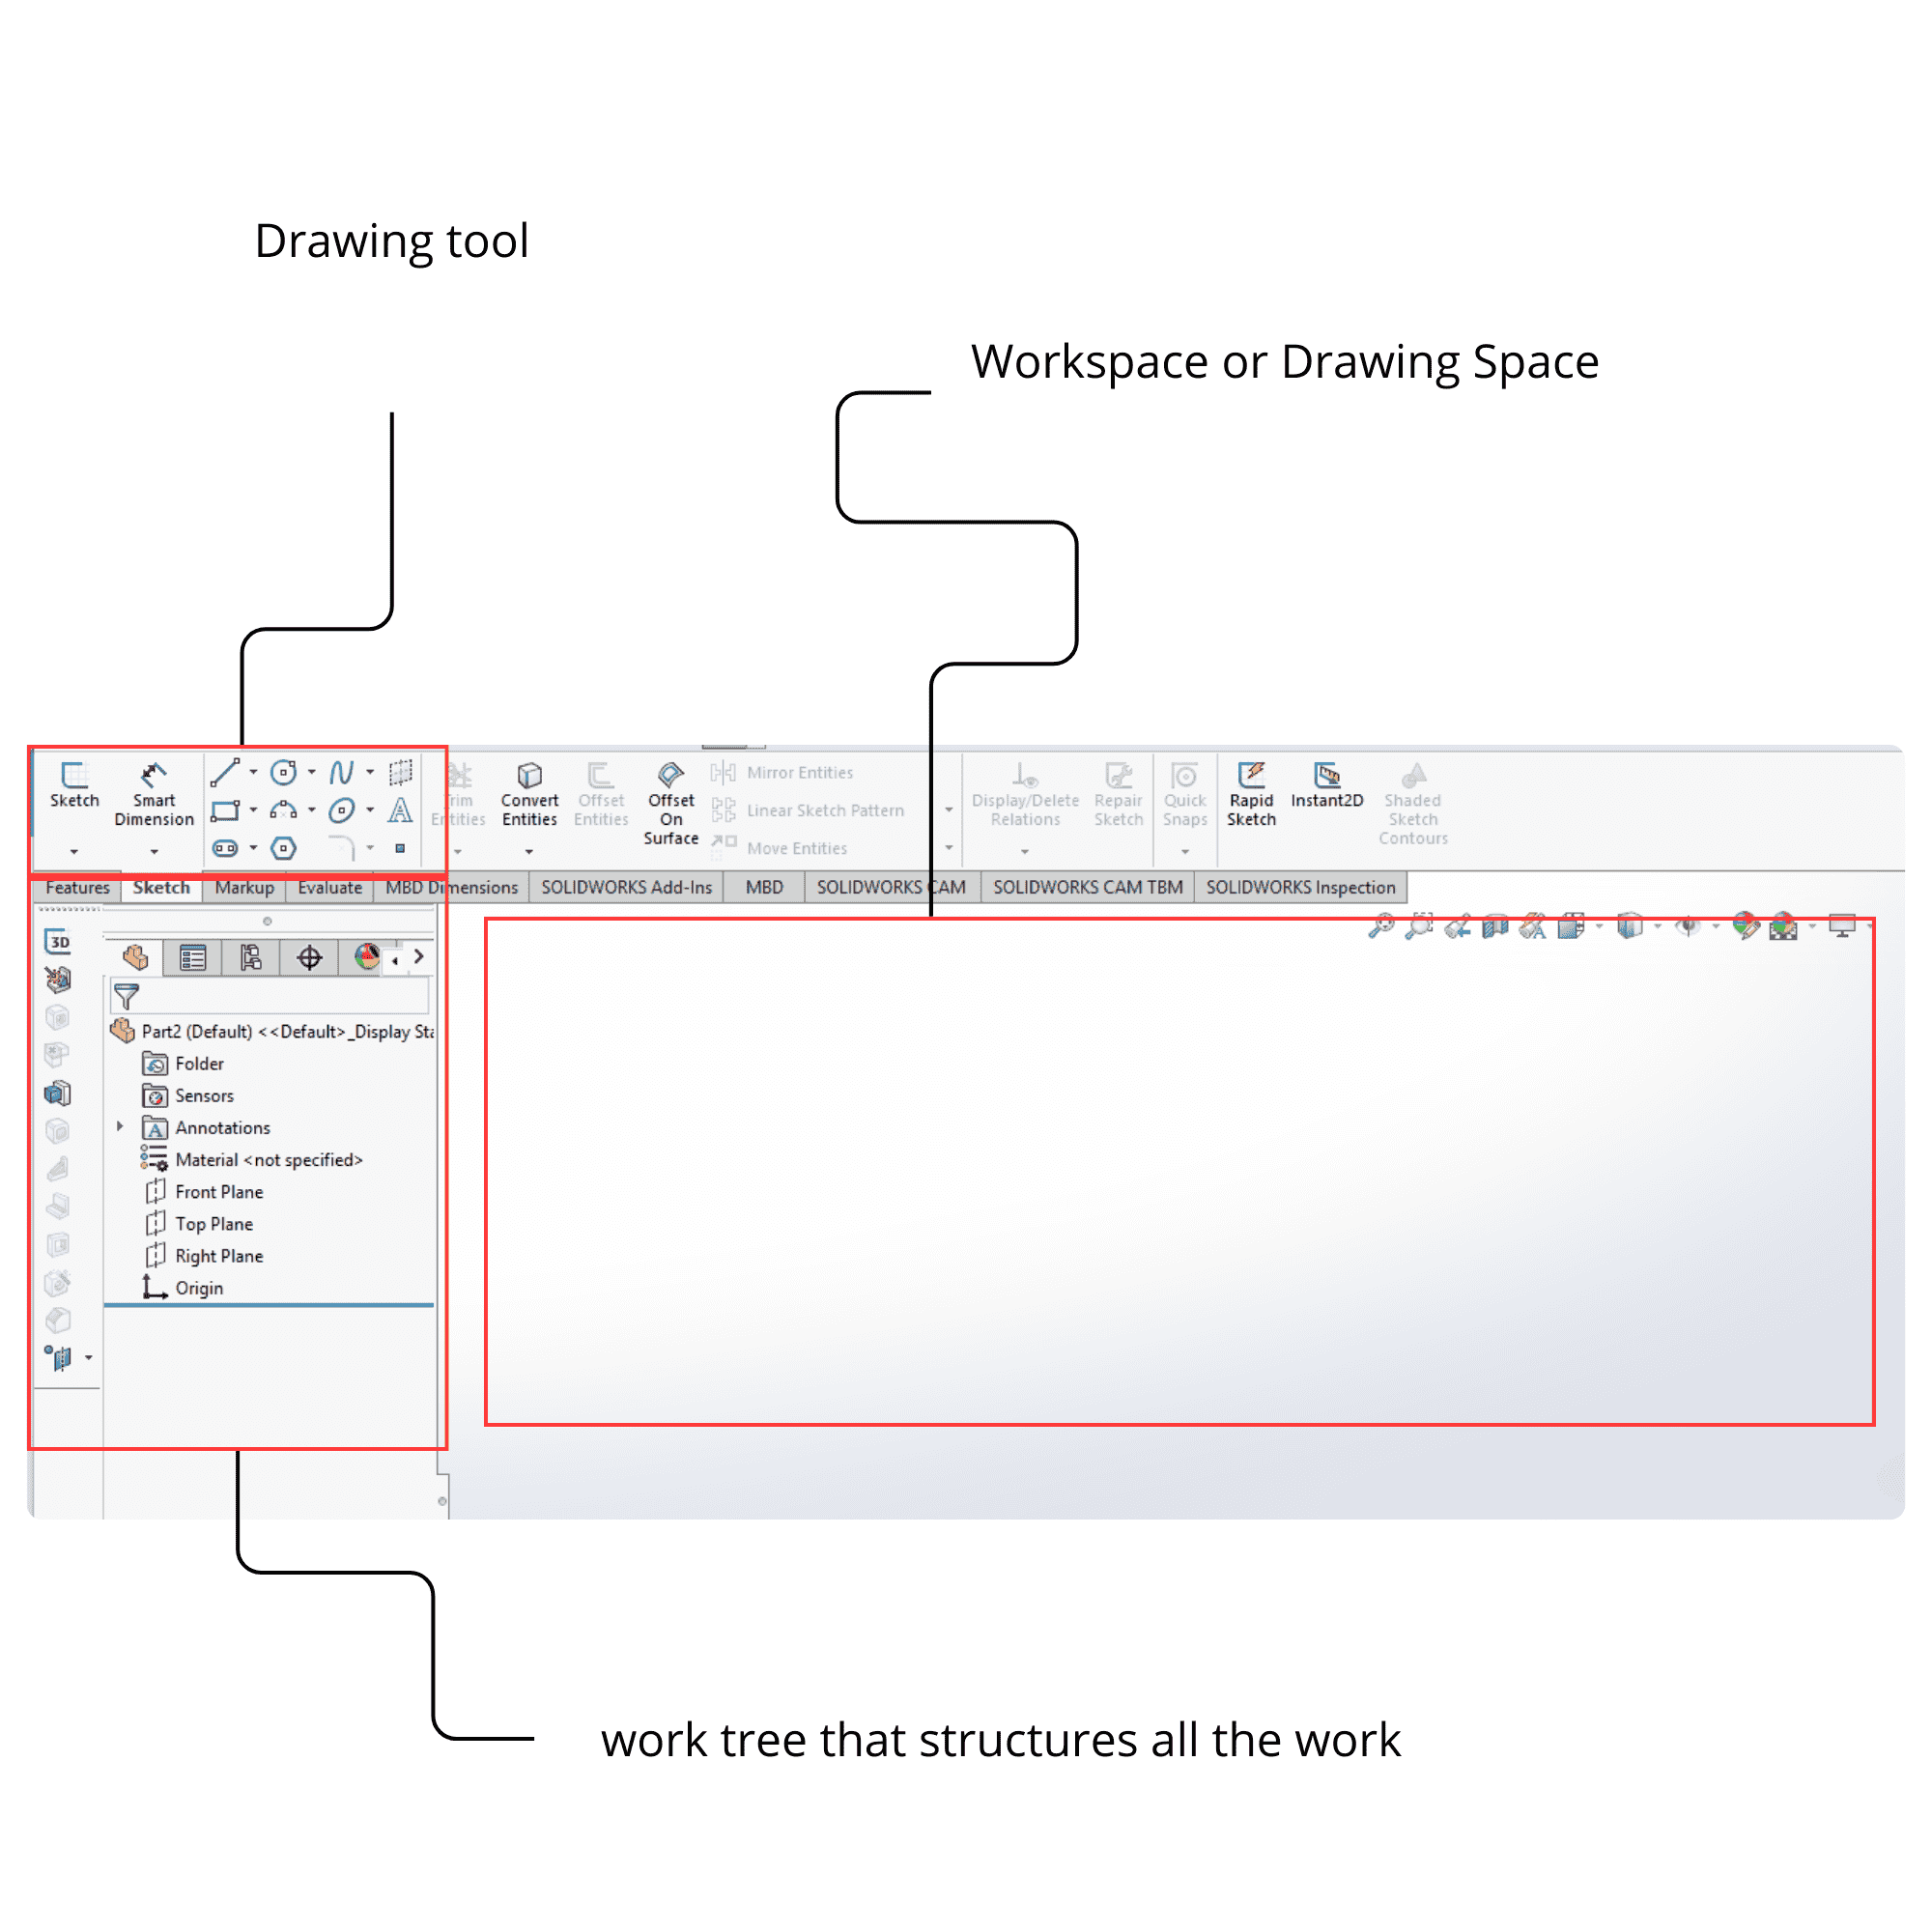
STEP3
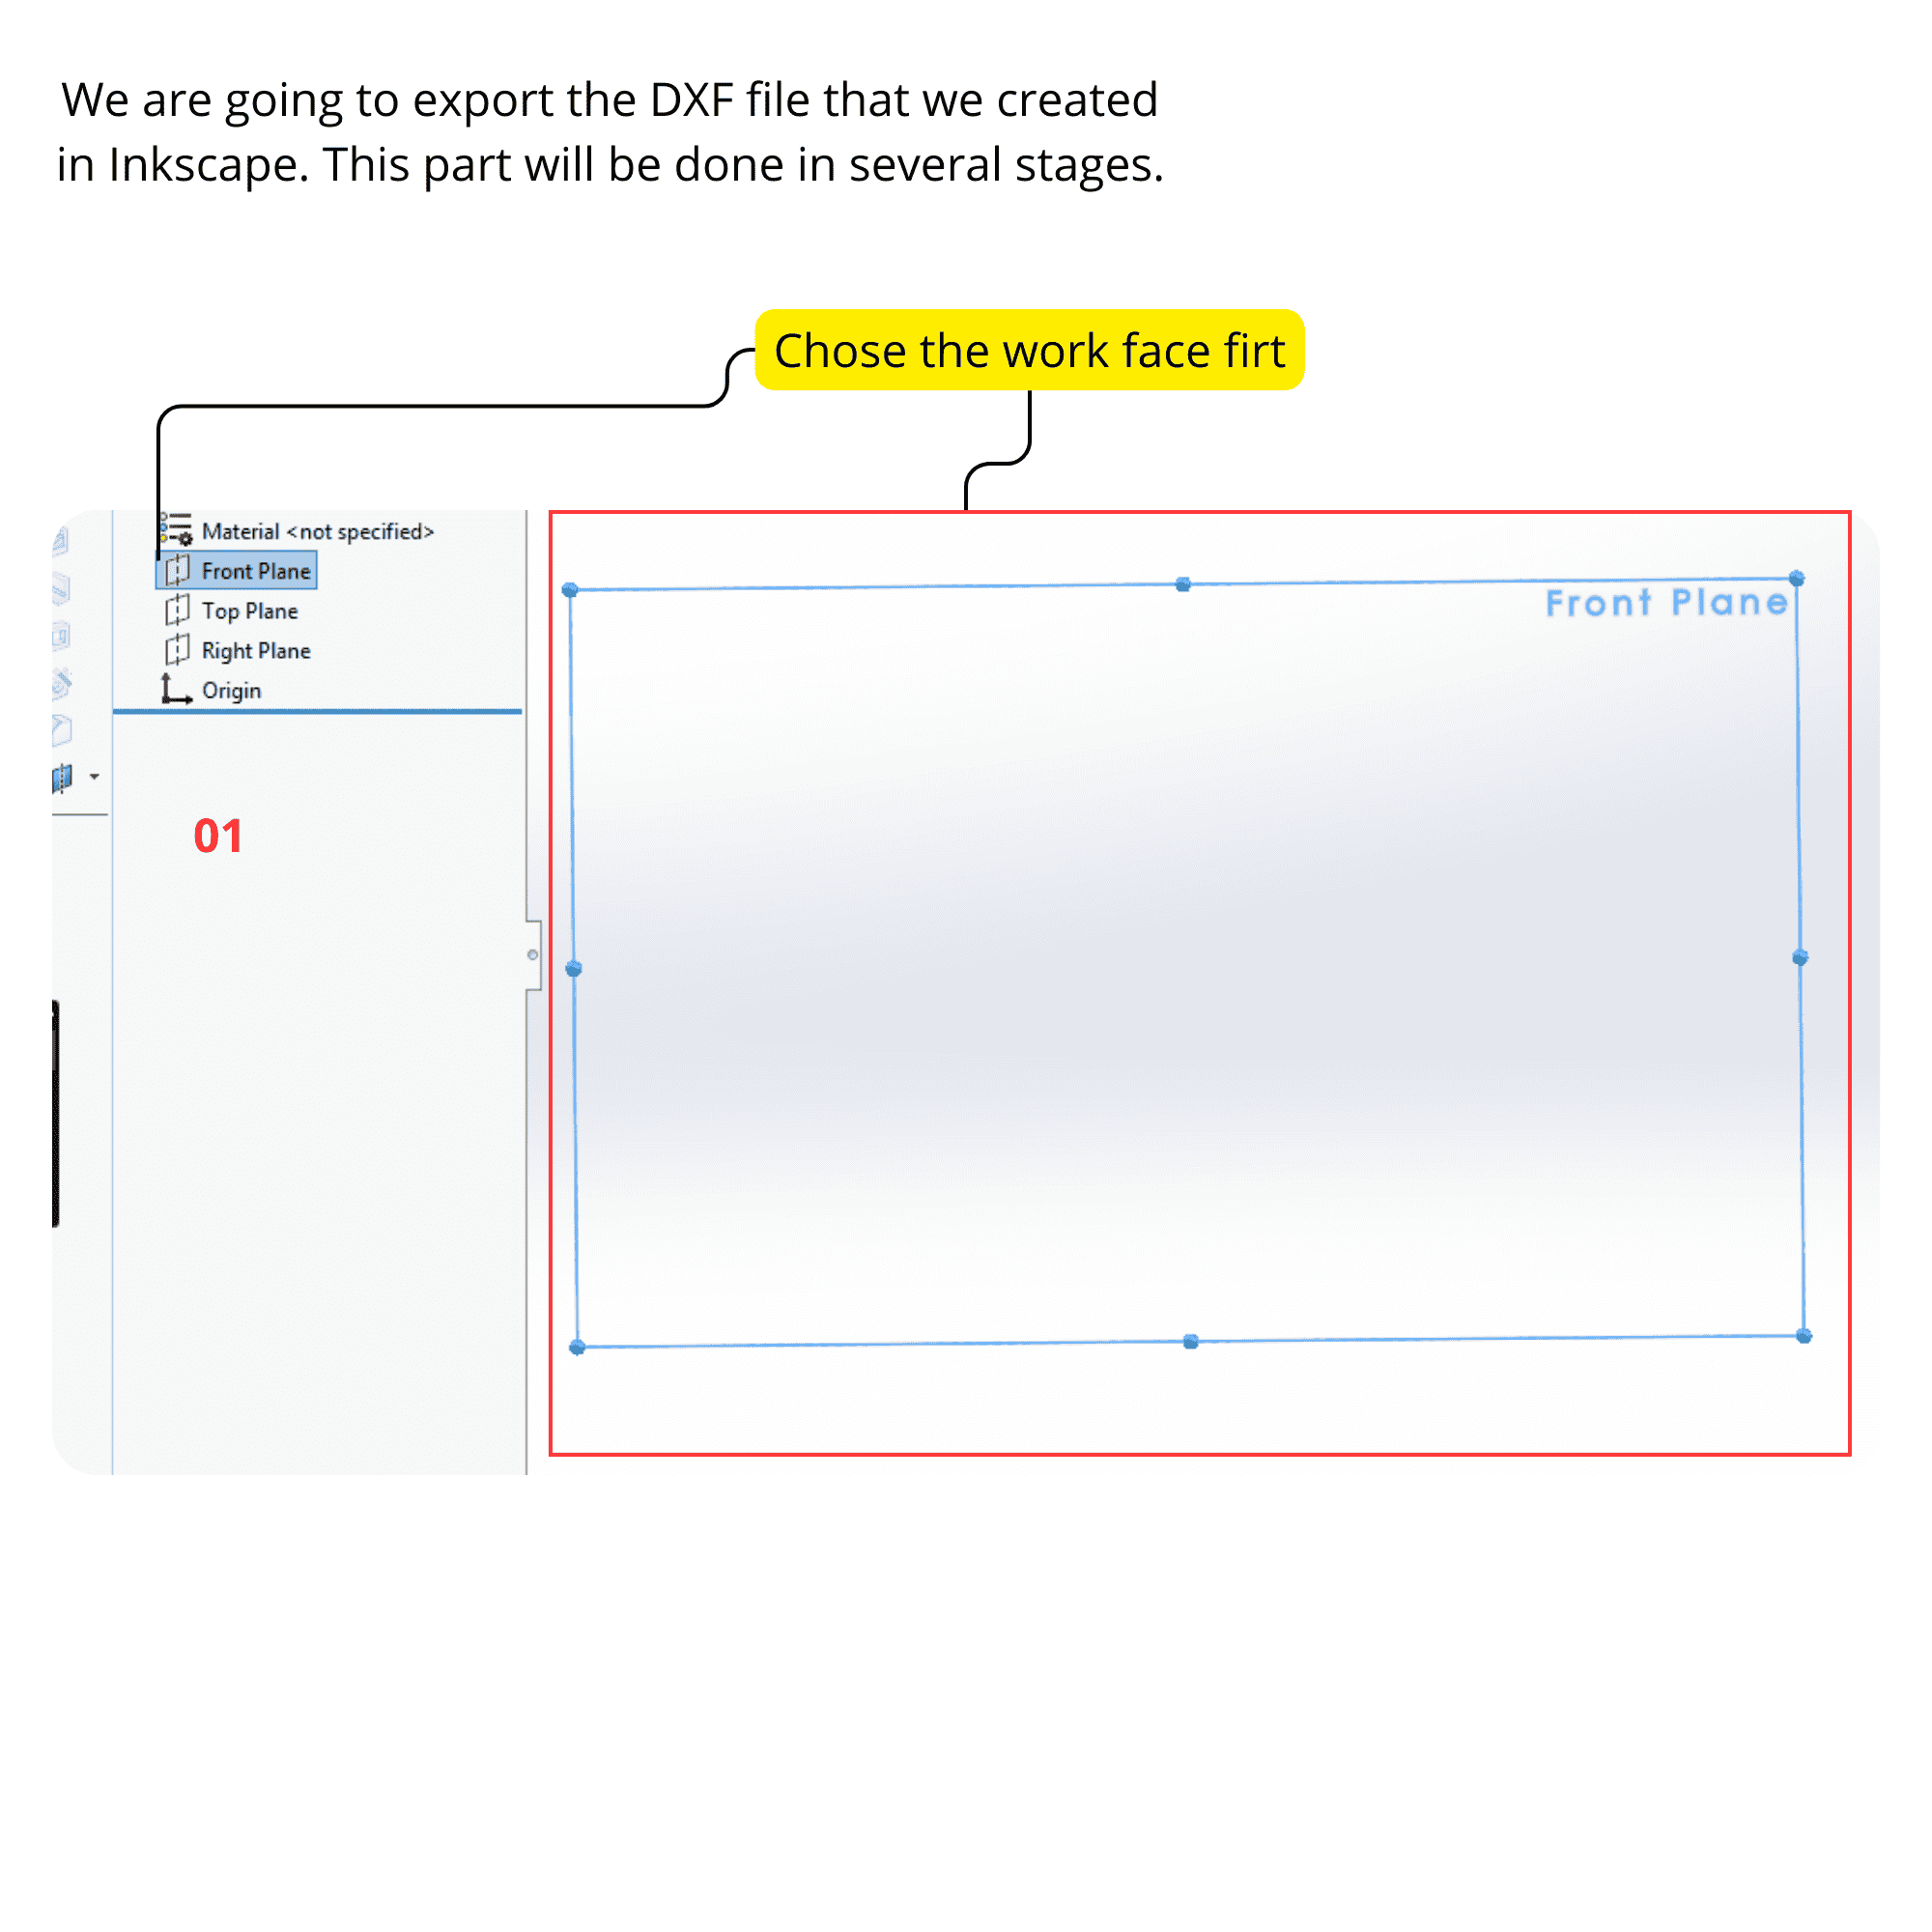 - STEP4
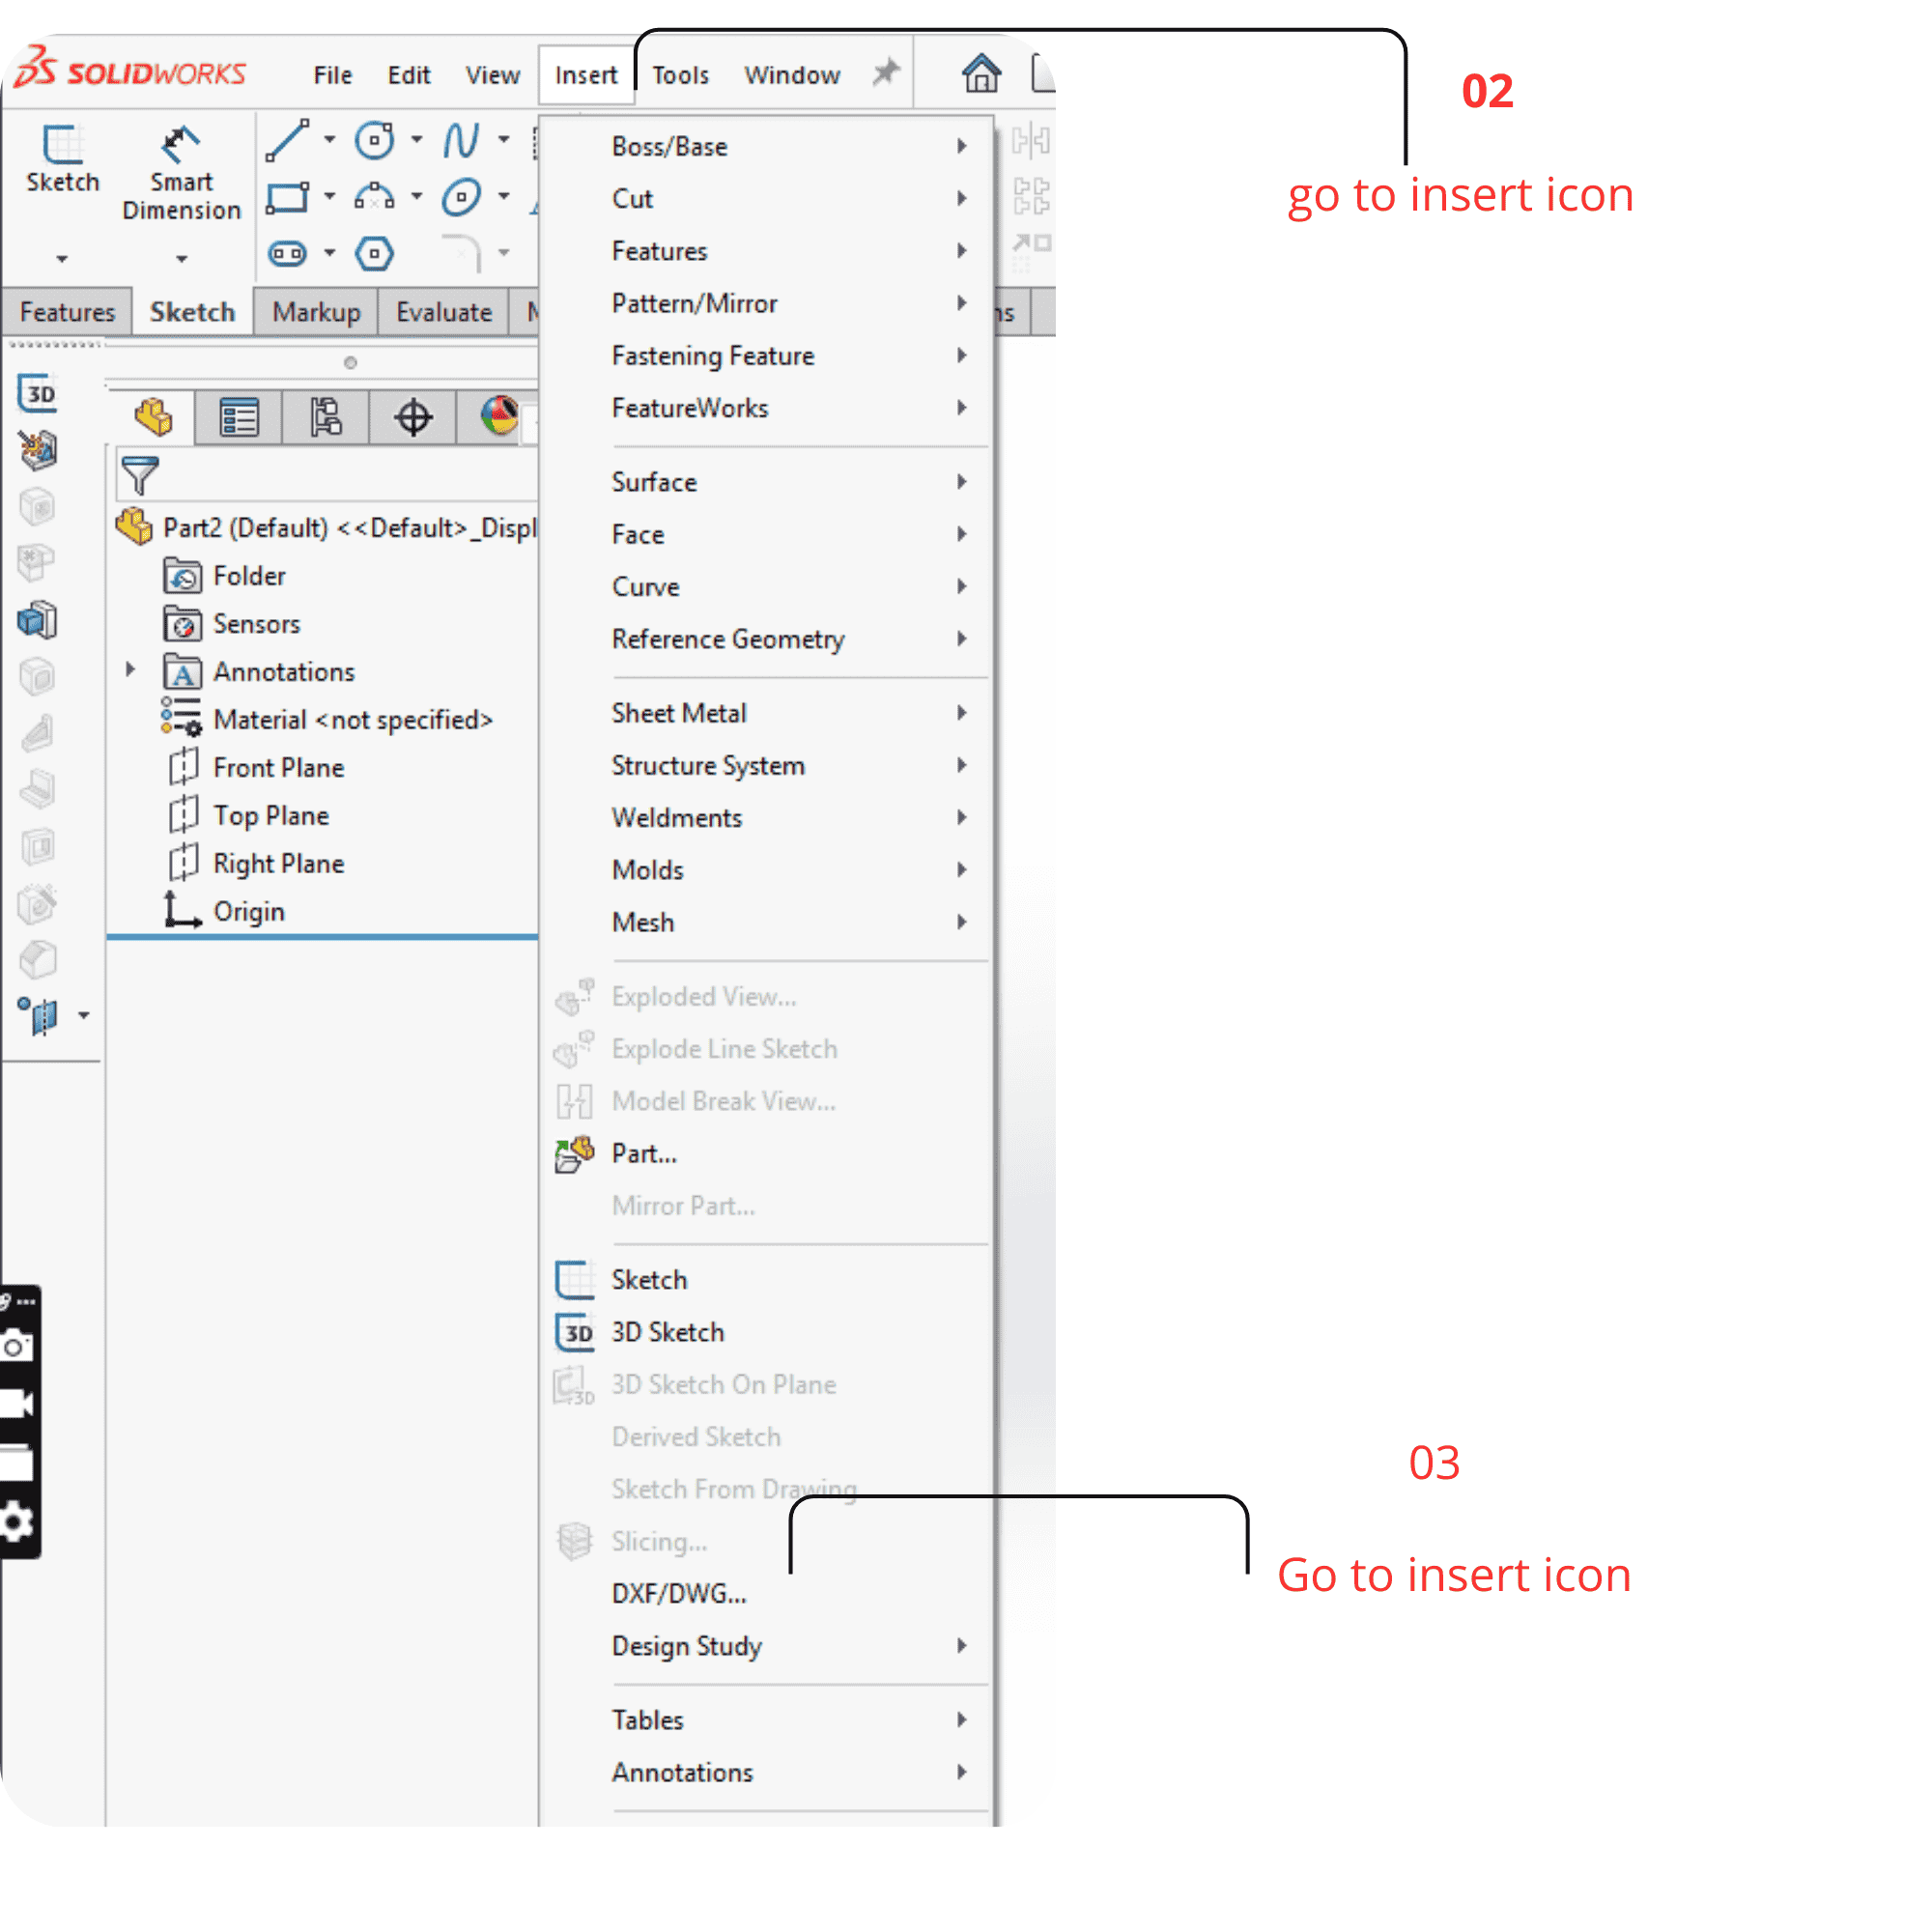
STEP5
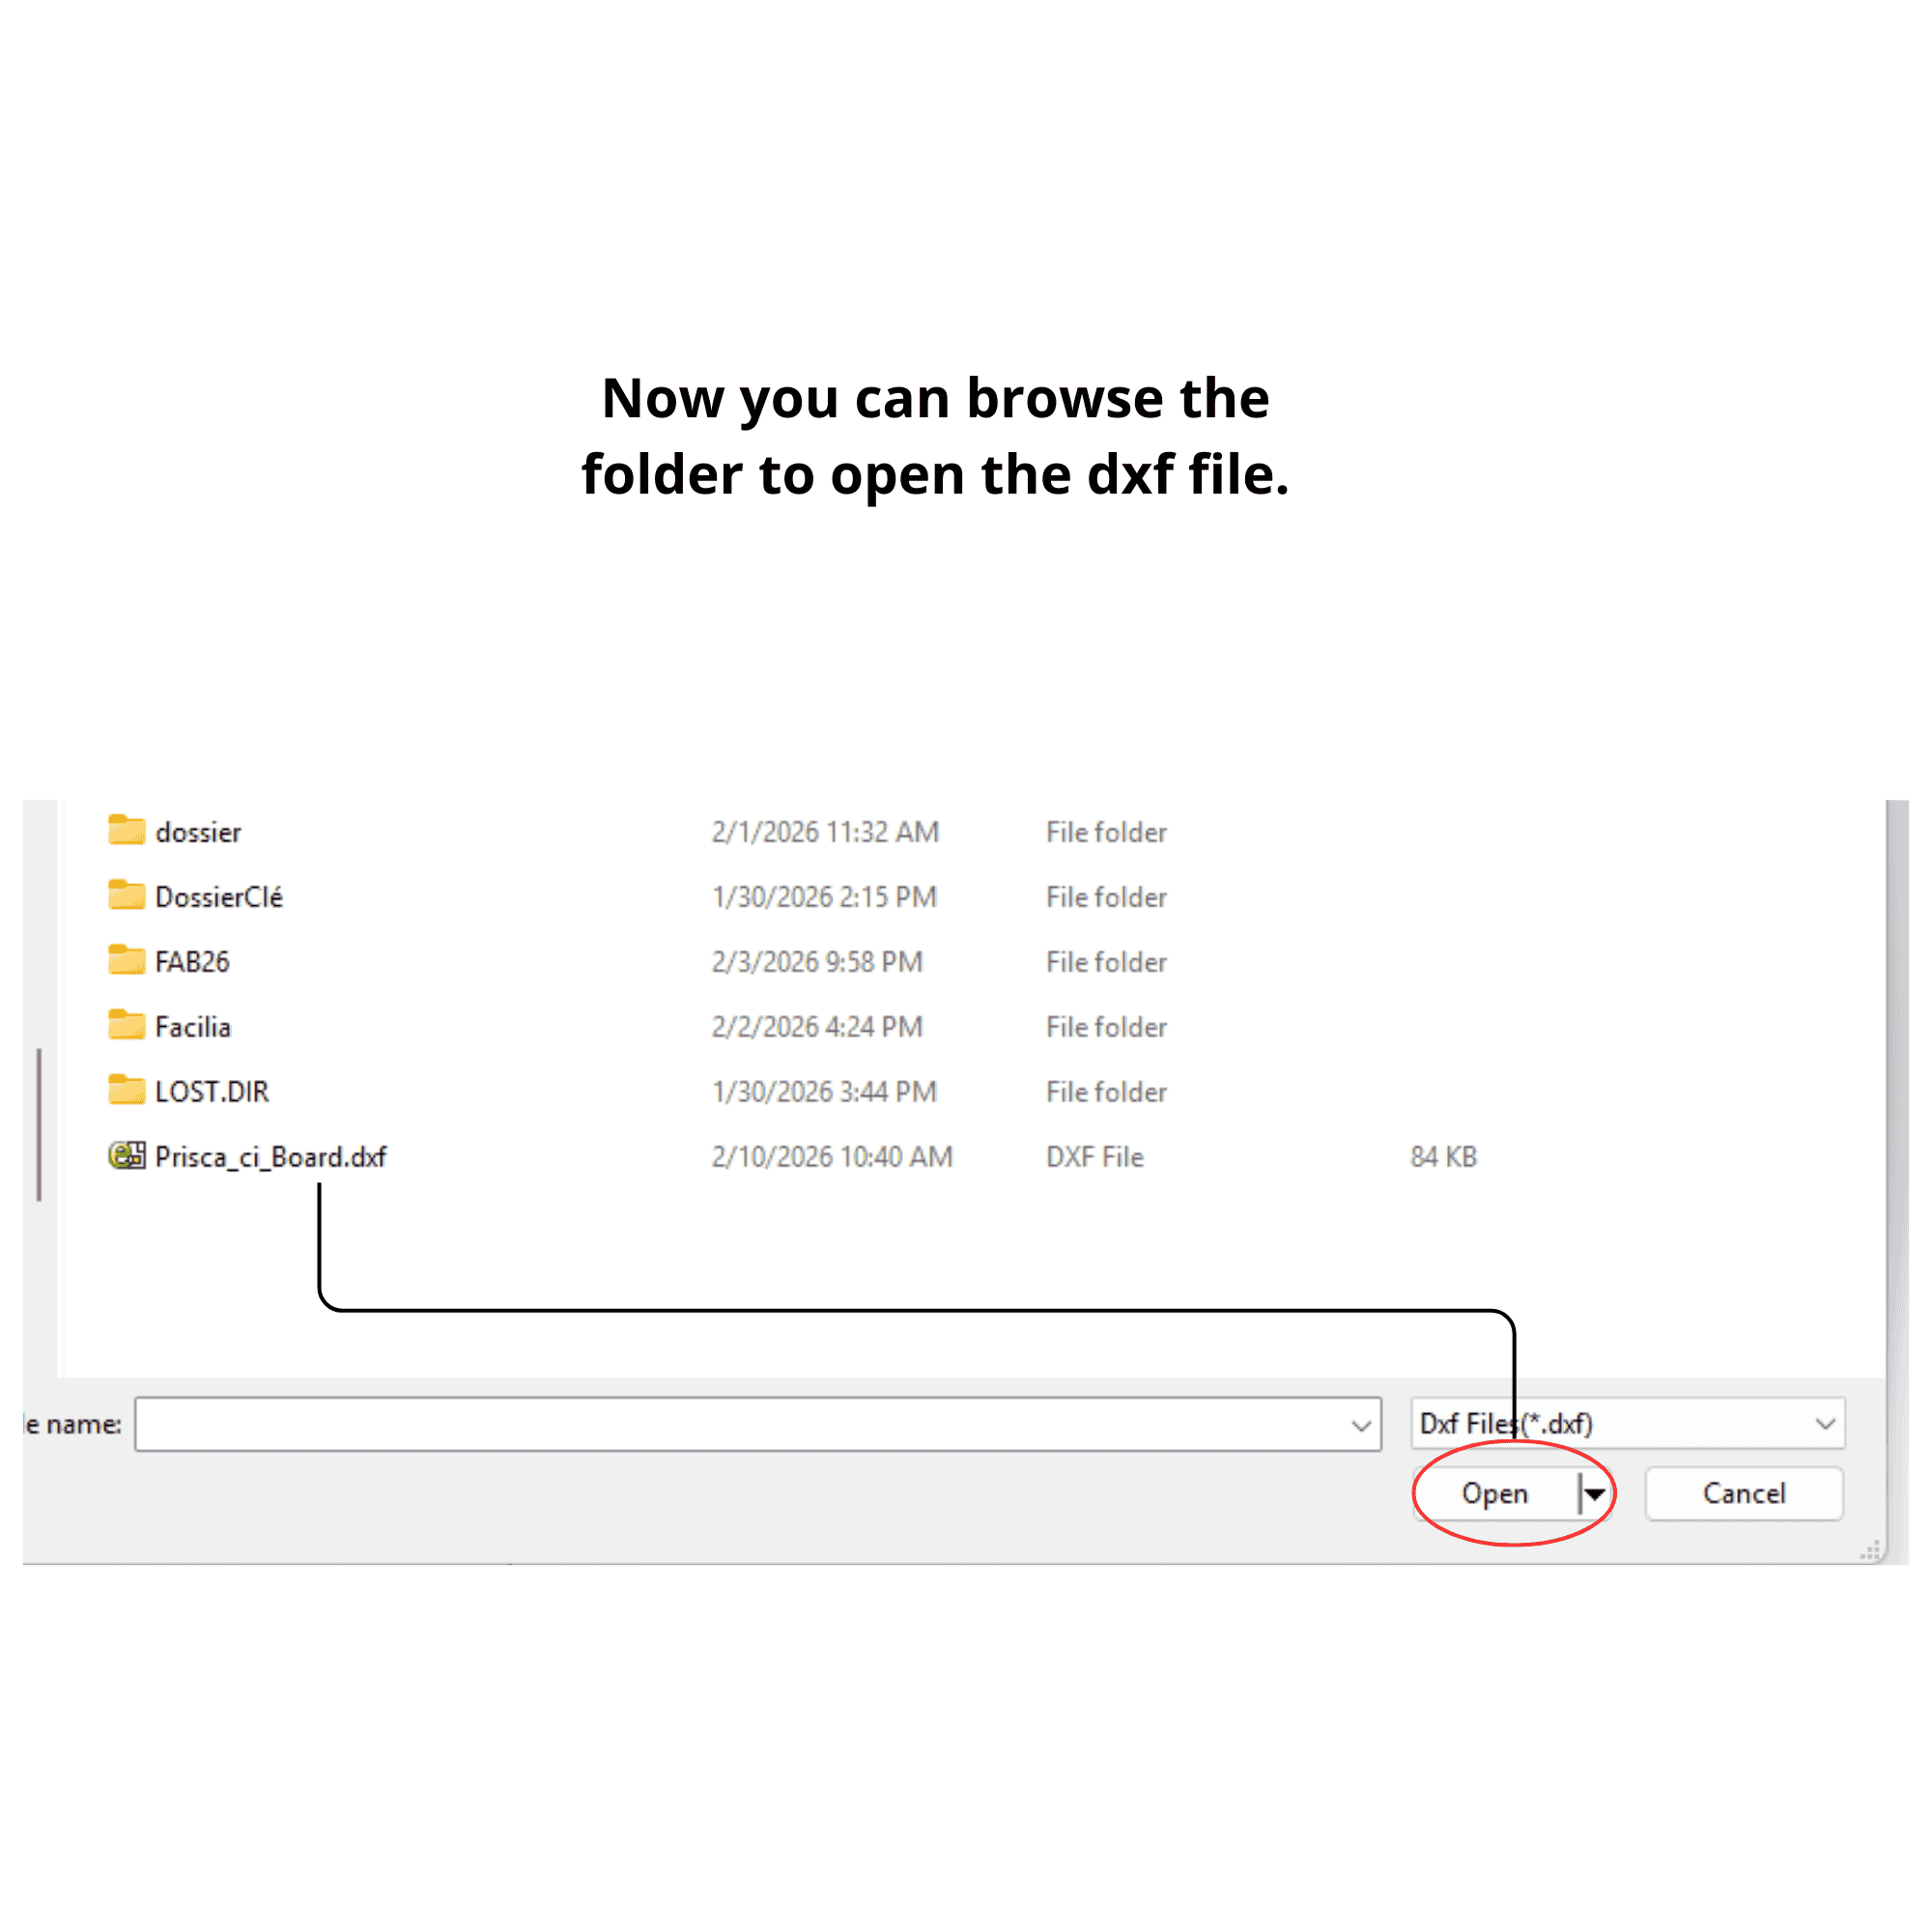
- STEP6
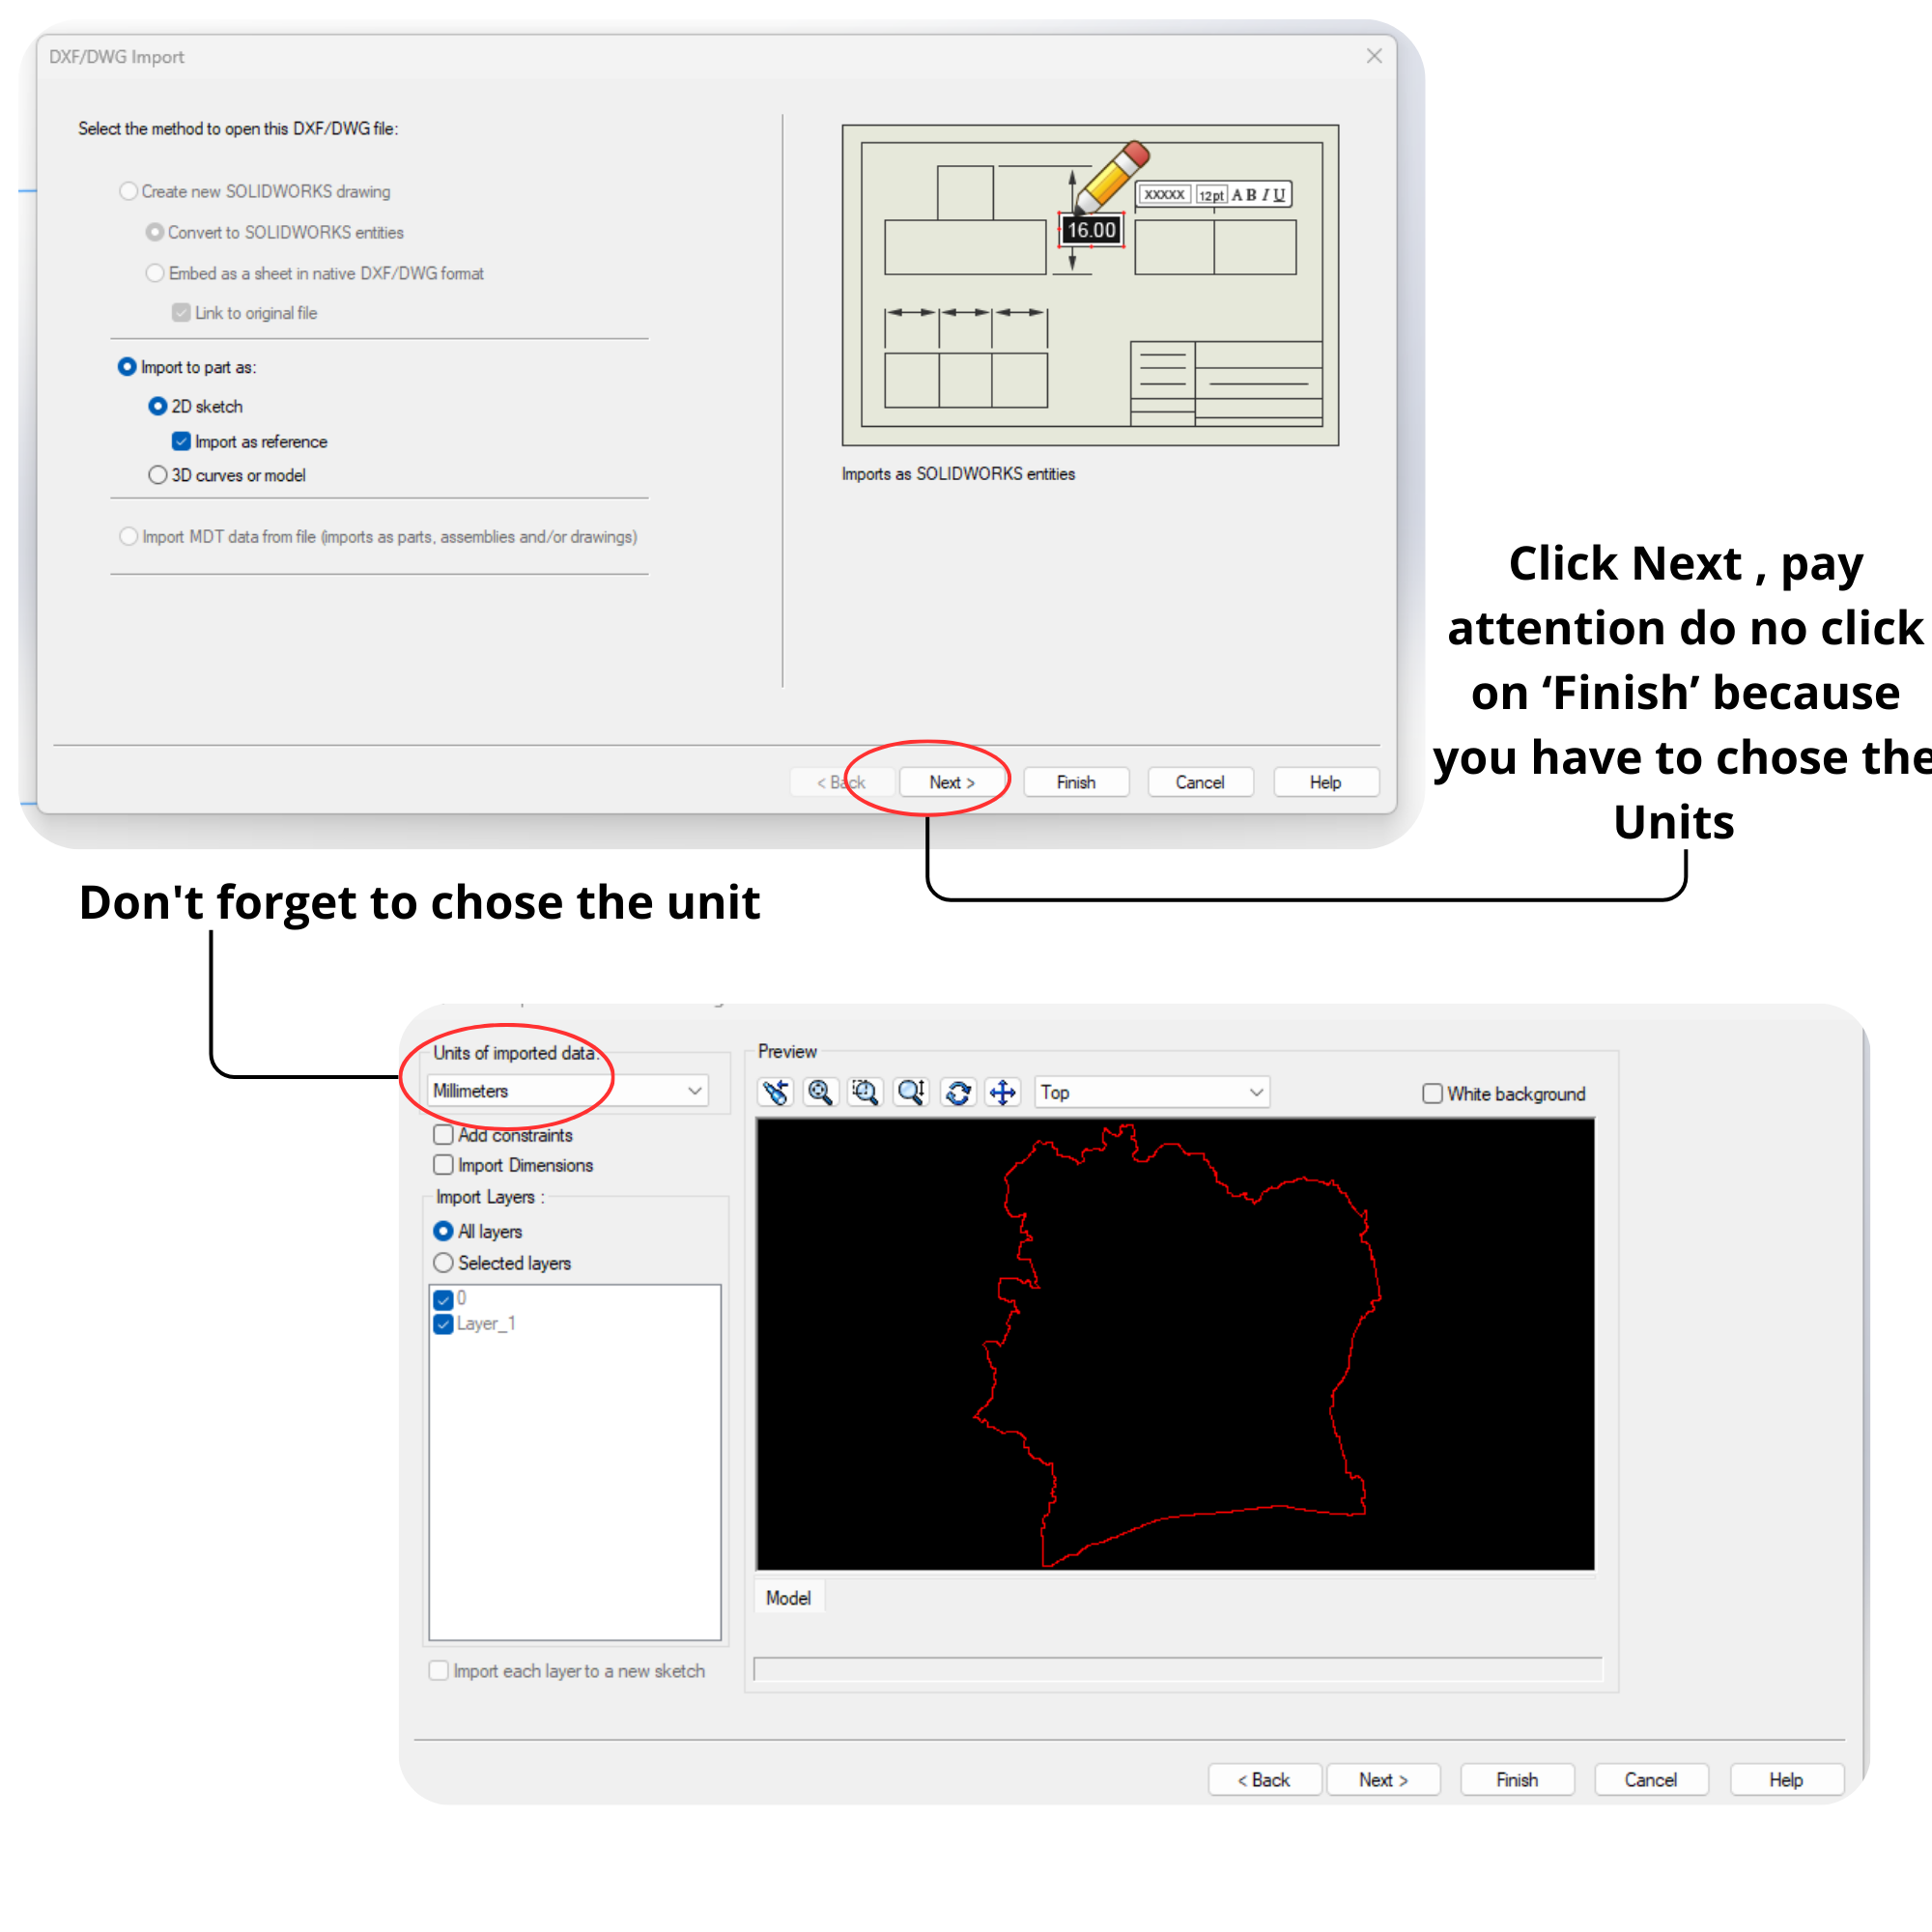
STEP7
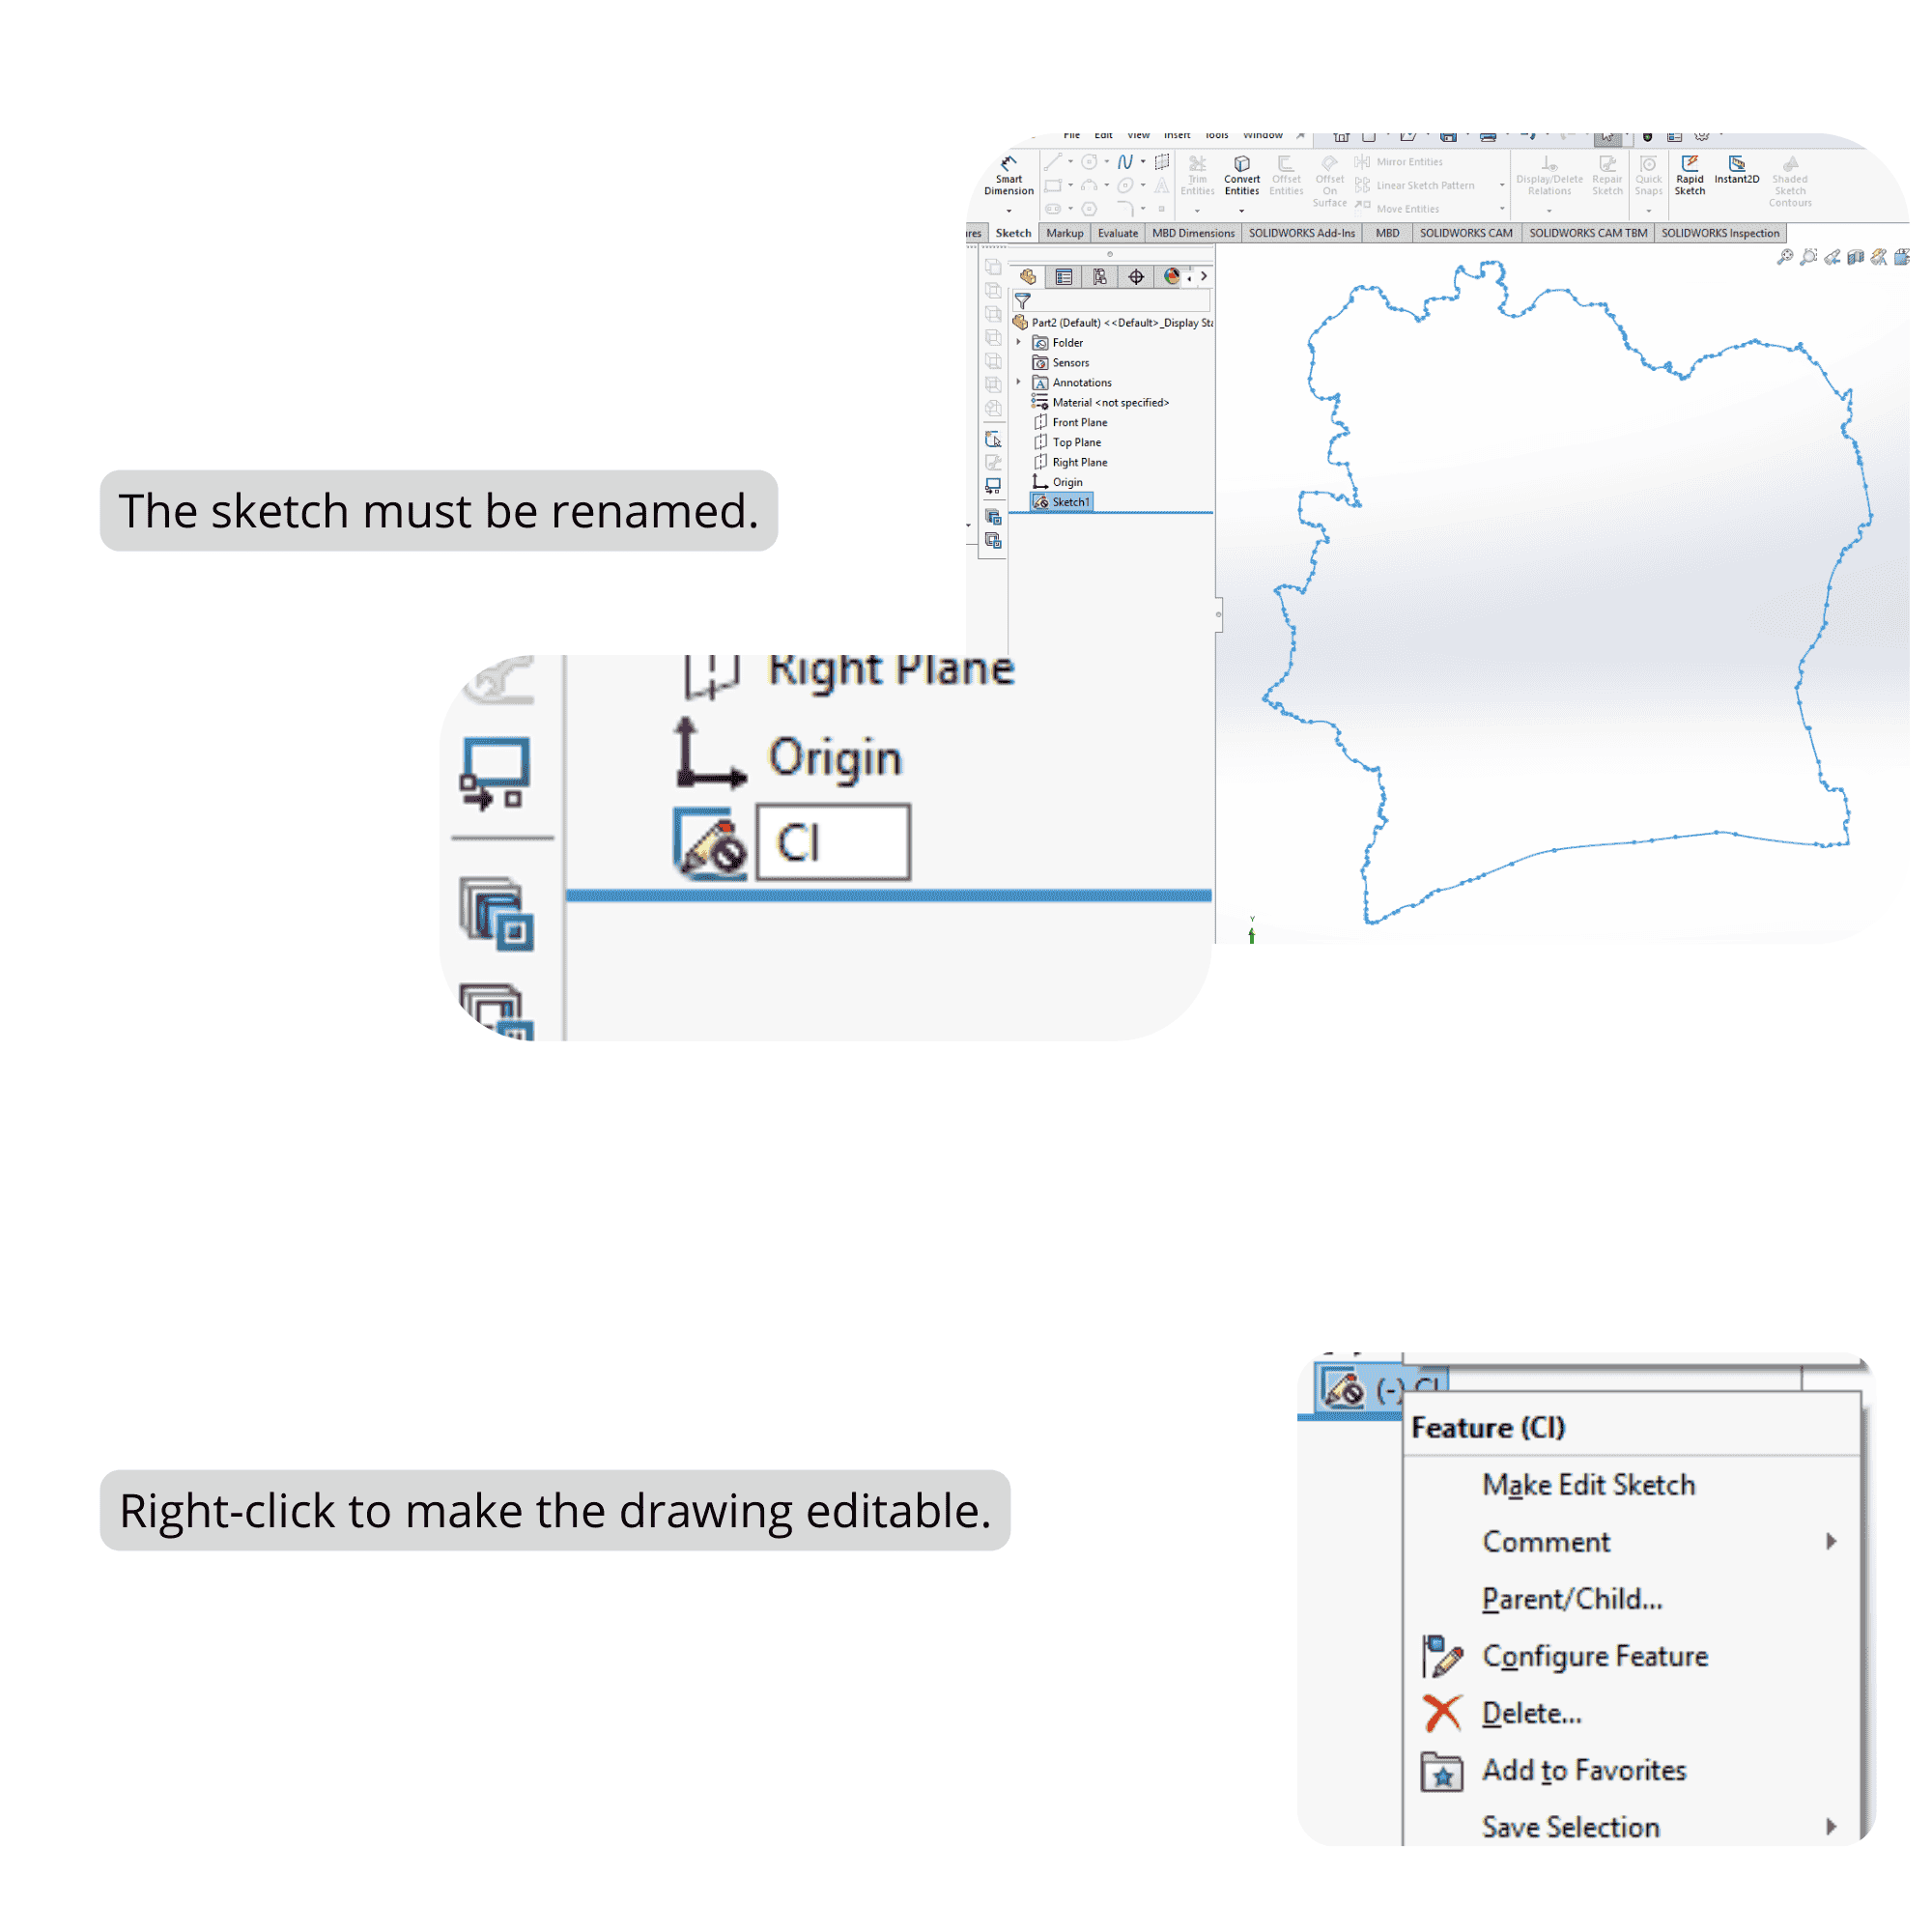
- STEP8
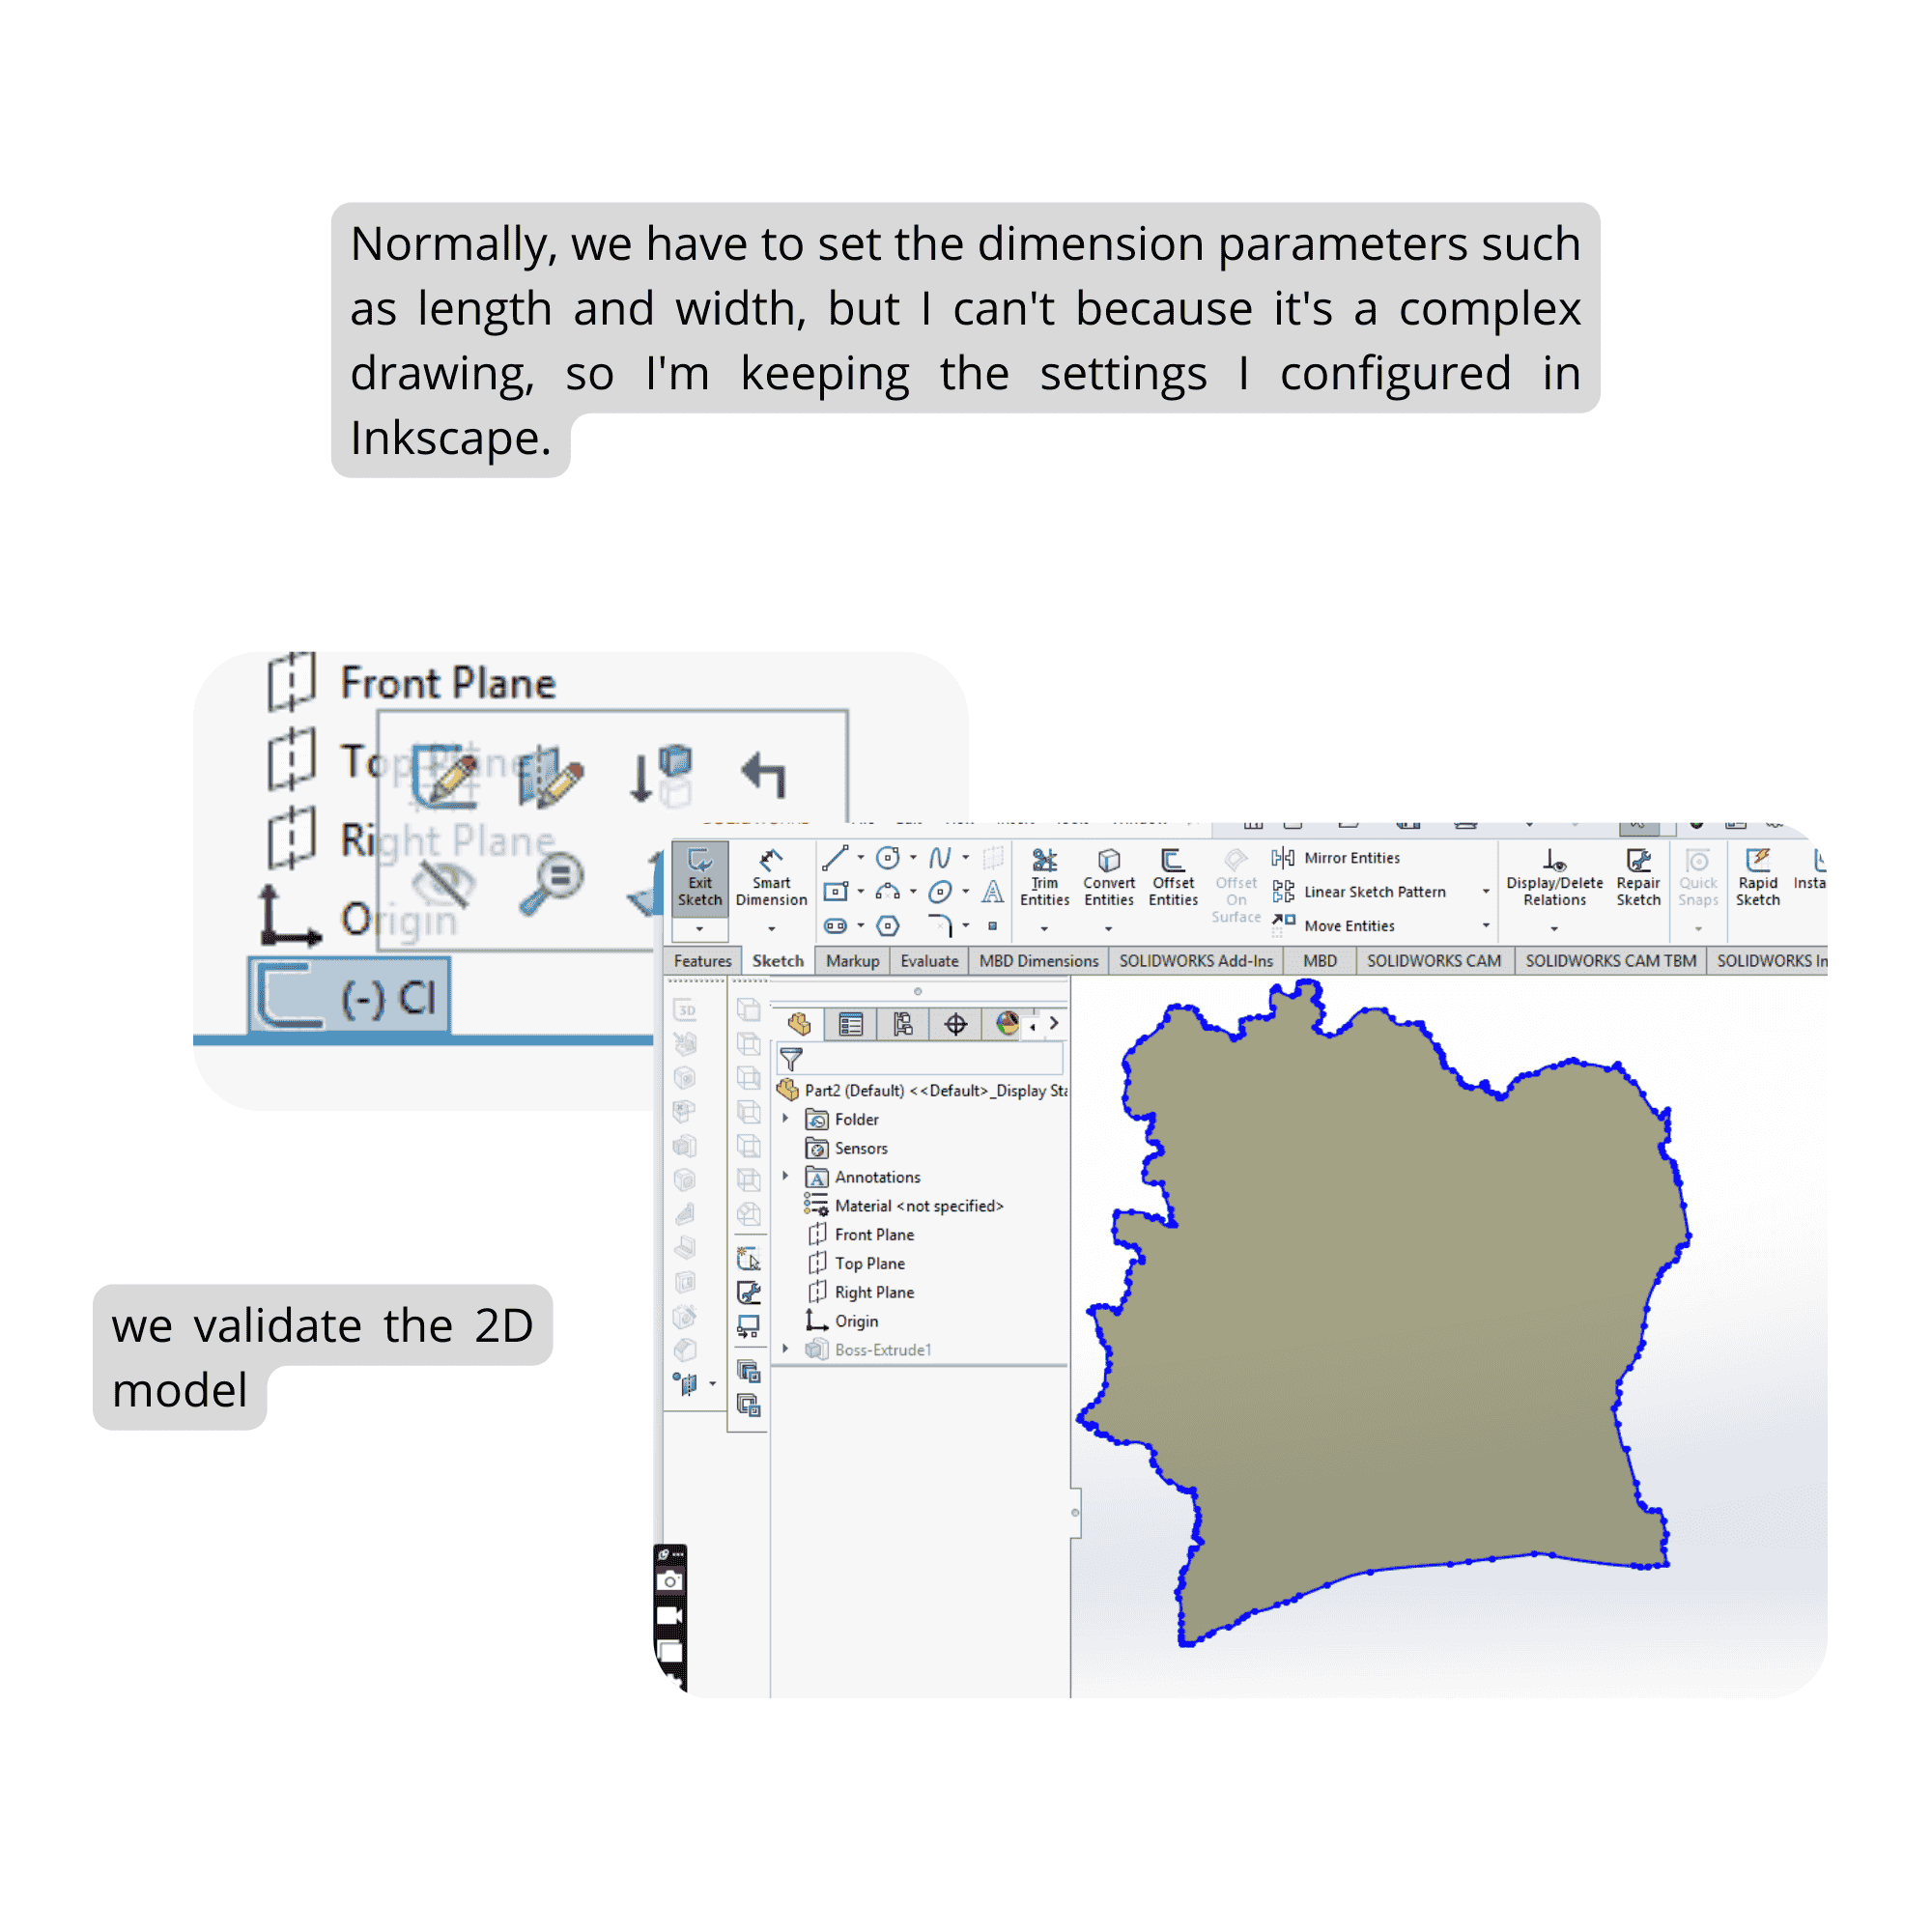
STEP9
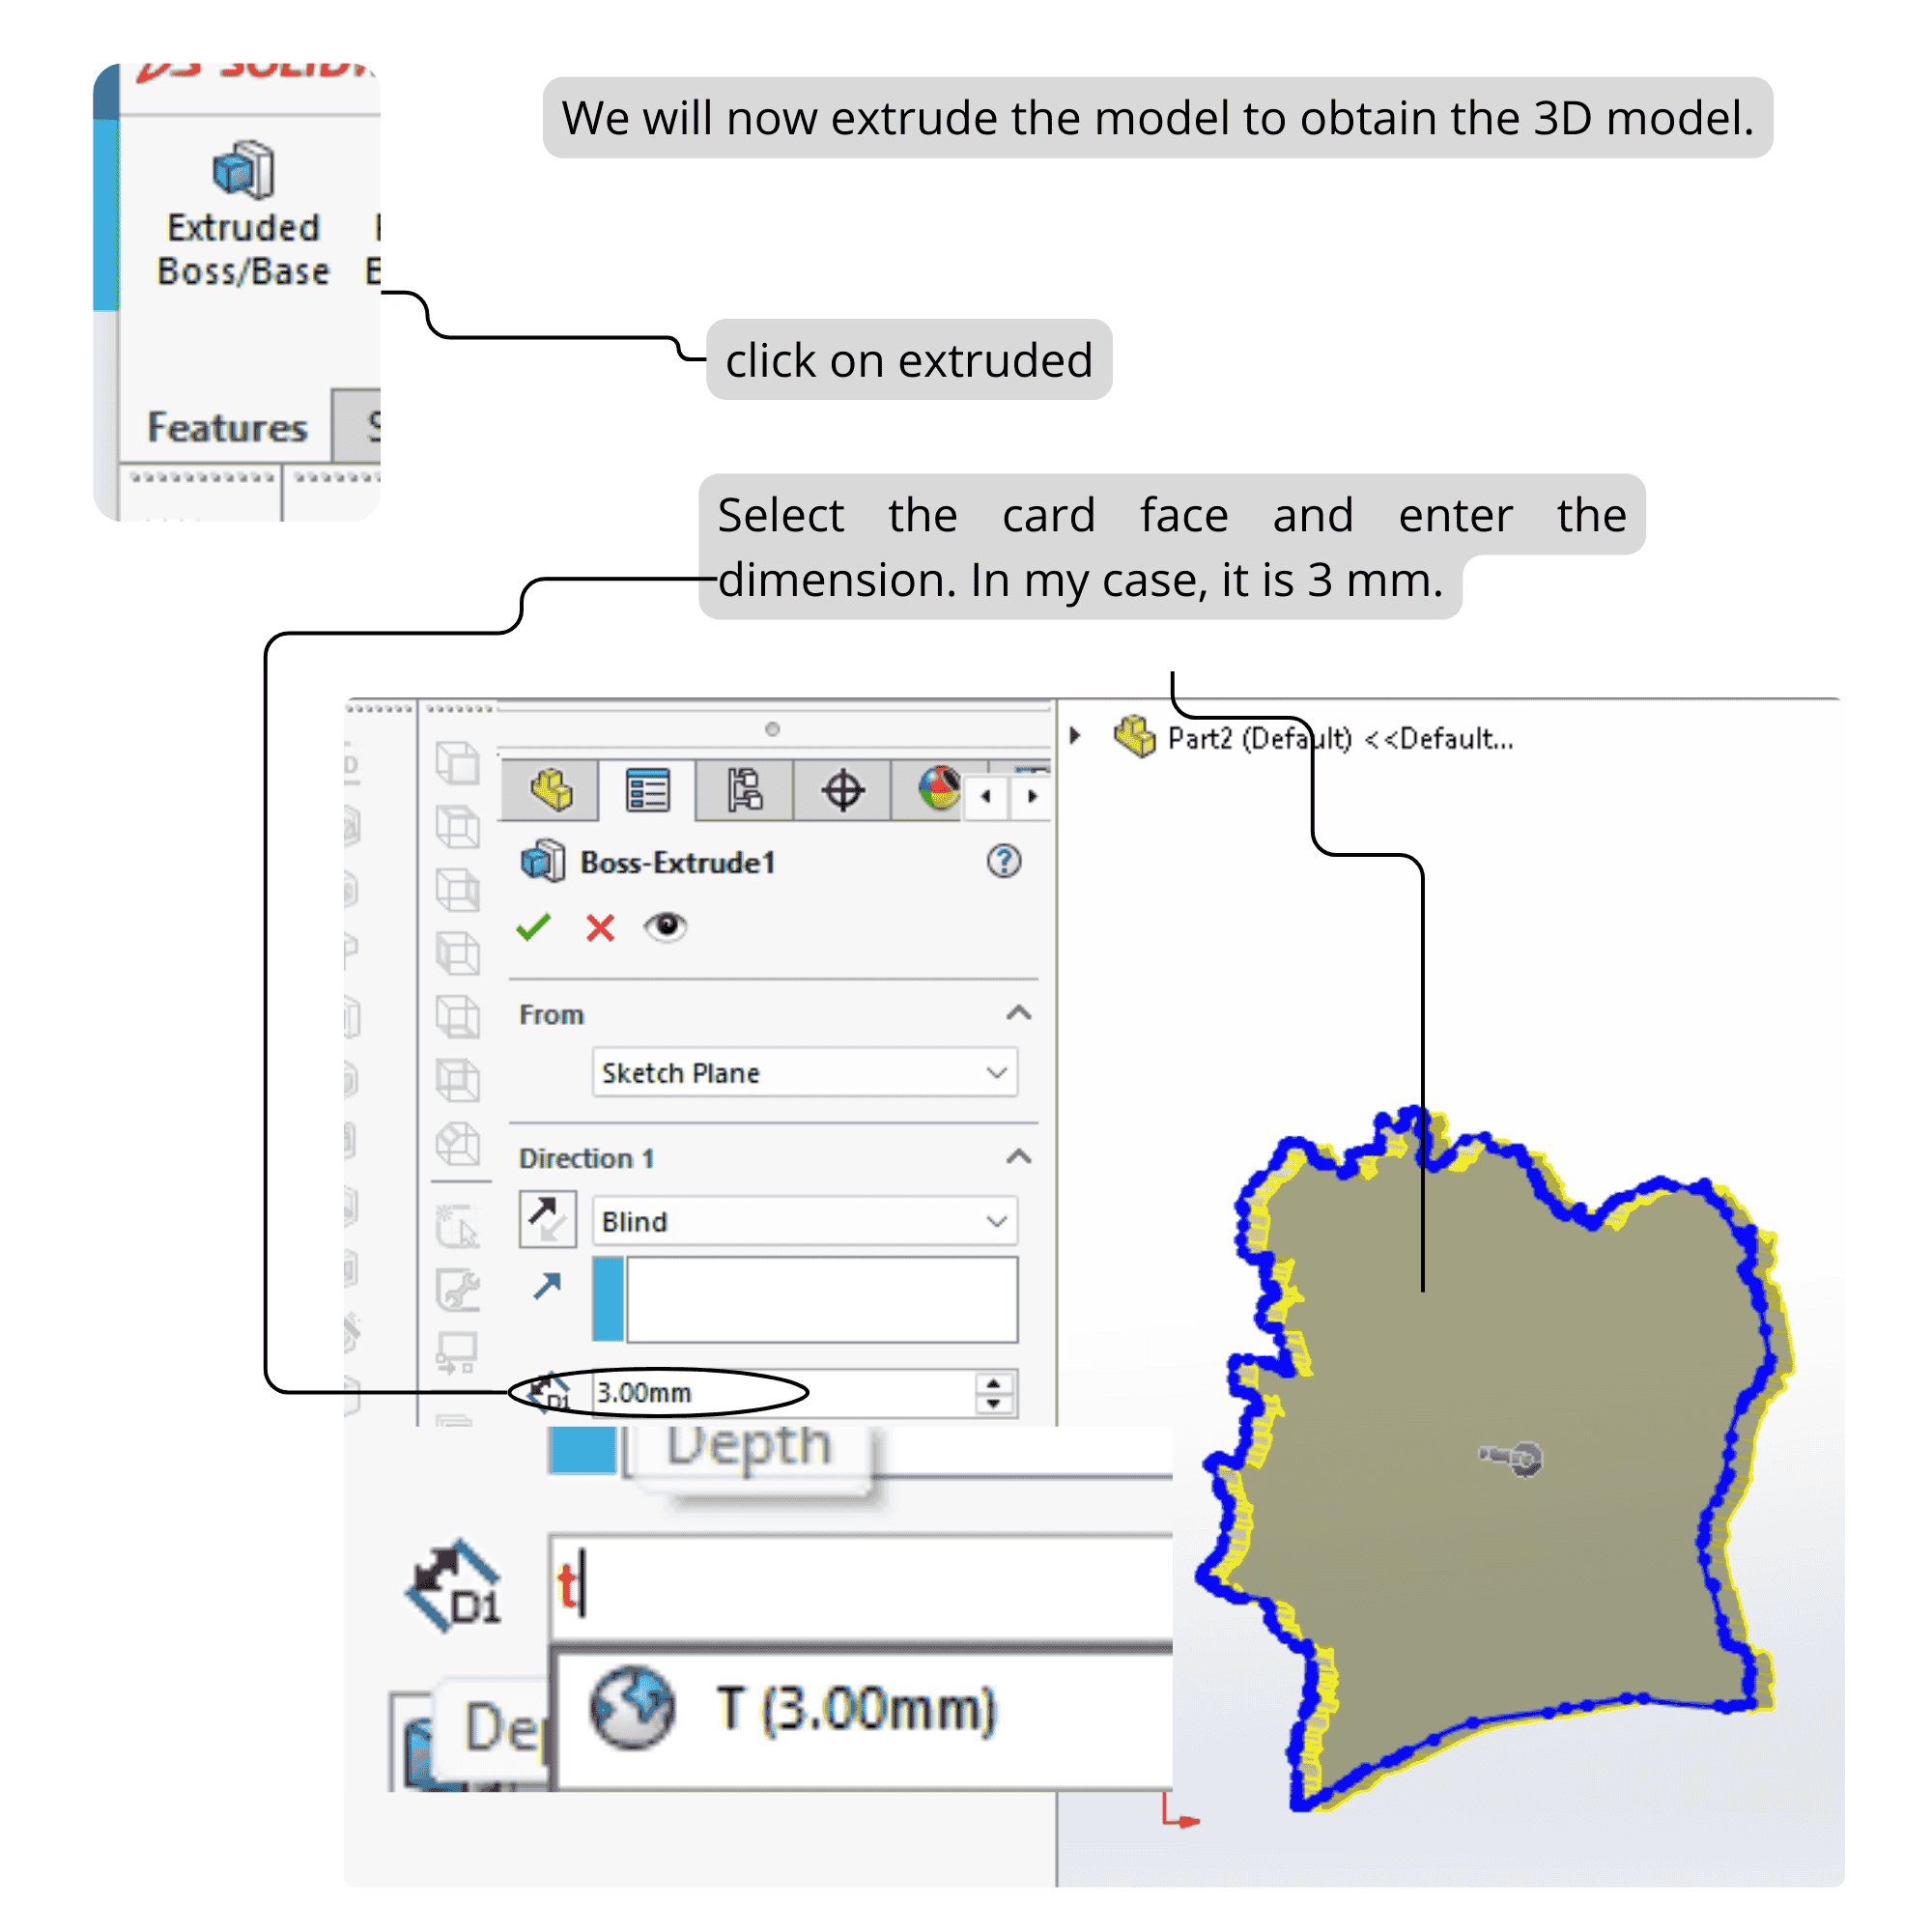
- STEP10
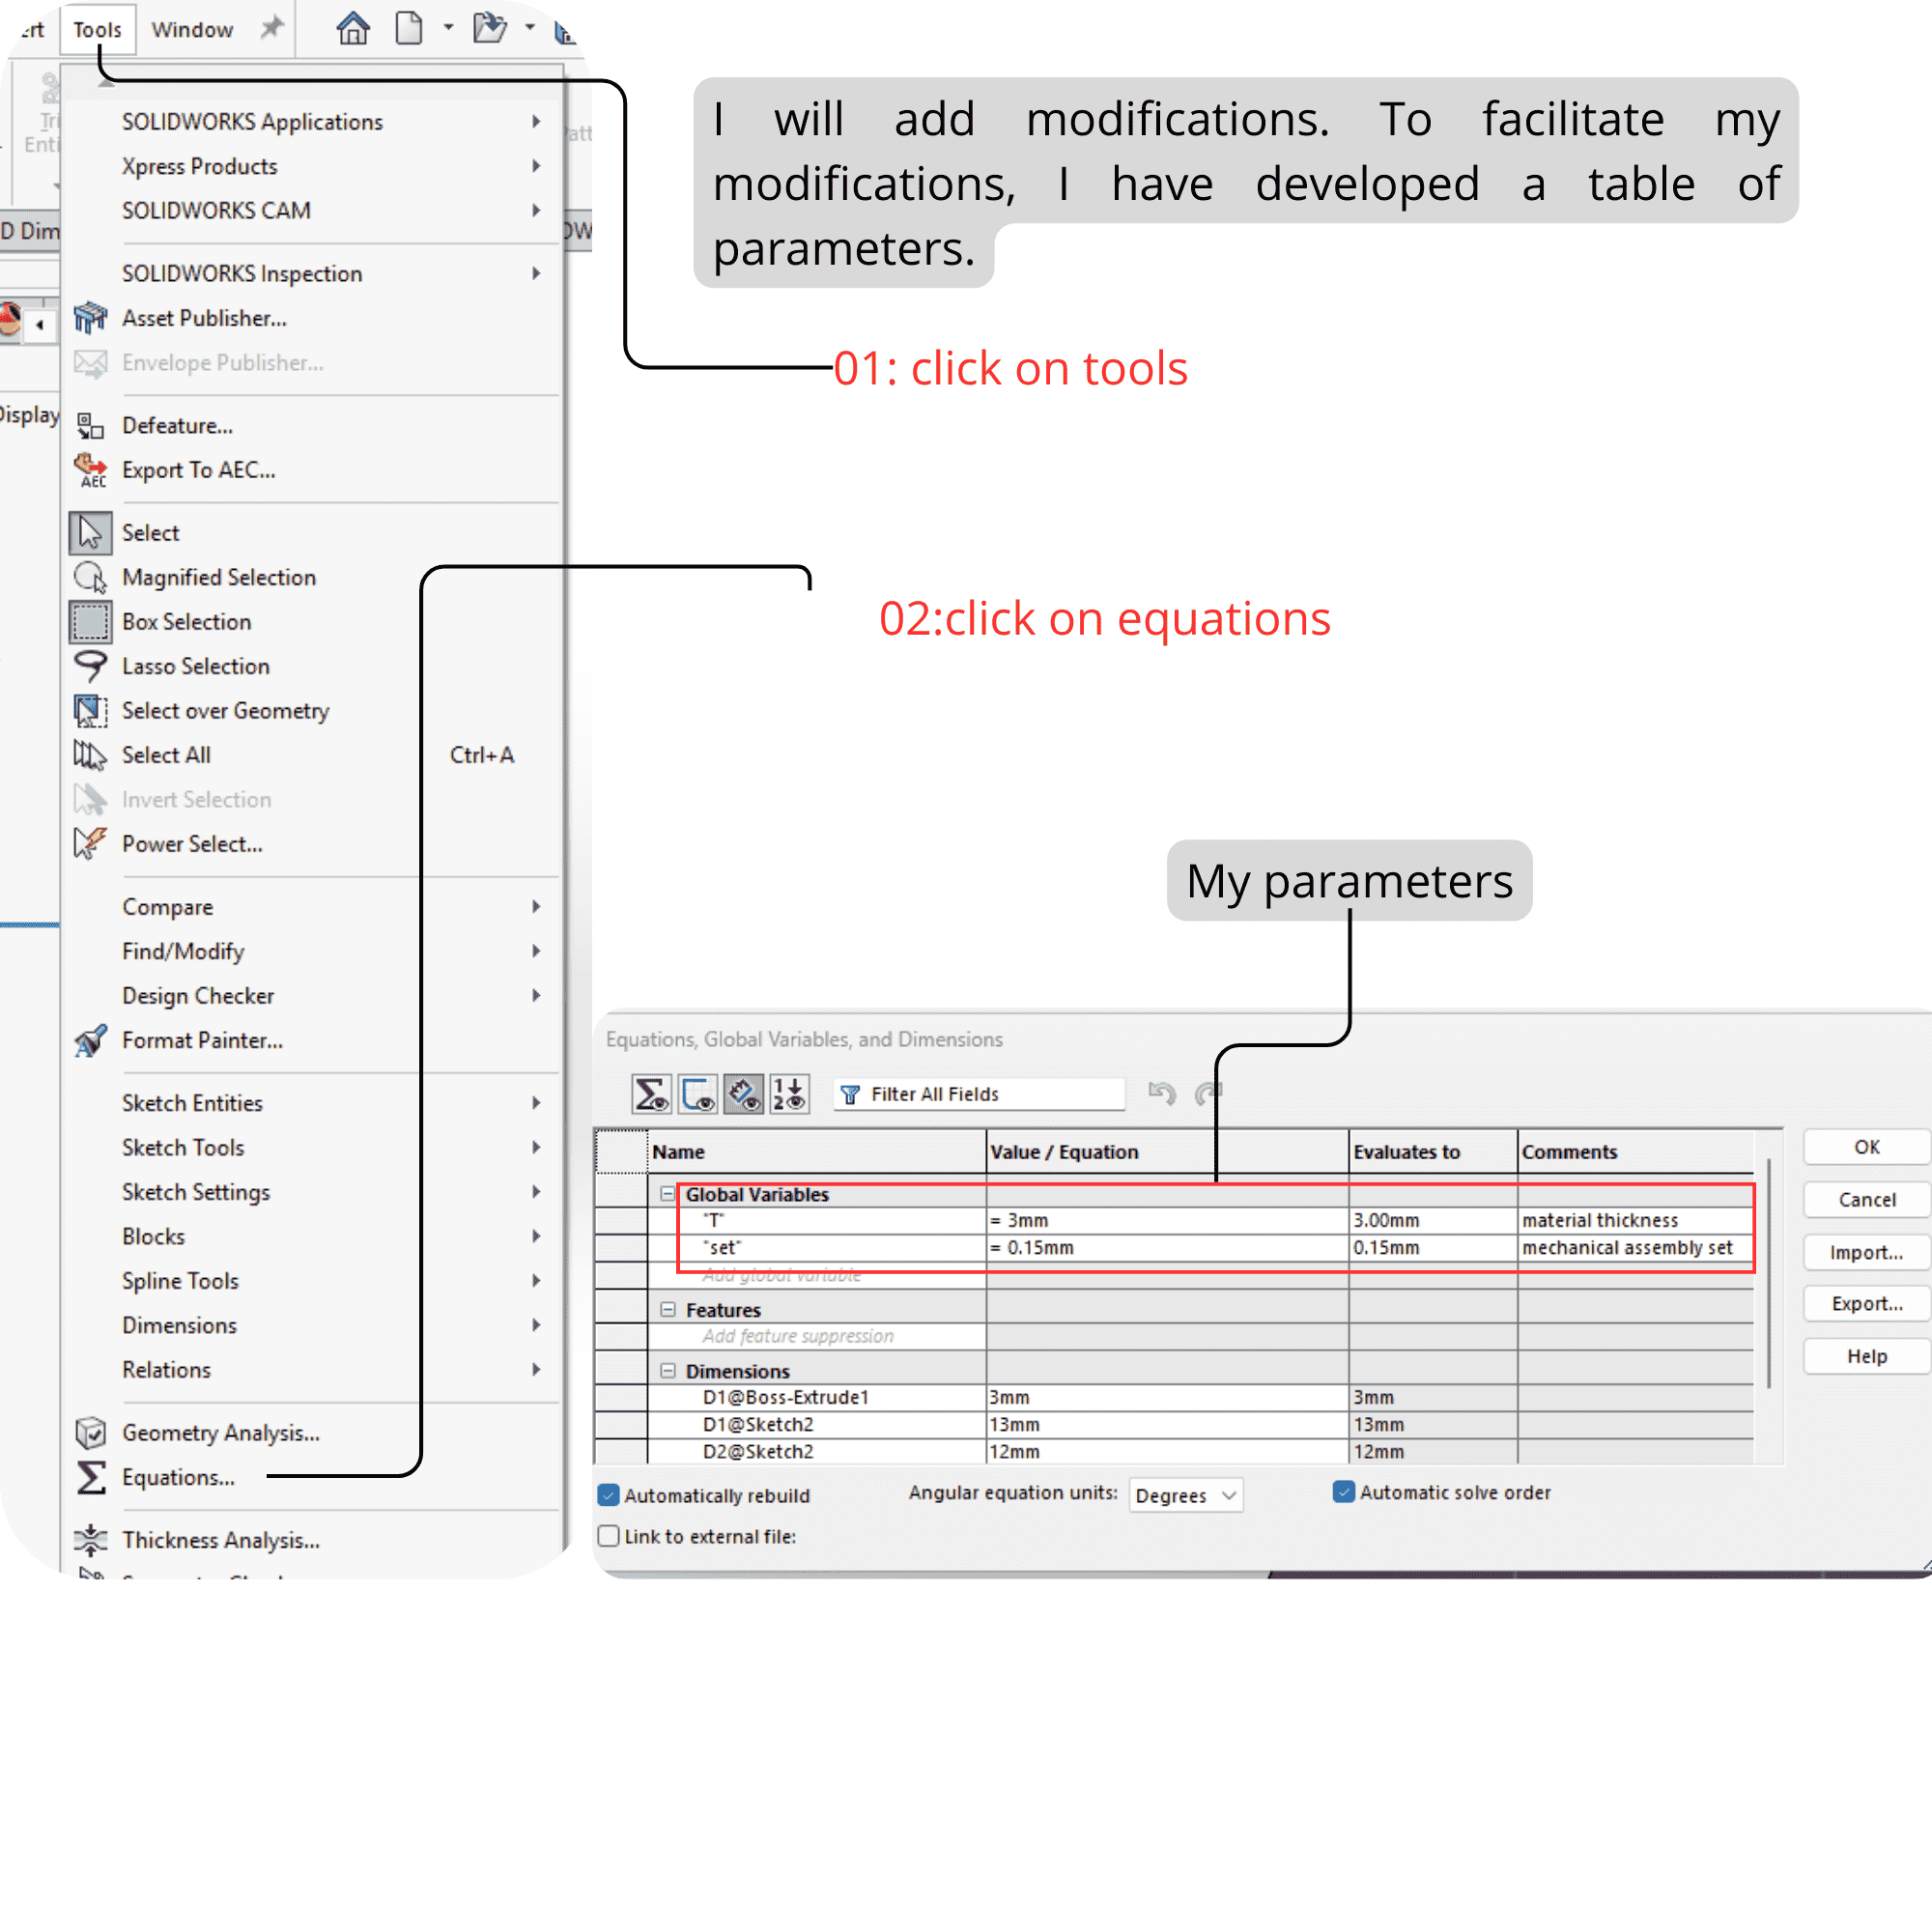
STEP11
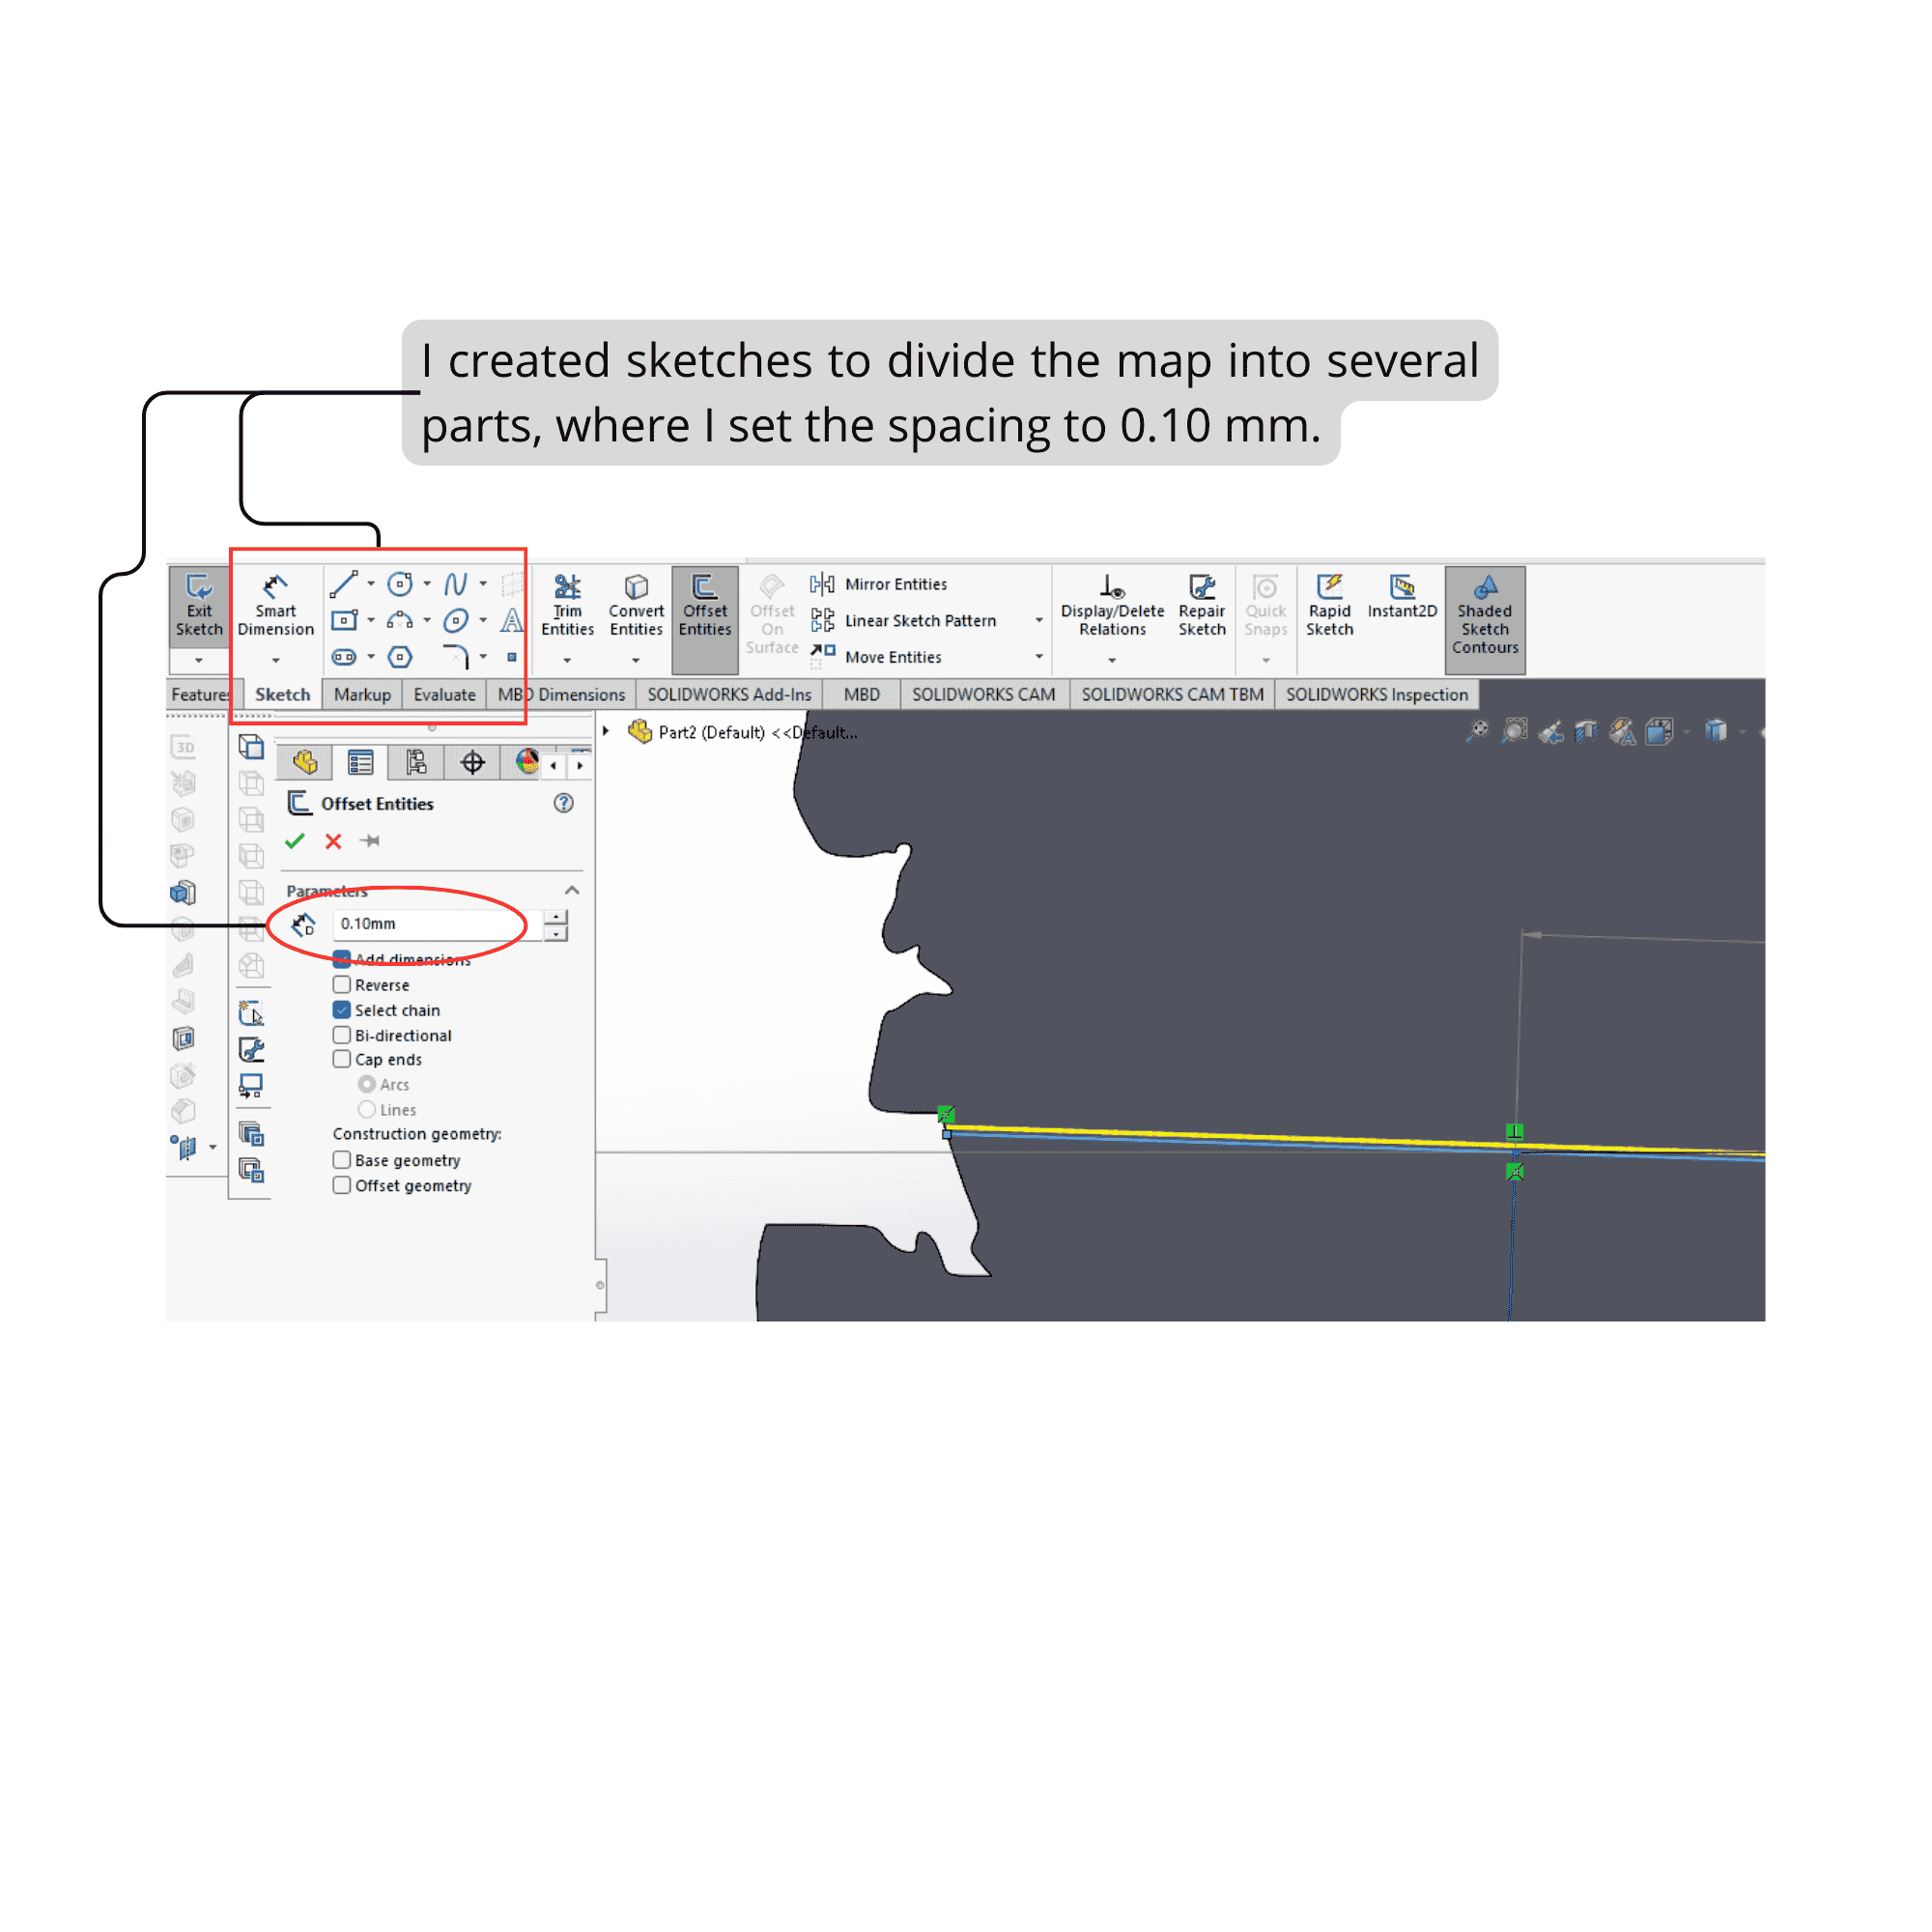
- STEP12
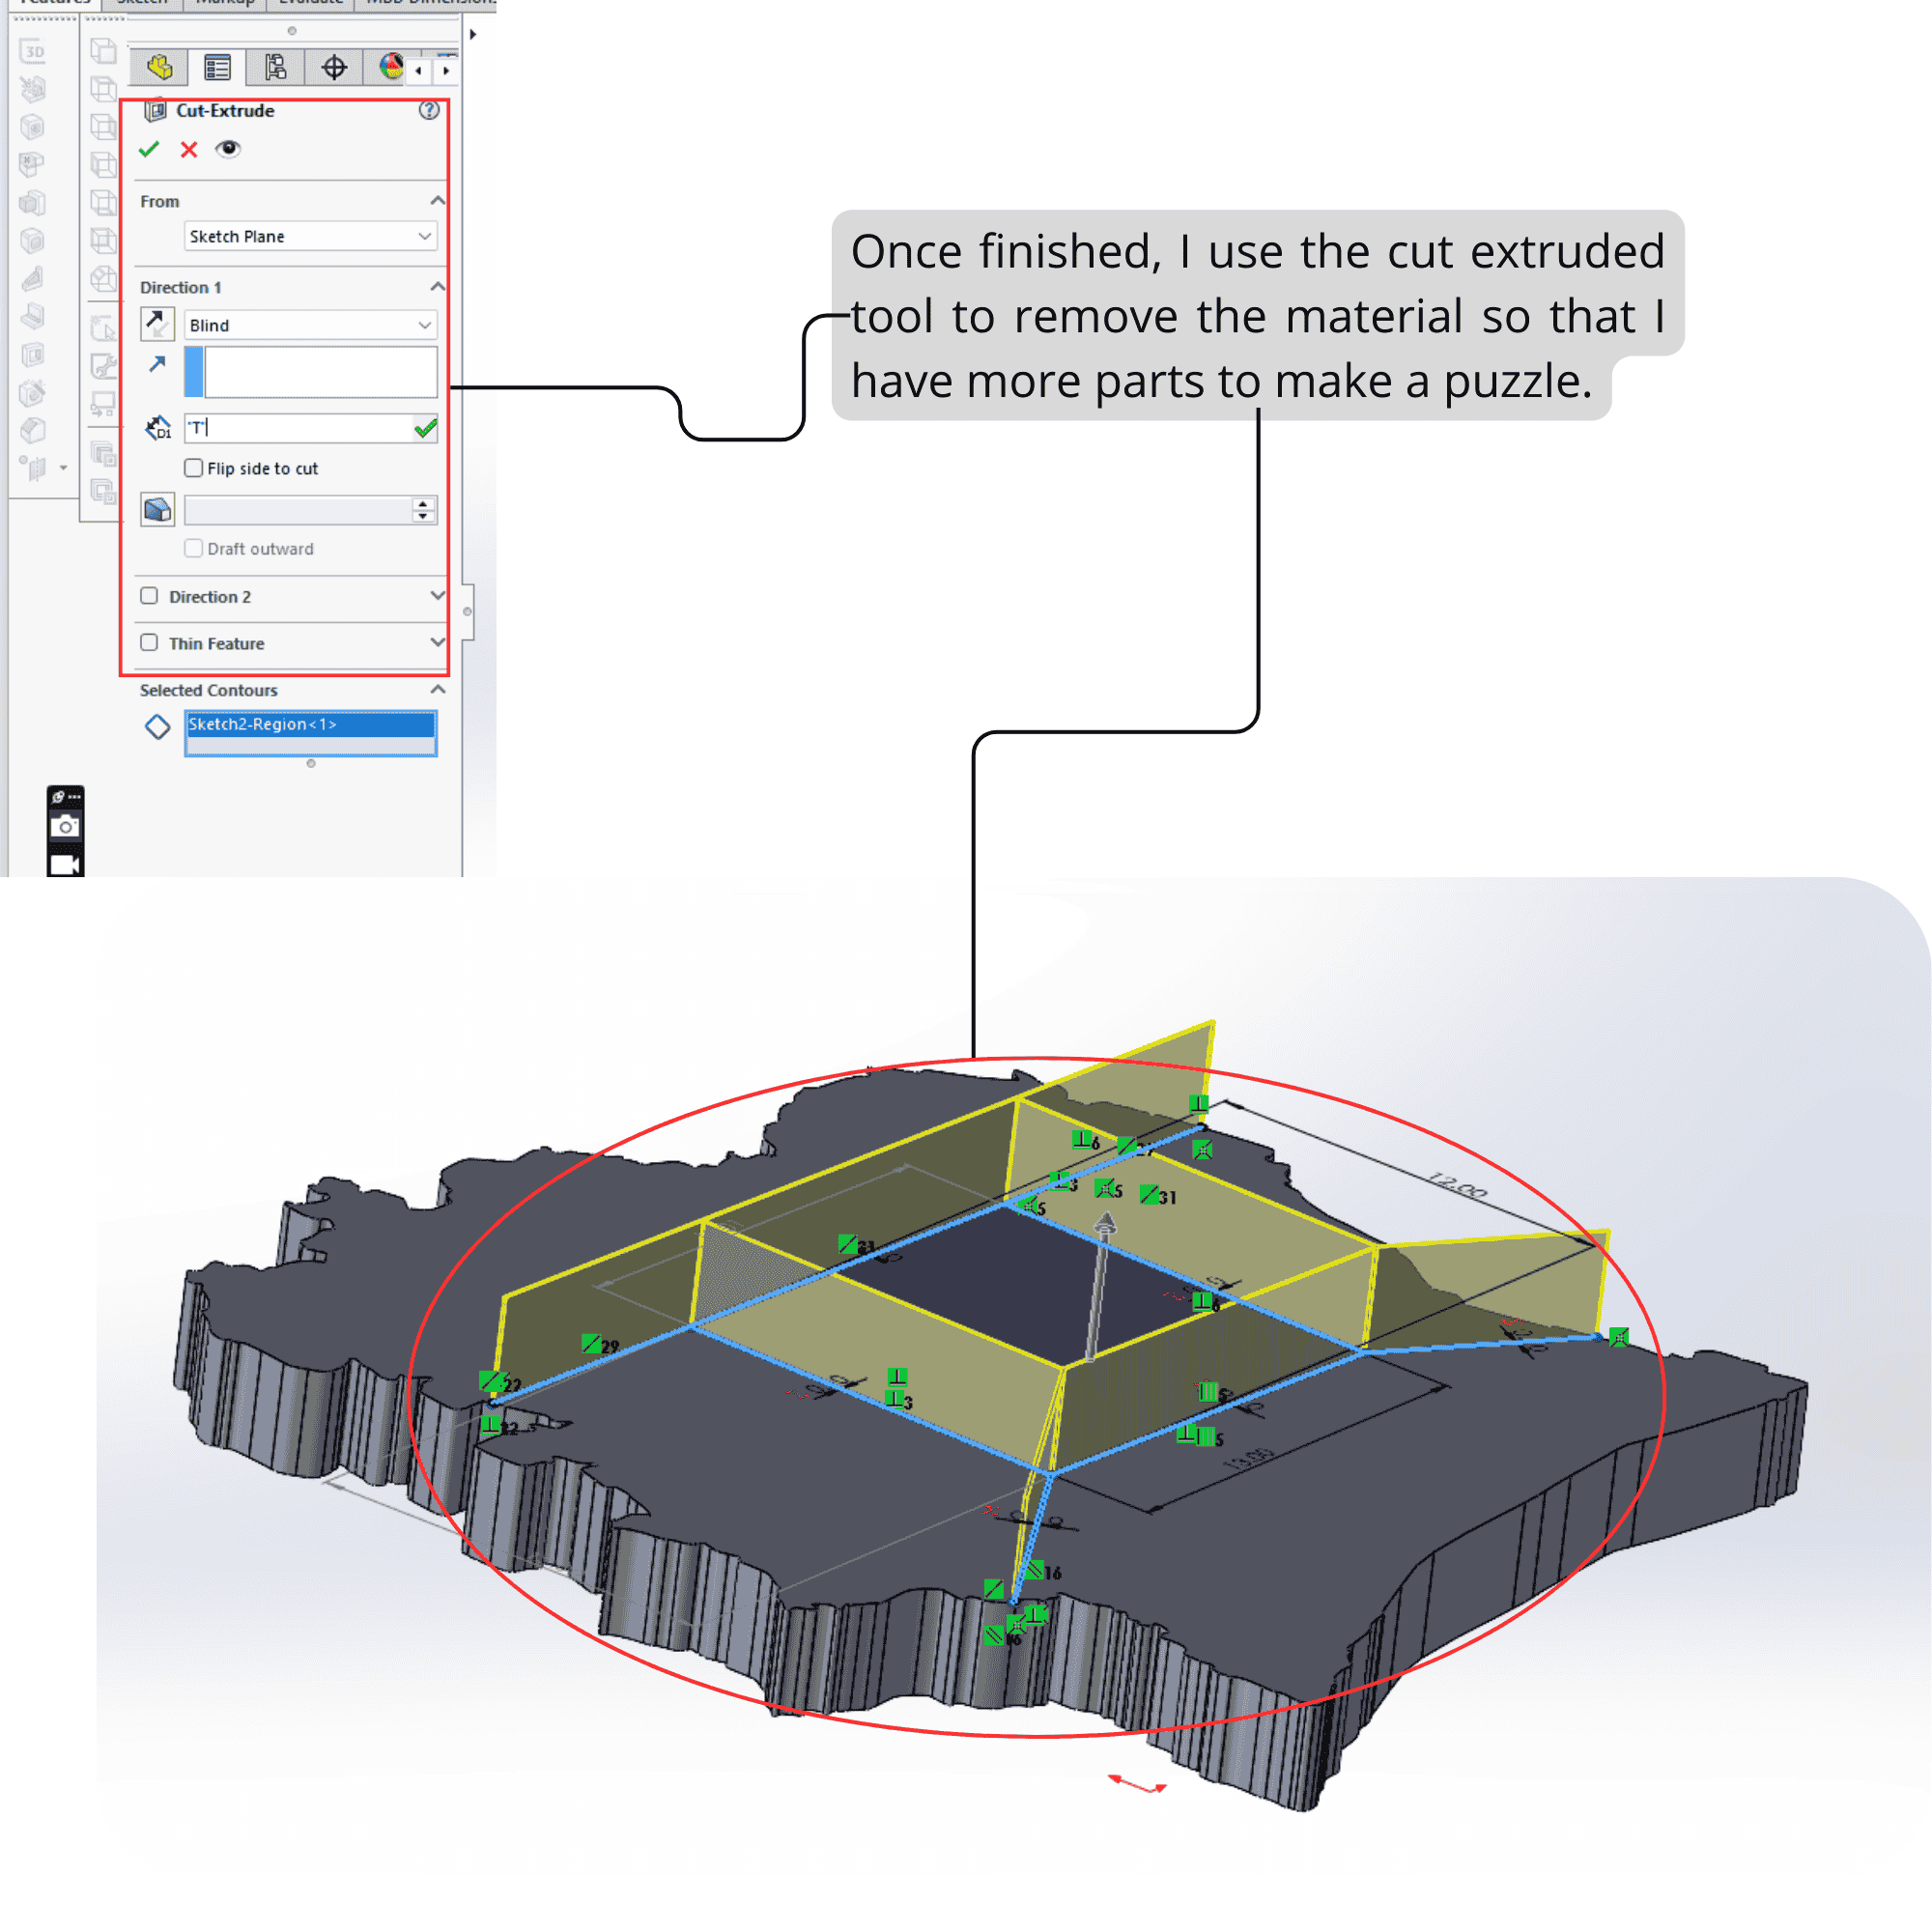
STEP13
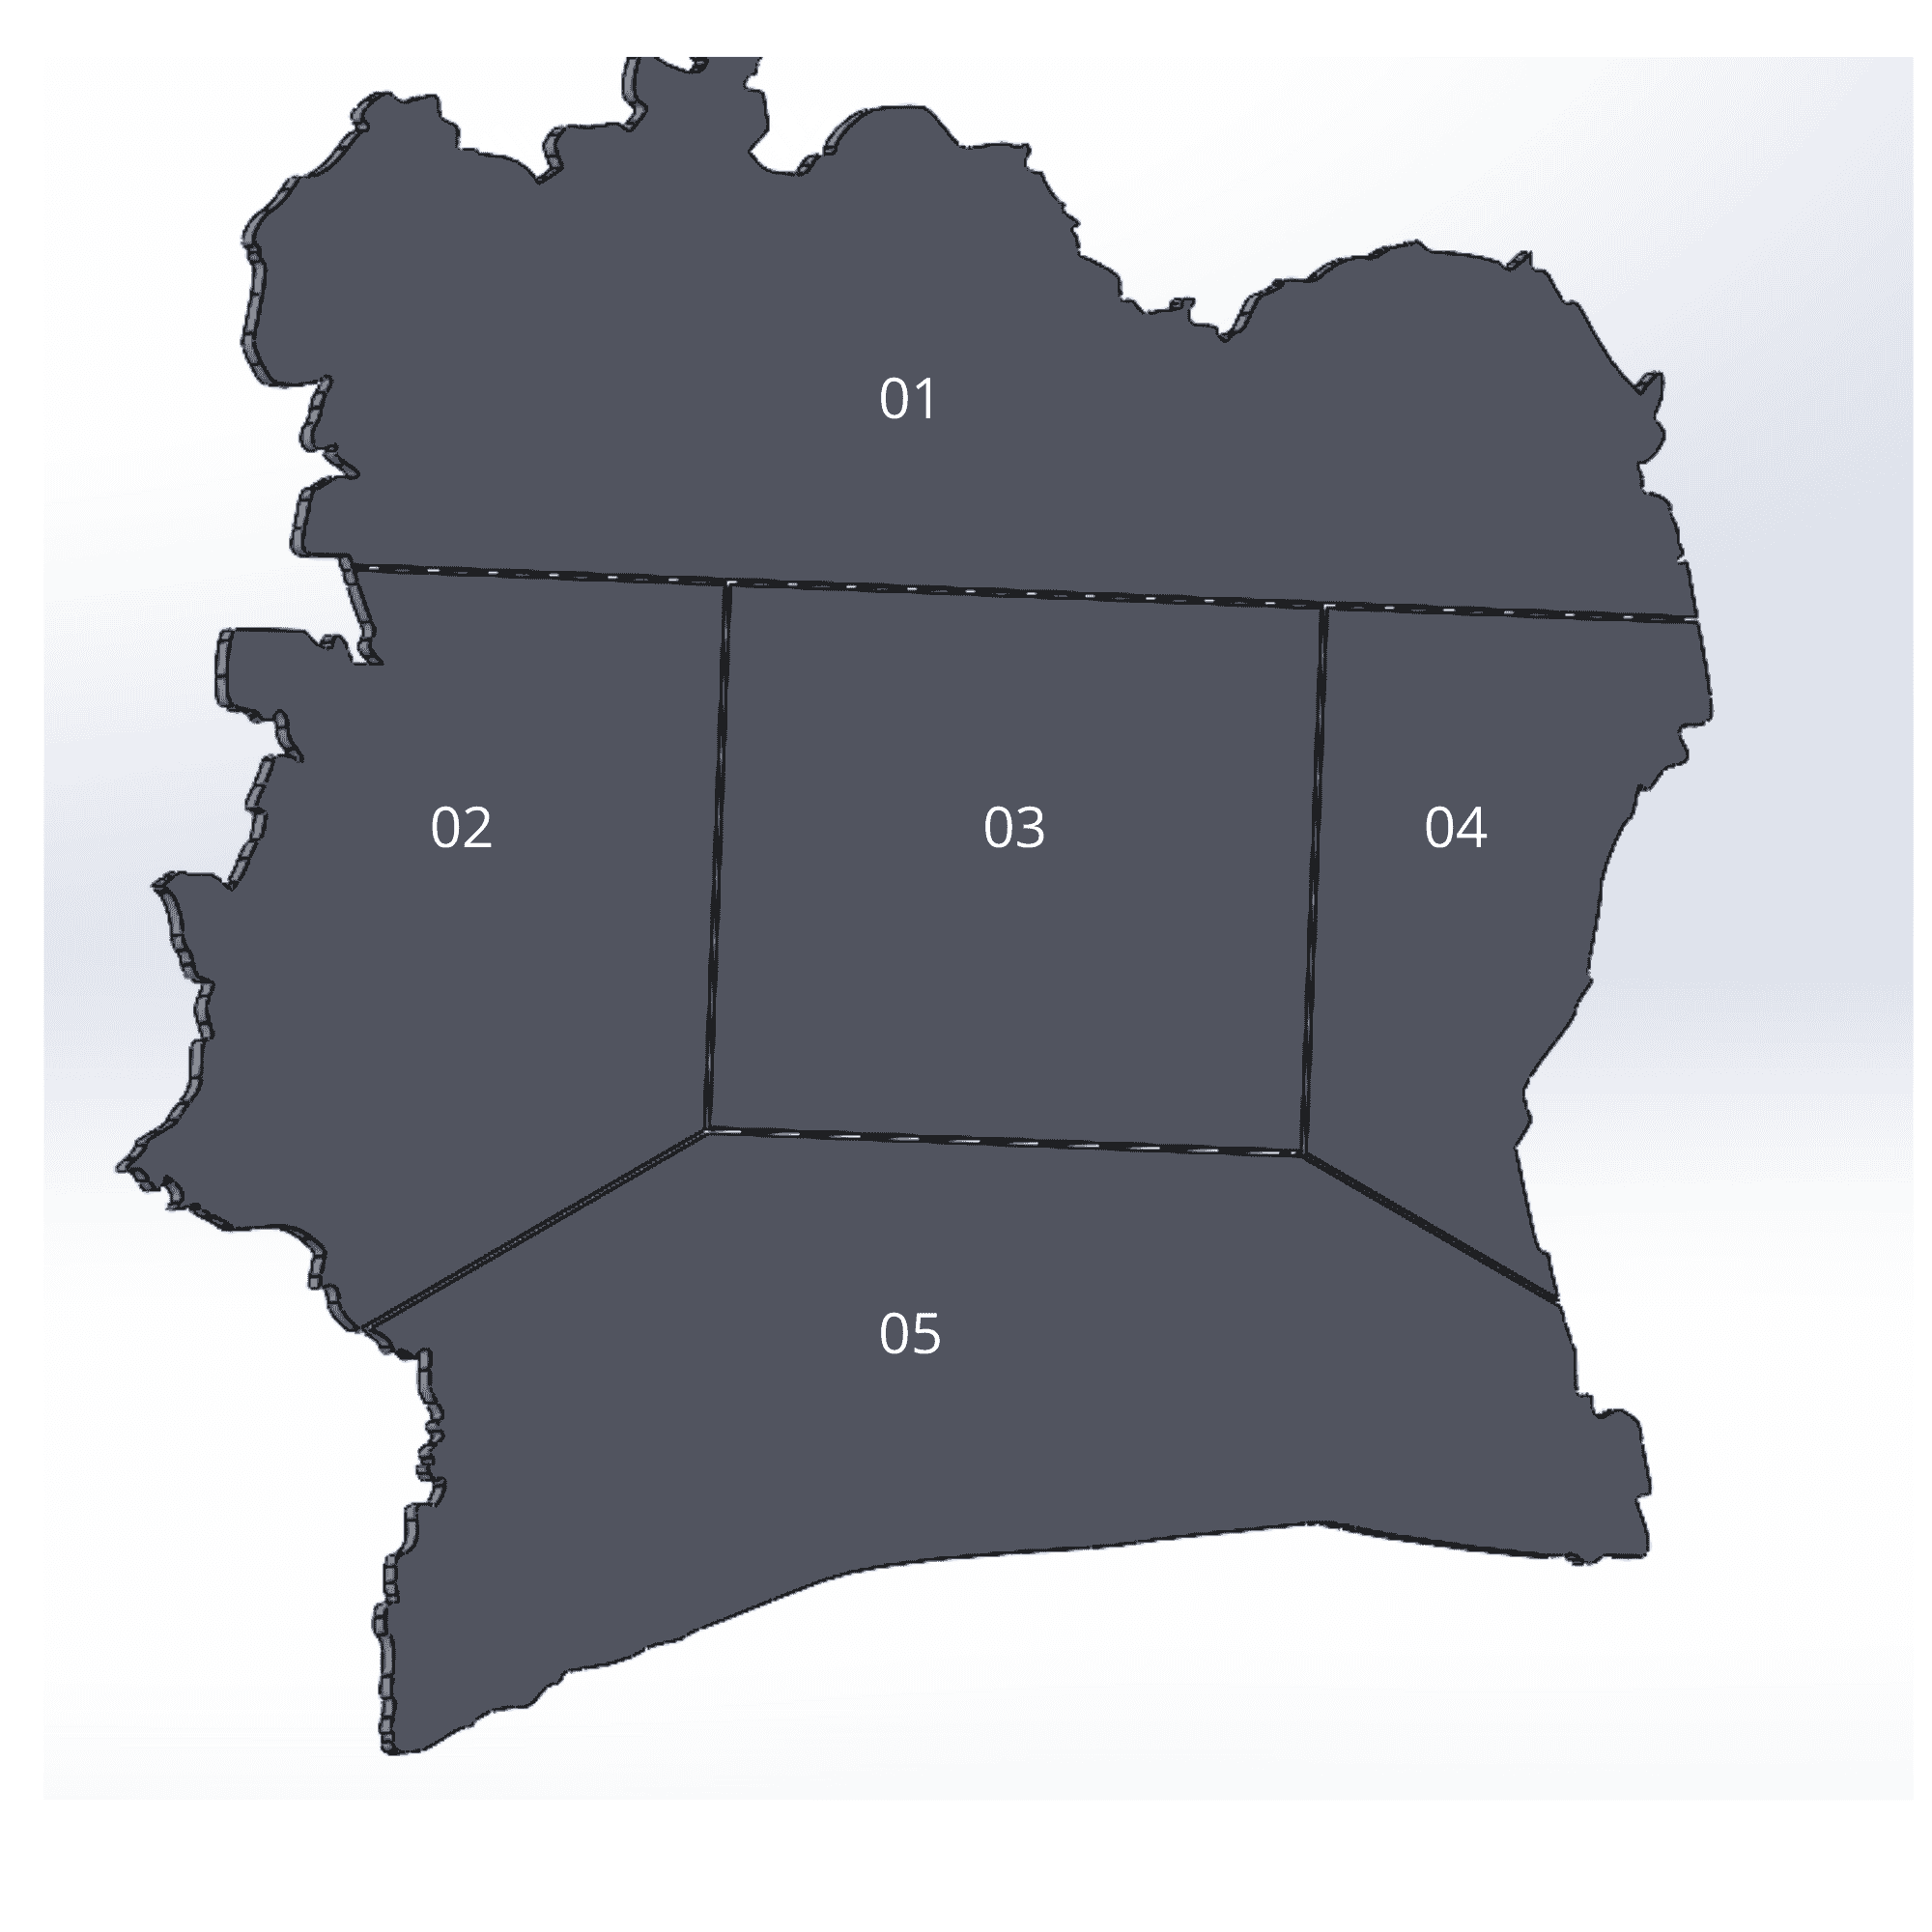
- STEP14
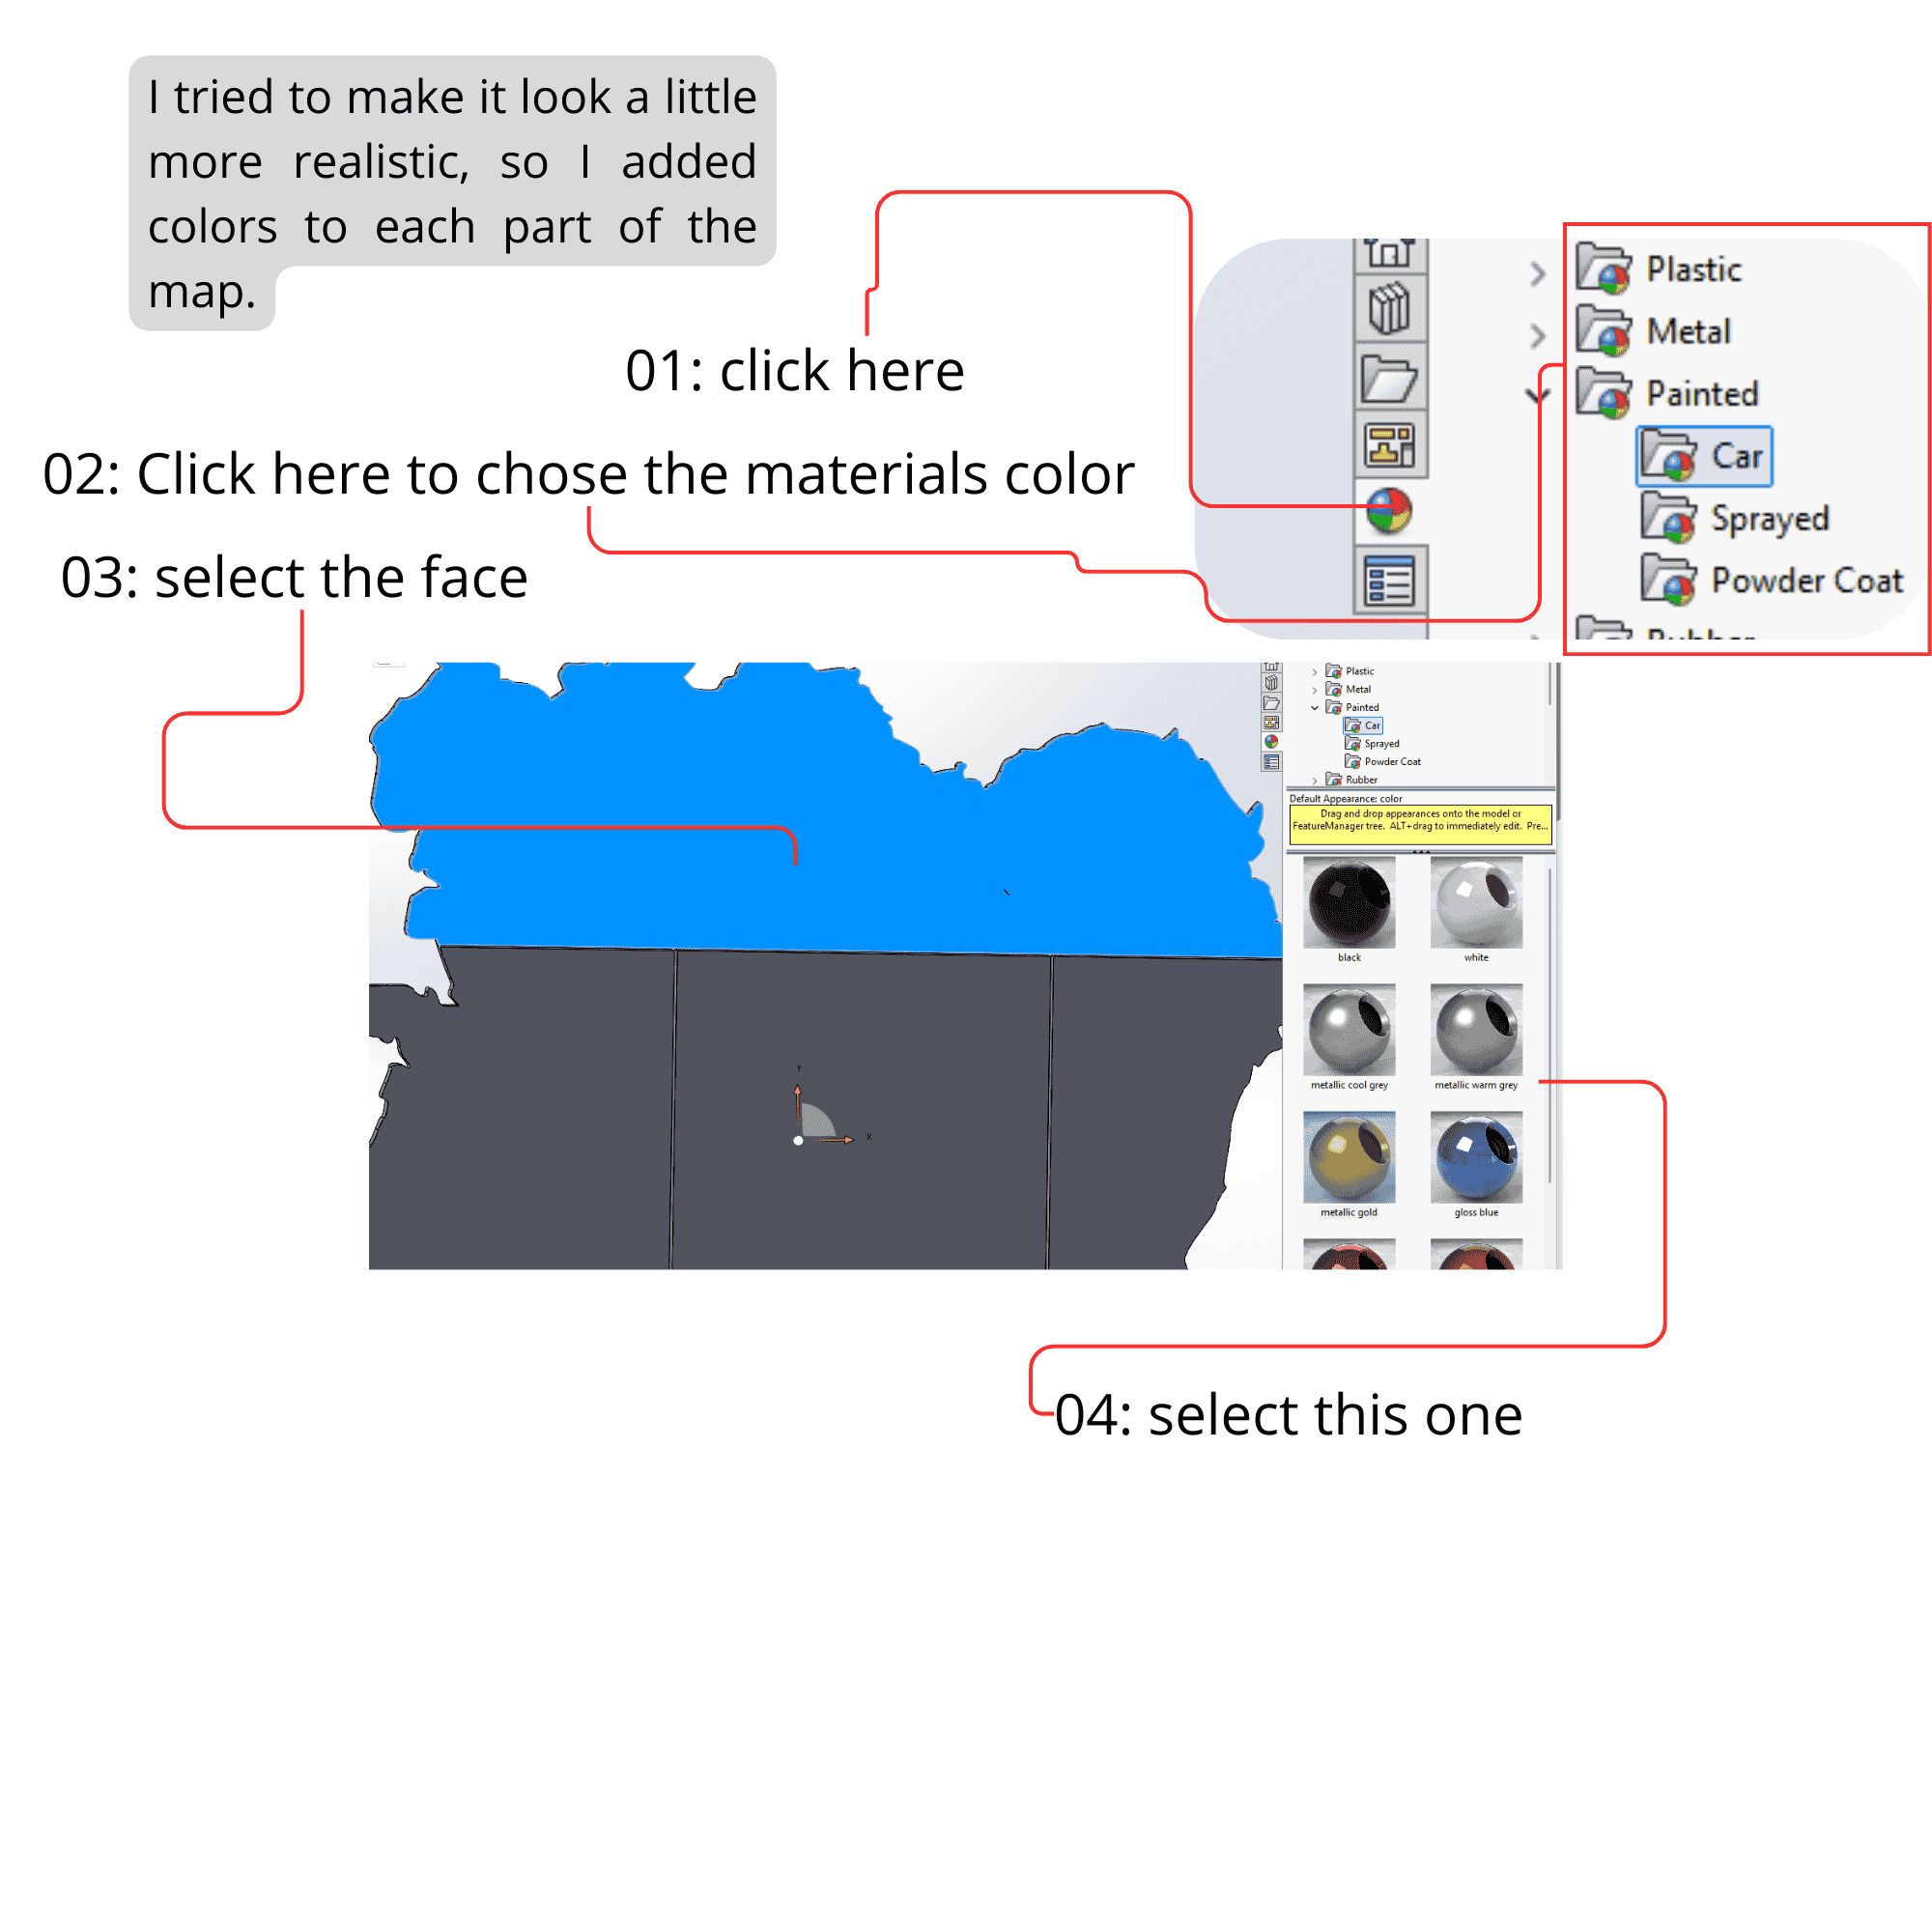
- STEP15
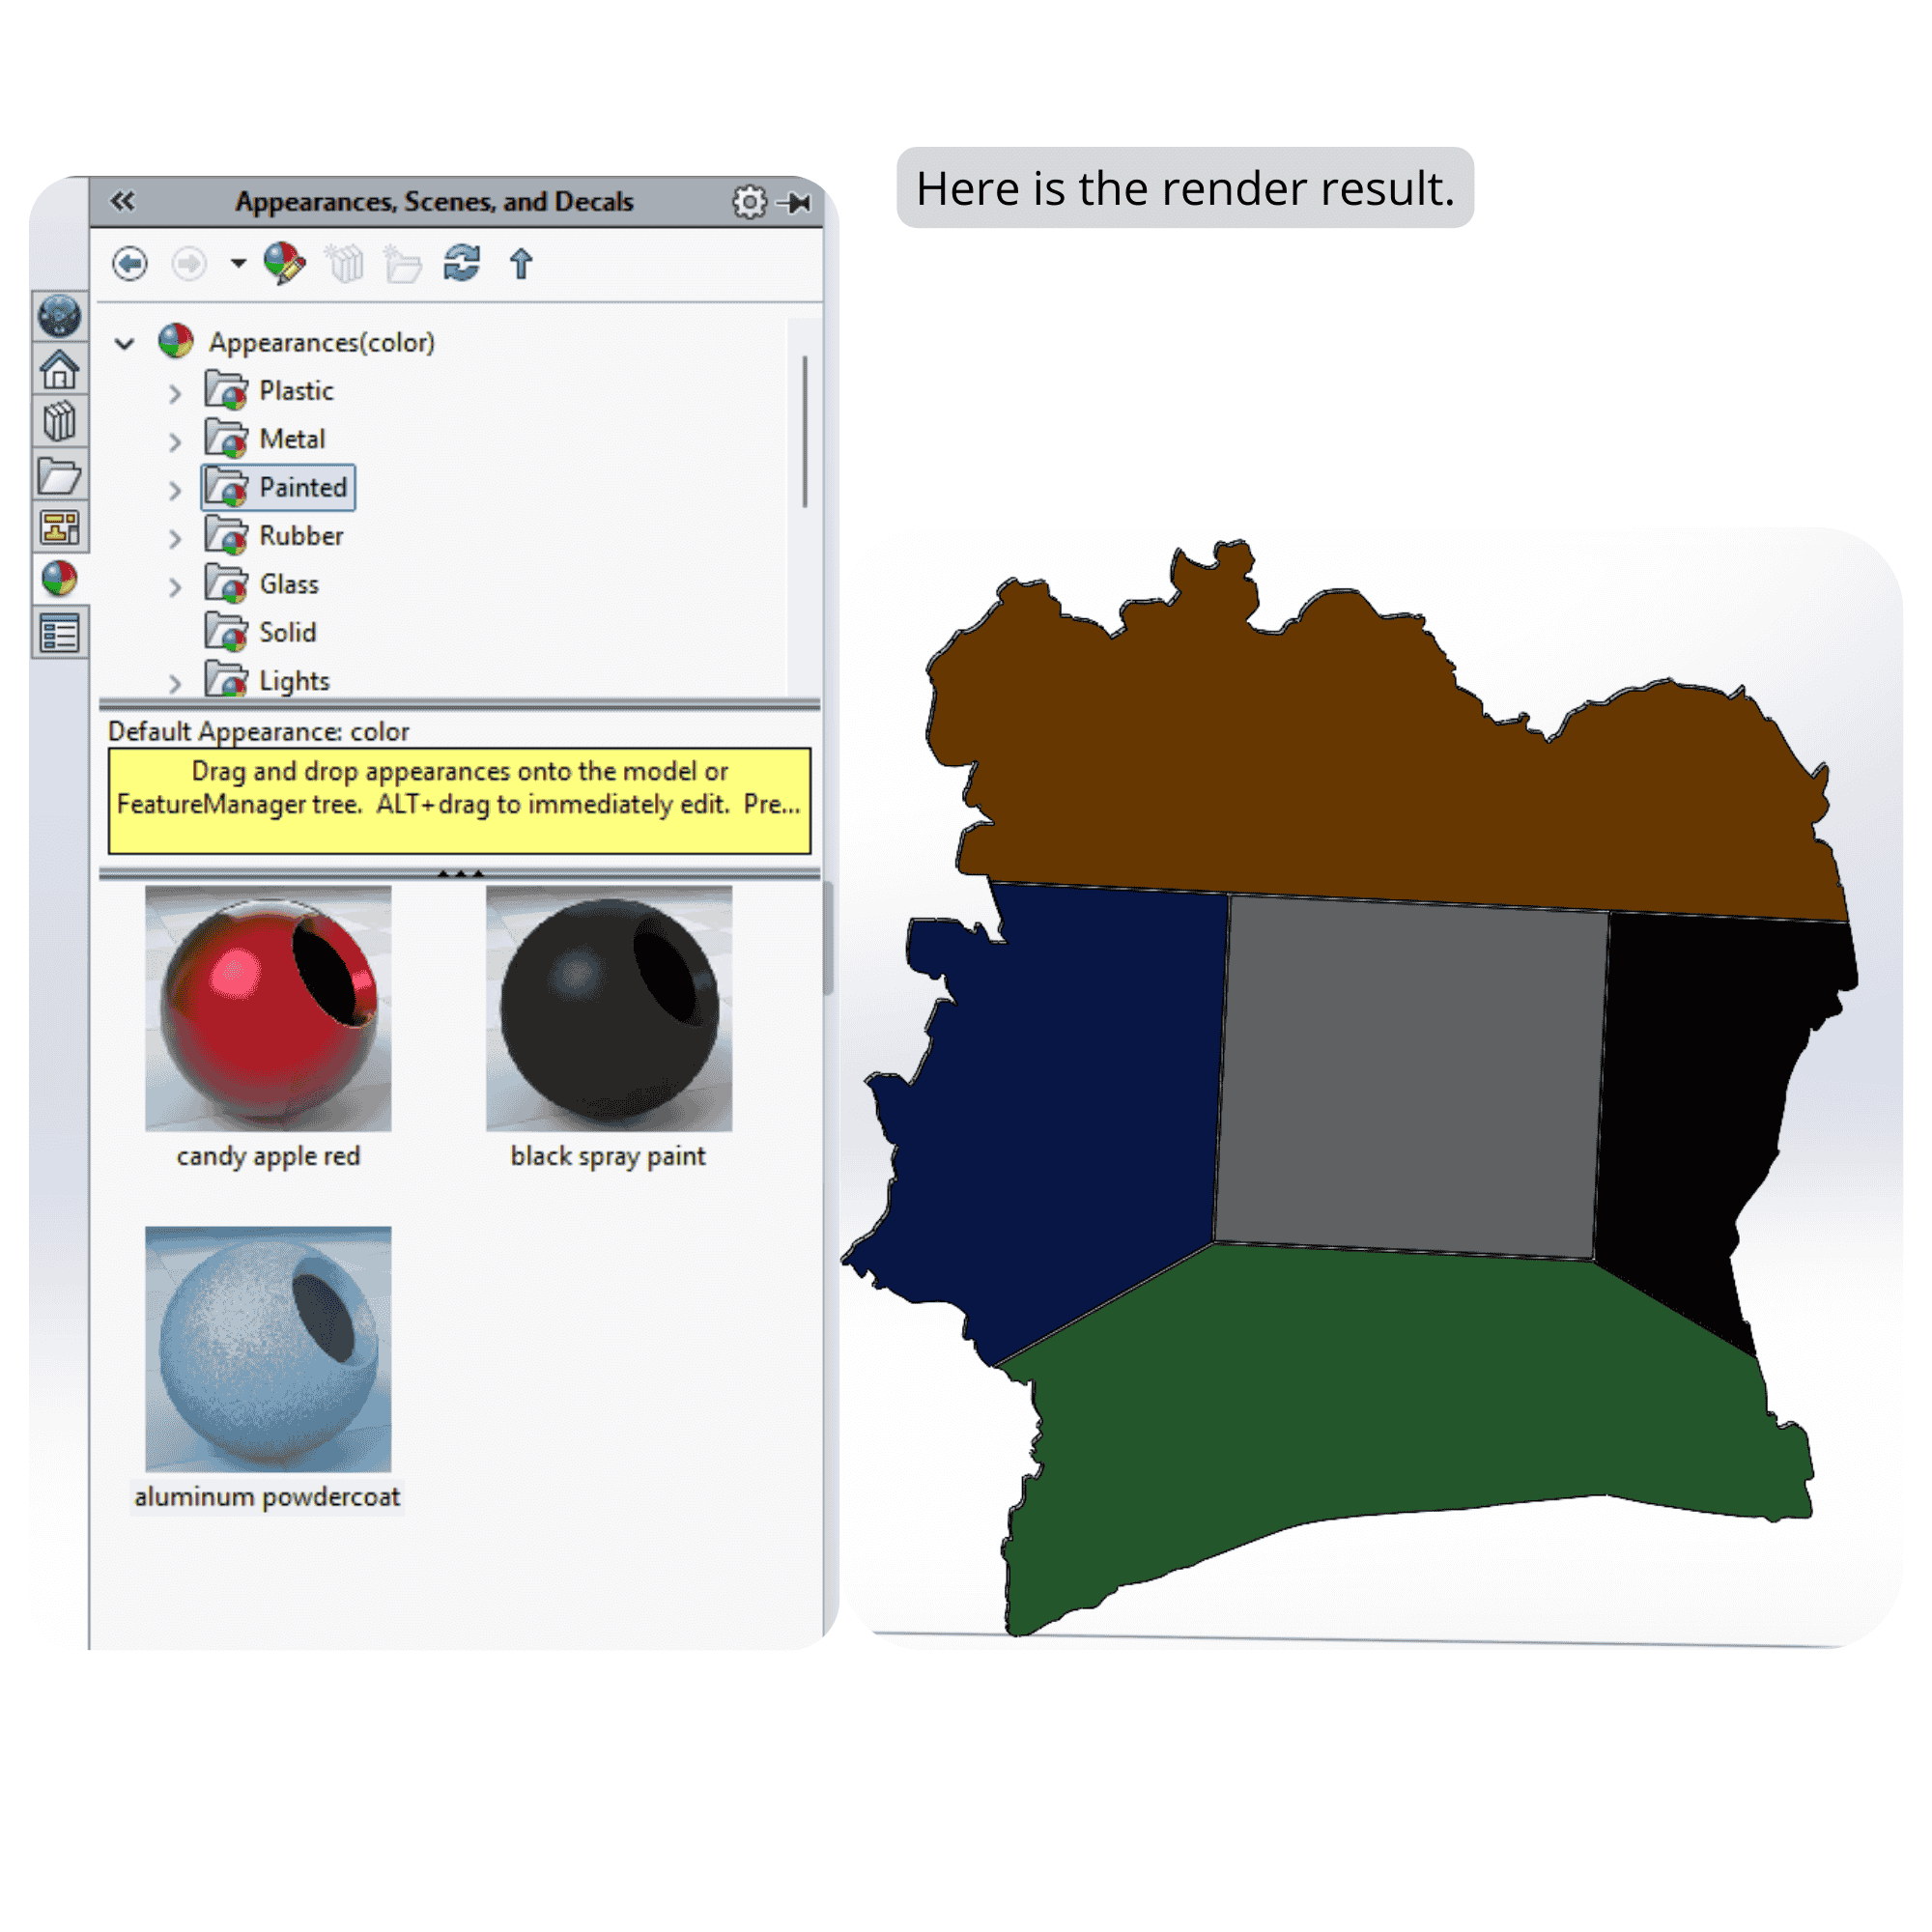
- STEP16
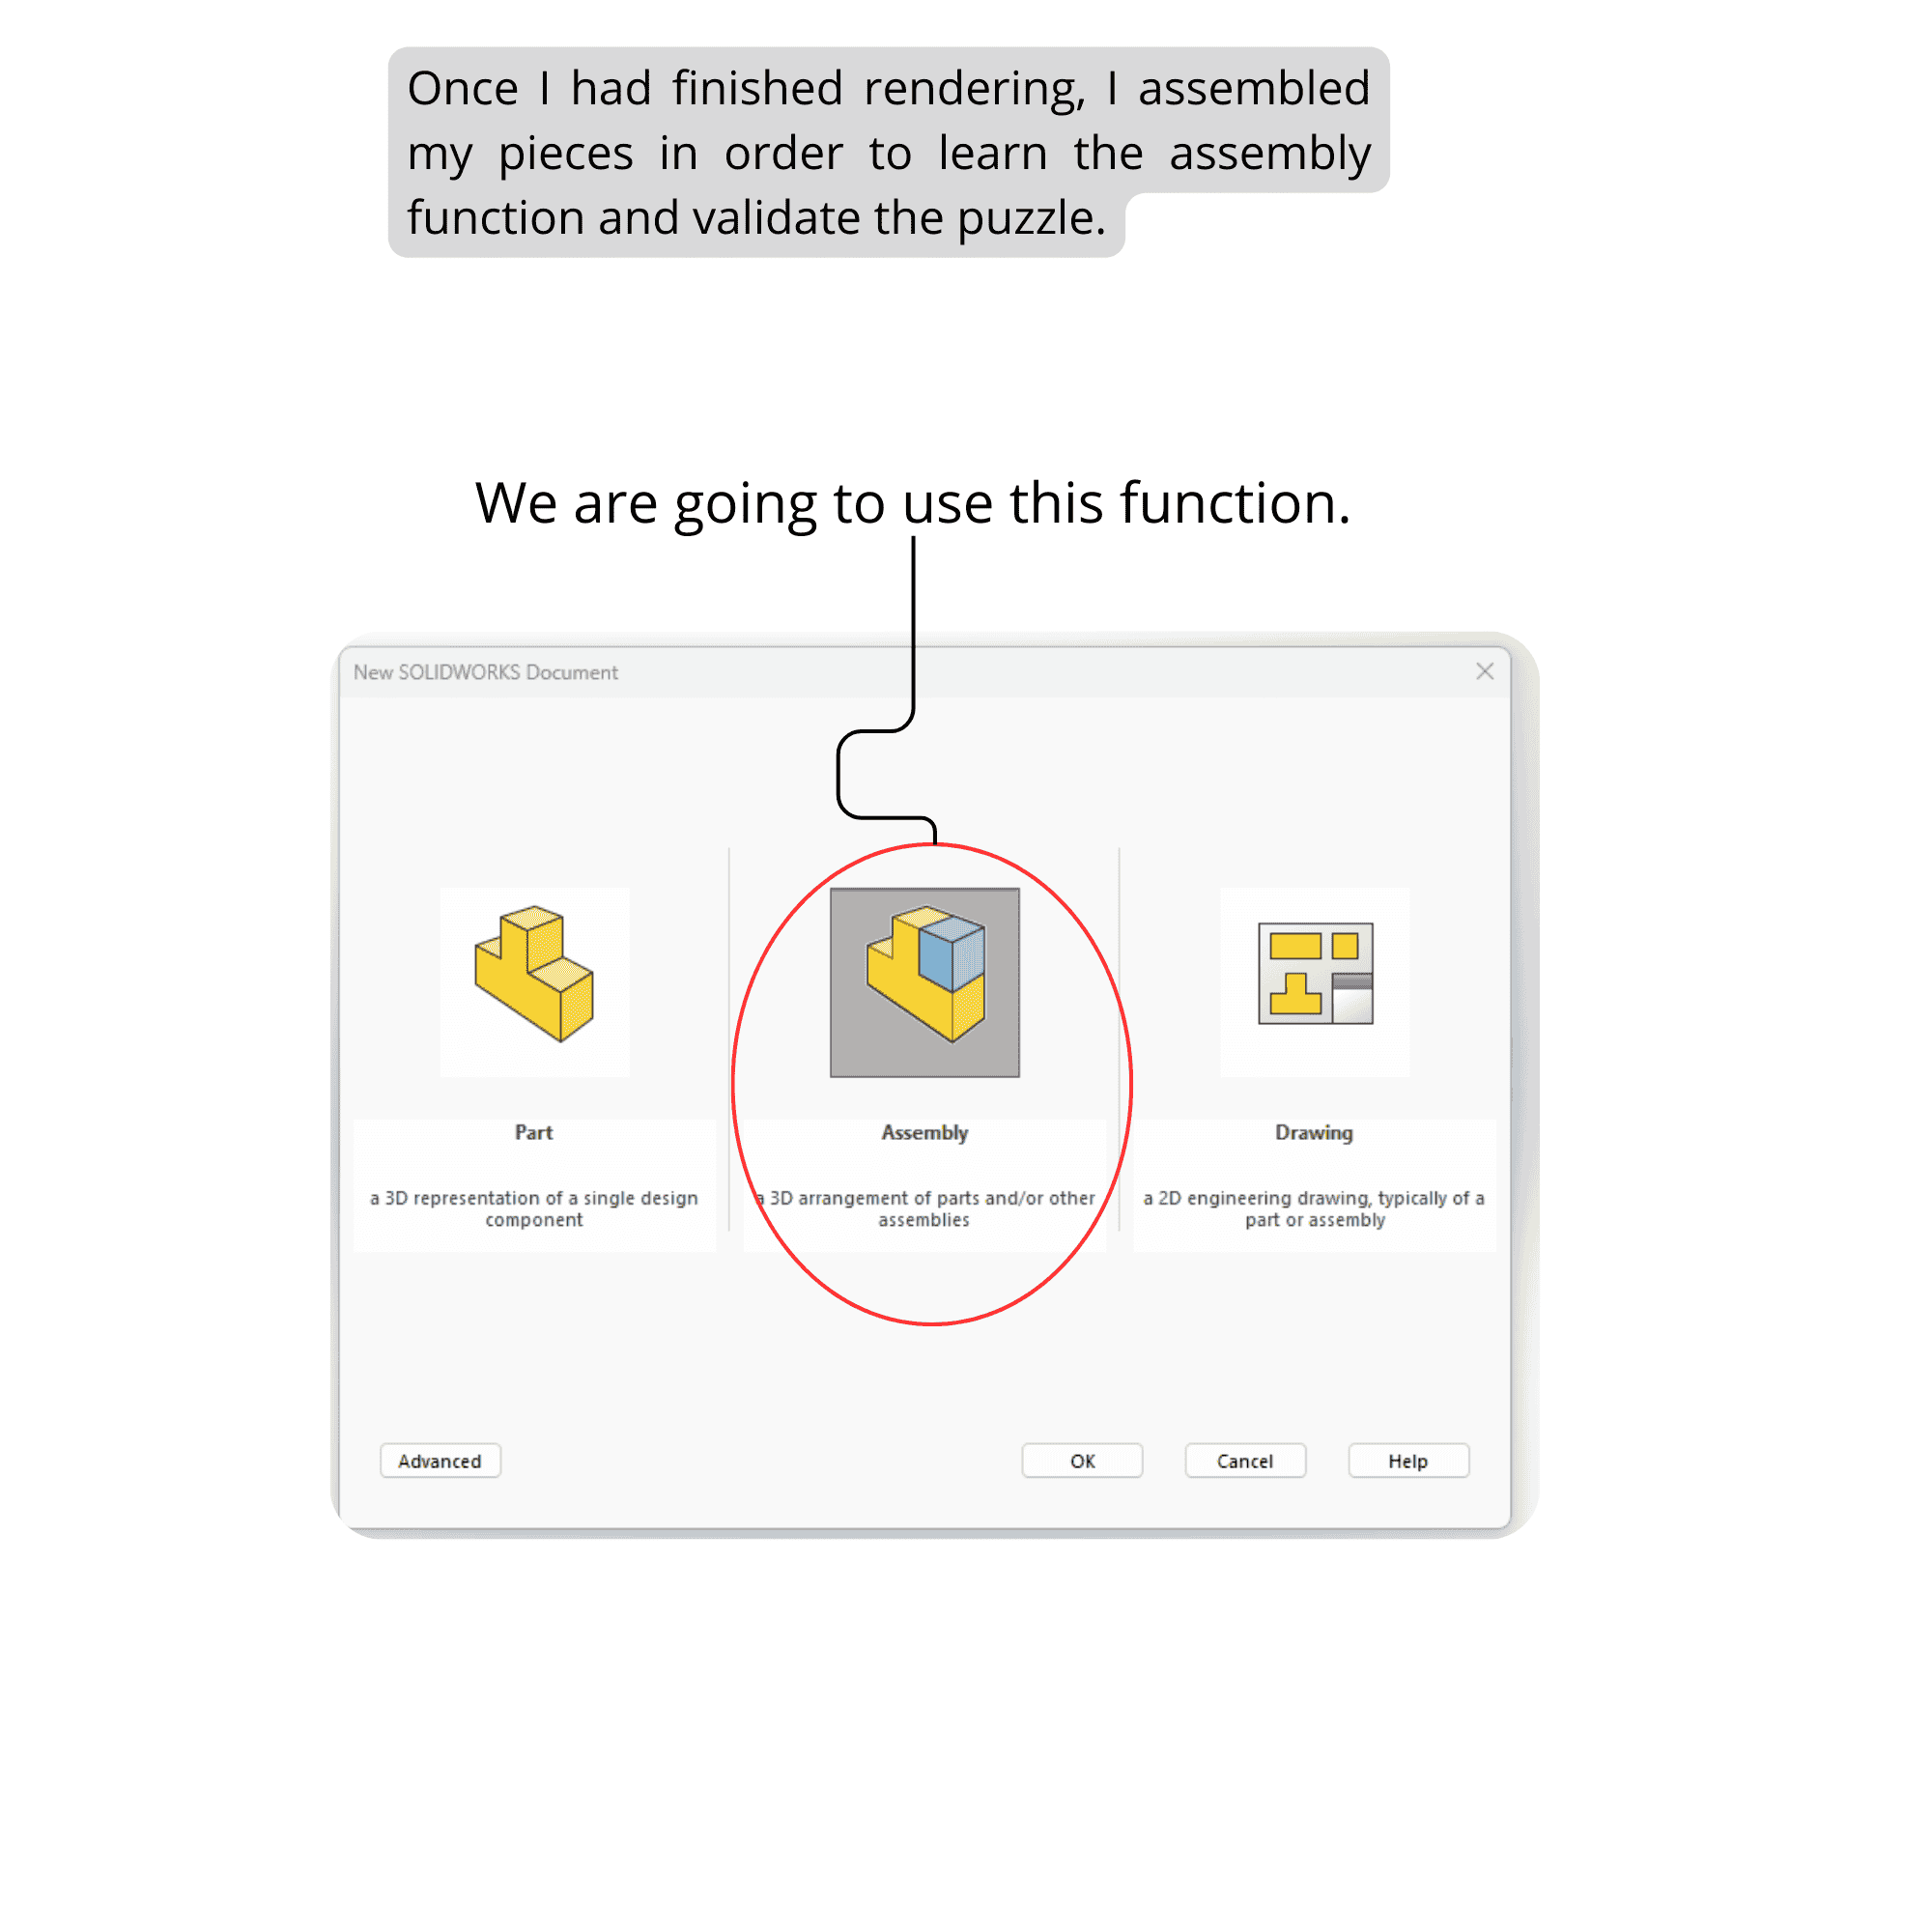
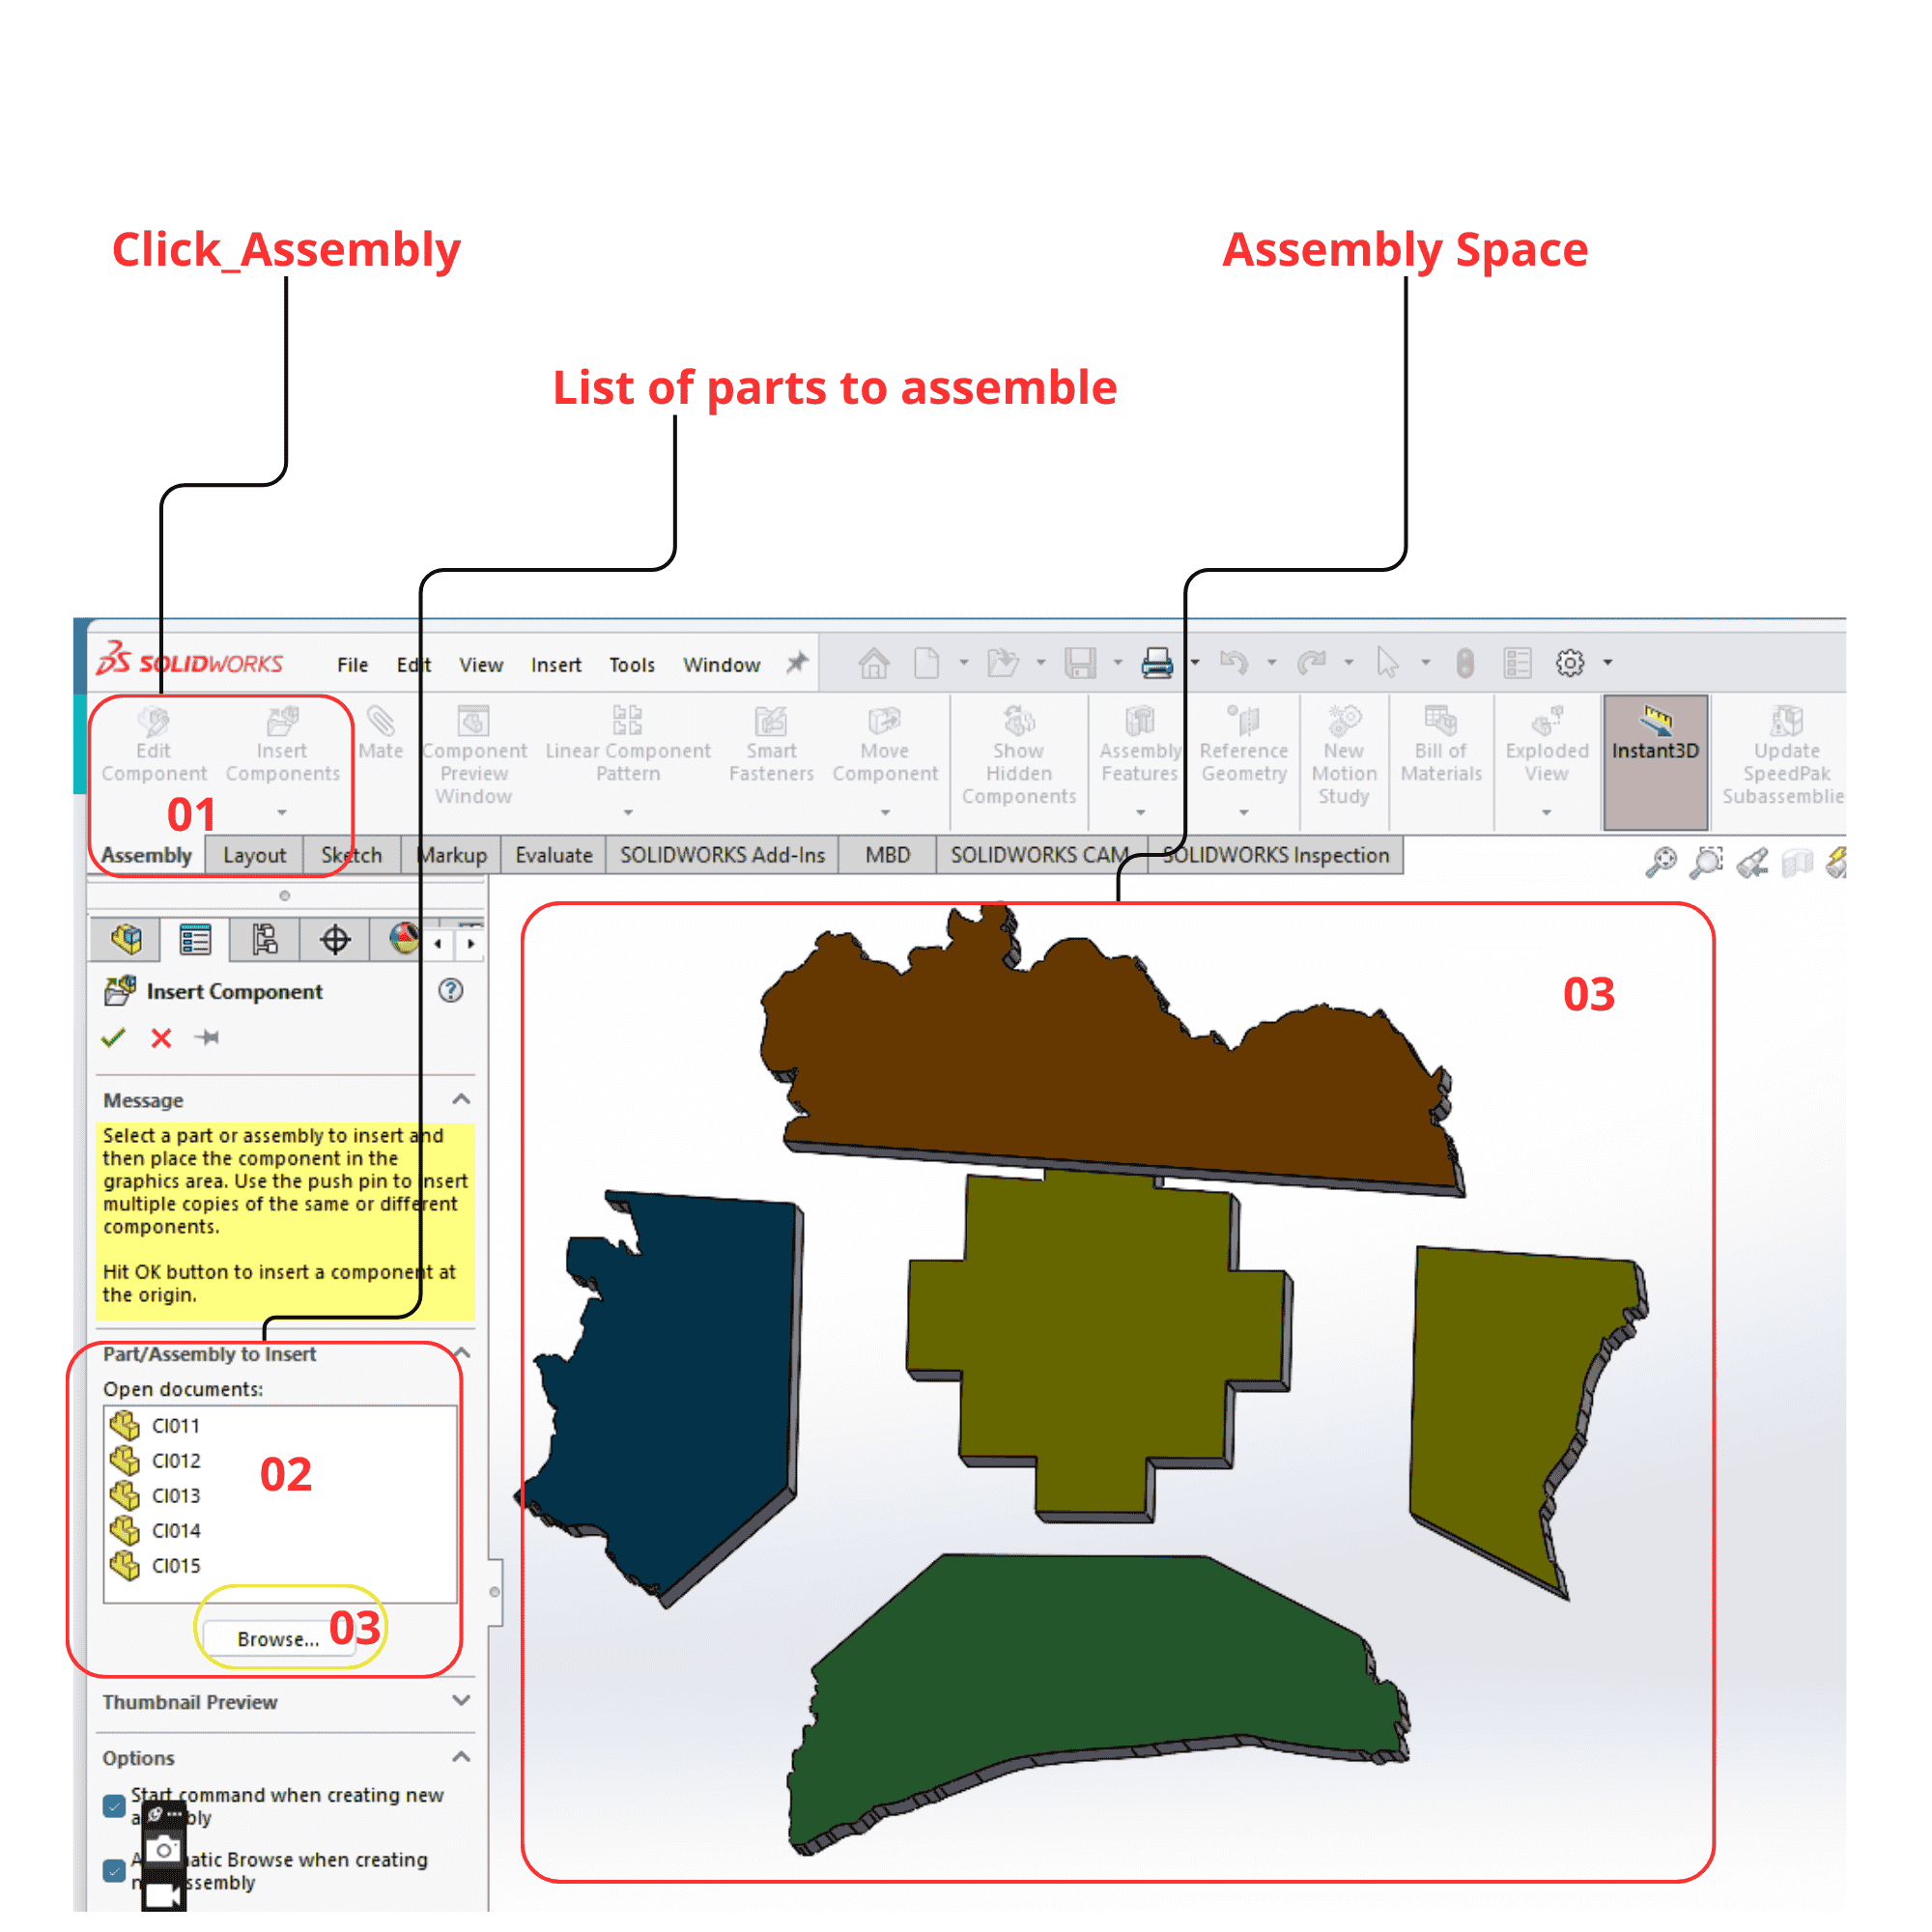
- STEP17
HandBrake Video Compression Guide
Follow these steps to efficiently compress your project videos while maintaining excellent quality.
1. Select the Source
- Open Source: Click this button in the top left corner to import the video you wish to compress.
- Verification: Once the file is loaded, verify the information displayed under Source (e.g.,
848x480, 30 FPS).
2. Choose the Preset
- Preset: Avoid using resolutions higher than your source (e.g., selecting "Fast 1080p30" for a 480p video), as this increases the file size unnecessarily.
- Tip: Click the Presets dropdown menu (top right) and choose a preset in the General category, such as
Very Fast 480p30orFast 480p30, for better alignment with your source.
3. Adjust Settings
Summary Tab (Format)
- Leave the format set to MP4 (universal).
- Check Web Optimized if you plan to share these videos on professional platforms or social media.
Video Tab
- Video Codec: The
H.264 (x264)setting is ideal. - Constant Quality (RF): This is the most important setting. A value between 20 and 23 offers the best compromise between file size and visual quality.
Audio Tab
- Verify that the codec is set to AAC or MP3. For a technical demonstration, a stereo bitrate of 128 kbps is sufficient.
4. Destination and Start
- Save As: Click the Browse button at the bottom of the window to choose the destination folder and name your final file.
- Start Encoding: Once the settings are configured, click the green Start Encode button located in the top toolbar.
Video Compression Guide
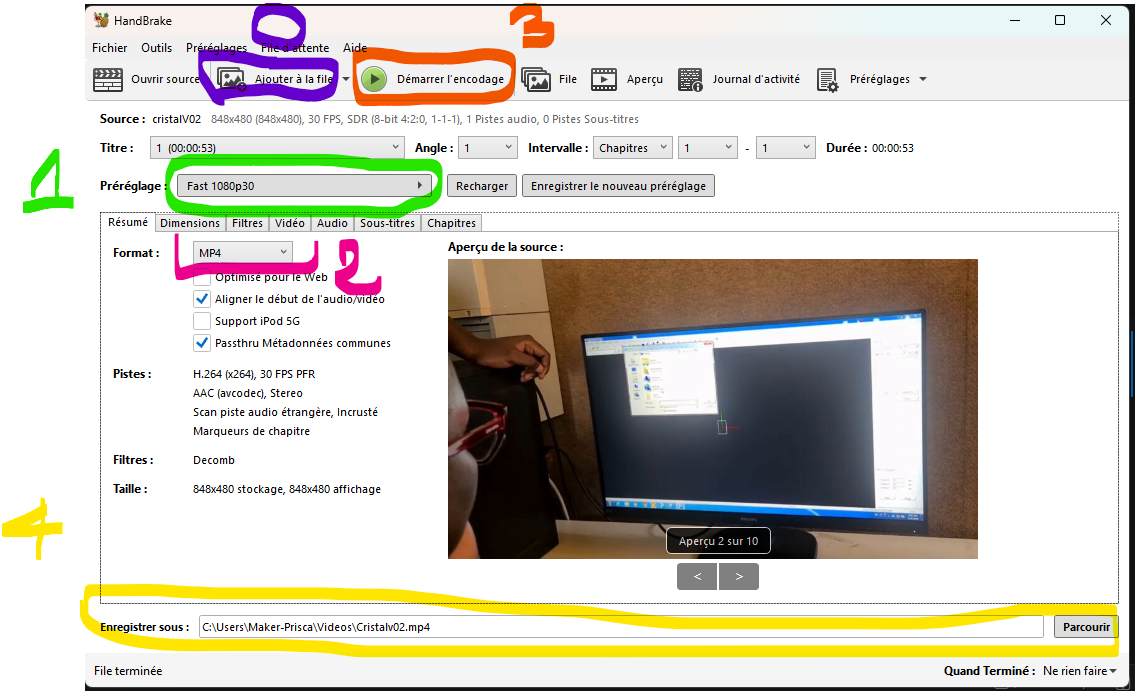
This guide outlines the workflow for compressing videos using HandBrake, as illustrated in image.
-
0. Import
- Click the "Open Source" button or "Ajouter à la file" in the top left corner to load your video file.
-
1. Resolution/Preset
- Select an appropriate preset from the "Préréglage" dropdown menu.
- Ensure the preset matches your source resolution to avoid unnecessary file size increases.
-
2. Format
- Navigate to the "Résumé" tab.
- Select your desired container format (e.g., MP4) from the "Format" dropdown.
-
3. Launch
- Once all settings are configured, click the green "Démarrer l'encodage" button in the top toolbar to begin the process.
-
4. Destination Folder
- Use the "Enregistrer sous" field at the bottom of the window to define the output path and filename.
- Click "Parcourir" to select the destination folder manually.
4.file
Files
| File | Description |
|---|---|
| Download project files | 2D model |
| Download project files | 2D or DXF model |
| Download project files | 2D or DXF model for final projet |