Final Project
Vahan
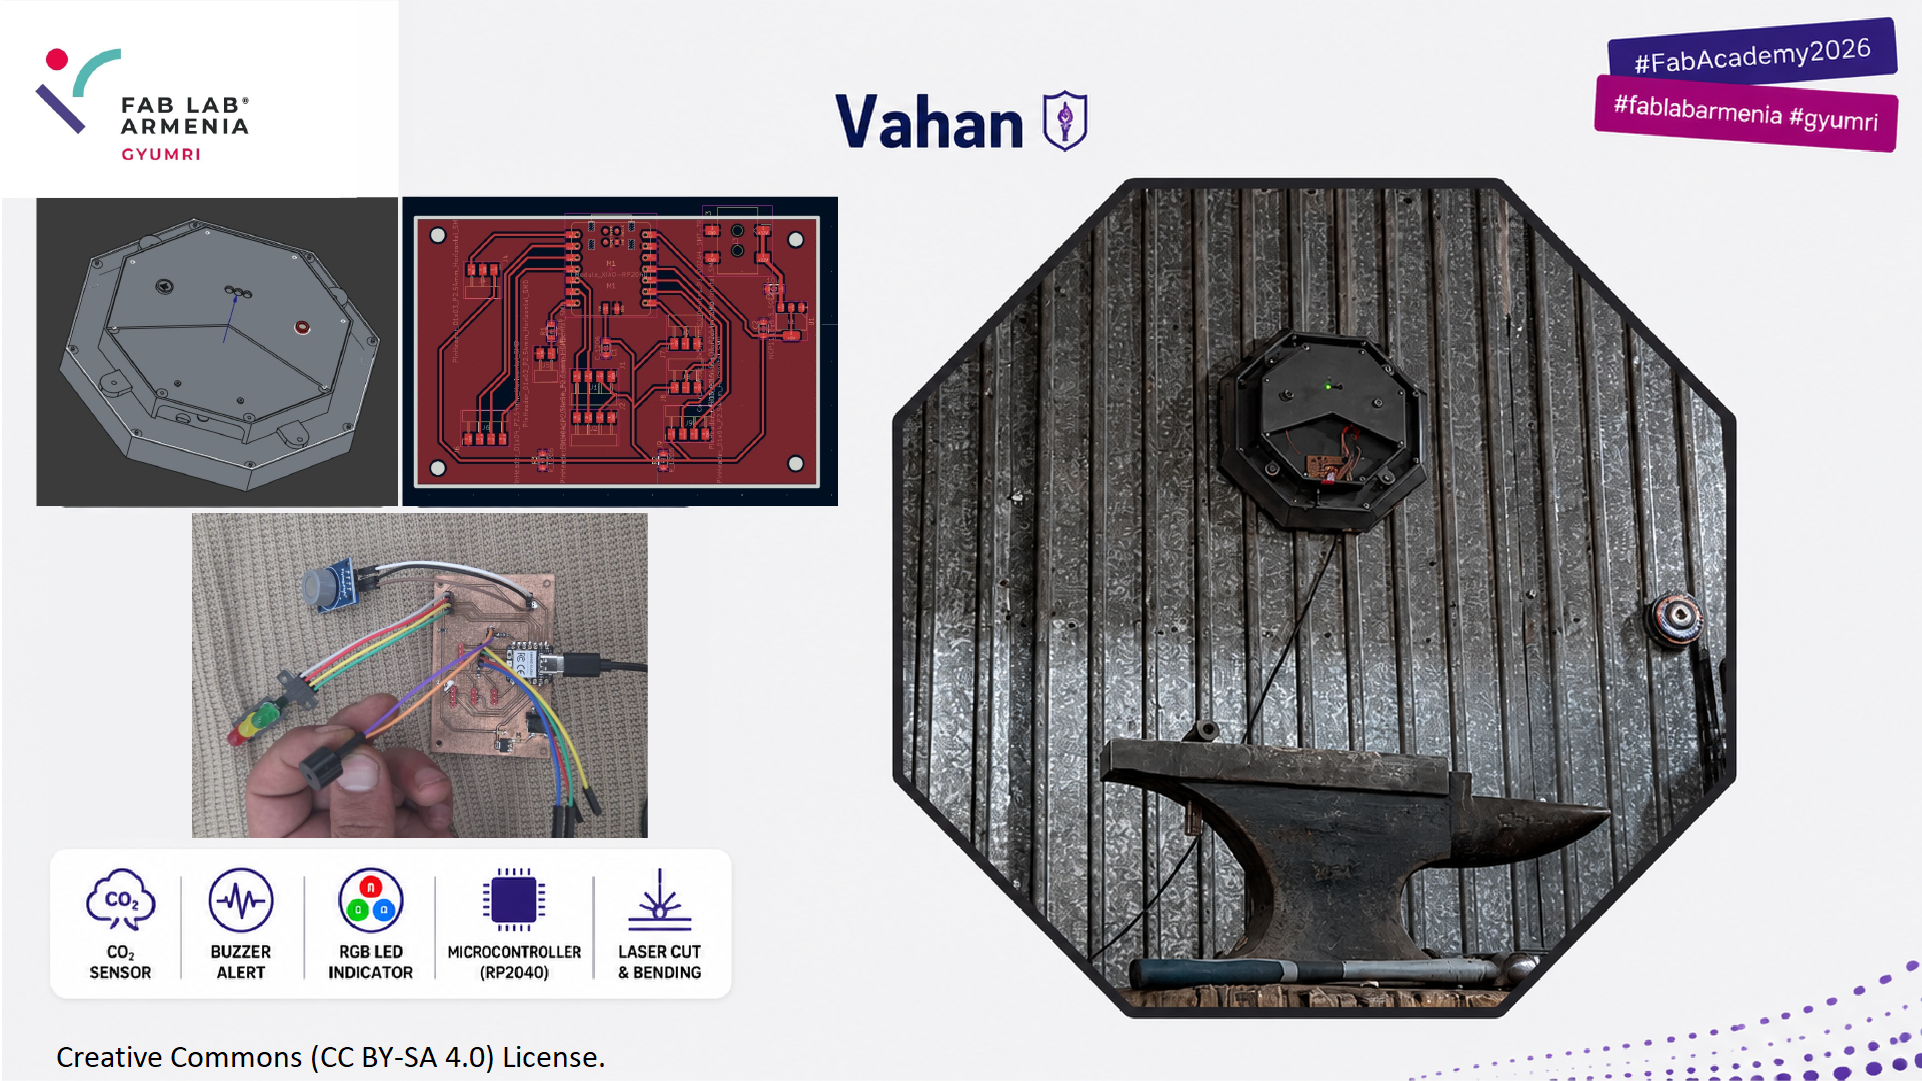
My final project is Vahan — a CO/CO₂ gas monitoring safety device designed for forge environments. The name means “shield” in Armenian, which reflects what the device is meant to do: warn a metalworker before gas levels become dangerous.
The idea came directly from a real problem in my own lab. Forges and blacksmith workshops produce carbon monoxide through incomplete combustion of coal, coke, and gas, and there’s no simple, dedicated way to know when the air has become unsafe to breathe. Vahan reads gas concentration continuously and reacts with clear visual and audible alerts — no display to read, no app to check, just a system you can glance at or hear from across the room.
What does it do
Vahan continuously measures CO/CO₂ concentration using an MQ-7 gas sensor connected to a custom PCB built around a Seeed XIAO RP2040. Based on the reading, the system moves between three states:
- Safe — green LED on, buzzer silent
- Warning — yellow LED on, buzzer pulsing
- Danger — red LED on, buzzer continuous
The three states are designed so a forge worker can understand the situation without looking closely at the device — green means keep working, yellow means ventilate, red means stop and leave.
The electronics sit inside a 3D-printed enclosure with dedicated openings for the gas sensor and a separate LED traffic-light module, and the enclosure itself carries a decorative metal element cut from steel sheet, shaped to reference a shield — tying the physical form of the device back to its name.
Interesting work done by others
- Airable by Fab Academy 2021 student Nicole Bakker monitors air quality using a CO₂ sensor and displays the air status through RGB LEDs (green, orange, red) — a similar status-indication logic to the one I used for Vahan.
- Plant.Air by Ana Filipa Silva (Fab Academy 2017) was designed to monitor CO₂ levels in indoor environments and helped users understand whether an environment was healthy to work or live in.
- Beyond Fab Academy, CO₂ monitoring and automatic ventilation systems are common in schools, offices, and industrial spaces — Sander van Vliet, for example, combined a CO₂ sensor with a ventilation control system that automatically reacts to changes in air quality.
Sketch and Early Concept
The project started on paper, in Week 1, as a rough sketch and the first version of the idea — a system that would watch over air quality in a workshop and respond automatically as conditions worsened.
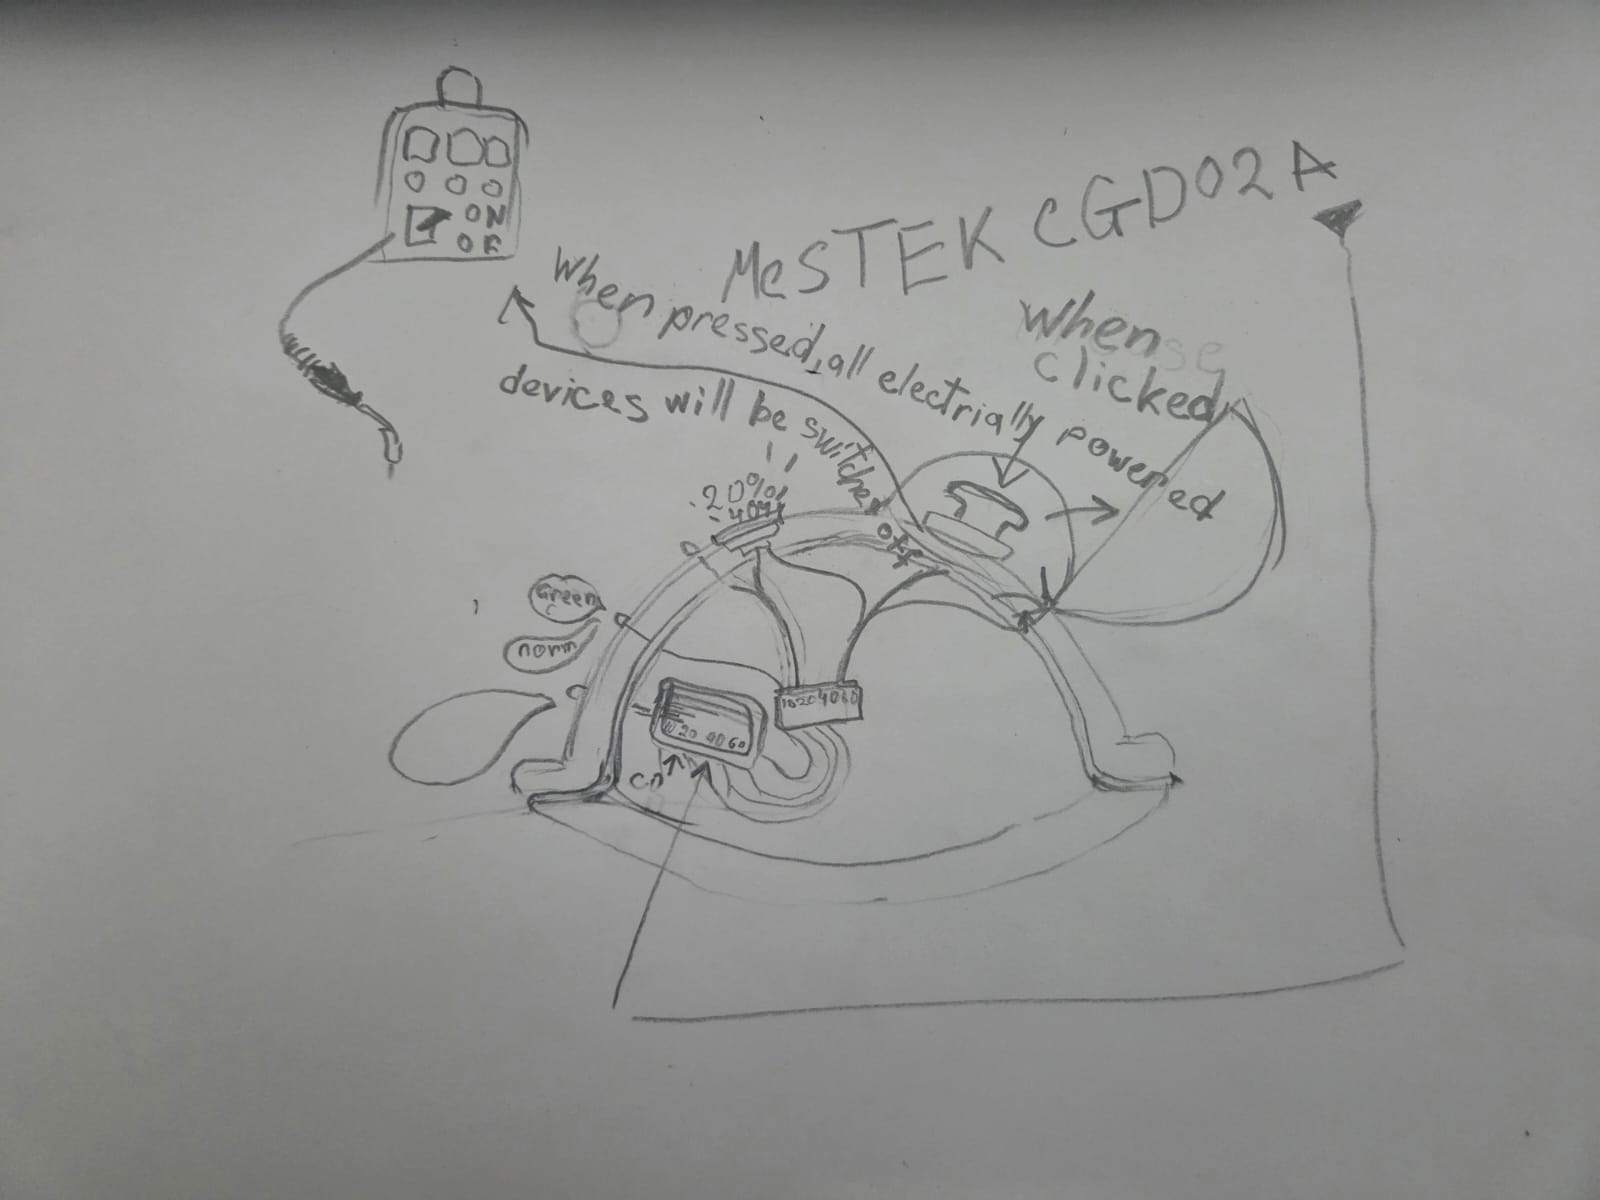
The very first version of this idea was a rough concept sketch, mapping out a MeSTEK CGD02A sensor, an on/off control panel, and the rough threshold logic (20% normal, 40% warning, 60%+ danger) that later evolved into the SAFE/WARNING/DANGER states Vahan actually uses:
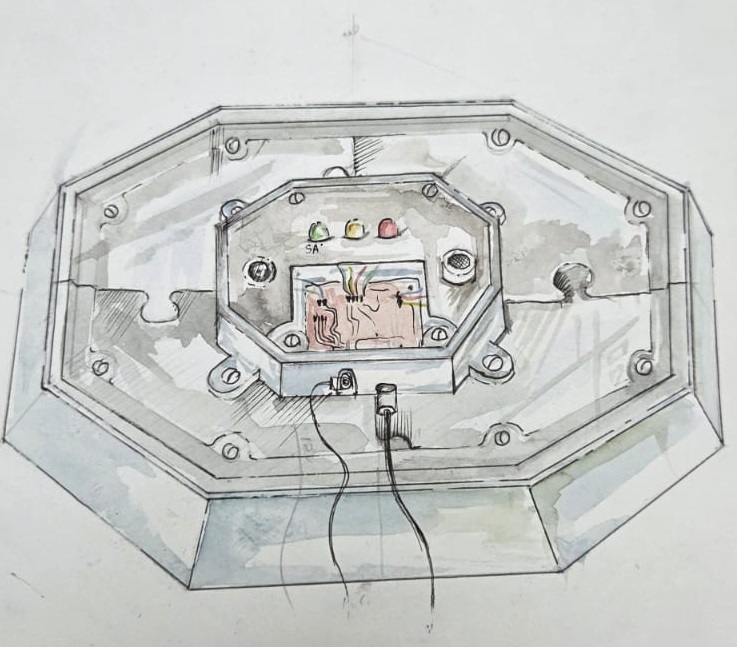
A more detailed internal-layout sketch came later, once the enclosure and component placement were being worked out, showing the PCB, the three status LEDs, the buzzer, and the wiring routed inside the octagonal enclosure:
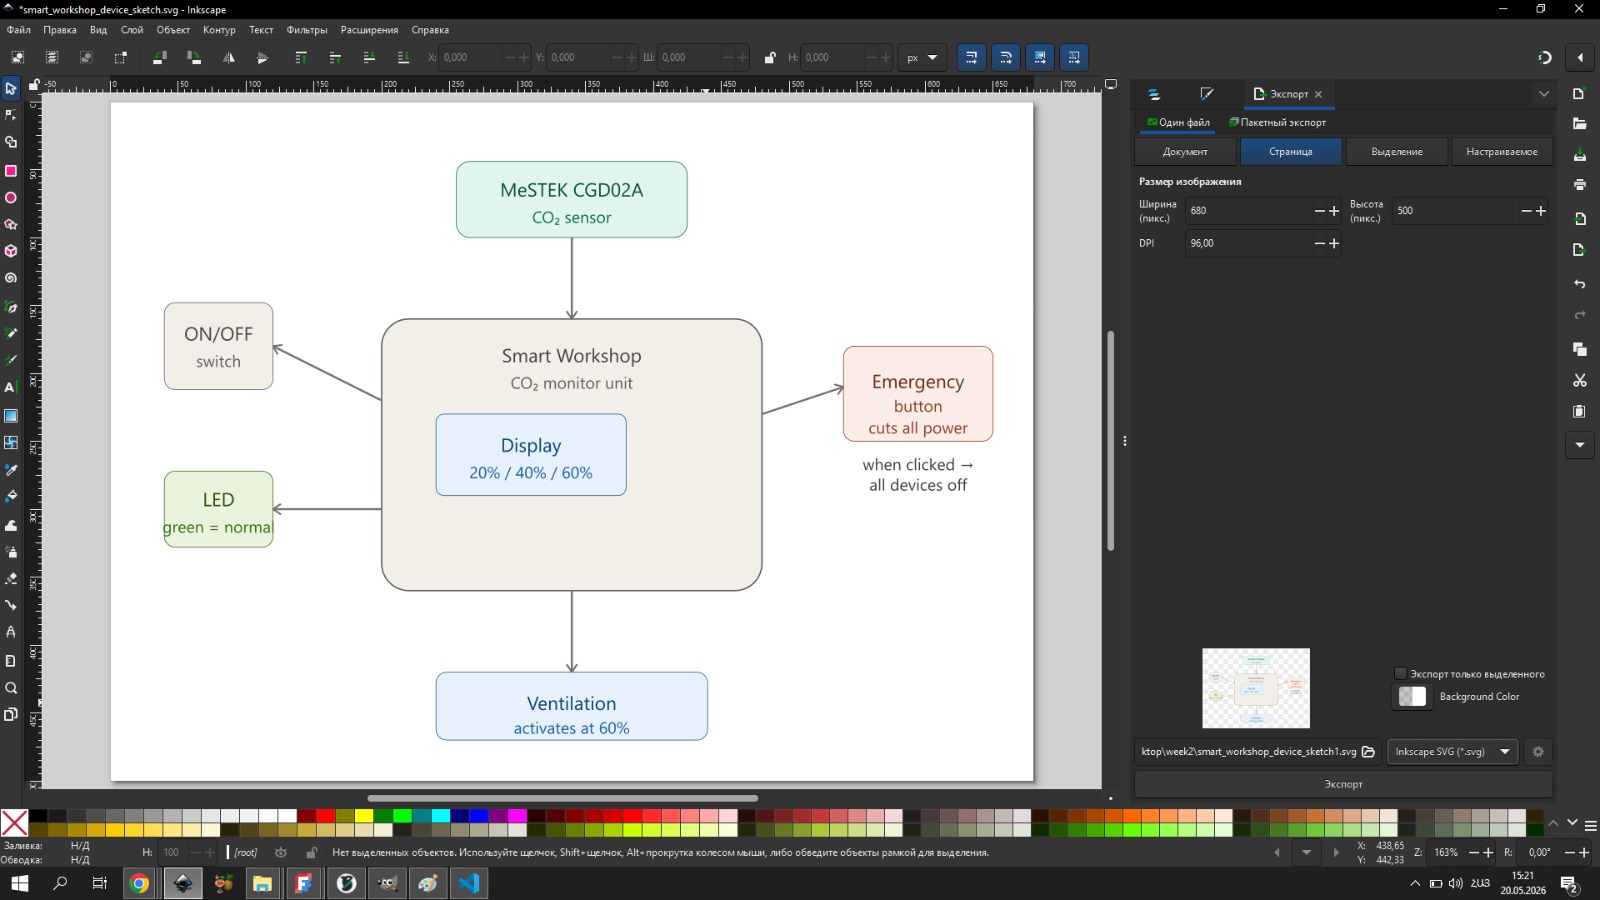
In Week 2, I turned that idea into an actual block diagram in Inkscape, mapping out the components and their connections, and modeled a first rough enclosure in FreeCAD to get a sense of the physical scale of the device. At that stage I was still planning around a CO₂ sensor (the MeSTEK CGD02A) rather than the MQ-7 I ended up using, and the response thresholds were sketched out conceptually — 20% normal, 40% sound alert, 50% strong alarm, 60% ventilation — long before I had real sensor data to calibrate against. Even though almost everything about the design changed afterward, this first rough pass was what turned the project from an idea into something I could actually start building toward.
2D concept — Inkscape block diagram, mapping the CO₂ sensor, control unit, LED indicator, emergency button, and ventilation output:
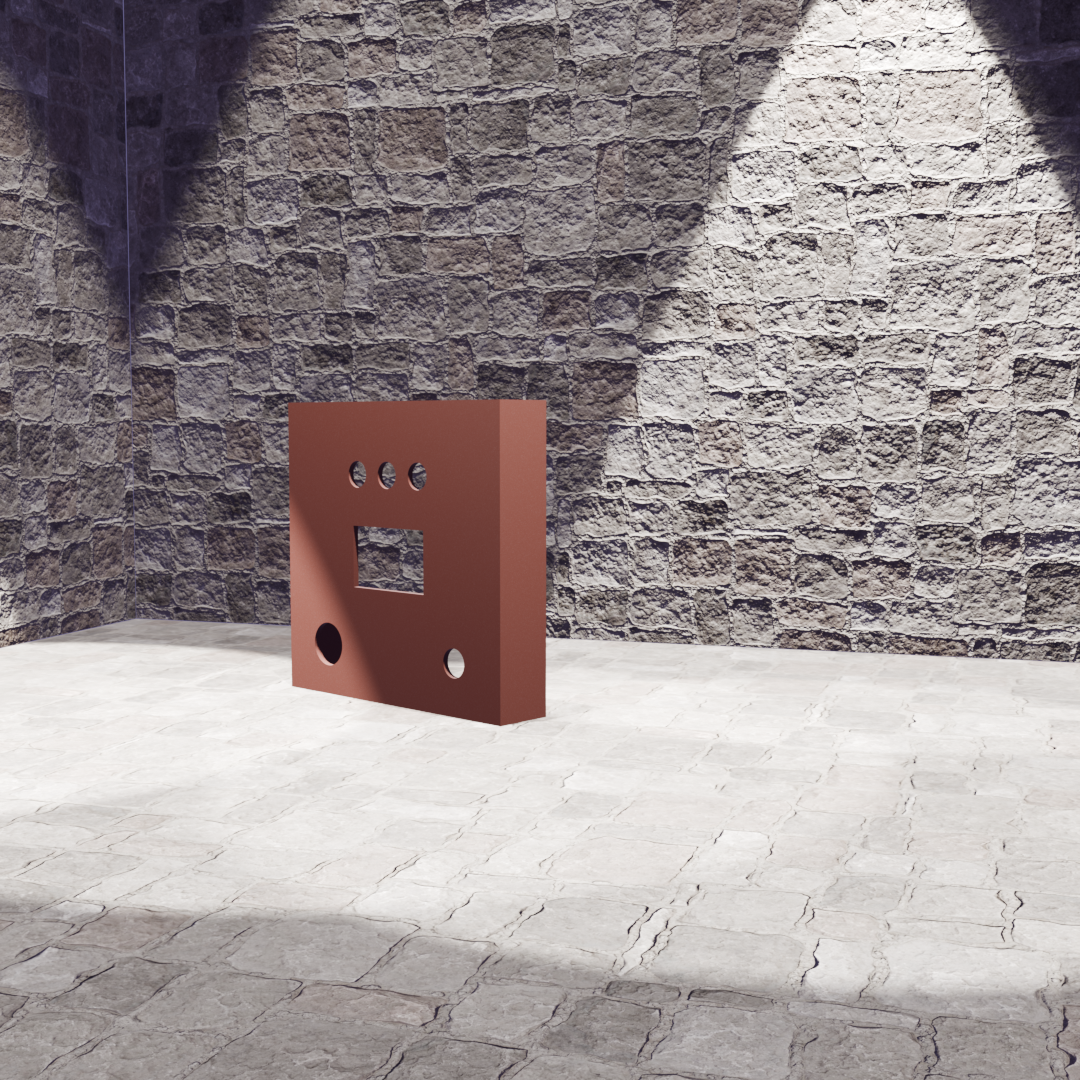
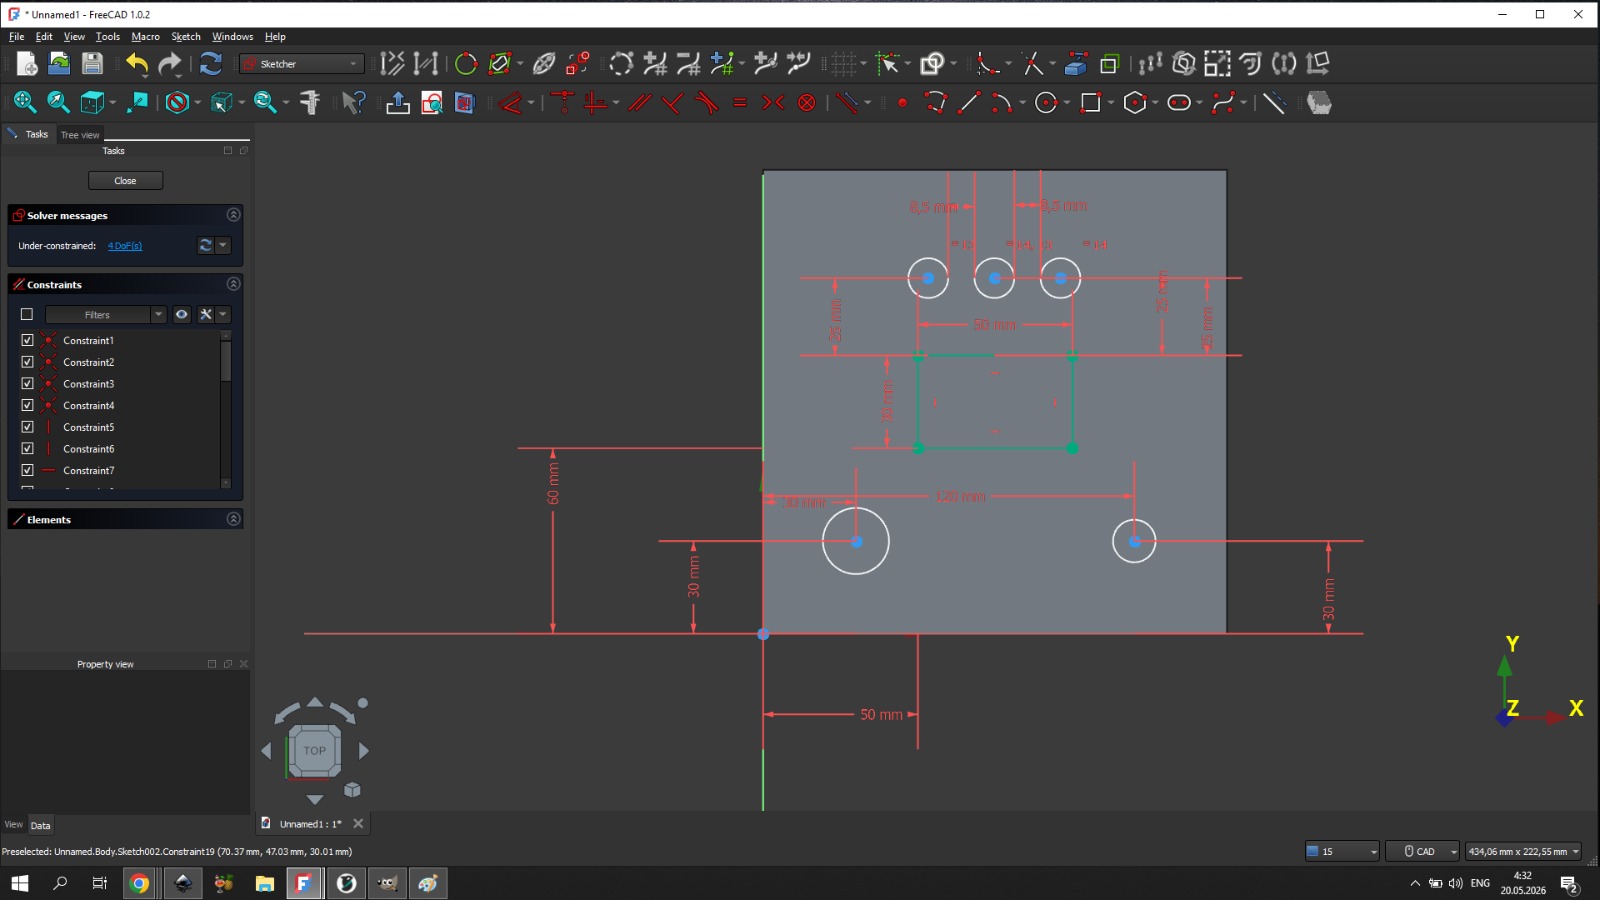
3D concept — FreeCAD enclosure, a rough first model to check physical scale and component placement, later rendered in Blender for a clearer look:
Choosing the Gas Sensor
In Week 4, I tested an MQ-135 sensor that was available in the lab, and noticed it reacted to almost everything — breath, movement, any change in the air — without distinguishing between gases. For a safety device meant to warn specifically about CO, that was a real problem: if the sensor reacts to everything, you can’t know what it’s actually warning about.
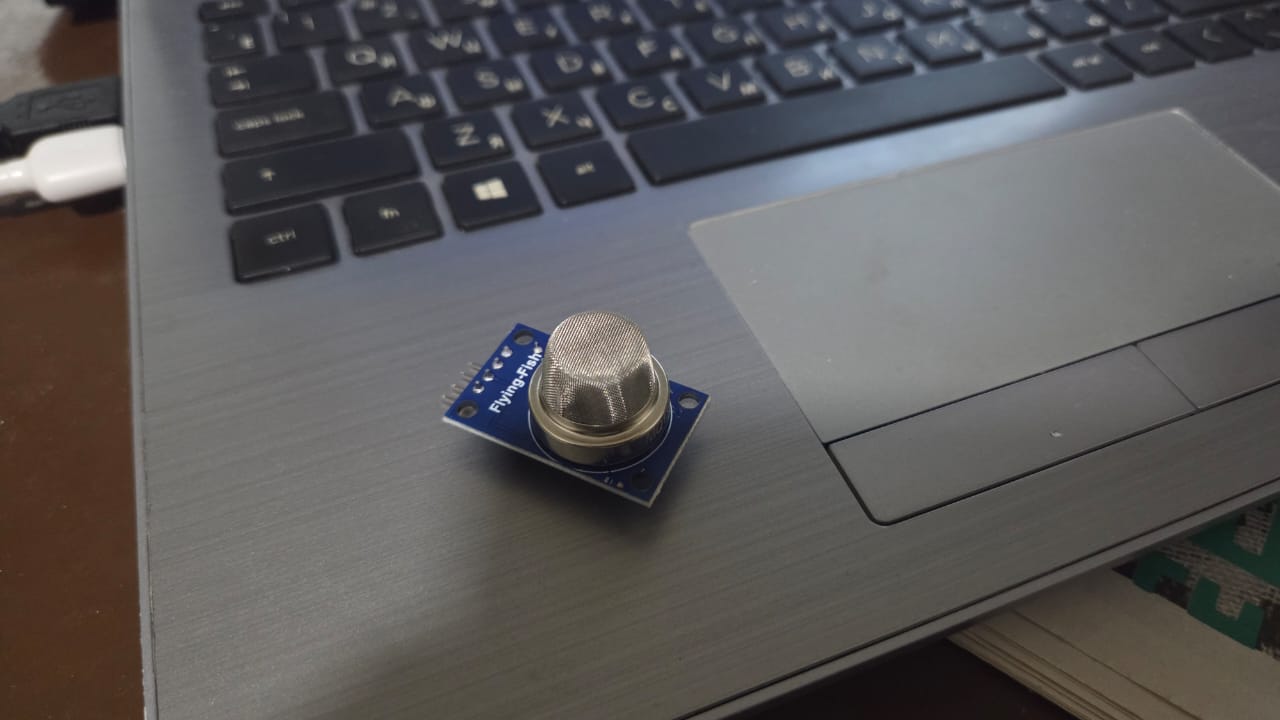
That observation, together with guidance from my instructor Rudolf, pushed me toward the MQ-7 instead — a sensor specific to carbon monoxide, which is the actual danger in a forge environment.
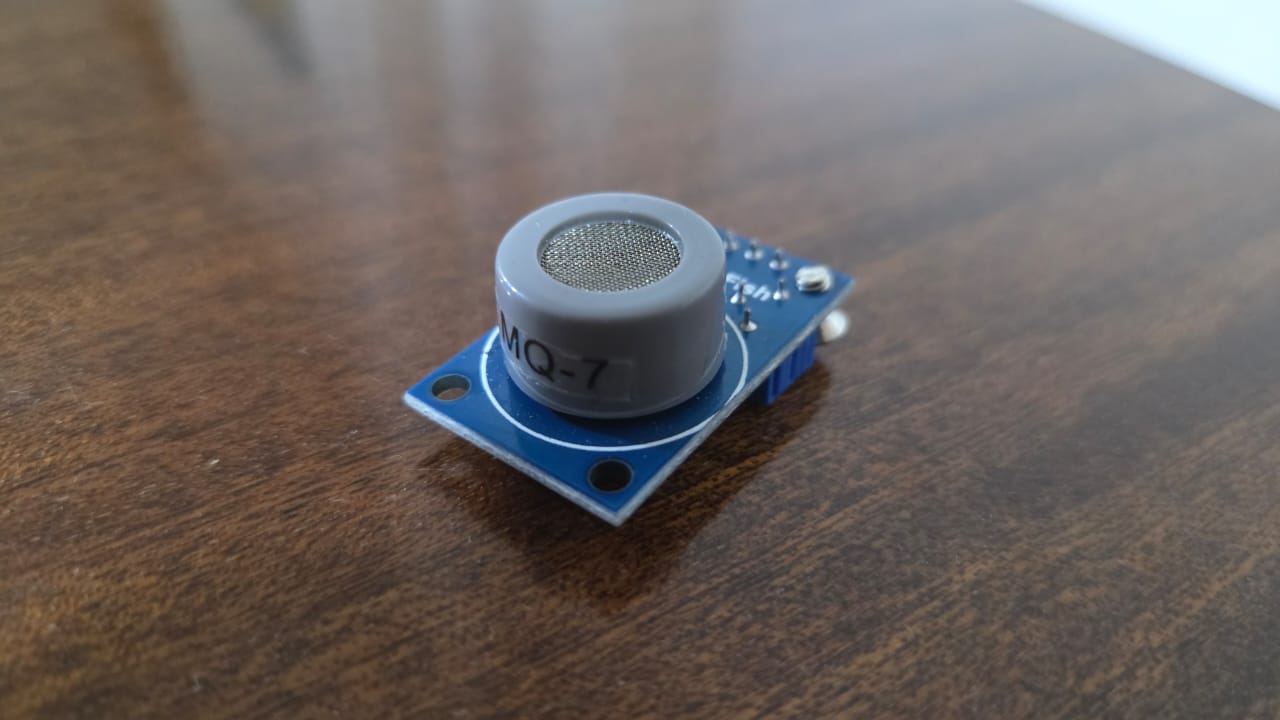
This switch became the foundation for the rest of the electronics: the PCB, the firmware, and the alert logic were all built around the MQ-7’s analog output from this point forward.
Electronics Design and Production
The PCB went through two iterations. The first version, designed and milled in earlier weeks, could only be powered through the XIAO RP2040’s USB-C port and used SMD LEDs soldered directly onto the board.
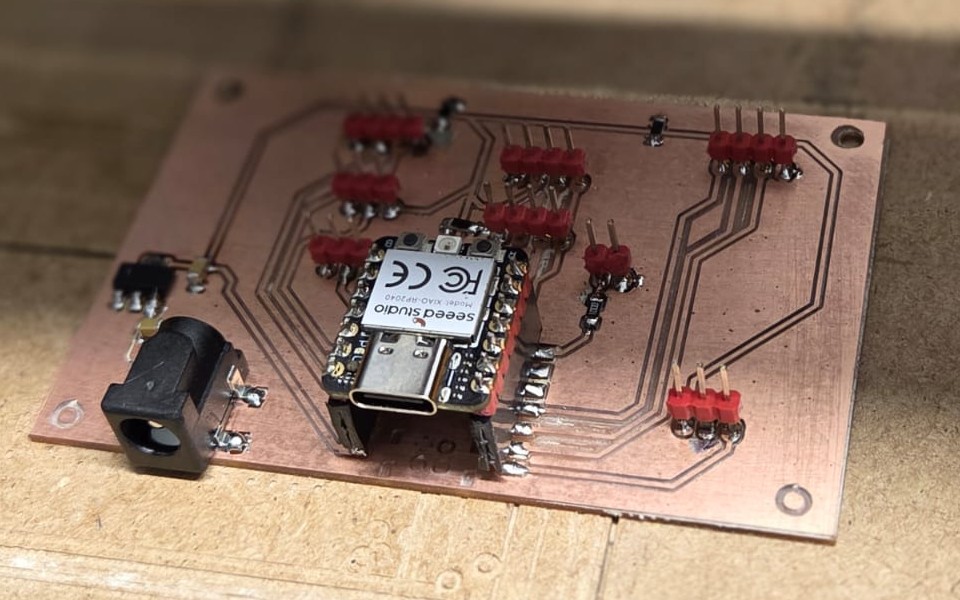
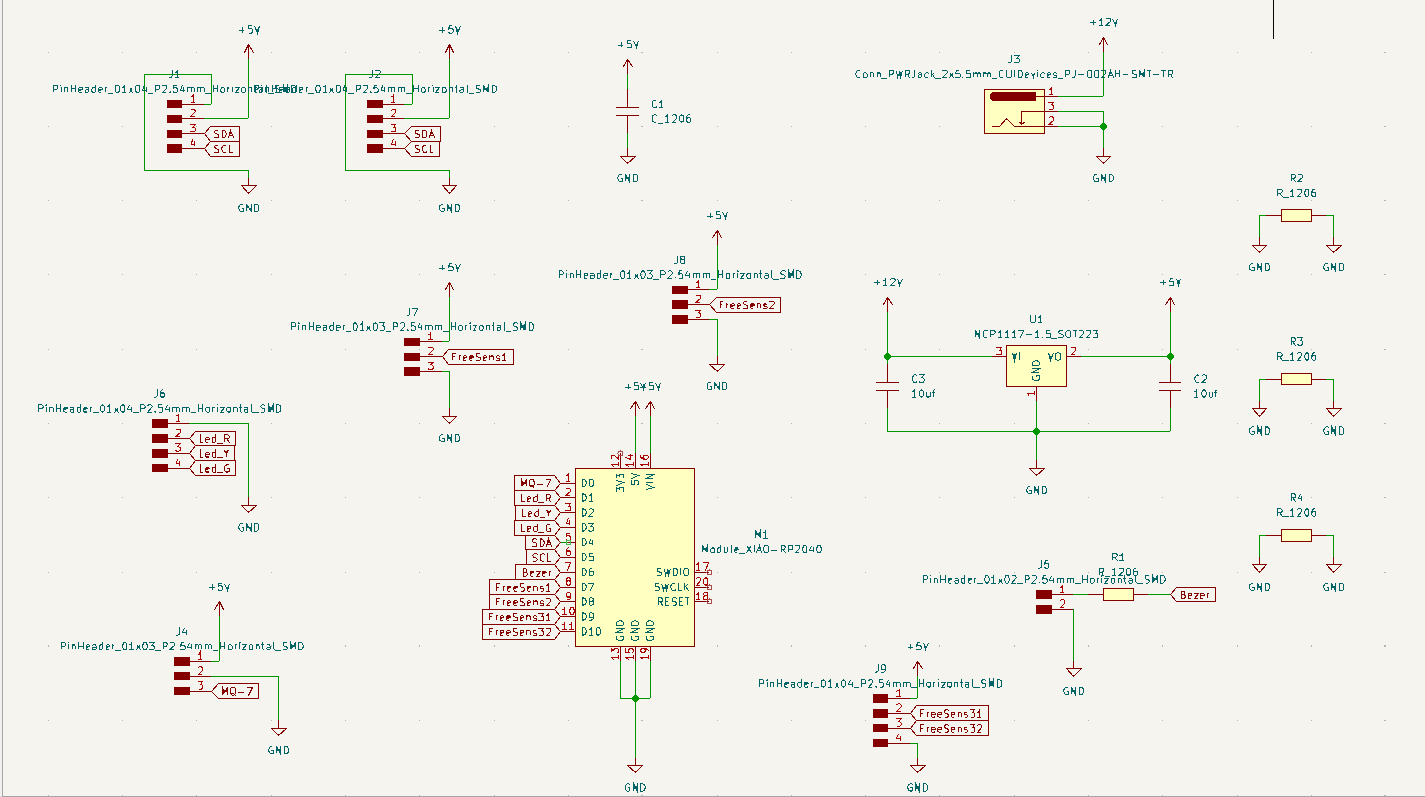
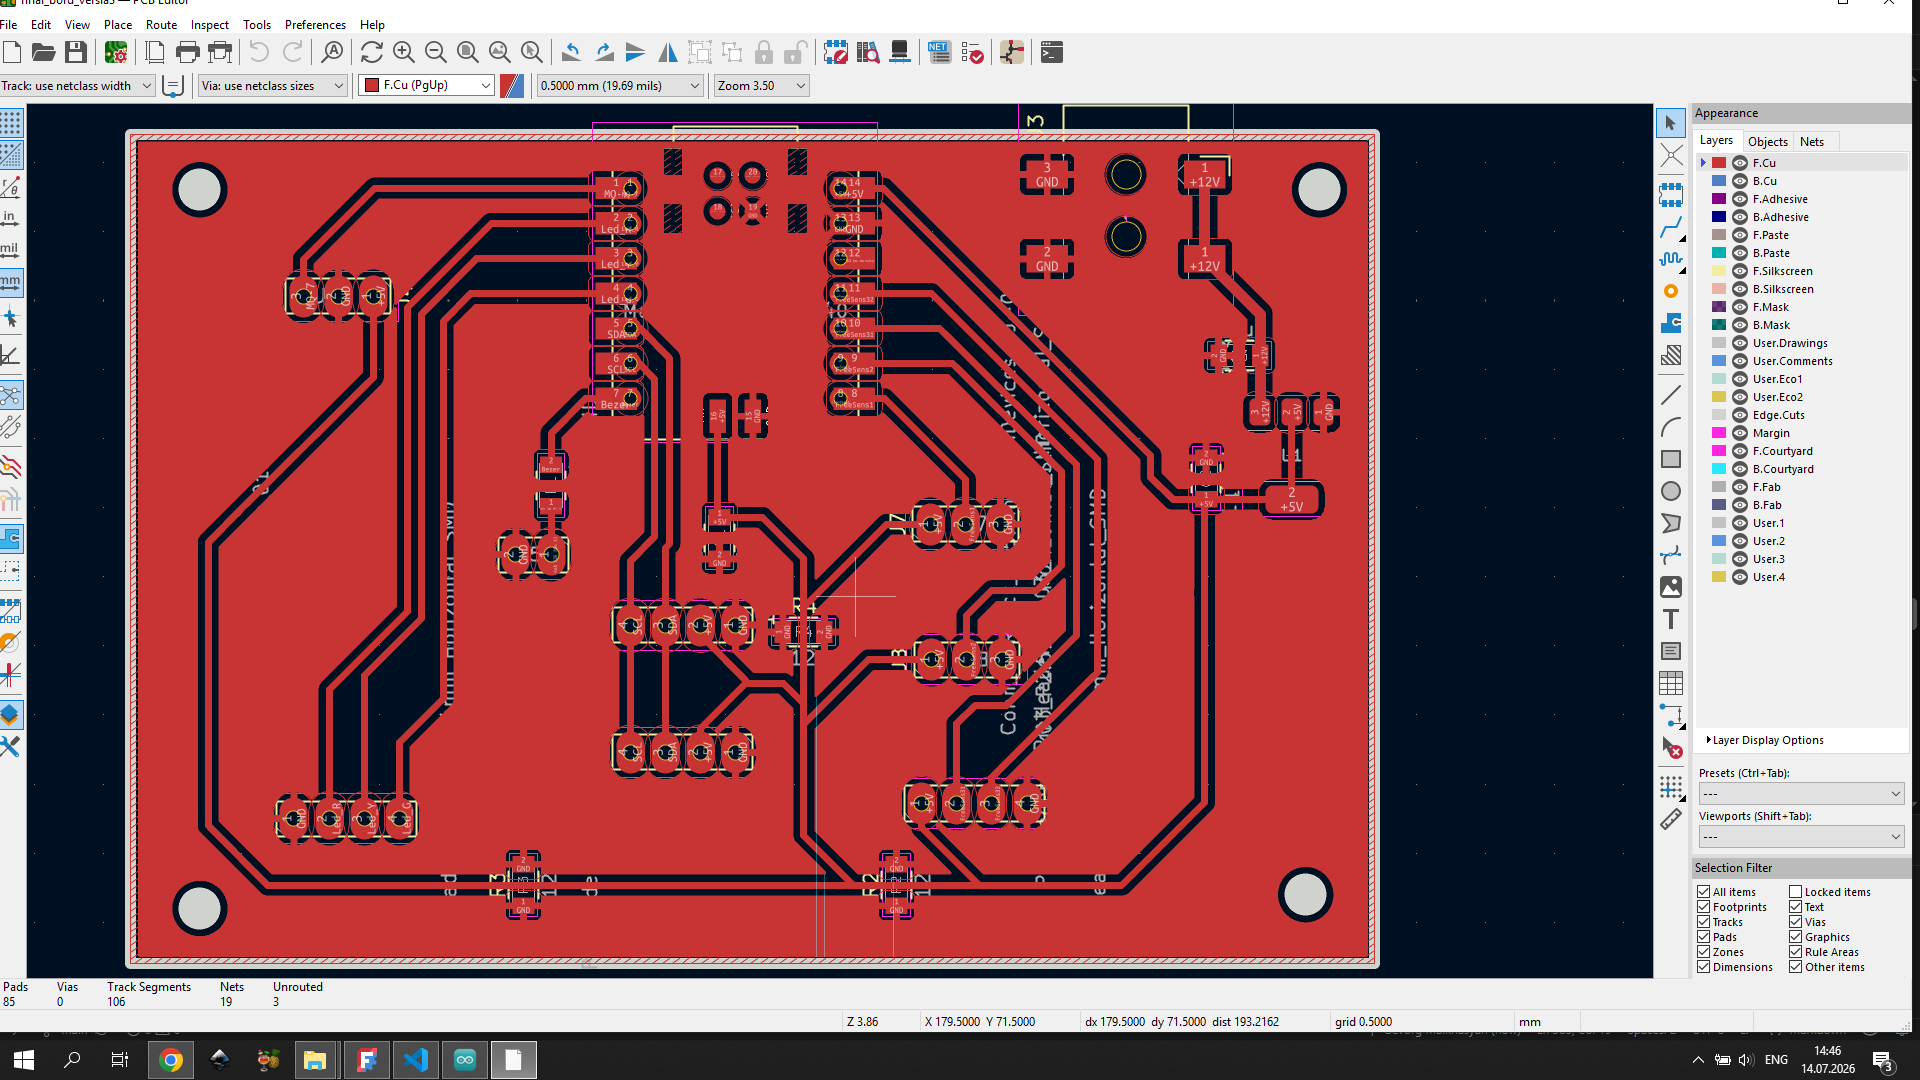
In Week 9, I redesigned the board specifically for the final project. I added a 12V barrel jack and an NCP1117 voltage regulator so the board could be powered independently of a computer, replaced the SMD LEDs with a ready-made 5V LED Traffic Light Module (since the enclosure made SMD LEDs impractical to see clearly), and dedicated a proper 3-pin header for the MQ-7 (+5V, GND, analog output). I also added two I2C headers and a few spare sensor pins to keep the board flexible for future use, and used three 0 Ω “bridge” resistors to fix a GND-zone routing issue on the PCB.
KiCad Design Files
The PCB layout, showing the copper routing (F.Cu layer) that connects all the components:
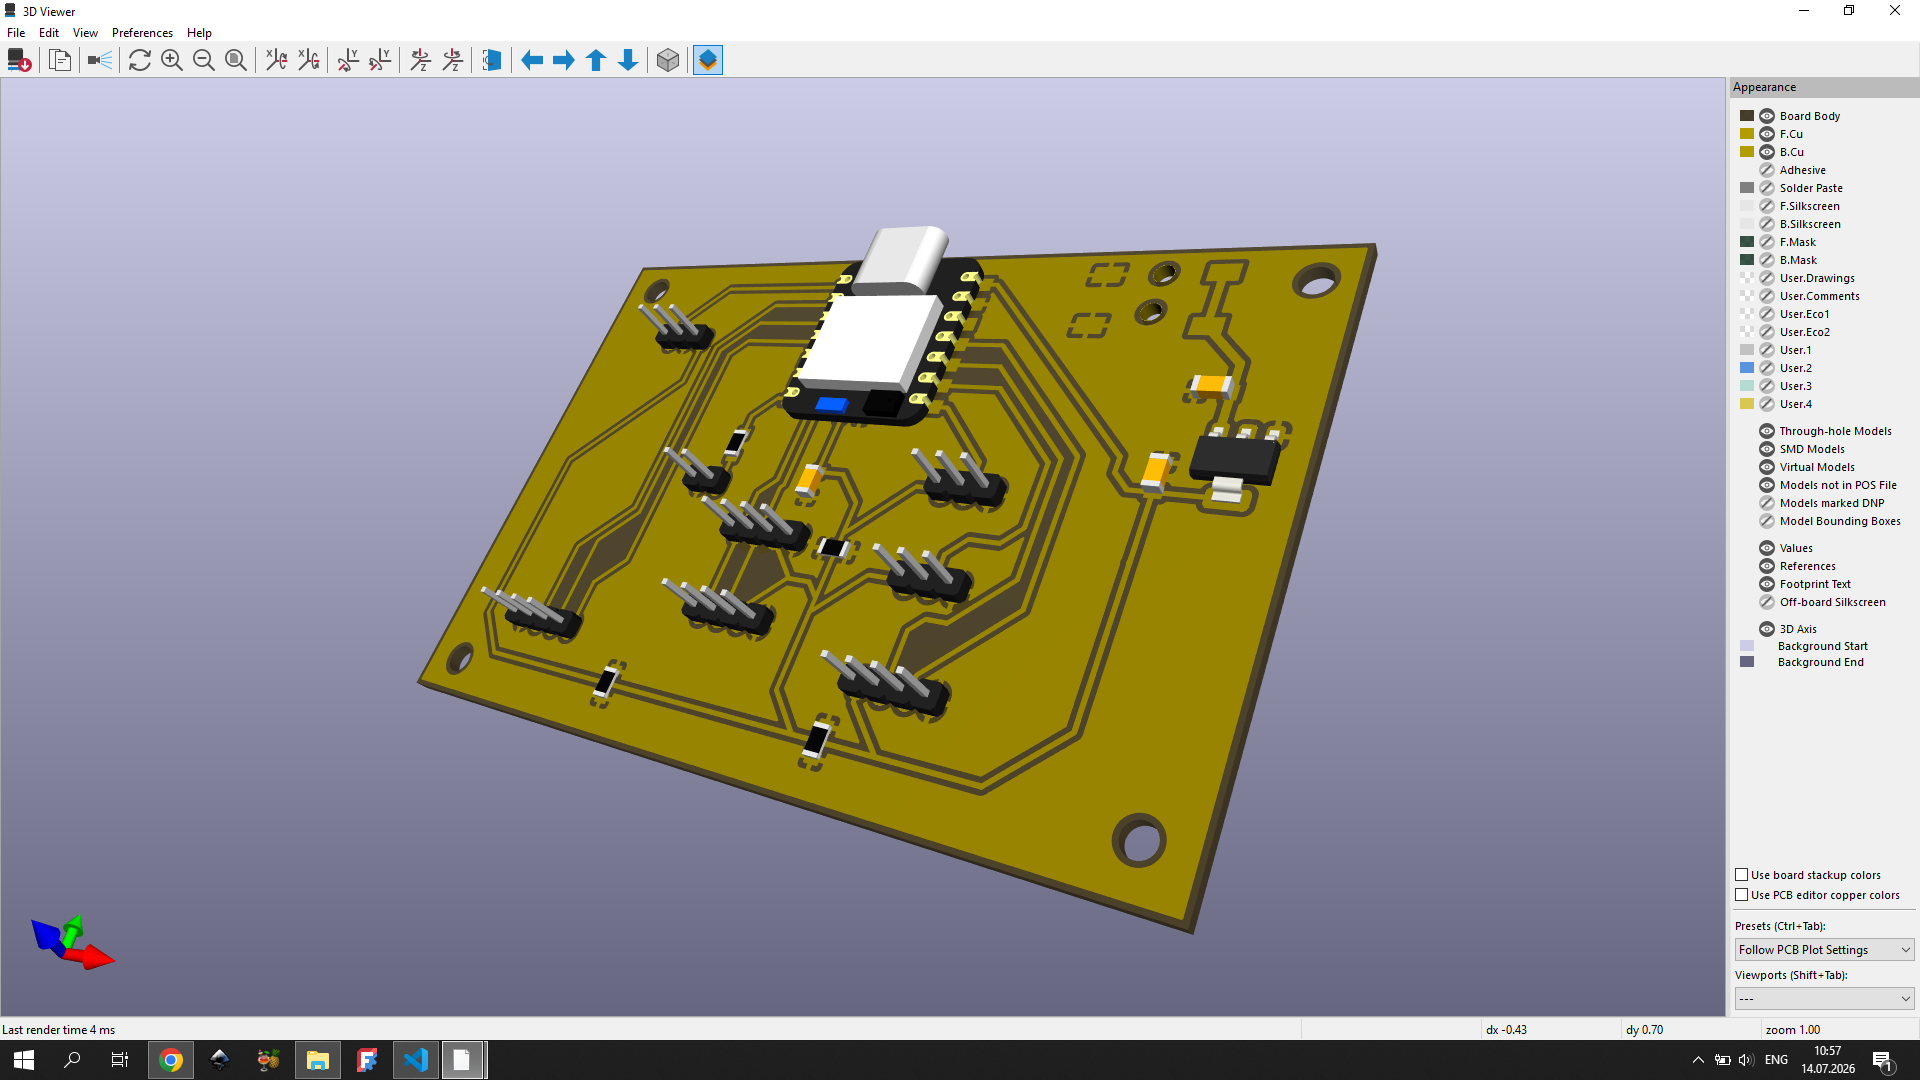
Assembled Board
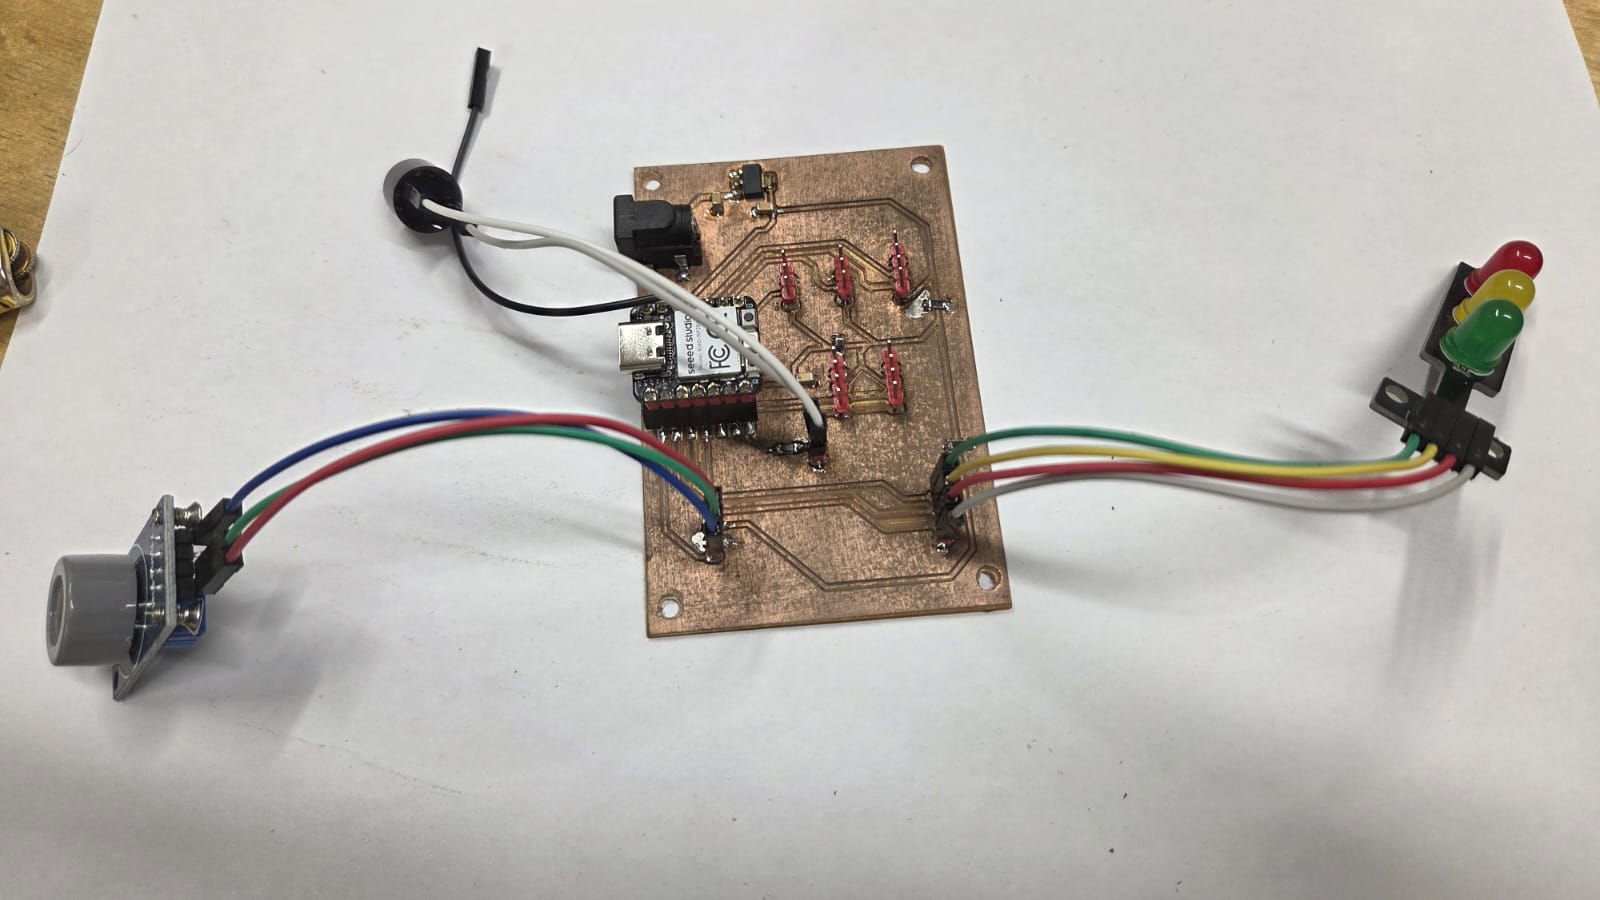
The board fully populated, with the MQ-7 sensor, buzzer, and LED traffic-light module all connected through their pin headers:
Circuit Block Diagram
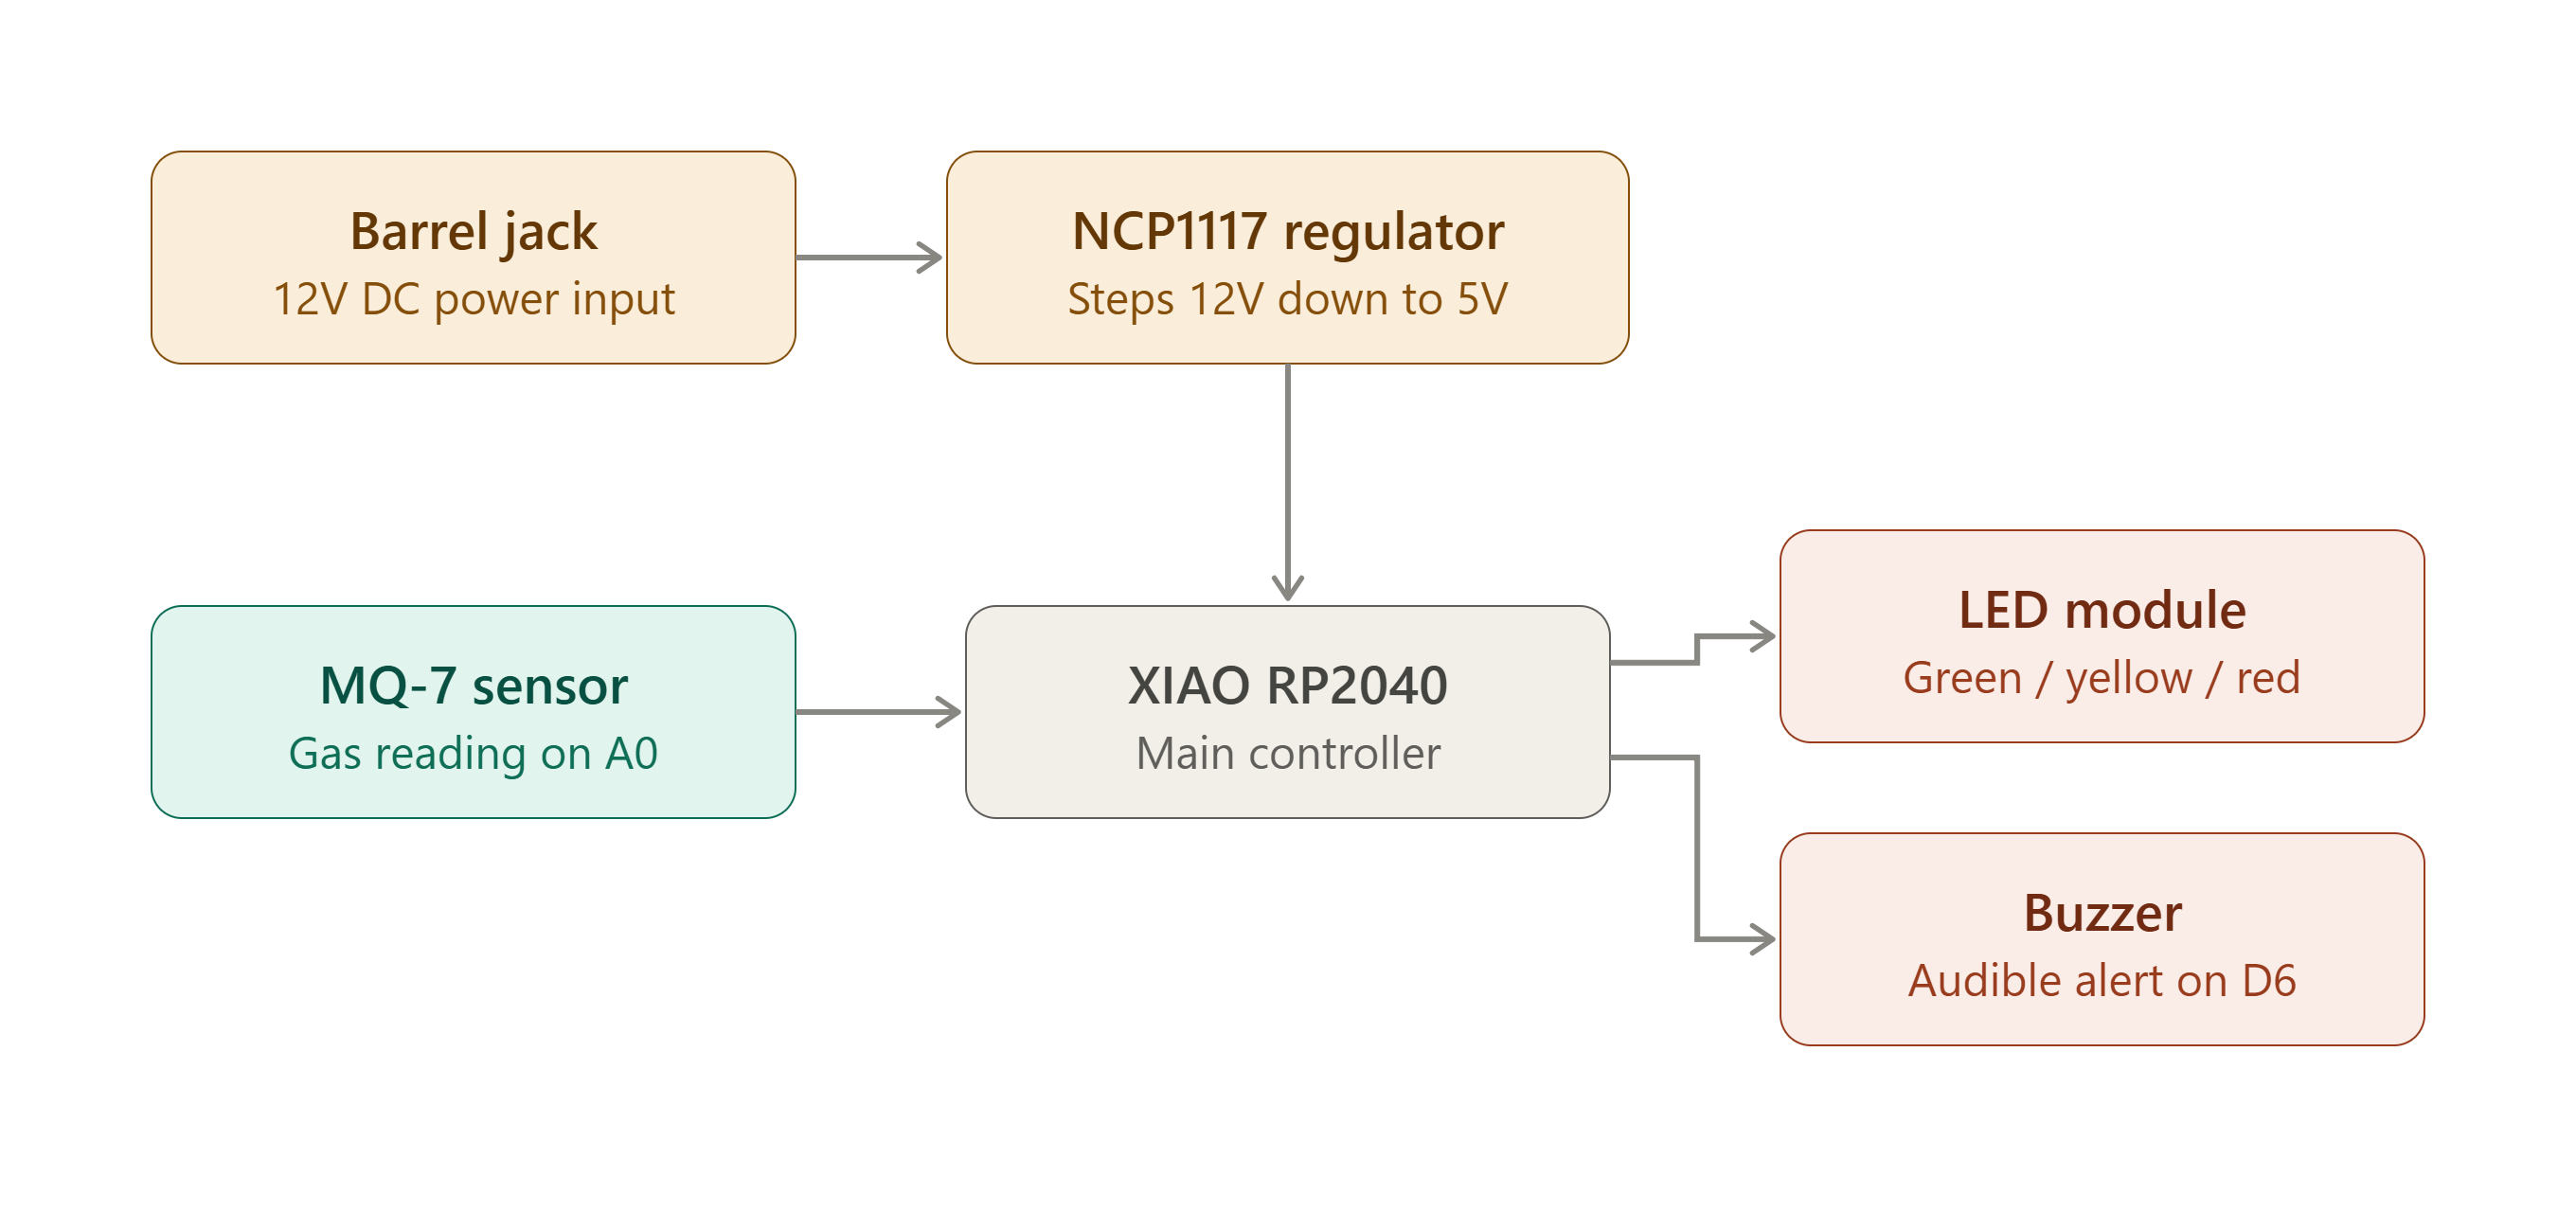
Power comes in through a 12V barrel jack and is stepped down to 5V by the NCP1117 regulator before reaching the XIAO RP2040. The MQ-7 gas sensor feeds its analog reading into the controller on pin A0, and the controller drives the LED module and buzzer as outputs based on that reading.
Wiring and Connectors
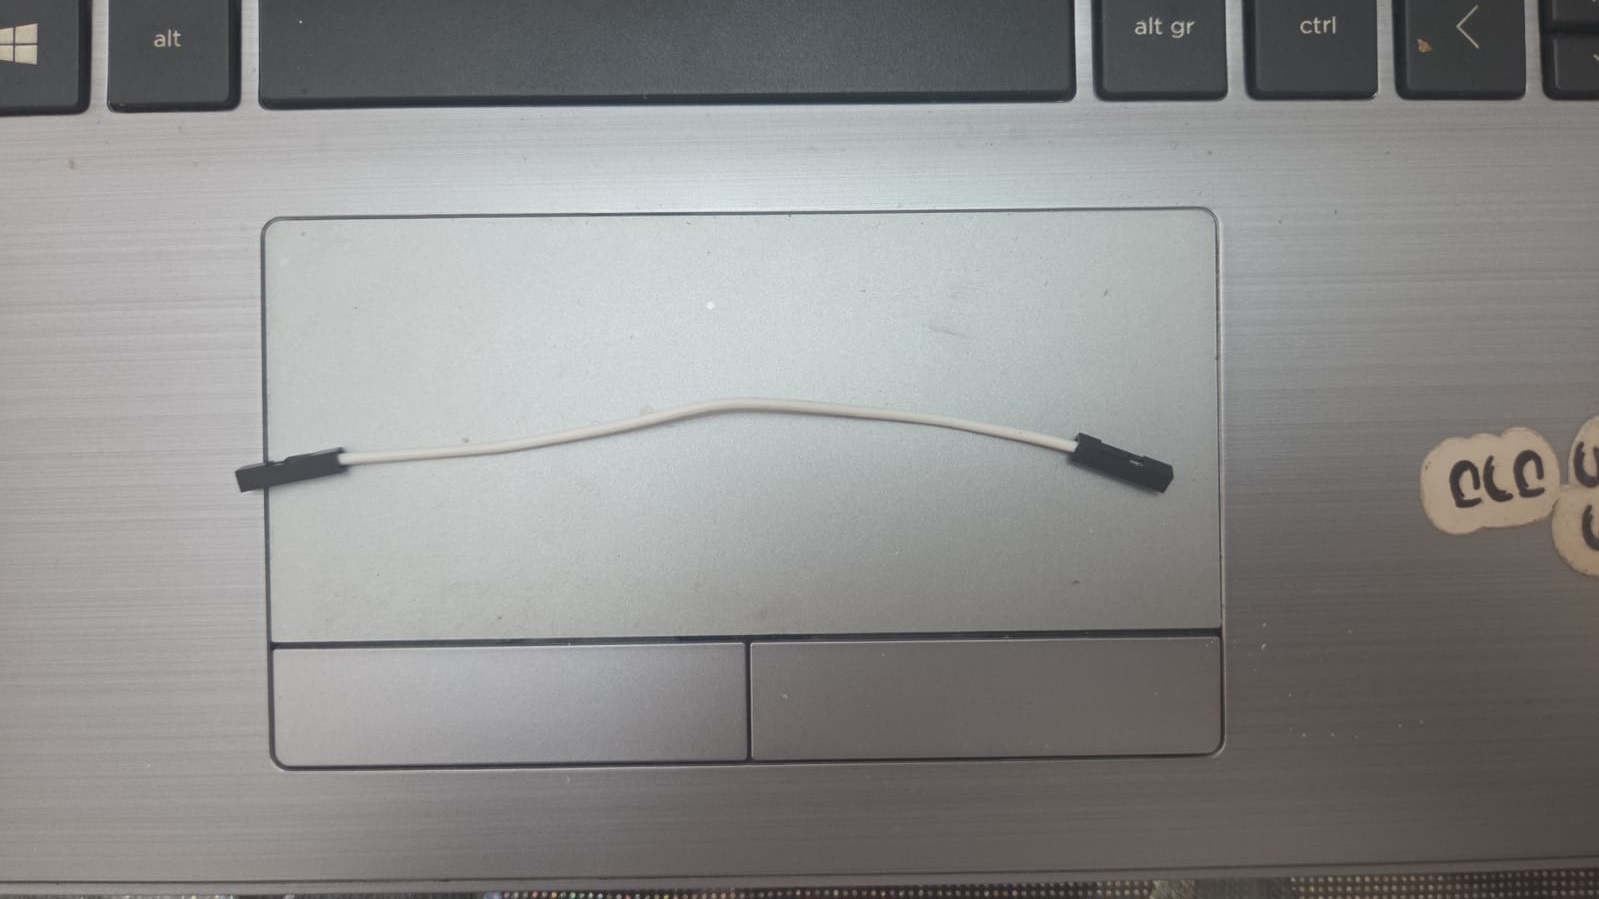
The sensor, LED module, and buzzer all connect to the PCB through pin headers rather than being soldered directly, which made assembly and enclosure fitting easier. The MQ-7 uses a 3-pin header (VCC, GND, analog out), the LED module uses a 4-pin header (GND + one line per color), and the buzzer connects through a 2-pin JST-style connector:
Power Source
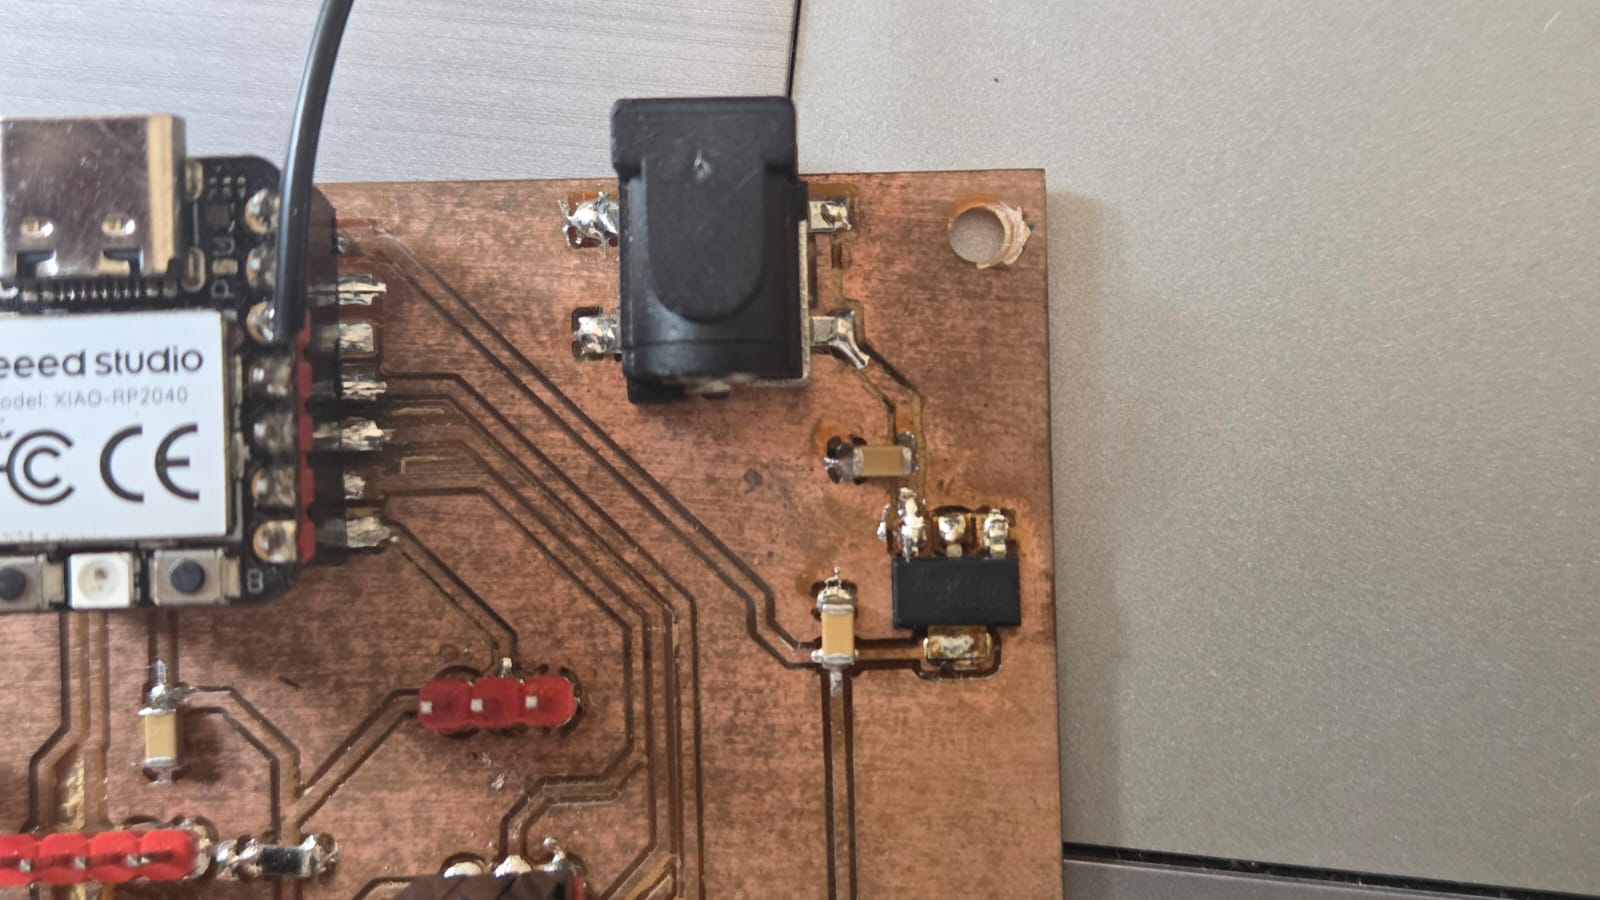
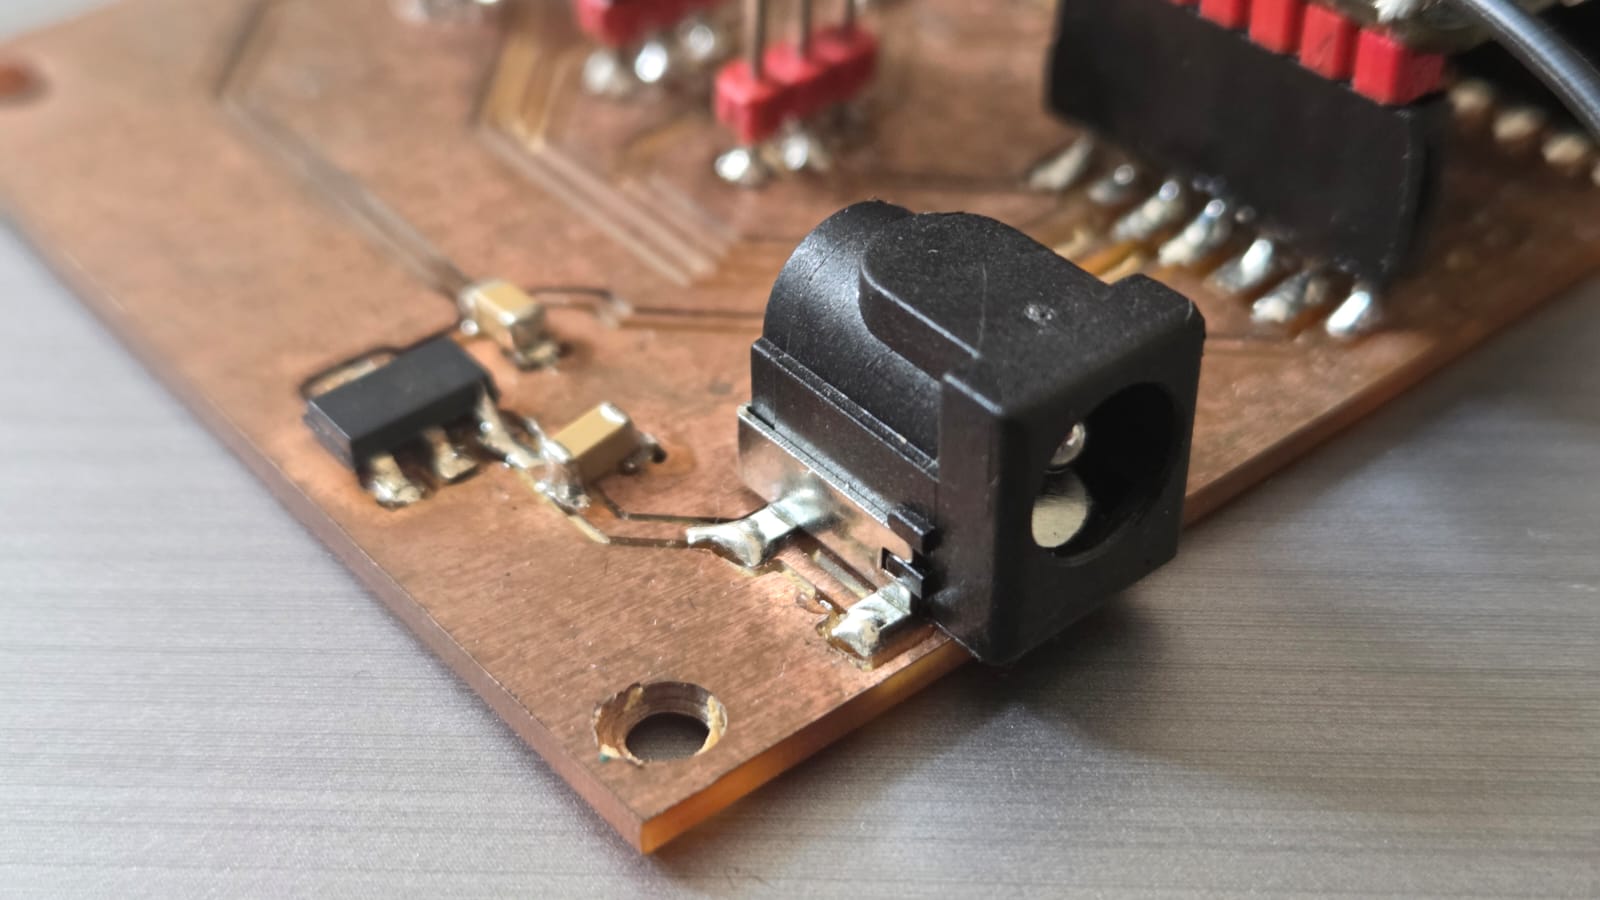
Vahan is powered through a single 12V DC barrel jack, so the device can run from a standard wall adapter or a portable 12V source in the workshop rather than depending on a USB connection to a computer. Right next to the jack, the NCP1117-1.5 regulator steps that 12V down to a stable 5V for the rest of the board.
Firmware and Output Logic
The core alert logic was developed in Week 10, built in three stages: first just reading the MQ-7 and logging values to find realistic thresholds, then mapping those thresholds to the three LEDs, and finally adding the buzzer with different behavior per state — silent when safe, pulsing at warning, continuous at danger.
#define MQ7_PIN A0        // MQ-7 analog output

#define RED_LED    D1     // DANGER indicator
#define YELLOW_LED D2     // WARNING indicator
#define GREEN_LED  D3     // SAFE indicator
#define BUZZER_PIN D6     // audible alert

void setup() {
  Serial.begin(115200);   // for live debugging / Week 14 interface

  pinMode(RED_LED, OUTPUT);
  pinMode(YELLOW_LED, OUTPUT);
  pinMode(GREEN_LED, OUTPUT);
  pinMode(BUZZER_PIN, OUTPUT);
}

void loop() {
  int gas = analogRead(MQ7_PIN);  // raw MQ-7 reading, 0-1023

  Serial.println(gas);            // send reading out for logging/visualization

  // reset all outputs at the start of every loop so only
  // the state that matches the current reading stays on
  digitalWrite(RED_LED, LOW);
  digitalWrite(YELLOW_LED, LOW);
  digitalWrite(GREEN_LED, LOW);
  digitalWrite(BUZZER_PIN, LOW);

  if (gas < 200) {
    // SAFE — green LED on, no buzzer
    digitalWrite(GREEN_LED, HIGH);
    delay(300);
  }
  else if (gas < 600) {
    // WARNING — yellow LED, buzzer pulses on/off every 300ms
    // so it's noticeably different from the continuous DANGER tone
    digitalWrite(YELLOW_LED, HIGH);
    digitalWrite(BUZZER_PIN, HIGH);
    delay(300);
    digitalWrite(BUZZER_PIN, LOW);
    delay(300);
  }
  else {
    // DANGER — red LED, buzzer stays continuously on
    digitalWrite(RED_LED, HIGH);
    digitalWrite(BUZZER_PIN, HIGH);
    delay(300);
  }
}
The 200/600 thresholds aren’t arbitrary — they came from watching the sensor’s raw readings in normal air and then deliberately introducing gas near it, to get a feel for the range before committing to specific numbers.
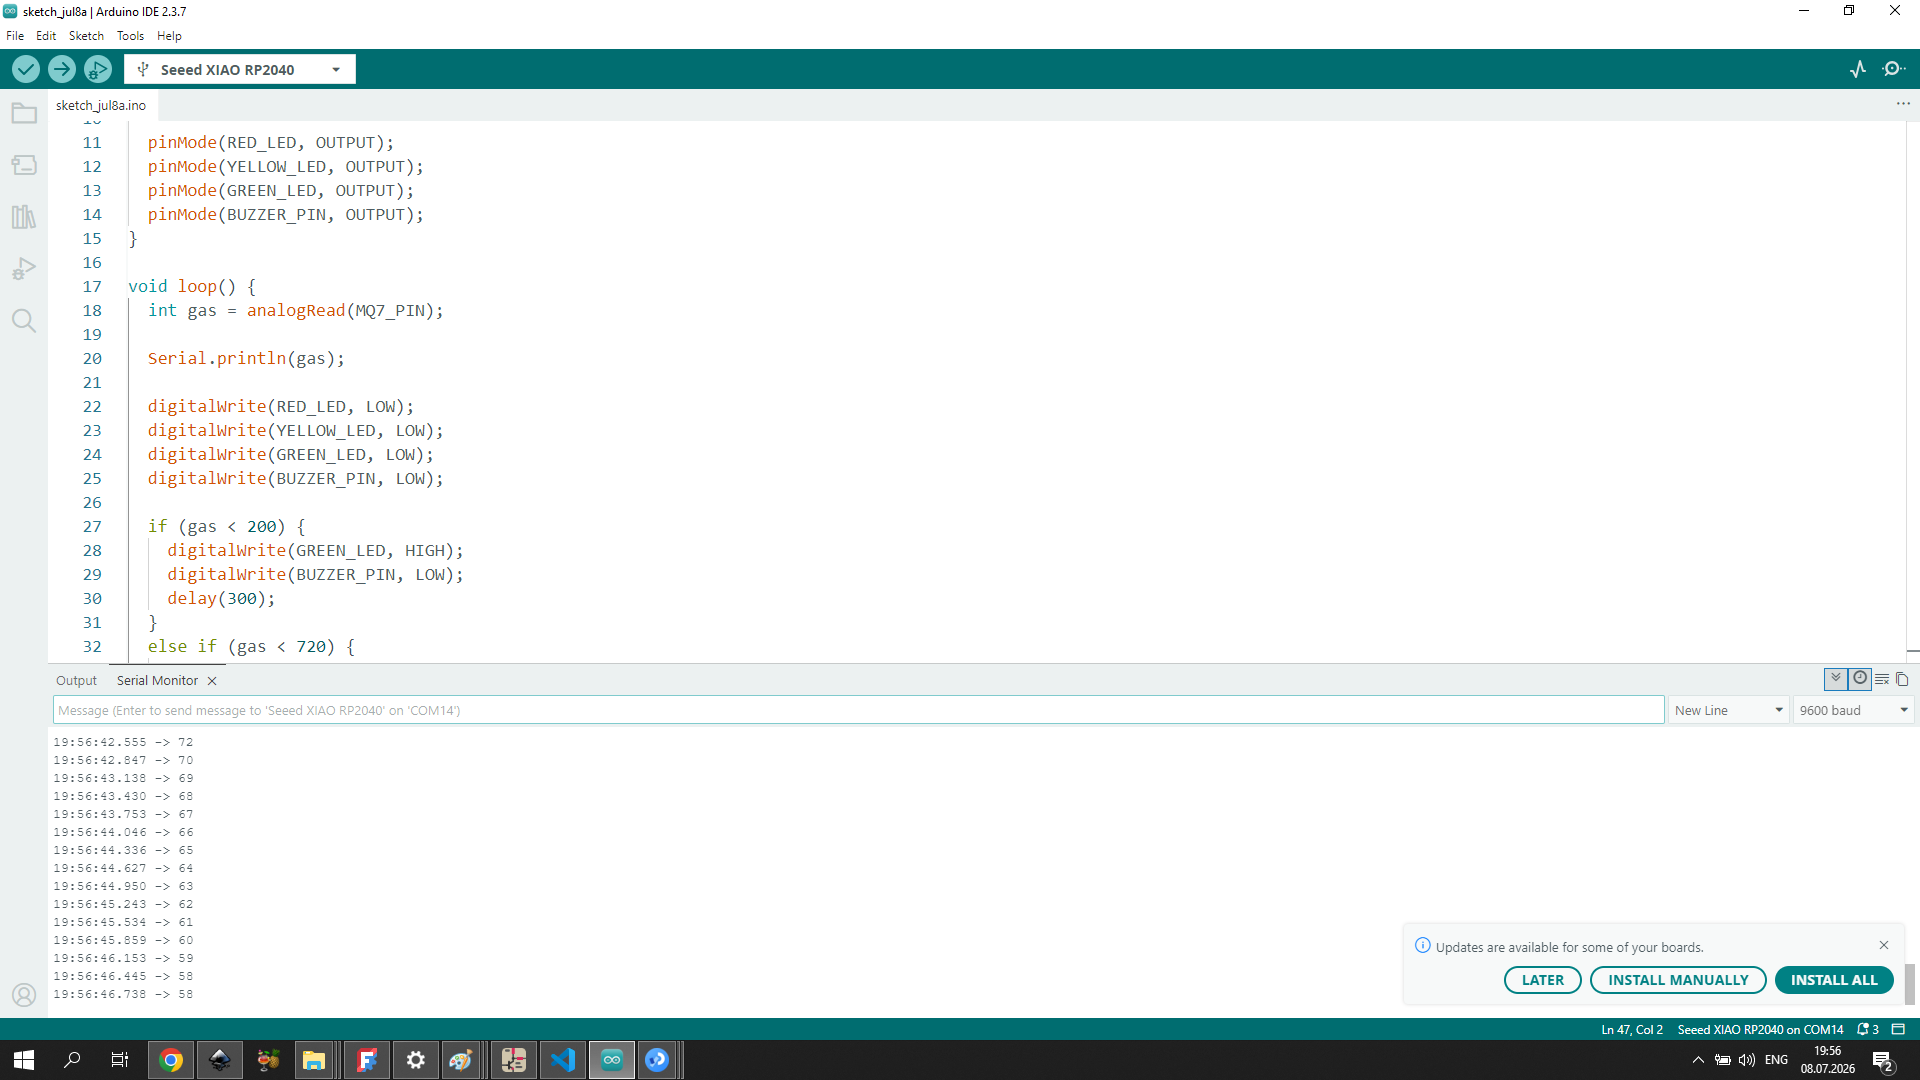
Here’s the same firmware running in the Arduino IDE, with the Serial Monitor showing the live gas readings coming from the board:
Interface Experiments
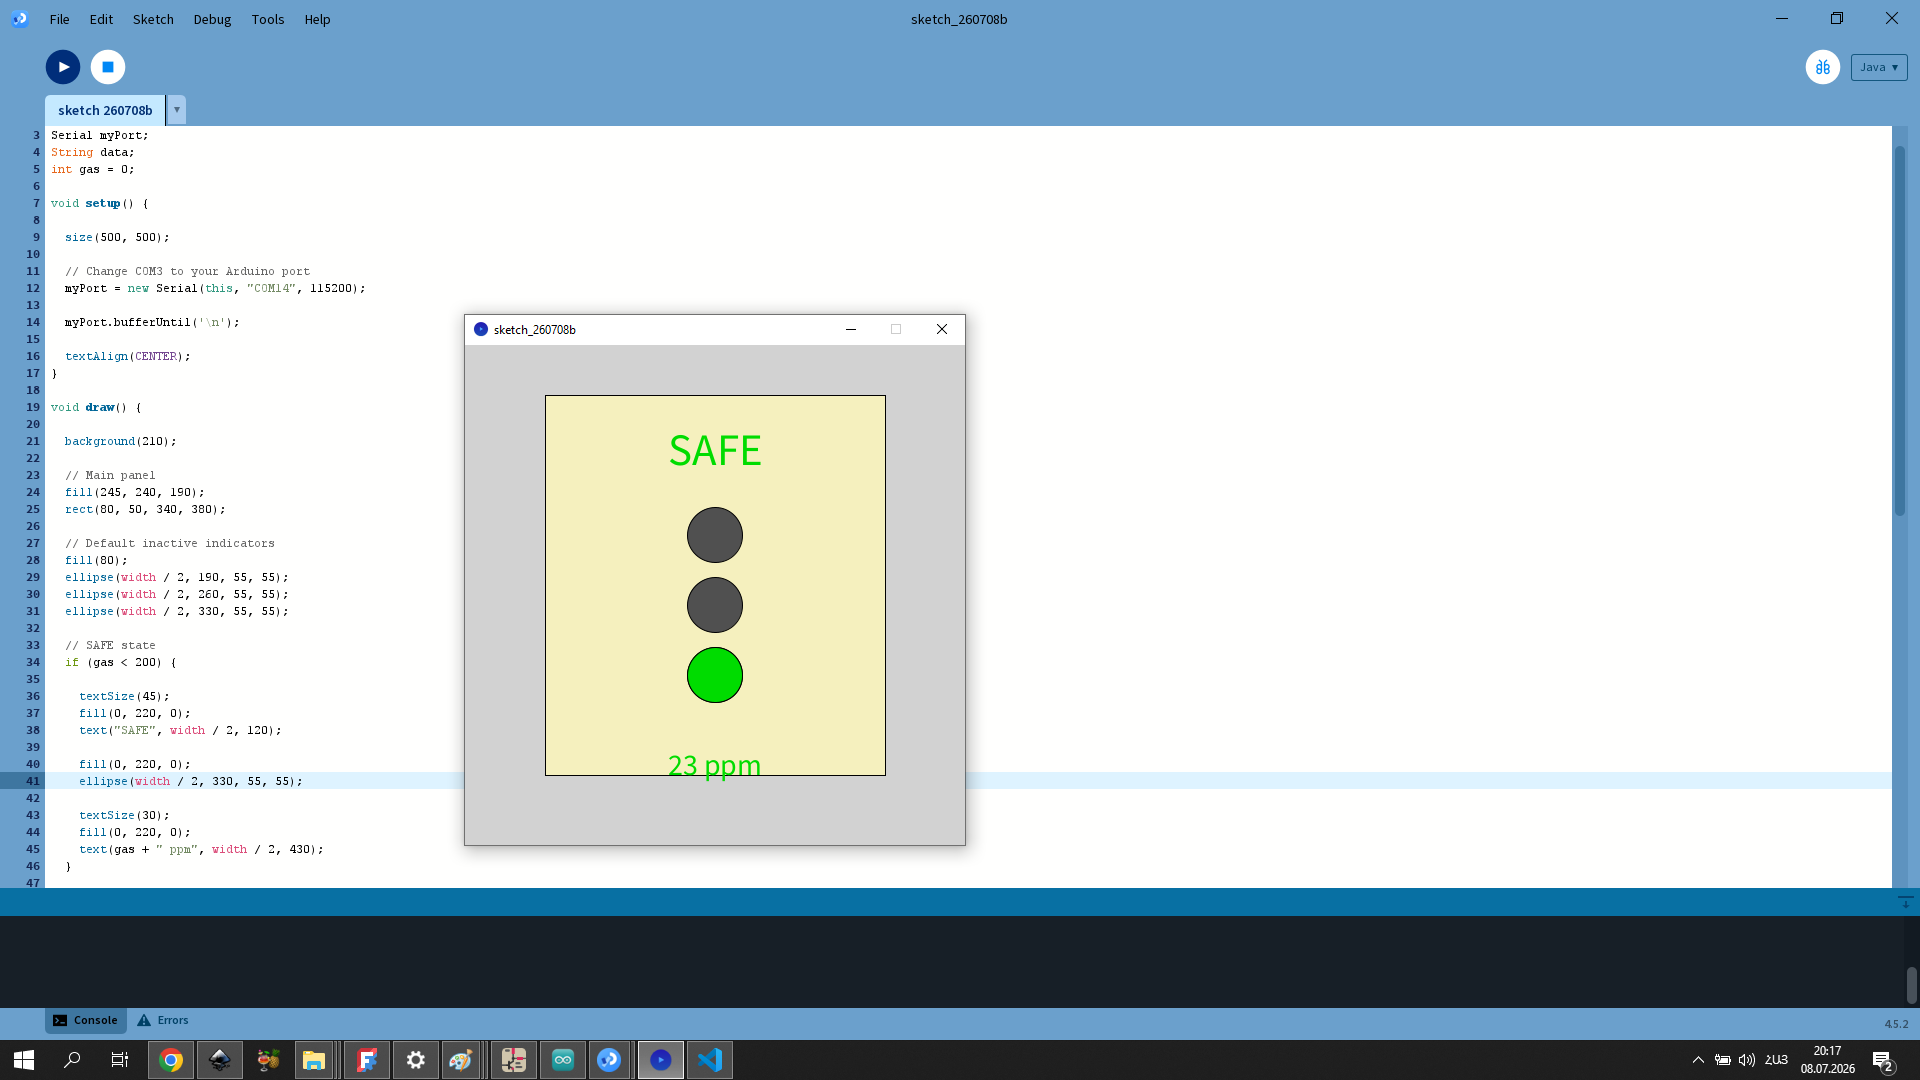
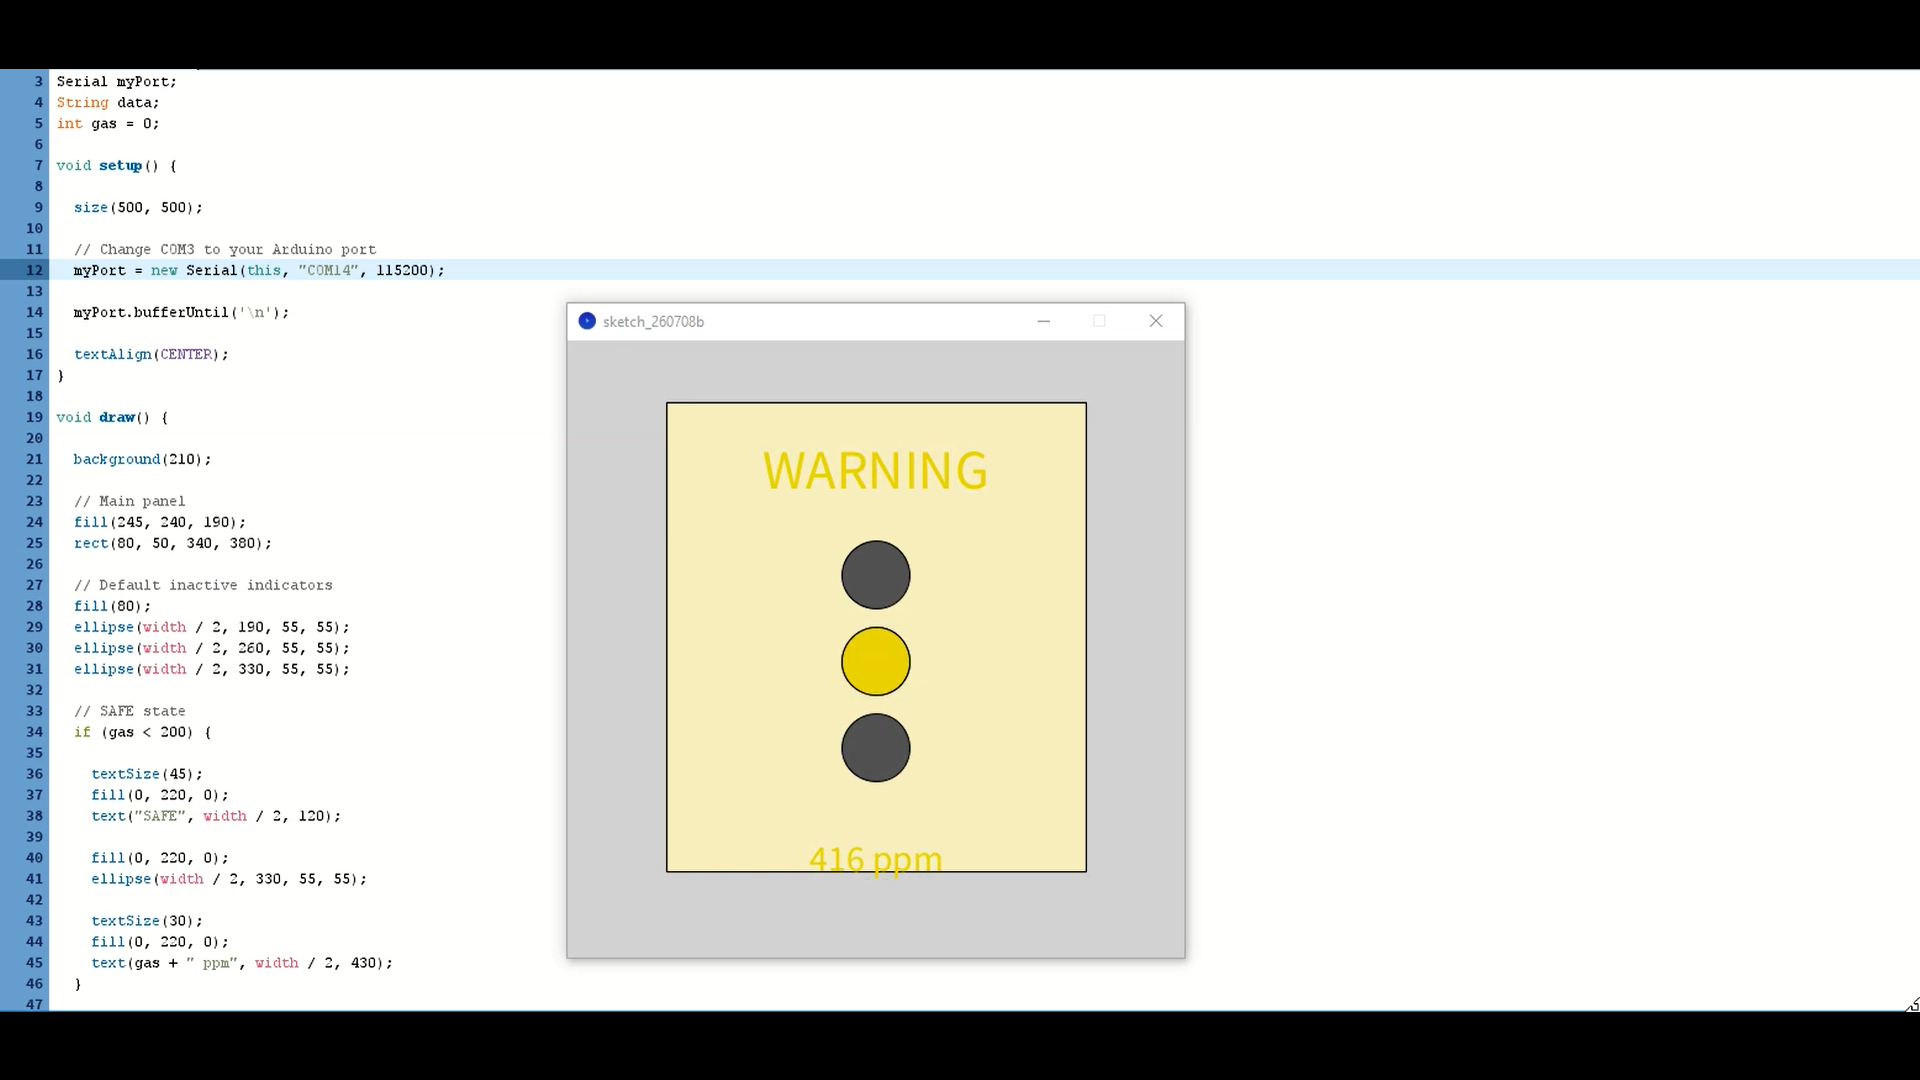
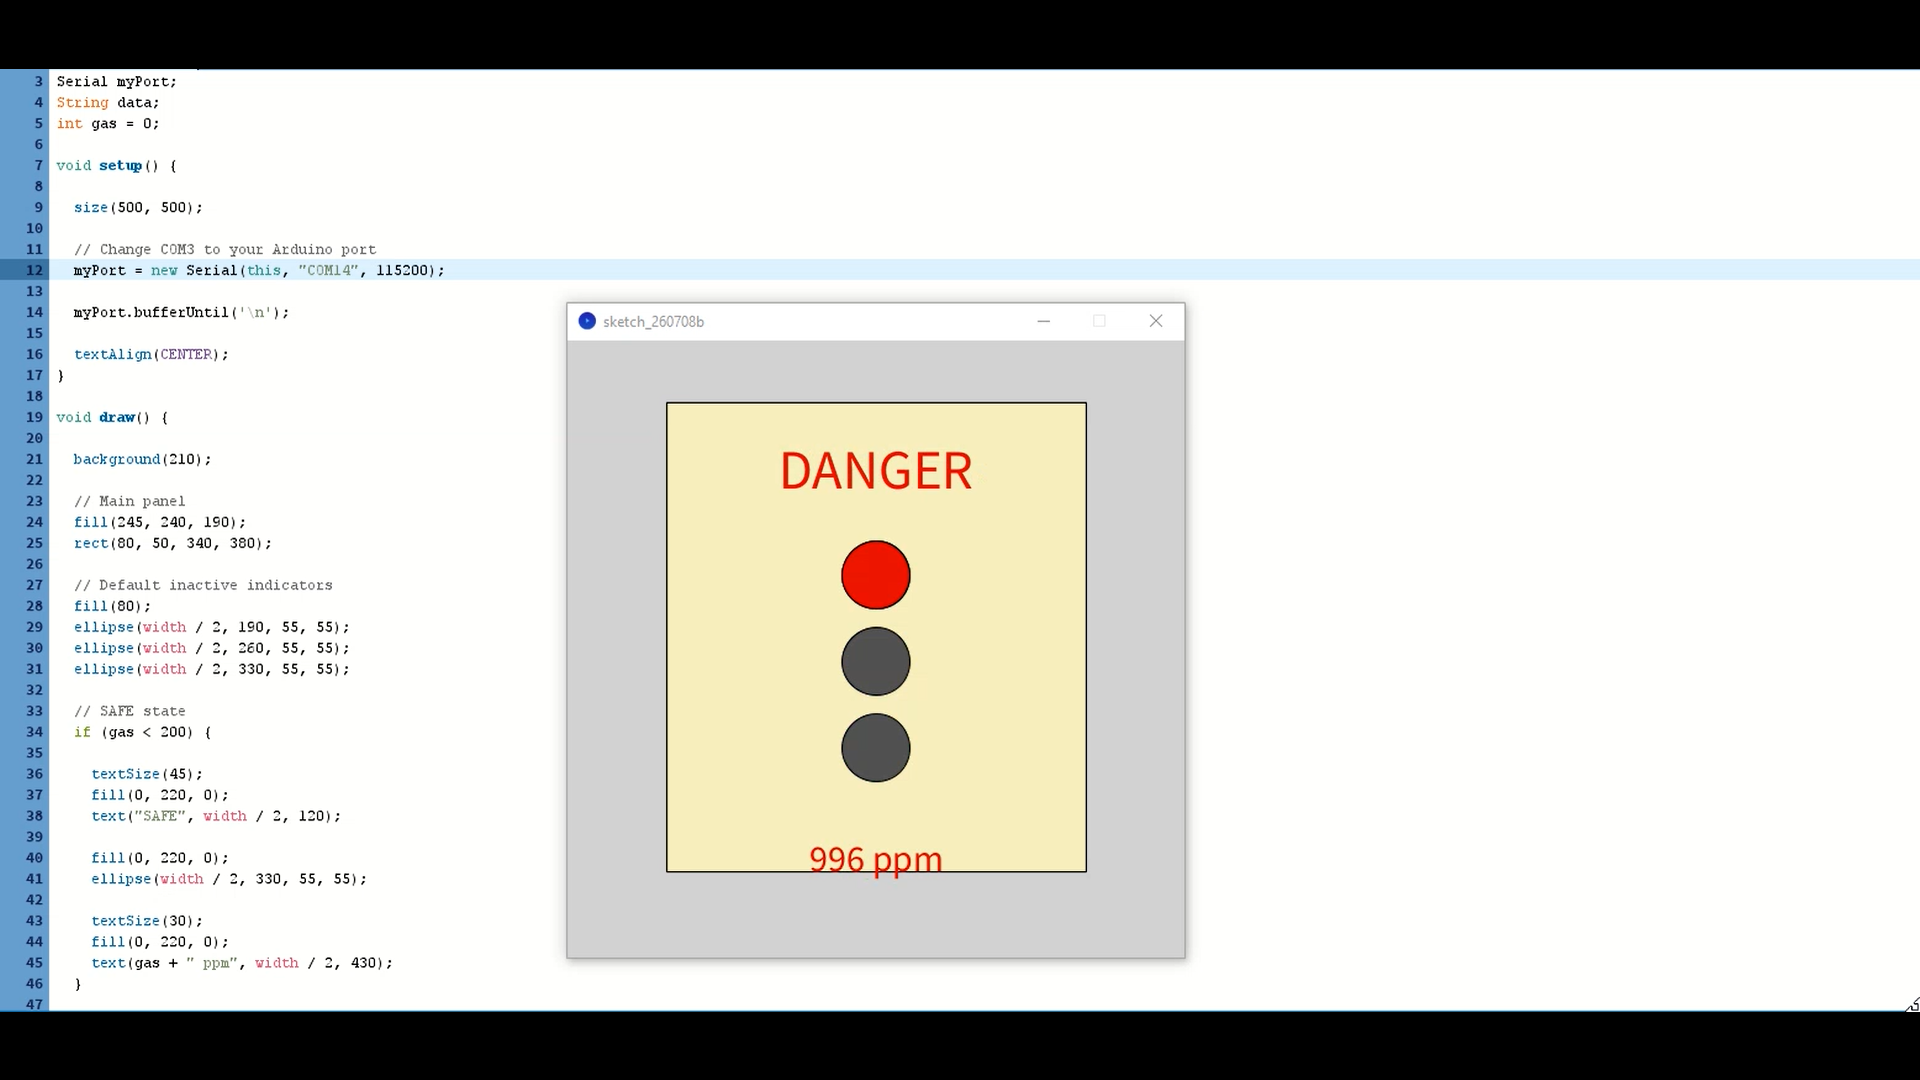
Week 14 extended this same firmware with a Processing-based visualization: the MQ-7 readings are sent over Serial and drawn as a live panel with colored LED indicators, a status label, and a real-time ppm value, using the same SAFE/WARNING/DANGER thresholds as the physical LEDs. This isn’t part of the device itself yet, but it’s the planned interface for a second version of Vahan — letting the same alert logic also be monitored remotely from a screen, not just from across the workshop.
Enclosure Design and Assembly
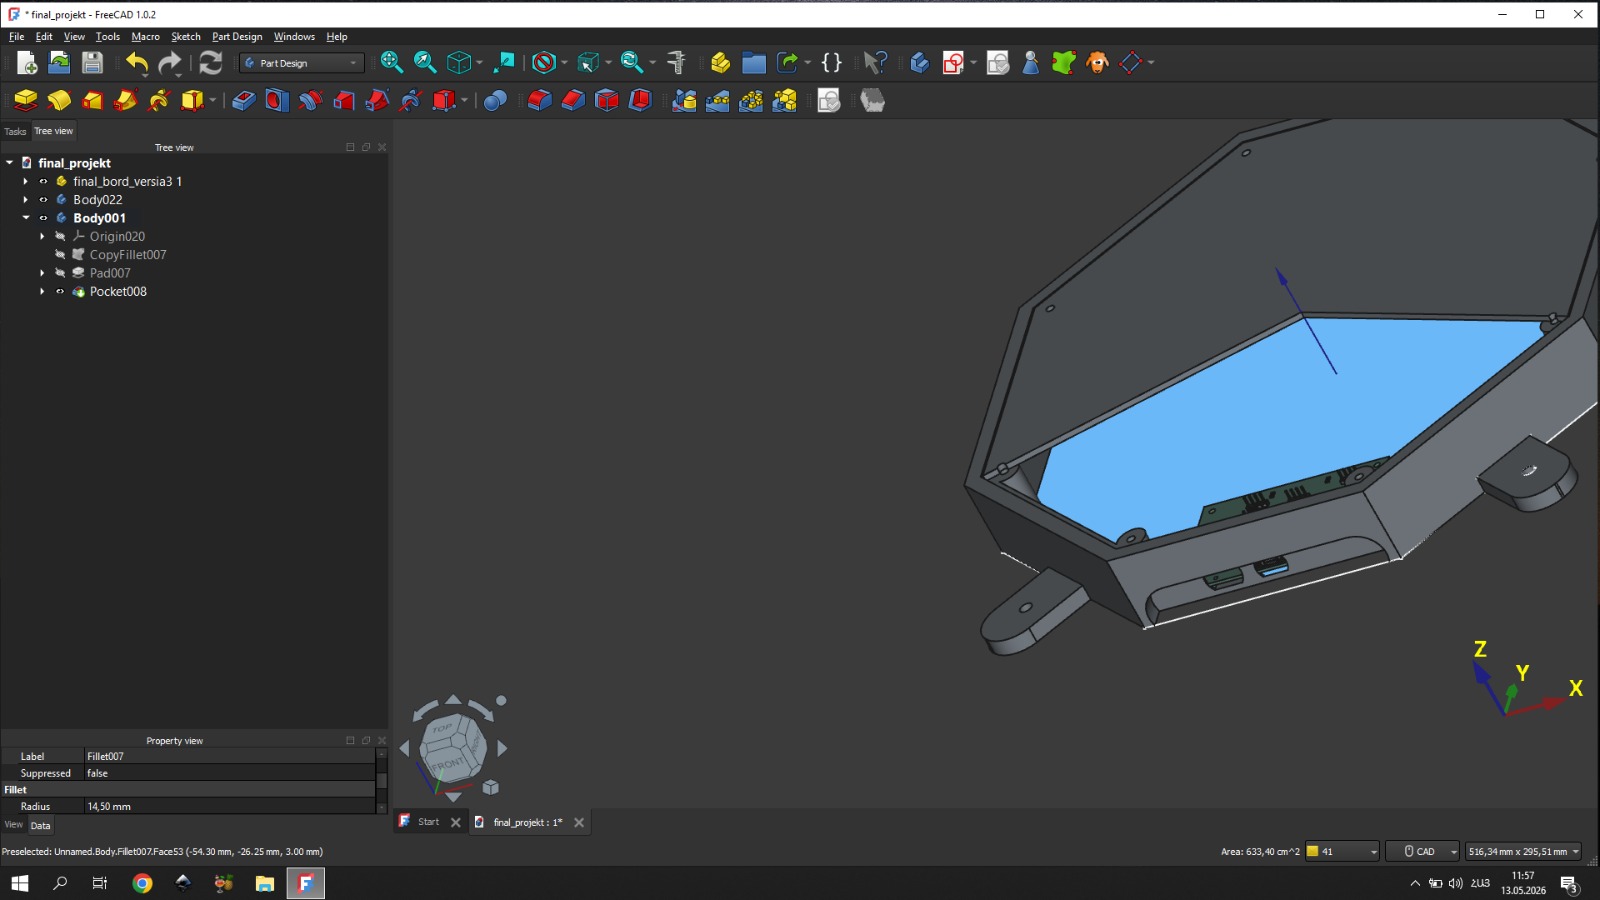
Week 15 brought everything together into a finished physical product. Before any printing, the actual planning was done in FreeCAD: real component models from GrabCAD (PCB, sensors, and other parts) were placed directly inside the enclosure design so I could check clearances and fit before committing to any physical part.
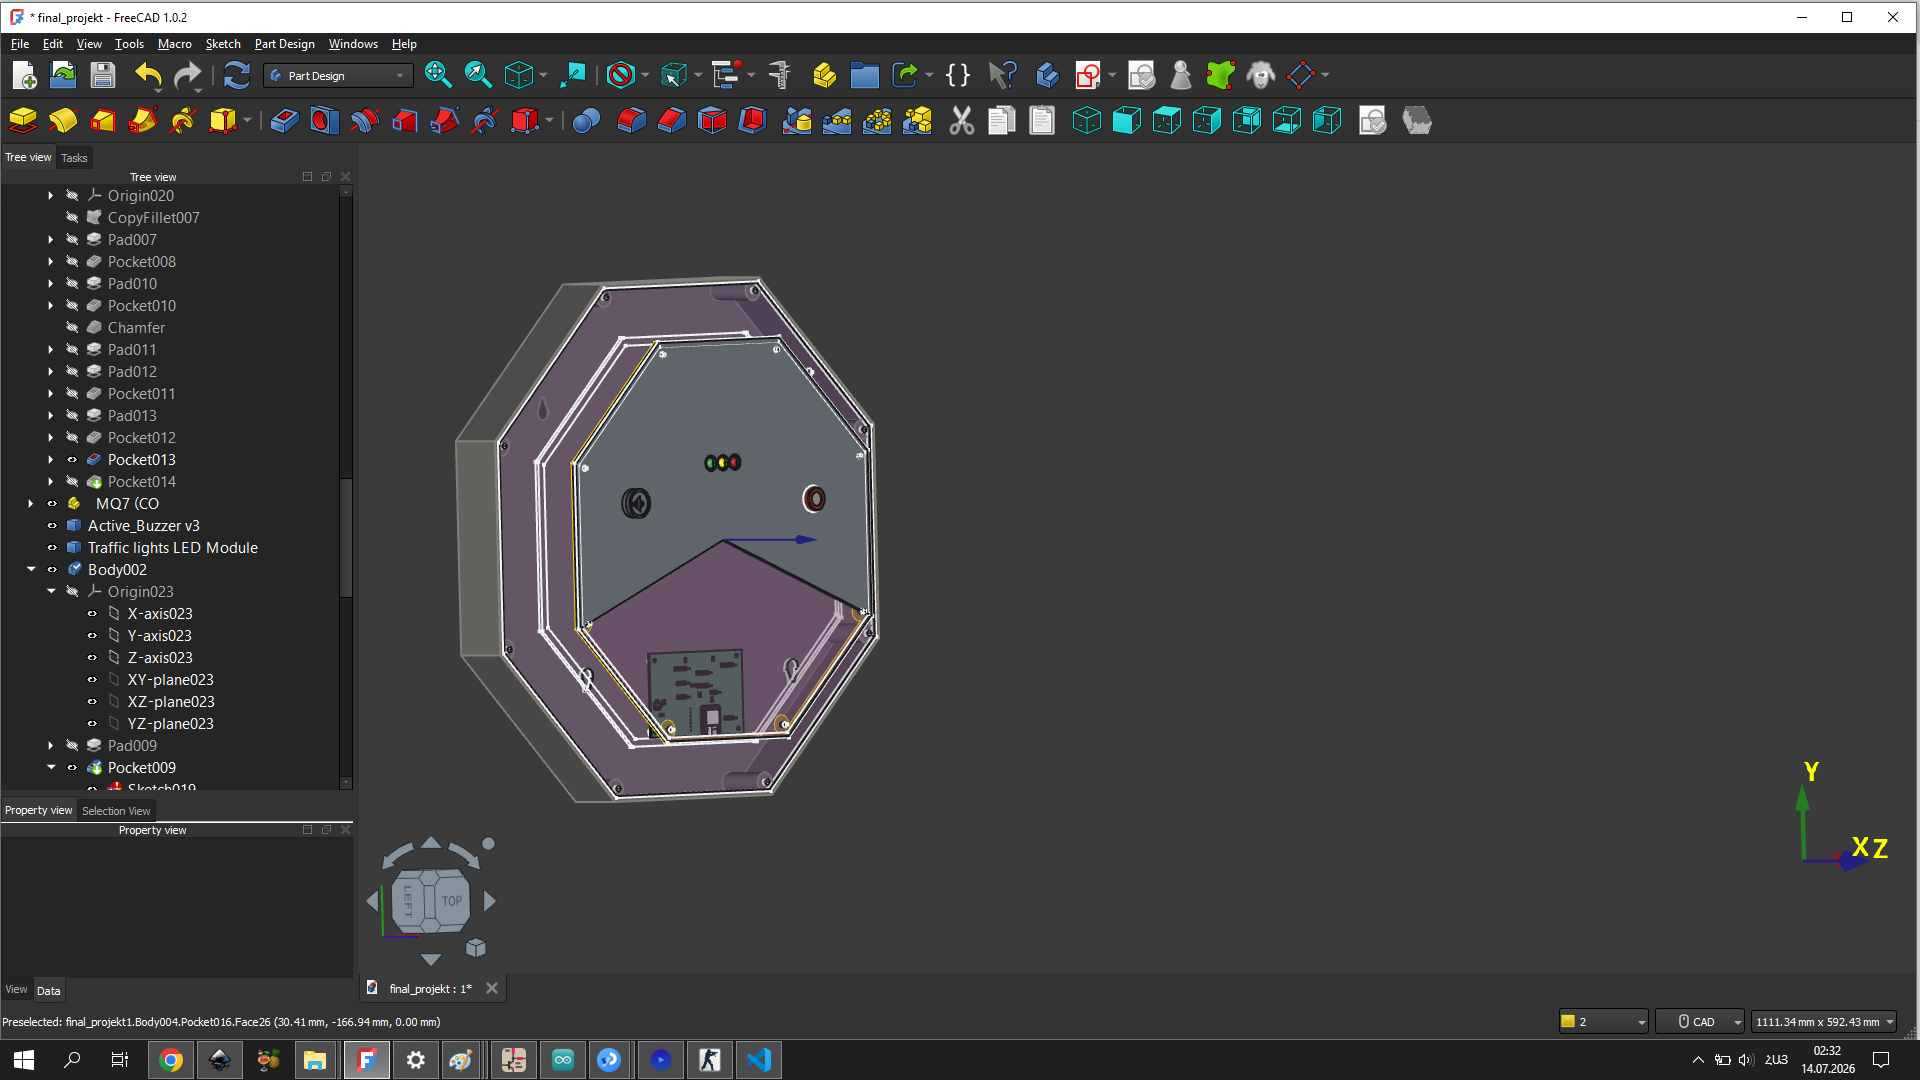
To get a clearer sense of what the finished enclosure would actually look like, I also added color to the model directly in FreeCAD:
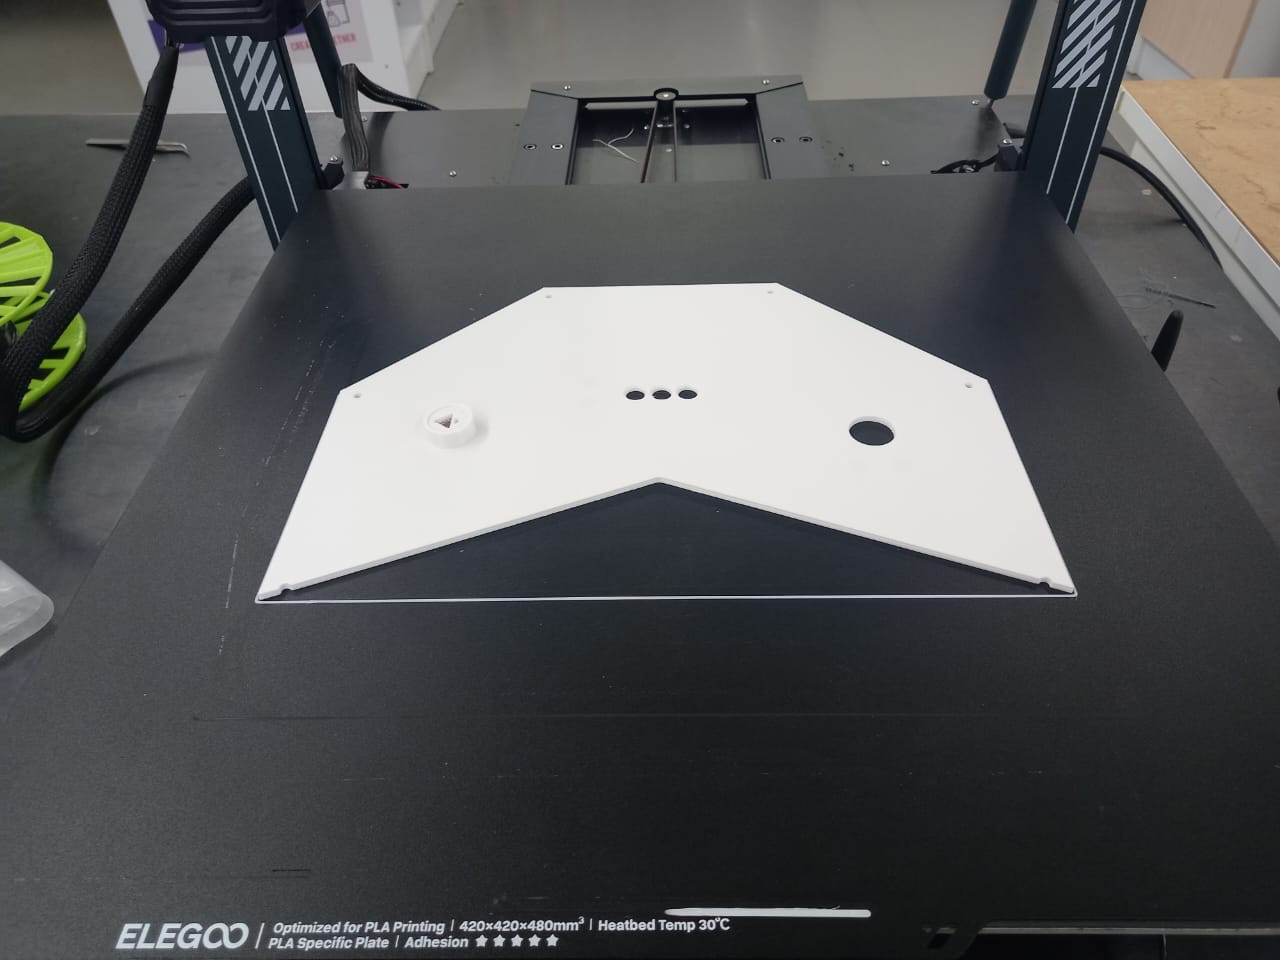
All parts were printed in PETG on a Prusa MK4S — chosen specifically because it handles heat better than PLA and resists the fumes and conditions present in a forge environment, which is exactly where Vahan is meant to live.
After printing, the surfaces were finished with putty and sanding to remove visible layer lines, then primed and painted in a dark asphalt grey to suit the industrial context of a forge workshop.
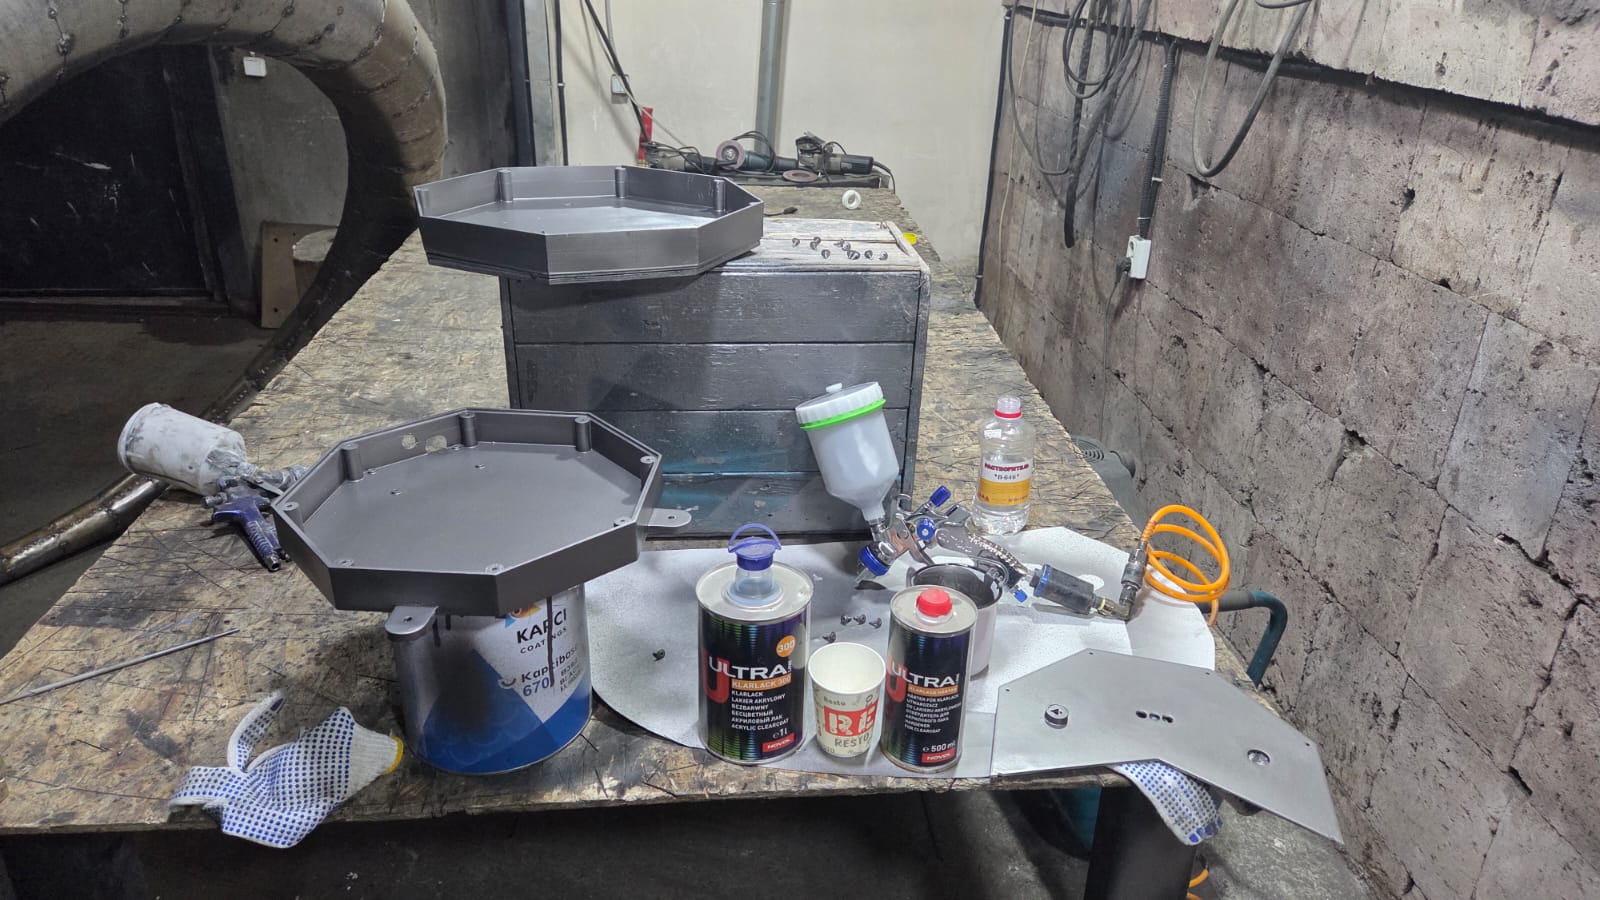
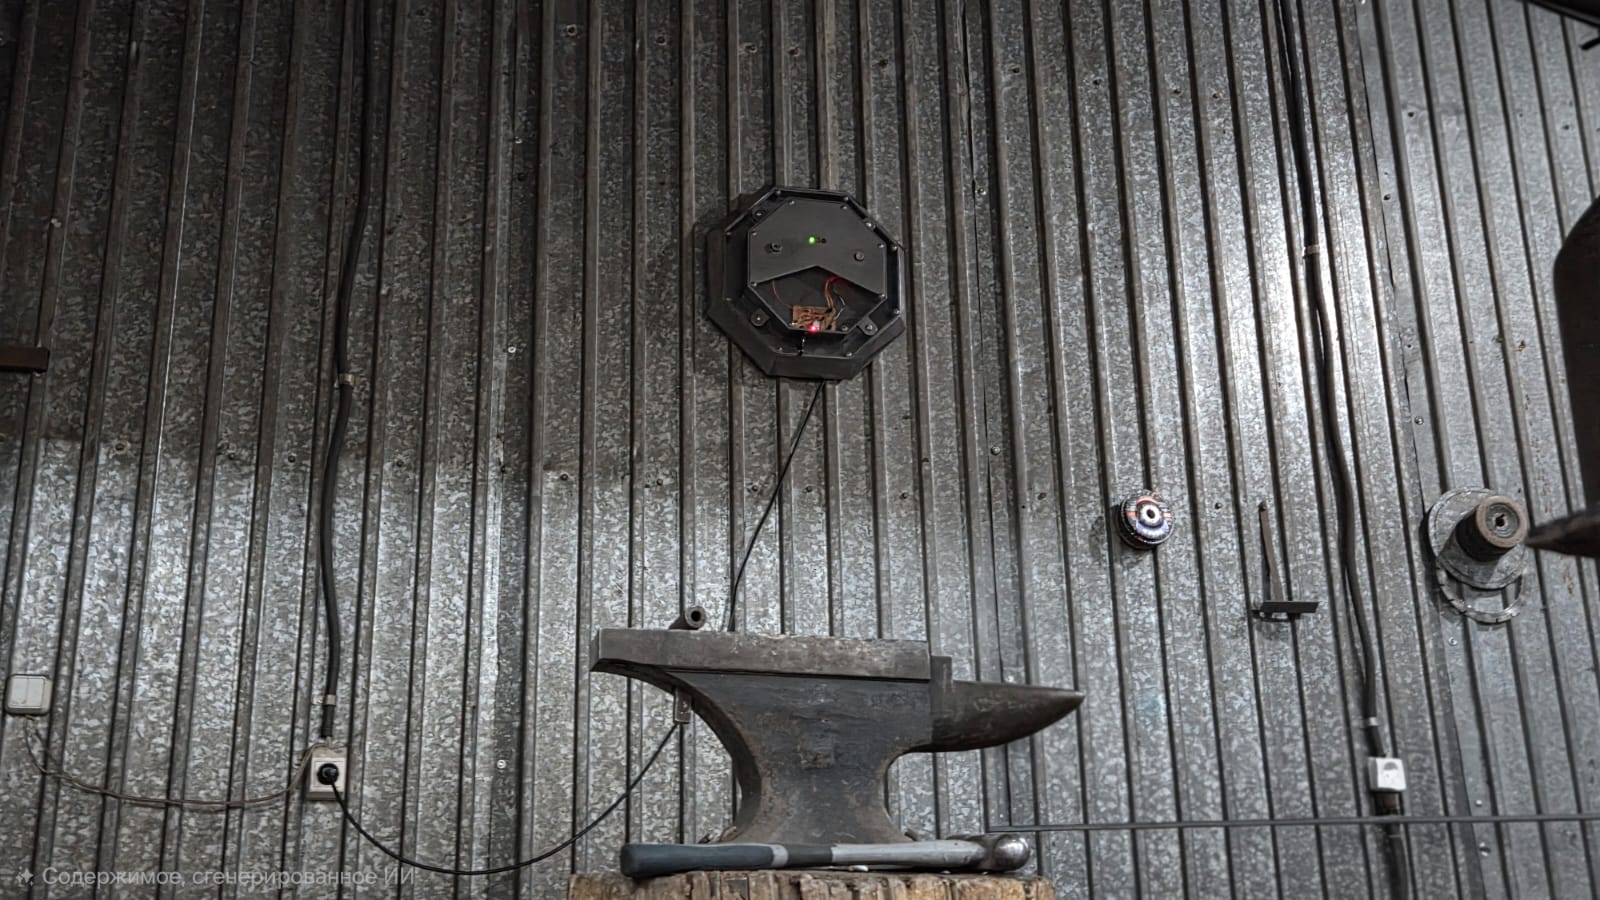
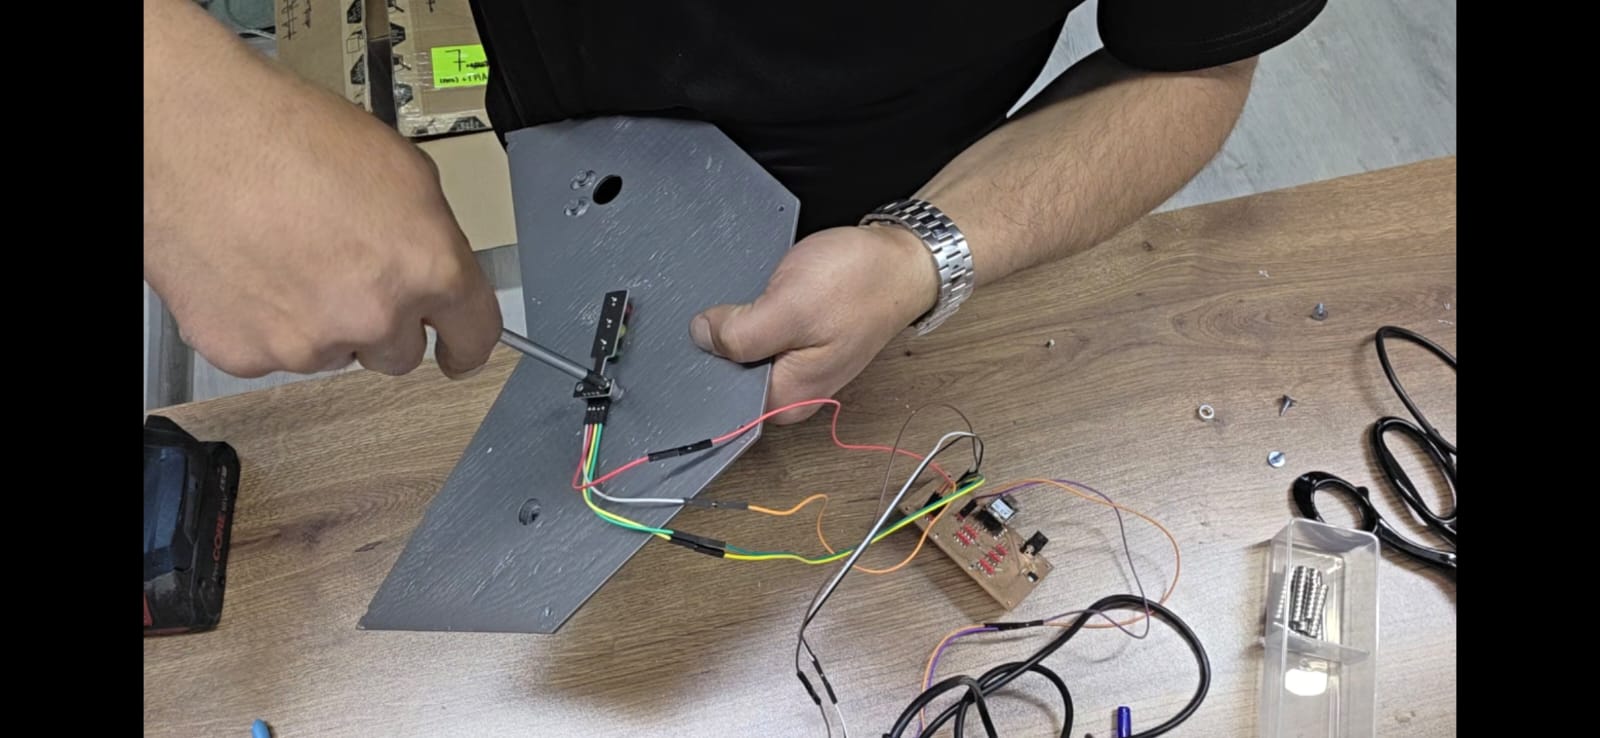
With the enclosure cured, the PCB was screwed into its mounting points, the gas sensor was seated into its dedicated opening in the enclosure wall, and all wiring was routed neatly inside the housing through proper headers rather than loose wires.
Assembly Process
A closer look at putting the final device together — fitting the metal shield element to the enclosure, wiring the PCB to the sensor and outputs, and securing everything in place:
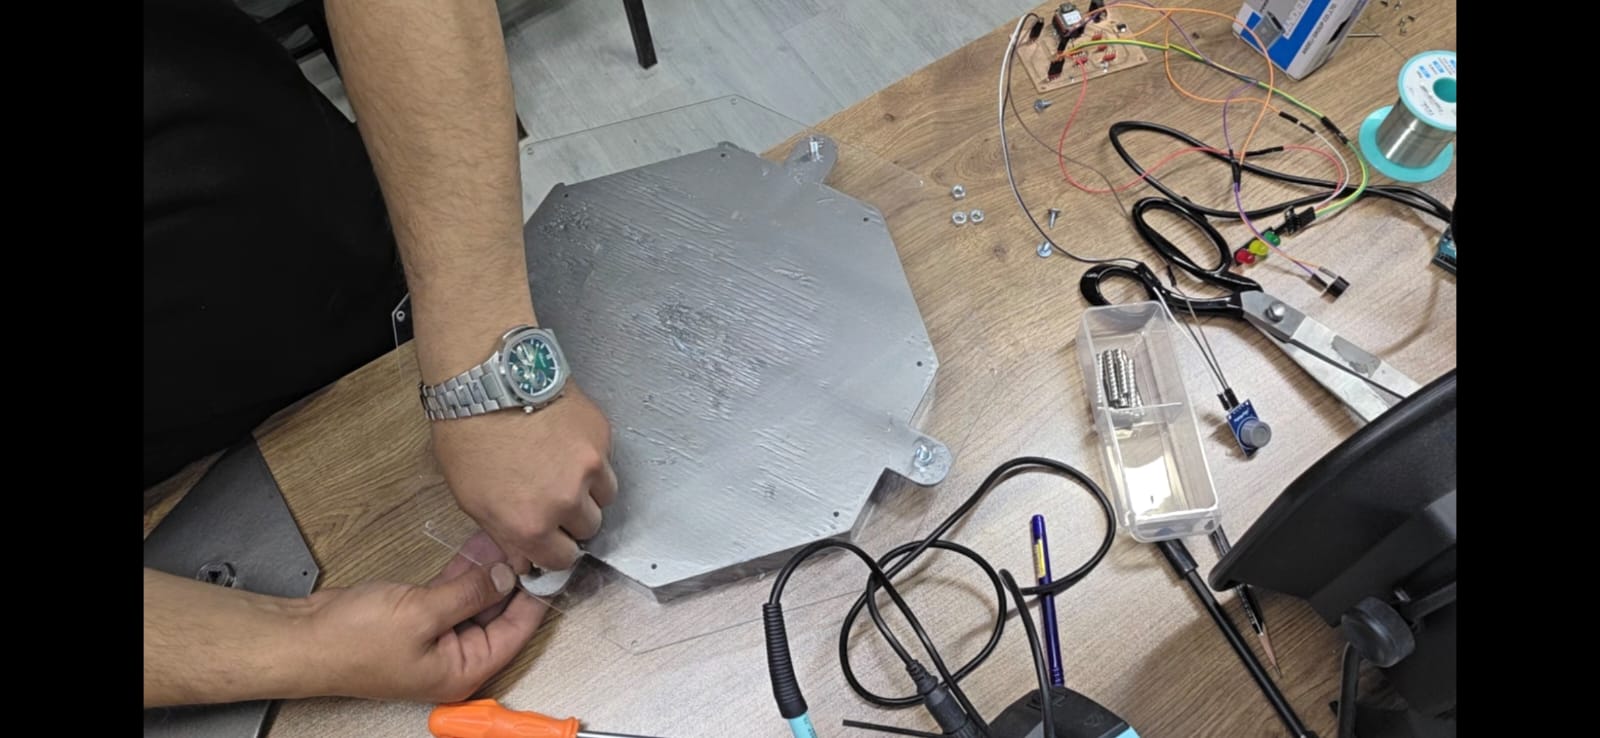
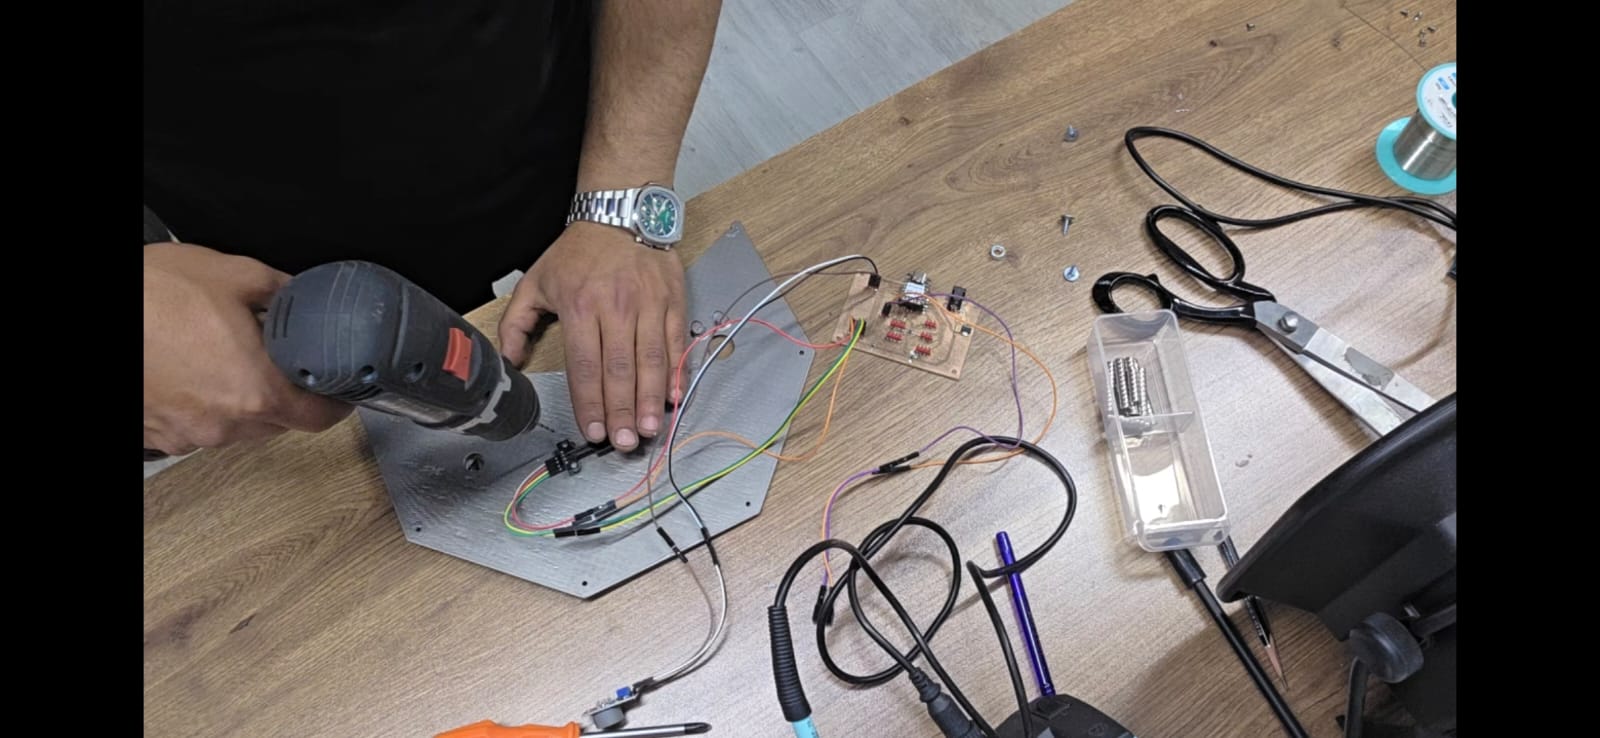
The Metal Shield Element
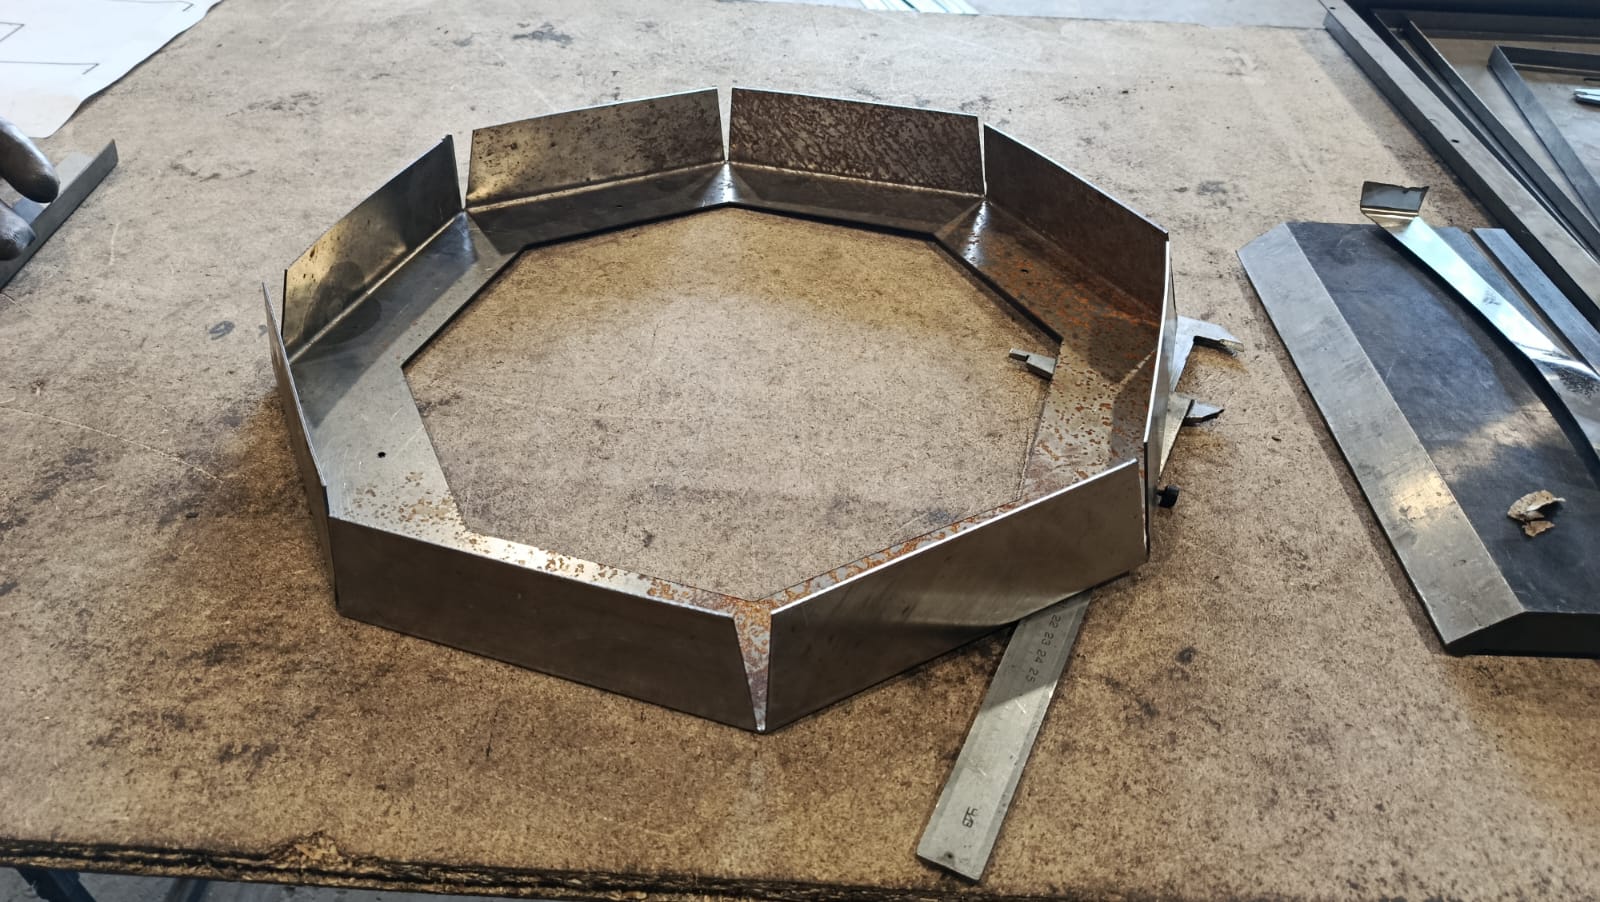
The enclosure also carries a decorative metal element cut from 1.2 mm steel sheet, shaped to reference a shield — directly connecting the physical device to its name. This part was produced during Wildcard Week using metal laser cutting, a process not covered elsewhere in the program. The flat pattern was unfolded in FreeCAD accounting for bend allowance, cut on a 6 kW fiber laser with a 1.2 mm nozzle, and then bent to its final angle on a press brake.
What Worked, What Didn’t
The electronics side of Vahan works reliably: sensor readings, the LED/buzzer alert logic, and the power path through the redesigned board have all been tested and behave as expected. The enclosure design, 3D printing, finishing, and final assembly are also complete, with all components properly mounted and wired.
What’s still in progress is long-term calibration — the current 200/600 thresholds were set from short, informal exposure tests, not from extended real-world monitoring in an actual forge. Proper calibration, along with evaluating alarm response speed and the practical effectiveness of the LED/buzzer alerts under real working conditions, is the main piece of testing still ahead. The Processing-based visualization interface from Week 14 also isn’t integrated into the device yet — it currently runs as a separate experiment, intended for a future second version of the project.
Materials and accessories used
| Qty | Description | Price | Origin | Link |
|---|---|---|---|---|
| 1 | XIAO RP2040 microcontroller | 6.23 $ | Our Lab | Seeed Studio |
| 1 | MQ-7 gas sensor | 4 $ | Our Lab | Amazon |
| 1 | Buzzer | 1 $ | Our Lab | Amazon |
| 3 | LEDs (Green, Yellow, Red) — LED traffic light module | 1 $ | Our Lab | Otronic |
| 1 | PCB board | 9.05 $ | Our Lab | milled in-house, see Week 9 |
| - | Resistors, capacitors, headers, and other electronic components | 3 $ | Our Lab | Amazon |
| - | Wires and connectors | 2–3 $ | Our Lab | Amazon |
| 1 kg | PLA / PETG filament | 32.99 $ | Our Lab | Amazon |
| 670 ml | Kapci Base Paint | 18 $ | Local Supplier | Kapci Coatings |
| 0.1 L | Clear Lacquer | 16 $ | Local Supplier | Amazon |
| 0.4 m² | Acrylic Sheet | 10 $ | Our Lab | Amazon |
| 0.3 | Metal Sheet | 16 $ | Our Lab | Amazon |
| Total | ~125 $ (~45.500 ֏ AMD) |
Files
License
My project is licensed under the Creative Commons Attribution–ShareAlike 4.0 International (CC BY-SA 4.0) License.
I chose this license because I want the project to remain open and accessible — especially for educational institutions, workshops, and laboratories where gas safety is a real concern. Anyone can use, adapt, and share it, as long as they credit the original work and keep the same open license.