1. Principles and Practices, Project Management
During the first week of Fab Academy, we were introduced to the course structure, workflow, and digital documentation process. The main focus of this stage was setting up the working environment and preparing the necessary tools for future assignments.
During this week, I installed and configured the required software:
- Creating and exploring a GitLab account
- Installing Git Bash for managing the local repository
- Installing Visual Studio Code for editing the website and documentation
We learned how the Git version control system works, including creating repositories, making commits, and pushing changes to GitLab. This week established the foundation for future documentation and project development, as an organized workflow is essential for successful progress during Fab Academy.
Final Project Proposal
During the first week, alongside setting up the working environment, I began thinking about my final project concept.
My initial idea was to create a Smart Workshop system — a device that monitors air quality in a forge or metalworking environment, where CO and CO₂ gases can reach dangerous levels.
Initial Sketch
The first sketch was a quick hand-drawn idea I made before any discussions — just to capture the concept.
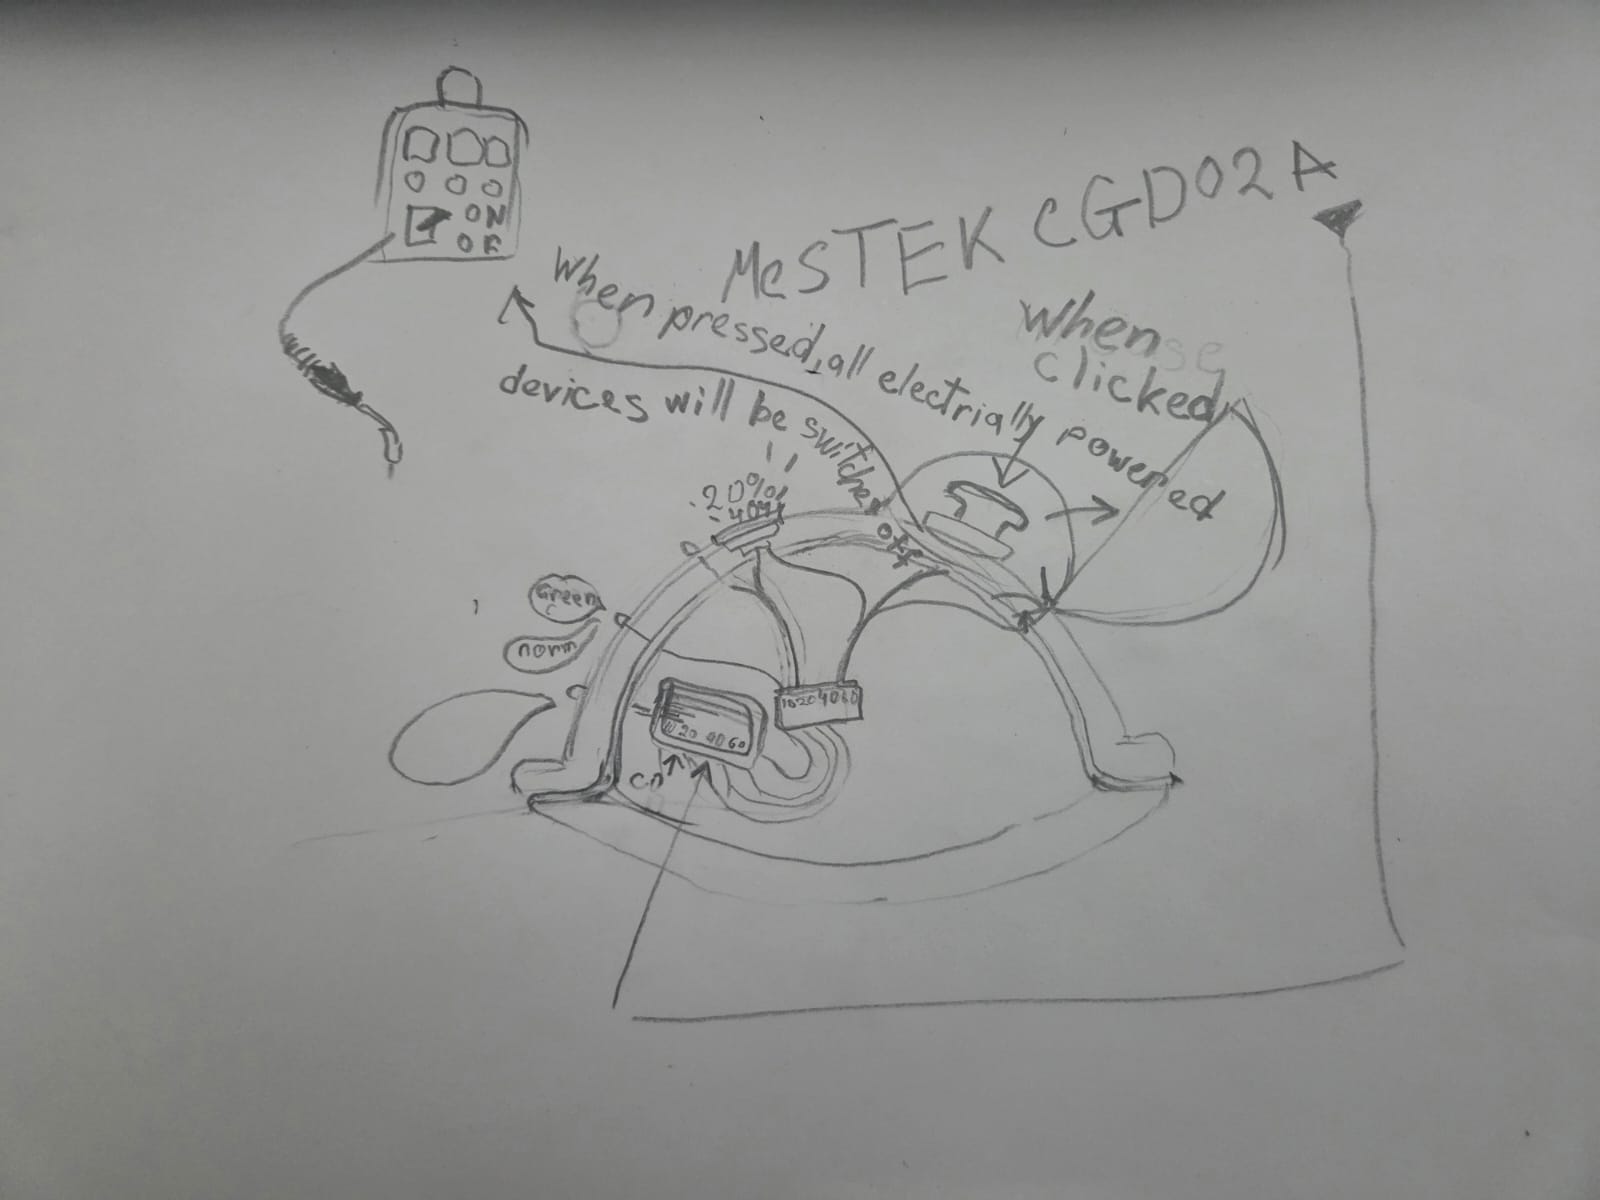
Revised Concept
After discussing the idea with my local instructor, we confirmed that the concept was feasible and worth developing. Based on that conversation, I refined the design and produced a more detailed sketch.
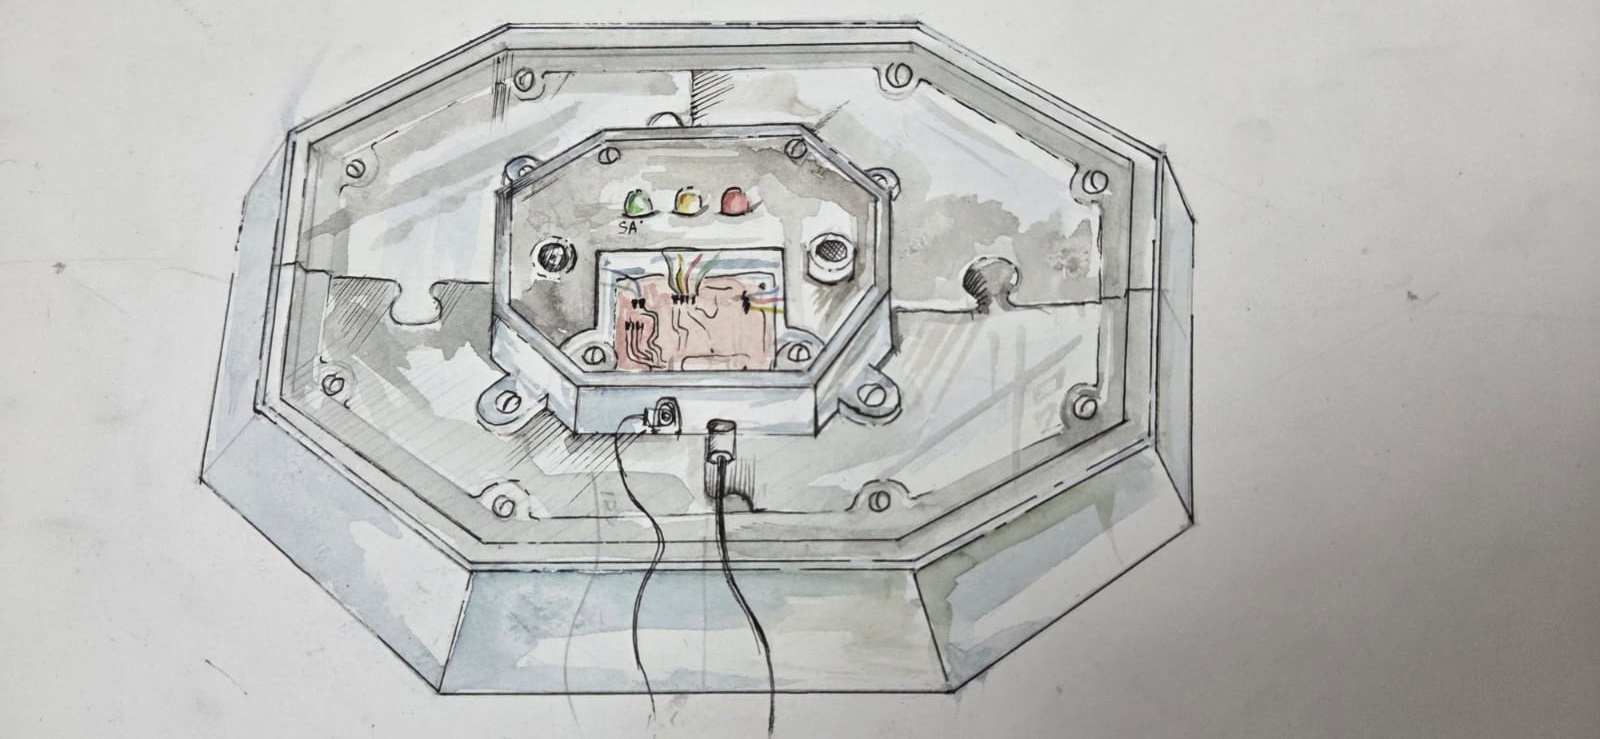
The final concept focuses on a compact gas safety monitor — later named Vahan — that detects CO and CO₂ levels and triggers visual and sound alerts based on danger thresholds.
See the full Final Project page
Git Setup Process
During this week, I prepared my working environment using Git Bash and GitLab to organize my documentation workflow.
Learning Resources
This week I learned how to use Git, Git Bash, and other tools through online classes, tutorials, and hands-on practice.
I followed the official Fab Academy classes, especially the documentation and version control topics, which helped me understand the workflow and requirements.
In addition to the official materials, I participated in online workshops and group meetings guided by Onik Babajanyan and Rudolf Igityan and Elen Grigoryan using the Zoom platform.
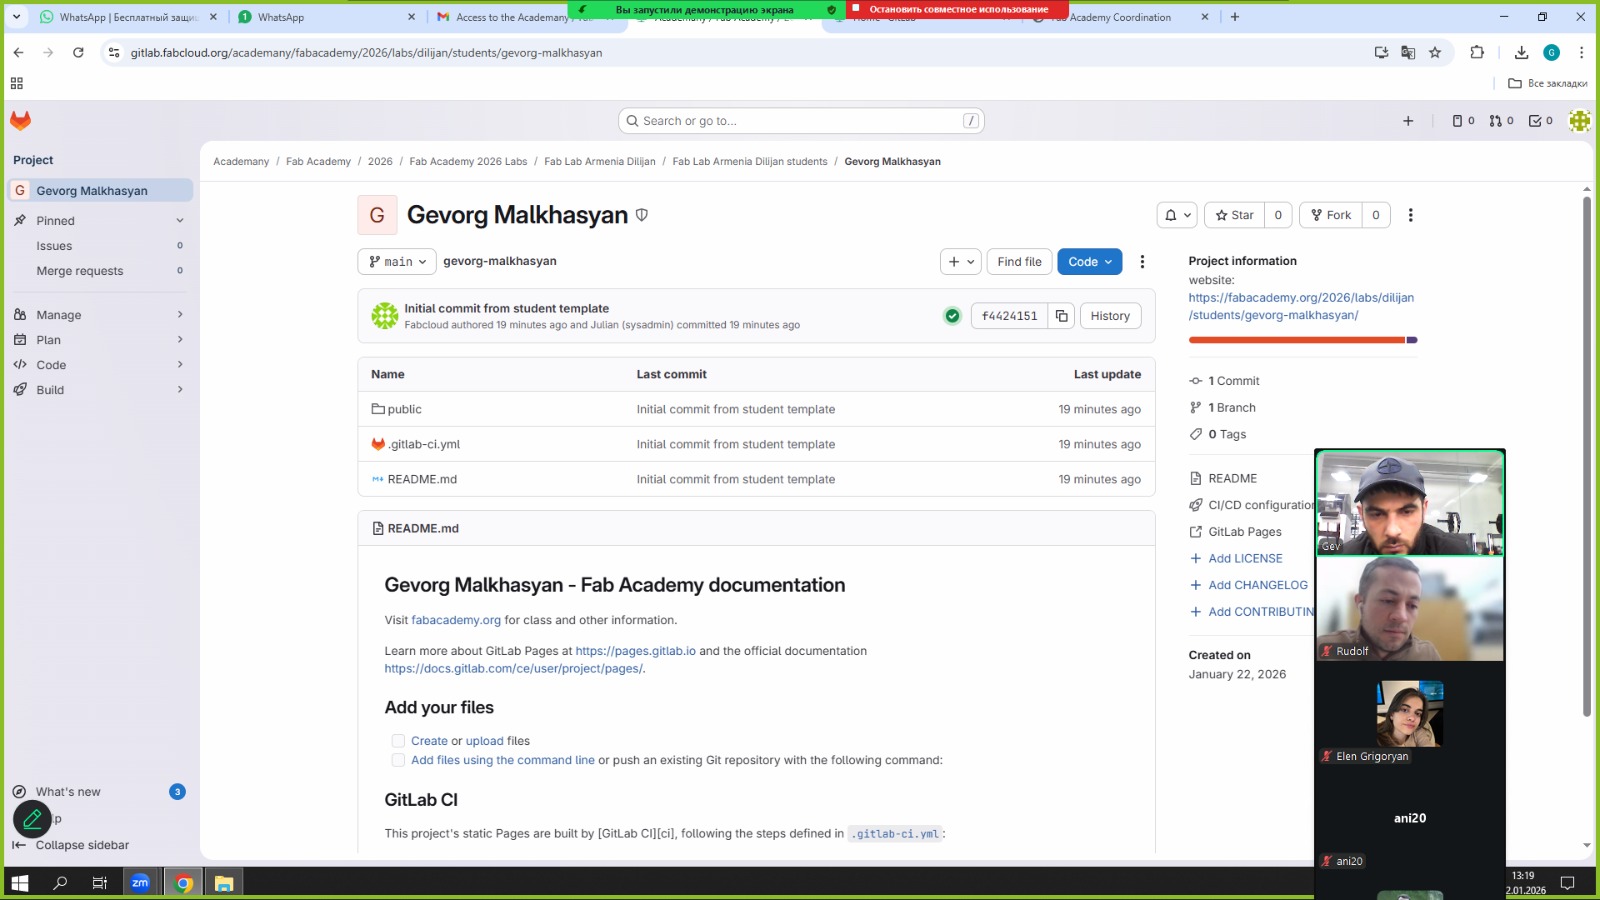
During these sessions, we not only followed the lessons but also applied what we learned in practice by working together and solving different problems.
Tools Used
Git
Git is a distributed version control system used to track changes in files and manage project history.
It allows you to:
- track changes in your files
- create commits (snapshots of your work)
- manage different versions of a project
GitLab
GitLab is an online platform for hosting Git repositories.
It allows you to:
- store your repositories online
- collaborate with others
- manage projects and track changes remotely
More info: https://gitlab.com/
Git Bash
Git Bash is a command-line interface (CLI) that allows you to run Git commands on your computer.
It is used to:
- clone repositories
- commit and push changes
- interact with Git locally
Visual Studio Code
Visual Studio Code is a code editor used for programming and documentation.
It allows you to:
- write and edit code or Markdown
- organize files
- manage projects efficiently
First Steps
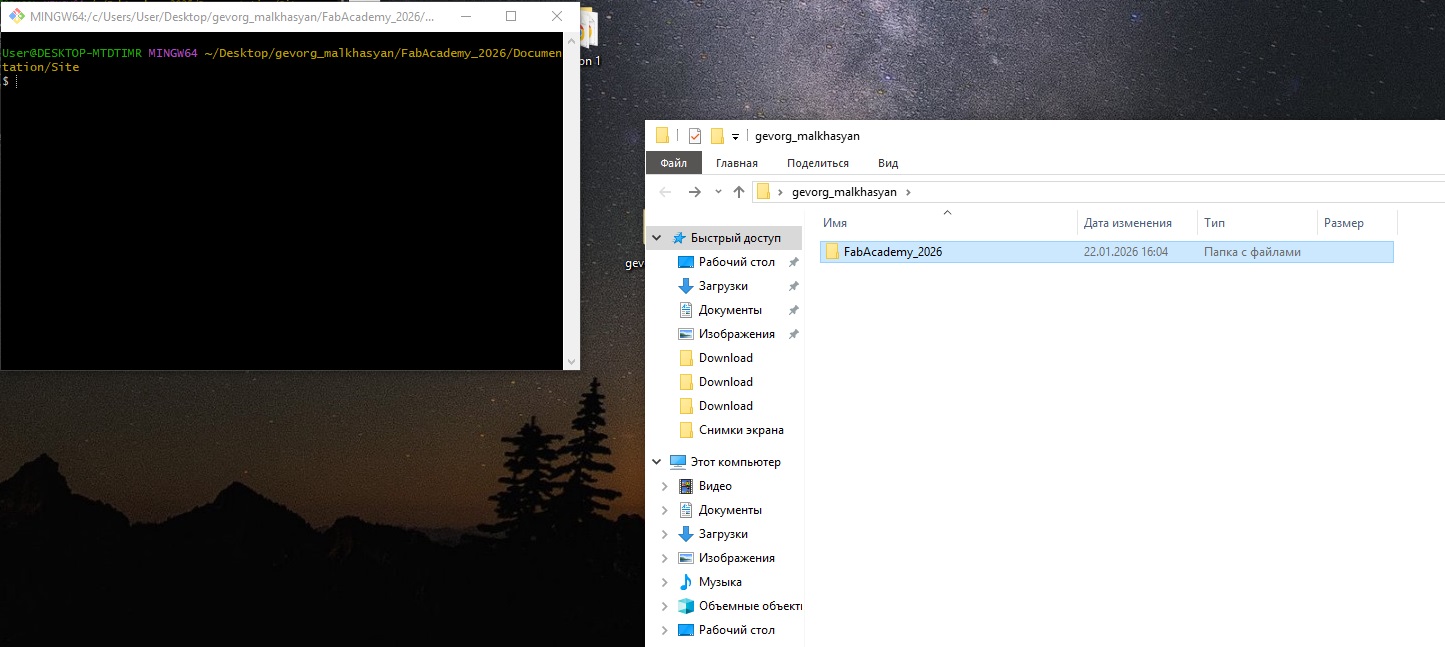
First, I installed Git on my computer, which also included Git Bash.
Then I opened Git Bash and created (or navigated to) a folder called Fabacademy2026, which I use as my main working directory.
Clone Methods (SSH vs HTTPS)
GitLab provides two methods for cloning repositories:
- SSH
- HTTPS
Why I Did Not Use HTTPS
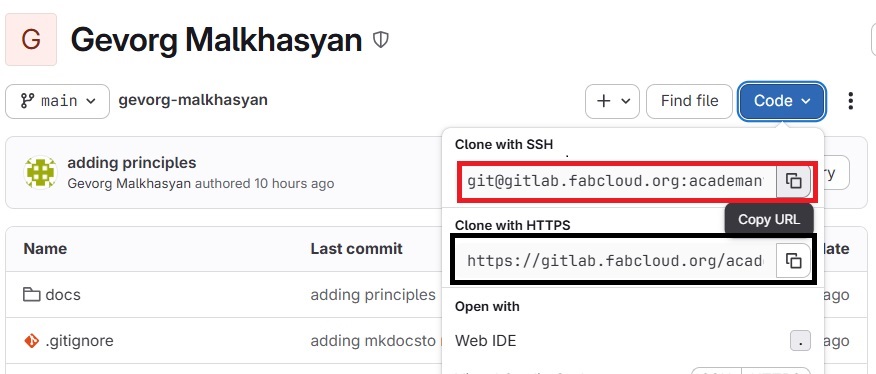
Although HTTPS is available, I chose not to use it.
Using HTTPS requires entering credentials (username and password or token) repeatedly when interacting with the repository.
This slows down the workflow and makes the process less efficient.
Why I Chose SSH
I used SSH authentication instead because:
- Secure connection
- No need to repeatedly enter credentials
- Faster and more efficient workflow
SSH Key Setup and Repository Connection
To enable secure authentication with GitLab, I generated and configured an SSH key.
First, I opened Git Bash and navigated to my working directory:
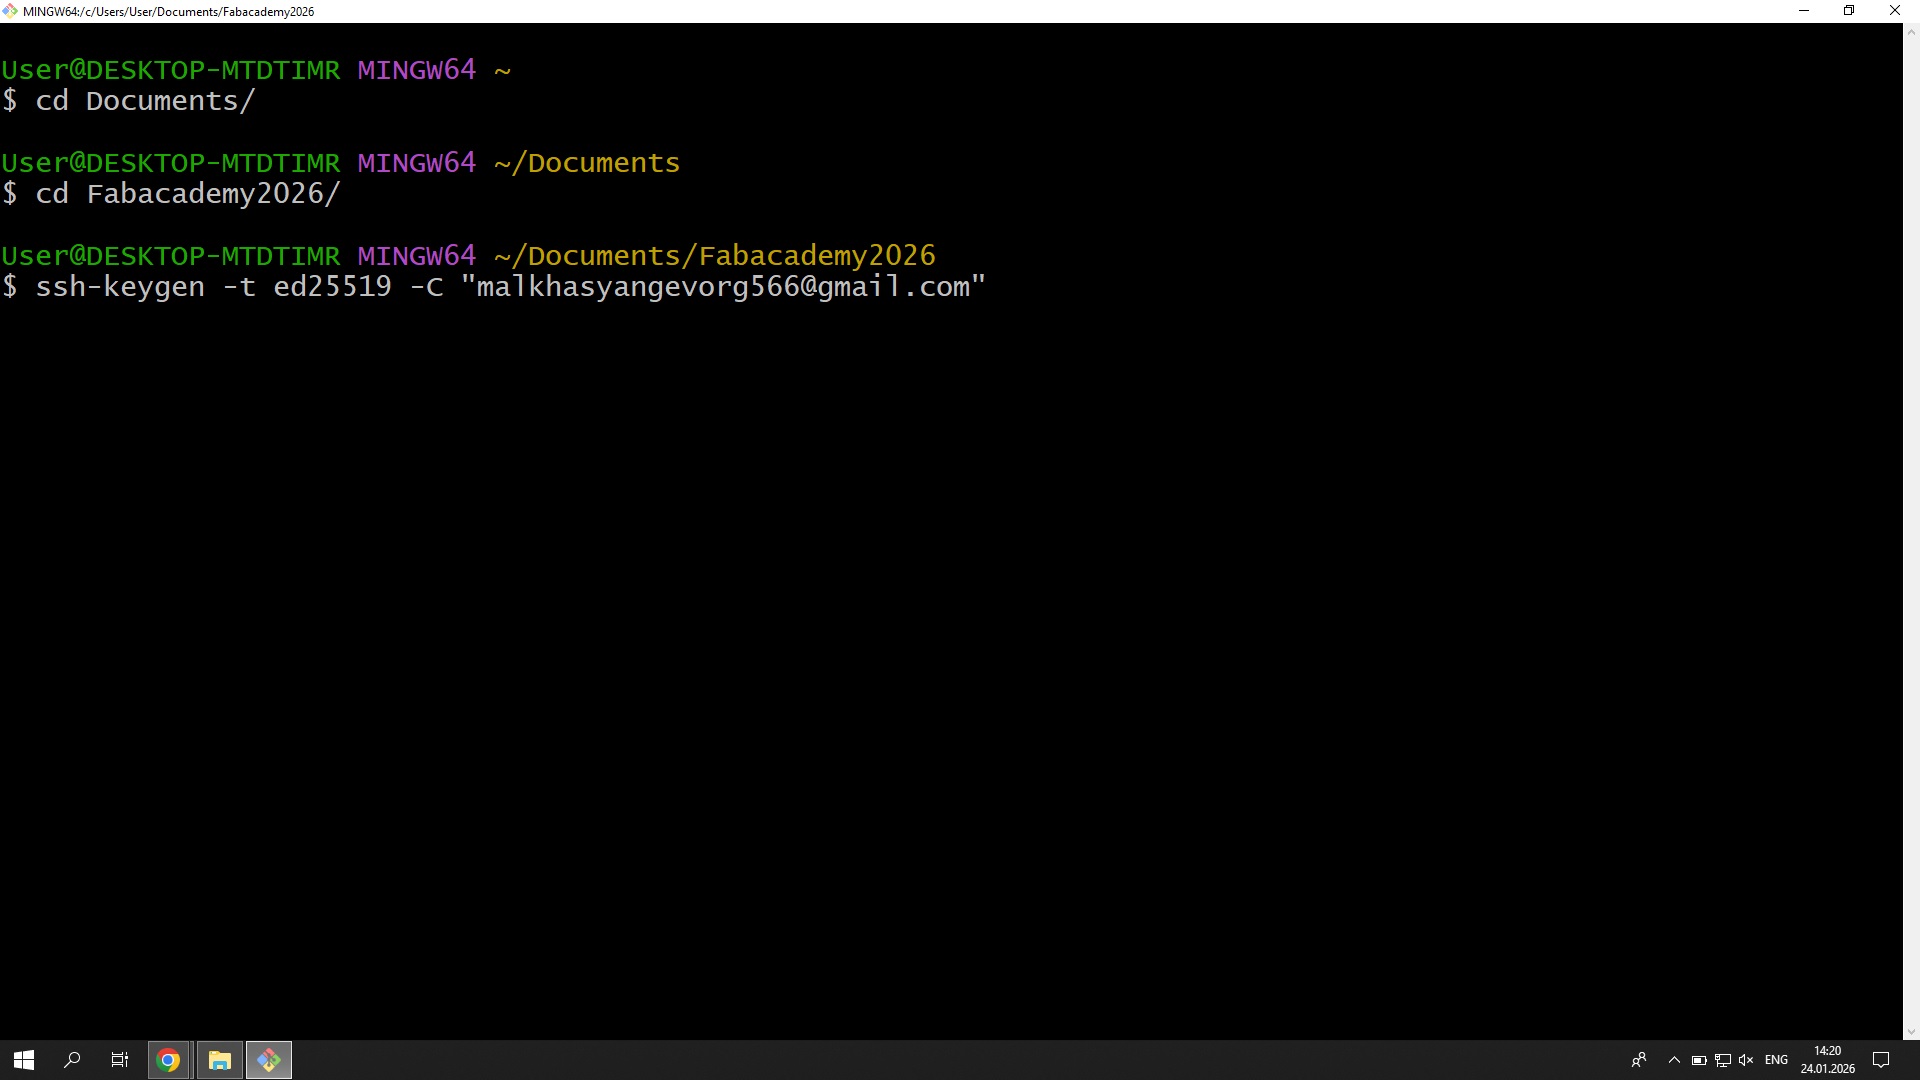
cd Documents/
cd Fabacademy2026/
Then I generated a new SSH key:
ssh-keygen -t ed25519 -C "malkhasyangevorg566@gmail.com"
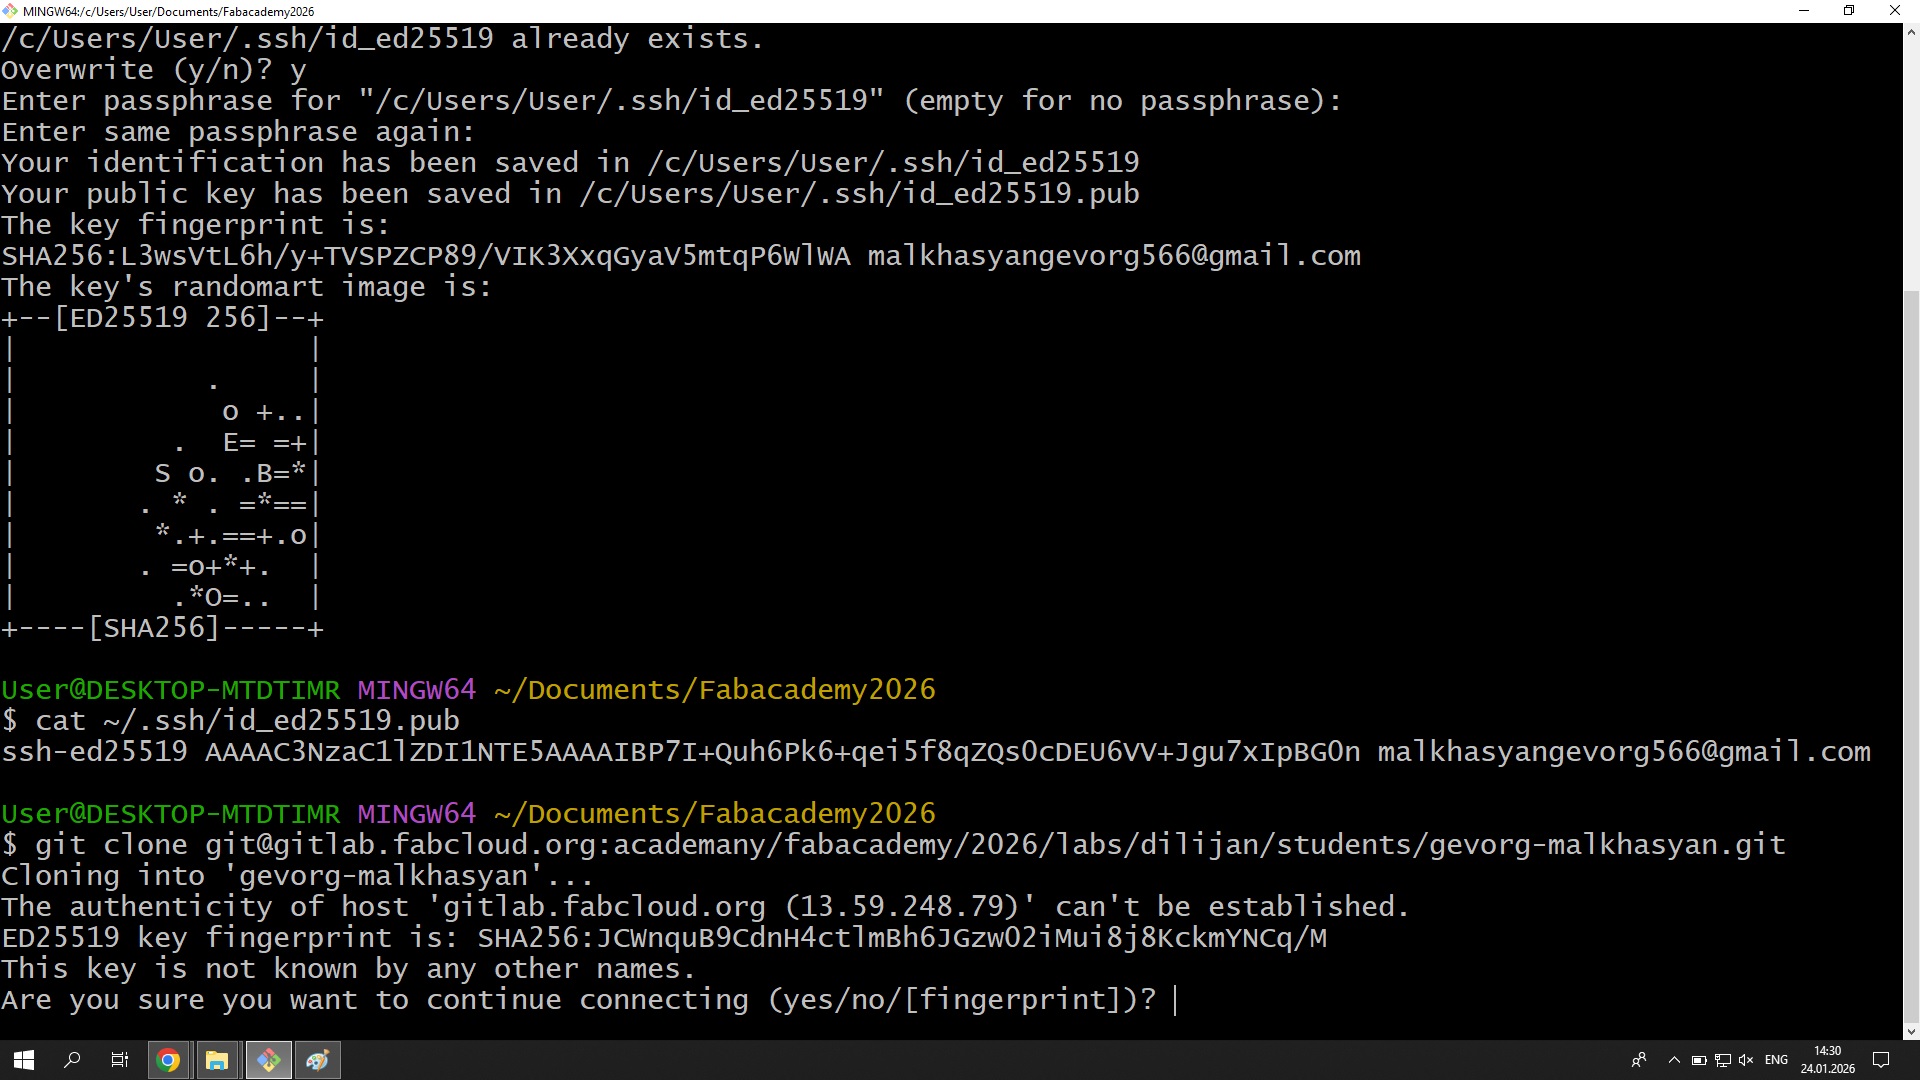
This created two files:
id_ed25519 (private key)
id_ed25519.pub (public key)
I displayed and copied the public key:
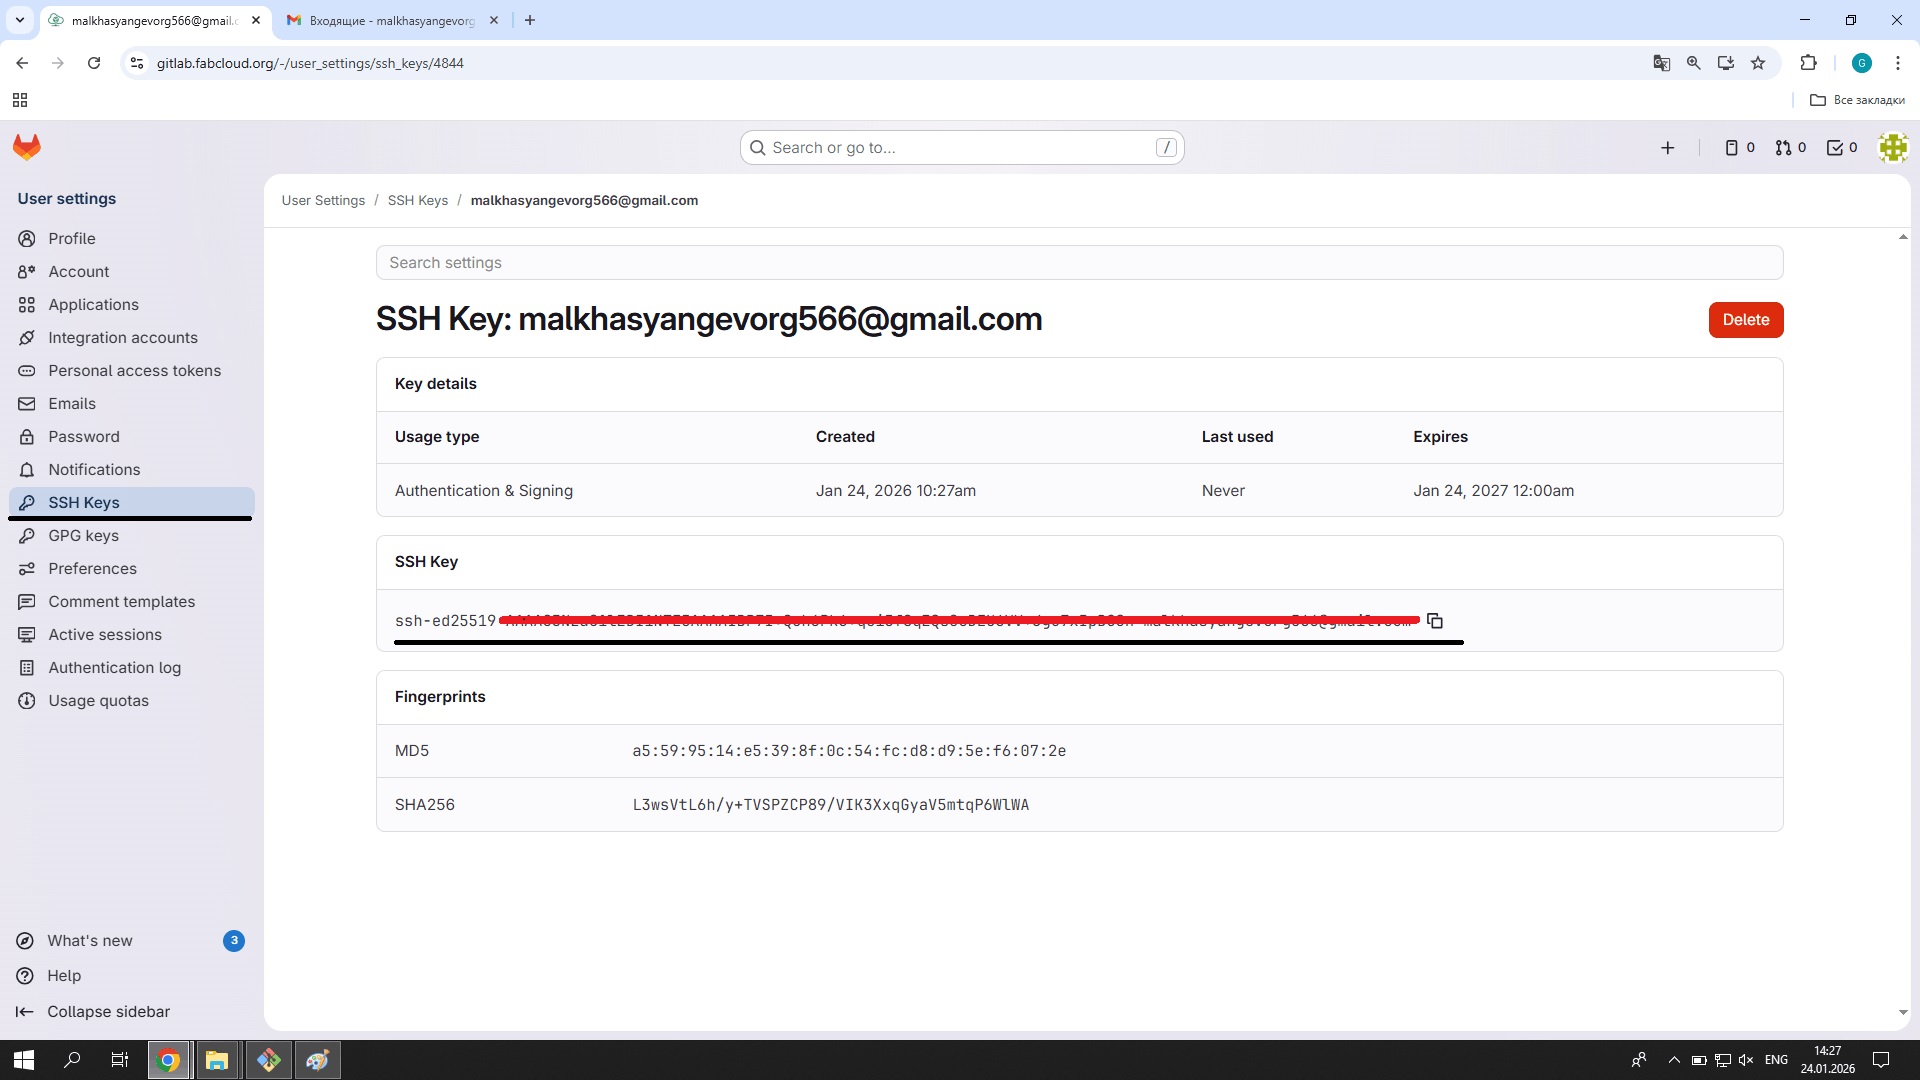
cat ~/.ssh/id_ed25519.pub
After copying the key, I logged into GitLab, opened User Settings → SSH Keys, pasted the key, and added it to my account.
Activating SSH Agent
To enable secure authentication, I started the SSH agent:
eval "$(ssh-agent -s)"
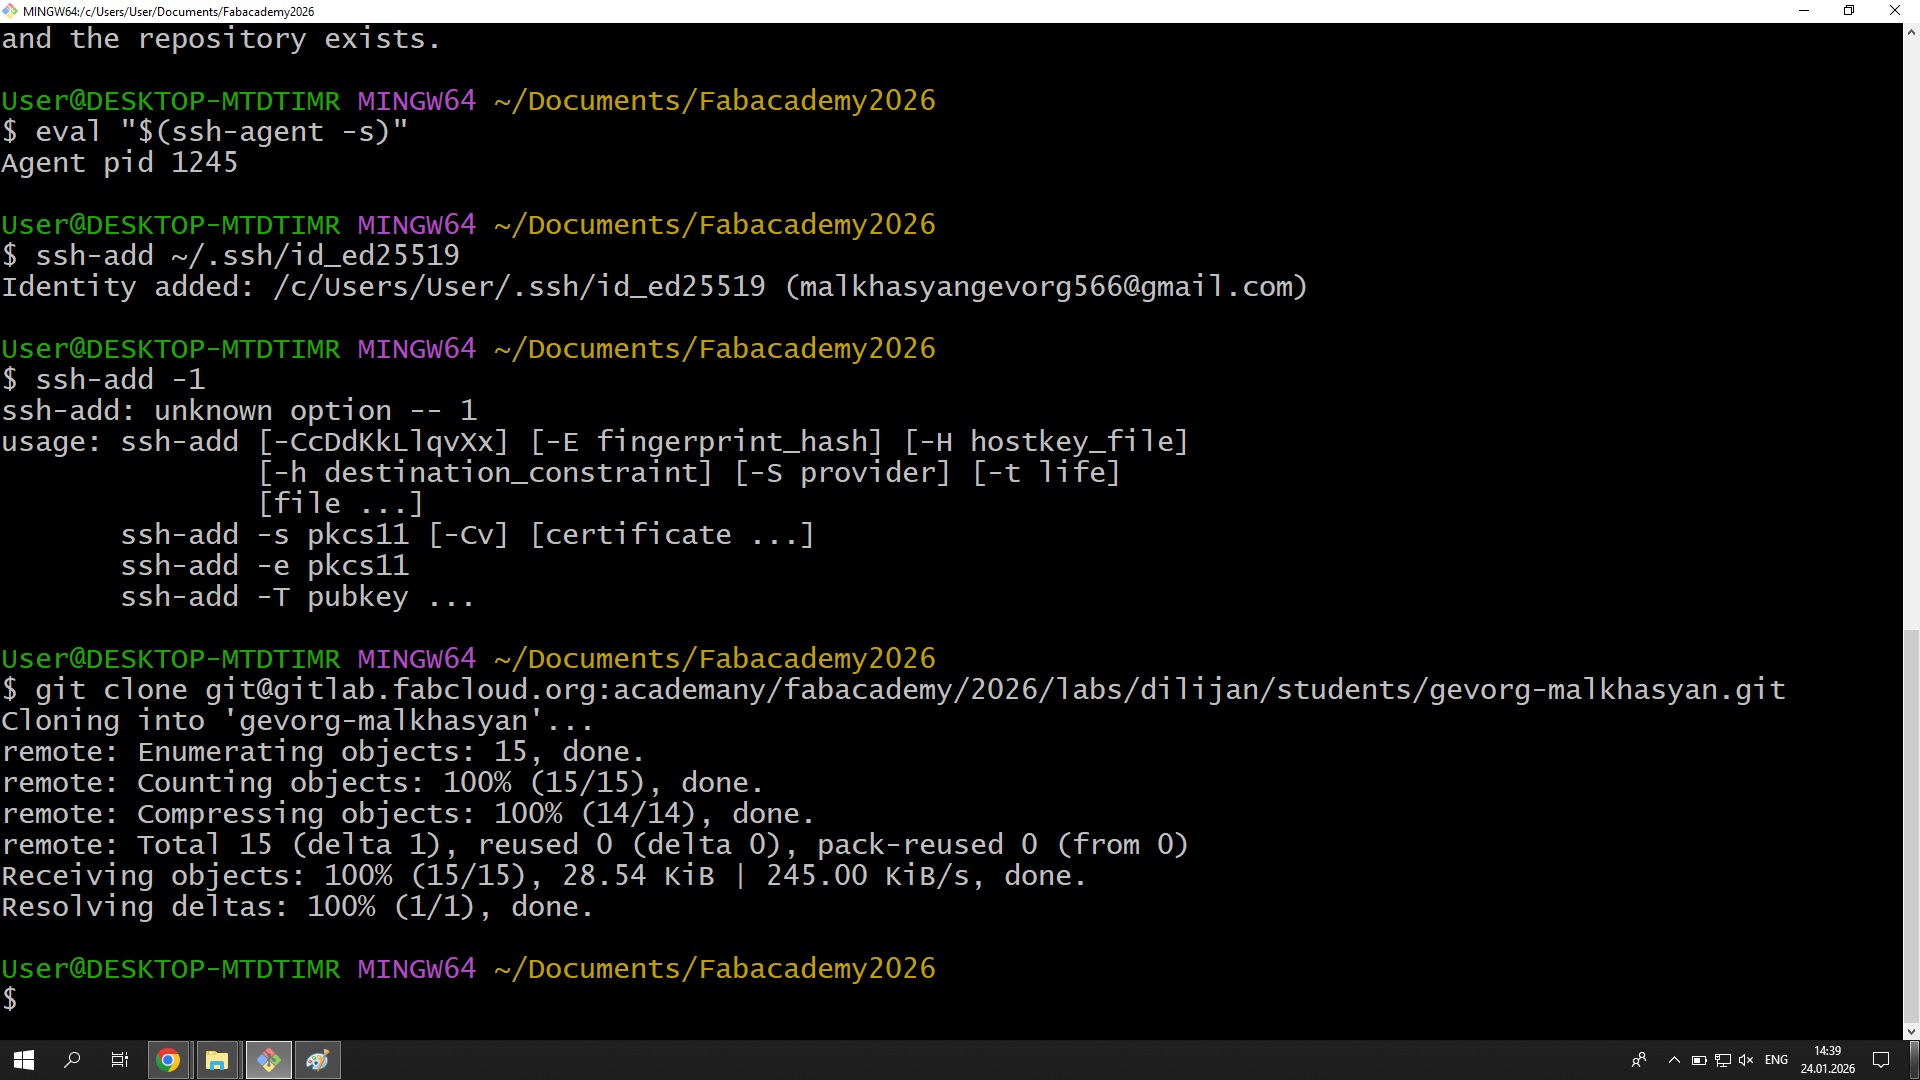
Then I added my SSH key:
ssh-add ~/.ssh/id_ed25519
Cloning the Repository
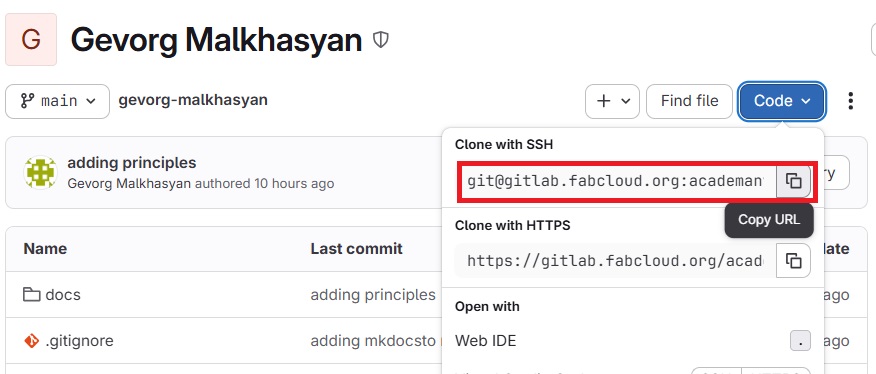
Next, I copied the SSH clone link from GitLab and cloned my Fab Academy repository:
git clone git@gitlab.fabcloud.org:academany/fabacademy/2026/labs/dilijan/students/gevorg-malkhasyan.git

After confirming the host connection, the repository was successfully cloned to my local machine.
Visual Studio Code Setup
After cloning the repository, I opened Visual Studio Code as my main development environment.
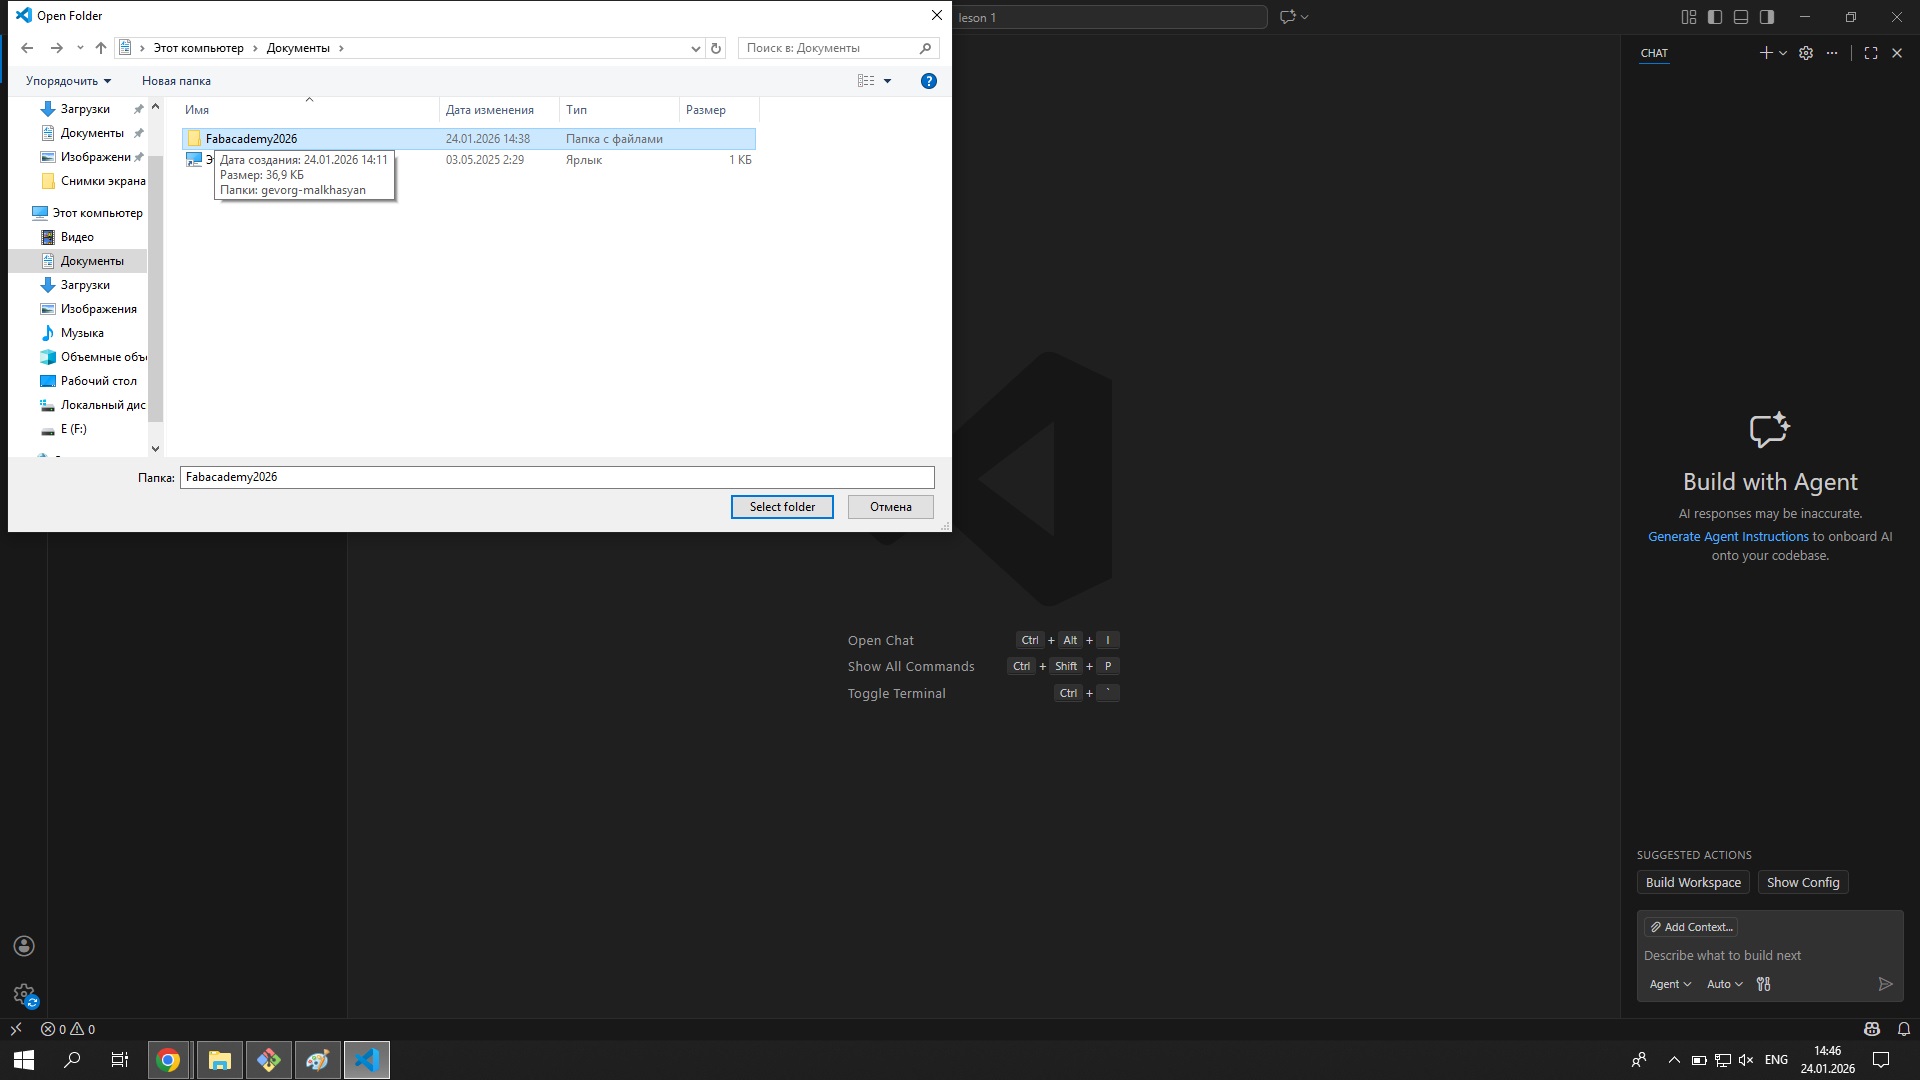
I selected Open Folder and opened the Fabacademy2026 directory, which contains my Fab Academy repository files such as:
- index.html
- about.html
- style.css
- assignments folder
- images folder
Visual Studio Code provides:
- A clean interface for HTML and CSS editing
- Integrated terminal
- Built-in Git integration
For committing and pushing changes, I switched from Git Bash to the integrated terminal inside VS Code, as it allows editing files and running Git commands in the same window without switching between applications.
Staging, Committing and Pushing
Inside the VS Code integrated terminal, I first configured my Git identity:
git config --global user.email "malkhasyangevorg566@gmail.com"
git config --global user.name "Gevorg Malkhasyan"
Then I checked the repository status, staged all changes, and made my first commit:
git status
git add .
git commit -m "adding year in index"
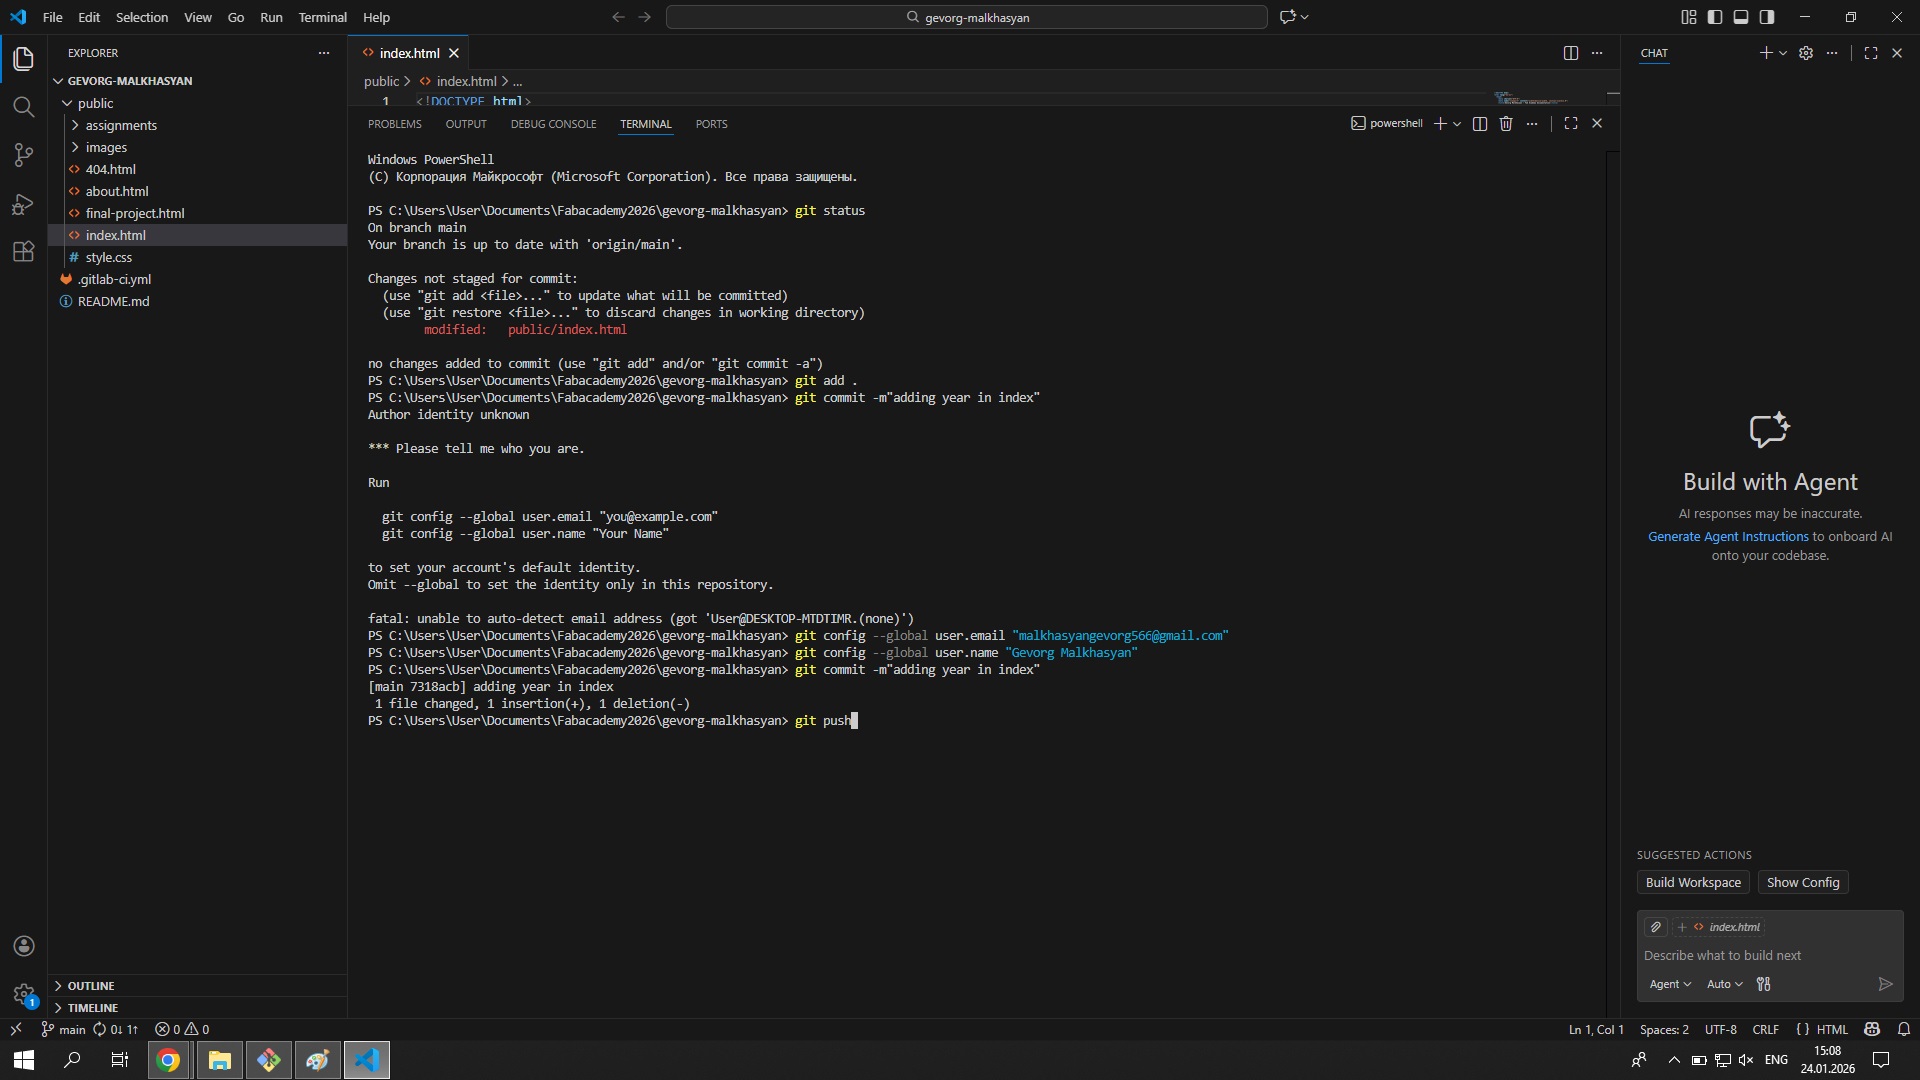
Finally, I pushed the changes to GitLab:
git push

After pushing, I opened GitLab in the browser and confirmed that the changes were reflected in my online repository.
Setting Up the Documentation Website
MkDocs and Markdown
For my documentation, I used Markdown because it is simple, clear, and easy to use. With Markdown, I can create well-organized and readable documents — including images, links, formatted text, and code blocks — without writing complex HTML.
Markdown also integrates seamlessly with GitLab, which allows me to manage and update my documentation, track changes, and present completed work in a clear and professional way.
To build my documentation site, I used MkDocs with the Material theme — a tool designed for creating static websites directly from Markdown files. MkDocs allowed me to organize and present my documentation as a clean and structured website while focusing on writing content rather than dealing with design code.
Customizing the Site
To improve the appearance of my documentation, I made several changes in the
mkdocs.yml configuration file.
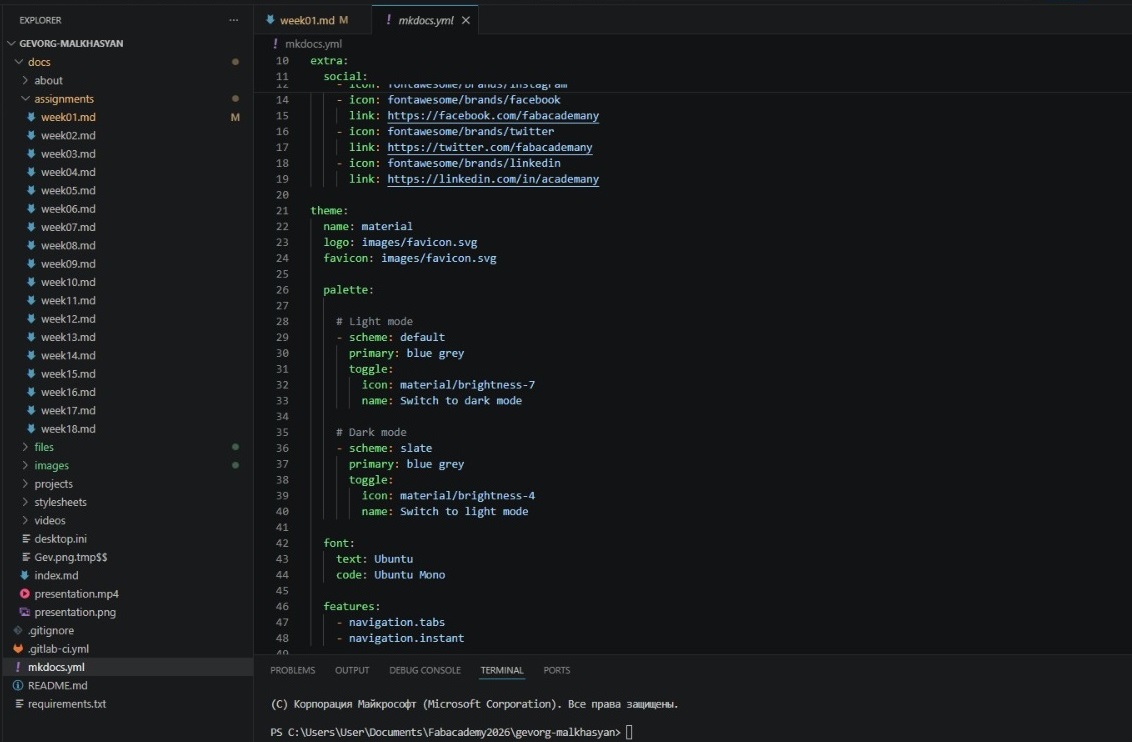
I customized the color theme by setting the primary color to blue grey and enabled Dark/Light Mode, allowing users to choose their preferred viewing style.
  # Light mode
    - scheme: default
      primary: blue grey
      toggle:
        icon: material/brightness-7
        name: Switch to dark mode

Setting Up Pages
I structured the site by adding and organizing the main pages — About Me,
Student Agreement, and Final Project — editing the navigation section in mkdocs.yml.
- Updated
mkdocs.ymlwith my ownsite_name,site_author, andsite_url - Filled in the About Me page with my background and goals for Fab Academy
- Signed the Student Agreement page — the agreement text is taken from the official Fab Academy Student Agreement and committed to my repository as required
- Set up the Final Project page as a place to document my project as it developed
These changes made my documentation more professional, visually engaging, and easy to navigate.
Conclusion
This week was my first experience in Fab Academy, where everything was new and quite challenging, especially understanding Git.
Despite the initial confusion and mistakes, with the support of our instructor I gradually began to understand the workflow and move forward with more confidence.
This experience also showed me how important it is not only to complete the work, but also to document and present it properly.