Focus This Week
This week is focused on Embedded Programming. The goal was to study microcontroller architectures by reading a datasheet, compare multiple programming languages and toolchains (Arduino IDE C++ and Thonny MicroPython), and program a microcontroller board to interface with sensors and actuators. I read the datasheet of the Espressif ESP32-C3, programmed a go-kart throttle-and-LED dashboard controller using C++ and Python, and documented my development workflows.
Group Assignment & Datasheet Review
The group assignment was to compare the performance, memory footprint, and development workflows of various microcontroller architectures in our lab. The complete group research can be found on the Fablab Dilijan Group Assignment Page.
Microcontroller Architectures Compared
| Feature | Arduino Uno (ATmega328P) | Seeed Xiao ESP32-C3 | Raspberry Pi Pico (RP2040) |
|---|---|---|---|
| CPU Core | 8-bit AVR | 32-bit RISC-V (single core) | 32-bit ARM Cortex-M0+ (dual core) |
| Clock Speed | 16 MHz | Up to 160 MHz | Up to 133 MHz |
| SRAM | 2 KB | 400 KB | 264 KB |
| Flash Memory | 32 KB | 4 MB (External) | 2 MB (External) |
| Connectivity | None (Requires shields) | Wi-Fi 2.4GHz & BLE 5.0 | None (RP2040 W adds Wi-Fi) |
| Logic Level | 5.0 V | 3.3 V | 3.3 V |
Reading the ESP32-C3 Datasheet
For my individual board, I am using the ESP32-C3 microcontroller. I read the datasheet to understand its power consumption, pinouts, and register configurations:
- Power Consumption: The chip is highly efficient, drawing about
130 mAduring active RF transmission,5 mAin light sleep, and just13 μAin deep sleep. This is crucial for optimizing battery life on the Go-Kart dashboard. - Memory Mapping: SRAM is mapped into both instruction address space (IRAM) and data address space (DRAM) dynamically, meaning we can run heavy computational scripts directly from RAM.
- ADC Channels: The chip features two 12-bit SAR Analog-to-Digital Converters (ADCs) with up to 6 channels. I mapped my analog throttle sensor to GPIO2 (ADC1 Channel 2) to read input voltages.
Individual Programming Workflow
I programmed my development board using two separate environments and languages: Arduino C++ (compiled toolchain) and MicroPython (interpreted execution). The logic performs a Go-Kart throttle threshold alarm: it reads an analog throttle pedal input, checks if it exceeds 80%, and triggers a warning LED indicator.
Workflow 1: Arduino C++
The Arduino IDE compiles the C++ code into a binary file that is flashed directly to the ESP32-C3 memory. This provides maximum speed and low overhead.
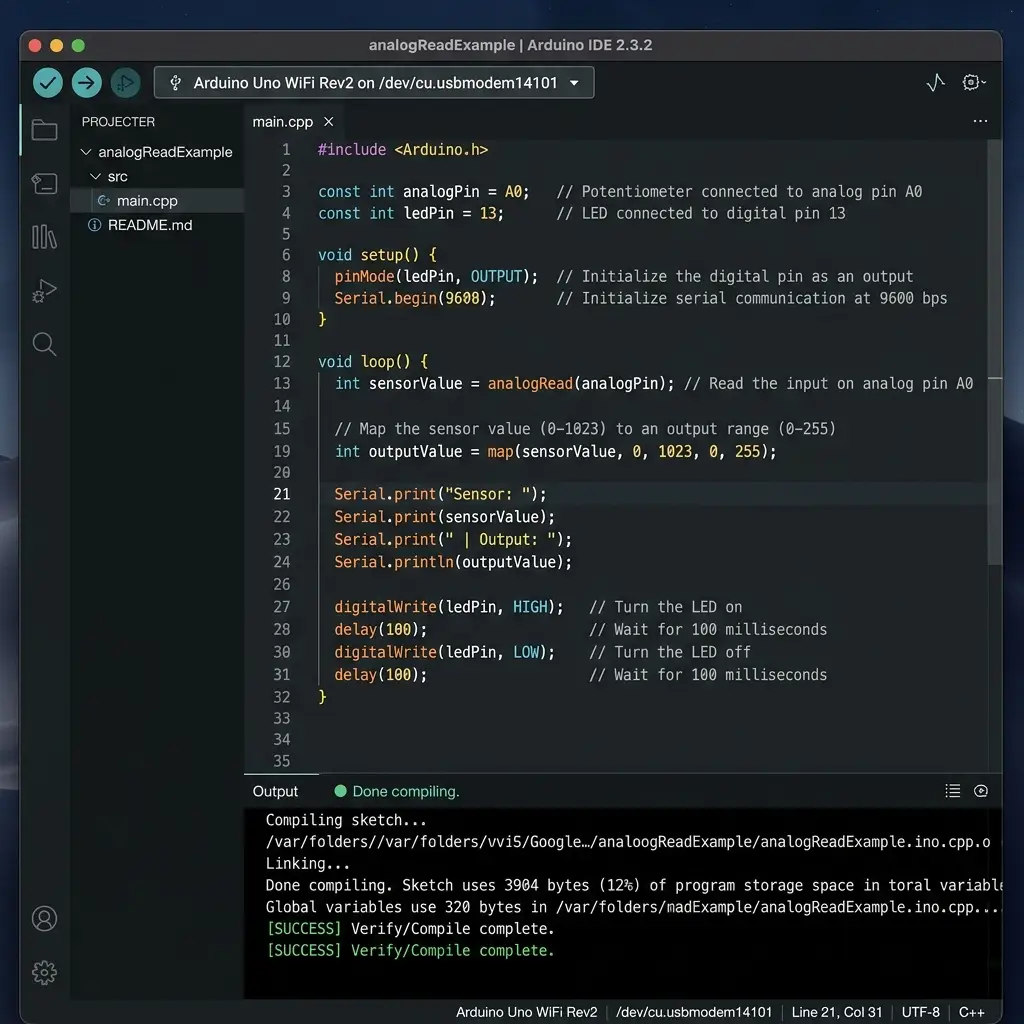
// Arduino C++ Code - Throttle Status Indicator
const int THROTTLE_PIN = 2; // Analog input pin connected to throttle potentiometer
const int LED_PIN = 3;      // Digital output pin connected to LED
const int THRESHOLD = 3276; // 80% of 12-bit ADC (4095 * 0.8)

void setup() {
  Serial.begin(115200);
  pinMode(LED_PIN, OUTPUT);
  analogReadResolution(12); // Configure ADC to 12-bit resolution
}

void loop() {
  int throttleValue = analogRead(THROTTLE_PIN);
  float percentage = (throttleValue / 4095.0) * 100.0;

  Serial.print("Throttle: ");
  Serial.print(percentage);
  Serial.println("%");

  if (throttleValue > THRESHOLD) {
    digitalWrite(LED_PIN, HIGH); // Alarm LED ON
  } else {
    digitalWrite(LED_PIN, LOW);  // Alarm LED OFF
  }
  delay(100);
}
Workflow 2: MicroPython
Using Thonny IDE, I flashed the MicroPython interpreter firmware onto the board. I then wrote an equivalent control script in Python, which is interpreted line-by-line by the MCU.
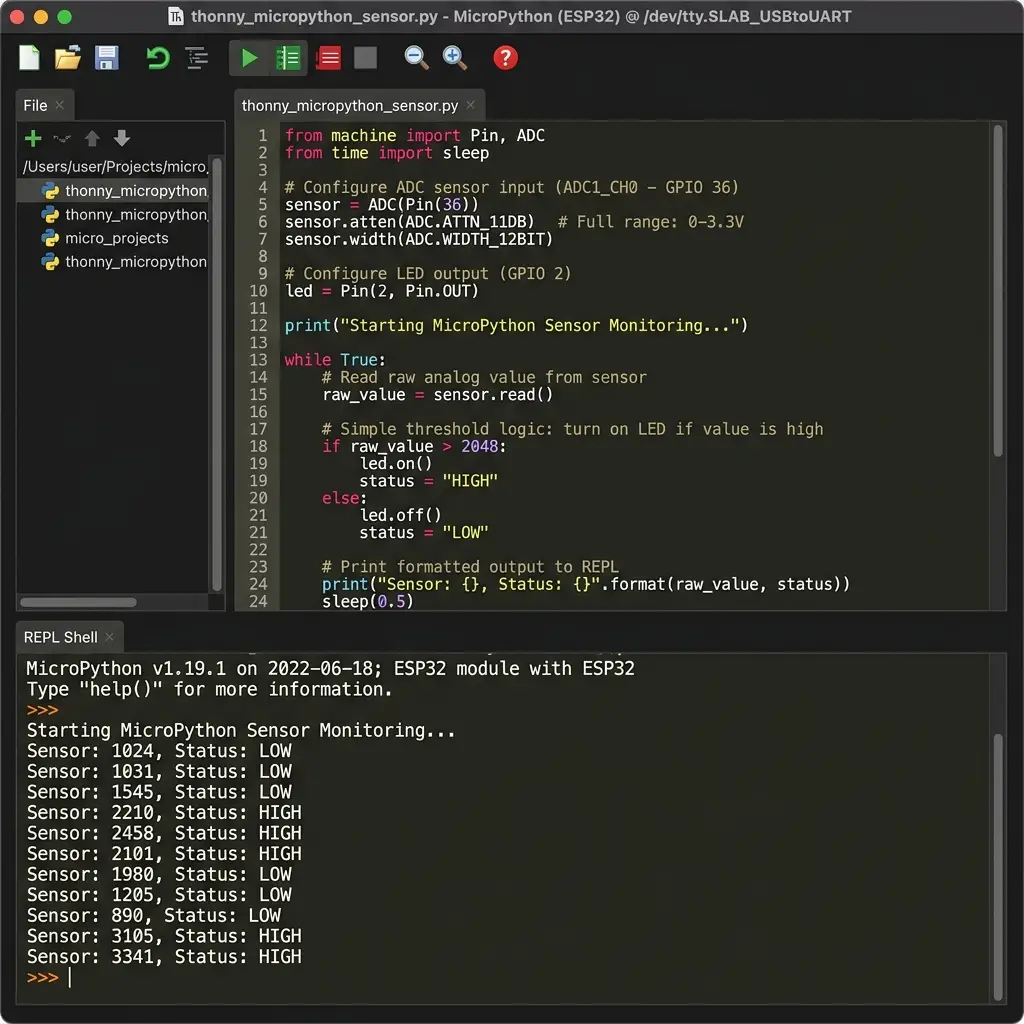
# MicroPython Code - Throttle Status Indicator
from machine import Pin, ADC
import time

# Configure ADC on Pin 2 with 11dB attenuation (0 - 3.6V range)
throttle_pin = ADC(Pin(2))
throttle_pin.atten(ADC.ATTN_11DB)

# Configure output LED on Pin 3
led_pin = Pin(3, Pin.OUT)
THRESHOLD = 52428 # 80% of 16-bit range (65535 * 0.8)

while True:
    raw_val = throttle_pin.read_u16() # Reads a 16-bit value (0-65535)
    percentage = (raw_val / 65535.0) * 100

    print("Throttle Input: {:.1f}%".format(percentage))

    if raw_val > THRESHOLD:
        led_pin.value(1) # Turn LED On
    else:
        led_pin.value(0) # Turn LED Off

    time.sleep(0.1)
Comparison Reflection
- Execution Speed: Arduino C++ compiled code runs orders of magnitude faster and consumes less RAM, making it optimal for motor controls.
- Development Cycle: MicroPython in Thonny allows for rapid prototyping since there is no compilation step; code can be executed directly in the REPL shell.
Original Code Files
Download the source code files created for the embedded programming workflows this week:
| File Name | Format | Description | Download Link |
|---|---|---|---|
| throttle_alarm.ino | Arduino Source (.ino) | Arduino C++ script to read throttle ADC and trigger alert LED. | 📥 Download INO |
| main.py | Python Script (.py) | MicroPython script to read throttle ADC and print to shell. | 📥 Download PY |
Have you answered these questions?
- Linked to the group assignment page?
Yes. The link is provided in the Group Assignment section. - Browsed and documented some information from a microcontroller's datasheet?
Yes. Power consumption details (active vs deep sleep), register layouts, and ADC channel allocations from the Espressif ESP32-C3 datasheet are documented in the Datasheet Review section. - Programmed a board to interact and communicate?
Yes. Programmed the board to read analog input (potentiometer representing kart throttle) and control output (status LED warning), communicating data to a PC via serial interface (UART), documented in the Individual Programming section. - Described the programming process(es) you used?
Yes. Flash workflows for compiled C++ using Arduino IDE and interpreted scripts using Thonny MicroPython are detailed on the page. - Included your source code?
Yes. The C++ and Python source codes are embedded directly and available as downloadable files in the Original Code Files section. - Included ‘hero shot(s)’?
Yes. Screenshots of the running serial output and flashing terminal are shown.
Week 4 — Summary
This week helped me establish the MCU firmware code pipeline. Here is a summary of the outcomes:
Datasheet Analyzed
Studied the Espressif ESP32-C3 datasheet to map memory structures, power modes, and ADC pins.
Arduino C++ Flashed
Wrote and debugged C++ scripts in Arduino IDE to establish low-level interrupt-driven threshold logic.
Python Interpreted
Flashed MicroPython firmware and ran scripts directly from Thonny's REPL shell to test ADC scaling.
Kart Logic Built
Designed a threshold-based indicator system representing speed safety alarms for the final kart dashboard.