Appearance
Week 9 - Input Devices
Assignments
Group Assignment
- Probe an input device's analog levels and digital signals
Individual Assignment
- Measure something: add a sensor to a microcontroller board that you have designed and read it
Group Working
My group work is attached here: https://fabacademy.org/2025/labs/unnc/assignments/week9/week09.html
Individual Working
I will use the PCB board processed last week for testing, primarily to implement the signal acquisition functionality for ultrasonic and temperature/humidity sensors.
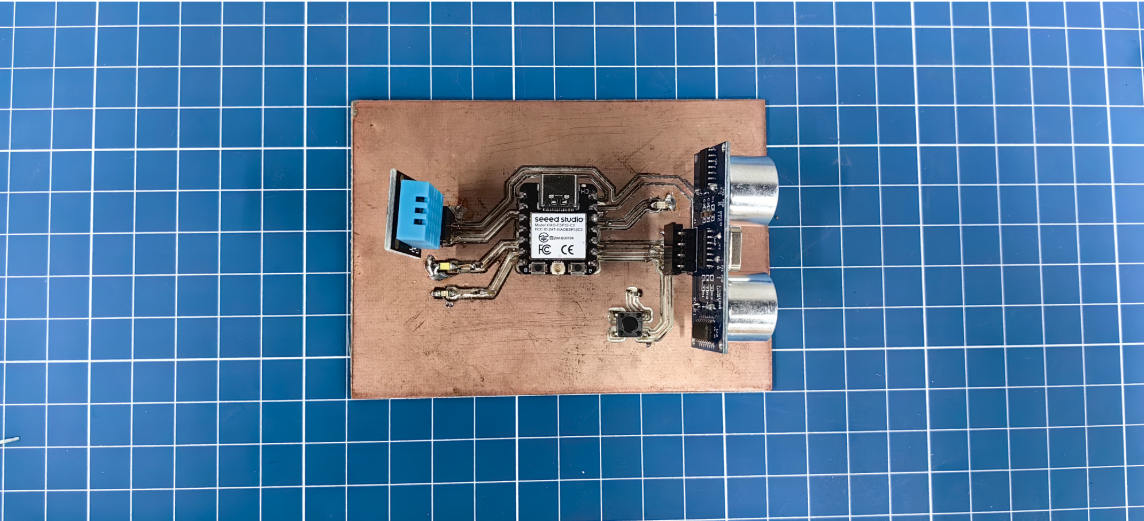
Circuit design for Testing
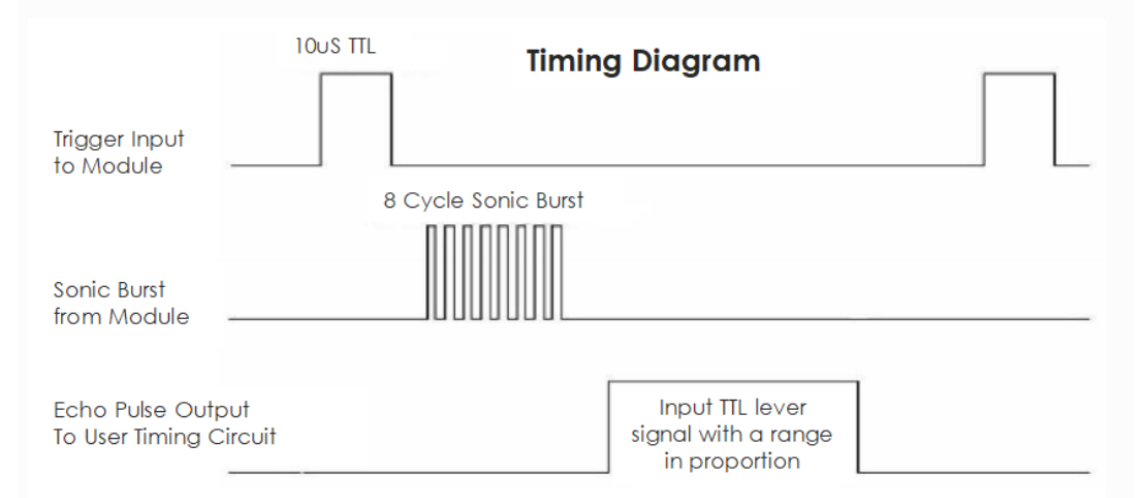
Ultrasonic Sensors
- Read the data from the ultrasonic sensor to calculate the distance and print the result on the serial port. If the distance is less than 200mm, the white LED (used as a replacement for the blue LED) will turn on; otherwise, the green LED will light up.
- Ultrasonic sensor model:HC-SR04
- Pinout:
| Pin Name | Function Description |
|---|---|
| VCC | Power Supply (Connect to MCU's 5V) |
| GND | Ground (Connect to MCU's GND) |
| TRIG | Trigger Control Signal Input |
| ECHO | Echo Signal Output |
- Timing diagram
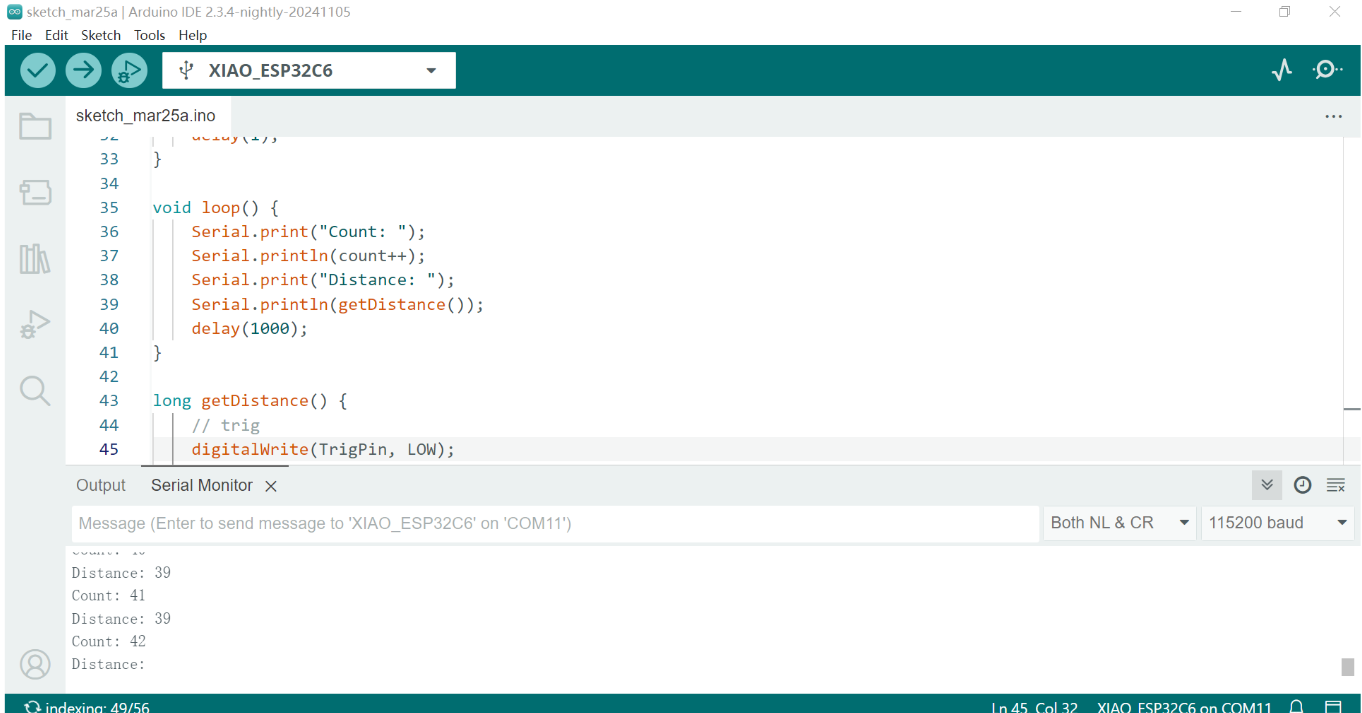
- After uploading the code, set the baud rate to 115200. You will then be able to see the calculated distance displayed on the serial port.
- The following is a demonstration video: When the obstacle distance is less than 200mm, the green LED lights up; otherwise, the white LED lights up.
- The usage code is as follows:
cpp
// circuit

/*
xiao esp32        SR04
5V        ---    VCC
D8        ---    Trig
D9        ---    Echo
GND        ---    GND
*/

// pin setting

#define TrigPin D8
#define EchoPin D9

// Distance = Speed x Time
// Speed of sound ~= 340m/s = 0.340mm/us

int count = 0;

long duration;
// PULSE WIDTH

void setup() {
    // set Serial communication
    Serial.begin(115200);
    // set pin mode
    pinMode(TrigPin, OUTPUT);
    pinMode(EchoPin, INPUT);
    pinMode(D4, OUTPUT);
    pinMode(D5, OUTPUT);
    // init pin
    digitalWrite(TrigPin, LOW);
    delay(1);
}

void loop() {
    Serial.print("Count: ");
    Serial.println(count++);
    Serial.print("Distance: ");
    int distance = getDistance();
    Serial.println(distance);
    delay(1000);
    if (distance > 200){
      digitalWrite(D4, HIGH);
      digitalWrite(D5, LOW);
    }
    else {
      digitalWrite(D5, HIGH);
      digitalWrite(D4, LOW);
    }


}

long getDistance() {
    // trig
    digitalWrite(TrigPin, LOW);
    delayMicroseconds(2);
    digitalWrite(TrigPin, HIGH);
    delayMicroseconds(10);
    digitalWrite(TrigPin, LOW);
    // echo
    duration = pulseIn(EchoPin, HIGH);     // unit: us
    return duration * 0.34029 / 2;         // unit: mm
}
Temperature and humidity sensor
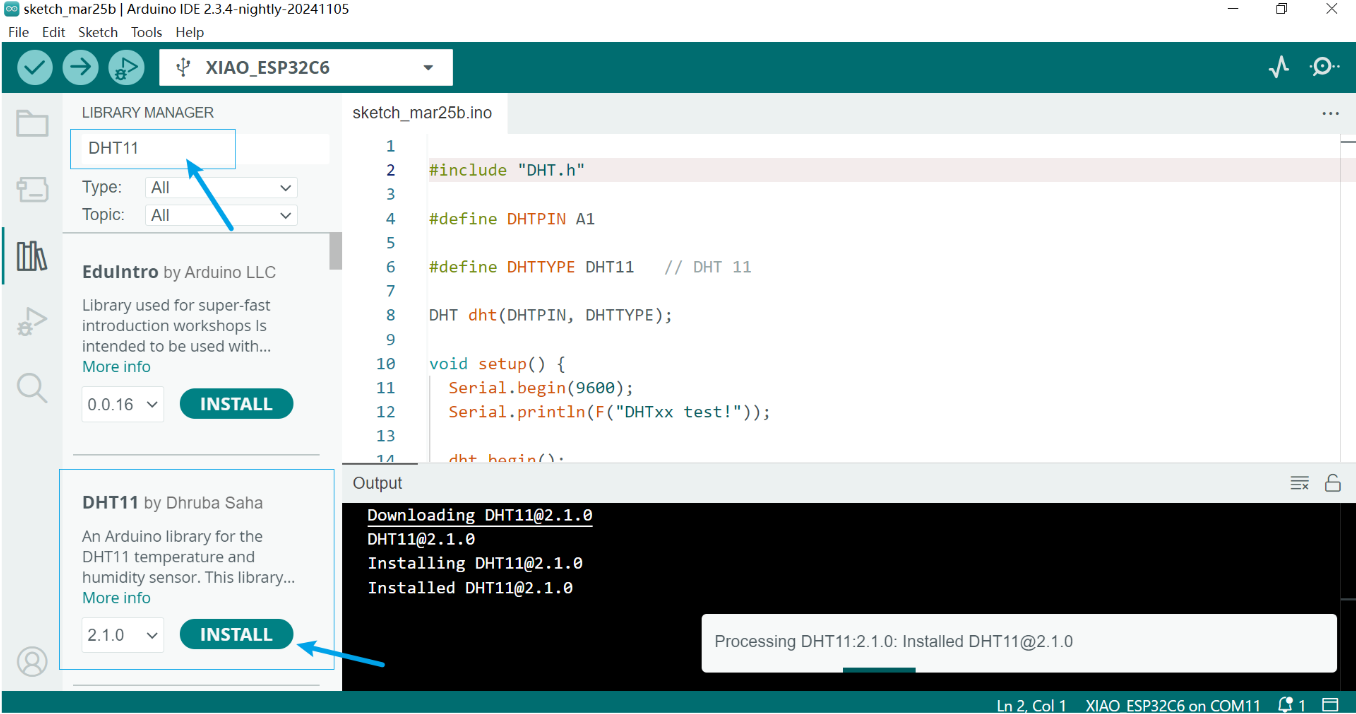
- To use the temperature and humidity sensor, you first need to download the DHT11 library. You can search for it and download it directly in the Arduino IDE. Once the library is installed, you can use it to read the temperature and humidity data, which will then be printed on the serial port.
- After burning the code, open the serial port and set the baud rate to 9600. Wait for two seconds to see the temperature and humidity data.
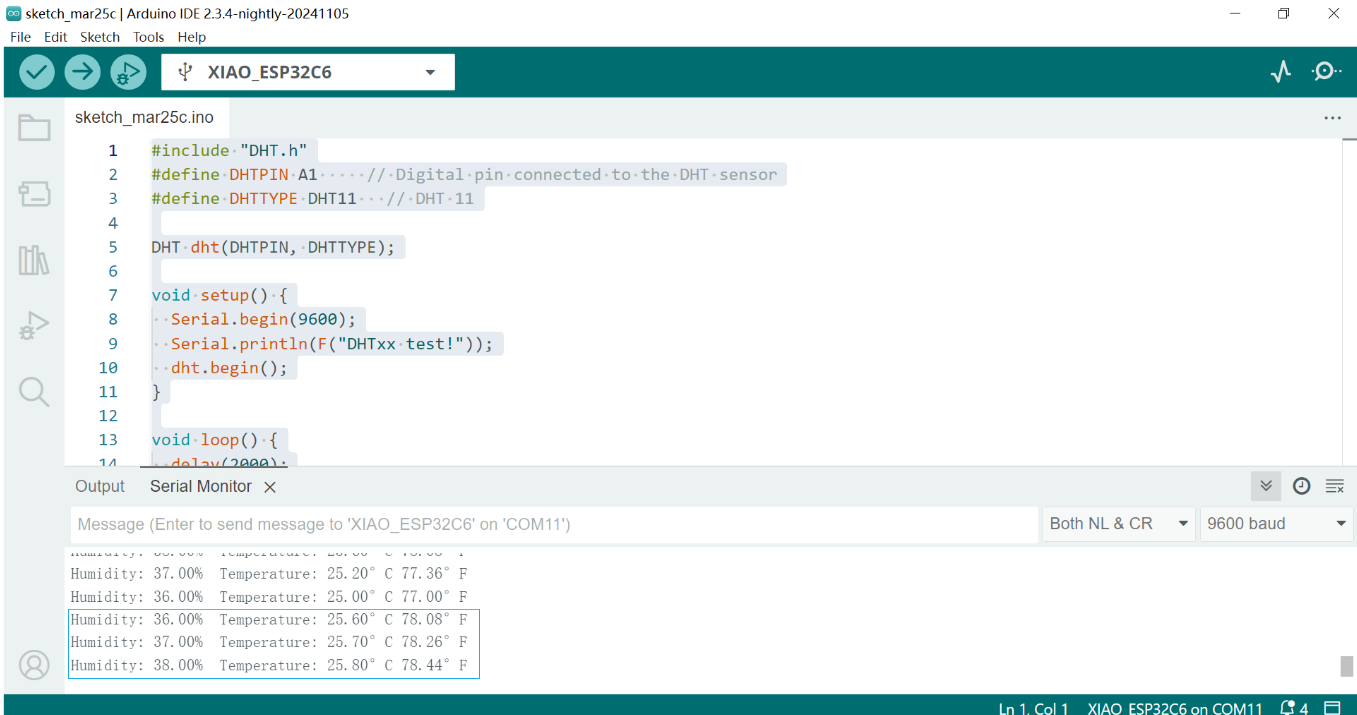
- The usage code is as follows
#include "DHT.h"
#define DHTPIN A1     // Digital pin connected to the DHT sensor
#define DHTTYPE DHT11   // DHT 11

DHT dht(DHTPIN, DHTTYPE);

void setup() {
  Serial.begin(9600);
  Serial.println(F("DHTxx test!"));
  dht.begin();
}

void loop() {
  delay(2000);
  // Reading temperature or humidity takes about 250 milliseconds!
  // Sensor readings may also be up to 2 seconds 'old' (its a very slow sensor)
  float h = dht.readHumidity();
  // Read temperature as Celsius (the default)
  float t = dht.readTemperature();
  // Read temperature as Fahrenheit (isFahrenheit = true)
  float f = dht.readTemperature(true);

  // Check if any reads failed and exit early (to try again).
  if (isnan(h) || isnan(t) || isnan(f)) {
    Serial.println(F("Failed to read from DHT sensor!"));
    return;
  }
  Serial.print(F("Humidity: "));
  Serial.print(h);
  Serial.print(F("%  Temperature: "));
  Serial.print(t);
  Serial.print(F("°C "));
  Serial.print(f);
  Serial.println(F("°F"));
}
Reference:
The reference and design files are listed below:
The .ino code file for the ultrasonic sensor is available in my repository:https://gitlab.fabcloud.org/academany/fabacademy/2025/labs/unnc/students/xu-sun/-/blob/main/docs/assignments/week9/resource-week9/week9-SR04Demo.ino?ref_type=heads
The .ino code file for the temperature and humidity sensor is available in my repository:https://gitlab.fabcloud.org/academany/fabacademy/2025/labs/unnc/students/xu-sun/-/blob/main/docs/assignments/week9/resource-week9/week9-DHTDemo.ino?ref_type=heads