Week 16. Wildcard Week
Water Jet Cutting.....

Assignment
Design and produce something with a digital process
(incorporating computer-aided design and manufacturing) not covered
in another assignment, documenting the requirements that your
assignment meets, and including everything necessary to reproduce
it. Possibilities include (but are not limited to):
useful links
OMAX maxim gen2 searies manualWater Jet Cutting
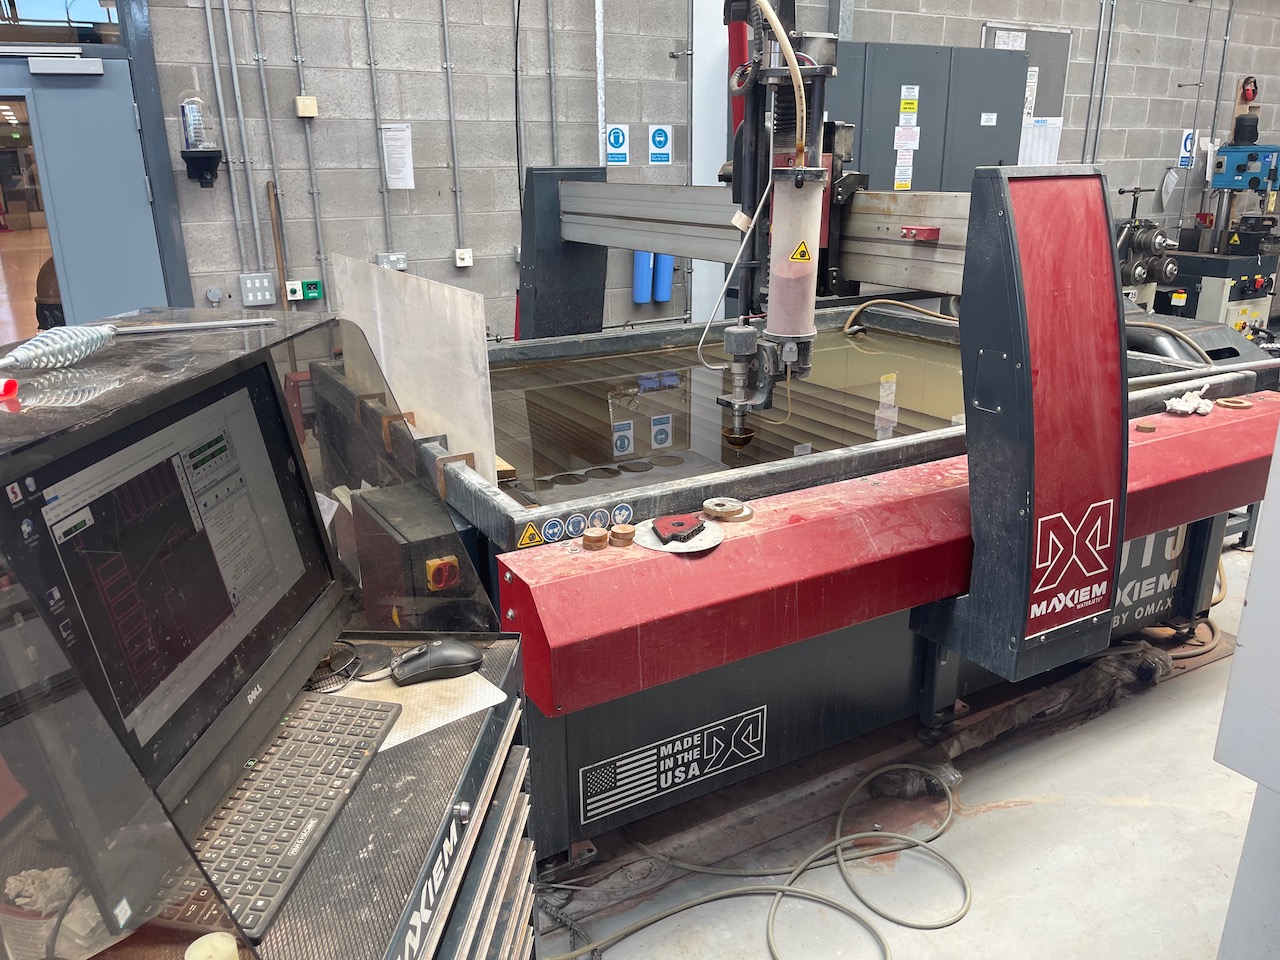
I decided to do some water jet cutting this week with an OMAX Maxium (gen2) 1515 water jet cutter we have in the engineering workshop at South West College, Omagh Campus.
Start procedure - OMAX Maxium (gen2) 1515 water jet cutter
Power up by turning on the water tap at the wall. Switch on the red isolator switch, switch on the two power sockets on the wall and open the air regulator.
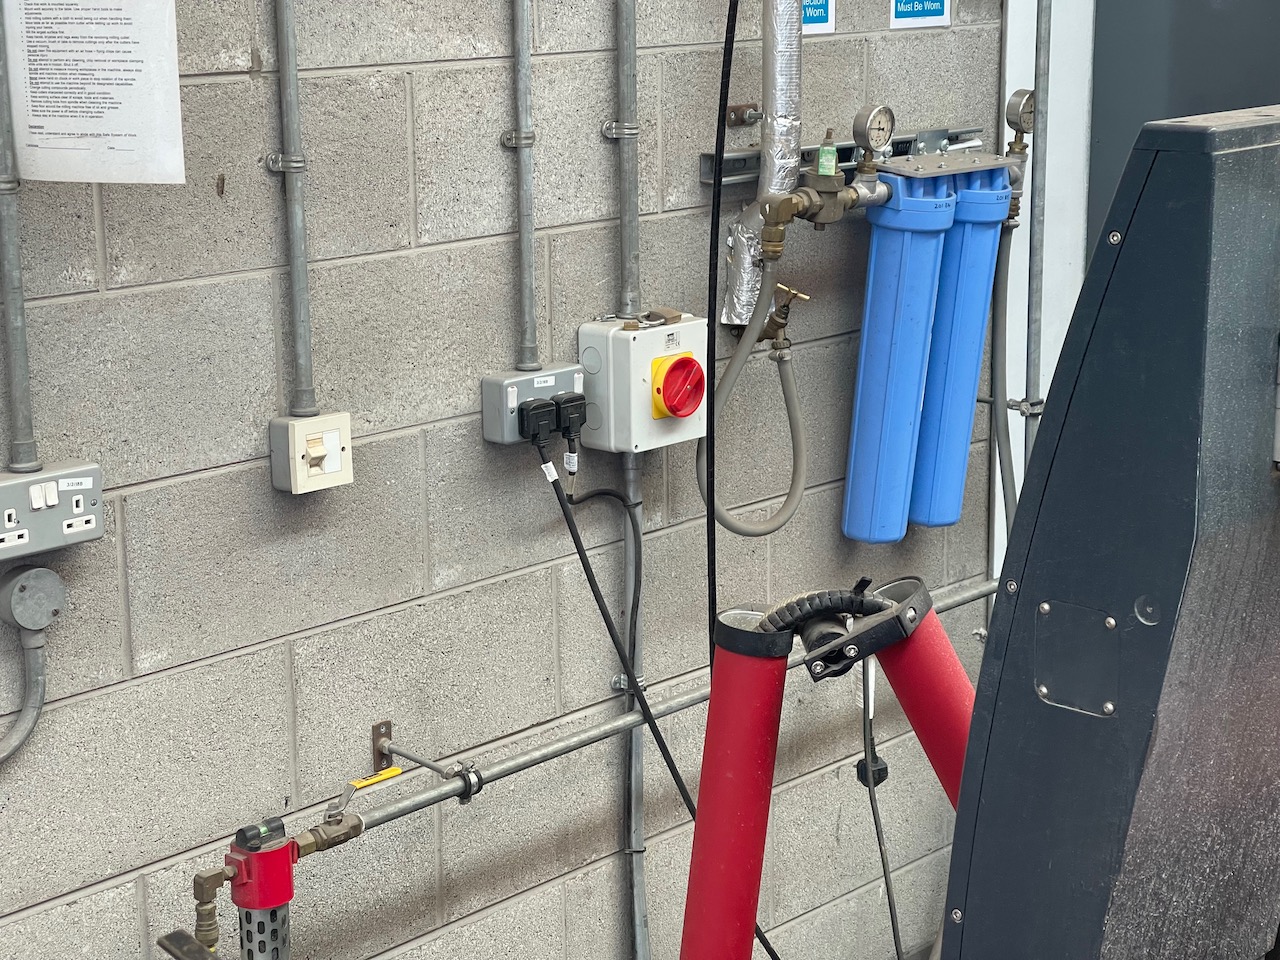
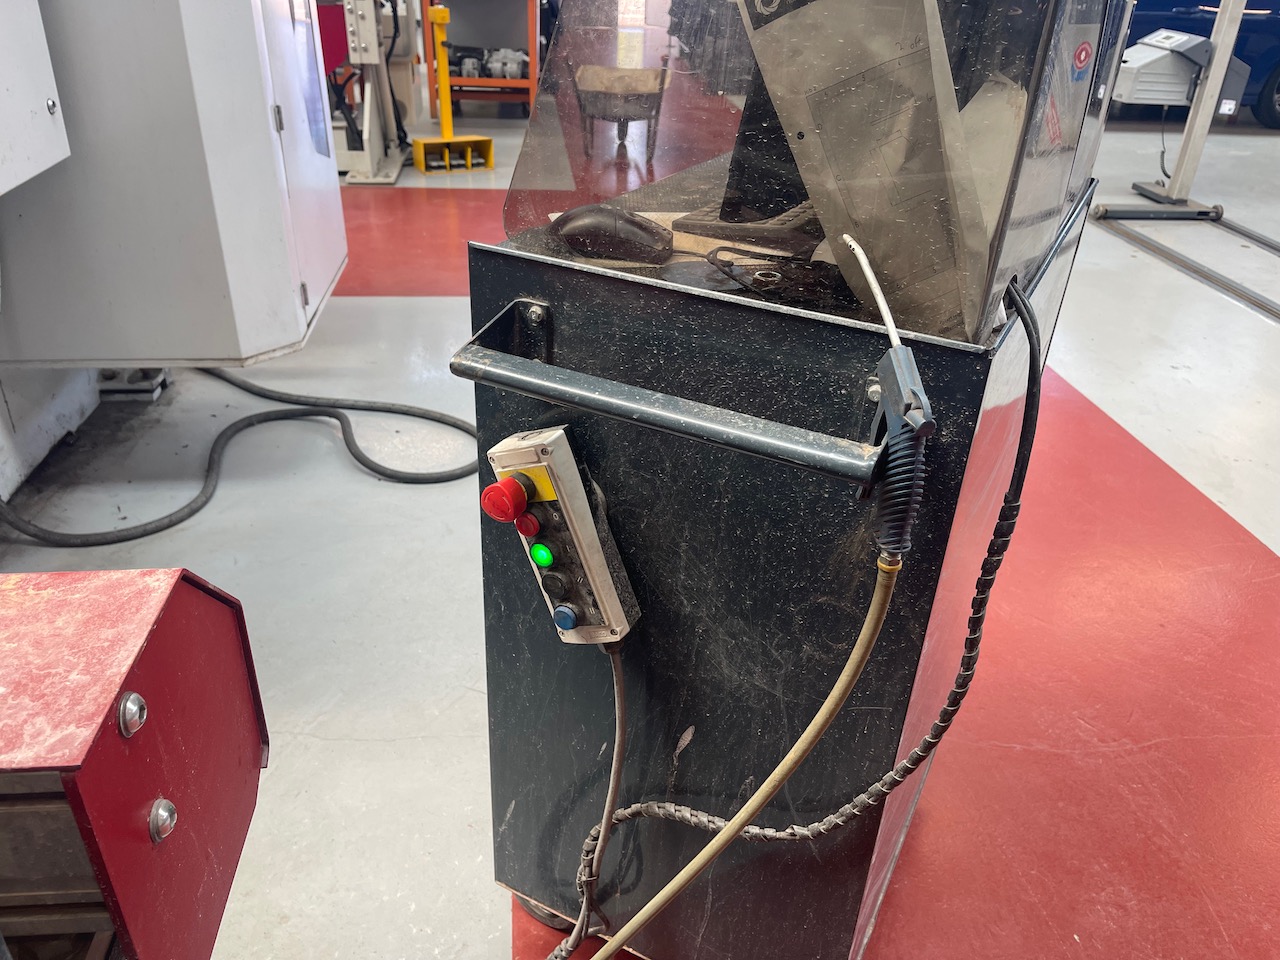
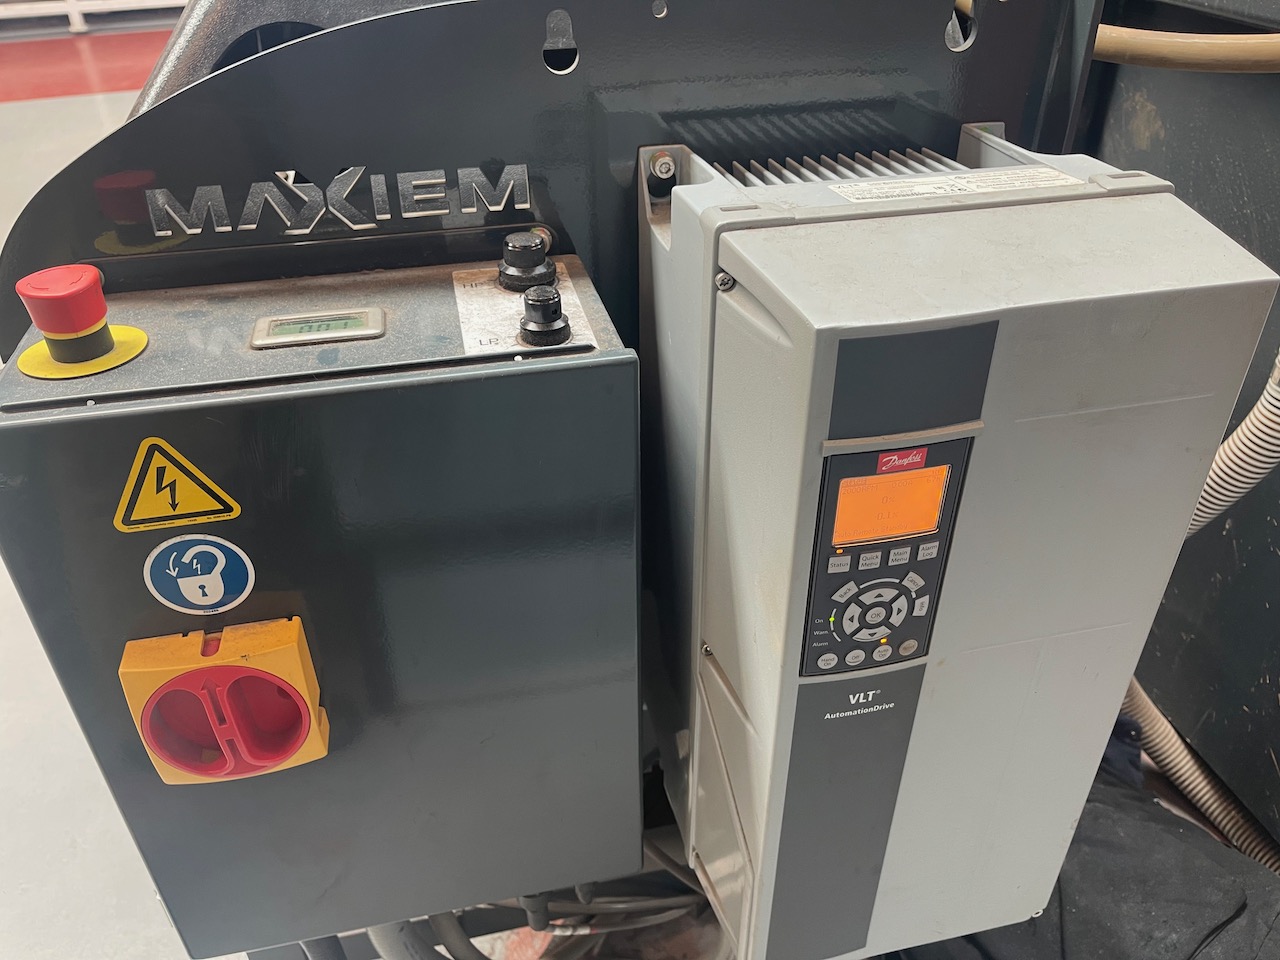
Turn on the red isolator switch and flick the switch on the side of the white box - and press the blue button on the white box.
Make sure the red emergency stop button is deactivated - and press the blue button
Over at the pump turn the red isolator switch on - make sure the dump valve lever is closed (open this to fill the water tank)
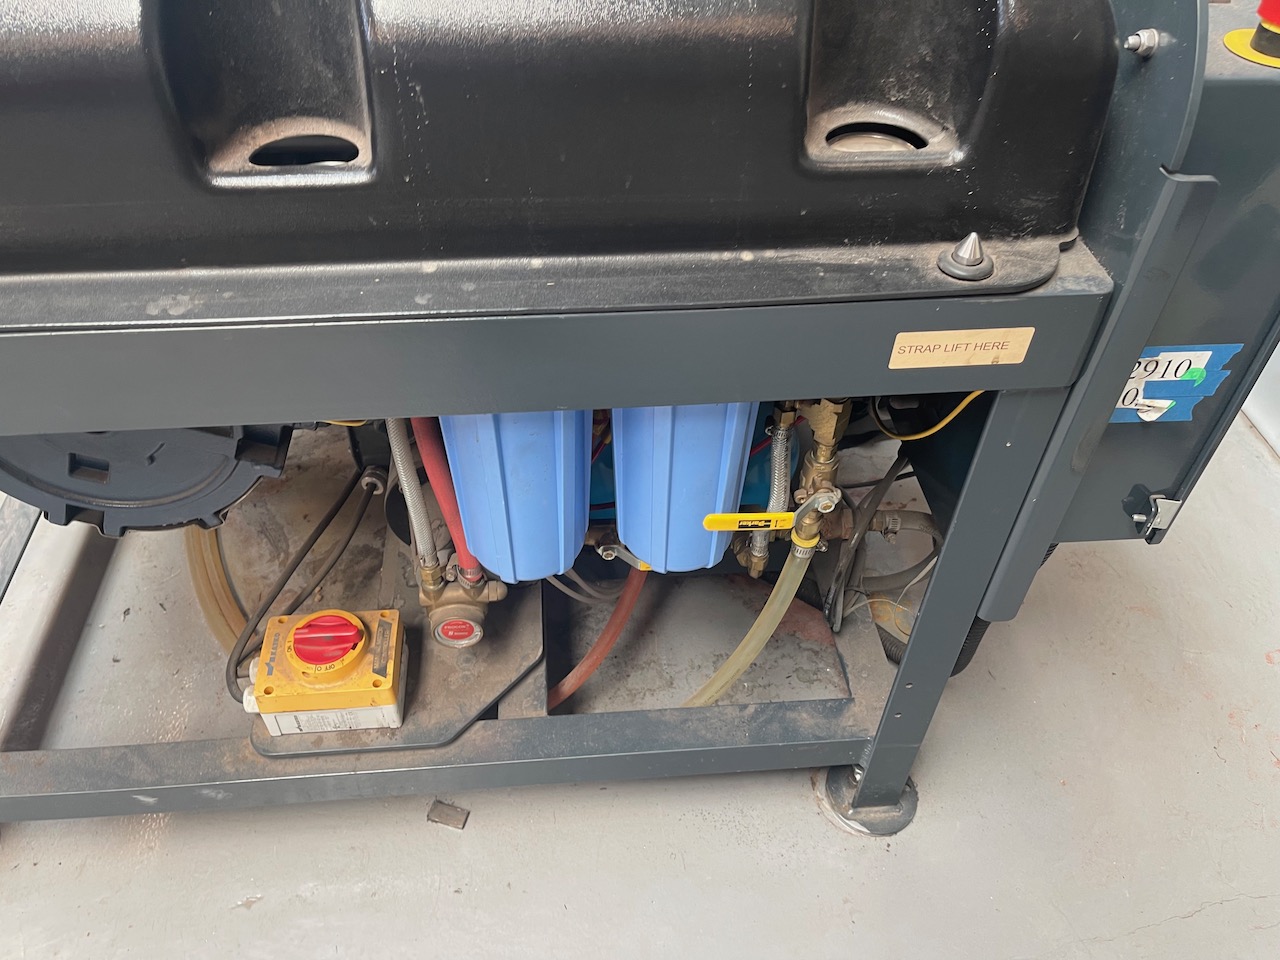
Around the side of the pump turn the red isolator switch on and the emergency stop button is deactivated
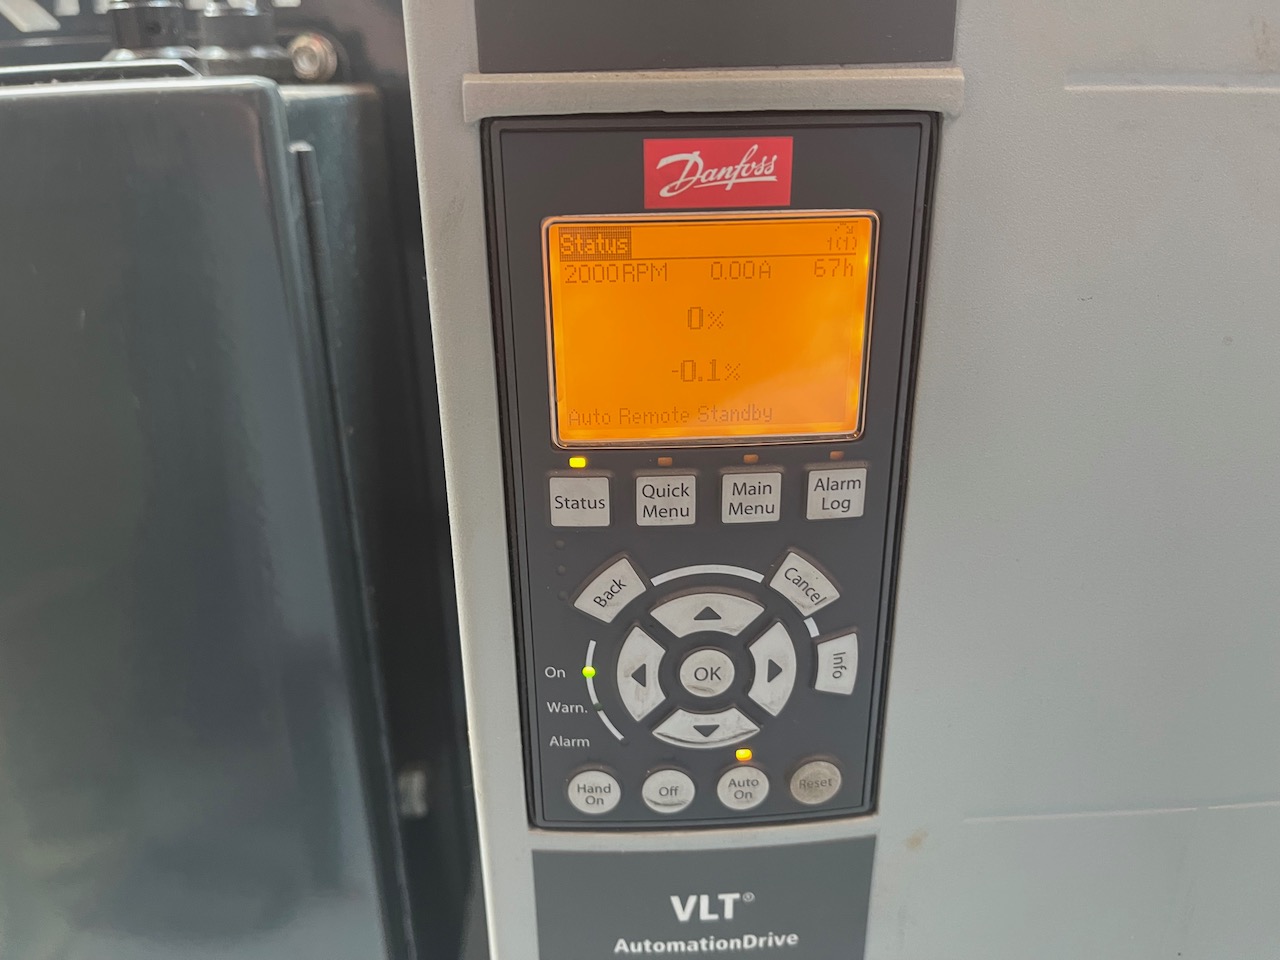
The pump display screen should display like the image below - you might need to press the reset button in the bottom right.
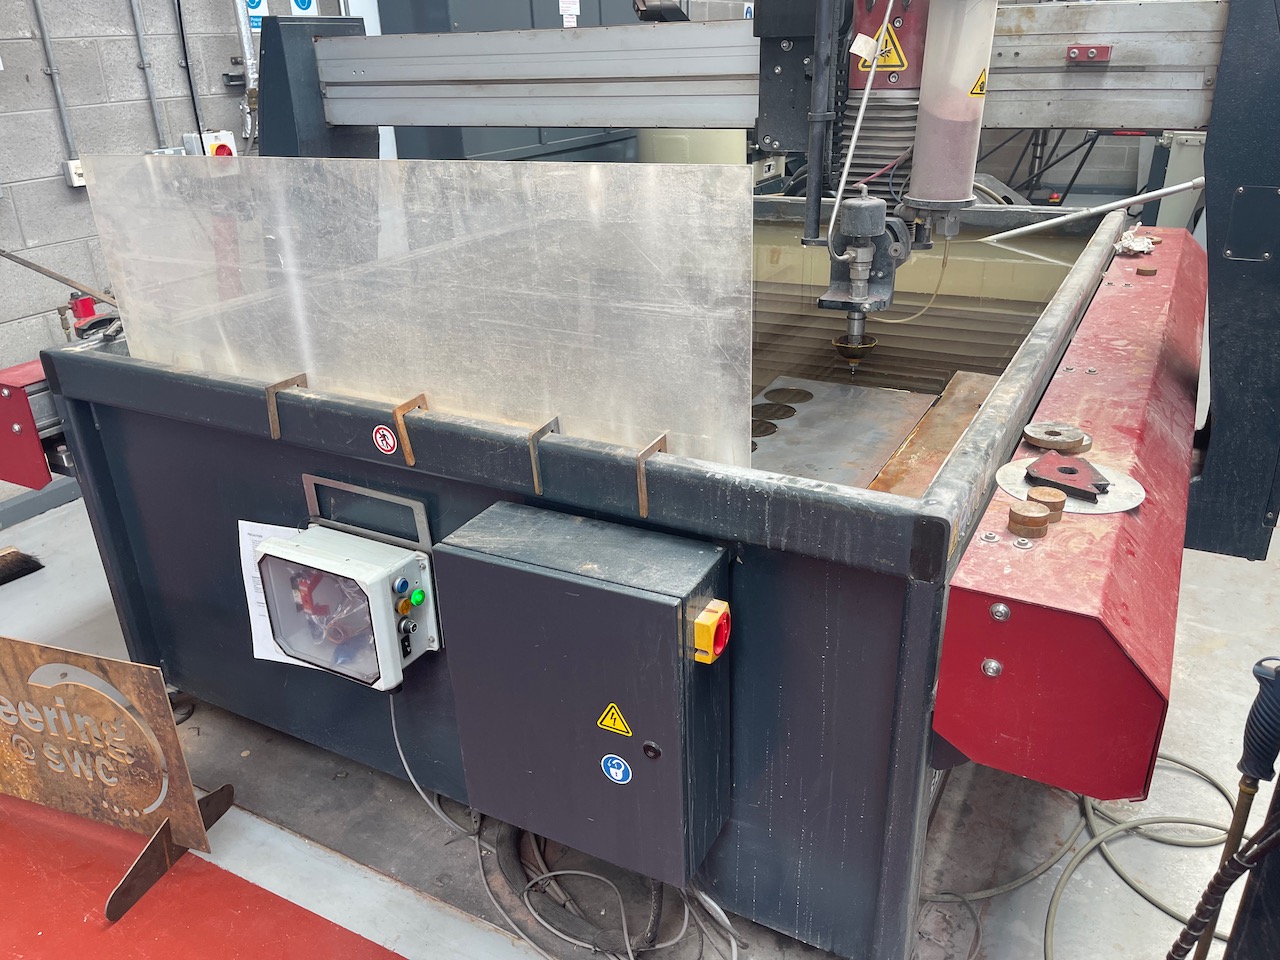
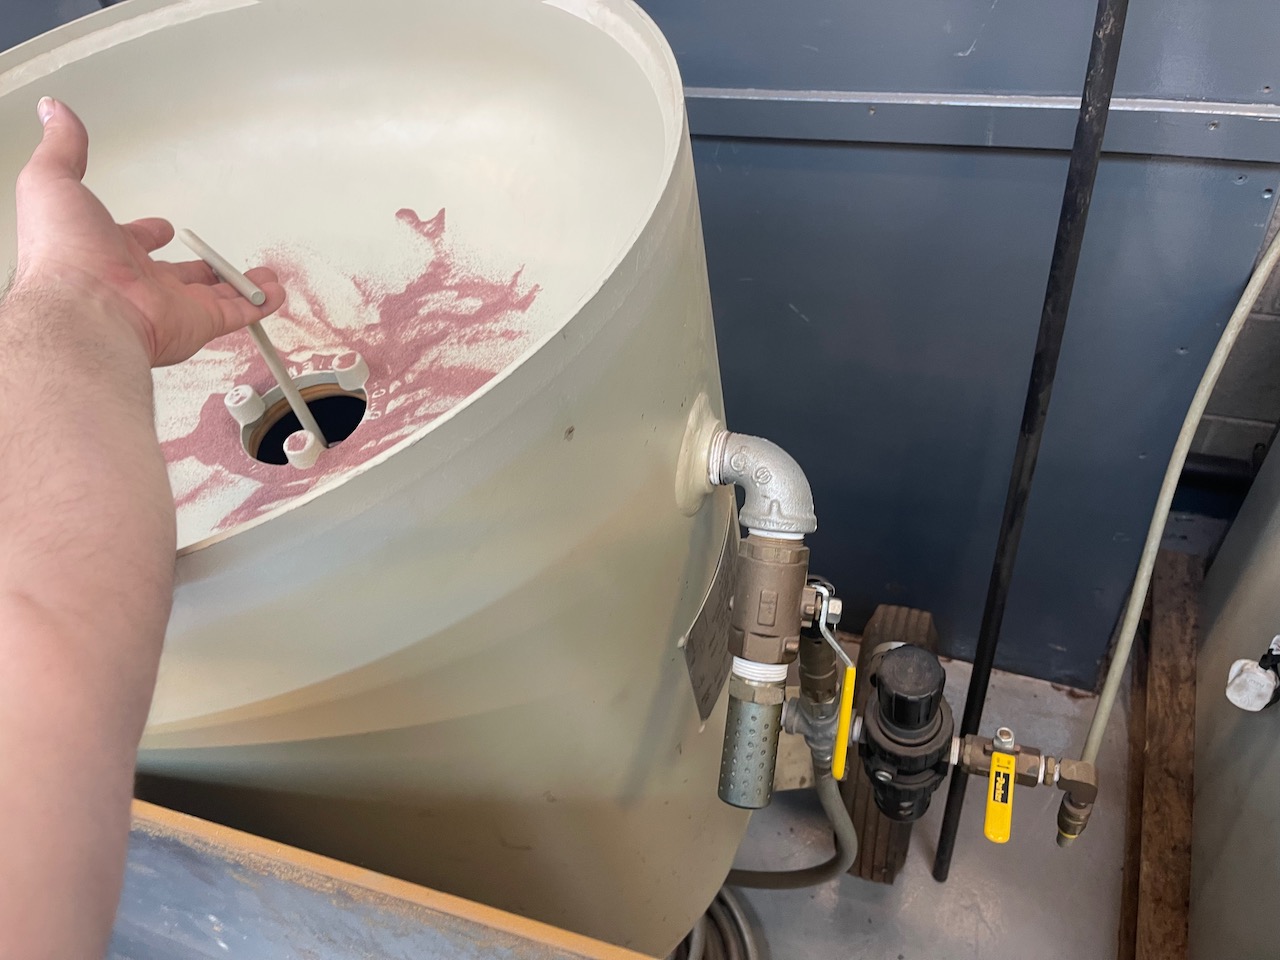
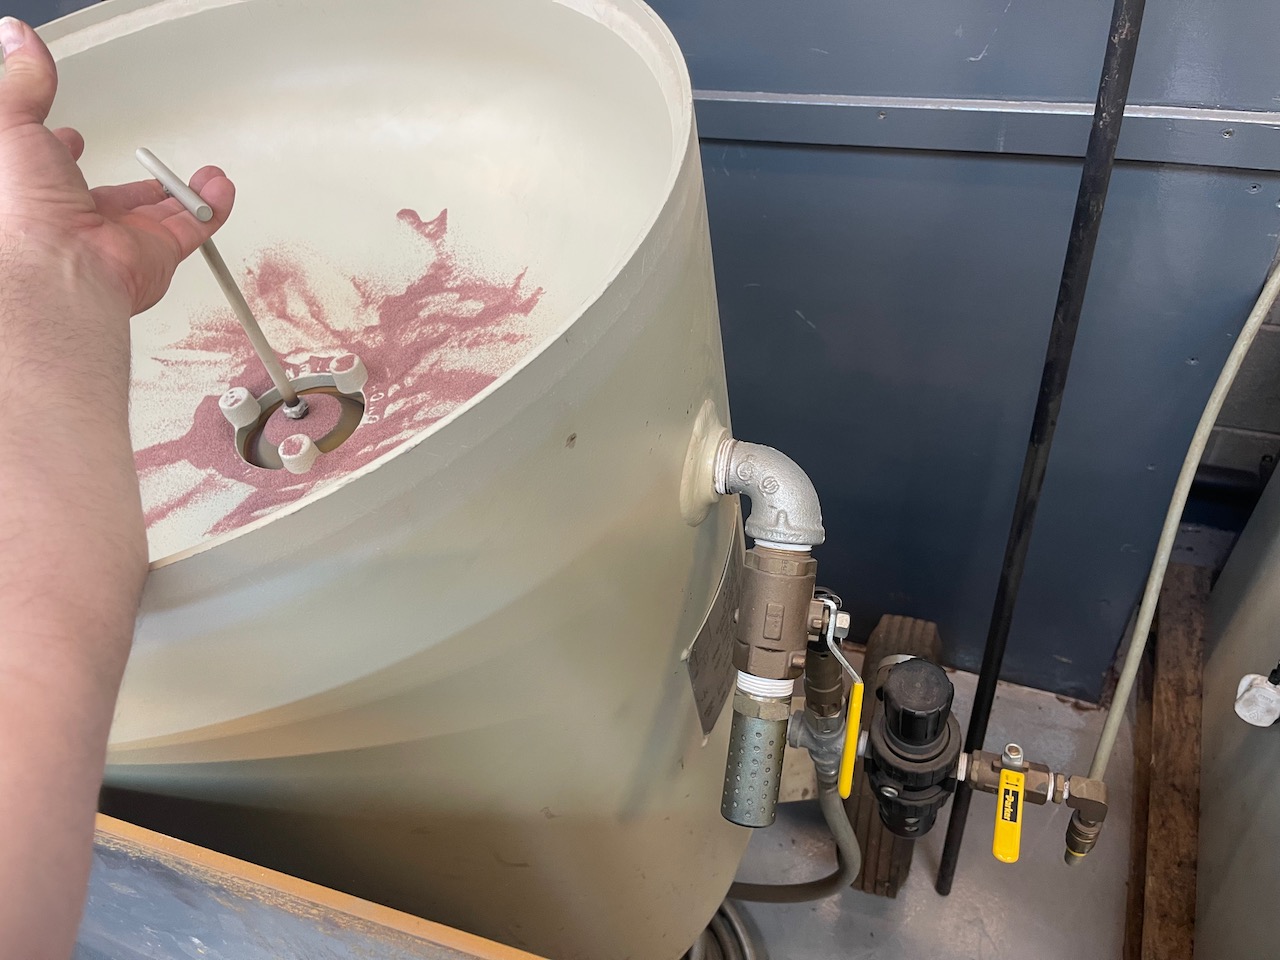
It's a good idea to add garnet to the hopper at this point - be sure to use a sharp scalpel or Stanley knife do not rip the bag, we don't want paper contaminating the garnet
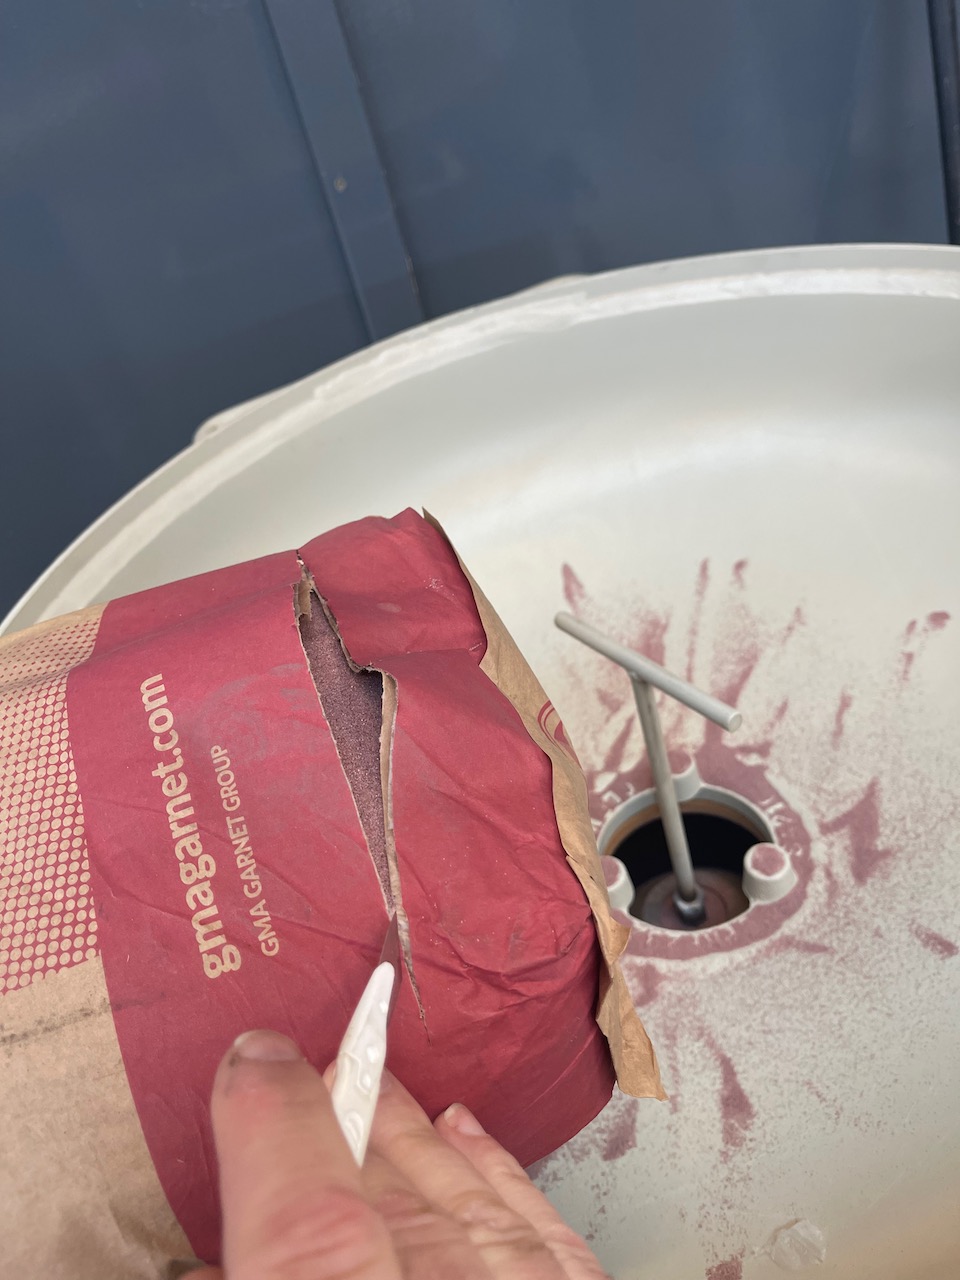
Empty the bag taking care not to get any contaminant into the hopper - push the garnet in
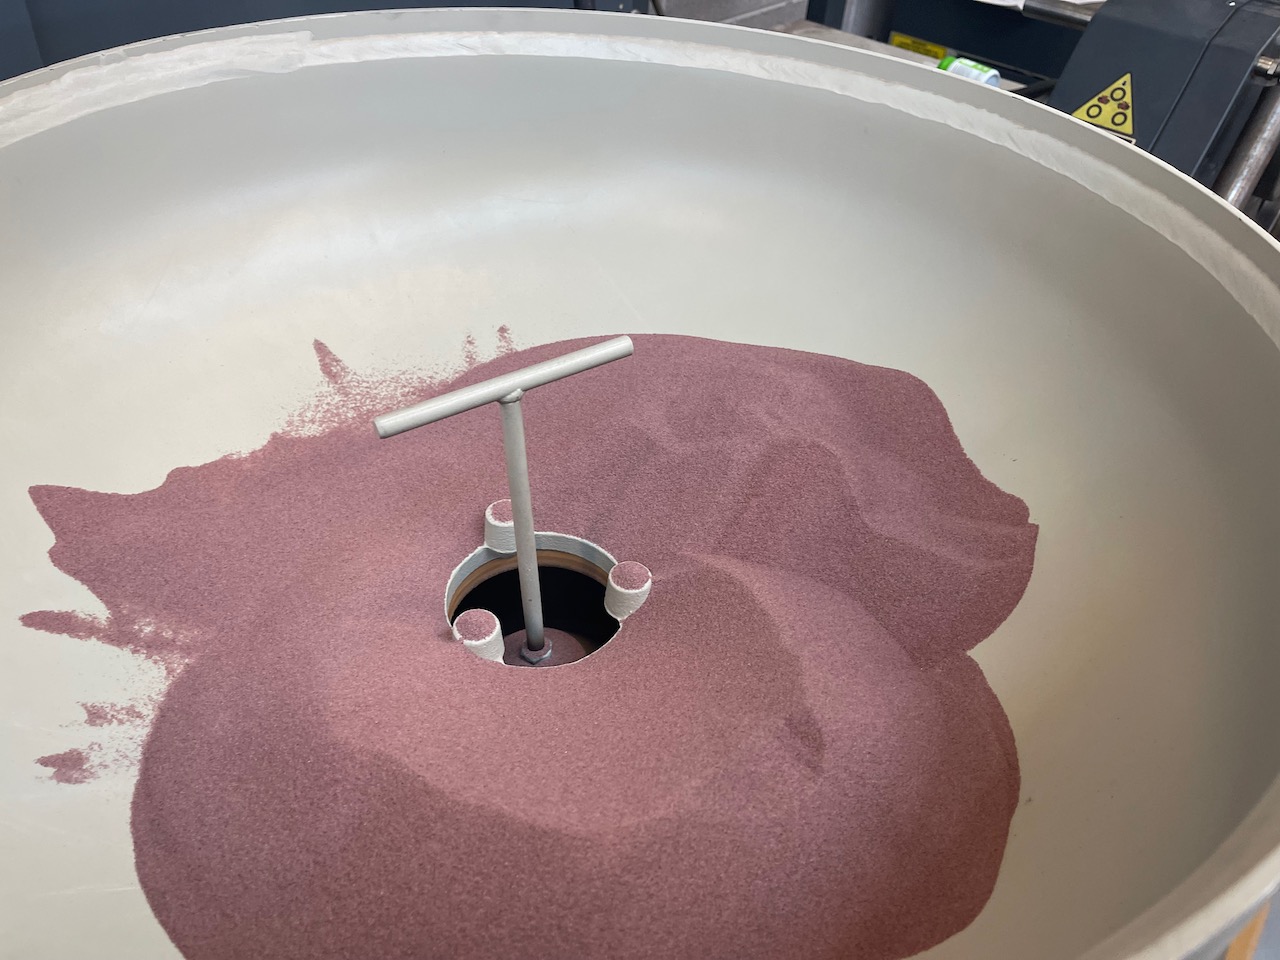
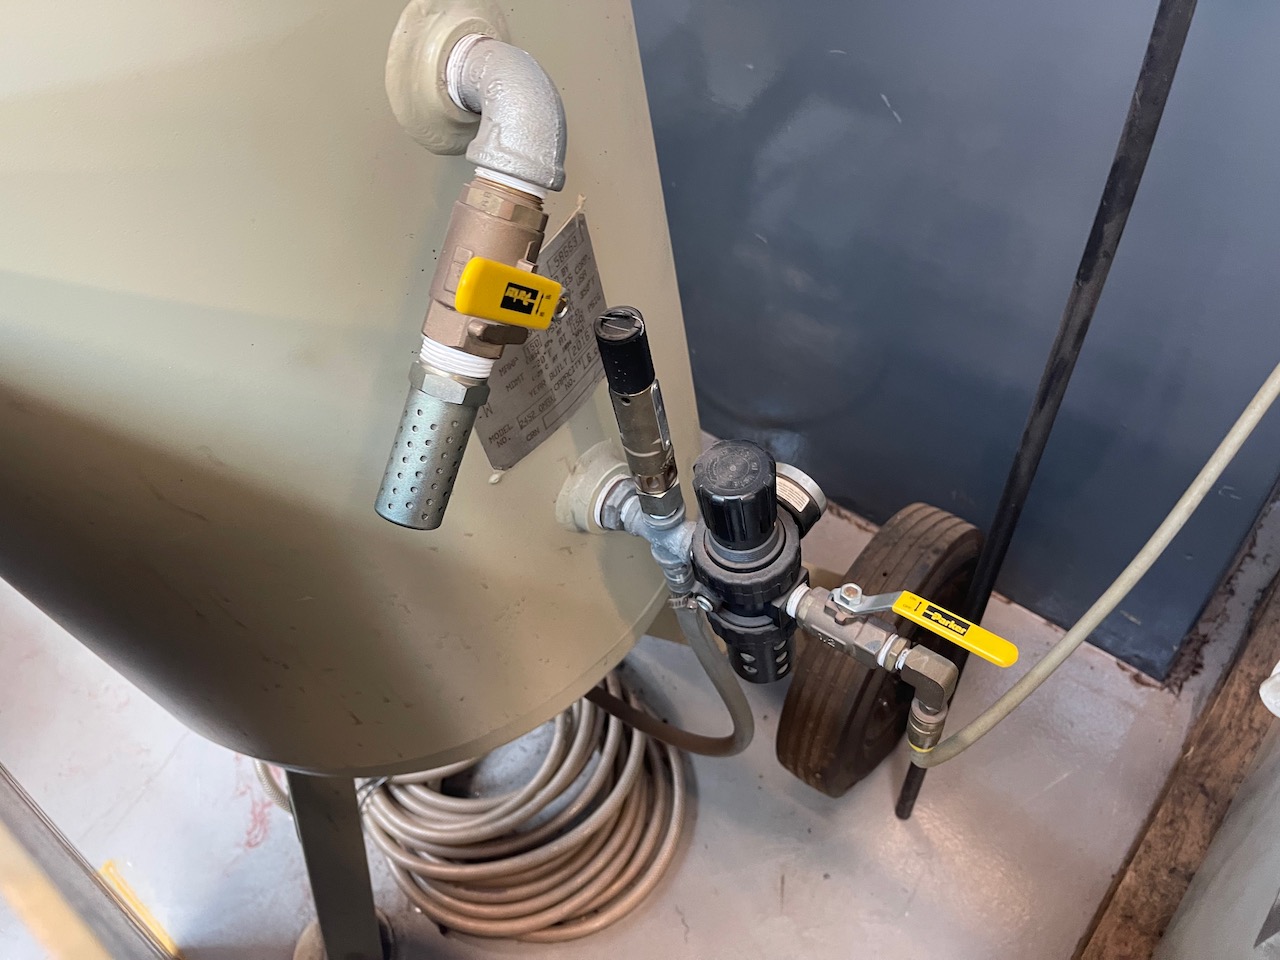
Lift the plunger/seal - close the leak valve and open the air pressure to the hopper while holding the plunger up.
The water jet cutter is now ready to warm up - we will run the water only at low pressure for 60 sec and high pressure for 60 sec - and with garnet for 10 sec - I will go through this procedure in a bit - for now let's look how we set up parts for cutting.

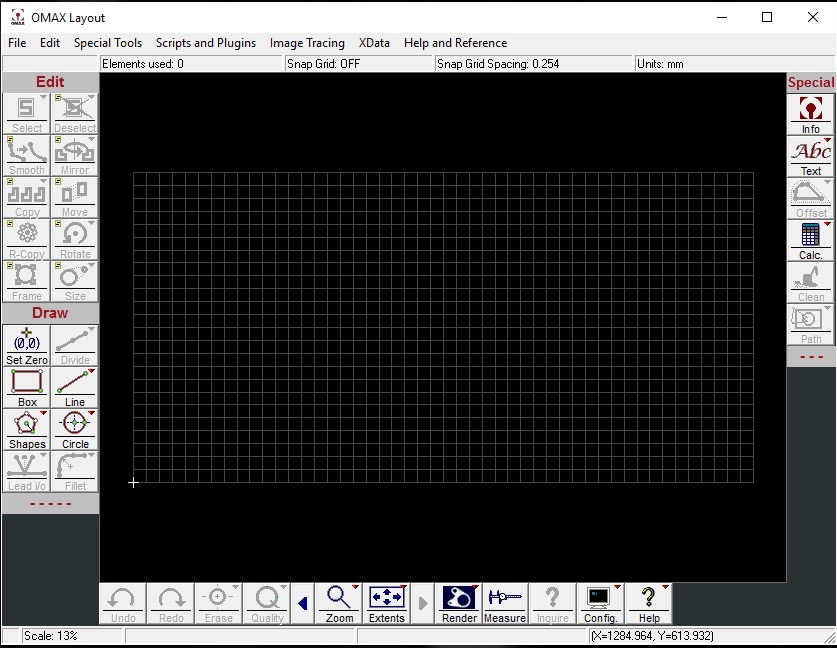
OMax software - OMax Layout and OMax Make

OMAX Layout and OMAX Make are two software packages that are used to setup water jet cutting files.
Lets start with OMAX Layout - this is a pre-processor for the water jet cutter. It allows you to set up the cutting parameters and the cutting path for the water jet cutter.
First step is to import our CAD file into OMAX Layout. DXF is the preferred format to use.
Go >File>Import from other CAD
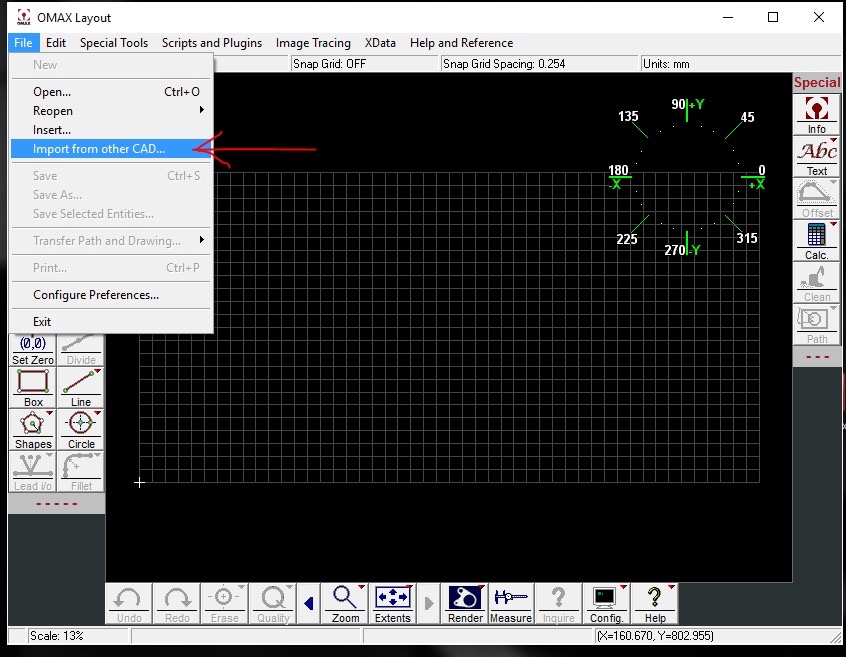
Navigate to where the file is saved (I do prefer to copy it to a location on the PC before completing this step)
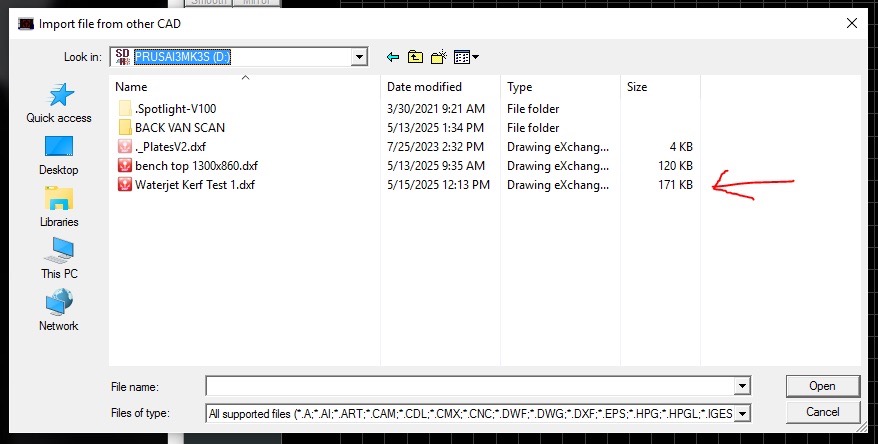
For now it's on the SD card. Select the file and click open.
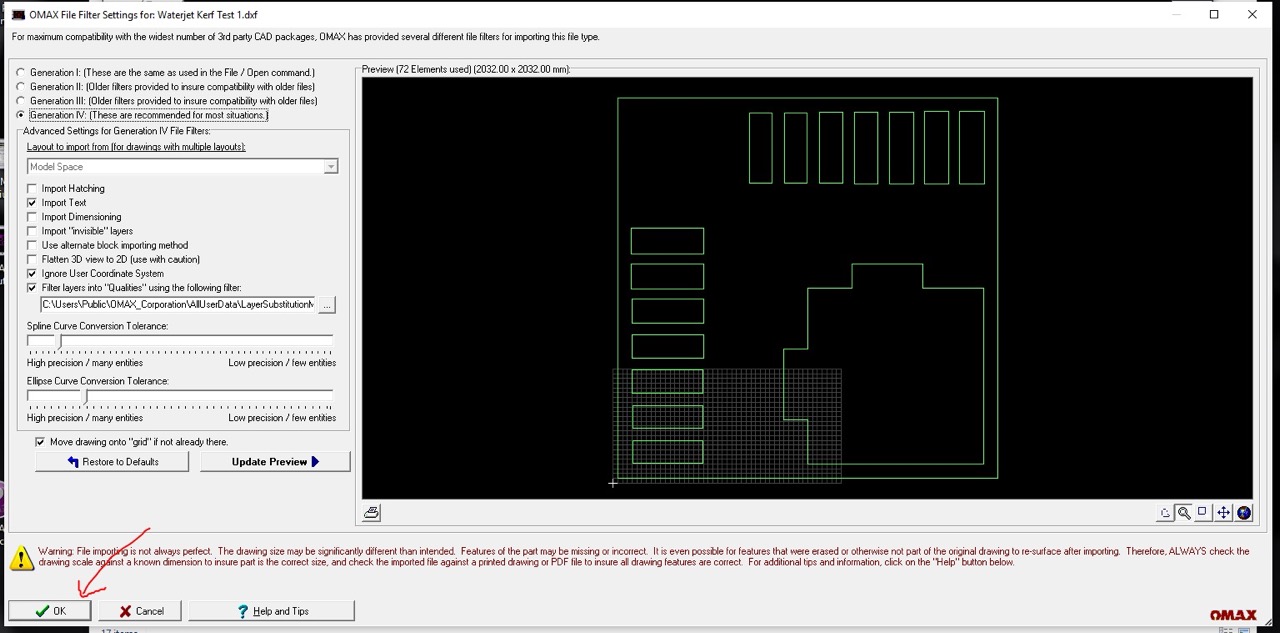
You should see a preview in the OMAX filter settings window - if all looks good you should be able to click OK
You should now see the file in the OMAX Layout window.
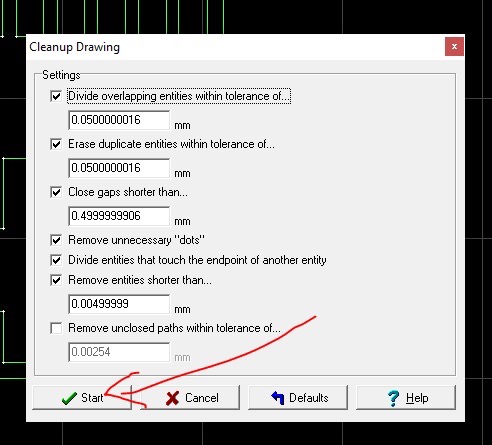
We can then go to >Special Tools > Cleanup Drawing
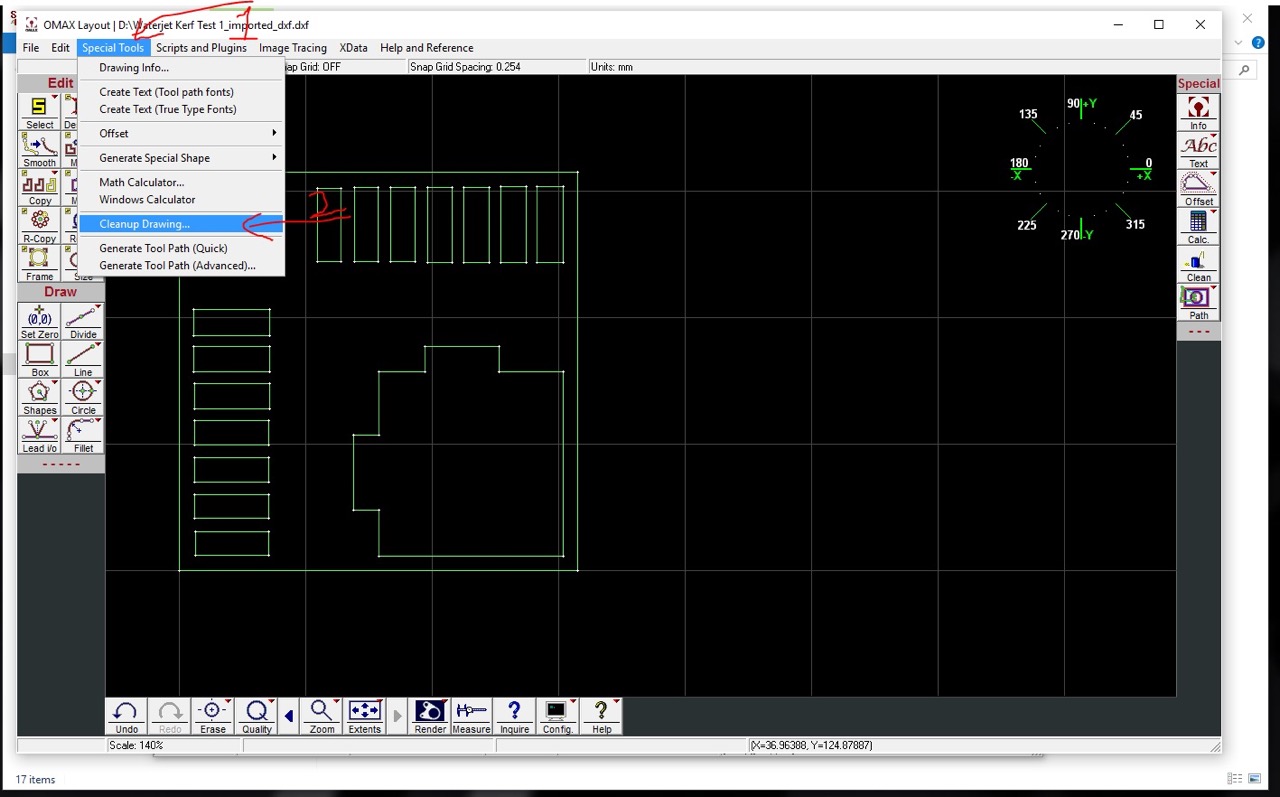
I tend to leave everything at default and just click OK - it should do what was asked of it
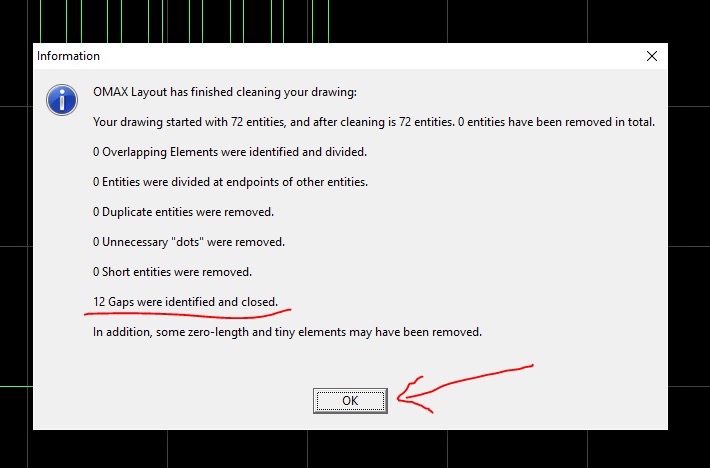
In my case 12 gaps were found and closed
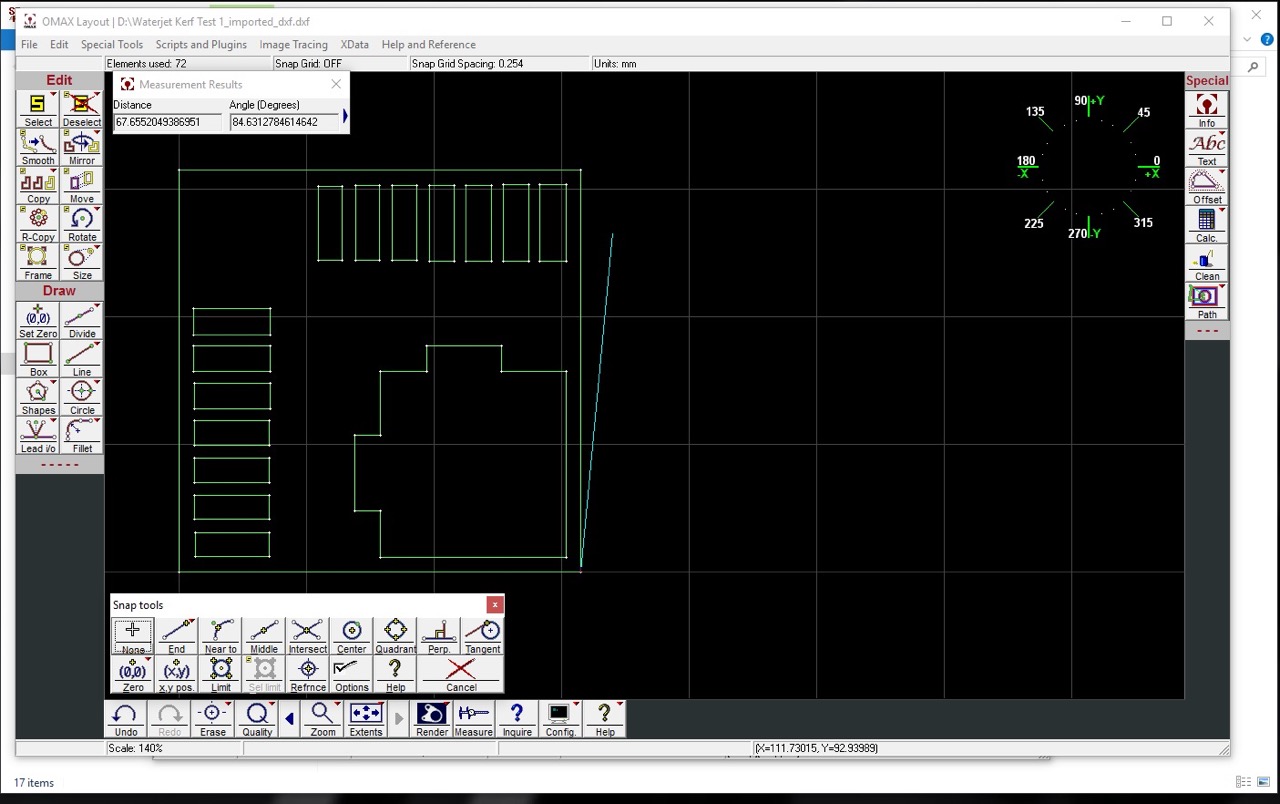
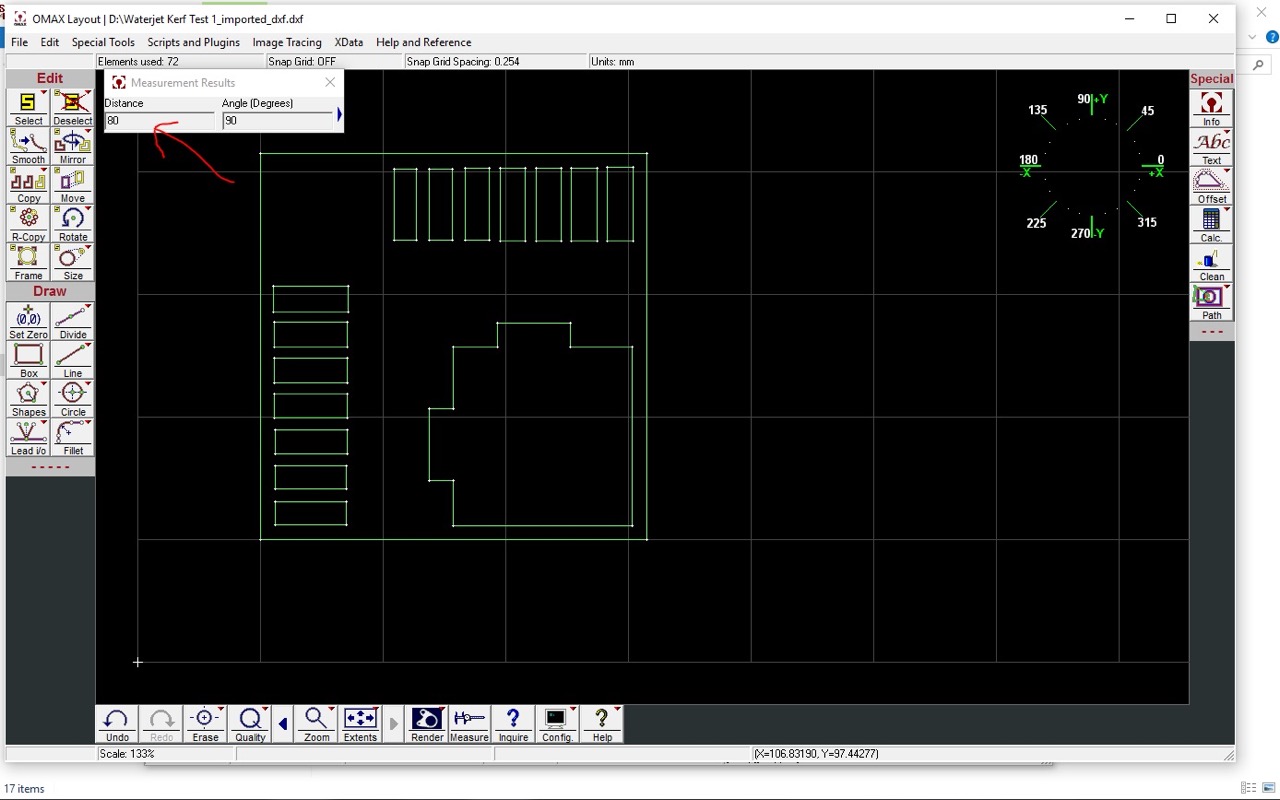
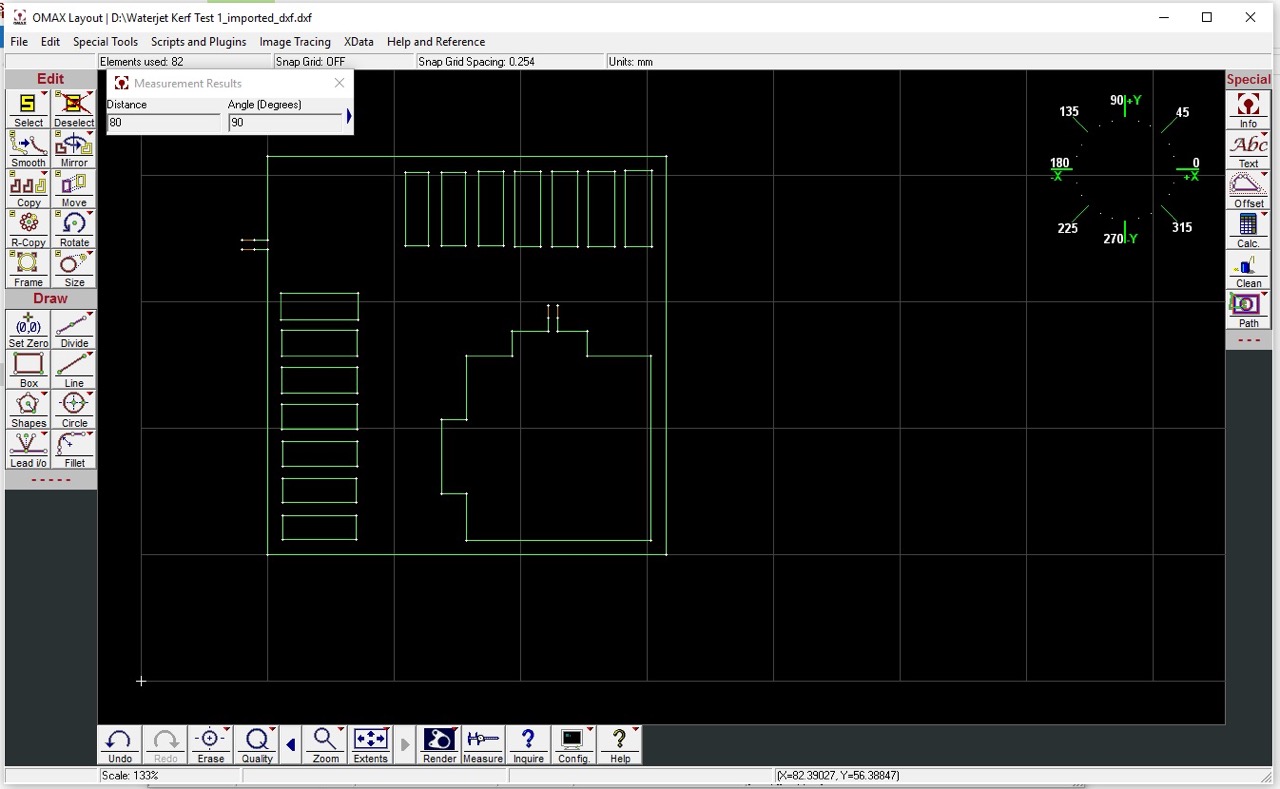
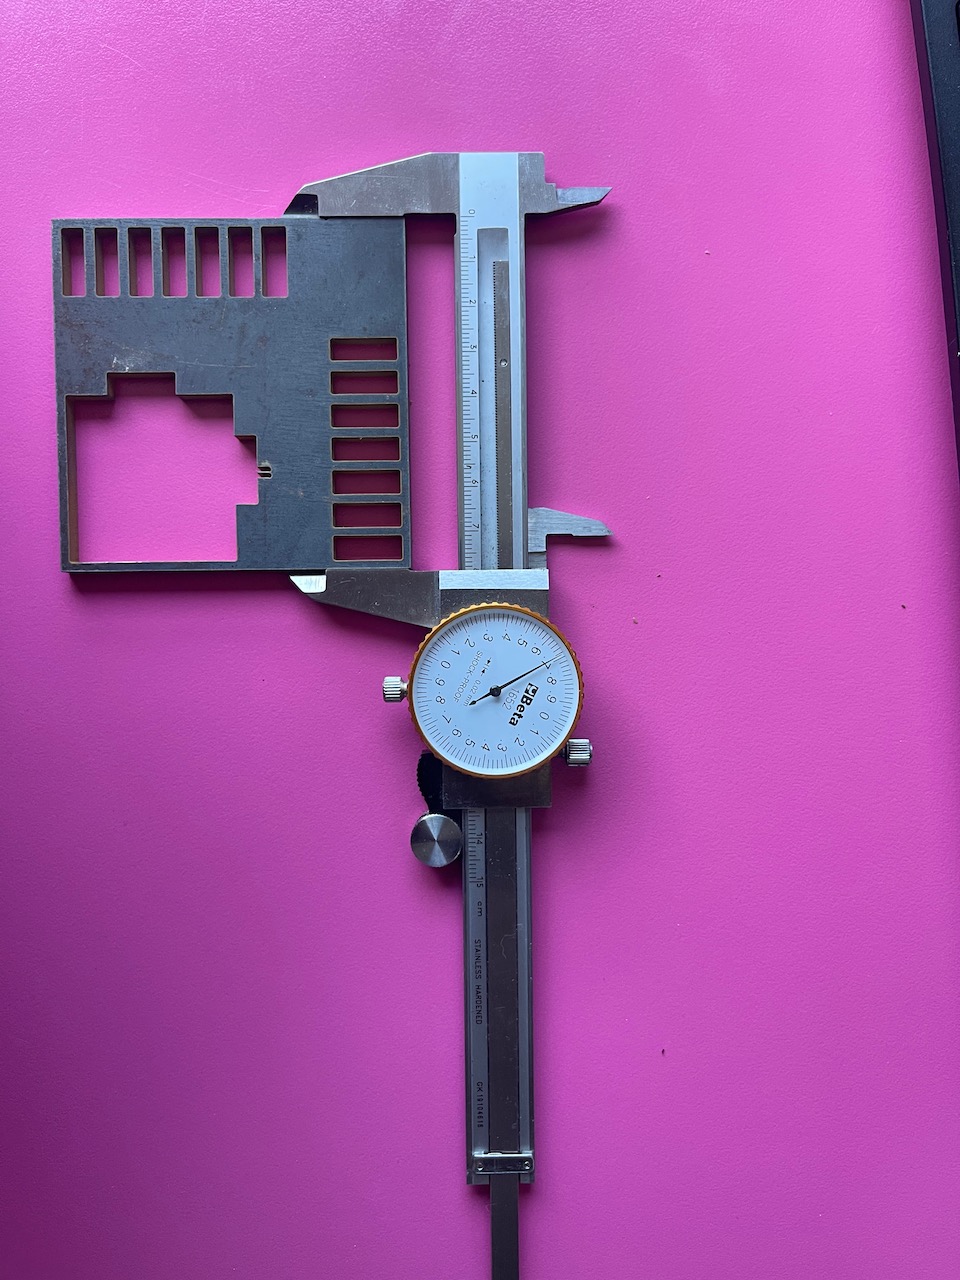
Next I'm going to check measurement to confirm scale of the part. See process below.
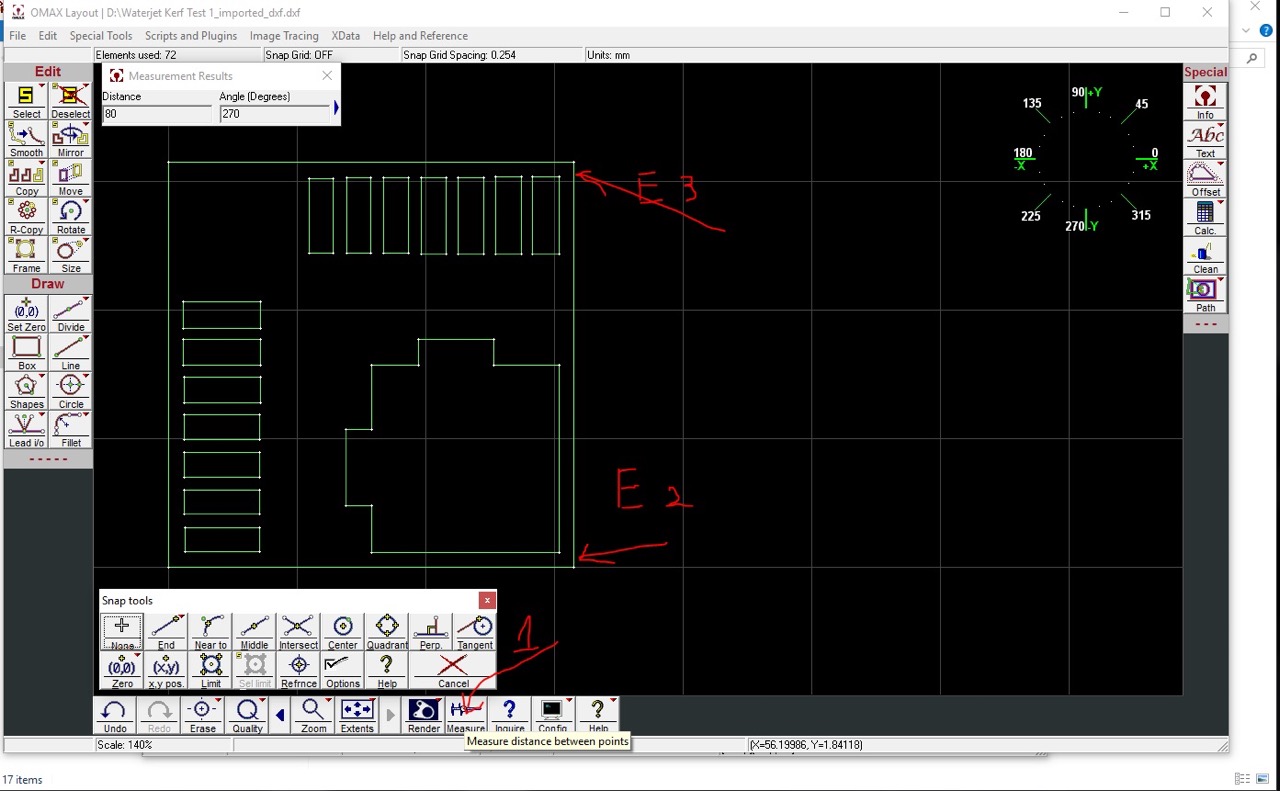
Looks good, its 80mm same as the CAD file.
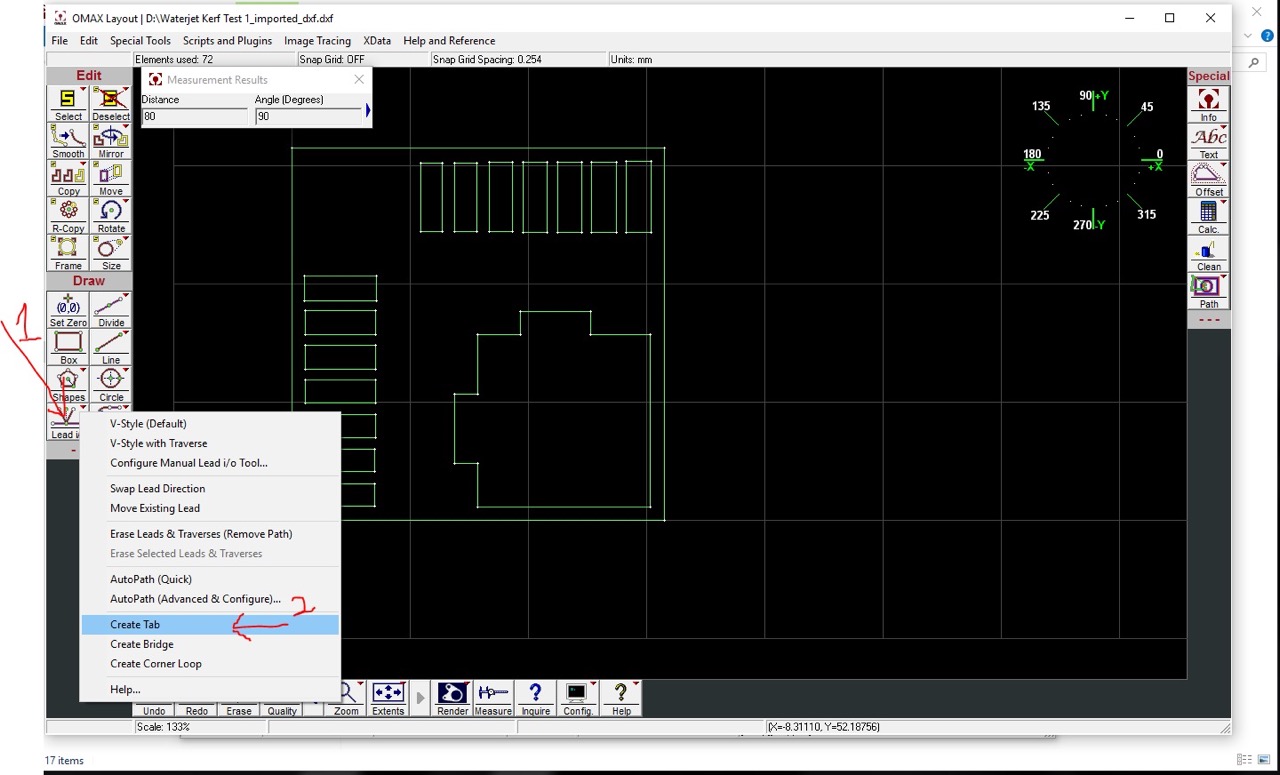
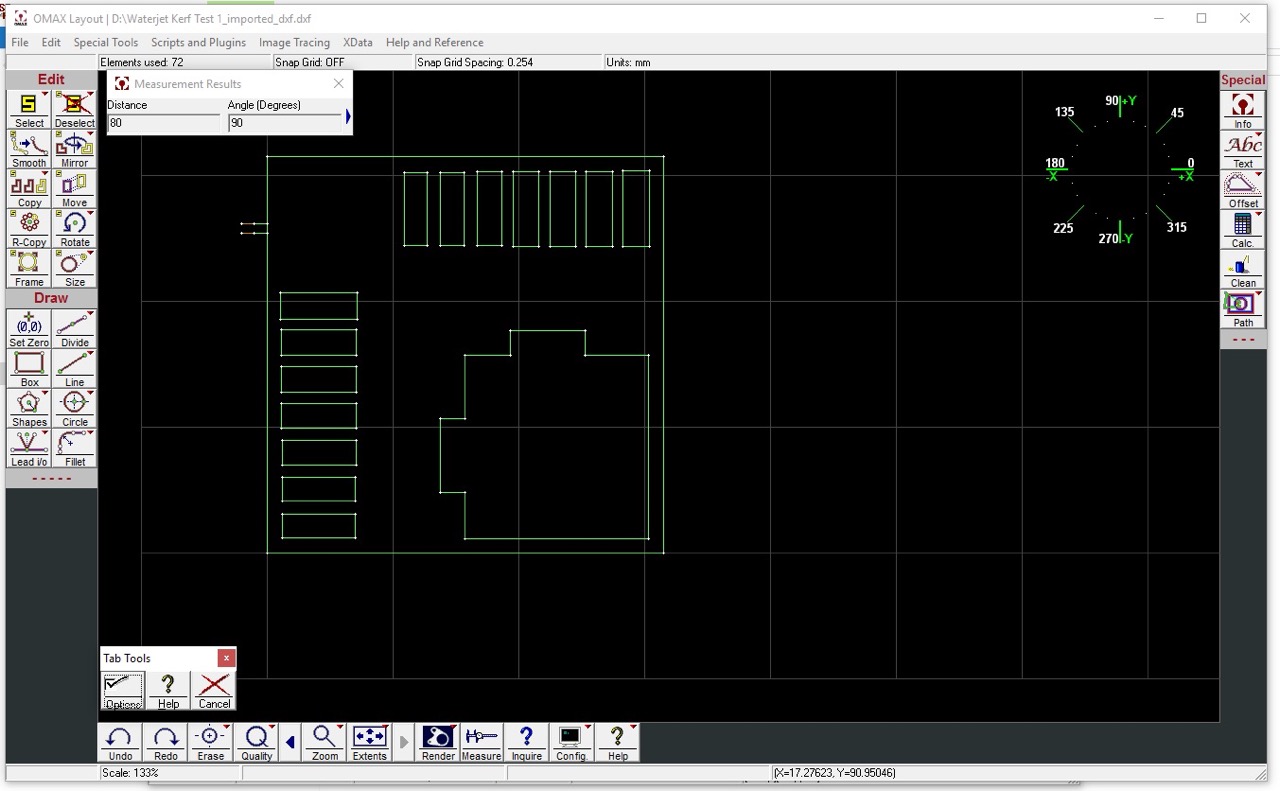
Next we need to add some tabs to hold the part and prevent it from falling to the bottom of the water tank see process below.
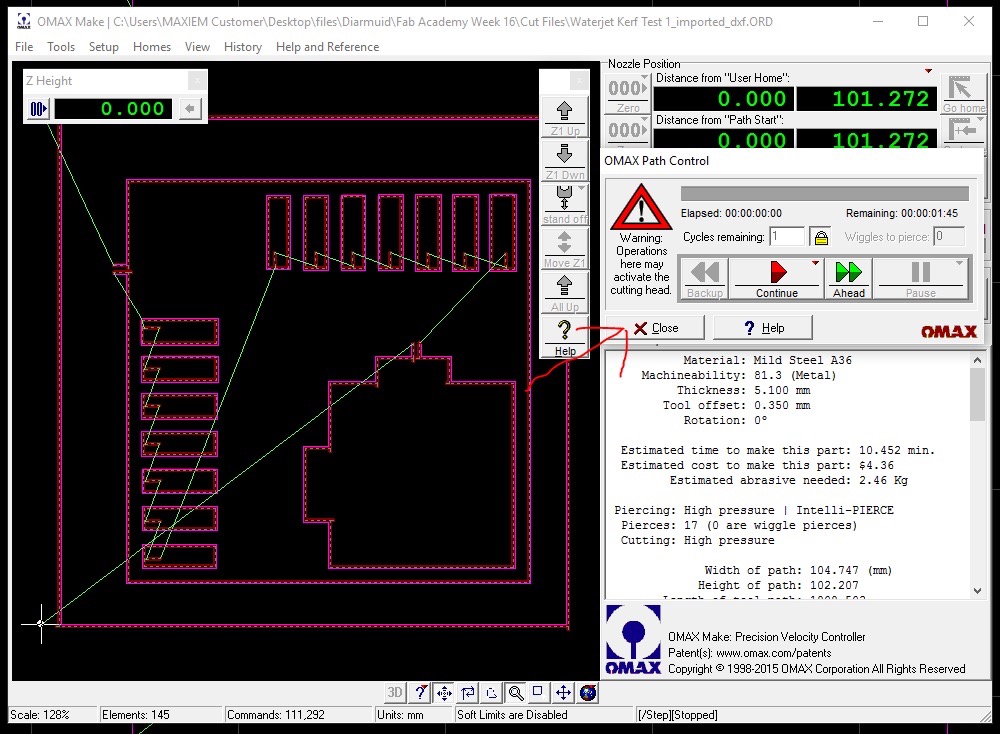
Next we can set the cut quality - for most parts we will use 3 - see below - then we can run auto path
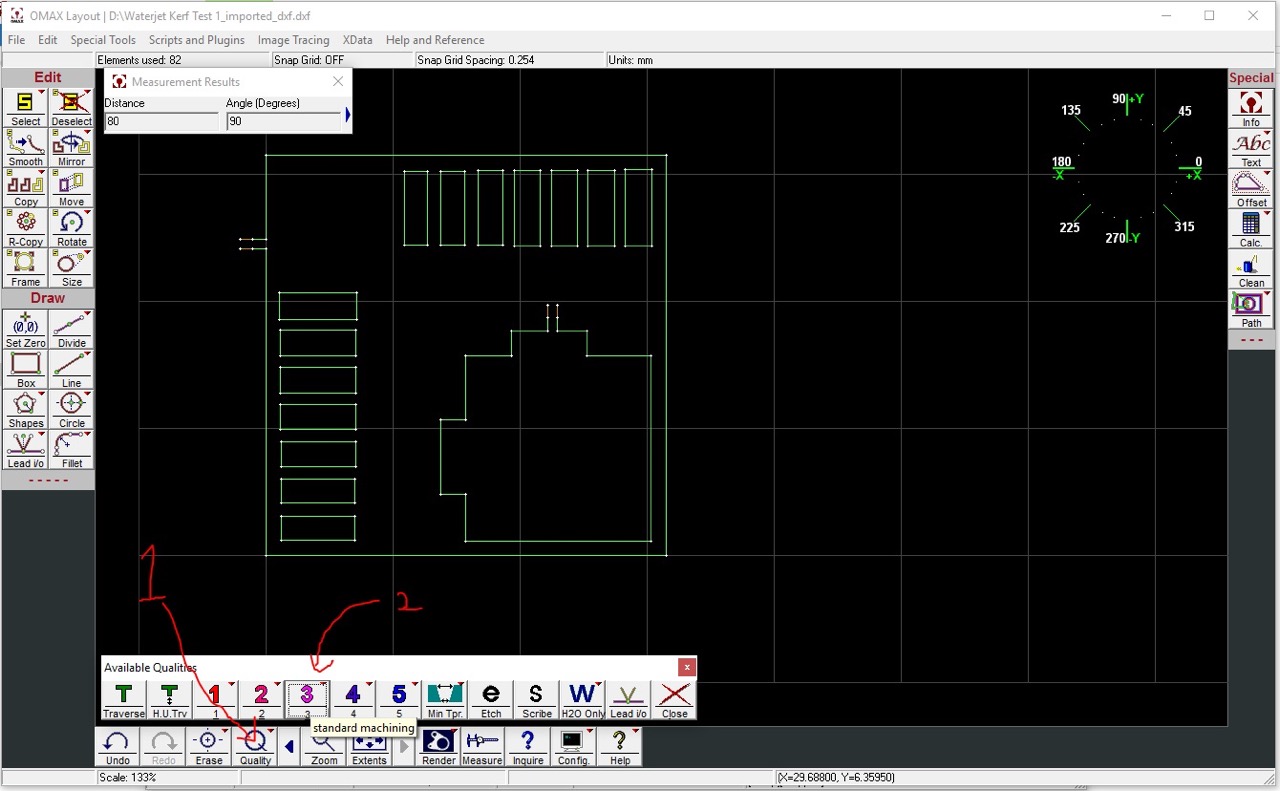
Autopath (quick) will create cutting paths and traverse or travel lines automatically
Note the colour change of the cut lines lead ins and outs and the traverse lines
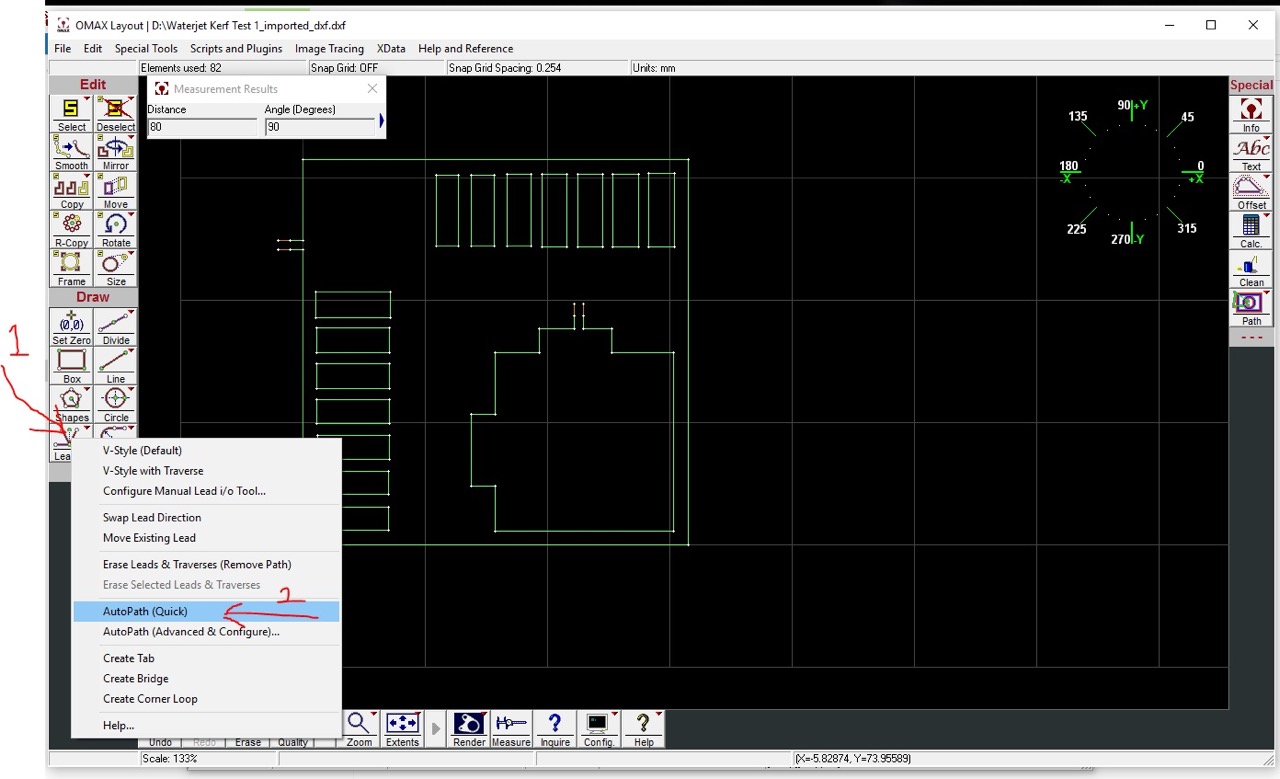
Next we need to generate the cutting tool path follow the steps below.
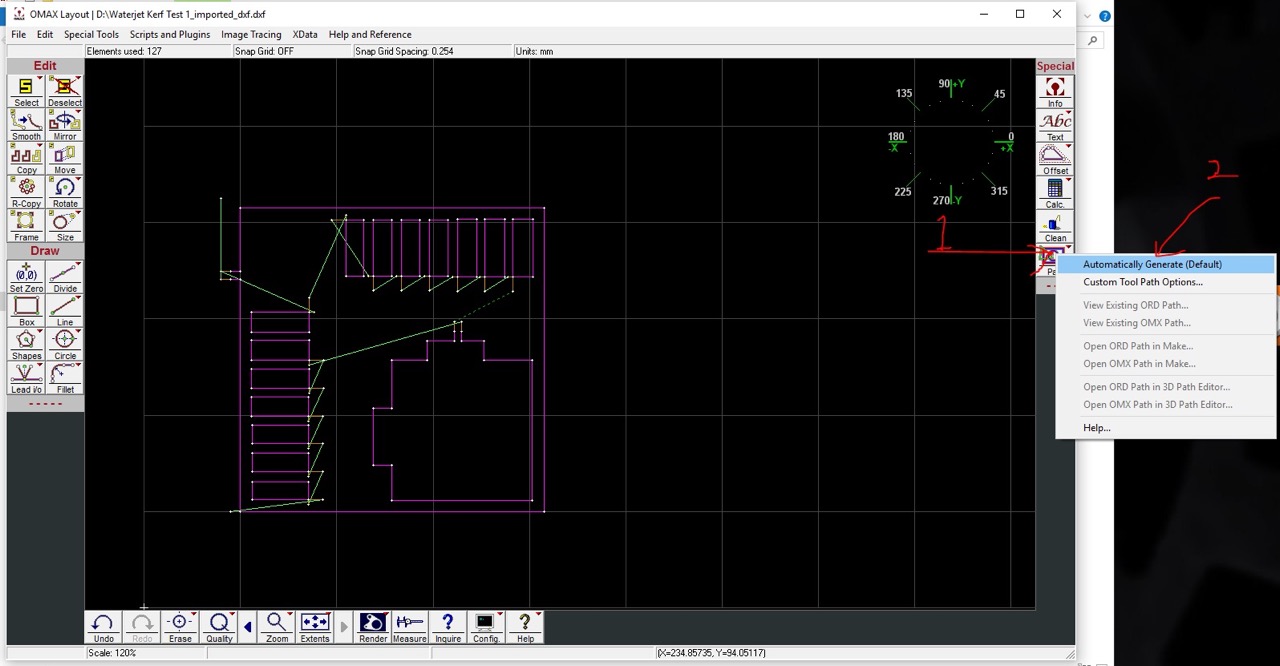
It is now asking for a start point - select the lower left point of the green line as the start point
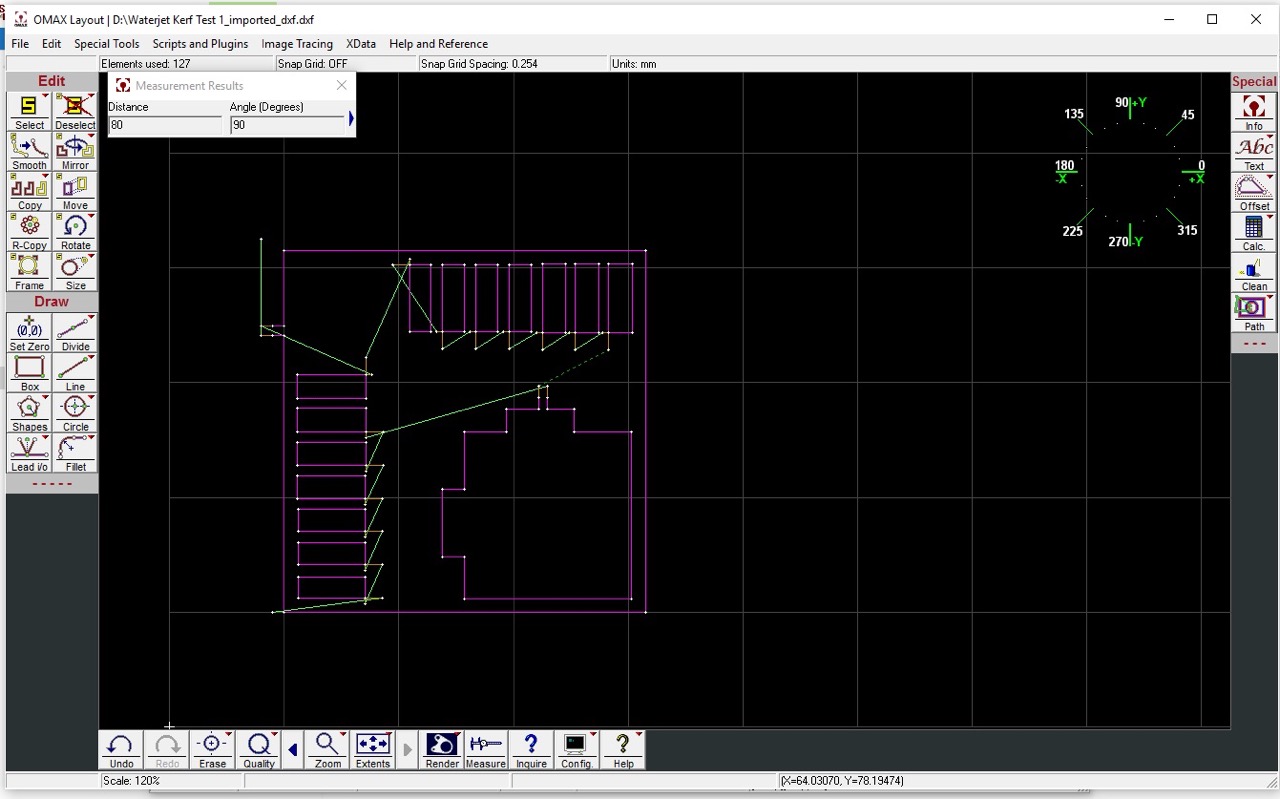
Cutting paths will now be generated.
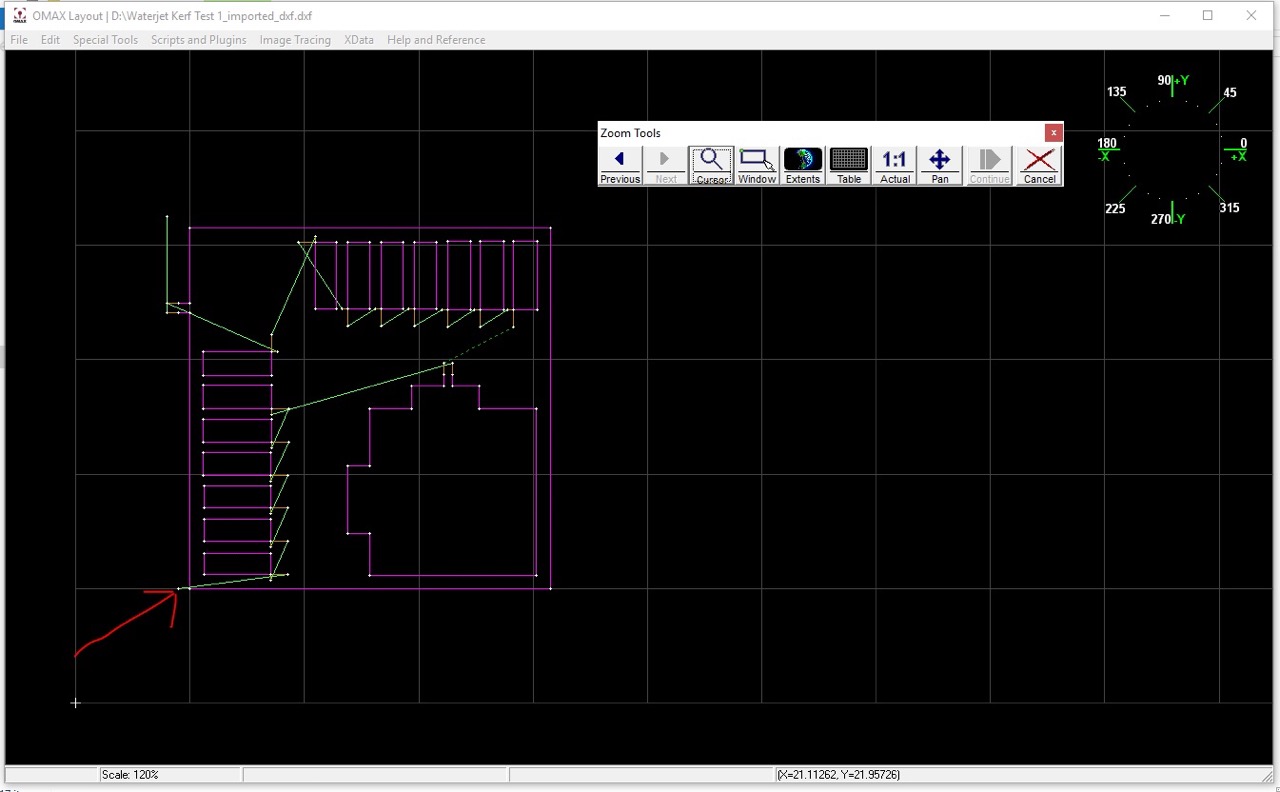
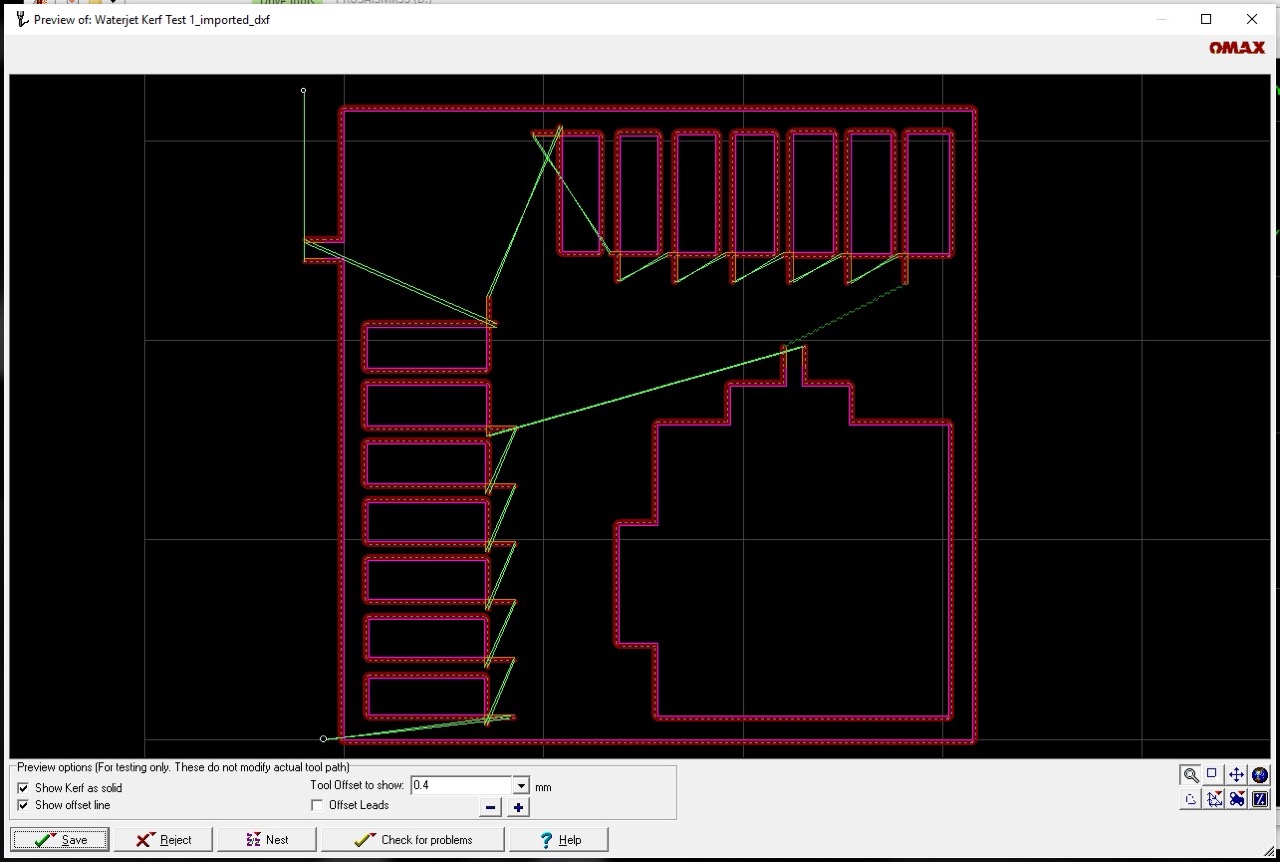
We will see a preview on screen - note the cut line is indicated by a thicker line and it has also offset to one side of the line - make sure it's on the correct side.
If you're happy click save (this will save a new file for OMAX Make in the same location as the CAD file) - don't forget to also save the CAD file in OMAX Layout
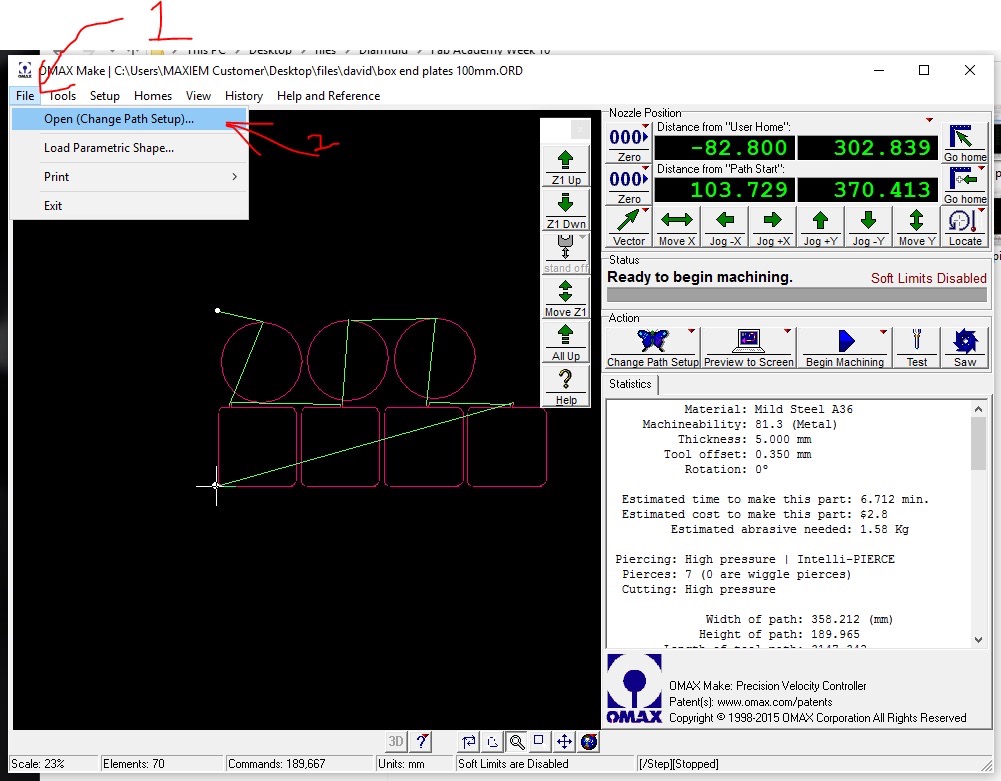
We can now open OMAX Make
the last opened file will be displayed by default
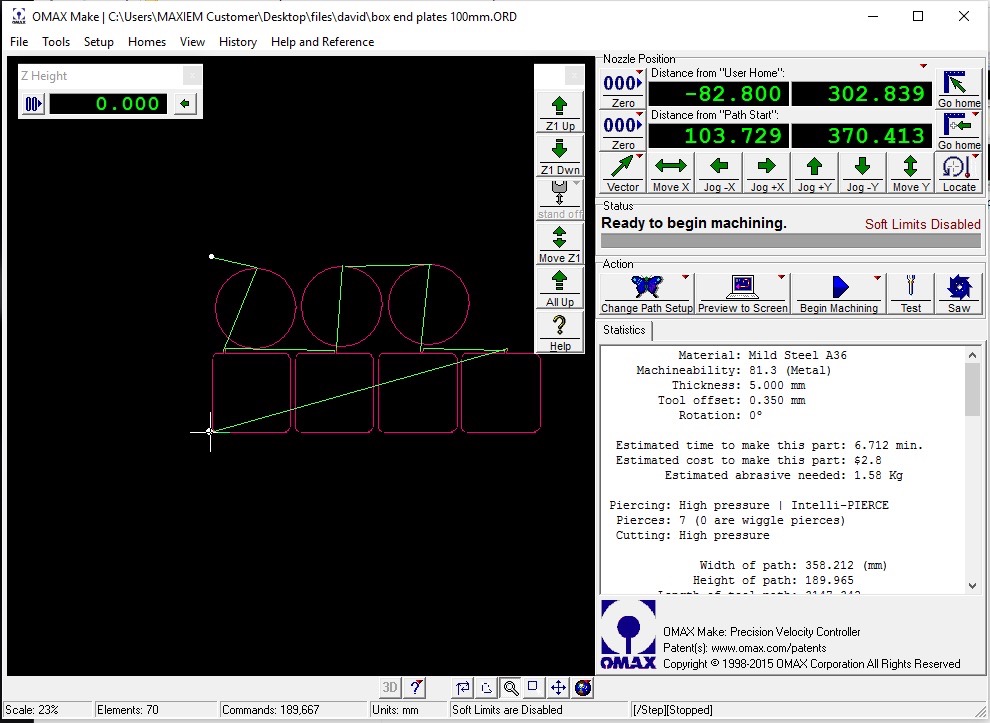
Go >File>Open and select the make file you just saved in the previous step.
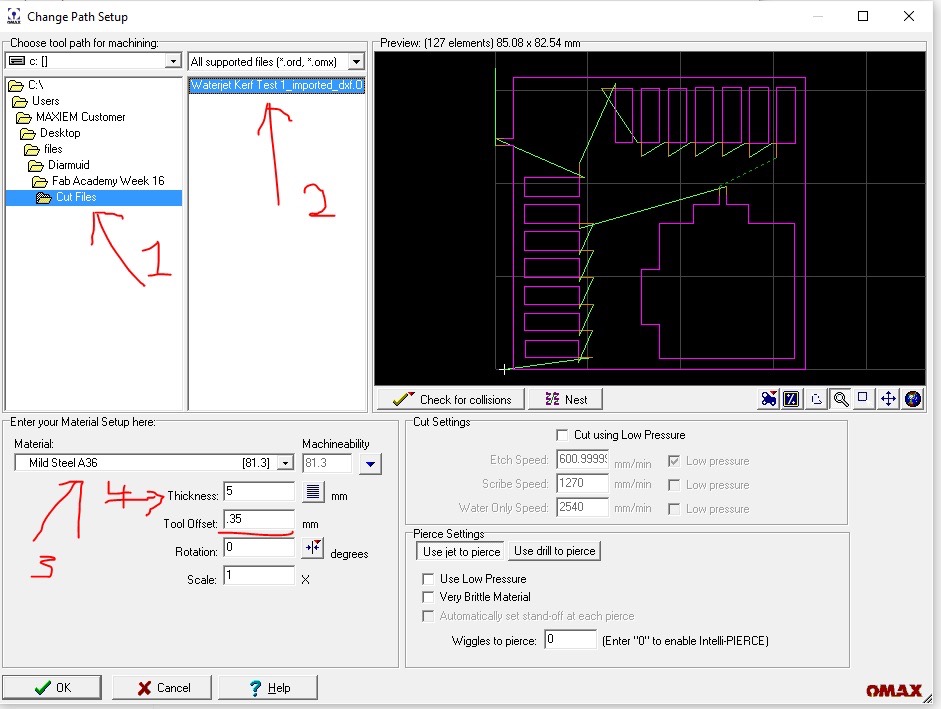
I moved it to the file folder located on the desktop - at this point we can also select our material and the material thickness - we can also nest parts if we need multiples.
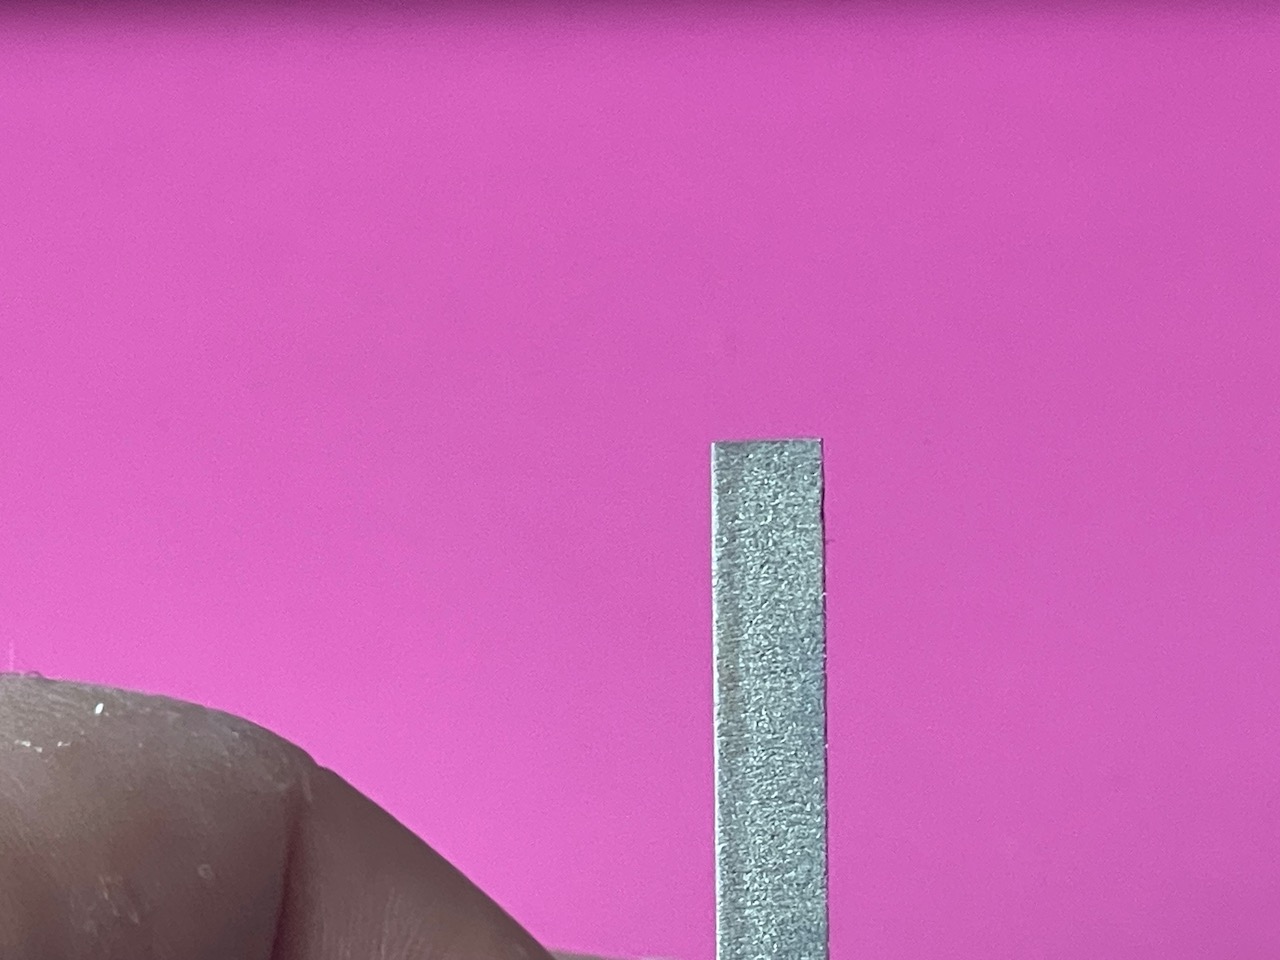
The tool offset is at 0.35mm, we should know after this cut if that is correct or if we need to adjust it.
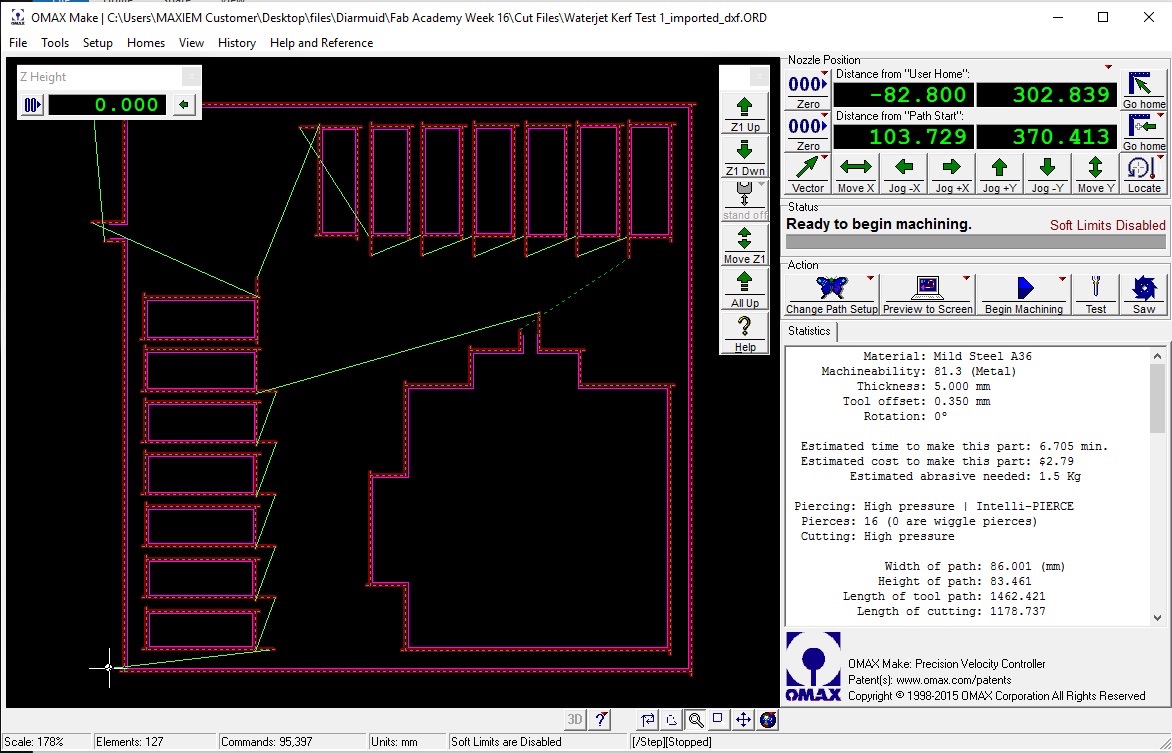
The part is now open in OMAX Make and ready to cut. (acording to the software) but we still need to home and warm up the water jet -
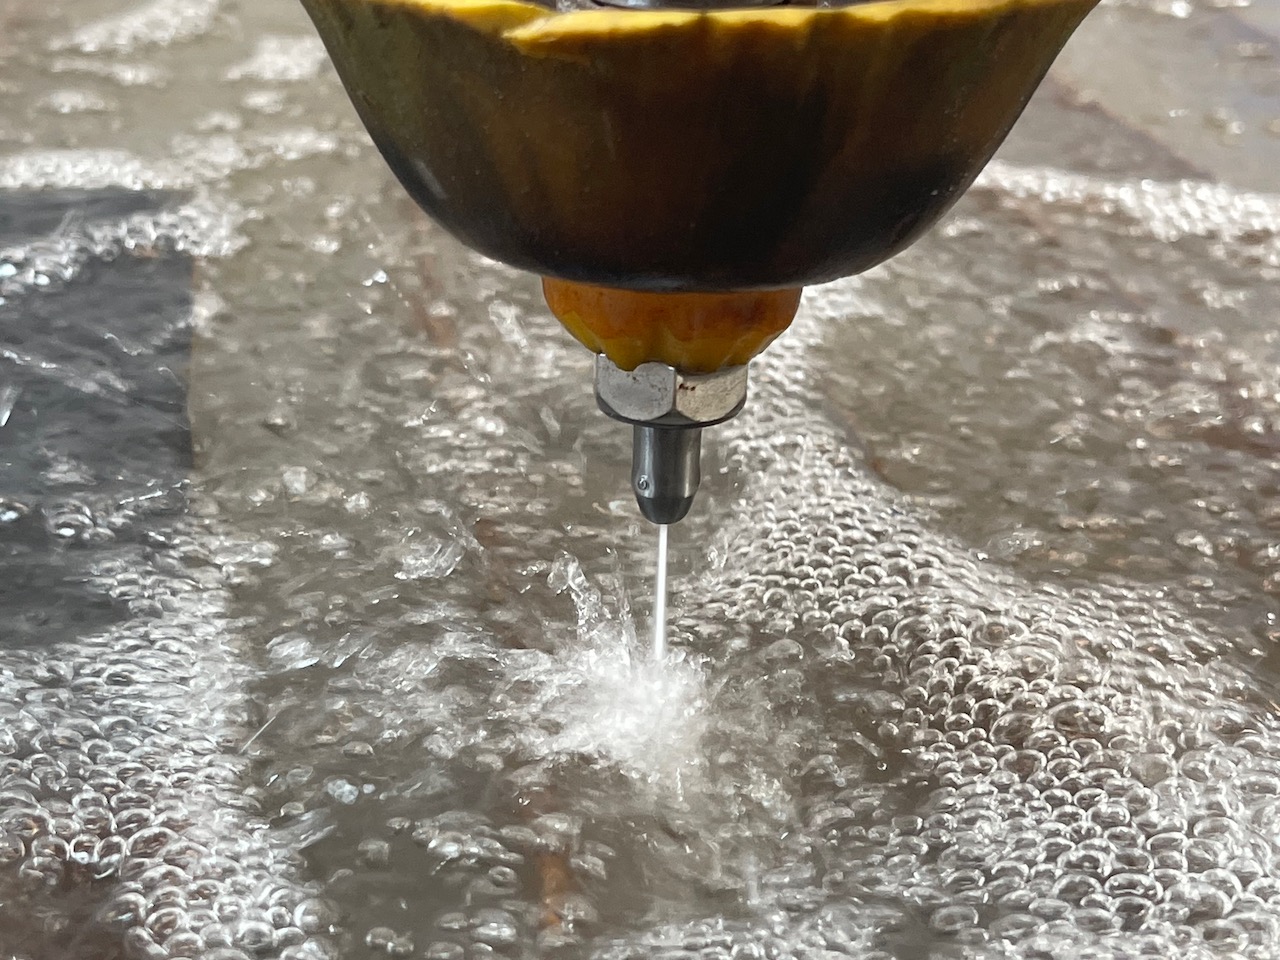
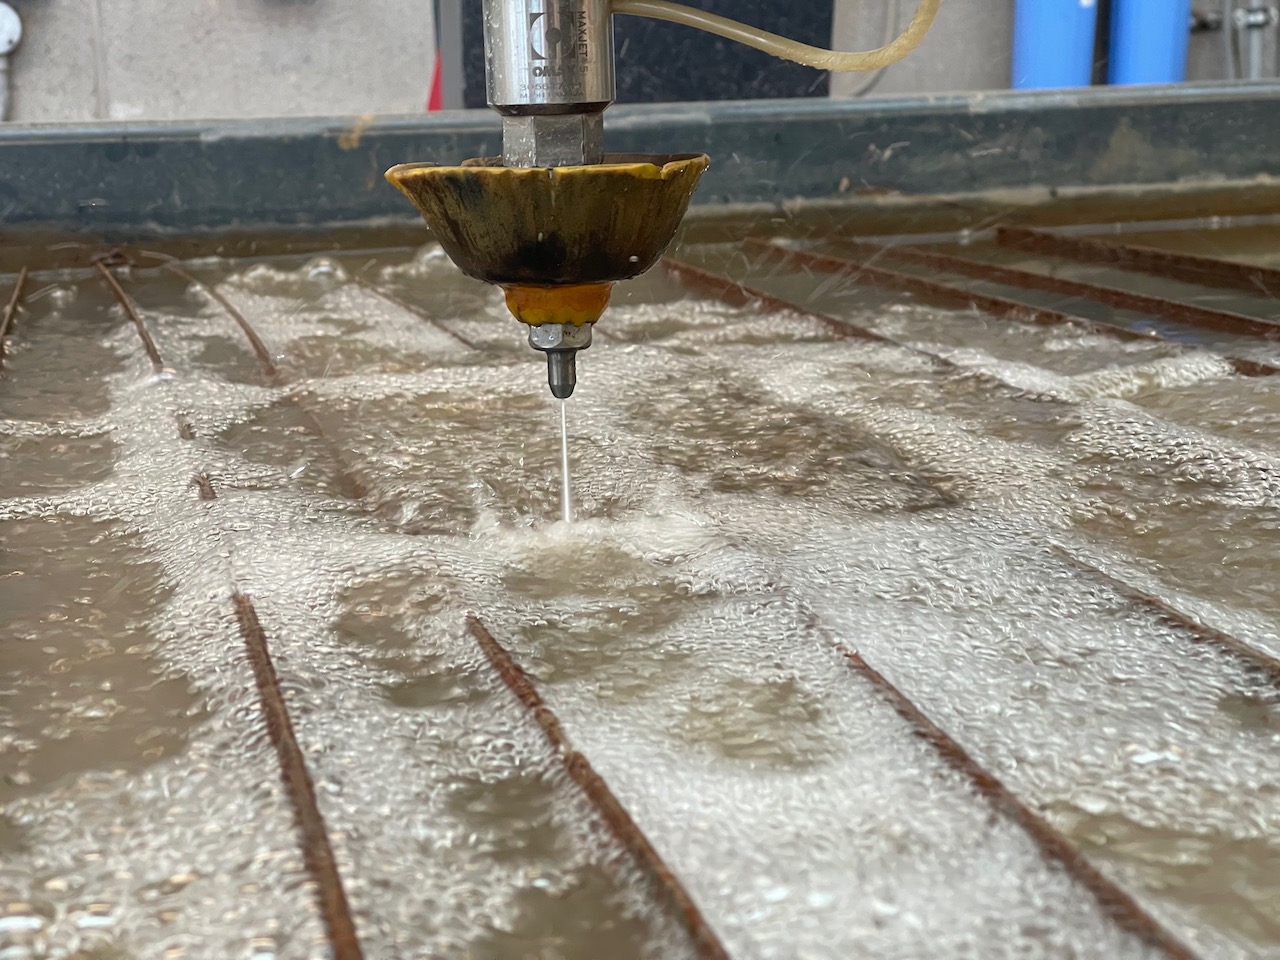
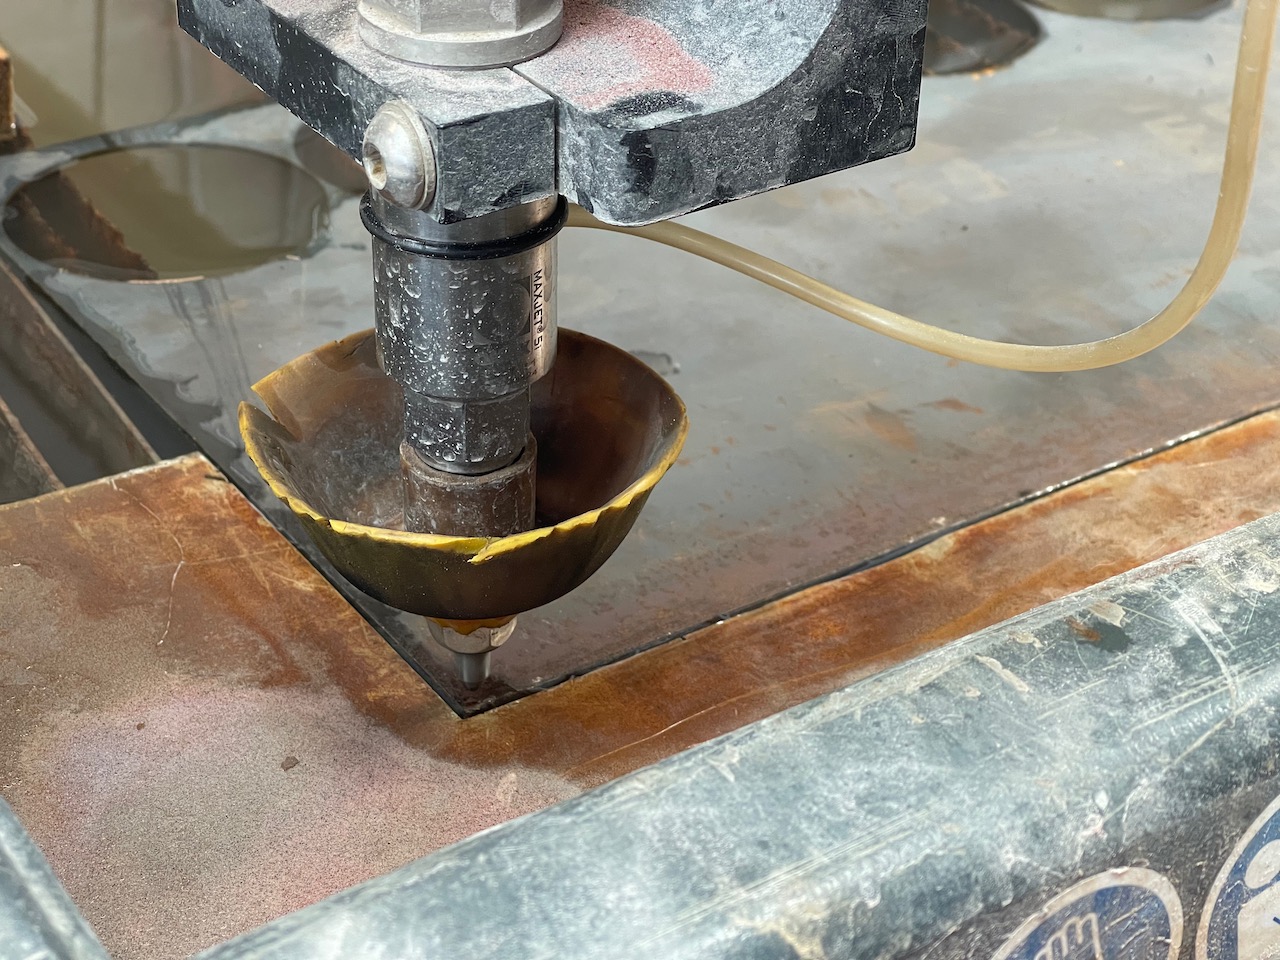
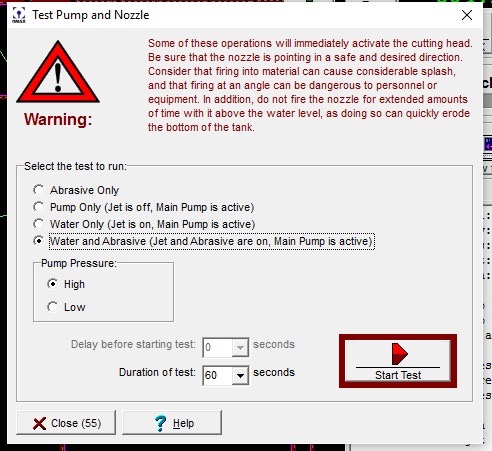
First let's warm up the nozzle - make sure the nozzle is over water and away from the edge of the tank.
Select test, a new dialogue window opens - select water only and low pressure - click start - this will initiate the pump and run water only through the water jet for 60 sec.
Repeat for water only high pressure - run for 60 sec.
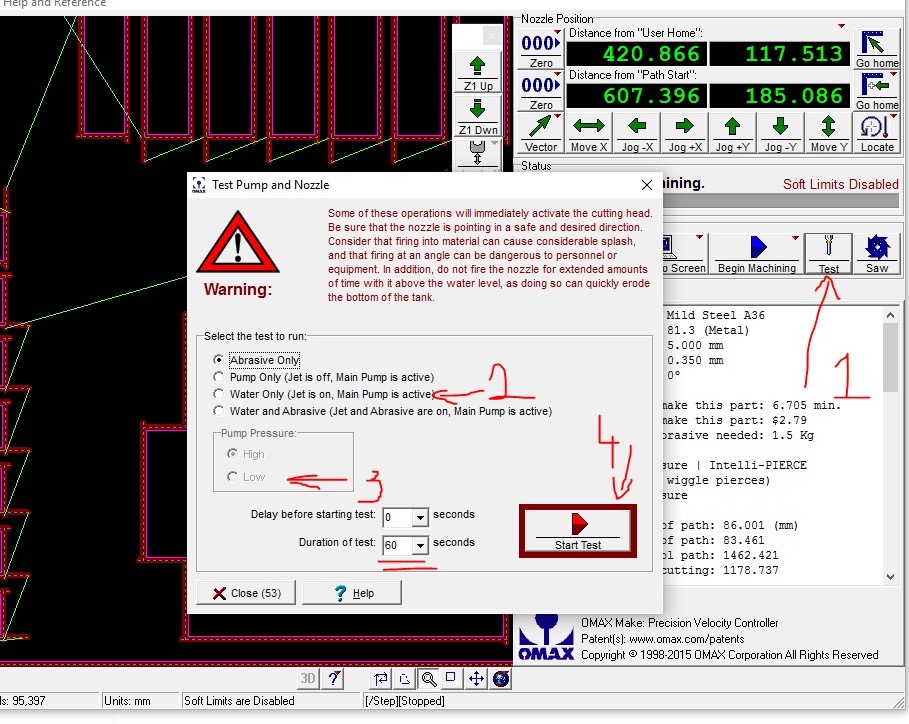
We can also check the garnet is running well - select Water and Abrasive - click run - let it run for about 10 sec and click stop.
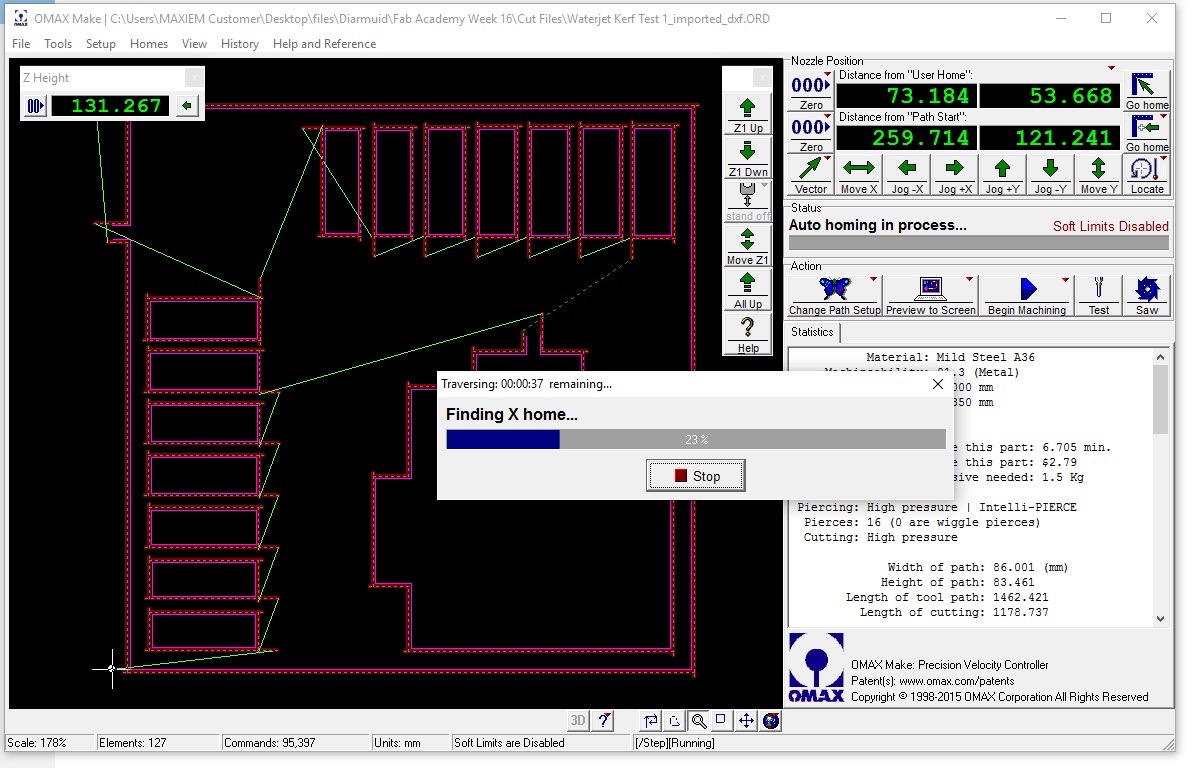
We also need to home the CNC - if possible use the arrow keys to jog the cutting head near to the front left don't hit the end stops. When close we can go >homes>advanced>auto home
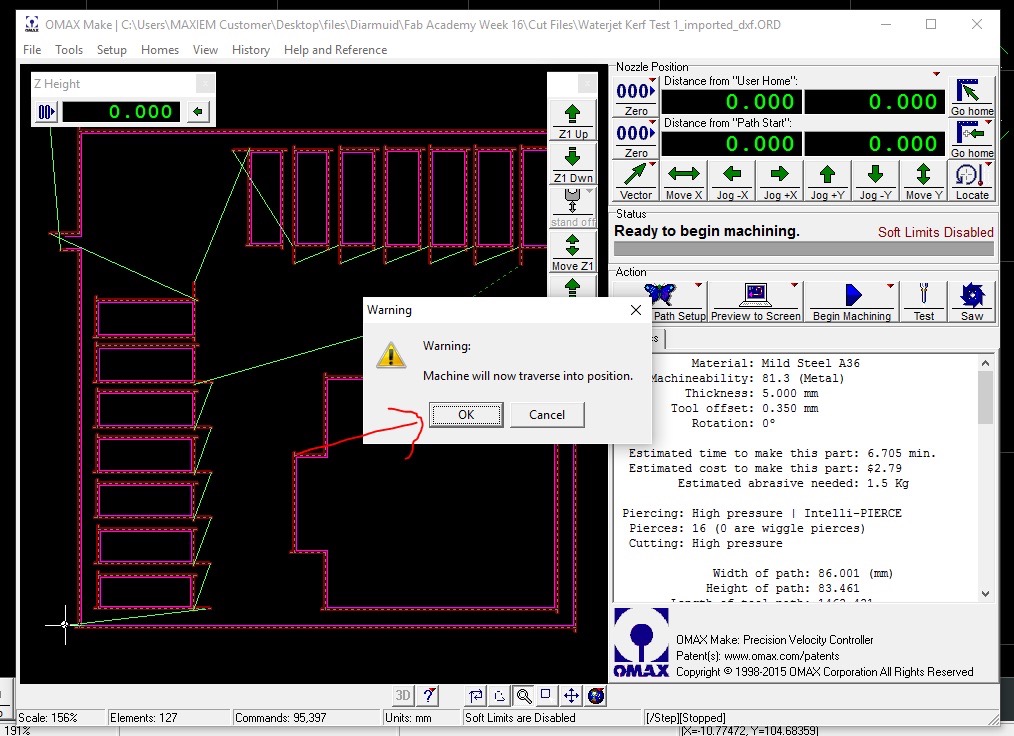
Make sure nothing is in the path of the gantry as it will be moving.
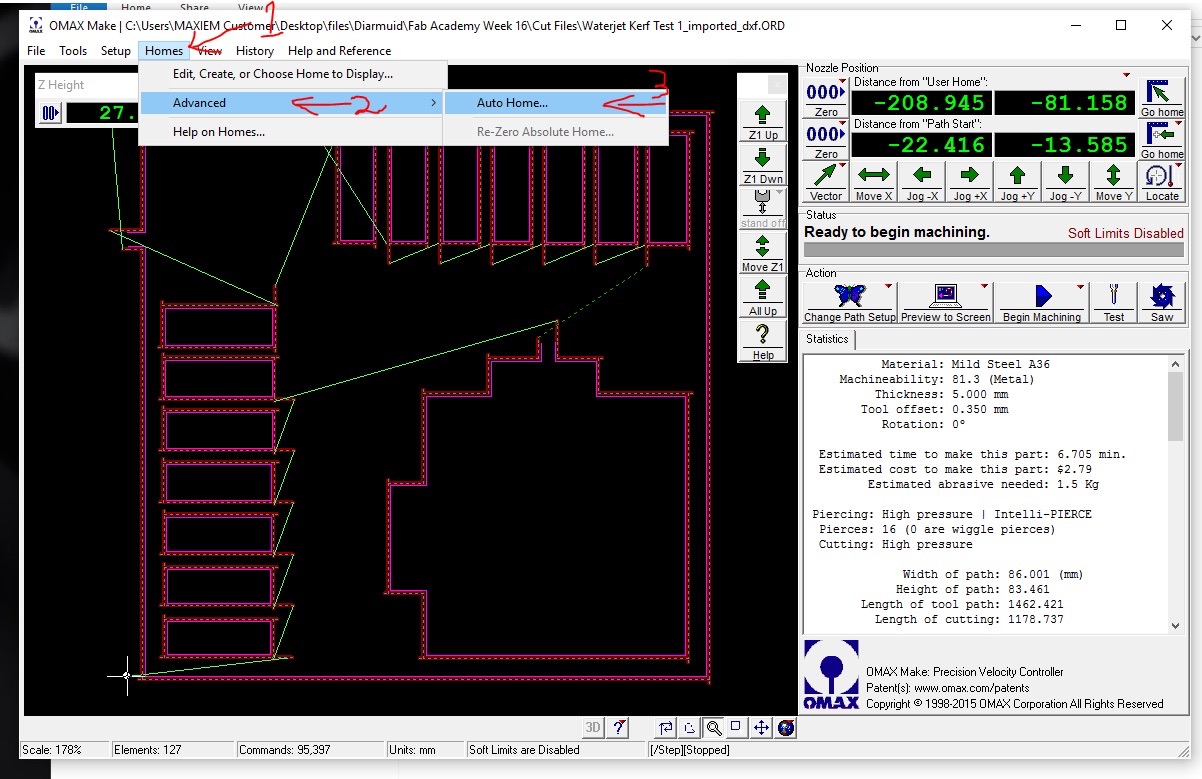
Read the warning and press OK
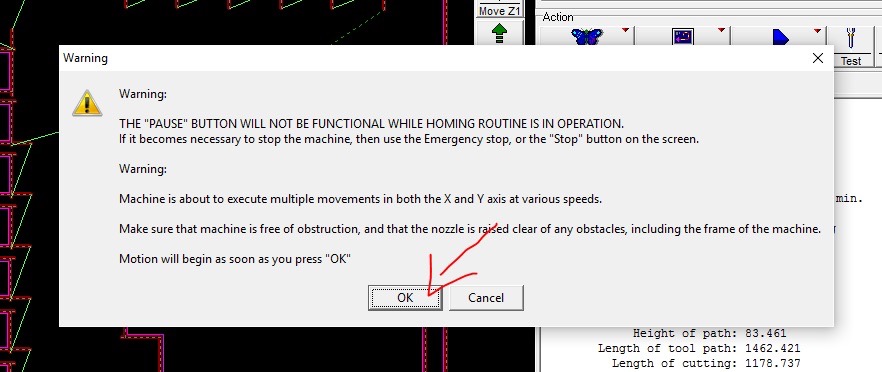
It will ask if you want to "Move all Z axis up" I generally click "No" however I make sure the cutting head is high enough that it's not going to collide with anything.

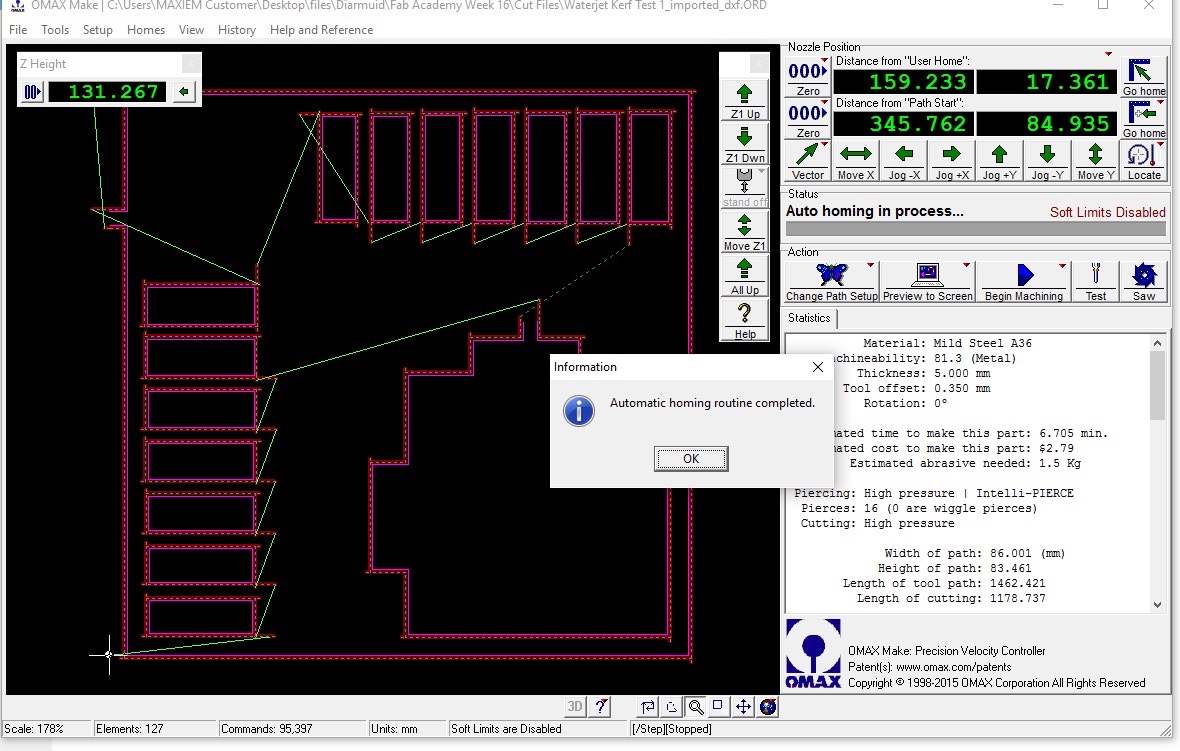
It will now home the Axis - let it run through the cycle - even if it's not moving -
Once complete we can now load material, clamp it in and move the tool head to the origin - bottom left of the stock.
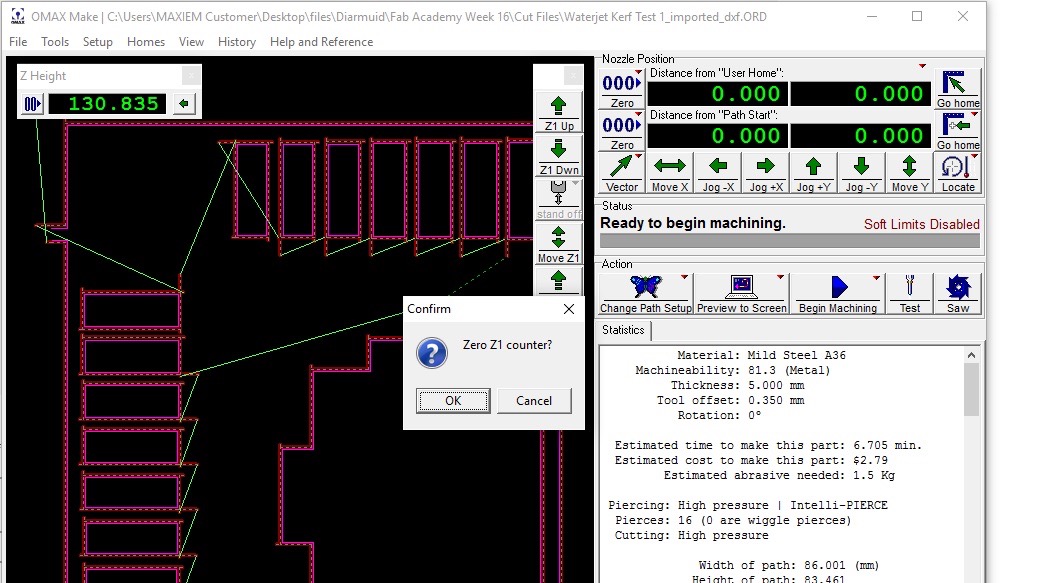
Once there we can reset the origins one and two below
3 sets the z origin, it needs to be sitting approximately 2 mm above the material. We have some 2mm sheet we can place between the stock and the nozzle. Jog the Z height up and down using 1 and 2 on the key pad on the keyboard, pg up and pg down will move in finer increments.

Once we have the origin set, remove the 2mm sheet. Make sure the stock is clamped in place, we can check the part is within the stock and the tool head does not touch at any point (this will block the nozzle and cause the garnet tube to pop out)
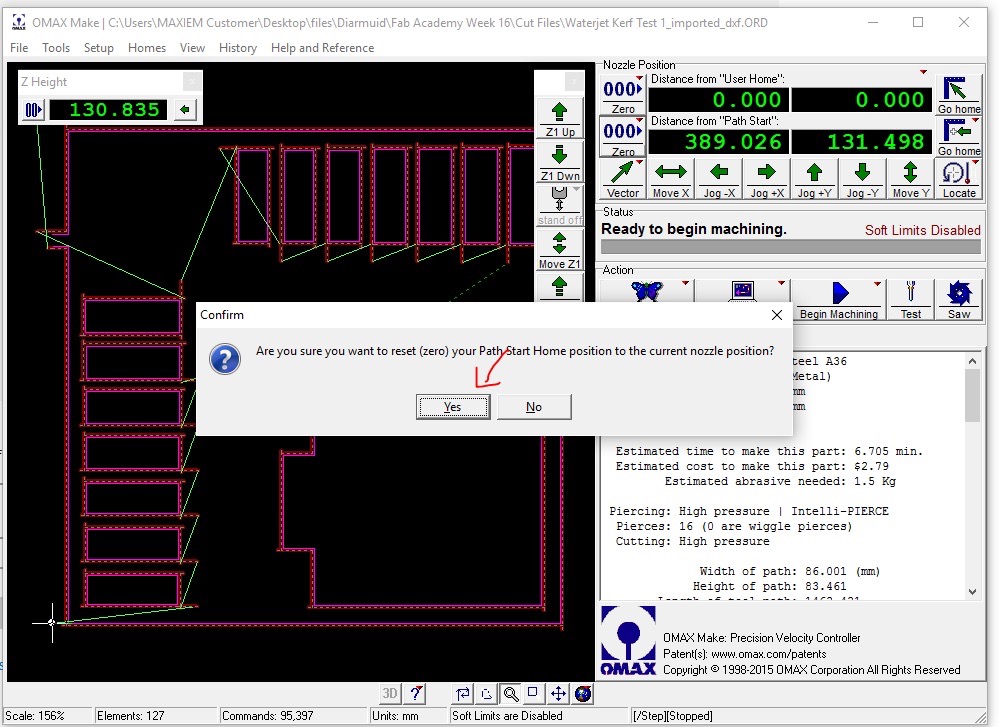
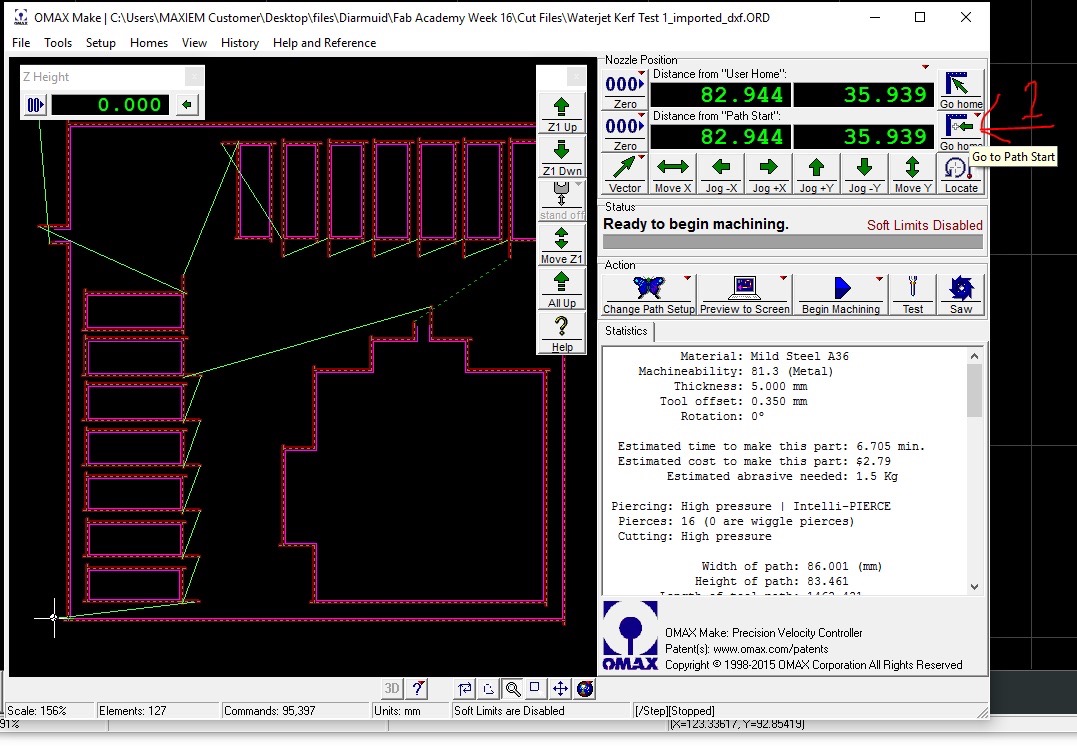
Right click on the begin machining button and click go to spot on path
Select a point on the furthest path from the origin
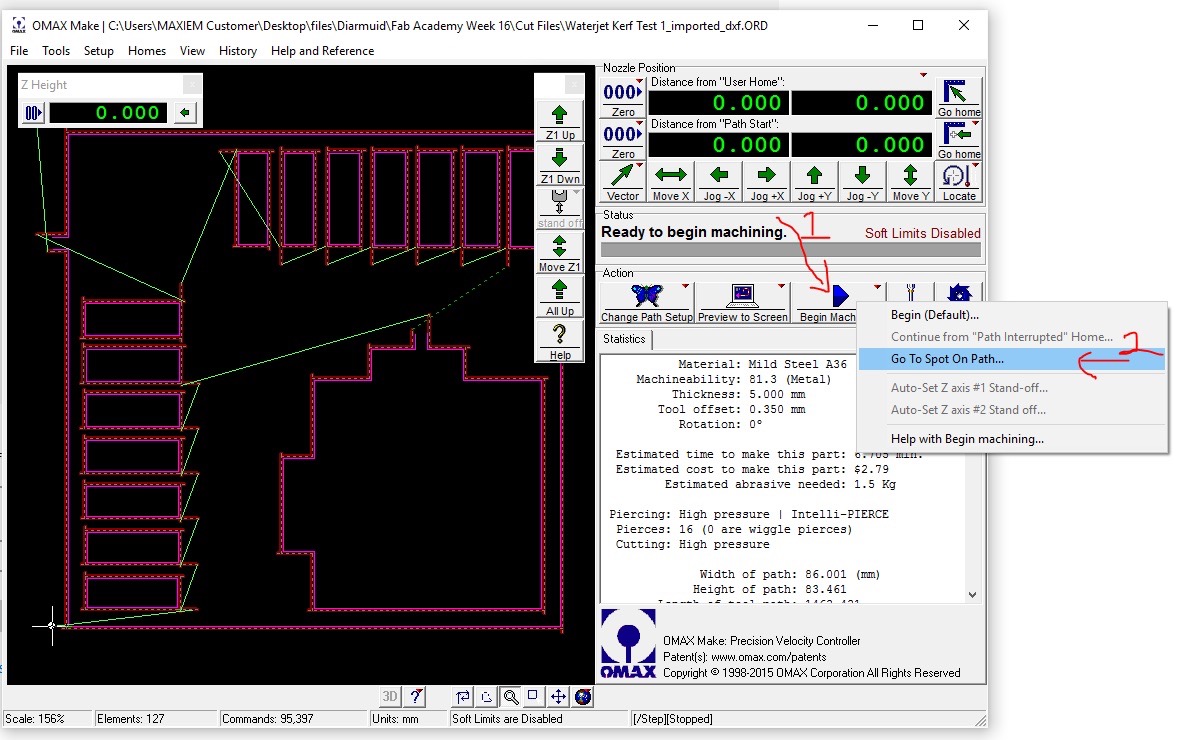
Click OK
Watch the tool head as it moves across the material making sure it does not come into contact - if it does raise the Z height and reset the z origin
Make sure when you have finished with the preview that you click Close - (pressing continue will start the machine)

Click on go home - the tool head will return to the origin
If everything is in order we can now click begin machining
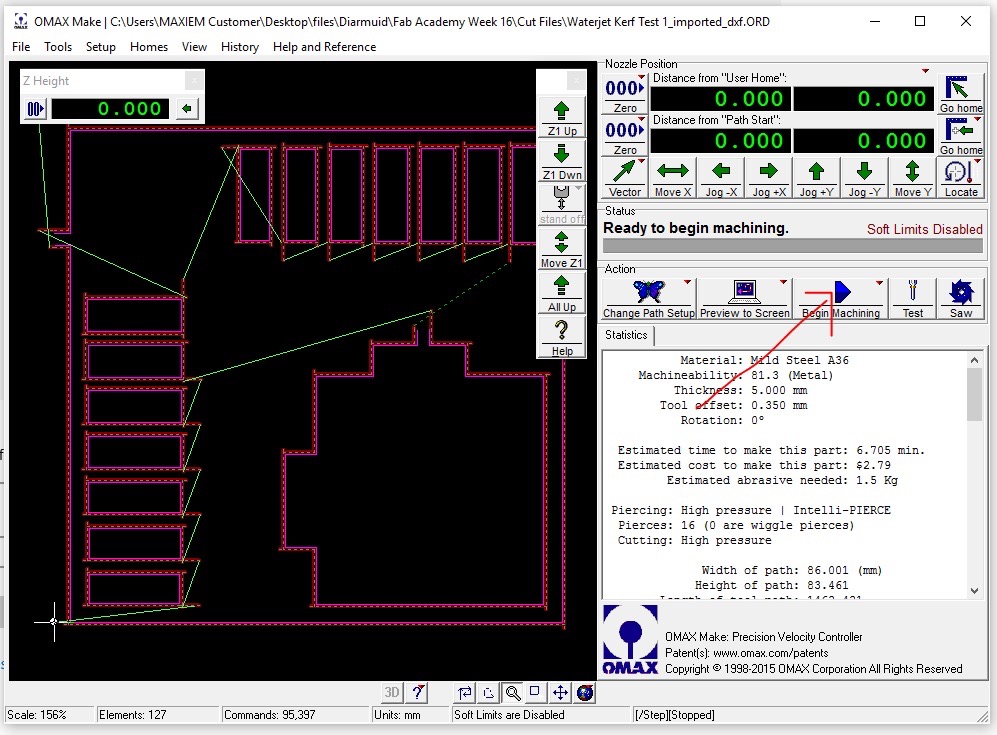
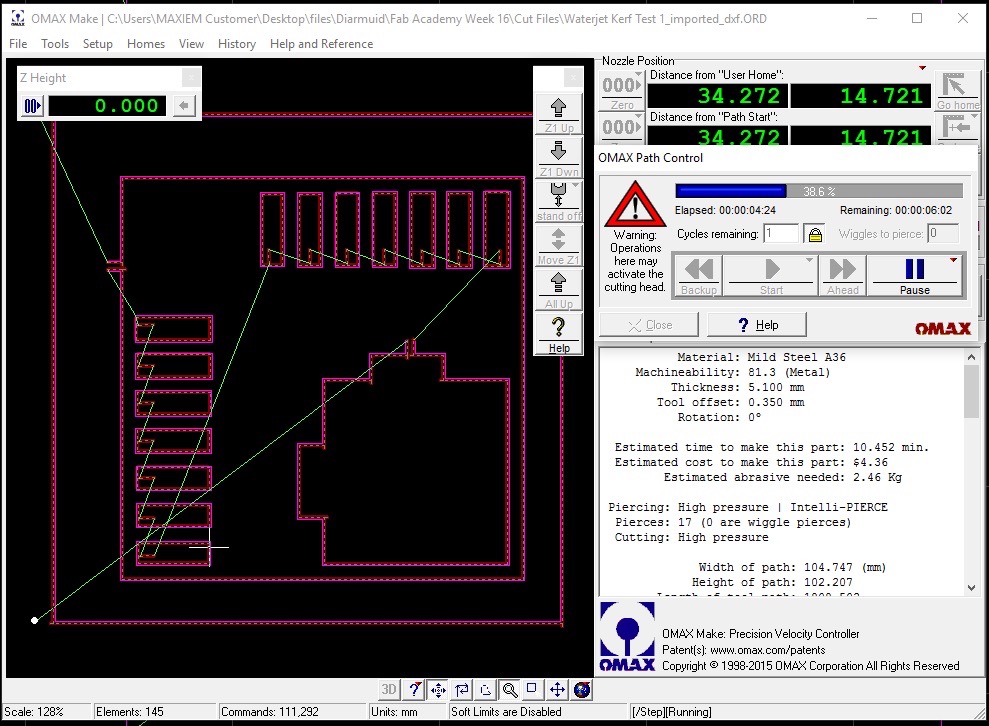
press the play button in OMAX Make - The part will start cutting - do not leave the machine unattended

When cutting has completed we can click close in OMAX Make - and jog the tool head out of the way.
when the part is complete we can check the dimensions and confirm what tolerance is needed or if we need to adjust our kerf offset in OMAX Make.
Issues I've encountered
AGHHHHH
What went wrong.
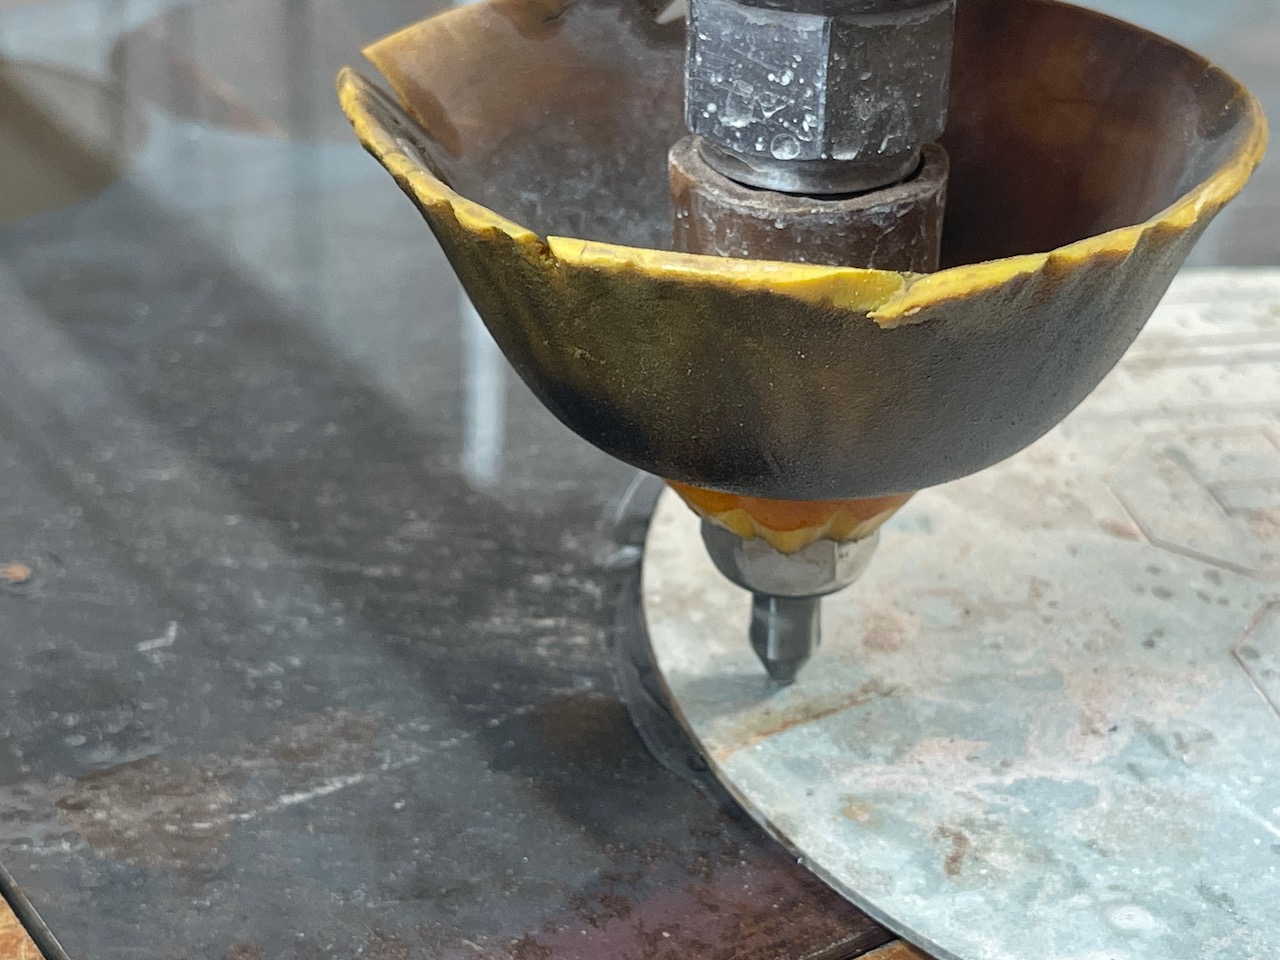
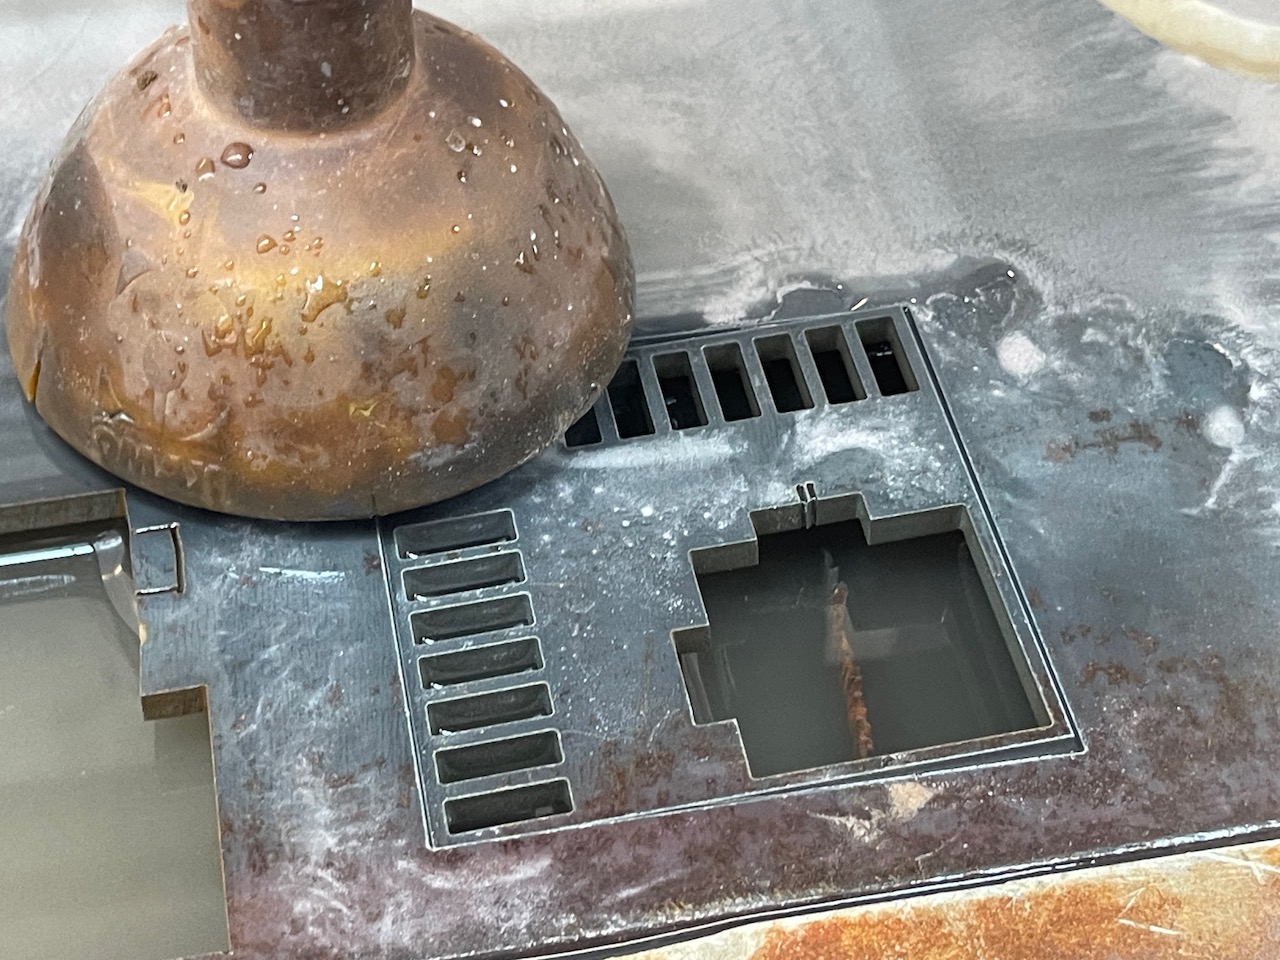
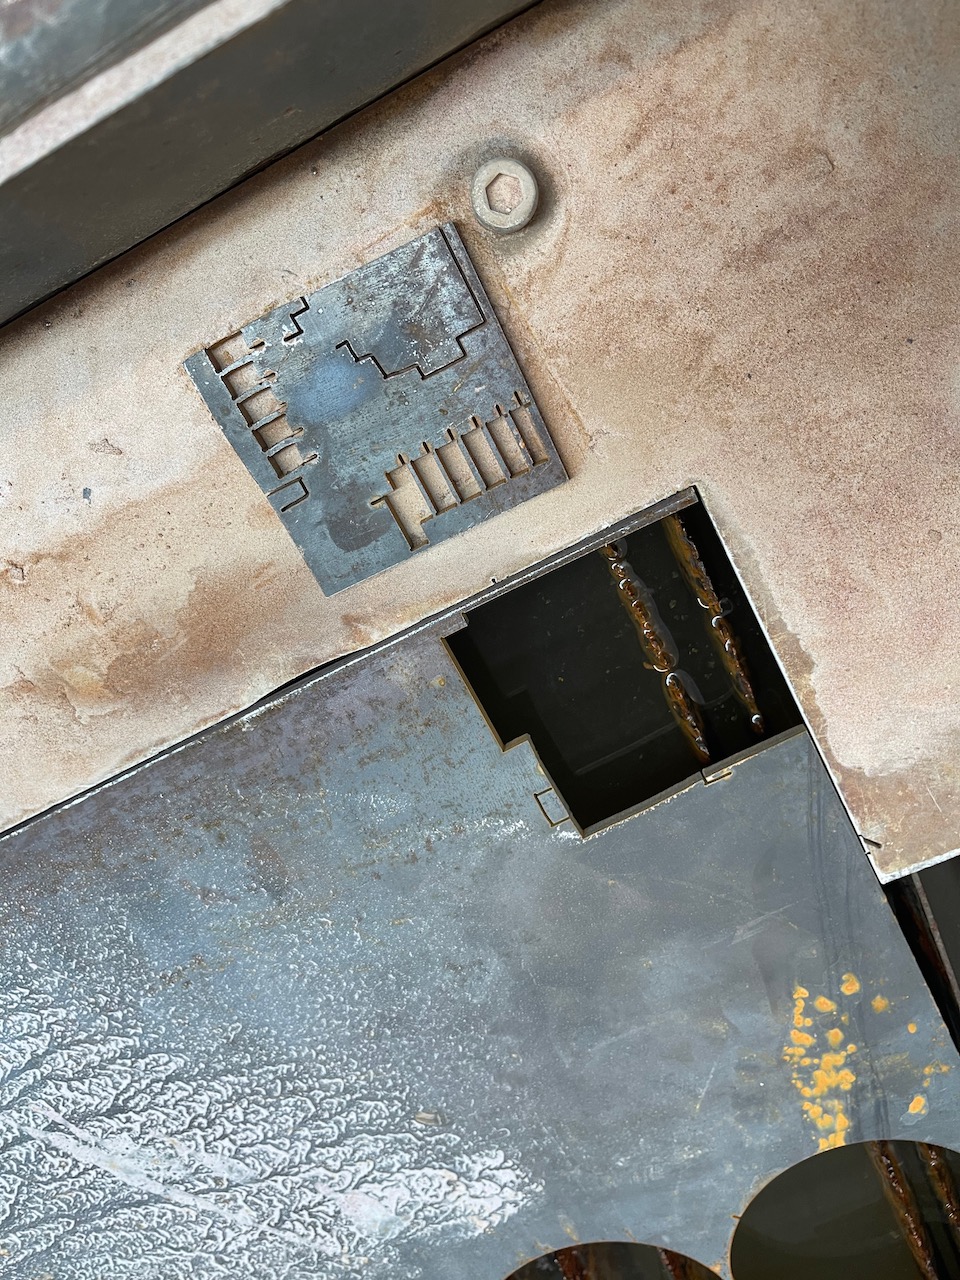
I forgot to clamp in the stock the first time I ran it - see the results below - the stock wandered when cutting. This was likely caused by the water turbulence from the water jet under the stock - just need to make sure that the stock is clamped into place before we start cutting.
What went wrong.
Learning Outcomes
Through this week's exploration of water jet cutting, I have gained the following key insights:
- Understanding of water jet cutting principles and safety procedures, including proper machine setup and operation
- Proficiency in using OMAX Layout and OMAX Make software for preparing and optimising cutting paths
- Knowledge of material preparation and securing techniques to prevent workpiece movement during cutting
- Experience in troubleshooting common issues, such as workpiece stability and tool offset calibration
- Understanding of the importance of proper workpiece clamping and the effects of water turbulence
- Ability to set up and maintain the water jet cutter, including garnet loading and system warm-up procedures