Week 10. Output Devices
Let's make some things move, sound and light up.
Assignment
Group Assignment: (linked here)
Measure the power consumption of an output device.
Individual Assignment:
add an output device to a microcontroller board you've designed, and program it to do something
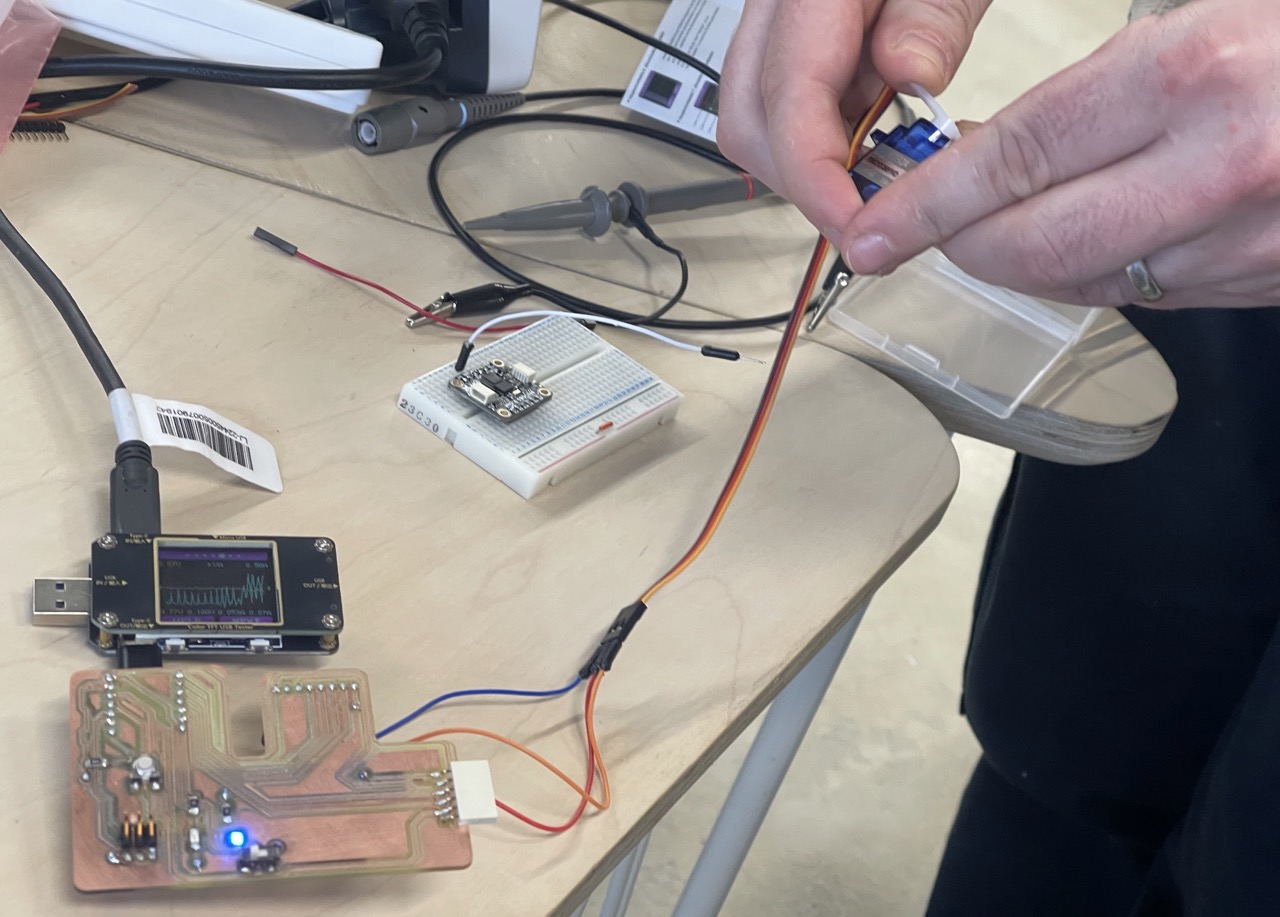
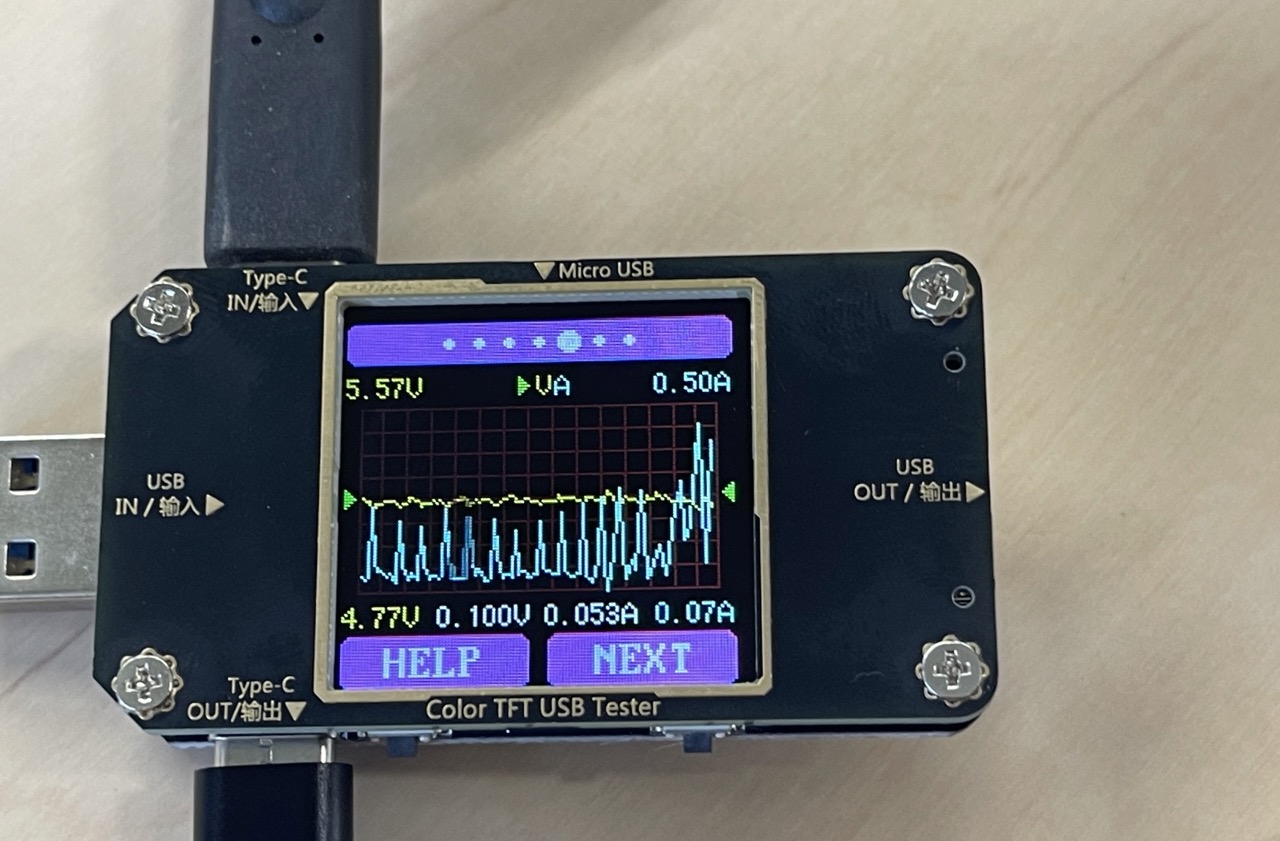
Below are some images of the group assignment. We were using a Colour TFT USB Power Meter/Tester to measure current from a servo that was programmed using Arduino IDE. The videos show the servo motor in action.
Below we put the servo under load to see how it performs.
Adding an output device to a microcontroller board
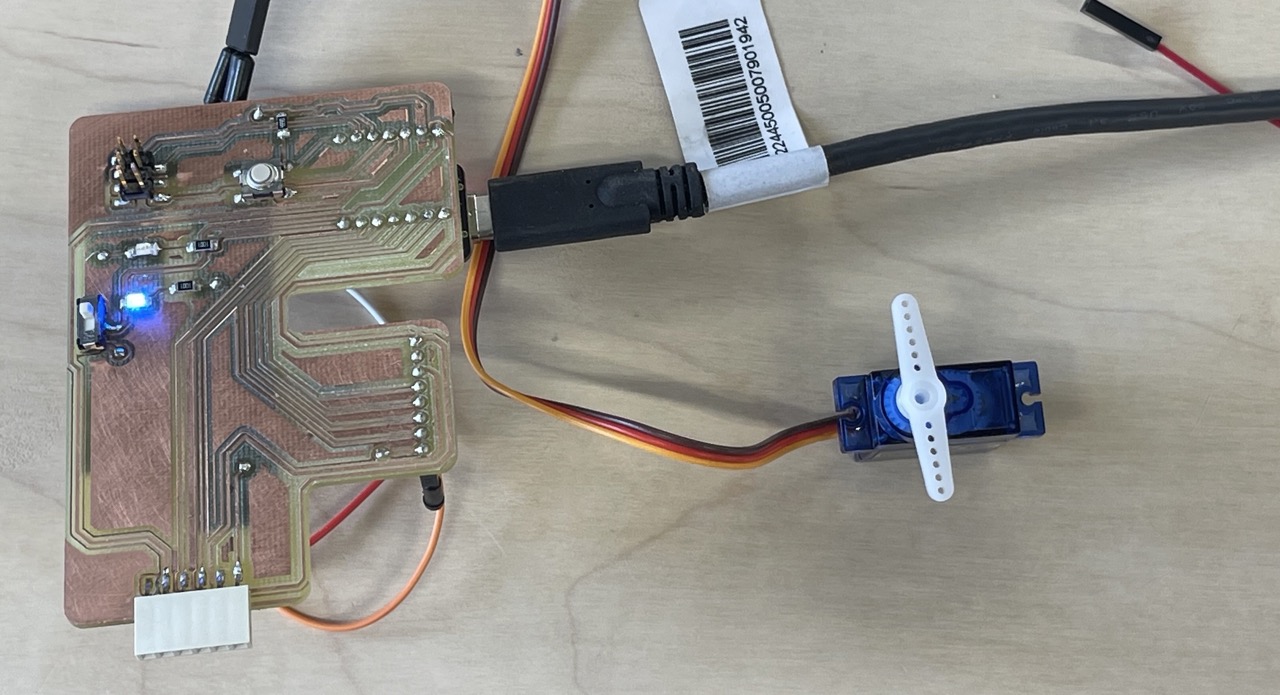
I added a Servo to my Fab Board this week. Check out the video below.
This is the code I used for the above video, which I copied from Arian Torres' example code.
#include <Servo.h>
#include <servo.pio.h>

/* Sweep
by BARRAGAN
This example code is in the public domain.

modified 28 May 2015
by Michael C. Miller
modified 8 Nov 2013
by Scott Fitzgerald

http://arduino.cc/en/Tutorial/Sweep
*/
//Modified by Adrián Torres Omaña
//Fab Academy 2023 - Fab Lab León
//Servo
//Fab-Xiao


//#include

Servo myservo;  // create servo object to control a servo
// twelve servo objects can be created on most boards


void setup() {
	myservo.attach(26);  // attaches the servo on GIO26 to the servo object
}

void loop() {
	int pos;

   for (pos = 0; pos <= 180; pos += 1) { // goes from 0 degrees to 180 degrees
// in steps of 1 degree
	myservo.write(pos);              // tell servo to go to position in variable 'pos'
	delay(15);                       // waits 15ms for the servo to reach the position
		}
	for (pos = 180; pos >= 0; pos -= 1) { // goes from 180 degrees to 0 degrees
	myservo.write(pos);              // tell servo to go to position in variable 'pos'
	delay(15);                       // waits 15ms for the servo to reach the position
		}
}
I modified the code to produce an intermittent sweep so we could use that to analyse the power consumption of the servo in our group assignment. Here is the code I used for this.
#include <Servo.h> // if you dont include the servo library you will get an error


Servo myservo; // create servo object to control a servo

void setup() {
myservo.attach(26);// put your setup code here, to run once:

	}

void loop() {
	int pos;

for (pos = 0; pos <= 180; pos += 1) { // goes from 0 degrees to 180 degrees
// in steps of 1 degree
myservo.write(pos);              // tell servo to go to position in variable 'pos'
 delay(1);                       // waits 1ms for the servo to reach the position
	}
for (pos = 180; pos >= 0; pos -= 1) { // goes from 180 degrees to 0 degrees
     myservo.write(pos);              // tell servo to go to position in variable 'pos'
	     delay(10);                       // waits 10ms for the servo to reach the position
			}
}
see video below for the intermitent sweep
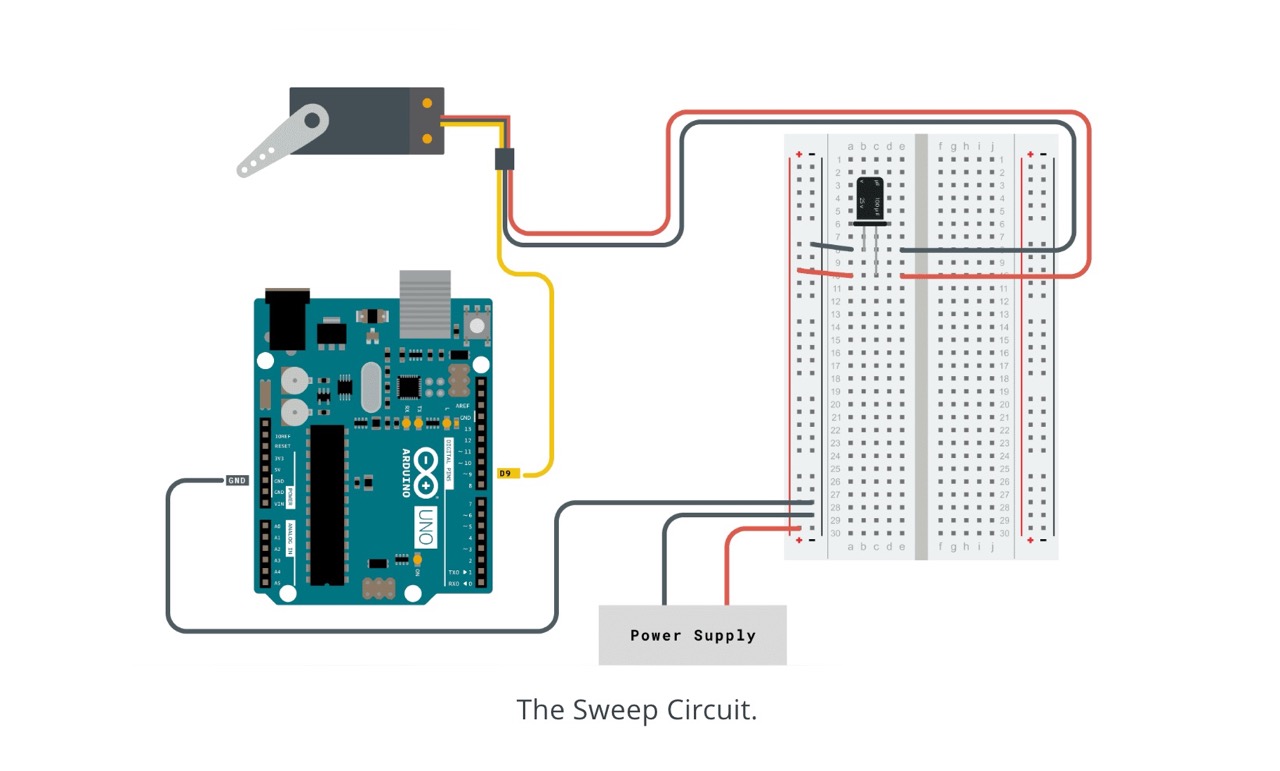
I also looked up some information on servos here https://docs.arduino.cc/learn/electronics/servo-motors/
I learned about the need to power servos from a separate power supply (which I have not been doing) and to use a capacitor to smooth out the power (which I have also not been doing). This should improve performance when the servos will be under load.
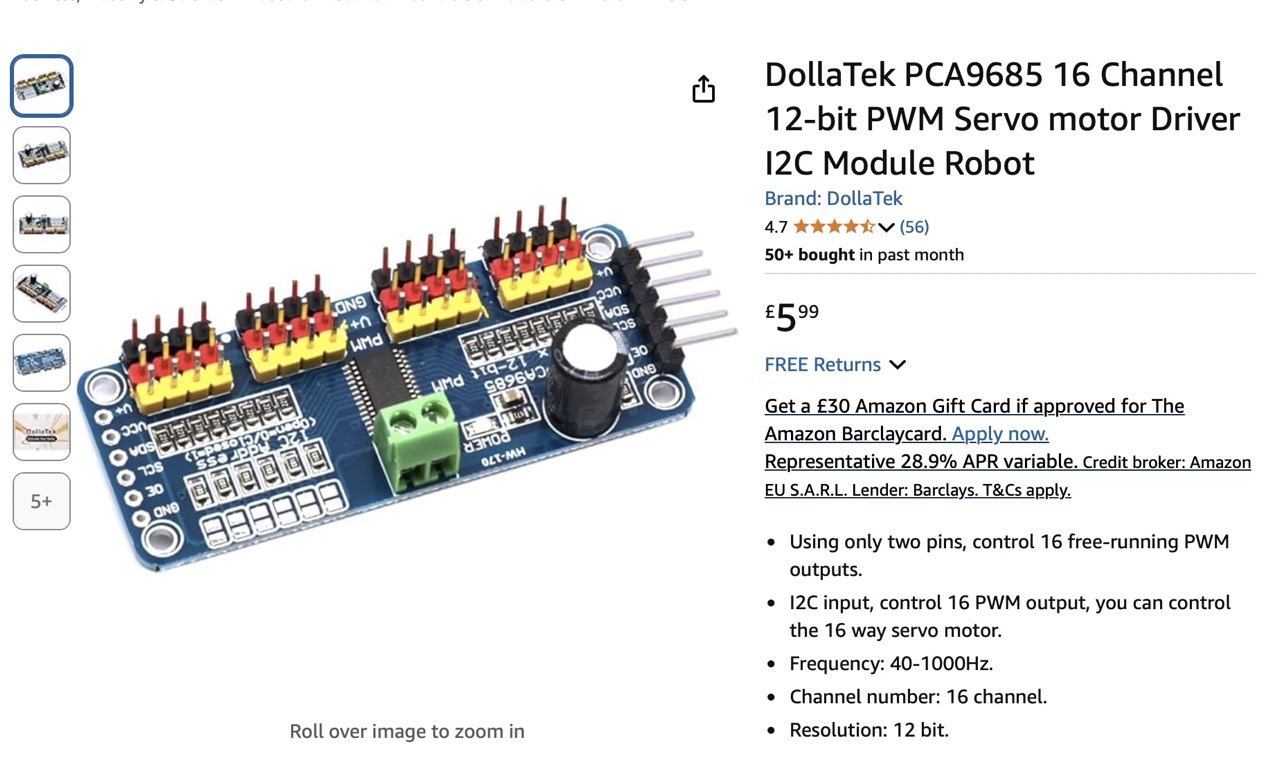
I also looked at how I could control multiple servos for my final project and identified the following servo controller. Is it acceptable to be purchasing something like this, or should I be including it in my design and build the PCB myself?
Issues I've encountered
AGHHHHH
What went wrong.
I did notice that this servo was only moving approximately 90 degrees. See image below.
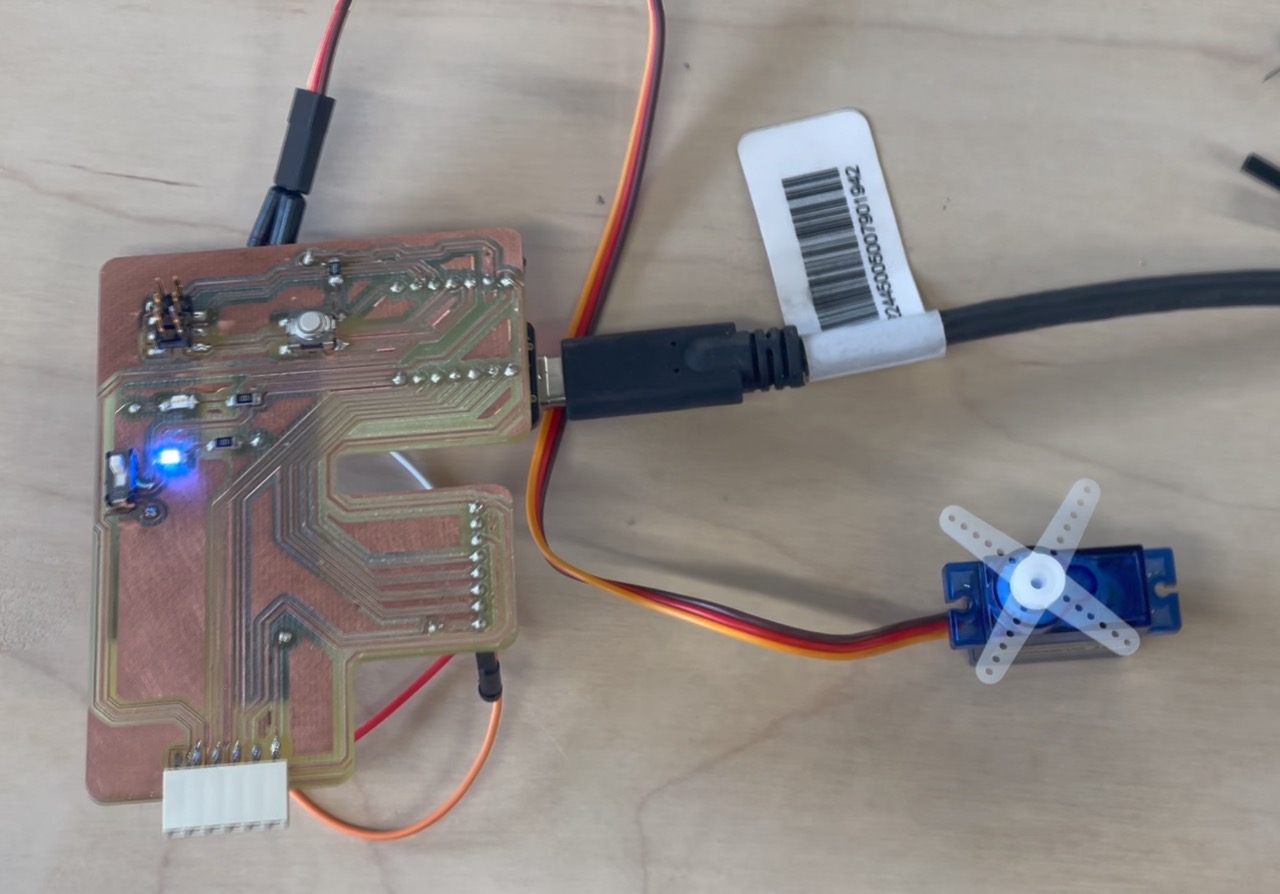 I adjusted the code using Arduino IDE to move from 180 up to 220 degrees and down to 90 degrees, but this did not affect the maximum movement of the servo.
- The upper limit seemed to stay the same when dropping down to 90 degrees; the movement was less than 90 degrees. I would estimate 45 degrees.
I didn't dwell on this for too long; I'll come back to figure it out later.

The power indicator LED died on my Fab board... it's become the f'in board again lol.....

I am once again struggling with time management and getting things done on time.
Learning Outcomes

I have managed to do some coding and getting bits to move; however, I would like to look at Python programming.
I also understand I2C a little better; however, I'm still not sure which one should be used for my final project - I guess I need to explore this a little more.