Week 13: Molding & Casting
Assignment
Group Assignment
Test the design rules for your molding and casting process
Individual Assignment
Design and make a mold and cast something with it
Reflections
This week, as with all weeks, was a gentle reminder that computers are only as clever as the human beings operating them, aka, me — I started out excited about the moulding process as I thought I had it!..After bumping into Santi one early morning I realised I had inverted the mould and created a negative whereas I needed to create a positive.
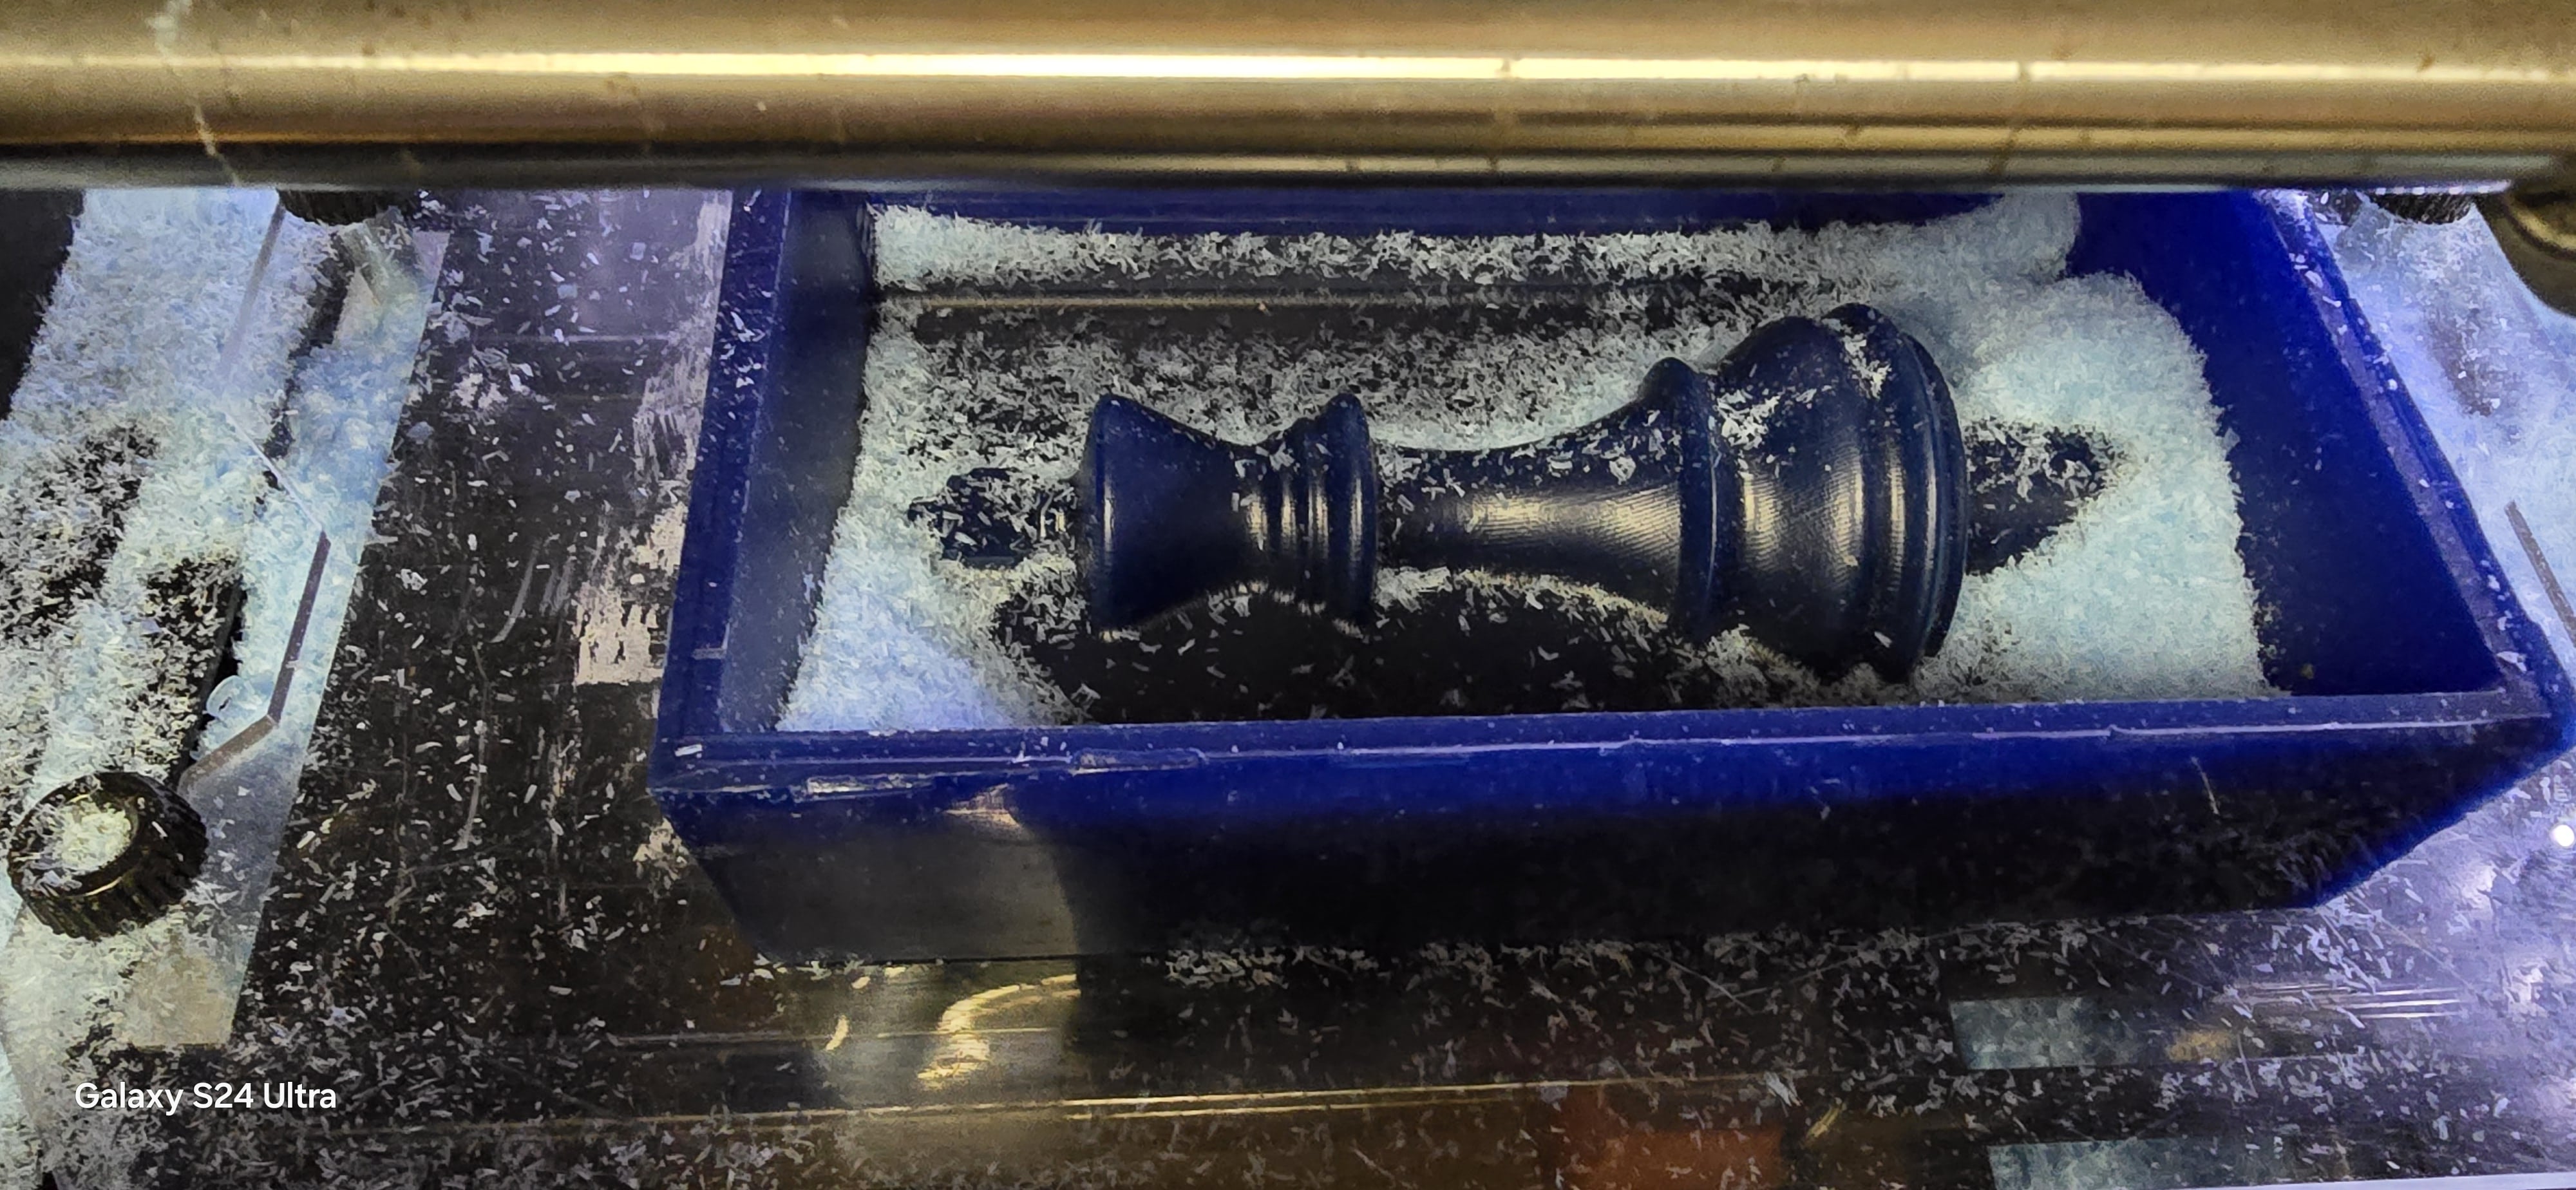
I corrected it and after slicing in Modela I went to mill. I thought the printer had malfunctioned as my chess piece mould seemed semi finished and it seemed as if the blade had taken some random stabs at the wax. It turns out, it wasn't the printer after all. I just needed a longer end mill. Adai suggested that I extend the reach of the end mill – unlike PCB milling, where we keep the bit shorter and tight to the collet since the material's is harder - But with wax, it's a different story. The material is soft, and the Ferris wax block is 37mm thick, so we needed the extra length to get the depth for the shape we wanted.
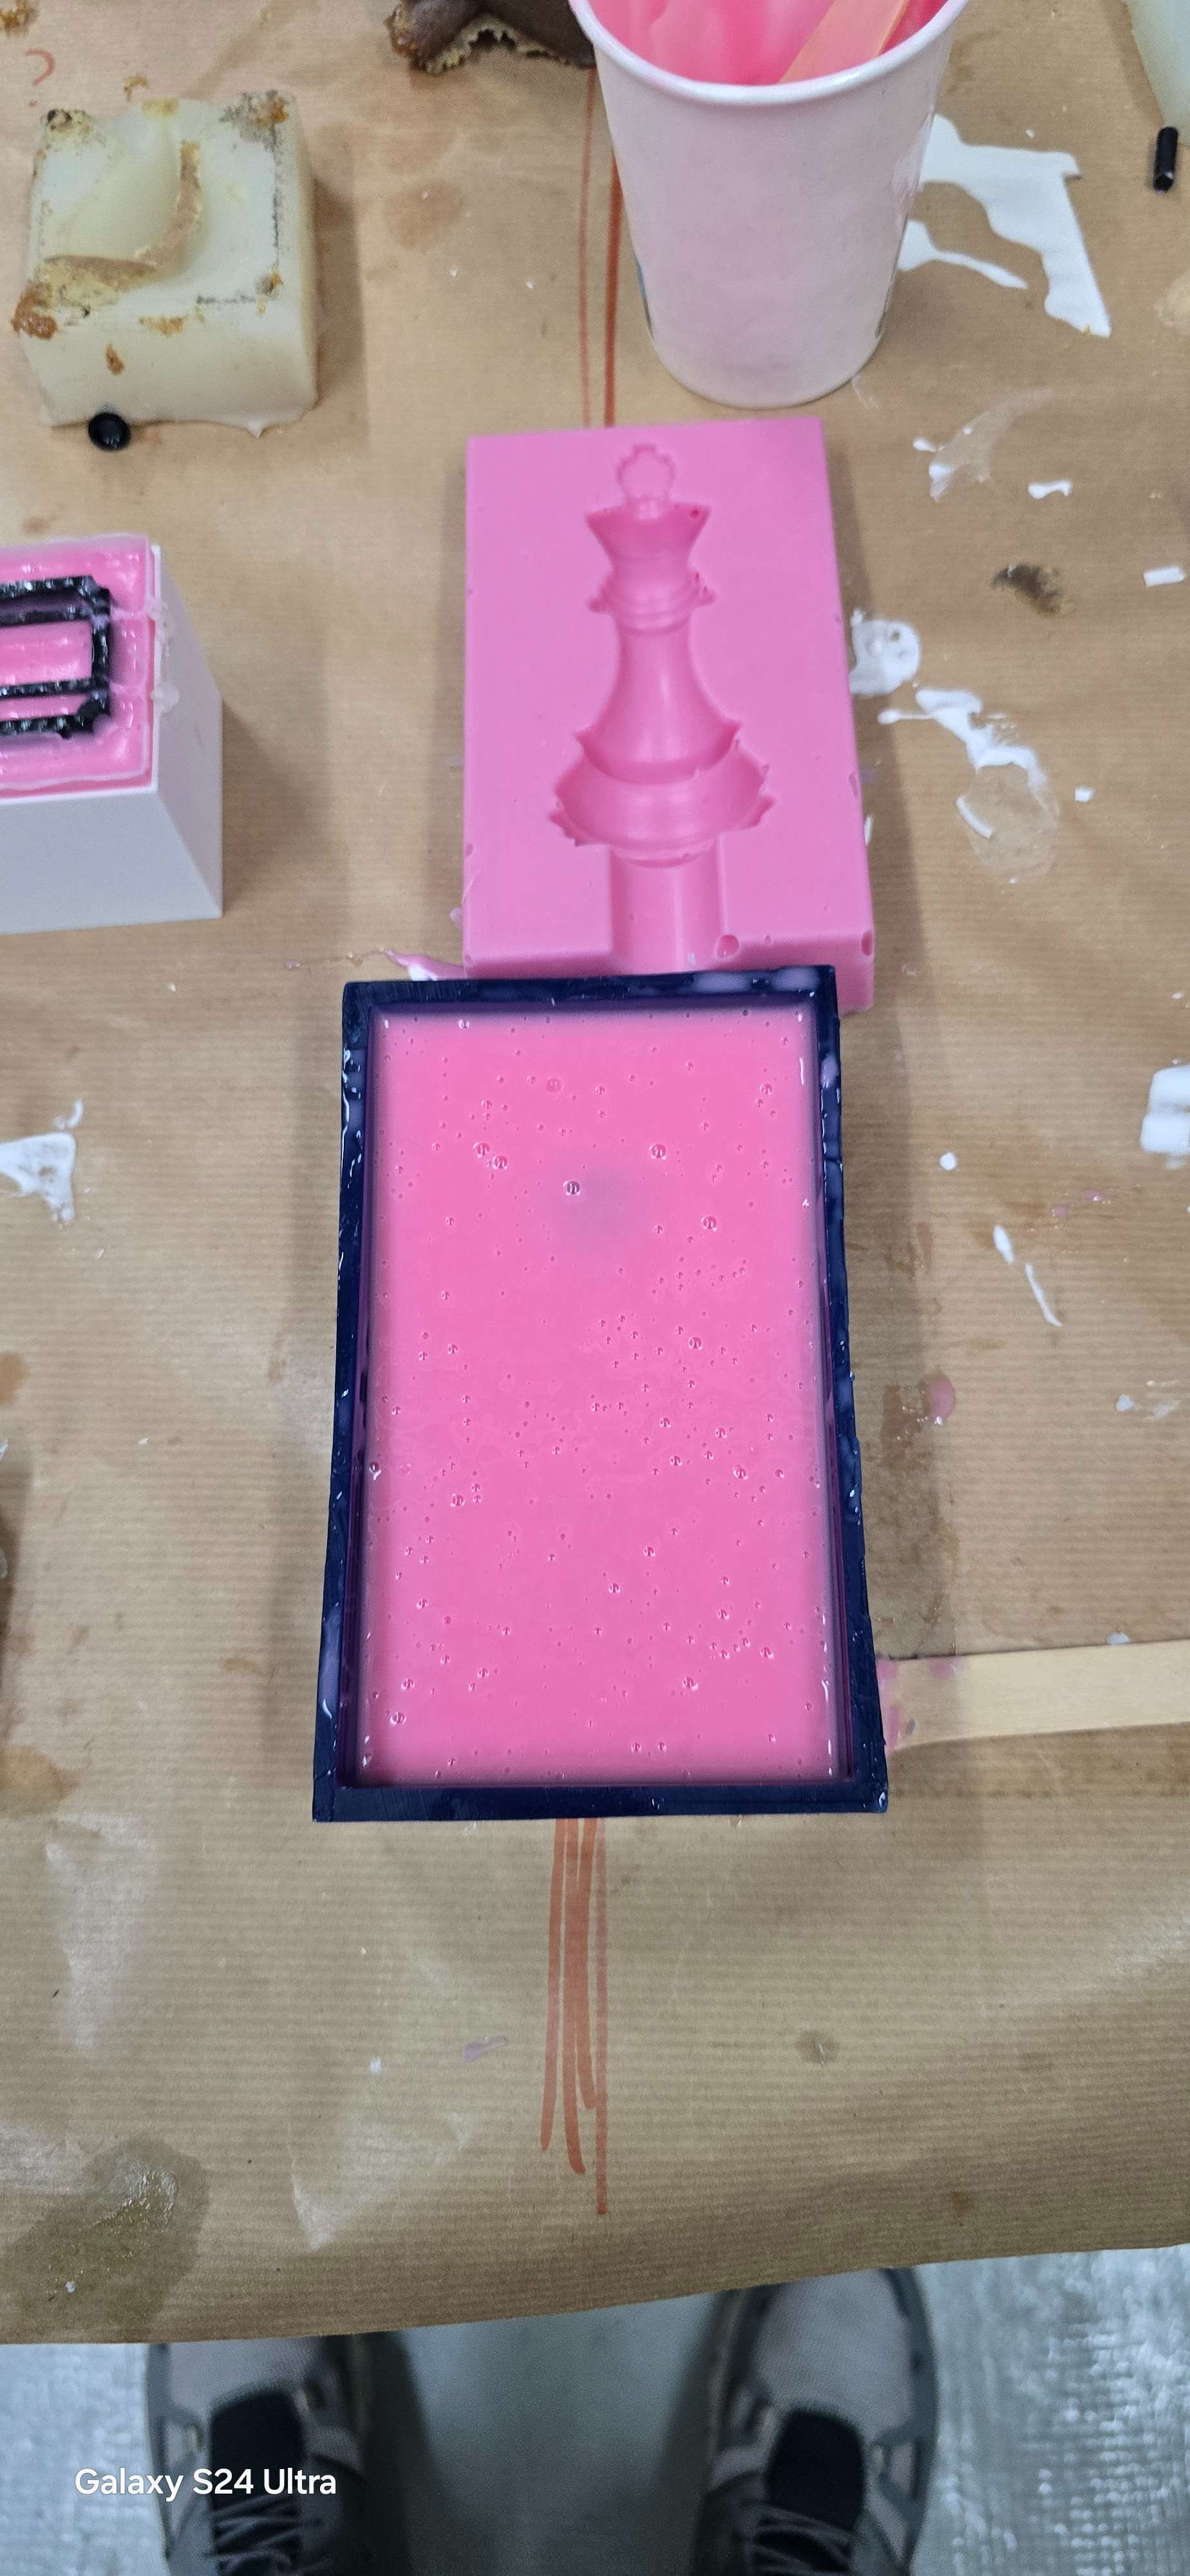
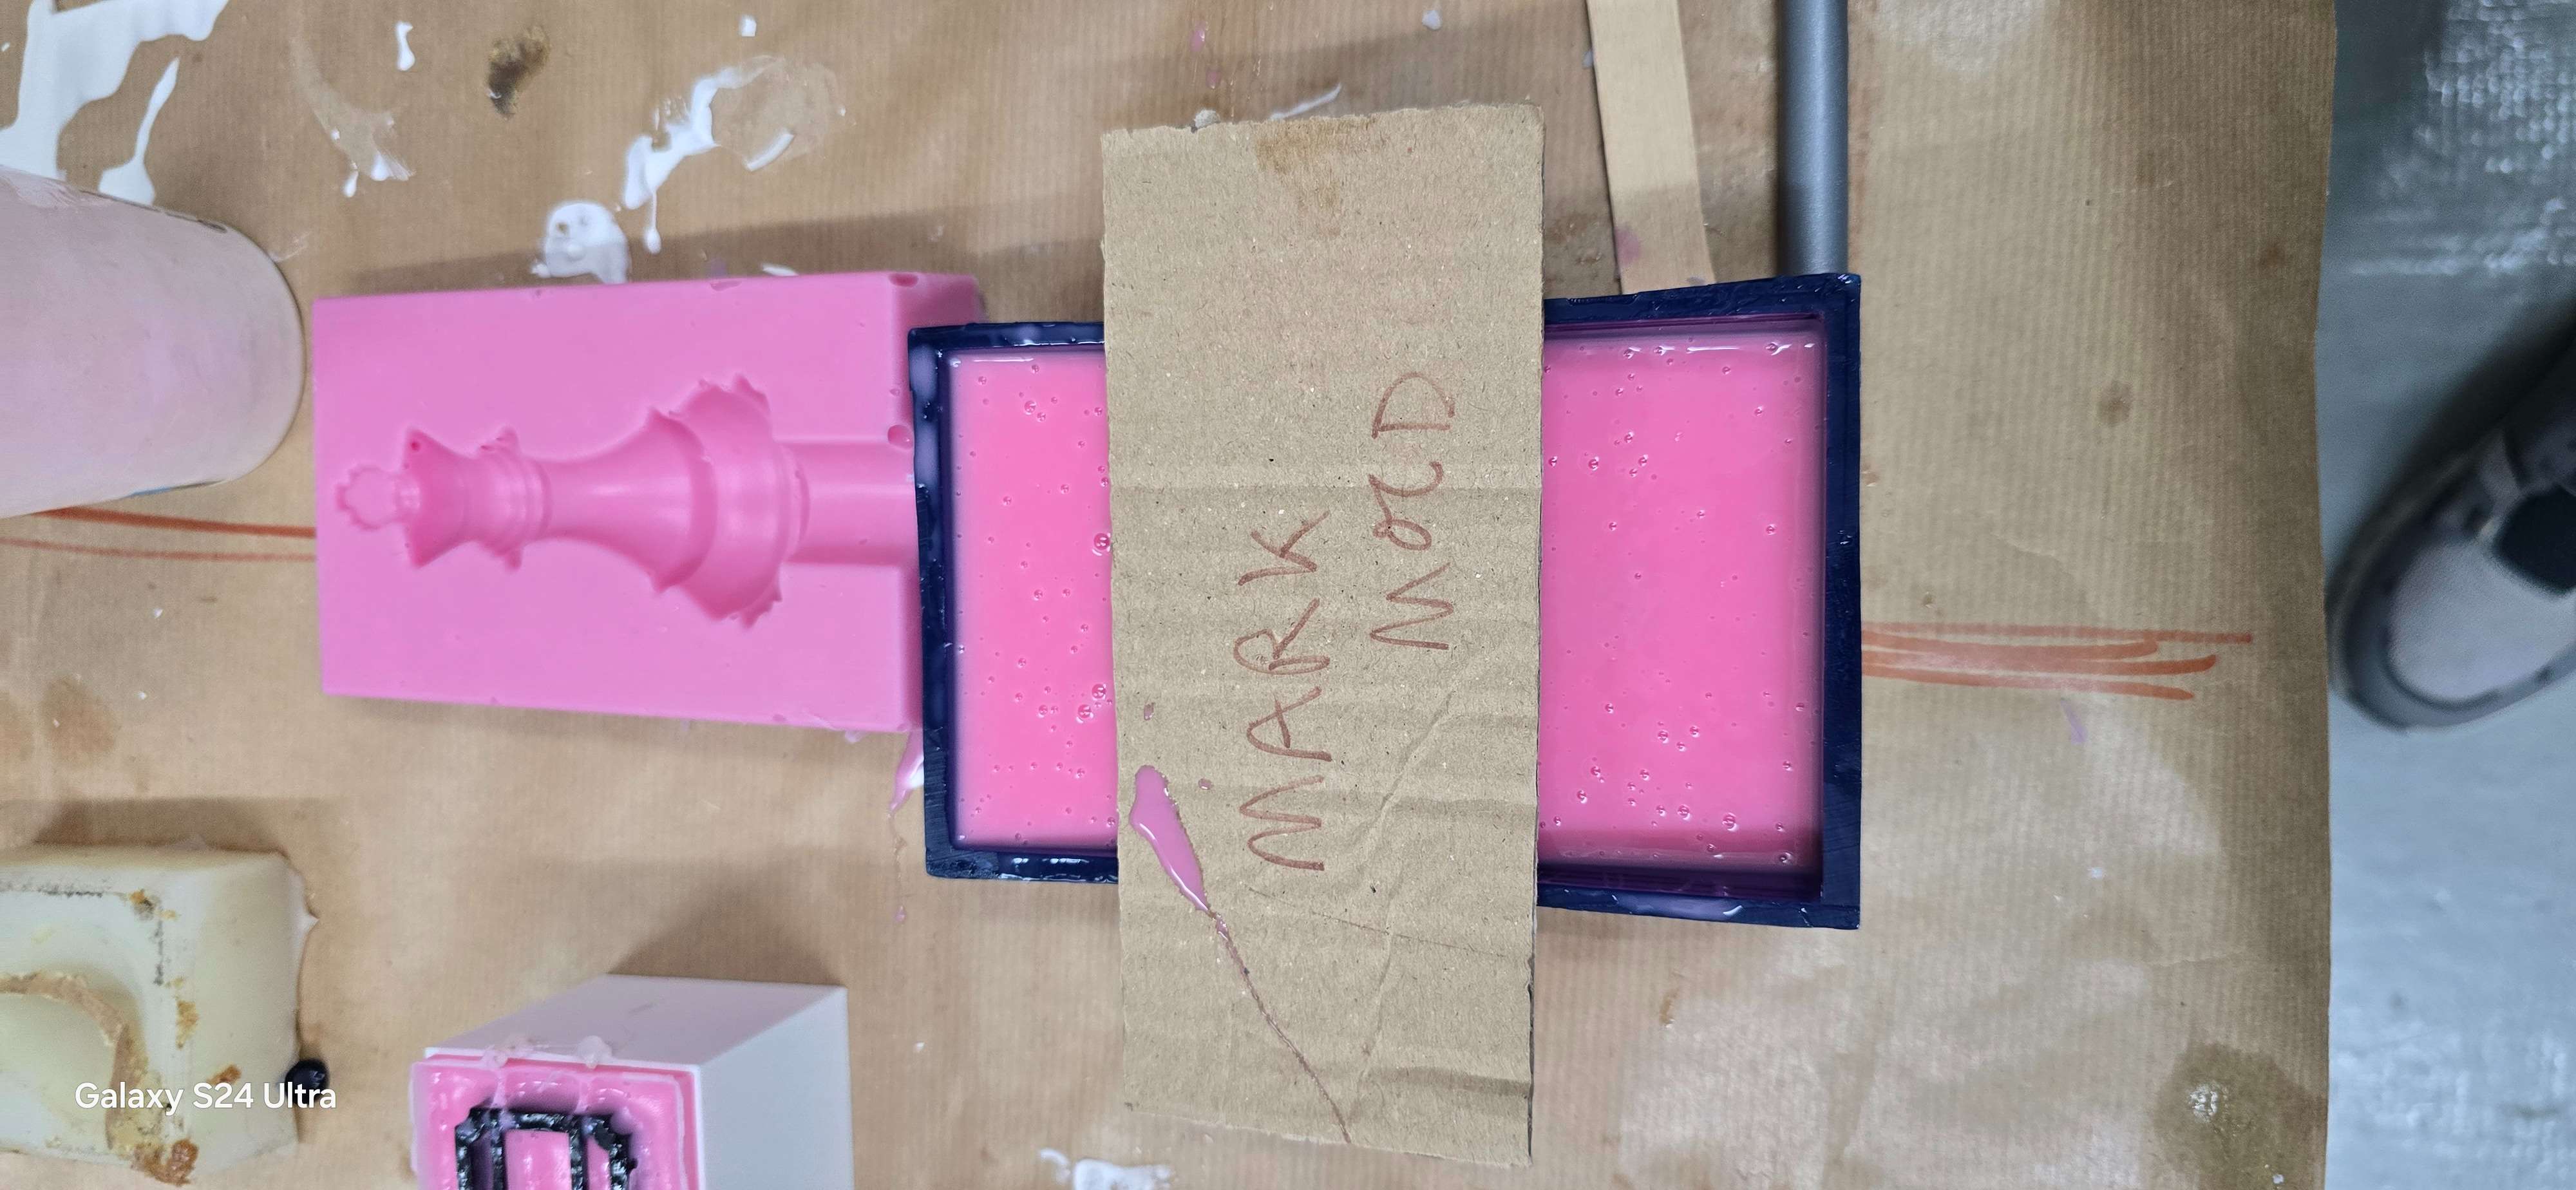
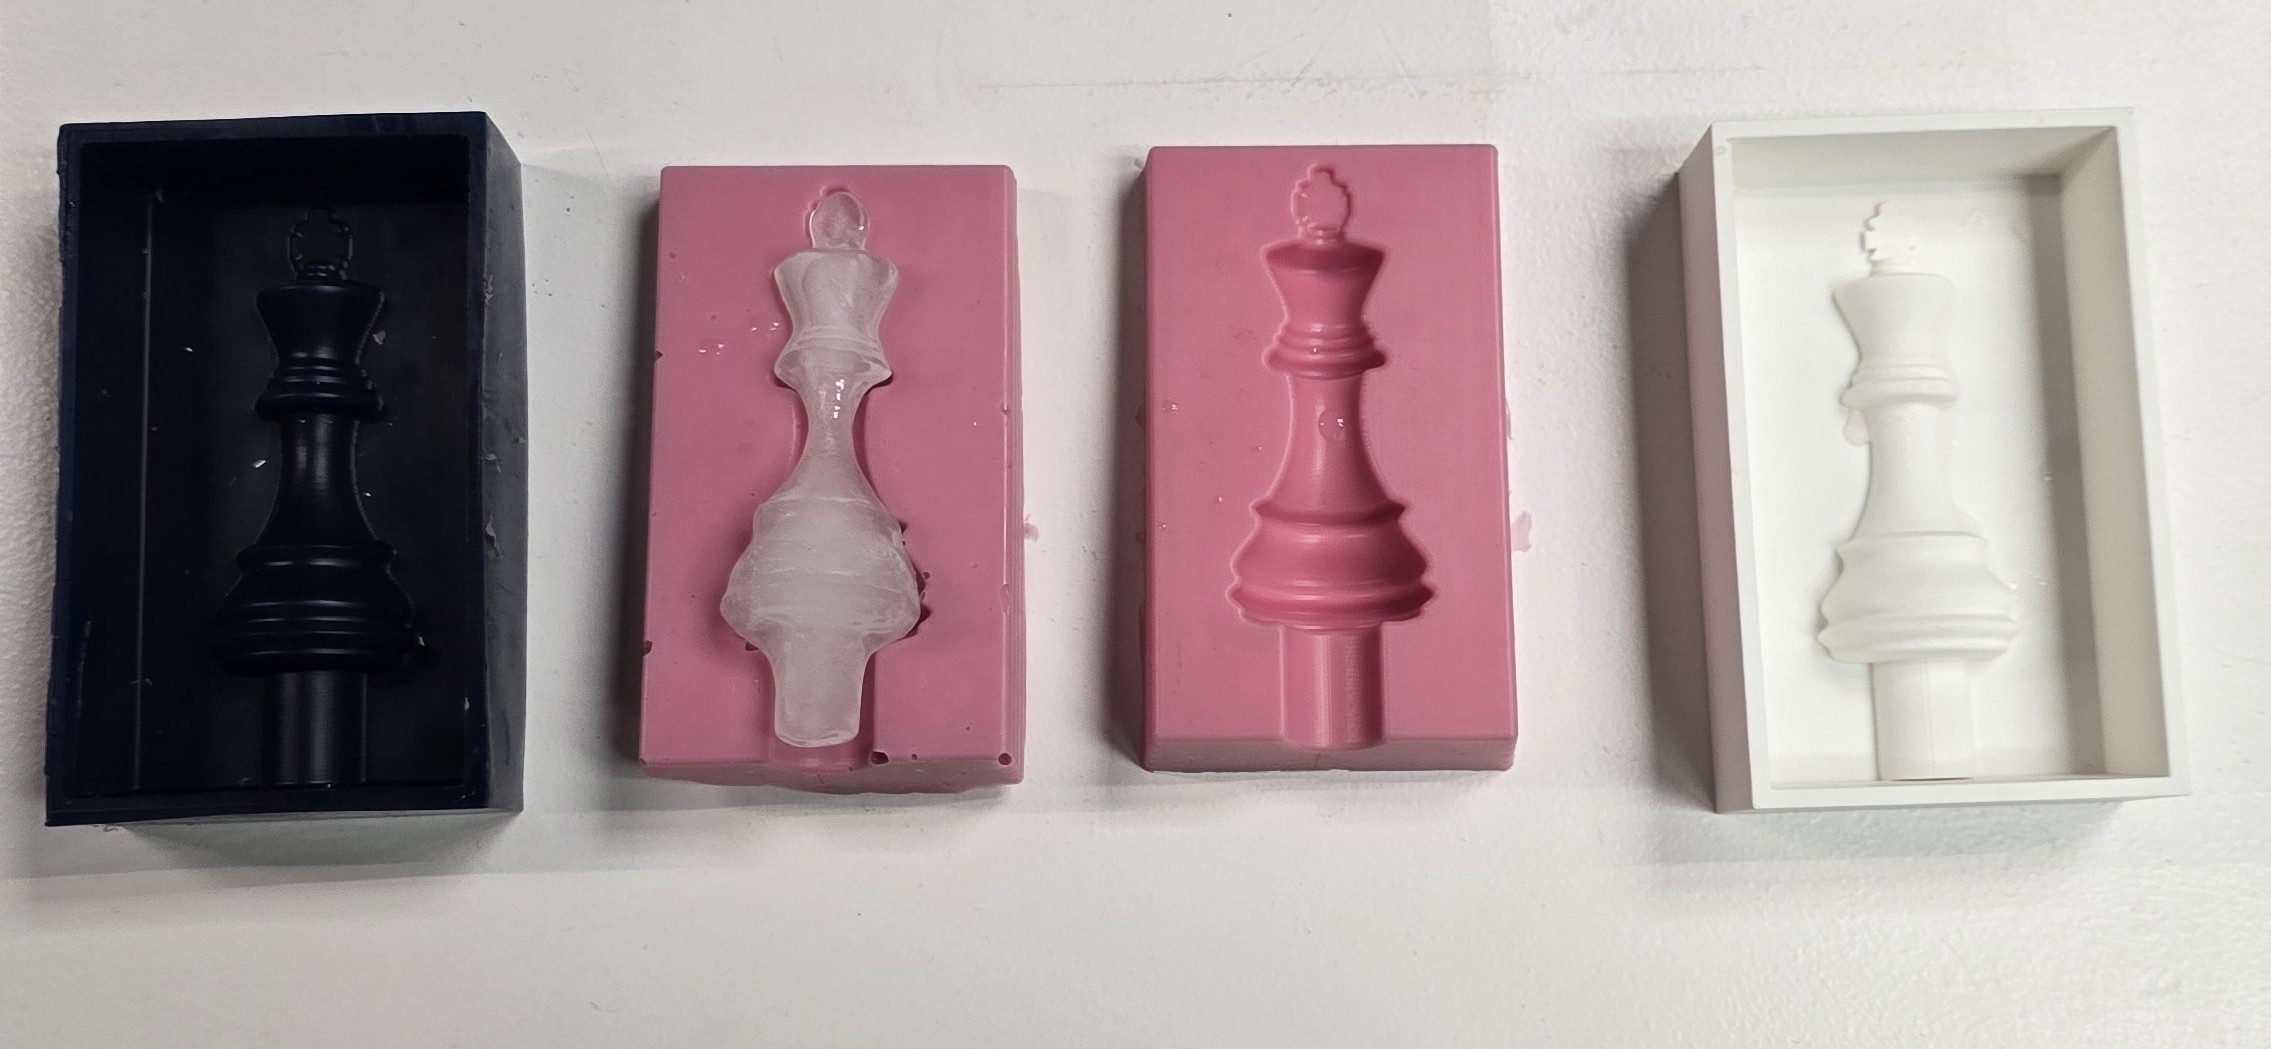
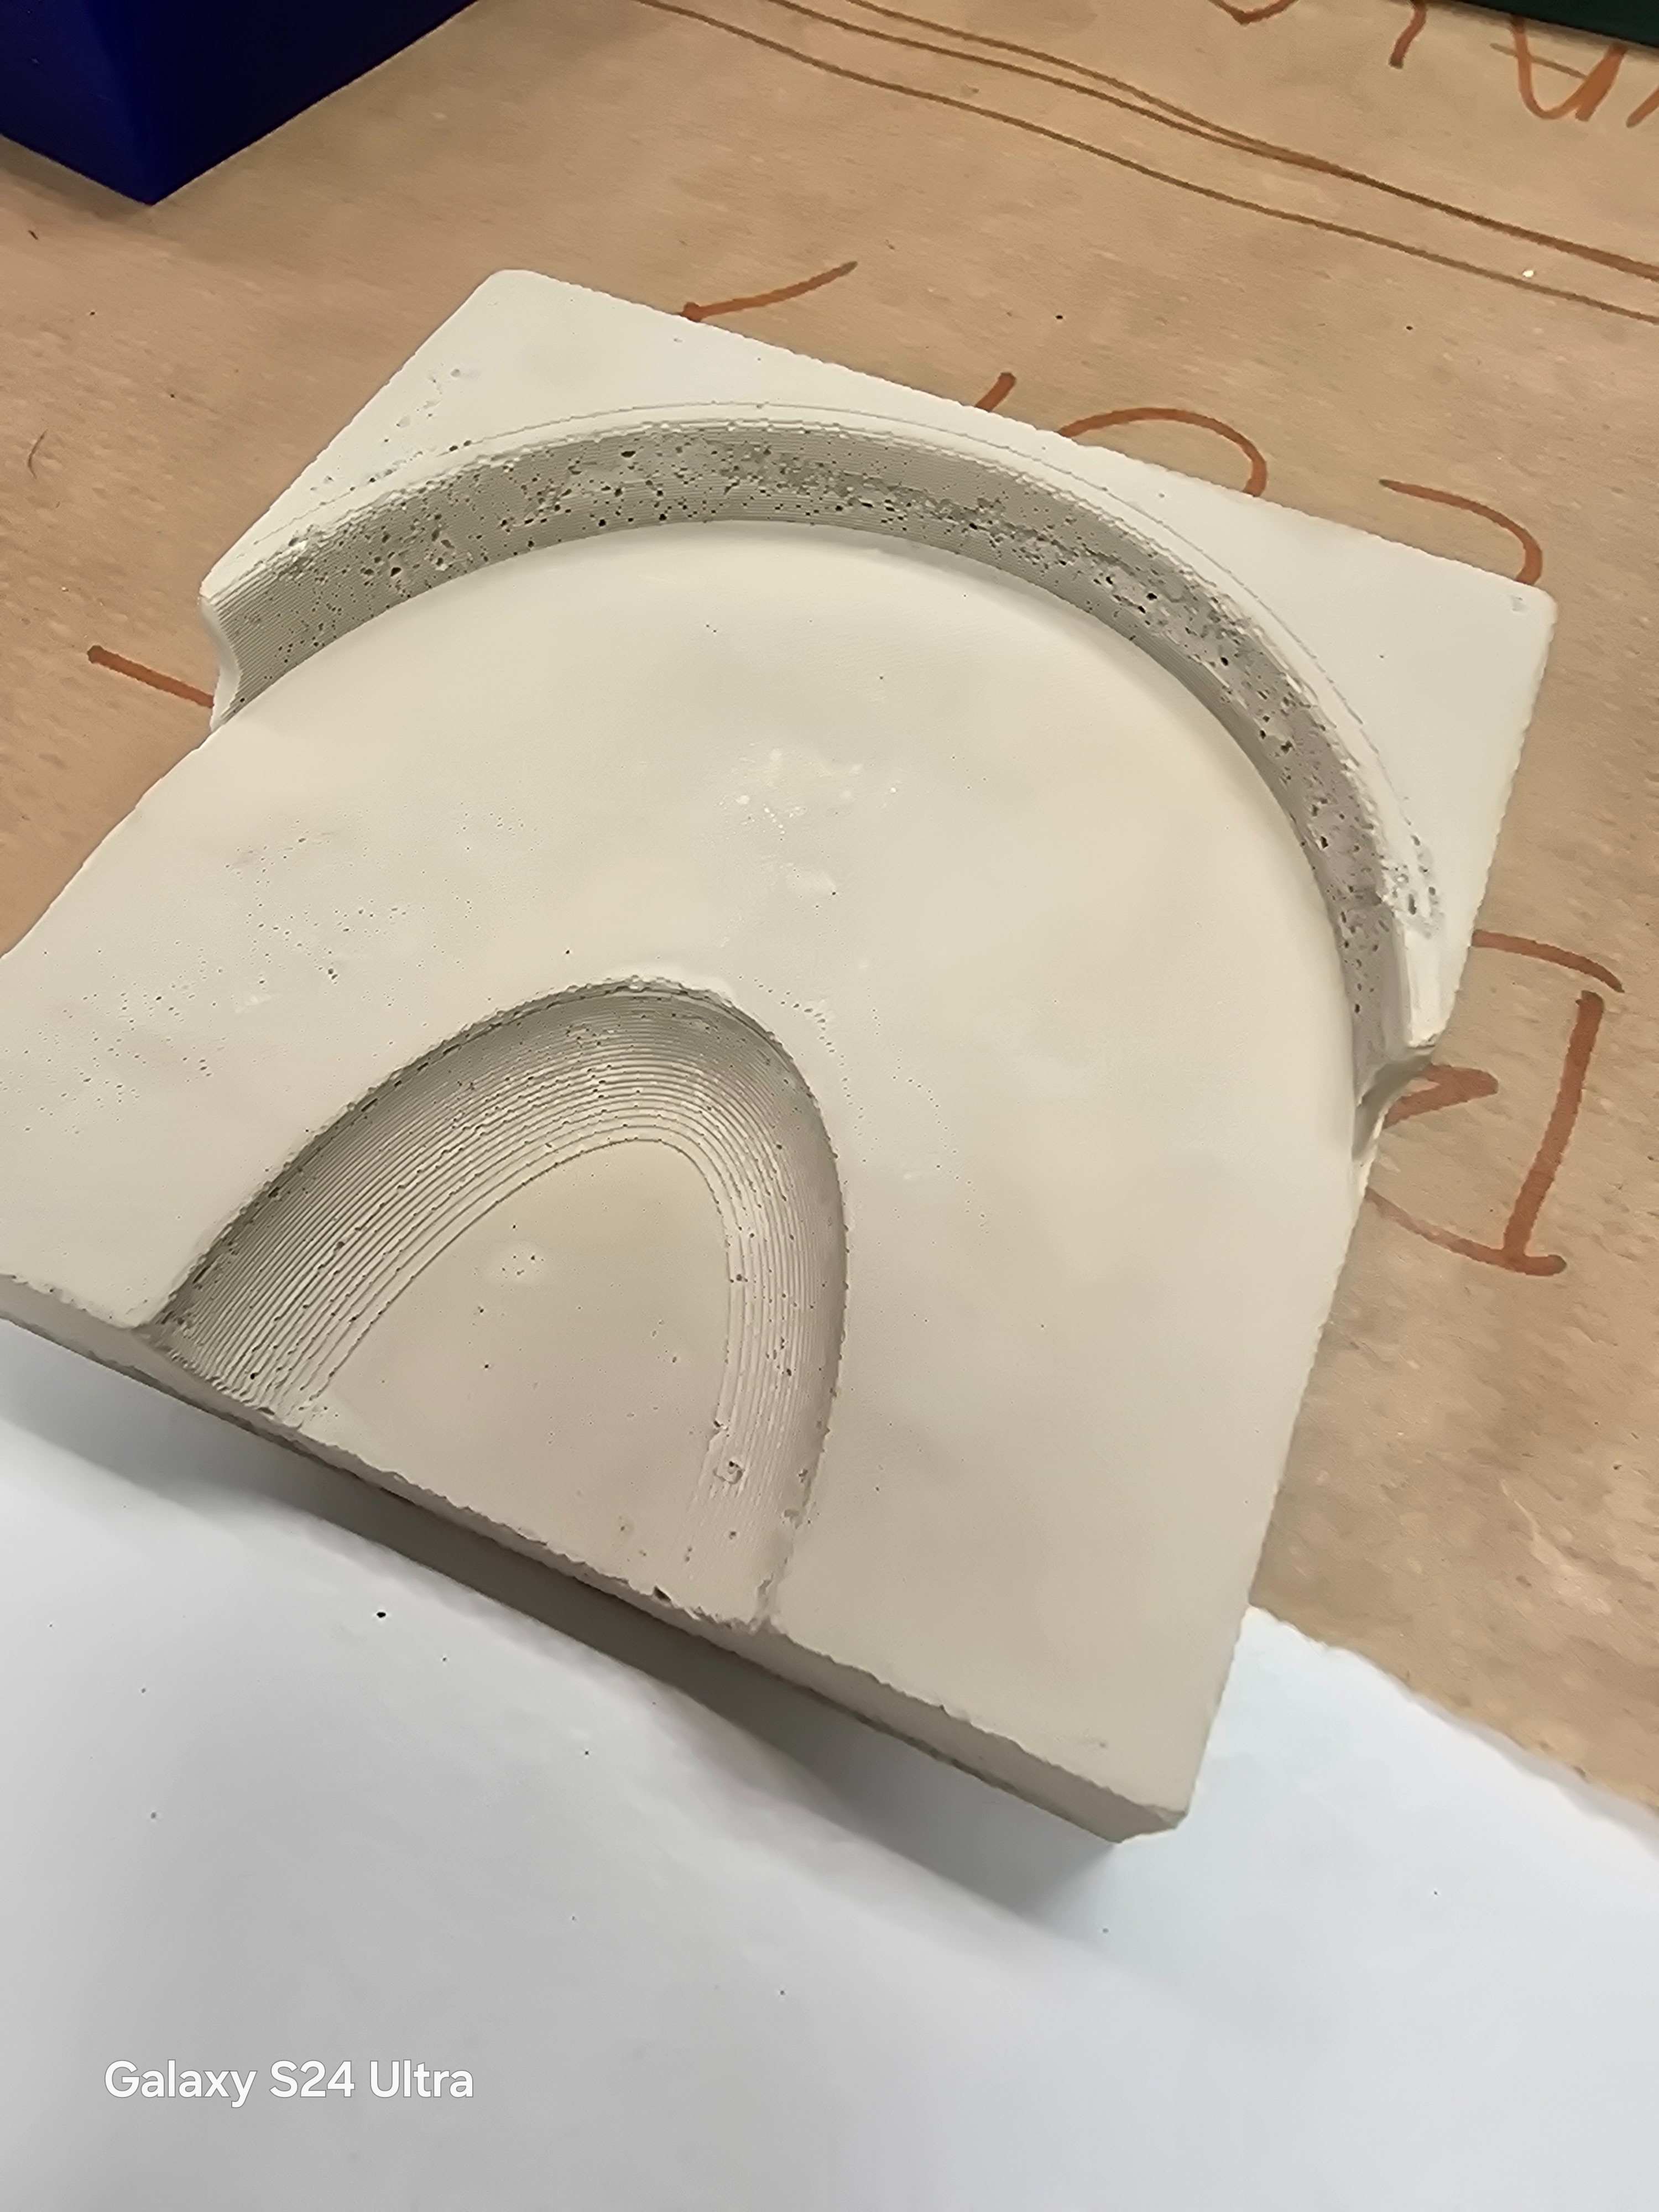
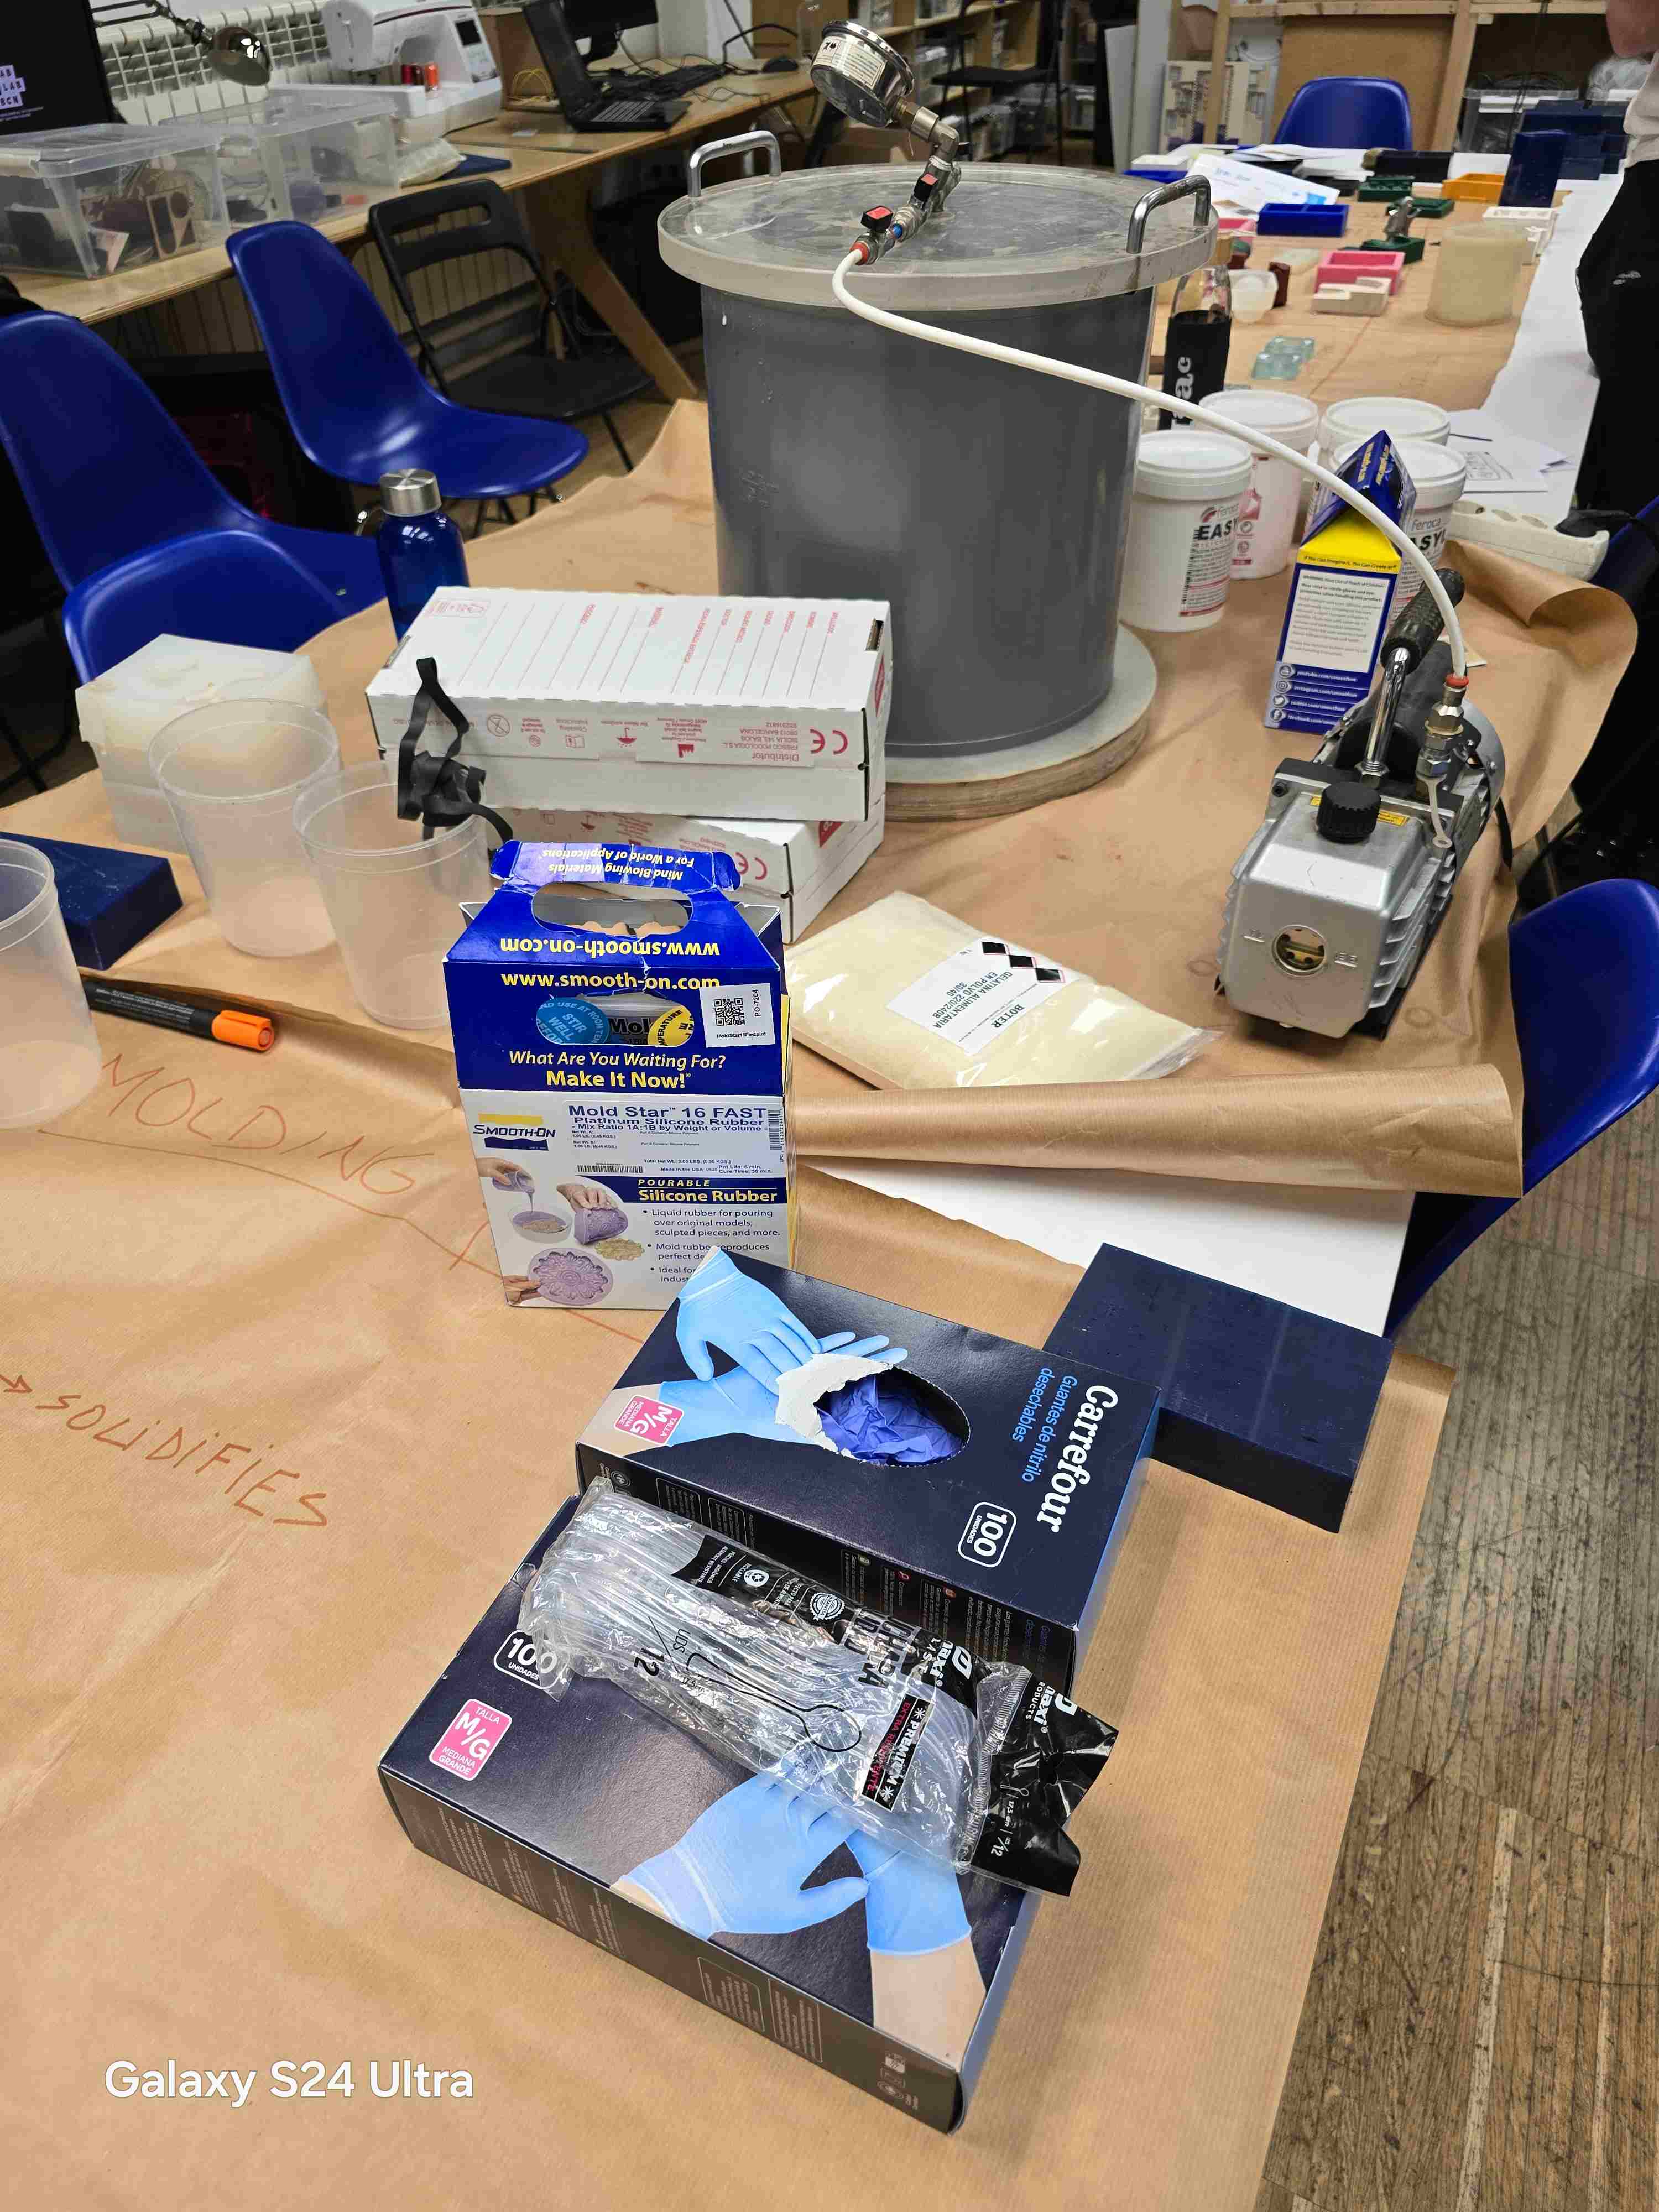
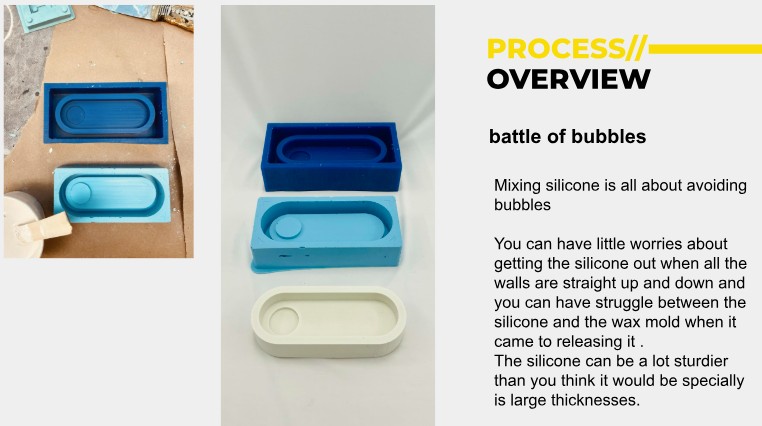
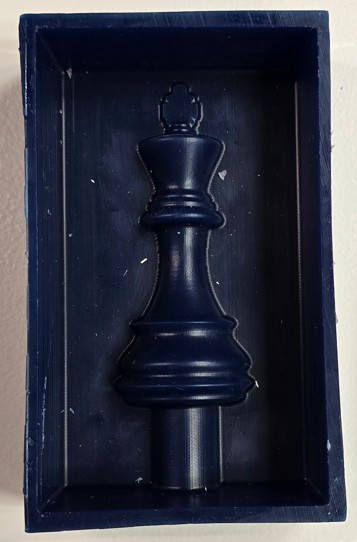
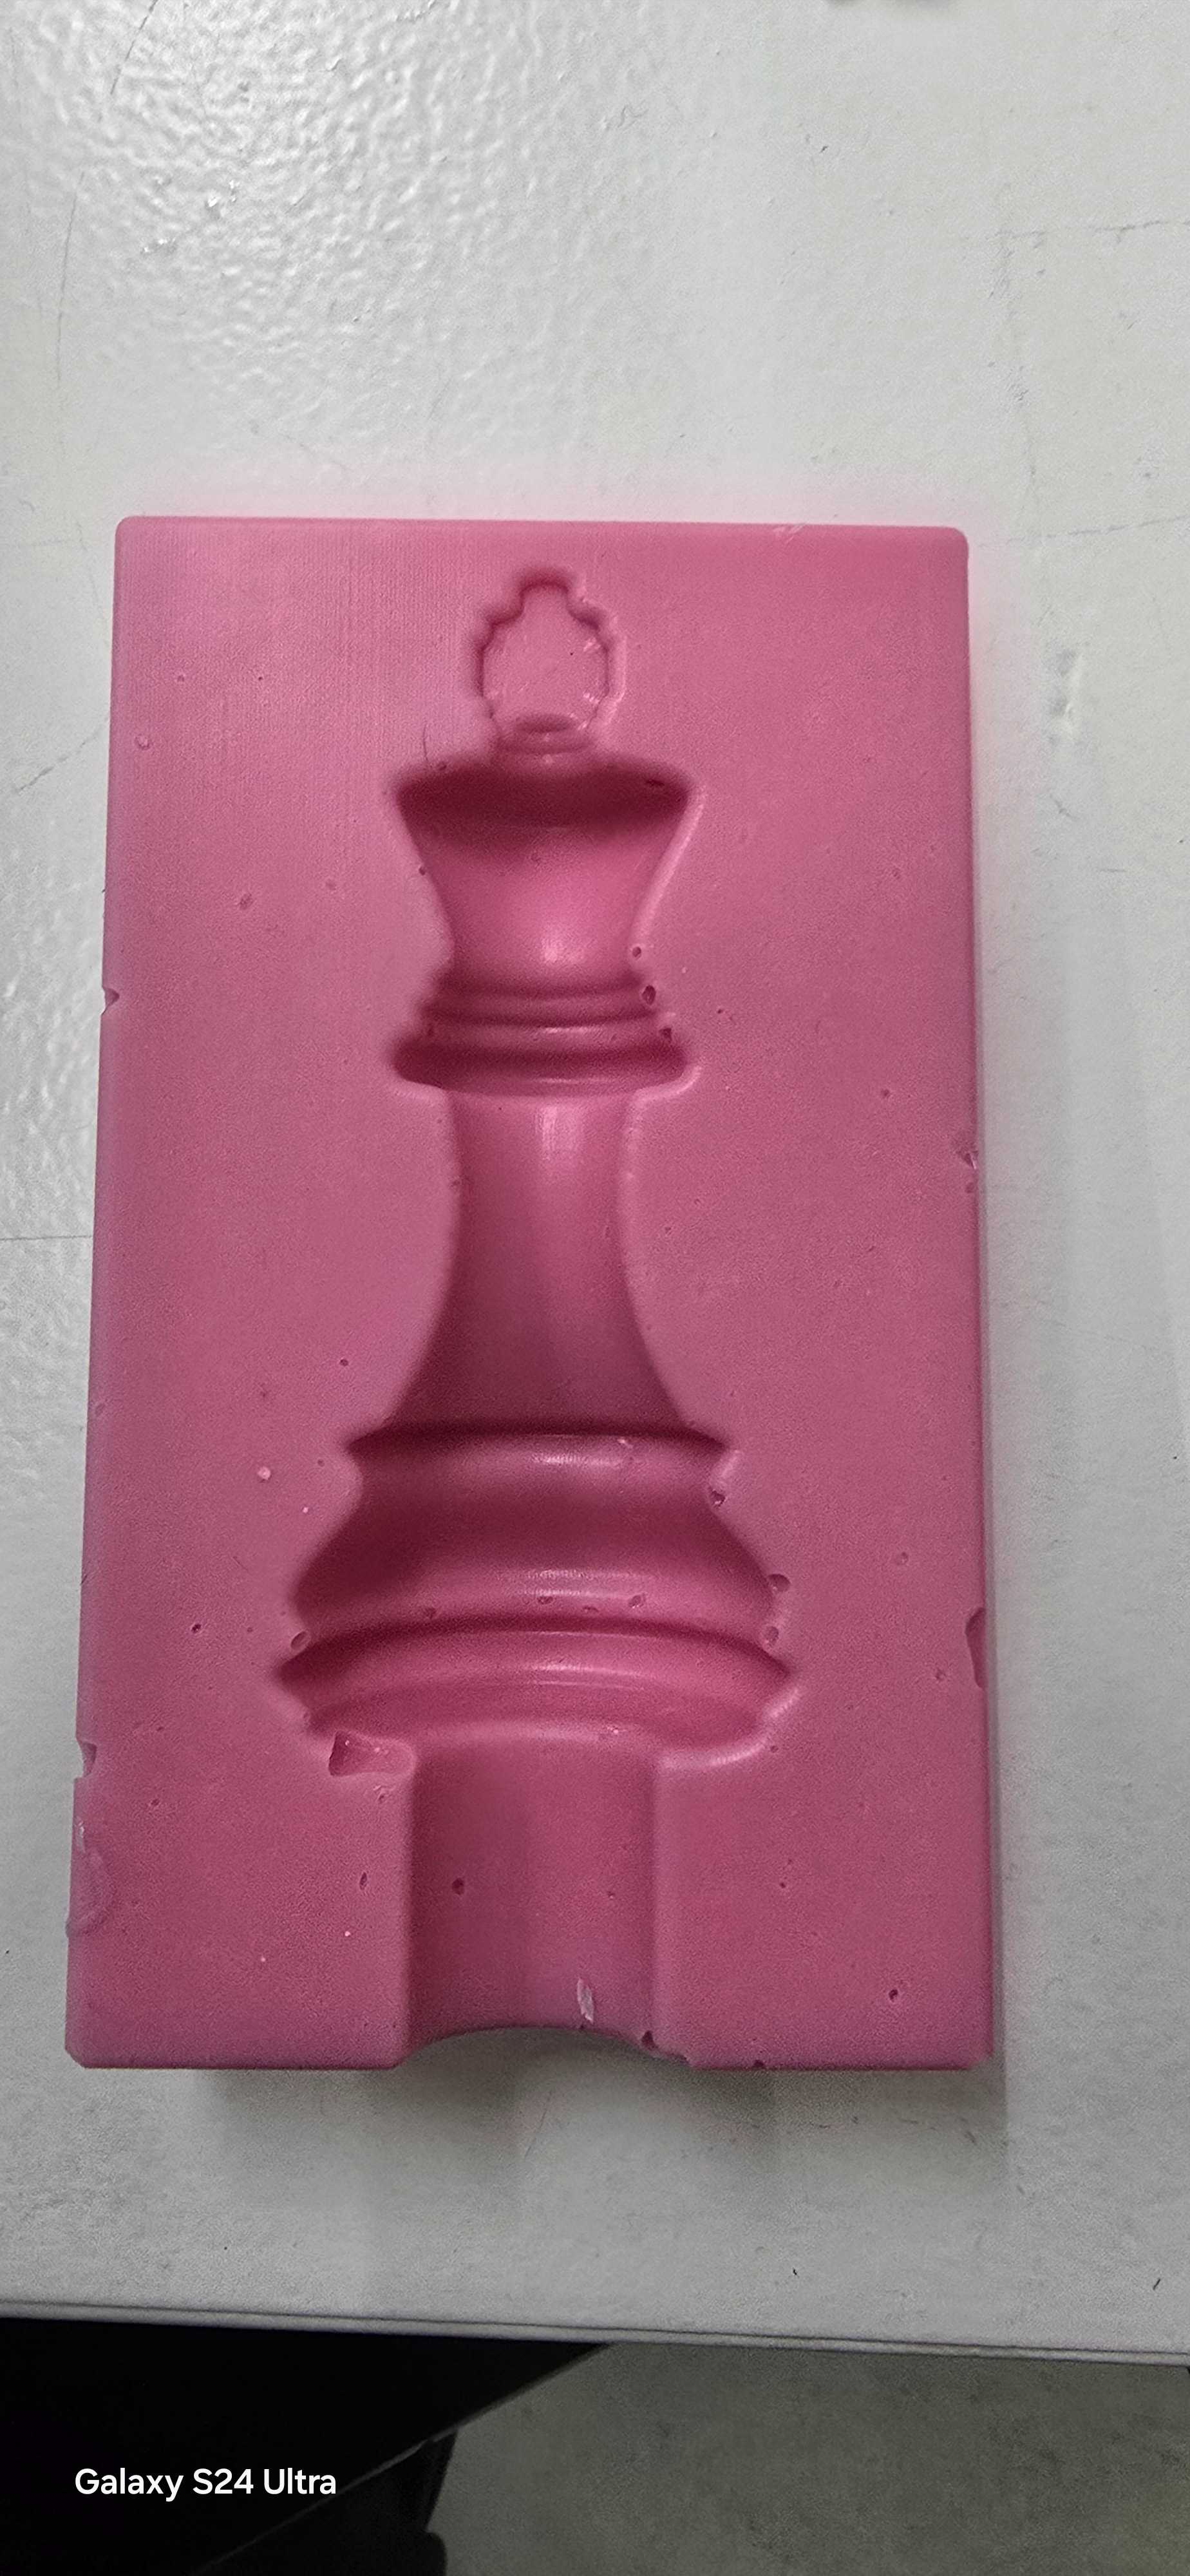
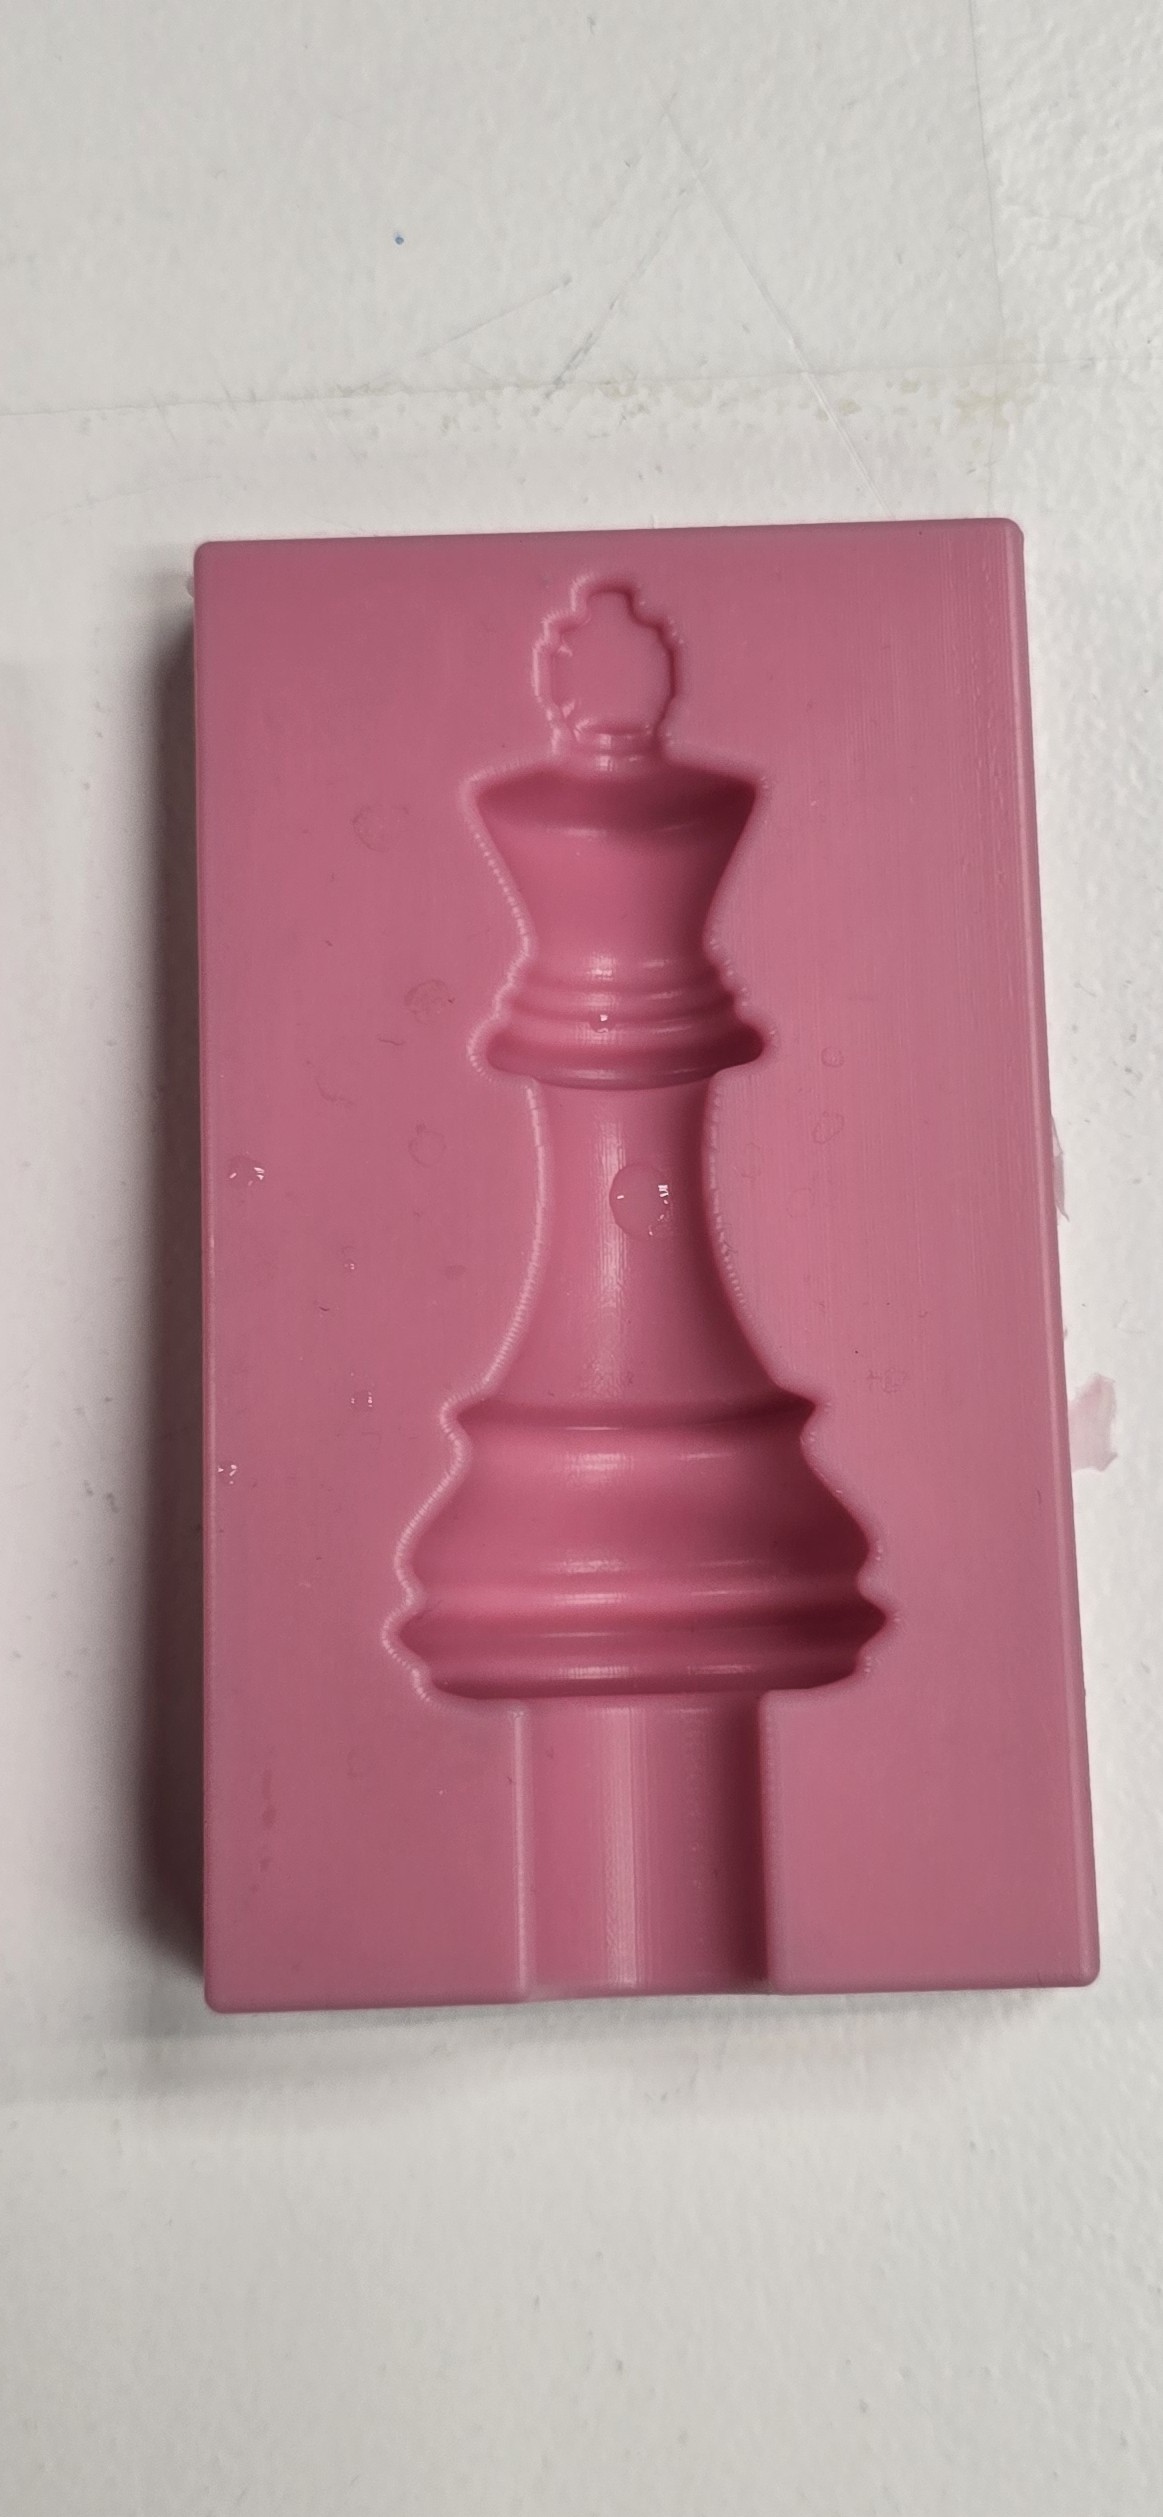
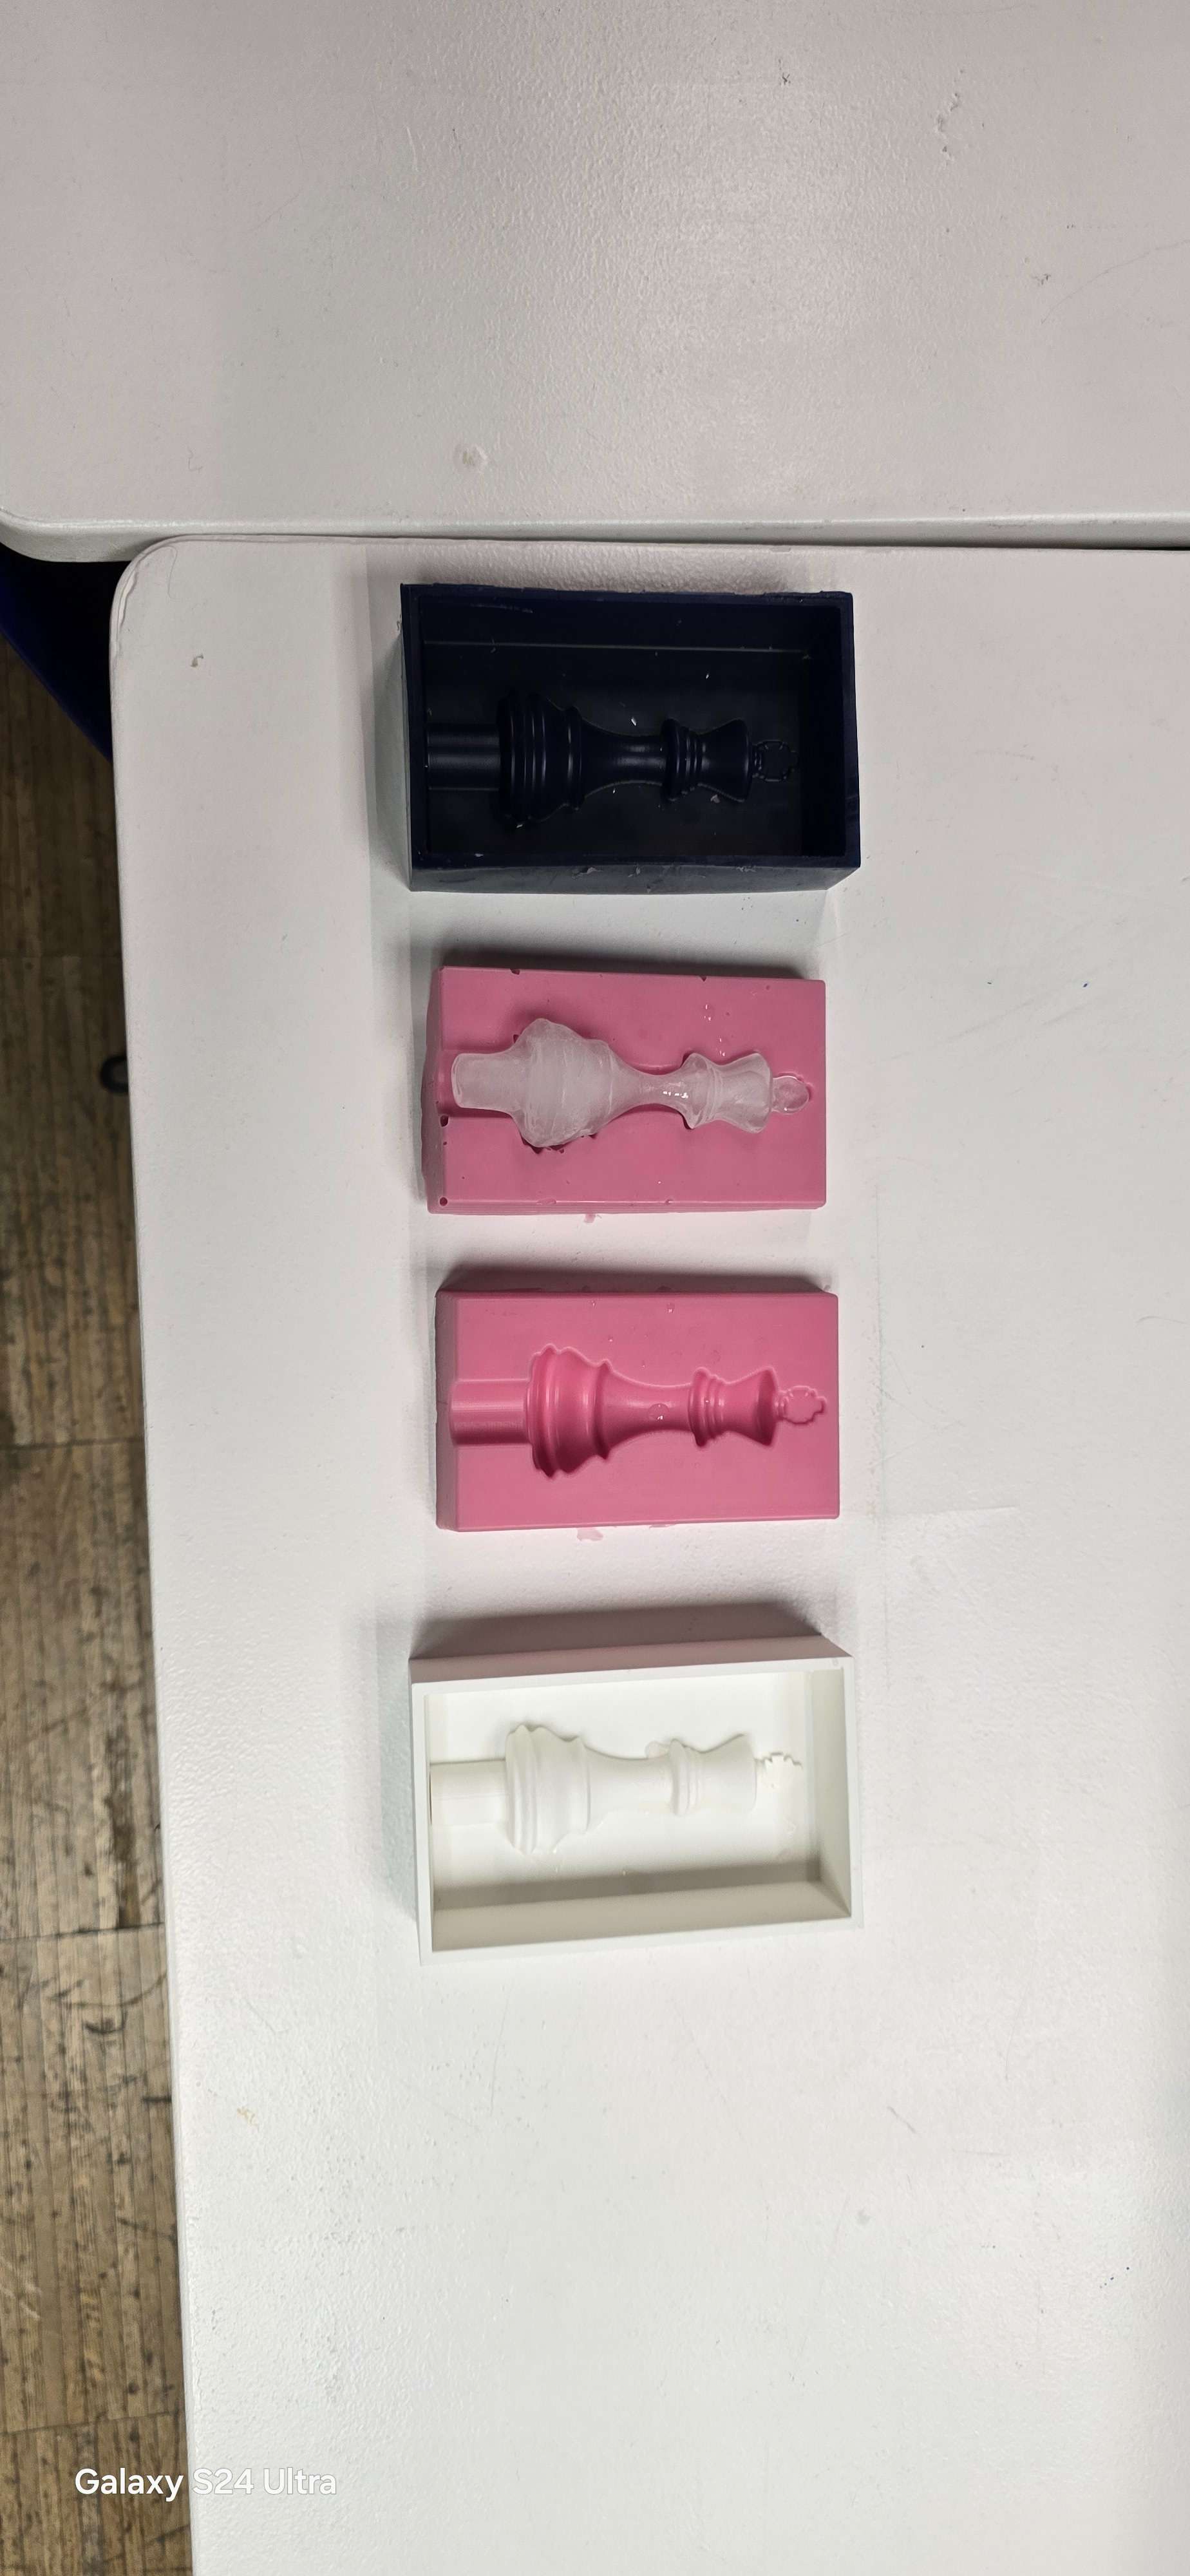
Once my block was produced it looked beautiful. Dani demonstrated pouring in A & B parts of the food safe mould material and then operating the vacuum machine to suck out all the bubbles. Then I came back the next day to see the mix. There were still a few bubbles and I opened a new batch of food safe mould solution and repeated the process Dani had shown me. I think it came out very well and there were no bubbles.
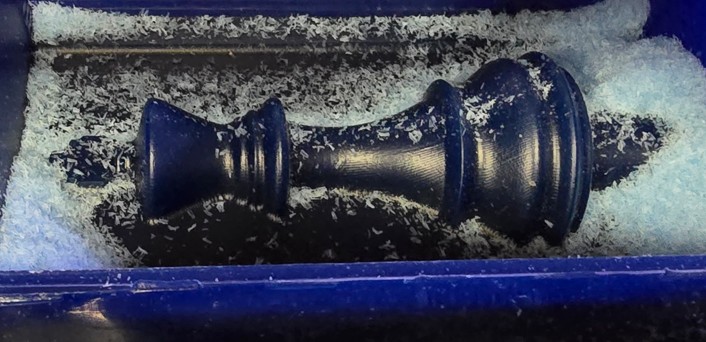
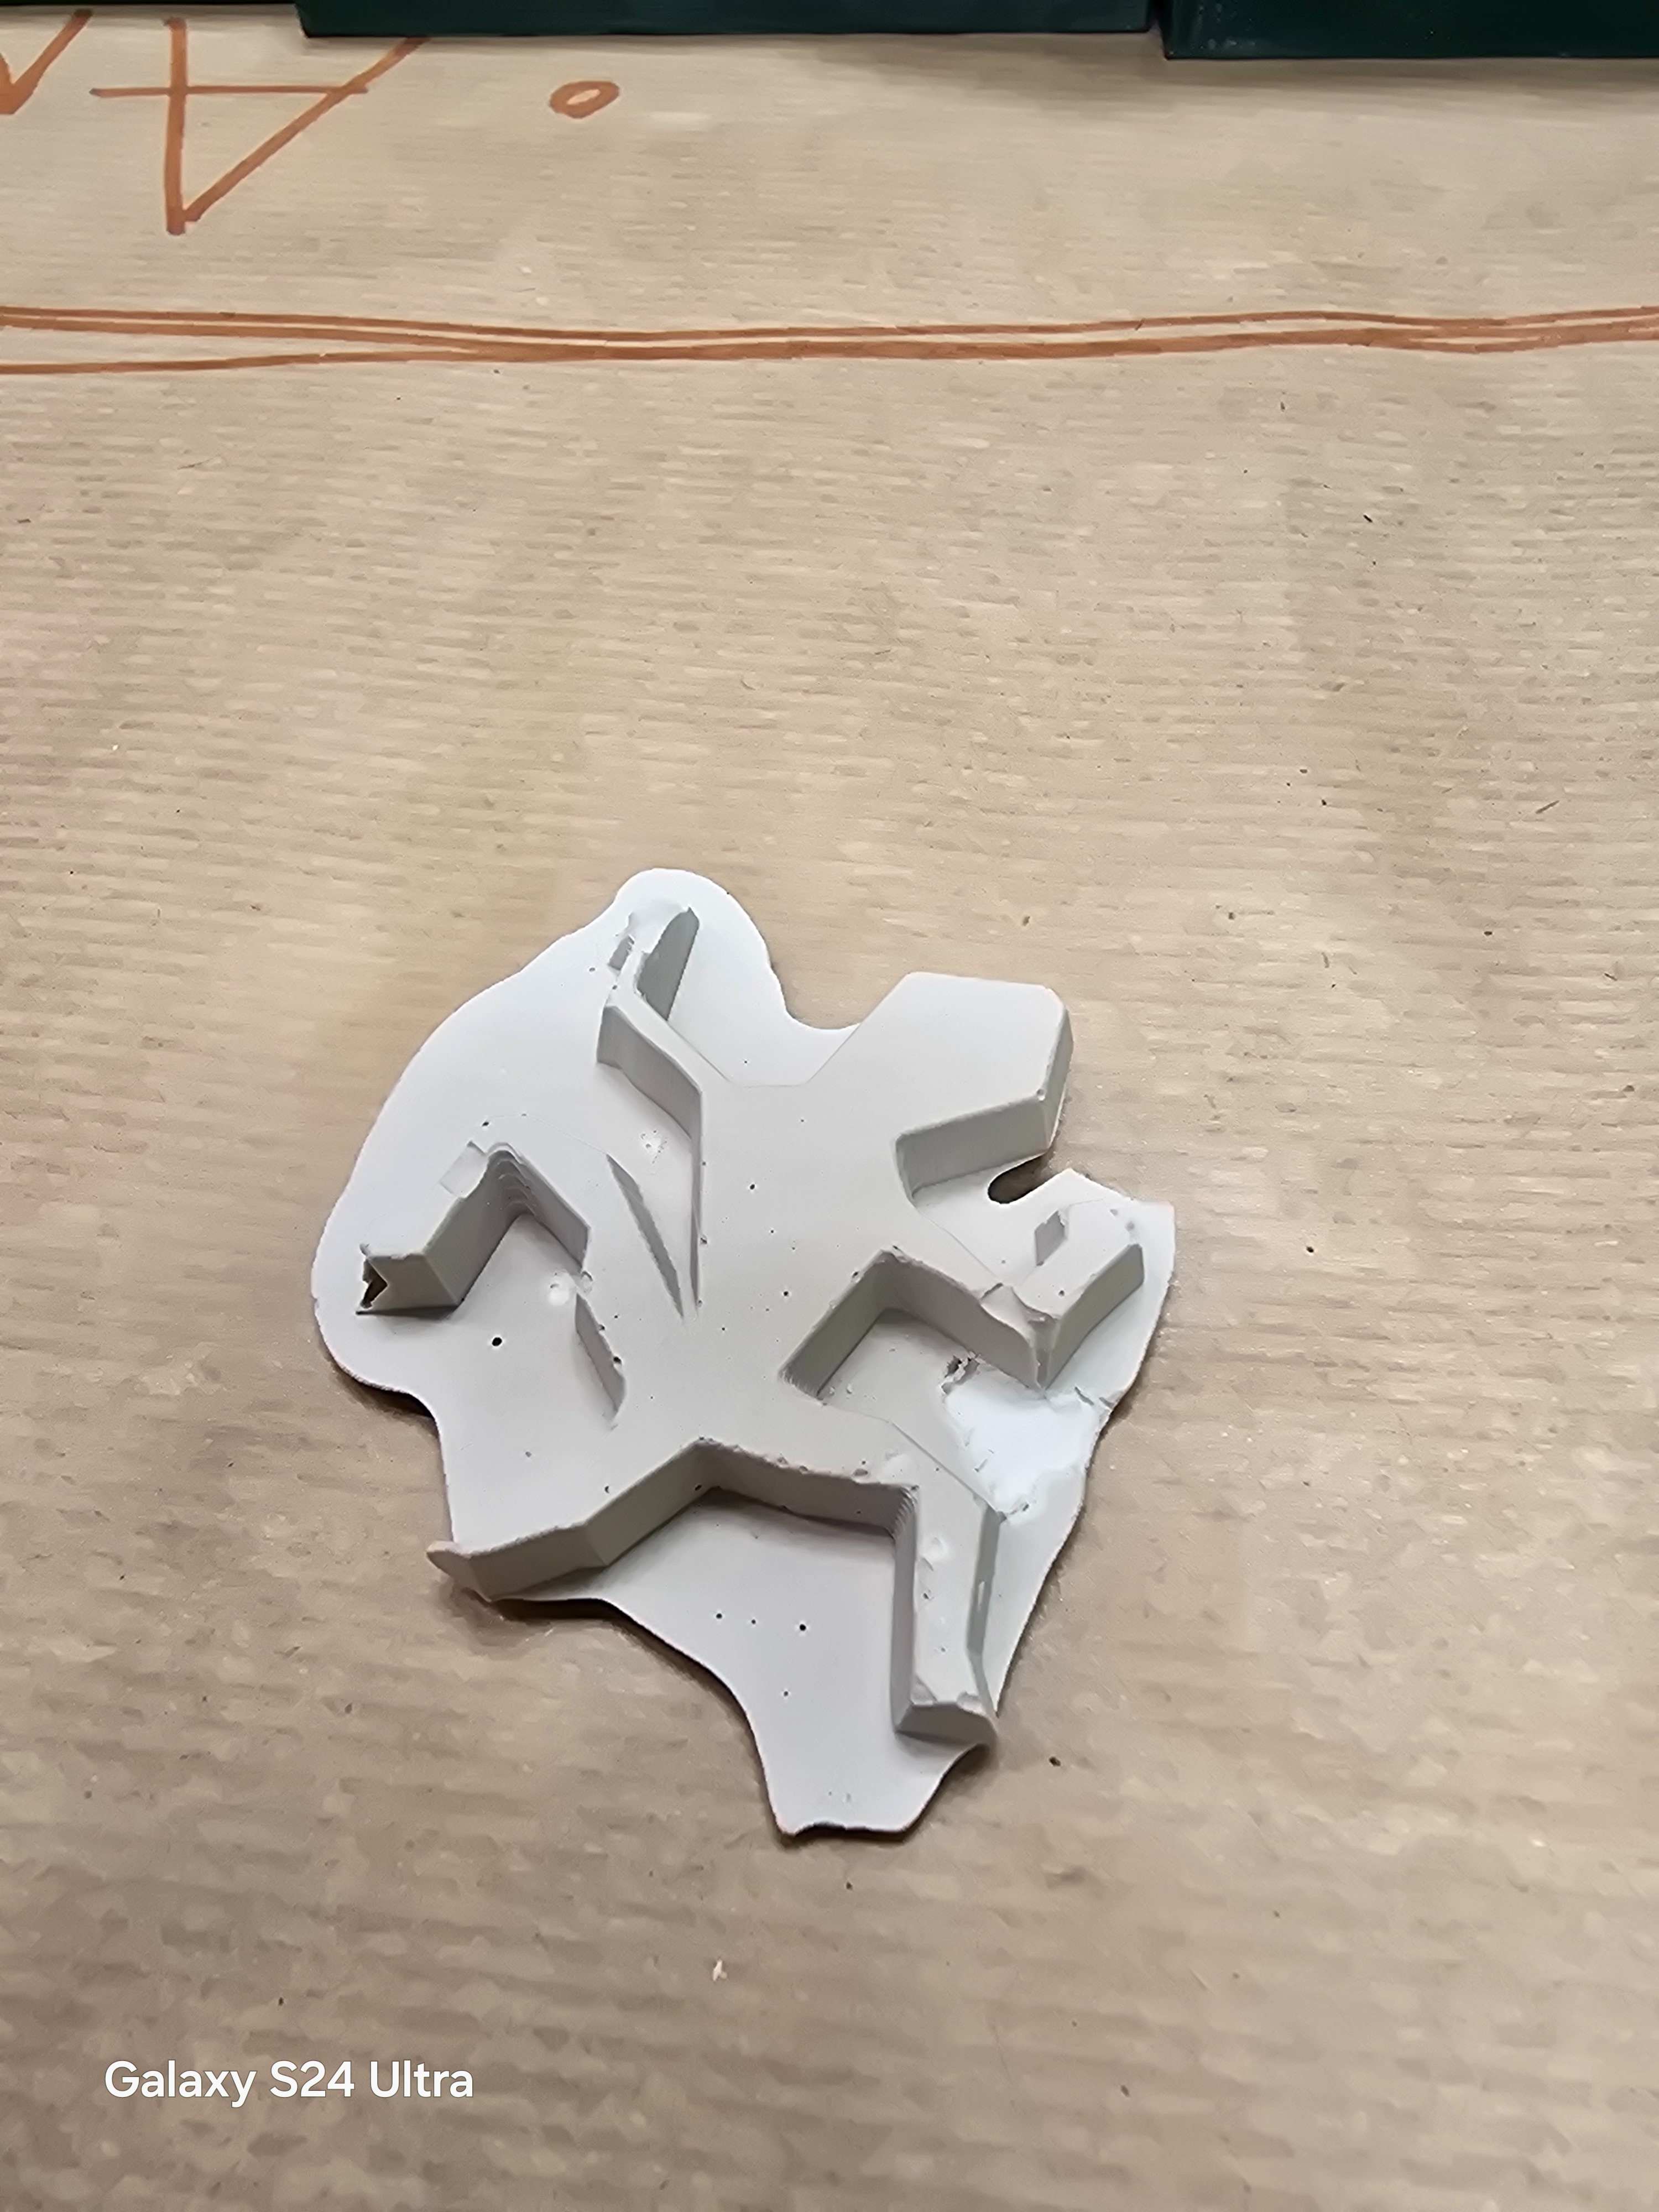
After that I poured water into the mould and froze it and it came out looking very cool.
I would love a lot more time on this, let's say a month to explore all kinds of different materials and moulds.
Theory
Below are examples of different casting techniques and molds:
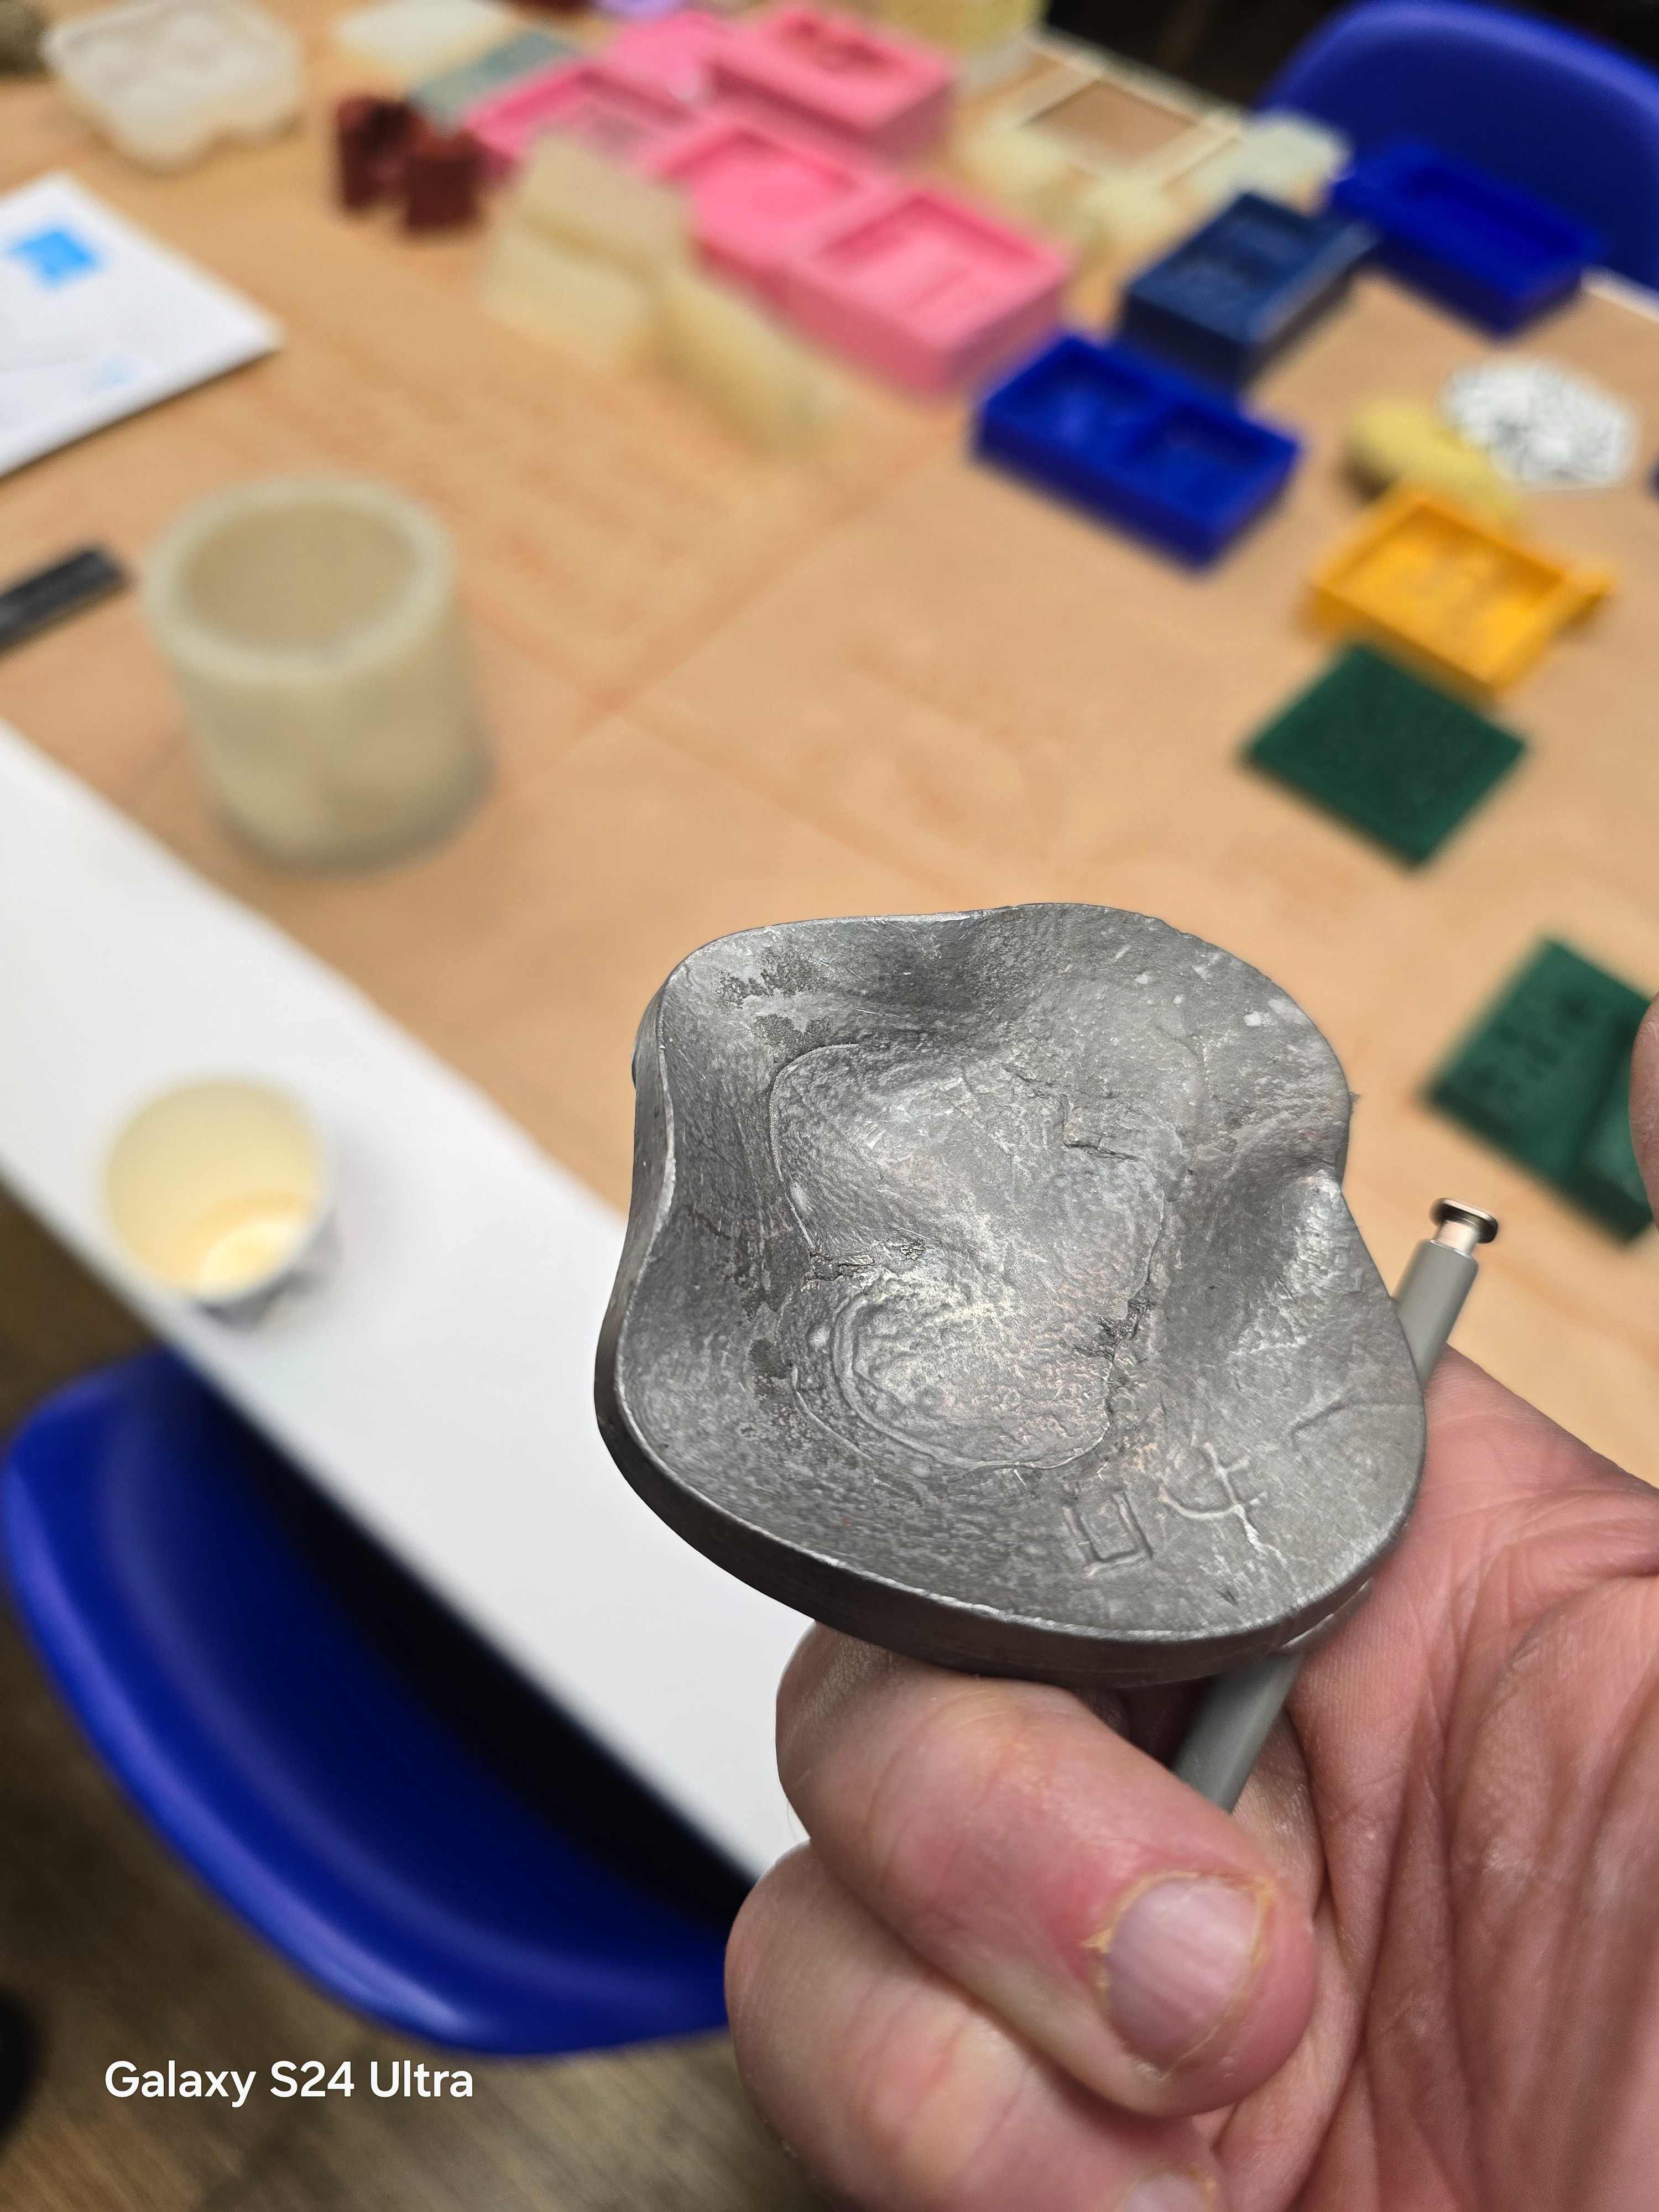
The following images are of low temperature metal casts:

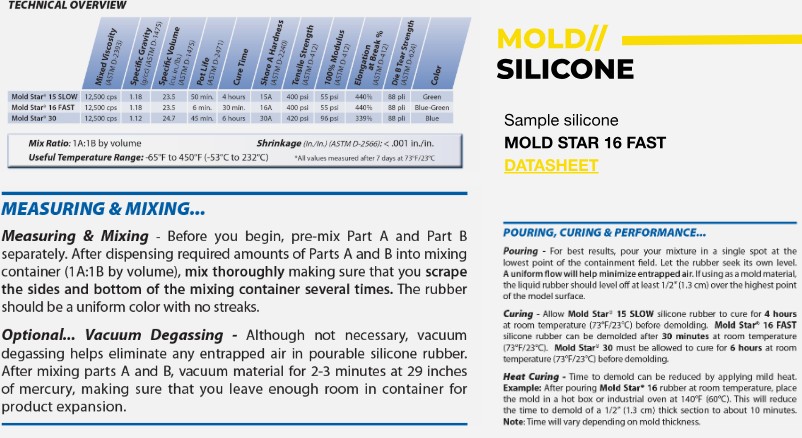
The following image is an example of a silicon mould:
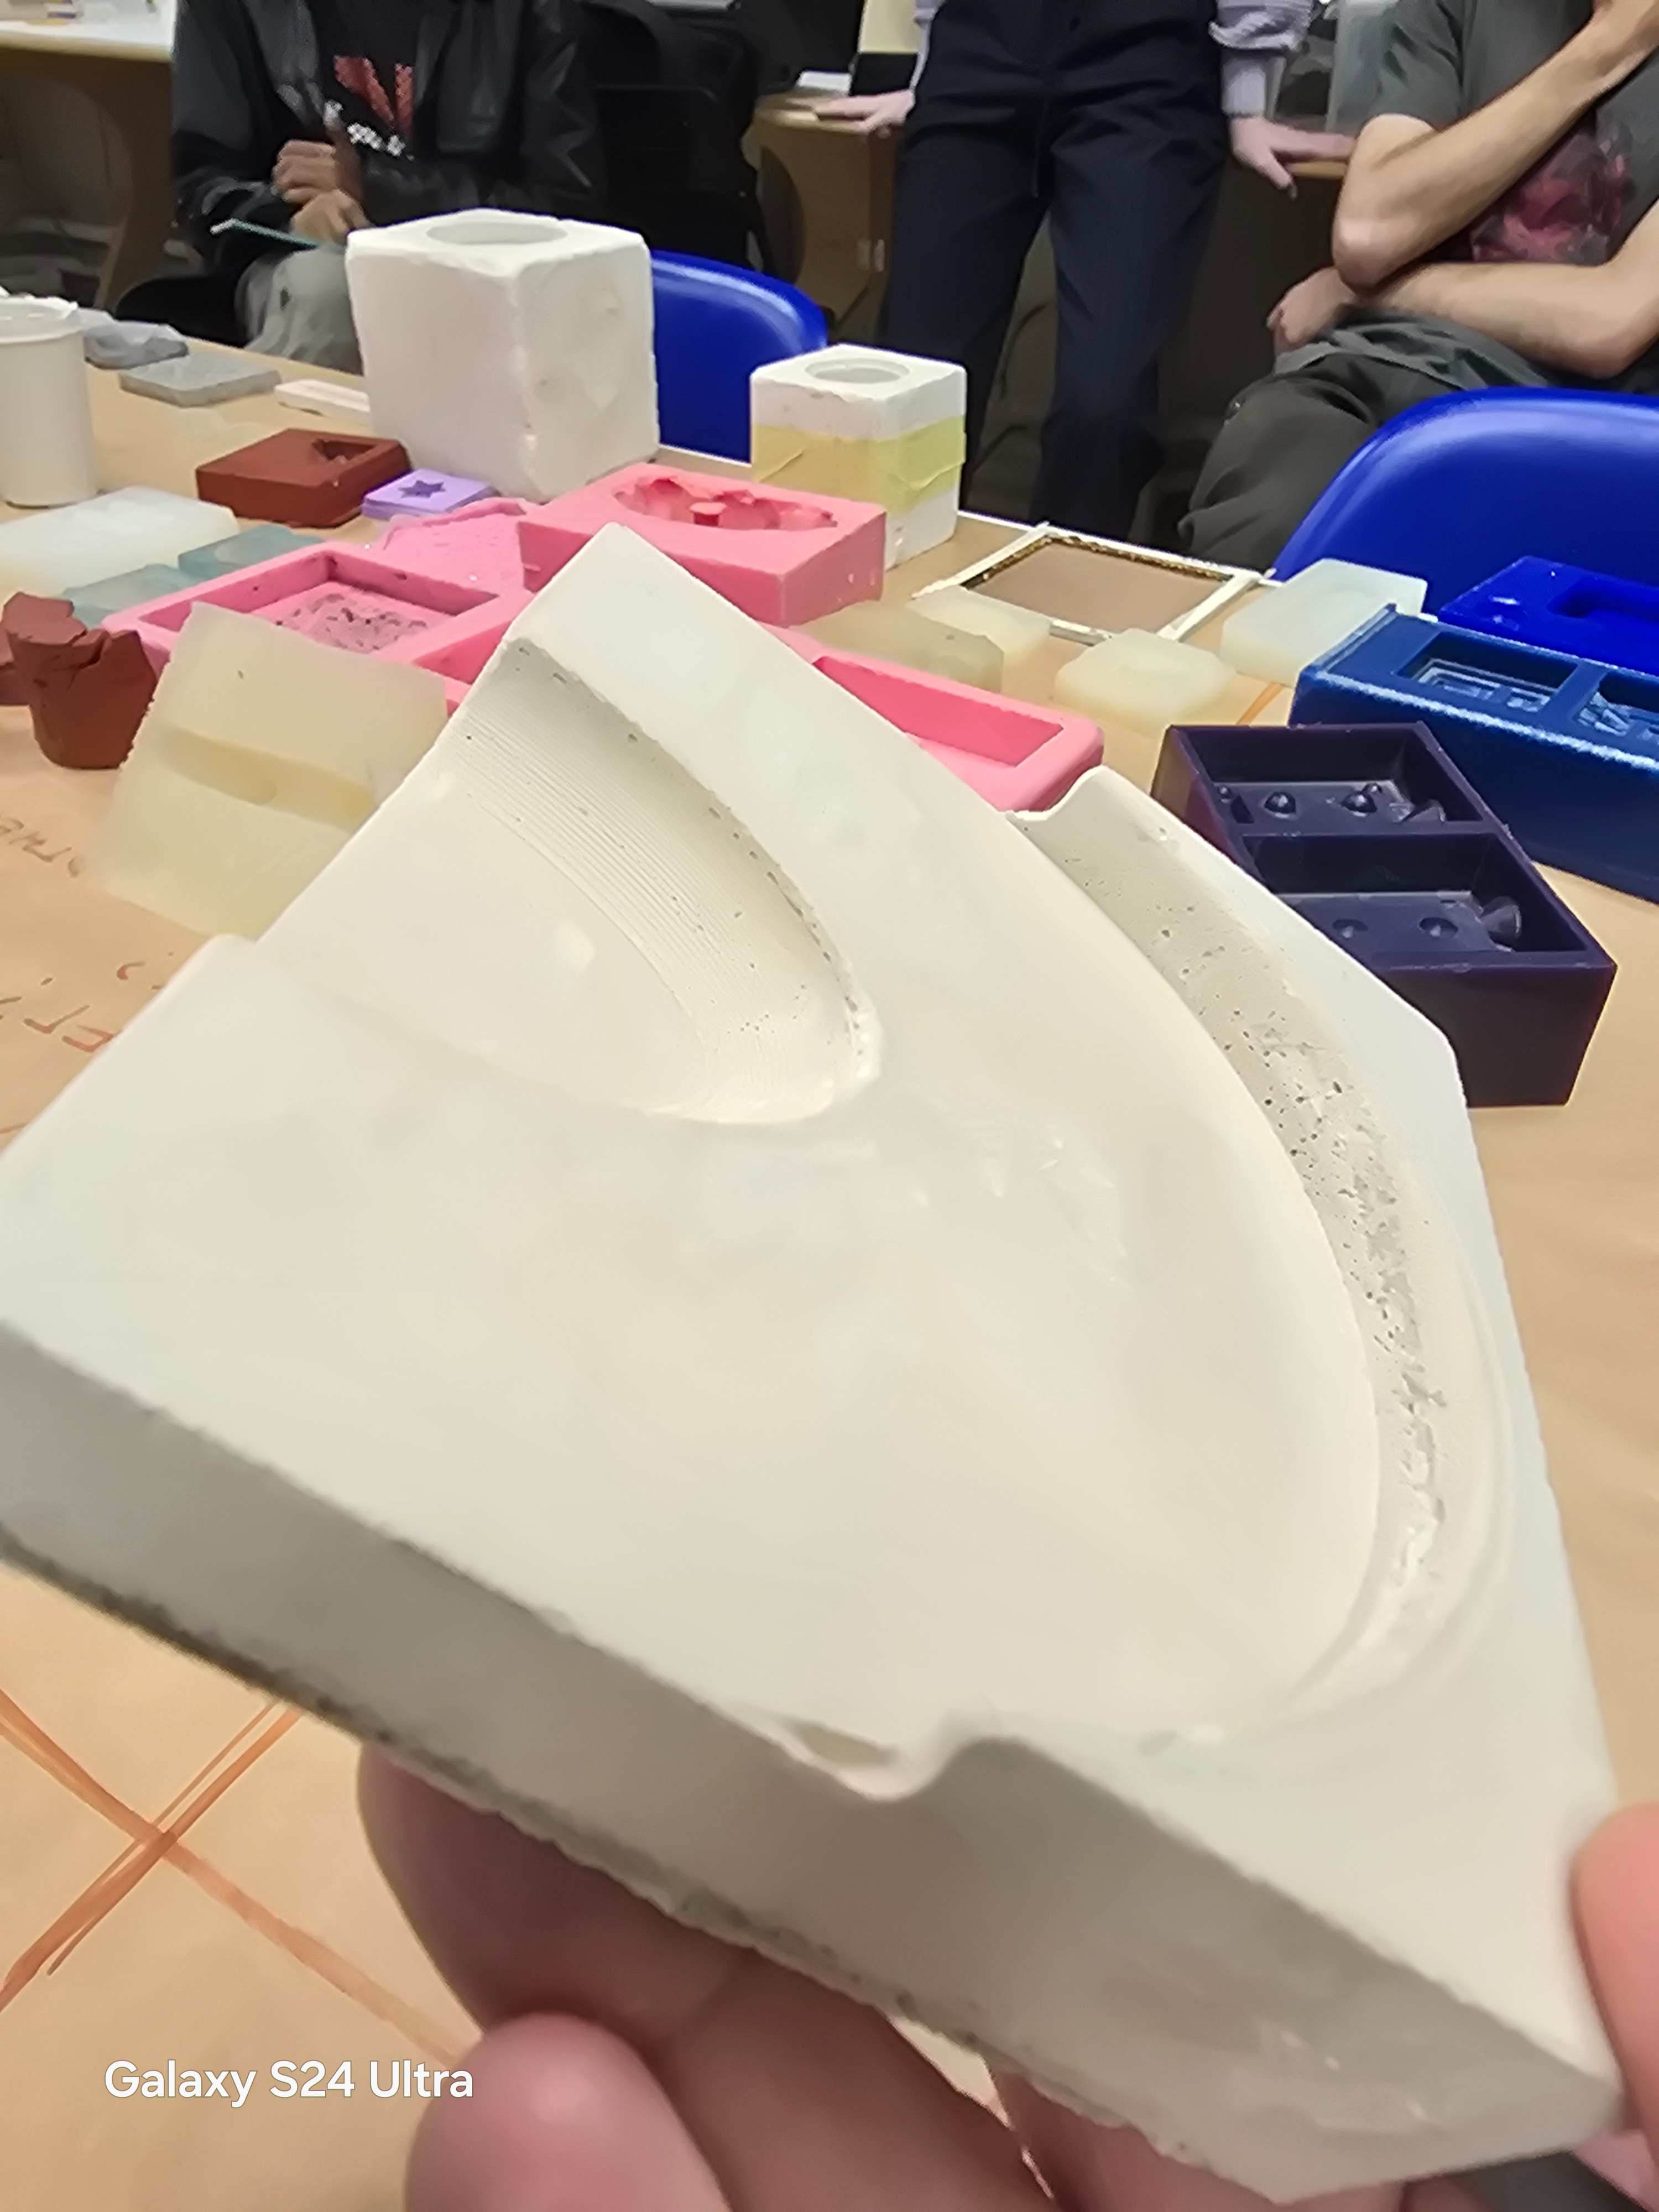
The following image is of an epoxy plaster mould:
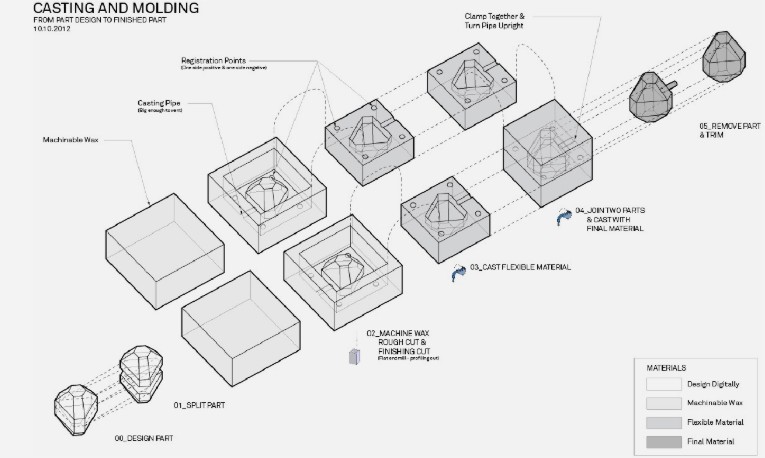
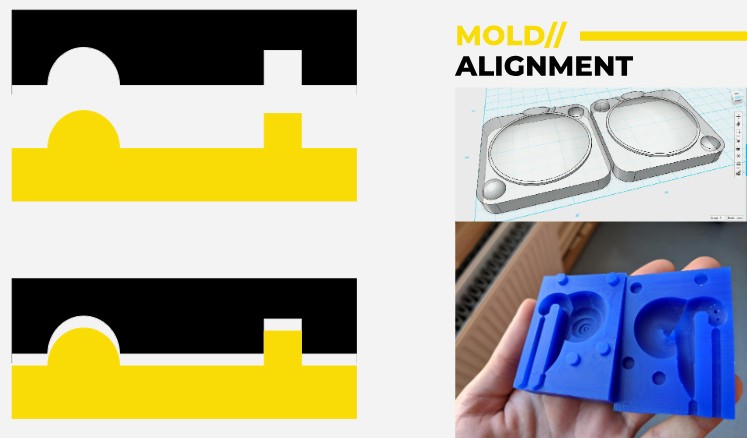
Registration Marks and Materials
To create alignment one can create lines, or registration marks on the moulds:
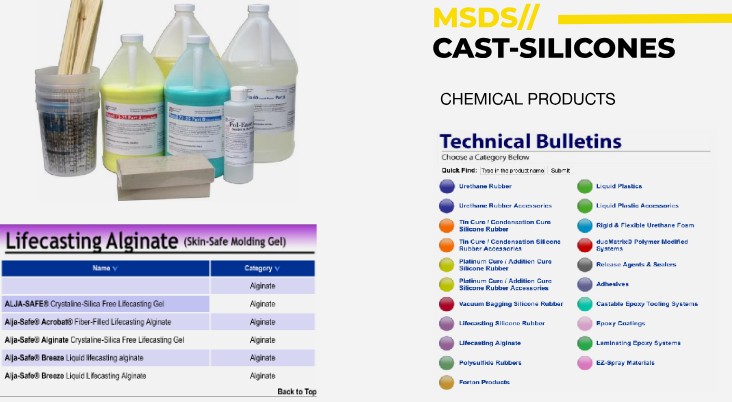
Generally speaking one can use silicon chemicals which fuses to itself, or mix gelatin, glycerin and water. I am keeping it deliberately vague as there are data sheets which very clearly explain how to mix something, the issues to be aware of for use and related.
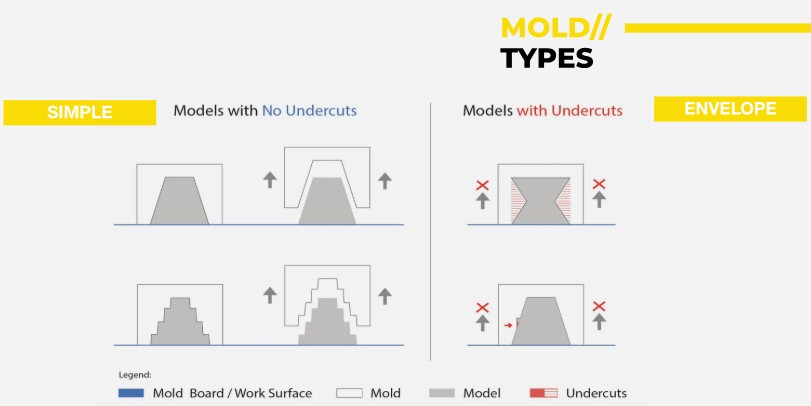
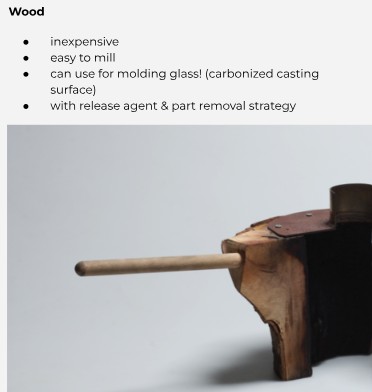
Hard vs Soft Molds
A rules of thumb that should be kept in mind is that a Hard Mould is for soft casting and vice versa. A Hard mould is typically made from materials like plaster, resin, fiberglass or other such materials. They are designed to create rigid shapes and are often used when the final product requires a durable structure.
For soft casting, which involves materials that are flexible or pliable (like silicone or certain foams), a hard mould is necessary. The general rule is that if you are casting a soft piece, you will need a hard mould to ensure that the final product retains its shape and detail during the curing process.
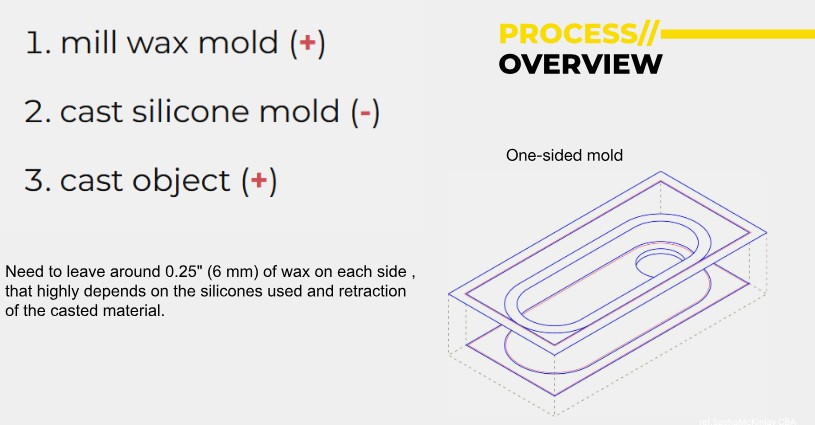
Bear in mind that I am casting a hard piece – the chess piece. I use a hard mould, to create a soft cast, which then allows me to pour in a material which will be hard for the final product.
In summary, hard moulds play a vital role in the soft casting process by providing the necessary support and structure for flexible materials, ensuring that the final products are both accurate and durable.


CLASS: THEORY
First we had a class with Neil where he explained many of the processes of moulding and casting.Then we had a class with Julia, Santi, and Dani.
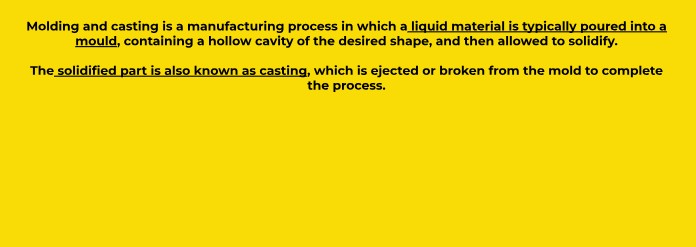
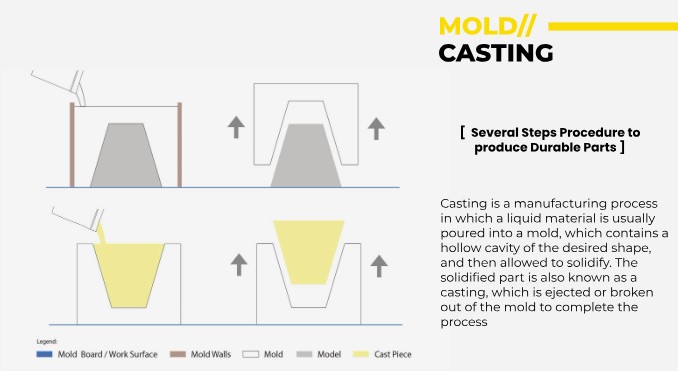
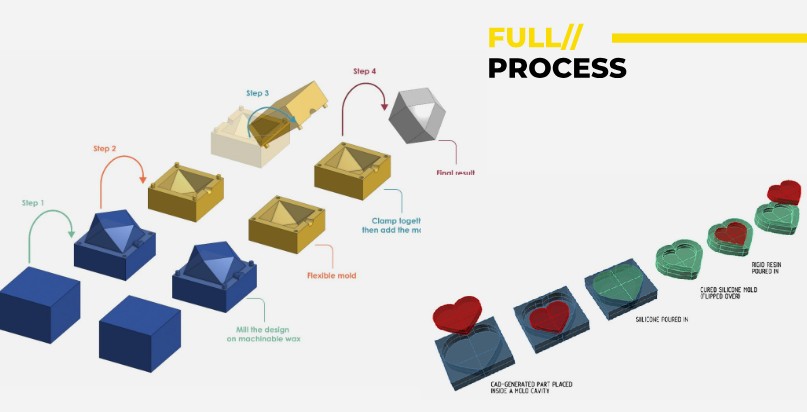
We were told that a mold is a tool holding a liquid long enough for it to solidify – we pour the liquid material into a hollow cavity. Then after a set amount of time it solidifies. Molds are mostly reproduceable – They allows us to make unlimited pieces (almost).
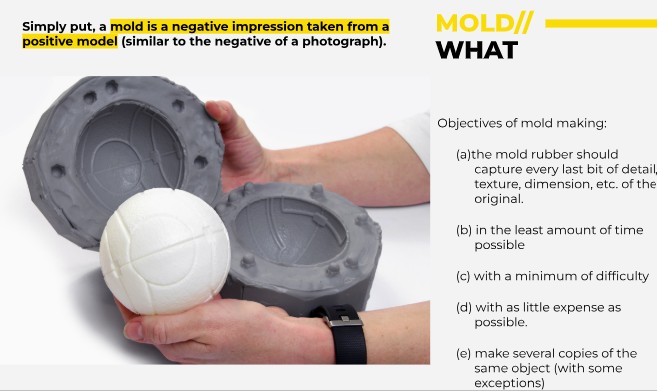
We use digital production techniques to make a mold. A mold is a negative form that creates the hollow space where the casting material will be poured. This mold is created from a master or pattern that represents the desired object.
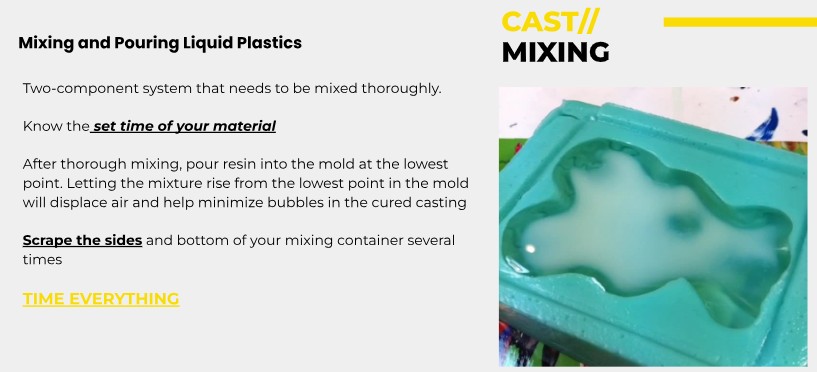
Then we pour Liquid Material which is heated to a molten state (for metals) or mixed into a liquid state (for plaster, concrete, etc.) and then poured into the mold cavity.
Next is the 'Solidification' phase where the liquid material cools and/or solidifies, taking the shape of the mold.
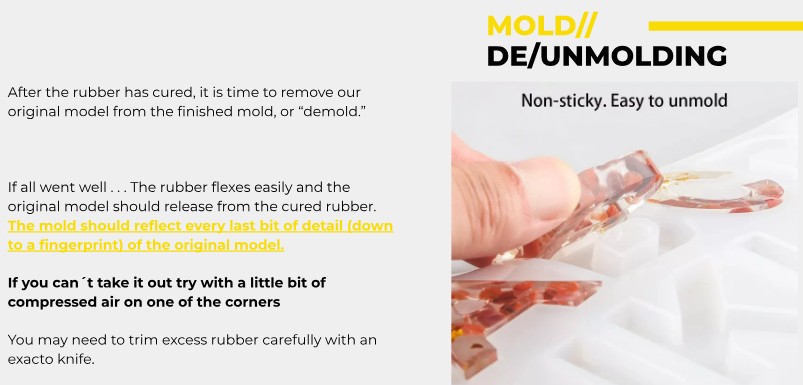
Finally, we remove the cast. Once the material is solid, the mold is opened, and the resulting "cast" is extracted.
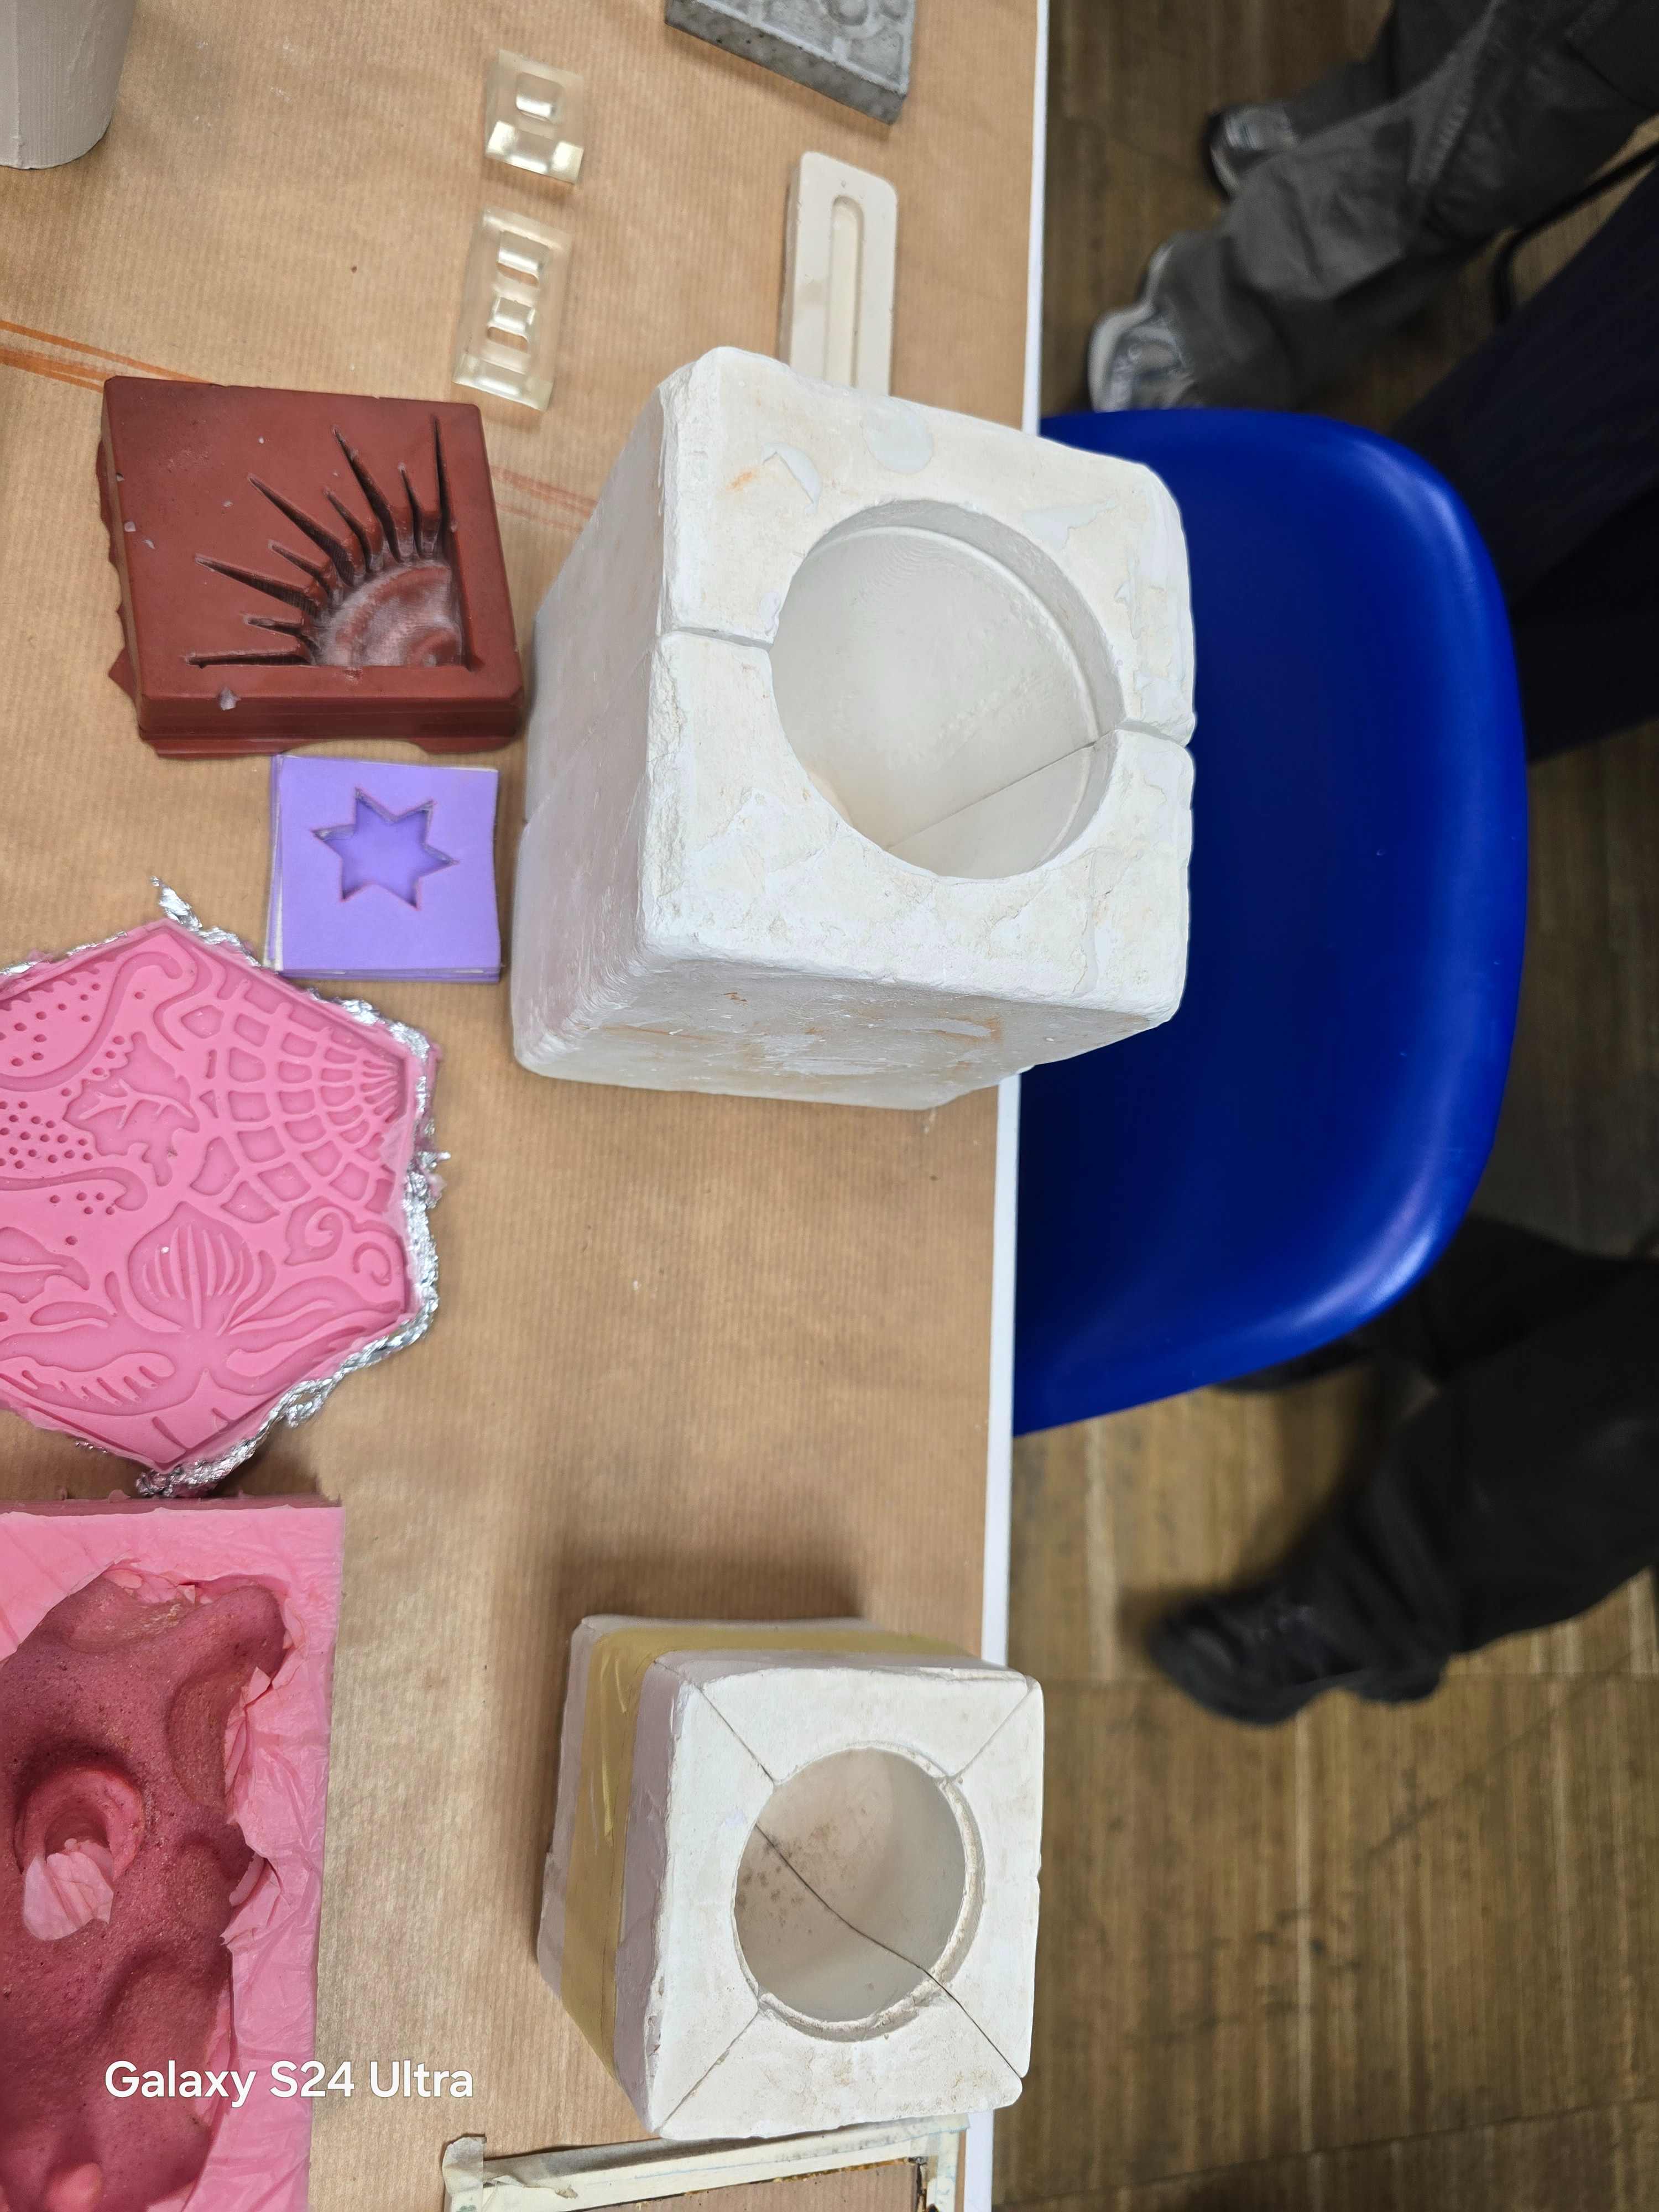
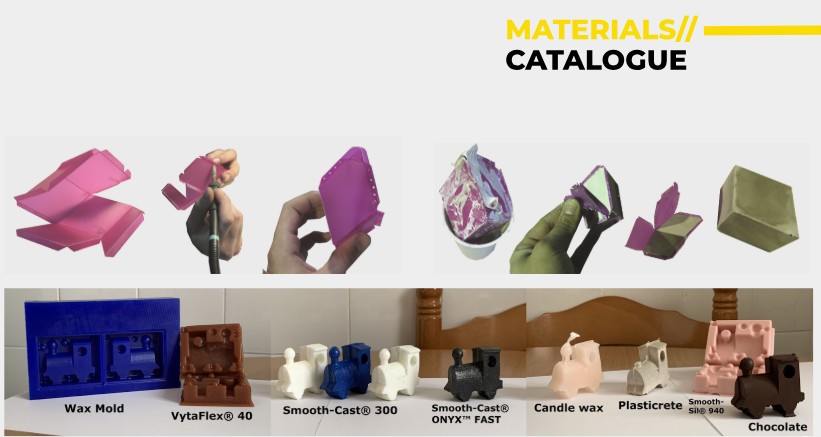
In the class with Dani, Julia, & Santi where they set out a large table of example moulds and materials. First they showed us examples of just some of the array of choices we had.
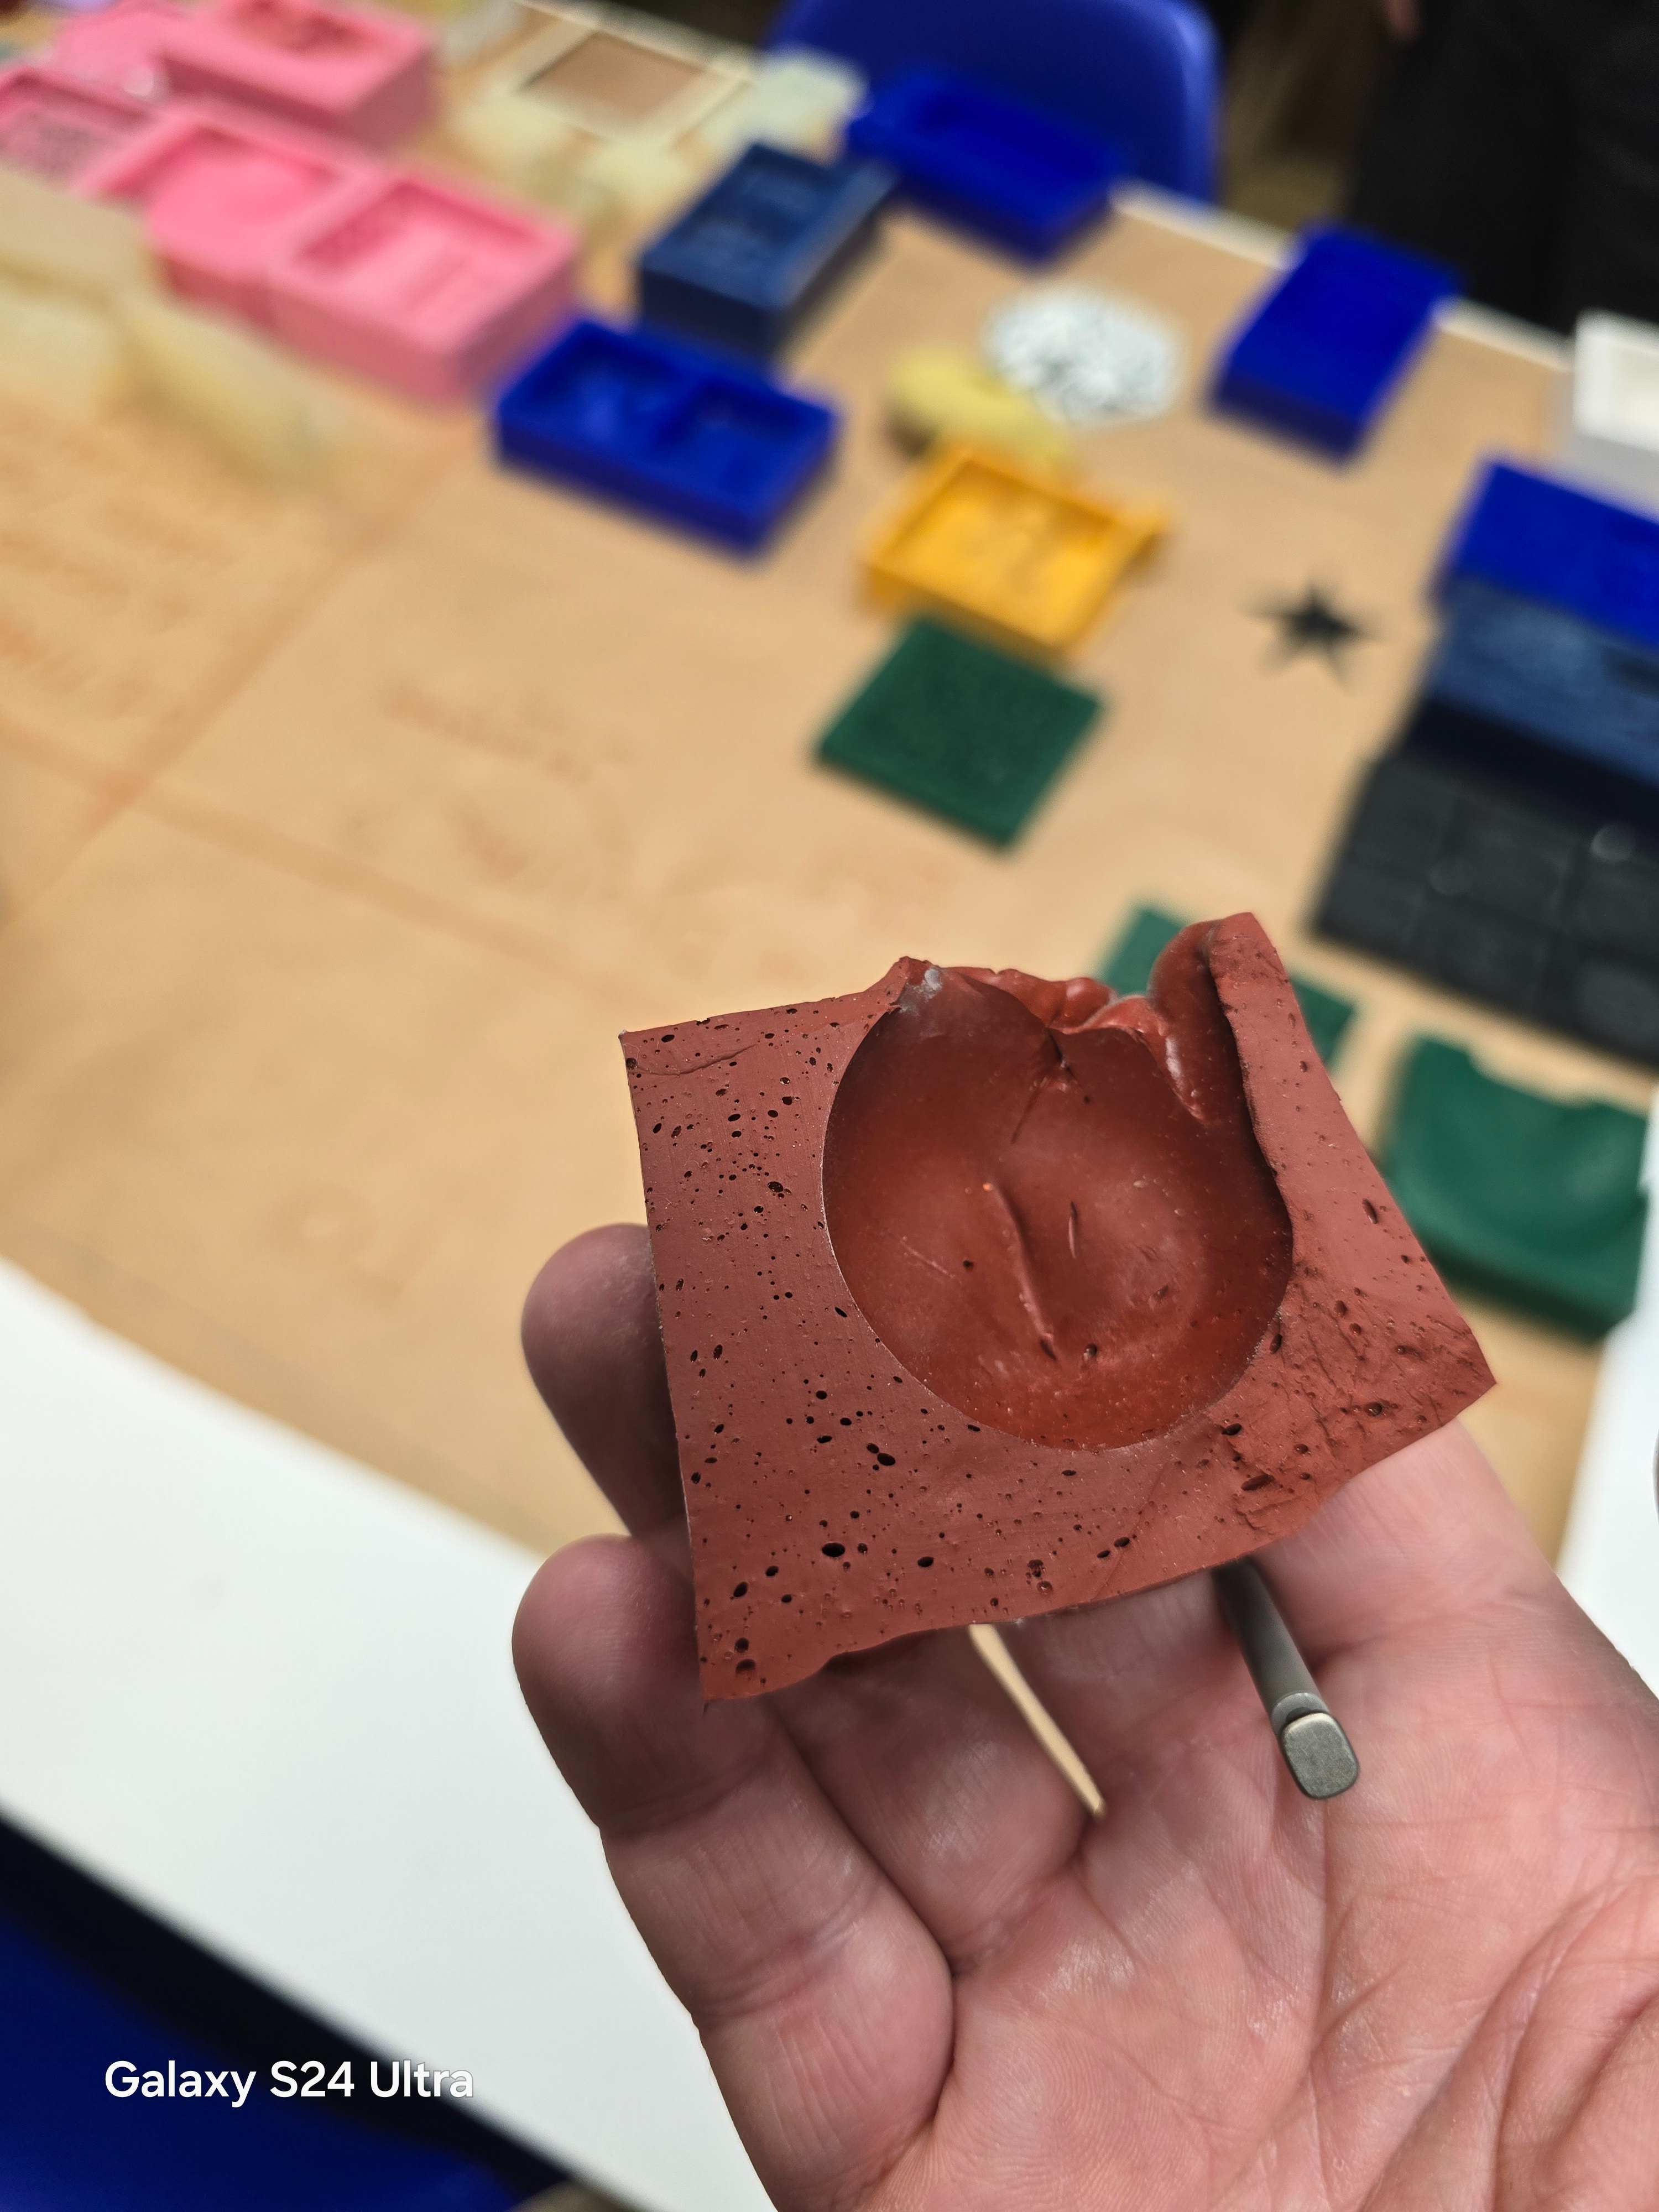
This was a beautiful moment where Danny made a Chenna paw mould:
The following image is an example of slip casting. This is where ceramic is allowed to slip to solidify in a mould:
The following images are of low temperature metal casts:
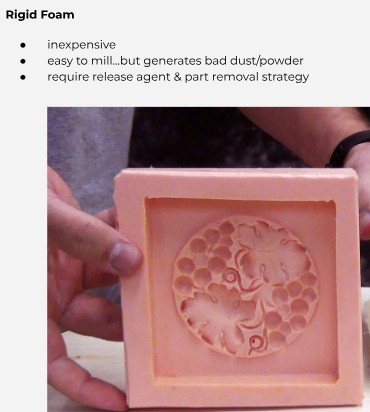
The following image is an example of a silicon mould:
The following image is of an epoxy plaster mould:
Registration Marks and Materials
To create alignment one can create lines, or registration marks on the moulds:
Generally speaking one can use silicon chemicals which fuses to itself, or mix gelatin, glycerin and water. I am keeping it deliberately vague as there are data sheets which very clearly explain how to mix something, the issues to be aware of for use and related.
I really like a piece of paper that Julia gave us showing us a flow chart of how to think about the process:
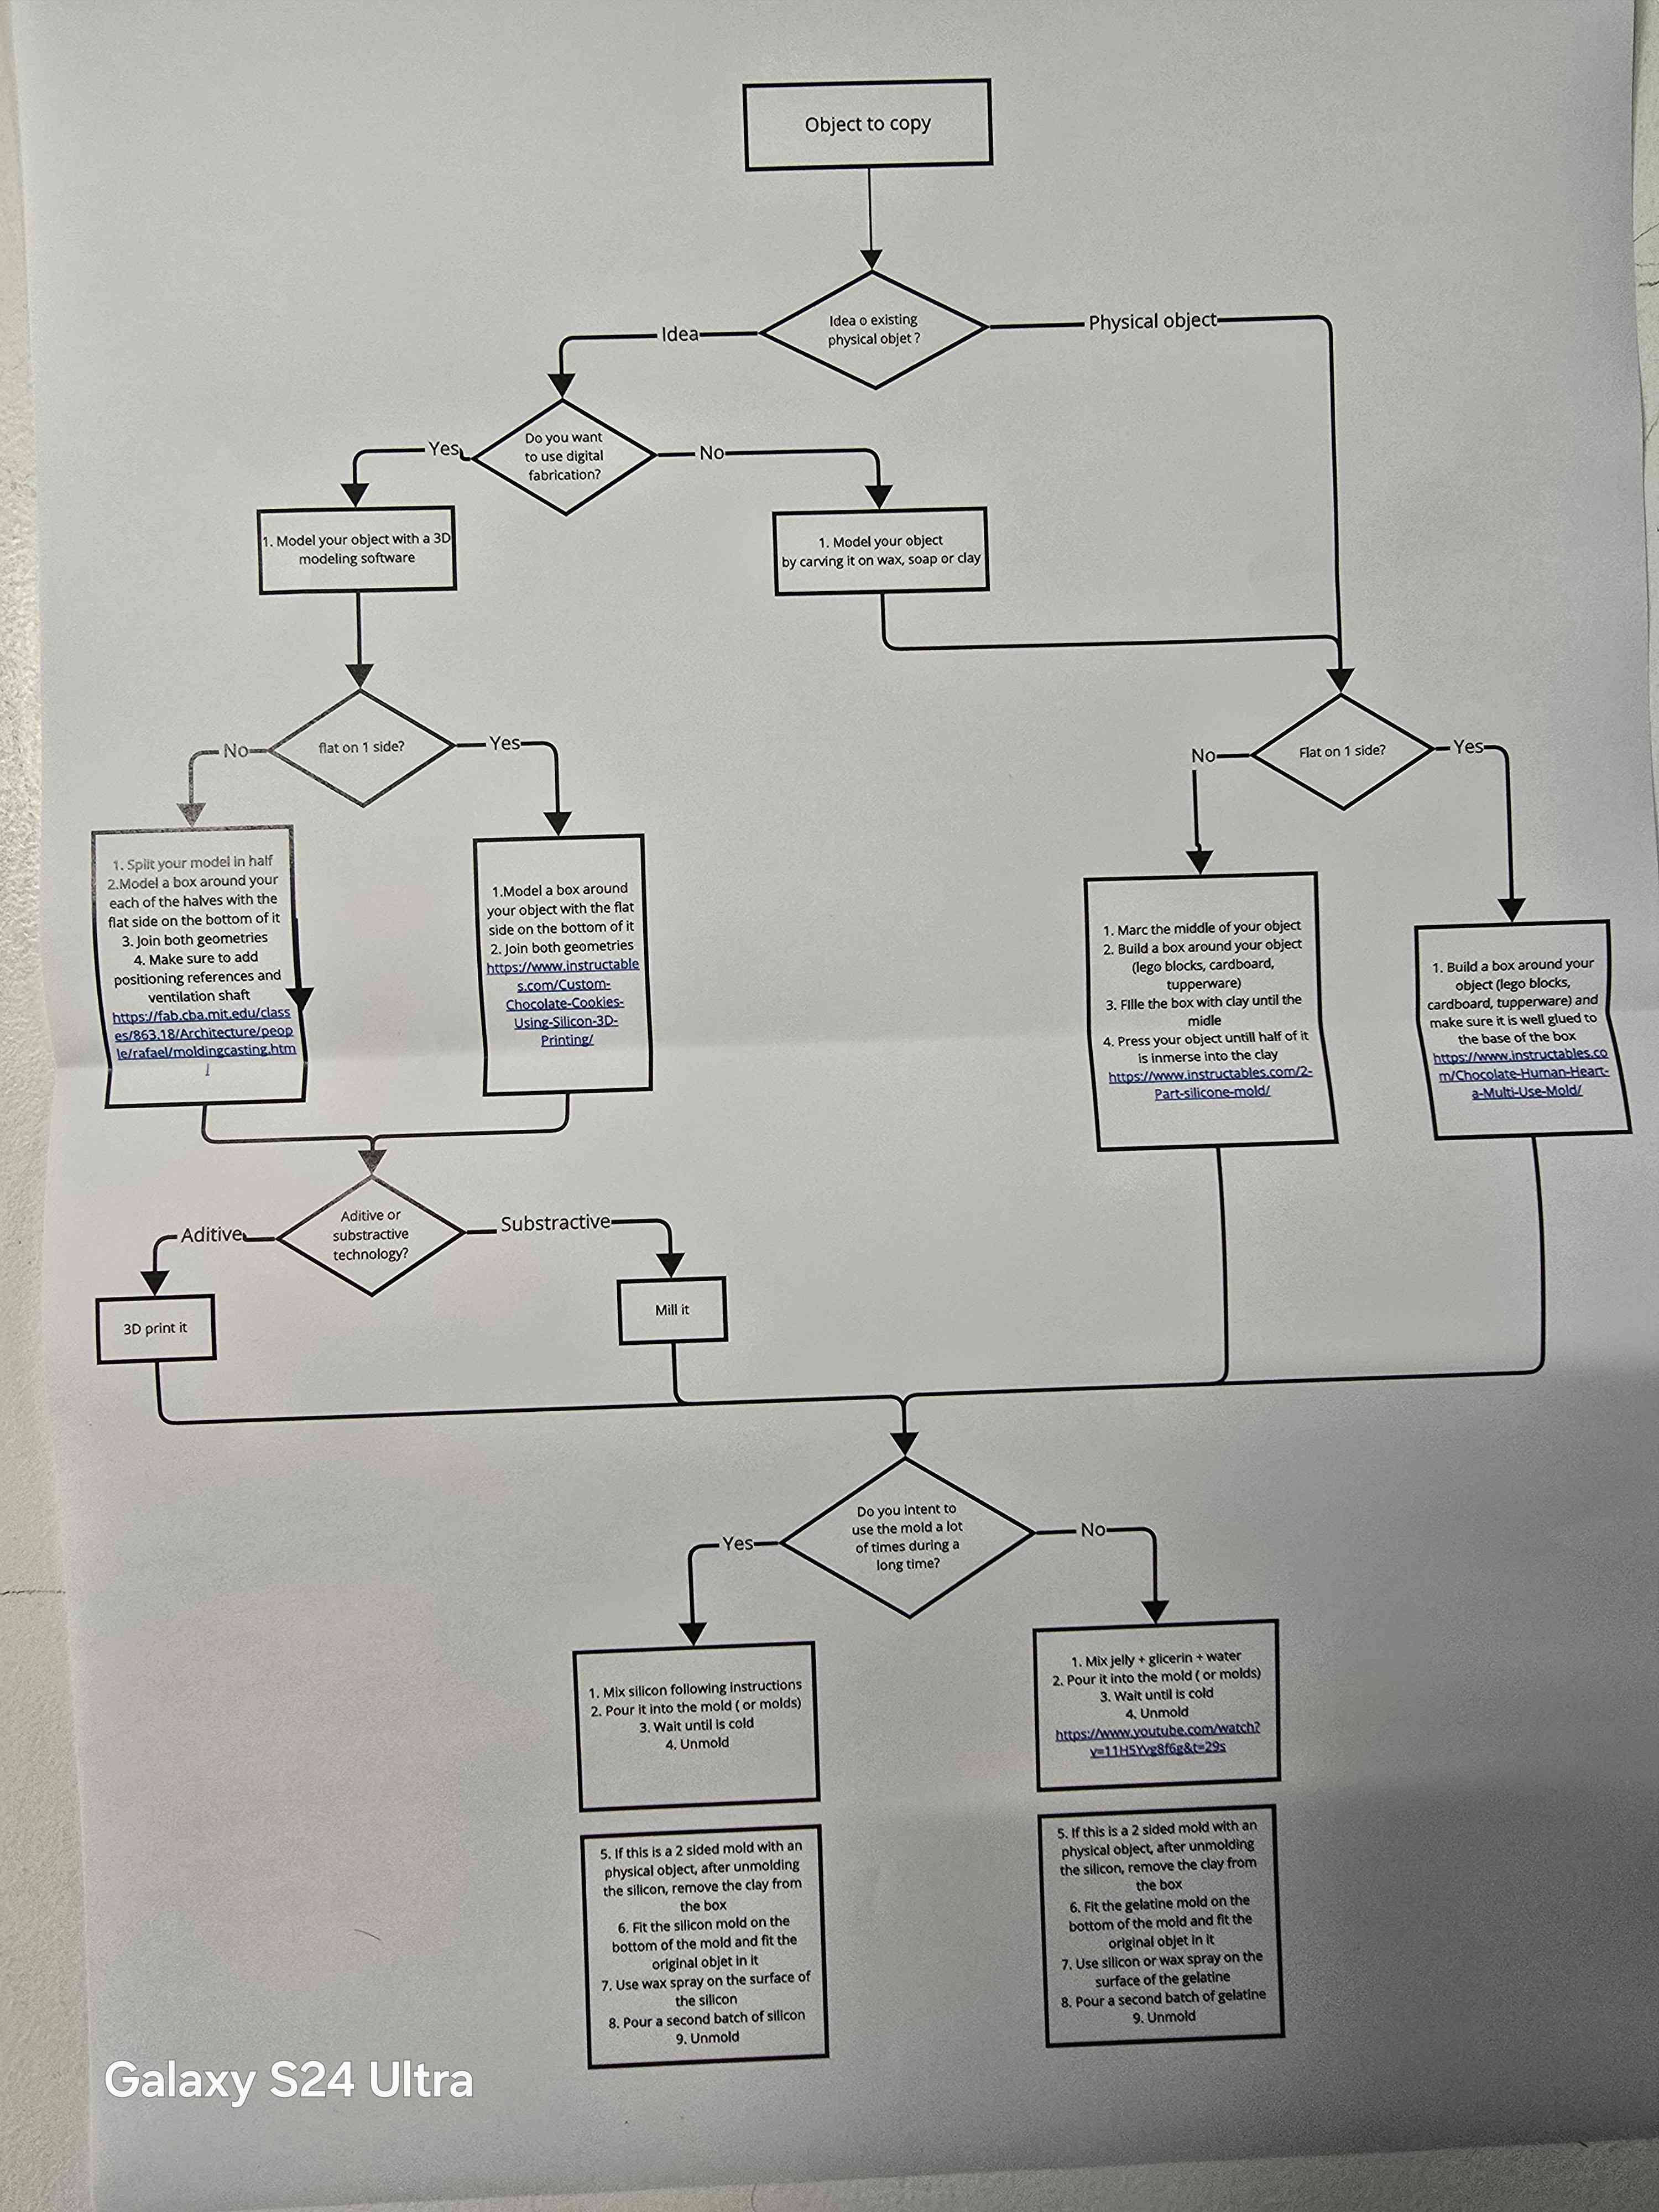
I want to do this with a chess piece and used a food safe substance. From that I will be able to create chocolate, or ice cubes or anything else, as desired.
Hard vs Soft Molds
A rules of thumb that should be kept in mind is that a Hard Mould is for soft casting and vice versa. A Hard mould is typically made from materials like plaster, resin, fiberglass or other such materials. They are designed to create rigid shapes and are often used when the final product requires a durable structure.
For soft casting, which involves materials that are flexible or pliable (like silicone or certain foams), a hard mould is necessary. The general rule is that if you are casting a soft piece, you will need a hard mould to ensure that the final product retains its shape and detail during the curing process.
Bear in mind that I am casting a hard piece – the chess piece. I use a hard mould, to create a soft cast, which then allows me to pour in a material which will be hard for the final product.
In summary, hard moulds play a vital role in the soft casting process by providing the necessary support and structure for flexible materials, ensuring that the final products are both accurate and durable.
Individual Assignment
Originally, not having a clue what I was doing, I decided to proceed in steps.
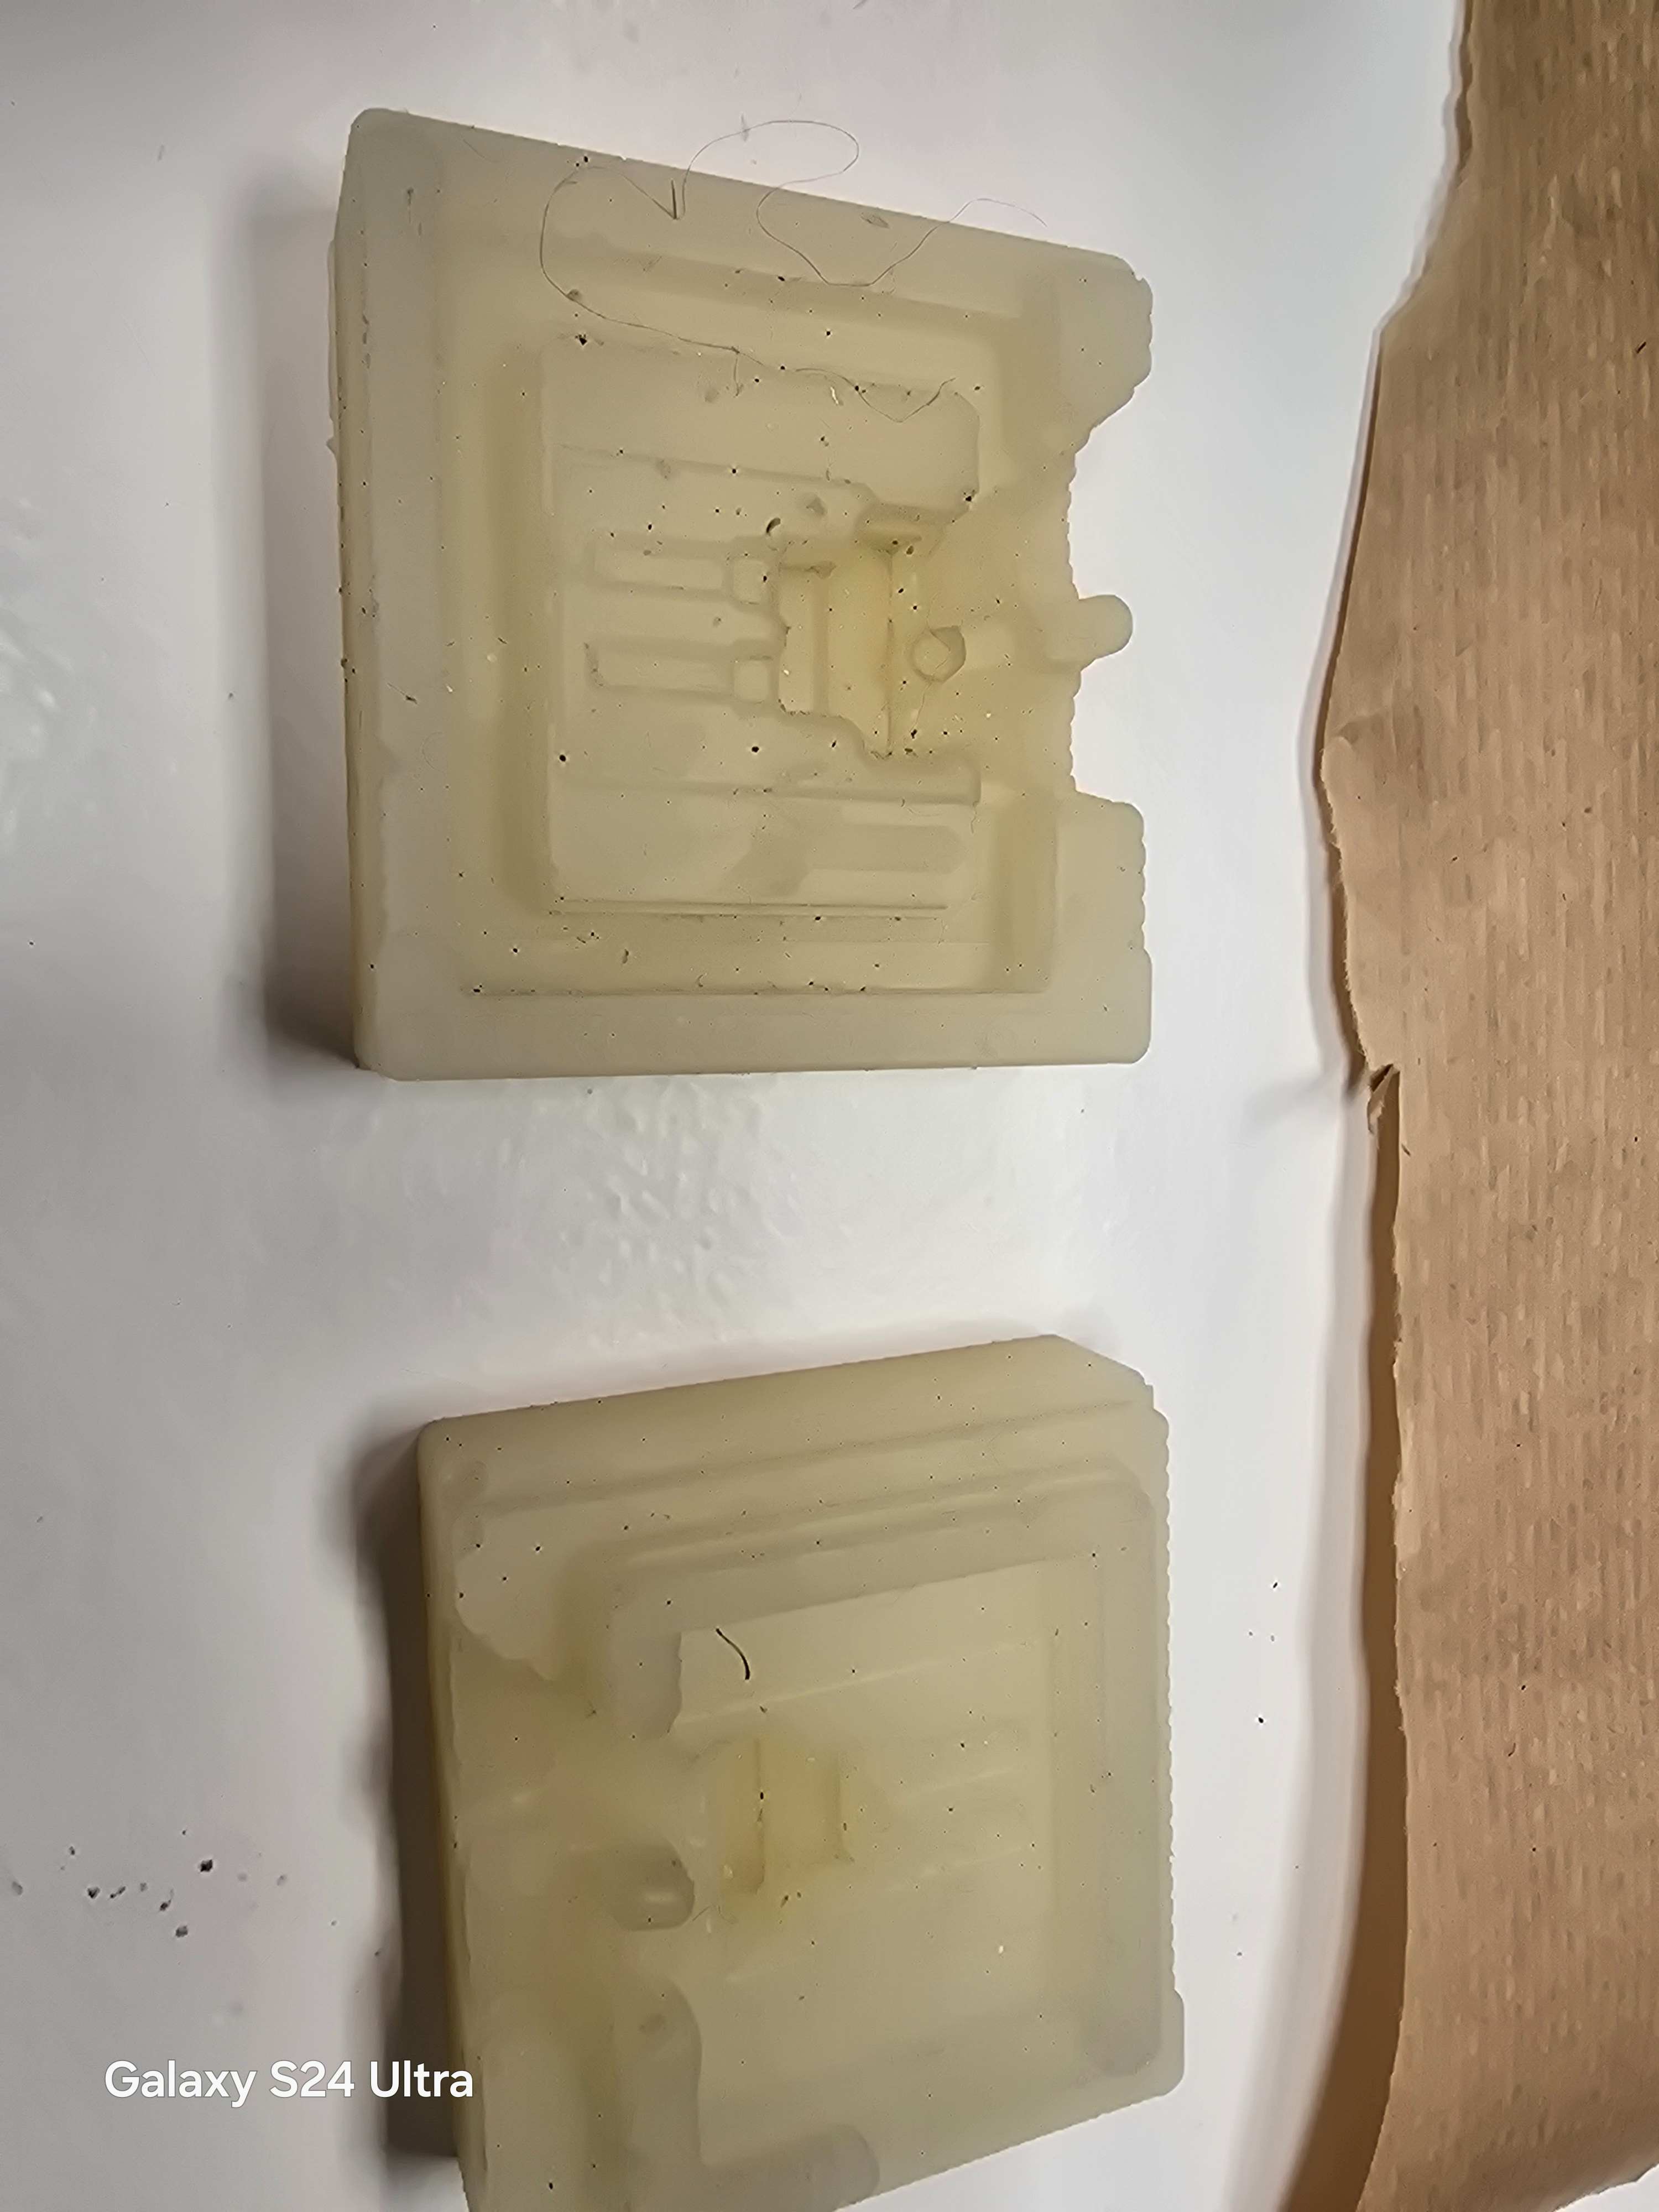
Initially, make a chess piece. Print it as a 3D Object in the Bambu printer and then stick it into some kind of container and then surround it with silicon gloop. I hadn't really thought it through. When I came to the lab and printed out my chess piece, I found that it would not really work in a very professional way. I would have had to attach a little sticky tape to the bottom of the piece and stick it in the bottom of a cup or otherwise somehow suspend the piece in a cup or container. I imagined that this is what kids do with a home set they buy off the internet. I wasn't aiming for that so I decided to proceed to phase 2 of the master plan – a milled mould for the chess piece.
I modelled a chess piece into Fusion 360 into a Wax Ferris block for milling. I did it mostly by importing an image that I had found online, tracing it out and then using a revolve tool for most of it and a combination of revolve and extrude for the crown.
In Fusion360 I made sure the size of the chess piece was roughly double. I had to redo it completely because splined bodies or components don't permit parameterisation as far as I know.
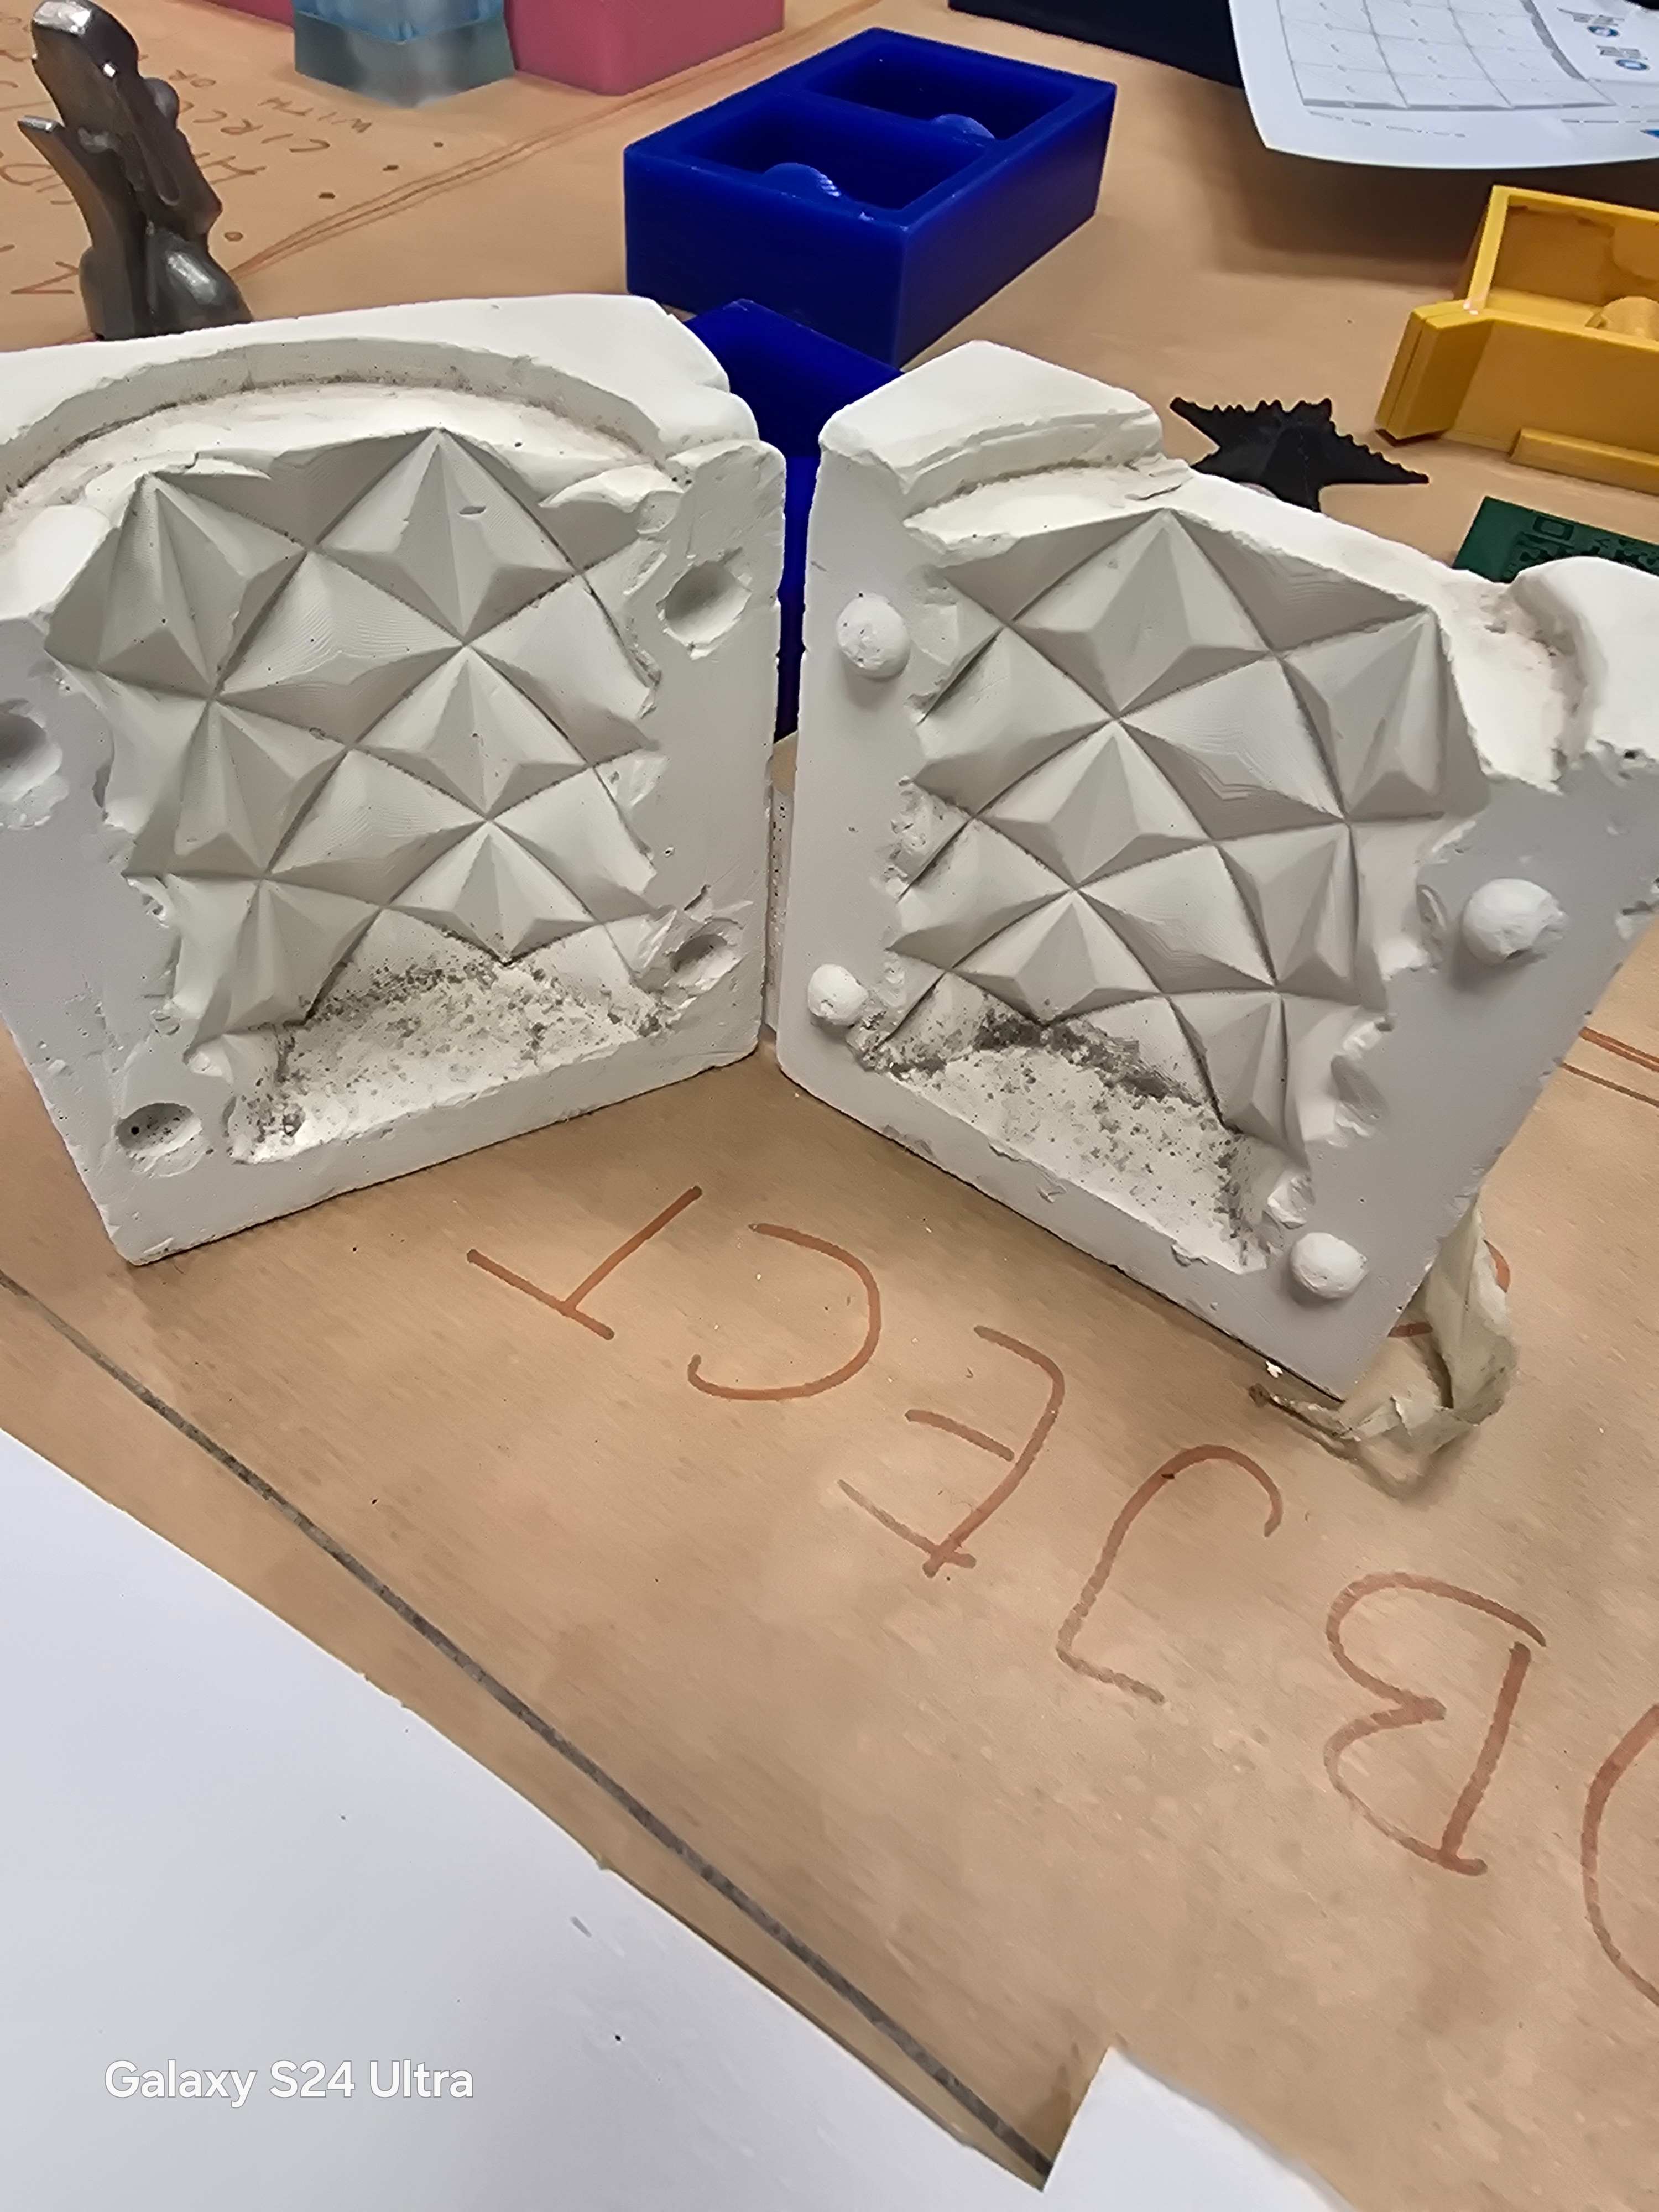
The second piece of bad news I received was that I had unwittingly created a negative mould of the chess piece, whereas in actuality I needed to create a positive of the chess piece, so that I could create a negative in a food safe silicon mould, followed by a hard positive final piece.
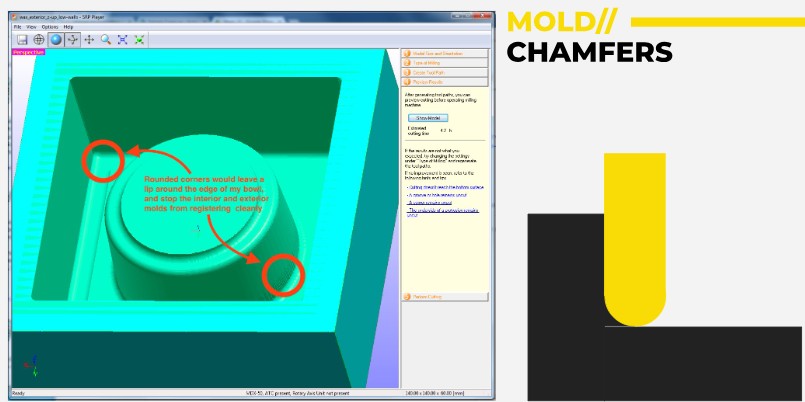
I went back to the drawing board and created this positive chess piece at the bottom of a simulated wax Ferris block. I forgot to create a registration key, or a vent which is something to be aware as it prevents bubbles getting into the liquid, but I did remember to create the sprue, which in layman's terms is the shape which will allow the liquid to be poured into the chess piece geometry.
My sprue was quite slim and nice looking. I was told by Adai that I needed to increase the size to make it much larger as it was too narrow to allow viscous silicon to flow in smoothly. So on the spot I edited the relevant sketch in Fusion 360 and doubled the radius. This has the added benefit that it should act as a registration key later on.
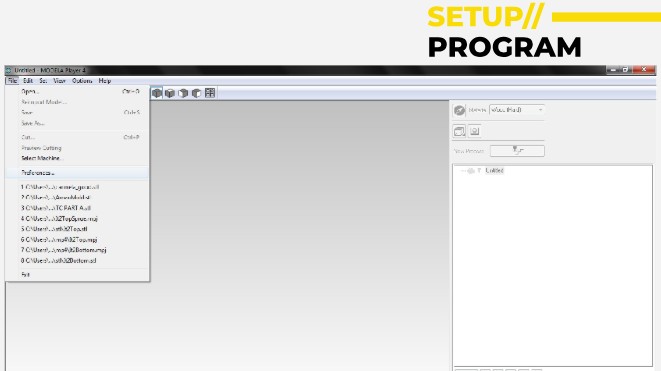
Workflow based on ChatGPT plus my own inputs:
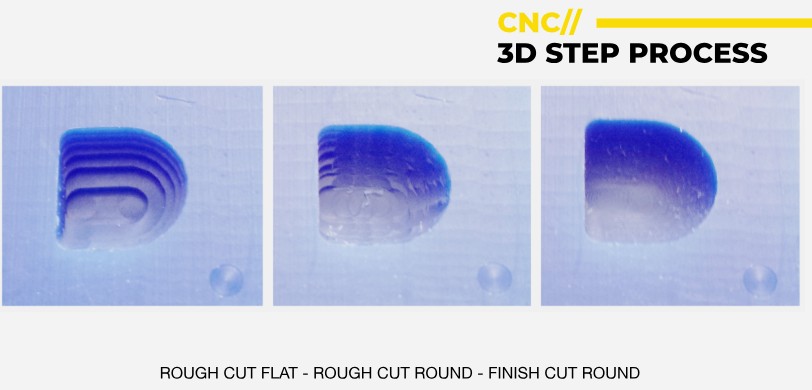
To mill your positive mold (e.g. for a chess piece) into wax using Modela Player 4, here's a step-by-step guide to prepare your model and create the toolpaths:
✅ What You'll Need
- Your Fusion 360 file, exported as STL or DXF.
- Modela Player 4 installed.
- A Roland MDX series mill or similar, with wax Ferris blocks mounted securely.
- An appropriate end mill (e.g., 1/8" flat end mill for roughing and then 1/16" ball nose for finishing).
🔄 Step 1: Export Your Fusion 360 Mold
Since you're making a positive mold, ensure:
- Each mold half is exported separately.
- Export as STL (Mesh > Save As Mesh in Fusion 360).
- Set refinement to high.
- Orientation should match how it will lie flat on the wax.
🧩 Step 2: Open in Modela Player 4
- Launch Modela Player 4.
- Import your STL via File > Open.
- You may need to scale or rotate to align it to the wax block orientation.
- The model should be aligned flat to the XY plane, with Z up.
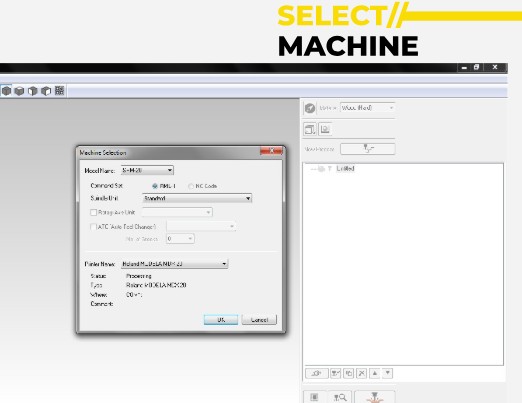
🛠 Step 3: Set Up Material and Model Origin
- Click on Set > Modeling Form.
- Define the size of the wax block (length, width, height) – once the positioning step below has been done then this step will automatically be correct as everything is already parametrised.
- Position your model inside it, leaving a margin (1–2 mm at least usually "but in this case we set it to 0mm as I already built in margin to my design").
- Click on Set > Origin.
- Typically, use the bottom-left corner (X0, Y0) and top surface (Z0).
- This must match how you zero the mill.
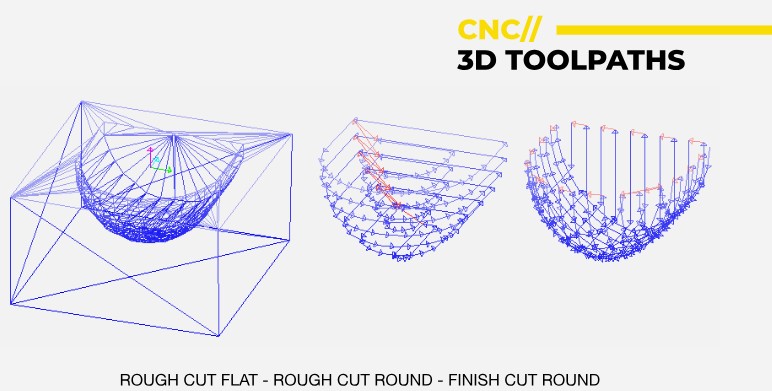
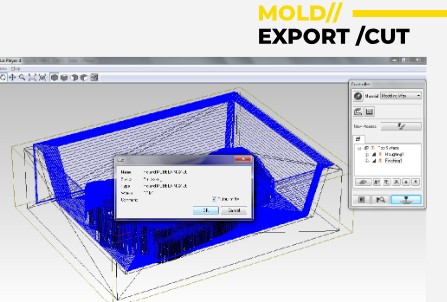
🌀 Step 4: Generate Toolpaths
You'll need at least two toolpaths: roughing and finishing.
- Click Set > New Process.
- Select:
- Surface Roughing → Next → Choose a flat end mill (e.g., 1/8").
- Define cutting area (model only or full block).
- Set cutting parameters – (Goto OPTIONS – Add/Remove Tool, then NEW, give the tool a name like Roughing 1-8th FLAT NOSE).
- Under Tool Type Choose SQUARE, Tool Material should be HIGH SPEED STEEL. Choose appropriate FLUTE Diameter and then click on CUTTING PARAMETERS then SET PARAMETERS then REGISTER.
- Add cutting margins if you want excess material for clean finishing or registration alignment.
- Click on GENERATE TOOL PATH
💾 Step 5: Output the File
- Click File > Output to send the toolpath to the SRM-20.
- Make sure your wax block is mounted securely.
- Set the origin and tool zero manually on the machine before starting.
- For two halves of the chess piece:
- Make two versions of your mold (front and back).
- Flip or duplicate your model in Fusion to make the second half.
✅ Tips for a Clean Mold
- Add registration keys (like small hemispheres) in both mold halves to align them when casting.
- Ensure you leave vents and sprues if pouring resin later.
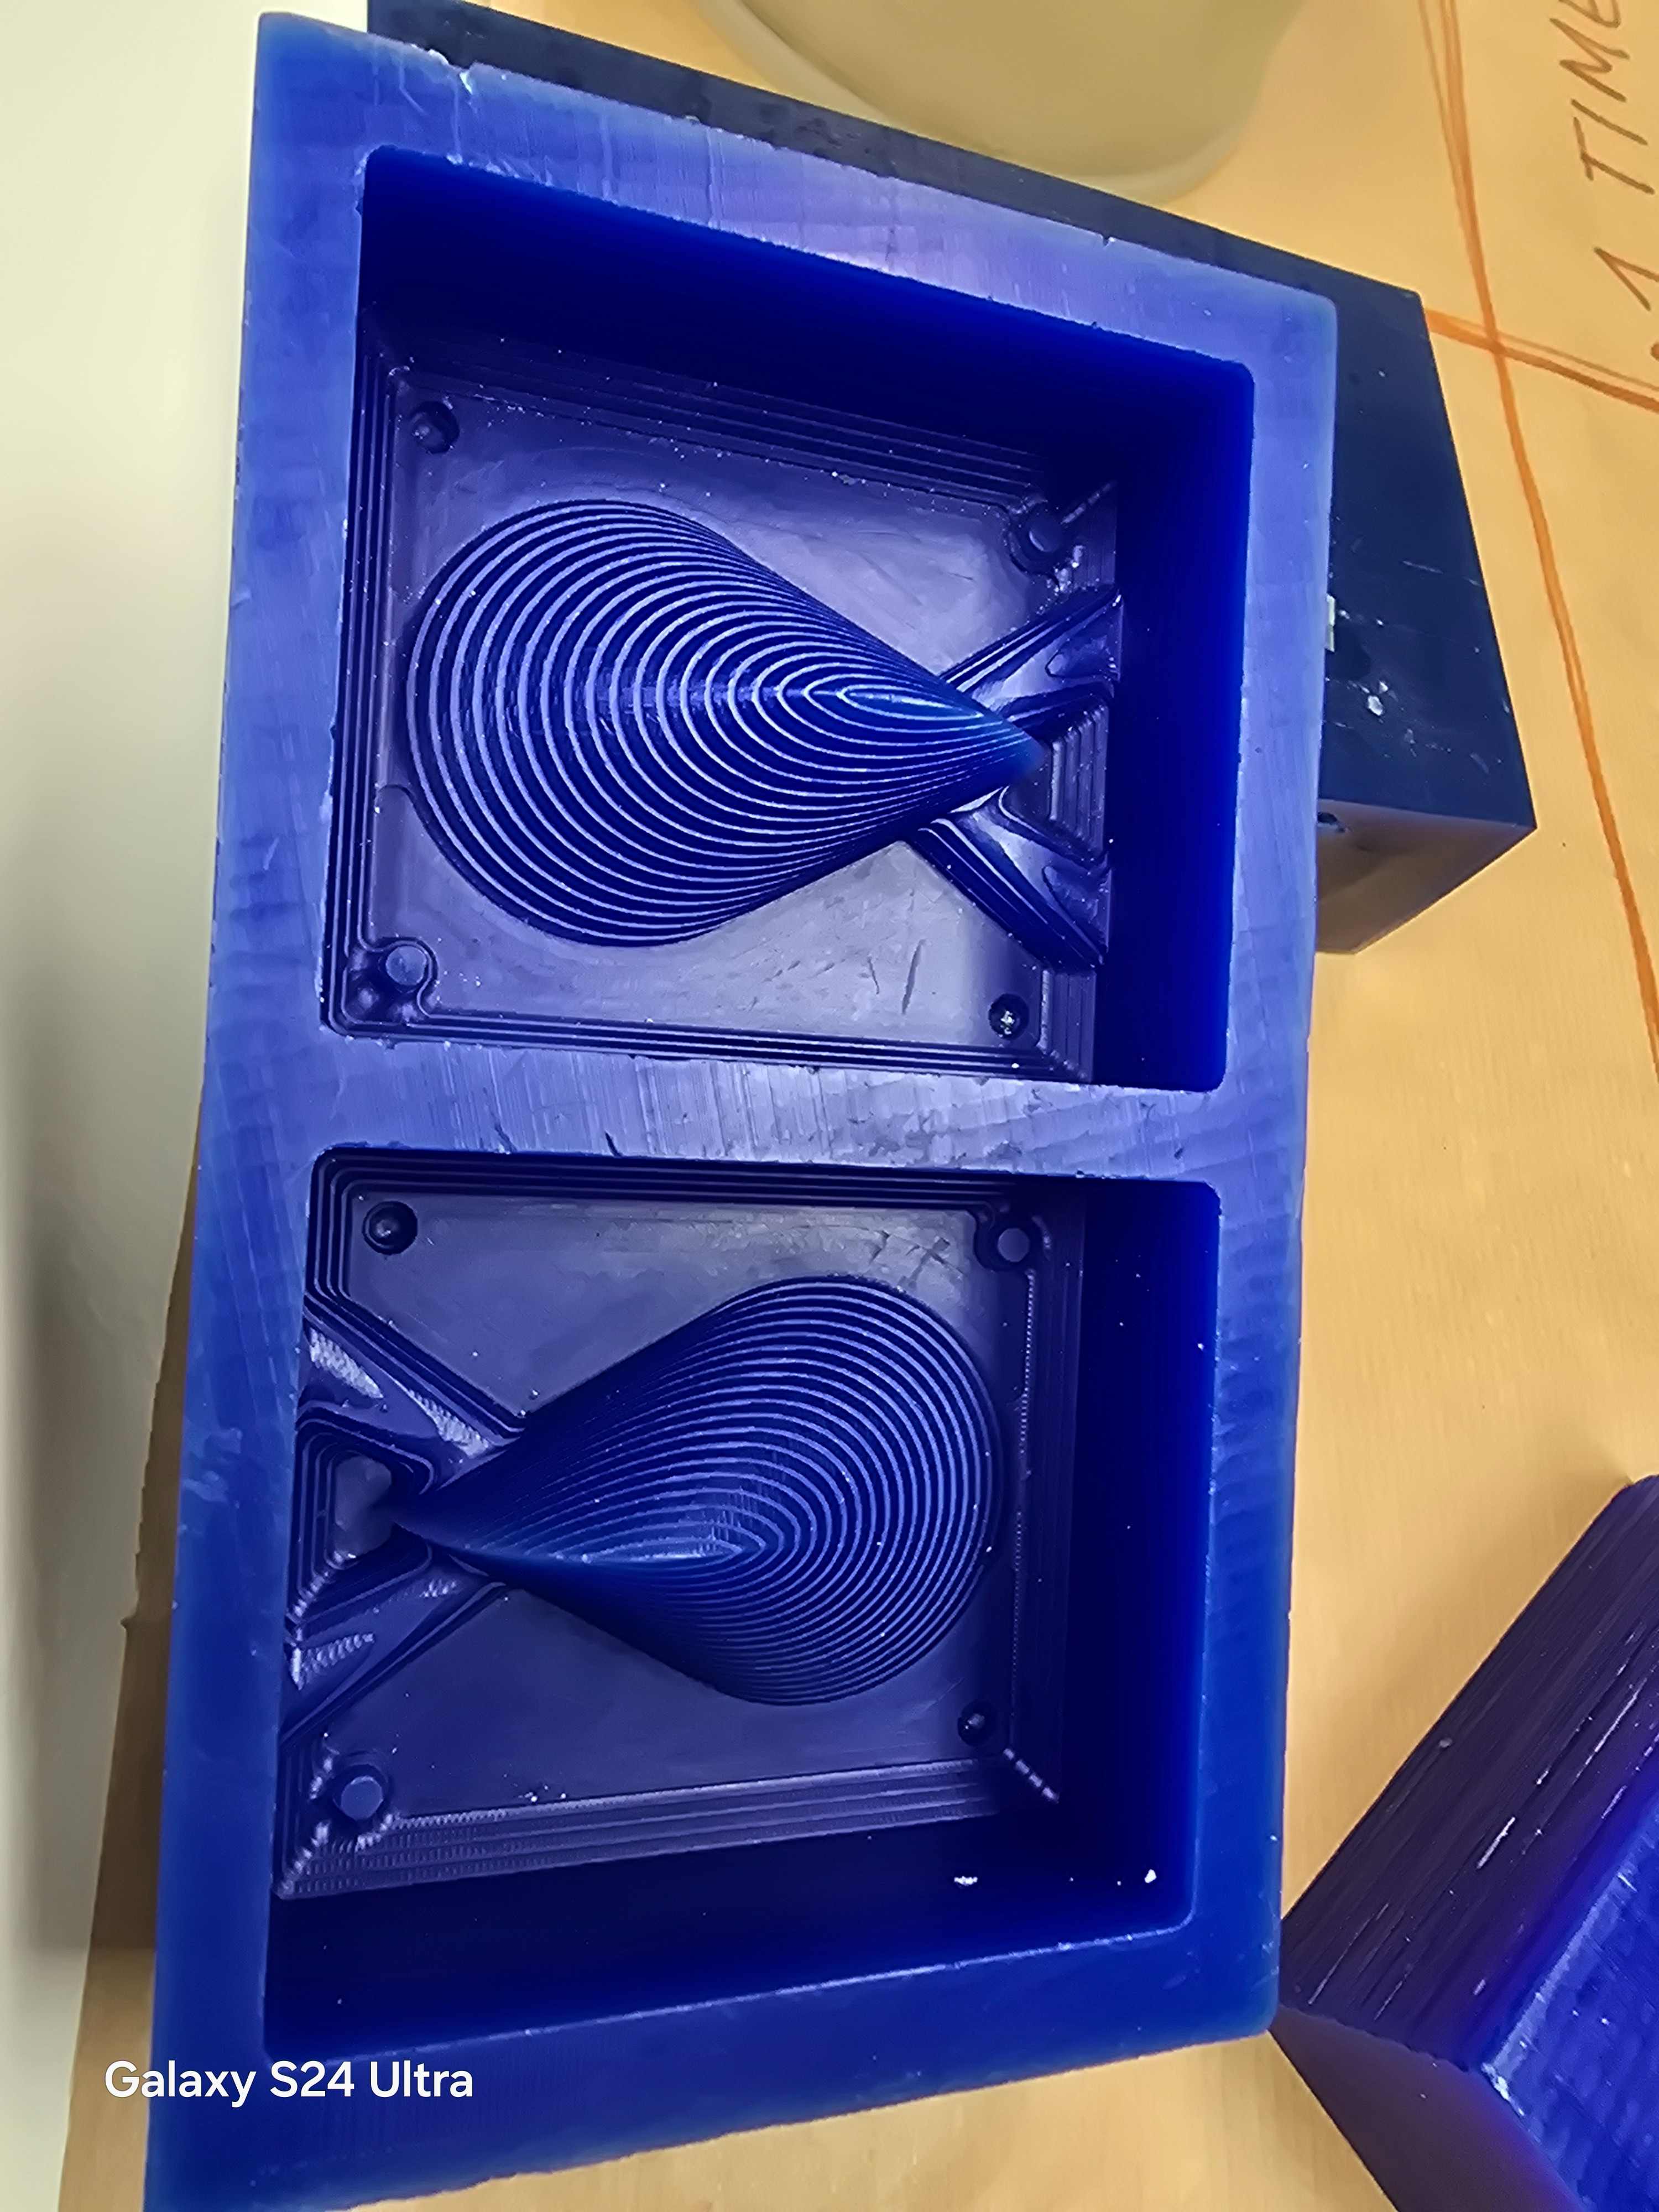
Slicing and Milling Process

Now we finished the slicing part, we uploaded the toolpath file (from cloud.iaac.net:5001), as a .prn file to the Roland SRM-20 mill via a USB.
I put double-sided sticky tape to the bottom of the waxFerris and firmly pressed the block down on the plastic bed. To be sure I then removed the plastic bed from the Roland and pushed down on it with my body.
After that I brought the mill to the exact bottom left corner of the block of wax and then zeroed the XY and Z axes. I loaded up the file and hit 'CUT'.
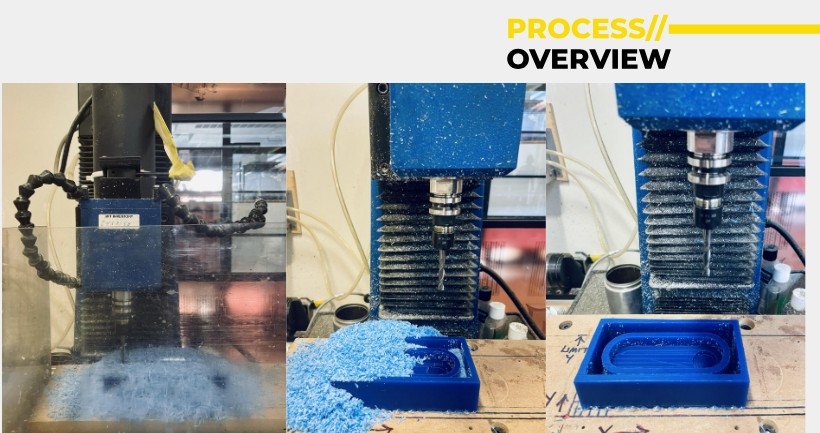
It turned out that the cut did not go as planned and was not really cutting enough. I could not figure out what the issue was but Dani and Adai figured out that I needed to loosen the end mill in the collet to make it longer. I had positioned the mill very tight, short with cutting part of the mill close to the collet. This works with PCB milling but with the soft wax and the tight space the correct way was to let it drop further down.
I ran the toolpath for the Roughing again and it worked.
Solution Preparation
The next stage is preparing the solution which will surround and fill into the mould and create a soft negative which will then be filled up with a final mixture i.e. cement, water, resin for the final piece.
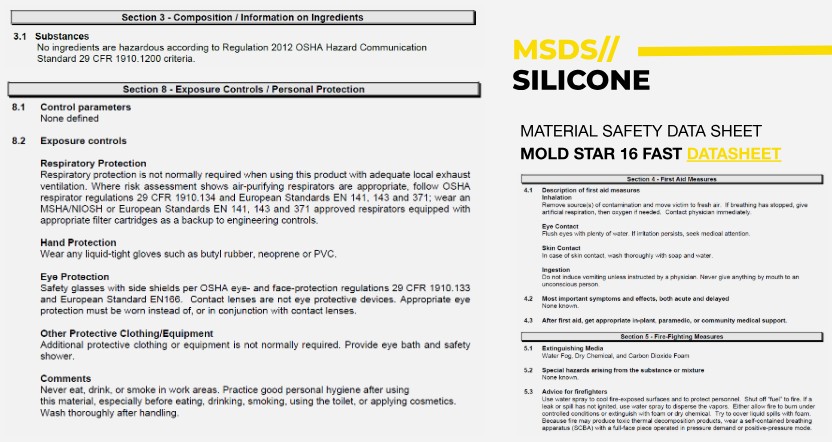
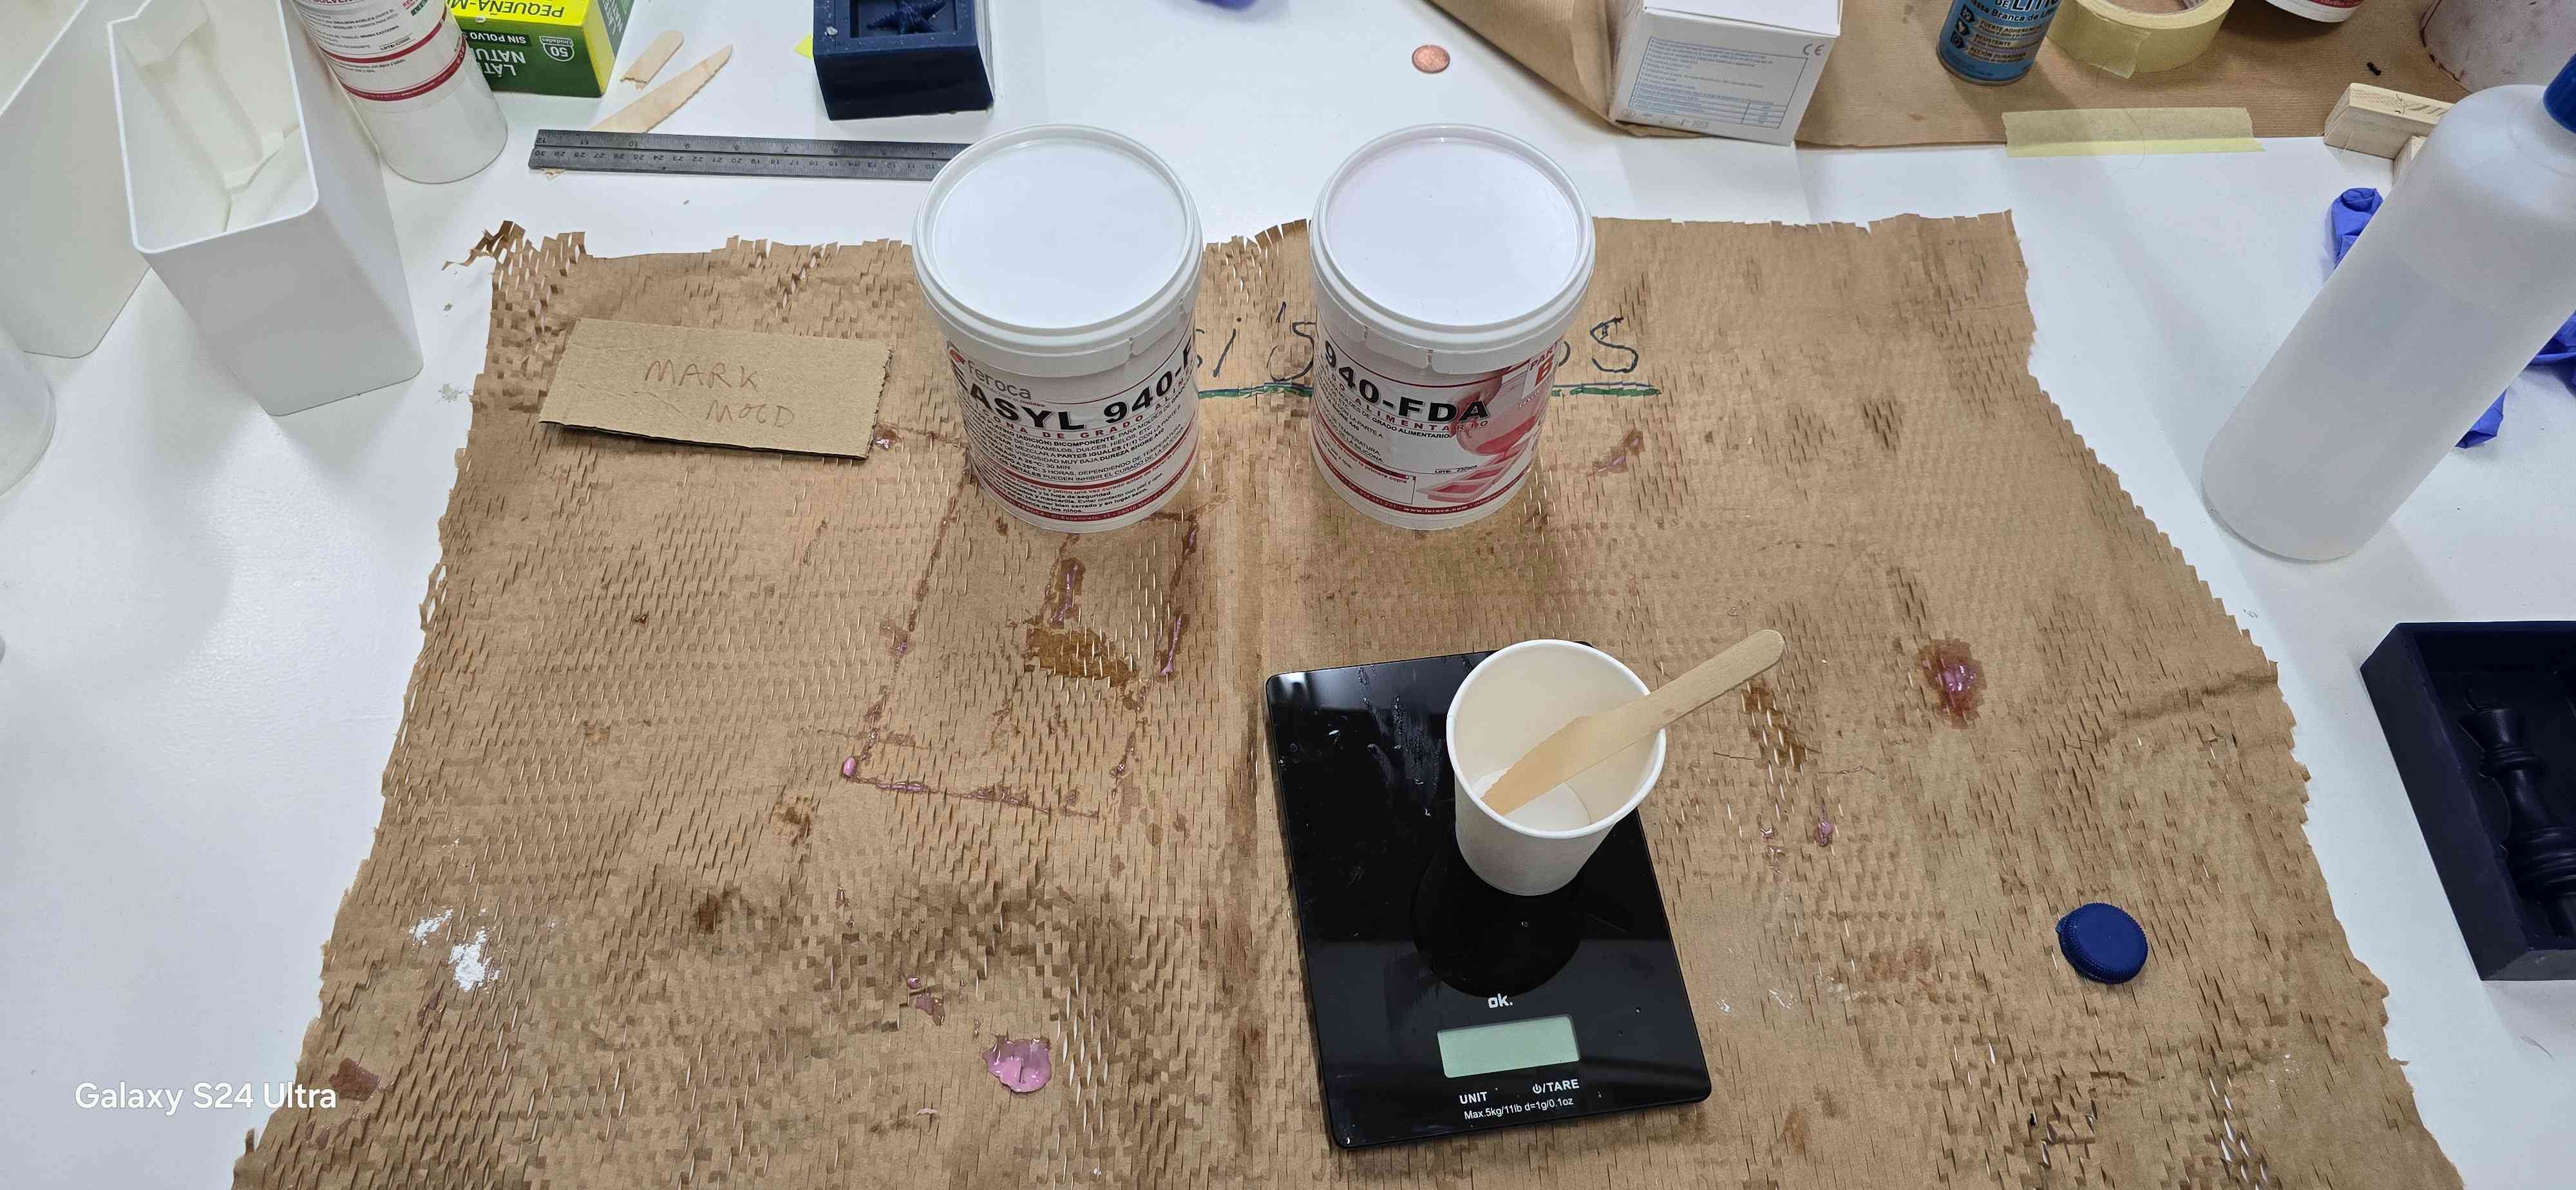
I will be using a data sheet for a food safe FDA approved solution: EASYL 940-FDA and FabLab SEDI-Cup-ct did a very good primer on it...
Data Sheet Information

Links to the data sheet in Spanish:
Final Results
Design file: Bambu King
Fusion file: Bambu King Fusion
Group Assignment
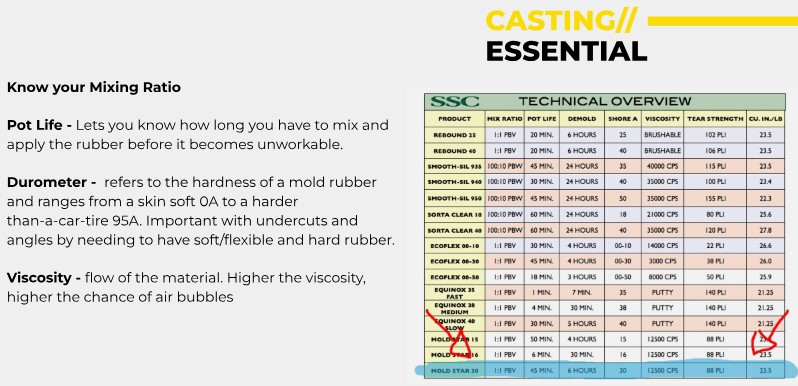
Mixing Instructions for EASYL 940-FDA
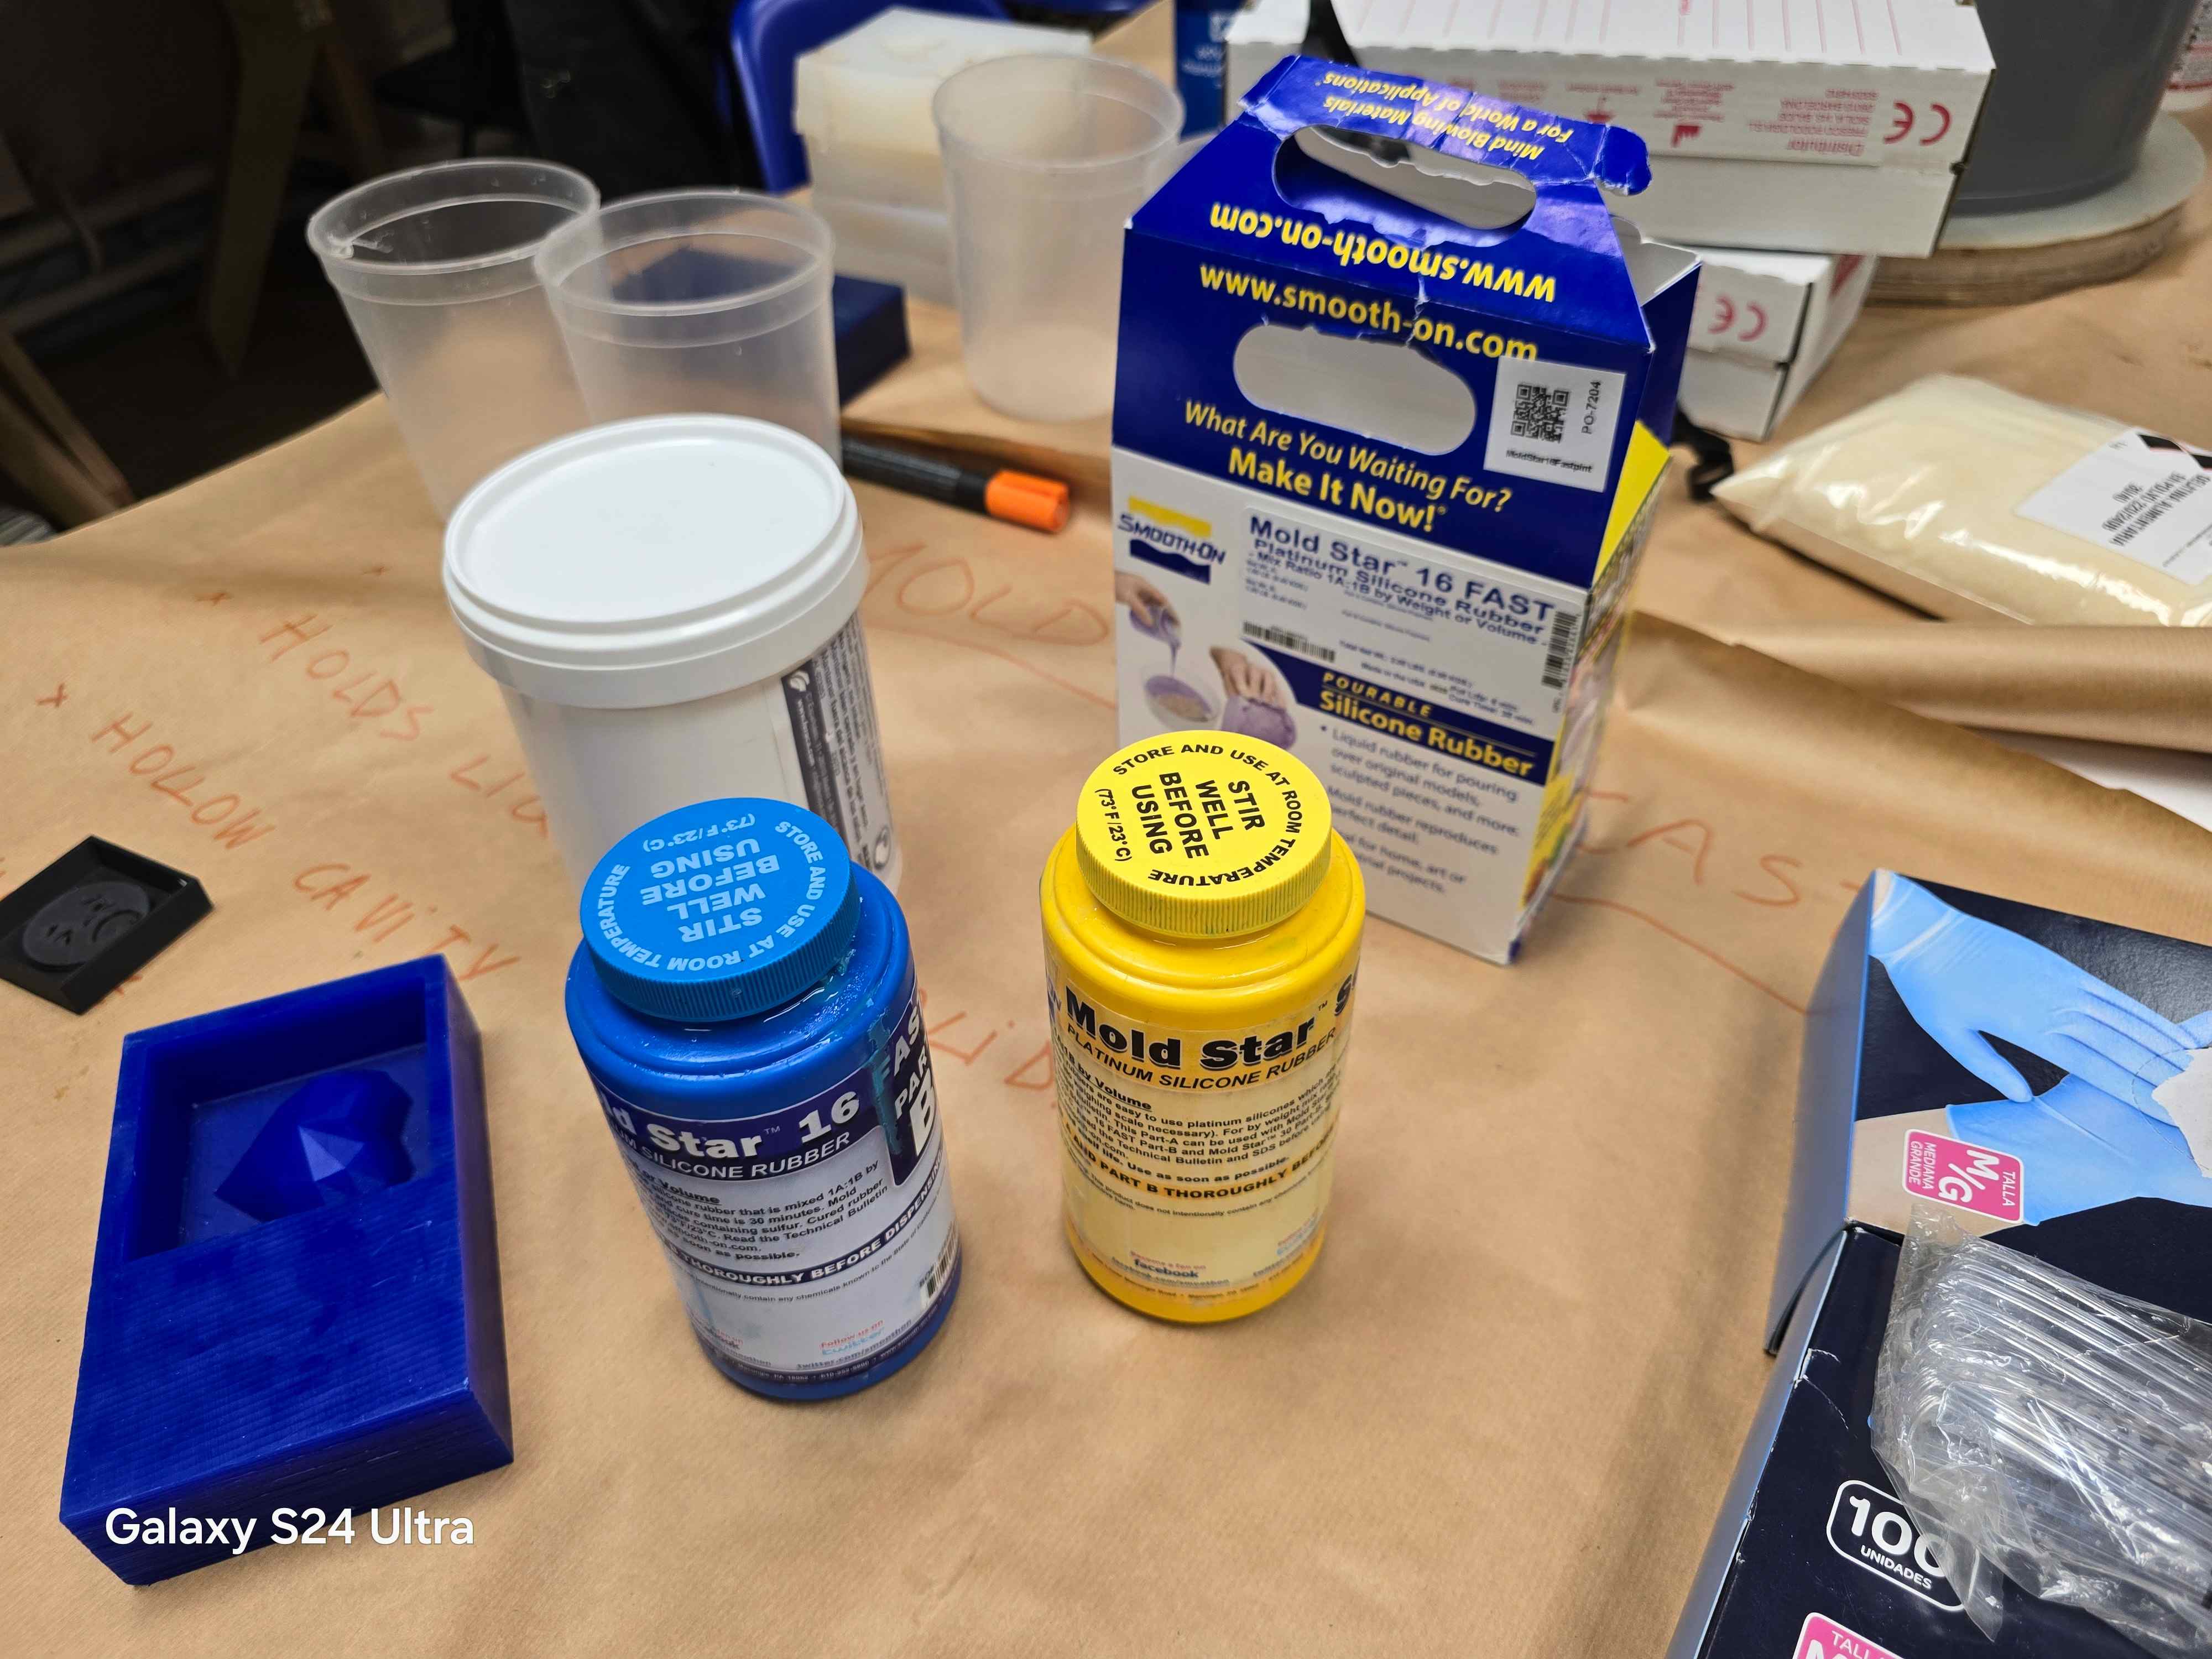
Mixing Ratio: Combine equal parts of Component A and Component B by volume (1:1 ratio) with the help of electronic scales.
Preparation:
- Work in a well-ventilated area (wear mask)
- Wear gloves and safety glasses to protect against skin and eye contact
- Ensure all tools and containers are clean and dry
Mixing Process:
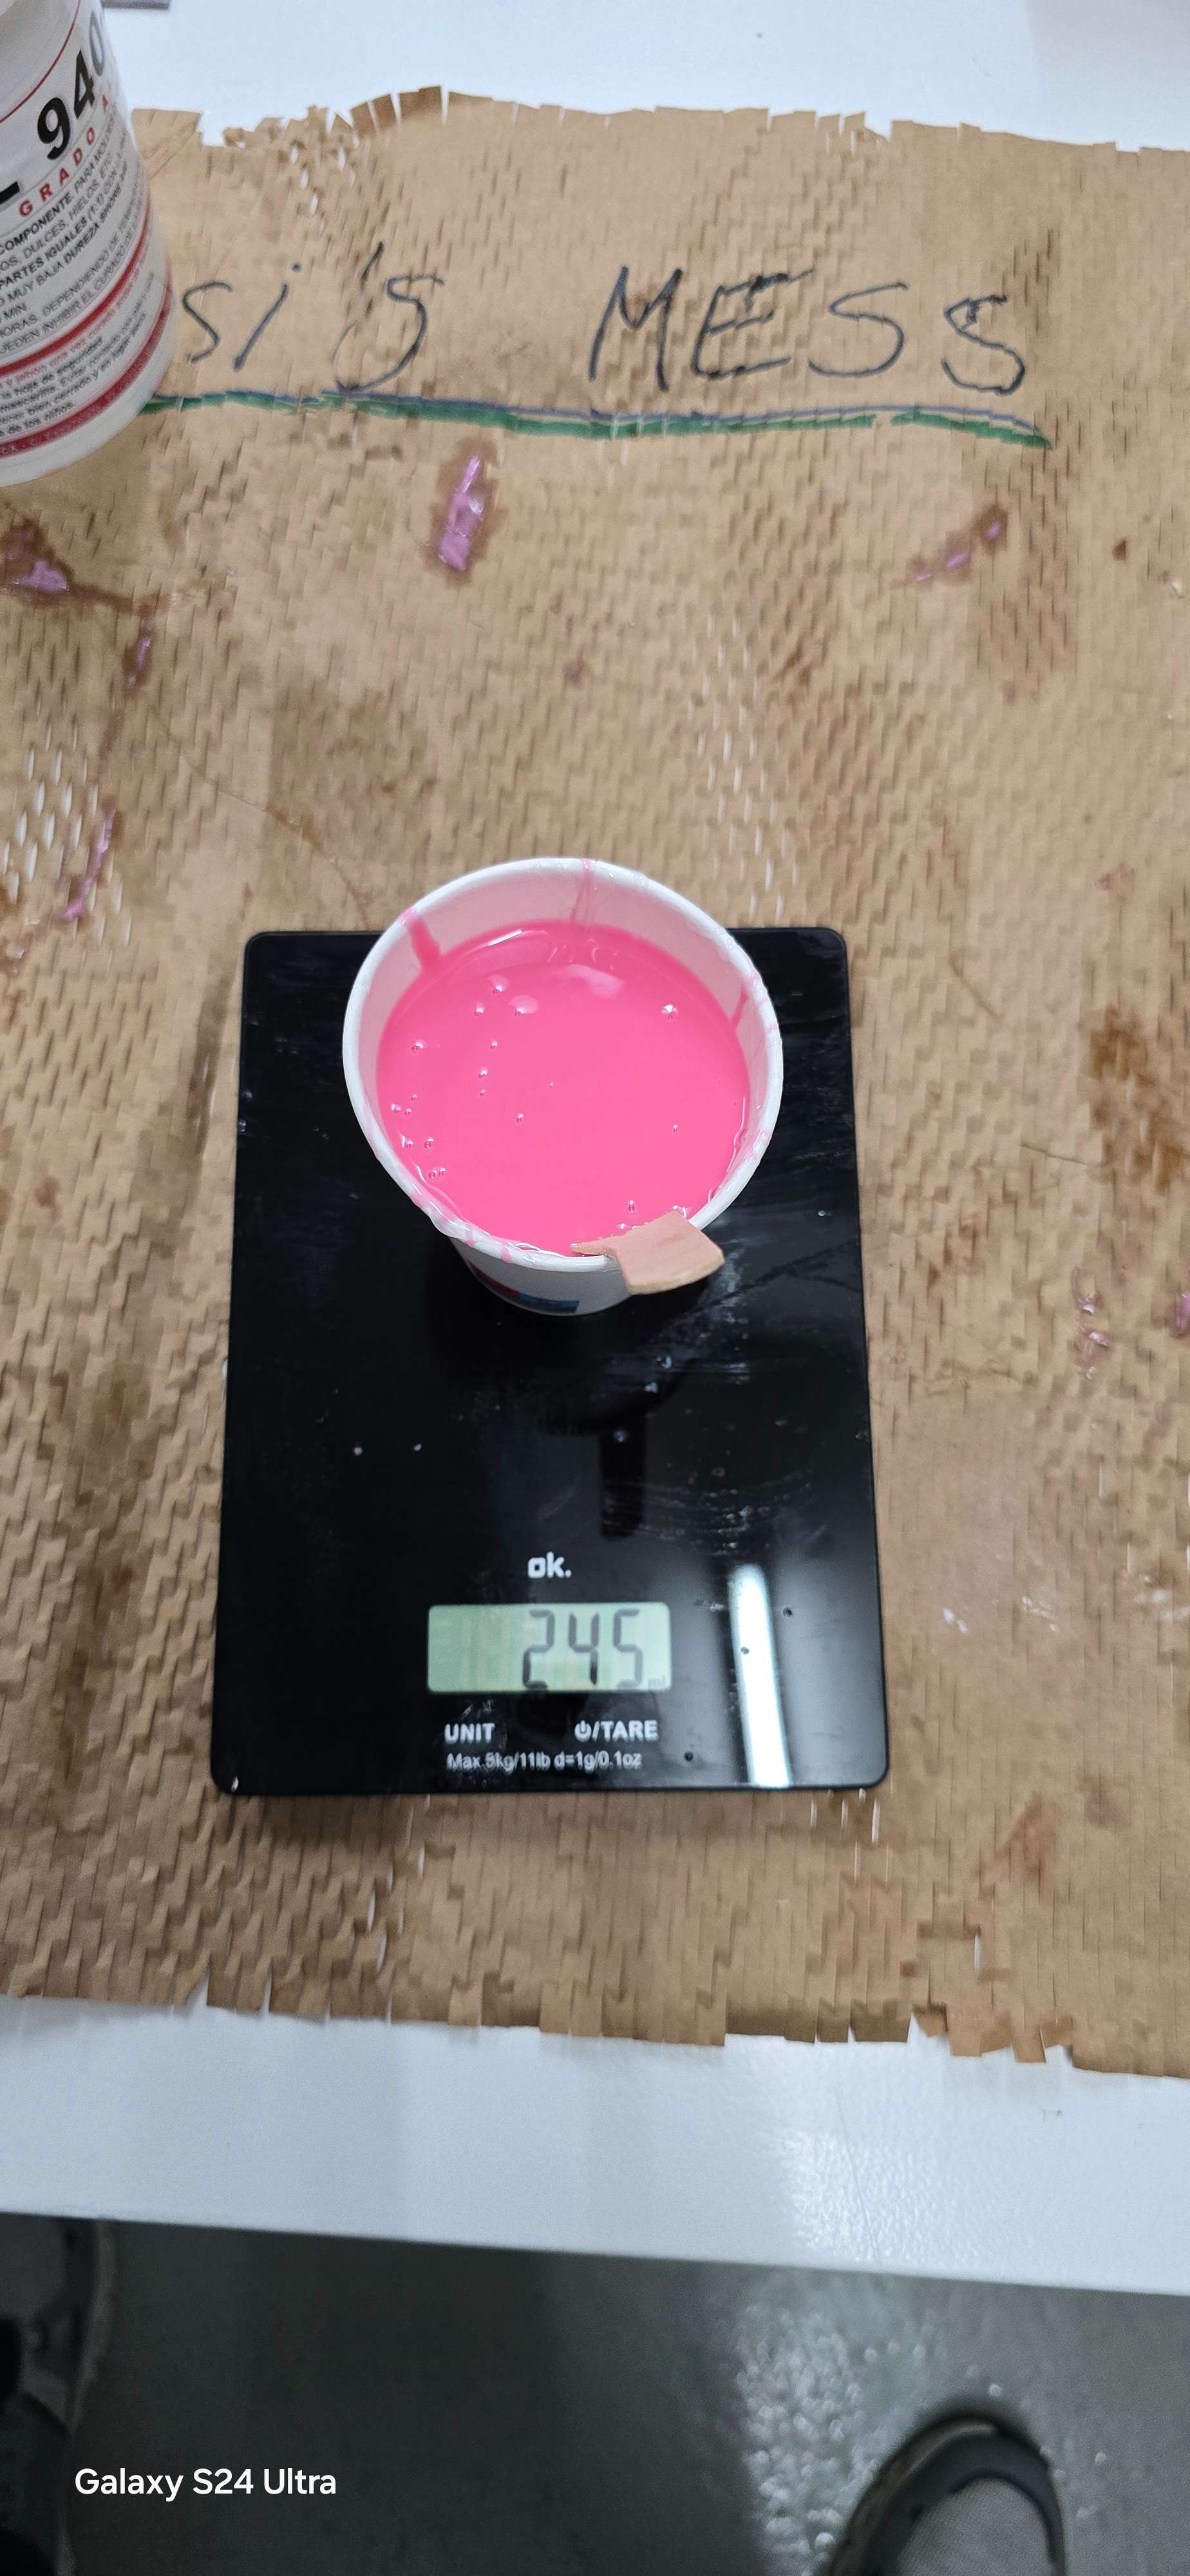
Slowly pour both components into a mixing container. Stir thoroughly for several minutes, scraping the sides and bottom to ensure a homogeneous mixture. Due to its low viscosity, the mixture should be easy to stir and pour, if not check the age of the product.
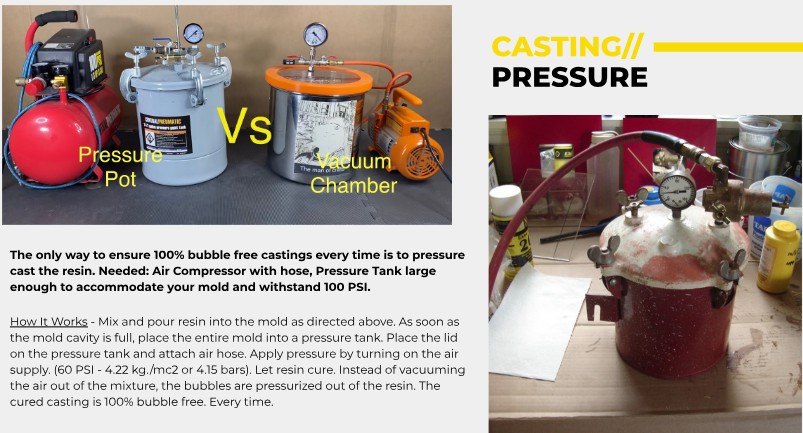
Degassing Process:
Although the silicone has low viscosity which should minimise bubble formation, there are still plenty of air bubbles. For optimal results, place the mixed silicone in a vacuum chamber to remove any entrapped air bubbles.
Pouring Process: