Input Device
This week I dedicated to input device. For this assignment, I first explored the Adafruit website to gather information, then determined that my task would be to connect various sensors as part of the project.I chose to use an I2C connector to integrate the load cell, temperature sensor, and step response sensor.
Group Assignment
Examine the analog levels and digital signals produced by an input device.
Please find group assignment link here Group Assignment Link
Individual Assignment
measure something: add a sensor to a microcontroller board that you have designed and read it
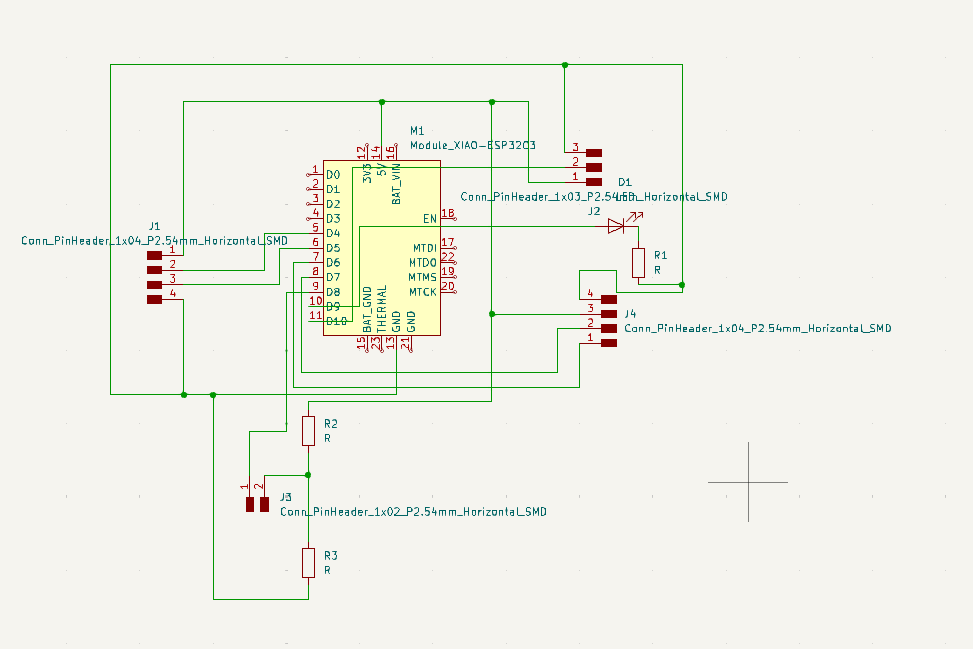
Circuit diagram
During last week assignment I have downloaded and installed Kicad in my system. I have also added the Fab library to KiCad. For details please refer Click Here
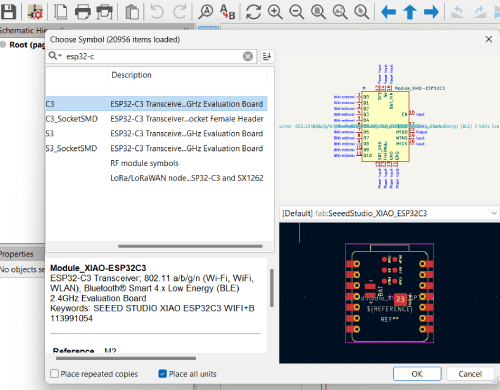
Then I take components one by one from library.First I took ESP32C3 microcontroller board.
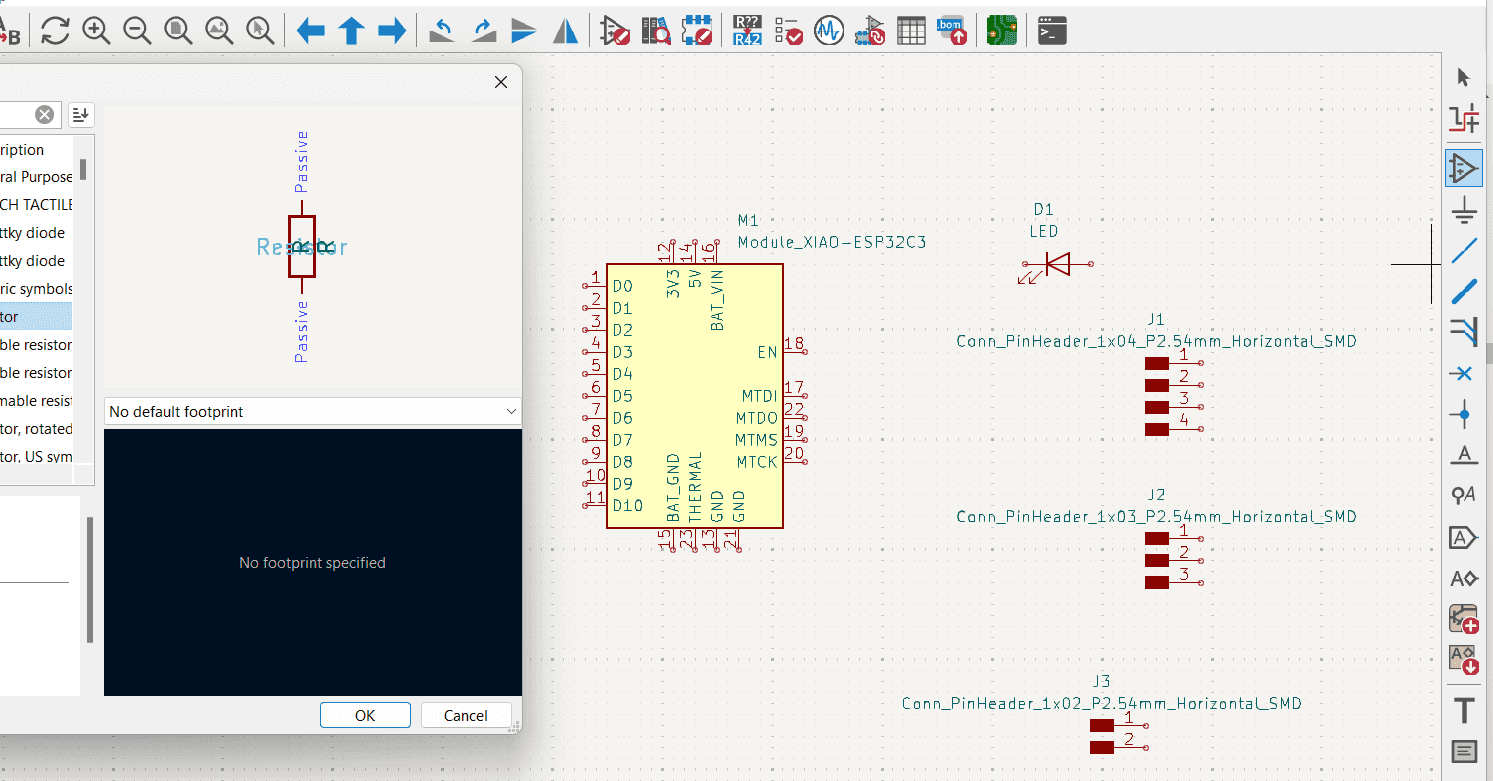
Then similarly I selected the components required for my library like Resister, Led, Connector.
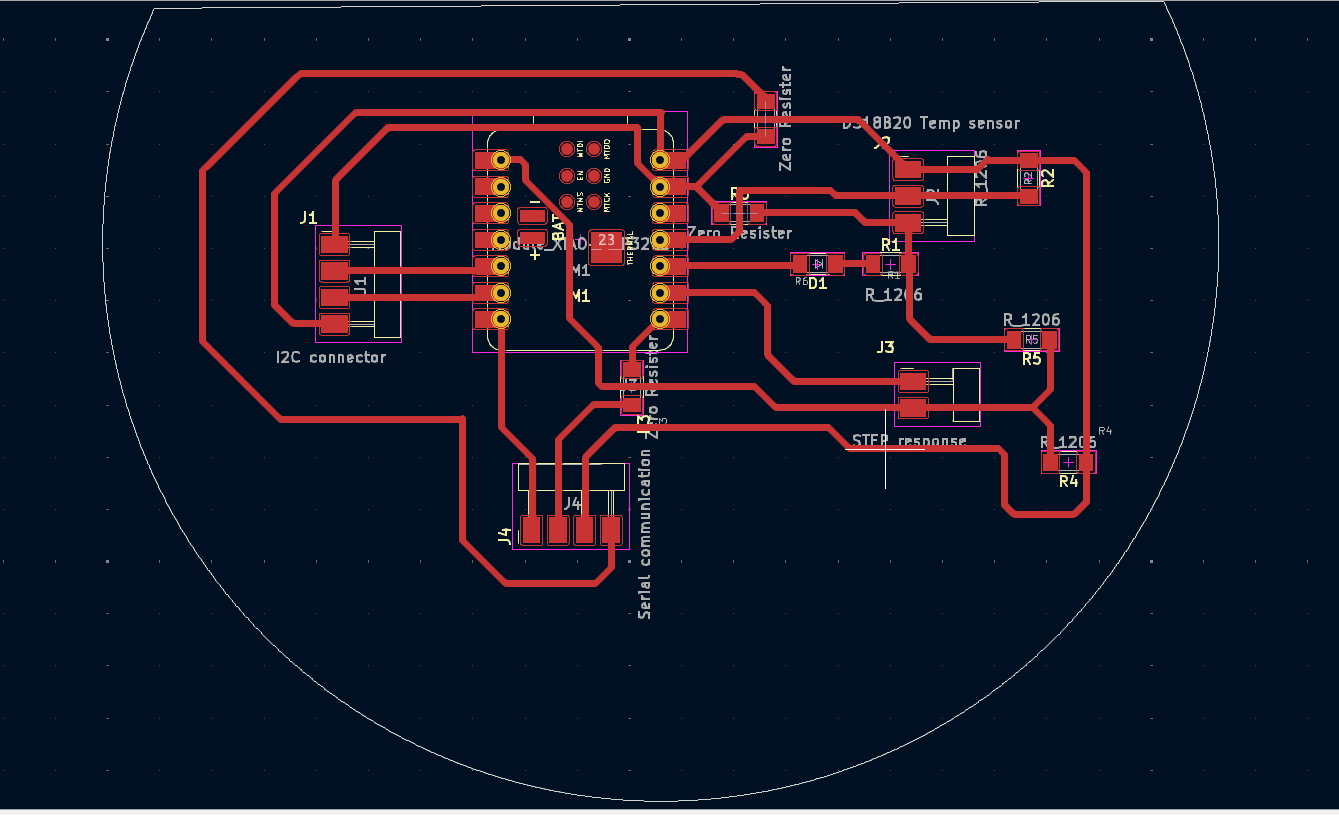
Then I maked circuit diagram for my PCB by keeping selected components in proper place and connected them by using wire.
Then update the PCB from schematic.
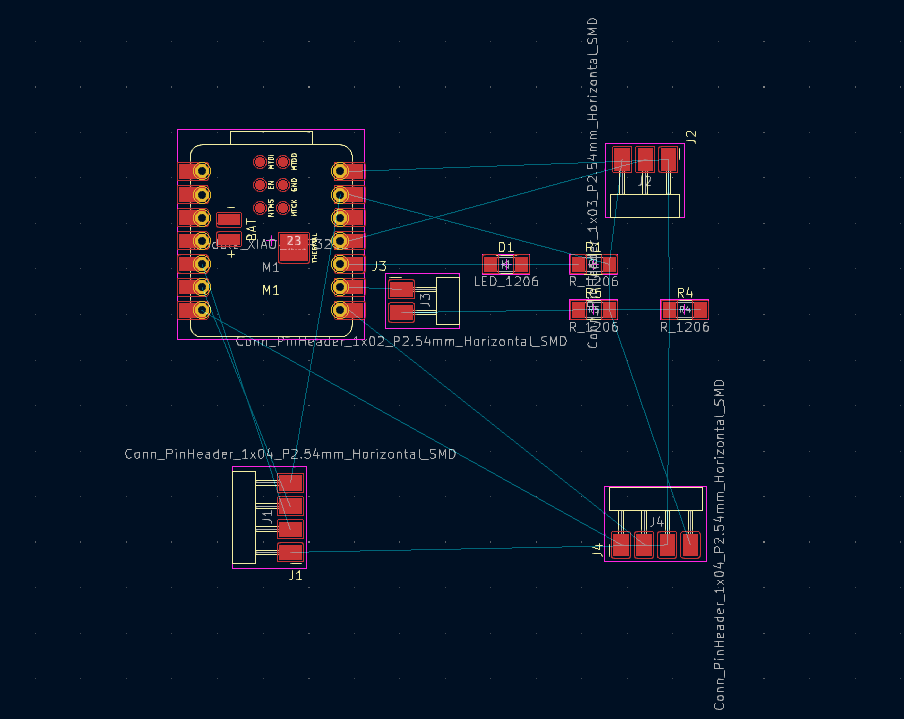
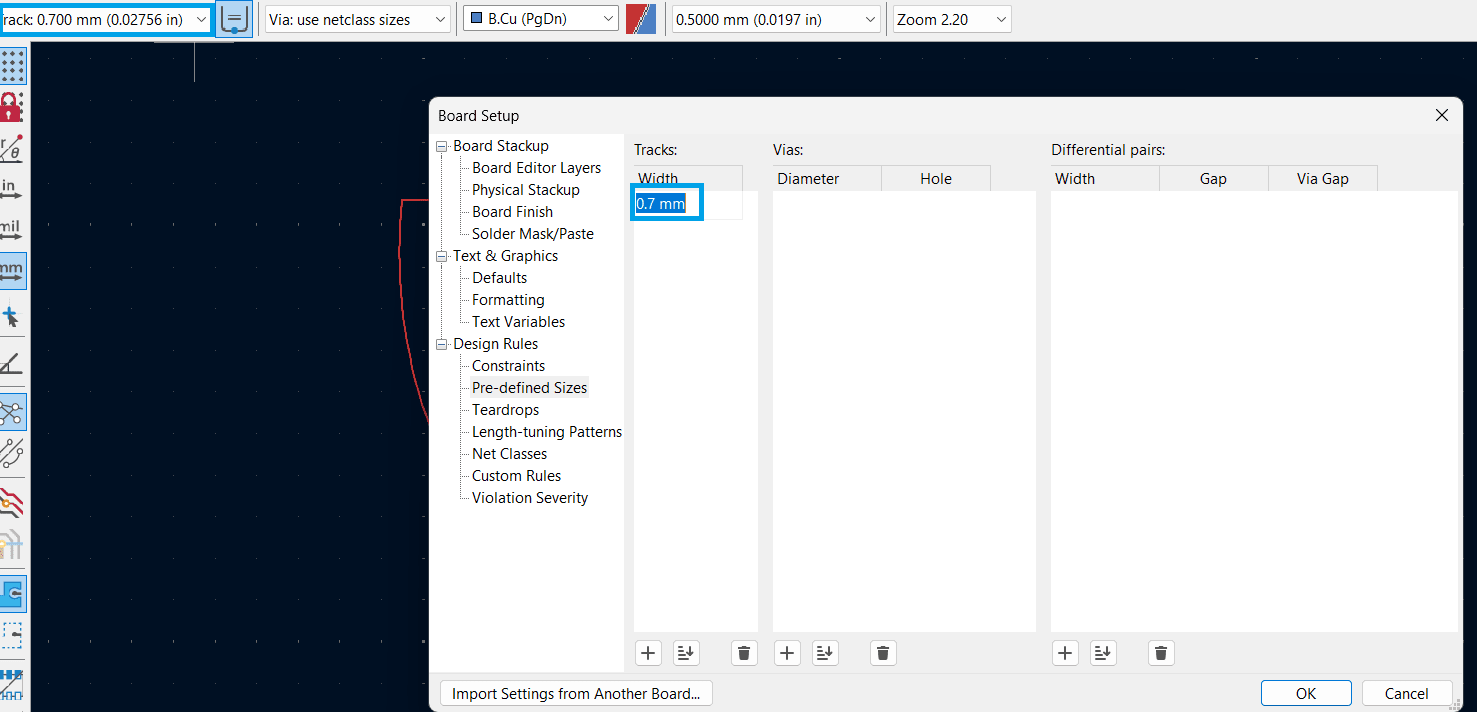
Then I started for routing here is the task to minimise cross lines. and then start routing. I took 0.7 mm trace width for routing.
I had more trouble during routing my three connections are overlapping so then I added zero resister into the schematic.

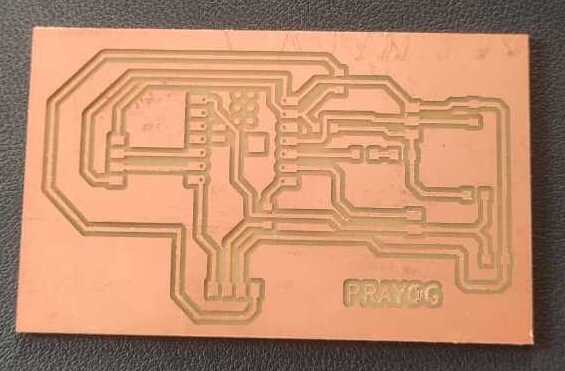
Then Again update the pcb and make the border for PCB. and this is the final output.
Then export that png file and then open the mods ce.
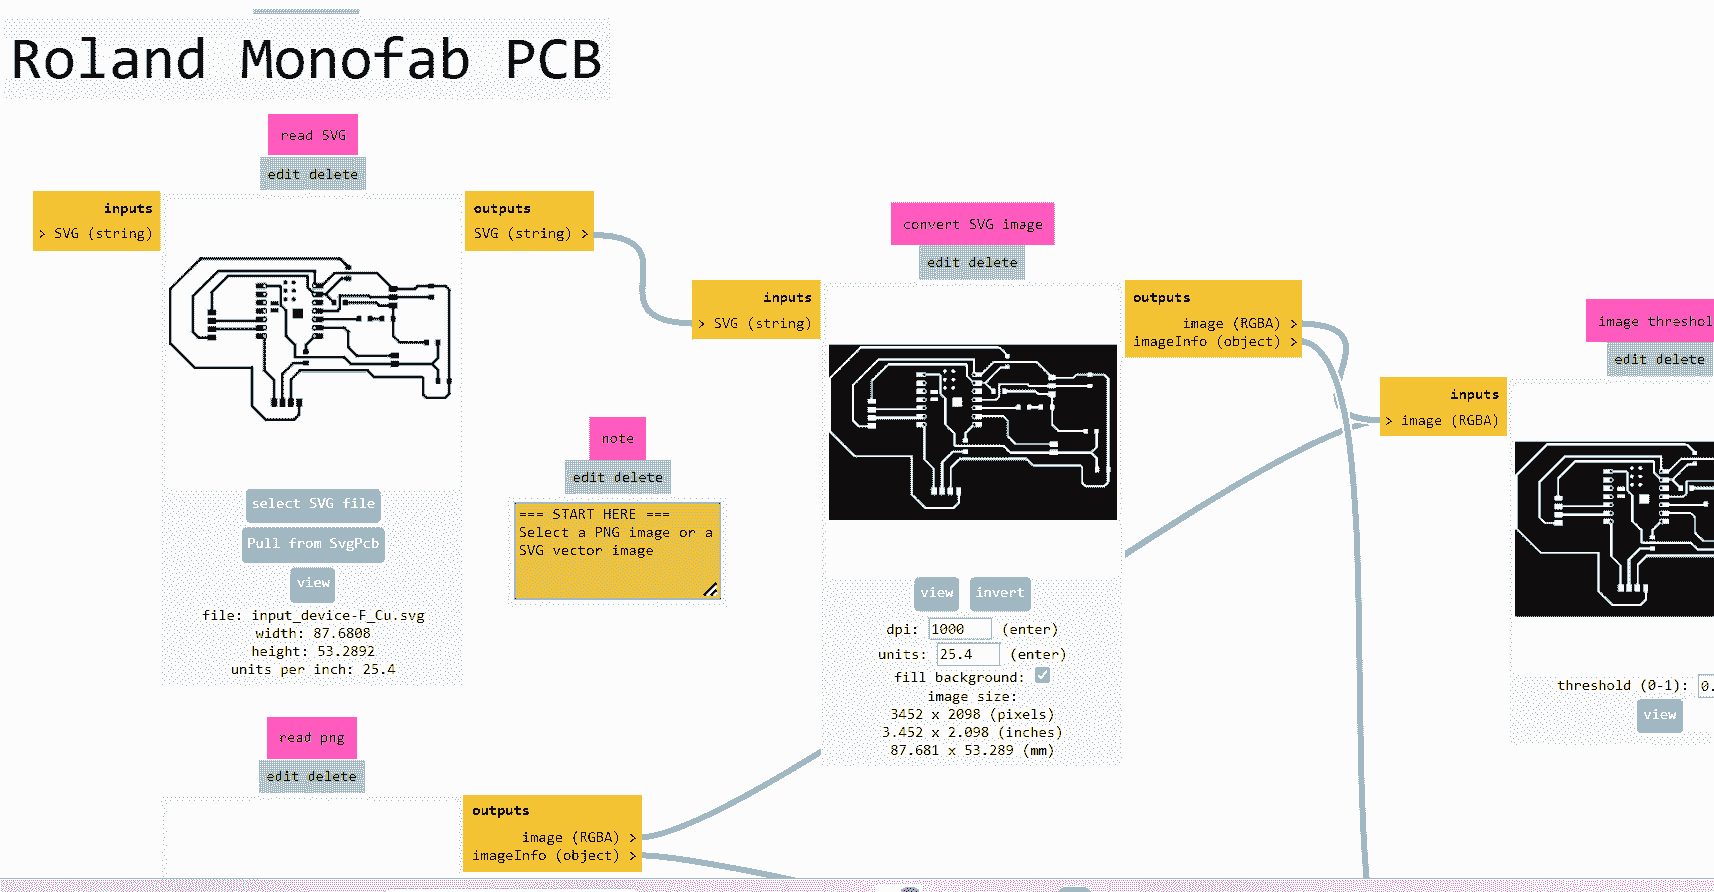
Save the .rml file
First select the png file then invert the file and select the bit. I chose a trace setting of 1/64, which corresponds to a width of 0.04, and for cutting, I select for a 1/32 setting, equating to a width of 0.08. then select the x, y, z and job height 12.then convert the file and download the .rml file.
Milling
Then I switched on the milling machine and open the v-panel software. I encountered several challenges while milling this PCB. Initially, I set the cutting depth to 1026 mm, but the PCB wasn't milled. The bit is not milling the traces. Then I increase the cut depth to 2016 mm still my pcb is not milling then I again increase the cut depth upto 3016mm but then there is the The size of the PCB can be an issue, as it may not be milled properly due to limited space. Additionally, if the bed surface is uneven, the PCB might not be milled uniformly.
I replaced the old PCB with a new one on the board to run the file again. However, this time the border file came too close to the edge of the PCB, causing a risk of the bit breaking, so I stopped the machine. The traces were milled well, but when I tried to run the border file, it didn’t come out correctly.
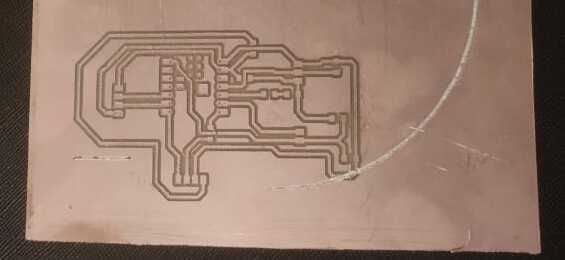
I paused the milling machine and tried to rerun the file to cut the traces, but during the process, the drill bit loosened and broke. This is may be due improper tightning the drill bit or the mistake during export the file.
Again I observed the pcb where bit broken I think I forgot to invert the file in mods ce by observing milled PCB in details..
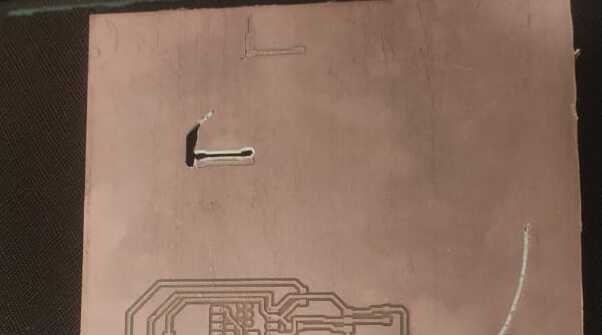
I replaced the PCB with a new one, completed the milling process, and finally finished the task. Thanks to my instructor mr. Suhas, he guided me for milling PCB.
Soldering
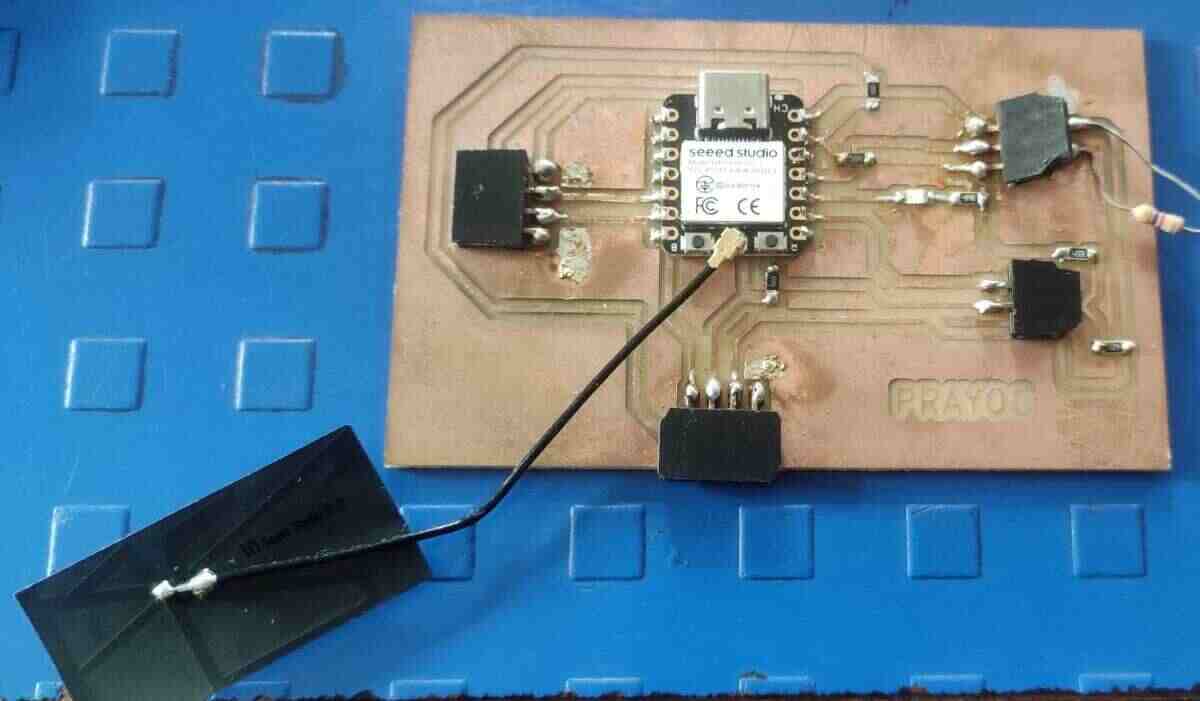
Then I done soldering....
Before going to the soldering I find the components required for soldering in our fab inventory.
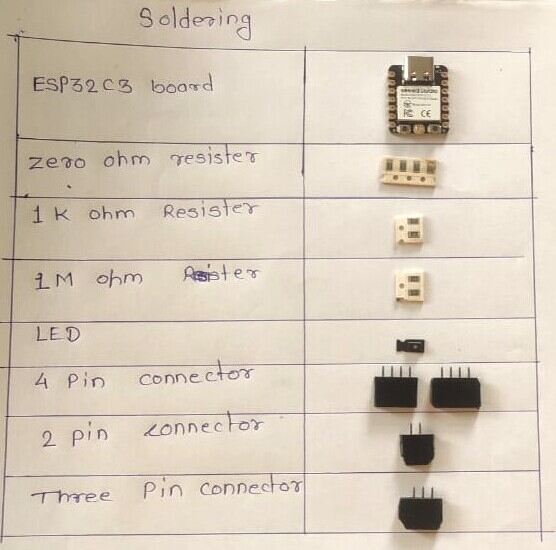
I done with soldering the PCB
Input Sensor
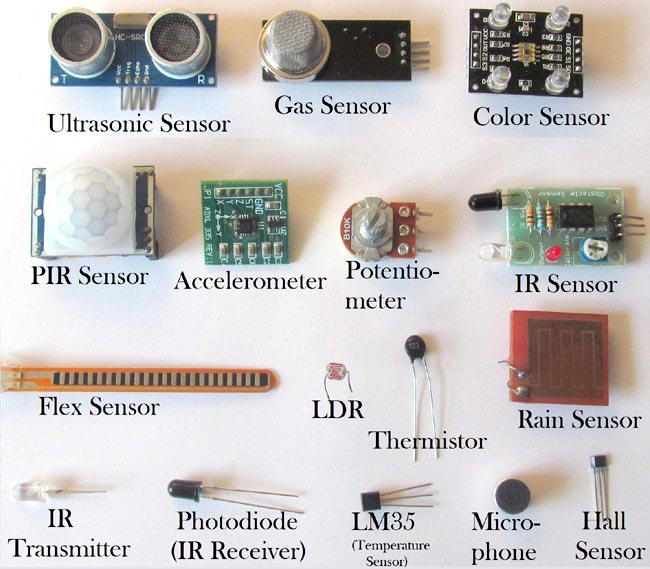
Input Sensor is like any physical quantity like distance, length, temperature, sound etc and output for the sensor is one kind of response or feedback of the input we recieved in the program. Certain sensor images shown below have been sourced from Google for reference purposes.
Types of Sensors
In this assignment, I aimed to conduct tests using both an IR sensor and an ultrasonic sensor.
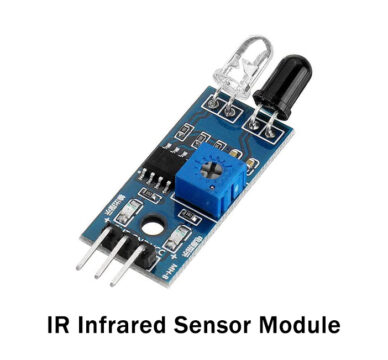
IR (infrared) Sensor
An infrared (IR) sensor is a device used to detect and measure infrared radiation in its environment. When a person or object approaches the sensor, the infrared light emitted by the LED bounces off the object and is subsequently captured by the receiver. I used HW-201 IR Sensor.
HW-201 IR Sensor
Working Principle:
In this module, the TR Transmitter emits infrared radiation. When this radiation is reflected back, the IR Receiver picks it up, resulting in a decrease in its resistance and a low output signal. If the radiation is not reflected, the Receiver fails to detect any signals, causing its resistance to rise and the output to switch to a high state. Resource link
| Features and Specifications | |
|---|---|
| Features |
|
| Specifications |
|
HW - 201 IR Sensor with Part Discription
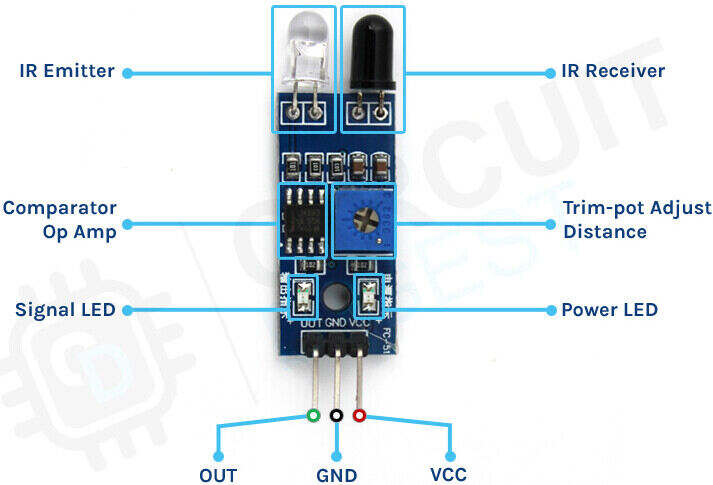
Pin Out Connections
VCC: Input Power Supply
GND: Ground Power Supply
Output:Active High Output
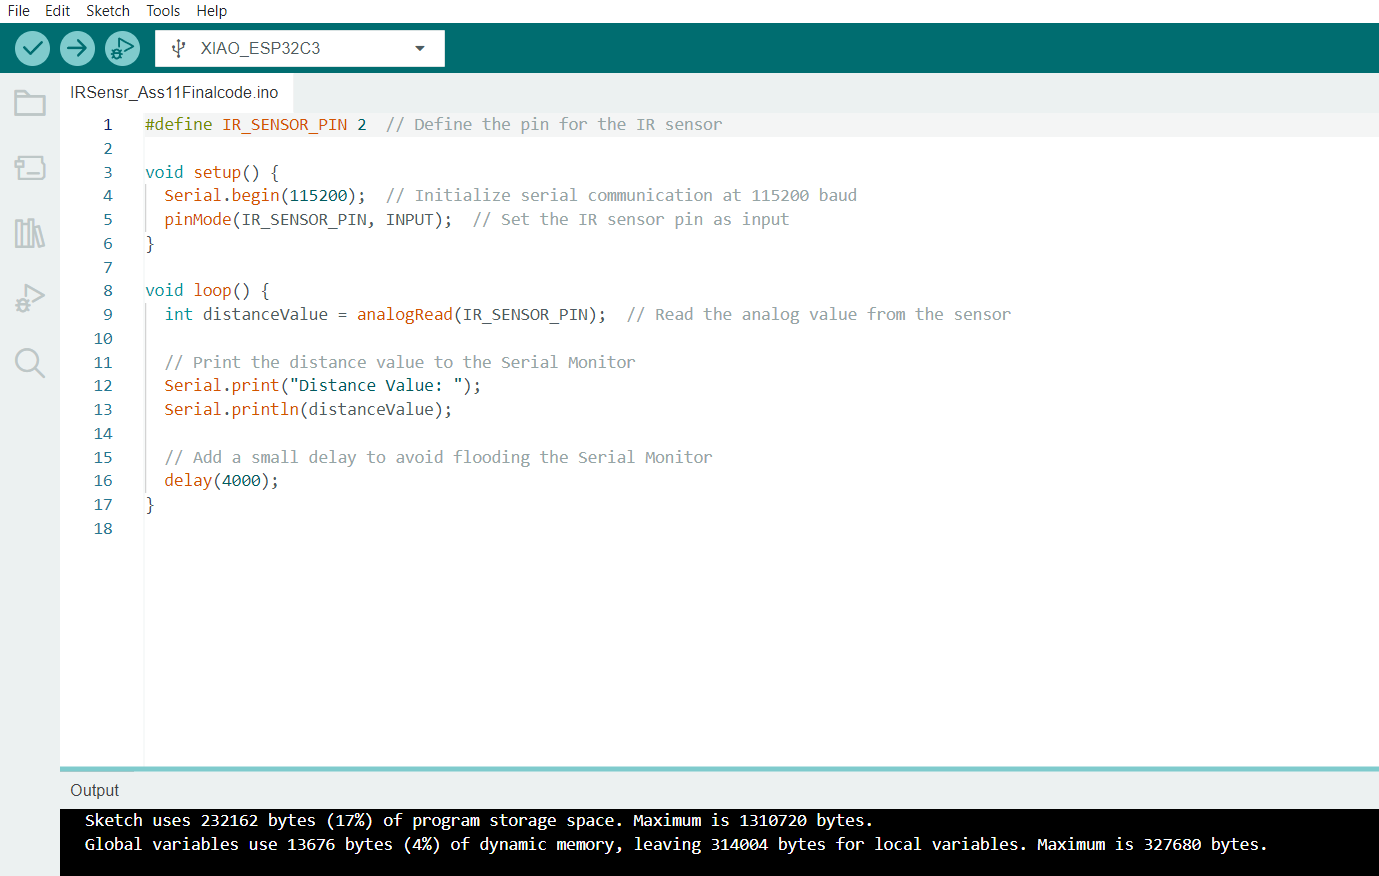
First I tried for Simple programme. I placed my hand near Sensor and it gives output, if hand detected then it print 1 if not detected then it print 0.
I execute a separate program for testing the IR sensor, similar to the one above, but I display "Palm detected" and "Palm not detected" instead of 0 and 1.
Code For IR Sensor in Arduino
Ultrasonic Sensor
An ultrasonic sensor is a device that determines the distance to an object by emitting ultrasonic sound waves.
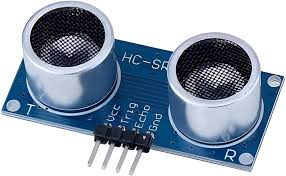
HC-SR04 Ultrasonic Sensor
Working Principle:
The HC-SR04 ultrasonic distance sensor is made up of two ultrasonic transducers. It emits an ultrasonic pulse at a frequency of 40 kHz, which travels through the air. When this pulse encounters an obstacle or object, it reflects back to the sensor. By measuring the time it takes for the pulse to return and knowing the speed of sound, the sensor can determine the distance to the object.Reference Link
Sensor Specifications
| Specification | Value |
|---|---|
| Operating Voltage | DC 5V |
| Operating Current | 15mA |
| Operating Frequency | 40KHz |
| Max Range | 4m |
| Min Range | 2cm |
| Ranging Accuracy | 3mm |
| Measuring Angle | 15 degree |
| Trigger Input Signal | 10µS TTL pulse |
| Dimension | 45 x 20 x 15mm |
Pin Out Connections
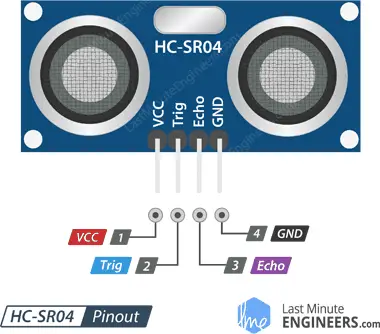
VCC: Connect the HC-SR04 ultrasonic sensor to the 5V output.
Trigger: Pin is used to trigger ultrasonic sound pulses. Setting this pin to HIGH for 10µs triggers the sensor to emit an ultrasonic burst.
Echo: The Echo pin becomes high when the ultrasonic pulse is sent out and stays high until the sensor detects an echo, at which point it returns to low. By timing how long the Echo pin remains high, the distance can be determined.
GND: Ground Power Supply
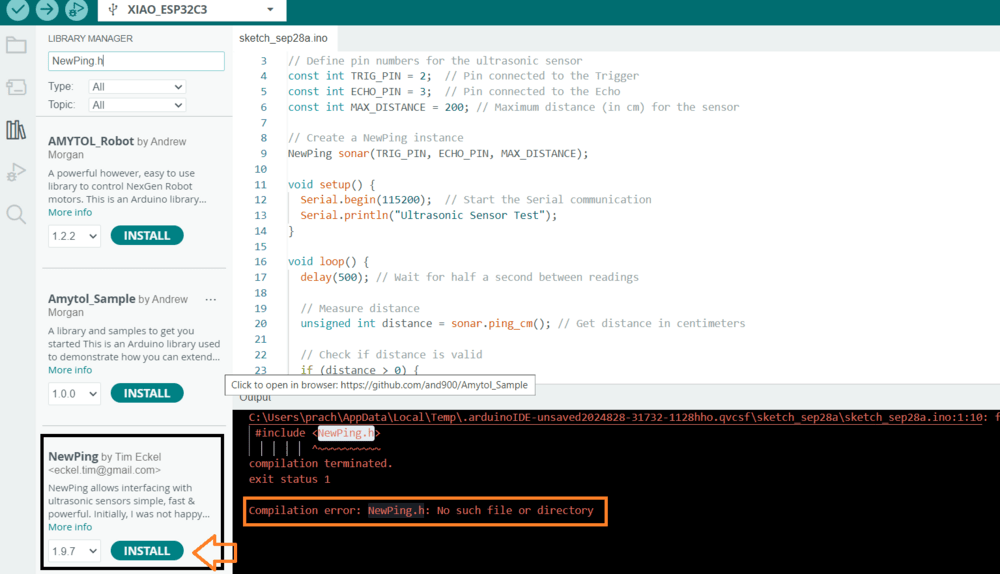
I have written a simple Arduino code to check the distance. I have connected it to my ESP32C3 board and verified the code. Then, I have encountered a compilation error with the NewPing library.
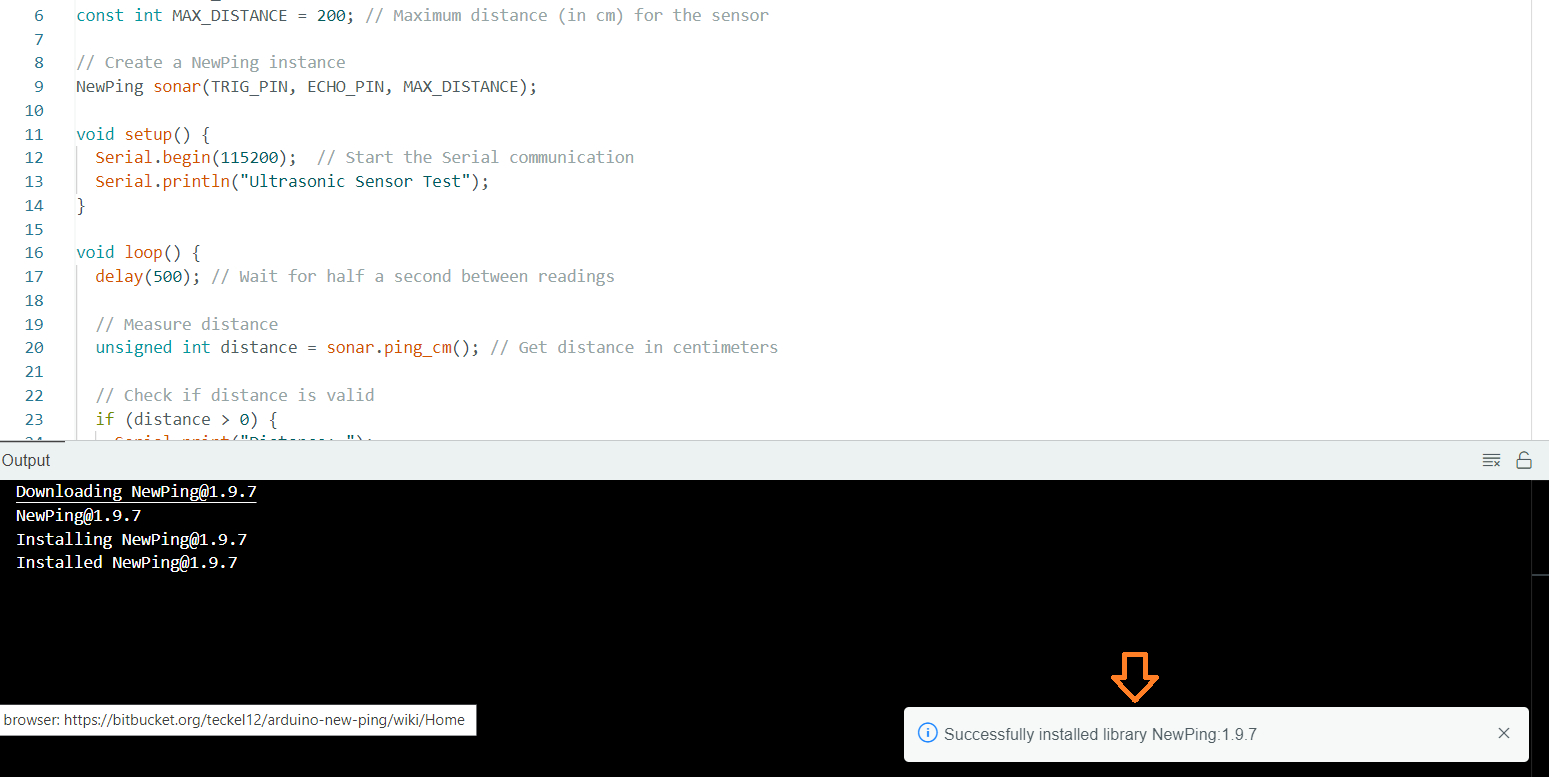
Then, I have successfully installed the NewPing library.
Then uploaded the code by selecting the port and board.
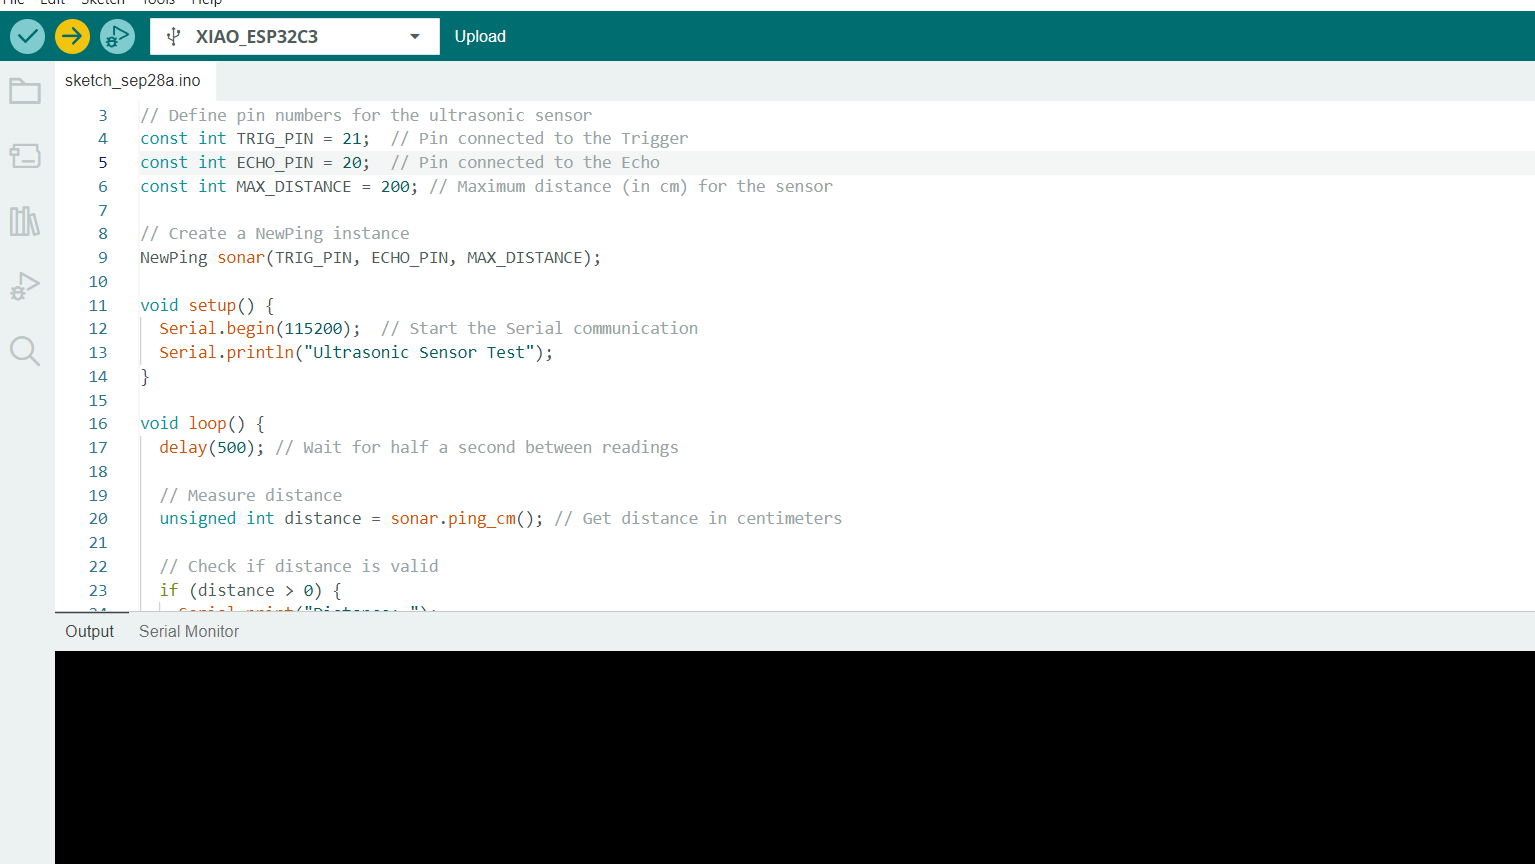
Get the output in the Arduino code.
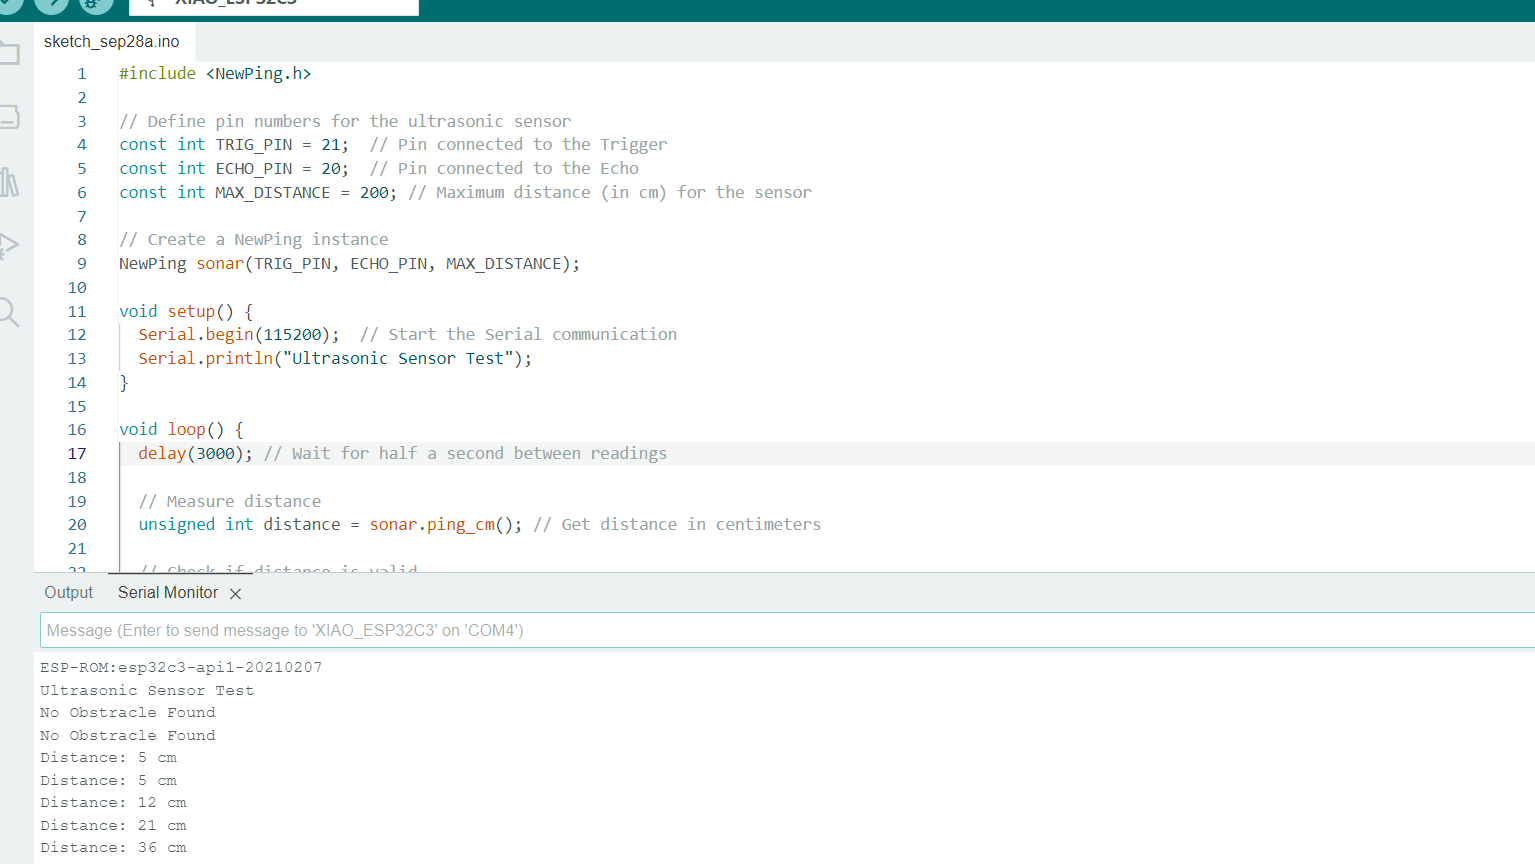
Arduino Code
Problem Faced
During this assignment, I initially having problems with coding the IR sensor pin. My board includes SDA and SCL pins for I2C communication, along with TX and RX pins for the ultrasonic sensor, which interfered with the functionality of the IR sensor. I then connected the jumper wire to GPIO02, and it is now working, as it requires an analog pin..
Key Learnings
During this assignment I learnt different sensors and also learnt how they are working.