Title: Shadenet Automation at Polyhouse
About Project
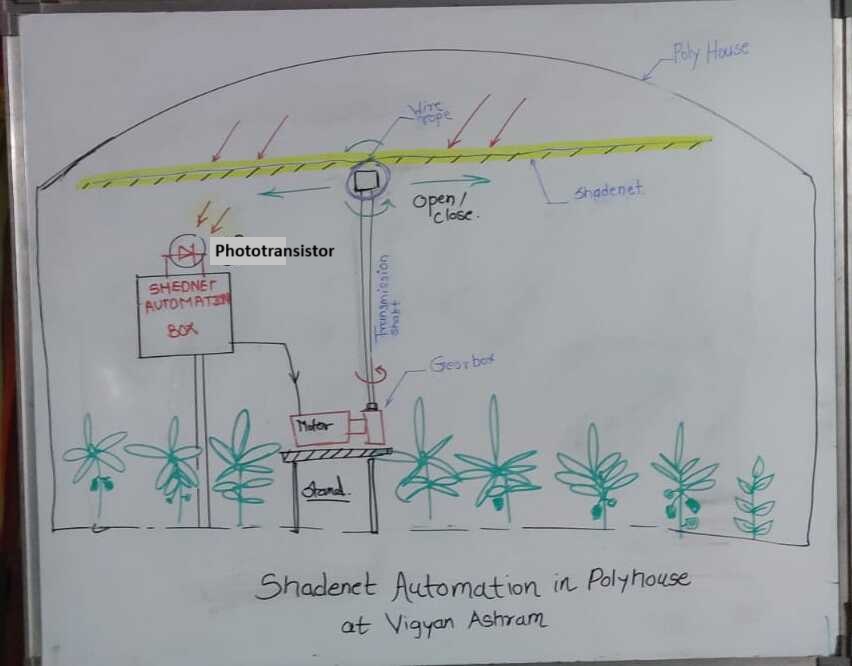
I am working on a Shadenet Automation project aimed at improving the productivity and lifespan of plants in the polyhouse at Vigyan Ashram. To achieve this, I have incorporated a Phototransistor sensor, which helps manage the light exposure for the plants. By detecting the intensity of light, the system automates the opening and closing movements of the Shadenet. This is controlled using two single-channel relays that facilitate both clockwise and counterclockwise movements of the motor. Automating the Shadenet operation through the Phototransistor reduces the need for manual intervention, minimizing human error, such as forgetting to adjust the Shadenet, and making the process more efficient.
Problem Statement:
In a polyhouse, the absence of curtains makes regulating temperature and light challenging, which can result in overheating that stresses plants and hampers their growth. Uncontrolled light can negatively impact plant health, while the lack of curtains increases the vulnerability to pests and diseases. Furthermore, energy efficiency declines, leading to higher operational costs. Curtains play a crucial role in creating a stable environment that promotes healthy plant growth and maximizes yields.
Manually operating curtains in a polyhouse is labor-intensive and often results in inconsistent control of temperature and light, making it difficult to maintain optimal conditions for plant growth and productivity. Automating the curtain system allows for more precise and consistent regulation, improving the overall efficiency of the growing environment. As part of my project at the FabLab in Vigyan Ashram, I am working on developing an automated curtain system for a capsicum polyhouse using a Phototransistor to enhance light and temperature control.
Objective Of The Project:
Developing an automated shadenet system for a capsicum polyhouse utilizing an Phototransistor sensor to optimize temperature and light management, minimize manual intervention, and promote better plant growth and crop yields.
This system decreases labor costs and time spent on manual operations, while also extending the lifespan of the plants.
Sketch of the Final_Project
Bill Of Material
Material and Components required with their cost
| Item | Description | Price |
|---|---|---|
| Single Phase Induction Motor with Gear box | 1 Nos | Rs 5700 |
| Relay | 2 nos | Rs 450 |
| Phototransistor | 1 nos | Rs 78 |
| 3 core wire | 50 ft | Rs 836 |
| Switch Button | 1 Nos | Rs 21 |
| MS Angle 25×25×5 | 20 ft. | Rs 650 |
| MS flat Plate 30×5 mm | 4 ft. | Rs 150 |
| MS Square Tube 25×25×2 | 6 ft. | Rs 230 |
| 5V Adapter | 1 Nos | Rs 189 |
| PCB Copper Clad | 5cm×7cm | Rs 20 |
| Microcontroller | XIAO ESP32 C3 | Rs 450 |
| Nut and bolt | 8 nos | Rs 40 |
| Washer | 16 Nos | Rs 20 |
| Metal Sheet | 2 X 2 ft | Rs 180 |
Ideas / Solutions
At Vigyan Ashram in Pabal, we have a polyhouse where capsicum plants are cultivated. The polyhouse has a dome-shaped structure and is equipped with foggers, cooling pads, and a shade net to maintain optimal temperatures for the plants. The shade net is attached to a shaft with clips and wire ropes, allowing it to be manually rolled up or down. This manual system requires significant labor and time, which I observed as an inefficiency. As a FabLab student, I decided to explore a solution to automate the shade net. After discussing the idea with Mr. Suhas, we finalized the Shade Net Automation project as my graduation project, aiming to address the challenges of manual operation.
Process Flow
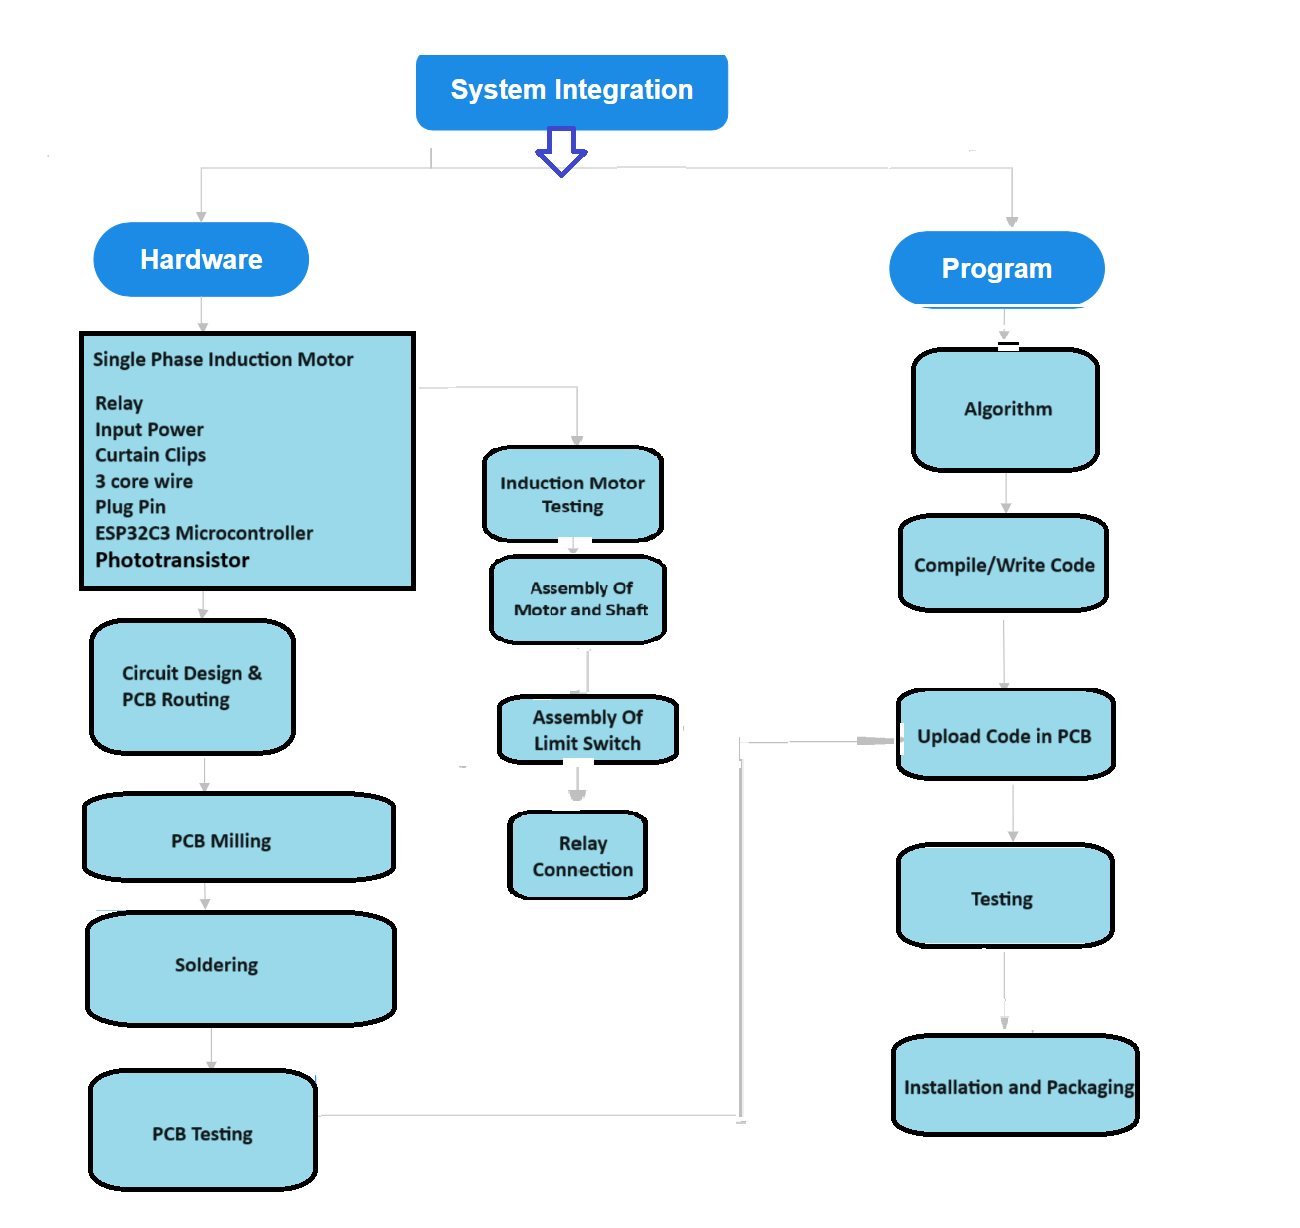
This is the flow chart for my Project.
Previous System Analysis
In the previous system for shed net movement in the polyhouse, the process of manually rotating the shaft in clockwise and counterclockwise directions was used to open and close the shed net. This method required human labor and was inefficient, potentially negatively impacting the crops in the polyhouse.
Cad Modelling
I have created CAD models for the following parts:
Controller board
Controller lid
Motor stand.
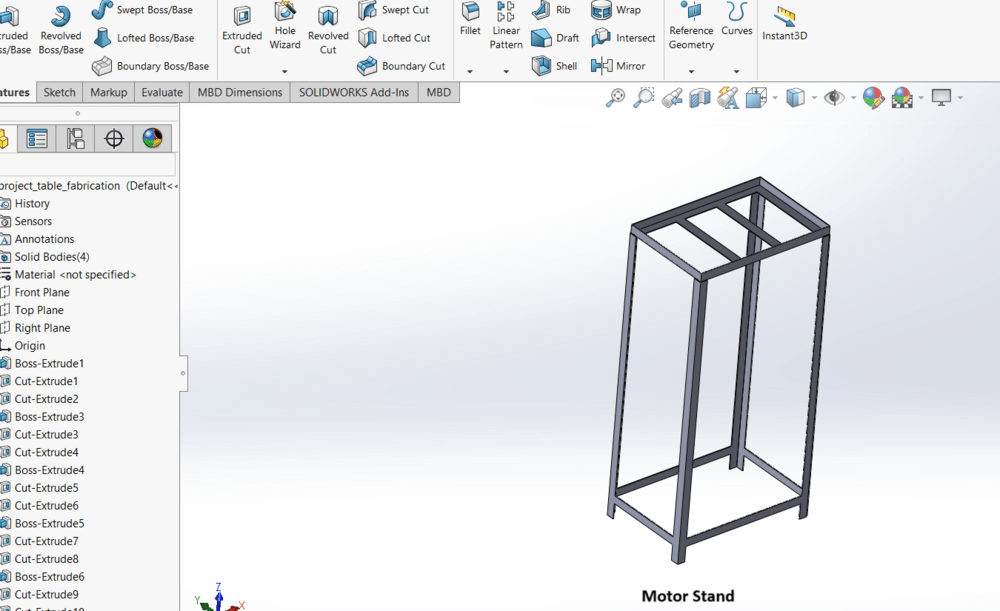
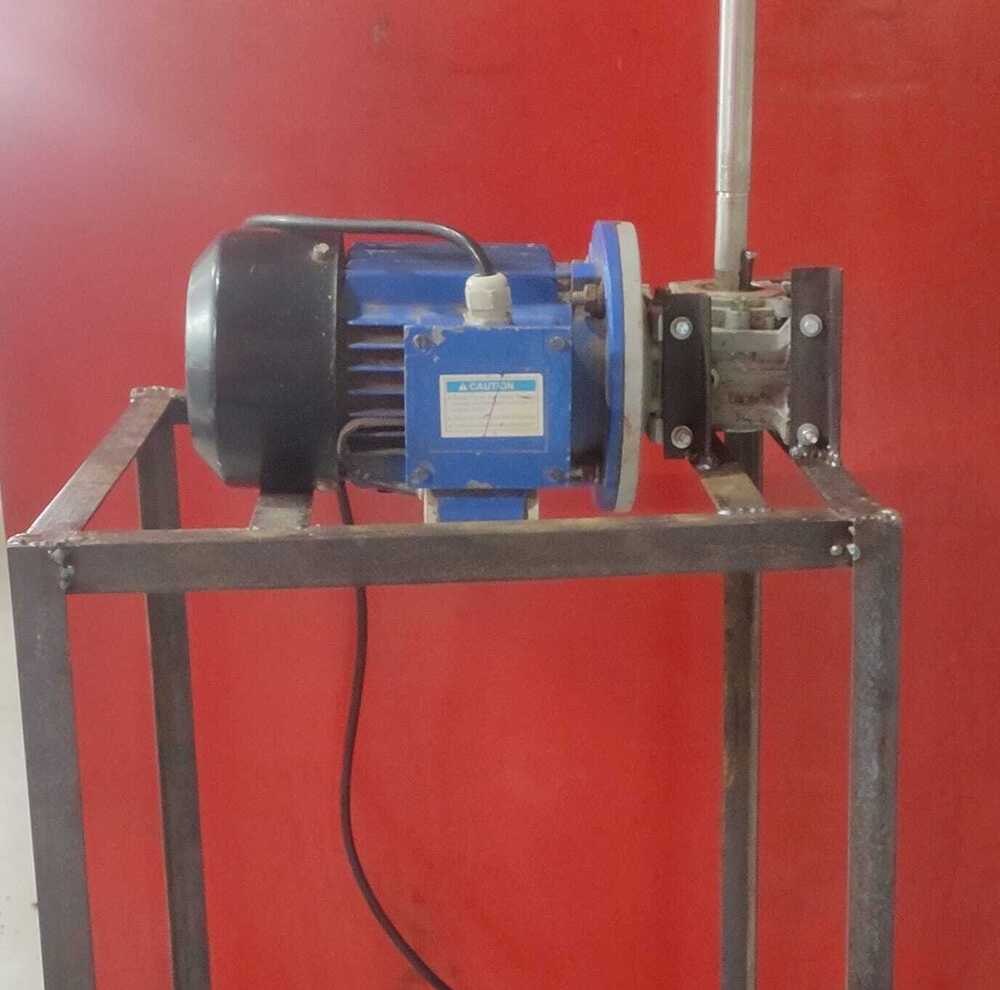
For this project, I used a single-phase induction motor, which required a motor holder stand. Therefore, I started by designing the motor stand as above.
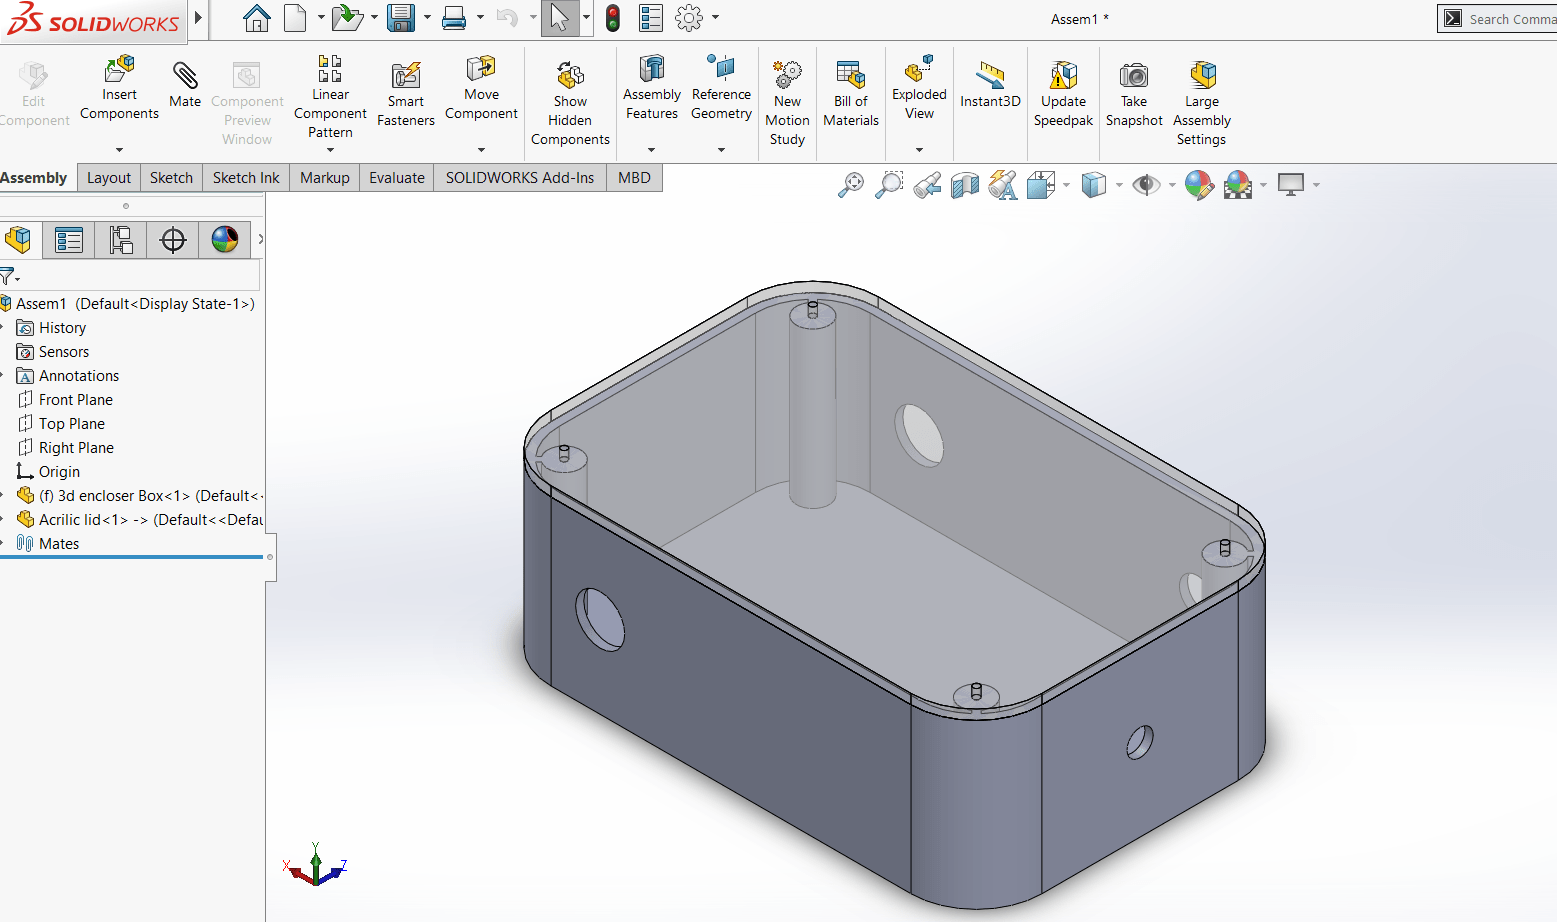
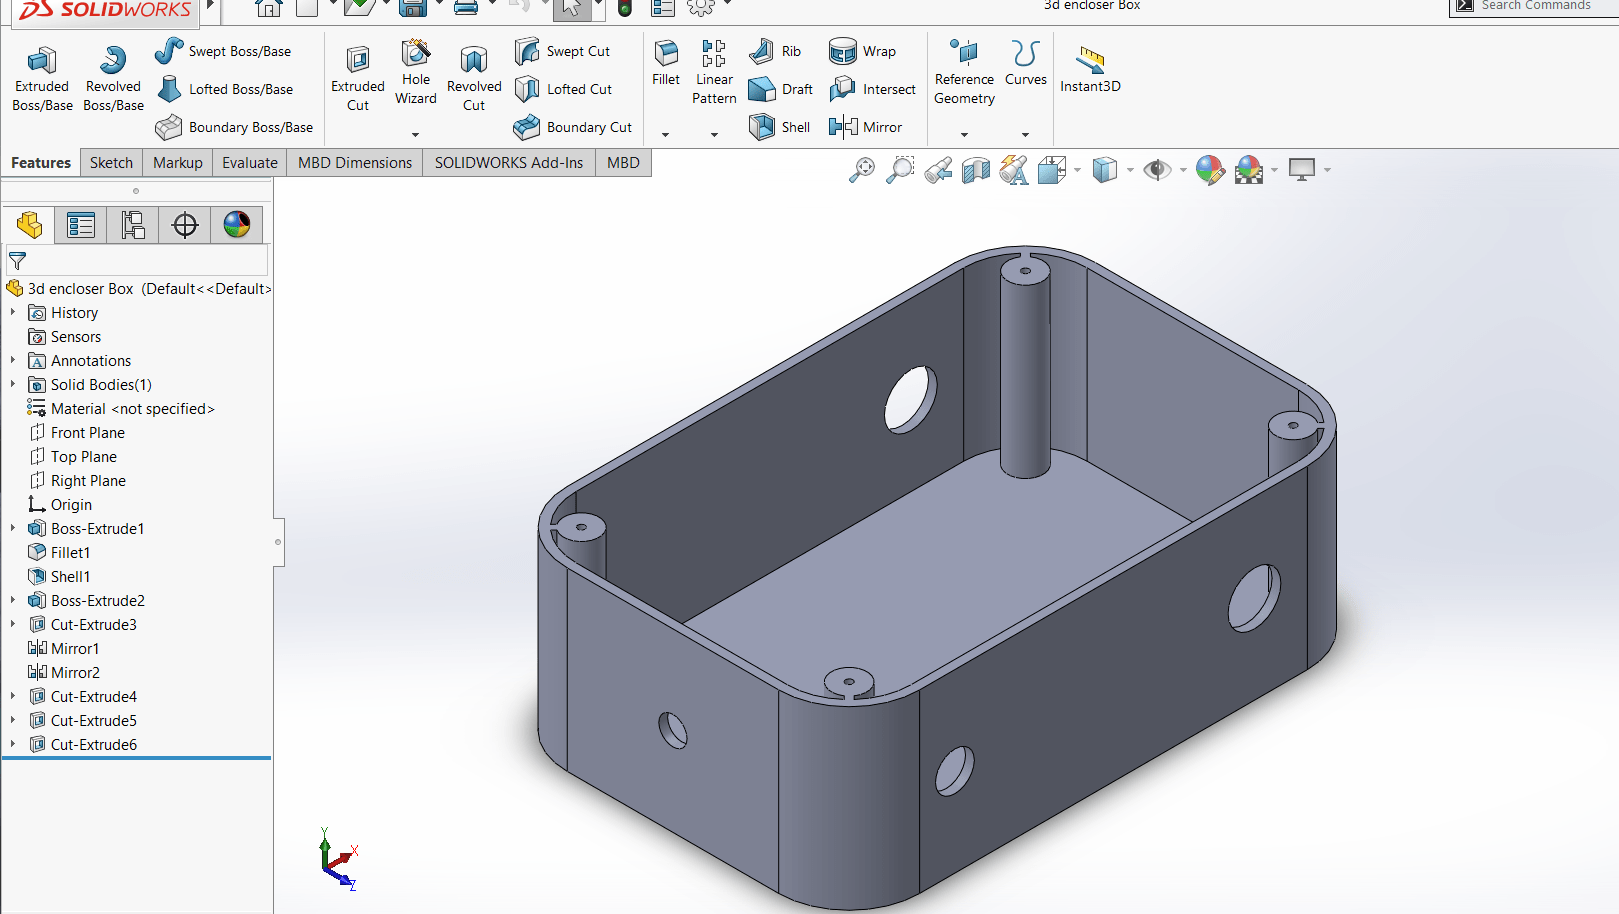
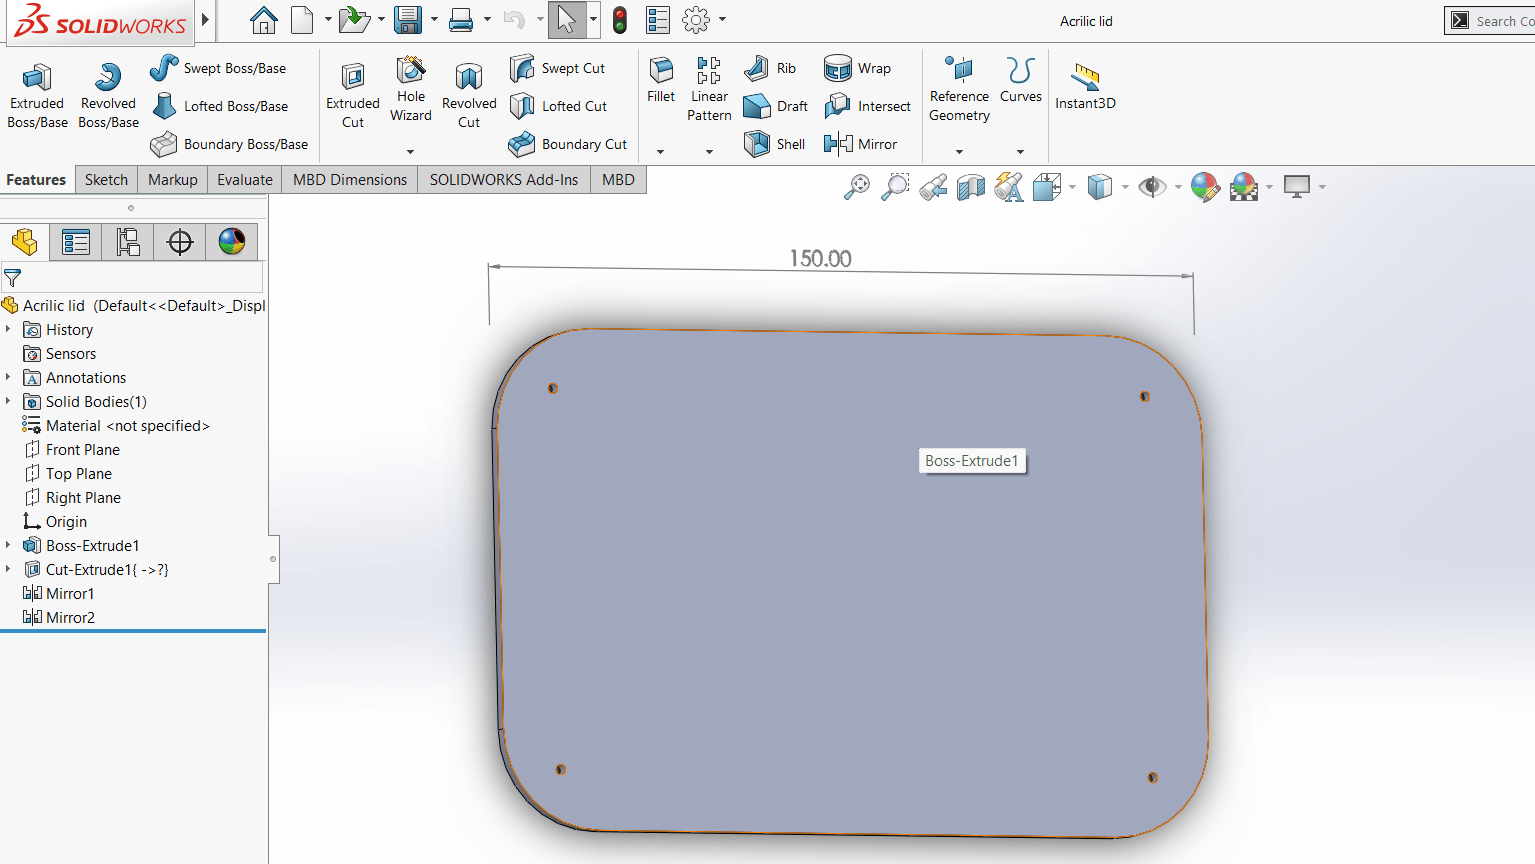
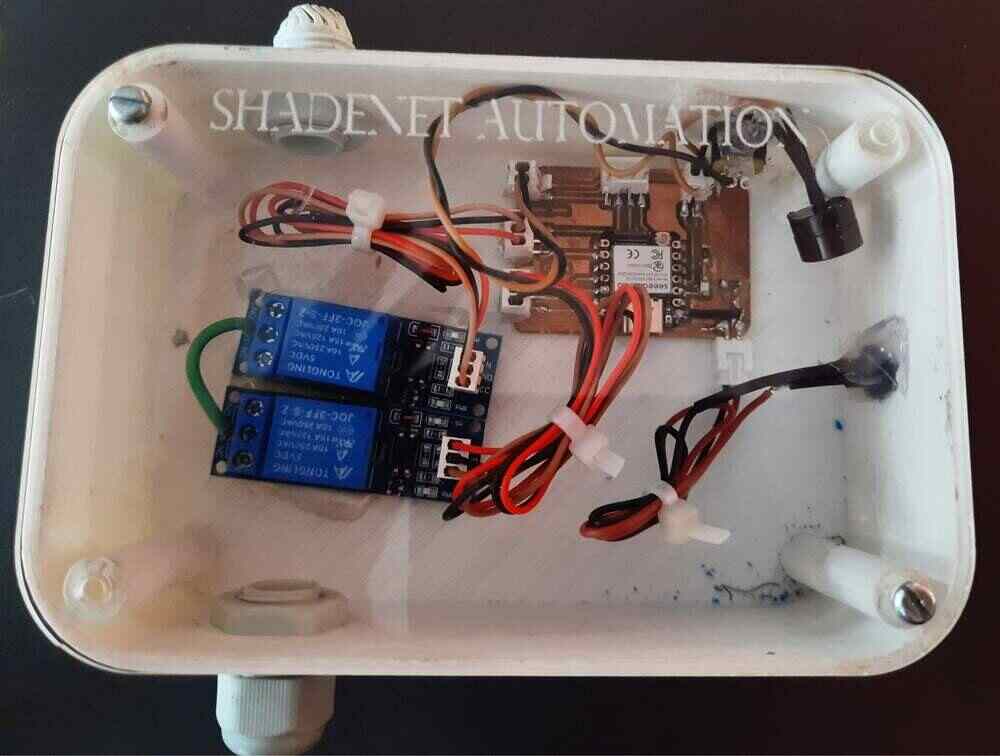
I created a controller board using the ESP32C3, which I connected to an Phototransistor and relays. To keep everything organized, I designed a controller box with a lid to securely close it.
3D Printing
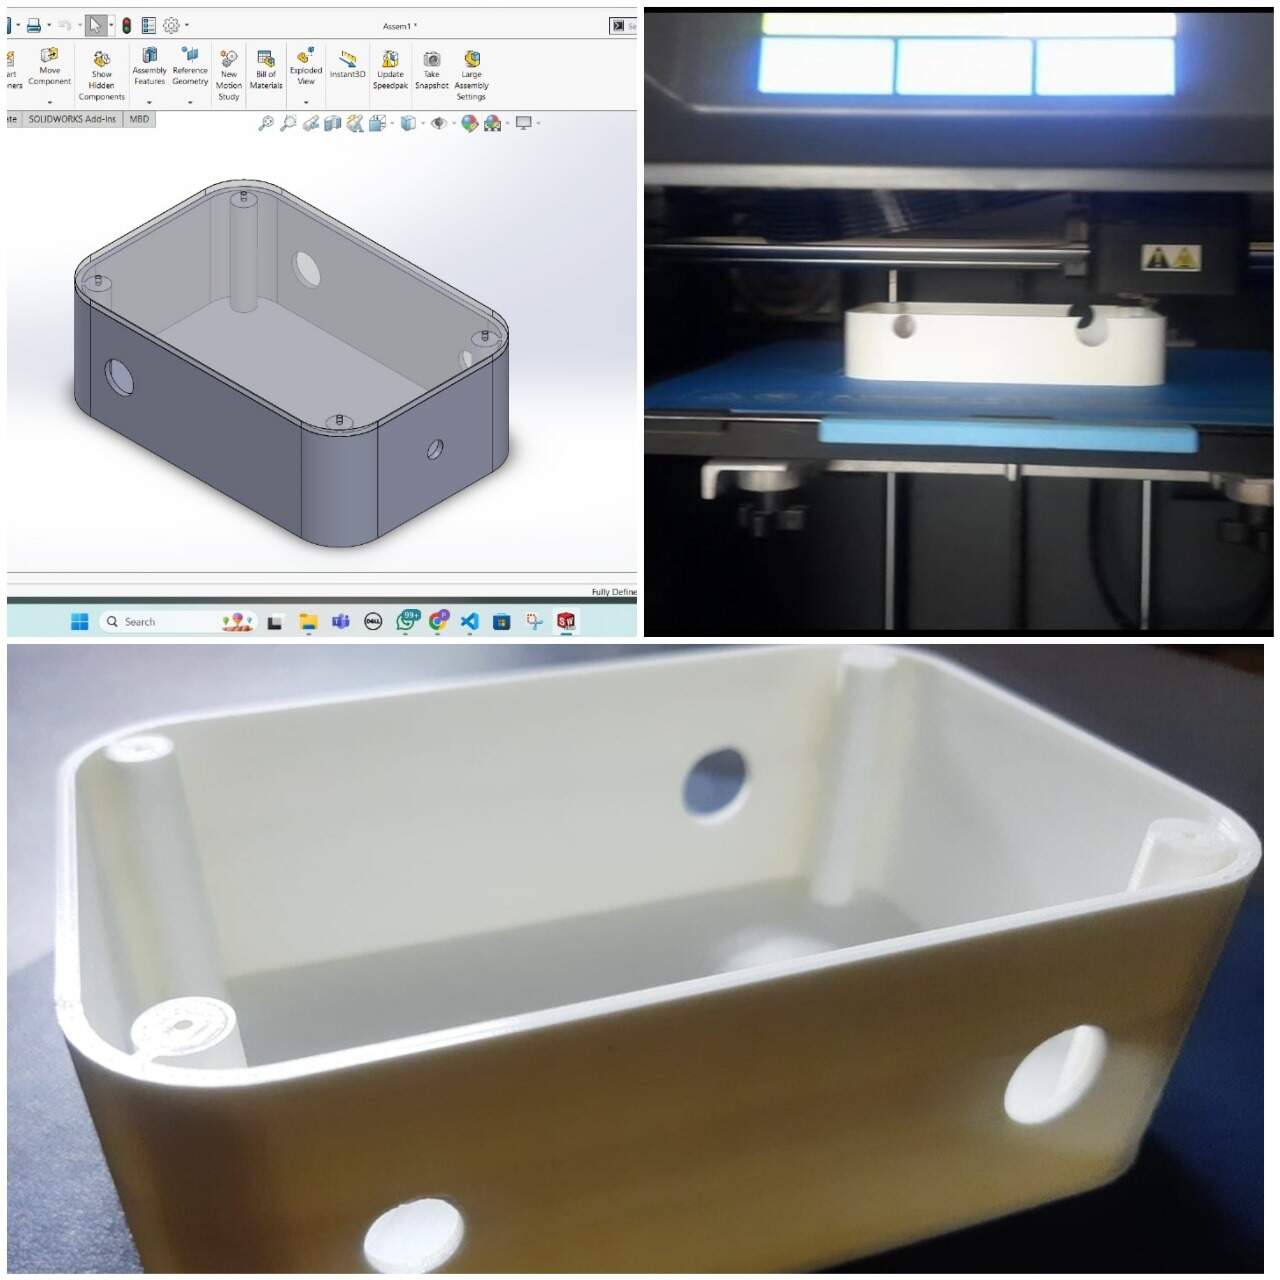
I decided to build a controller box utilizing 3D printing technology, and I accomplished this using our Flashforge 3D printer.
Laser Cutting
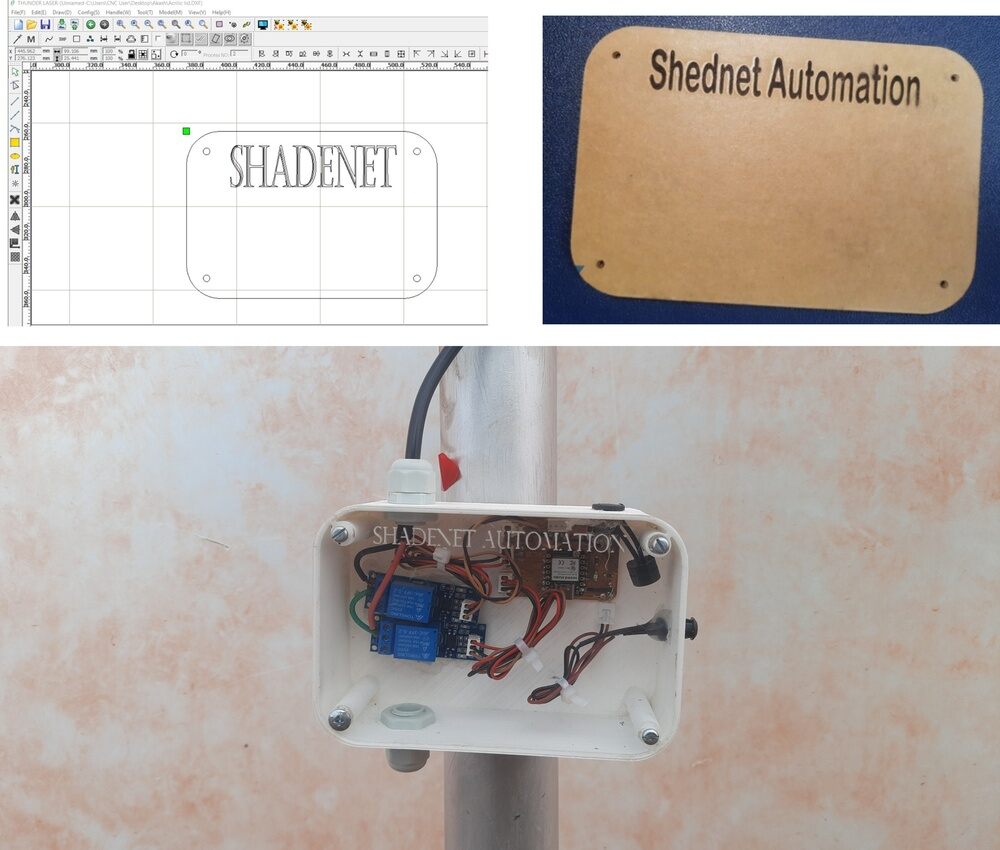
I chose to create a stylish lid for my microcontroller using laser cutting. I also engraved my project name on it and utilized acrylic material for the laser cutting of design.
Circuit Design and PCB Milling
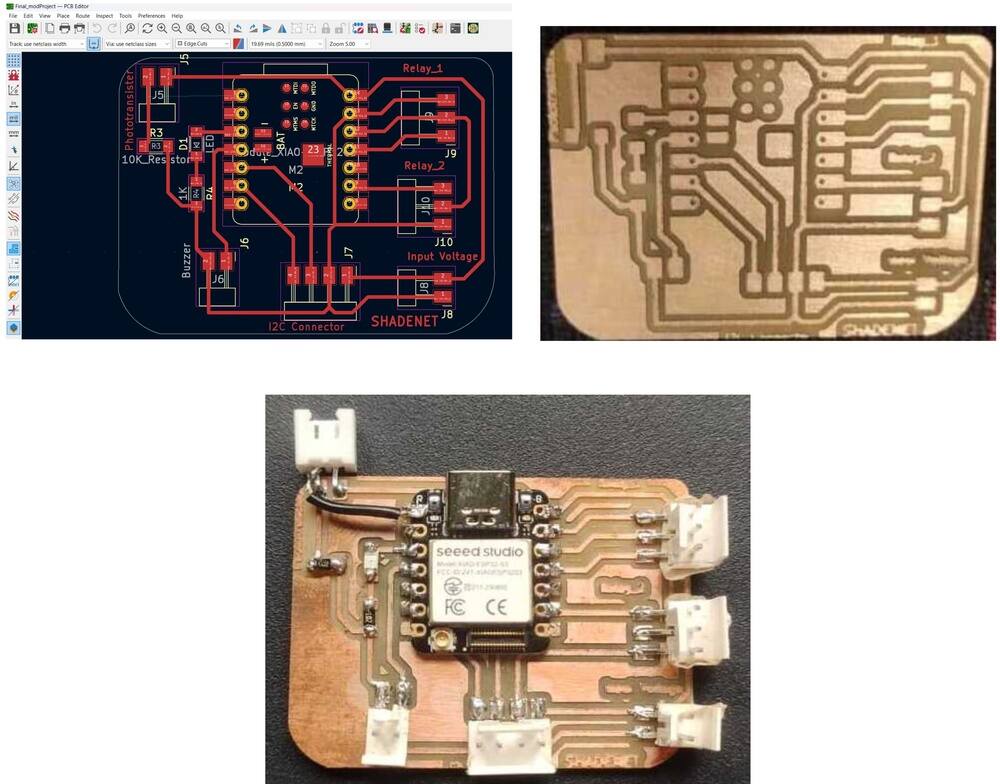
First, I compiled a list of the components needed for my Shed Net automation project. I chose to use a Phototransistor, single-channel relays, an ESP32-C3 microcontroller board, and SMD connectors for the power supply. After considering all these factors, I created a connection diagram. Then, I utilized KiCad software, which I learned about during Electronic Production week, to design the PCB. Once I completed the PCB design in KiCad, I milled the board using a PCB milling machine. After that, I gathered the materials and components from the inventory for soldering and completed the soldering process. Now, my PCB is ready for Arduino coding.
I have provided information regarding Circuit Design and PCB Milling during the system integration week.
For reference, please Click Here
System Development
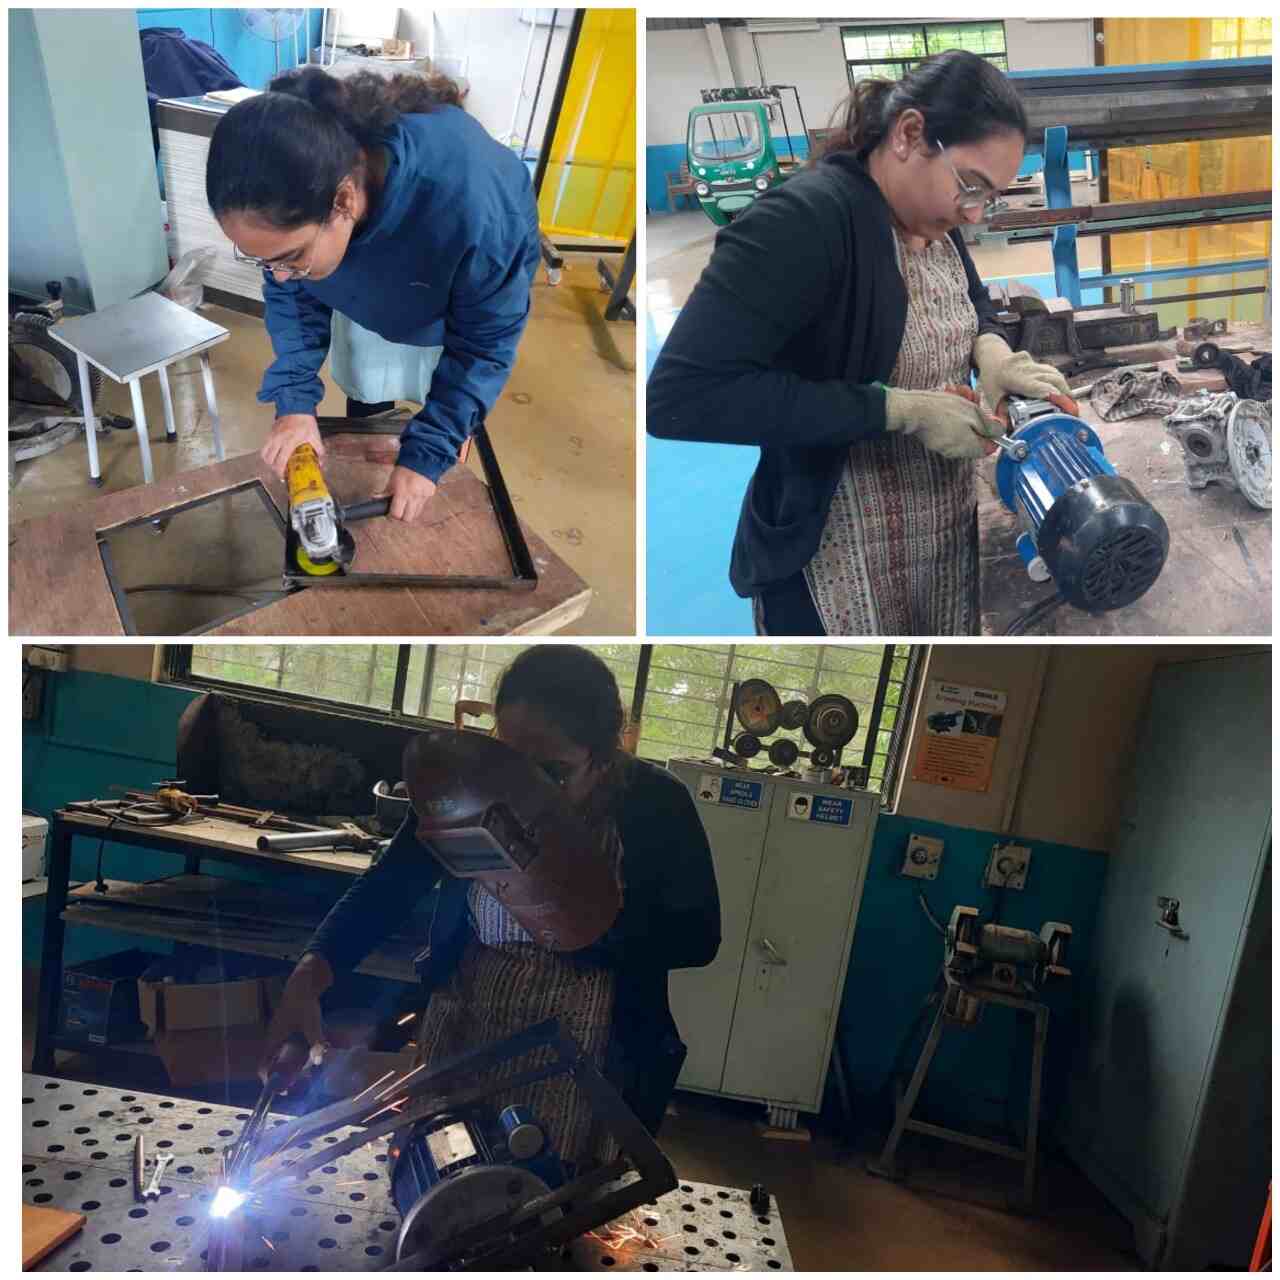
For my shed automation project, I completed the integration of mechanical, electrical, and electronic systems. I began by using
a single-phase induction motor (0.5 HP, 1140 RPM). After verifying the motor connections, I set up the system outside the polyhouse
by fabricating a motor stand using welding, grinding, and milling processes.
To view the detailed fabrication work I did for the project, please refer to my previous assignment link.Click Link
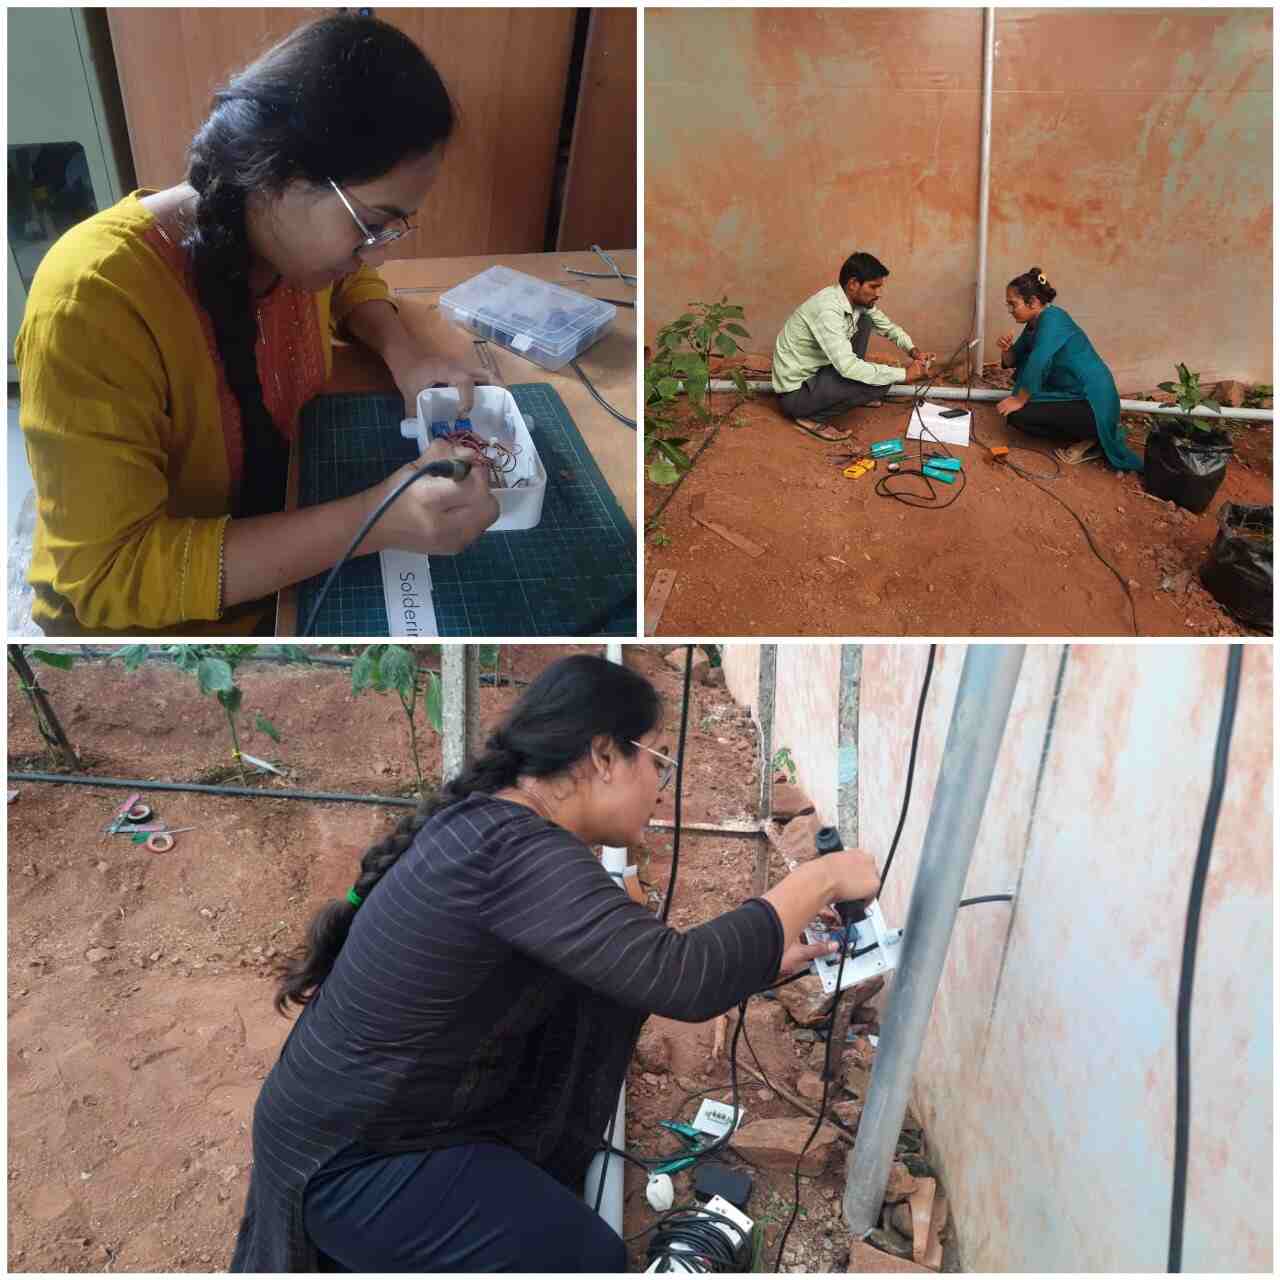
I created the PCB design using KiCad and milled it with the SRM-20 milling machine. Following this, I soldered
various components, including two single-channel relays, a Phototransistor, the ESP32C3 microcontroller board, SMD connectors,
and an LED. After completing the soldering process, I programmed the board with the Arduino IDE to control the motor,
enabling it to rotate the shaft in both clockwise and counterclockwise directions for opening and closing the shed net
based on light intensity detected by the Phototransistor. Once the coding was done, I installed the system in the polyhouse and
connected it to a single-phase induction motor.
To view the detailed PCB Design work I did for the project, please refer to my previous assignment link.Click Link
Final Testing
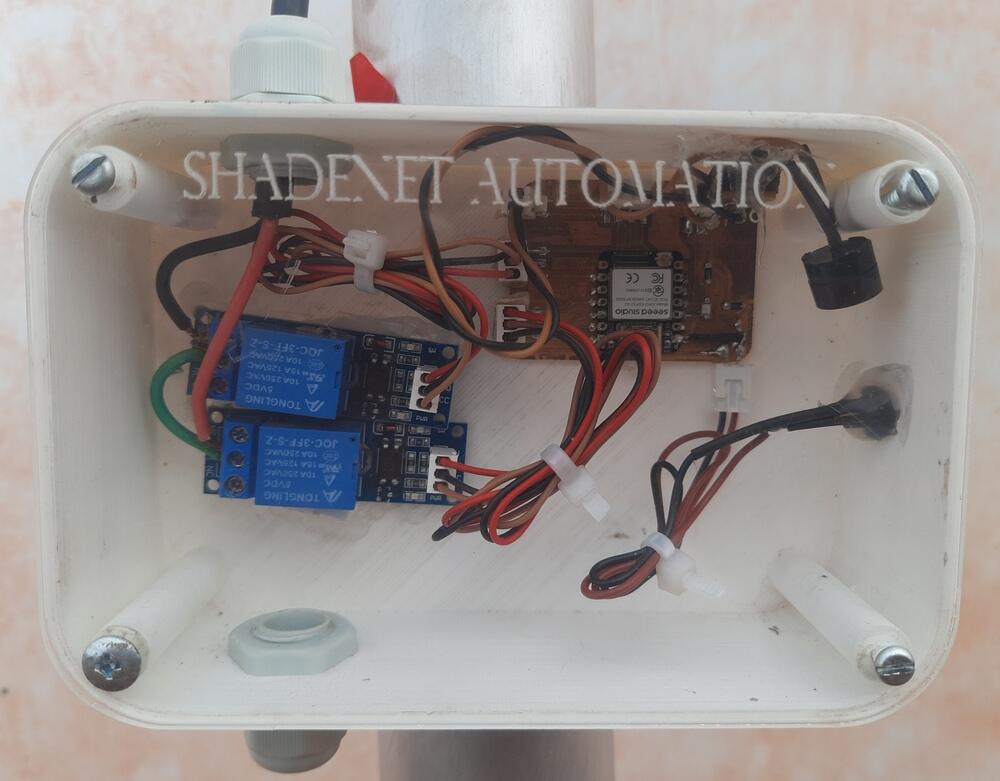
Once the controller board and motor were installed, the system was put through a test. The shade net automatically opens or closes depending on the light intensity detected. When the light level becomes too high and poses a risk to the capsicum plants, the shade net closes. Conversely, it opens when the light intensity is low. The full operation of opening or closing the shade net takes about 4 to 5 minutes. The program includes a 1000-millisecond delay, allowing the phototransistor to continuously monitor the light intensity and adjust the shade net as needed.
Hero shots
Final PPT

Final Video
Resourses Link
Acknowledment:
My Fab Academy experience has been an incredible journey of learning, growth, mastering time management, and forming lasting connections. This transformative path would not have been possible without the encouragement and guidance of several remarkable individuals.
I am deeply thankful to Prof. Neil Gershenfeld for his constant inspiration and leadership, as well as to Dr. Yogesh Kulkarni, Director of Vigyan Ashram, whose support was crucial throughout this experience.
I also owe a special thanks to Mr. Suhas Labade, our dedicated FabLab manager, and Ms. Dipali Kamble, my local instructor, for their ongoing mentorship and timely evaluations. I am grateful to have had the opportunity to learn from Mr. Adrian Torres, a highly skilled global instructor. His timely evaluations and valuable guidance have been instrumental in the success of my project. I am grateful to Sumit Thakare, a fellow student, for his constant support and friendship, and to my husband, Mr. Yogesh Onkar, for his unwavering encouragement and advice.
I would like to express my sincere gratitude to Mr. Hrushabh Zunzarkar for his insightful guidance on documentation. Additionally, I appreciate my friends Sagar Kawade, Bhushan Rothe,Prasad Patil ,Mahesh Shinde and Priyanka Jadhav for their support and assistance with CAD design tasks.I would also like to thank Mr. Suyog, Mr. KV Jadhav, and Mr. Anil Gade for their guidance on electrical connections.
I also want to thank my FabLab colleagues—Shankar Sai, Soham Kolaki, Tanmay More, Abhijeet, Priyanka Choudhary, Akash Lonke, Pranit Sankapal, Rinal and Aarti Bhosale—for their valuable support, which made this experience even more enriching.
Each of you played a pivotal role in making this journey both educational and personally fulfilling. Thank you for being an essential part of my Fab Academy experience.