Week06-Embedded Programming
Group assignment:
- Browse through the datasheet for your microcontroller
- Compare the performance and development workflows for other architectures
- Document your work to the group work page and reflect on your individual page what you learned
Individual assignment:
- Write a program for a microcontroller development board to interact (with local input &/or output devices) and communicate (with remote wired or wireless devices)
- Linked to the group assignment page
- Programmed your board to interact and communicate
- Described the programming process(es) you used
- Included your source code
- Included ‘hero shot(s)’
1. Group assignment
This is the link to the group assignment.🥳
Group Assignment
What did I learn?
In this process, I learned how to program different microcontrollers, including micro:bit, ATmega328P, RP2040, and ESP32. I mastered using development environments like MakeCode and Arduino IDE to write programs, and gained an understanding of the hardware specifications and interface functions of various development boards. Through programming, I implemented interactive programs and tasks like controlling LED blinking, further deepening my understanding of how microcontrollers work and the collaboration between hardware and software.
2. Individual assignment
I will use Arduino Uno for my personal project.
2.1 Input and Output Devices
I used the PCB board from Week 04, and I continued to use ISP for programming. For more details, you can refer to the content in Week 04. This is the link:week 04
I made a device that controls an LED light with a button.
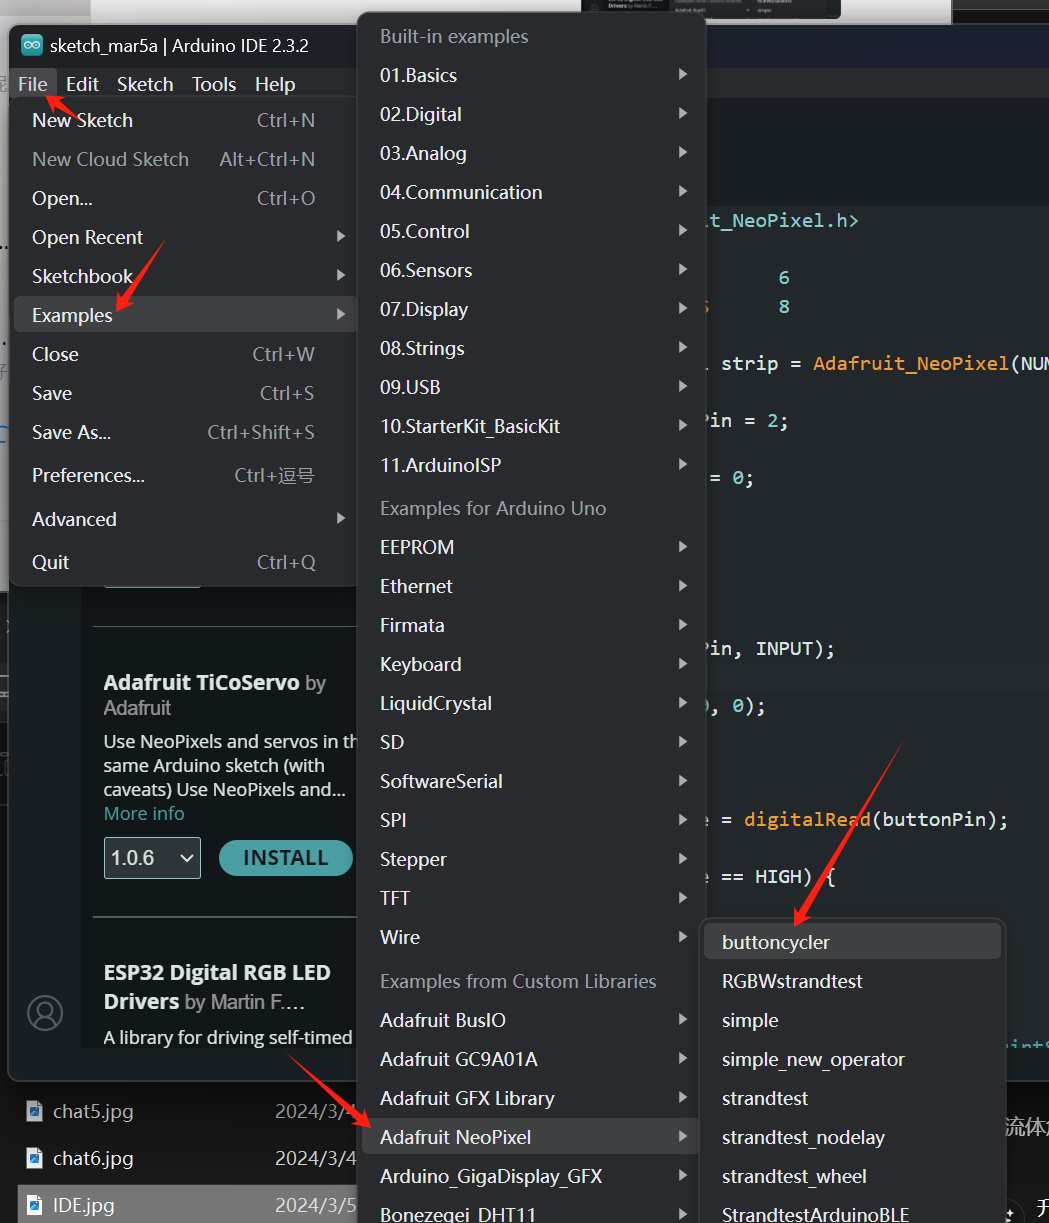
First, I installed the NeoPixel library in Arduino IDE.
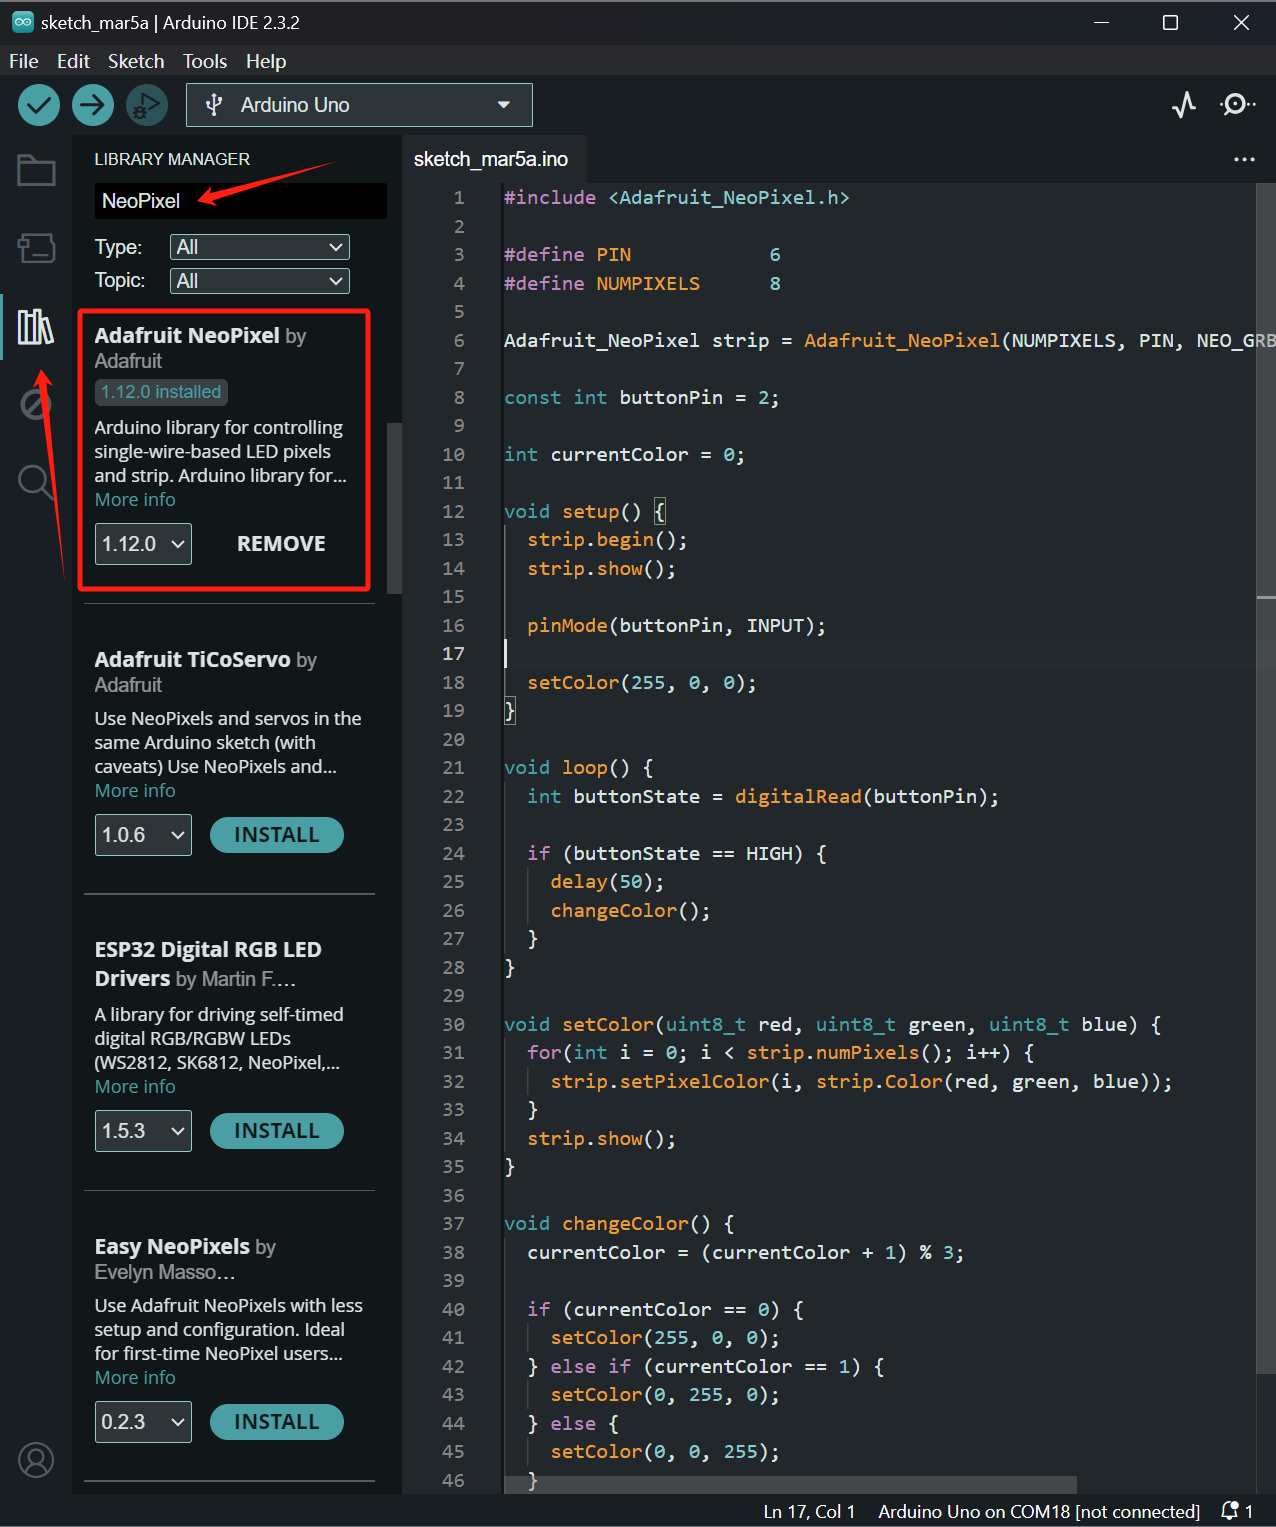
Then, I referred to the example code.
I began writing my program.
#include <Adafruit_NeoPixel.h>

#define PIN            6
#define NUMPIXELS      8

Adafruit_NeoPixel strip = Adafruit_NeoPixel(NUMPIXELS, PIN, NEO_GRB + NEO_KHZ800);

const int buttonPin = 2;

int currentColor = 0;

void setup() {
  strip.begin();
  strip.show();

  pinMode(buttonPin, INPUT);

  setColor(255, 0, 0);
}

void loop() {
  int buttonState = digitalRead(buttonPin);

  if (buttonState == HIGH) {
    delay(50);
    changeColor();
  }
}

void setColor(uint8_t red, uint8_t green, uint8_t blue) {
  for(int i = 0; i < strip.numPixels(); i++) {
    strip.setPixelColor(i, strip.Color(red, green, blue));
  }
  strip.show();
}

void changeColor() {
  currentColor = (currentColor + 1) % 3;

  if (currentColor == 0) {
    setColor(255, 0, 0);
  } else if (currentColor == 1) {
    setColor(0, 255, 0);
  } else {
    setColor(0, 0, 255);
  }

  delay(500);
}
After uploading the code, I found that the RGB colors were not under my control.
In my puzzlement, it suddenly occurred to me. The button’s logic is inverted; it reads 0 (LOW) when pressed and 1 (HIGH) when not pressed.
odd:
    if (buttonState == HIGH) {
    delay(50);
    changeColor();

new:
    if (buttonState == LOW) {
    delay(50);
    changeColor();
Reupload the program.
it’s work!
2.2 Communication Between Devices
2.2.1 Communicating with the computer.
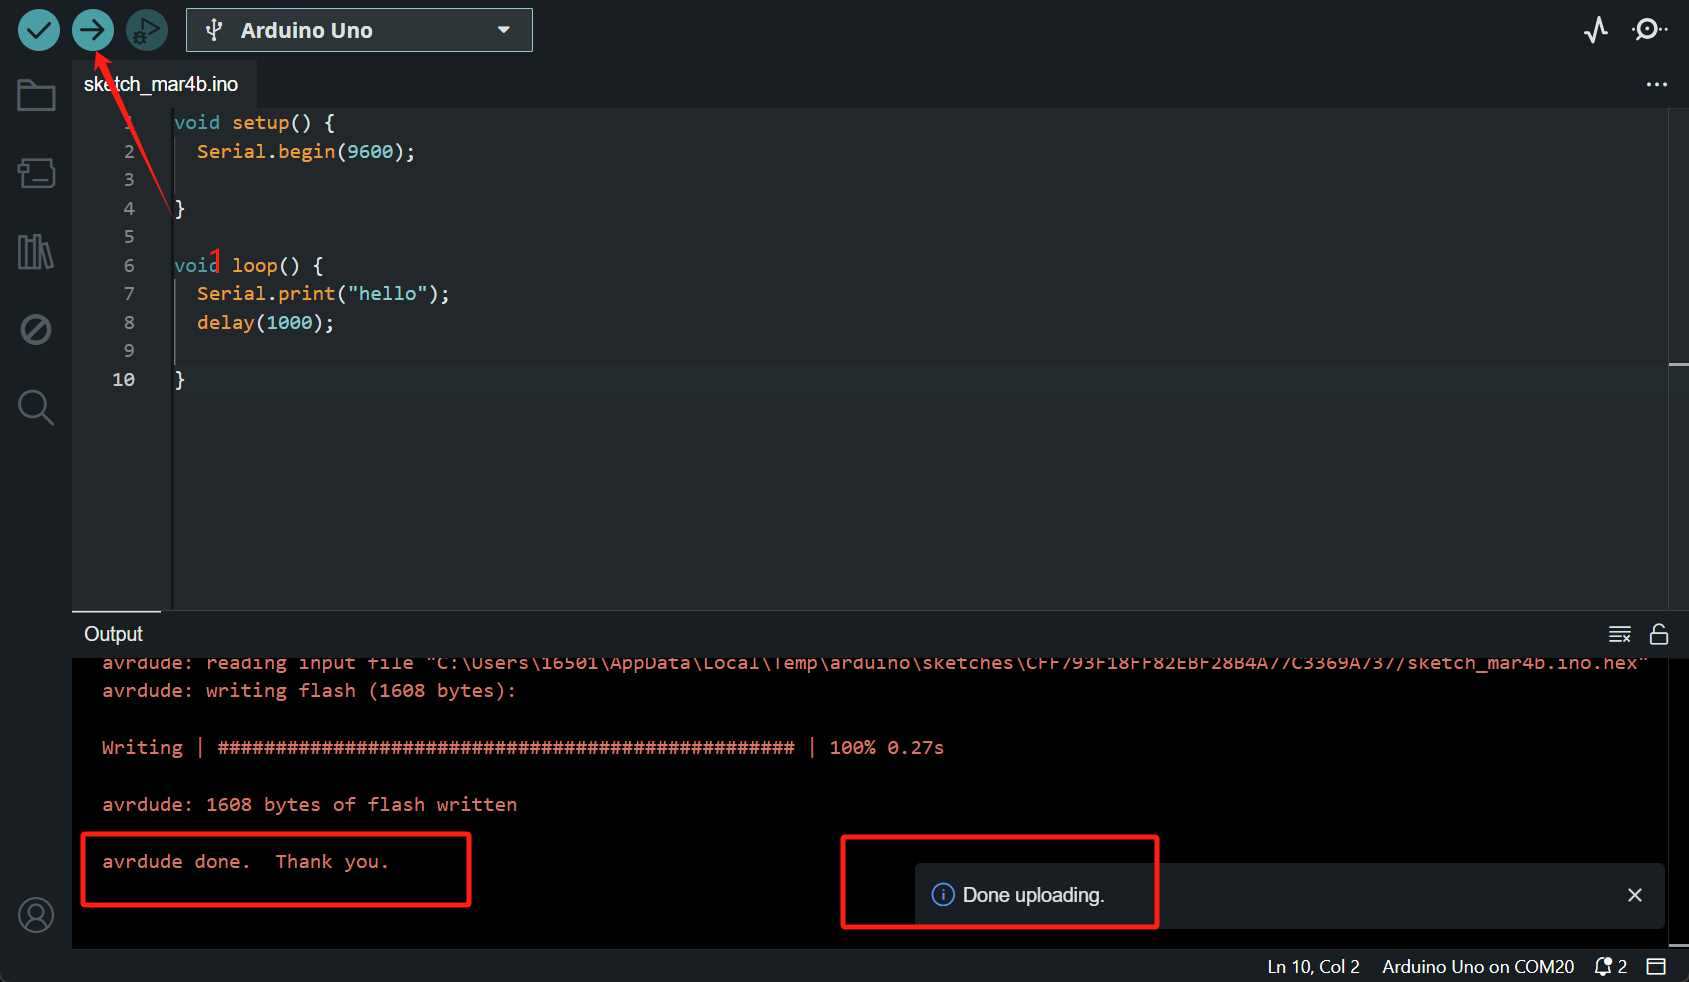
connecting the computer and the motherboard using a Micro-B USB cable, I started writing the code.
void setup() {
  Serial.begin(9600);

}

void loop() {
  Serial.print("hello");
  delay(1000);

}
uploading the code,Until it displayed “avrdude done. Thank you.”
Open the serial monitor.
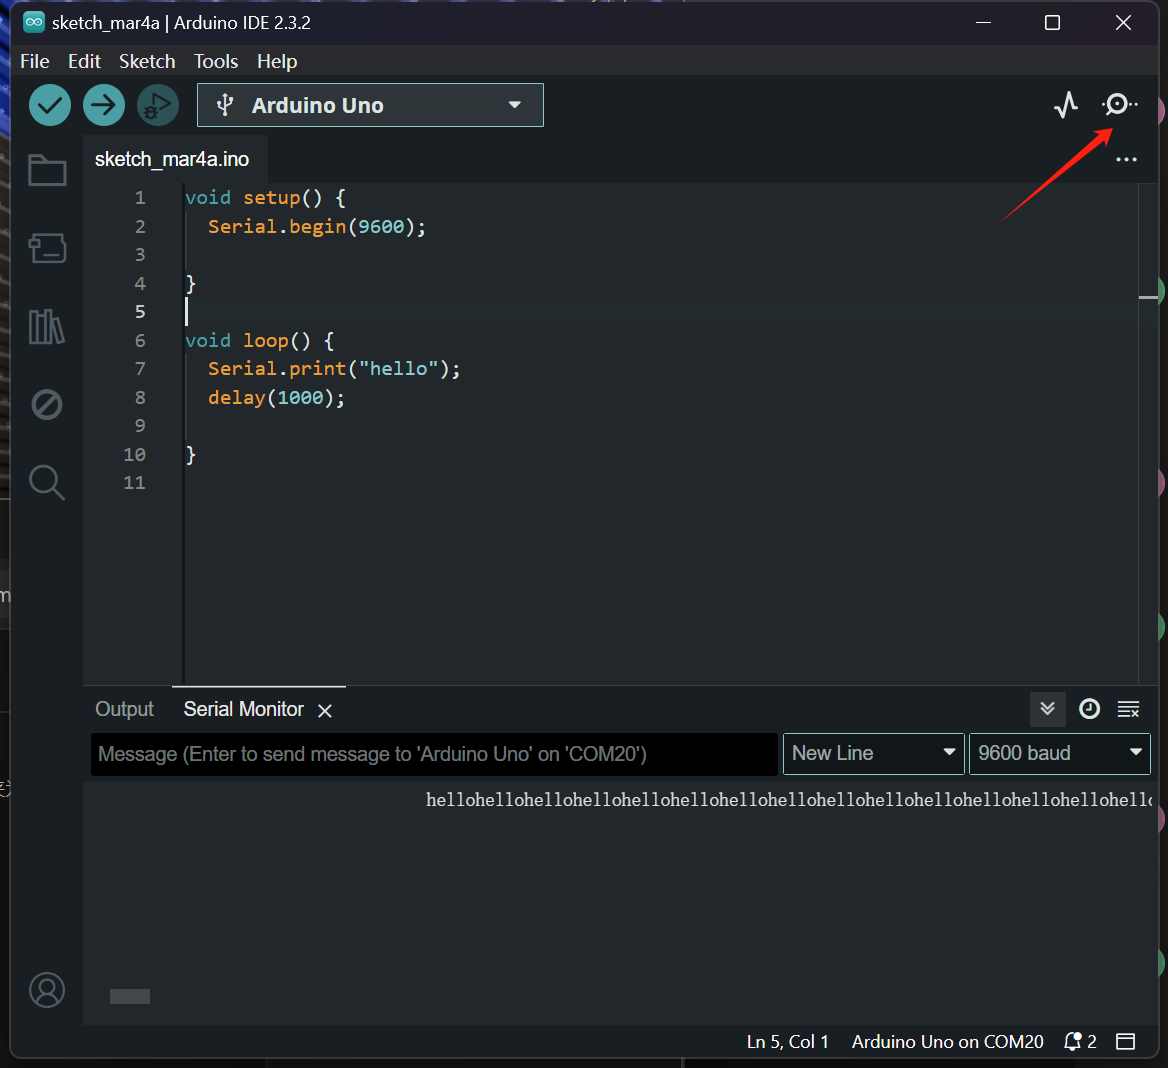
ohhh!! it’s work
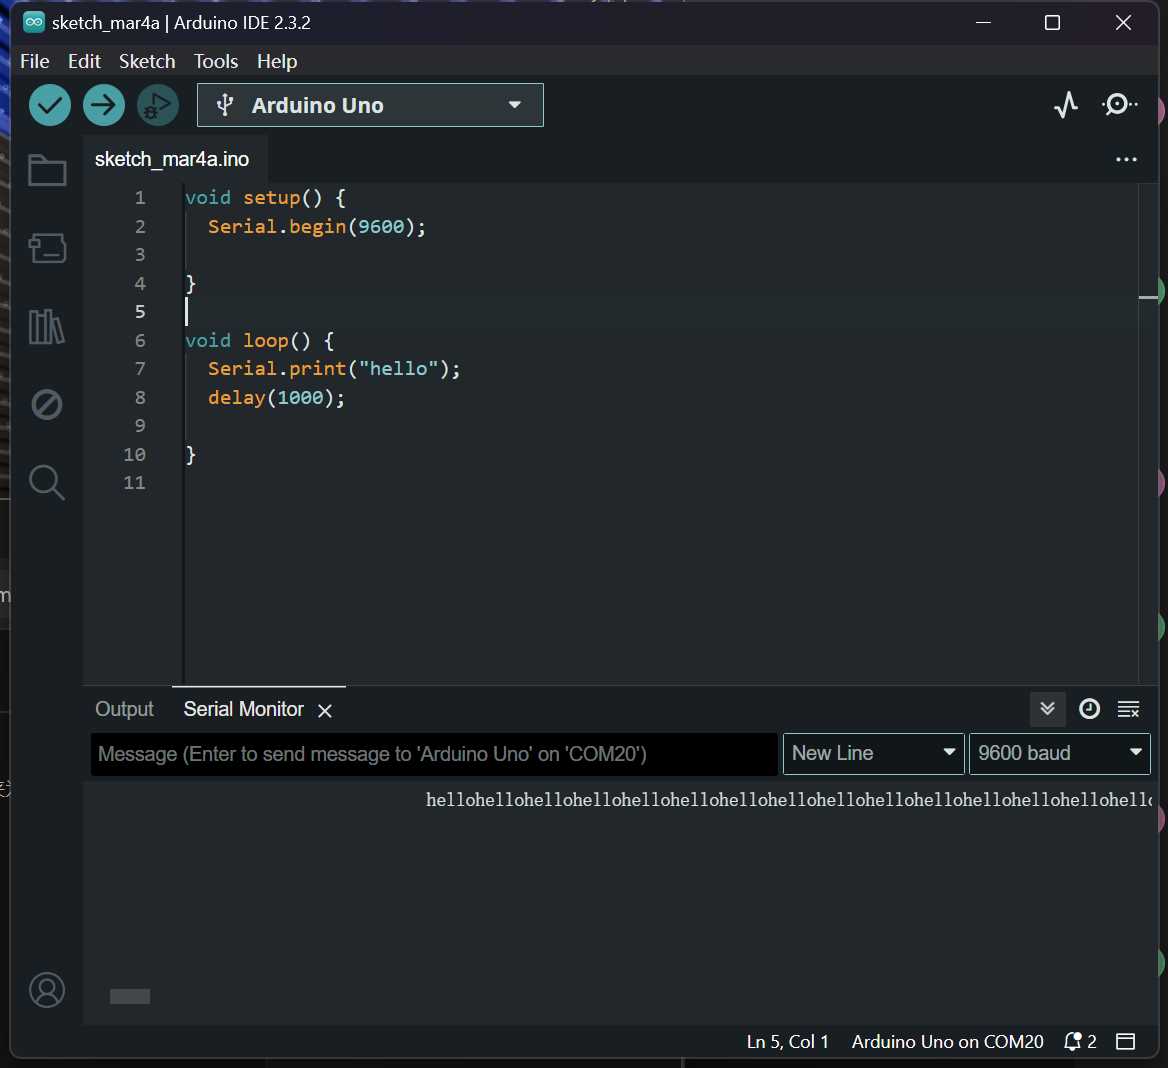
But I found that “hello” was connected together.I decided to separate them.I modified the code.
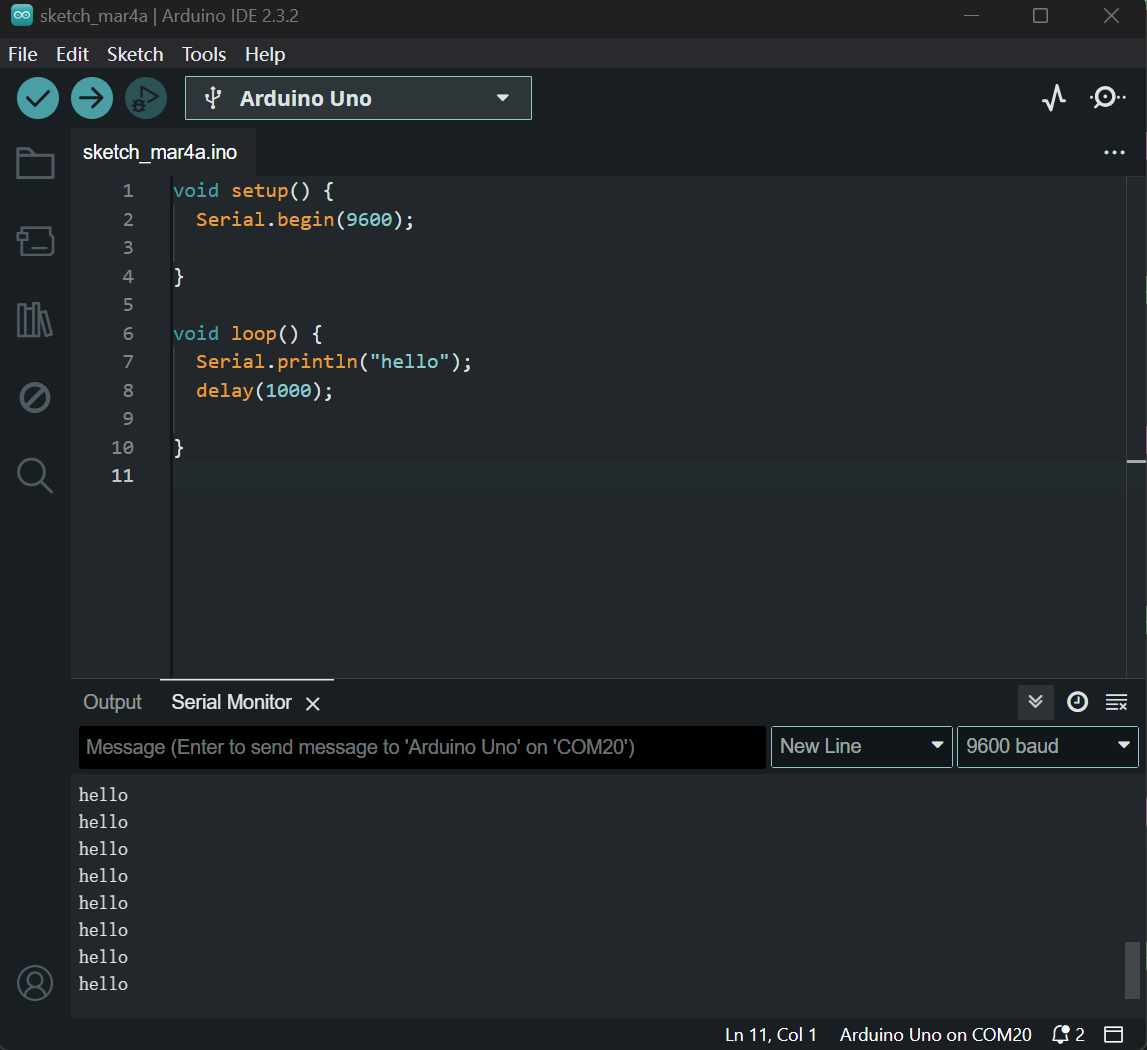
void setup() {
  Serial.begin(9600);

}

void loop() {
  Serial.println("hello");
  delay(1000);

}
I changed “print” to “println”. It automatically adds a newline character at the end of the output.
Click upload.
Look, it’s on a new line. I succeeded!😎
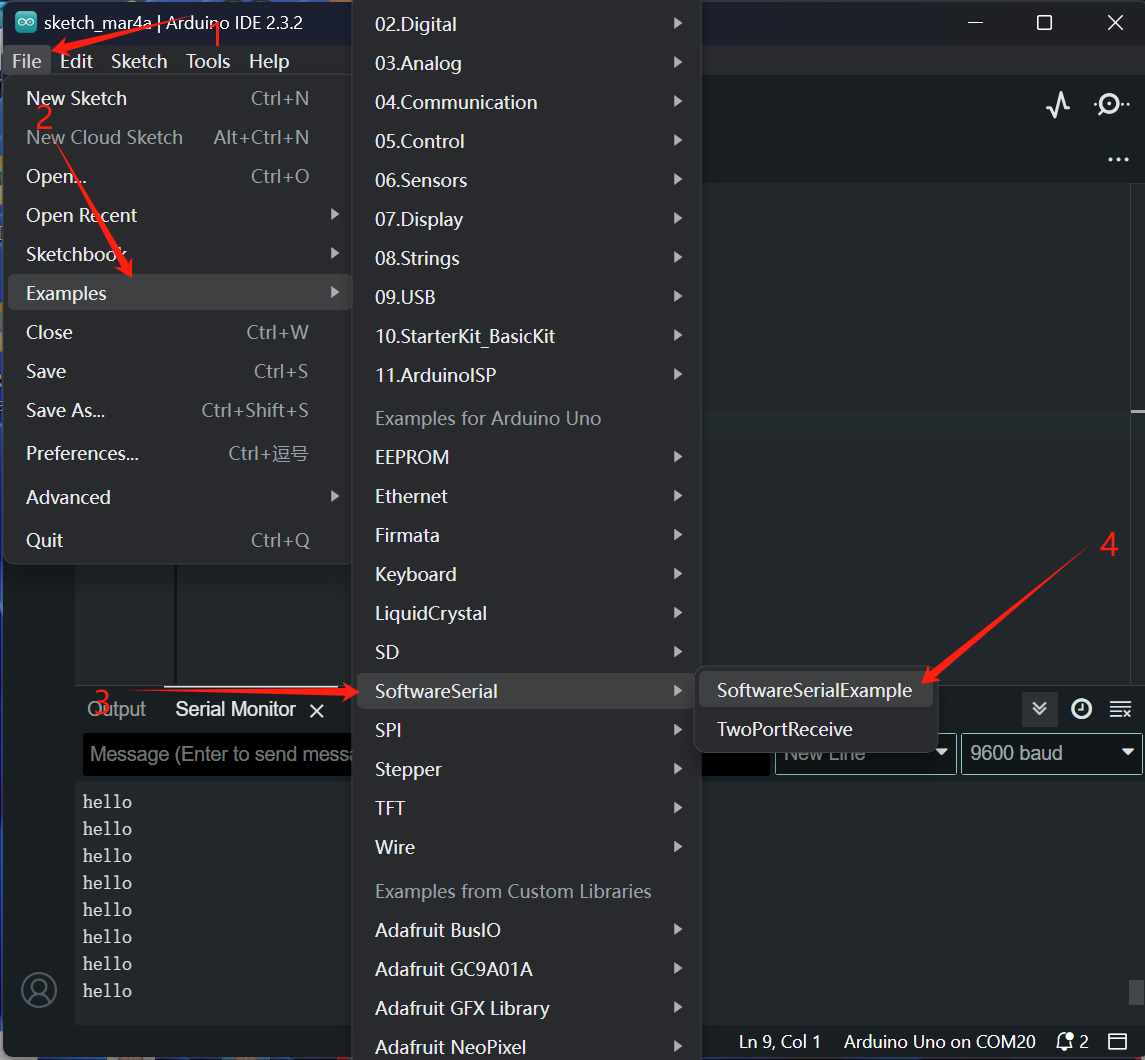
2.2.1 Chat program between two boards
I want to enable communication between two boards. Both boards receive input from the computer, send messages to the other board through their serial connection, and then transmit the received data from the other board back to the connected computer to display the messages in the respective serial monitors.
However, the Uno board has only one serial port.
Fortunately, I discovered that I could create a SoftwareSerial object, configure it as an additional serial port, and connect it to the digital pins of another Arduino Uno. This way, bidirectional communication can be achieved between the two Arduino Uno boards via the software serial port.
I referred to Arduino’s sample code.
Connect the TX of the first board to the RX of the second board, and connect the RX of the second board to the TX of the first board.
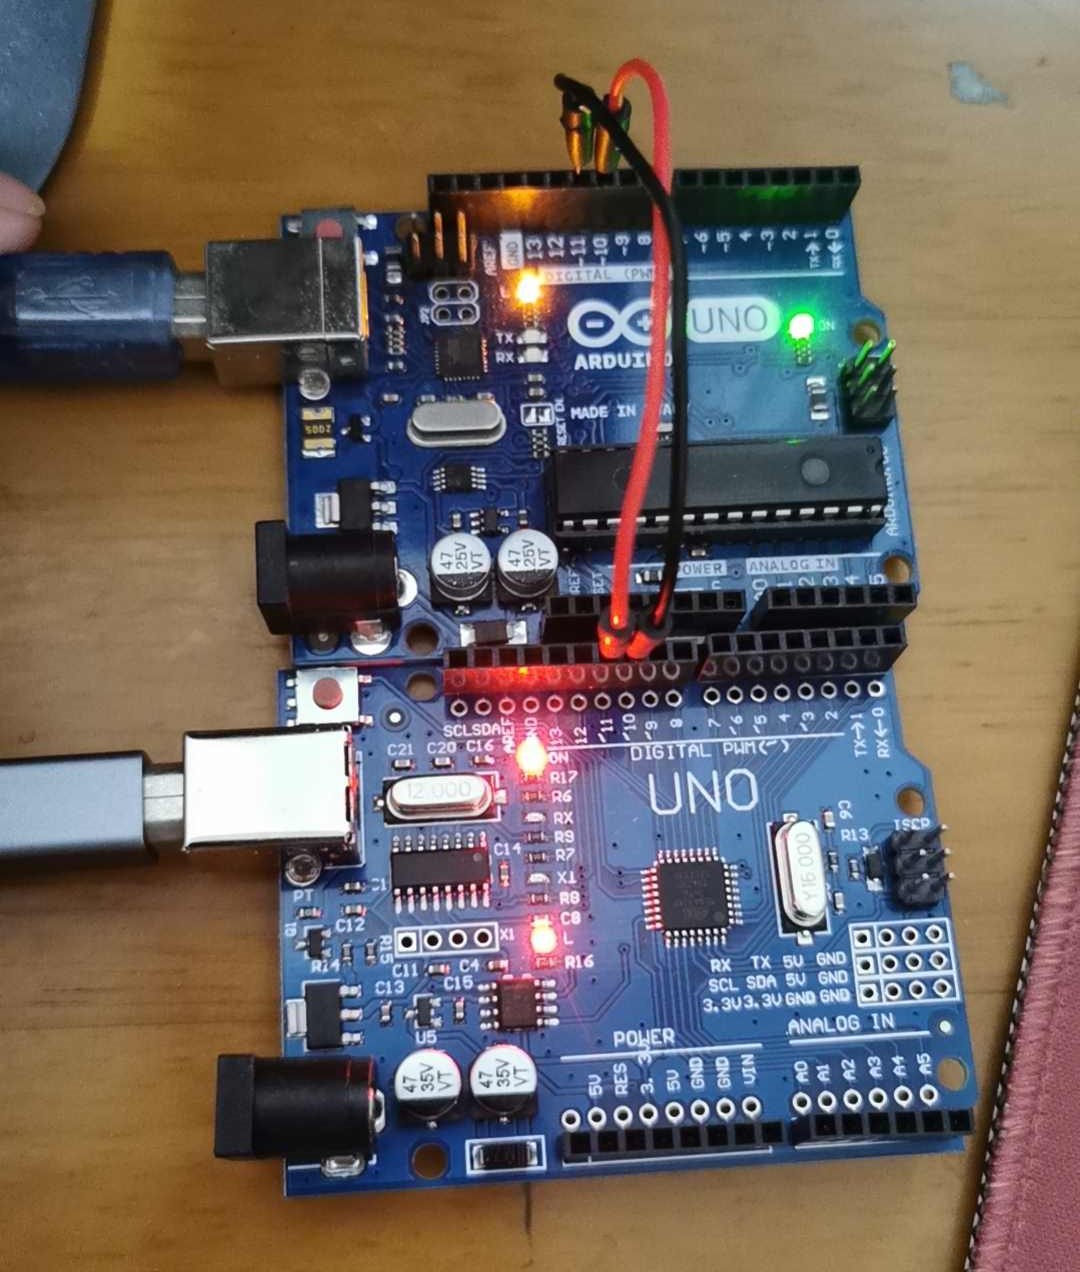
Then I wrote a simple chat code.
#include <SoftwareSerial.h>
SoftwareSerial myserial4(10, 11);  // RX, TX

void setup() {
  Serial.begin(57600);
  myserial4.begin(4800);
}
String current_msg = "";

void loop() {
  while (myserial4.available() > 0) {
    char c = myserial4.read();
    Serial.write(c);
  }
  while (Serial.available() > 0) {
    char c = Serial.read();
    if (c == '\n') {
      Serial.print("me: ");
      Serial.println(current_msg);
      current_msg = "";
    } else {
      current_msg += c;
    }
    myserial4.write(c);
  }
}
During the testing process, I found that the chat software was “dropping characters.” I believe it’s an issue related to a too high baud rate.
I lowered my baud rate from 57600 to 9600.
Then, I uploaded the program.
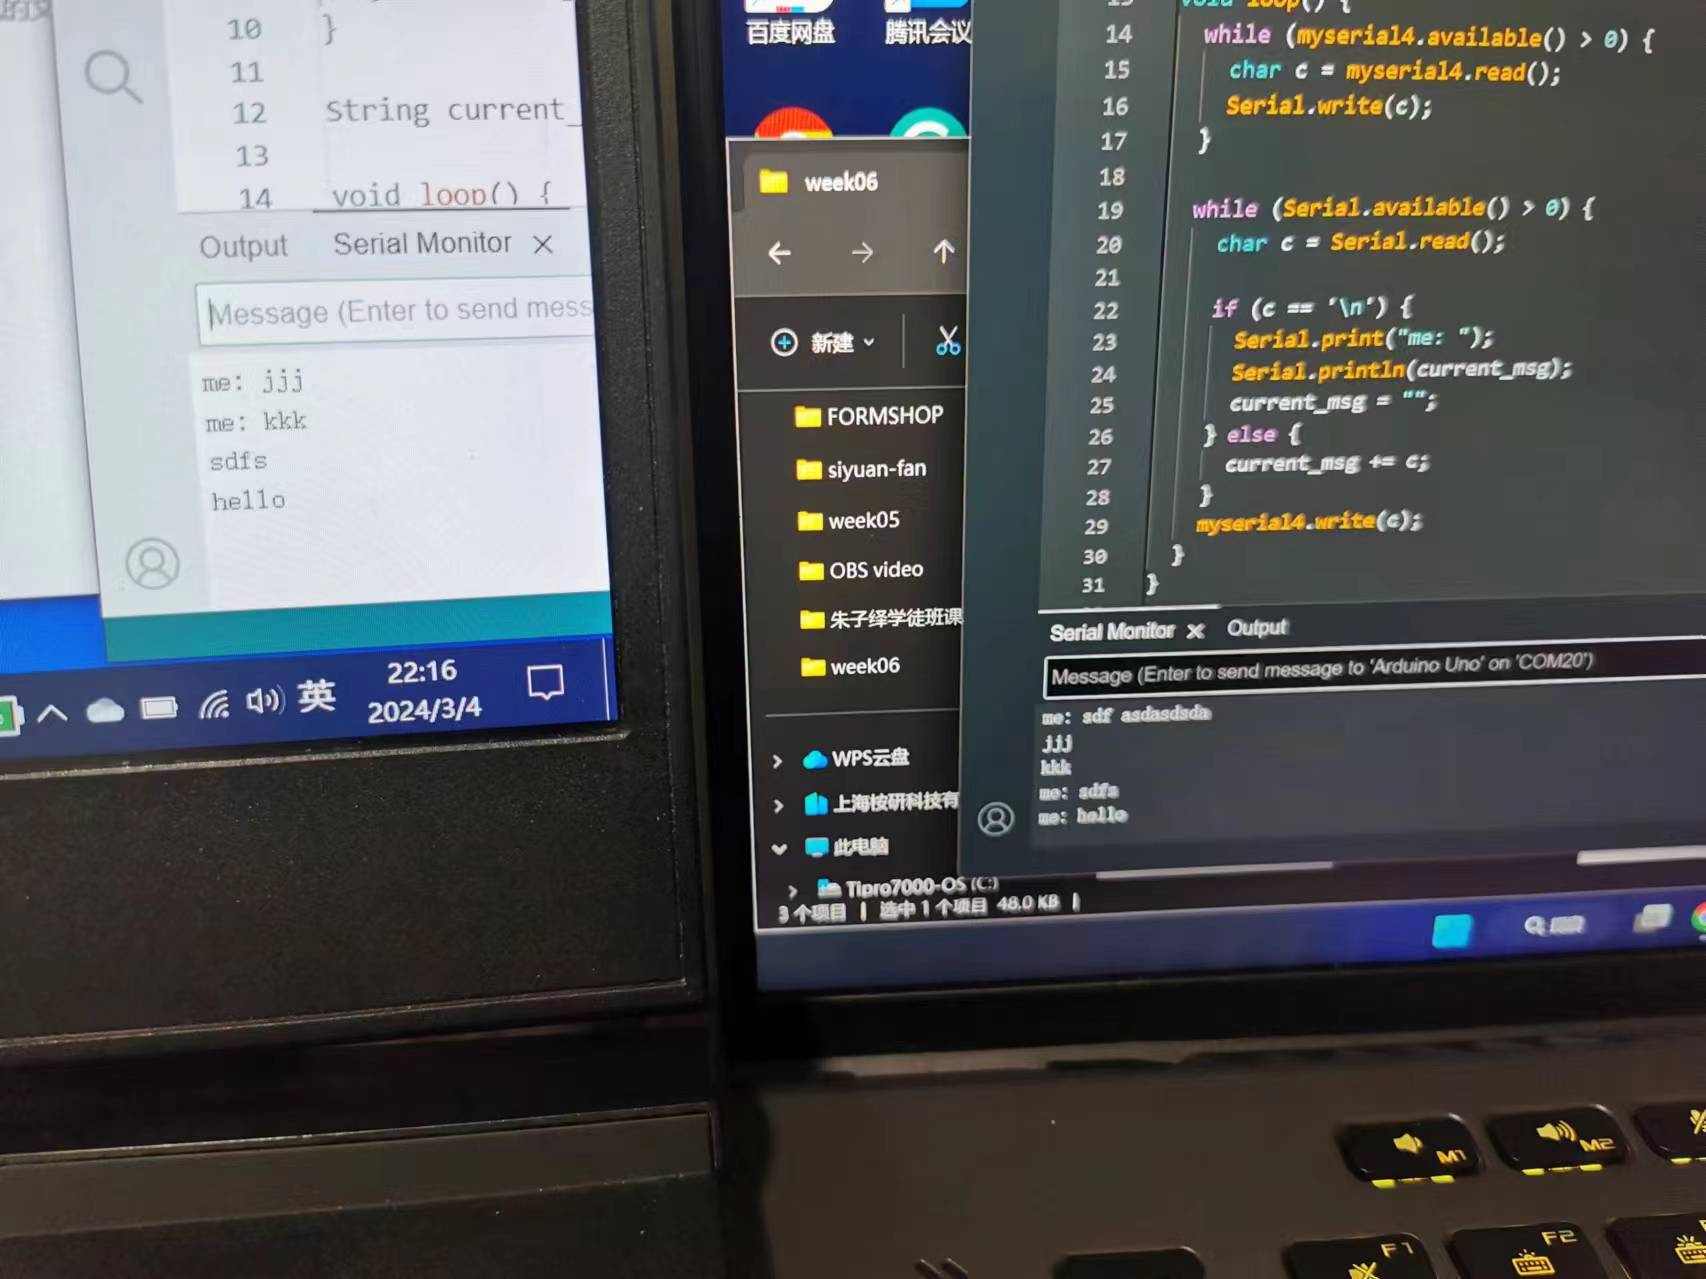
Congratulations on your success!😎😎😎
sorce file