Weekly assignments
- week 1. Project Management
- week 2. Computer Aided Design
- week 3. Computer Controlled Cutting
- week 4. Electronics Production
- week 5. 3D Scanning and Printing
- week 6. Embeded Programming
- week 7. Computer Controlled Machining
- week 8. Electronics Design
- week 9. Output Devices
- week 10. Mechanical design & Machine Design
- week 11. Break & Midterm Review
- week 12. Input devices
- week 13. Moulding and Casting
- week 14. Networking and communications
- week 15. Interface and application programming
- week 16. Wildcard week
- week 17. Applications And implications
- week 18. Project Development
- week 19. Invention, Intellectual Property and Income
Week15. Interface and Application Programming
Group assignment:
Compare as many tool options as possible
Individual assignment:
Write an application that interfaces a user with an input &/or output device that you madeGroup Assignment My Part
Programming Languages
Python
Java
C++
JavaScript
Device Interfaces
USB (Universal Serial Bus)
Bluetooth
Ethernet
SPI (Serial Peripheral Interface)
User Interfaces
GUI (Graphical User Interface)
CLI (Command Line Interface)
Individual Assignment
Research
This is a website I highly recommend to learn about MQTTPart1. How MQTT Works
1. MQTT Introduction
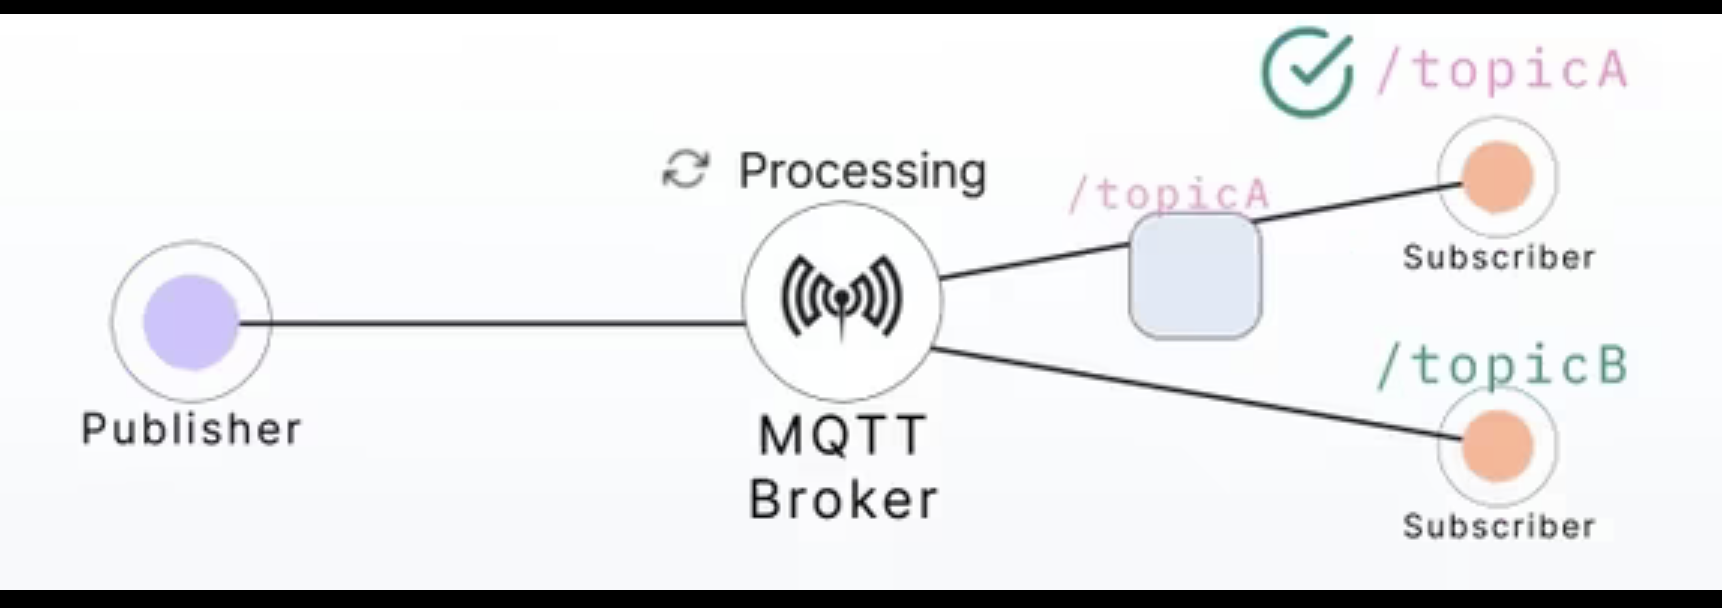
2. MQTT Publisher and Subscriber
Clients that receive messages of interest to them which contain information on a specific topic
Clients that send messages on a chosen topic
The centerpiece that receives messages from publishers, processes, and then forwards them to the subscribers of a topic
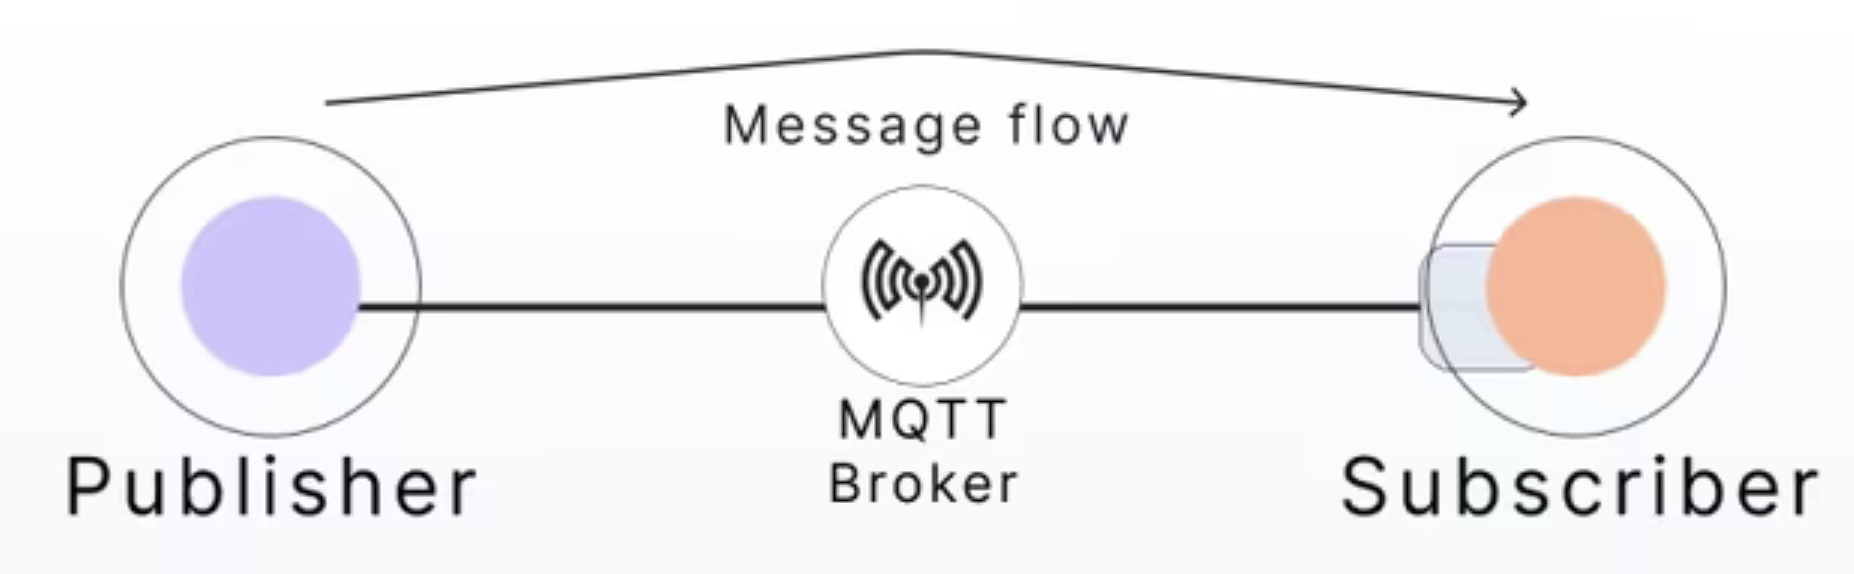
The communication between clients in an MQTT pub-sub model is bi-directional, meaning publishers can be subscribers and vice versa.
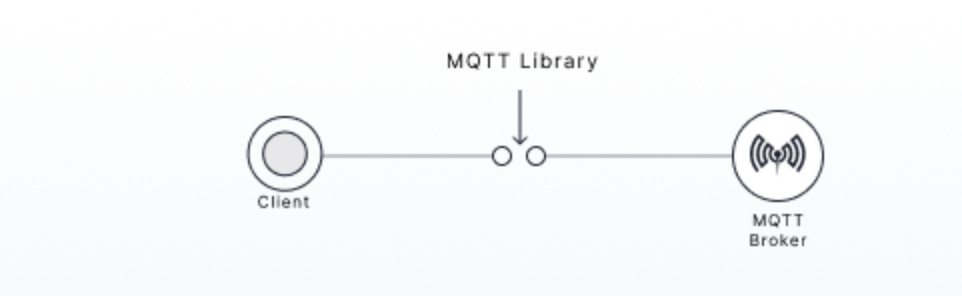
To establish the connection, clients use an MQTT library, a software component that handles the MQTT protocol implementation. MQTT libraries provide an interface between clients and the MQTT broker, allowing the clients to communicate with the broker.
3. MQTT Broker
4. MQTT packet format
Fixed header:
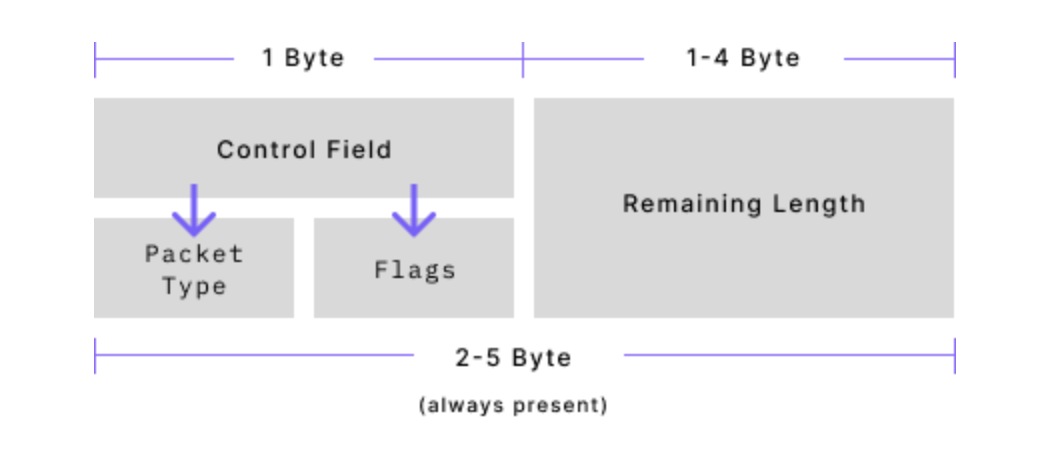
Variable header:
Payload:
clientID –
cleanSession –
keepAlive –
Part2 Set up MQTT on my computer (MAC OS)
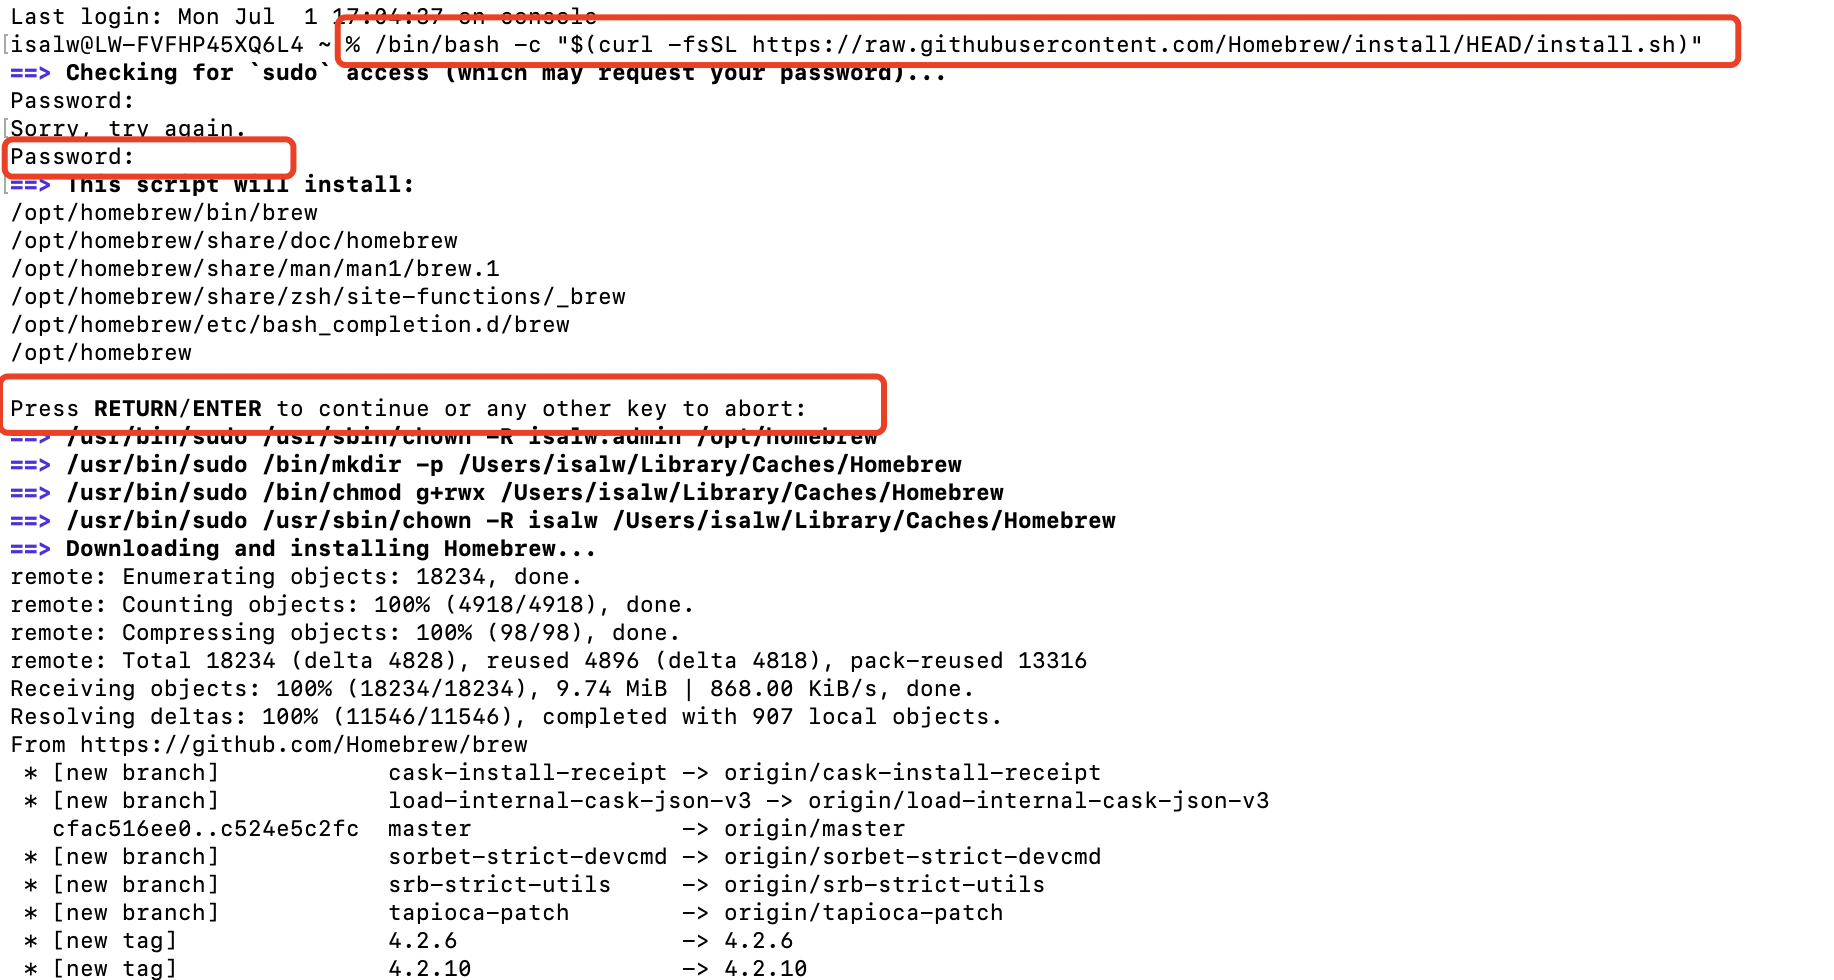
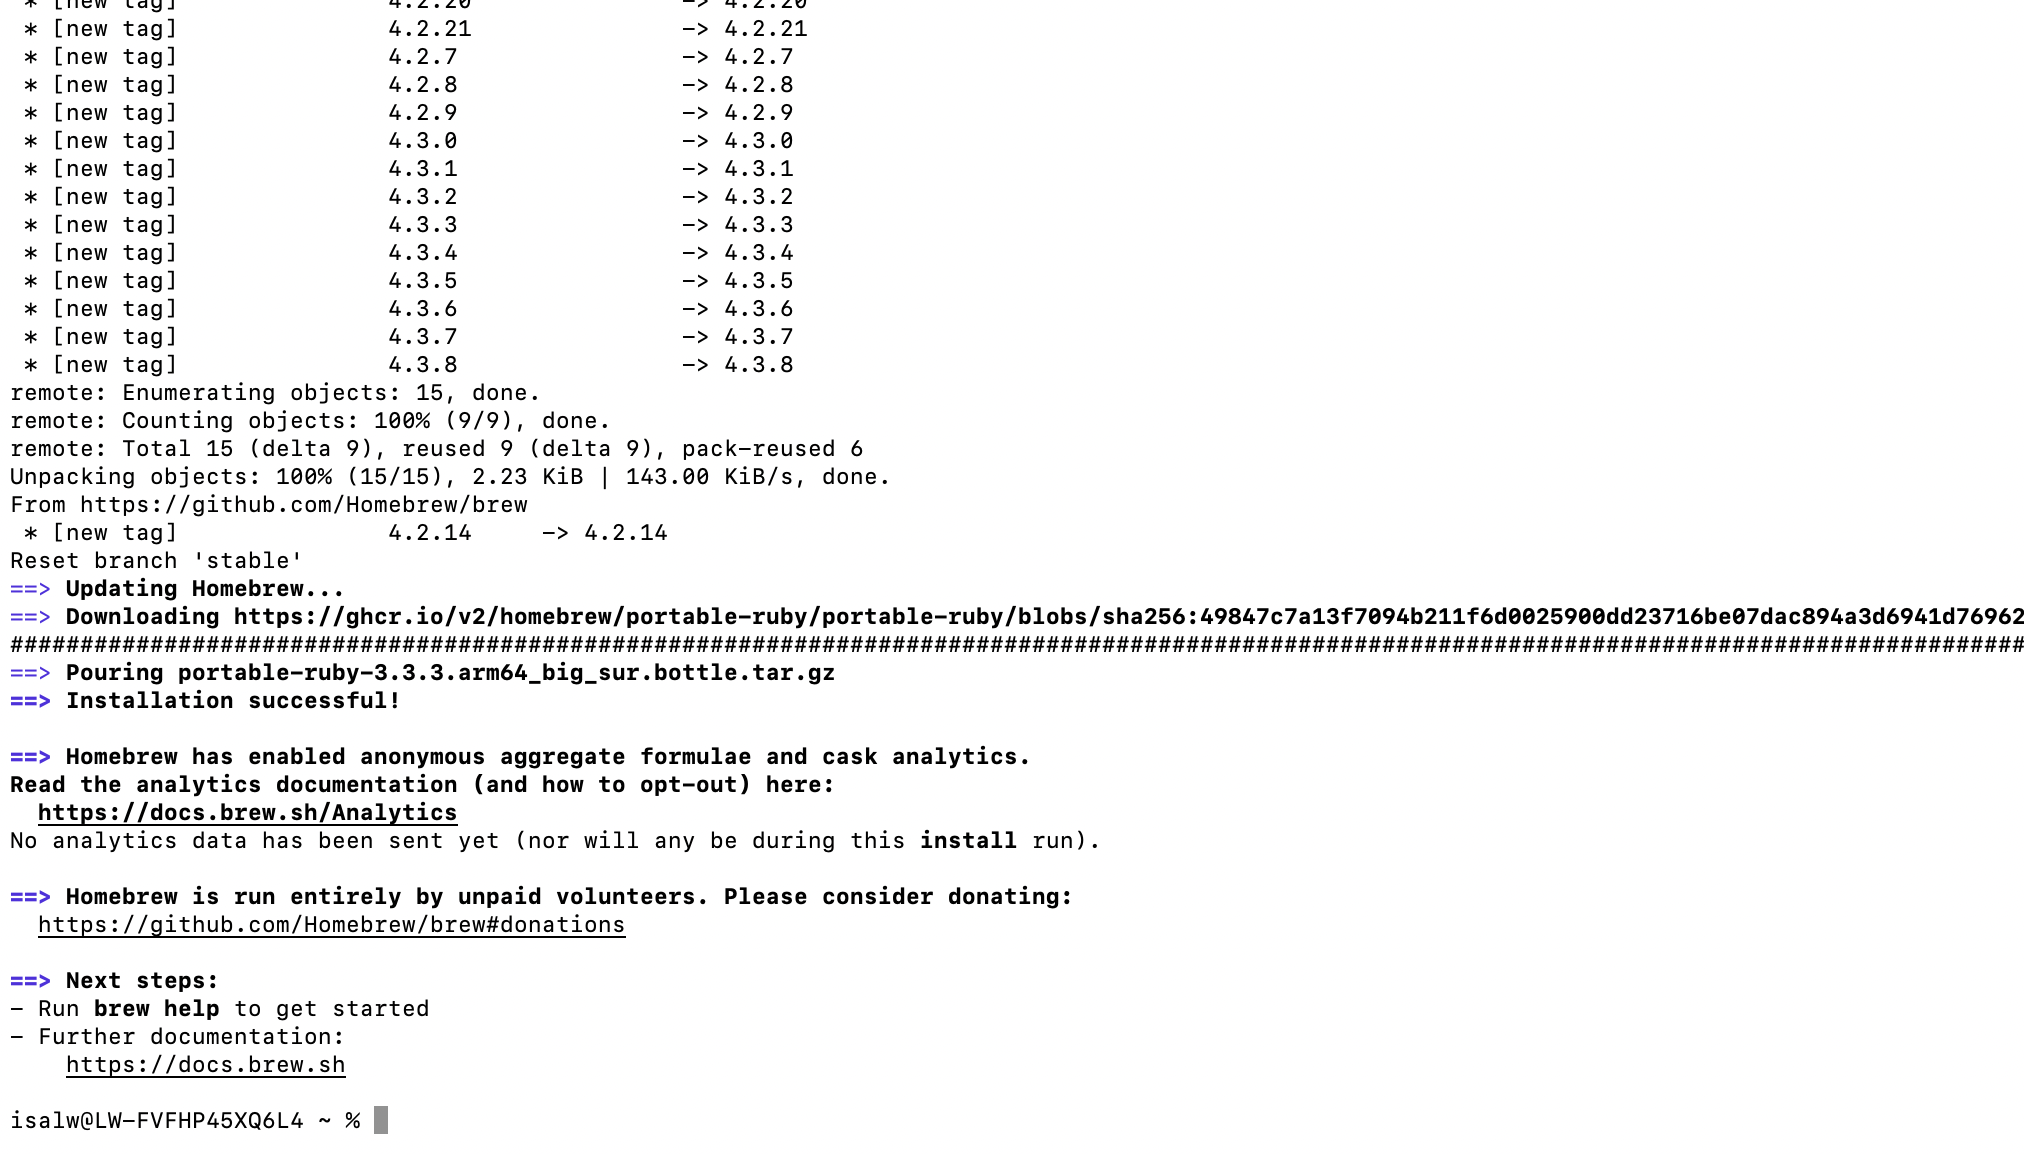
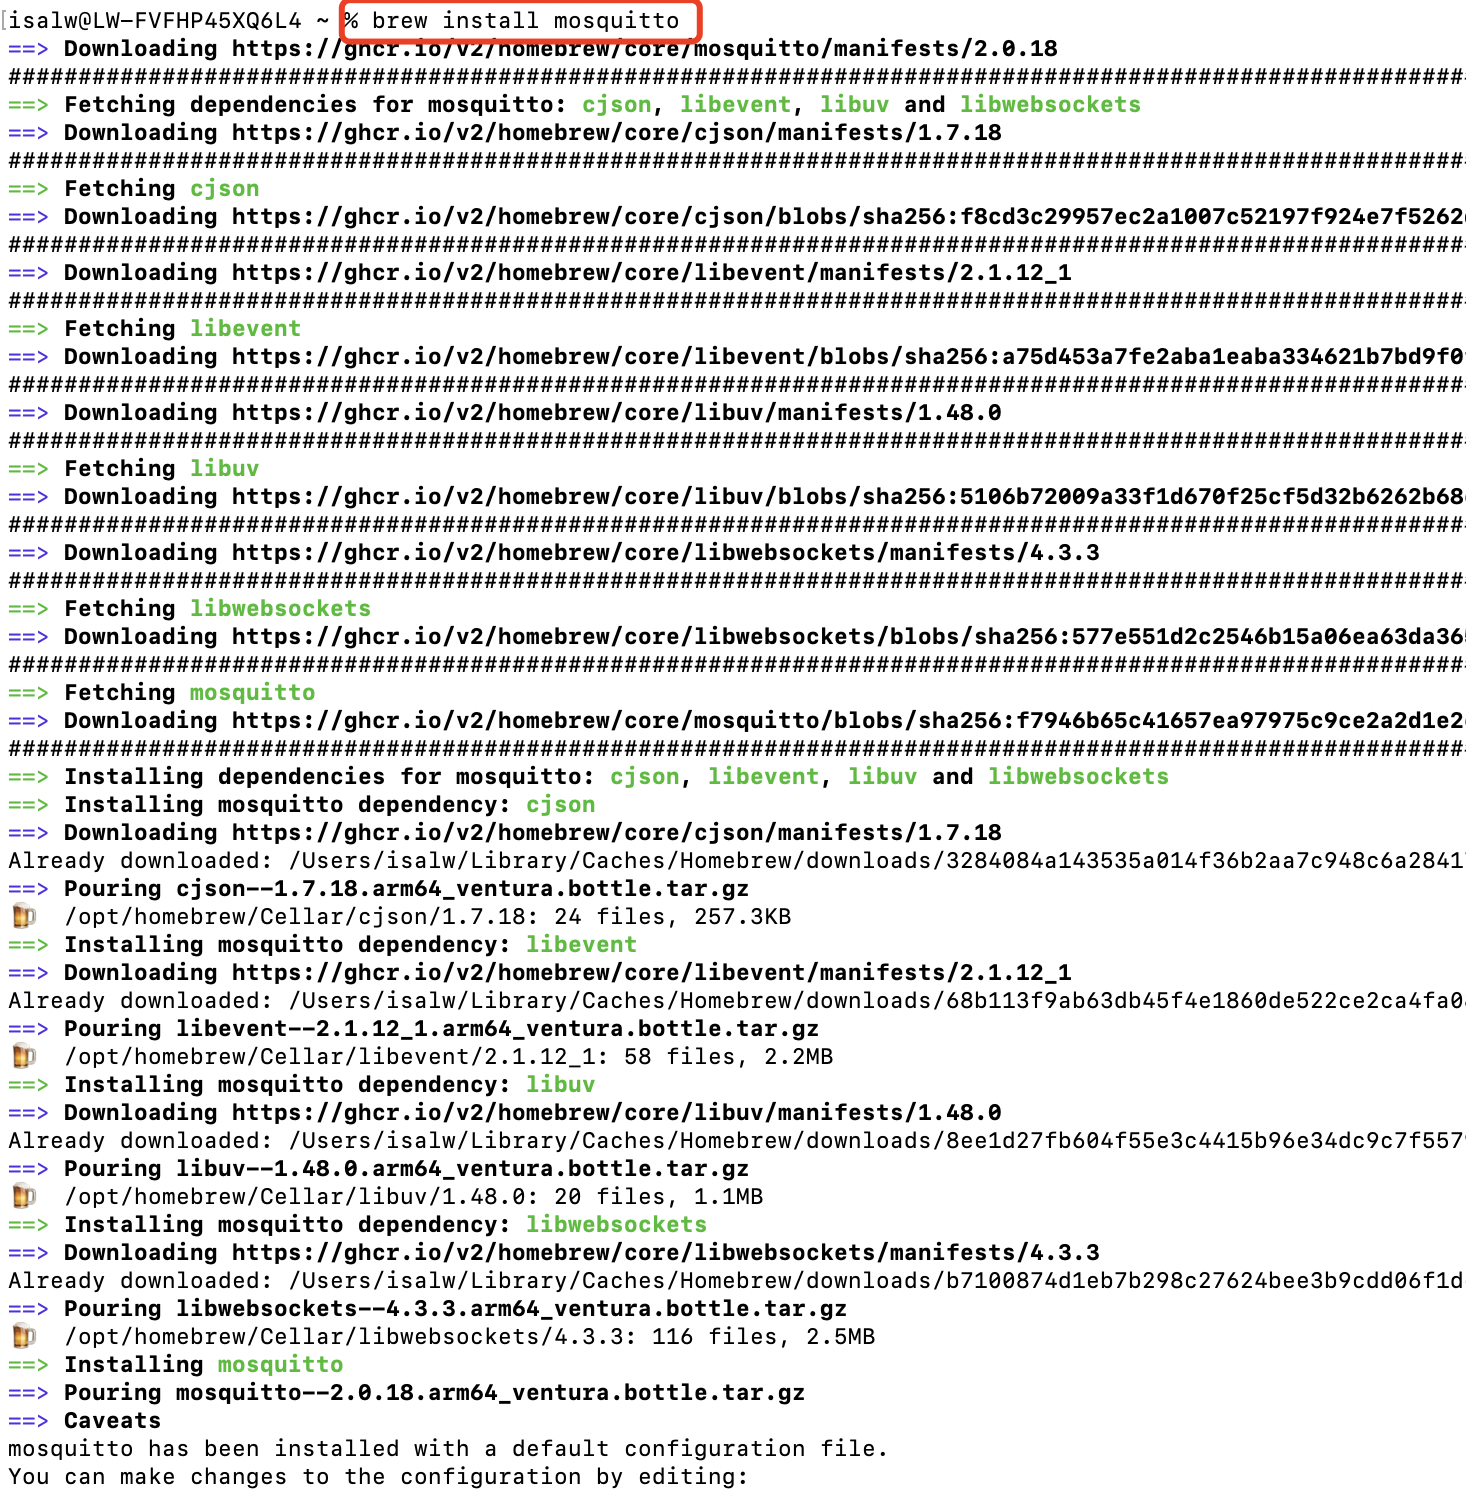
Setting up Mosquitto (MQTT) and Brew on mac os
/bin/bash -c "$(curl -fsSL https://raw.githubusercontent.com/Homebrew/install/HEAD/install.sh)"
brew install mosquitto
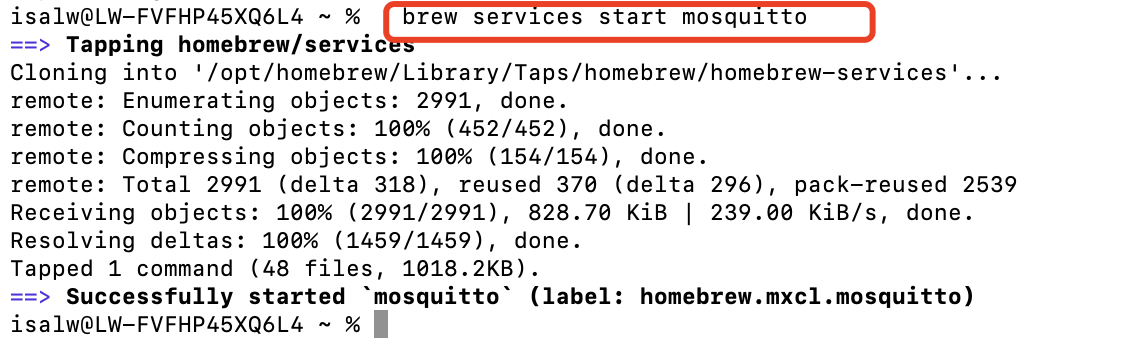
brew services start mosquitto
brew service list
ps aux | grep mosquitto

mosquitto_sub -h localhost -t "Test"
            mosquitto_pub -h localhost -t "Test" -m "Hello"
            mosquitto_pub -h localhost -t "Test" -m "How are you doing"

Part3 Set up a web page to connect to Mosquitto via WebSocket
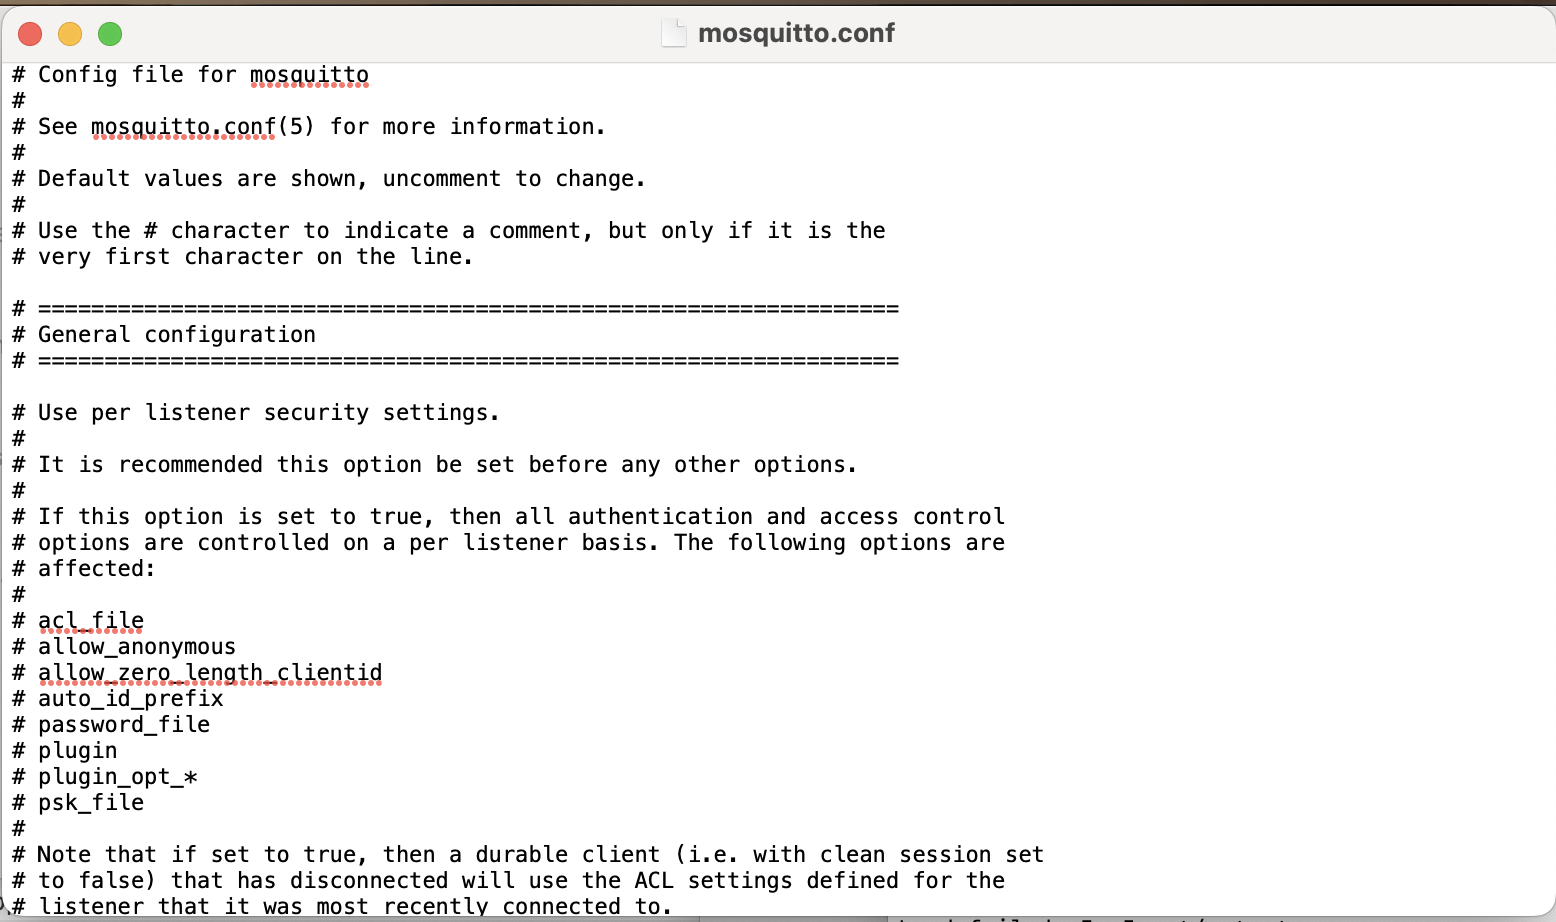
open -a textedit /opt/homebrew/etc/mosquitto/mosquitto.conf
        listener 1883
        listener 8080
        protocol websockets
        allow_anonymous true
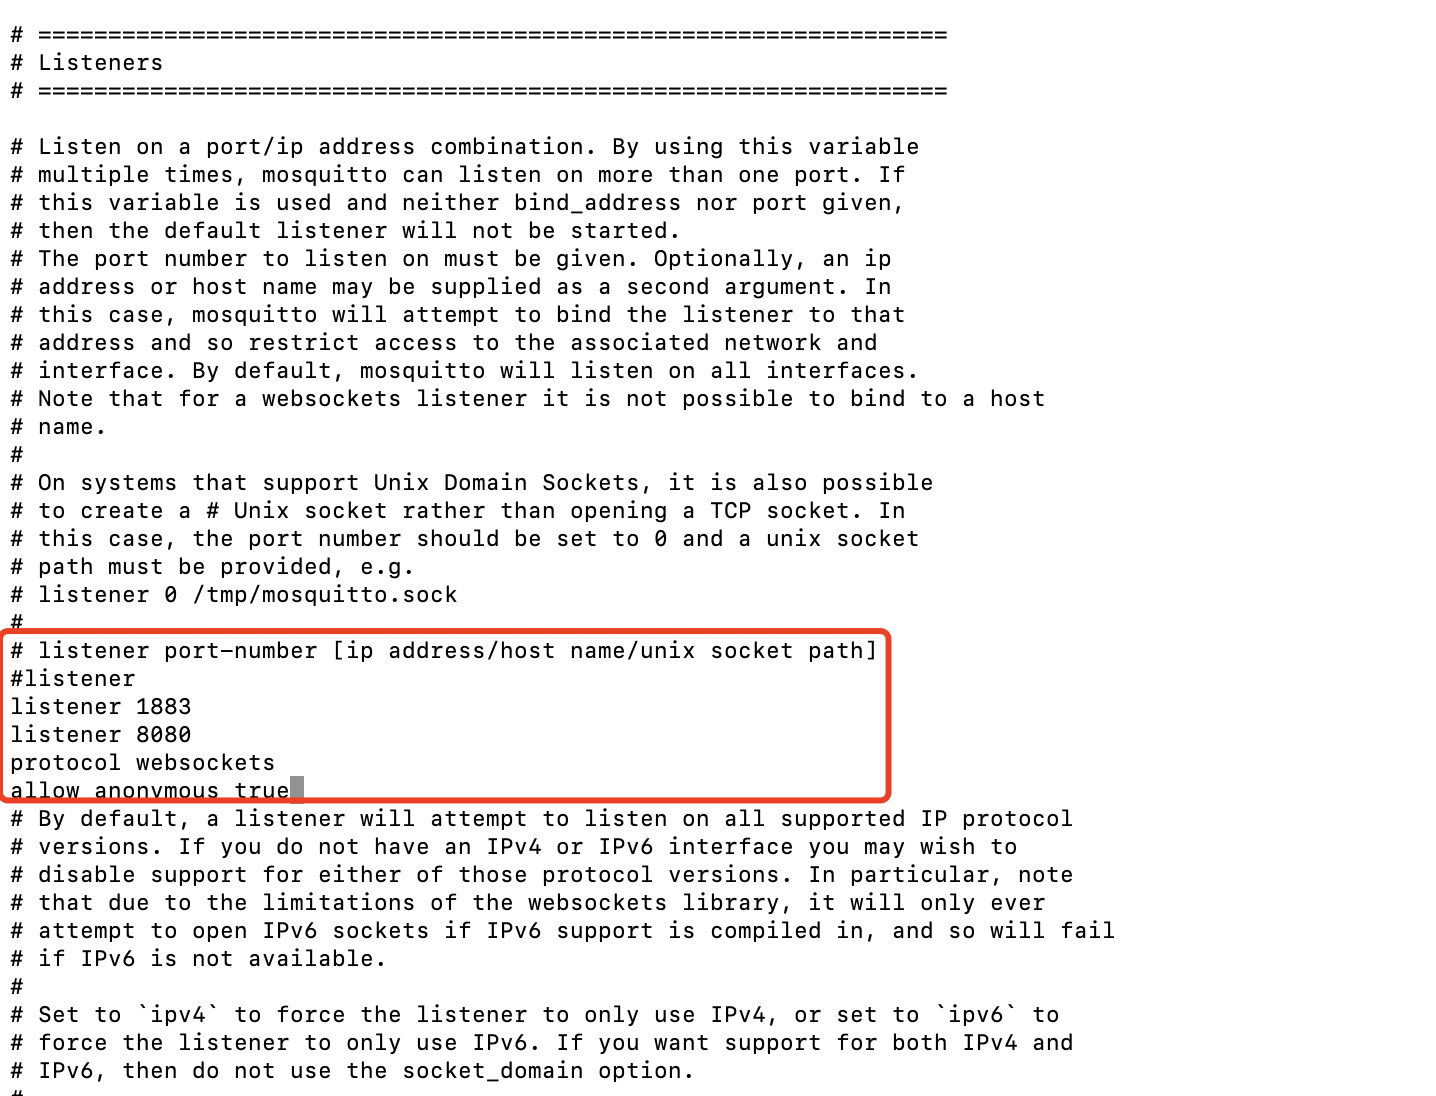
Important thing is that to add two listeners, one on 1883 port for the ESP32C3, another 8080 for the webbrowser using websocket protocol.
brew service restart mosquitto
sudo lsof -i :1883
sudo kill -9 2751 kill
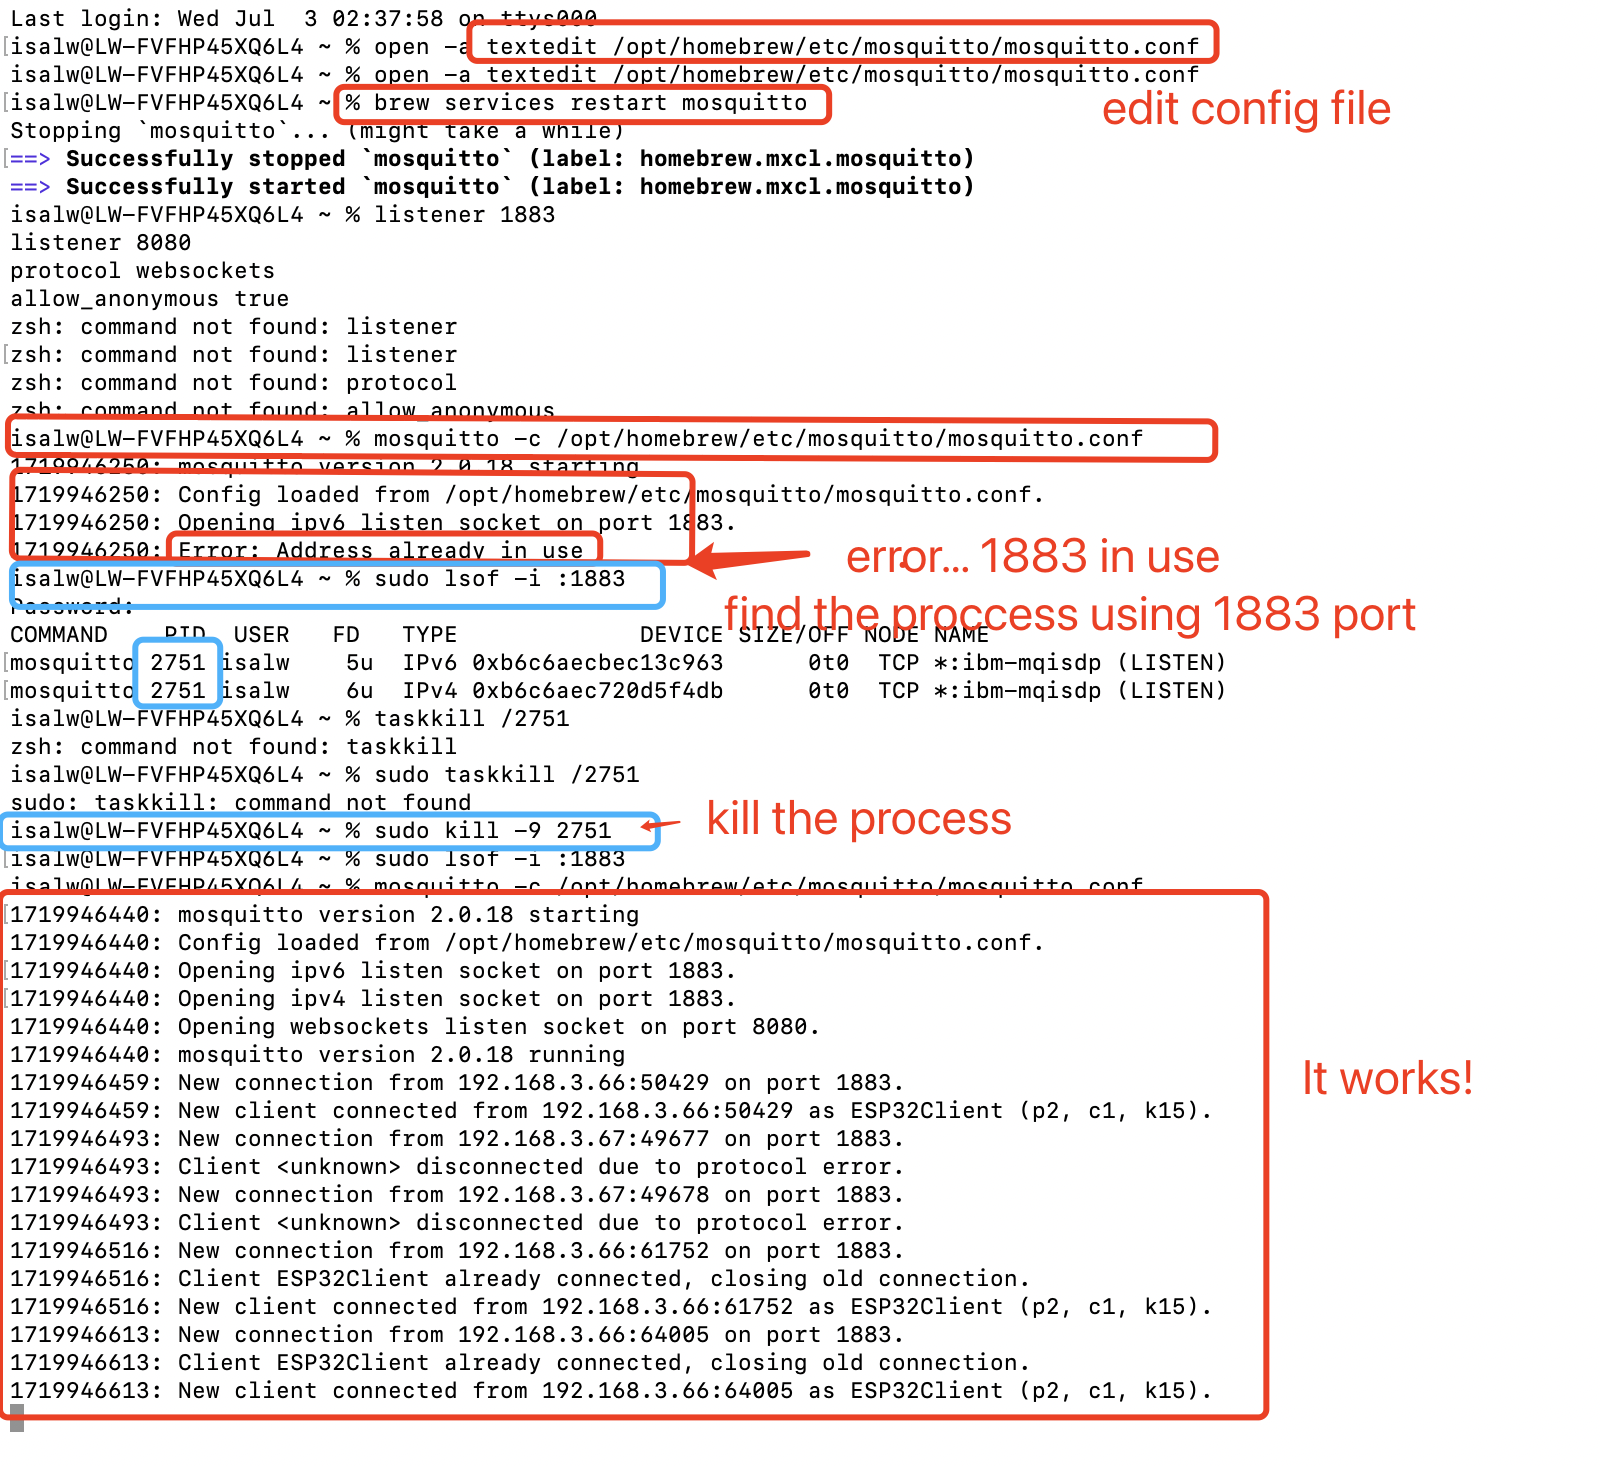
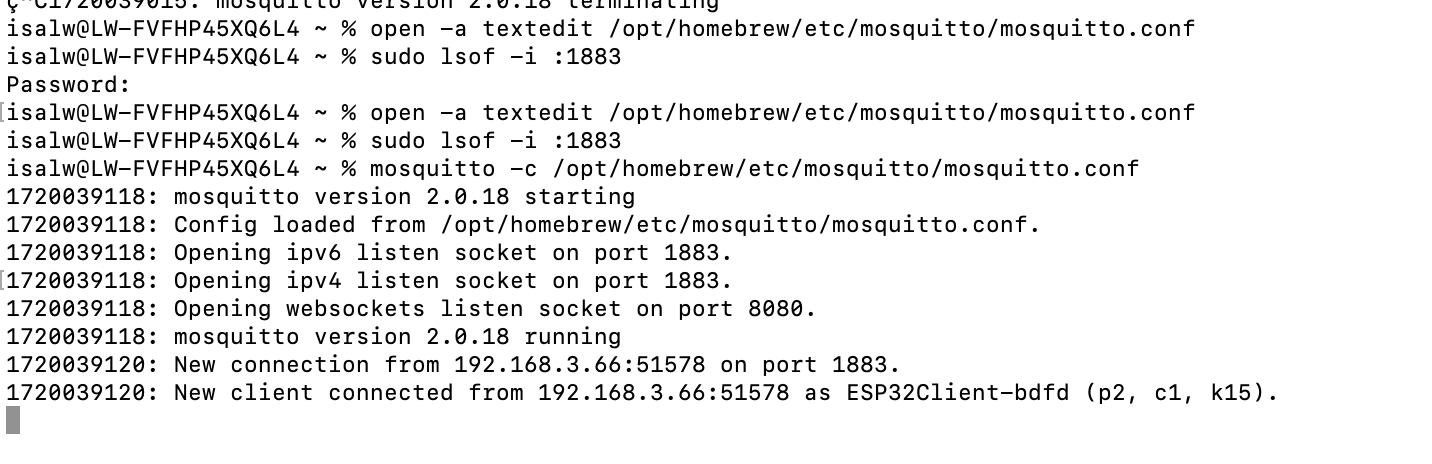
mosquitto -c /opt/homebrew/etc/mosquitto/mosquitto.conf
Part4. Programming Code for WebPage
            <!DOCTYPE html>
            <html>

            <head>
              <script src="https://cdnjs.cloudflare.com/ajax/libs/paho-mqtt/1.0.1/mqttws31.min.js"></script>
            </head>

            <body>

              <h2>MQTT Publisher and LED Control</h2>

              <button onclick="turnOnLed()">Turn On LED</button>
              <button onclick="turnOffLed()">Turn Off LED</button>

              <script>
                // MQTT Broker configuration
                const brokerUrl ='mqtt://192.168.3.67:8080';
                const topic = 'esp32c2/led';

                // Create MQTT client
                const client = new Paho.MQTT.Client(brokerUrl, {
                  clientId: 'html-client',
                  cleanSession: true,
                  useSSL: false
                });

                // Connect to MQTT broker
                client.connect({
                  onSuccess: function () {
                    console.log('Connected to MQTT Broker');
                  },
                  onFailure: function (error) {
                    console.error('Connection failed:', error);
                  }
                });

                // Subscribe to topic
                client.subscribe(topic);

                // Publish message
                function publishMessage(message) {
                  const payload = new Paho.MQTT.Message(message);
                  payload.destinationName = topic;
                  client.send(payload);
                }

                // Turn on LED
                function turnOnLed() {
                  publishMessage('ON');
                }

                // Turn off LED
                function turnOffLed() {
                  publishMessage('OFF');
                }
              </script>

            </body>

            </html>
It didn't work!

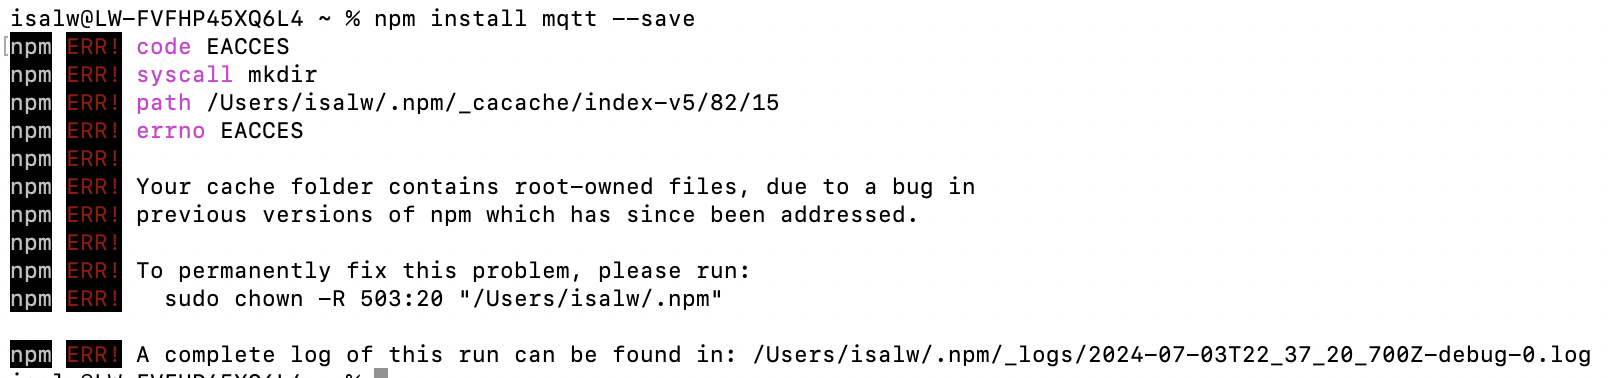
Then I tried to download the scipt to my computer and put it in the same folder with html
curl -o mqtt.min.js https://cdnjs.cloudflare.com/ajax/libs/mqtt/4.3.7/mqtt.min.js

Changed this line to
src="mqtt.min.js"
Still, it didn't work and the error is as below :
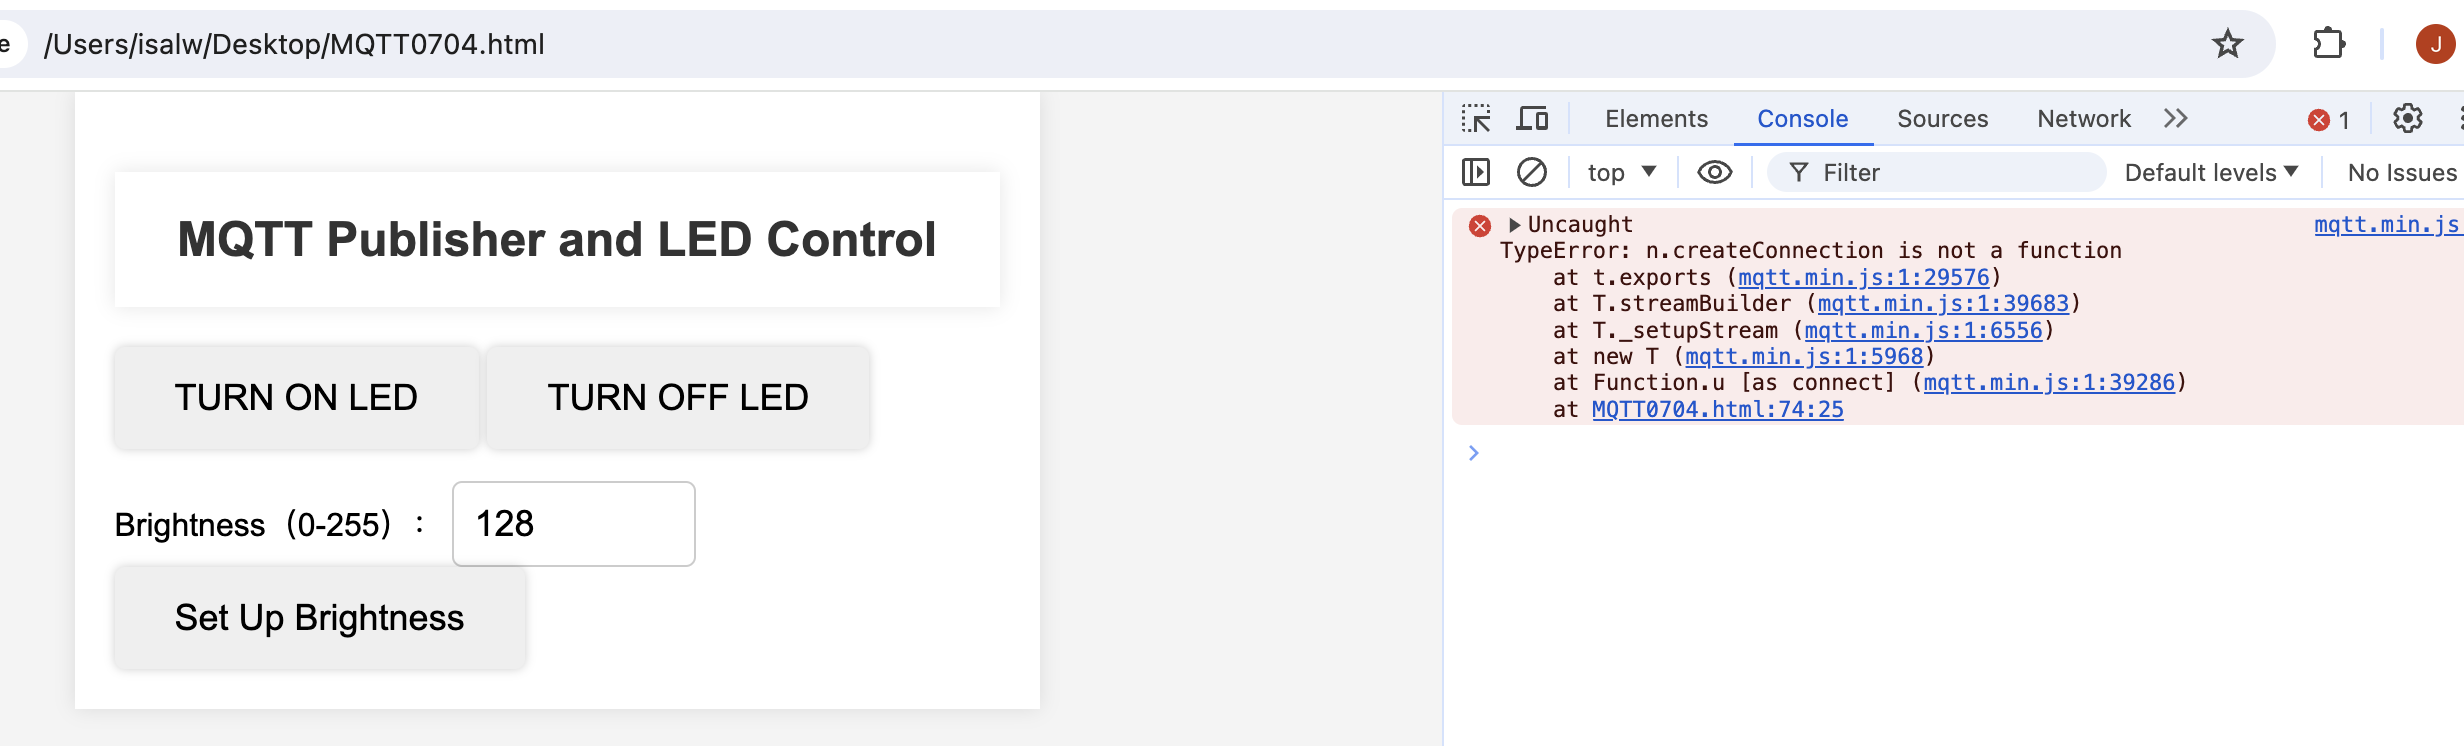
The explaination of this error is that
This error typically indicates that the createConnection method in the mqtt.min.js library is undefined or unavailable. This could be due to the following reasons:
- Version incompatibility: The version of
mqtt.min.jsyou are using might not be compatible with your code or environment. You can try replacing it with other stable versions of the mqtt library. - Loading issue: Although the library file has been loaded, there might be a partial loading failure or corruption. You can re-acquire or reload the library file.
- Conflicts with other scripts: There might be other scripts in your page that conflict with the mqtt library, affecting its normal functionality.
You can first try changing the version of the mqtt library to see if it resolves the issue.
Then I tried to find other Jacascript that may be compatible for my mac_homebrew environment
Changed the html code to be
      const mqtt = require('mqtt');

      // Configuration for the MQTT Broker
      const brokerUrl ='mqtt://192.168.3.67:8080';
      const topic = 'esp32c2/led';

      // Create MQTT Client
      const client = mqtt.connect(brokerUrl);
Still, it didn't work and the error is as below :
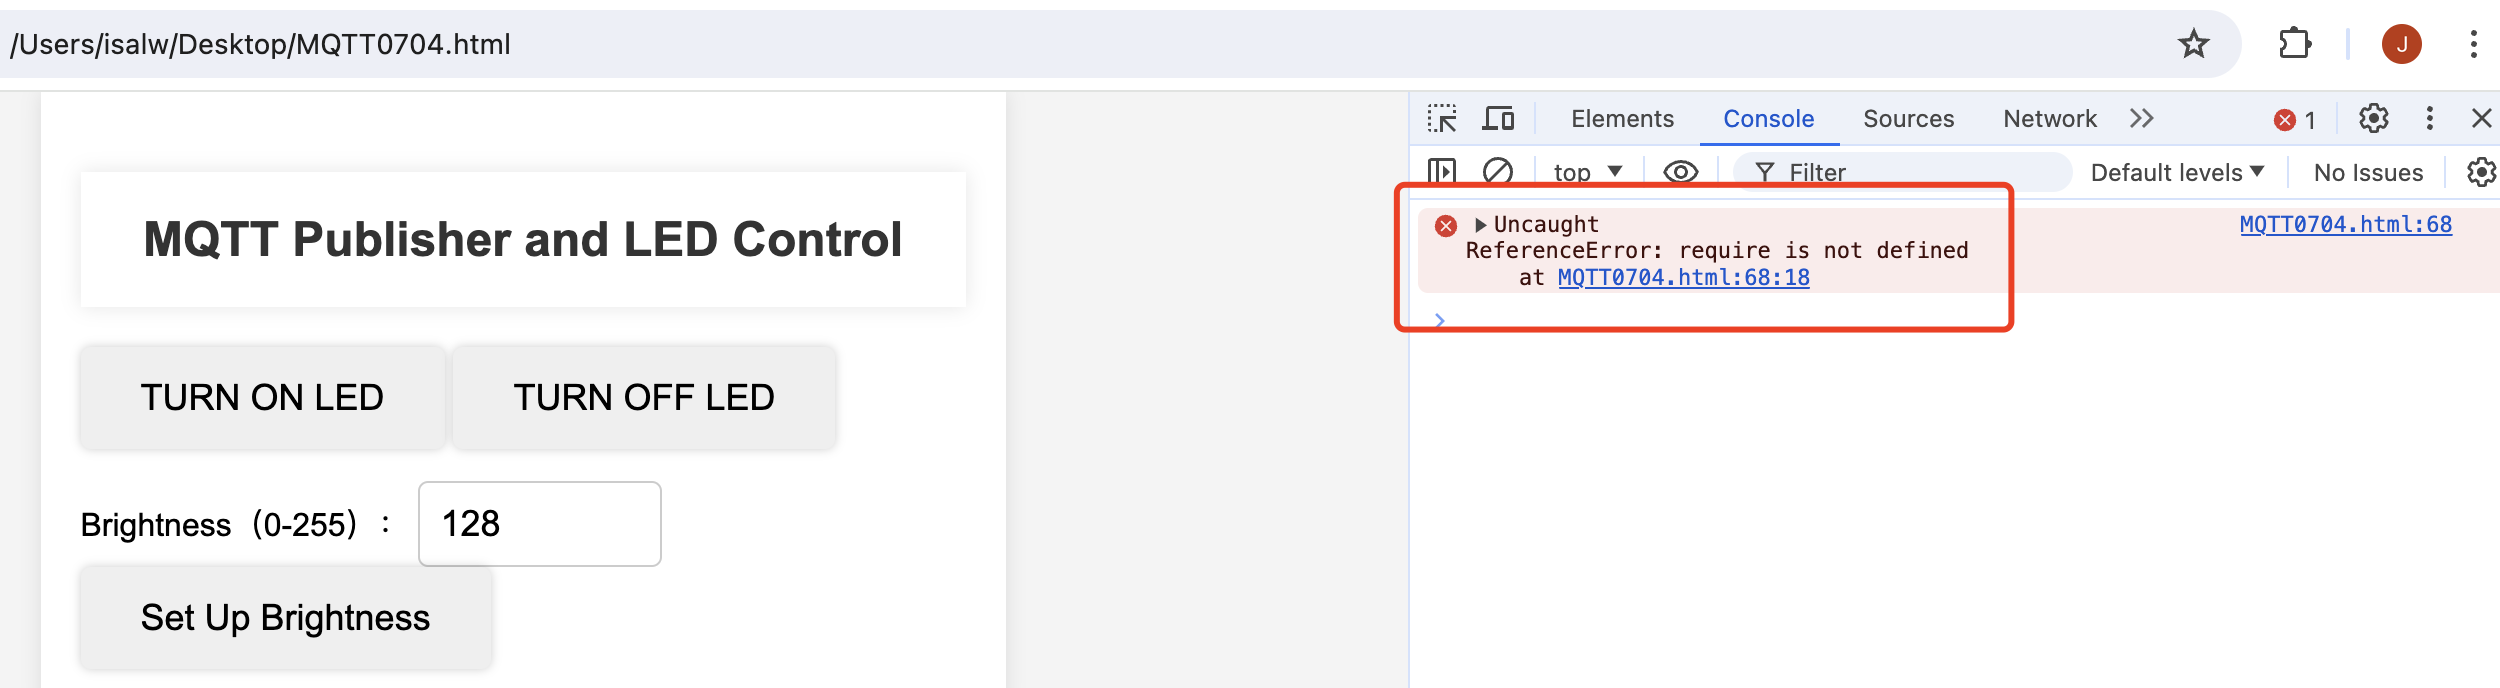
The explaination of this error is that
Using require directly in HTML may not work properly because the browser environment typically does not support the module system of Node.js. This approach is more suitable for environments that support the Node.js runtime, such as when using a backend template engine to render HTML pages.
If you need to run in a pure browser environment, you may need to use other methods, such as packaging the code with packaging tools (such as Webpack or Parcel) and handling the import of modules.
IMPORTANT Import the mqtt library from a CDN using the <script> tag
Finally, it works! And the code is as below:
MQTT Publisher and LED Control Code
    <!DOCTYPE html>
    <html>

    <head>

      <style>
        body {
          font-family: Arial, sans-serif;
          background-color: #f4f4f4;
          margin: 0;
          padding: 0;
        }

        h2 {
          color: #333;
          text-align: center;
          padding: 20px 0;
          background-color: #fff;
          box-shadow: 0 0 10px rgba(0, 0, 0, 0.1);
        }

        button {
          padding: 15px 30px;
          font-size: 18px;
          border: none;
          border-radius: 5px;
          cursor: pointer;
          box-shadow: 0 0 5px rgba(0, 0, 0, 0.2);
          transition: background-color 0.3s ease;
        }

        button:hover {
          background-color: #4CAF50;
          color: #fff;
        }

        #container {
          width: 50%;
          margin: 0 auto;
          padding: 20px;
          background-color: #fff;
          box-shadow: 0 0 10px rgba(0, 0, 0, 0.1);
        }

        #brightnessValue {
          width: 100px;
          padding: 10px;
          font-size: 18px;
          border-radius: 5px;
          border: 1px solid #ccc;
        }
      </style>

      <script src="https://unpkg.com/mqtt/dist/mqtt.min.js"></script>
    </head>

    <body>
      <div id="container">
        <h2>MQTT Publisher and LED Control</h2>
        <button onclick="turnOnLed()">TURN ON LED</button>
        <button onclick="turnOffLed()">TURN OFF LED</button>
        <p></p>
        <label for="brightnessValue">Brightness(0-255):</label>
        <input type="number" id="brightnessValue" min="0" max="255" value="128" />
        <button onclick="setLedBrightness()">Set Up Brightness</button>
      </div>

      <script>

        const brokerUrl ='mqtt://192.168.3.67:8080';
        const topic = 'esp32c2/led';


        const client = mqtt.connect(brokerUrl);


        client.on('connect', () => {
          console.log('Connected to MQTT Broker');
        });


        client.on('error', (error) => {
          console.error('Error:', error);
        });


        function turnOnLed() {
          client.publish(topic, 'ON');
        }


        function turnOffLed() {
          client.publish(topic, 'OFF');
        }


        function setLedBrightness() {
          const brightness = document.getElementById('brightnessValue').value;
          client.publish(topic + '/brightness', brightness);
        }
      </script>
    </body>

    </html>
Part5. Programming Code for ESP32C3
Install the MQTT Libary
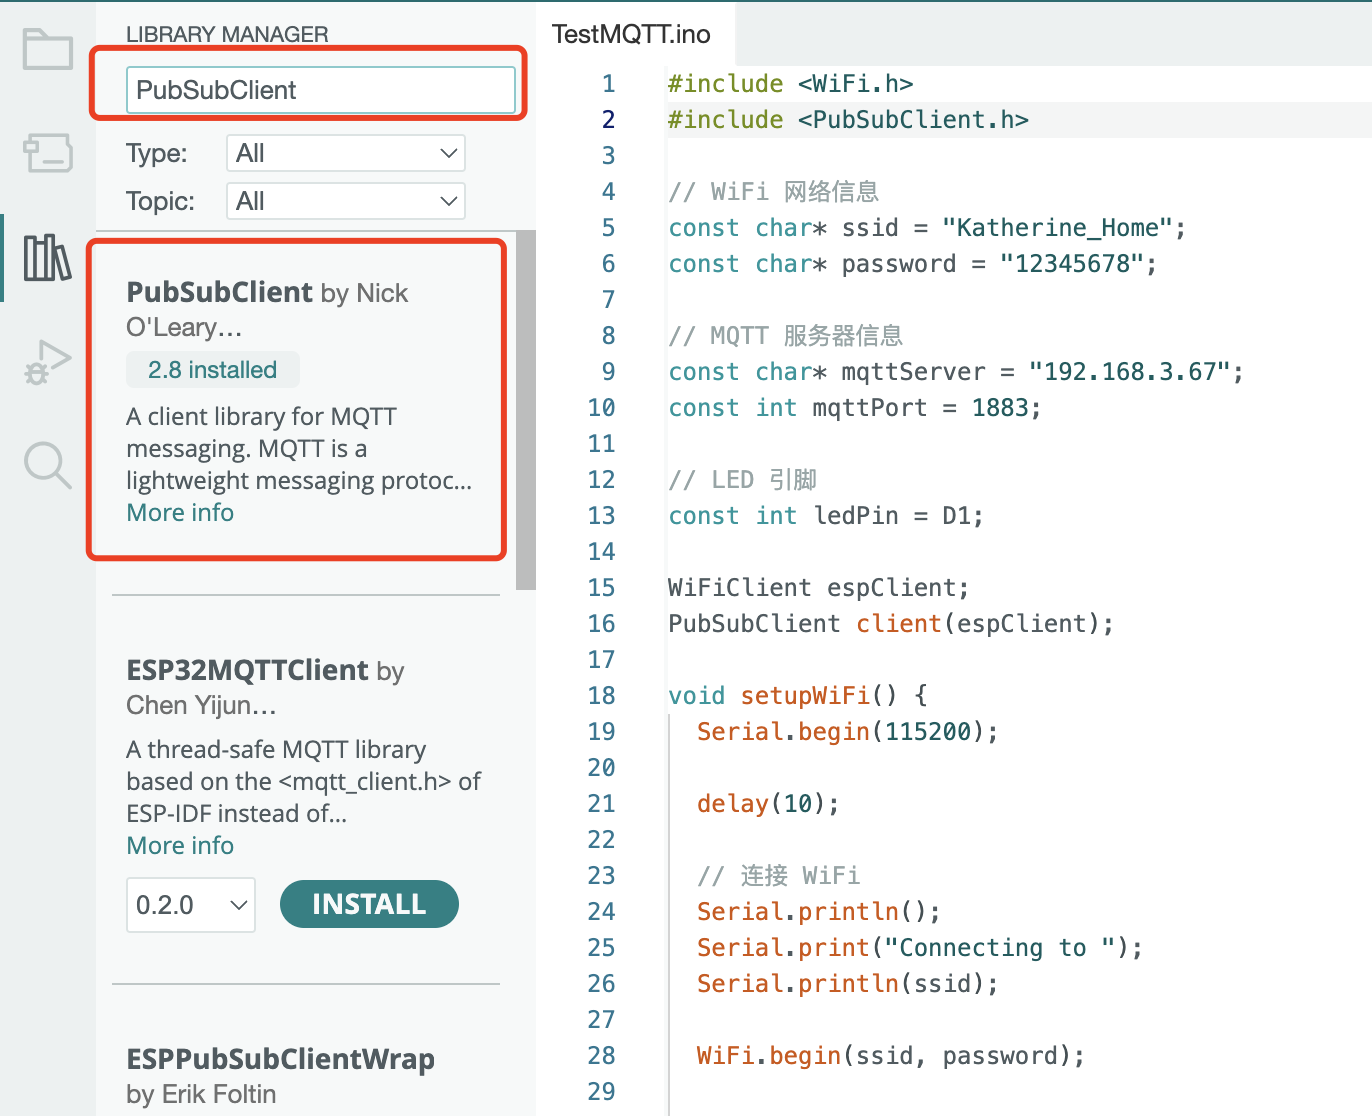
Programming part of ESP32C3 is relatively easier.
#include <WiFi.h>
#include <PubSubClient.h>
// WiFi configuration
const char* ssid = "Katherine_Home"; // The name of the WiFi network
const char* password = "NiuNiu876519"; // The password of the WiFi network
// MQTT server configuration
const char* mqttServer = "192.168.3.67"; // The address of the MQTT server
const int mqttPort = 1883; // The port of the MQTT server
// LED pin
#define LED_PIN D1 // Define the pin for controlling the LED
// Create WiFi client and MQTT client
WiFiClient espClient;
PubSubClient client(espClient); // Create MQTT client object and associate with WiFi client
/**
* MQTT message callback function
* Called when an MQTT message is received
* @param topic The topic of the message
* @param payload The payload (data) of the message
* @param length The length of the payload
*/
void callback(char* topic, byte* payload, unsigned int length) {
String message = "";
for (int i = 0; i < length; i++) {
message += (char)payload[i];
}
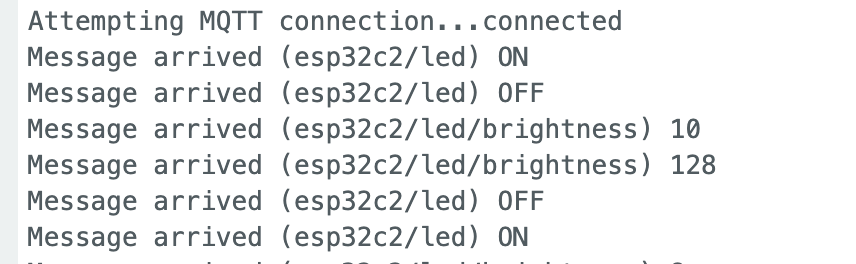
Serial.print("Message arrived (");
Serial.print(topic);
Serial.print(") ");
Serial.println(message);
// Control the LED based on the received "ON" or "OFF"
if (strcmp(topic, "esp32c2/led") == 0) {
if (message == "ON") {
analogWrite(LED_PIN, 256);
} else if (message == "OFF") {
analogWrite(LED_PIN, 0);
}
}
else if (strcmp(topic, "esp32c2/led/brightness") == 0) {
int brightness = atoi((char*)payload);
analogWrite(LED_PIN, brightness);
}
}
/**
* Function to reconnect to the MQTT server
*/
void reconnect() {
// Loop until reconnection is successful
while (!client.connected()) {
Serial.print("Attempting MQTT connection...");
// Try to connect
if (client.connect("ESP32Client")) {
Serial.println("connected");
// Subscribe to topics
client.subscribe("esp32c2/led");
client.subscribe("esp32c2/led/brightness");
} else {
Serial.print("failed, rc=");
Serial.print(client.state());
Serial.println(" try again in 5 seconds");
// Wait 5 seconds before retrying
delay(5000);
}
}
}
/**
* Setup function, runs once at the beginning
*/
void setup() {
Serial.begin(115200);
// Set the LED pin as output
pinMode(LED_PIN, OUTPUT);
// Connect to WiFi
WiFi.begin(ssid, password);
while (WiFi.status()!= WL_CONNECTED) {
delay(1000);
Serial.println("Connecting to WiFi...");
}
client.setServer(mqttServer, mqttPort);
client.setCallback(callback);
}
/**
* Main loop function, runs repeatedly
*/
void loop() {
if (!client.connected()) {
reconnect();
}
client.loop();
}