Weekly assignments
- week 1. Project Management
- week 2. Computer Aided Design
- week 3. Computer Controlled Cutting
- week 4. Electronics Production
- week 5. 3D Scanning and Printing
- week 6. Embeded Programming
- week 7. Computer Controlled Machining
- week 8. Electronics Design
- week 9. Output Devices
- week 10. Mechanical design & Machine Design
- week 11. Break & Midterm Review
- week 12. Input devices
- week 13. Moulding and Casting
- week 14. Networking and communications
- week 15. Interface and application programming
- week 16. Wildcard week
- week 17. Applications And implications
- week 18. Project Development
- week 19. Invention, Intellectual Property and Income
1. Project management
This week I worked on defining my final project idea and started to getting used to the documentation process.
Research
This week, I have learned about HTML, CSS, and Git. HTML forms the structure of web pages, CSS enhances their presentation, and Git is a version control system for managing software development.
HTML (Hypertext Markup Language):
HTML is the standard markup language for creating web pages and web applications. It provides the basic structure and content of a webpage, defining elements such as headings, paragraphs, links, images, and more. Learning HTML involves understanding the syntax, elements, attributes, and best practices for creating semantically structured web content.
CSS (Cascading Style Sheets):
CSS is used to style the presentation of HTML elements on a web page. It allows for the customization of layout, colors, fonts, and other visual aspects of a website. Learning CSS involves understanding selectors, properties, values, and layout techniques to create visually appealing and responsive web designs.
Git:
Git is a distributed version control system that tracks changes in source code during software development. It allows multiple developers to collaborate on a project, manage different versions of the code, and merge changes seamlessly. Learning Git involves understanding concepts such as repositories, branches, commits, merges, and resolving conflicts to effectively manage and track the evolution of software projects.
Useful links
Git Commands
Below are some really usefully git commands that you will use through the whole FabAcademy Journey!
The common workflow to upload your work to git folder is :
1. Make changes to files in your working directory2. Stage the changes you want to commit using git add
3. Run git commit to take a snapshot of the staged changes and record it in the repository history
4. Push your local commits to the remote repository using git push
1. git add:
The "git add" command is used to add changes in the working directory to the staging area.
The staging area is a holding place where changes are prepared to be committed to the repository.
When you make changes to files in your local repository, those changes are initially only in your working directory.
To include the changes in the next commit, you need to add them to the staging area using the git add command.
Some common uses of git add include:
- Adding new files: When you create a new file in your project, you need to run git add
- Adding modified files: If you've modified an existing file, you can run git add
- Adding all changes: You can use git add . (adding a period) to stage all changes in the current directory and its subdirectories.
- Interactively selecting changes: git add -p allows you to interactively select which changes you want to stage for the next commit.
Always keep in mind:
FabAcademy has a file size limitation of 10 MB for each git add command.
You should always check the file size before uploading files using the git add command.

2. git commit:
The git commit command is used to record changes to the local repository. When you run git commit,
Git takes a snapshot of the current state of your project and saves it to the repository's history.
Some key functions of the git commit command:
1. Capturing Changes:git commit captures the changes you've staged with git add and records them as a new commit in the repository's history.
2. Writing Commit Messages:
When you run git commit, Git will prompt you to write a commit message.
The commit message should describe the changes you've made, which helps you and others understand the commit history.
3. Building the Project History:
Each commit you make adds to the overall history of your project, creating a timeline of changes that you can reference and navigate.
4. Creating Checkpoints:
Commits act as checkpoints in your project, allowing you to revert to previous states if needed.
5. Collaborating with Others: Commits are the fundamental building blocks of collaboration in Git. By pushing your commits to a shared repository, you can share your work with team members.

3. git push:
The git push command is used to upload your local repository commits to a remote repository, such as one hosted on GitHub, GitLab, or a local server.
This allows you to share your work with others and collaborate on the project.
The main functions of git push are:
1. Uploading Commits:
When you run git push, Git will upload all of your local commits that have not yet been pushed to the remote repository.
2. Sharing Work:
By pushing your commits, you make your changes available to other collaborators working on the same project.
They can then pull your changes to update their local repositories.
3. Backup and Restore:
Pushing your commits to a remote repository acts as a backup, ensuring your work is saved and can be restored if needed.
4. Remote Branch Management:
git push allows you to create, update, and delete remote branches, helping you manage the branch structure of your project.
5. Synchronization:
Running `git push keeps your local and remote repositories synchronized, ensuring everyone is working with the same codebase.
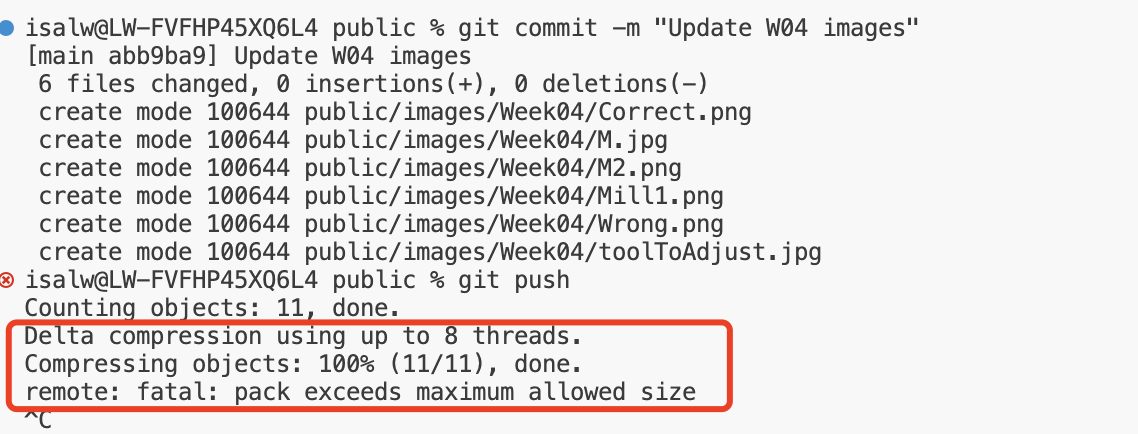
Normally, this is the last step to git push everything, and it is a successful push if you see the image below

But, if unfortunately this image below appears, it means the file size exceeds the 10MB limit. But don't worry, all you need is another magic command: 'git clone'.
4. git clone:
The git clone command is used to create a copy (clone) of an existing Git repository.
When you clone a repository, Git downloads the entire repository, including all of its files, branches, and commit history, to your local machine.
The main use cases for git clone include:
1. Obtaining a Working Copy:When you want to start working on a project that is hosted in a remote Git repository (e.g., on GitHub, GitLab, etc.), you can use git clone to download a copy of the repository to your local machine.
2. Collaborating on a Project:
If you're part of a team working on a shared codebase, you can use git clone to get a local copy of the repository, allowing you to contribute your changes back to the main project.
3. Forking a Repository:
When you want to create your own version of a project (a "fork") and work on it independently, you can use git clone to create a local copy of the original repository.
4. Mirroring a Repository:
git clone can also be used to create a full copy (mirror) of a remote repository on your local machine, including all branches and tags.
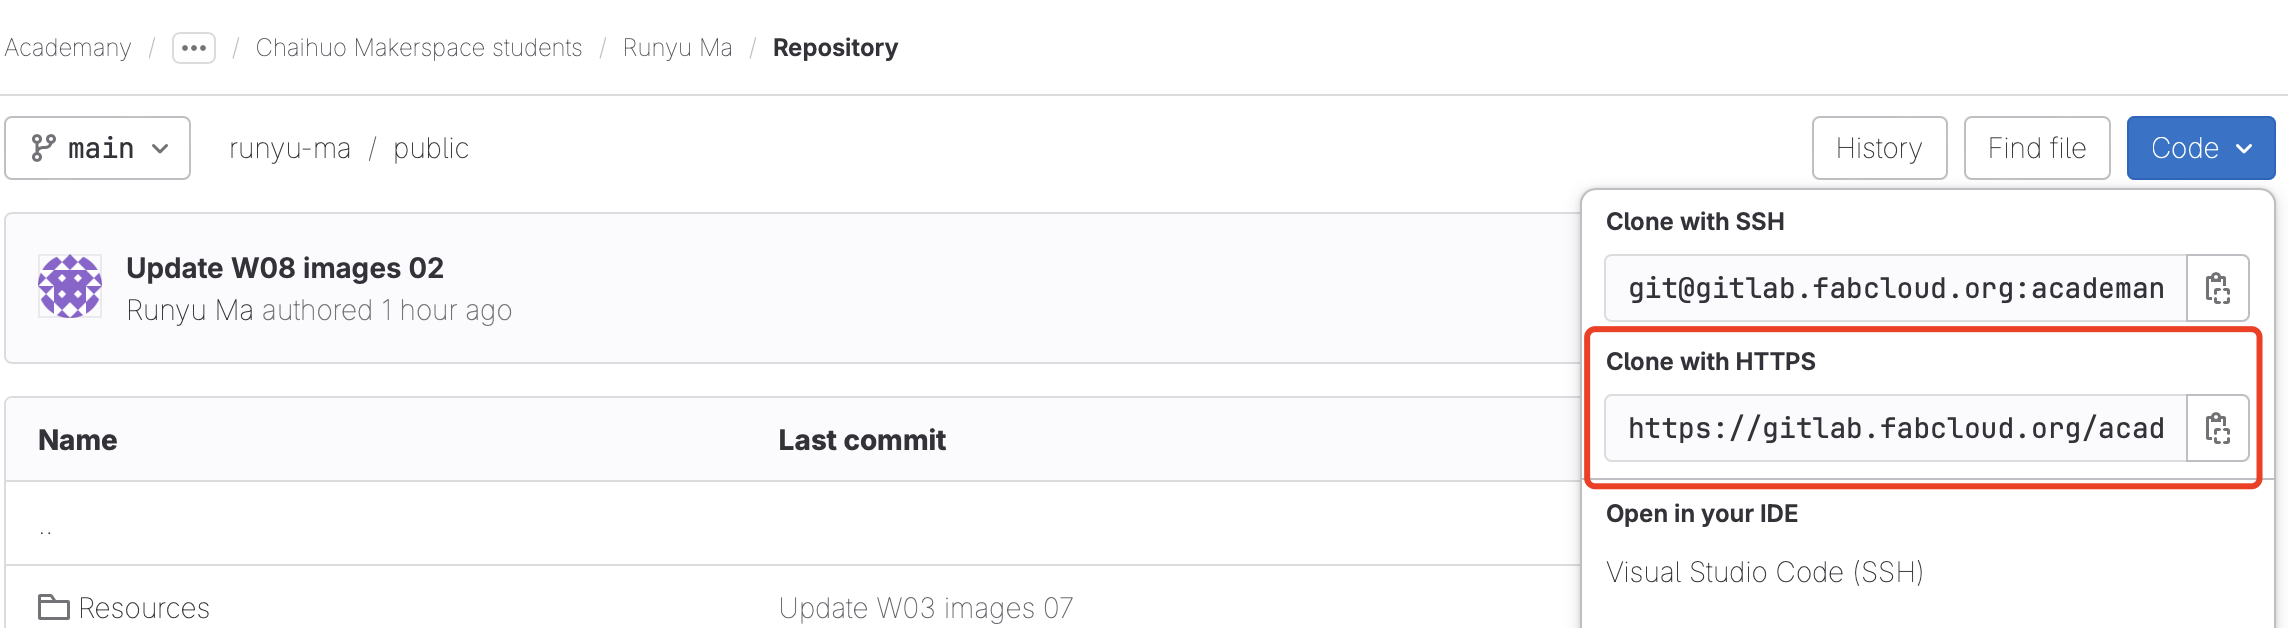
Create a new folder and clone everything into your new folder

HTML and CSS
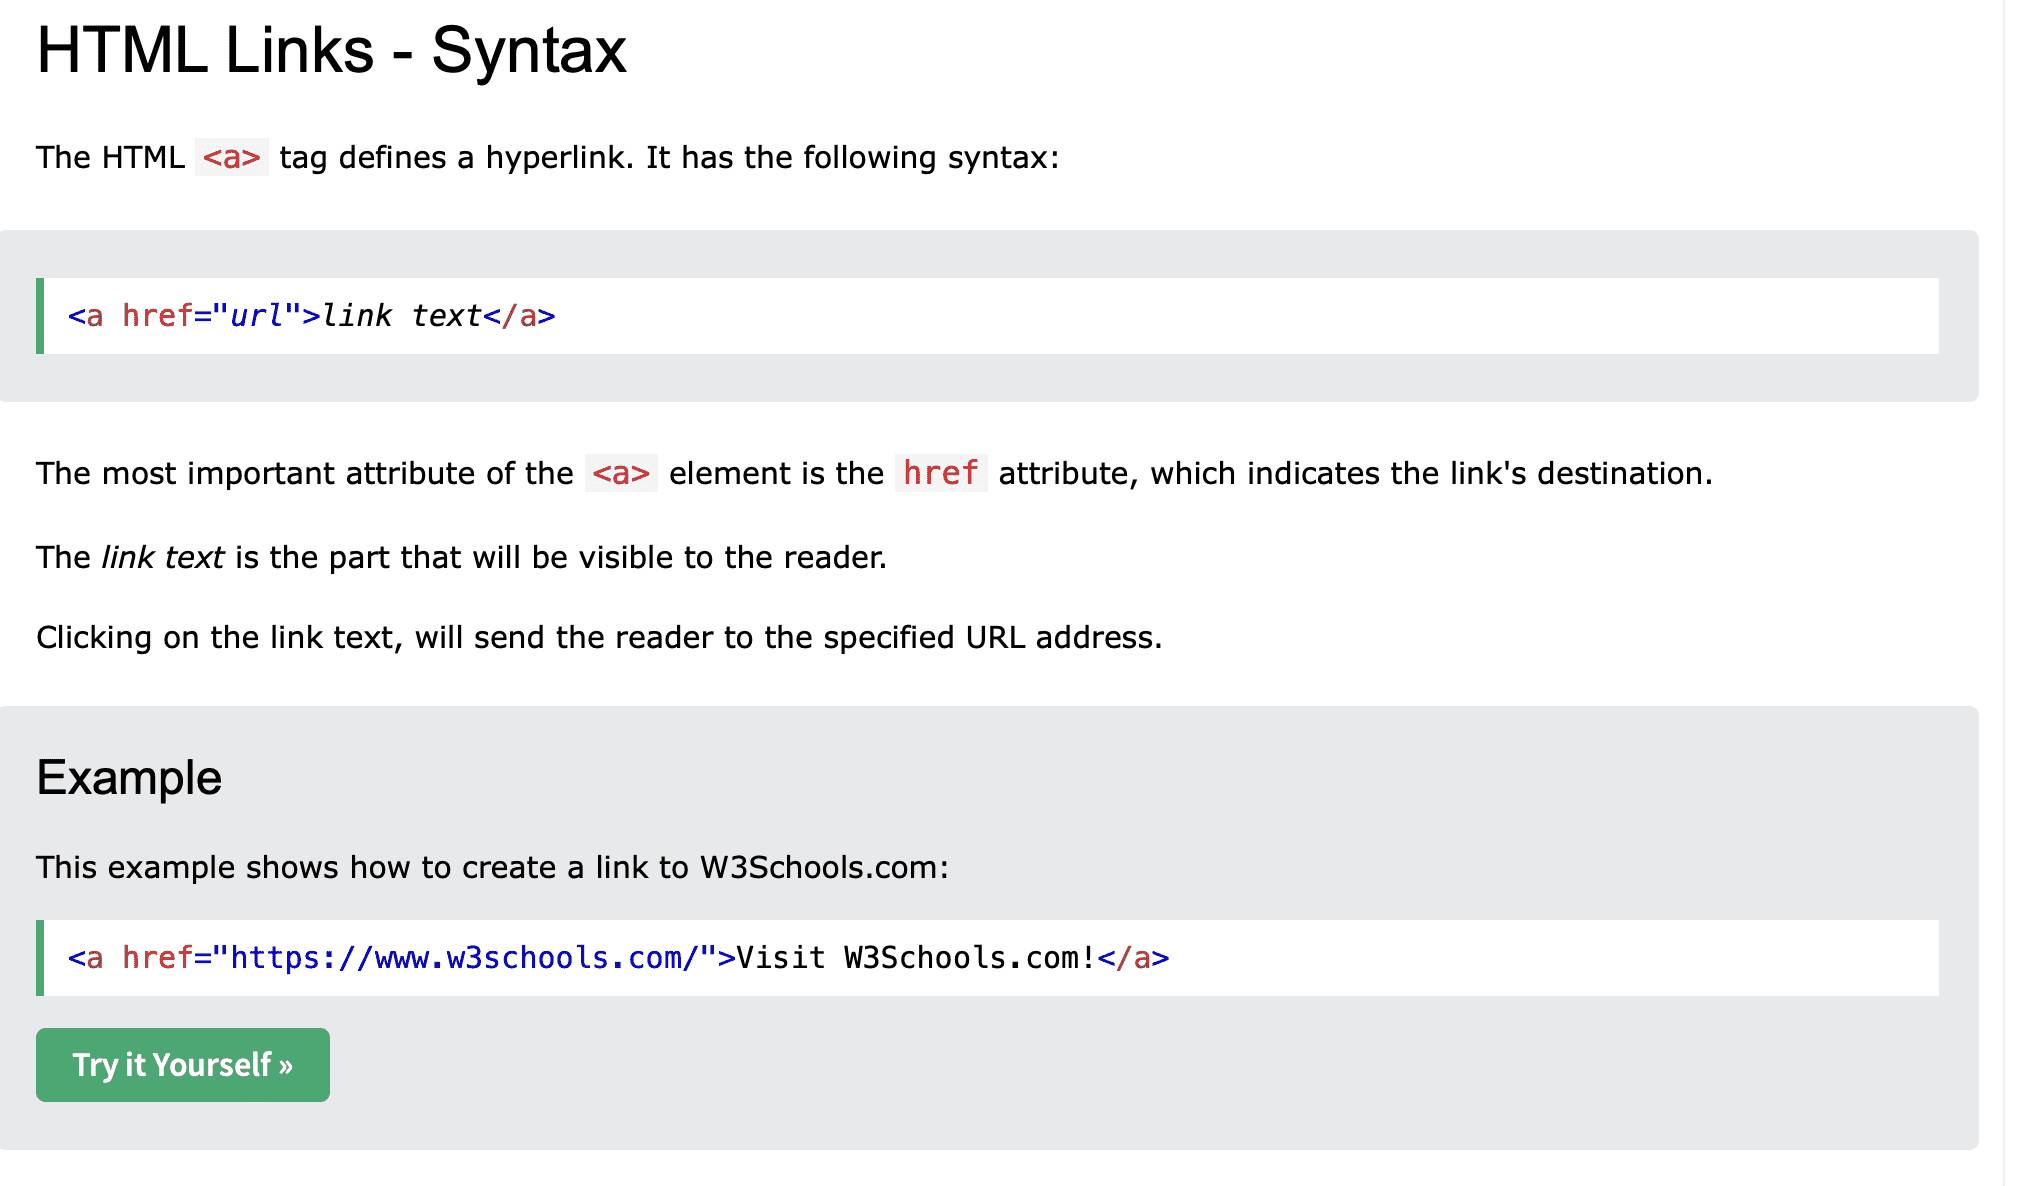
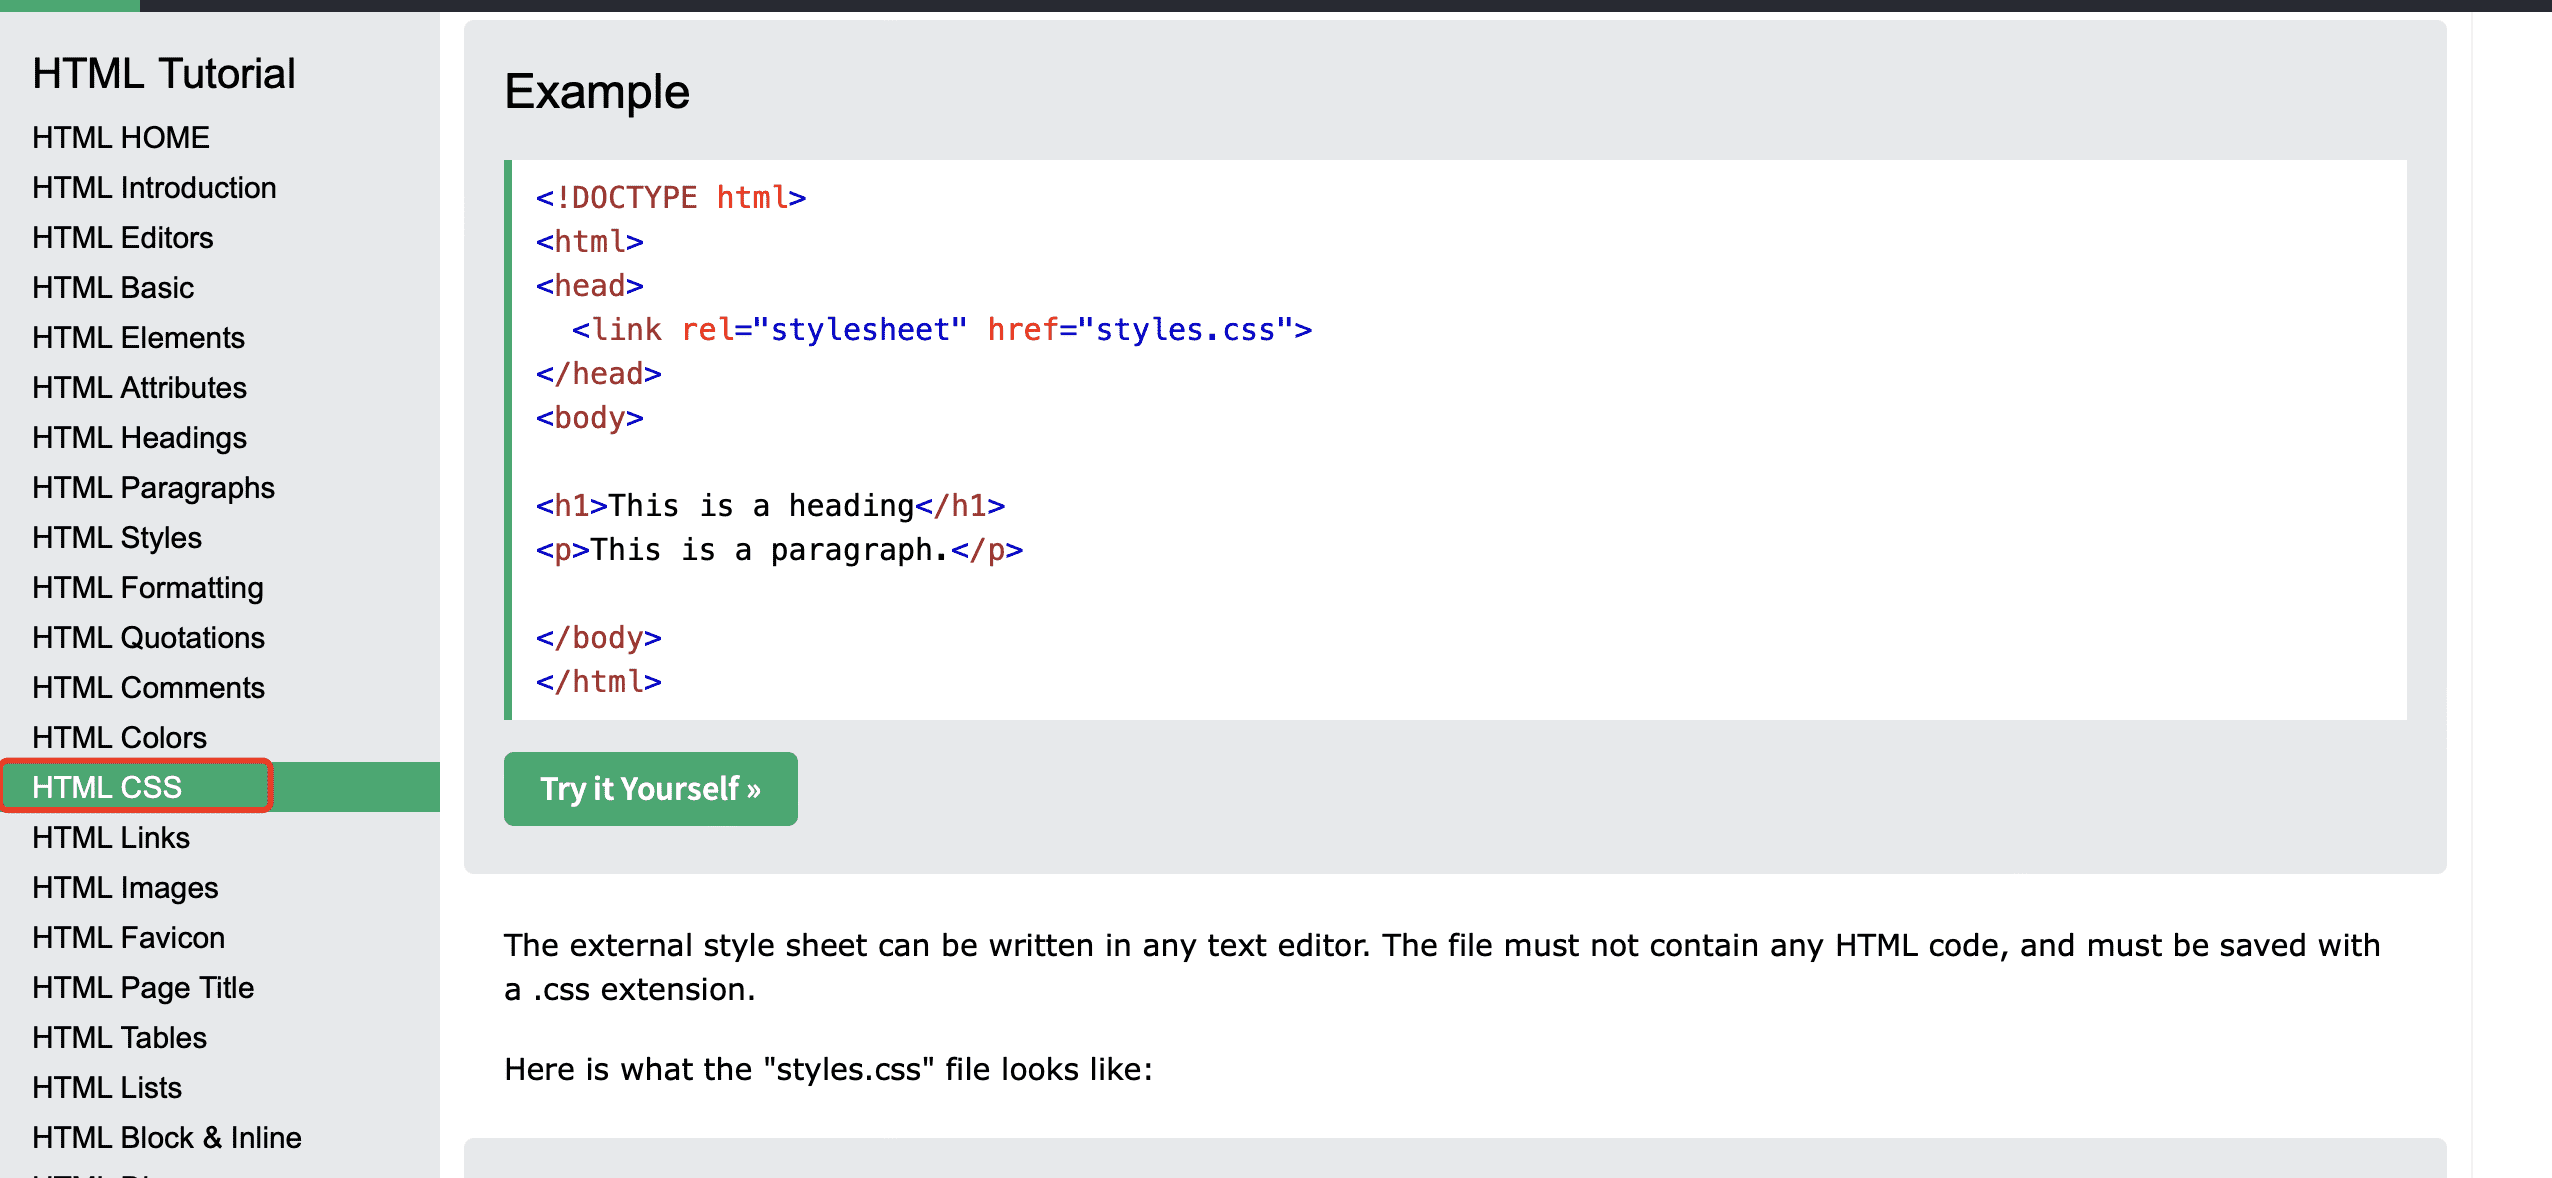
I have also learned some very useful skills about writing HTML and CSS. A useful link for me is W3Schools, a famous website that introduces various programming languages and formats.
HTML (Hypertext Markup Language) is the standard language for creating web pages. It provides the structure and content of a webpage by using a variety of tags to define different elements such as headings, paragraphs, images, links, and more.
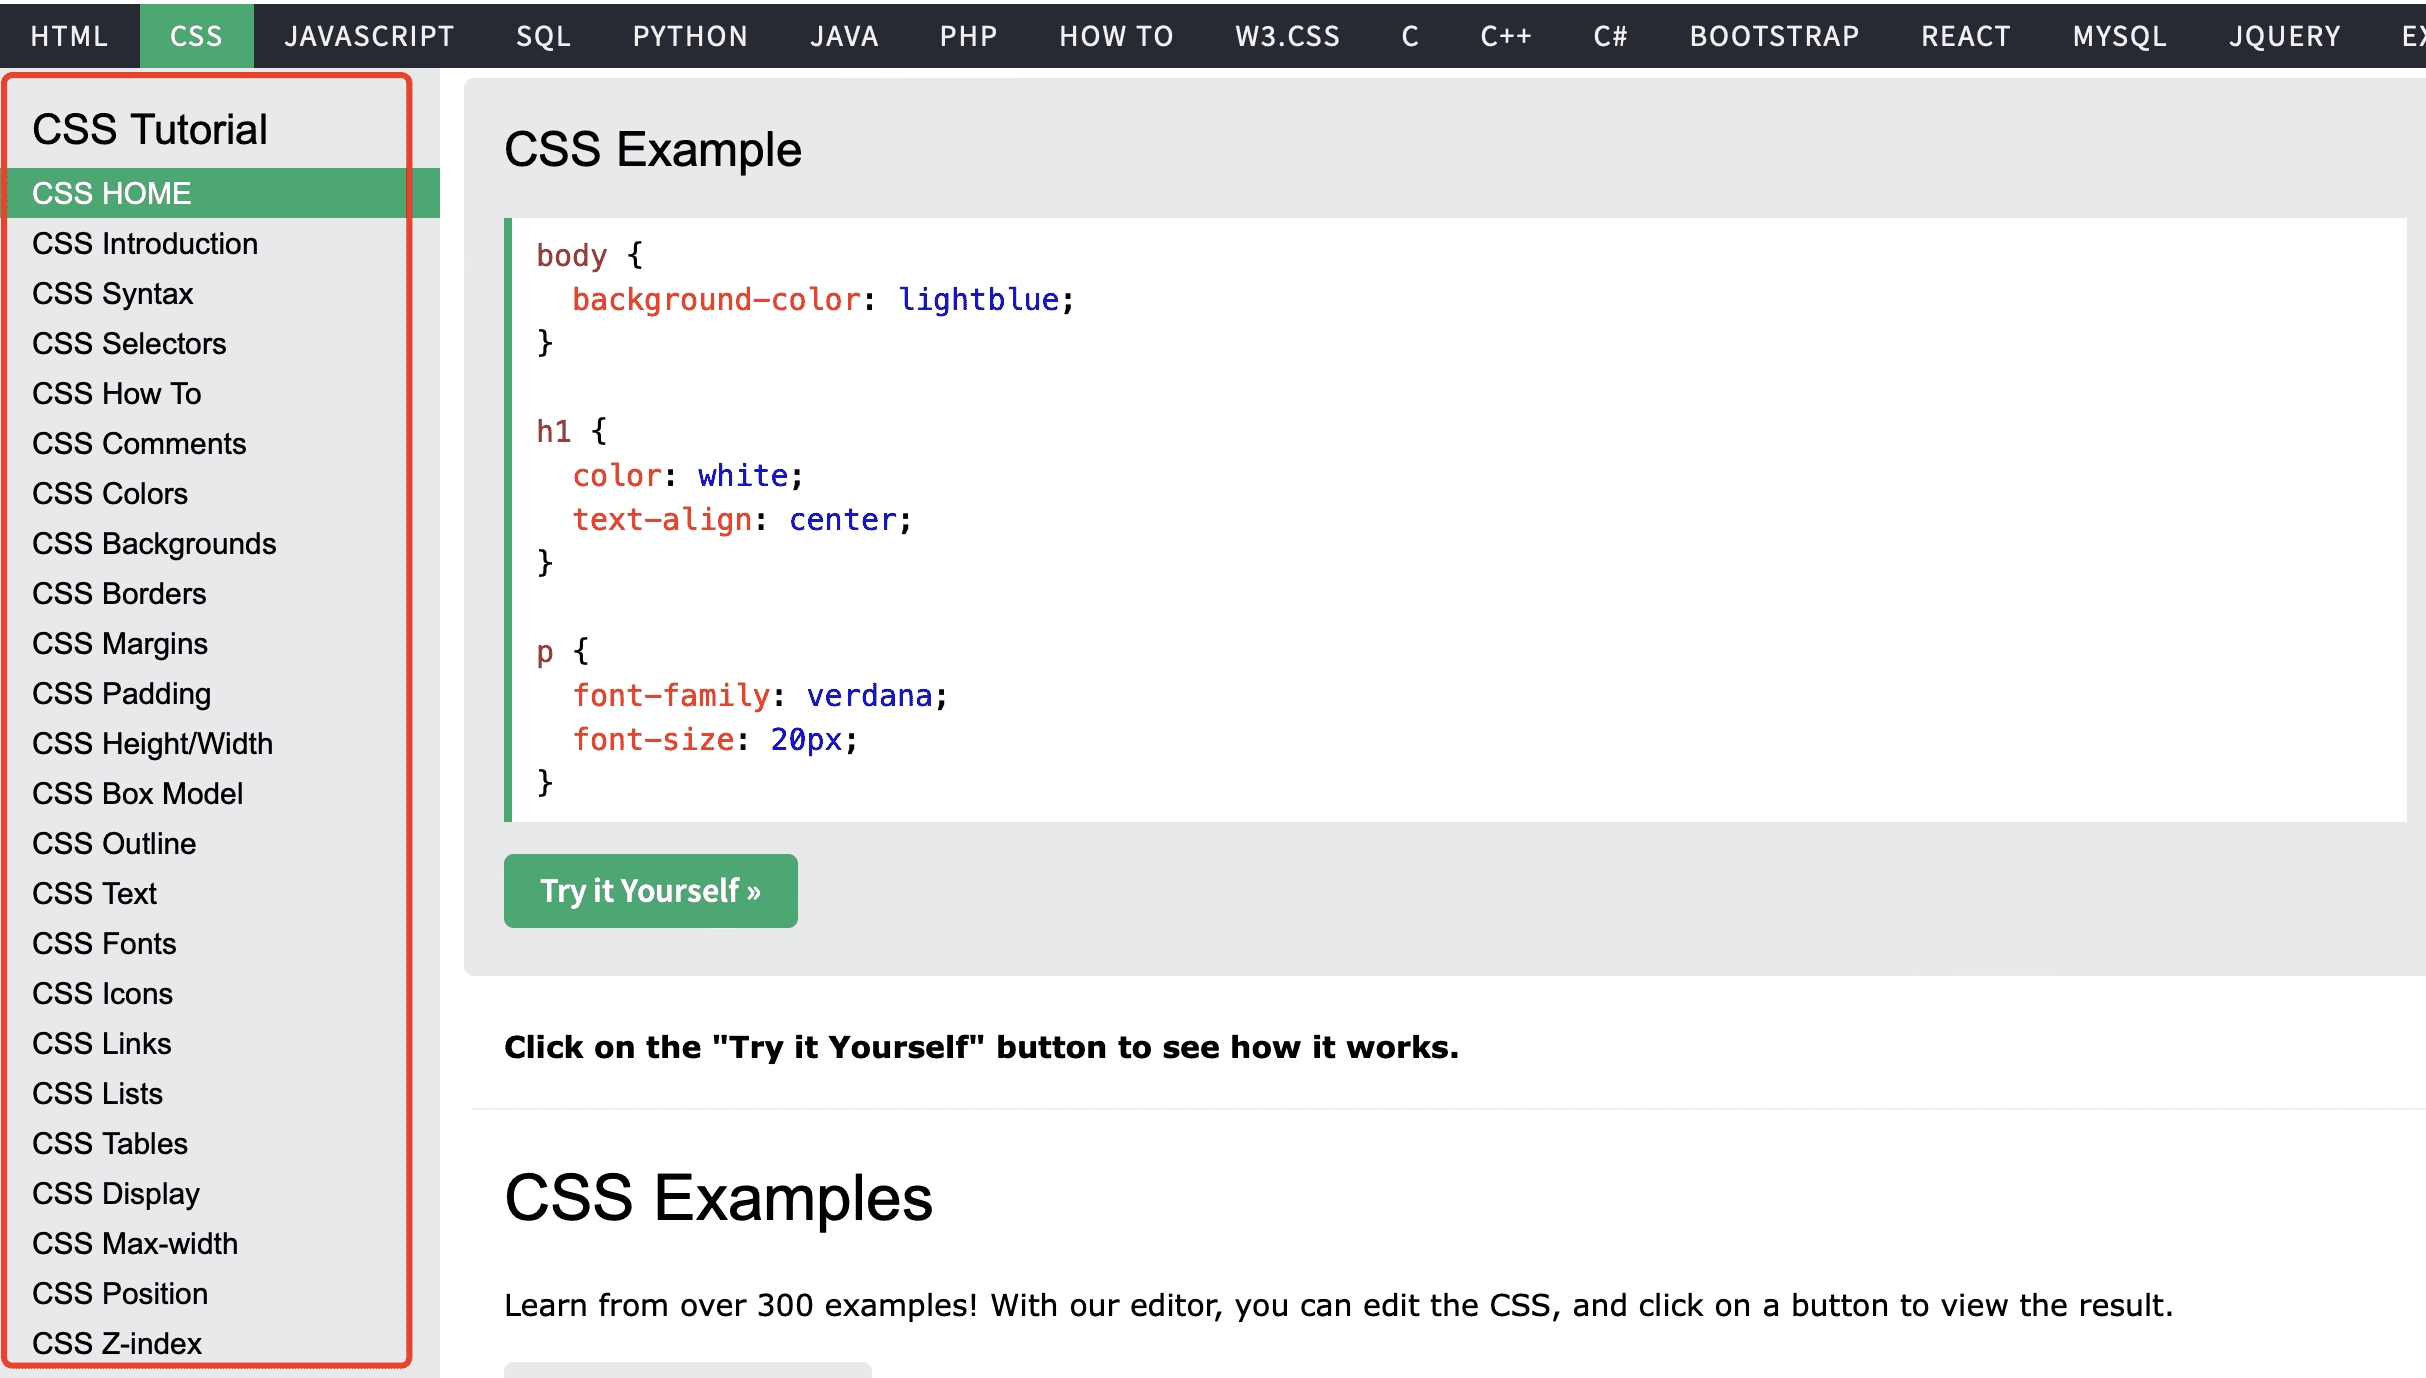
CSS (Cascading Style Sheets) is used to style the appearance of HTML elements on a webpage. It allows you to control the layout, colors, fonts, and other visual aspects of a webpage. CSS works by selecting HTML elements and then applying styles to them, either by directly applying styles to specific elements or by defining styles in a separate CSS file that can be linked to multiple HTML pages.
Together, HTML and CSS are essential tools for web development, allowing you to create visually appealing and well-structured web pages.
HTML
01. Study on w3school

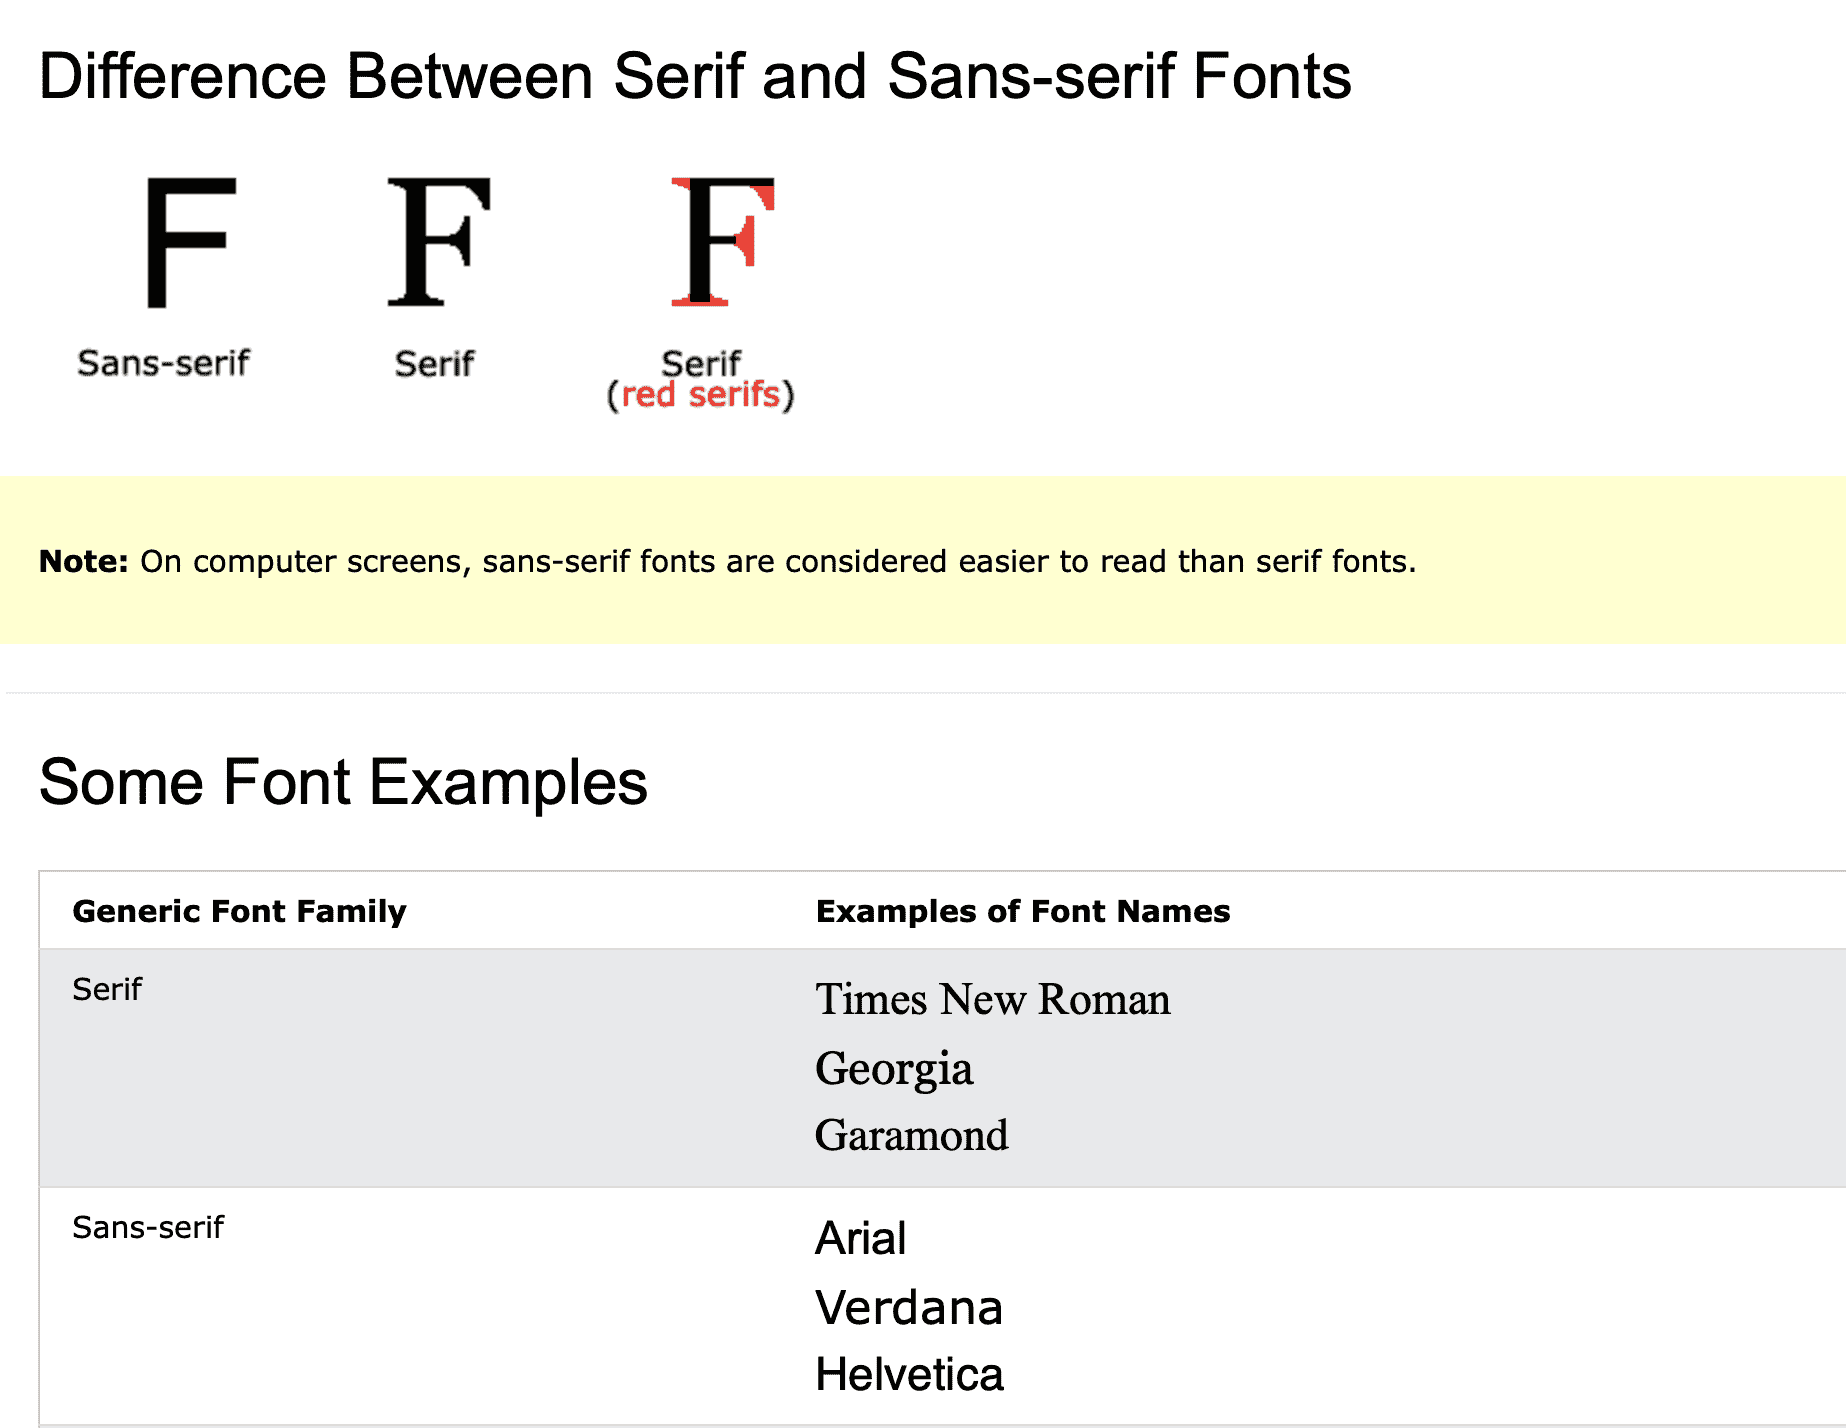
02. Add some new fonts from google fonts

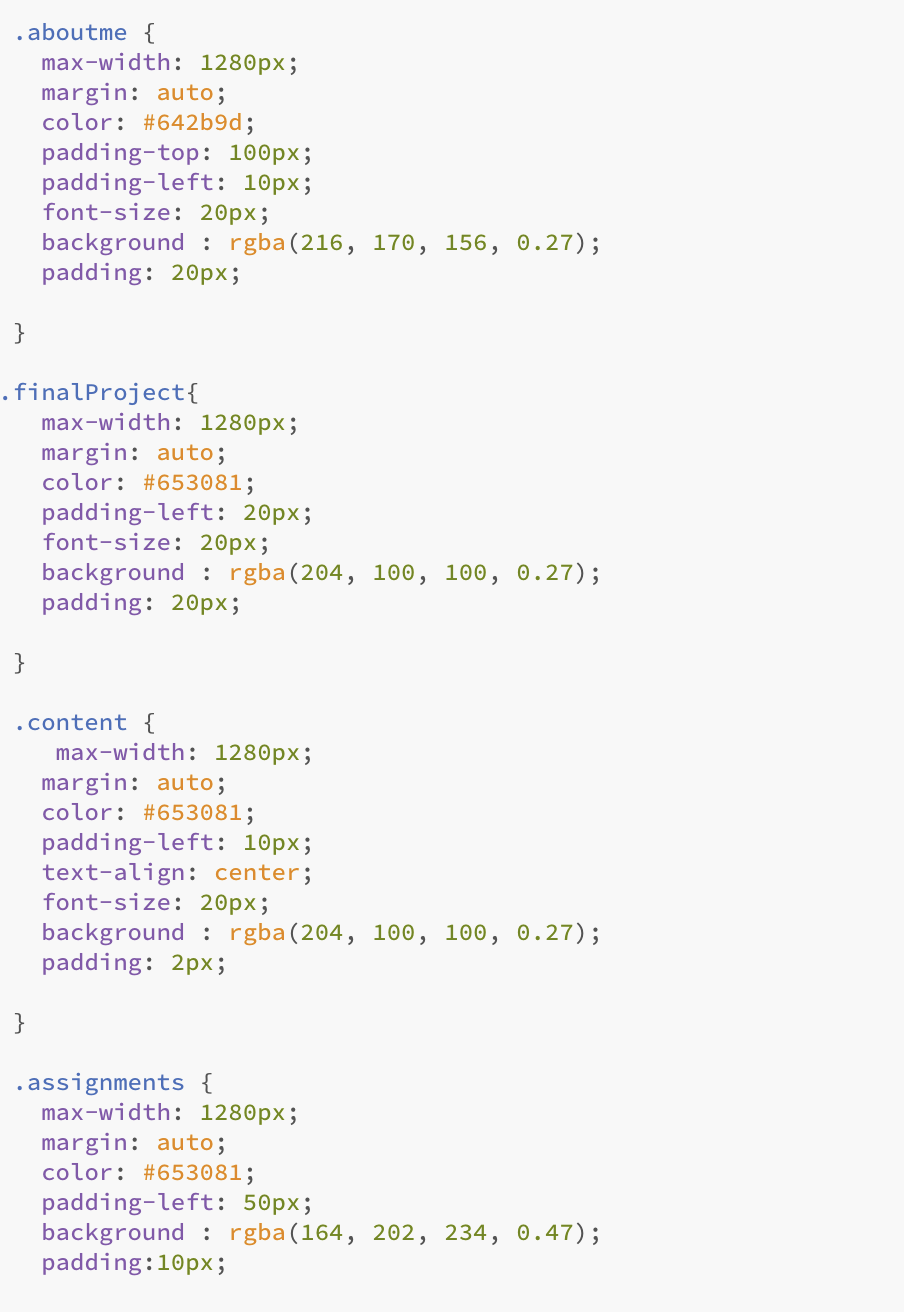
03. Add some new classes to make some new styles in css

CSS
01. Study on w3school
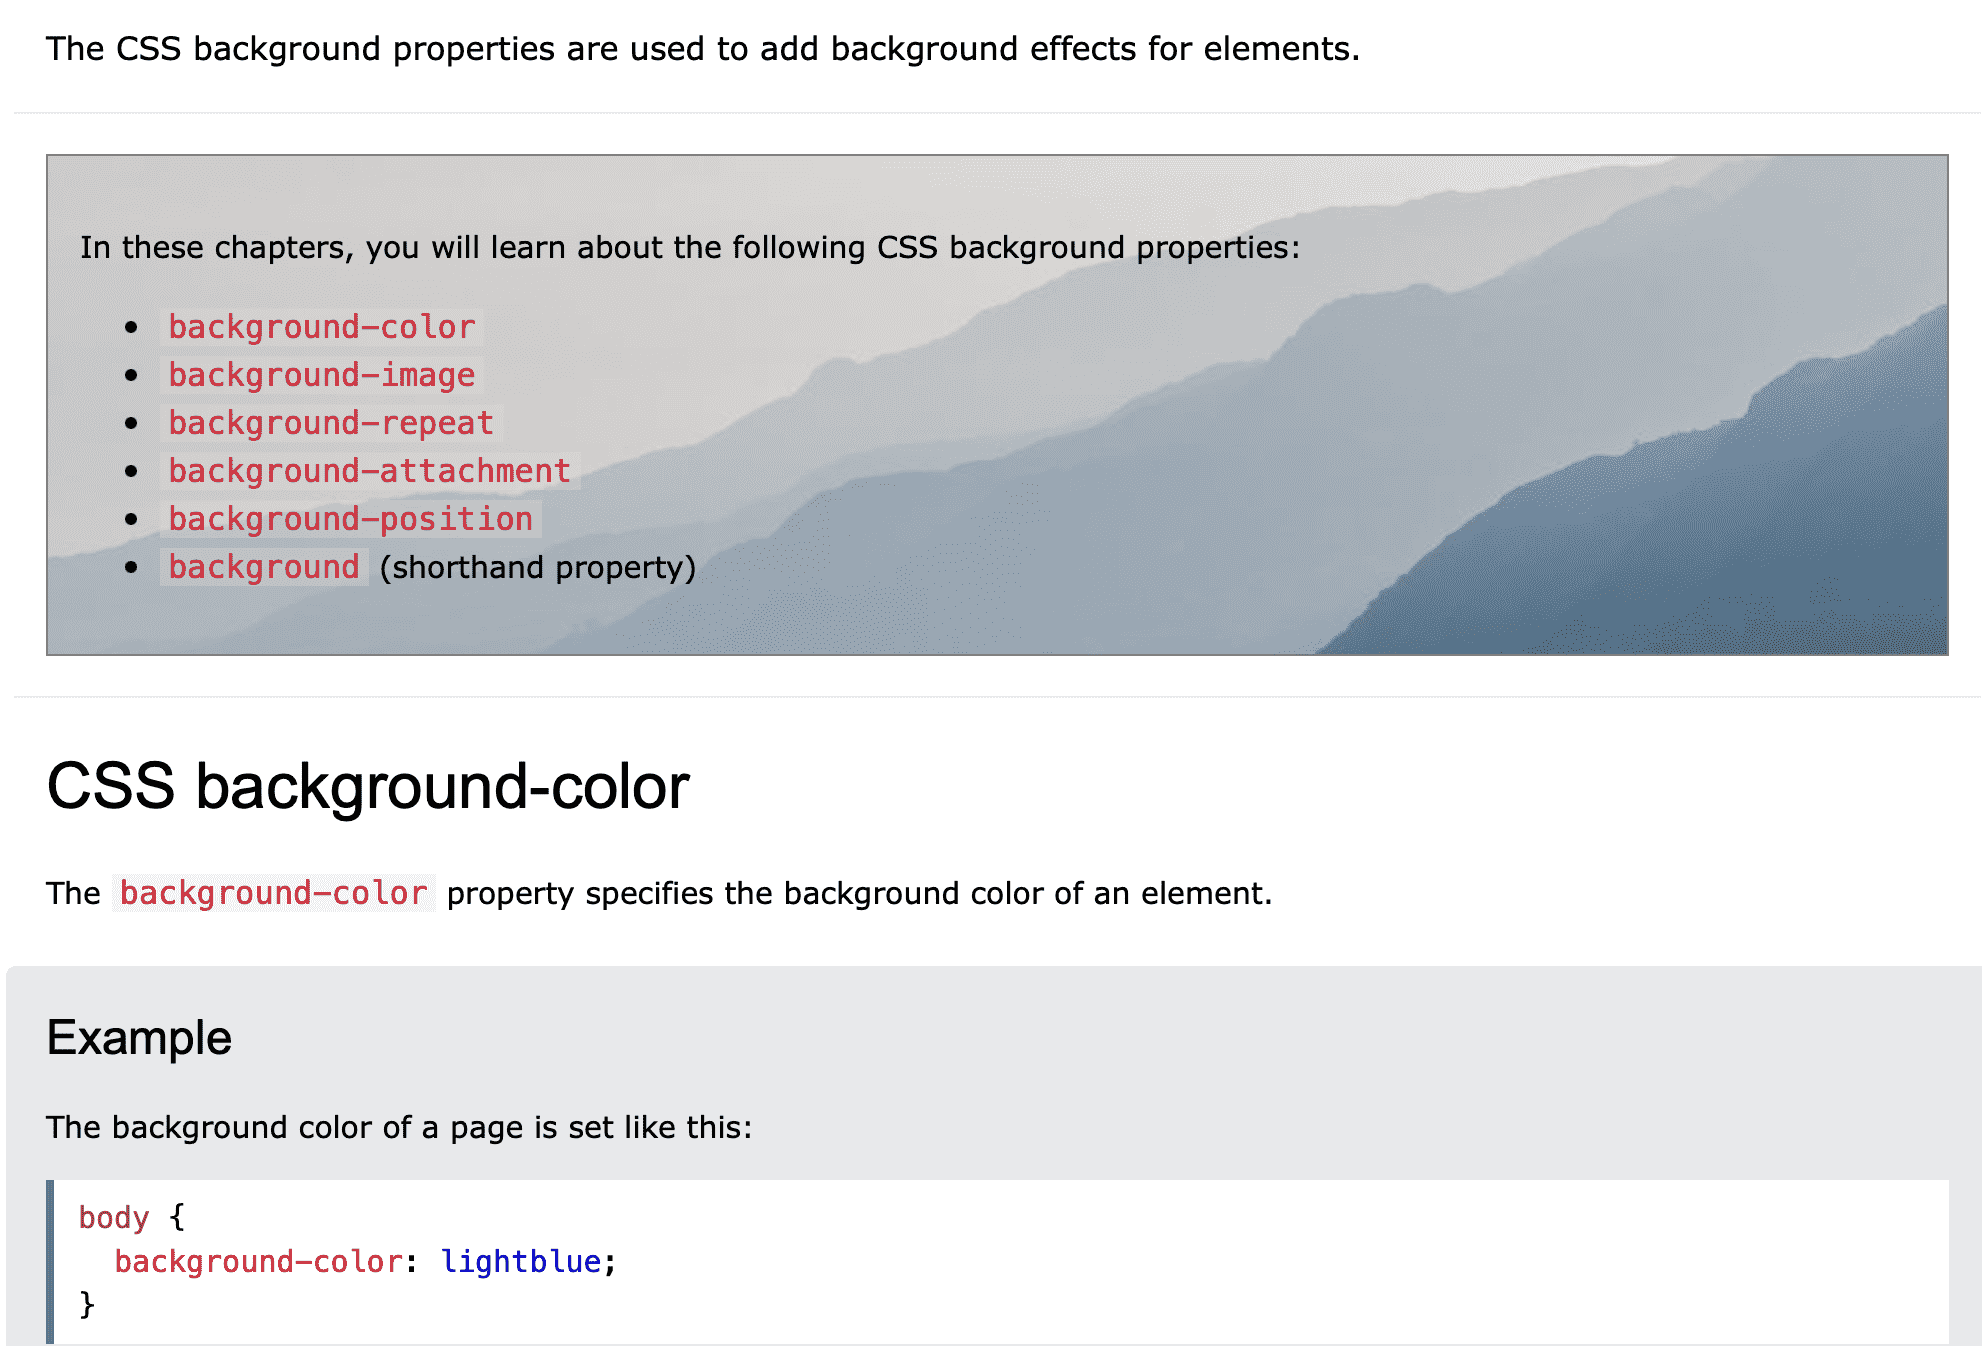
02. Make new designs on css file for my new classes in html