12. Casting and moulding
group assignment:
review the safety data sheets for each of your molding and casting materials,
then make and compare test casts with each of them
extra credit: try other molding and casting processes
individual assignment:
design a mold around the stock and tooling that you’ll be using,
mill it (rough cut + three-axis finish cut),
and use it to cast parts
extra credit: use more then two mold parts
Hero shots
Intro
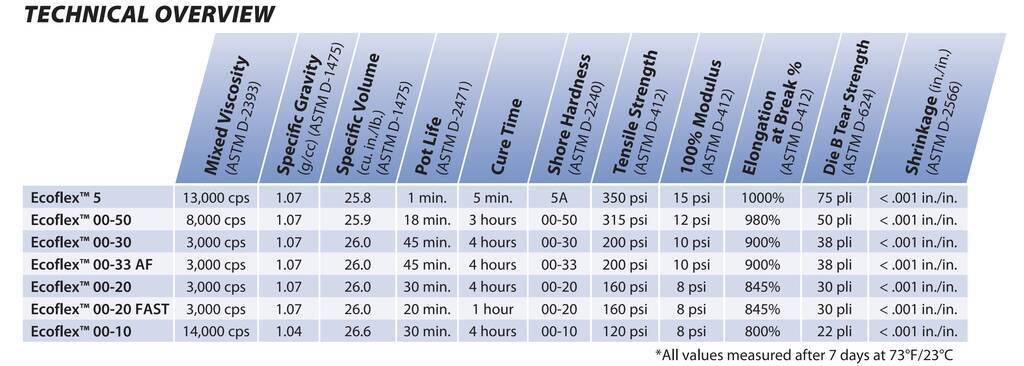
I found this link a while ago. This inflatable is made with ecoflex 00-50 and a pen. We have ecoflex 00-30, would that also work?
Here’s the datasheet for ecoflex. You can see that the 00-30 is more rigid. It break a little bit faster that 00-50 but we can strech it 9 times bigger before it’ll break. That would be enough!
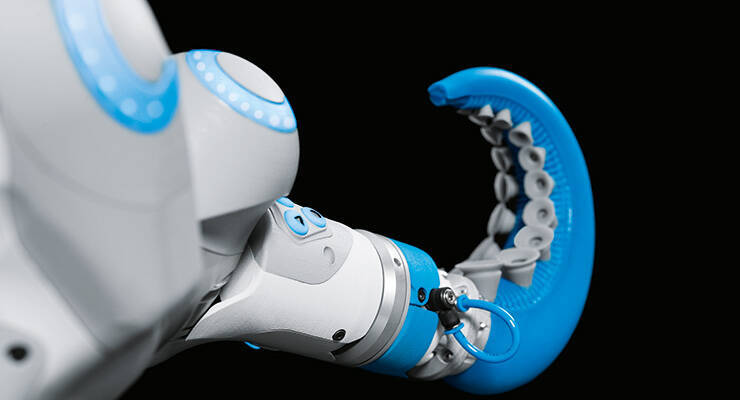
Something like this would be cool. It’s also smart to make a model that I can attach to my octopus arm.
Michelle tipt me for this link and I found this cool tutorial that will help me out.
Modeling the mould
I want to try something cool out. All the grippers I’ve seen are made with one mould and 2 stages. I’ll try to use a 2 sided mould with a TPU core so I can pull it out. Hopefully it will work.
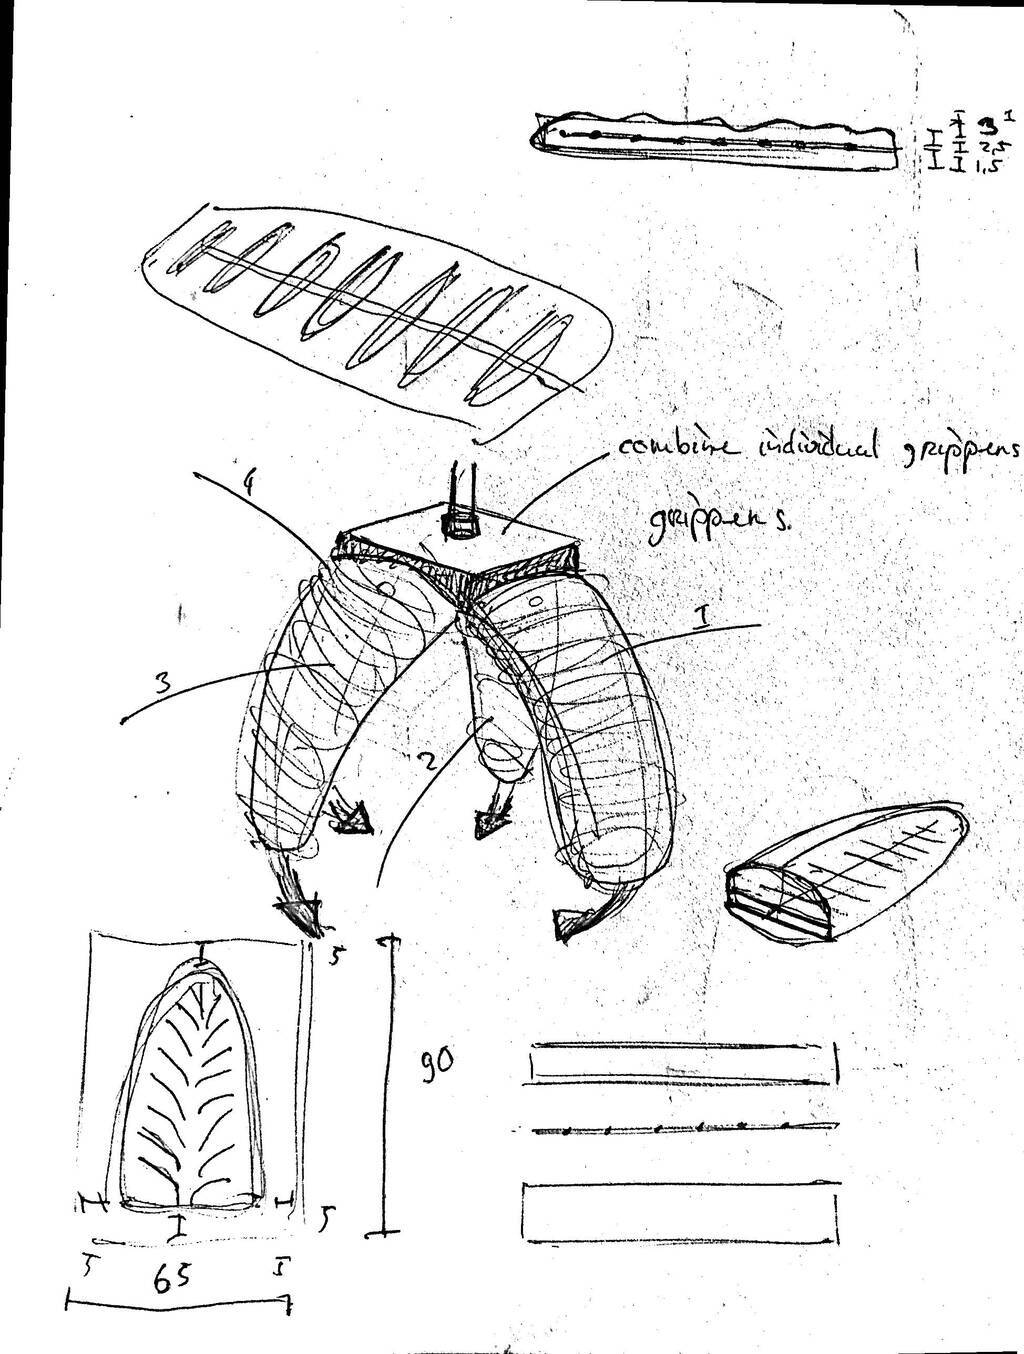
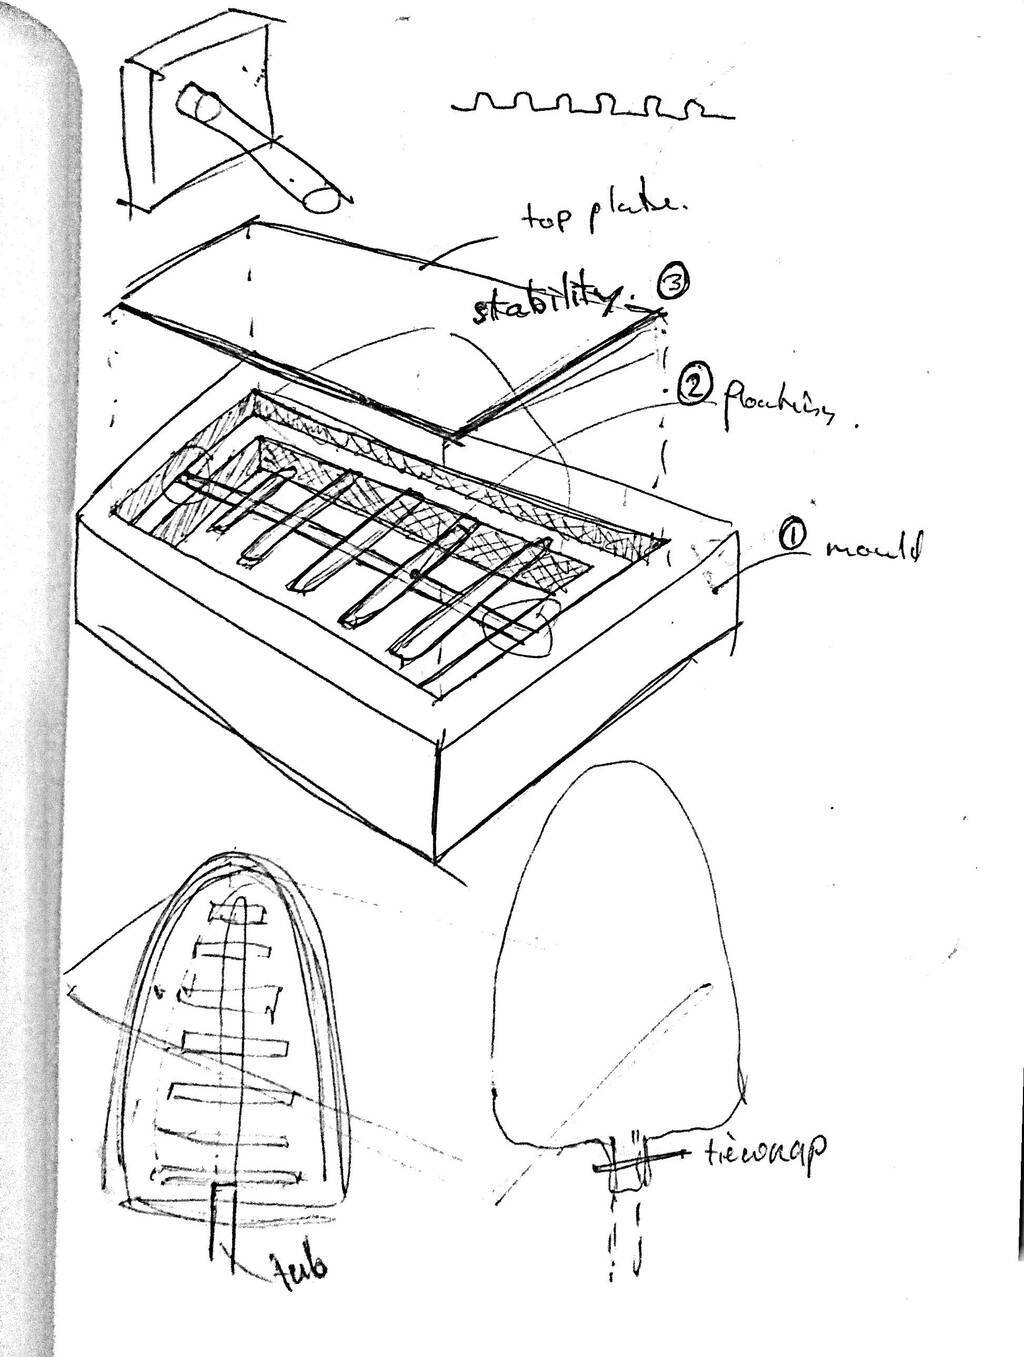
Made a couple of stupid models using the sweep and loft tool. But I don’t want something fancy now. I want something that maximize the the power of the air through the channels. So I need a big surface.
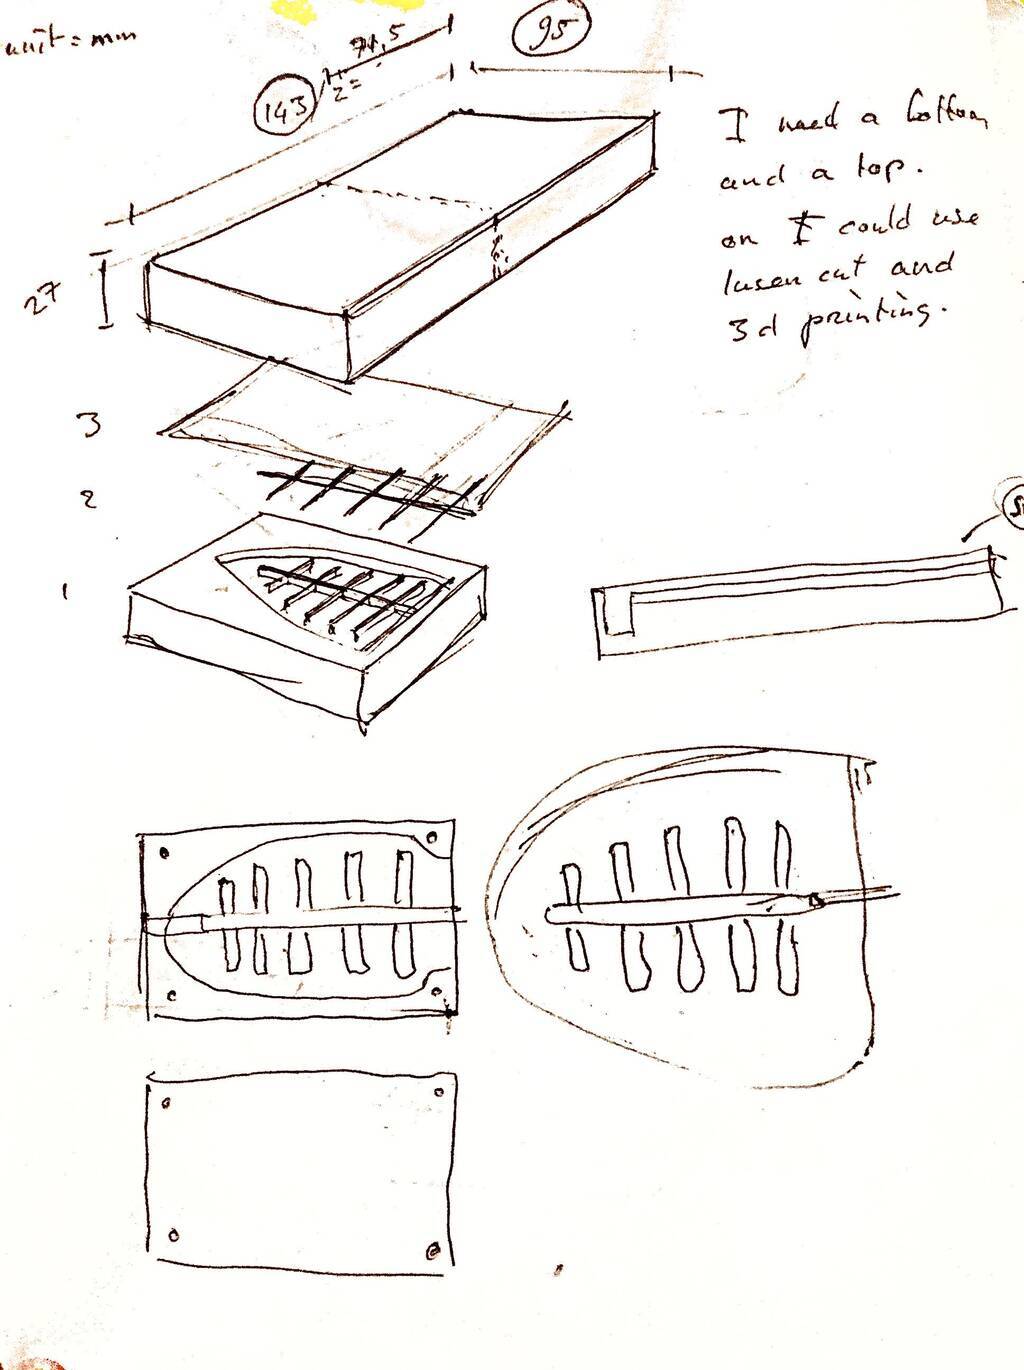
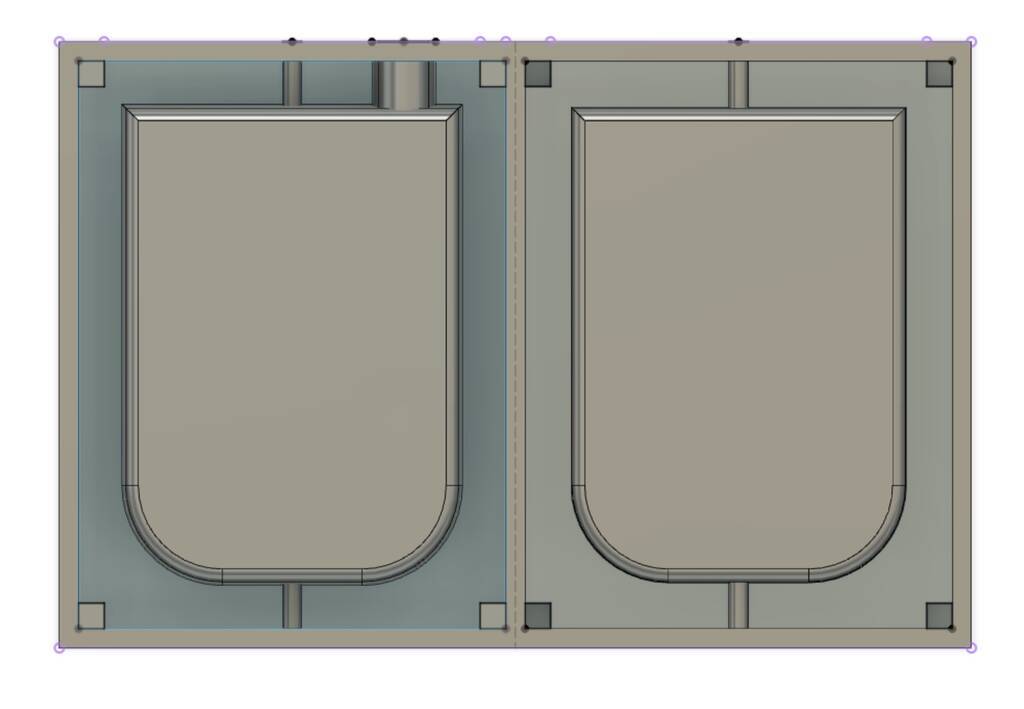
I think the most practical way to design a mould is to start with the dimensions of the material that you have. I measured my wax block and drew a 2 sided mould in. The shape is not that important because I’m super limited. The block of wax is smalll.
My end model will be from Ecoflex 00-30 so I’ll probably need to make my mould from a rigid material. That means I need a release angle. I used a tapered angle of 4 in fusion 360.
I want to create a hole so I can pour my material in. But as you see my thin side is 3 mm and that’s way to small too pour it in. I can do a hole at the other side but I want to prevent my 3d printed inner cast to move. But that probably that won’t happen since the 3d material is stick through and the silicone will build up from above.

I wanted to make these holes so the mould wouldn’t move. Besides it’s not the best way its also not possible becasuse the millingbit is 4mm.
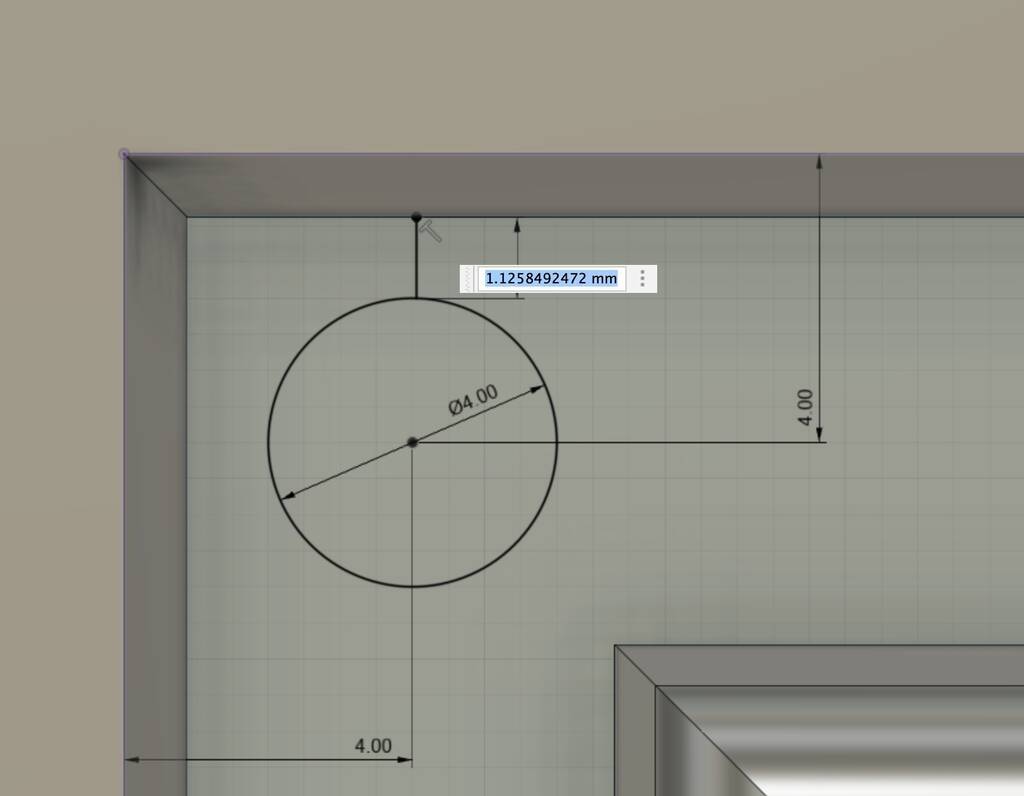
Oops, this will also be a problem.

Hopefully these pins will work.
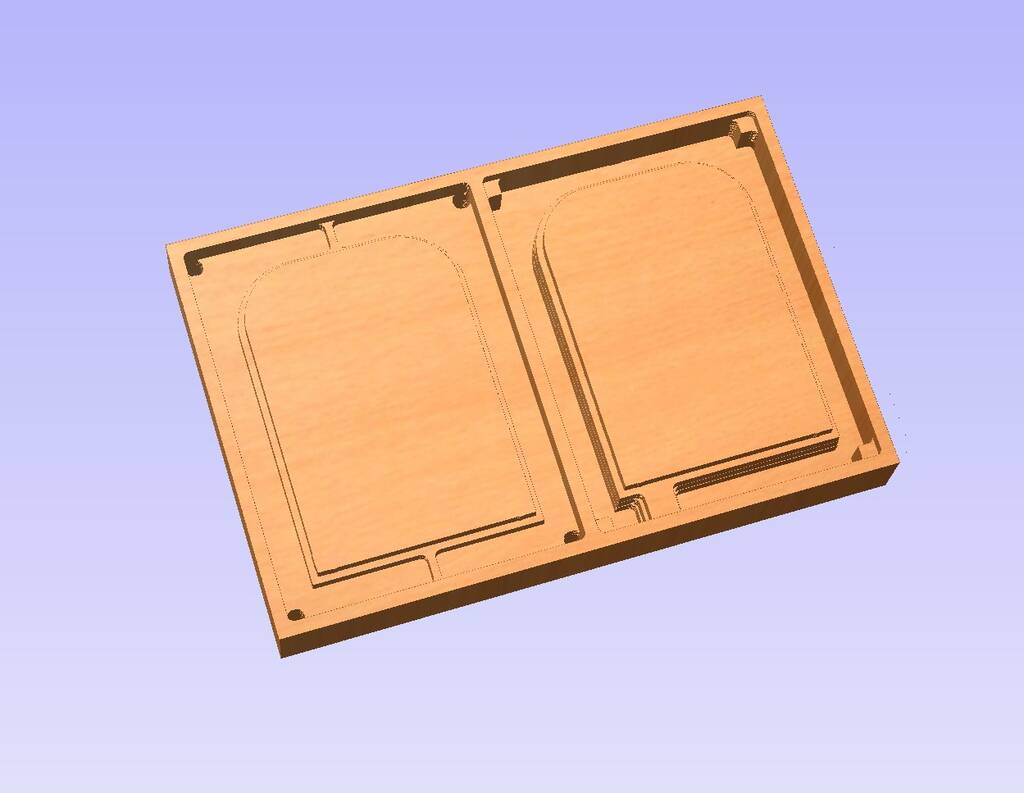
I did some minor changes after importing and edited the toolpaths in Vcarve. I reduced the thickness of the material from 27 to 26 to be sure it has a smooth finish. Because the top of my wax model is really uneven. I changed the holes so it will work. I forgot that I’m working with a round milling bit of 3 mm.
After adding a finishing toolpath I was ready to mill.
CNC milling
Checklist Vcarve and Shopbot
- Measure the block wax. Measure every corner because not everything is flat.
- Model your model
- Export as STL
- Open Vcarve
- Set Job size. Make the job size a bit smaller then the true dimensions.
- Set minimum material thickness, I did 1 mm smaller to be sure
- You shouldn’t do something with the offset if your model is slightly bigger then the block of wax.
- Uncheck ‘’data below zero’‘
- Next, go to File -> Import -> Import Component / 3D Model … and select the .stl file.
- Orientate the model within the red lines. You have an option center model. That worked for me.
- Material setup - you can leave these settings as is.
- Choose rough machine toolpath
- I’ll go for a ‘’End Mill (3mm) tough wax’‘
- Edit.
- The Stepover 20% because it’s a rough cut (For finishing we’ll go for 80%)
- The Spindle Speed is 9000 r.p.m
- The Feed Rate is 50 mm/sec
- The Plunge Rate is 15 mm/sec
- I’ll go for model boundary to ensure that my model is
- calculate and watch preview.
- Choose fnish toolpath
- Set stepover to 10%. Leave the rest. Make sure you have selected the same milling bit.
- I’ll go for offset and climb. This option makes more sense due to my model.
- Check preview
- Edit
- Calculate Finish machining toolpath
- edit - feed rate 60%
- Raster angle ??
- Create 2 different toolpaths. 1 with 45 % the other on with 35 %.
- Save toolpaths as .sbp file (There’s an icon for this in the toolpath menu)
Shopbot
- Sand bed
- Clean de bed so you can collect only the wax after milling.
- Tape model to bed
- Clamp the block wax with helping blocks and screw them to the bed.
- Insert spindle. Measure spindle. It should be long enough to cut in the model
- Use
Kon the keyboard to move the spindle. - Check for contact by holding the metal key against the milling head.
- Zero the Z Axes. Press zero axes with the metal underneath the spindle head.
- Zero X and y angle. (first bring up Z axes)
- Check of machine can move freely
- Turn on machine
- Set spindle speed 9000 rpm
Pieter made this checklist that you can find on his page. It’s nice to check a checklist from someone else to be sure that you don’t forget anything important.
Milling
Oops, that’s a good start! The X and Y axes were not in place.
I sanded the top side and turned flipt the model and started over.
 x
x
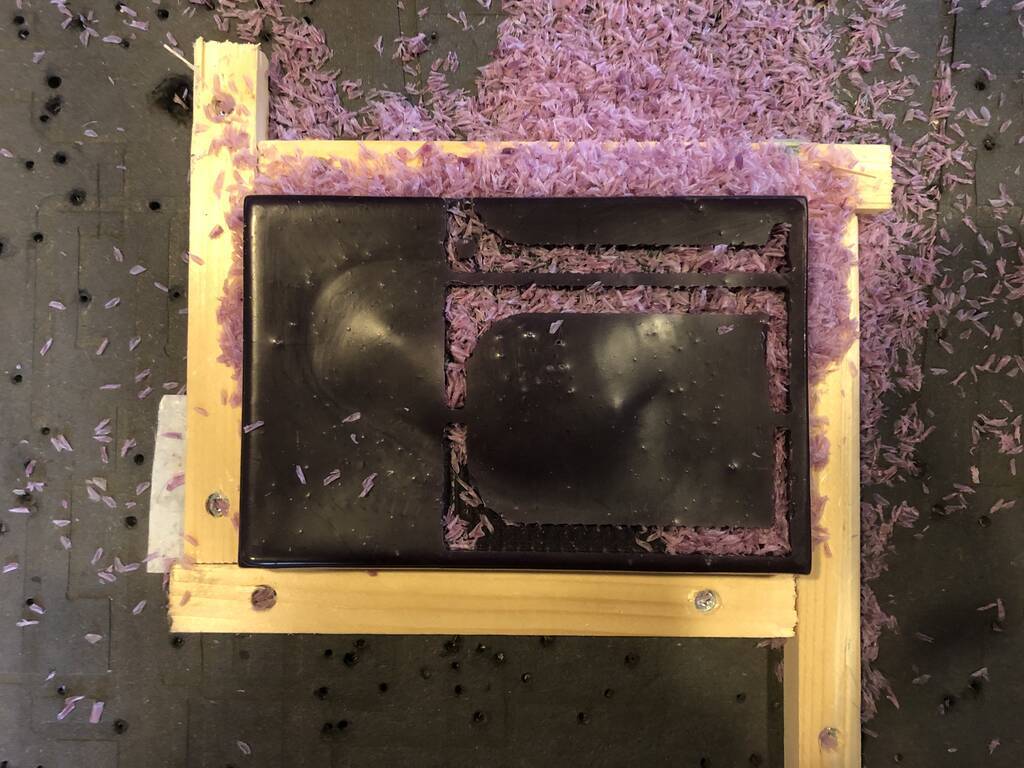
Oh shit. I made another icredibly stupid mistake. I made a box with sides of the same height. Now I can’t pour my material in.. I’m not going to wait for another mill session.

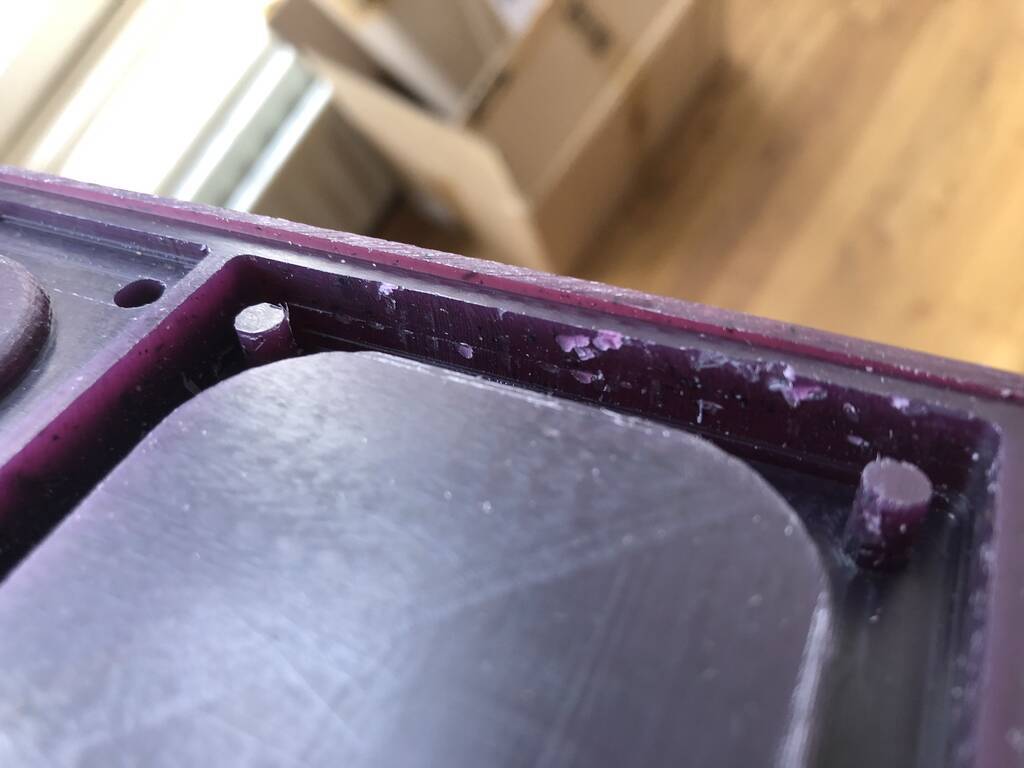
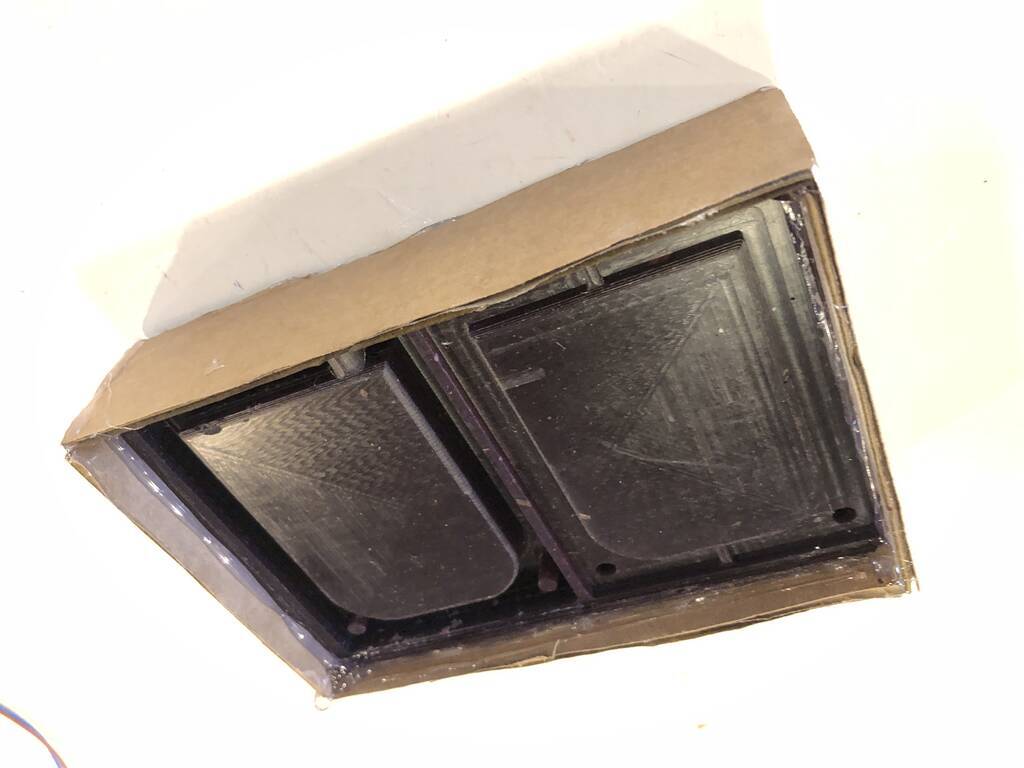
Like a true proffessional I solved it with some hot glue and carton! Tadaaaaaaaa!
CNC mould
These are the types of materials that we have. A few of them were too old to use. So Henk went up to FormX a couple of times to buy the correct material.

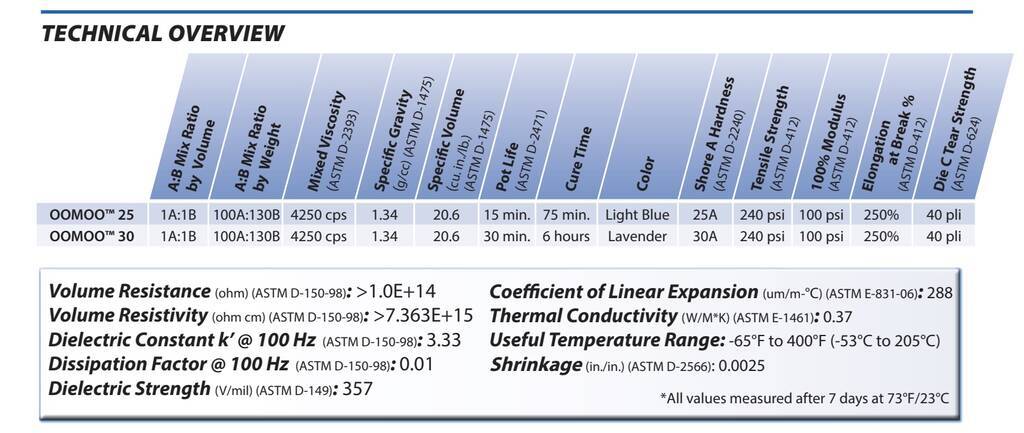
I’ll go for Oomoo 30. This is the datasheet.
Important
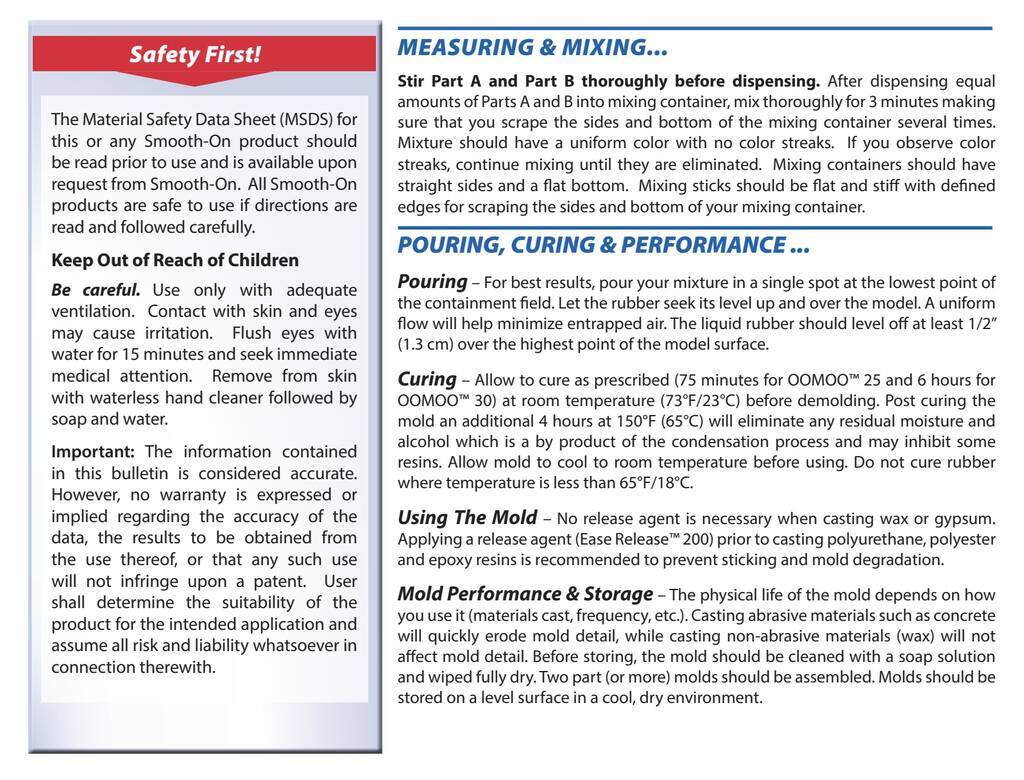
- Where gloves and glasses. Ventilated room.
- Low viscosity for easy mixing and pouring.
- 30 minute pot life with a six hour cure time.
- 1a : 1b . Even mix ratio in volume. NOT BY WEIGHT!! Weight is A: 100 B: 130
- Wear vinyl gloves. Latex gloves will inhibit the cure of the rubber.
- mix thourougly for 3 minutes.
- No release agent is neccesary when using wax. But is also heb glue and carton… Let’s test it out.
I just a wooden icecube stick and a plastic spoon. Both of them didn’t worked well. Part A is super gooey and you need to stirr it with something thats pretty strong.

Let’s wait for six hours now. 11:00 am - 5 pm it will be finished.
All looks good. But using a flexible mould material was not super smart..
3d print for mould insert
I’ll try this model out with Flexfill 98A. I couldn’t find if this material is compatible with Ecoflex 00-30.
Flexfill is Thermoplastic Polyurethane.

End result
I heard everyone talking about using Oomoo with Ecoflex. So I asumed this would work. As you see it didn’t work. You need a mould release or seal agent. Arcrylic lacquer should work.
3d printed mould
I don’t have a lot of faith that my previous model will succeed. I also think it’s way easier to make a 3d printed mould. I don’t have to much limitations with my dimensions and it’s way easier.
I wanted to model something by myself. But I don’t have a lot of time so I’ll use this link for the model an instructions how make the gripper. It’s exactly what I want.
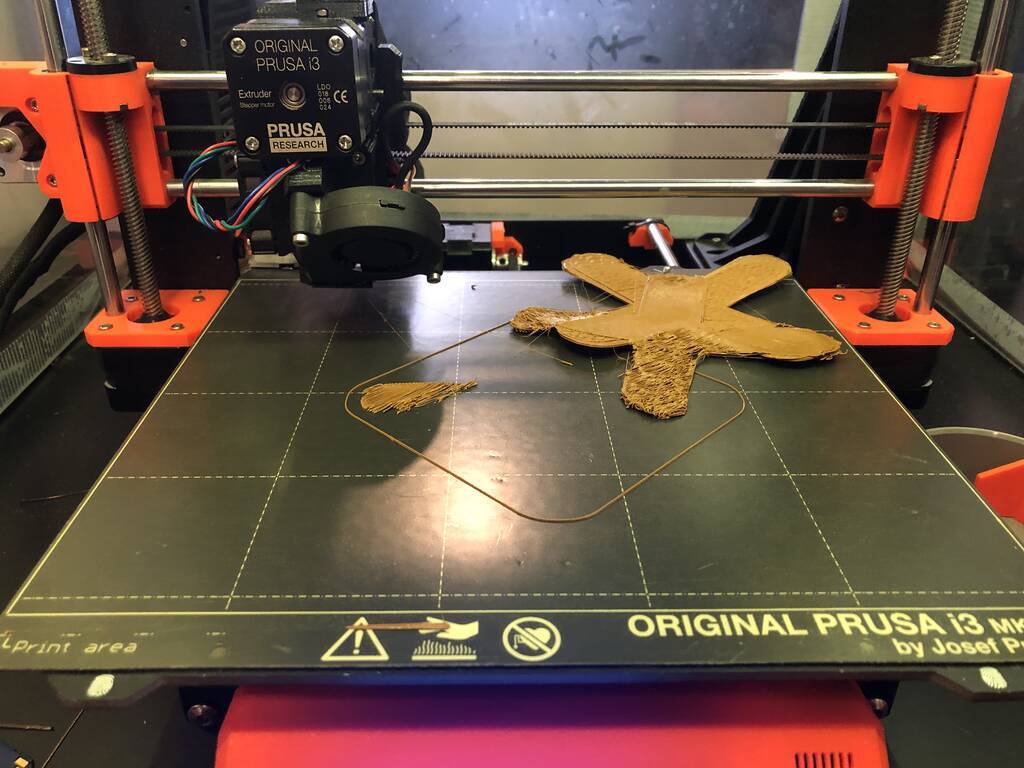
My first model was too small and had stringing. I slightly scaled it and slowed down the spped of my material.
Oops, for the second model I used weird settings. Dit not work as you see.
Required materials
- 3d printer & PLA/ABS
- Ecoflex 00-30
- 1.5 - 3 mm tubing. But you can also print a to fit the tubing
- something that can blow. A bottle. A pair of lungs a bikepump, Syringe
- Plastic cafeteria tray or metal baking tray (metal tray only required if you plan to use an oven, see below)
- Disposable rubber gloves
- Scissors
- Plastic cups
- Coffee stirrers or popsicle sticks
- Paper towels for clean-up
- (Optional) toaster oven. Do not use an oven that you also use for food.
I need a smooth surface for my 3d print. So I cleaned a bit of stringing out of the models.
’‘ Ecoflex is a brand of silicone rubber used for molding made by Smooth-On Inc. Ecoflex comes in two bottles, containing Part A and Part B. Parts A and B are liquids - when mixed together, they will solidify and form silicone rubber (in 4 hours at room temperature, or 10 minutes at 150º F). The materials are non-toxic, and harmless once cured. However, according to the Material Safety Data Sheet (MSDS), “repeated or prolonged” exposure to the unmixed materials (Part A and Part B) can cause mild skin irritation. We recommend wearing disposable gloves when handling unmixed material. If you do get Part A or B on your skin, just wash it off with soap and water.
Mix parts A and B of the Ecoflex in a 50/50 ratio by volume, using a paper or plastic cup. You do not need to use all of your Ecoflex - fill one cup (the one pictured here is a 9oz cup), put the lids back on your Ecoflex jars, and save the rest of the material to make more robots later. Stir the mixture for about two minutes. ‘’
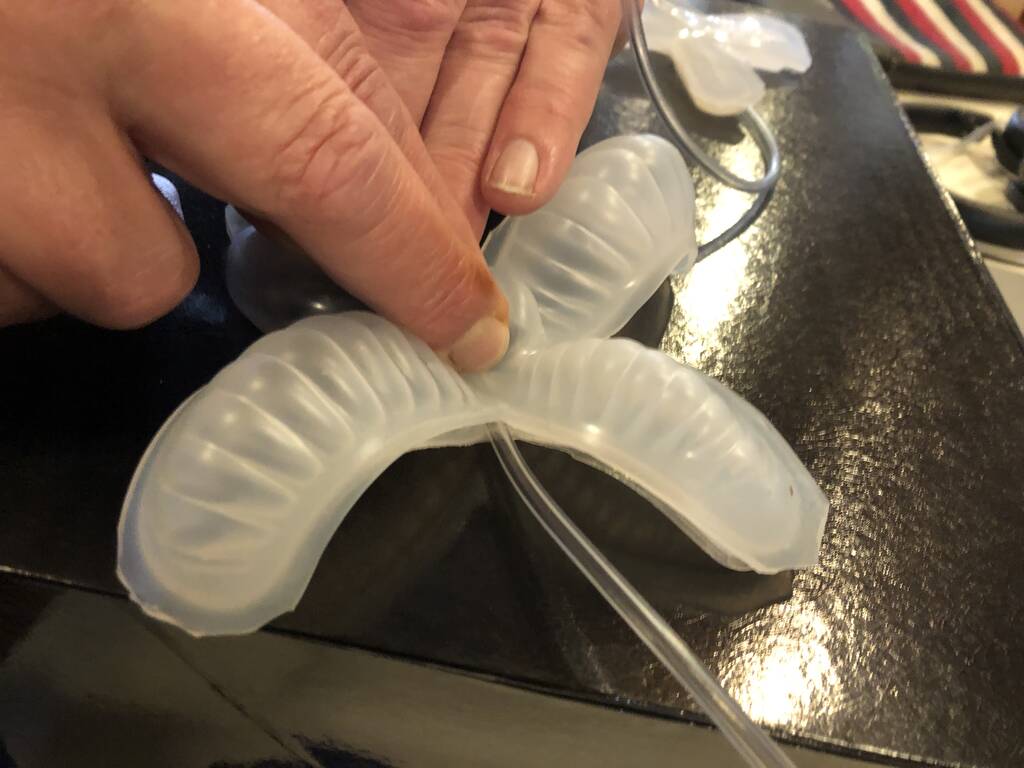
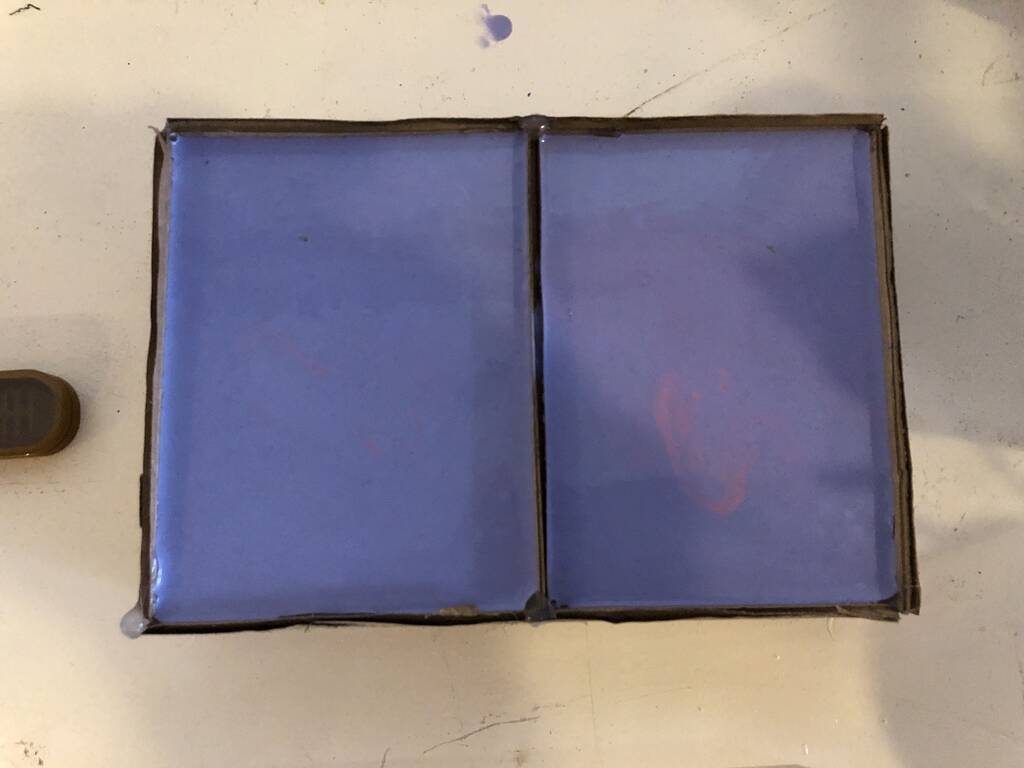
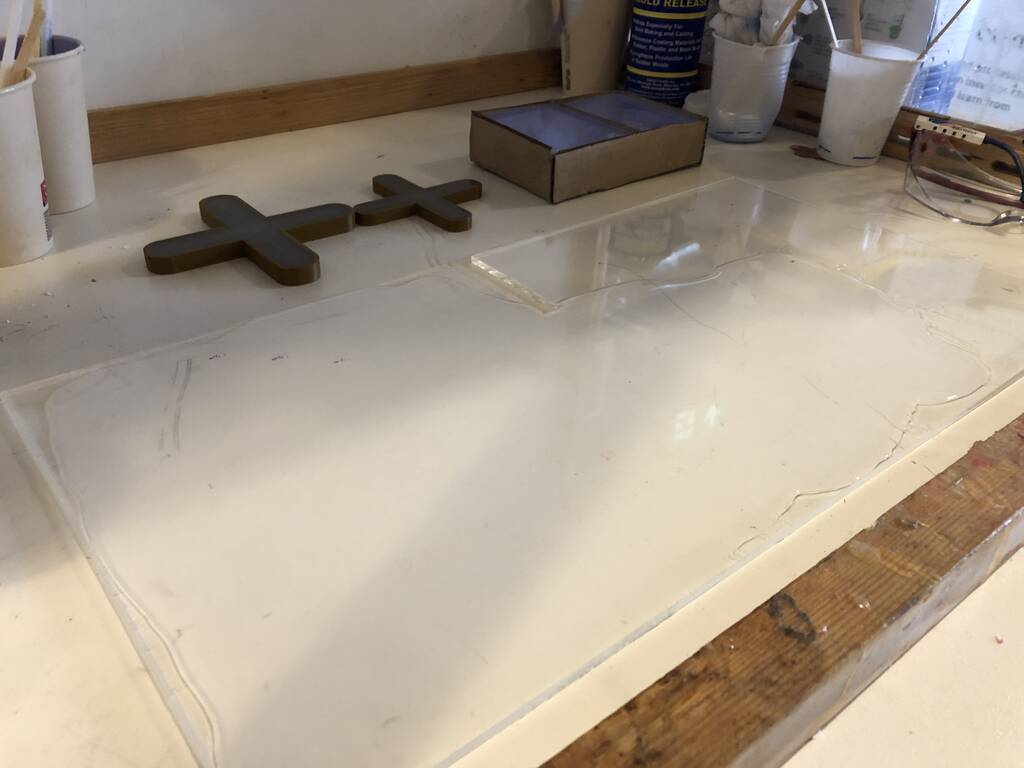
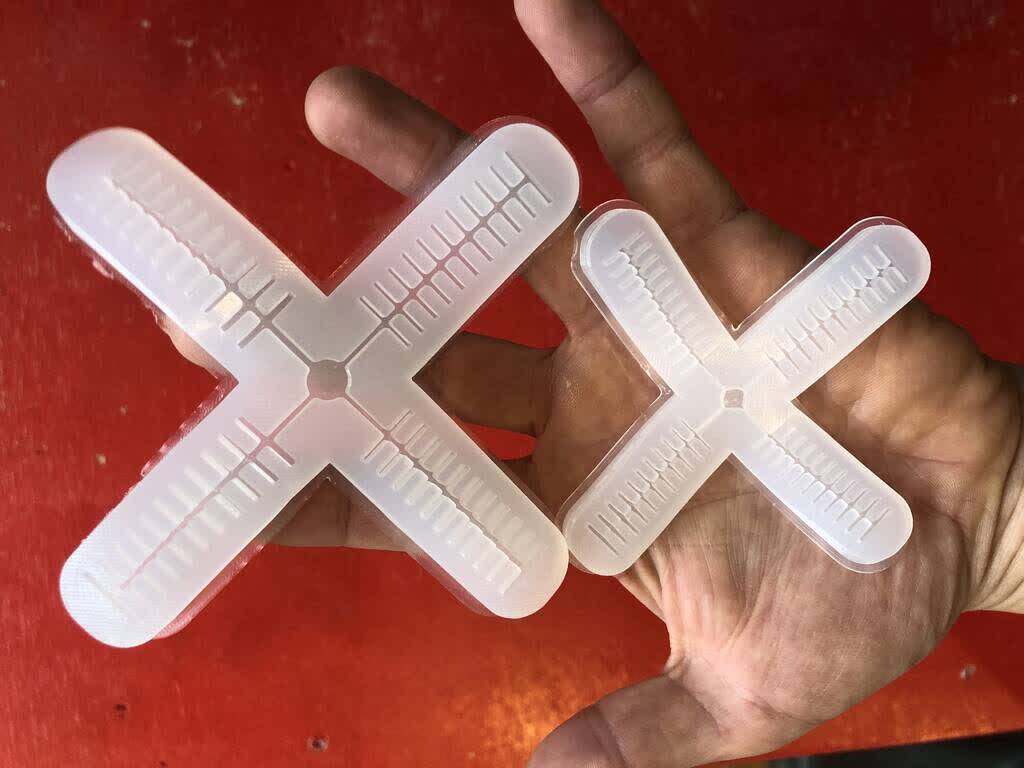
Filled these two badboys and a sheet of ecoflex that I’ll later on glue to each other.
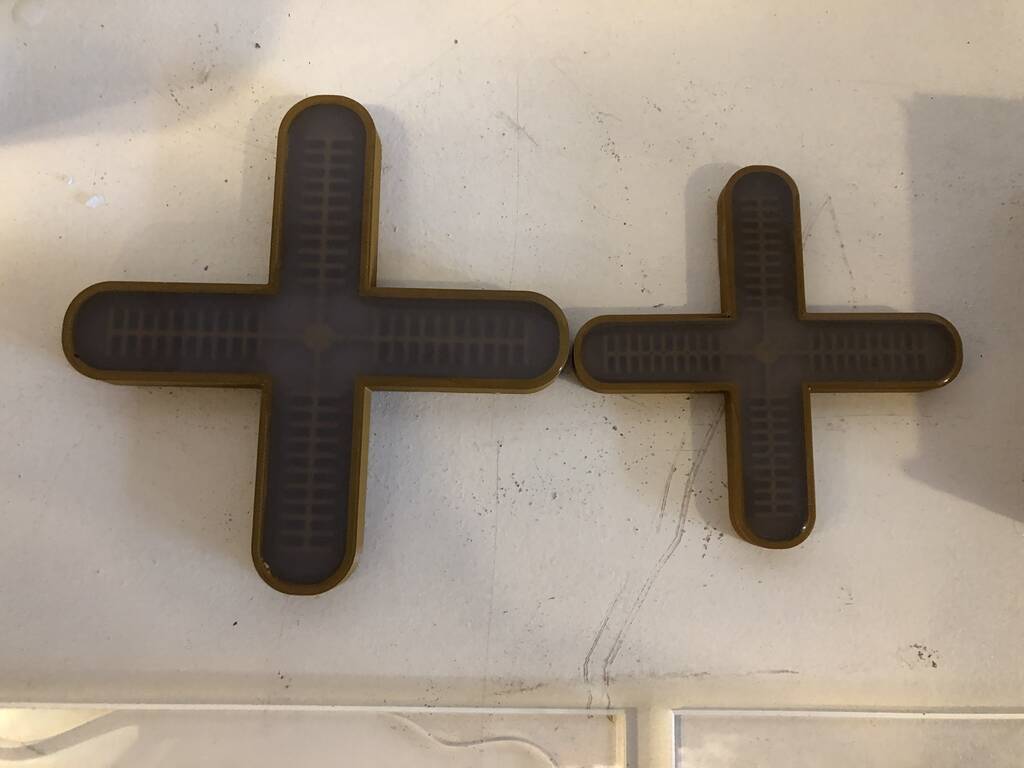
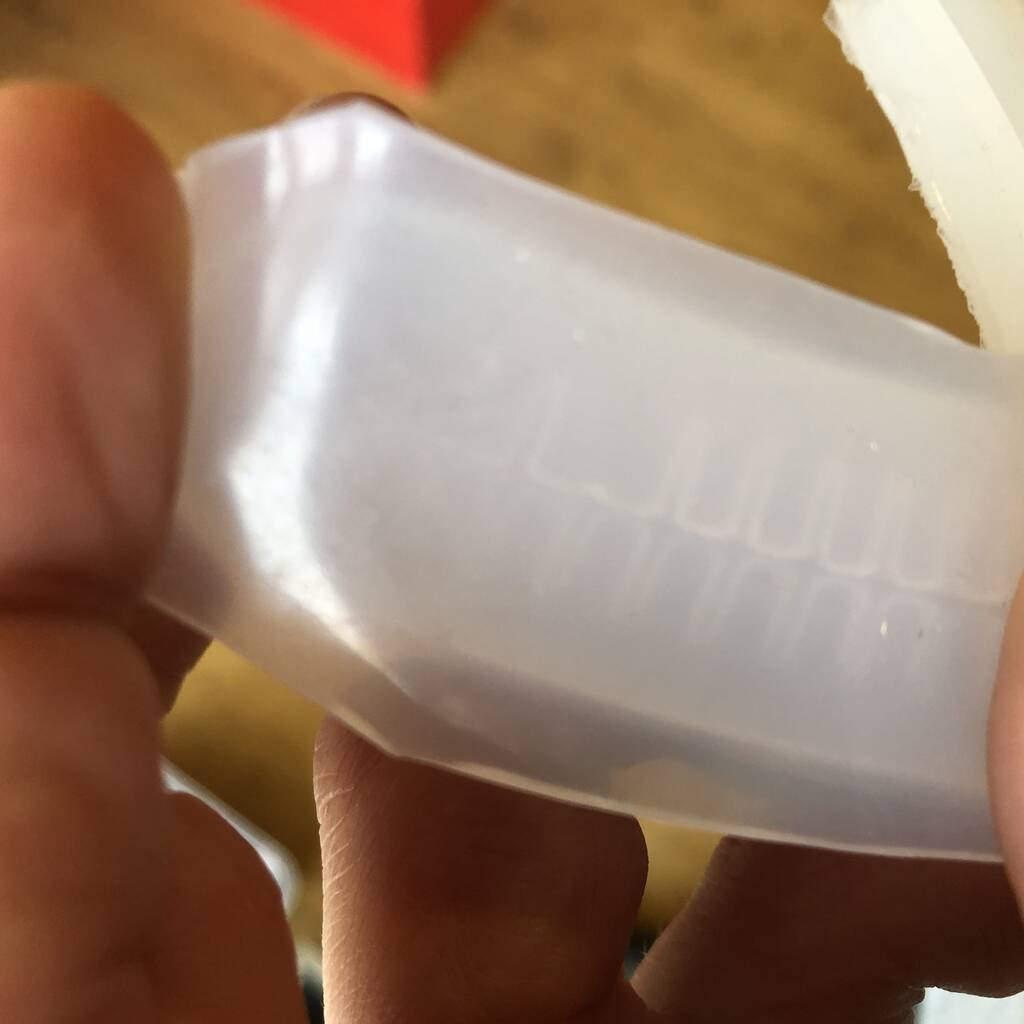
You can’t see it really clearly. But one of the airchannels is clocked some of the material didn’t reached all through the end. Pouring really slowly in a nice thin line is really important for small moulds.
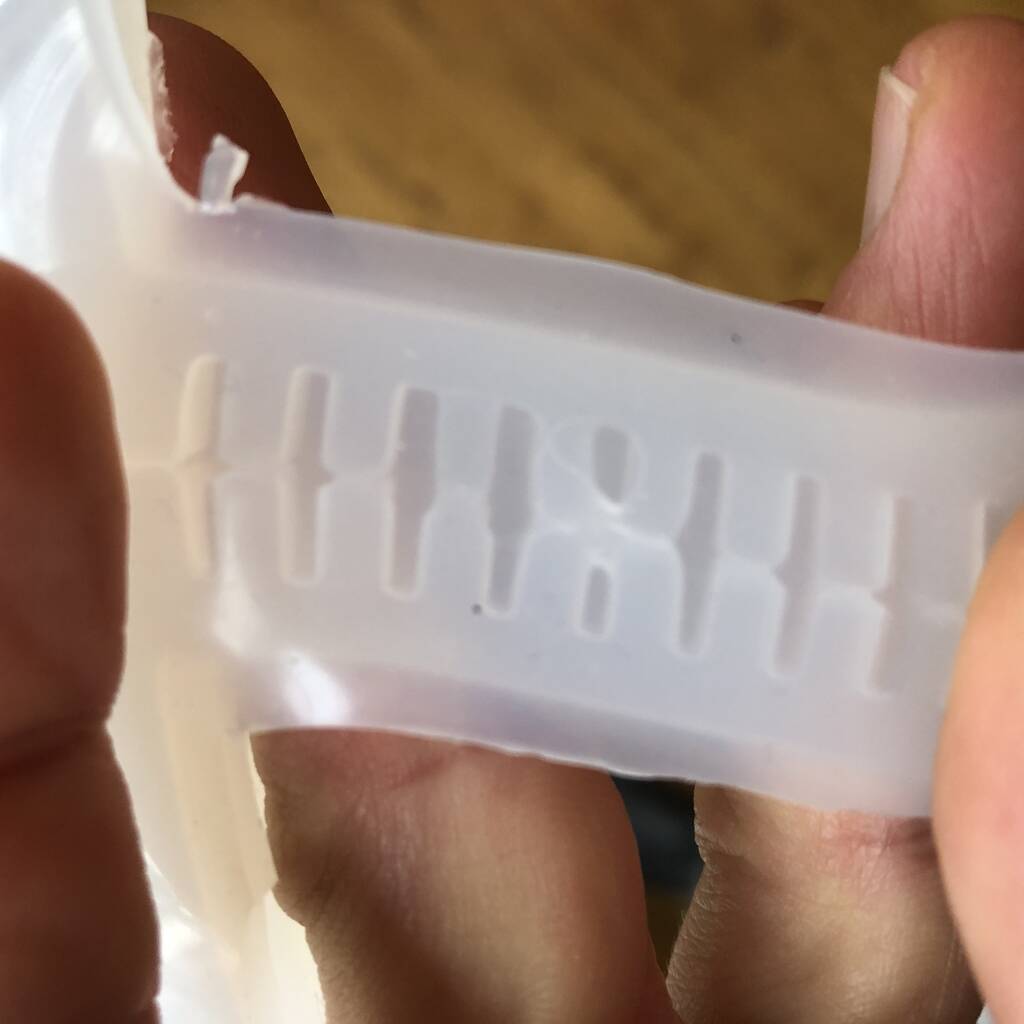
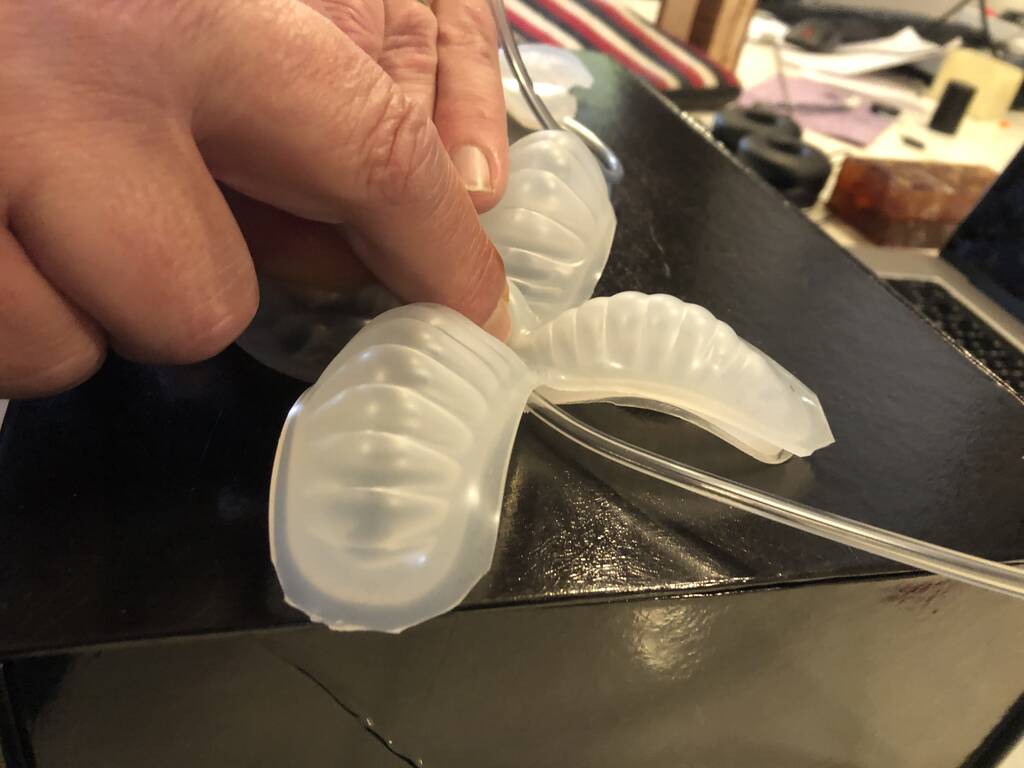
Second batch turned out real nice!
After sealing glueing the top and bottom plate together with some ecoflex. I enserted a little screwdriver in inserting the tube would be easier.
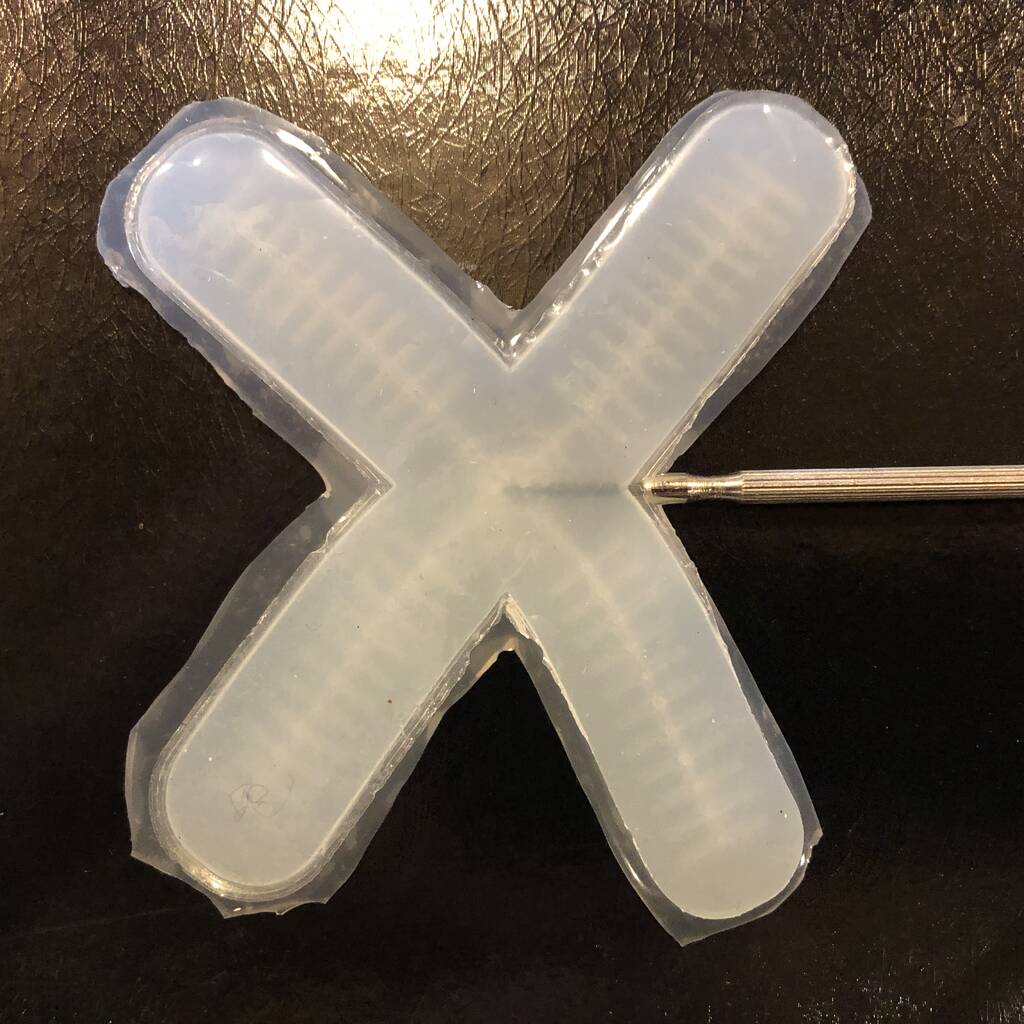
Blowing didn’t work as you see.
But using a bike pump worked out pretty nice.

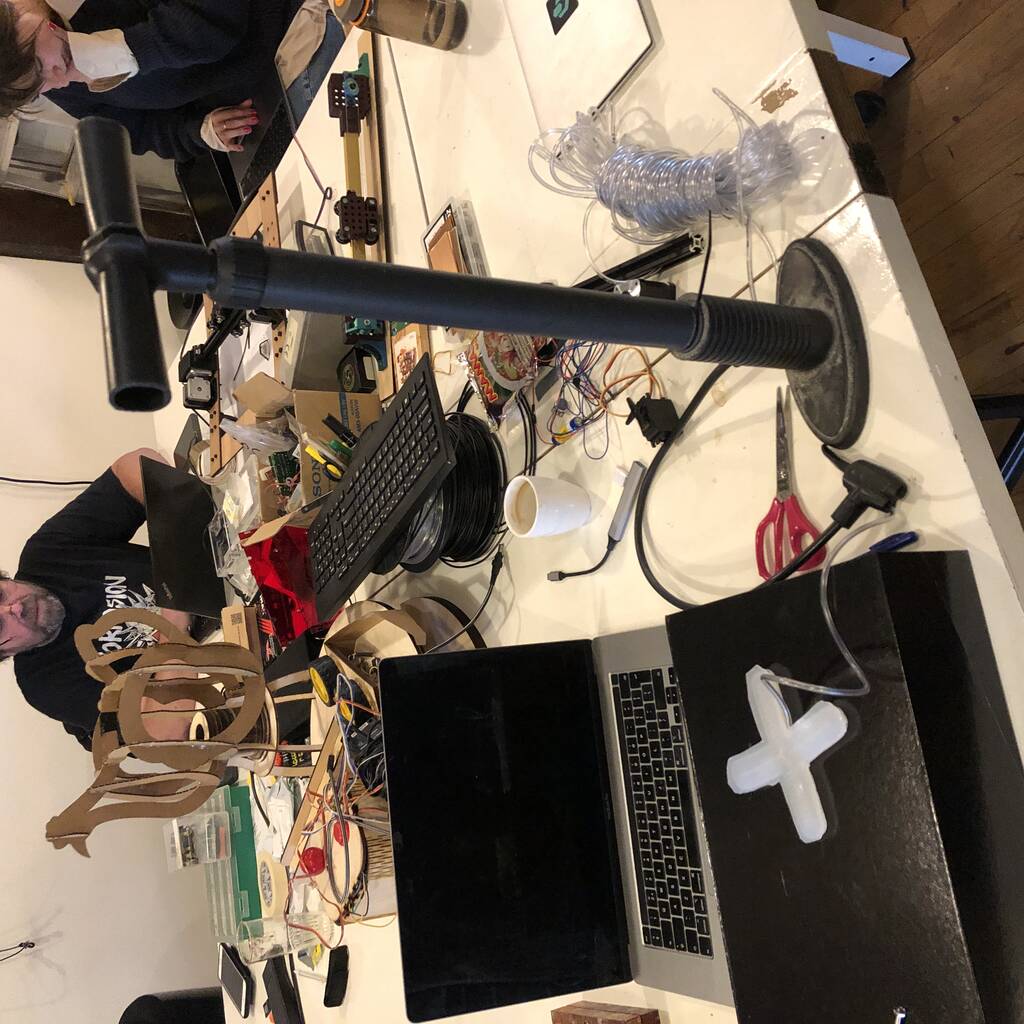
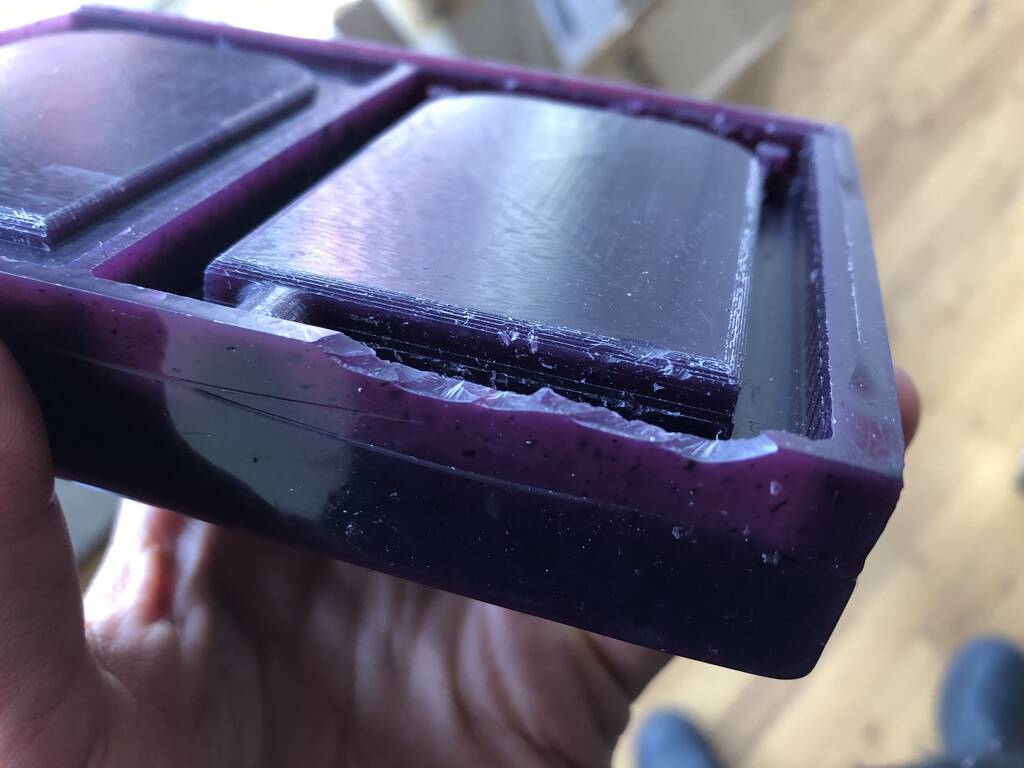
Oops, this broke with a big bang!

End result
Okay, it works. But not good enough for my final project.
The problem is that the thickness is not even. Maybe I should make a mould where for the bottom layer that can also work for an even glue layer. But then I should keep an eye on the sides. They need to be sealed off good.
Files
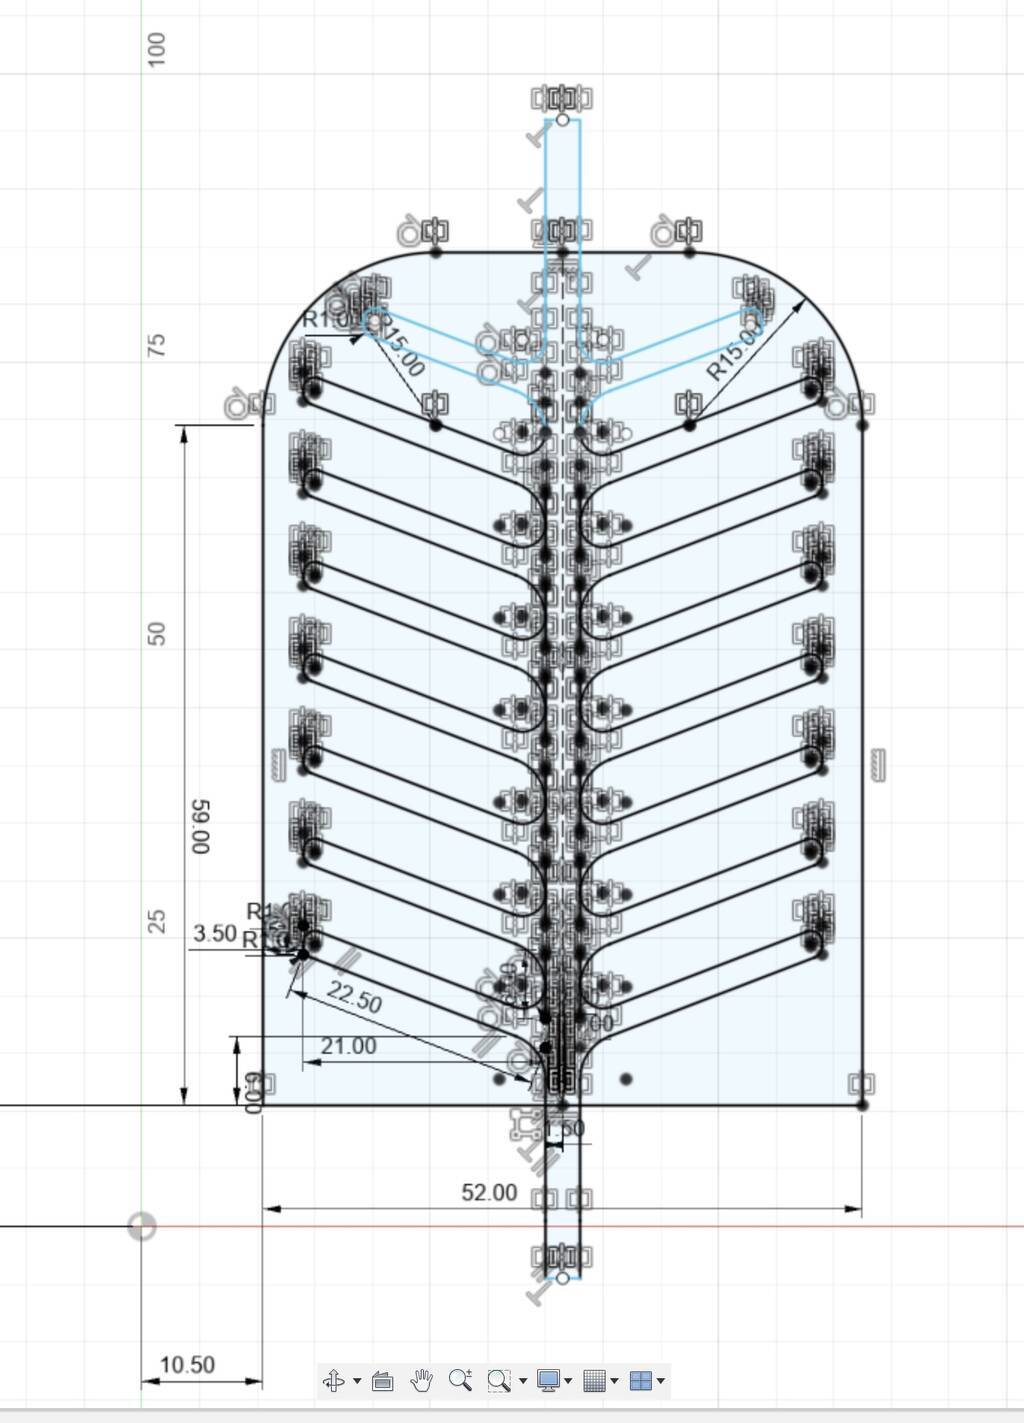
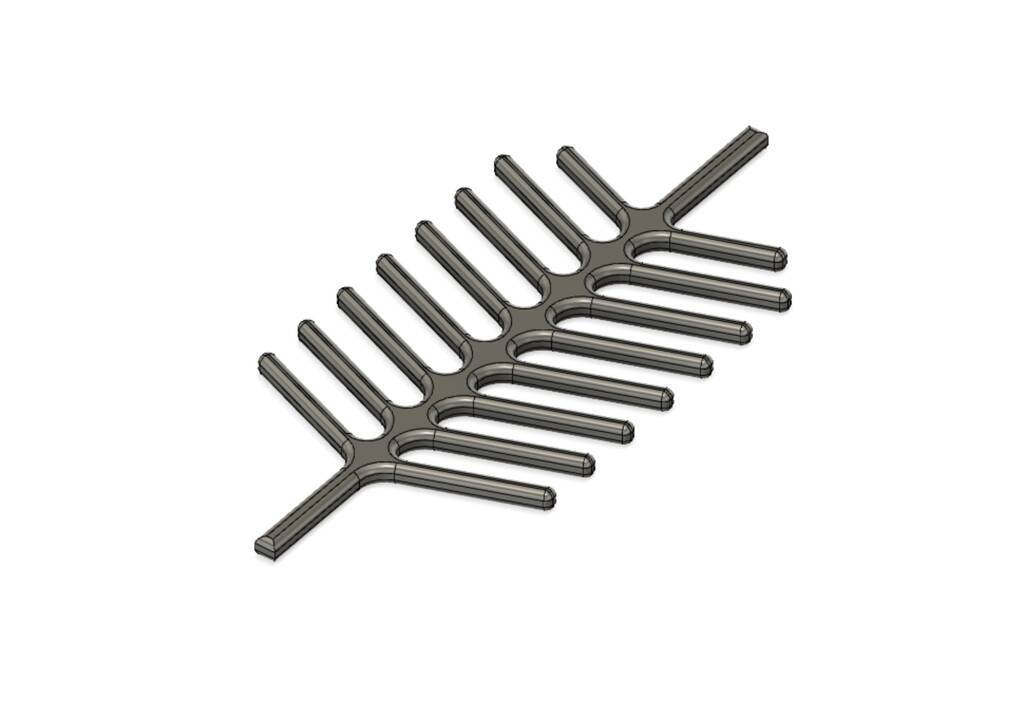
Airchannel 3d print for mould
Grippermould Fusion
Grippermould STL
3d print mould