13. Networking and Communications
This week I worked with UDP ports to cotrol the esp32-cam via my computer or mobile phone.
‘’User Datagram Protocol (UDP) refers to a protocol used for communication throughout the internet. It is specifically chosen for time-sensitive applications like gaming, playing videos, or Domain Name System (DNS) lookups.’‘
Assignment
Individual assignment: design, build, and connect wired or wireless node(s) with network or bus addresses
Group assignment: send a message between two projects
Group assignment
ESP32
Goal: Communicate between two ESP32 micro controllers with serial communication.
We start with UART. We connected the TX with the RX and the TX with the RX.
We used this tutorial
We used this code for the receiver.
//#include <HardwareSerial.h>

//HardwareSerial SerialPort; // use UART2

char number  = ' ';
int LED = D0;

void setup()
{
  Serial.begin(115200);
  pinMode(LED, OUTPUT);
}
void loop()
{
  if (Serial.available());
  {
    char number = Serial.read();
    if (number == '0') {
      digitalWrite(LED, LOW);
    }
    if (number == '1') {
      digitalWrite(LED, HIGH);
    }
  }
}
We struggled to long with connecting 2 esp32-C3 with each other. So we decided to continue with 2 arduino’s.
Arduino Leo with UNO
We used the following code for the receiver.
//#include <HardwareSerial.h>

//HardwareSerial SerialPort; // use UART2

char number  = ' ';
//int LED = D0;

void setup()
{
  Serial.begin(115200);
  pinMode(LED_BUILTIN, OUTPUT);
}
void loop()
{
  if (Serial.available());
  {
    char number = Serial.read();
    if (number == '0') {
      digitalWrite(LED_BUILTIN, LOW);
    }
    if (number == '1') {
      digitalWrite(LED_BUILTIN, HIGH);
    }
  }
}
And this code for the sender.
void setup()
{
  Serial.begin(115200);
}
void loop()
{
  Serial.print("1");
  delay(1000);
  Serial.print("0");
  delay(1000);
}
It didn’t worked out as planned. Finally we replaced the receiving UNO and then it worked. One of the Arduinos was broken.
Here you see that Michelle (master) is sending 1(on) and 0(off) to the receiver.
Individual
basic principle
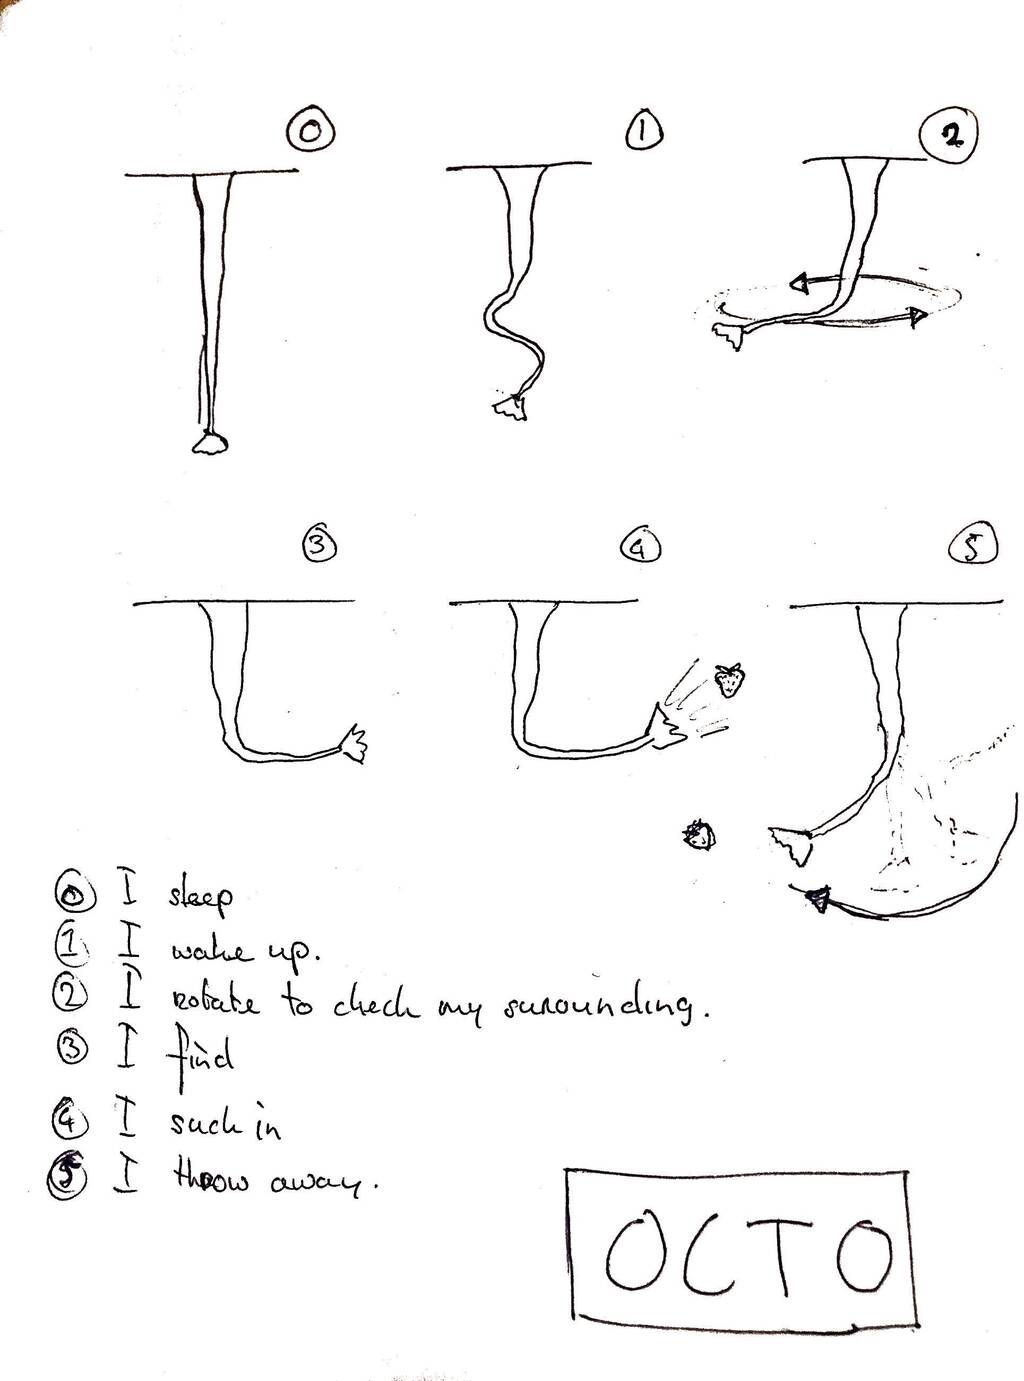
I want to control my Octo with motion tracking. I decided to work with an esp32-CAM.
First I created the basic principle which I knew that already worked. I made the same principle I already made a while ago you can see an example on my final project page. I connected a joystick to controll the 2 servo’s. I used a couple of codes but some of them didn’t work properly. The following code did was one of the simplest and worked okay. I might want to slow it down in the future though.
#include <Servo.h>
Servo servo1;
Servo servo2;
int joyX = A0;
int joyY = A1;
int joyVal;
void setup ()
{
  servo1.attach(10);
  servo2.attach(9);
}
void loop()
{
  joyVal = analogRead(joyX);
  joyVal = map (joyVal, 0, 1023, 0, 180);
  servo1.write(joyVal);
  joyVal = analogRead(joyY);
  joyVal = map (joyVal, 0, 1023, 0, 180);
  servo2.write(joyVal);
  delay(15);
}
This was the result.
ESP32-CAM & 2 servos
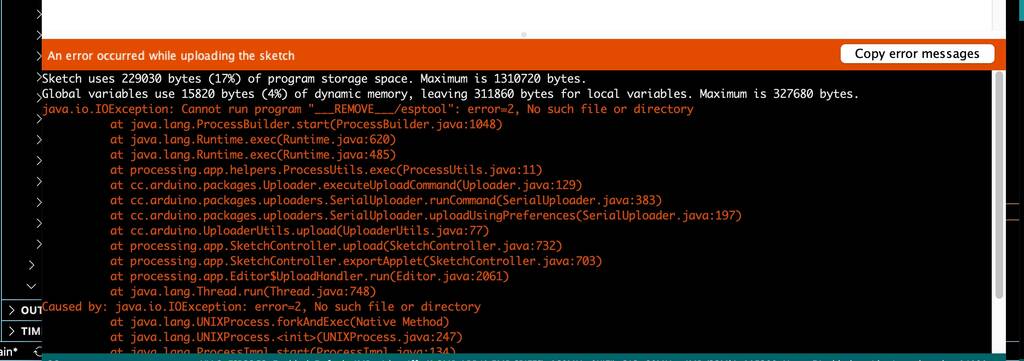
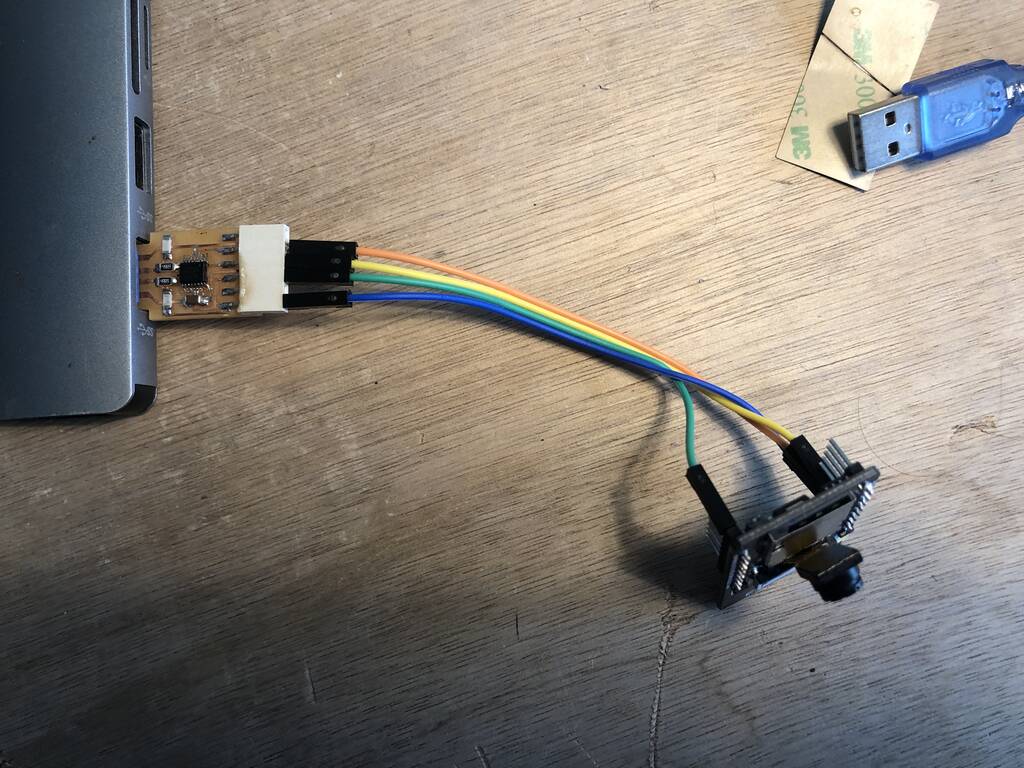
I tried to uploud my code with the same FTDI that I used in imput week. But it didn’t worked out as planned.
Also with the arduino selected as the programmer I get the same error..
Let’s try something new..
Xiao ESP32-c3 wifiscan
Since nothing worked I wanted to do something that would pay off.
Let’s start with something simple. I followed this link to scan the wifi connections. I used one of the example codes arduino has in its wifi examples directory.
Here you can see the result of the wifi-scan.

’‘ With this command Serial.print(WiFi.SSID(i)); The WiFi.RSSI() function will give us the RSSI (Received Signal Strength Indicator) of a network. It is an estimated power level or signal strength which ESP32 is getting from the router. ‘’
If you upload the below code and you know the SSID password you can connect to the wifi.
#include <WiFi.h>
const char* ssid = "Your SSID NAME";
const char* password = "SSID PASSWORD";
void setup(){
Serial.begin(115200);
delay(1000);
WiFi.mode(WIFI_STA);
WiFi.begin(ssid, password);
Serial.println("\nConnecting");
while(WiFi.status() != WL_CONNECTED){
Serial.print(".");
delay(100);
}
Serial.println("\nConnected to the WiFi network");
Serial.print("Local ESP32 IP: ");
Serial.println(WiFi.localIP());
}
void loop(){}
ESP32-CAM local webserver
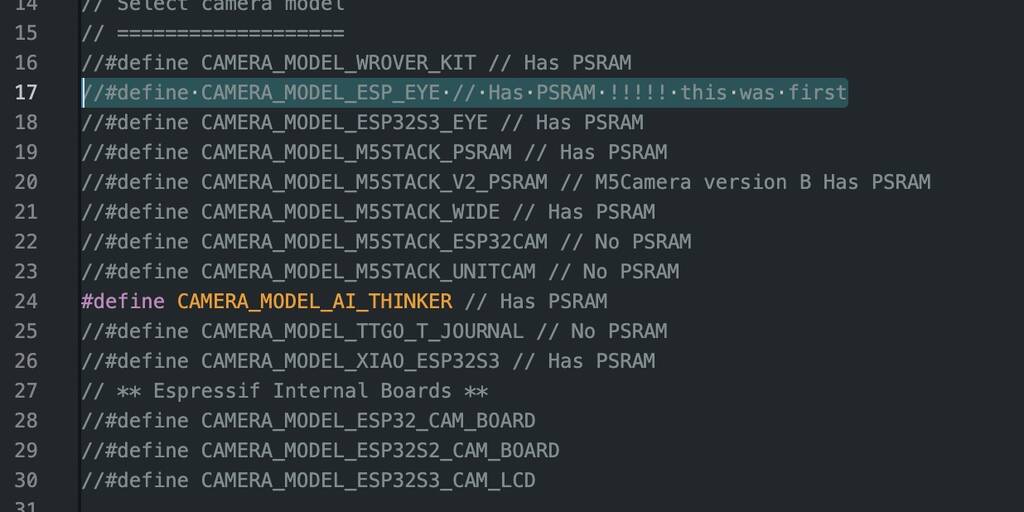
My esp32-cam has an esp32-s chip. Most of the people that work with an esp32-cam have a different type. I thought that might be the problem of hassle that I found attaching the esp32-cam. But most all of the esp32-cam examples I found online define the ai-thinker in their code.
I found a tutorial that explains how to set up the ESP32-CAM with esp32-s chip in a local webserver.
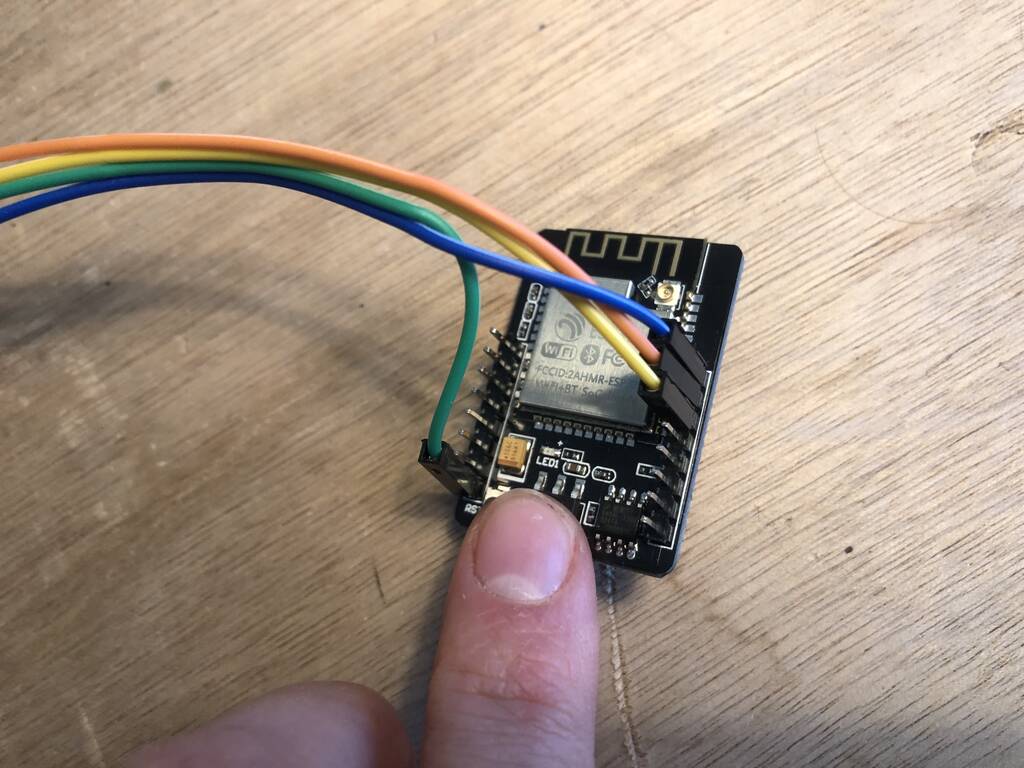
Don’t forget that you need to connect the IO0 and gnd on the esp32-cam (I already unplugged them in the pictures below). But you can read this is in the tutorial above.
Open this example in arduino. Change the esp_eye for the ai-thinker and correct the baud rate.

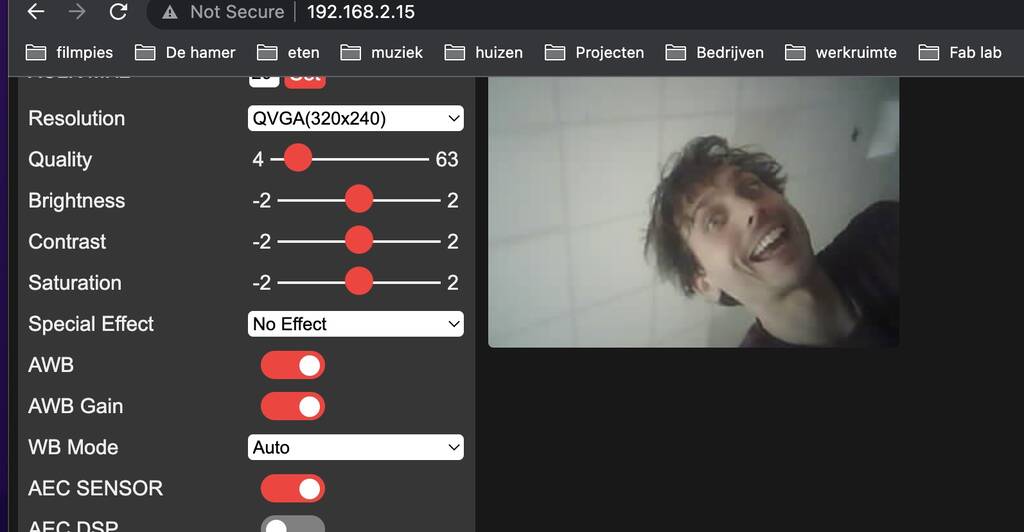
The tutorial is quite complete. But when you open your serial (and set the correct Baud rate) you need to reset the esp32-CAM. Then you can copy the http in your browser and start stream.
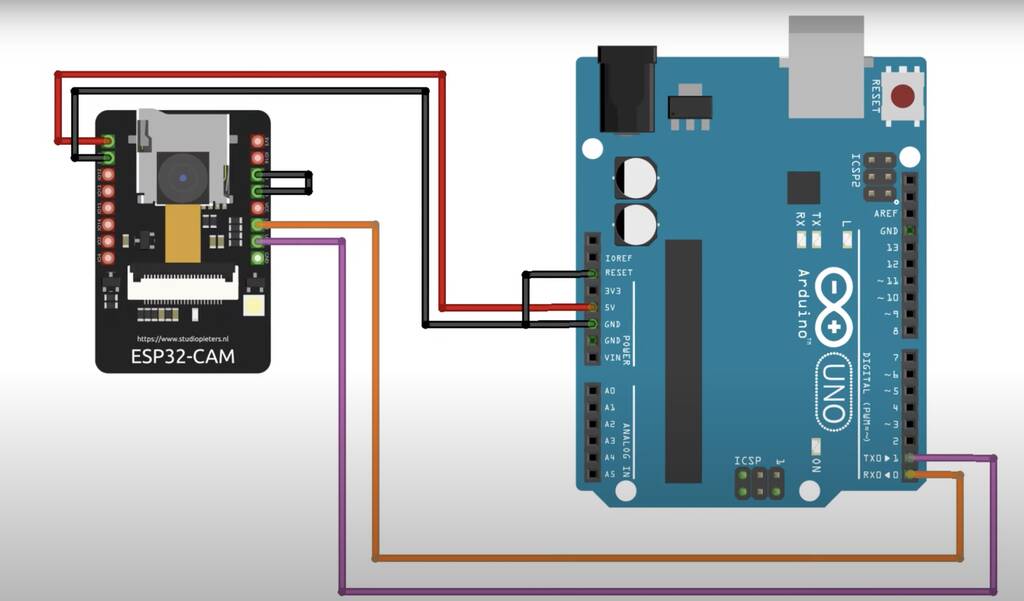
Connect esp32-cam with servos
Set-up
I followed the following link. There were some minor changes I had to do in this code
- int servo1Pos = 0;
- int servo2Pos = 0;
Into middle position. maybe not 90. Test first.
- int servo1Pos = 90;
- int servo2Pos = 90;
The Working Frequence: 20ms period / 50hz (Digital Control) link
servo1.setPeriodHertz(50); // standard 50 hz servo
servo2.setPeriodHertz(50); // standard 50 hz servo
Test 1
First I tested it with the serial. You can see in the video that it worked.
Then I disconnected the Tx and Rx. I could upload in in my browser. The esp cam with my computer was extremely slow and streaming did not work. On my mobile phone it did work but it was extremely slow.
This was my test installation but the servos weren’t responding.
Test 2
Maybe it’s because I used the wrong servos. I’ll try to set it up with mini servos and in the exact same way as the turorial.
I’ll take two sg90 servos and connect the circuit just like they want me too. Boring but I’ll hope it will work. Oops no luck.
I installed a different version in of the ESP32Servo (library version 0.4.2.). An older one and then the streaming and the buttons were way faster.
I also powered the esp and the servos externally. It still didn’t work but the servos were slightly moving.
I don’t like the fact that the explanation is pretty old and that I have to instal an esp32servo library that is super outdated. I’ll try to give it a shot with another example I found online.
Test 3
For this test I used another link. There were some different libraries that I had to install, a weird change in one of the libraries but no old versions.
This is the code
#include "esp_camera.h"
#include <Arduino.h>
#include <WiFi.h>
#include <AsyncTCP.h>
#include <ESPAsyncWebServer.h>
#include <iostream>
#include <sstream>
#include <ESP32Servo.h>
#define DUMMY_SERVO1_PIN 12 //We need to create 2 dummy servos.
#define DUMMY_SERVO2_PIN 13 //So that ESP32Servo library does not interfere with pwm channel and timer used by esp32 camera.
#define PAN_PIN 14
#define TILT_PIN 15
Servo dummyServo1;
Servo dummyServo2;
Servo panServo;
Servo tiltServo;
//Camera related constants
#define PWDN_GPIO_NUM 32
#define RESET_GPIO_NUM -1
#define XCLK_GPIO_NUM 0
#define SIOD_GPIO_NUM 26
#define SIOC_GPIO_NUM 27
#define Y9_GPIO_NUM 35
#define Y8_GPIO_NUM 34
#define Y7_GPIO_NUM 39
#define Y6_GPIO_NUM 36
#define Y5_GPIO_NUM 21
#define Y4_GPIO_NUM 19
#define Y3_GPIO_NUM 18
#define Y2_GPIO_NUM 5
#define VSYNC_GPIO_NUM 25
#define HREF_GPIO_NUM 23
#define PCLK_GPIO_NUM 22
const char* ssid = "NowISeeYou";
const char* password = "12345678";
AsyncWebServer server(80);
AsyncWebSocket wsCamera("/Camera");
AsyncWebSocket wsServoInput("/ServoInput");
uint32_t cameraClientId = 0;
#define LIGHT_PIN 4
const int PWMLightChannel = 4;
const char* htmlHomePage PROGMEM = R"HTMLHOMEPAGE(
<!DOCTYPE html>
<html>
<head>
<meta name="viewport" content="width=device-width, initial-scale=1, maximum-scale=1, user-scalable=no">
<style>
.noselect {
-webkit-touch-callout: none; /* iOS Safari */
-webkit-user-select: none; /* Safari */
-khtml-user-select: none; /* Konqueror HTML */
-moz-user-select: none; /* Firefox */
-ms-user-select: none; /* Internet Explorer/Edge */
user-select: none; /* Non-prefixed version, currently
supported by Chrome and Opera */
}
.slidecontainer {
width: 100%;
}
.slider {
-webkit-appearance: none;
width: 100%;
height: 20px;
border-radius: 5px;
background: #d3d3d3;
outline: none;
opacity: 0.7;
-webkit-transition: .2s;
transition: opacity .2s;
}
.slider:hover {
opacity: 1;
}
.slider::-webkit-slider-thumb {
-webkit-appearance: none;
appearance: none;
width: 40px;
height: 40px;
border-radius: 50%;
background: red;
cursor: pointer;
}
.slider::-moz-range-thumb {
width: 40px;
height: 40px;
border-radius: 50%;
background: red;
cursor: pointer;
}
</style>
</head>
<body class="noselect" align="center" style="background-color:white">
<!--h2 style="color: teal;text-align:center;">Wi-Fi Camera 🚗 Control</h2-->
<table id="mainTable" style="width:400px;margin:auto;table-layout:fixed" CELLSPACING=10>
<tr>
<img id="cameraImage" src="" style="width:400px;height:250px"></td>
</tr>
<tr/><tr/>
<tr>
<td style="text-align:left"><b>Pan:</b></td>
<td colspan=2>
<div class="slidecontainer">
<input type="range" min="0" max="180" value="90" class="slider" id="Pan" oninput='sendButtonInput("Pan",value)'>
</div>
</td>
</tr>
<tr/><tr/>
<tr>
<td style="text-align:left"><b>Tilt:</b></td>
<td colspan=2>
<div class="slidecontainer">
<input type="range" min="0" max="180" value="90" class="slider" id="Tilt" oninput='sendButtonInput("Tilt",value)'>
</div>
</td>
</tr>
<tr/><tr/>
<tr>
<td style="text-align:left"><b>Light:</b></td>
<td colspan=2>
<div class="slidecontainer">
<input type="range" min="0" max="255" value="0" class="slider" id="Light" oninput='sendButtonInput("Light",value)'>
</div>
</td>
</tr>
</table>
<script>
var webSocketCameraUrl = "ws:\/\/" + window.location.hostname + "/Camera";
var webSocketServoInputUrl = "ws:\/\/" + window.location.hostname + "/ServoInput";
var websocketCamera;
var websocketServoInput;
function initCameraWebSocket()
{
websocketCamera = new WebSocket(webSocketCameraUrl);
websocketCamera.binaryType = 'blob';
websocketCamera.onopen = function(event){};
websocketCamera.onclose = function(event){setTimeout(initCameraWebSocket, 2000);};
websocketCamera.onmessage = function(event)
{
var imageId = document.getElementById("cameraImage");
imageId.src = URL.createObjectURL(event.data);
};
}
function initServoInputWebSocket()
{
websocketServoInput = new WebSocket(webSocketServoInputUrl);
websocketServoInput.onopen = function(event)
{
var panButton = document.getElementById("Pan");
sendButtonInput("Pan", panButton.value);
var tiltButton = document.getElementById("Tilt");
sendButtonInput("Tilt", tiltButton.value);
var lightButton = document.getElementById("Light");
sendButtonInput("Light", lightButton.value);
};
websocketServoInput.onclose = function(event){setTimeout(initServoInputWebSocket, 2000);};
websocketServoInput.onmessage = function(event){};
}
function initWebSocket()
{
initCameraWebSocket ();
initServoInputWebSocket();
}
function sendButtonInput(key, value)
{
var data = key + "," + value;
websocketServoInput.send(data);
}
window.onload = initWebSocket;
document.getElementById("mainTable").addEventListener("touchend", function(event){
event.preventDefault()
});
</script>
</body>
</html>
)HTMLHOMEPAGE";
void handleRoot(AsyncWebServerRequest *request)
{
request->send_P(200, "text/html", htmlHomePage);
}
void handleNotFound(AsyncWebServerRequest *request)
{
request->send(404, "text/plain", "File Not Found");
}
void onServoInputWebSocketEvent(AsyncWebSocket *server,
AsyncWebSocketClient *client,
AwsEventType type,
void *arg,
uint8_t *data,
size_t len)
{
switch (type)
{
case WS_EVT_CONNECT:
Serial.printf("WebSocket client #%u connected from %s\n", client->id(), client->remoteIP().toString().c_str());
break;
case WS_EVT_DISCONNECT:
Serial.printf("WebSocket client #%u disconnected\n", client->id());
panServo.write(90);
tiltServo.write(90);
ledcWrite(PWMLightChannel, 0);
break;
case WS_EVT_DATA:
AwsFrameInfo *info;
info = (AwsFrameInfo*)arg;
if (info->final && info->index == 0 && info->len == len && info->opcode == WS_TEXT)
{
std::string myData = "";
myData.assign((char *)data, len);
Serial.printf("Key,Value = [%s]\n", myData.c_str());
std::istringstream ss(myData);
std::string key, value;
std::getline(ss, key, ',');
std::getline(ss, value, ',');
if ( value != "" )
{
int valueInt = atoi(value.c_str());
if (key == "Pan")
{
panServo.write(valueInt);
}
else if (key == "Tilt")
{
tiltServo.write(valueInt);
}
else if (key == "Light")
{
ledcWrite(PWMLightChannel, valueInt);
}
}
}
break;
case WS_EVT_PONG:
case WS_EVT_ERROR:
break;
default:
break;
}
}
void onCameraWebSocketEvent(AsyncWebSocket *server,
AsyncWebSocketClient *client,
AwsEventType type,
void *arg,
uint8_t *data,
size_t len)
{
switch (type)
{
case WS_EVT_CONNECT:
Serial.printf("WebSocket client #%u connected from %s\n", client->id(), client->remoteIP().toString().c_str());
cameraClientId = client->id();
break;
case WS_EVT_DISCONNECT:
Serial.printf("WebSocket client #%u disconnected\n", client->id());
cameraClientId = 0;
break;
case WS_EVT_DATA:
break;
case WS_EVT_PONG:
case WS_EVT_ERROR:
break;
default:
break;
}
}
void setupCamera()
{
camera_config_t config;
config.ledc_channel = LEDC_CHANNEL_0;
config.ledc_timer = LEDC_TIMER_0;
config.pin_d0 = Y2_GPIO_NUM;
config.pin_d1 = Y3_GPIO_NUM;
config.pin_d2 = Y4_GPIO_NUM;
config.pin_d3 = Y5_GPIO_NUM;
config.pin_d4 = Y6_GPIO_NUM;
config.pin_d5 = Y7_GPIO_NUM;
config.pin_d6 = Y8_GPIO_NUM;
config.pin_d7 = Y9_GPIO_NUM;
config.pin_xclk = XCLK_GPIO_NUM;
config.pin_pclk = PCLK_GPIO_NUM;
config.pin_vsync = VSYNC_GPIO_NUM;
config.pin_href = HREF_GPIO_NUM;
config.pin_sscb_sda = SIOD_GPIO_NUM;
config.pin_sscb_scl = SIOC_GPIO_NUM;
config.pin_pwdn = PWDN_GPIO_NUM;
config.pin_reset = RESET_GPIO_NUM;
config.xclk_freq_hz = 20000000;
config.pixel_format = PIXFORMAT_JPEG;
config.frame_size = FRAMESIZE_VGA;
config.jpeg_quality = 10;
config.fb_count = 1;
// camera init
esp_err_t err = esp_camera_init(&config);
if (err != ESP_OK)
{
Serial.printf("Camera init failed with error 0x%x", err);
return;
}
if (psramFound())
{
heap_caps_malloc_extmem_enable(20000);
Serial.printf("PSRAM initialized. malloc to take memory from psram above this size");
}
}
void sendCameraPicture()
{
if (cameraClientId == 0)
{
return;
}
unsigned long startTime1 = millis();
//capture a frame
camera_fb_t * fb = esp_camera_fb_get();
if (!fb)
{
Serial.println("Frame buffer could not be acquired");
return;
}
unsigned long startTime2 = millis();
wsCamera.binary(cameraClientId, fb->buf, fb->len);
esp_camera_fb_return(fb);
//Wait for message to be delivered
while (true)
{
AsyncWebSocketClient * clientPointer = wsCamera.client(cameraClientId);
if (!clientPointer || !(clientPointer->queueIsFull()))
{
break;
}
delay(1);
}
unsigned long startTime3 = millis();
Serial.printf("Time taken Total: %d|%d|%d\n",startTime3 - startTime1, startTime2 - startTime1, startTime3-startTime2 );
}
void setUpPinModes()
{
dummyServo1.attach(DUMMY_SERVO1_PIN);
dummyServo2.attach(DUMMY_SERVO2_PIN);
panServo.attach(PAN_PIN);
tiltServo.attach(TILT_PIN);
//Set up flash light
ledcSetup(PWMLightChannel, 1000, 8);
pinMode(LIGHT_PIN, OUTPUT);
ledcAttachPin(LIGHT_PIN, PWMLightChannel);
}
void setup(void)
{
setUpPinModes();
Serial.begin(115200);
WiFi.softAP(ssid, password);
IPAddress IP = WiFi.softAPIP();
Serial.print("AP IP address: ");
Serial.println(IP);
server.on("/", HTTP_GET, handleRoot);
server.onNotFound(handleNotFound);
wsCamera.onEvent(onCameraWebSocketEvent);
server.addHandler(&wsCamera);
wsServoInput.onEvent(onServoInputWebSocketEvent);
server.addHandler(&wsServoInput);
server.begin();
Serial.println("HTTP server started");
setupCamera();
}
void loop()
{
wsCamera.cleanupClients();
wsServoInput.cleanupClients();
sendCameraPicture();
//Serial.printf("SPIRam Total heap %d, SPIRam Free Heap %d\n", ESP.getPsramSize(), ESP.getFreePsram());
}
It works super smooth and fast!!!
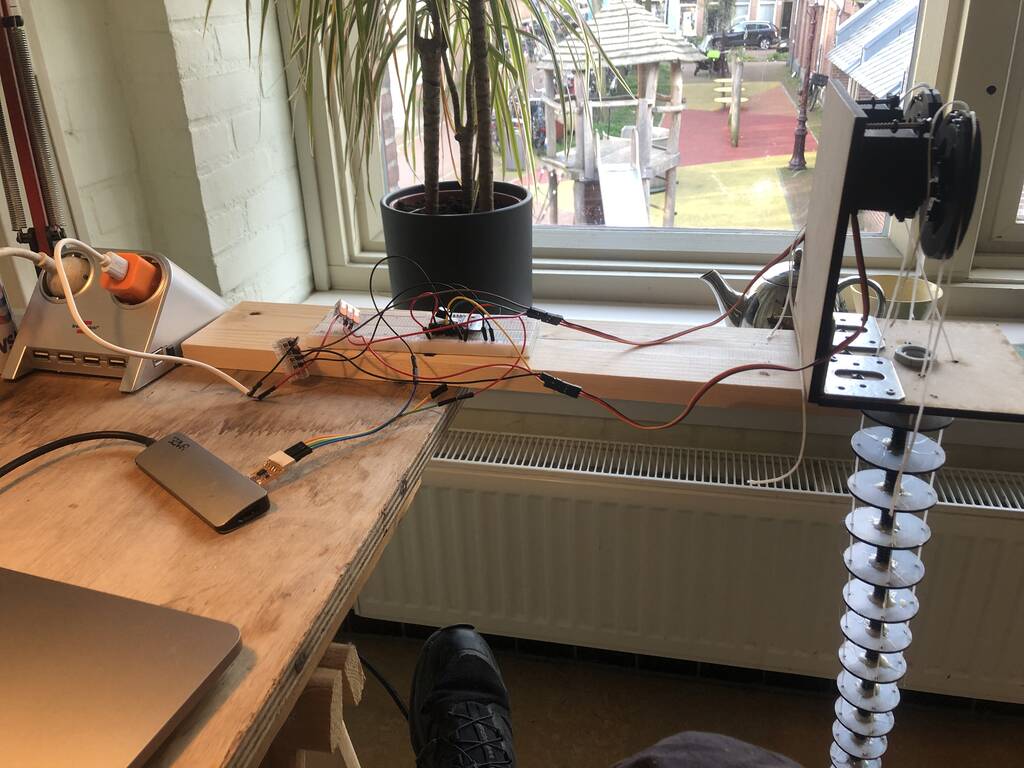
I’ll try it out with the servos on my trunk. I power the servos and esp individually. Gnd needs to stay connected trough all of them. I use wagos to connect the wires. They are easy to use and trustworthy.
Motion following
I want my esp32-cam to move the servos due to the motion regocnition.
I used the files1 from this link. You can check out the his youtube video as well. Cool and clear explanation.
Here you can see that it works with the serial. I’ll try it out with the servos and then I’ll take a look into how I can modify it. There are some problems with the streaming of the carmera though.. Sometimes it disapears out ot of the blue.. Maybe I should try to make its own network like I did earlier. So not on the already exsisting wifi connection.
If I unplug it the cam works but the servos don’t. Why? I don’t know yet.
Cam is also incredibly slow. This I might solve with an older version of the servo32 library.
In the following week I found out what the problem is. With this code you should install an ealier version of the esp32Servo library (esp32Servo library version 0.4.2.).
Notes
Should I work with an extra micro controller or should I extand the Cam cable?
Sending data from the esp32-cam to another esp32. Maybe to much for me now..
What other protocols should I consider?
Try to understand what you did.
This is fairly easy. color tracking color tracking with computer cambot MAKE OWN NETWERK TO CHECK IF CAMERA WORKS BETTER.