15. Wildcard Week
Assignment
Design and produce something with a digital fabrication process (incorporating computer-aided design and manufacturing) not covered in another assignment, documenting the requirements that your assignment meets, and including everything necessary to reproduce it.
I was super exicted for this weeks assignment. I wanted to do a lot of things. This weeks result was experimenting with different composites and working with inflatables.
Composites
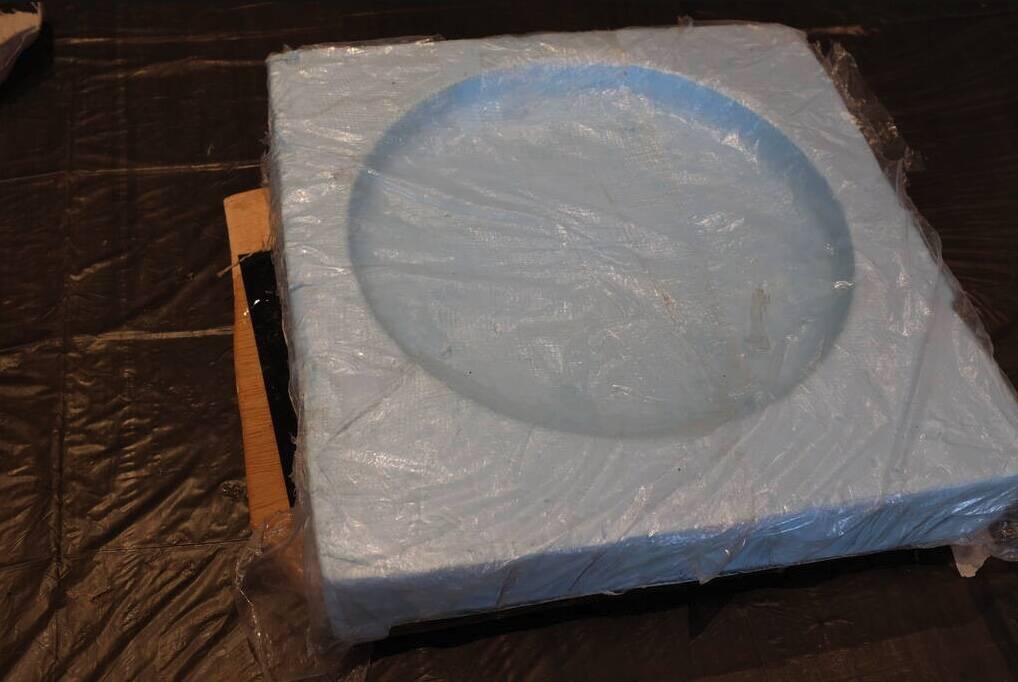
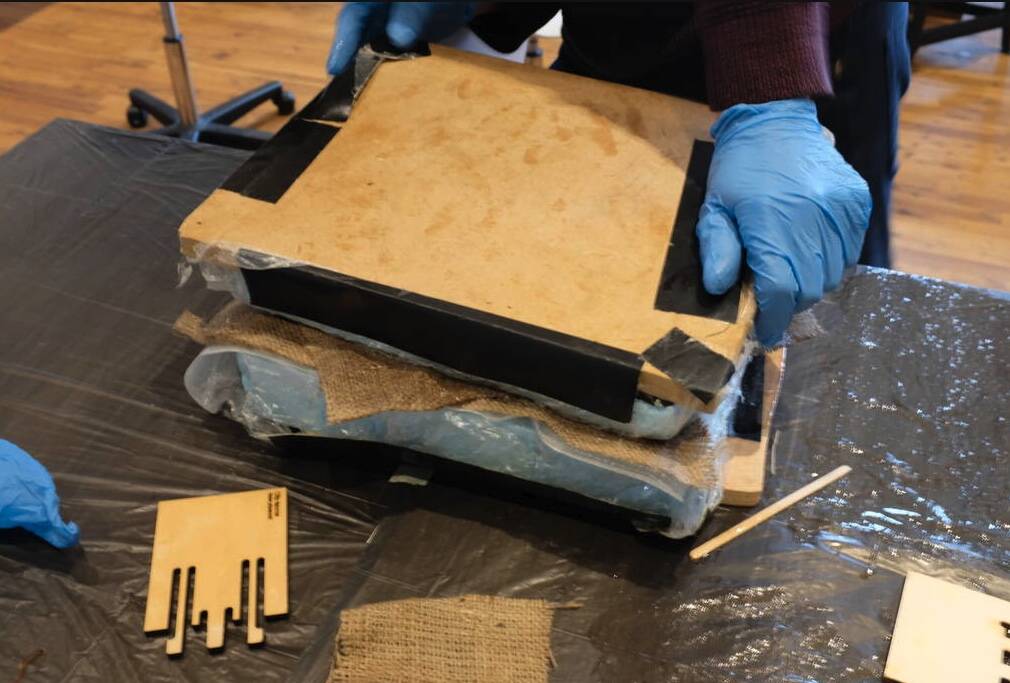
For this weeks assignment I decided to work with Pieter and make some frisbees out of two different expoxys and a set of different material. We used a 2 part mold that was milled with the shopbot.
This is the 2 part mold to make a frisbi out of.

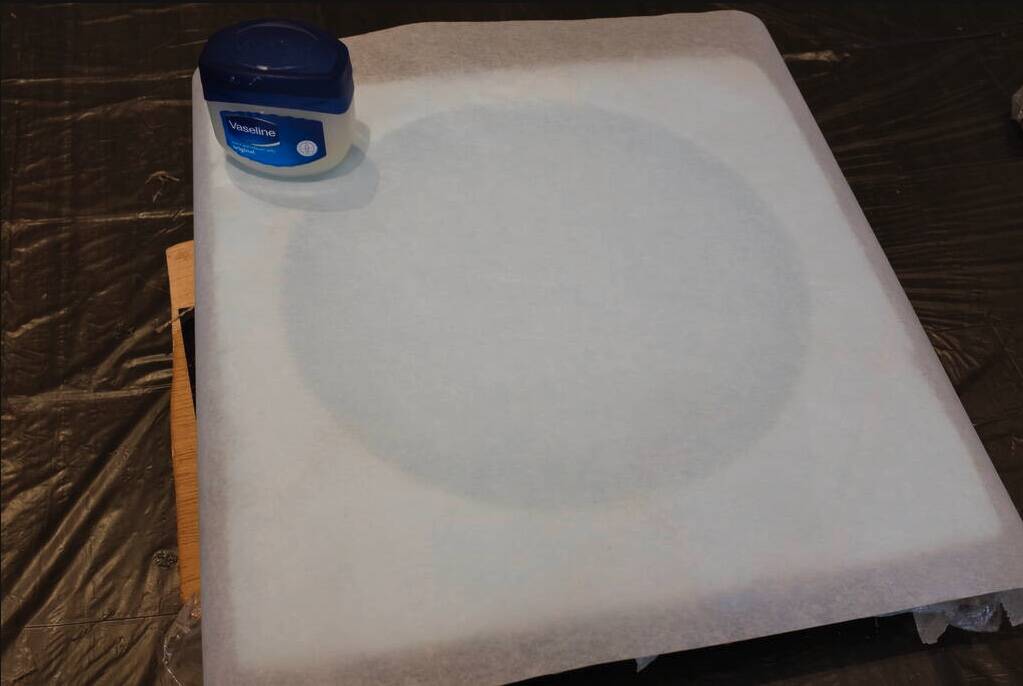
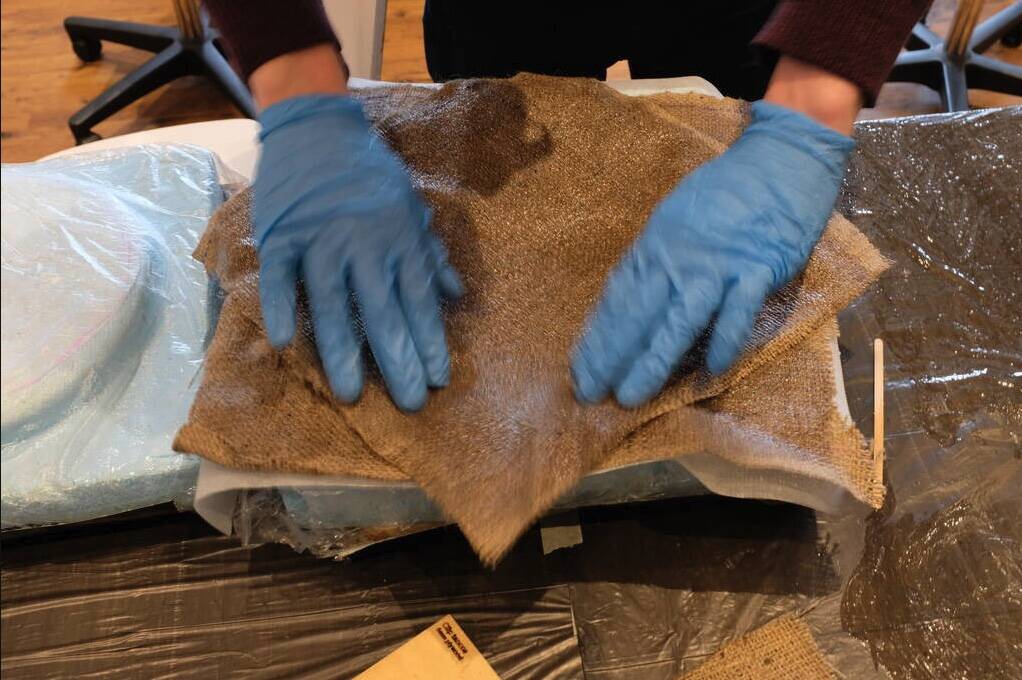
First we covered the mold with plastic foil to prevent the expoxys from leaking in. Then we covered it with baking paper. This helpes to get a real smooth finish. But it’s super inportant to smear the baking paper with a release agent. We used vaseline.

These are the 2 epoxys that we used. If the table won’t be suffient enough you can take a look at the datasheets. They’re really straight forward.
Please remember that working with composites is almost always dangerous! Please keep thinking wear gloves and eye protection.
Tarbender
Epoxymite 101 fast hardener
| Value | EpoxAmite | Tarbender |
|---|---|---|
| Mix by volume | 4A:1B | 2A:1B |
| Myx by weigt | 100A:24B | 100A |
| Pot Life (minutes) | 11 | 45 |
| Cure Time (hours) | 6-8 | 16 |
| Thin film working time (min) | 30 | 120 |
| Shore D hardness | 84 | 75 |
| Heat deflection temperature (degree Celcius) | 56 | - |
| Exotherm | yes, high | yes, high |
| Release Agent | yes | no |
| Application | laminating | epoxy encapsulant |
| Mixing time (minutes) | 3 (aggressive | 2 (specific instructions) |
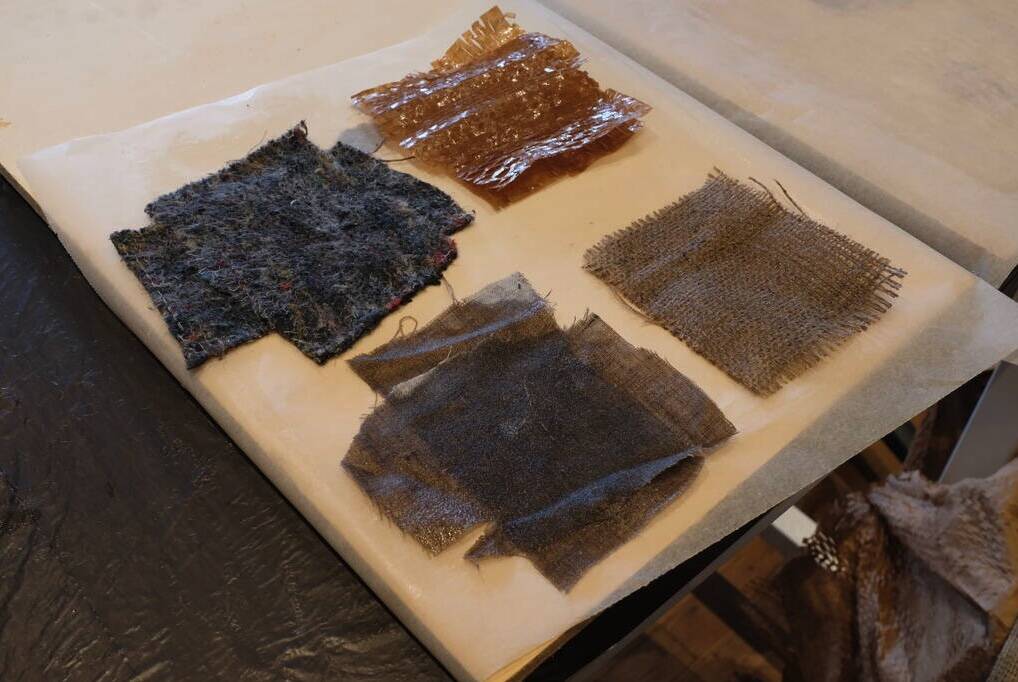
We used 4 different materials to work with the epoxys. All of the materials were woven. We used 2 layers of every material and stacked them in the an 90 degree angle from each other. This will give the material even more strenght.
On the photo below you see 2 fabric, 1 carton and a woven wrope kind of material.
This was the results of the tests we did.
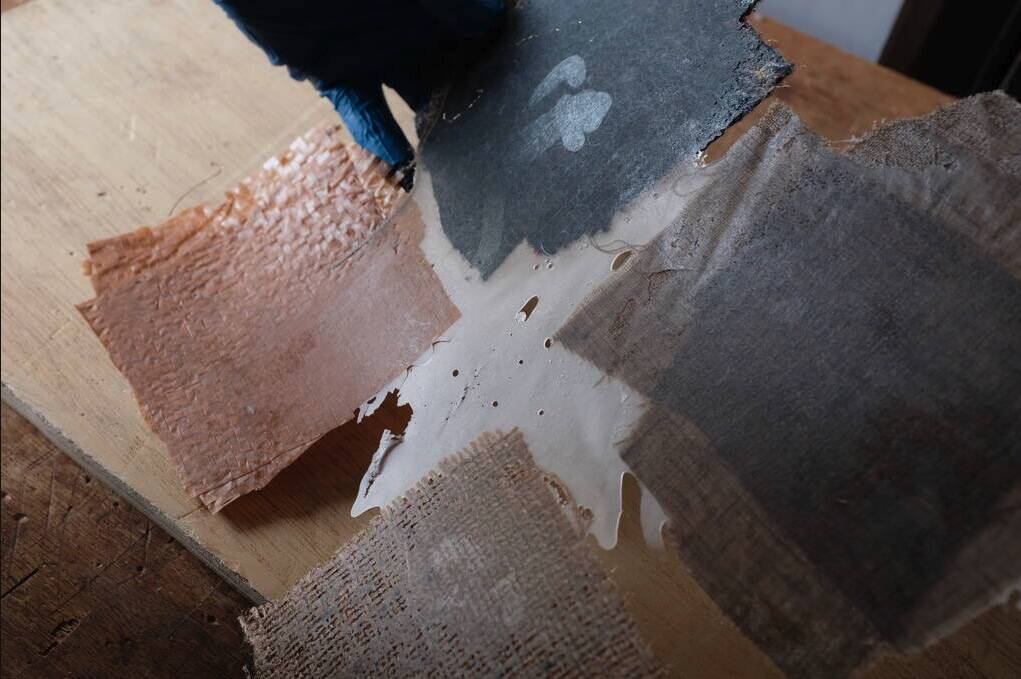
This video shows what kind of material the expoxy is and how it related to the fabric. You can see that if you won’t use any pressure. The material stays pretty soft and flexible. When you only use epoxy withoud a texitle or other material to combine it with. Then the material stays super frail.
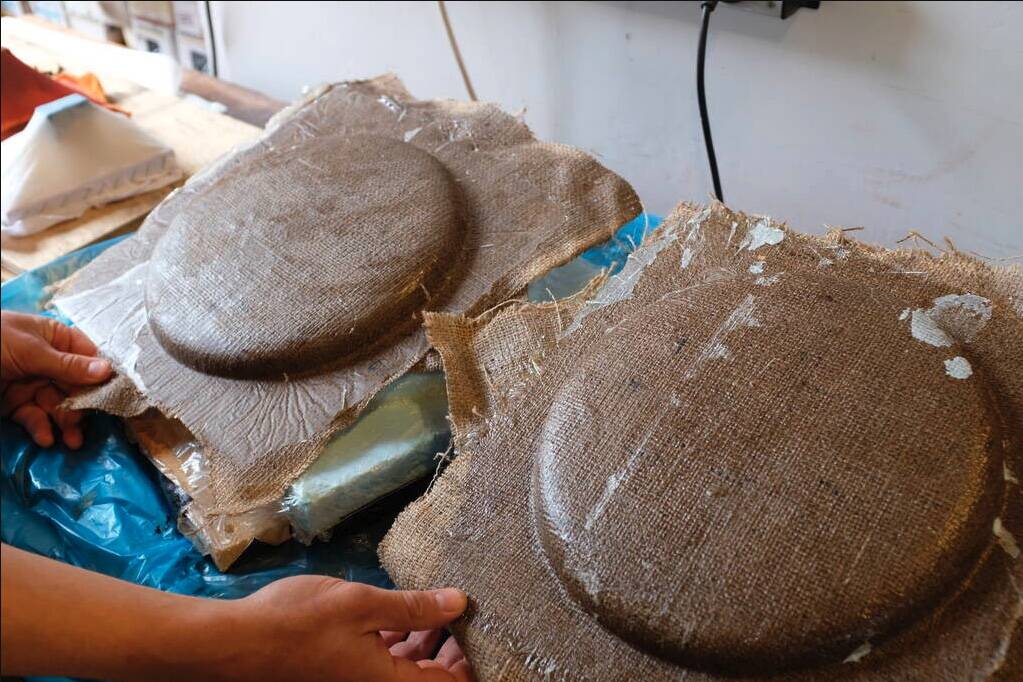
Because we did not have enough epoxy material and time was an issue we used for the frisbees only two type of materials. We used linnen and hemp.
First we mixed the epoxys. Then we ordered the material in the mold and smeared it with epoxys and closed the molds with a lot of pressure. Glue clamps will to the trick.
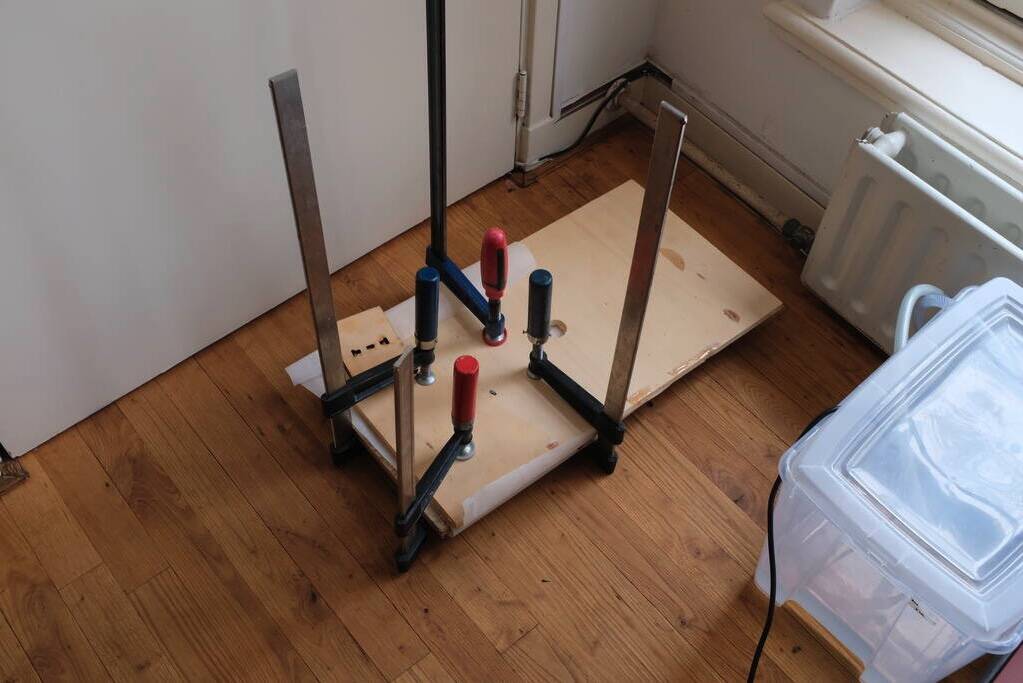
After releasing the glue clamps it was pretty hard to get de model out I think I did not put enough vaseline in there.
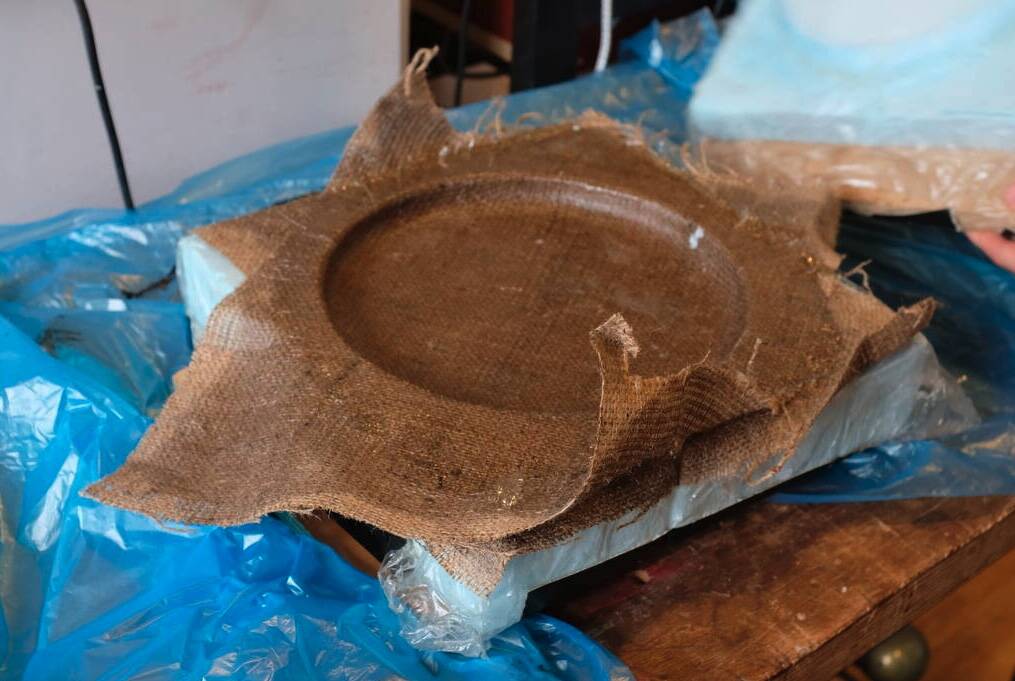
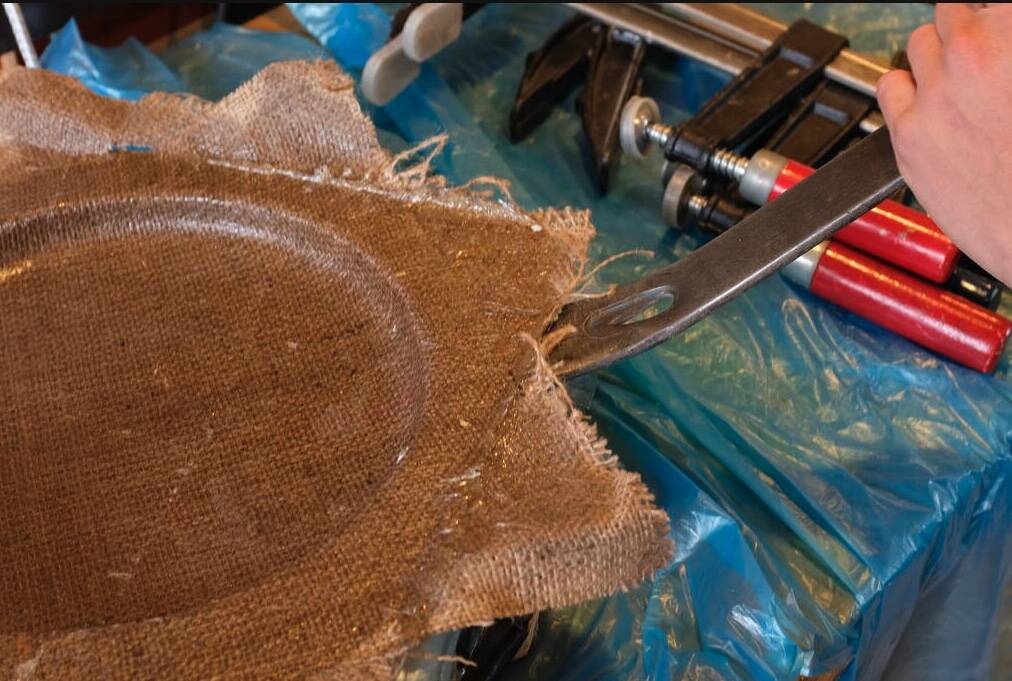
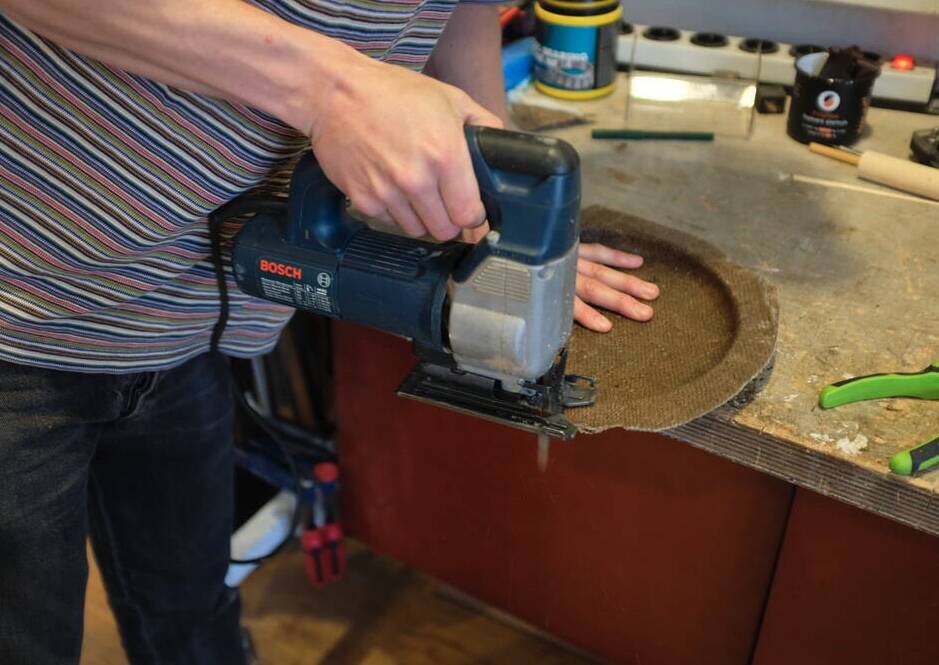
After we took it out we used an electric saw to get the suronding pieces of. Eventually I tried to pull a piece out but I ripped it. This was quite interesting because the material is super strong when you hit it with a hammer for example but if there’s a little crack you can rip it relatively easy.
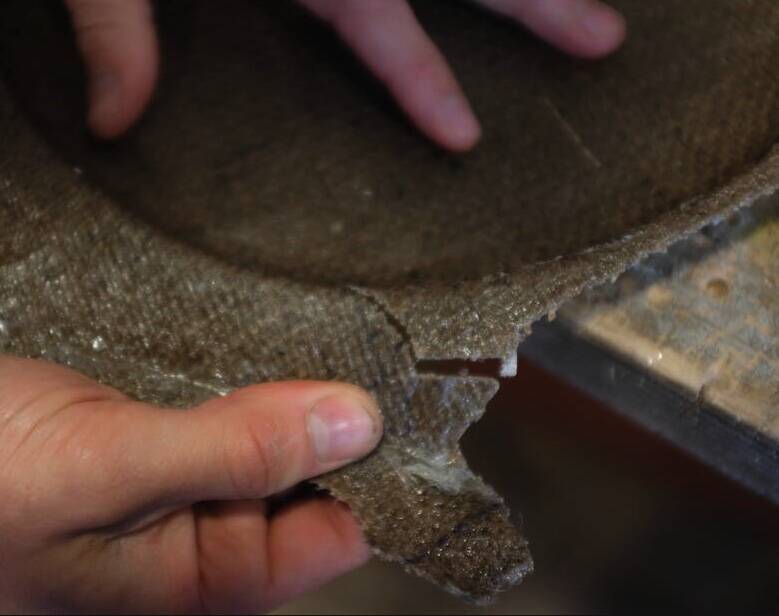
I tried to see any difference between the 2 materials but there were none to see by eye. Also about the strenght of the material were no differences to find.
Plastic deforming
I really wanted to work with a vacuumformer. Unfortunately we did not have this machine at the Waag. So I came up with the idea to reverse the technique and work with air pressure instead of a vacuum to form a plastic sheet.
With what kind of platsic will I work? There are 3 main types of plastic.
- thermoplastics
- elastomers
- thermosets
All thermoplastic synthetic materials can be bent when heated. Polycarbonate and PETG can also be bent (temper shaped) when cold. This technique involves forcing a plastic sheet into the desired shape in its cold state.
Thermoplastics
Examples of plastics from the group of thermoplastics include celluloid, ABS, polyamide, polyacetate, Plexiglas or acrylic glass, Makrolon and PVC.
All thermoplastics must first be brought into the thermoplastic state to be formable. This is done by heating beyond a certain temperature, which is different for each plastic.
After heating, thermoplastics can be bent or folded without much effort (in the case of plastic plates).
For this prototype I’ll use an acrylic sheet.
Heating the material
It is important that the heat source has a sufficient distance from the workpiece. As a rule, one starts from at least 20 to 30 centimeters. Direct contact between workpiece and heat source must be avoided. At my work we have a big oven.
For acrylic you need at least 80 degrees to deform the plastic. From 96 degrees the it can be bend into the product you want.
‘’Acrylic’s high temperature resistance is not high. When the temperature is around 80 degrees, the acrylic sheet will be slightly deformed. If the temperature is 96 degrees, it can be bent into the product you want. The melting point of acrylic is 230-260 degrees.’‘ source
After discussing with Henk he advised me to focus on the inflatbles instead of this project. But I would really like to try this out so when I’ll have time I’ll take the following steps.
- 3d model the mold
- lasercut
- stack it up
- heat up material
- blow air in the mould so heated acrylate will deform
Textile resin lamp
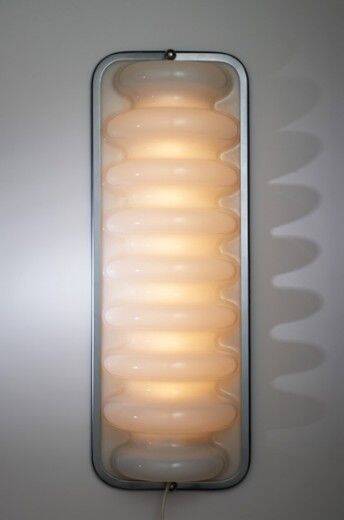
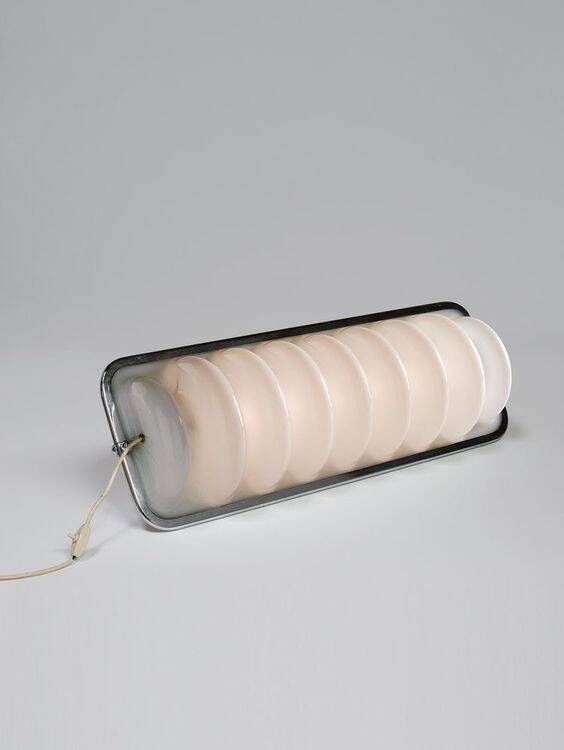
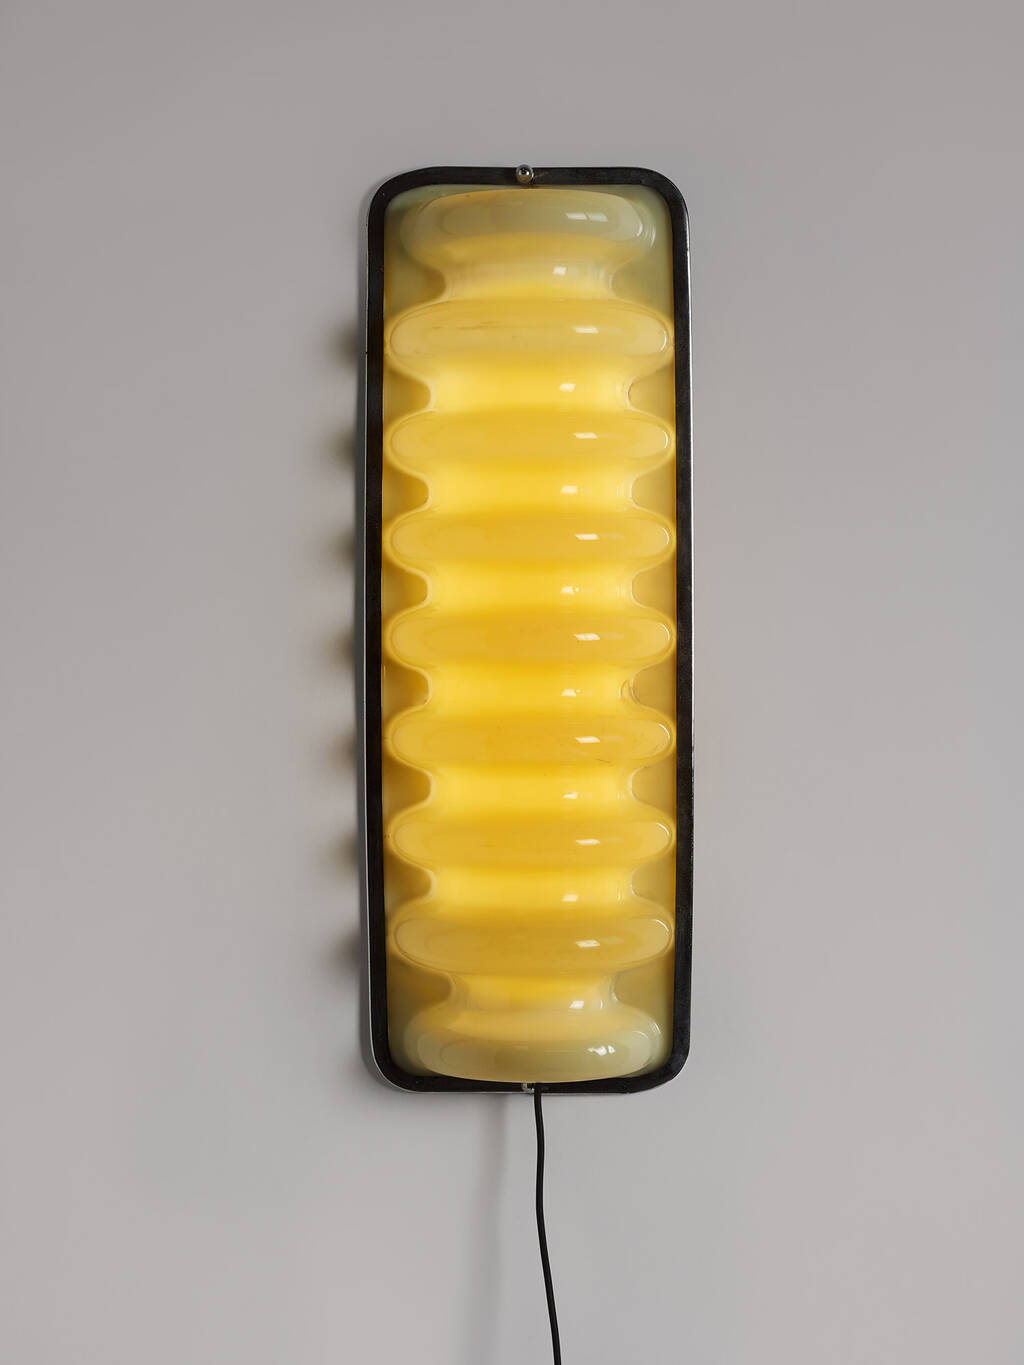
I like these lamps from Etorre Sottsass. These shapes would be perfect to make with a vacuumformer but we don’t have that machine. But these lamps made me think of a cool experiment that I could do. Create a chape that looks like it’s flexible and harden it with epoxy.
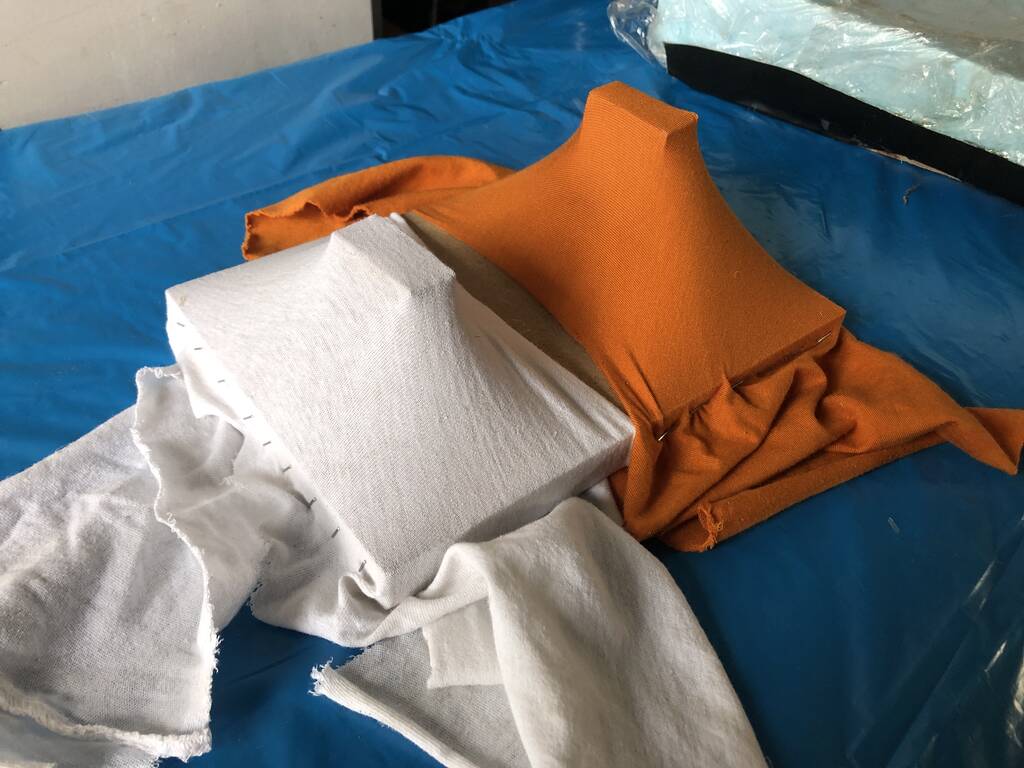
First I wanted to mill a shape and cover the shape with textile and brush them in with resin. But before I would do that I wanted to see how it would look like so I made some tests with textile and resin.
resin: Epoxymite 101 fast hardener
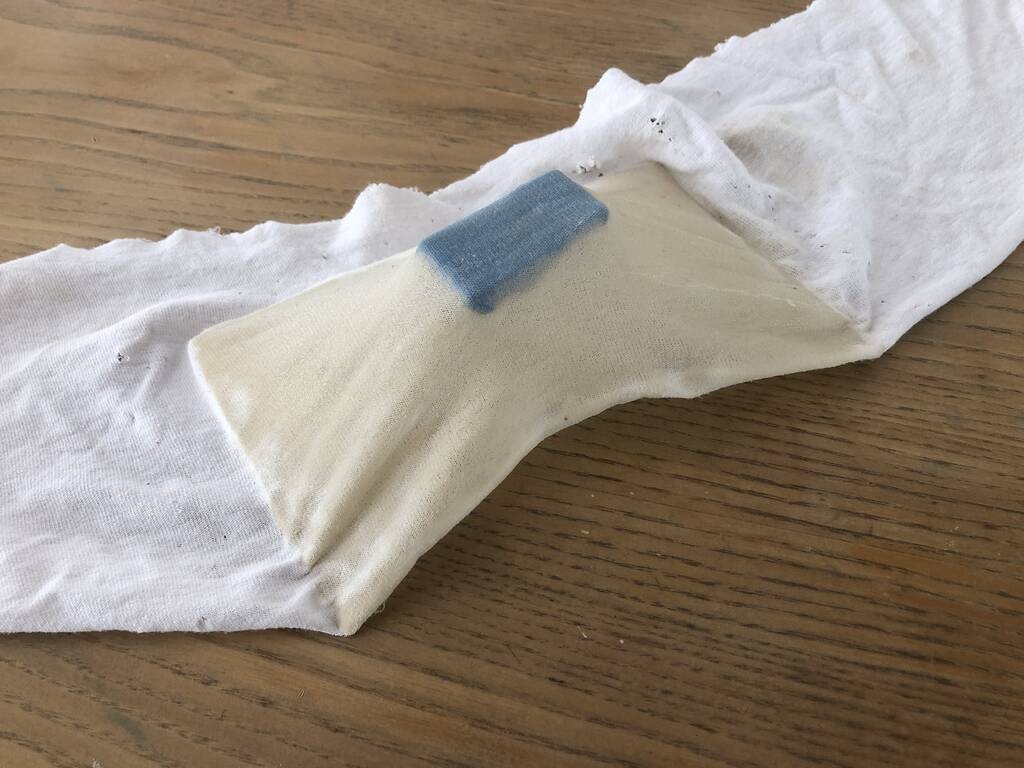
Textile 1: Cotton
Textile 2: PA with elastomer
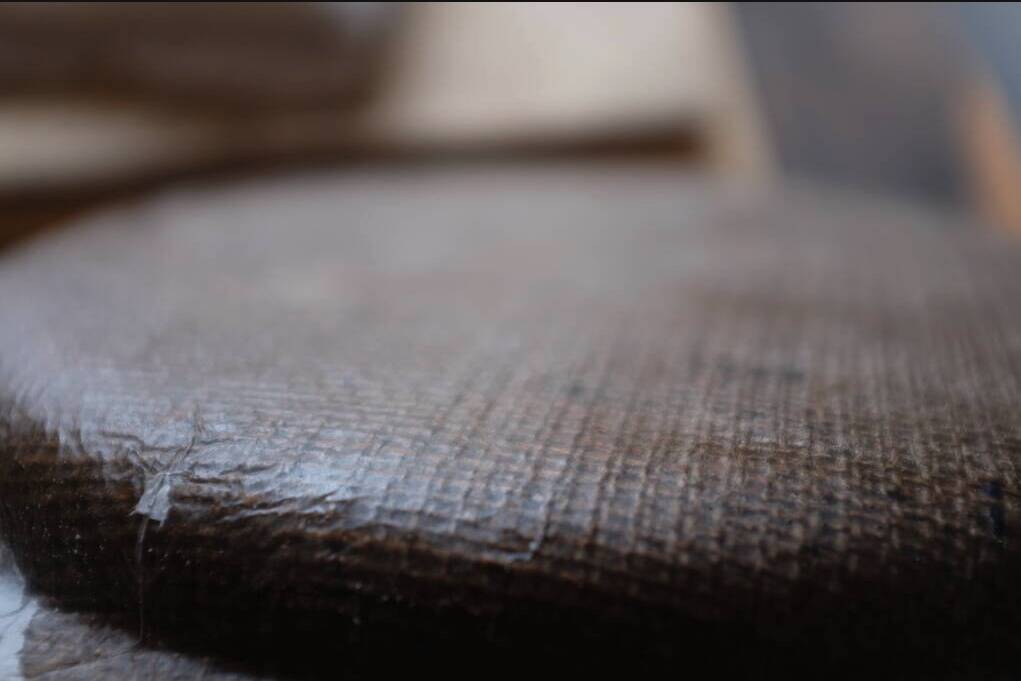
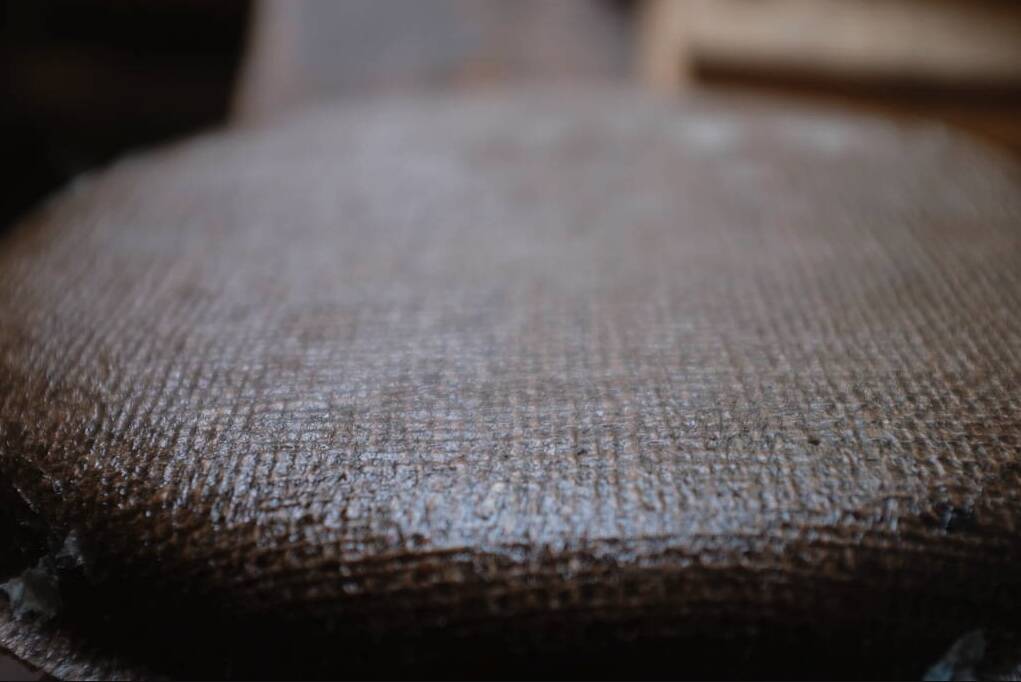
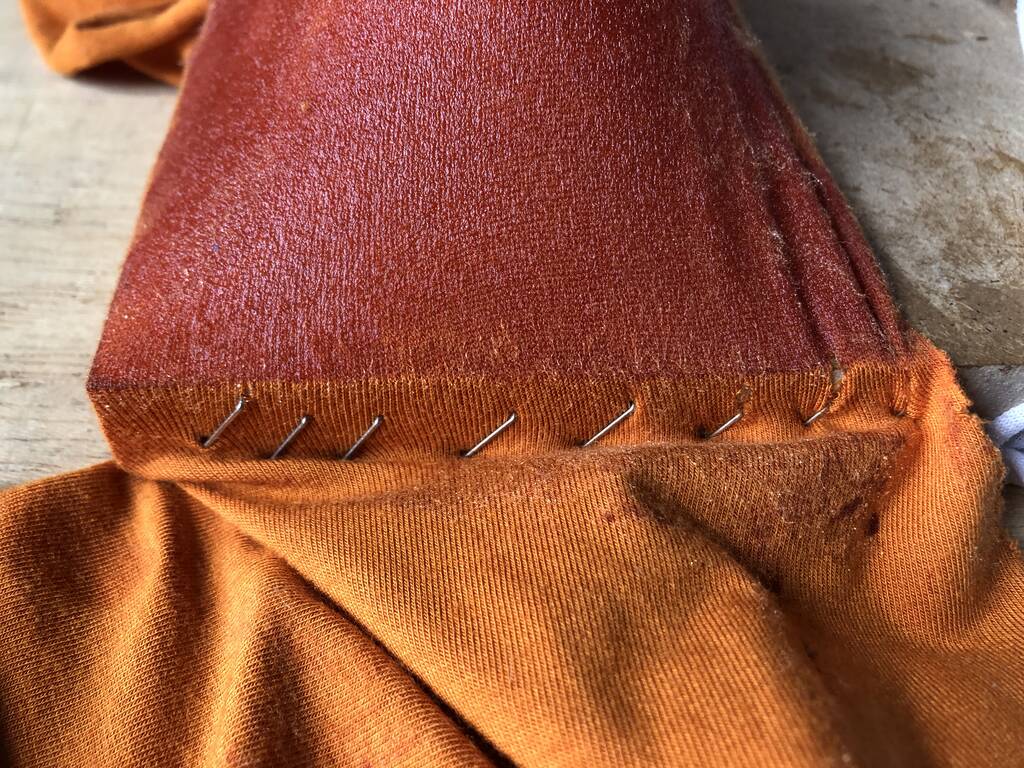
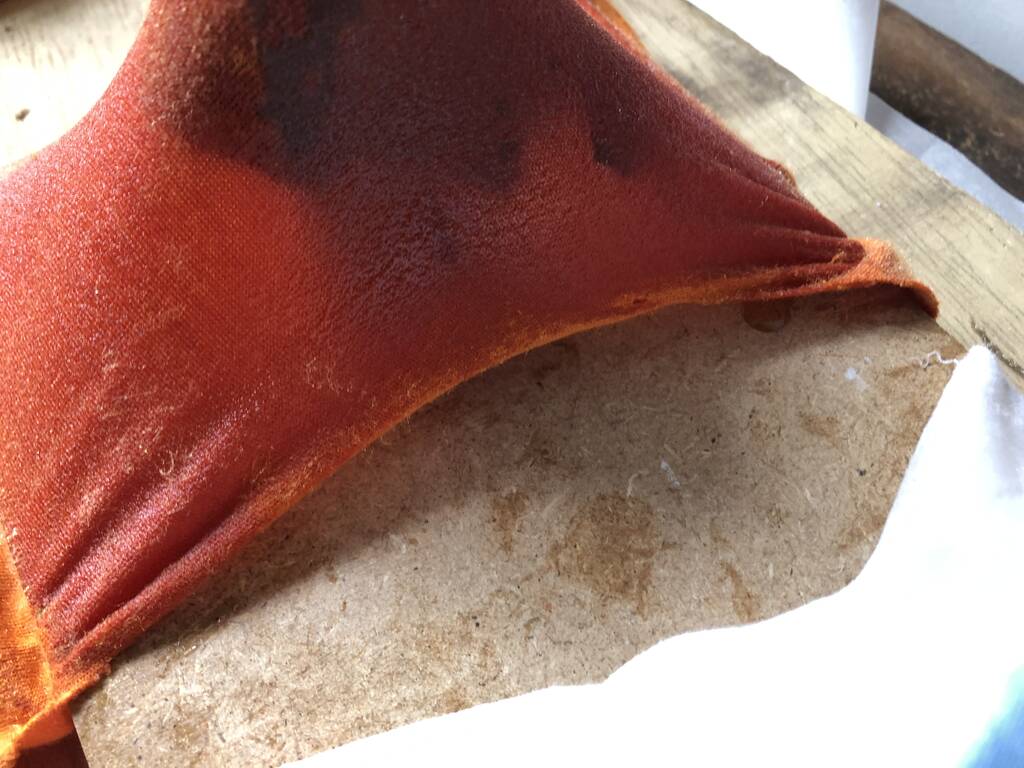
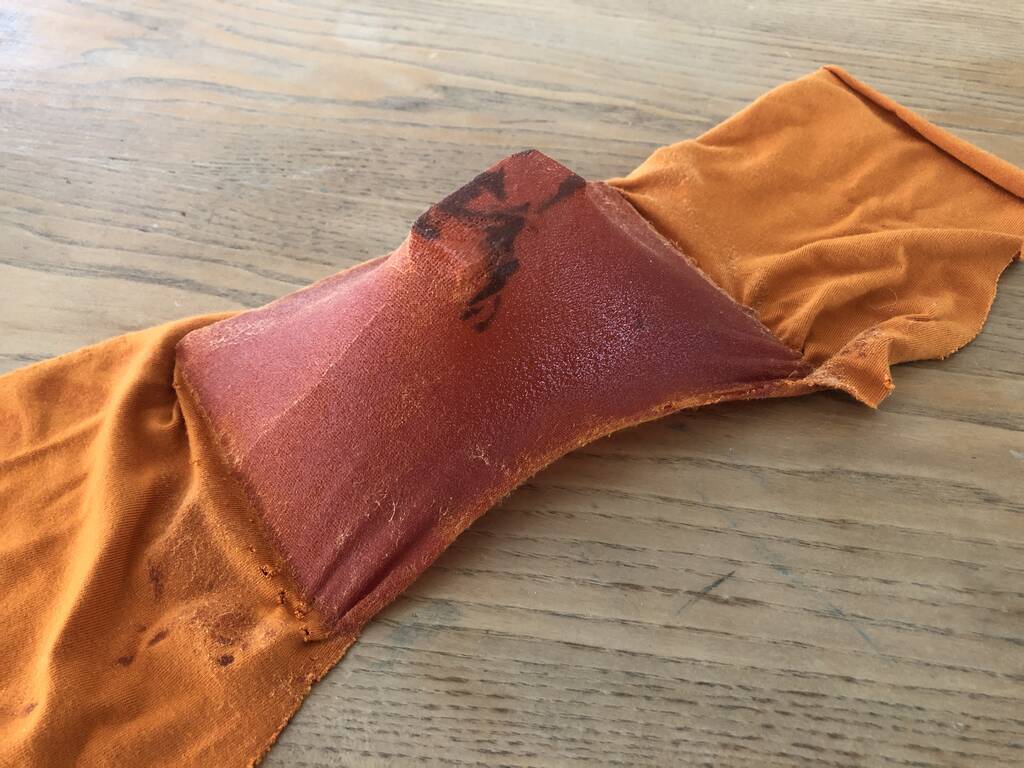
I made some reversed mold out of timber wood and span the flexible textile over the wood. I stapled the textile beneath the wood so it would stay and look like a streched piece of textile.
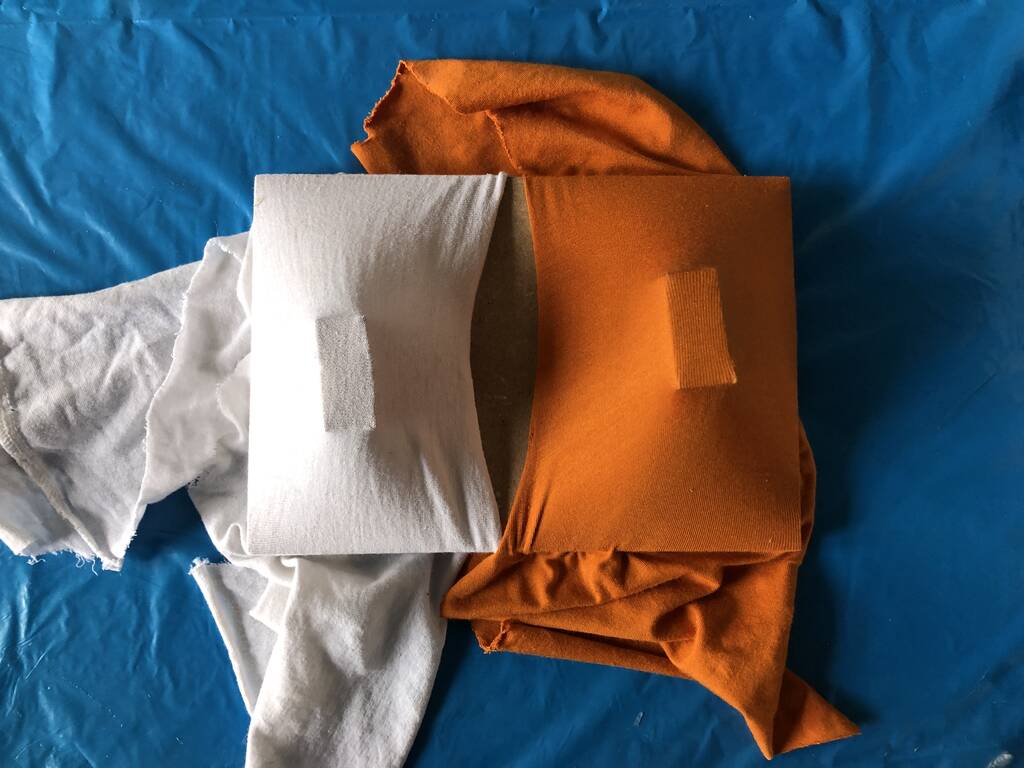
Finally I brushed them in with resin and waited for 10 hours.

I did like the result and wanted to make some Etorre sotass kind of shape on the CNC. But Henk adviced me to continue with the soft robotics because he was doubting if this would be enough for this week and the inflatables would be part of my final project.
Soft robotics
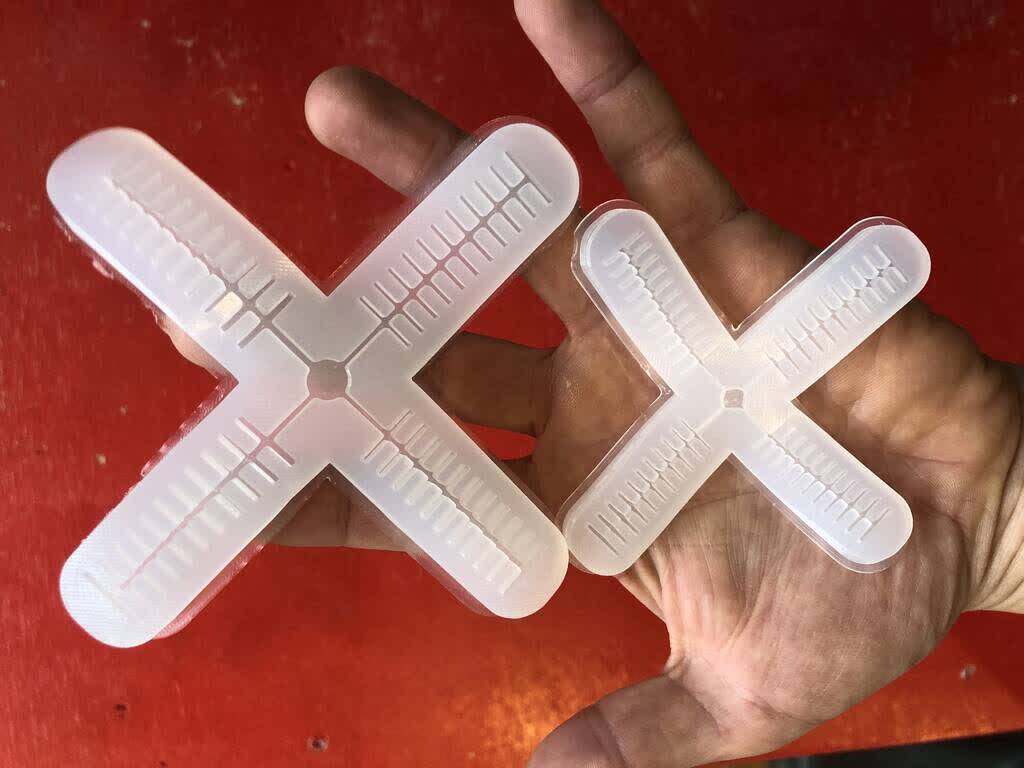
First I wanted to make the lampshade but it wasn’t enough so I focused on the inflatable soft robotic arm.
These links helped me on the way.
textile acadamy soft robotics
Adrian Torres soft robotics
For the soft robotics I need a mold so I can create airchannels. I wanted to model something by myself. But I don’t have a lot of time so I’ll use this link for the model an instructions how make the gripper. It’s exactly what I want.
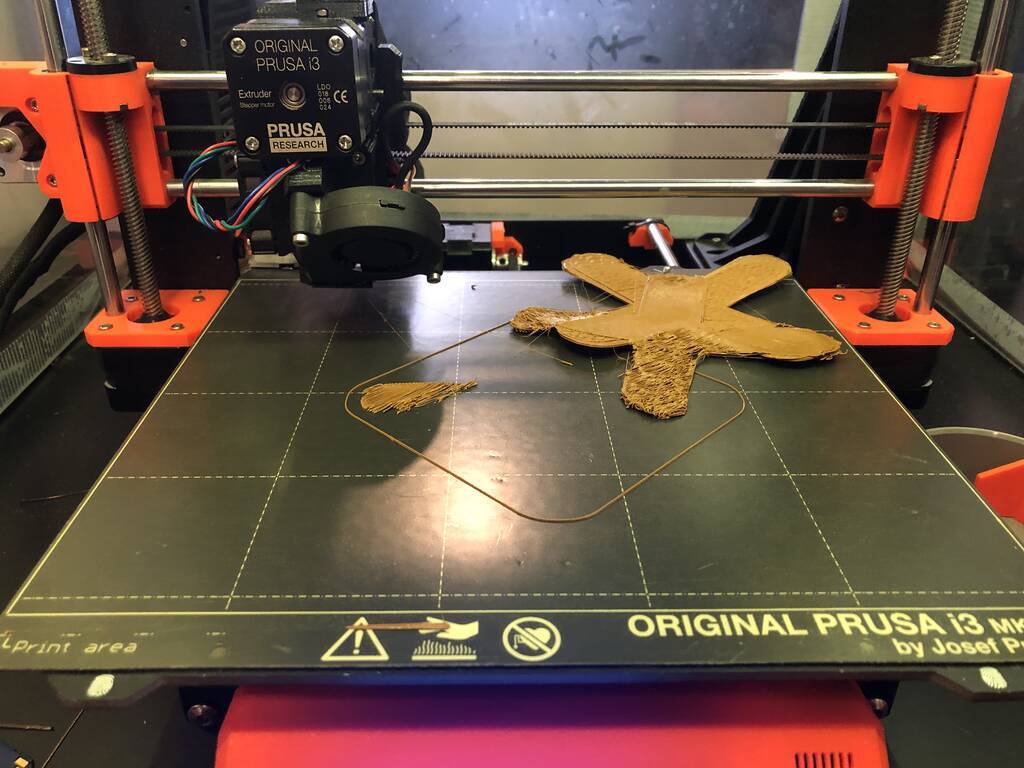
My first model was too small and had stringing. I slightly scaled it and slowed down the spped of my material.
Oops, for the second model I used weird settings. Dit not work as you see.
Required materials
These are the required materials that you need for making a soft robotic.
- 3d printer & PLA/ABS
- Ecoflex 00-30
- 1.5 - 3 mm tubing. But you can also print a to fit the tubing
- something that can blow. A bottle. A pair of lungs a bikepump, Syringe
- Plastic cafeteria tray or metal baking tray (metal tray only required if you plan to use an oven, see below)
- Disposable rubber gloves
- Scissors
- Plastic cups
- Coffee stirrers or popsicle sticks
- Paper towels for clean-up
- (Optional) toaster oven. Do not use an oven that you also use for food.
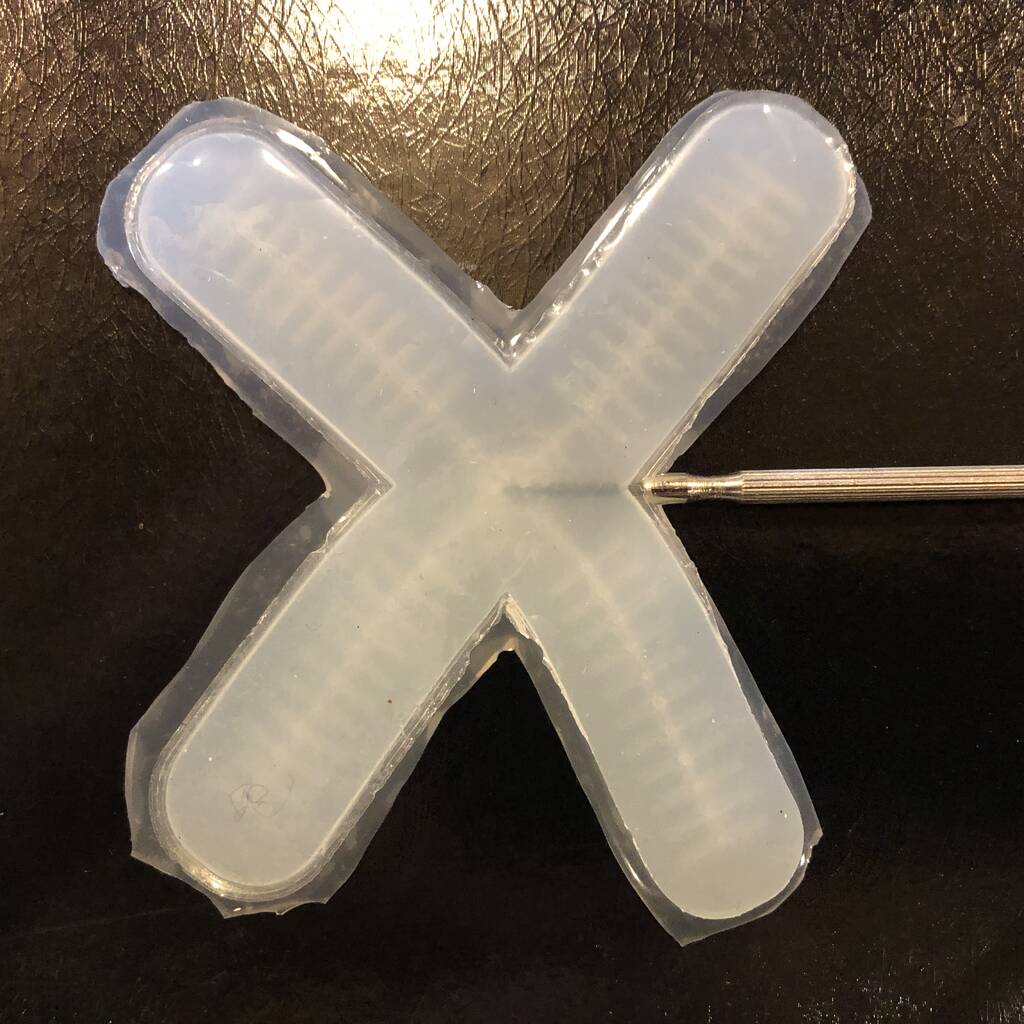
I need a smooth surface for my 3d print. So I cleaned a bit of stringing out of the models.
’‘ Ecoflex is a brand of silicone rubber used for molding made by Smooth-On Inc. Ecoflex comes in two bottles, containing Part A and Part B. Parts A and B are liquids - when mixed together, they will solidify and form silicone rubber (in 4 hours at room temperature, or 10 minutes at 150º F). The materials are non-toxic, and harmless once cured. However, according to the Material Safety Data Sheet (MSDS), “repeated or prolonged” exposure to the unmixed materials (Part A and Part B) can cause mild skin irritation. We recommend wearing disposable gloves when handling unmixed material. If you do get Part A or B on your skin, just wash it off with soap and water.
Mix parts A and B of the Ecoflex in a 50/50 ratio by volume, using a paper or plastic cup. You do not need to use all of your Ecoflex - fill one cup (the one pictured here is a 9oz cup), put the lids back on your Ecoflex jars, and save the rest of the material to make more robots later. Stir the mixture for about two minutes. ‘’
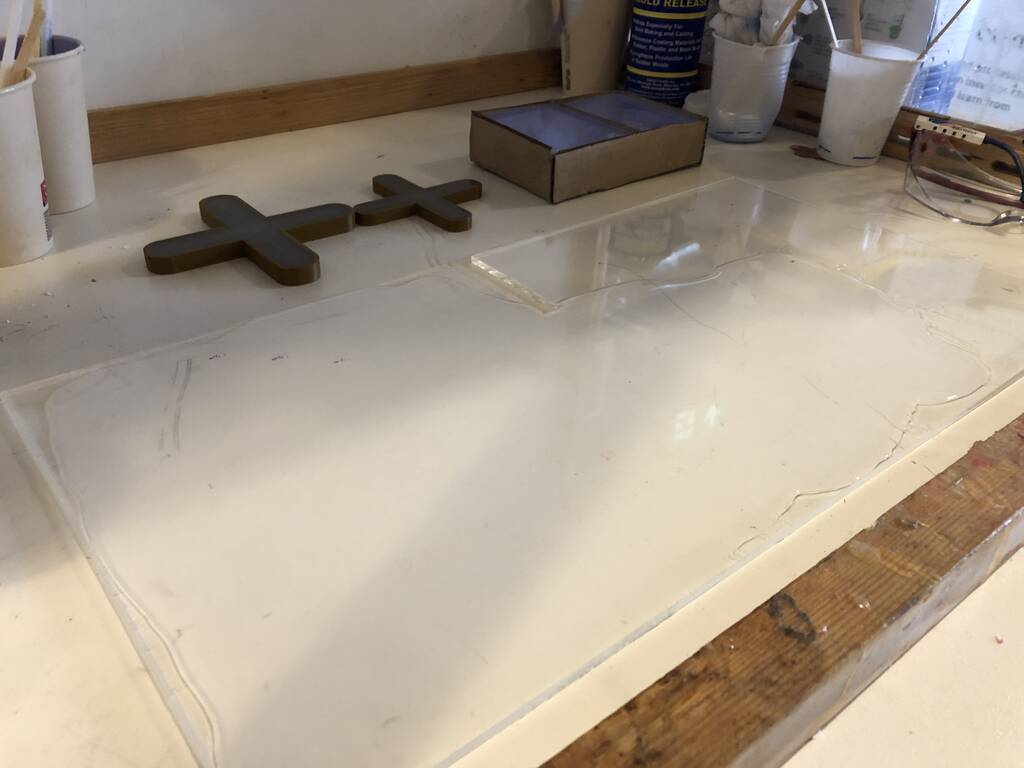
Filled these two badboys and a sheet of ecoflex that I’ll later on glue to each other.
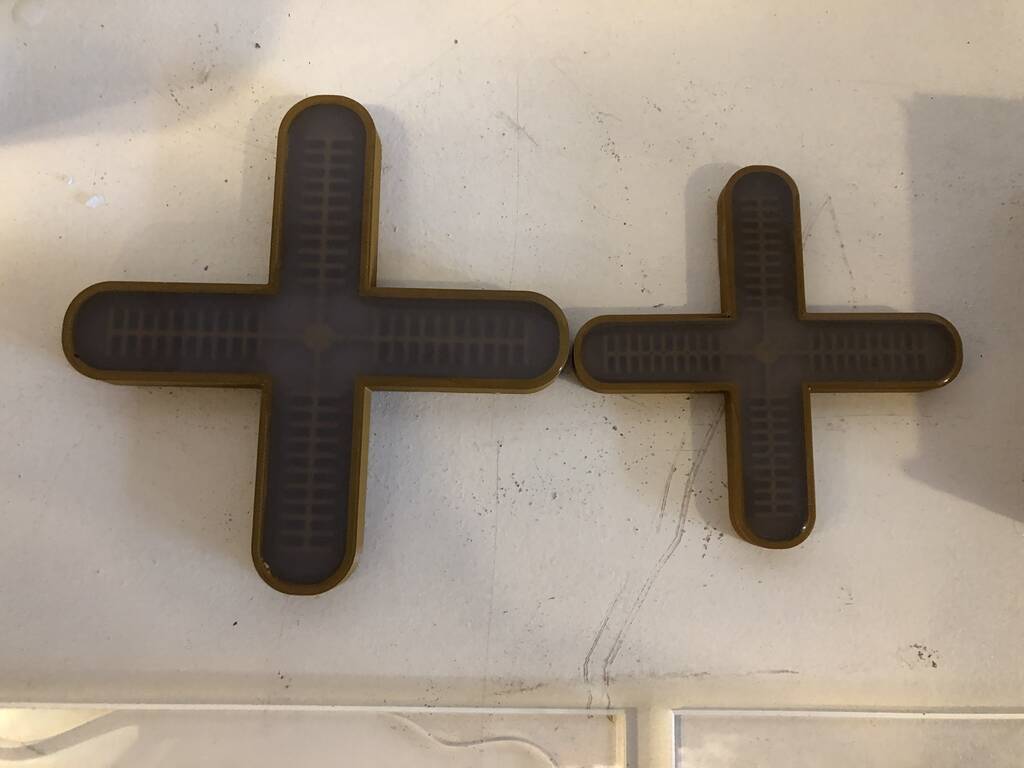
You can’t see it really clearly. But one of the airchannels is clocked some of the material didn’t reached all through the end. Pouring really slowly in a nice thin line is really important for small moulds.
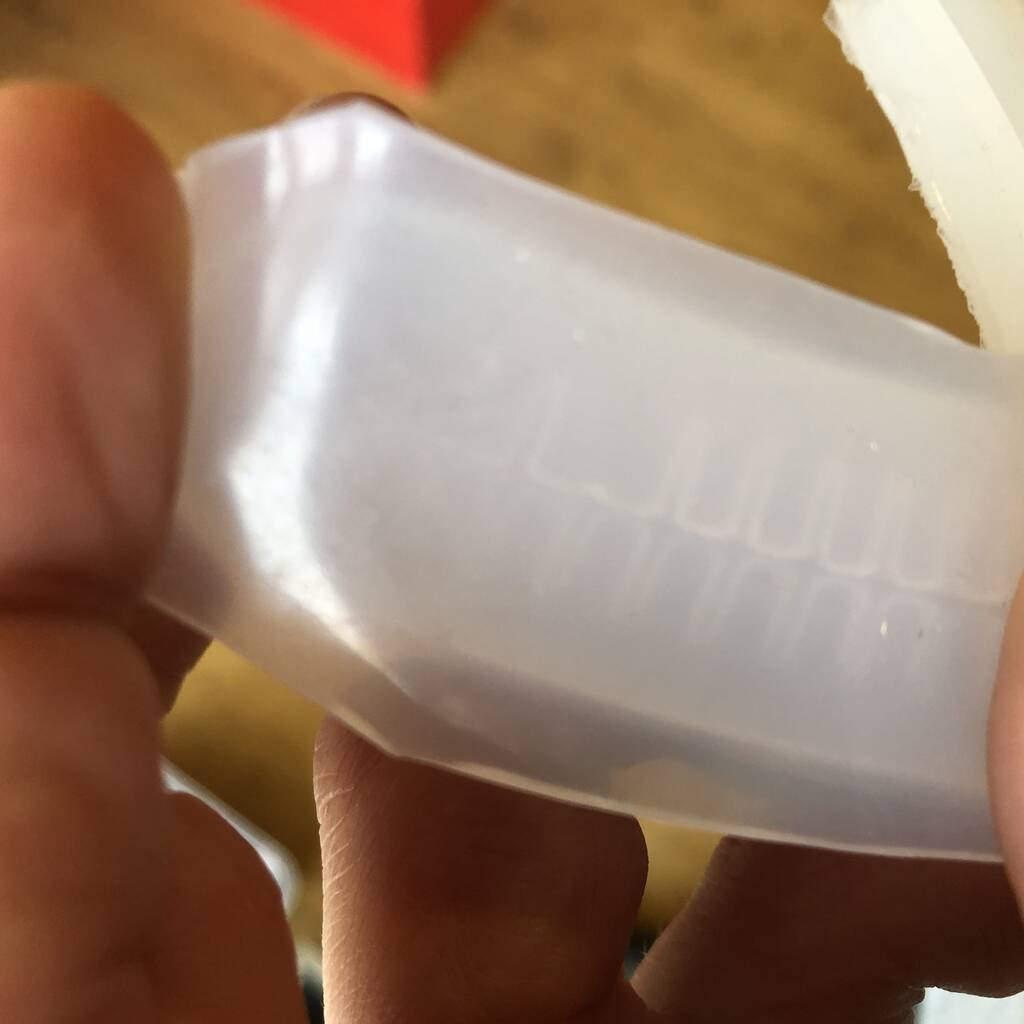
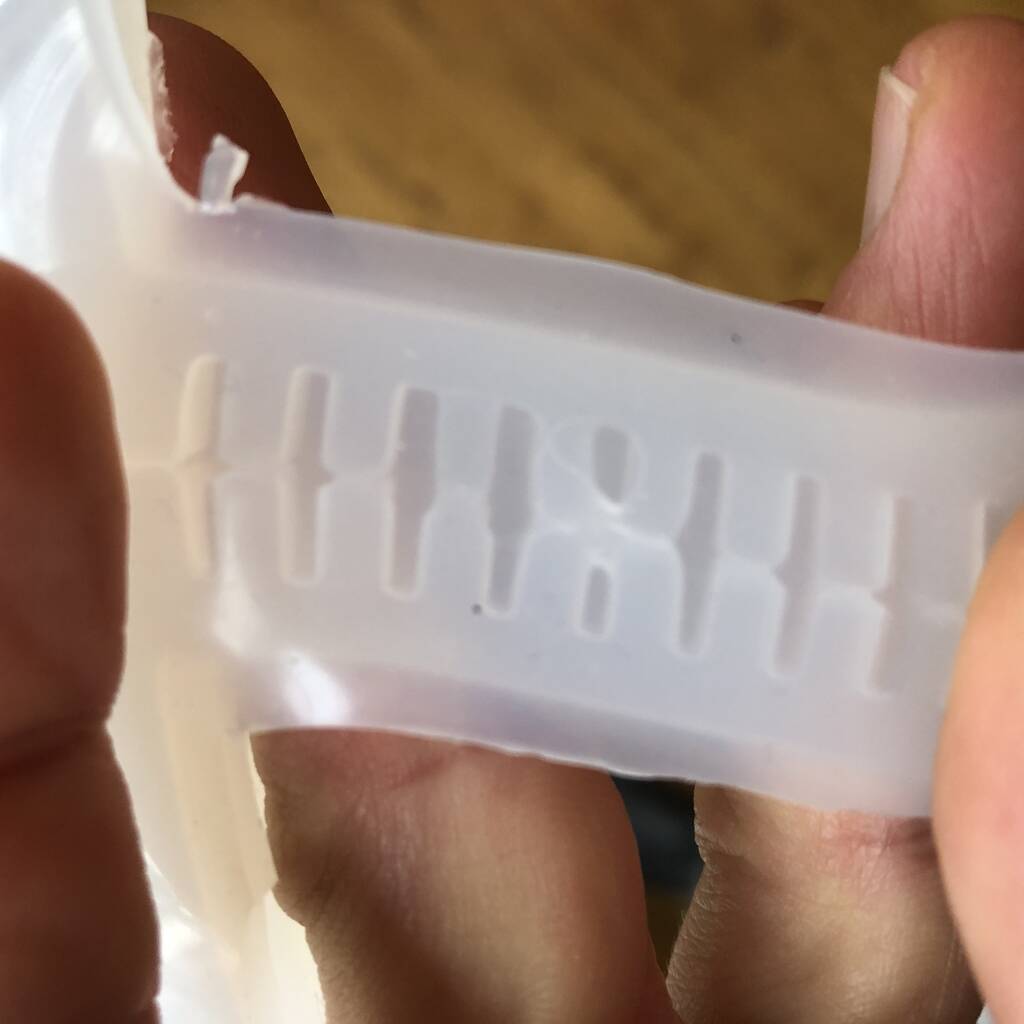
Second batch turned out real nice!
After sealing glueing the top and bottom plate together with some ecoflex. I enserted a little screwdriver in inserting the tube would be easier.
Blowing didn’t work as you see.
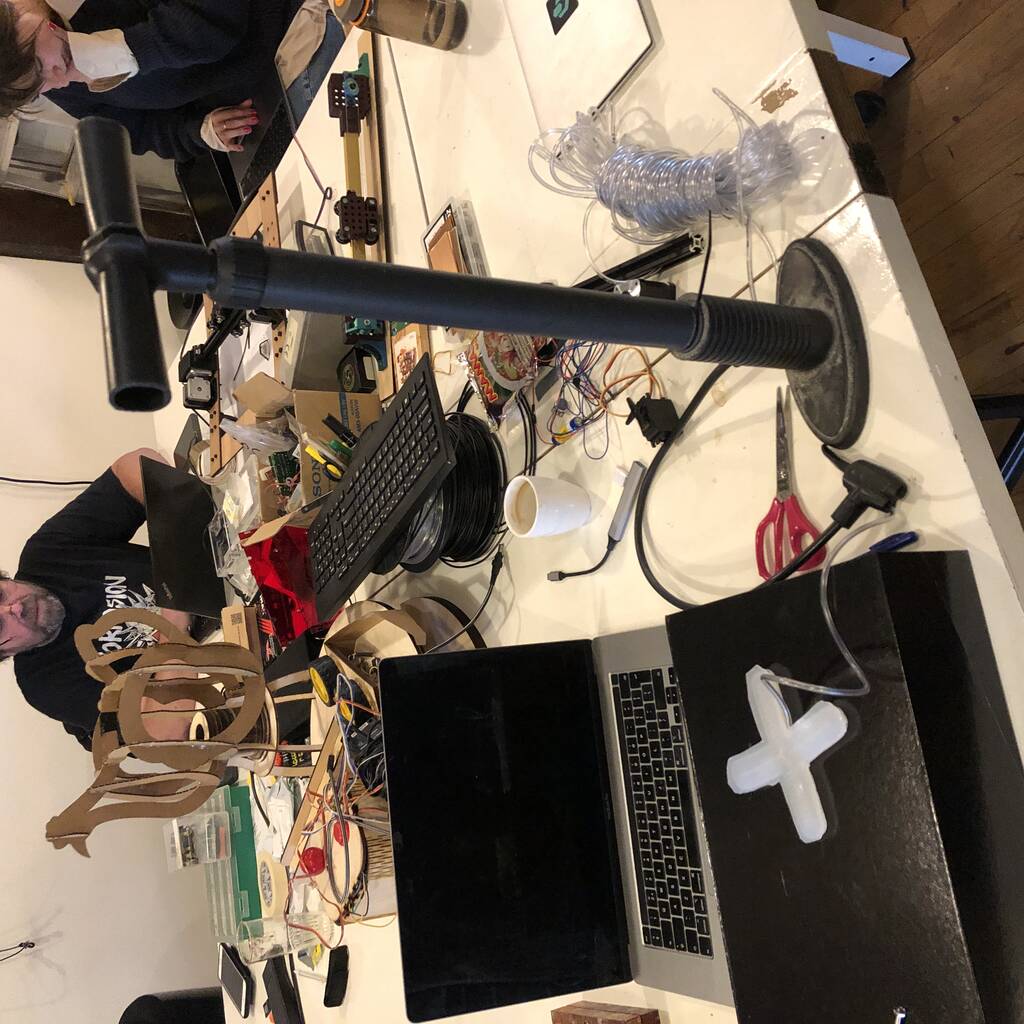
But using a bike pump worked out pretty nice.

Oops, this broke with a big bang!

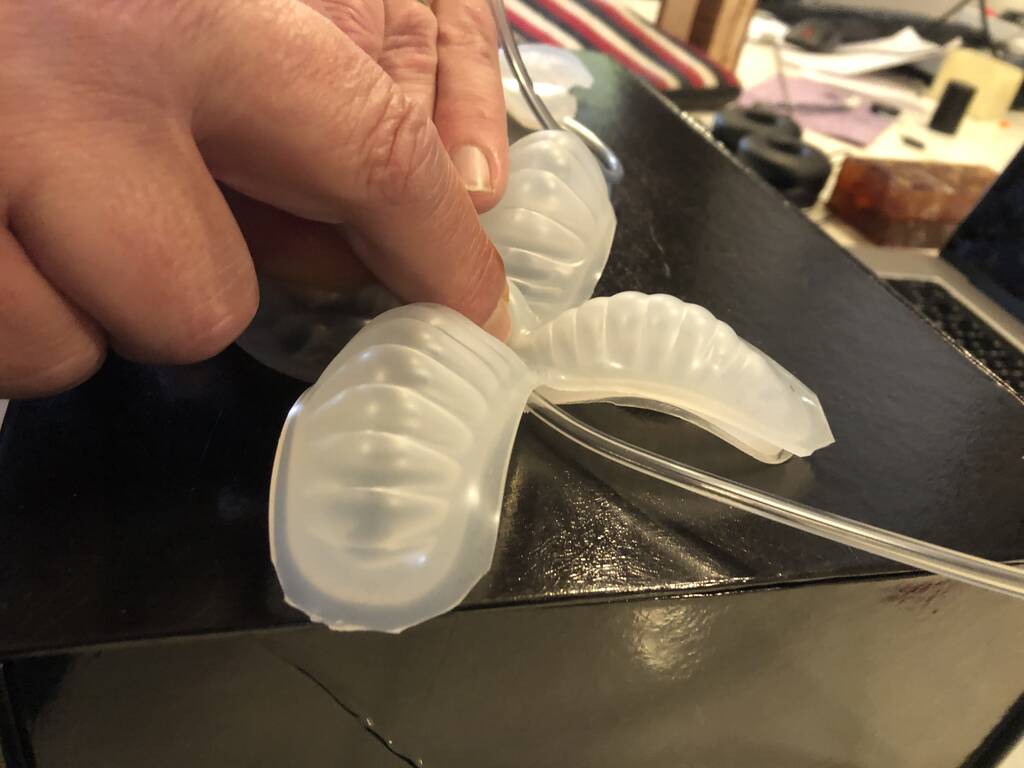
result
Okay, it works. But not good enough for my final project.
The problem is that the thickness is not even. Maybe I should make a mould where for the bottom layer that can also work for an even glue layer. But then I should keep an eye on the sides. They need to be sealed off good.
Dc motor
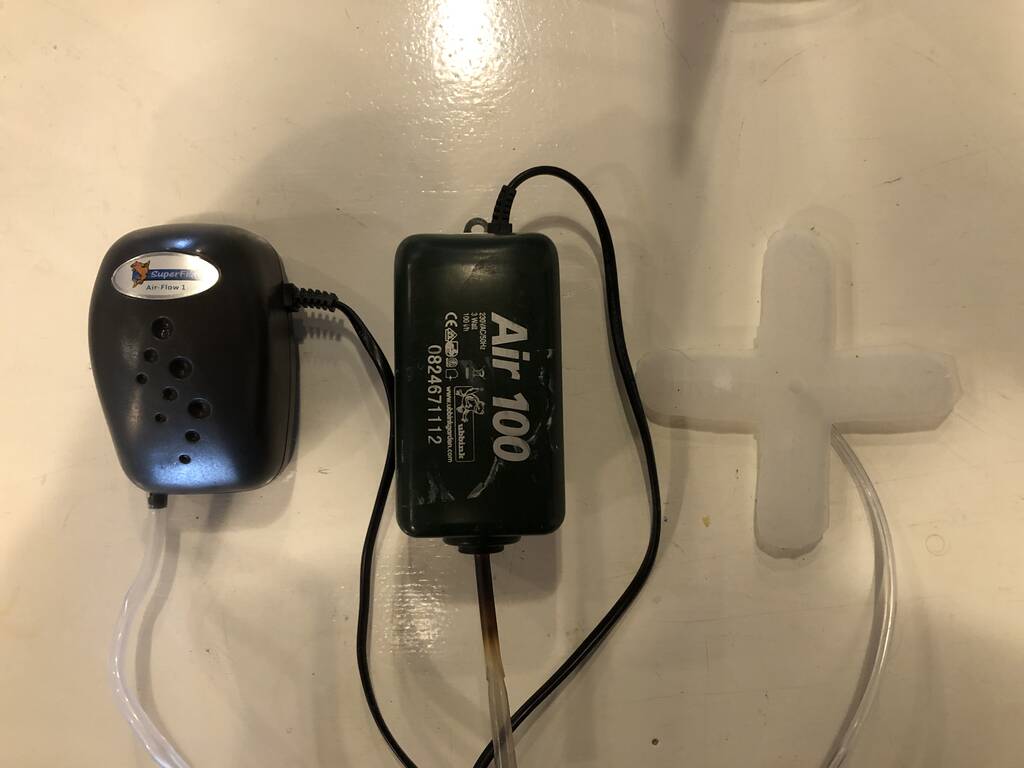
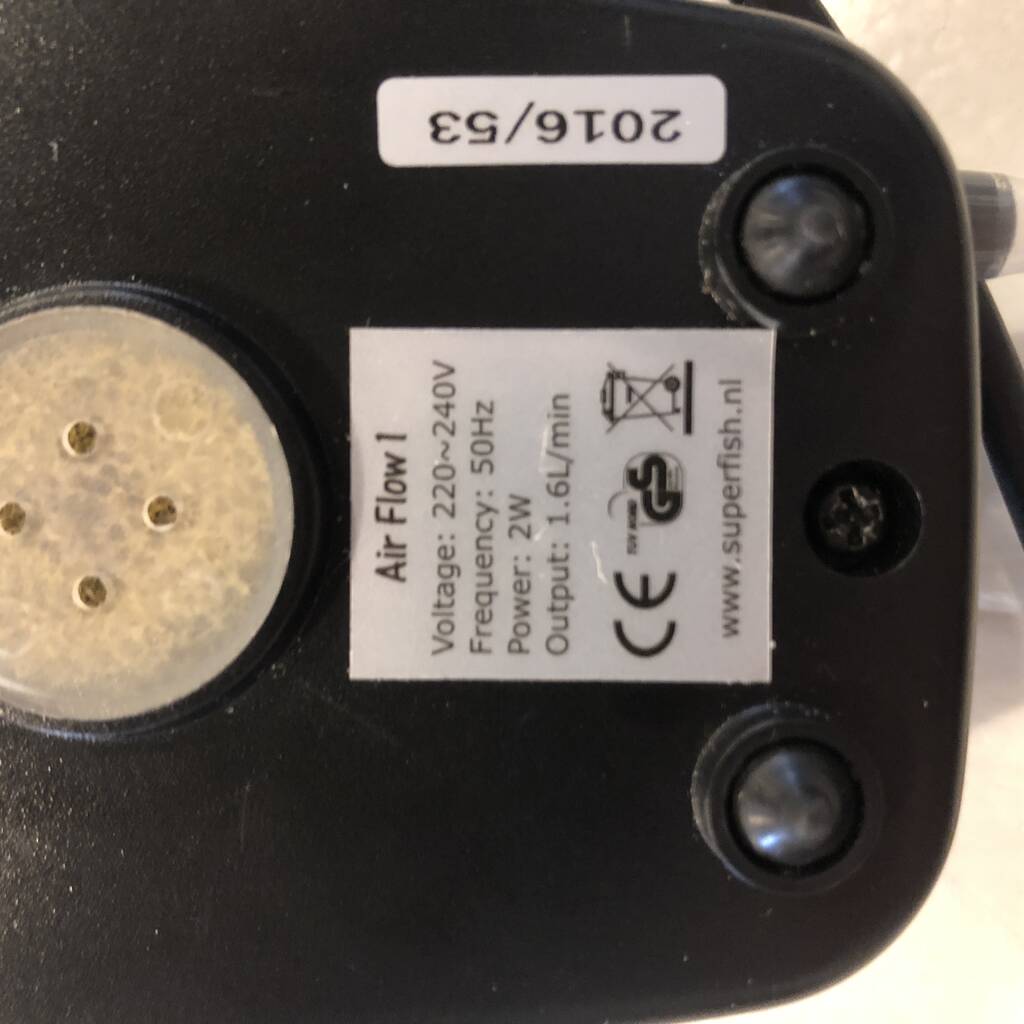
I tried to inflate the grippers with the following pump but it didn’t work. 2/3 Watt with 1.6 L/M seems to be to be not enough.

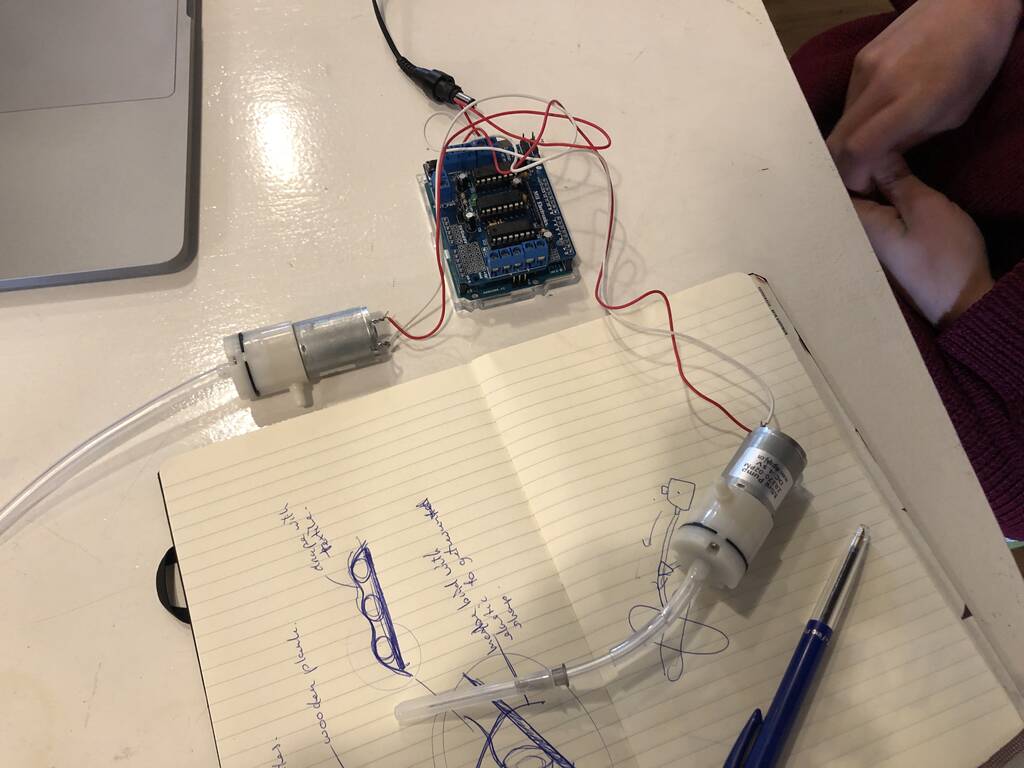
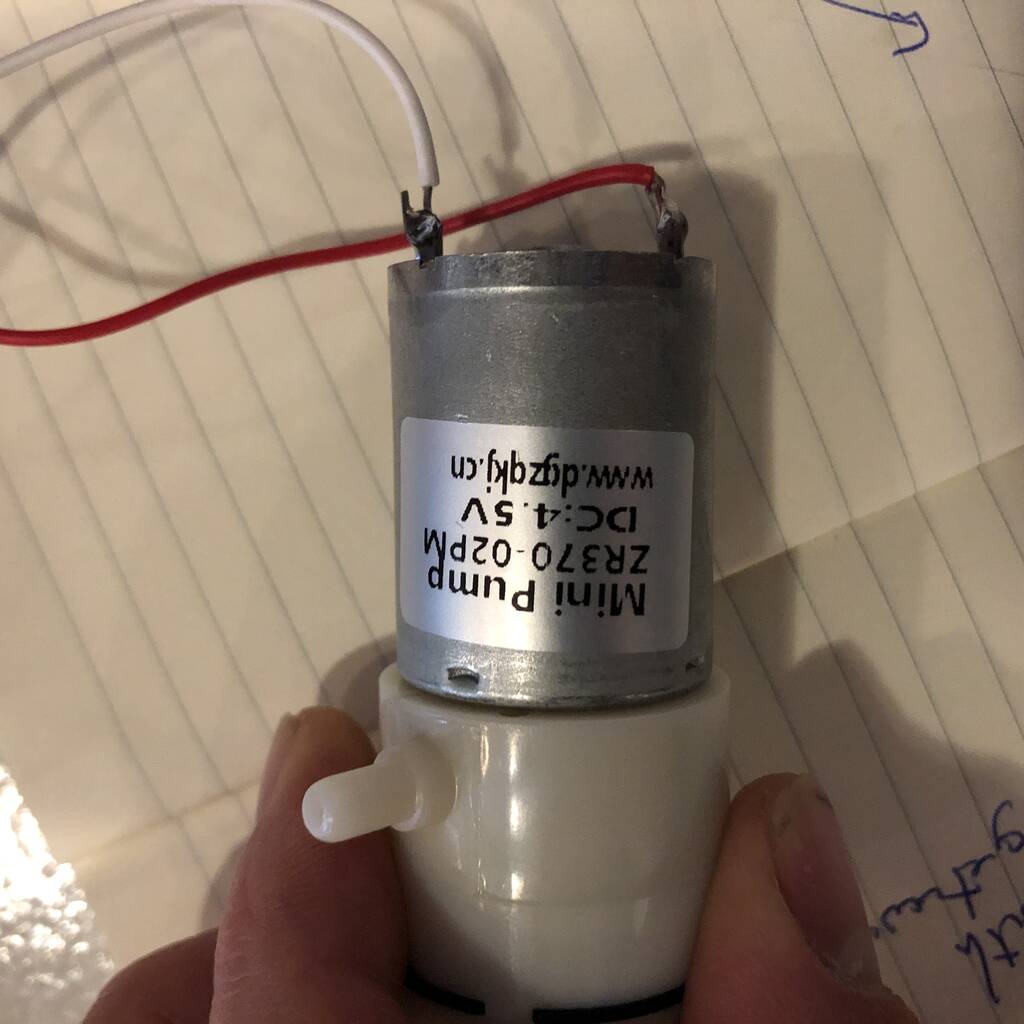
This works though! Found the specs here
ZR370-02PM
- Air Pump and Vacuum DC Motor
- 4.5 V and 2.5 LPM
BOM
So what do I need to make a complete automated inflatable?
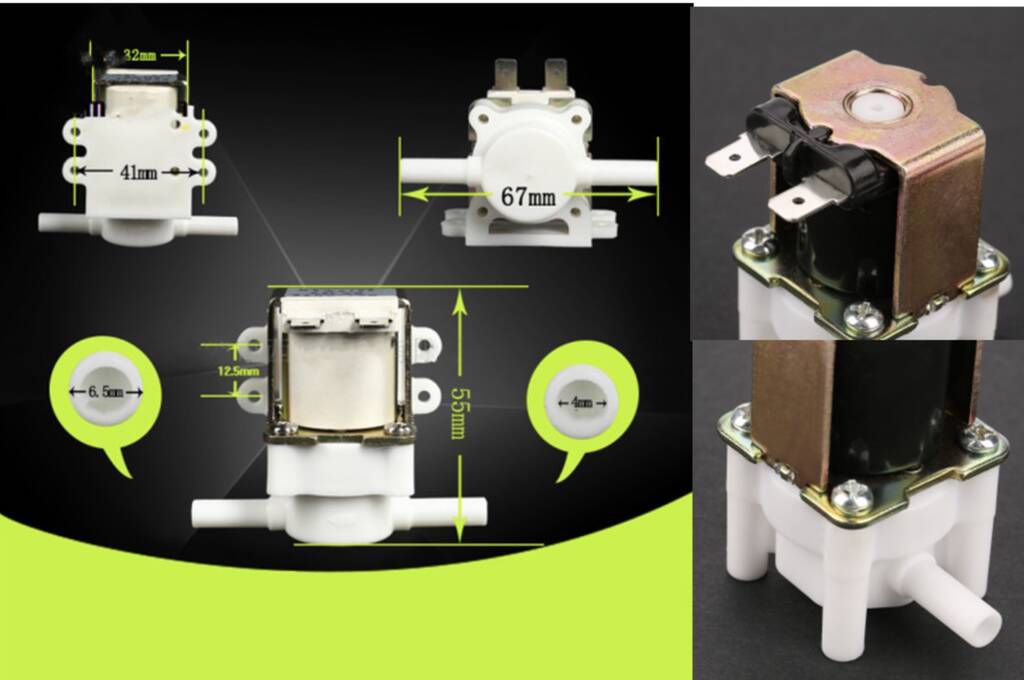
Solenoid valve
NC Solenoïde Water Valve Elektrische Magnetische Valve Inlaat Water Flow Switch Valve 12V
Explanation
- water valve
- 12 v
- valve closed without electricity
- Valve opens with closed loop
-
DC 12 airpump
- 12V
- IN and OUT for air. So can pump and suck
- 400 m/a
- 2 ~ 3,2 lpm.
Tube connectors

Xiao esp-32 c3
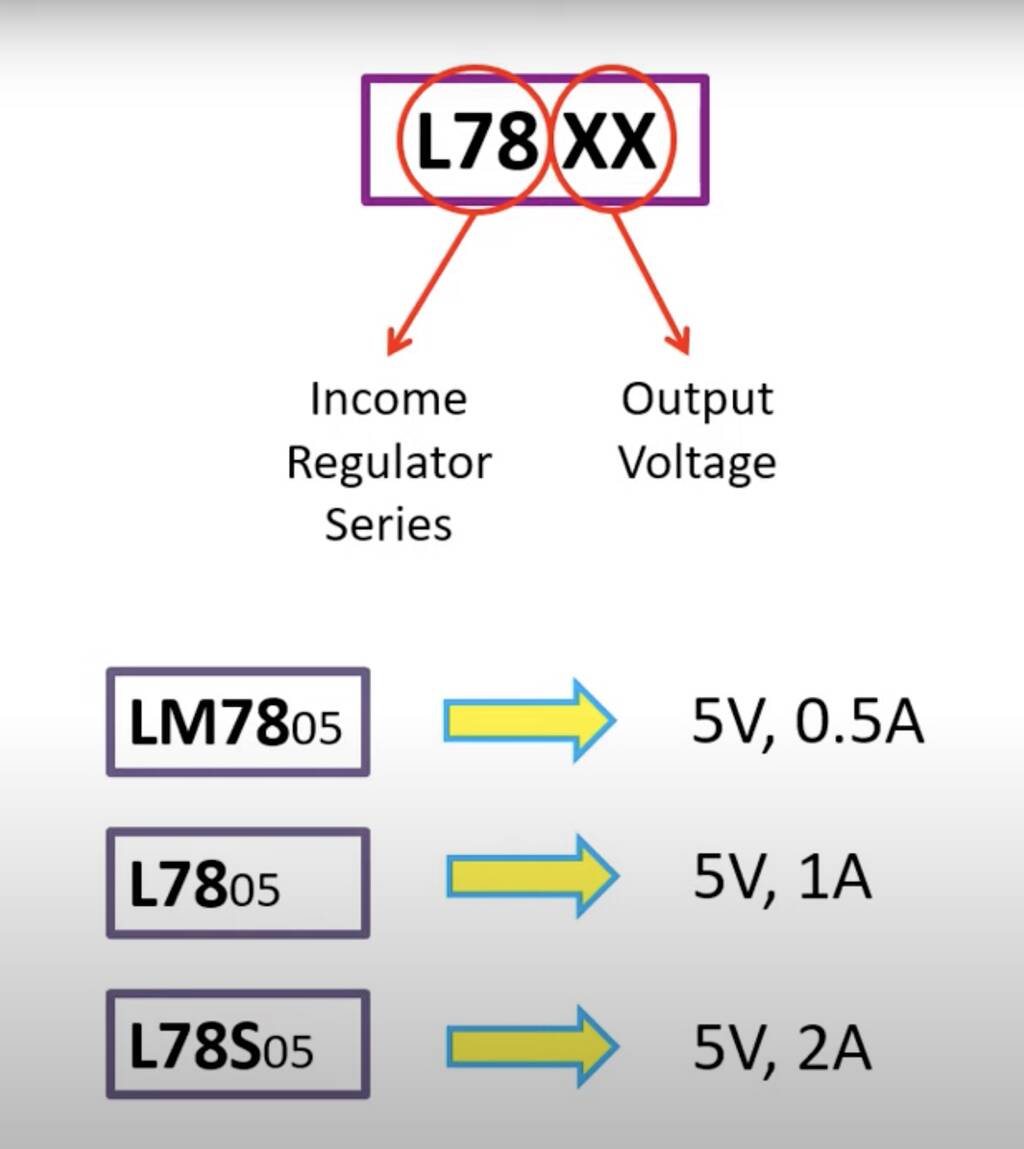
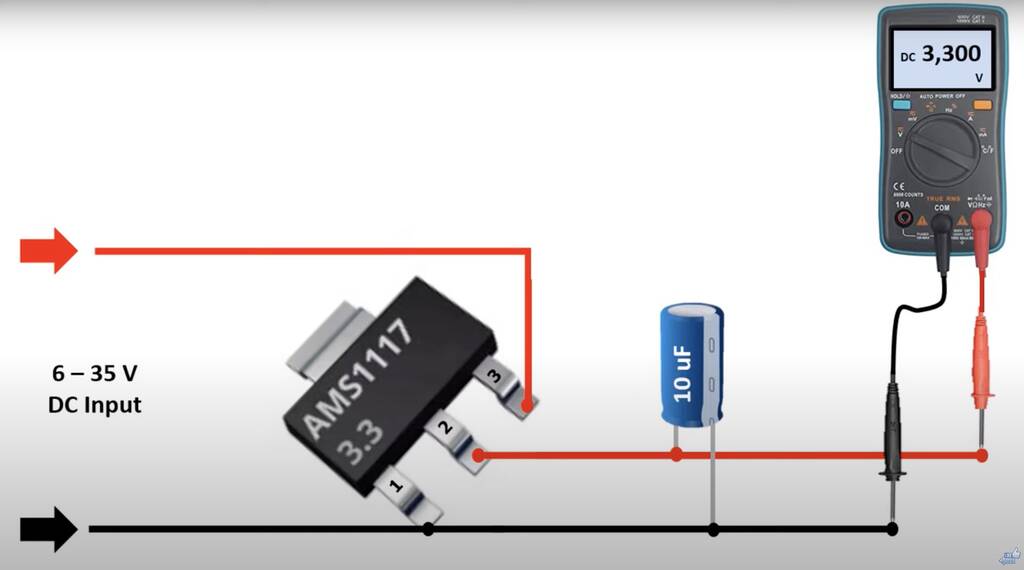
Voltage regulator
this is a good for a voltage regulator explanation.
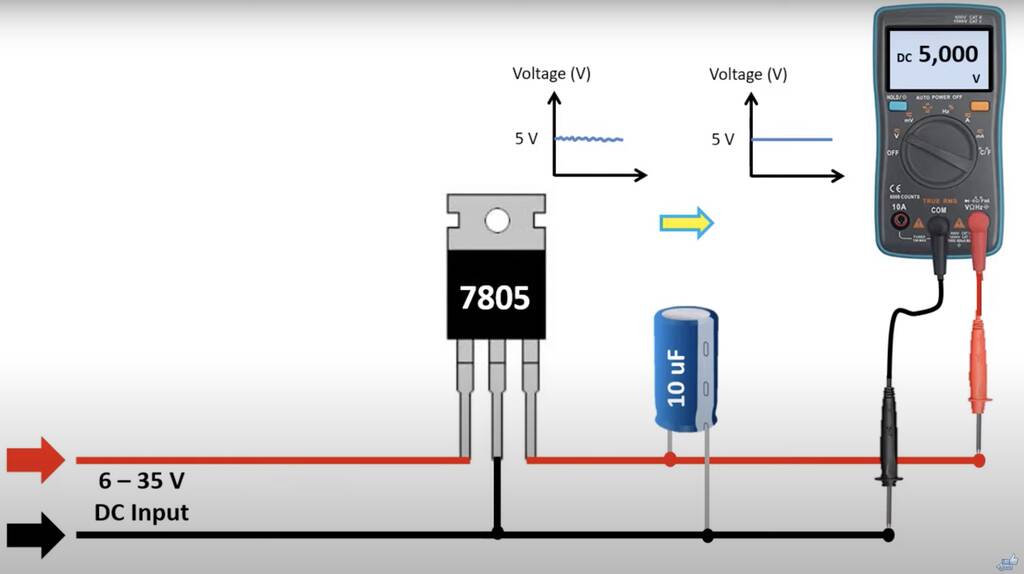

LM3480IM3-5.0/NOPB
- link datasheet
- input max 30 v
- output 5v fixed
- output 100ma
- I don’t think I need a capicitor. It’s only for the micro controller.
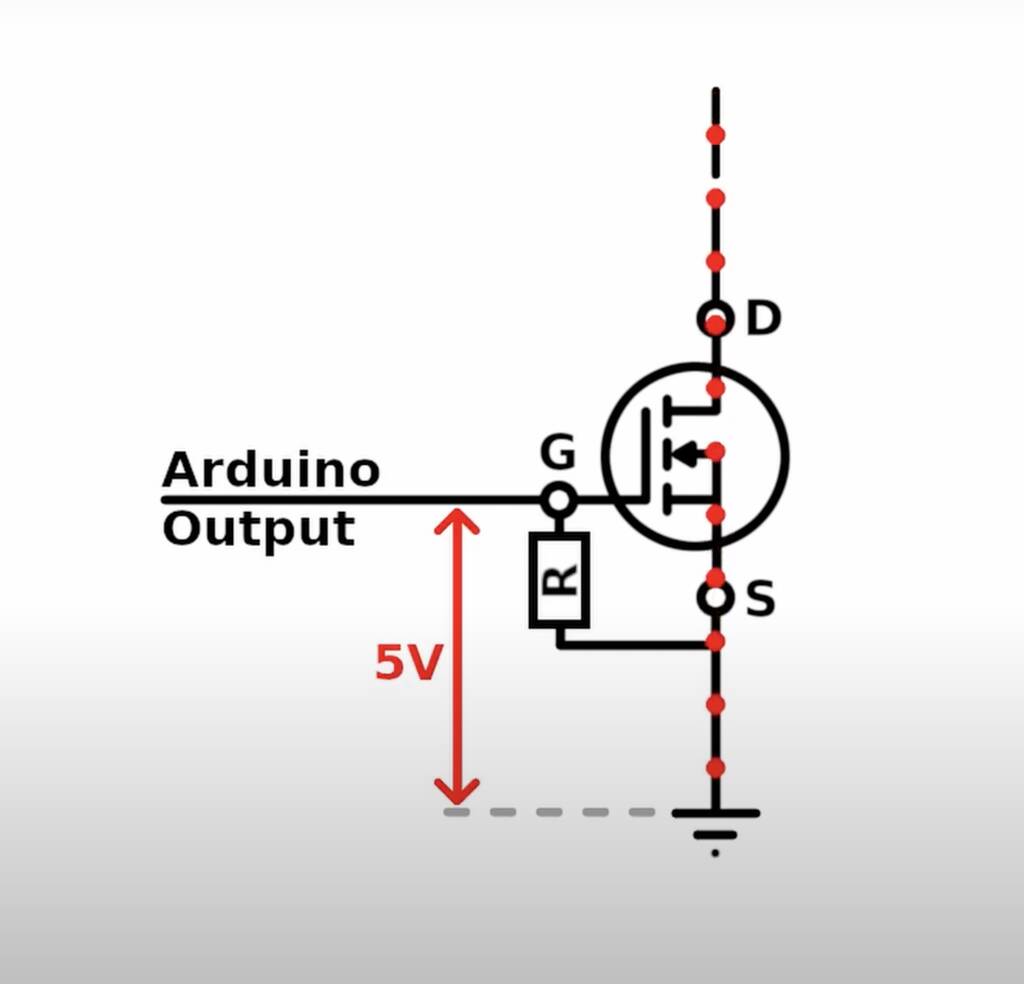
Mosfet
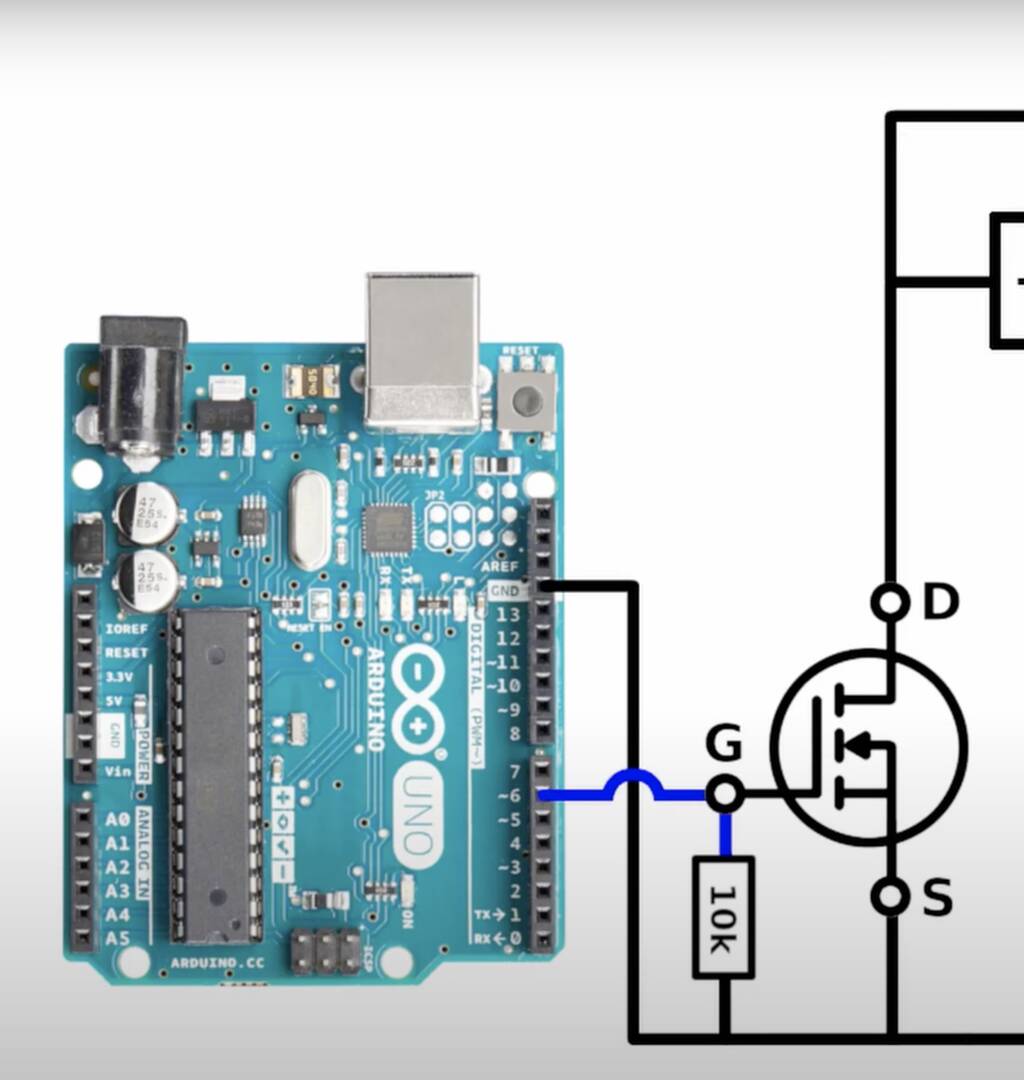
This is a super nice tutorial.
- Logic level = 5v enough to switch in on and off
- enchantment type = normally off
- need a pull down resistor to be off by default
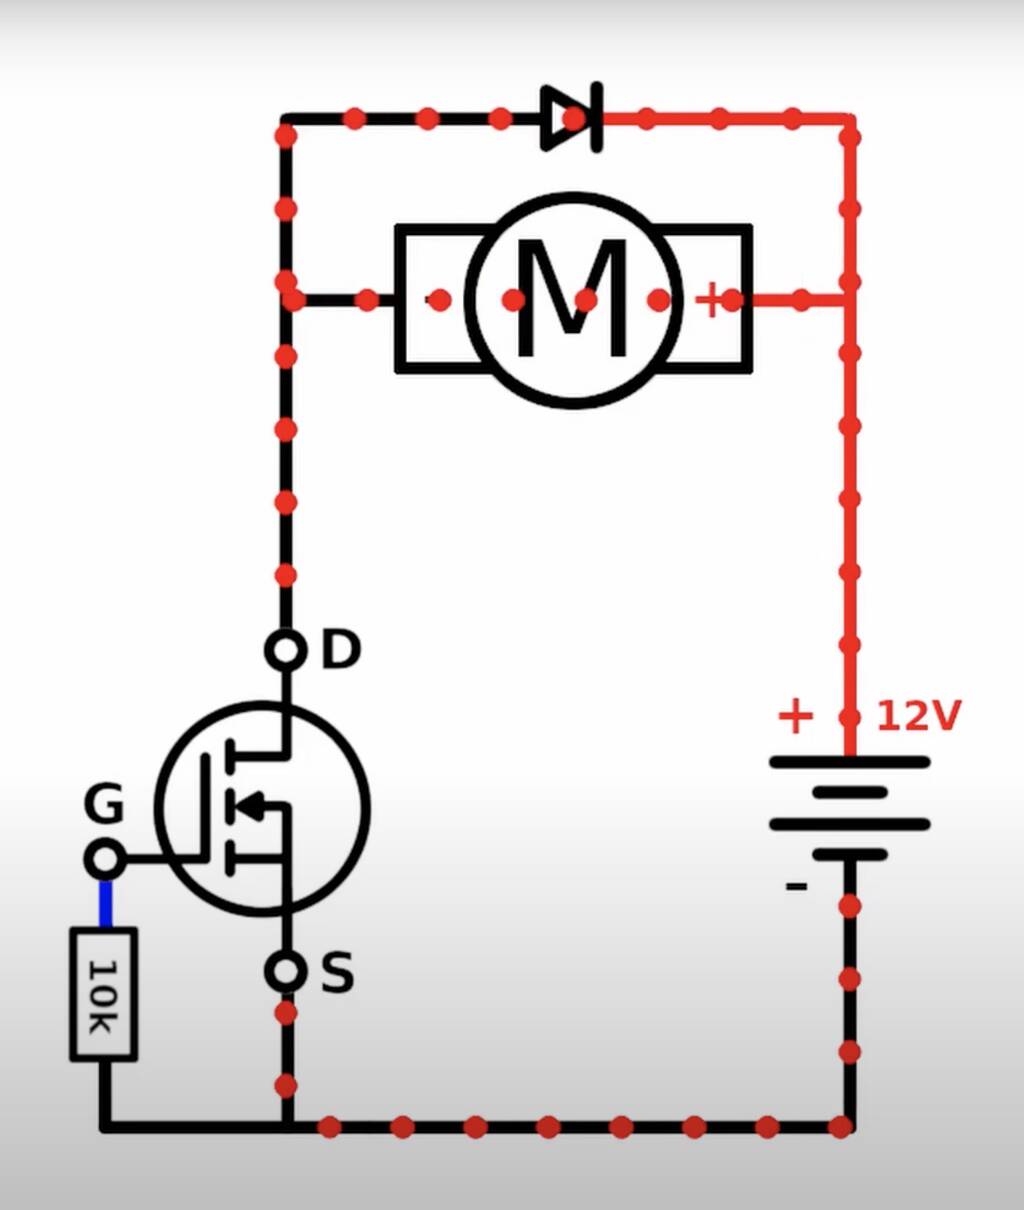
- with PWM you can run the motor half the power - Check tutorial
- he uses a “logic level N-channel enchantment type MOSFET - FQP30N06L” link datasheet
- Use a flyback diode
- Will a 10K resistor do the trick?
I’ll use this N-MOSFET
- SI2336DS-T1-GE3
- 30V 5.2A
- Drive voltage 1.8V, 4.5V
flyback diode
- type CDBM1100-G
- link
- 100V 1A
10 K resistor
- CDBM1100-G
- link
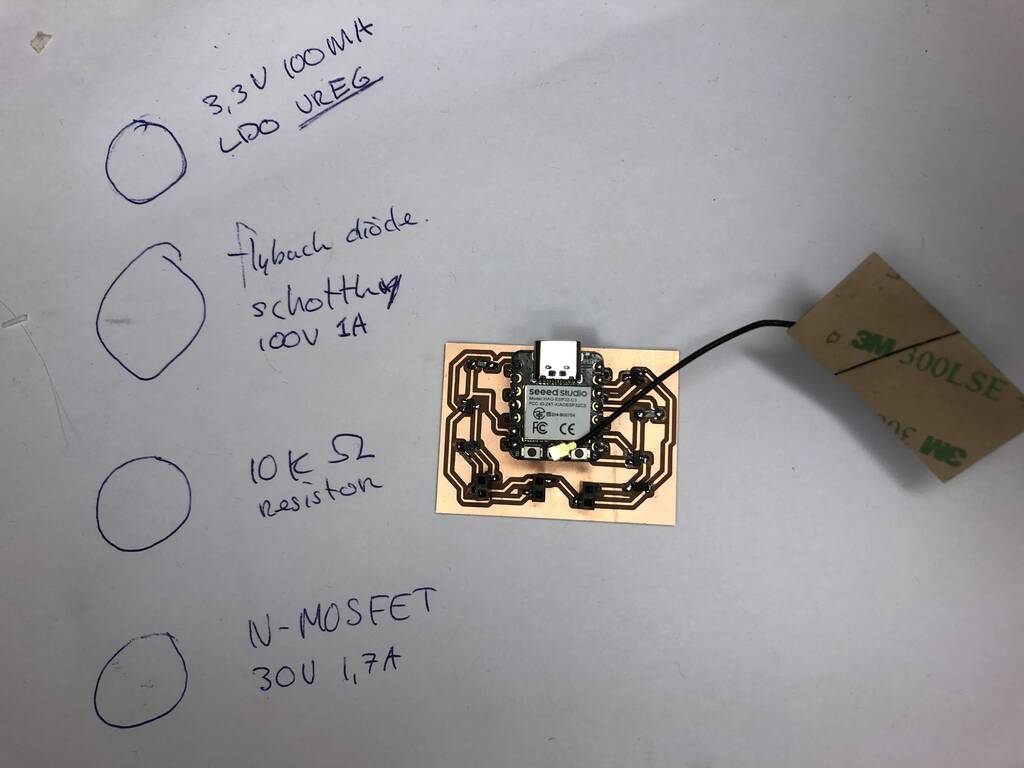
Components
(I changed a view components because the pcb didn’t work)
| What | Type | amount | link |
|---|---|---|---|
| flyback diode | CDBM1100-G | 2X | link |
| N-MOSFET | NDS355AN 30V 1.7A | 2x | link |
| 10K Resistor | 2x | link | |
| Voltage regulator | 3.3V 100MA LDO VREG | 1x | link |
| MCU | Xiao eps32-c3 | 1x | |
| PIN SOCKET SMD 1X02 | 3 | ||
| PIN SOCKET SMD 1X03 | 2X | ||
| PIN SOCKET SMD 1X04 | 2X |
Test
// SOL = solonoid valve
// AIR = dc air pump

int Sol = D5;
int Air = D8;
//int Delsol = 1000;
//int Delair = 1000;

void setup() {
  // put your setup code here, to run once:
Serial.begin(9600);

pinMode(Sol, OUTPUT);
pinMode(Air, OUTPUT);

}

void loop() {
  // put your main code here, to run repeatedly:
Serial.println();

digitalWrite(Sol, HIGH);
digitalWrite(Air, HIGH);

}
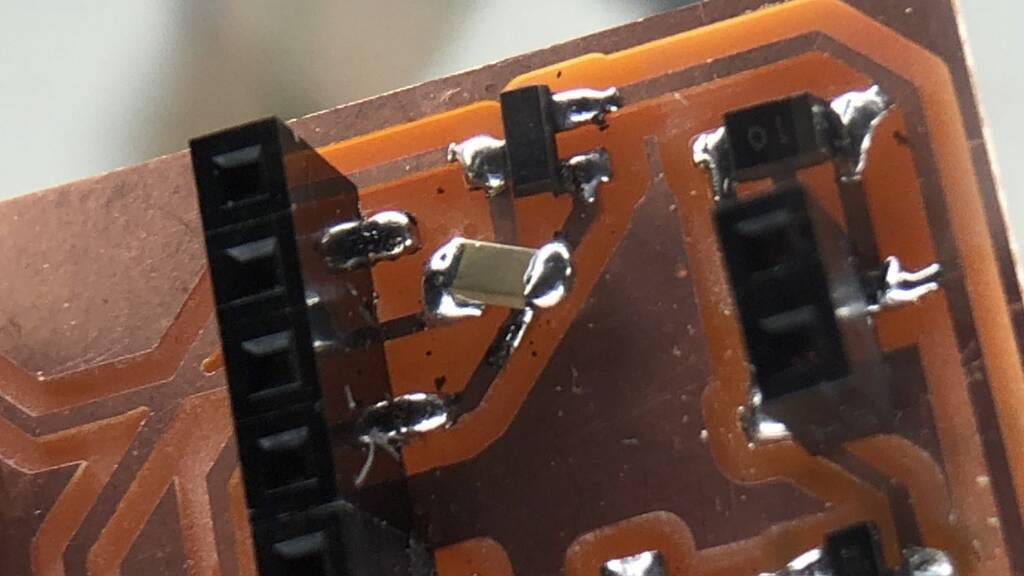
Pulles my traces of. Solderd it good but this is no good way of connecting it.
Not sure what happens here.
O.... My hole design was total shit. I didn’t realized that you need to think while drawing traces working in the pcb editor. Pretty dumbbbooo. I didn’t drew the traces in the right order. That was the reason why the Mosfet wasn’t working.
Test 2
New Kicad design.
Made the board.
Got this error. a fatal error occurred: unable to verify flash chip connection (no serial data received.)
Did I blew my board up? It smells funny.
I could upload a sketch to another board esp but not my own.
Ah, this worked though:
- hold the boot button whille connecting to computer and release when is connected.
When I power my board the light on the MCU is not on so maybe its my voltage regulator
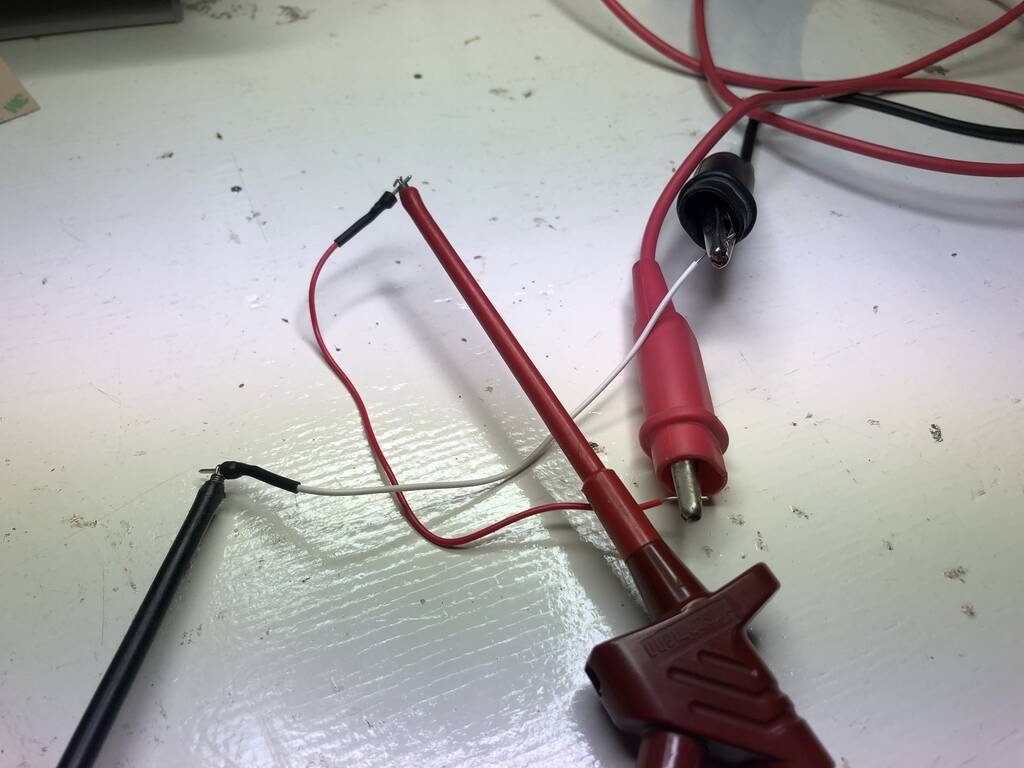
I started with the start. Measured the voltage at the powerbank and a set of wires didn’t work. I used others and then it did work. Maybe one of the cables is ripped.
Finally I got this result. I got this before.
Then I powered my MCU with the computer instead of working with the voltage regulator. Then it worked. But only on one side.....
If I change the code the right hand side also works.
digitalWrite(Air, HIGH);
delay(1000);
digitalWrite(Air, LOW);
delay(1000);

digitalWrite(Sol, HIGH);
I checked if the mcu get 3.3 and it did...........
I didn’t placed a capacitor between my power pin and the out pin of the voltage regulator.
So I placed a 10 uf capacitor between the output of the voltage regulator and the GND. Unfortunately the motor was still stumbling.
OOPS!! I powered my Xiao ESP32-C3 through my 3.3 output pin. That’s not possible. You can only power your esp32-x3 through the USB port.
5V - This is 5v out from the USB port. You can also use this as a voltage input but you must have some sort of diode (schottky, signal, power) between your external power source and this pin with anode to battery, cathode to 5V pin.
3V3 - This is the regulated output from the onboard regulator. You can draw 700mA
GND - Power/data/signal ground
Motor controller
Maybe it wasn’t working beause a dc motor is working better with a motor controller. Let’s find out.
Do I need a motor driver for my UNdirectional (one direction flow) Dc air motor?
What is a dc motor driver? ‘’DC motor drives are defined as amplifiers or power modules that interface between a controller and a DC motor. They convert step and direction input from the controller to currents and voltages compatible with the motor. T’‘
Do I need this? No, right? I’ll be able to controll my motor with PWM with the help of a transistor/MOSFET. So I was on the right track.
If your motor is brushed, also add a small capacitor (~1uF) across the terminals of the motor to help with the electrical noise. How do you know if your motor is brushed?
’‘ EXTERNAL - Brushed motors will have physical brushes on the outside of the motor, while BLDC motors will not. Externally you’ll notice that the brushed rotor has permanent magnets glued or bolted to the outside. The permanent magnet has a north and south pole that work with the armature to create motion. The armature is the rotating part inside the motor.’‘
Test 3
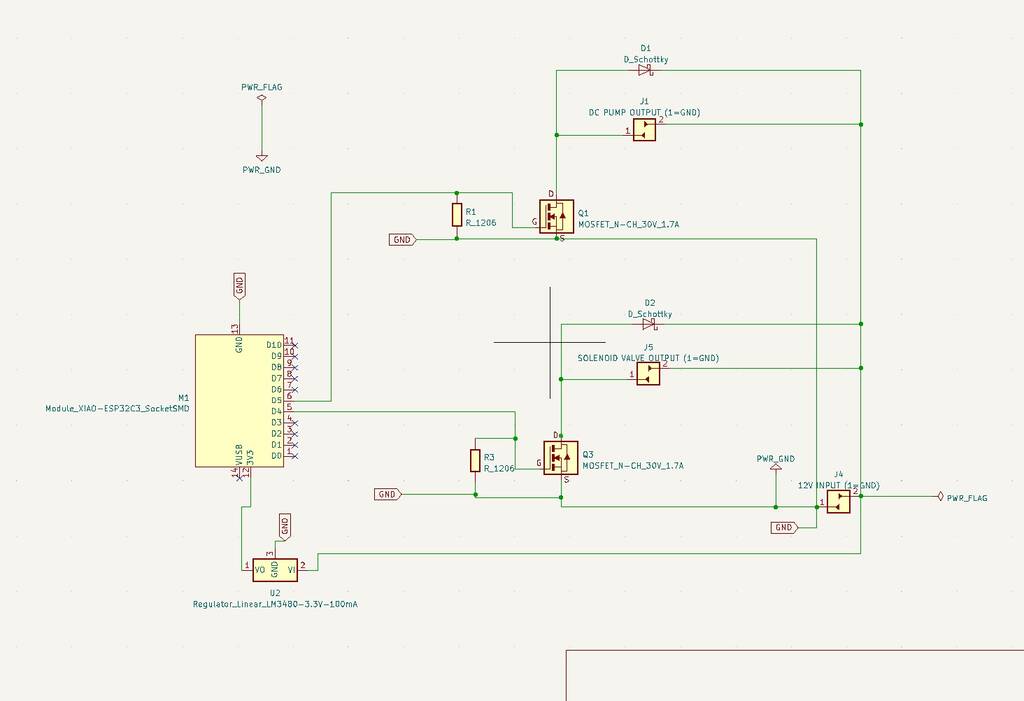
Finally succes! The problem was that I was powering the esp32 through its 3.3v pin. Stupido! You can only power the the xiao esp32-c3 externaly through the 5v pin. But if you power the esp through the 5v pin you need place schottky and in my case a voltage regulator that regulates the voltage from 12 to 5v. I also added 2 capictors to prevent the esp from interference.
I made some changes in my KiCad design.

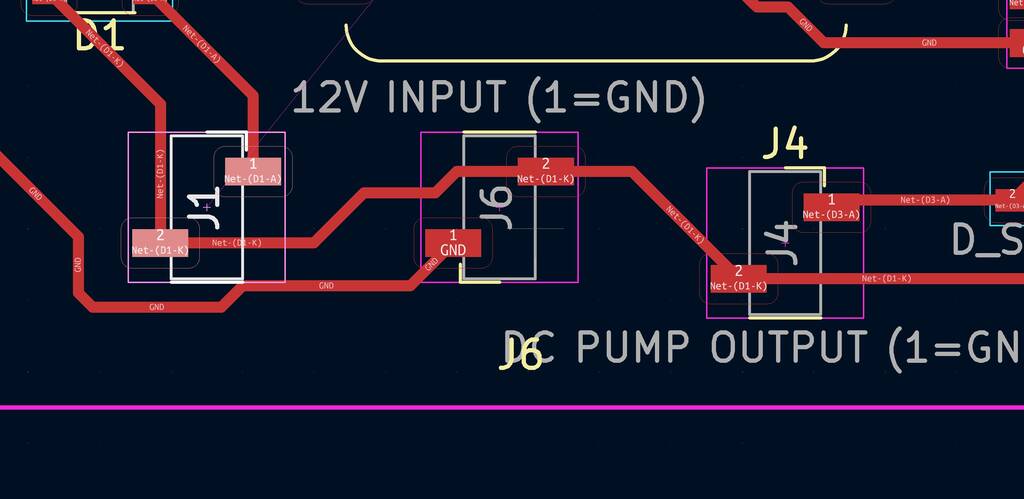
I made a lot of PCB’s and tested a view of them I finally found how to make one. This is the final BOM for the correct PCB.
| What | Type | amount | link |
|---|---|---|---|
| flyback diode | CDBM1100-G | 2X | link |
| N-MOSFET | NDS355AN 30V 1.7A | 2x | link |
| 10K Resistor | 1x | link | |
| Voltage regulator | 5V 100MA LDO VREG | 1x | link |
| Capacitor 10uf | 1x | ||
| capicitor 1uf | 1x | ||
| MCU | Xiao eps32-c3 | 1x | |
| Conn_PinHeader_2x02_P2.54mm_Vertical_SMD | 2x | ||
| PIN SOCKET SMD 1X03 | 2X | ||
| PIN SOCKET SMD 1X04 | 2X |
I made so many mistakes this week. The gripper and PCB do not work perfectly but it’s a good start for a nice inflatabe.
Files
milling
Grippermould Fusion
Grippermould STL
3d print mould
Helpful links and notes
Merav Gazit final project
Really clear tutorial for complicated arm
this is exactly what I did
Preparing all the materials for casting the Ecoflex. Ecoflex 00-30 for the top mold and ecoflex 00-50 for the bottom mold.
Casting silicon _ de-gassing_ curing in the oven for 10 minutes at 150F (Instead of 4 hours cure time for Ecoflex 00-30 and 3 hours cure time for Ecoflex 00-50). Ecoflex 00-30 pot life is 45 minutes, so you can take it easy… = 65 C
NOTES
Silicone gripper
- print 2 moulds
- Pour material (Ecoflex 00-30) in both moulds (it works without mold release but will use it to be sure)
- Cure in oven for 10 mintues on 65 celcius
- Poor in another THIN layer of ecoflex to bond bottom and top
- Cure in oven for 10 minuts on 65 celcius
- Make hole in side with something sharp (maybe print something for tube. Would be nice if you can make it stick with silicone or glue)
- Press tube in