5. 3d Scanning and printing
At the fab lab in the Waag we have 2 resin printers and 4 FDM printers. For this week we’ll stay with the FDM printers.
Group assignment
For the group assignment we compared the Micro - All in one.
Below you see a metrics of the printers that we have in our lab and their most importent features.
| Metrics | Ultimaker2+ | Prusa MK3S | Creality Ender 3 | Sains Smart infi 20 |
|---|---|---|---|---|
| Volume | 8.7 x 8.6 x 8 inch | 9.84 x 8.3 x 8.3 inch | 8.66 x 8.66 x 9.84 inch | 8.66 x 8.66 x 9.84 inch |
| Filament diameter | 2.85 mm | 1.75 mm | 1.75 mm | 1.75 mm |
| Bed calibration | .. | automatic | by hand | automatic? |
| Nozzle diamter | 0.4 mm | 0.4 mm | 0.4 mm | 0.4 mm |
| Heated bed | Yes | Yes | Yes | |
| Print speed | ? mm/s | ? mm/s | 180 mm/s | 180 mm/s |
| Layer resolution | 20 microns | 50 microns | 100 microns | 100 microns |
| Max extruder temperture | 260°C | 300°C | 255°C | 255°C |
| Type extruder | ||||
| Suggested material | PLA,ABS,PETG,TPU,Wood | PLA, PETG, ASA, ABS, PC (Polycarbonate), CPE, PVA/BVOH, PVB, HIPS, PP (Polypropylene), Flex, nGen, Nylon, Carbon filled, Woodfill | PLA,TPU,ABS | PLA,PETG |
| Specials | .. | .. | .. | belt printer |
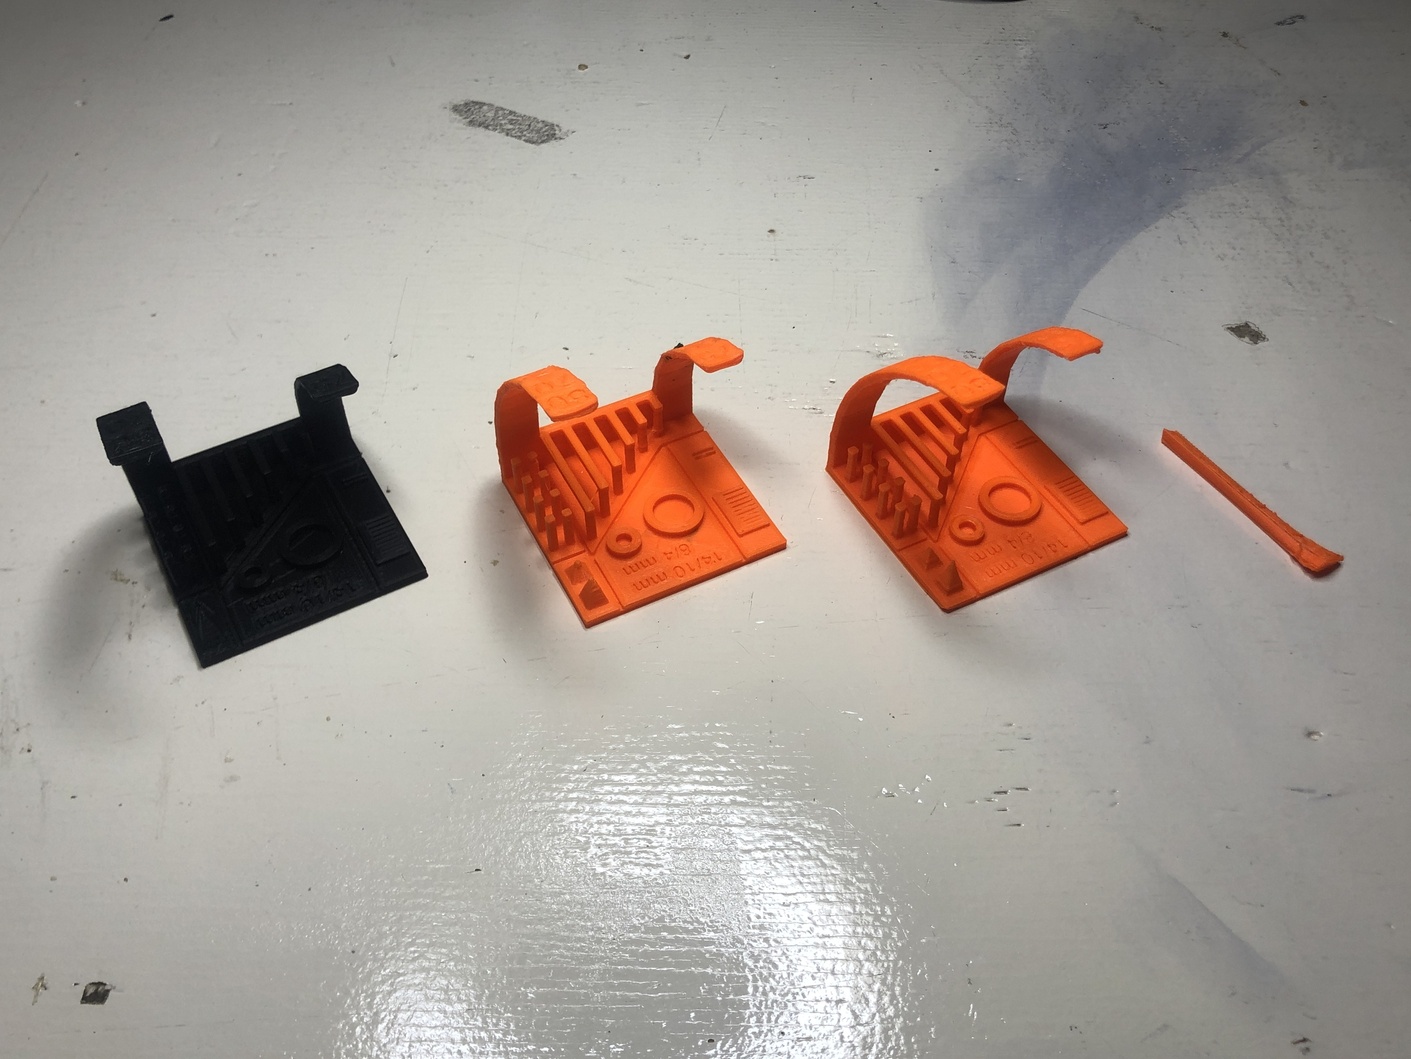
From left to right. Ulitmaker, Prusa, Ender, belt printer.
| Settings | amount |
|---|---|
| layer height | 0.2mm |
| brim | no, but with skirt |
| Material | PLA |
| Slicer | standard settings |
For the tests we are looking at the following features;
overhang
bridging
stringing
sharp-corners
tolerance
scale/diameter
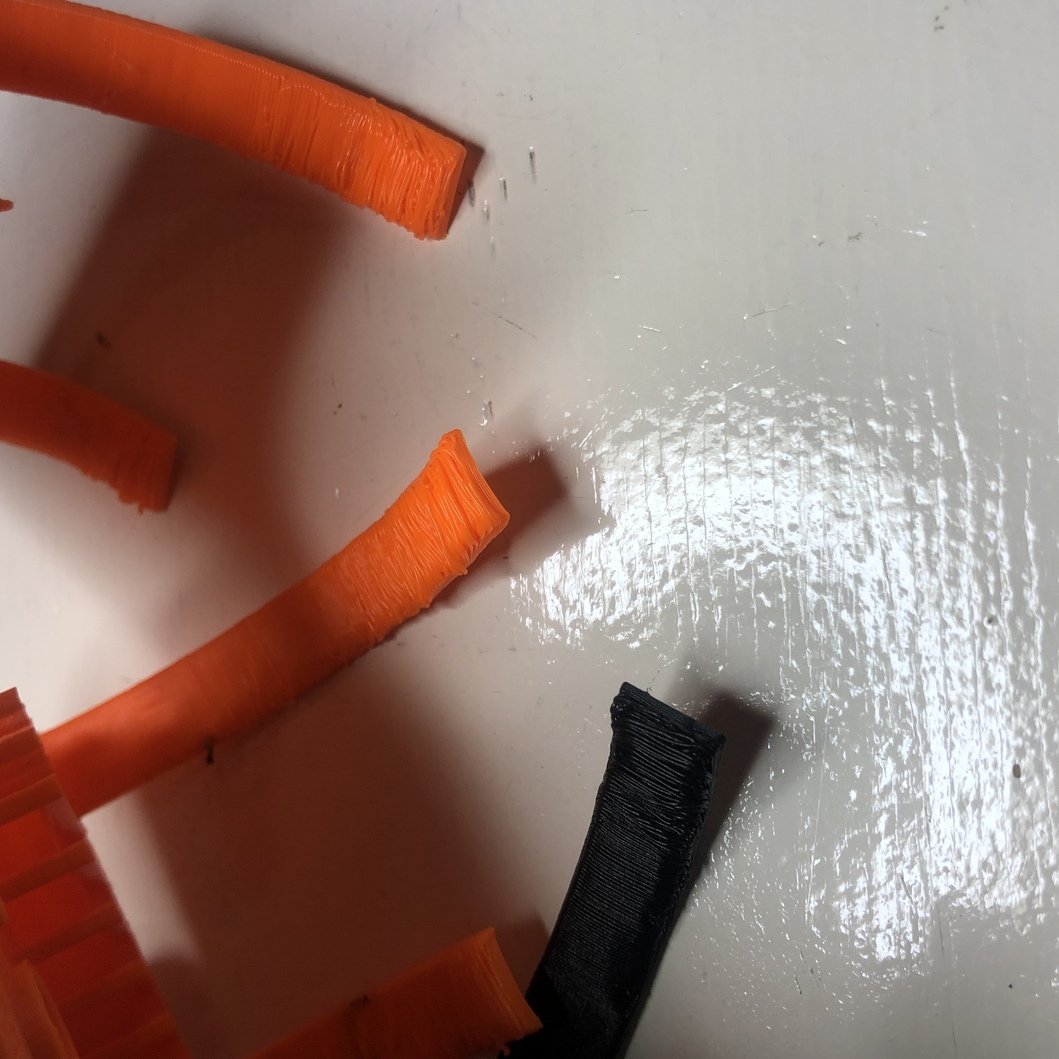
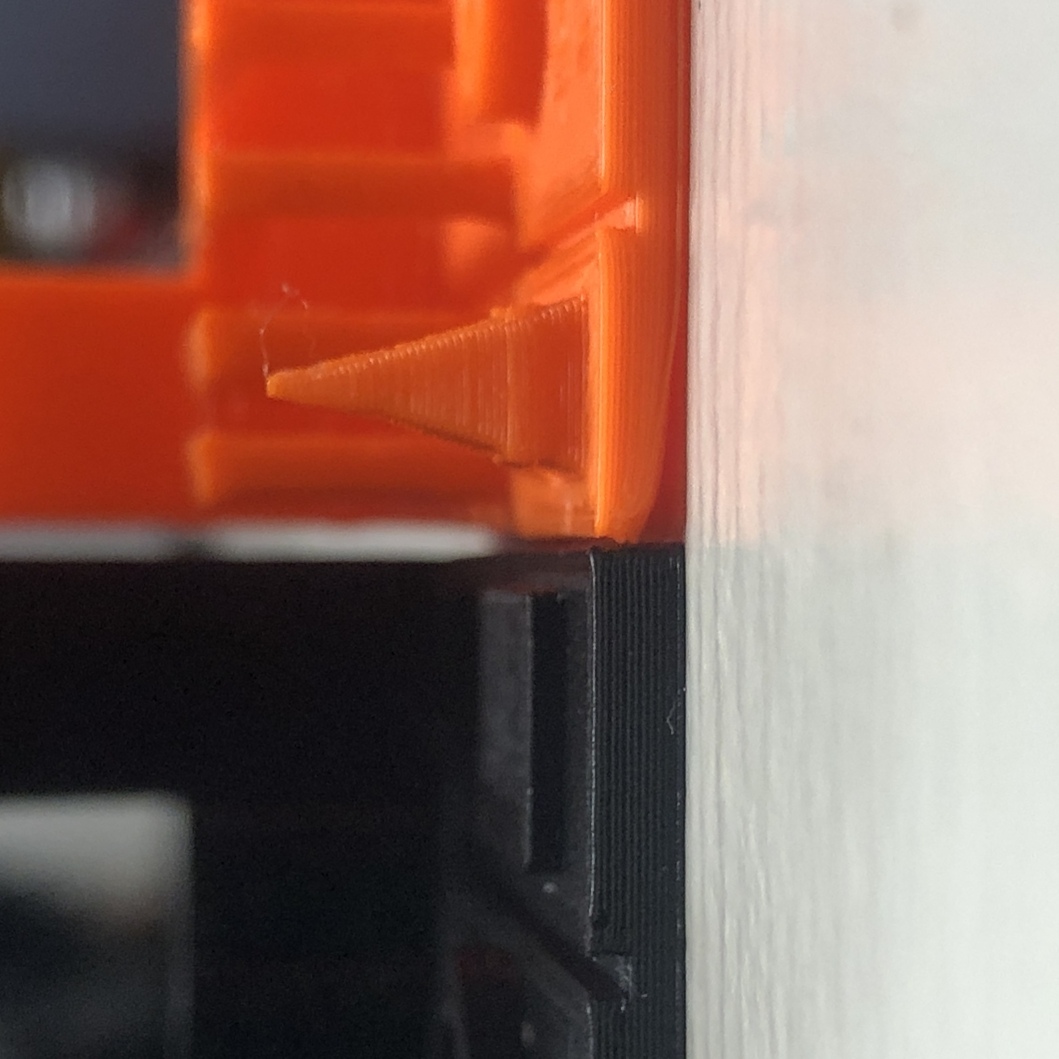
All of the models have really bad overhanging.
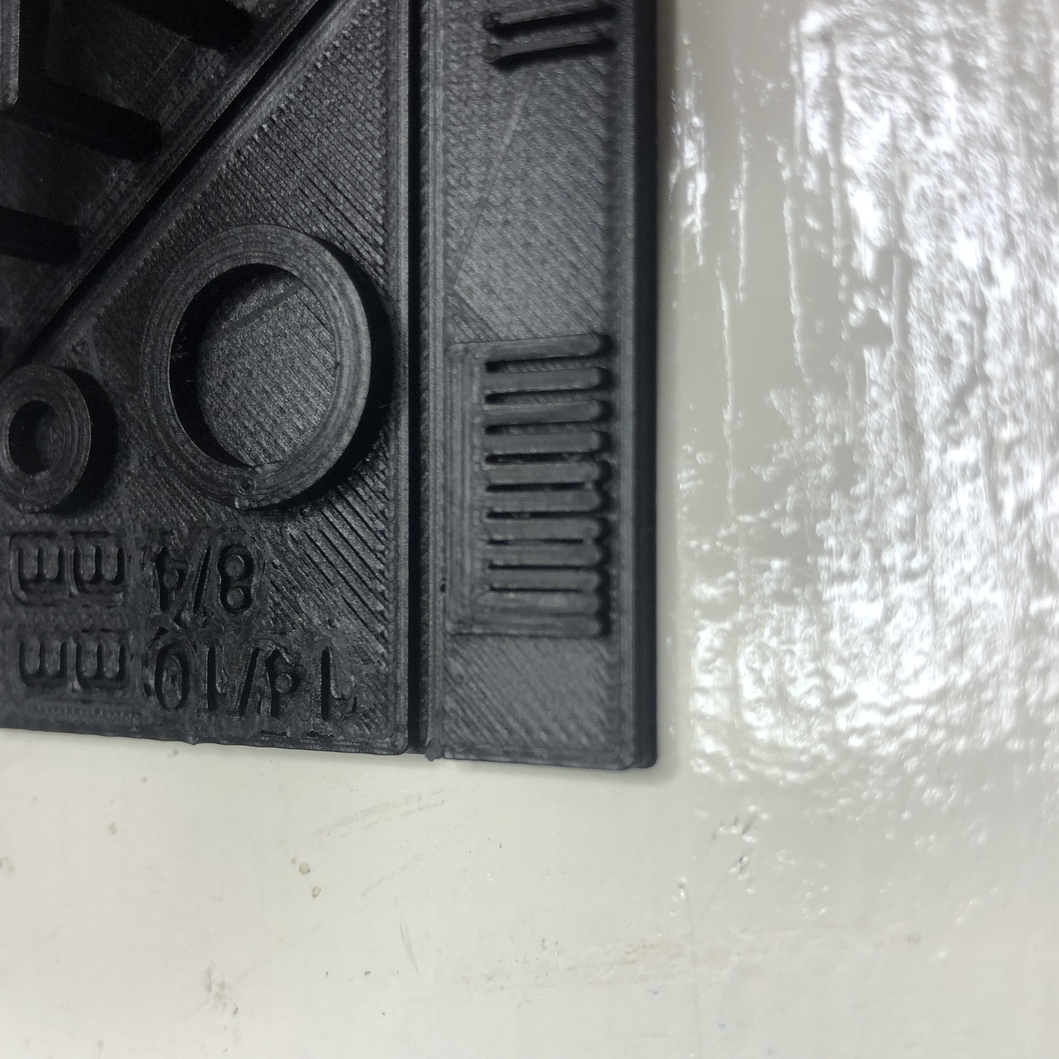
All of the combs were pretty smooth.
Prusa had the most stinging.

The Ender’s model is warping.
Mk3 is bending when making the bridge.
Conclusion
ALl of our prints were really bad. It makes it really hard to compare since we do not have a perfect print. A good print should have no stringing
Goals
Experimenting with a new material . PETG/TPU/ABS/WOOD
Flexible print
Scan, model, 3d print
Scan, model, 3d print
I would love to take a bit more time to understand blender a bit better and maybe try out another slicer. I’m using Cura now but everyone sais Cura is shit and Prusa is the shit.
Scan
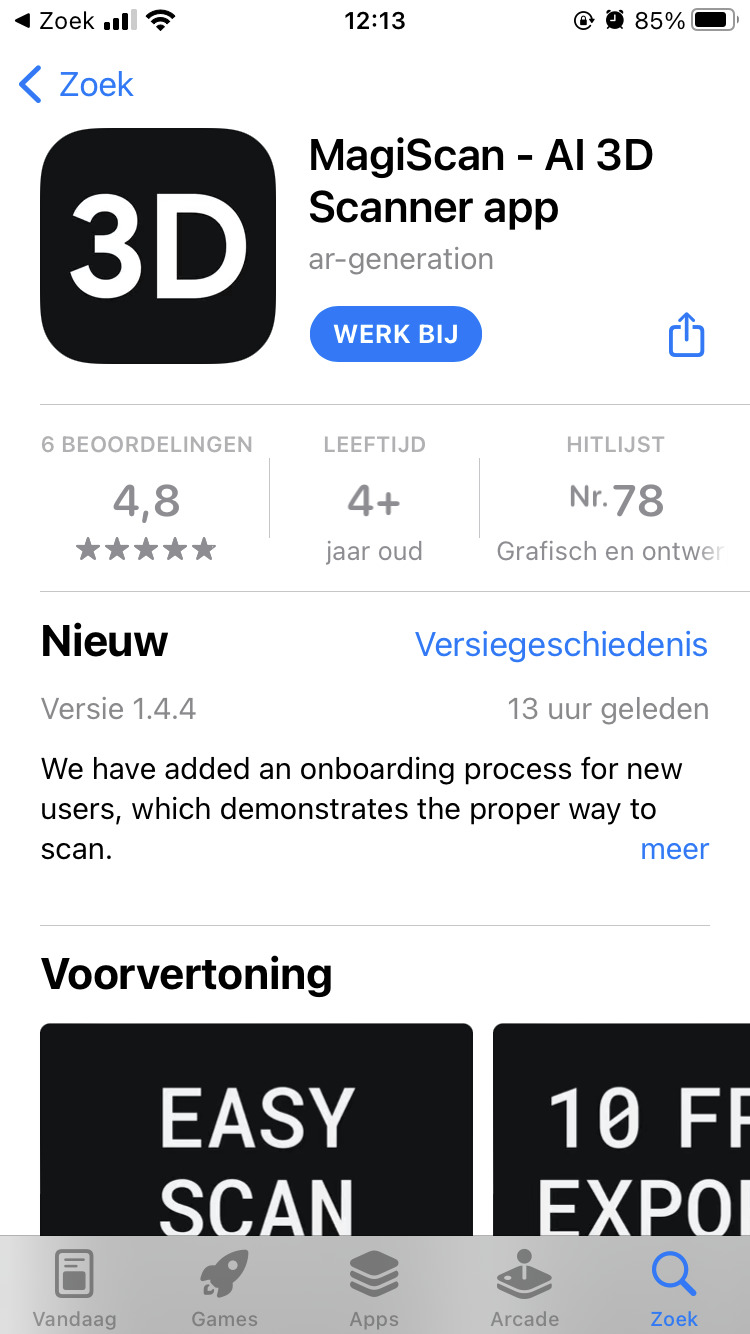
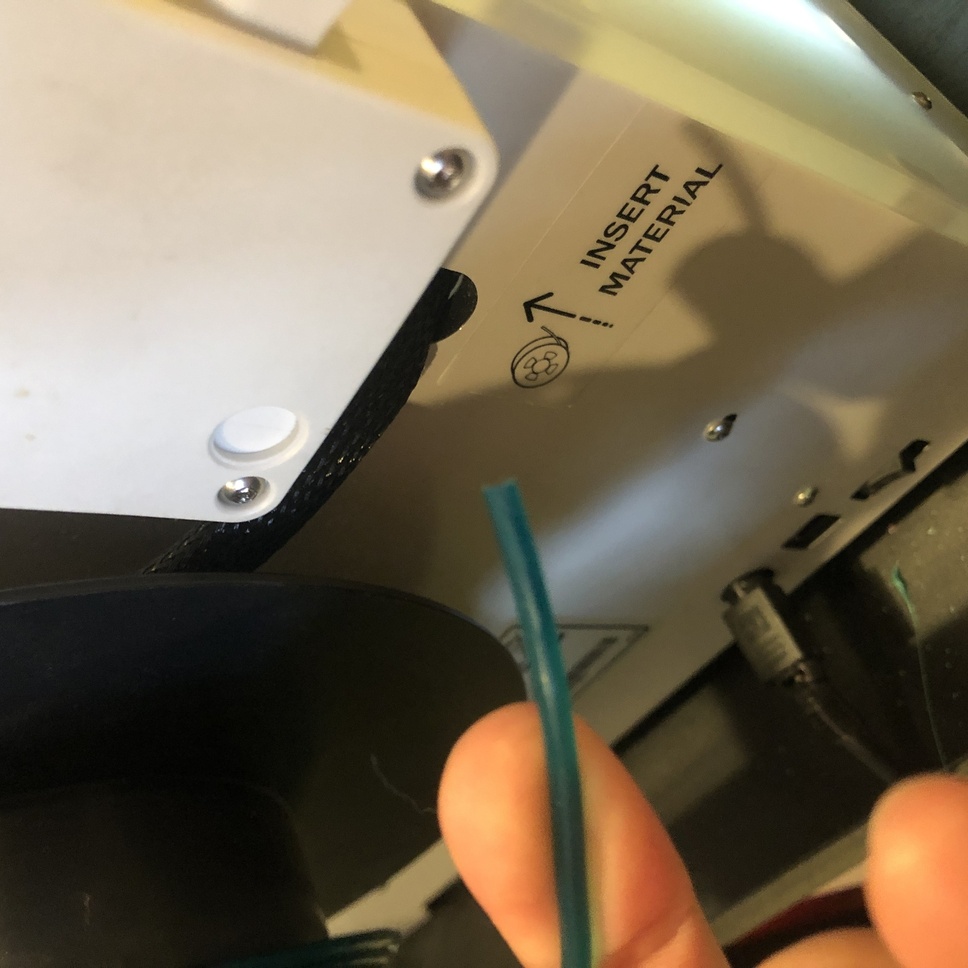
For 3d scanning I tried a couple of apps and a 3d scanning device we have at the Waag. Some 3d scanning apps only work on new phones with a new chip and a special camera. Magiscan 3d though, is free and worked really nice for me on an old Iphone 8.
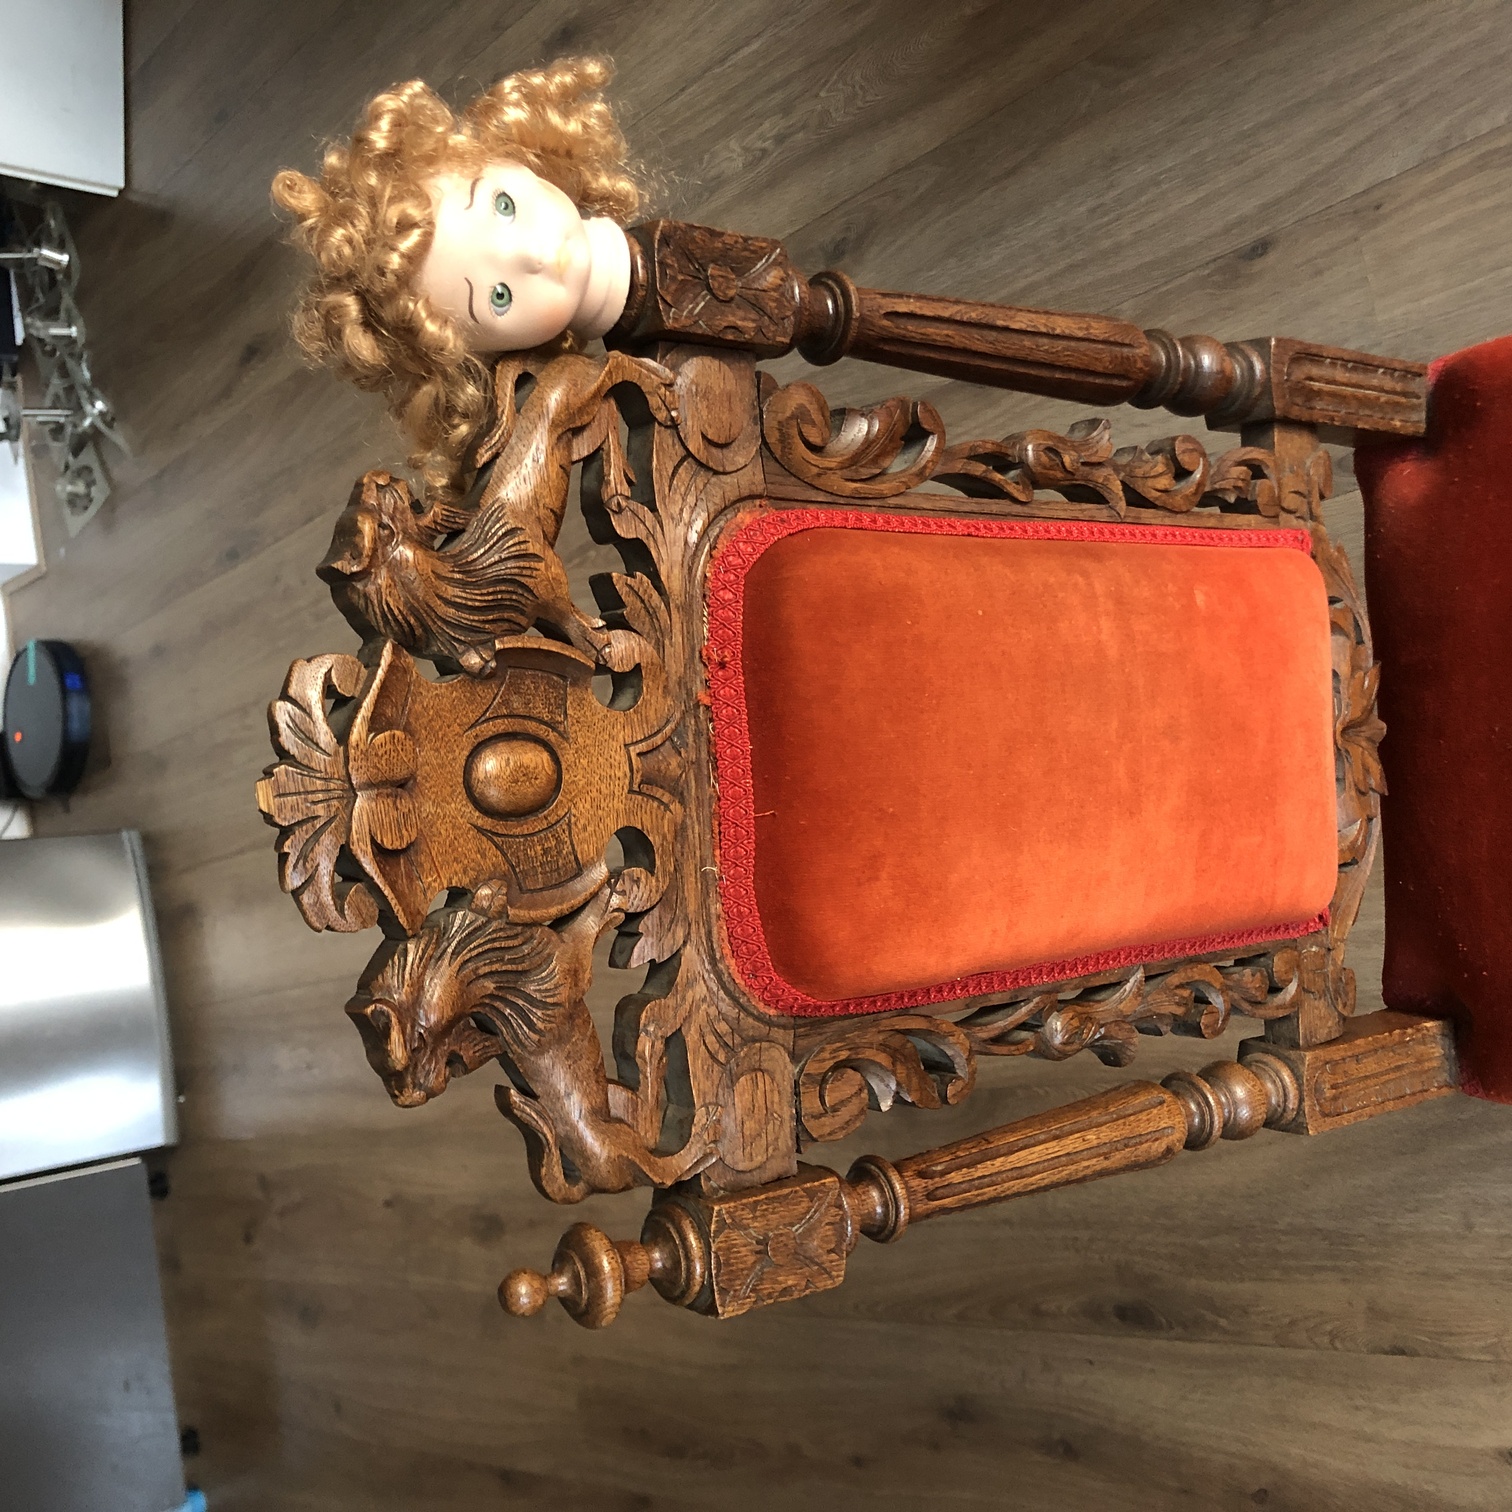
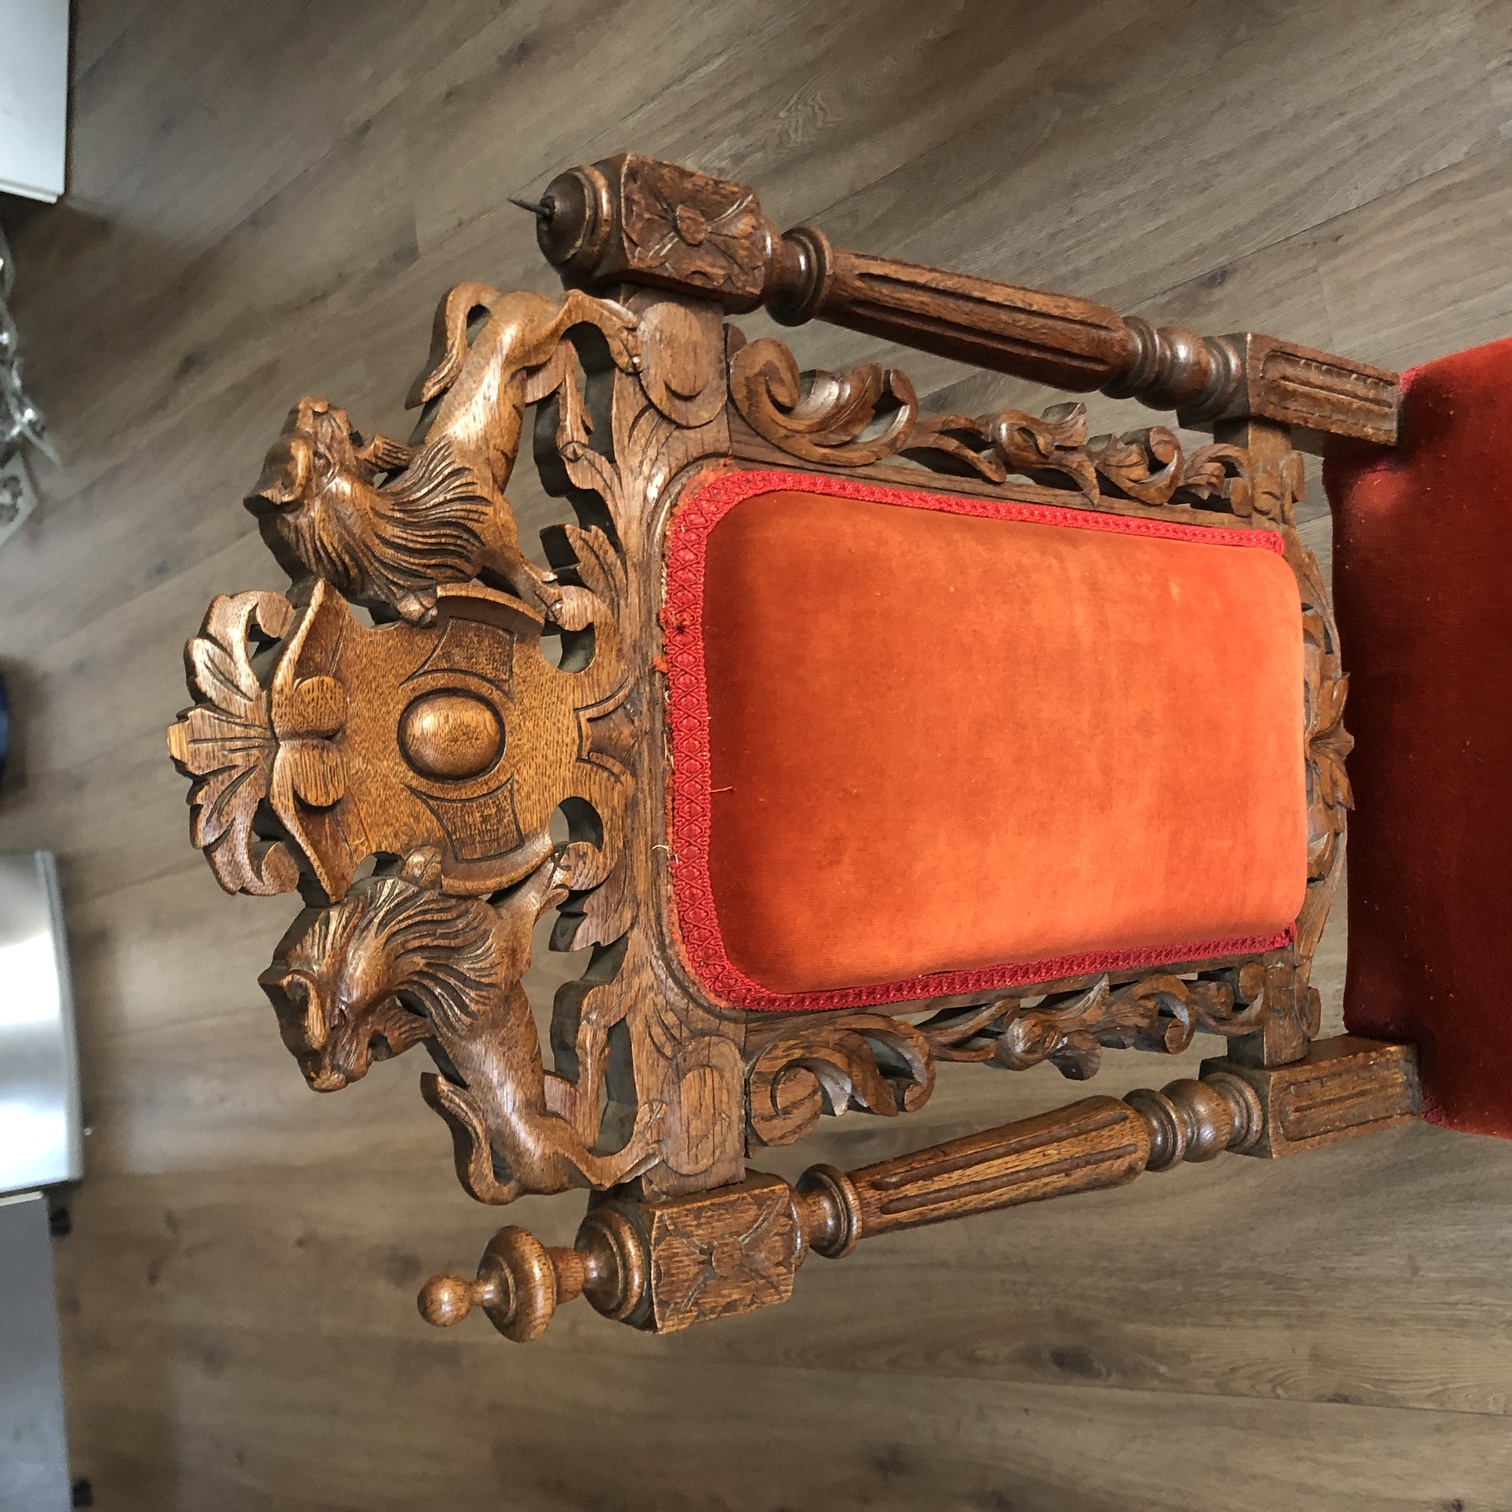
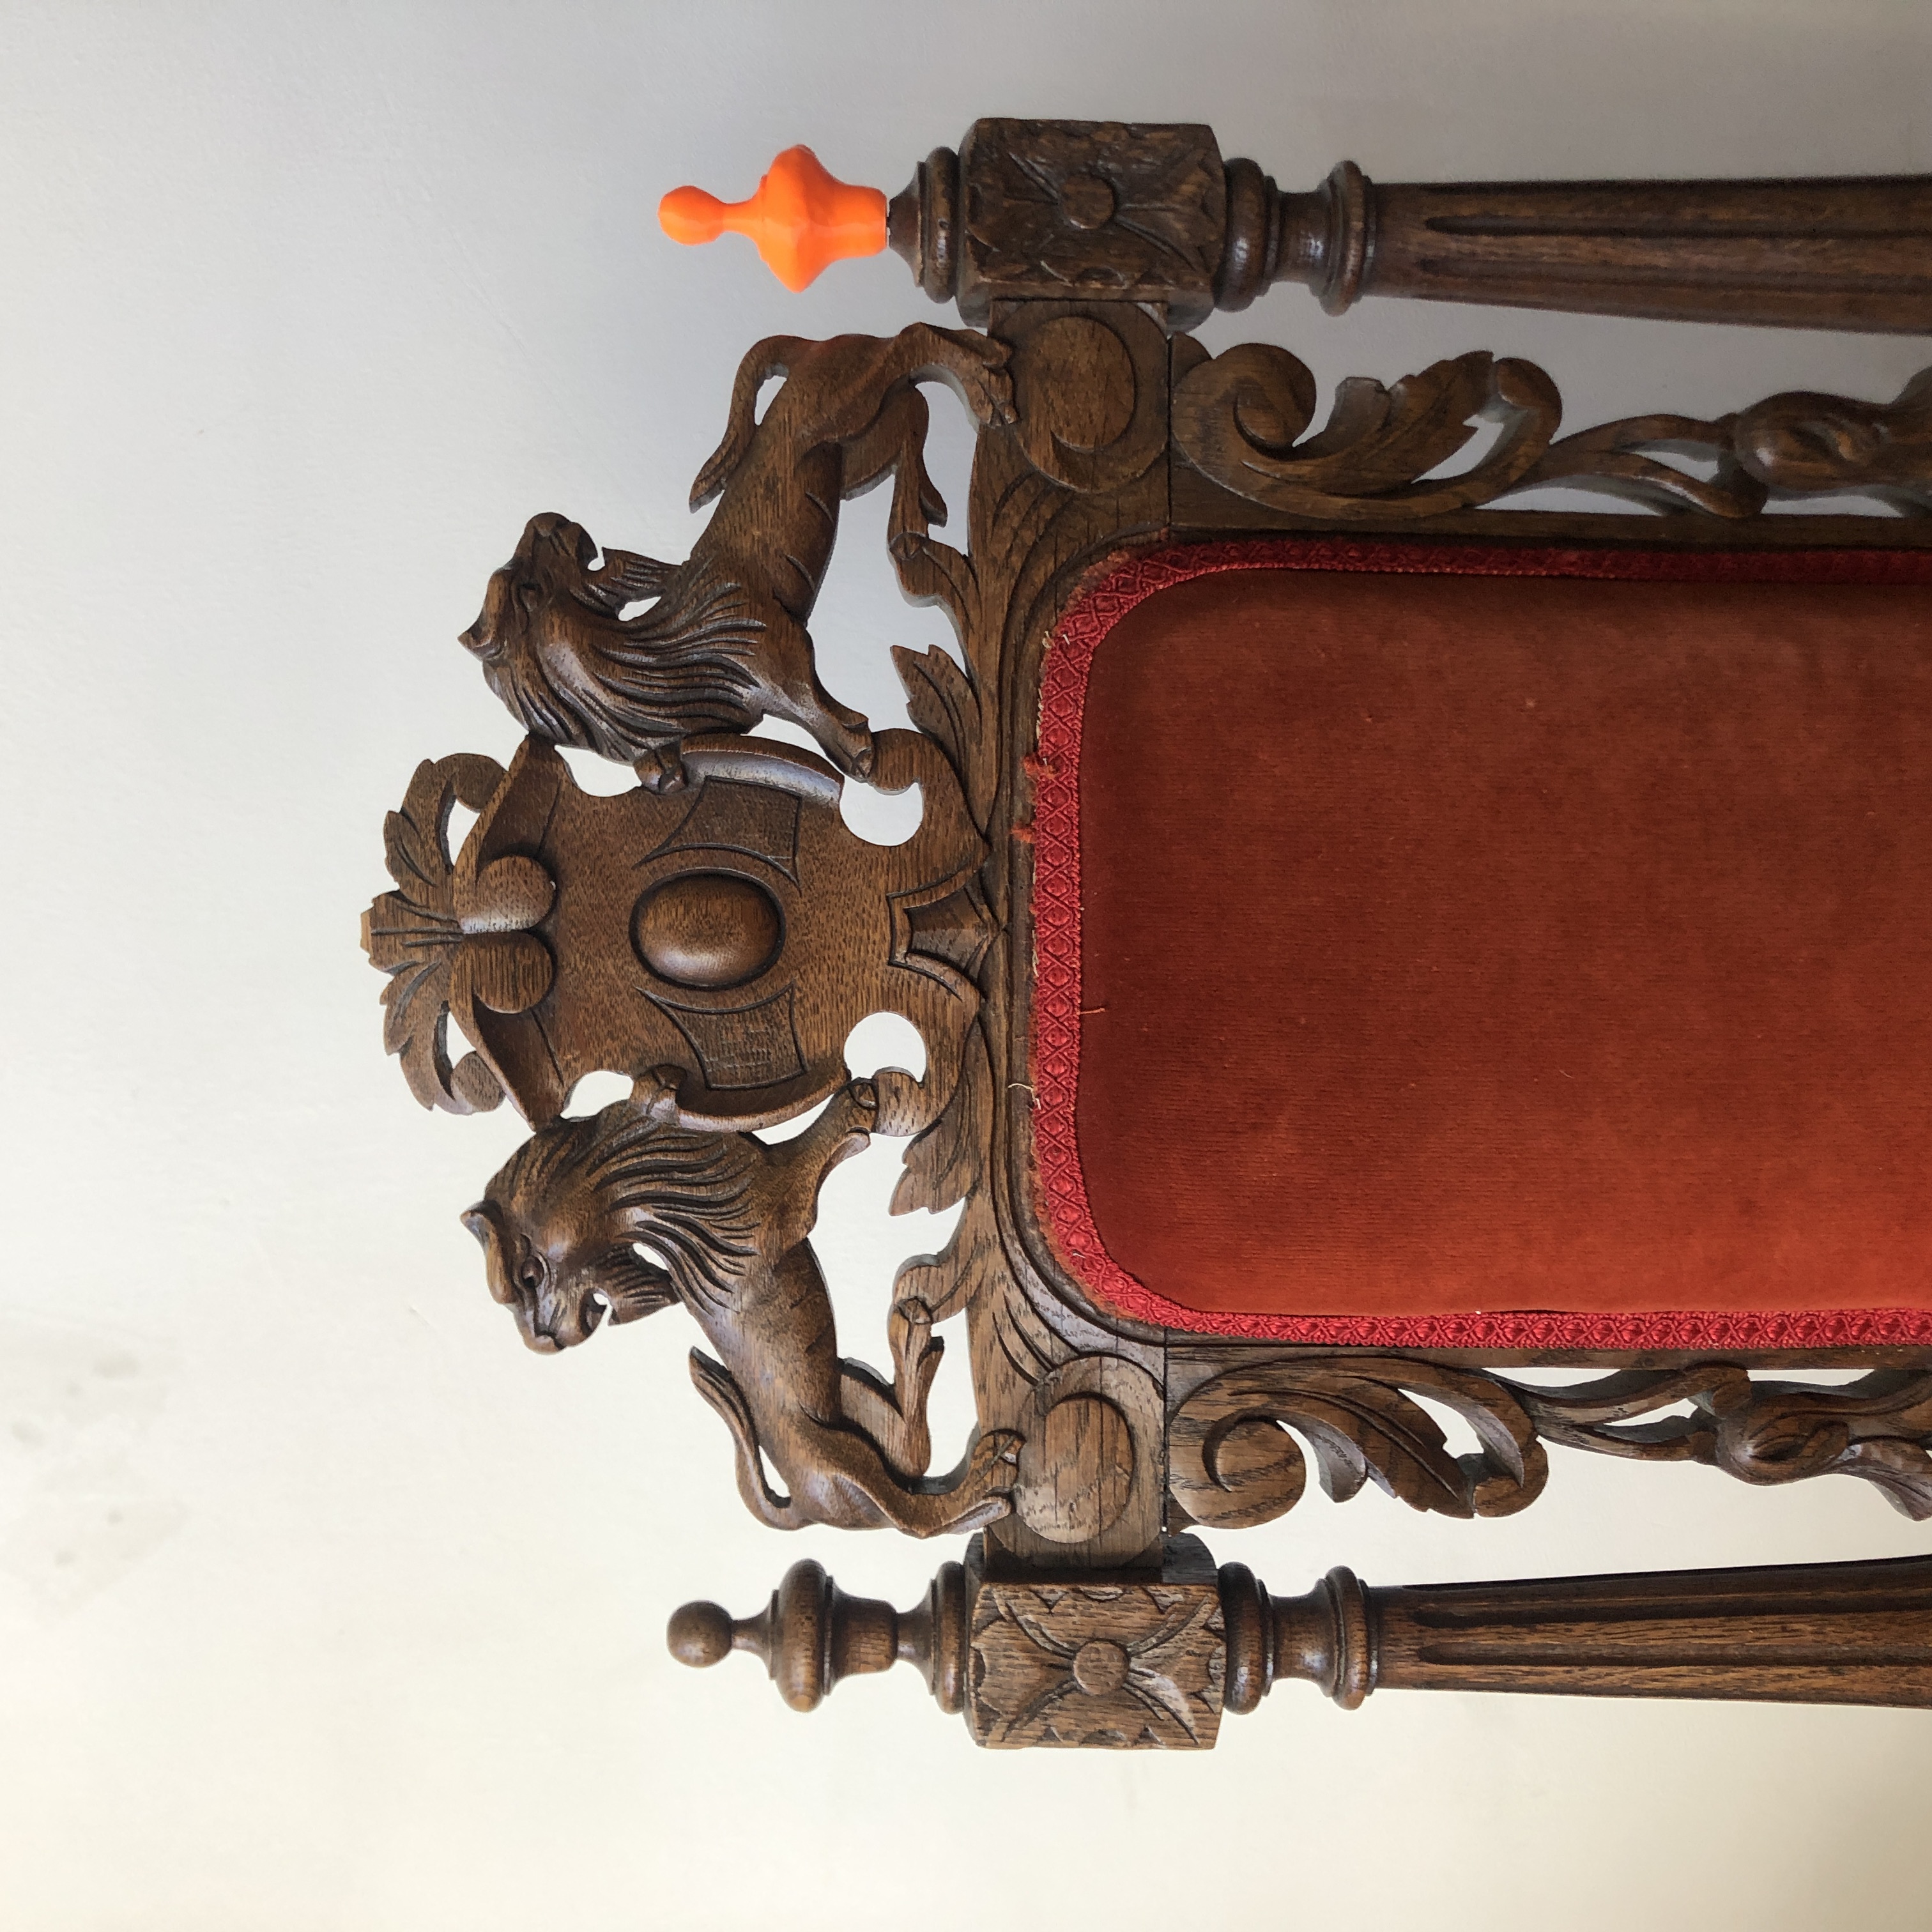
I have an old wooden chair that is missing a quite important piece. I replaced this missing part with this weird doll head. Not sure why, but I kind of like it. But it would be nice if I could restore this chair to its old self. I think 3d printing is mostly used to print shit, so I thought why don’t print something that’s actually usefull.
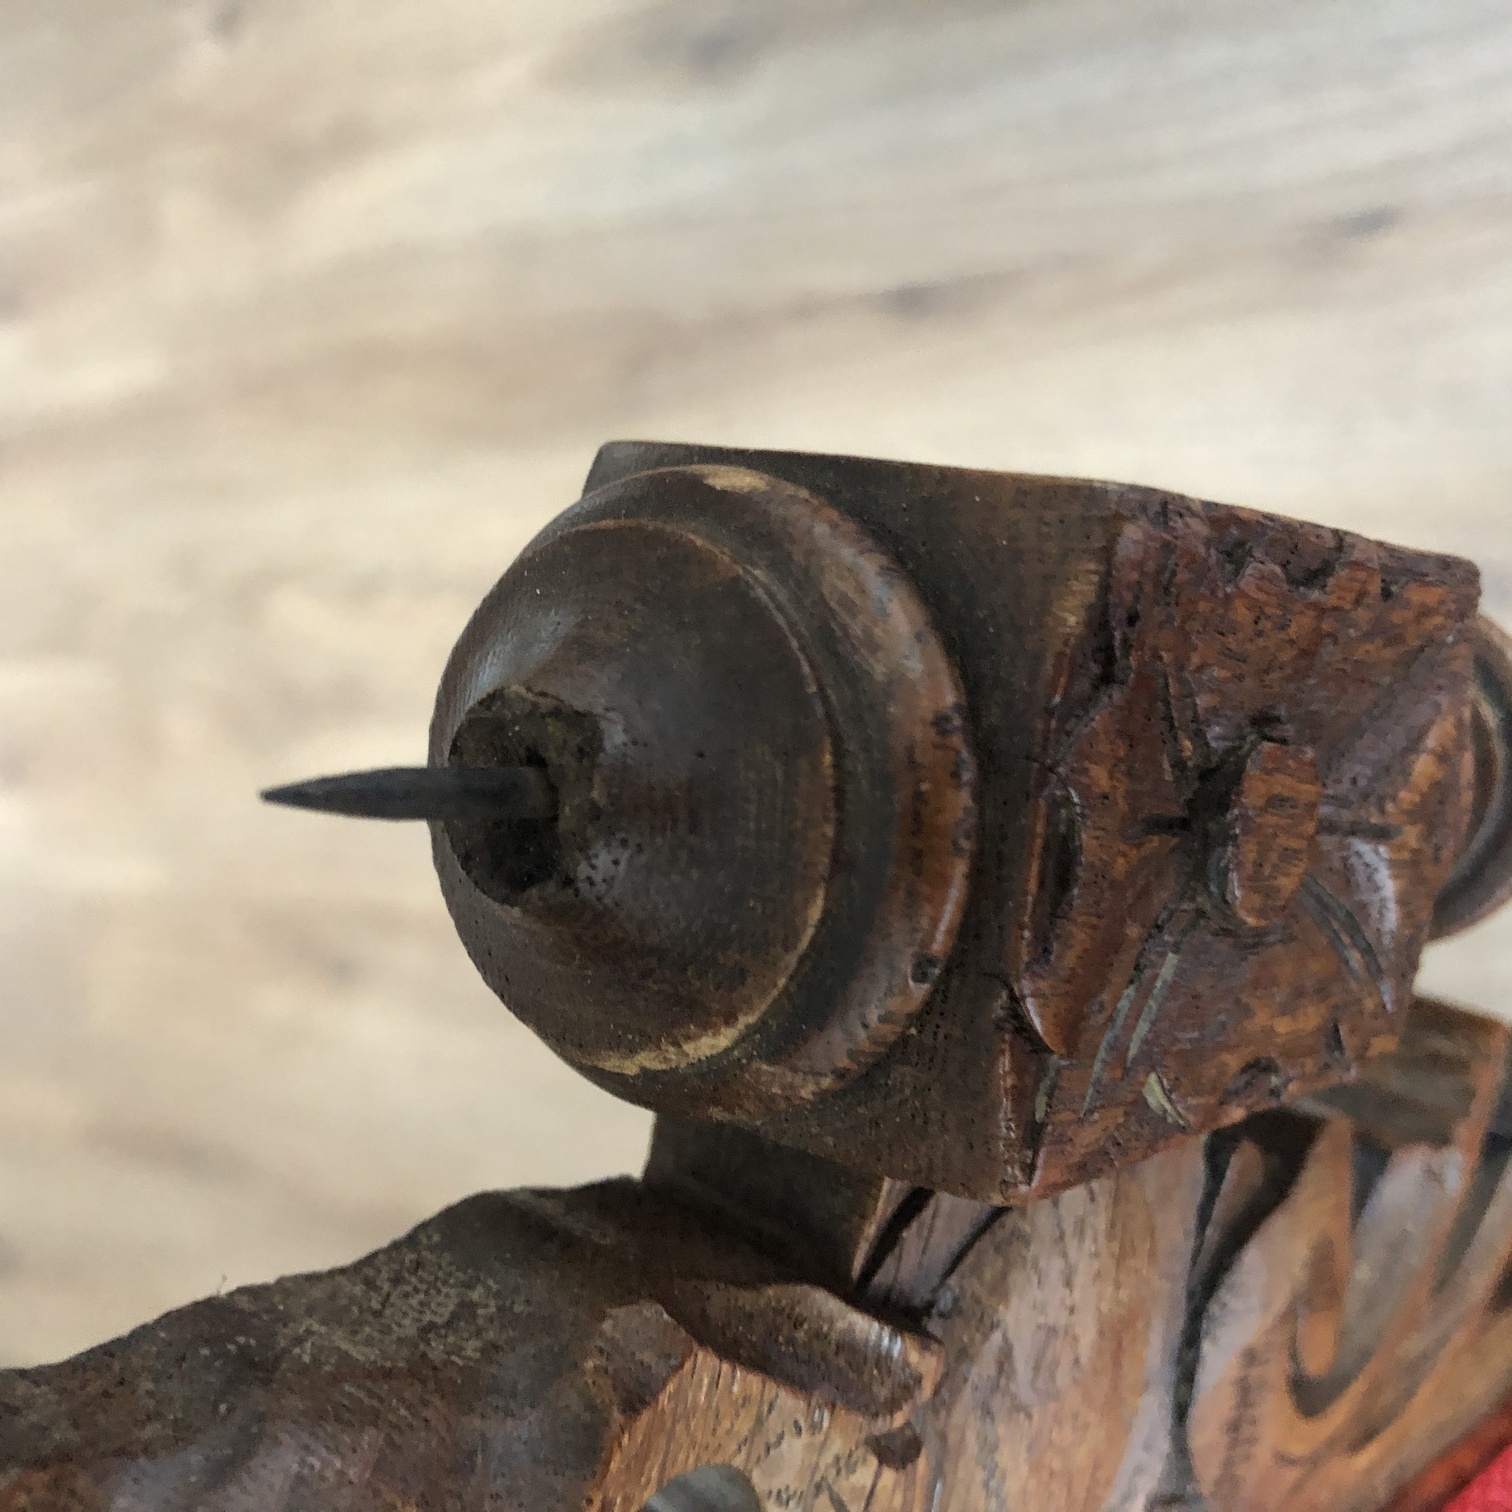
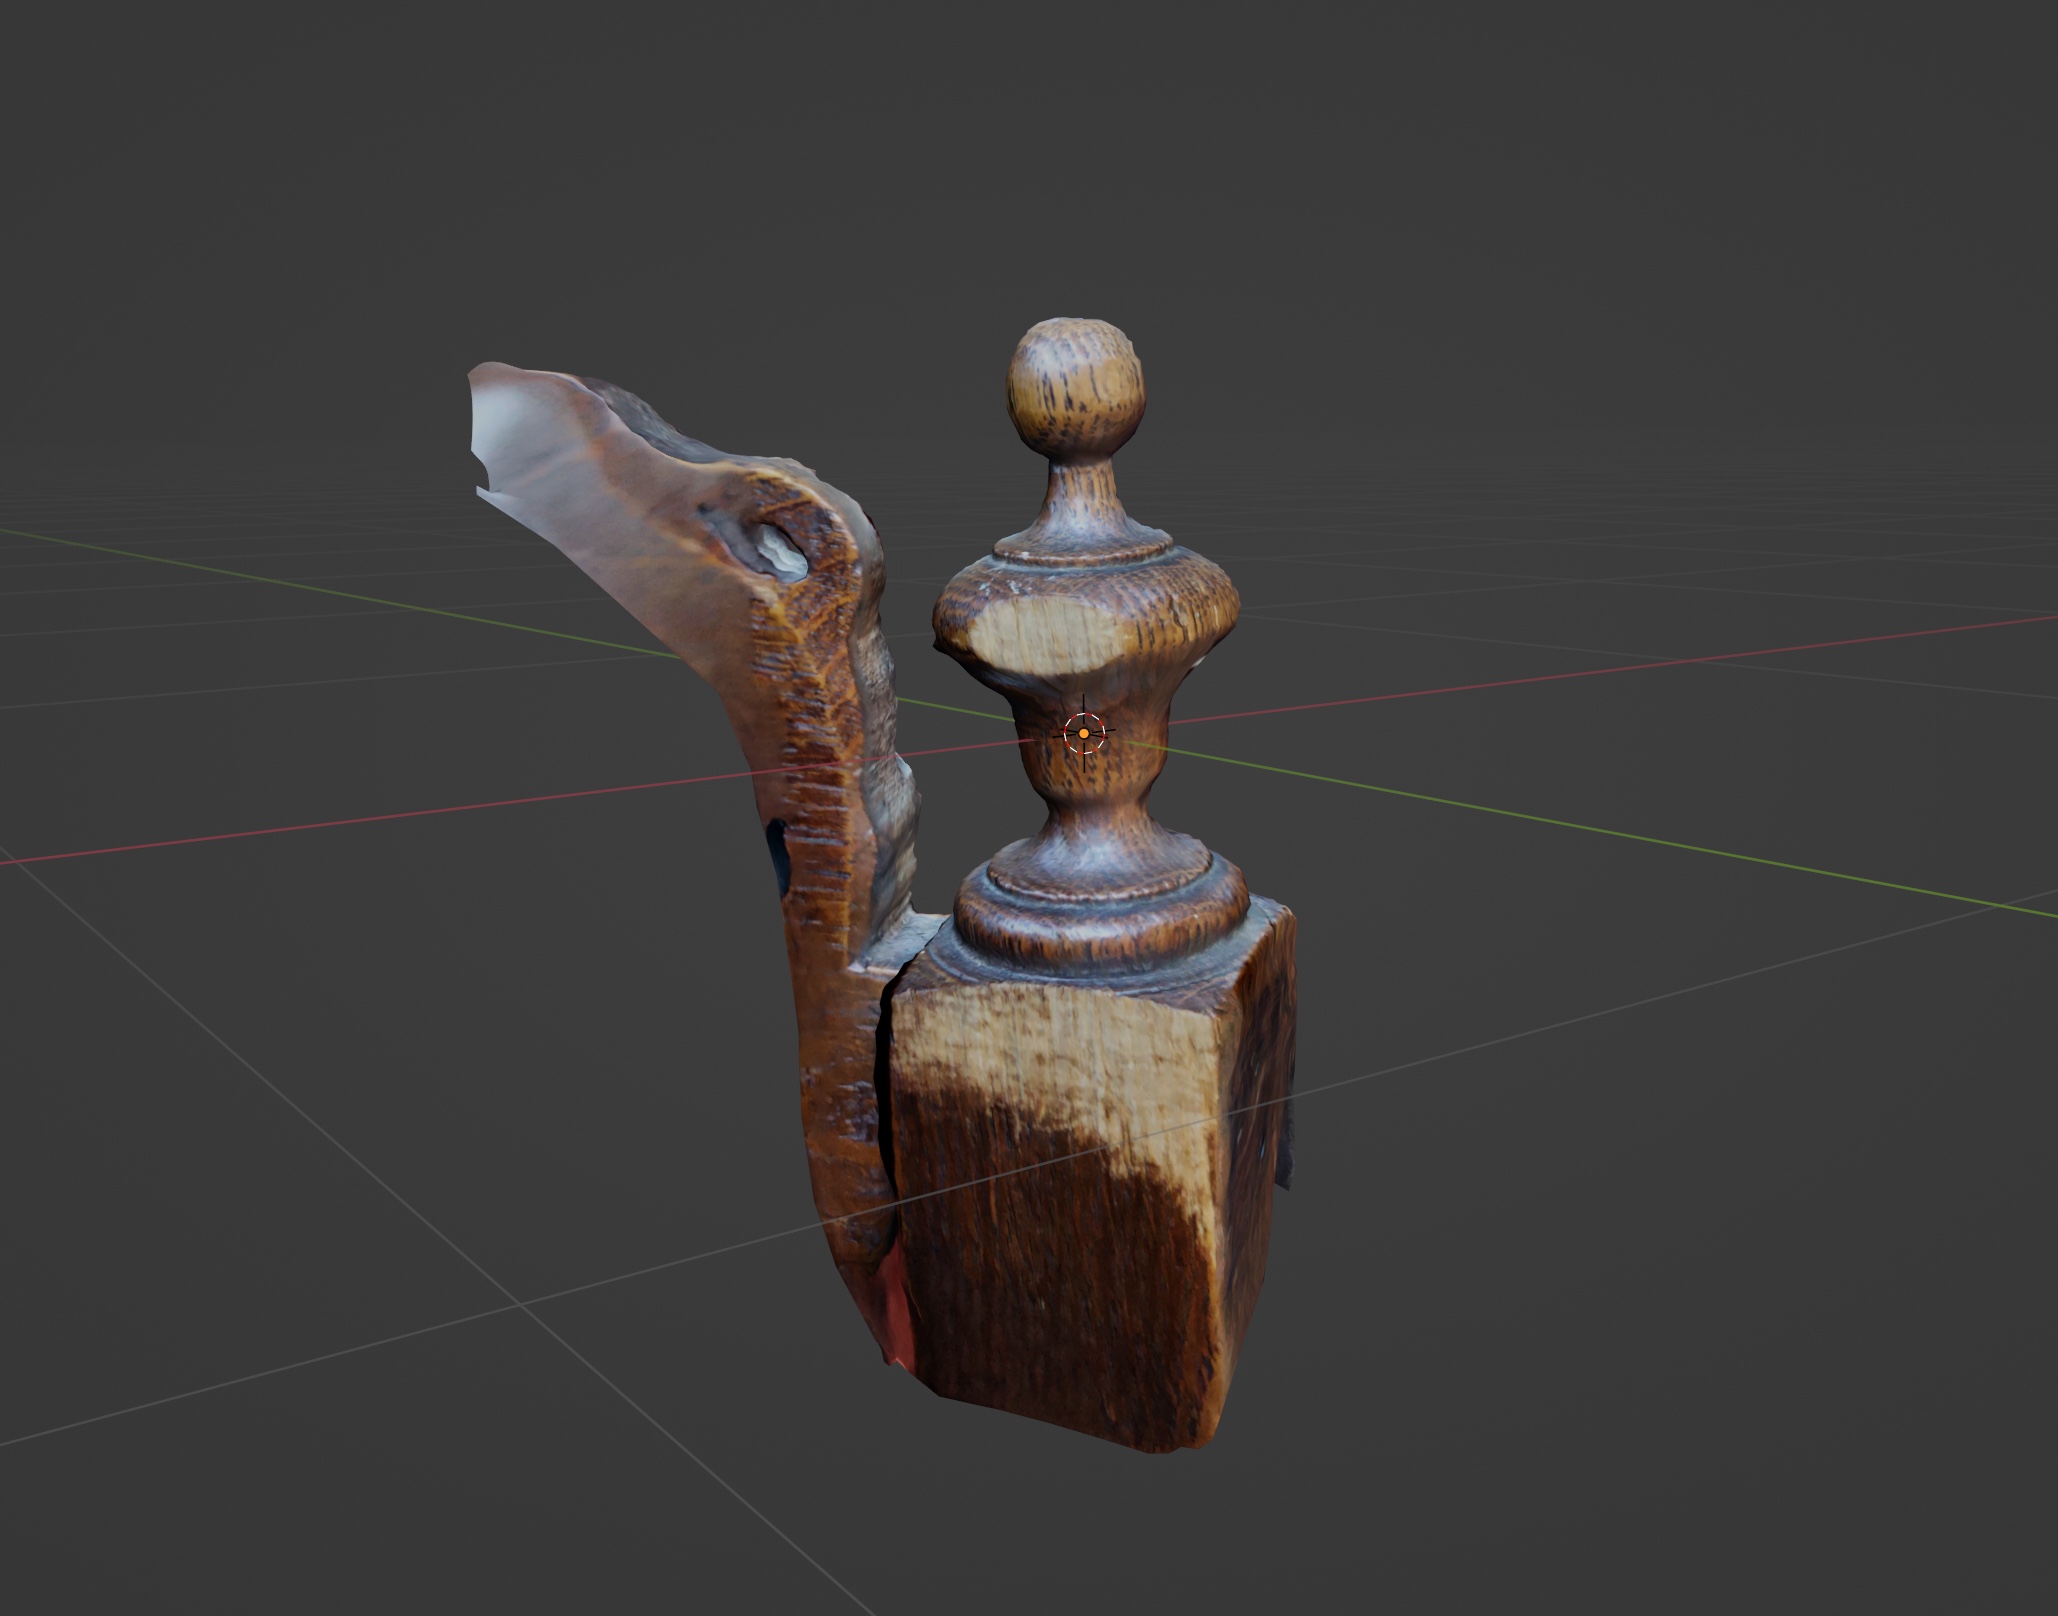
I made a couple of scans to see what’s up. My first scan, the tea mug, failed because I was in a hurry and didn’t paid enough attention. I didn’t expect that my other scans would turn out this good! Even when some angles of the model I couldn’t even reach. Take a look.
I exported the part that I wanted to print as an OBJ, STL and FBX to see how it would look in Fusion, a slicer and in Blender.
OBJ: an OBJ file (. obj) contains information about the geometry of 3D objects. The files are used for exchanging information, CAD, and 3D printing. OBJ files can support unlimited colors, and one file can define multiple objects.
STL: is a file format commonly used for 3D printing and computer-aided design (CAD). The name STL is an acronym that stands for stereolithography — a popular 3D printing technology. You might also hear it referred to as Standard Triangle Language or Standard Tessellation Language.
FBX: files are a type of 3D model file created using the Autodesk FBX software. They can be designed and modified in various modeling applications, such as Maya, 3ds Max, and Blender. Moreover, FBX files typically contain mesh, material, texture, and skeletal animation data.
Blender
Imported the model and as you see the material is also imported. I love it.
Since we’ll need to push and pull the model I probably want to decrease the amount of vertexes. A lot of vertexes will give you more detail but it takes ages. Find a good balance in this.
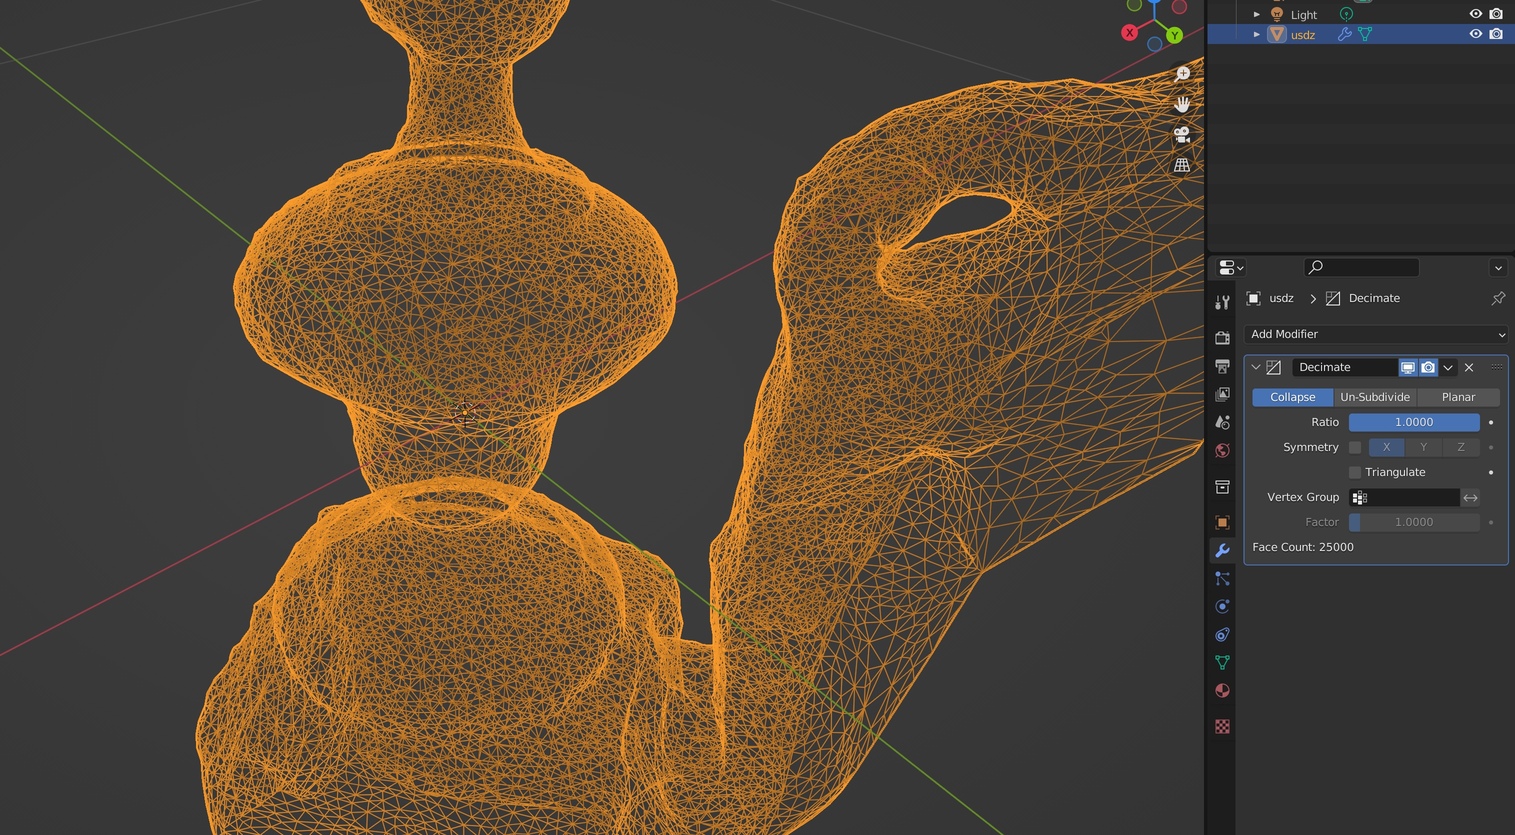
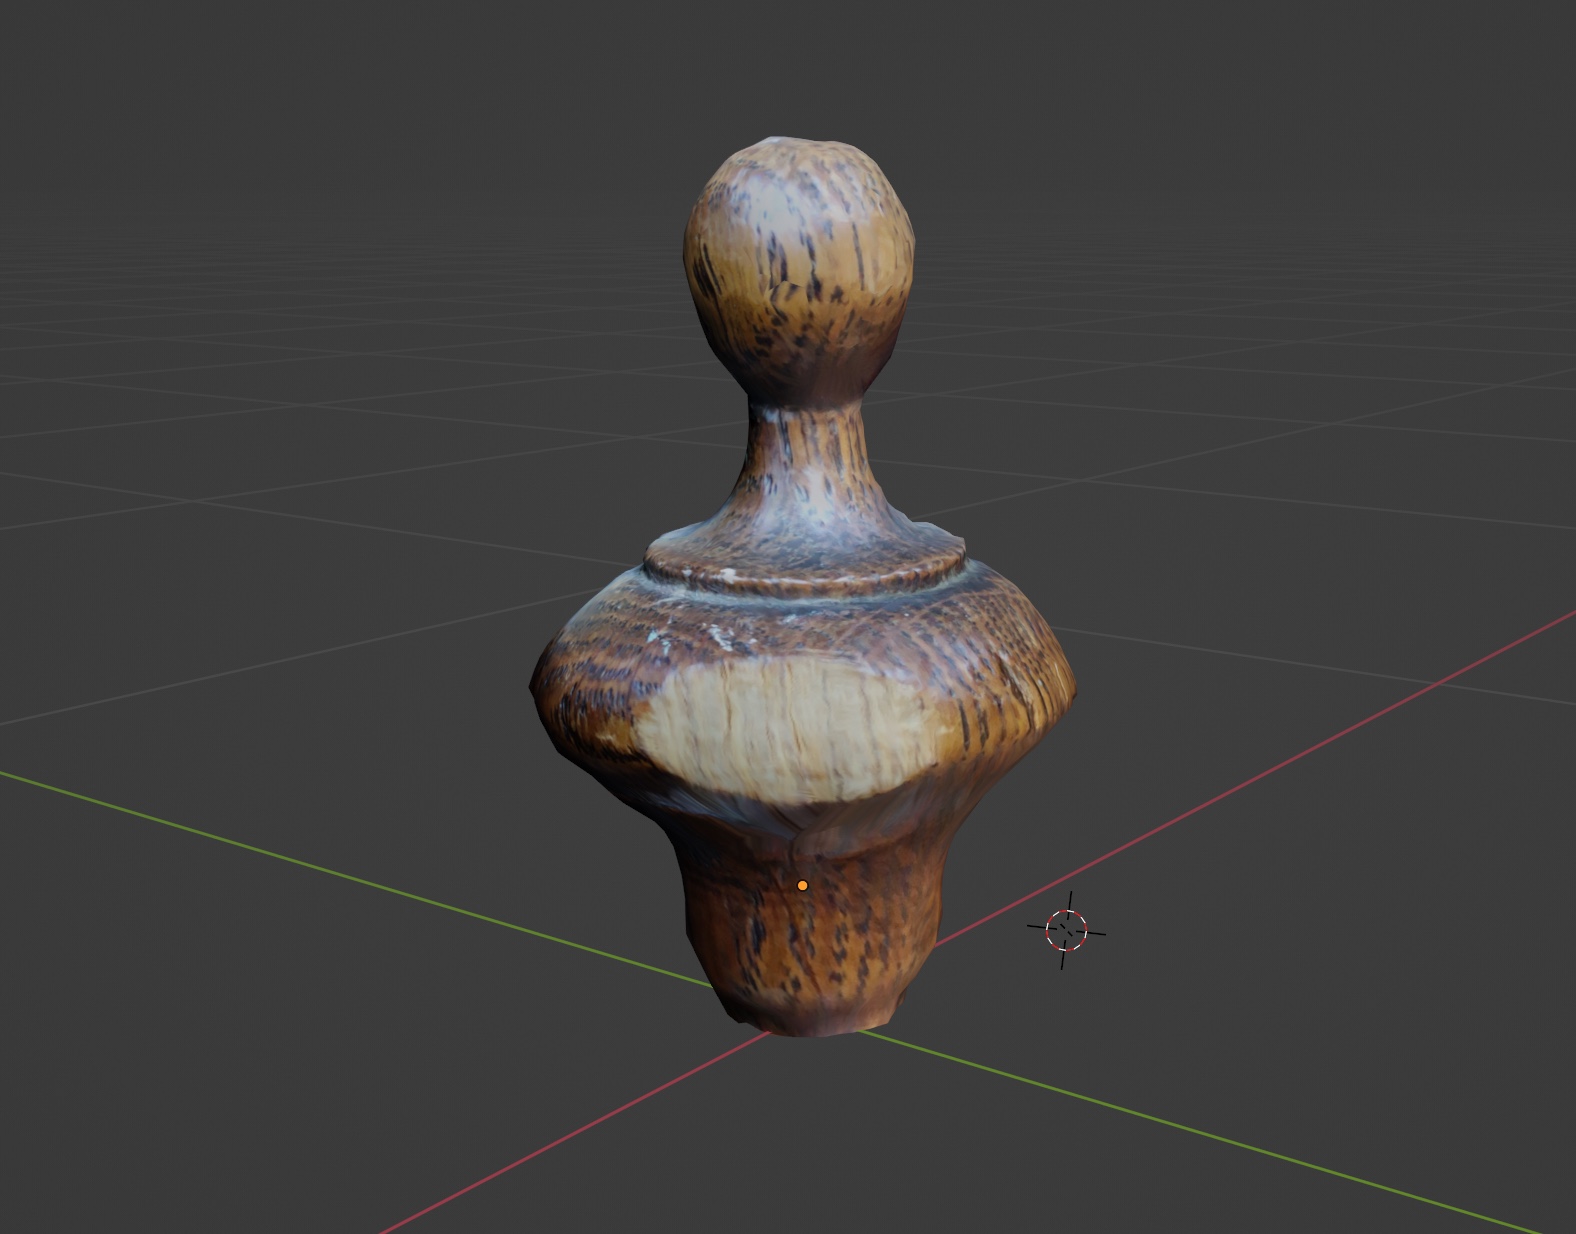
Smoothen my model out to make smoooooove edges.

I think this looks about right.
Printing
There’s an some difference in the print speed of this fairly simple model.
Ultimaker: 1h 13m
Ender 3: 1h 29m
Ender 5: 1h 30m
Pruse mk: 1h 16m
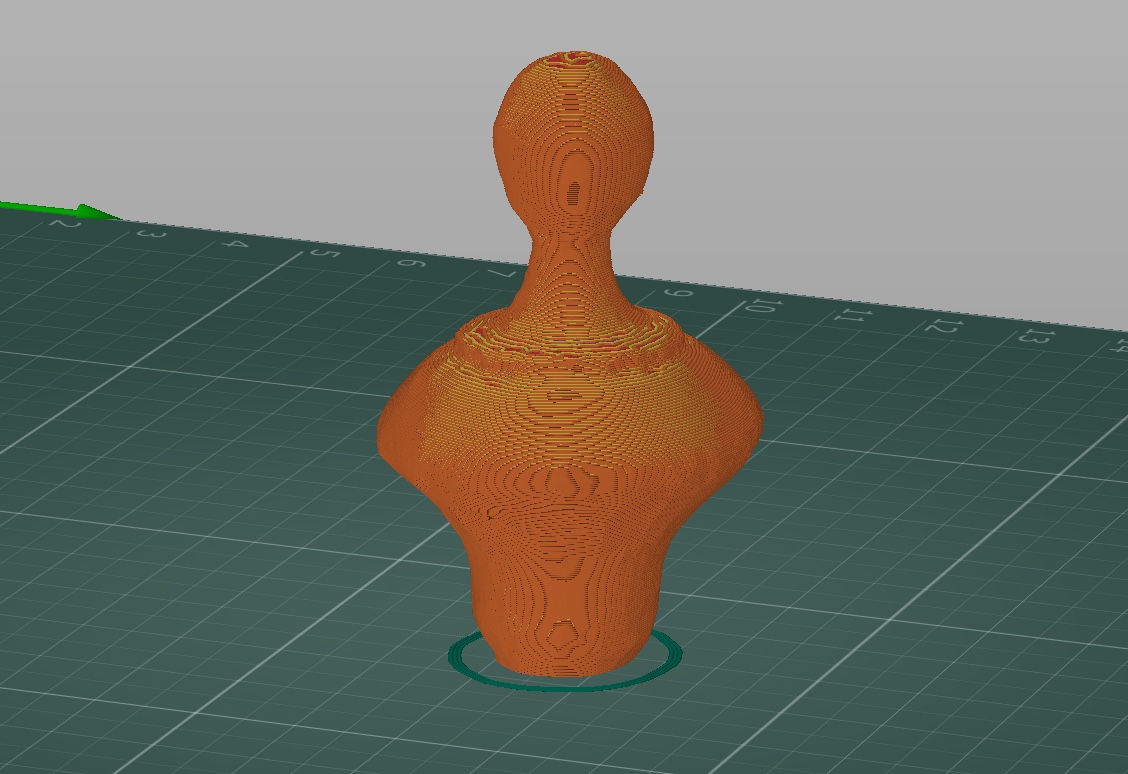
The model of my shape is way higher then it is wide. It makes sense that this model needs a brim/raft.
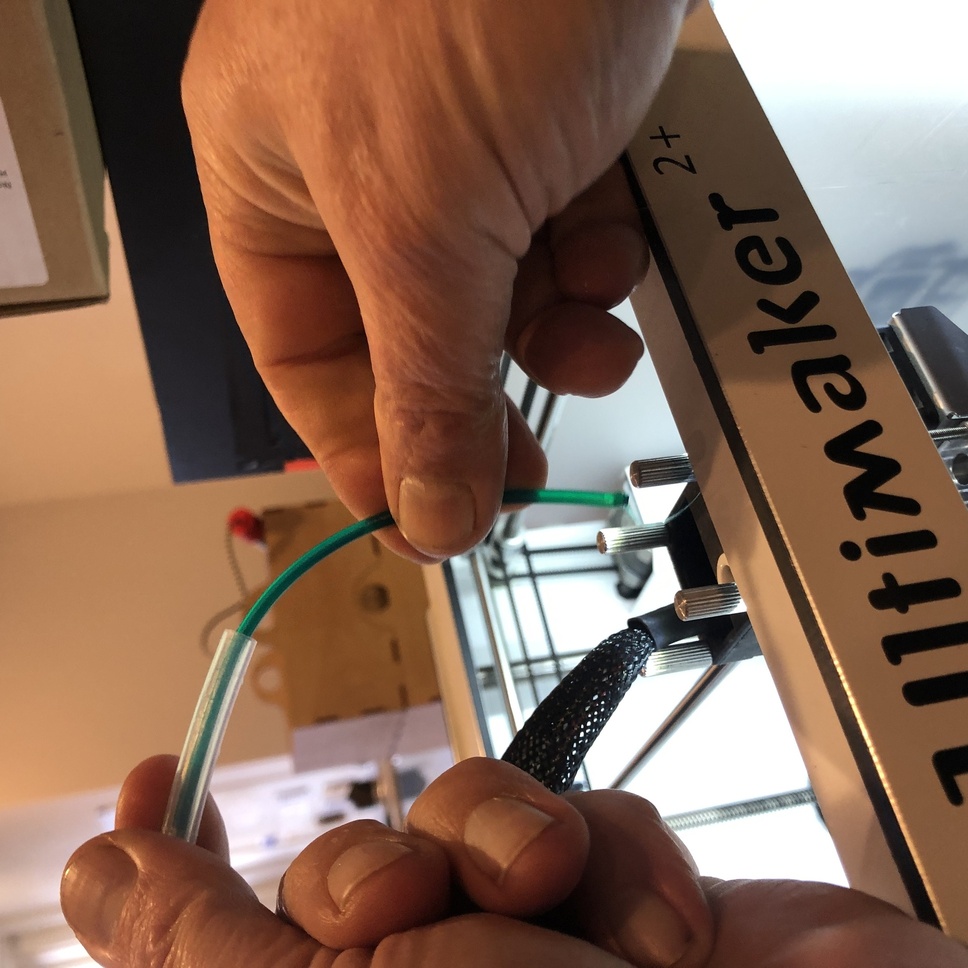
Here you see that my model has a seam. The reason for this is that my seam position was set on alligned. When you change this option to random. You shouldn’t see this anymore.
Taadaaaaaaaa.
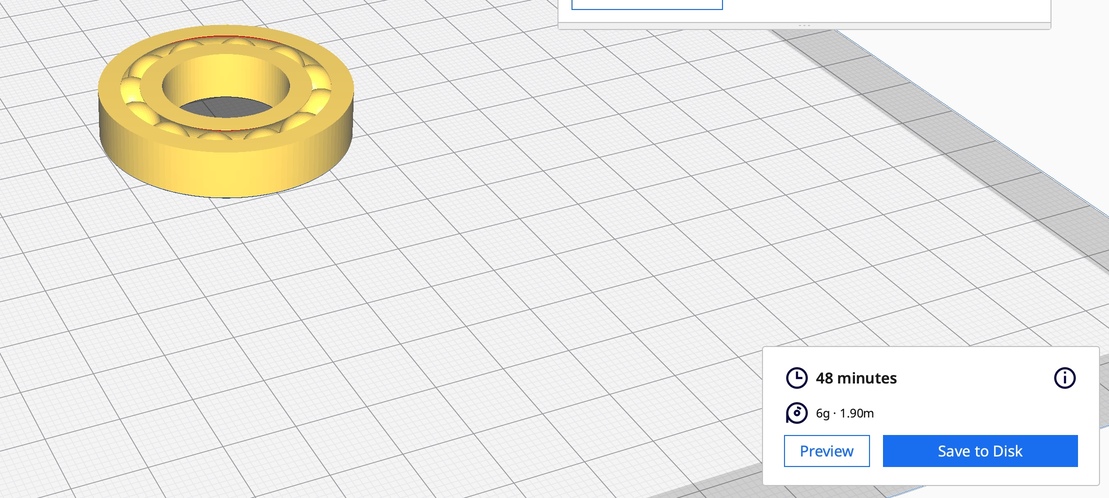
3d print assignment
Design and 3D print an object (small, few cm3, limited by printer time) that could not be made subtractively.
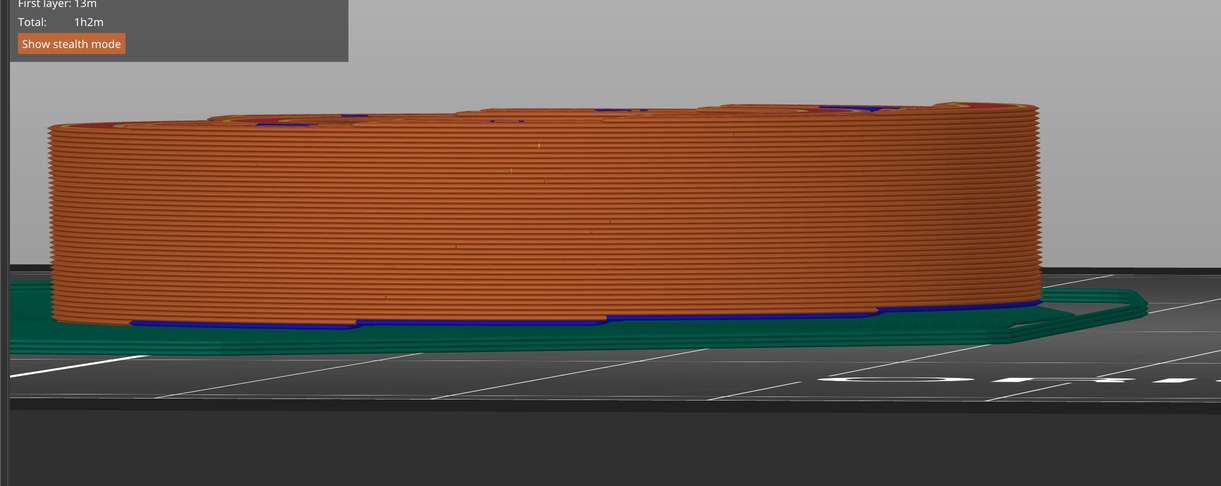
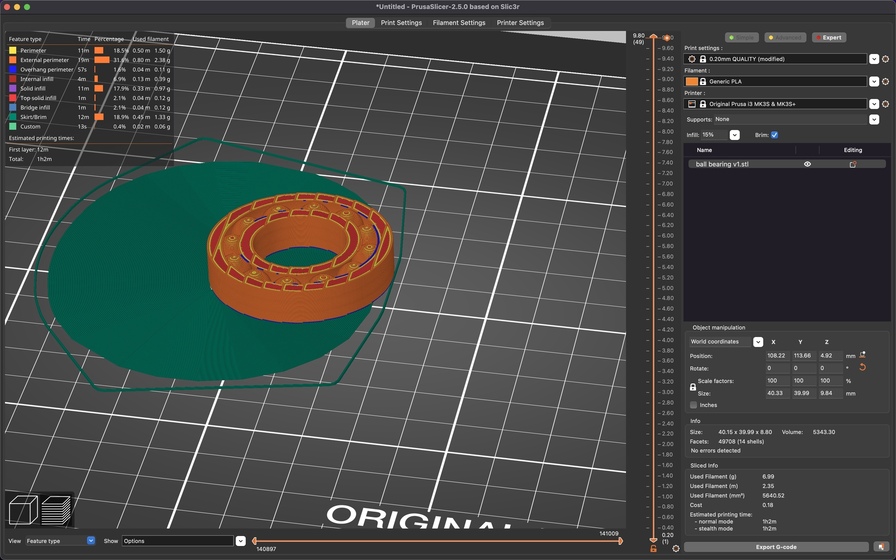
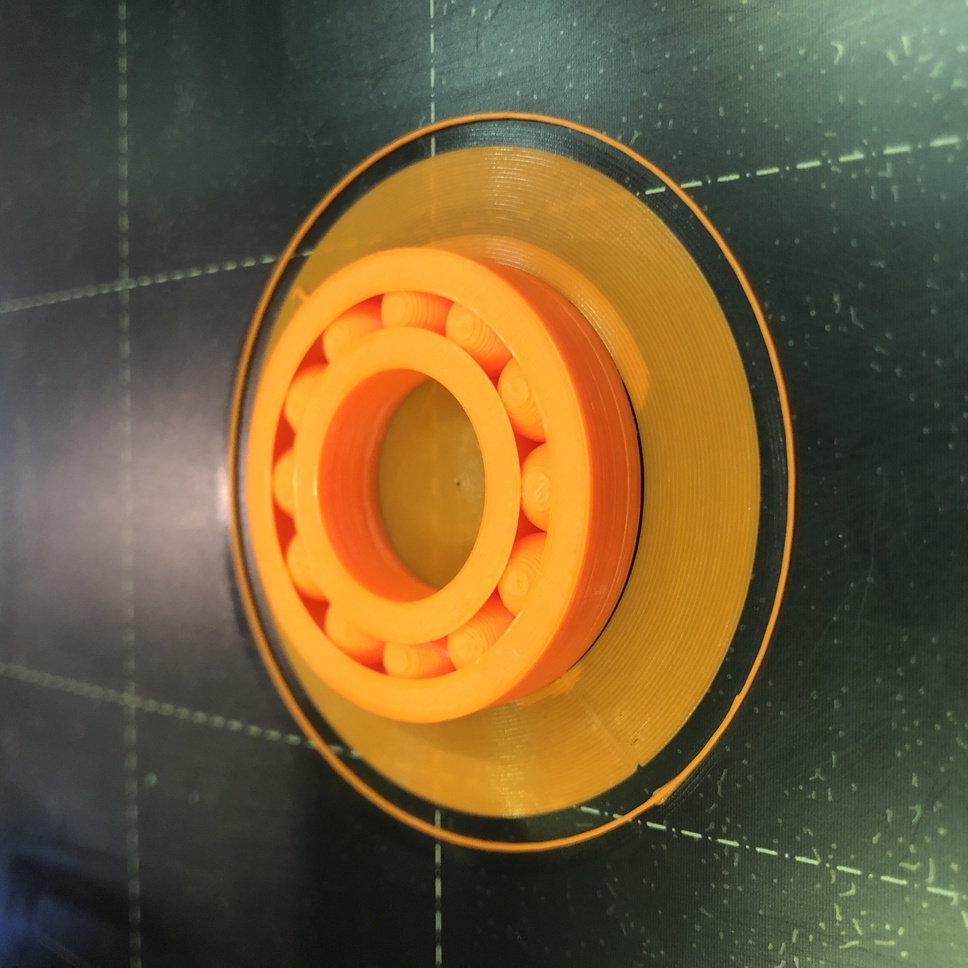
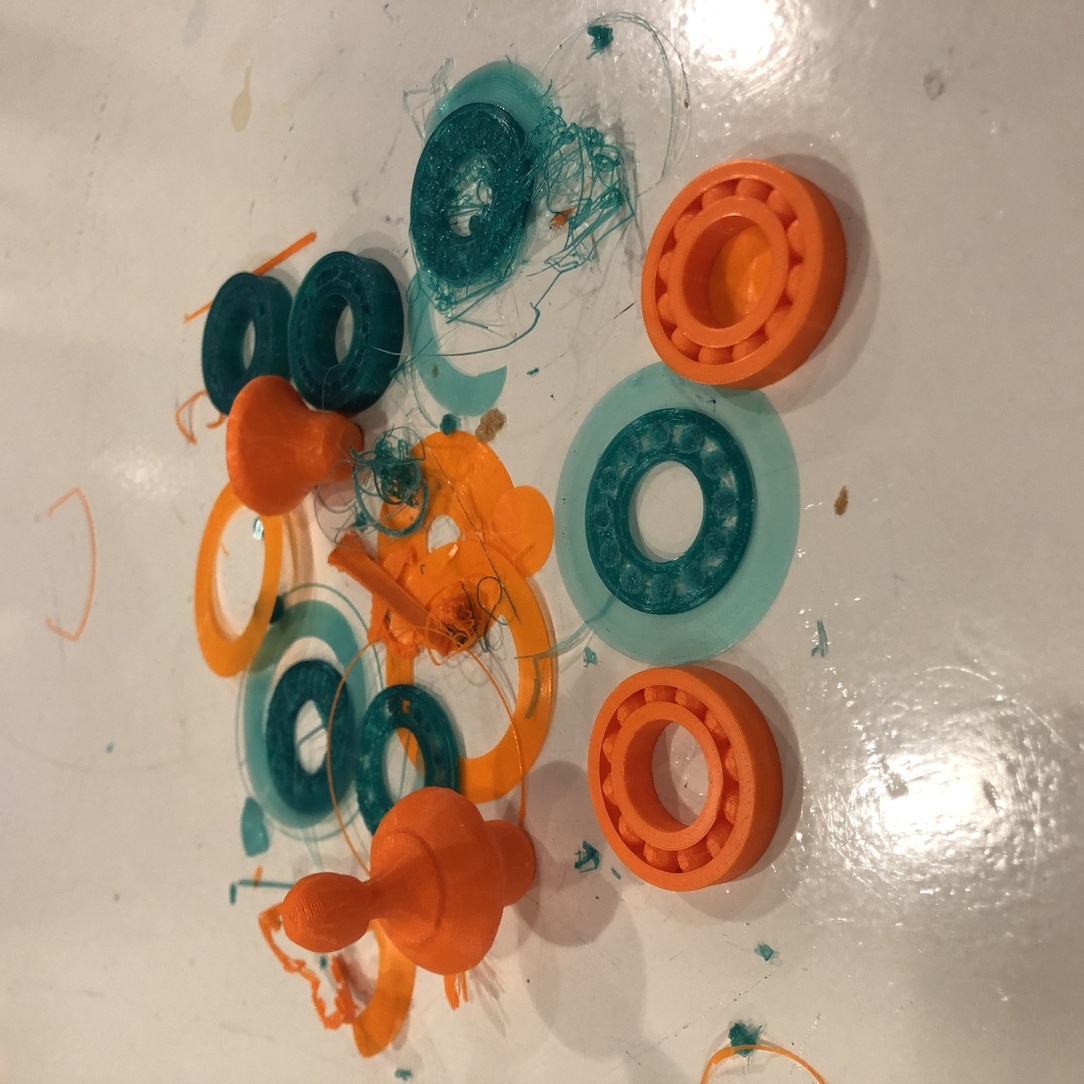
Orange model is made with Prusa and the Prusa slicer 2.5
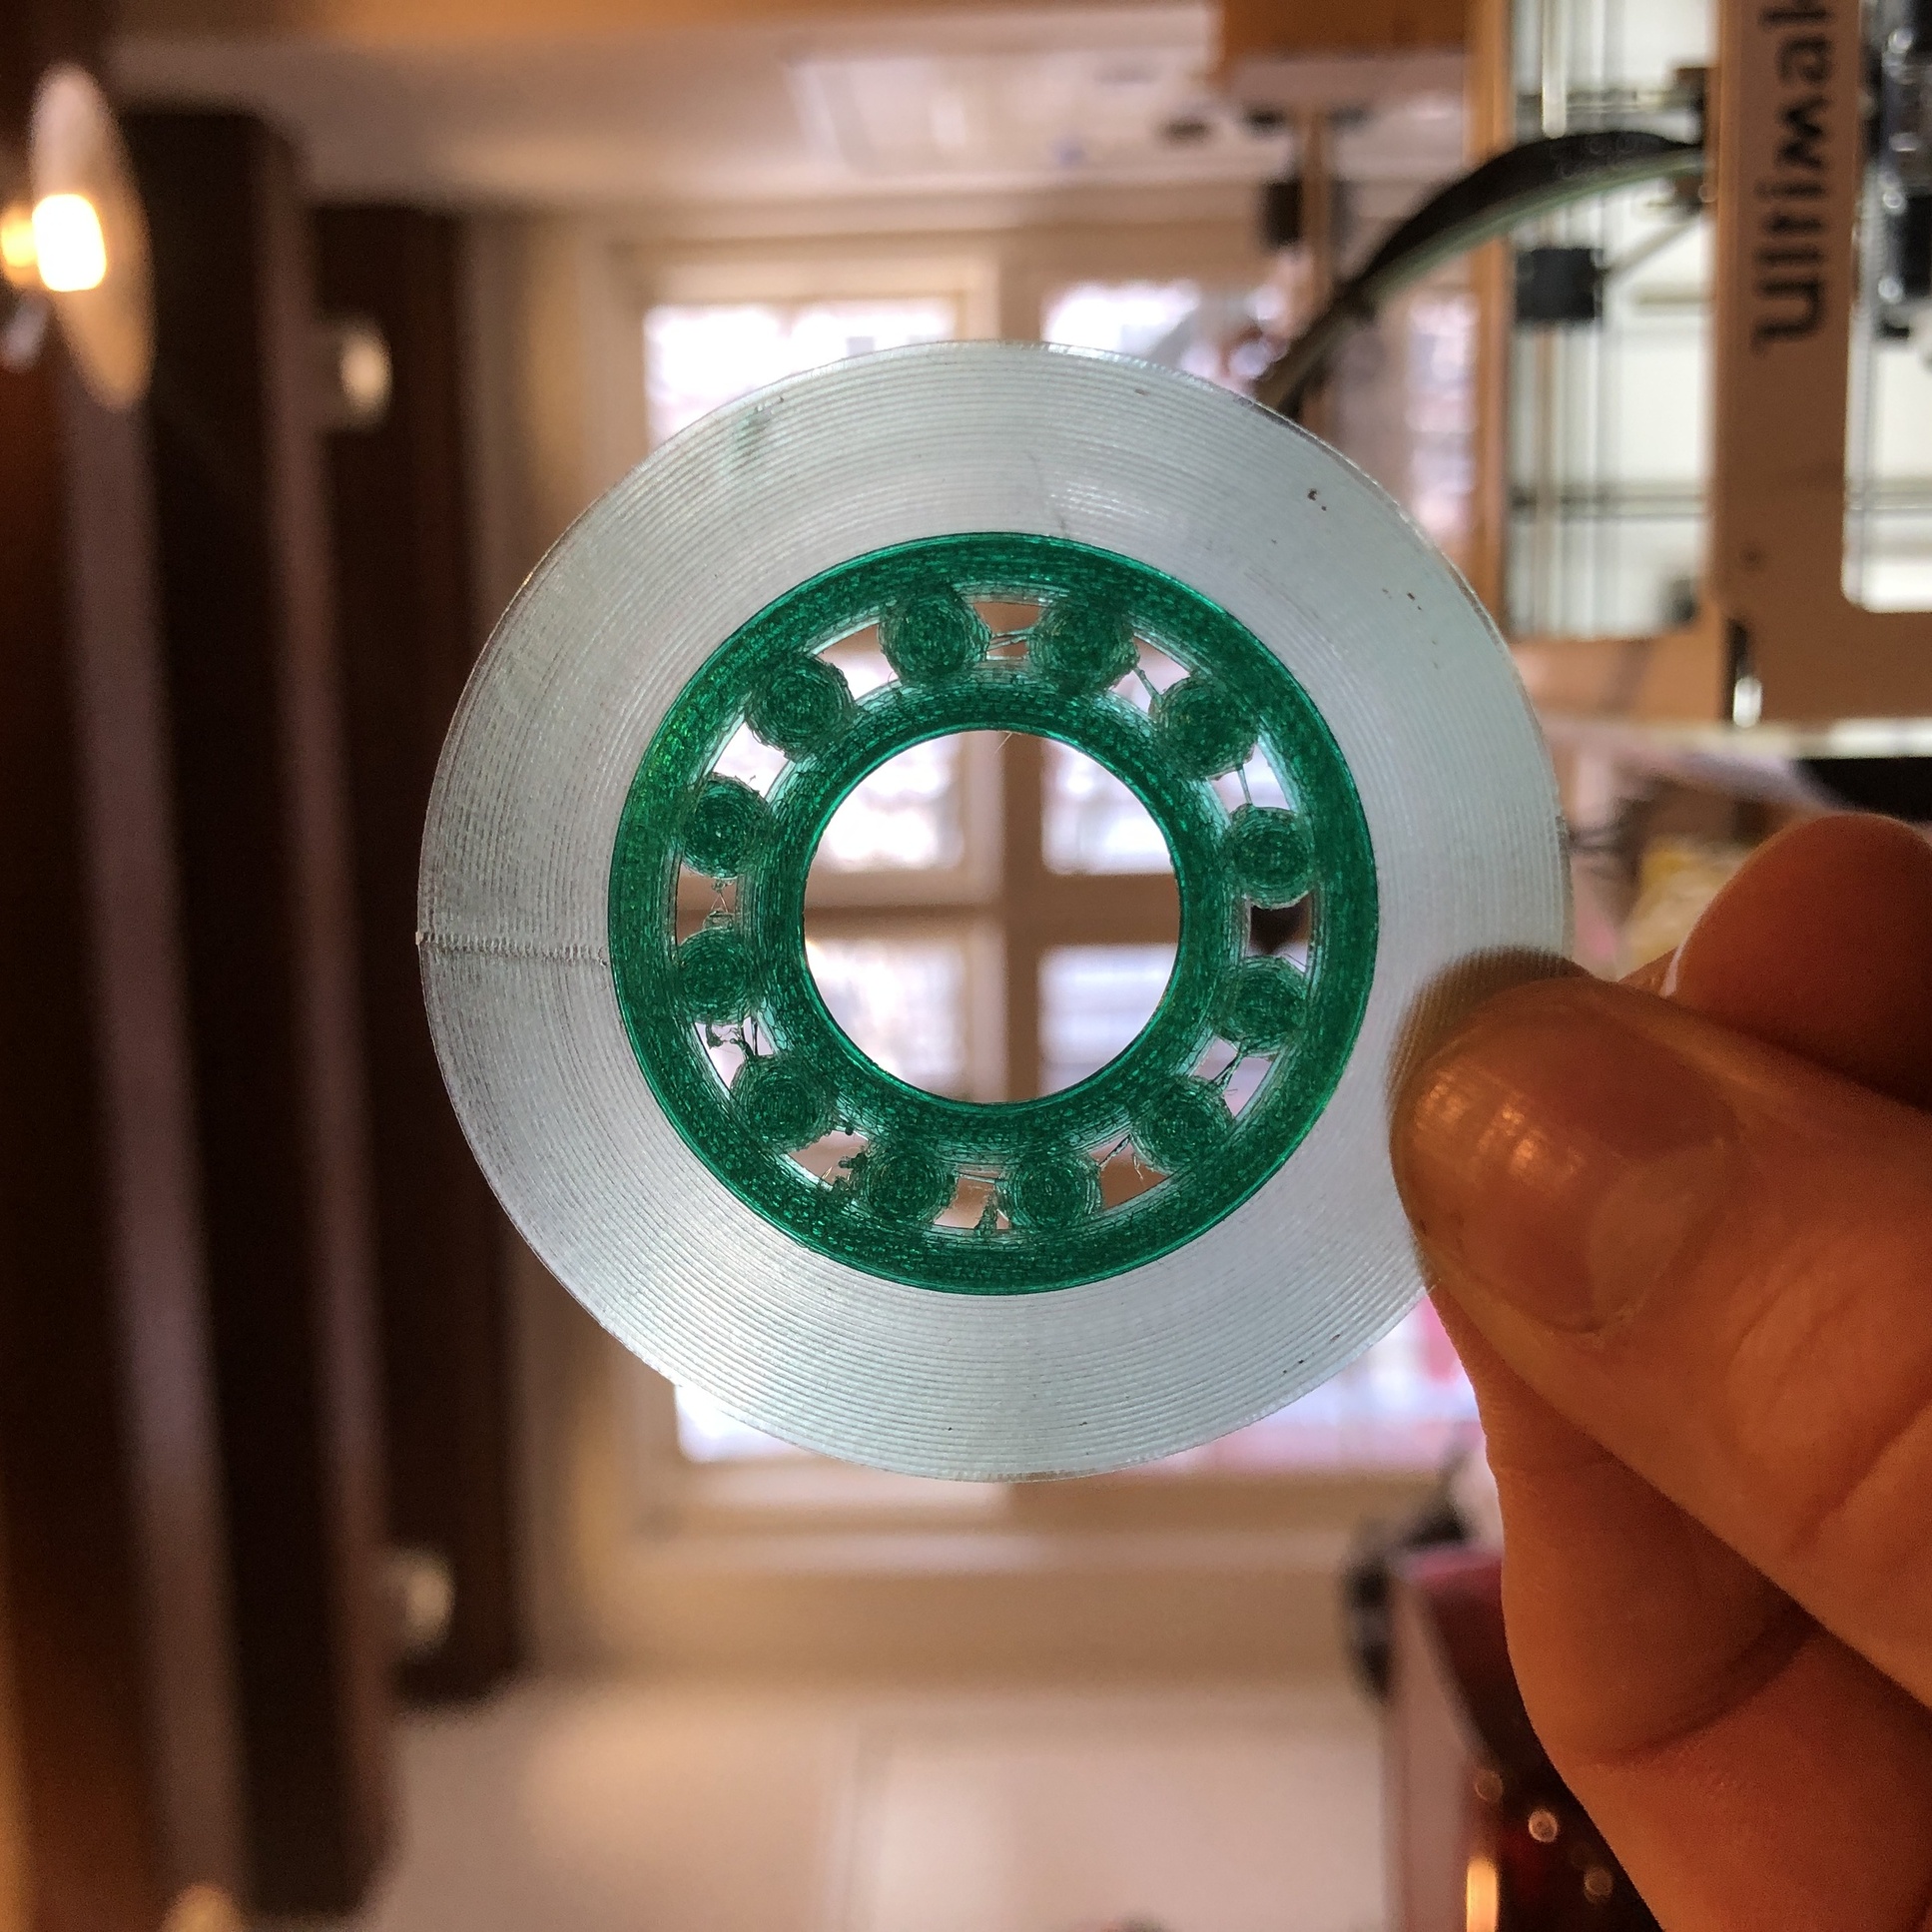
Green model is made with the Ultimaker using the Cura slicer
I want to print something functional. After some research I wanted to try a ball bearing out. There are a few tutorials out there that helped me out modeling.
I modeled the bearing in Fusion. Most of the dimesions are made with parameters so I’ll be able to make changes easily when necessary.


I exported my model out of Cura so I can compare my workflow and outcome with the prusaslicer. This model I’ll print with the Ultimaker 2.
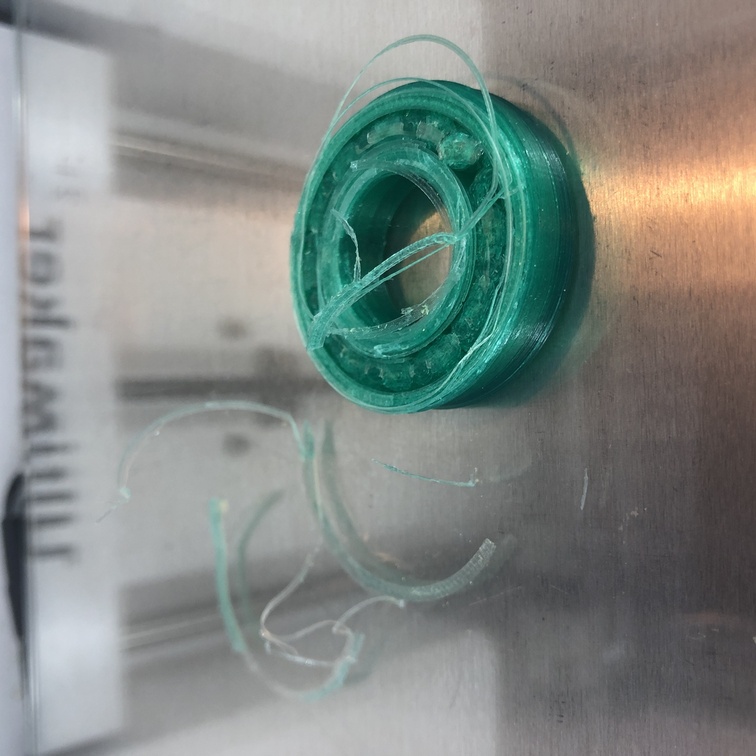
Easyyy. This is pretty fast.
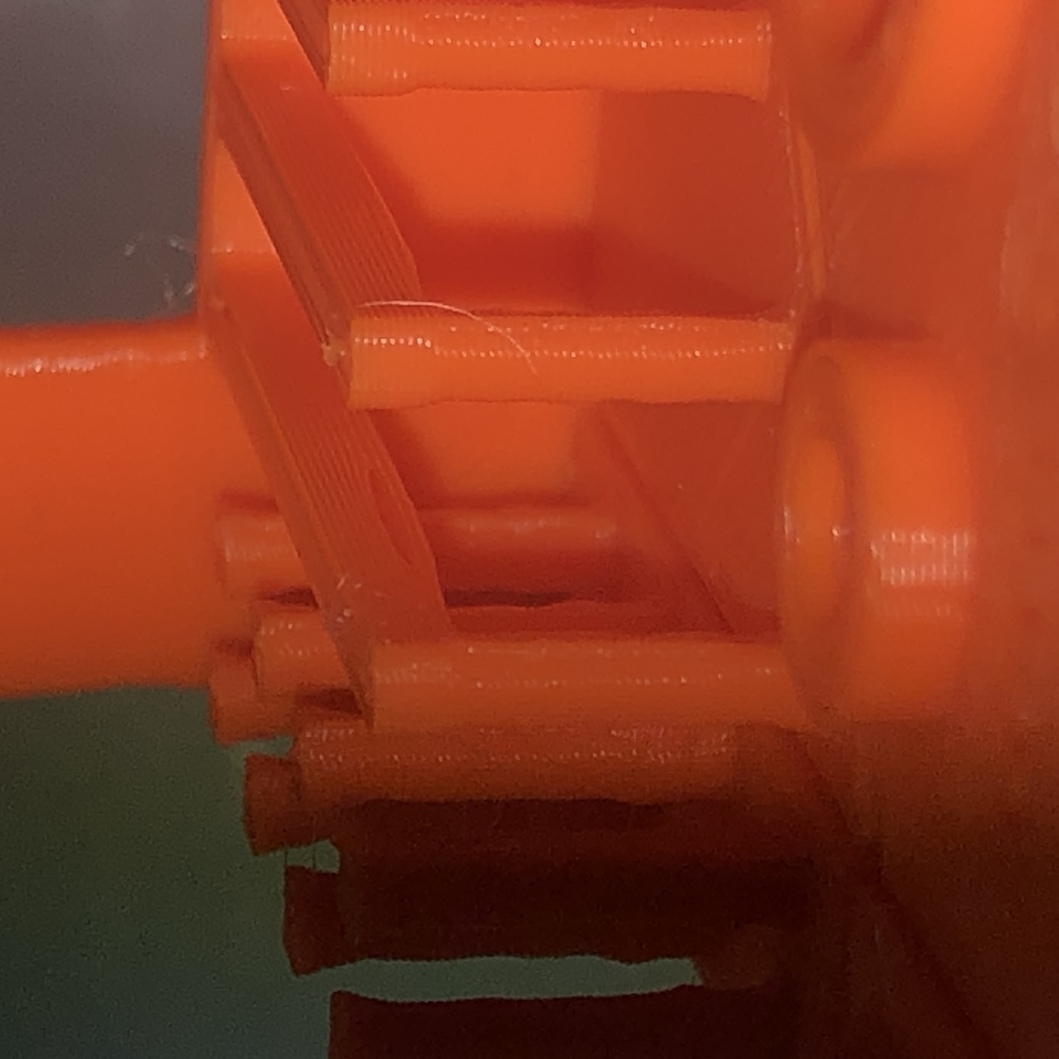
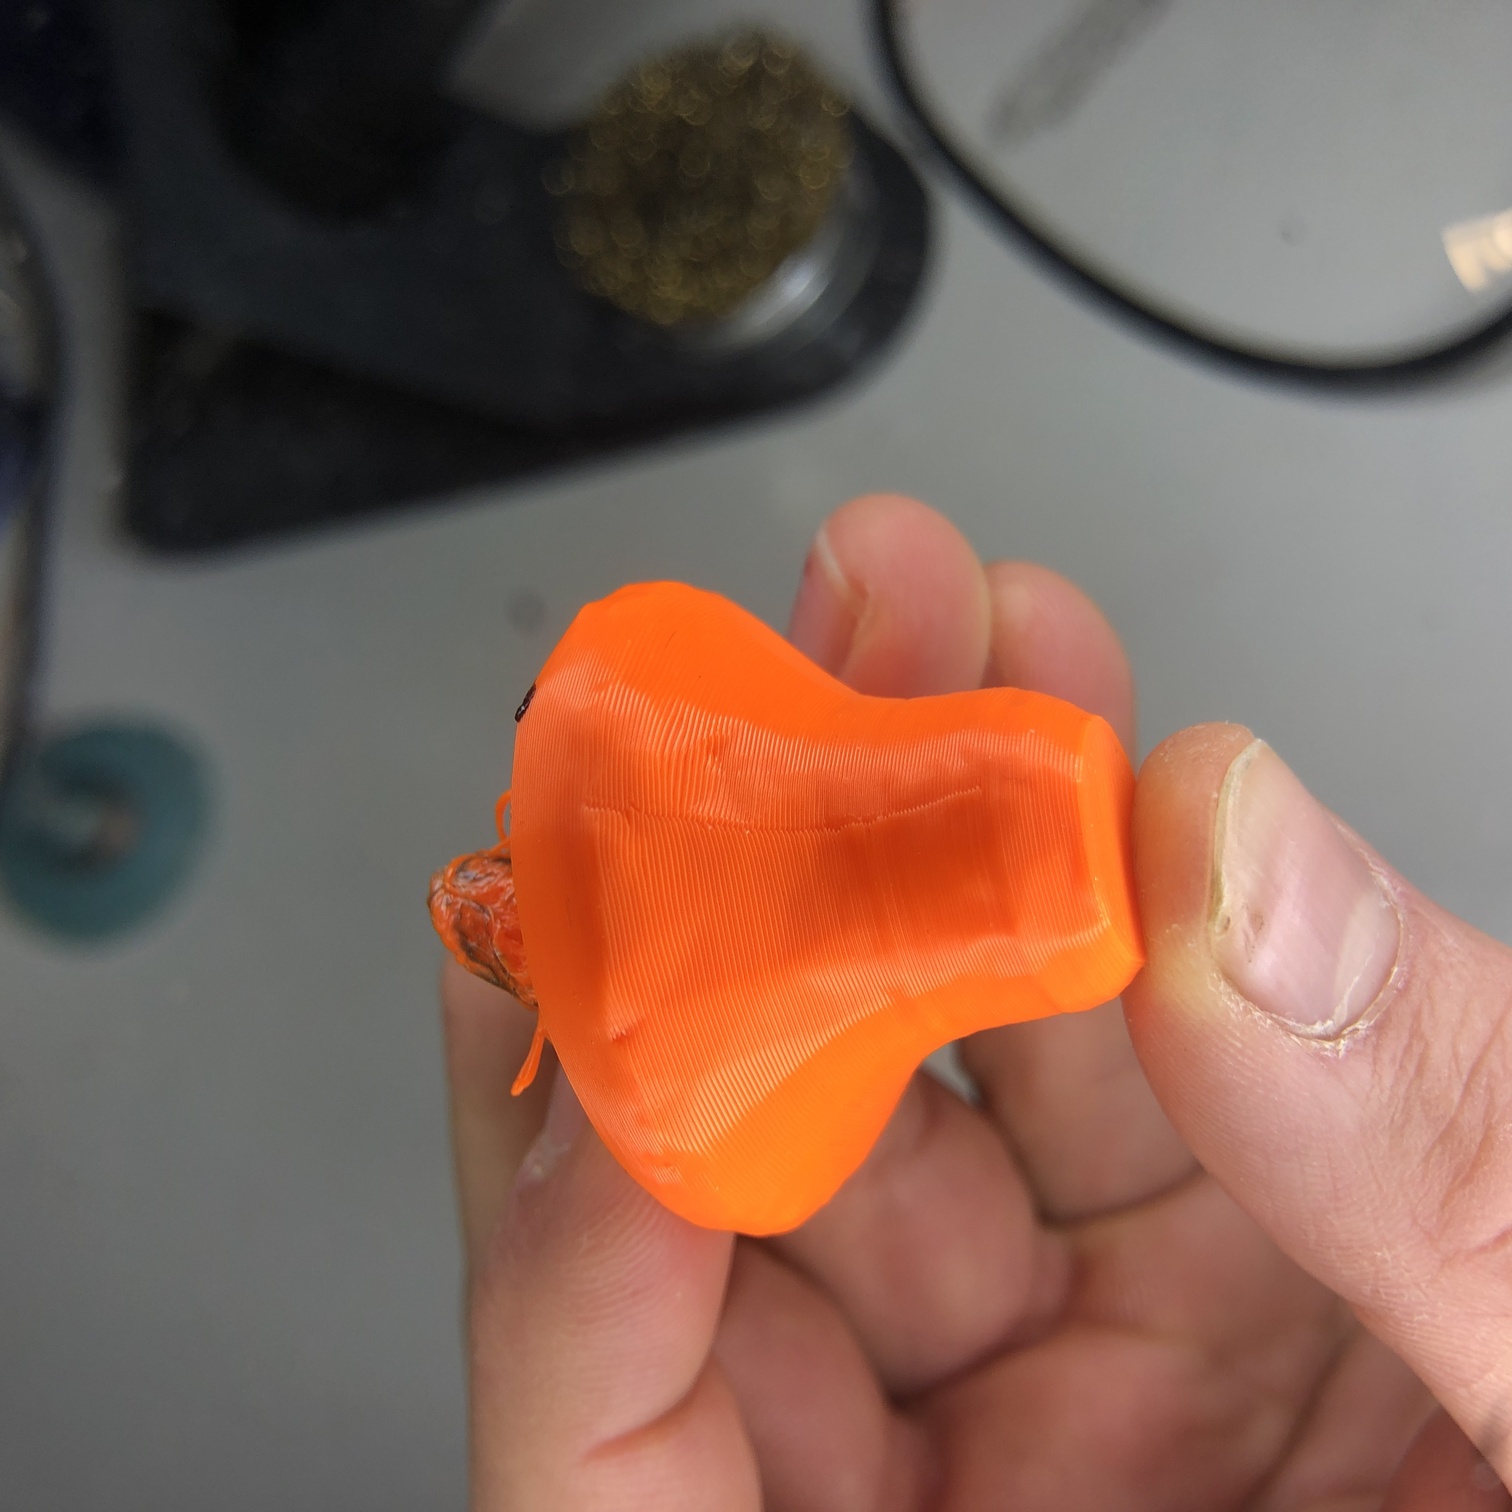
Here you see that one of my balls came loose:( It hurted real bad. (sorry for my portrait framework)
All of my other balls were intact so I choose to continue the process so I could see what would happen.
Here your can see that my model slightly shifted. You can also see why. The build plate is very loose. When I took the broken ball of my model I probably shifted the plate.
When I took my model out it was clear that the first layer was to tight.
I could relatively easy break my support out from the bottem side. The support from the top was really hard to take out. So hard that it wasn’t really possible without breaking my model.

I changed my settings in my slicer.
layer hight: 0.12 (I want my balls to be smooth)
support: only touching build plate
This ended real bad. I should go for a brim.
Ai, this looks really bad. The first layer was already to thight but with my layer hight set to 0.12 it looks even less promissing.
@$^$@^&*@$$@#$@#$!!! Been leveling this @$!@$^!#$^#!$ ultimaker for an hour now. But as usual it’s not the machine who’s stupid but me. While leveling I pressed on the building plate when I was holding my paper. Stupdido.
haha, my model is crooked!!!!! I rotated my model not a perfect 90 degrees. Use the automatic rotate setting in the Prusa slicer! Then it’s always ok!;)
That’s also the reason why my brim was so weird!
The reason that I chose for a brim is that my model shifted. But we found the reason now. I rotated my model wrong.. I think I’m not ready to mess my expert settings up in a cool slicer.
Oh oohh, fingers crossed! My balls are moving with the Prusa pinter.
The balls in the ultimaker are nice and thight. Not sure what’s up..
Let’s check out how the models are build in the different slicers. It seems there is no difference in the brim and support.
Both of the outside brims came off easily. The inner brim came off easily with the Prusa (orange) and almost didn’t cam of with the ultimaker. Remember that the balls of the Prusa where moving while printing and the balls from the Ultimaker didn’t. That probably has got something to do with the attachement of brim. I should check out the bed and extruder heat.
First model
Due to my extraordinary 3d pinting knowlegde my beloved balls in the Prusa printer survived. I hope they’ll do their work!
The bearing works nice! But I think there’s still a bit to much space for the balls to do what the want.
I’ll adjust the brim for both of the models. For the Prusa I want my brim to do a bit more work. Some support would maybe also to do the job. And for my Ultimaker I want my brim to come loose
Changing ball tolerence
ball tolerance from .3 to .1
Shit. Again a problem. My material broke… It’s probably to old. I had to get the bowden tube out to get material out of there.
In my model with the edited ball tolerenca I could see in the part that was printed that my the tolerance is probably to thight for this model. The balls are stuck to the ‘wall’ in my model. For the ultimaker this wouldn’t work out. For my Prusa it eventually did but it was a bit to thight. My next print should have a tolerance of .15.
Conclusion
I thought this week would be easy. I already printed a lot of things. I’m not sure where it started to go wrong but I made heaps of rookie mistakes. Probably because I was working with a new slicer, new printers and I didn’t expected that a simple print like the ball bearing would go wrong
Files
Notes
Import 3d scans
add conclusion workflow printers and workflow
Optimise video comprimise
Ideas for when I’m bored
When I this coming out of my printer I thought it looked pretty cooollll. The Brim is also super flexible
regenerative design
ball within ball (polyhedron, poly blablballblblalballablb )
3d printing handbook
geomatrical complexity
around 20/30 degrees you can grow out without support.
Strenght of the print depends on the angle of the print. strenght depends also on infill.
electroplating 3d printing!!! annealing prints wire additive
Resin print measured in hight
what’s meshing?
checkout meshroom
Project ideas: 3d scanning shoe molds: for shoesole what do I need for my final model z ax printer Moving bed printer (geleider maken zodat je oneindig kan printen) showing projects that you can repair things. make 3d printing useful again.
Boolean = somehting that's wrong ore right
3 types of modeling.
moudling and casting cutting additive
I have a 3d printer myself and I bought it so I would be ably to make technical components
Prusa slicer
I’ve never worked with Prusa slicer. Workflow
A lot of bullshit is printed.
How to scan something and print it?
Scan -> Blender -> Printing
3D scanning, CAD, and 3D printing have been used to restore the works of some of history’s most famous artists, returning works by the likes of Michelangelo and da Vinci to their former glory.
Generative design
3d printing for reparation
Metrics for the group assignment.
| Metrics | Ultimaker2+ | Prusa MK3S | Creality Ender 3 | Sain Smart infi 20 |
|---|---|---|---|---|
| Settings | ||||
| Material |