13. Networking & Communications
This week I started to work on networking & communication that includes design, build, and connect wired or wireless node(s) with network or bus addresses. As for the group assignement, we are suppose to send message between 2 systems/projects.
You can access the group assignment HERE.
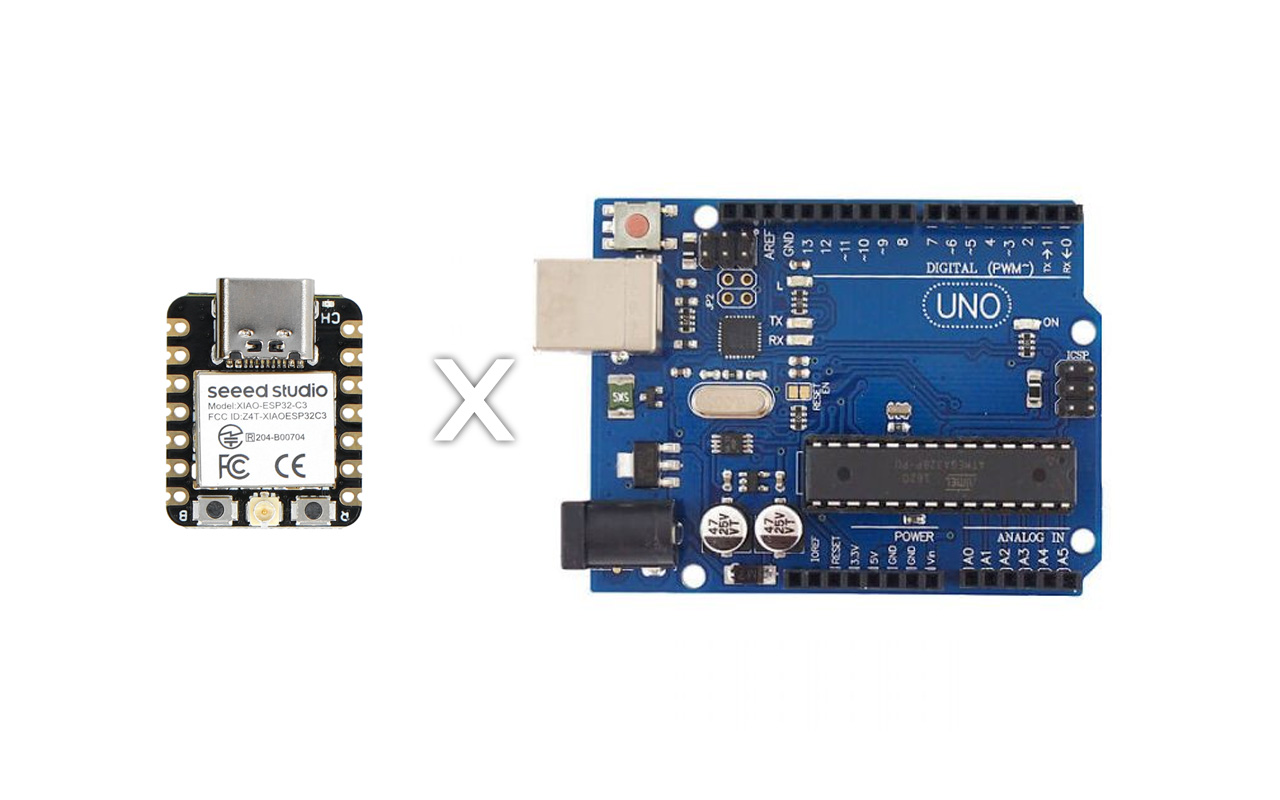
Serial Communication between Xiao ESP32C3 & Arduino UNO
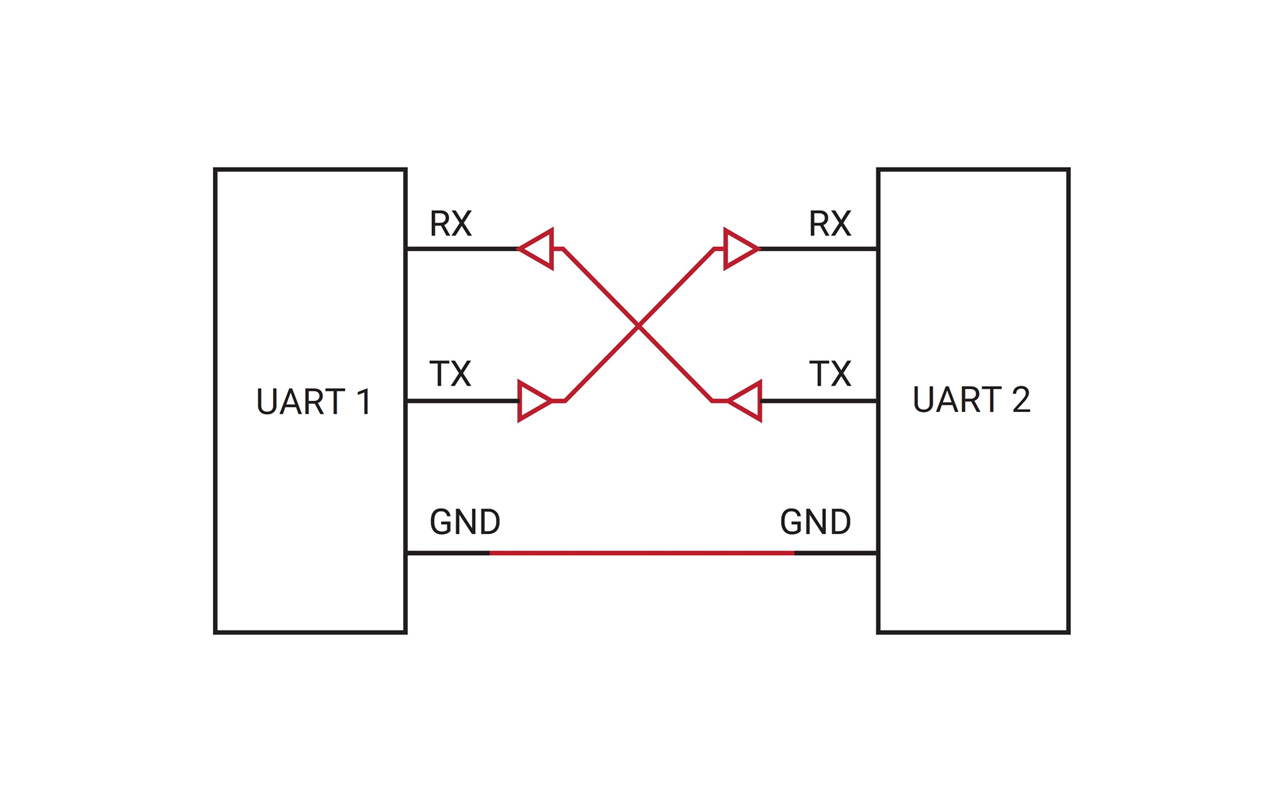
For my Networking & Communications assignment, I will be working with Serial Communication. Basically it is a process of data transmission sequentially through a communication channel or bus. In serial communication, the data is sent one bit at a time. The serial transmission can be performed using only a single wire and four wires. Serial communication is also known as UART or USART communication. Below is a simple diagram illustrating how a serial connection works.
In order to understand how a serial communication works, we will need to know which are the connection pins since we are going to try a serial connection between a Xiao ESP32C3 & Arduino UNO micro-controller. For Arduino UNO, there is at least one serial pin available for serial connection. The pins are named TX (Pin 1) and RX (Pin 0) pins. TX stands for transmitting while RX stands for receive. Likewise for Xiao ESP32C3, it also comes with both TX and RX pins, however, depending on the model, the serial pins number can vary. So, in order to establish serial connection between Xiao ESP32C3 & Arduino UNO micro-controller, we will need to cross-link TX and RX pins of Xiao ESP32C3 with Arduino UNO. Also, in the connection, we will need to have a common ground (GND) betweem the two micro-controller.
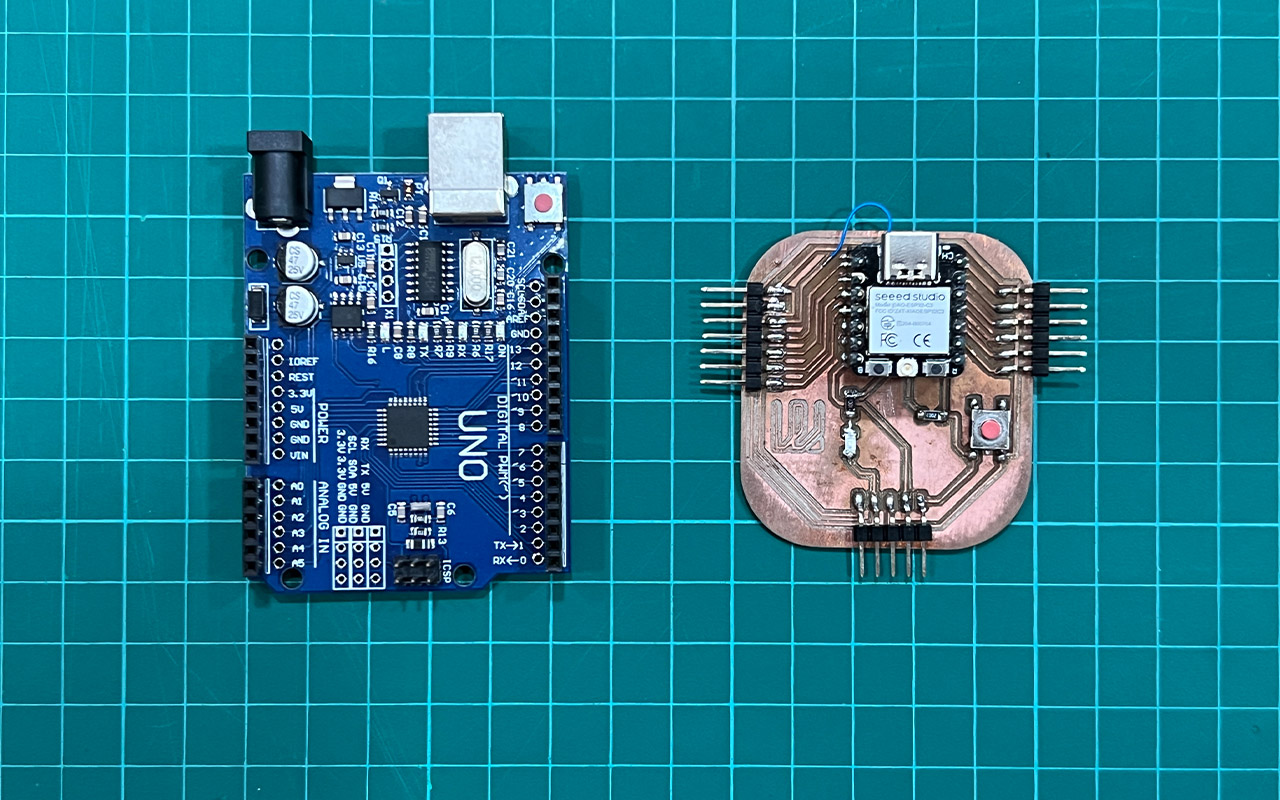
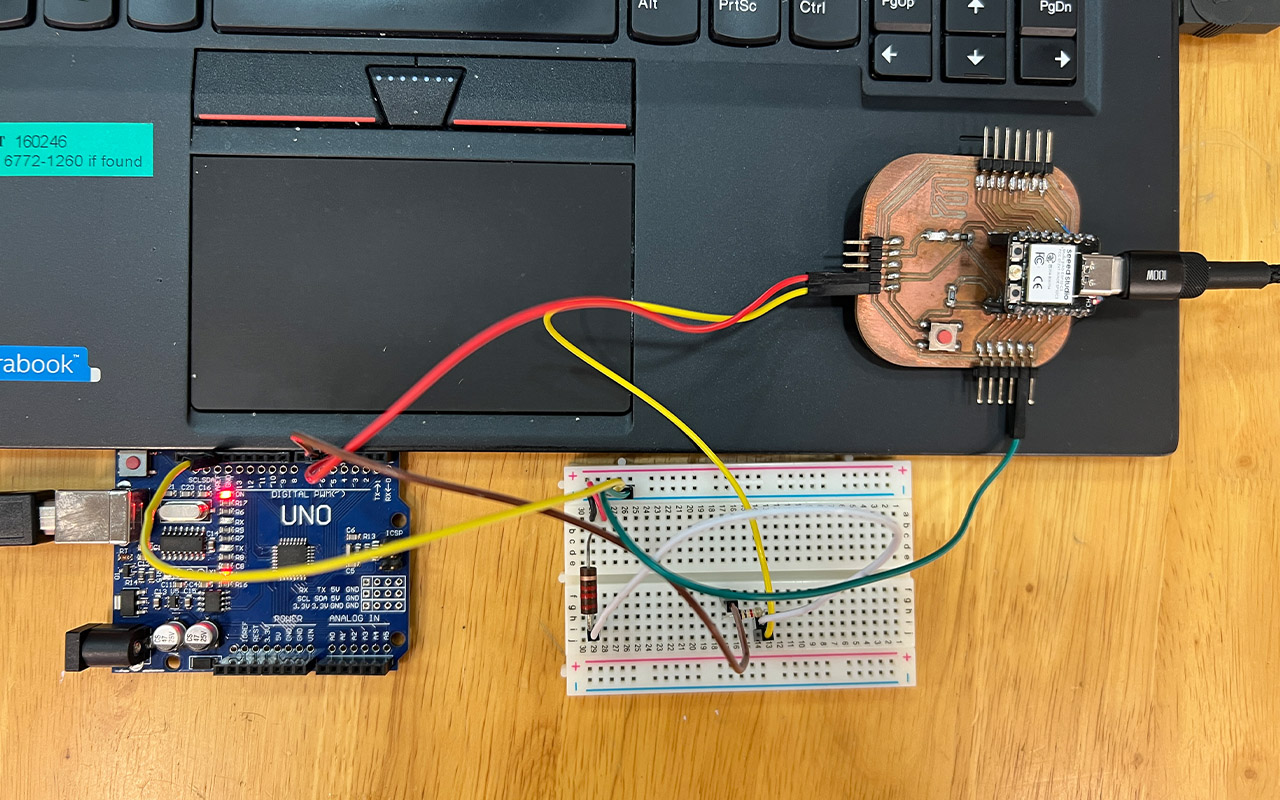
So as a start, I will use back my PCB design and swap the XIAO RP2040 controller to a XIAO ESP32C3 to establish a serial connection an Arduino UNO micro-controller. Below is a image of the hardware and components require for this simple serial communication project:
After getting the hardware and components ready, we can start to connect them using Jumper Cables. However, there is a problem because Arduino UNO works on 5 volts while Xiao ESP32C3 works on 3.3 volts. Meaning to say, we cannot just connect them directly as we might risk damaging the Xiao ESP32C3 micro-controller. Therefore, we need to come up with a plan to reduce the voltage so that we can do the serial connection. After consulting our local Fab Academy Instructor, the best and easiest way to do it is to use a voltage divider circuit to step-down the voltage with resistors as shown in the image below:
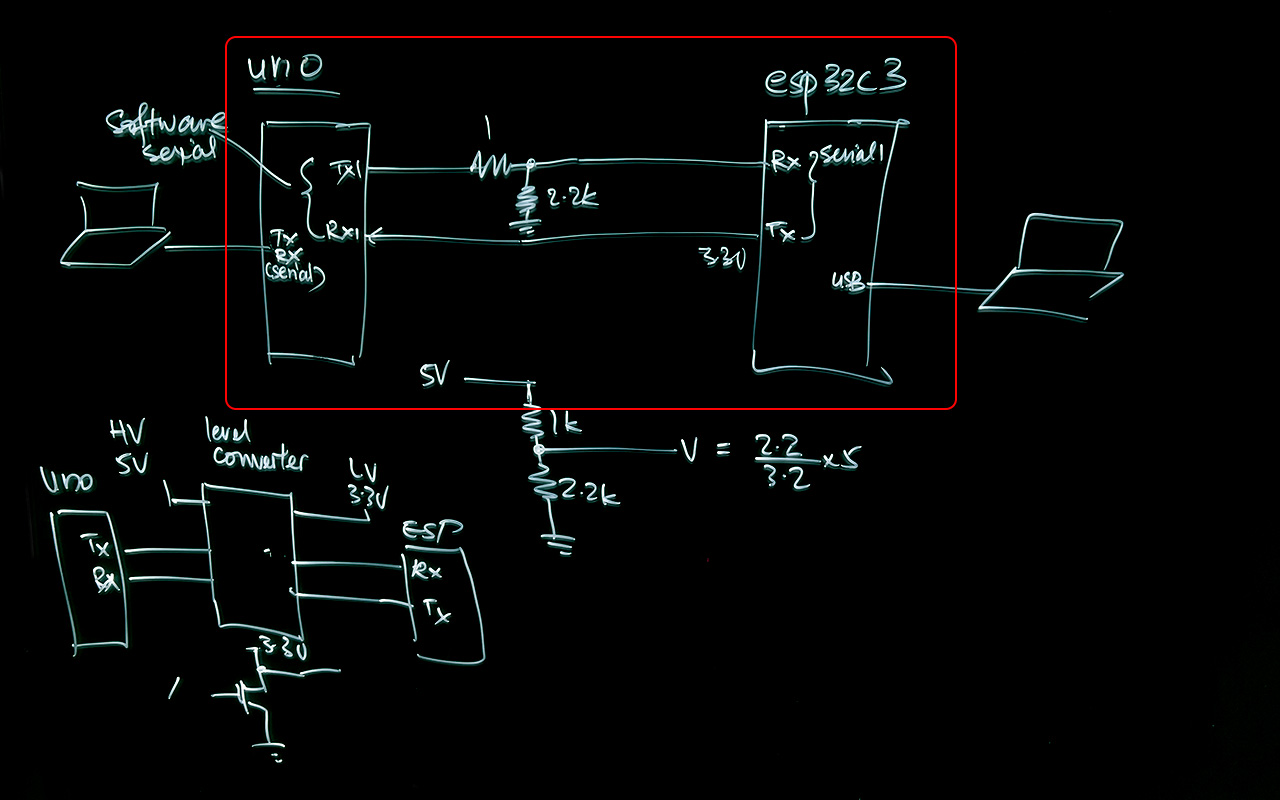
There is actually another way to solve the voltage issue which is to use a Level Converter. However, we do not have one in our lab so I decided to make do with the voltage divider circuit. And with the circuit diagram ready, I am able to do up the wiring connection with ease. Below is an image of the final connection between my Xiao ESP32C3 and Arduino UNO micro-controller:
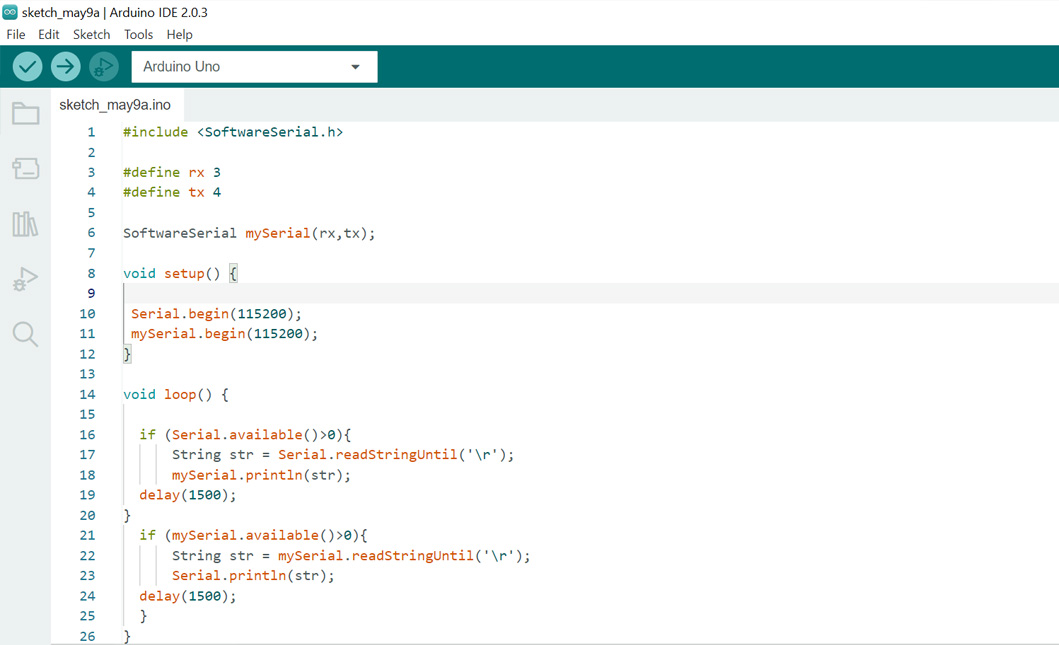
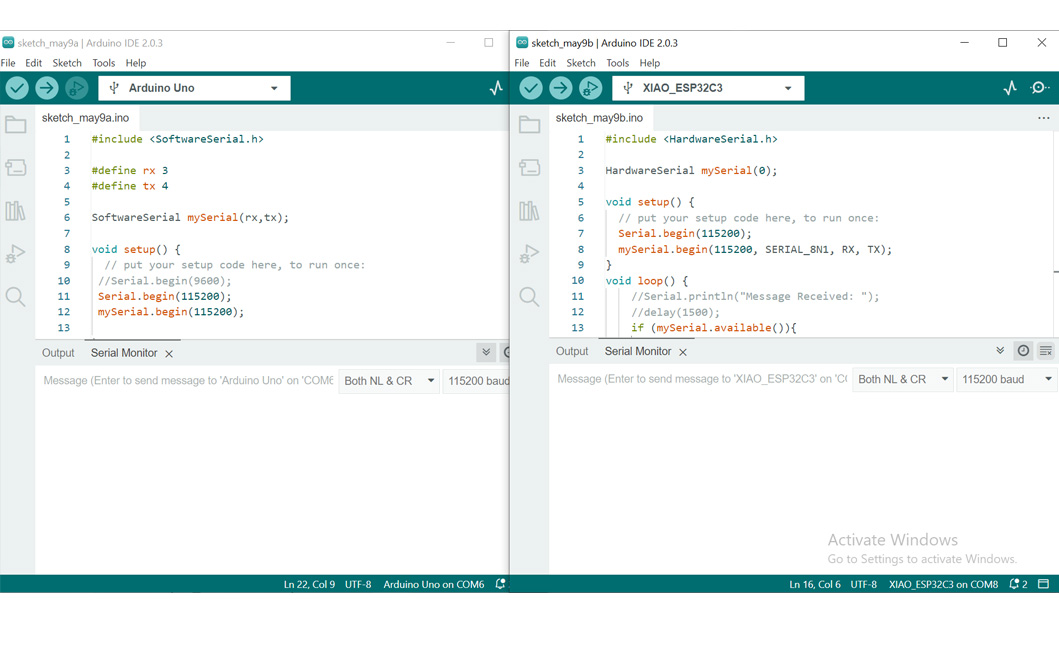
Once the hardware is done, we can proceed to the software part. In order for us to do a serial communication, we will need to create 2 codes, one for Arduino UNO and the other for Xiao ESP32C3 micro-controller. Basically, what I want to do is to use serial communication to send & receive messages across the 2 different micro-controllers. So we will start off with the code for Arduino UNO whereby we will use the Software Serial library so that it allows us to send and receive data. Without using Software Serial, we can only either send or receive data as Arduino UNO have only 1 serial port. Below is a screenshot sample of the code for Arduino UNO:
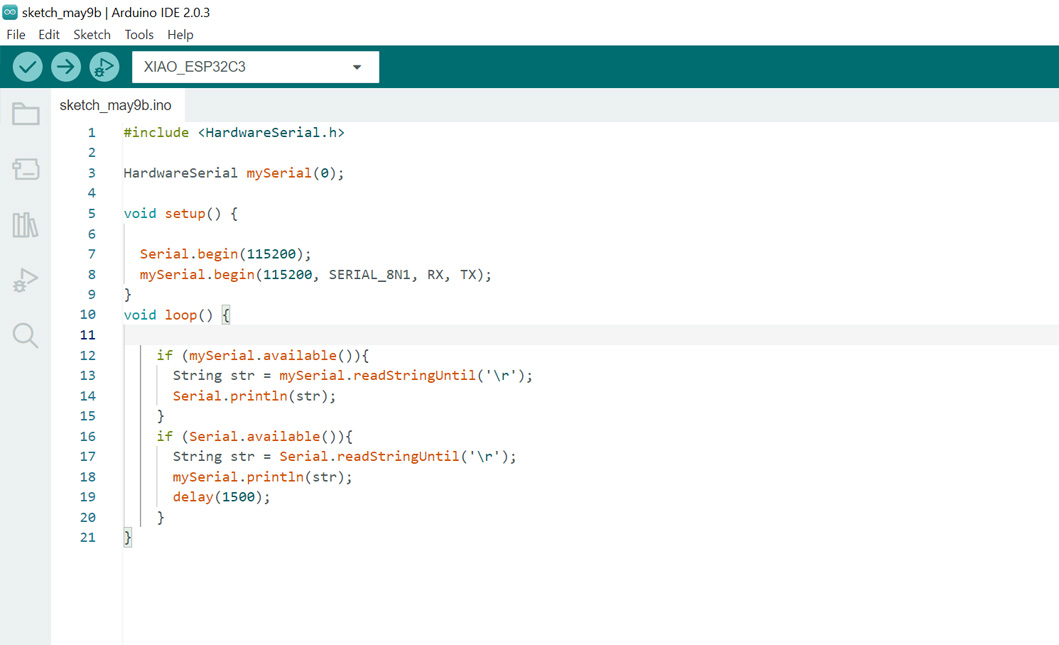
After writing the code for Arduino UNO, we will do it for Xiao ESP32C3 as well. The code will be slightly different as we will need to include the Hardware Serial library so that we can establish communication with the Arduino UNO micro-controller in terms of both hardware and software serial ports. Below is a screenshot sample of the code for Xiao ESP32C3:
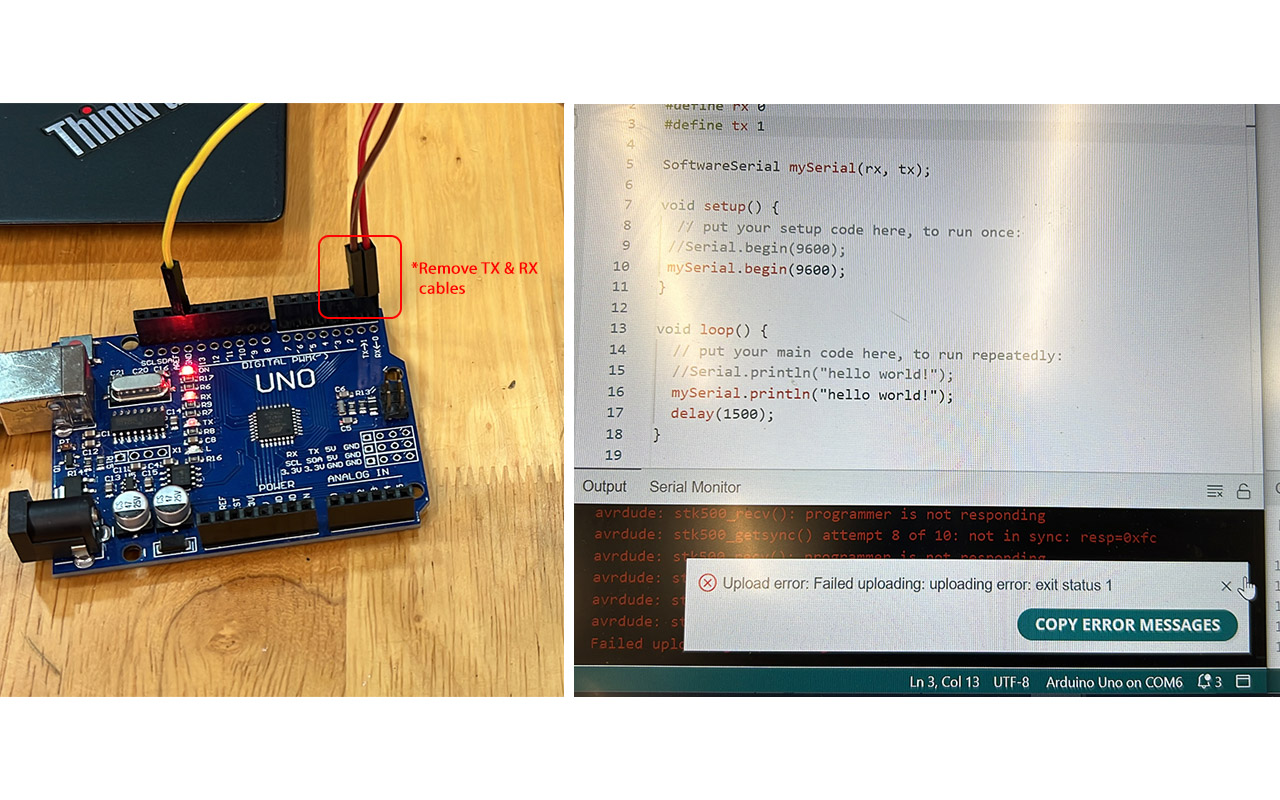
Once you are done with both codes, we can start to do the simple serial test. So firstly, we will need to compile and upload the codes to both the Xiao ESP32C3 & Arduino UNO micro-controller. One important thing to take note is that while we are going to upload the codes to the Arduino UNO micro-controller, we need to remove the TX & RX connection as it seems that having the connections on actually interupts the uploading of the codes and tends to have error. So in order to avoid this, it will be better to remove both TX & RX cables temporarily and then connect them back after uploading is successful.
You may download both of the codes HERE.
Lastly, we can start to test our serial communication code. Below is the video of the serial communication between a Xiao ESP32C3 & Arduino UNO micro-controller:
It was a success in this simple serial communication test between Xiao ESP32C3 & Arduino UNO. I am able to send and receive text messages from both micro-controllers. This experience gave me a better understand of Serial/UART communication among devices and network. Below is a heroshot of my serial communication work in progress coding in IDE:
Reflection
It was a long week in working on networking and communication because it was totally out of my scope of understanding. I practically spend weeks to just get my first serial communication test to work! During the process, there were alot of question marks in creating a serial communication between 2 different micro-controllers such as the hardware connection to software coding. It was with the precious guidance of our local Fab Academy Instructor that helps me to get my circuit and codes to work. I would say it is still a work in progress in learning networking and communication but nonetheless it was a good try.