5. 3D Scanning and Printing
This week I started to work on 3D Scanning and Printing that includes using a 3D Scanning App - Scaniverse to do a simple scanning of an object as well as to understand the parameters setting of 3D printing. The group assignement is to test the design rules of our 3D printer and in this case, we are using 2 different 3d printers for our test - the Ultimaker 2+ and Prusa i3 MK3S+. There are 4 members in my group and each of us are working on either the Ultimaker 2+ or Prusa i3 MK3S+ 3D printer.
You can access the group assignment HERE.
3D Scanning - Scaniverse App
There are 2 parts for this week assignment - 3D Scanning and 3D Printing. So as a start, I am going to play around with 3D scanning using Scaniverse, a free to use 3D scanning App available for download in Apple Store. It is a 3D scanning App that uses Photogrammetry to scan and reconstruct objects, rooms and even the whole building environment. I am not sure if this App is only applicable to Apple devices but it works even better with LiDAR enabled devices. It is also very user-friendly and easy to use whereby the UI are pretty straight forward with just a Library and New Scan buttons. I then started to scan something simple to see if it is really good and I started off scanning a nearby wooden stool.
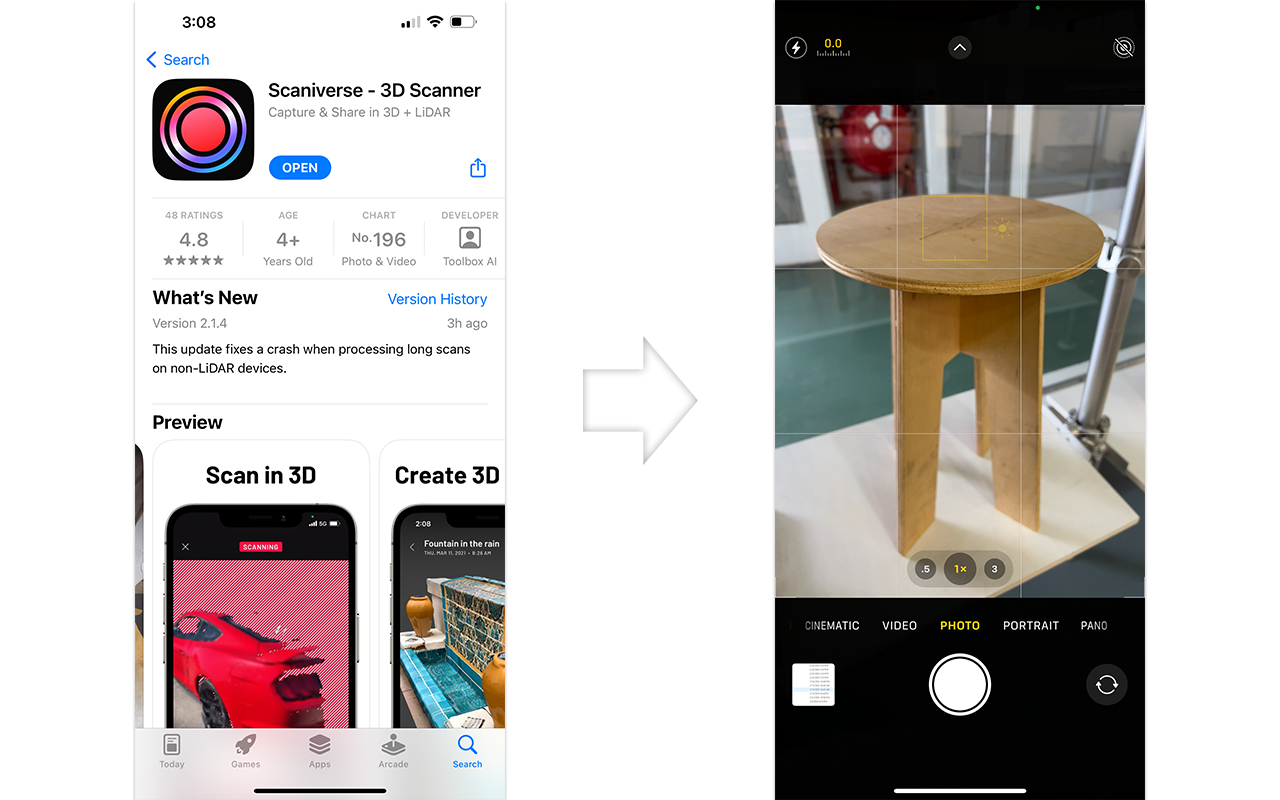
You will start the scanning process by pressing the New Scan button and you will see the details of 3d scanning triangulation appears in the UI, which is an indication to tell you that you are in scanning mode. The scanning is easy as what you need to do is to ensure that you do a full 360 degree scan of the object and make sure that you cover all angles and underneath areas too. Once you feel that you have already covered all the scanning areas, you may stop the scan and the App will kind of auto-post-process the raw data for you which takes only minutes afterwhich you will see the outcome of your scan.
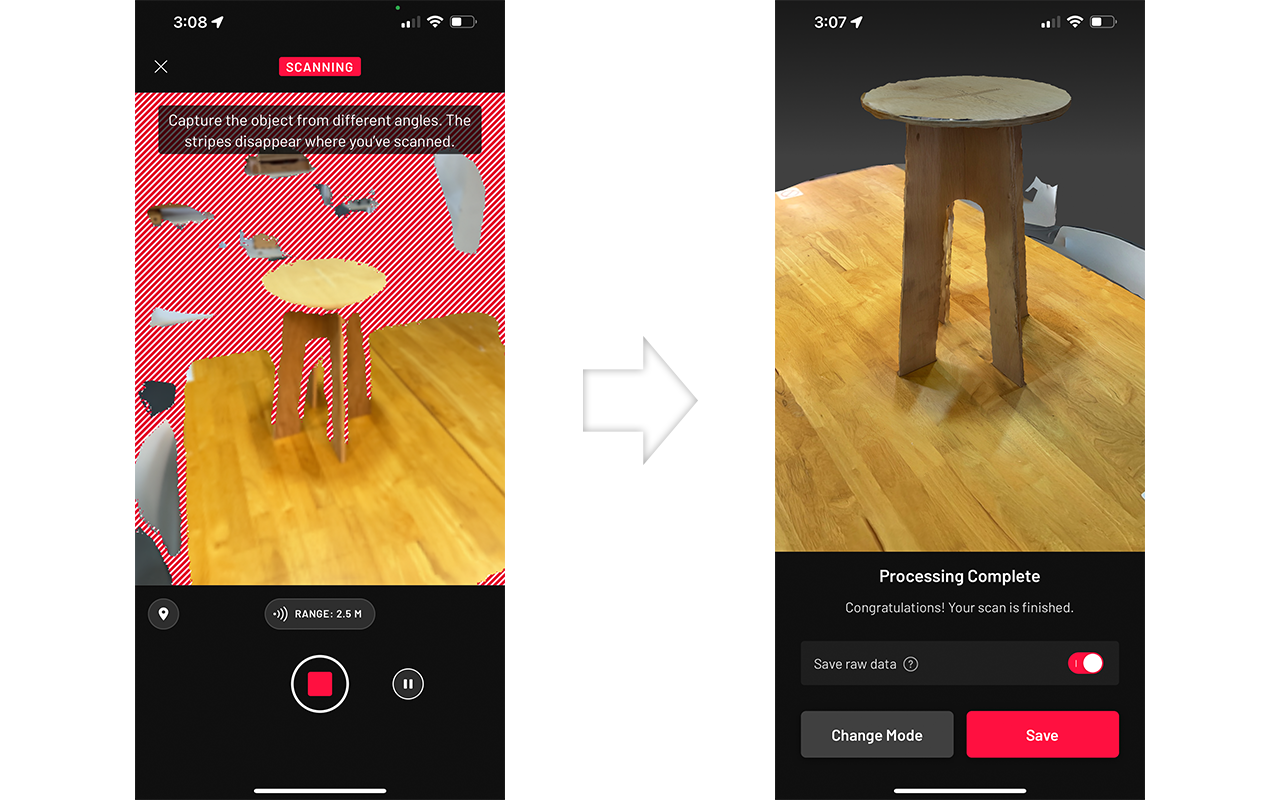
The outcome of the scan looks pretty good but then it also captures the surrounding which you will need to crop and remove otherwise you will not be able to export the model for 3D printing due to the surrounding noises/data. You can just use the existing Crop function within the App to adjust and crop the scan details that you do not need, to make it concise for exporting to a 3D model for 3D printing.
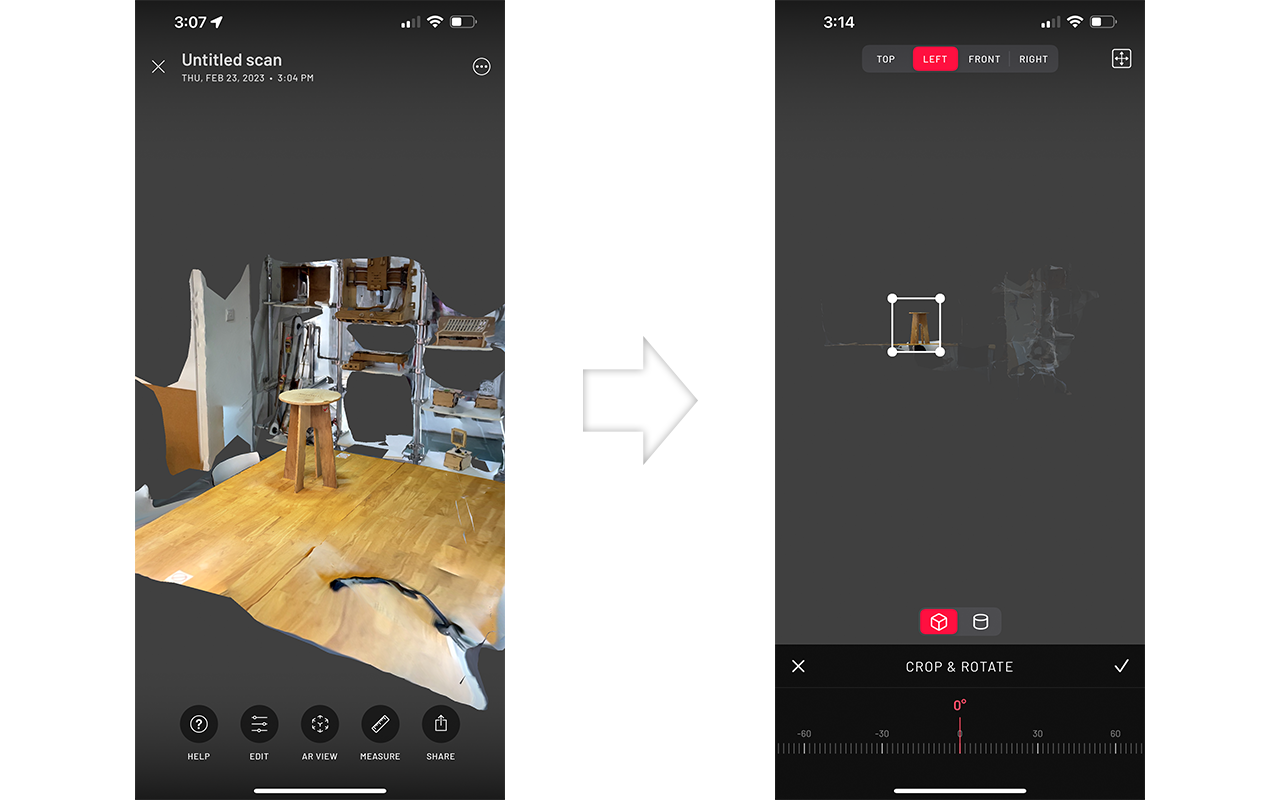
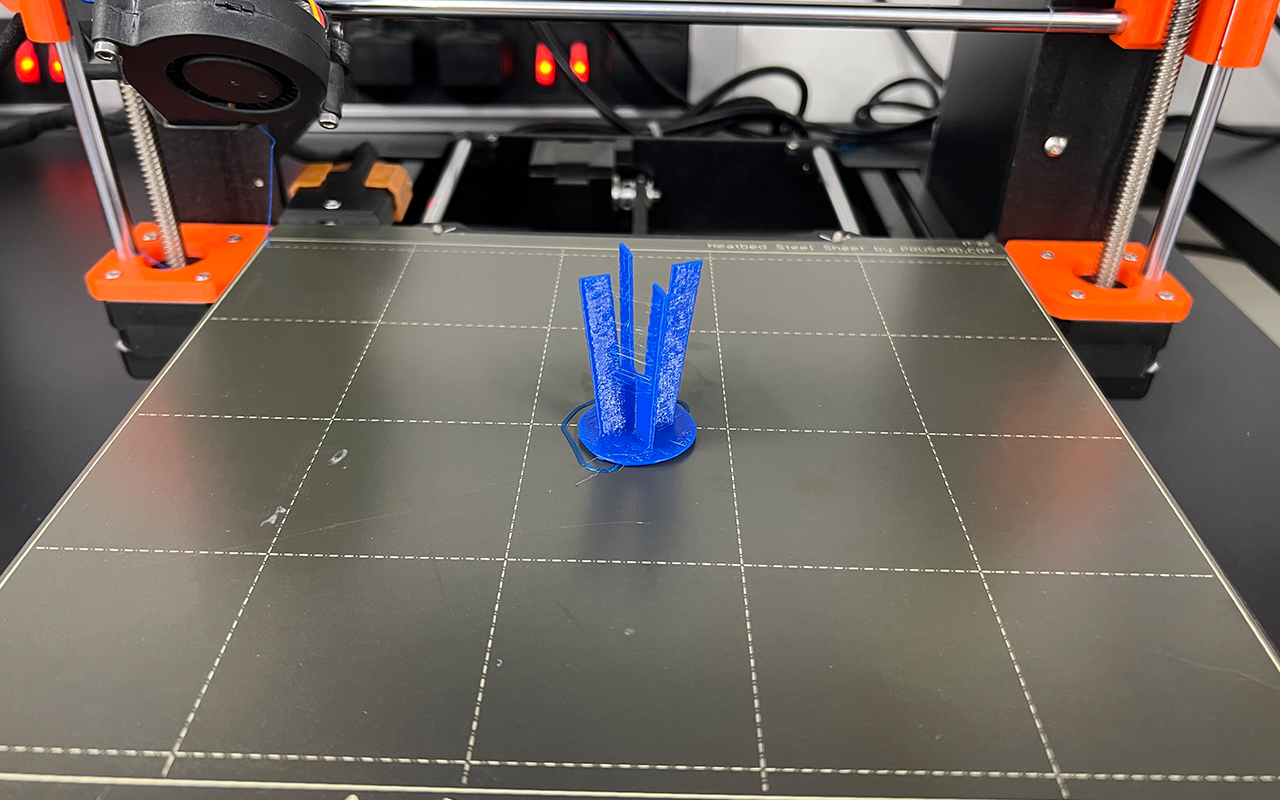
After cropping, you should have a clean and concise 3D scanned data which you could then export them into any 3D printing format (OBJ or STL) for 3D printing. Once I am done with the exporting, I send the file to CURA Slicer and eventually to Prusa i3 MK3S+ 3D printer to test print the model. I have change the orientation of the model by turning it 180 degree so that the model can be printed without supporting structure. I have also adjust the parameter settings for the printing as shown below:
- Temperature - 200 degree
- Base Plate Temperature - 60 degree
- Printing Resolution - 0.2mm
- Printing Speed - 60mm/s
- Infill Rate - 20%
- Infill Pattern - Triangle
- Plate Adhesion - Skirt
- Support - None
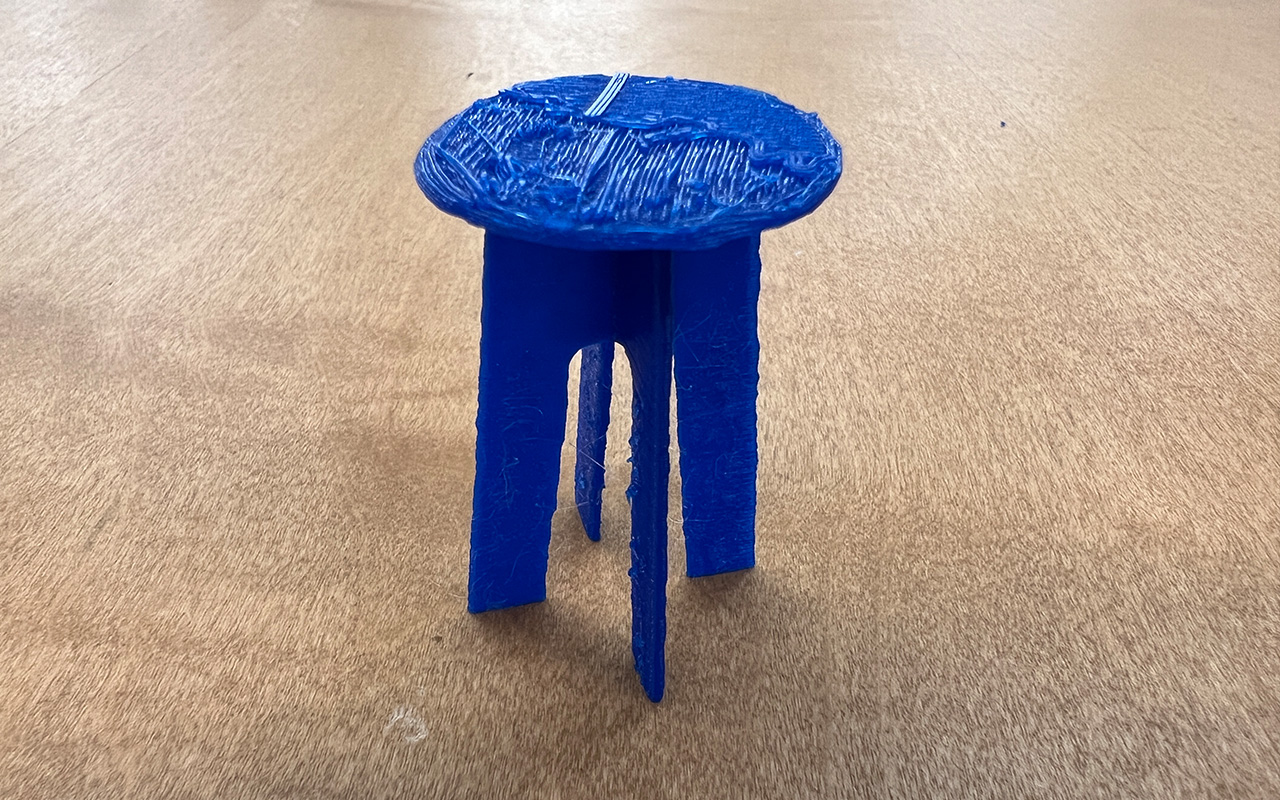
The outcome of the scanned model looks ok but the printing quality is not what I have expect as it is very rough and there are unevenness in certain parts of the model. This may be the limitation of Photogrametry 3D Scanning as it will not give you a very precise dimensional scan as compare to those industry grade 3D scanner but nonetheless it is a good try and experience of using a 3D scanning App for scanning. Probably, it is still a good alternative solution for hobbyist to do something fast and cheap if they require 3D scanning. For more precise 3D scanned data, we will still need to rely on industrial grade 3D scanners.
You may download the stool STL file HERE.
3D Printing - Gyroid Design
The next part of this week assignement is to create a 3D model that is unable or difficult to be subtractive manufactured and then have the model 3D printed. As I was still thinking of what to create for the assignment, I came across a Gyroid structure in the internet which inspired and motivated to create a gyroid design for this assignment as the Gyroid structure is quite impossible to be manufactured subtractively. I then started to create the Gyroid unit cell design in Rhino 3D. I also did a study on the Gyroid unit cell structure and its dimension so that I have a better idea and understanding of where and how to start the 3D modeling process.

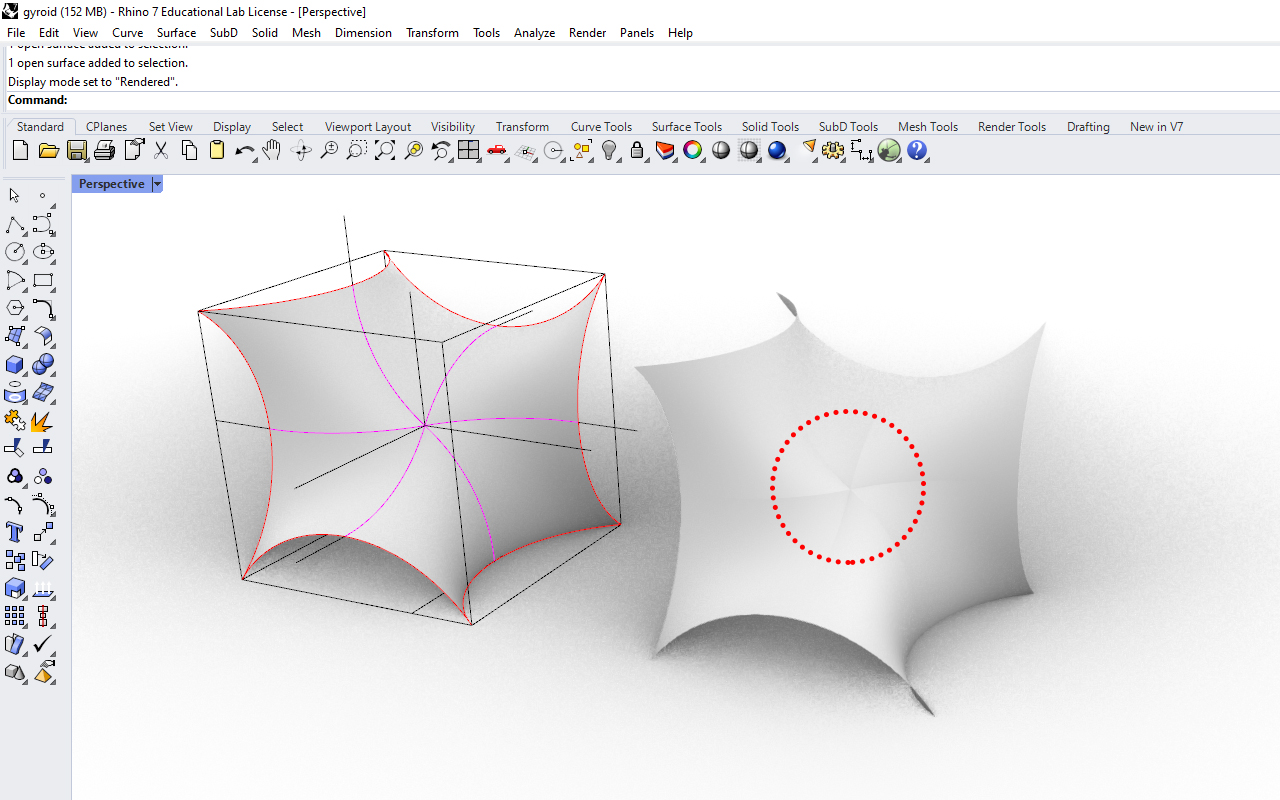
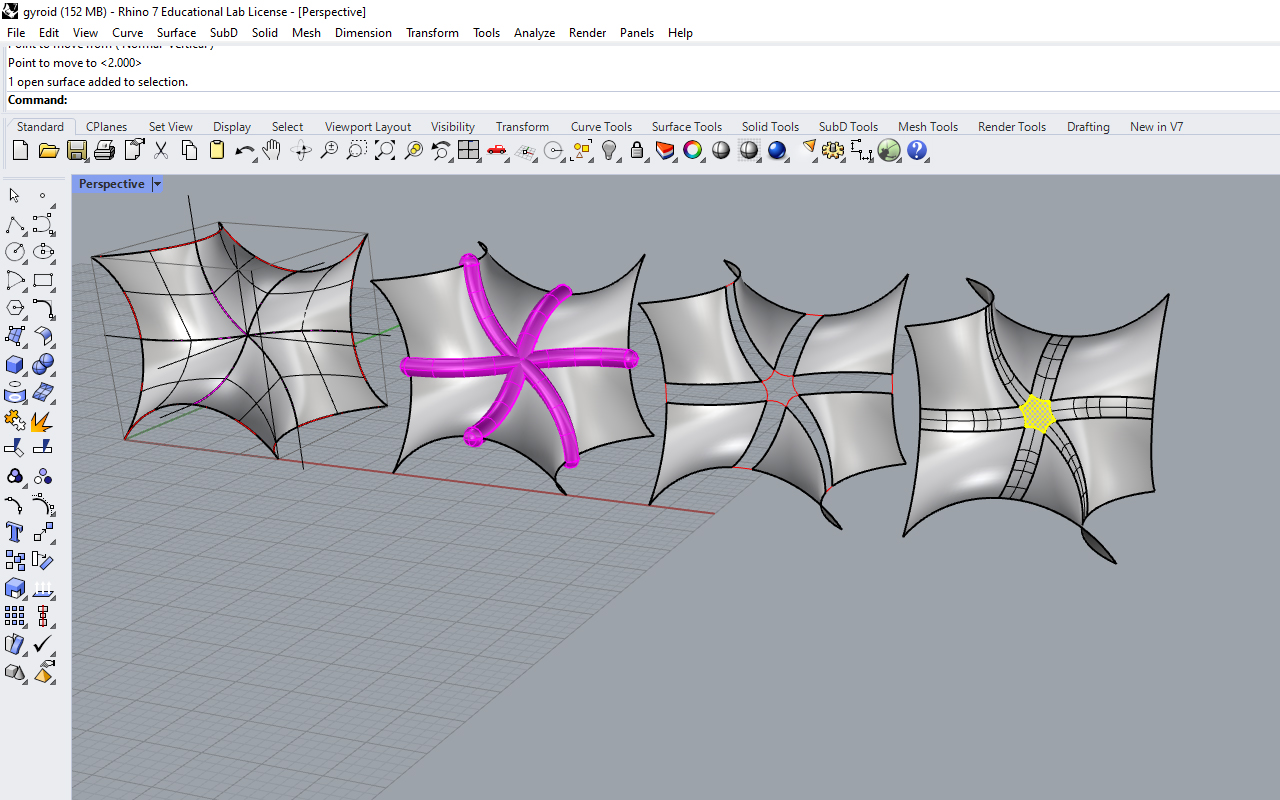
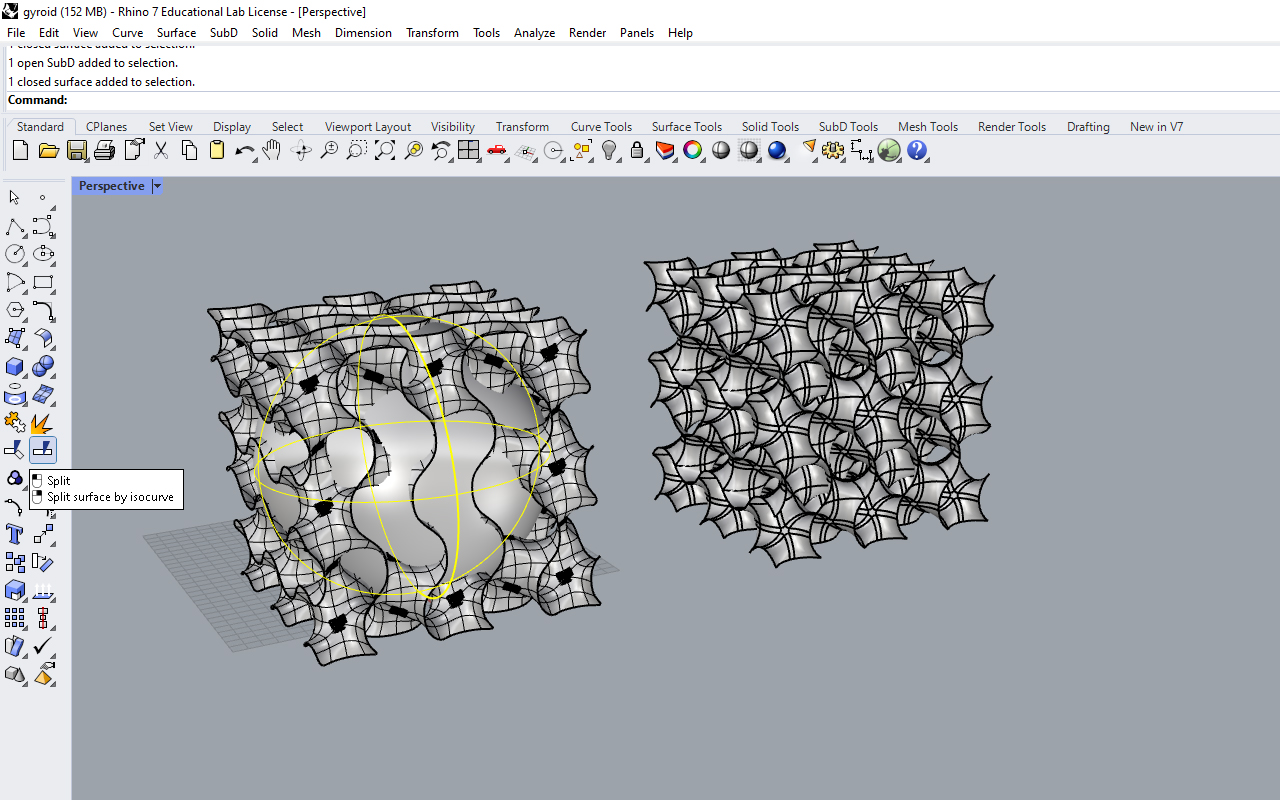
Firstly, I created the curve arc and reference lines of a Gyroid unit cell structure using Curve function and then created the surfaces using the Edge Curves function.
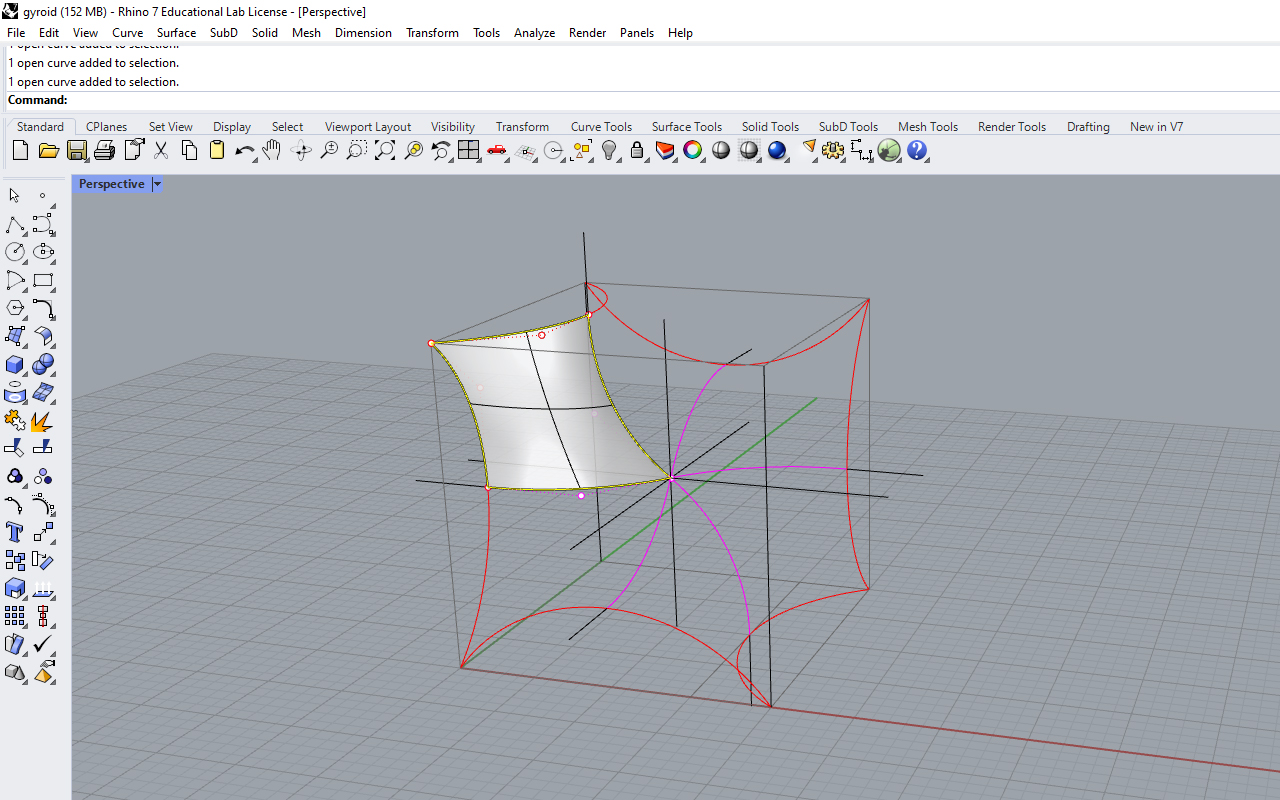
Once the surfaces are created, you should see a Gyroid unit cell shape but if you look closely to the surfaces, they are not really join/match tangently and it seems to have a crease on all the edges. I then use a Pipe function follow by a Split function to split the edges of the surfaces and then redo the surfaces with a Blend Surface function. After this you should be able to get a nice and smooth edge connection however, there is still a last step to do which is to close up the small hole among the surfaces. This can be done easily with just a Patch function and the Gyroid unit cell is done.
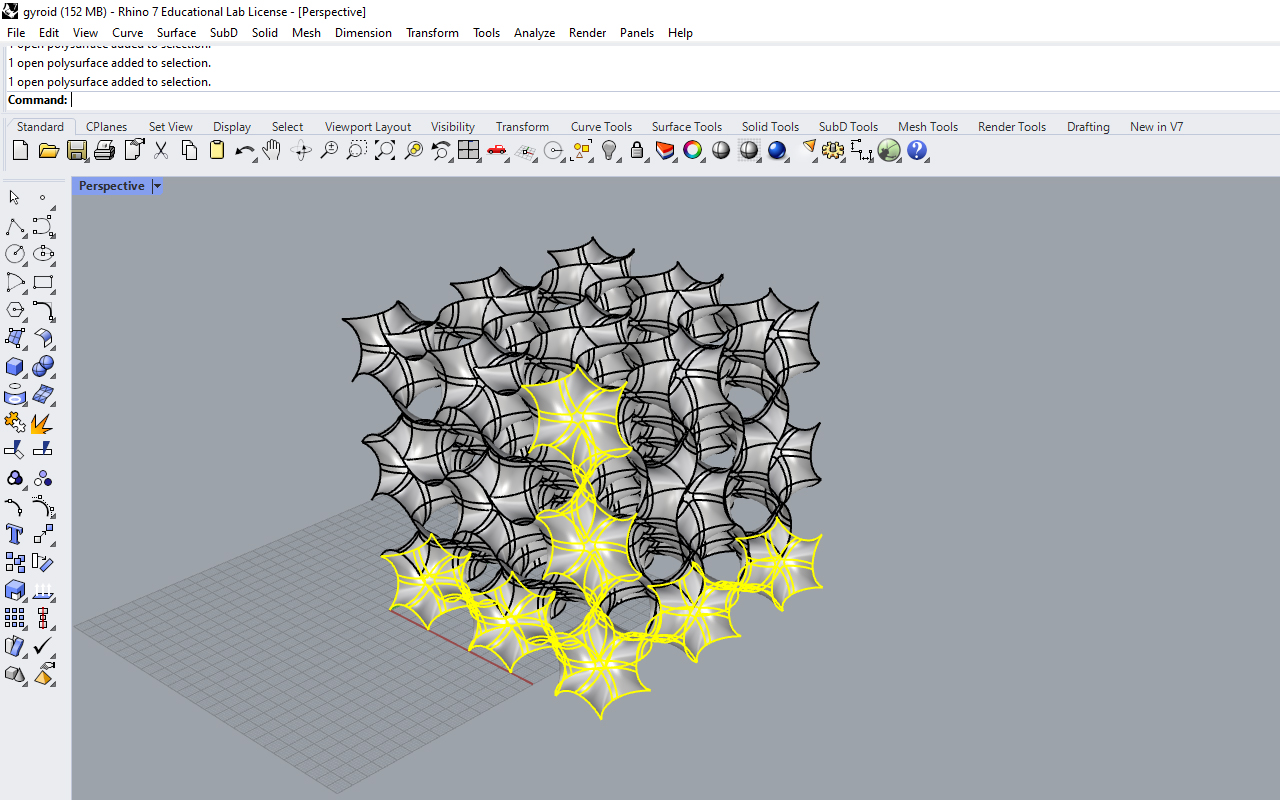
The next step is to do duplication of the Gyroid structure. As we know that the Gyroid unit cell is an uniform and modular structure which we can just easily copy and paste (Ctrl + C & Ctrl + V) the model and use the Translate function to move it side by side in both X and Y axis. (An entire Gyroid unit cell consist of five unit cells duplicated along each coordinate direction (X, Y, Z)). After duplicating the Gyroid unit cells, we will need to manually rotate the sets of Gyroid unit cells by 180 degree so that the individual sets of Gyroid unit cells matches with one another. This can be easily done by using the Rotate function.
Another important step that I forgot to mention is that the Gyroid unit cell model is just a single polysuface model and it is not possible to send it for 3D printing unless we convert it into a solid watertight model. So in order to do that, we will need to do an Offset Surface function. To ensure that we do not have any problem when we do the Offset Surface function for creating the thickness of the Gyroid unit cell, we can do a SubD conversion using the SubD Convert function. The SubD function is very useful and it is available only on Rhino 3D version 7 onwards that allows surface manupulating and editing, similar to the Sculpting function in Autodesk Fusion 360. The other reason of converting it to SubD is because Rhino 3D is a surface modeling software and there is a tendency of having error when we try to create solid from surfaces.
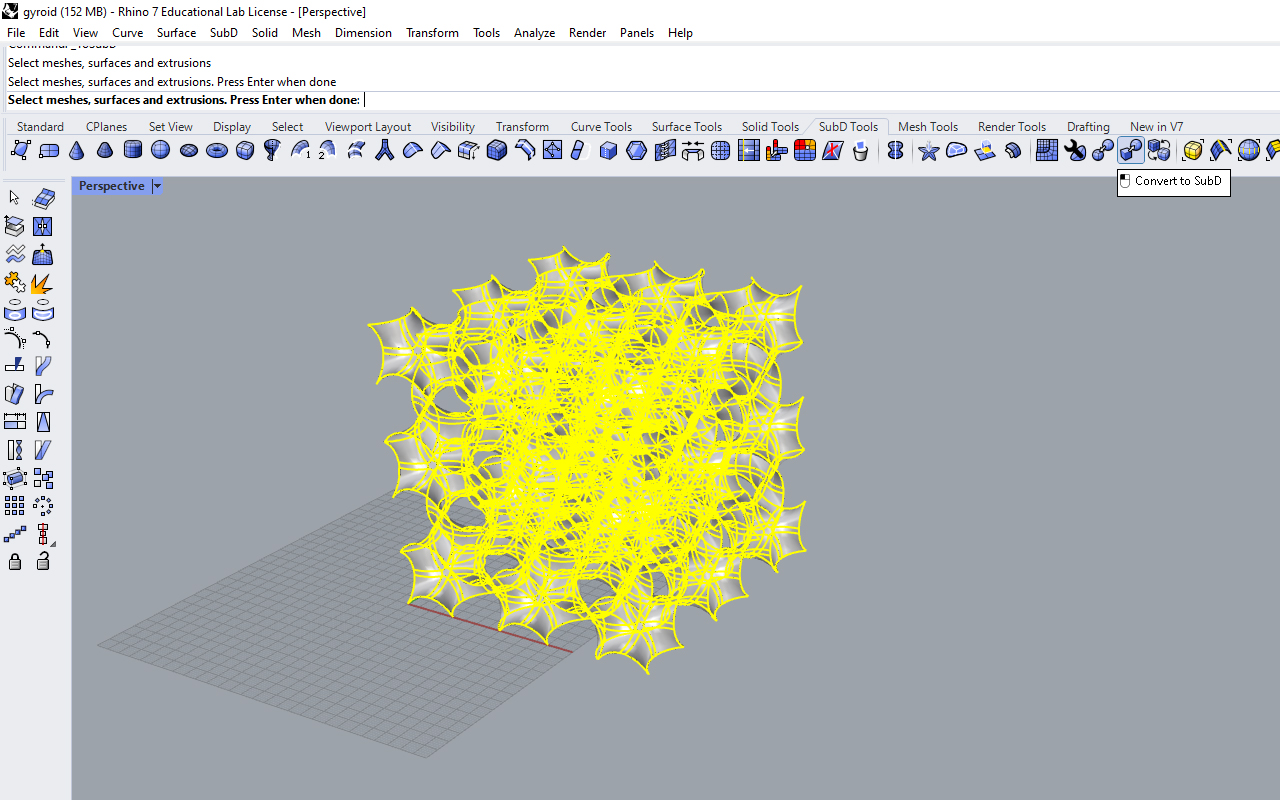
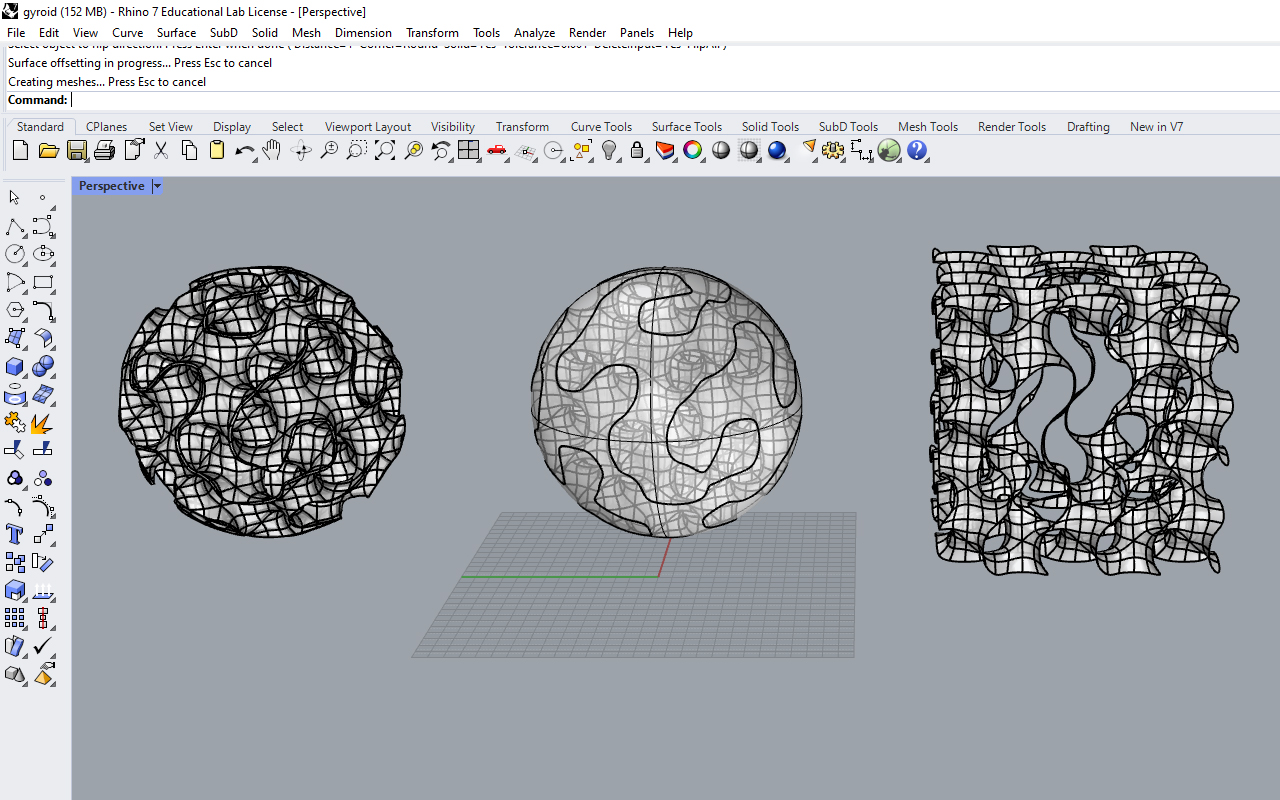
After the conversion is done, you may select SubD surfaces and joined them together to form a single SubD surface entity. This can be done by using the Join function. Once this is done, you may start to do the Offset Surface function now. But before I start to offset the SubD surface, I suddenly thought of if I can make it into a Gyroid Sphere instead. So I began to create a Sphere using the Solid Sphere function and use the Split function to remove the unwanted surfaces from my Gyriod model. What remains within the Sphere will be the model I need and the last step is to offset the surface and then export the Gyroid Sphere model into STL format for 3D printing.
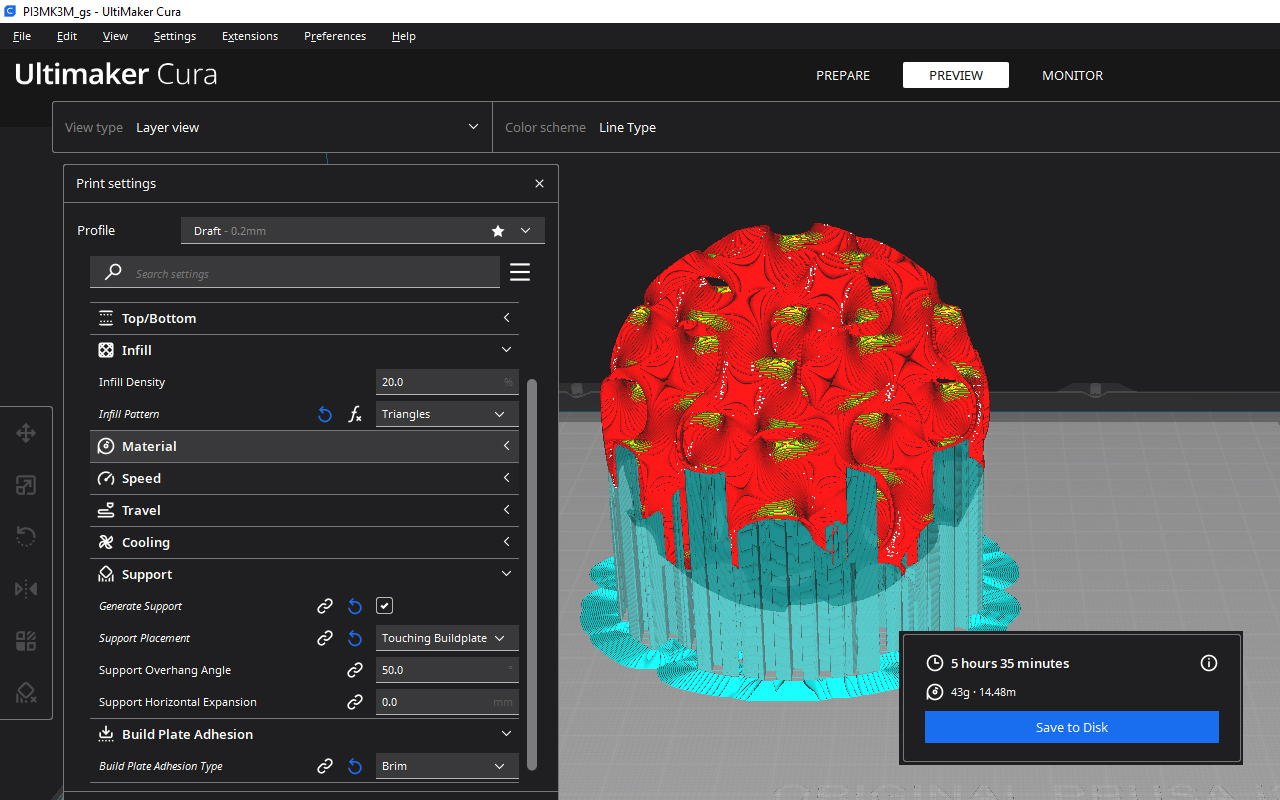
After exporting, I send the file into CURA Slicer to prepare it for 3D printing. Due to time limits, I have decided to scale down the model by 20% as the actual size would take around 11 hours to complete the print. I have also adjust the following parameter settings to speed up a bit on the printing of the Gyroid Sphere as shown below:
- Temperature - 200 degree
- Base Plate Temperature - 60 degree
- Printing Resolution - 0.2mm
- Printing Speed - 60mm/s
- Infill Rate - 20%
- Infill Pattern - Triangle
- Plate Adhesion - Brim
- Support - Touching Buildplate
There is a change of parameter settings as compare with the 3D scanned Stool model as this Gyroid Sphere is much more difficult to be printed. I will need to have some support generated to prevent the print from falling but then I do not want the supports to be everywhere which will be too much of a hassle and quite impossible for me to remove them especially the internal part of the Gyroid Sphere. So in order ensure that my prints will not fail, I will just need to have some minimal support structure around the Gyroid Sphere therefore, I decided to change the support parameters to Touching Buildpate instead of Everywhere so that only the exterior surface will be supported and not the interior part. The next paramenter that I will need to change is the Plate Adhesion as a Skirt adhesion will not be sufficient to hold the Gyroid Sphere but a Brim adhesion will do the job perfectly as it creates a thin flat base support to strengthen the adhesion so that the Gyroid Sphere will not fall off during printing.
The last step is to send it for printing! I am using the same 3D printer which is Prusa i3 MK3S+ for the Gyroid Sphere printing and it takes around 5.5 hours to complete.
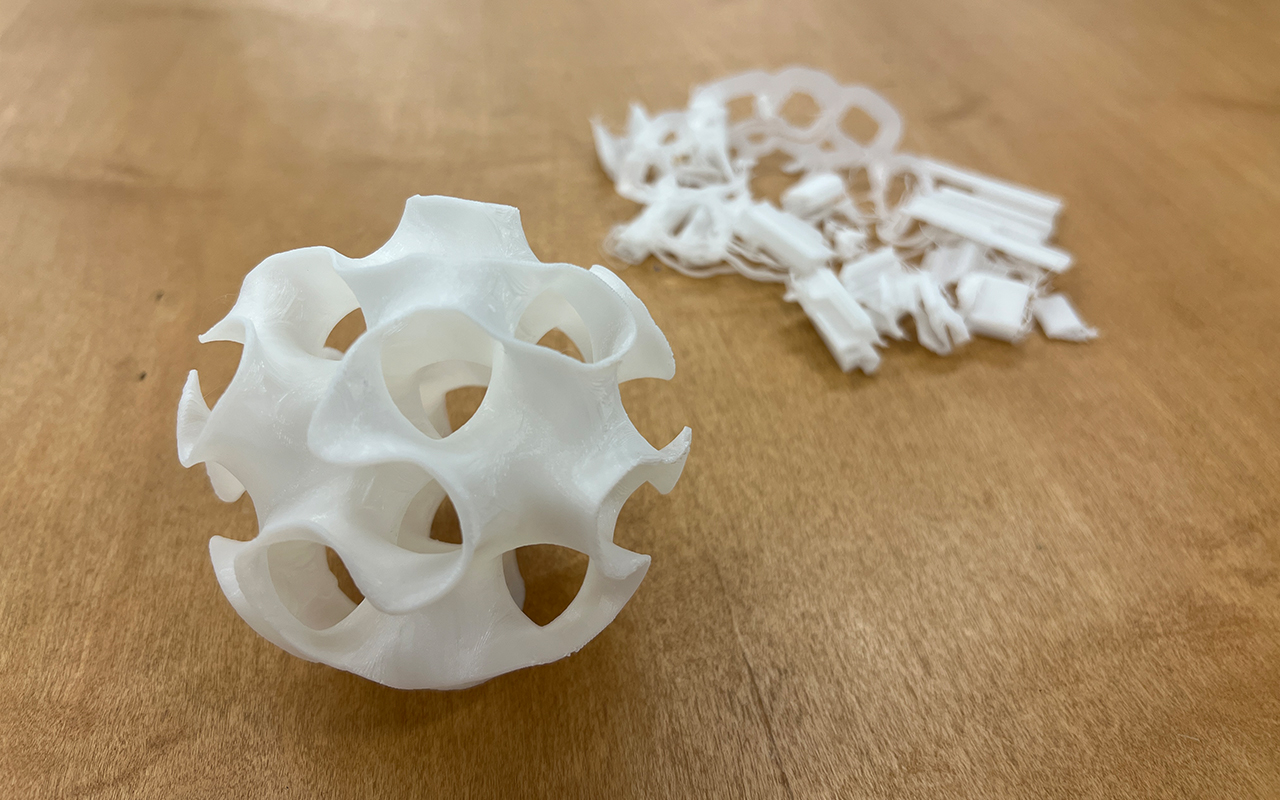
The printing takes around 5.5 hours for a Gyroid design with a size of 80mm x 80mm x 80mm and the outcome of the Gyroid Sphere is good!
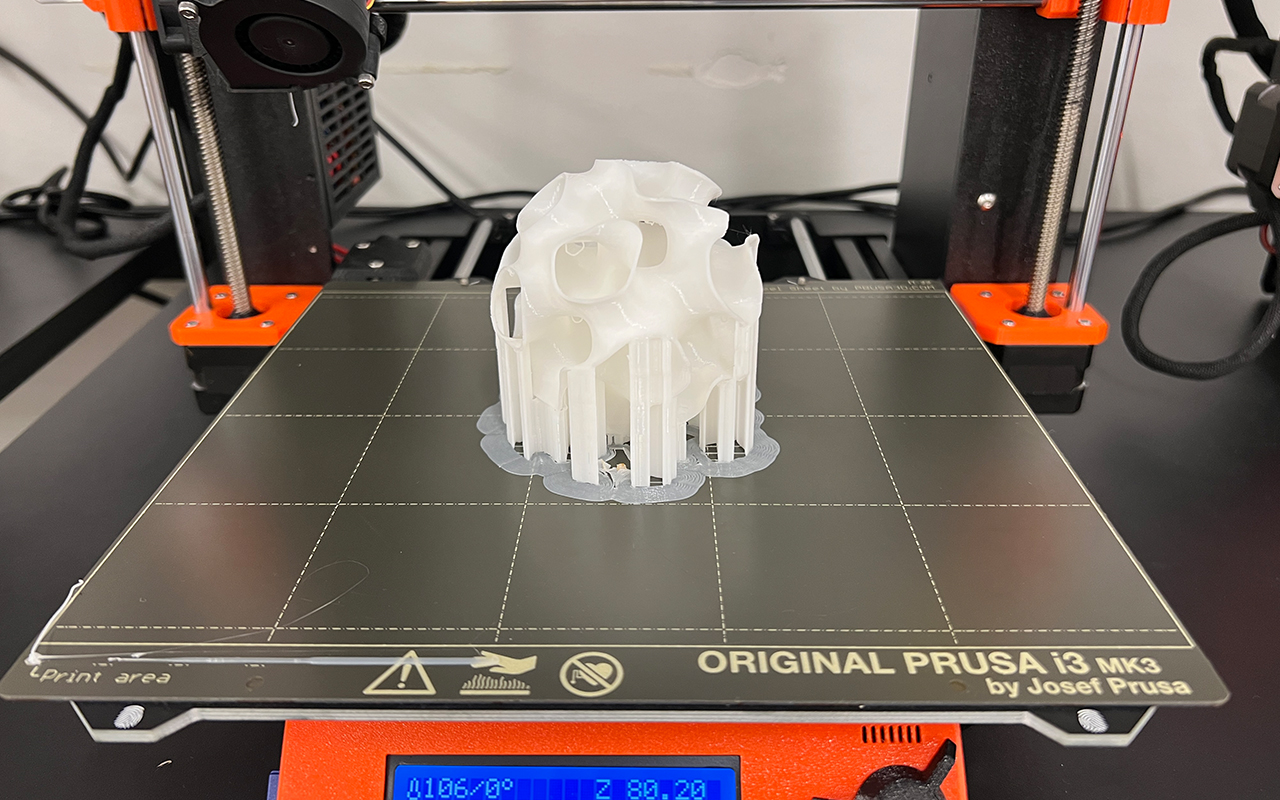
I then removed the supporting materials around the Gyroid Sphere model and the model look so much better as compare to the 3D printed stool.
You may download the gyroid STL file HERE.
Reflection
So far so good for both 3D scanning and 3D printing. It was a fun week to play around with these digital fabrication tools and I believe these digital tools will be extremely useful for everyone irregardless whether you are using these skills for work or hobby.
Extra Credits
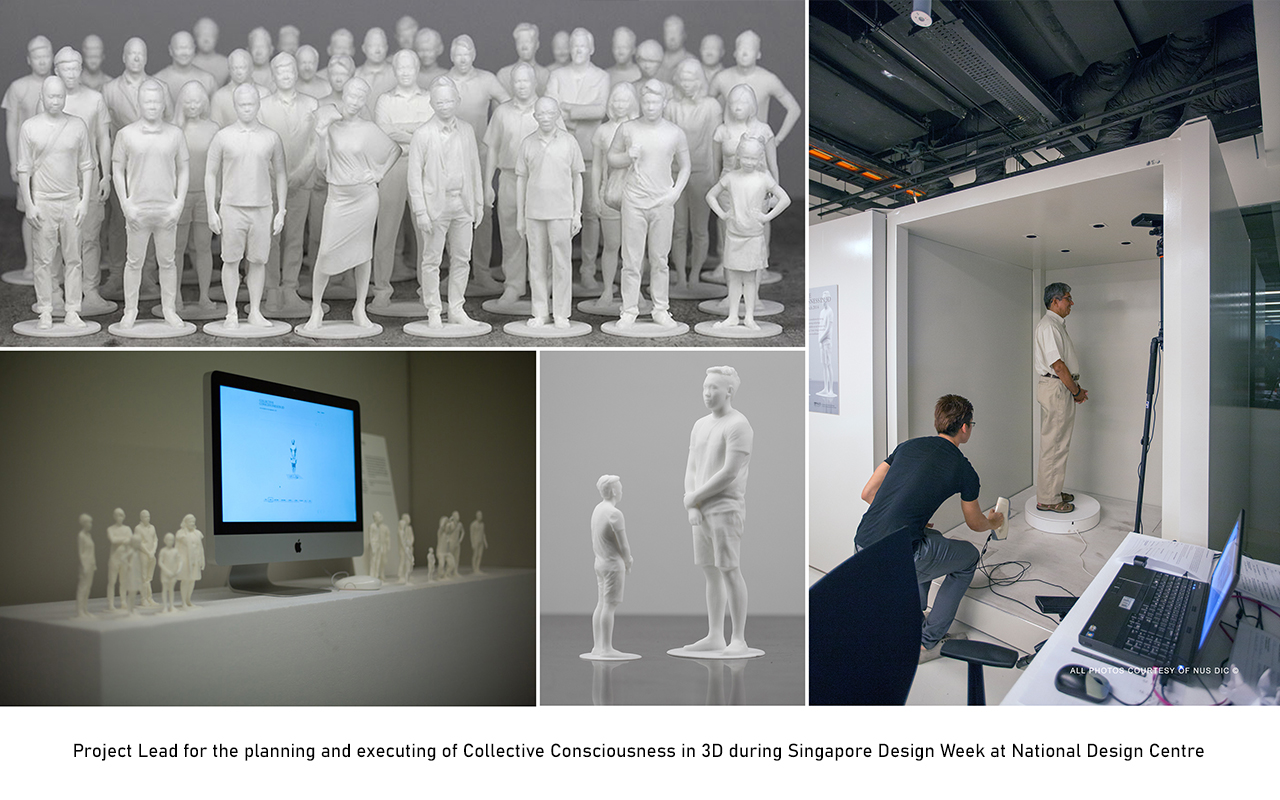
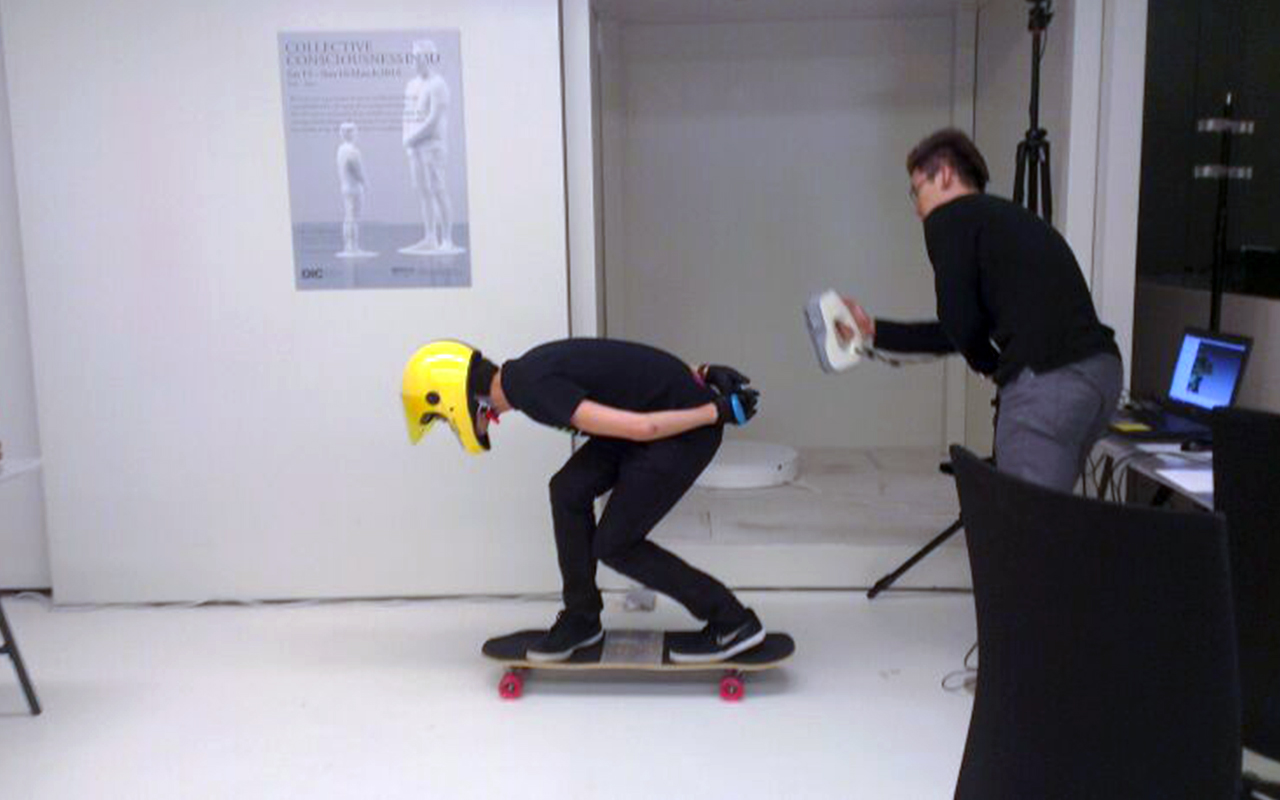
Some extra credits for sharing, I am actually a trained 3D Scanning & Printing Specialist and had been doing 3D scanning & printing commercial jobs for many years. Some projects that I have done are National Artefact Archiving as well as Exhibition Shows. Below are some images of the work that I have done previously.
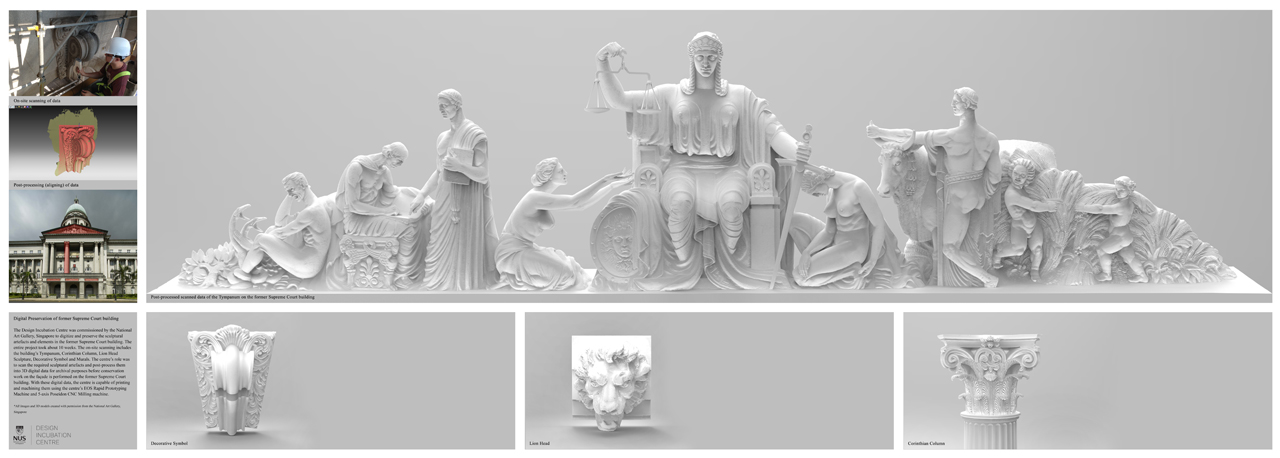
National Archiving of Singapore Supreme Court

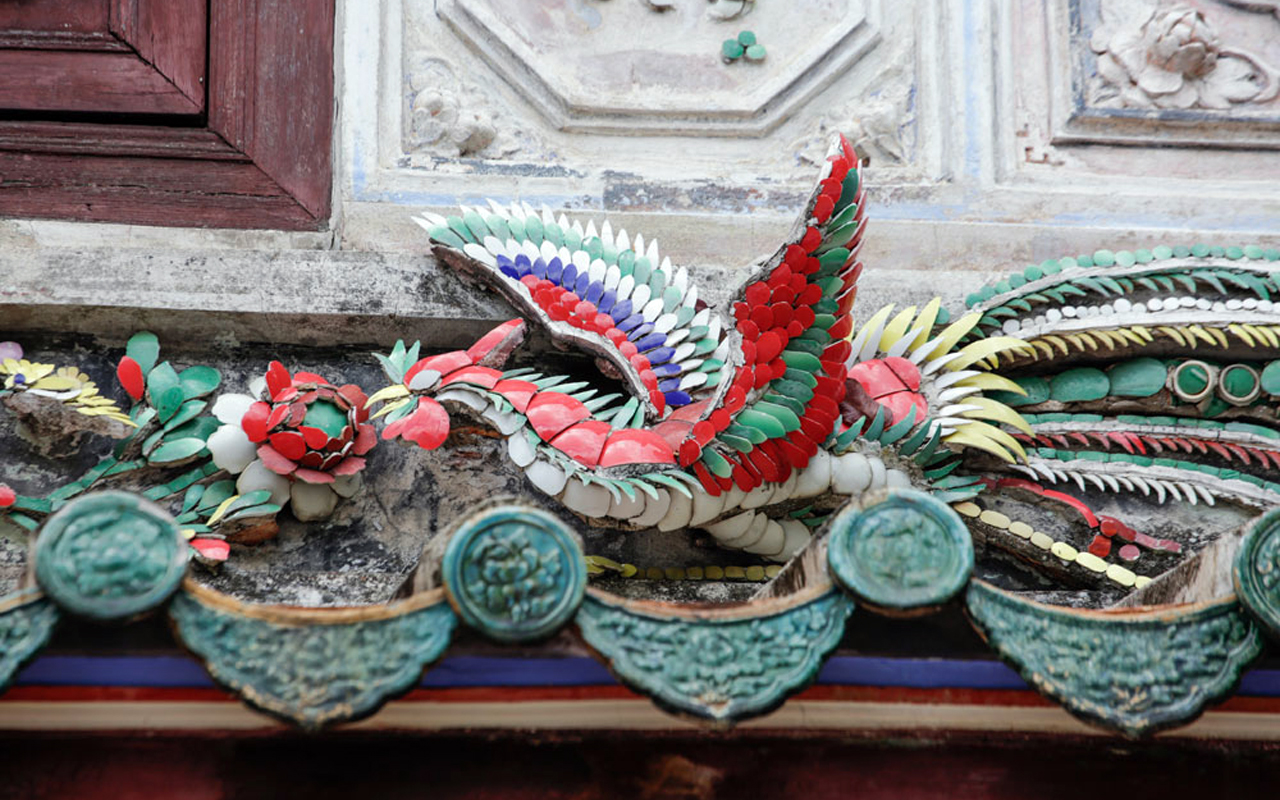
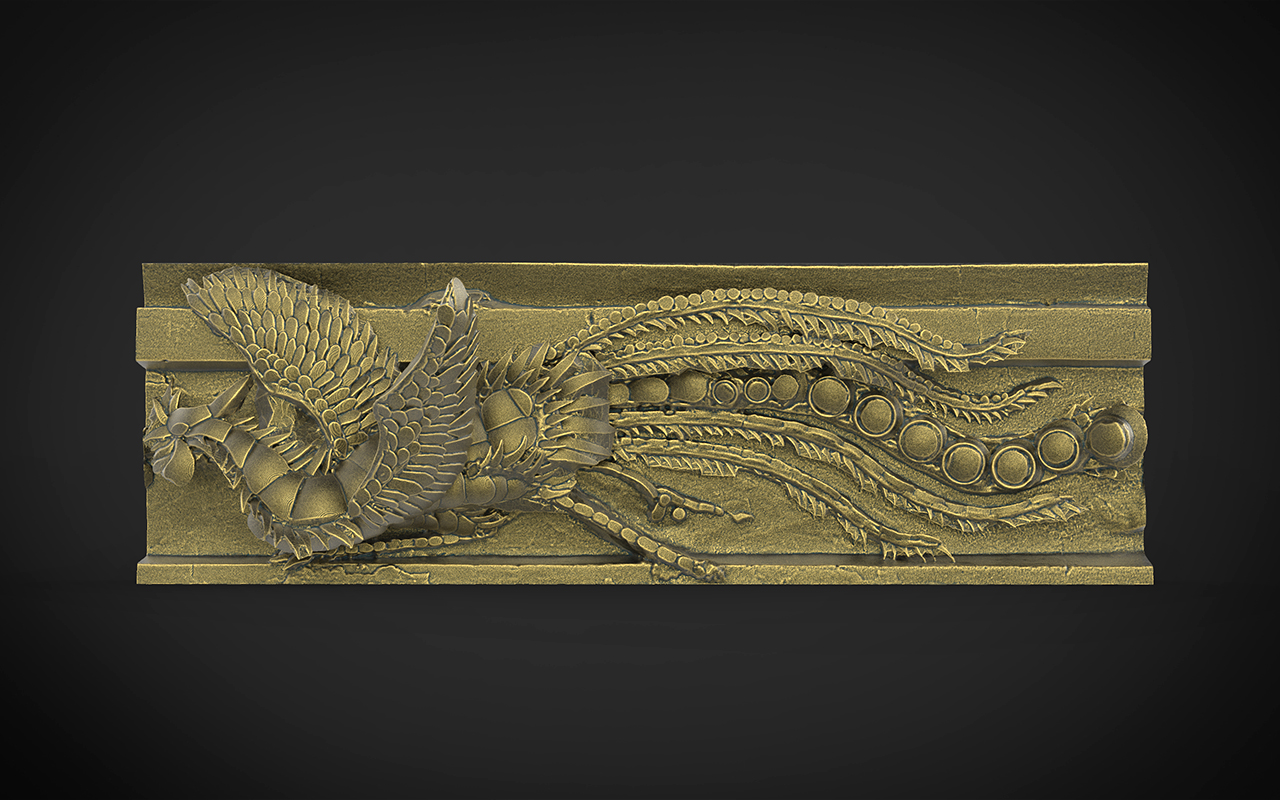
National Archiving of NUS BABA Heritage House
Collective Consiousness in 3D Exhibition during Singapore Design Week