2. Computer Aided Design
This week I started to work on computer aided design that includes 2D & 3D software tool, something that I am really good at especially 3D Cadding.
2D Design - Adobe Illustrator & Photoshop
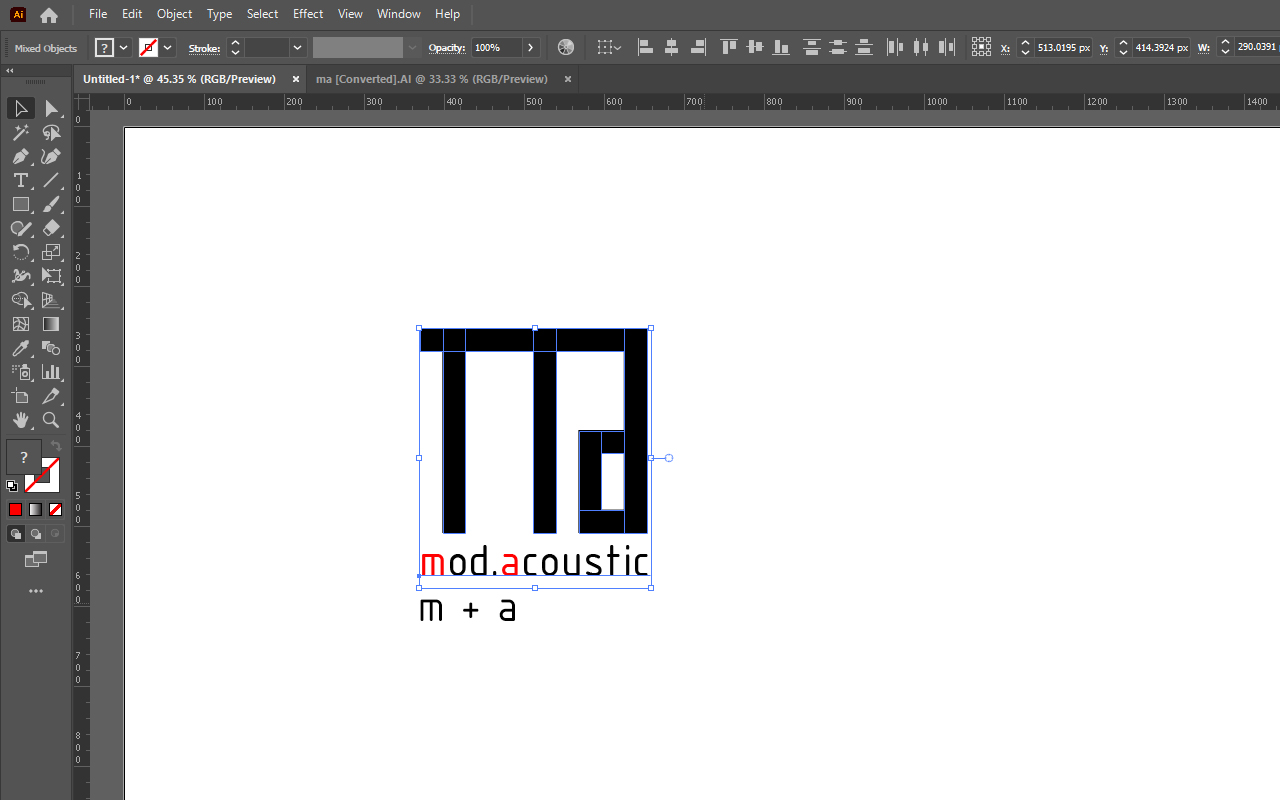
As I am designing a modular headphone design for my final project, it will be nice if I can create a logo / brand identity for it. I began to work on my idea in Adobe Illustrator as it is one of the best 2D vector software tool to create 2D design and illustration. Before designing, I actually had a brand name in mind for my modular headphone design and it is call Mod.Acoustic. I am thinking to adopt a contemporary and minimalist design style for my headphone so that it suits my design brief.
I started off by taking references from a typeface font call ISOCPEUR, focusing on the first letter of each word of the brand name - mod.acoustic. I then uses a simple Rectangular Tool to create a similar shape of the letter "m" and "a" and then try to merge them together. The result was a surprise as it becomes a logo that I really like thus, I have decided to confirm this logo design for my headphone branding.
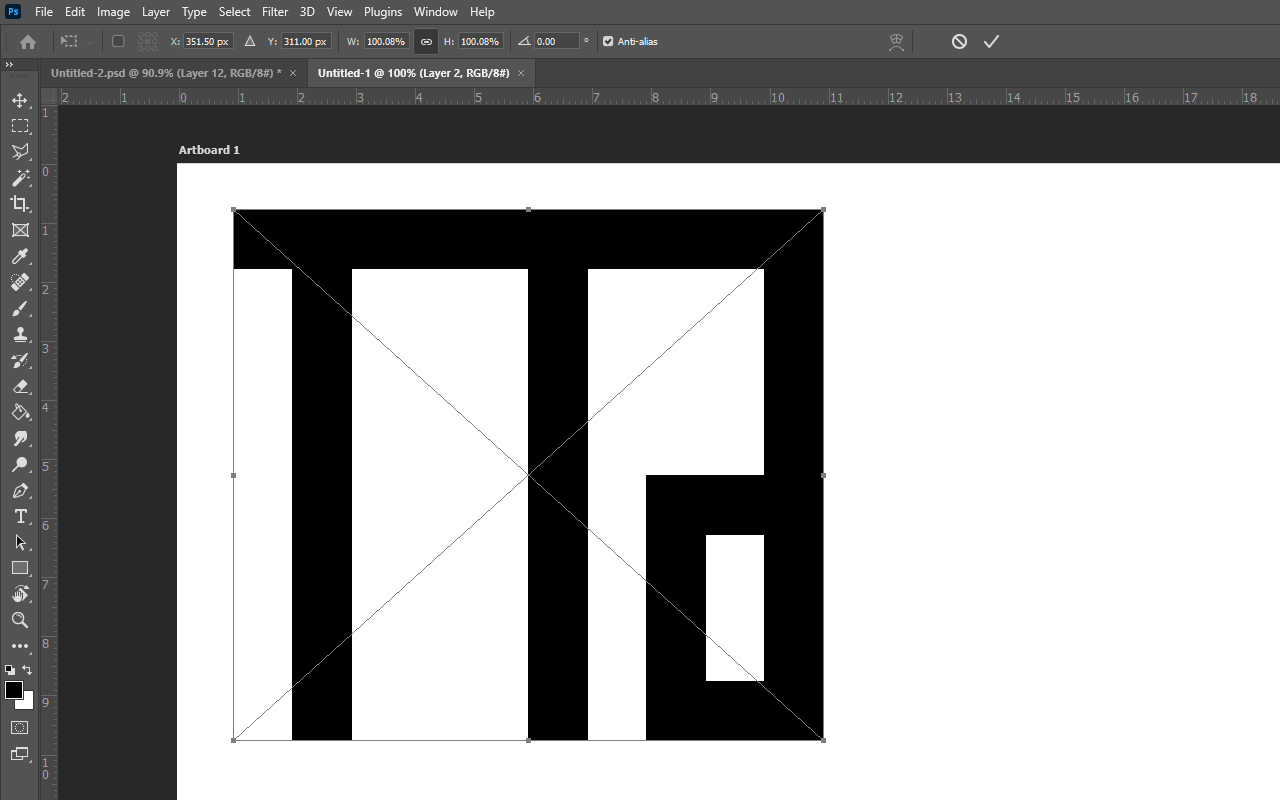
However, I have yet to confirm the color and styling for the logo. As of now, it is just black in color without any design input. I then decided to play around with the color and styling in Adobe Photoshop as it allows me to do quick design and testing of various design and color with ease. I use the Ctrl + C and Ctrl + V function to copy what I have created in Adobe Illustrator and paste it in Adobe Photoshop but before that, I have use the Pathfinder function: "Unite" to join all the rectangles into a single entity so that they do not appear as individual items.
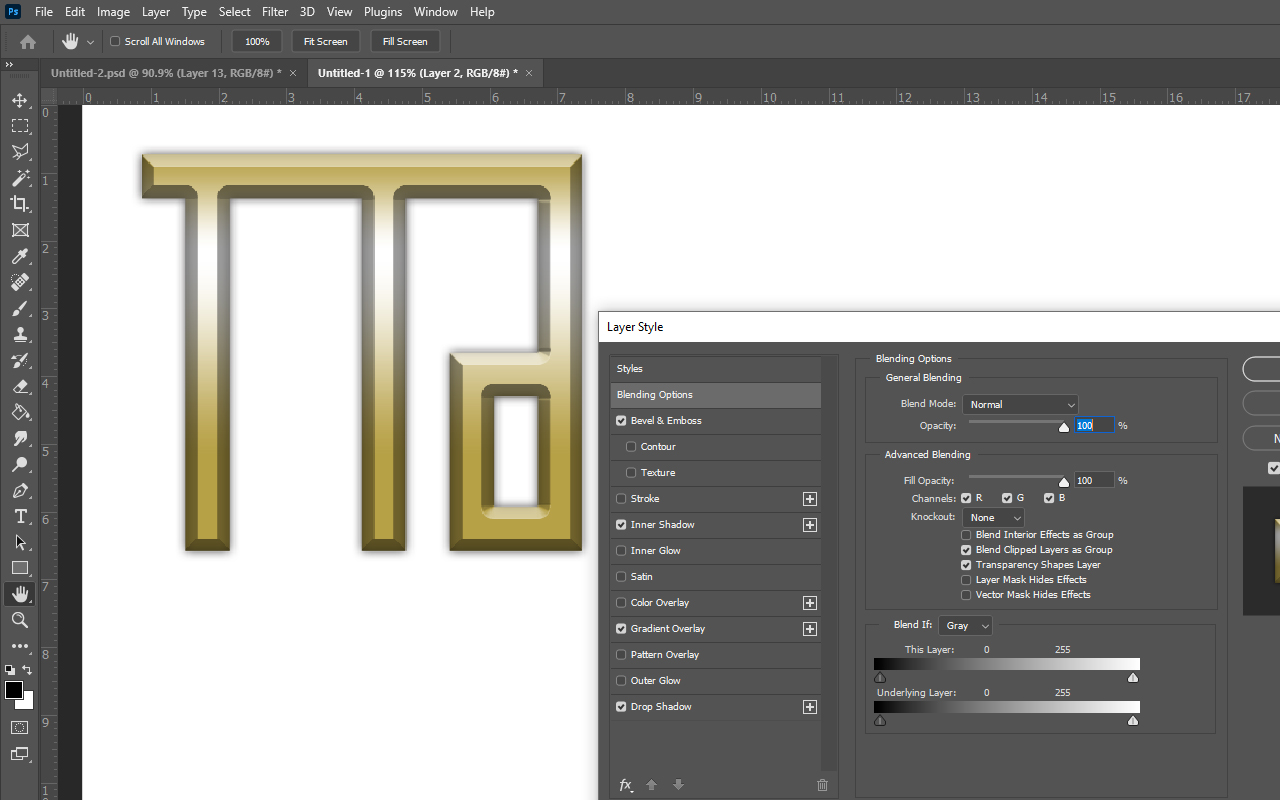
In Adobe Photoshop, I have used the Layer Style function and play around with the various blending options. I then decided to choose gold color for my logo as gold protrays a luxury and exclusive feeling which is in-line with my bespoke headphone design. I have also added shadows, bevels and color gradient overlay in the Blending Options to create a bold and minimalist design style. With that, I am done with my logo design using two 2D software - Adobe Illustrator and Photoshop.
You may download the logo illustrator file HERE.
3D Design - Rhino 3D & KeyShot
After finishing my logo design, the next step is to create my first 3D model of the headphone design. I first did a rough sketch on how the headphone will look like to see what and where am I going to place the components in the headphone and also to check what components will I actually need to make my bluetooth headphone works. I started to build the model in Rhino 3D as I feel that the software is more versatile and easier to create the design that I wanted.
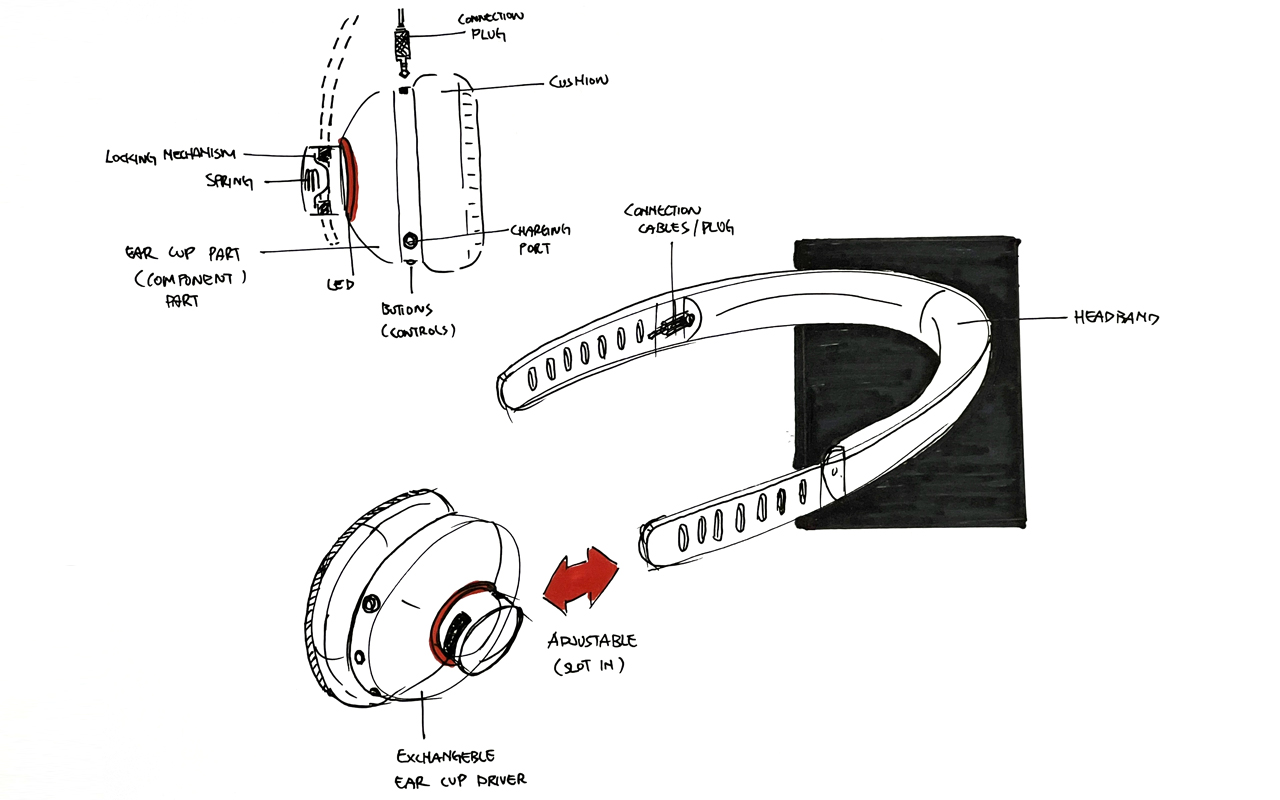
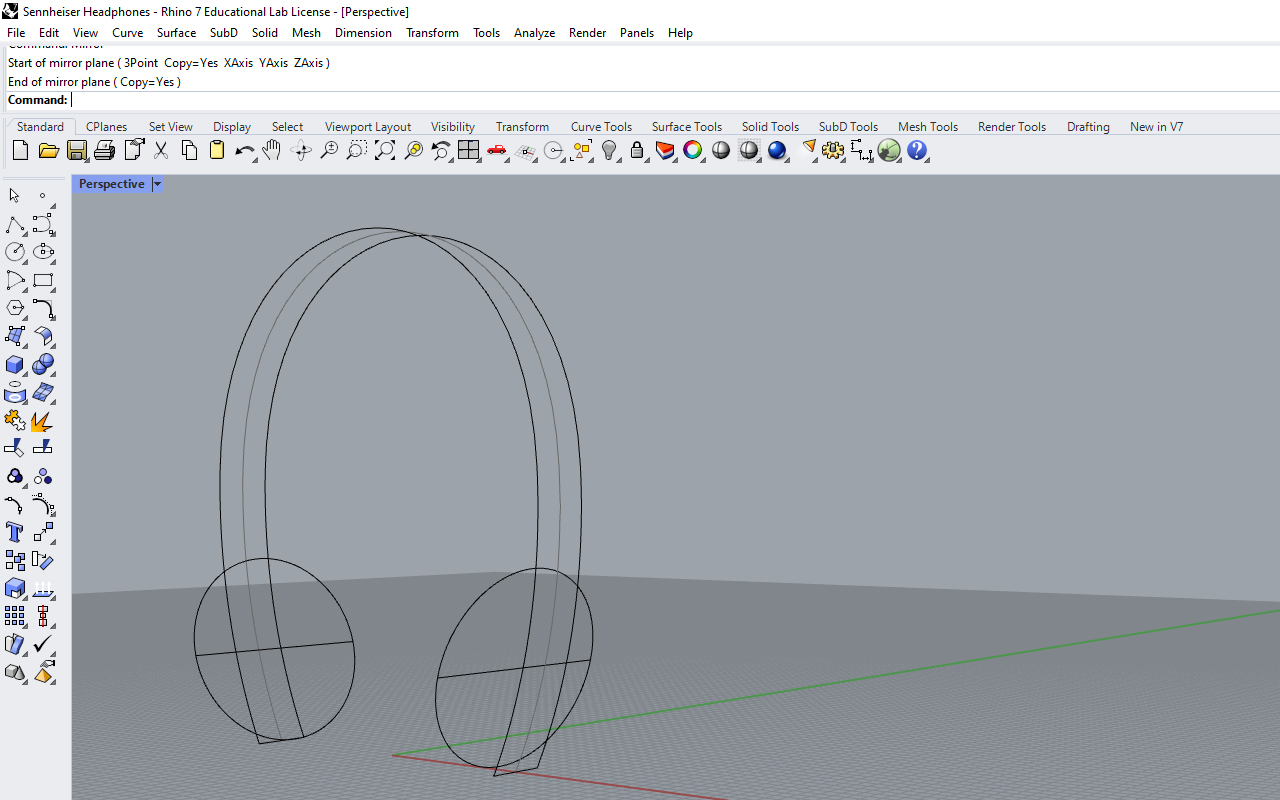
I first create the the head band and ear cup driver part using the Curve and Circle function in Rhino 3D.
As I have not really though on how the internal component will look like and also that I have not gotten all the materials that I need for the headphone such as the sound drivers, microcontroller, audio jack etc., I have decided to just create the ear cup driver component using the Cylinder function and extrude it to create a rough dimension size.
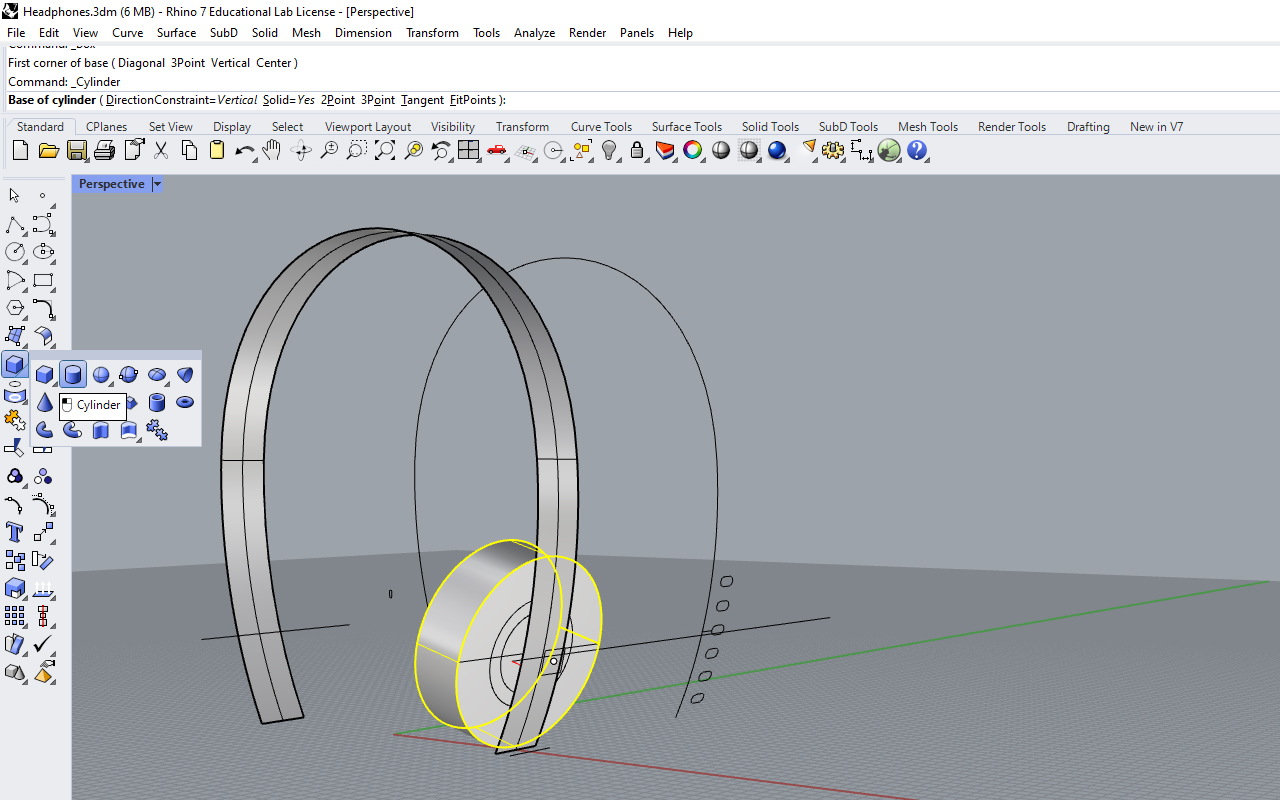
Next, I use the Mirror function and try to duplicate the parts and assemble them together to see if the overall structure looks good and proportionally correct.
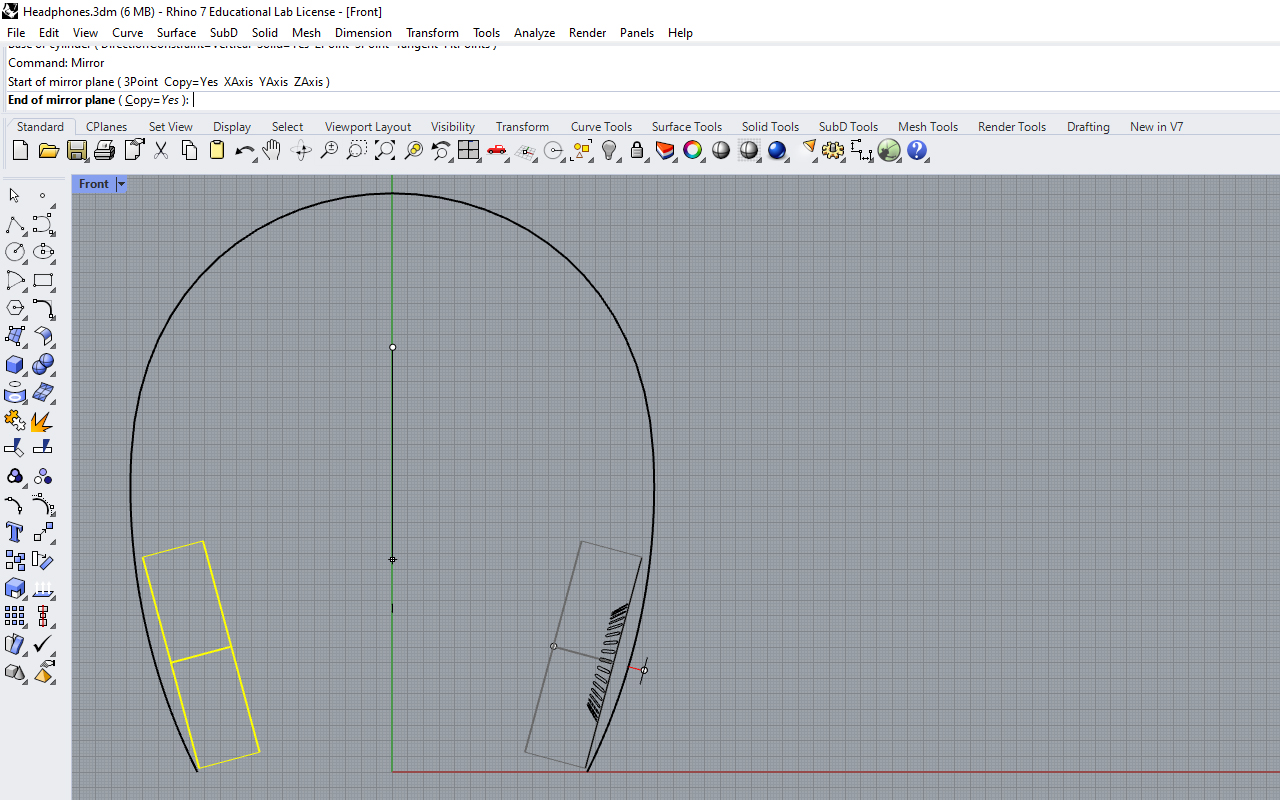
I then try to build the first ear cup driver and the headband using general construction function in Rhino 3D such as Extruction, Boolean Differences, Chamfer and Fillet Edges as well as some SubD modeling features for the cushion as I am thinking to apply some generative design using Grasshopper, an extension plug-in for Rhino 3D however, that will be done at a later stage.
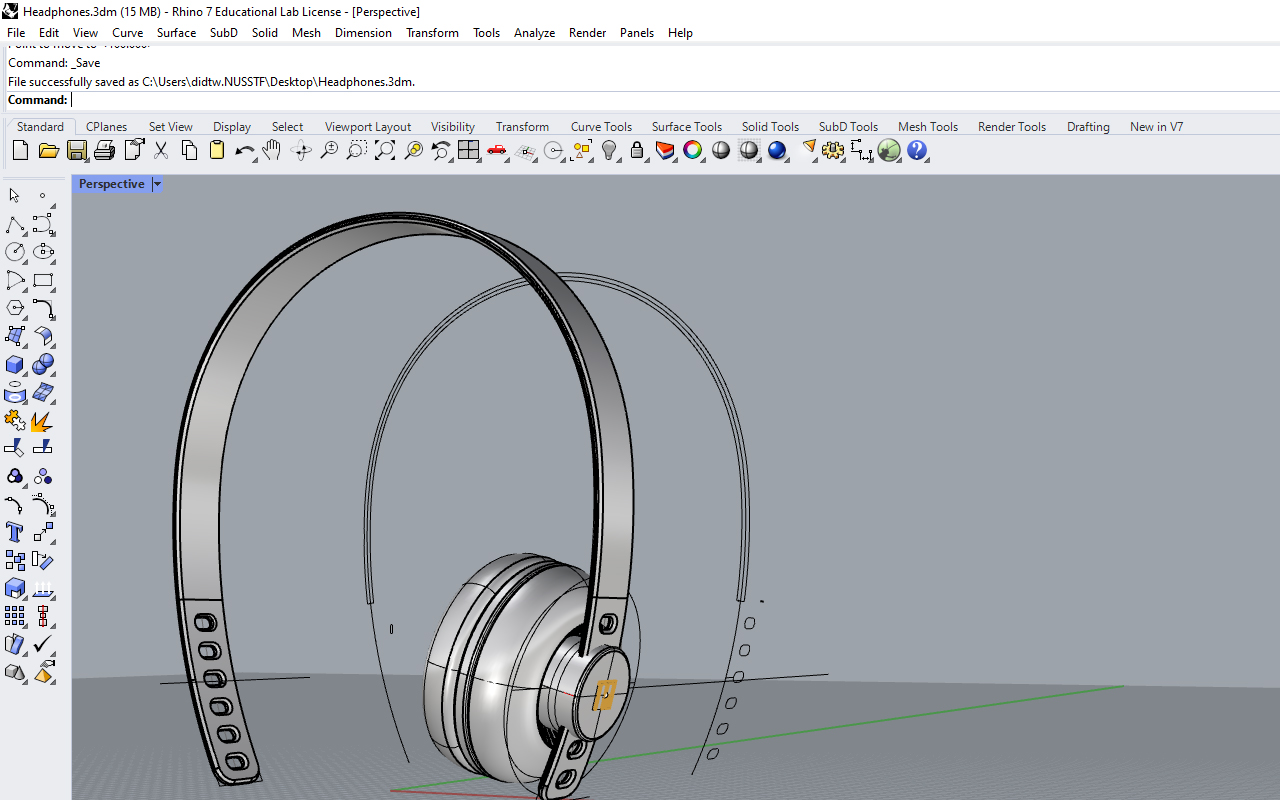
After spending some time to design and create all the parts with details such as the audio jack/plug location, buttons etc., I then finalized the design concept of my headphone. Overall, I am satisfied with the design and outlook of the headphone which looks really like a product that I am looking for.
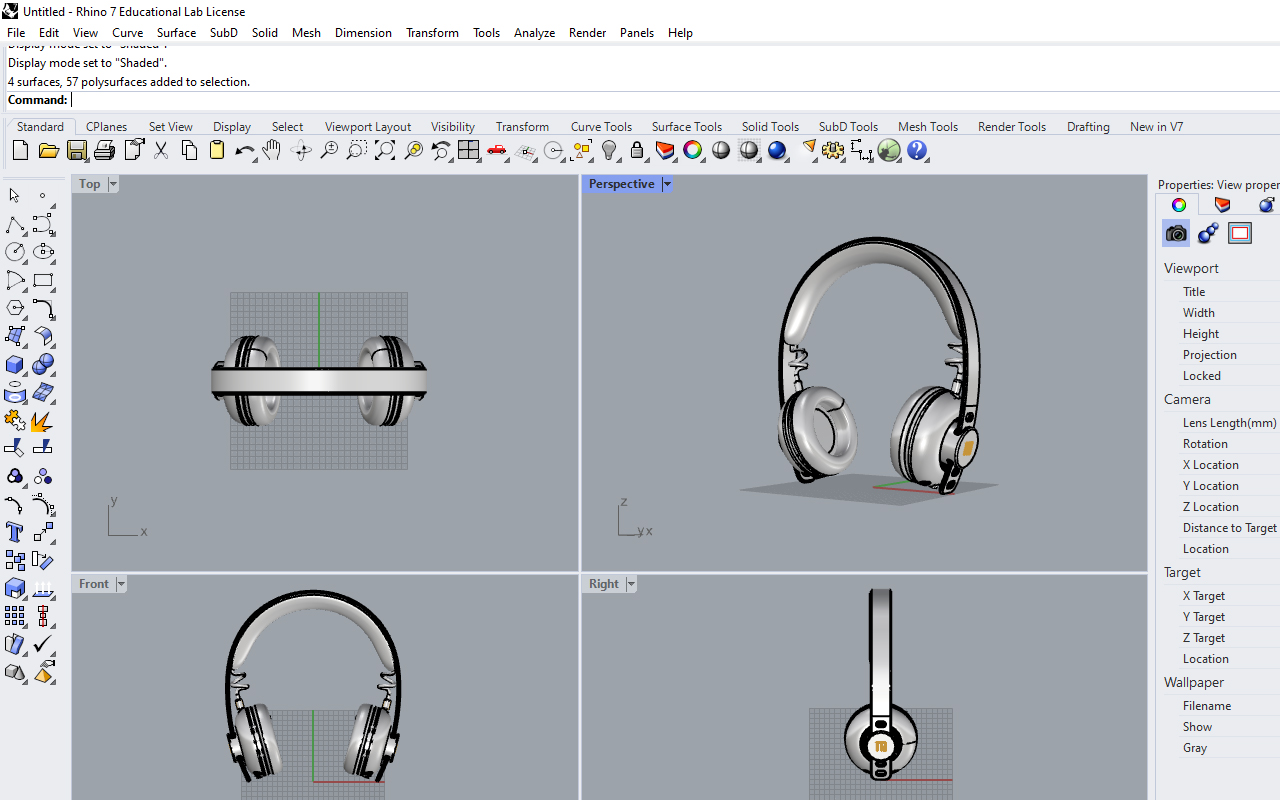
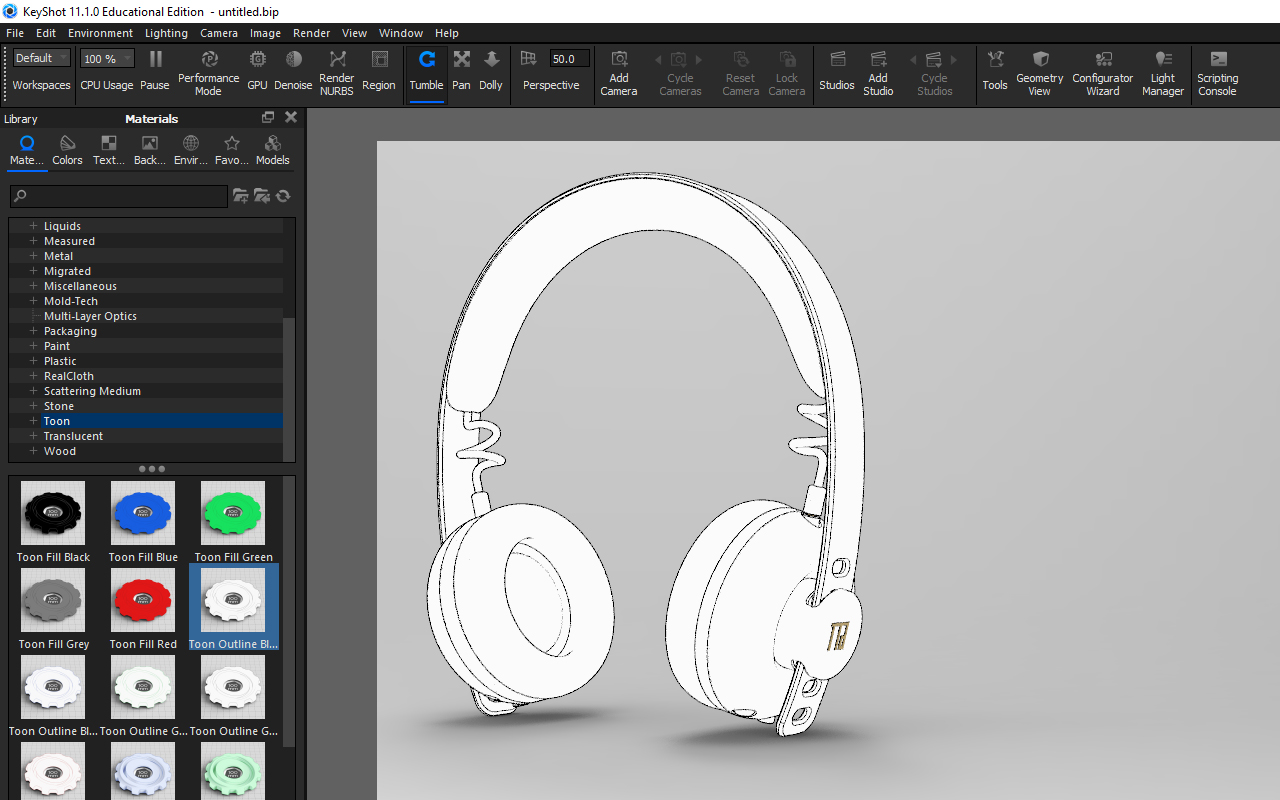
However, the model itself seems to lack of some clarity in terms of how it will really appear as a real product because there are no colors and textures on it. I then decided to bring it into a 3D Rendering Software call - KeyShot to apply some colors and textures to the model so that I will have a better idea and visualization of the design.
I then started to apply some colors and material textures to the headphone design, trying to do a C.M.F (color, material and finishing) strategy for my headphone design. Eventually, I decided on just a two tone color scheme (Black & Gold) with a matte textured finshing. I finish up the rendering process with some lighting and background adjustment using the KeyShot parameters and rendered the design in 3 different views. (Please visit the final project page for the renders)
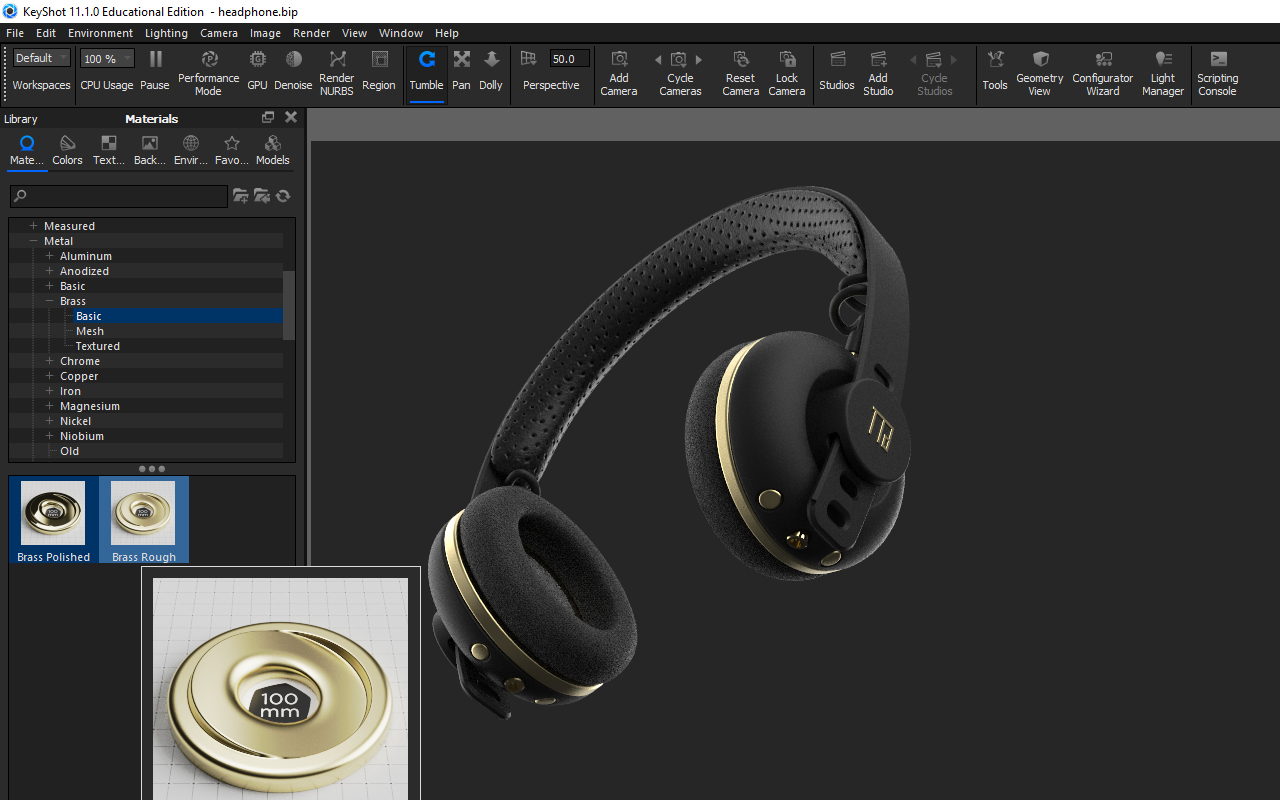
And since I am in keyshot, I have also decided to use the Animation function to create a short animated video on the modularity of the headphone and emphasize on how the ear cup driver component detaches from the headband. With the 3D rendering and animation, it give me a better picture of my headphone design and simplifies the process which I may need to improve.
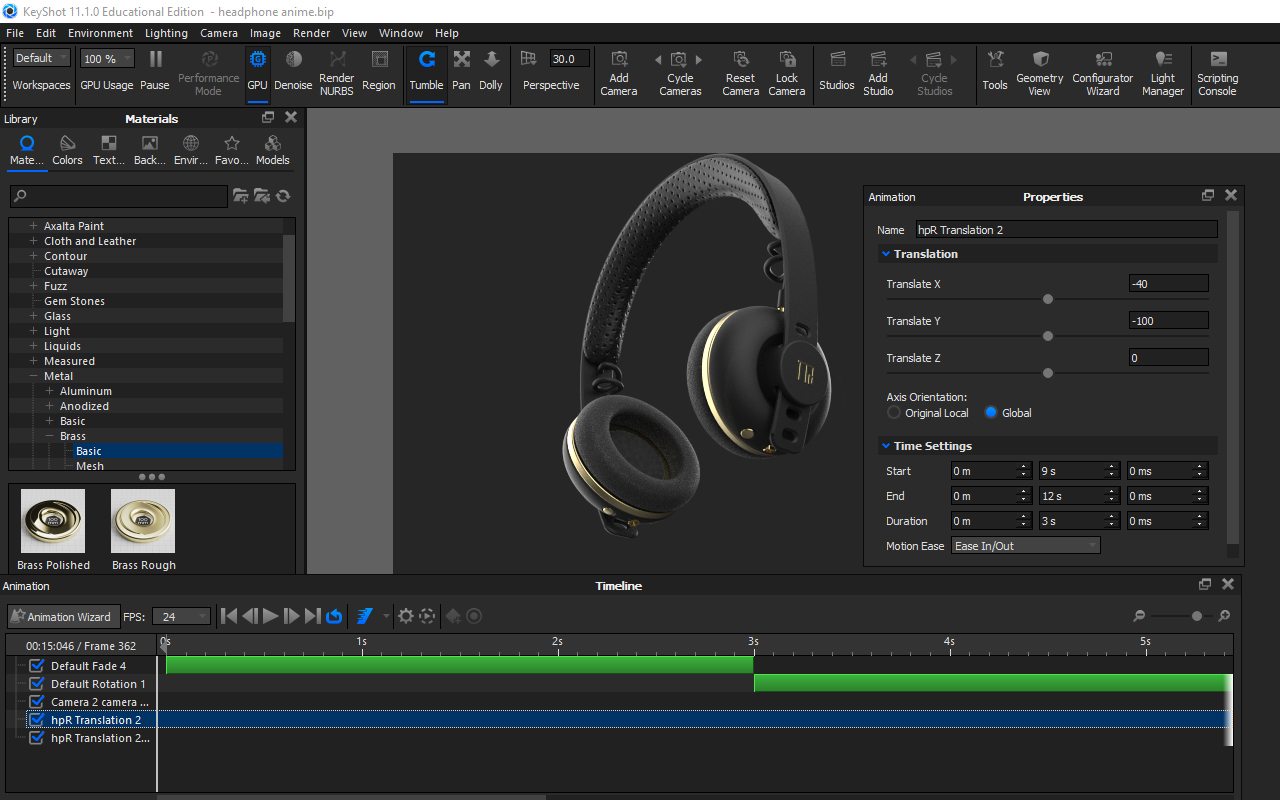
Below is the short animation of my headphone design!
You may download the 3D CAD file HERE.
Evaluation
The main benefits about CAD is to aid us in producing faster design iterations, improved accuracy, reduced development time, and enhanced visualization. As an Industrial Designer and Additive Manufacturing Specialist, I am trained and proficient in various 2D & 3D CAD software so personally, my views on which CAD is better boils down to the application, ie. what are you designing? which industry are you in?
Various industries uses different types of CAD i.e for Industrial Designers and Architects, the most preferred 3D CAD software is Rhino 3D while a Mechanical Engineer or Manufacturing Engineer would prefer SolidWorks or AutoDesk Fusion 360.
Likewise for 2D CAD, Web Artist and Content Creator would prefer the Adobe Creative Suites of software (Photoshop, Illustrator, Indesign) etc. while Printing Services Companies would prefer CorelDraw for their printing work.
End of the day, it really depends on individual and preferences. I personally love to use Rhino 3D eventhough I am well trained in Autodesk Fusion 360 and as for 2D CAD, I was actually trained in Freehand but ever since Adobe bought over the rights of Freehand, I began to use Illustrator instead eventhough Adobe has another new 2D CAD software call Adobe Freehand.
Therefore, my advice for people who wants to learn CAD, it will be good to understand where will you be applying this knowledge to i.e which industry are you working in or the area of work that you are required to do. However, if licensing is an issue (because these CAD software are so EXPENSIVE!), it will be good to look for free access or educational license software such as:
- GIMP
- InkScape
- AutoDesk Fusion 360
GIMP is a good alternative to Adobe Photoshop to do 2D works or imaging editing while InkScape is another good alternative to Adobe Illustrator for vector graphics.
As for 3D CAD, if you are working in the education industry, you will be entitled to use Autodesk Software for FREE! under the educational license. Fusion is a rather powerful CAD/CAM software that can do almost everything! So I will actually advice people to pick up Autodesk Fusion 360 as it will definitely be very useful in the world of making.
Reflection
This week assignment is relatively easy for me as 2D & 3D computer aided design is part of my expertise. I am also glad that I am able to get most of my design finalized, only awaiting for the next phase to start which are the programming, internal components and electronics to be integrated for my headphone project.