12. Molding and Casting
This week I started to work on Molding and Casting that includes making a mold from CNC milling and then use the mold to create a cast of a design that I have created. As for the group assignment, we are suppose to review the safety data sheets for each of the molding and casting materials and then make and compare test casts with each of them.
You can access the group assignment HERE.
CNC Milling with Roland MDX 50
For our individual assignment, we are required to create a design model and have it fabricated using CNC milling to create the mold, so in my case, I am going to use Roland MDX 50 CNC milling machine to fabricate the mold while using Rhino 3D to create the design model.
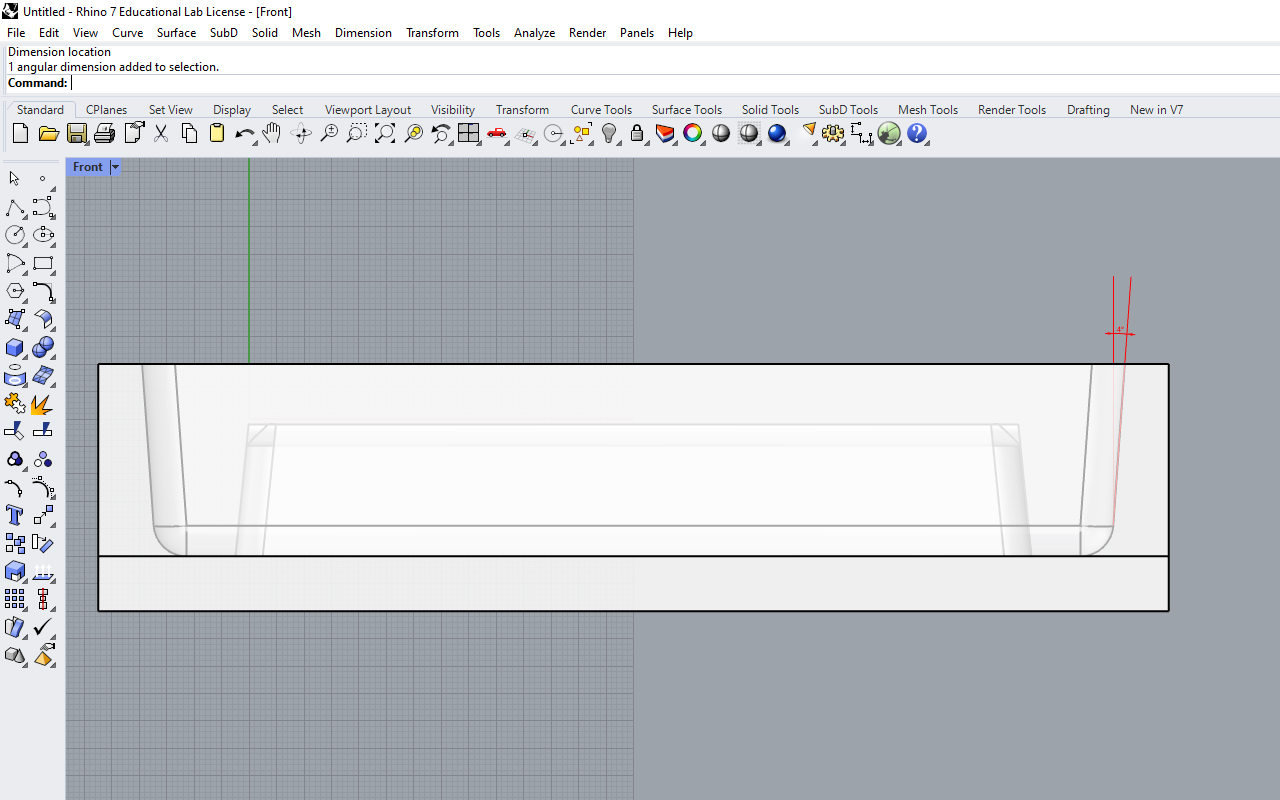
I started to create a pen/pencil holder which is something simple to be fabricated and molded through Rhino 3D. The design of the holder comes in a minimalist form with a subtle curvature surface to allow pen or pencil to be rested. In my design, I have also decided to make it slightly tapered, with a 4 degree of draft angle and rounded corners so that the design of the holder will look softer and more approachable as well as easier to be remove from the mold after casting.
After the design is created, I then began to create the mold for my holder design and employs the 4 degree draft angle as well.
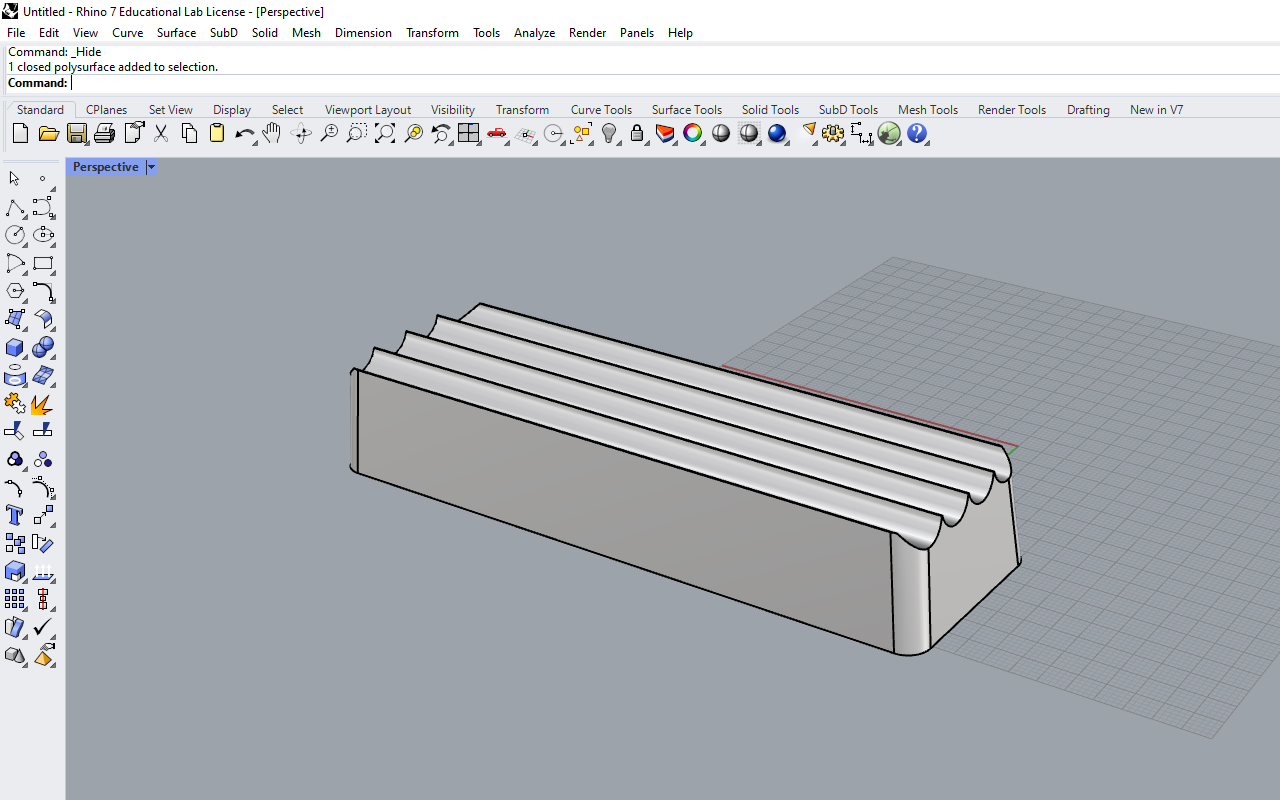
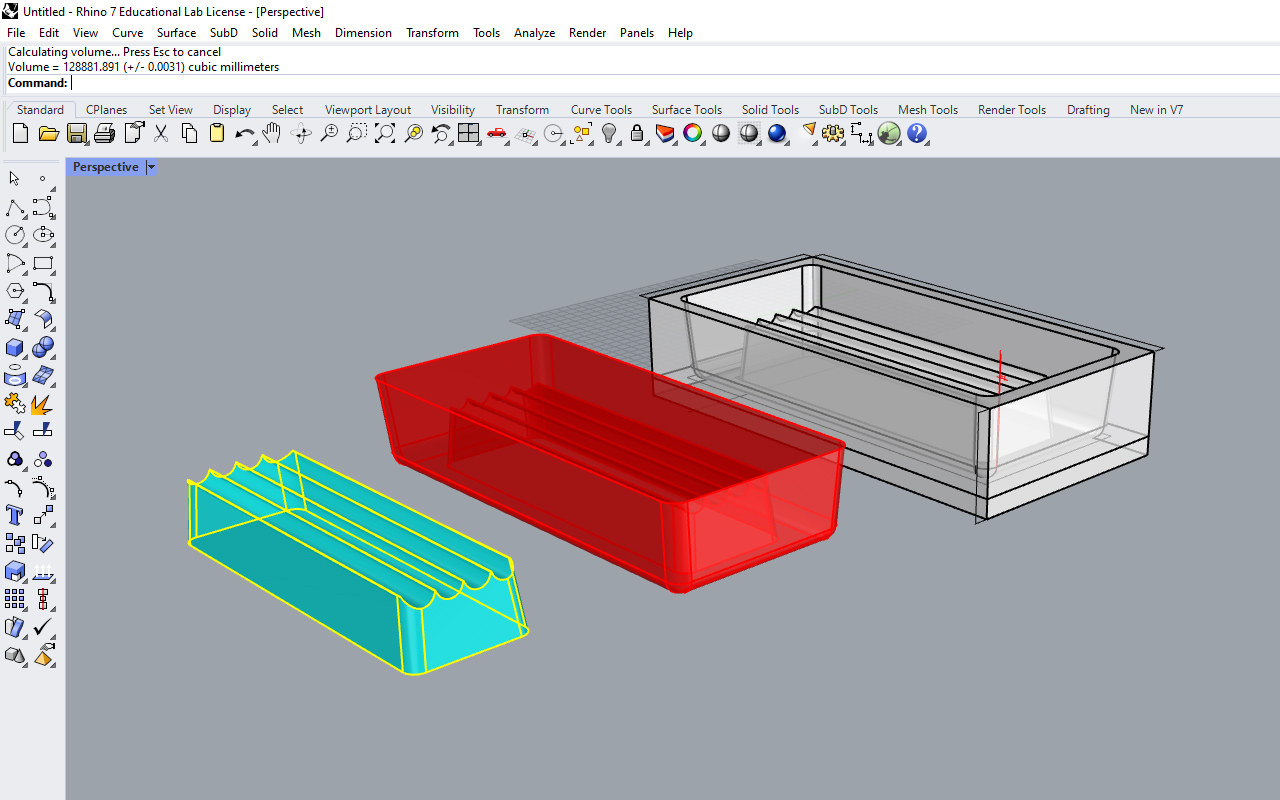
Below is the screenshot of my final holder design in Rhino 3D. Basically, I have 3 model which is the mold design, the negative portion of the model design as well as the holder design. The mold design is rather straight forward so I will not explain further. As to why I have the negative portion of the mold design is because I need use it to calcuate the mass so that I will know how much of Silicon Rubber I will need to mix. In rhino 3D, there is a function call Volume whereby it will automatically calculate the volume of the model. Hence, I use the Volume Function to calculate the mass of my model parts so that I will know the amount and weight to mix the Silicon rubber.
You may download the holder design CAD & STL file HERE.
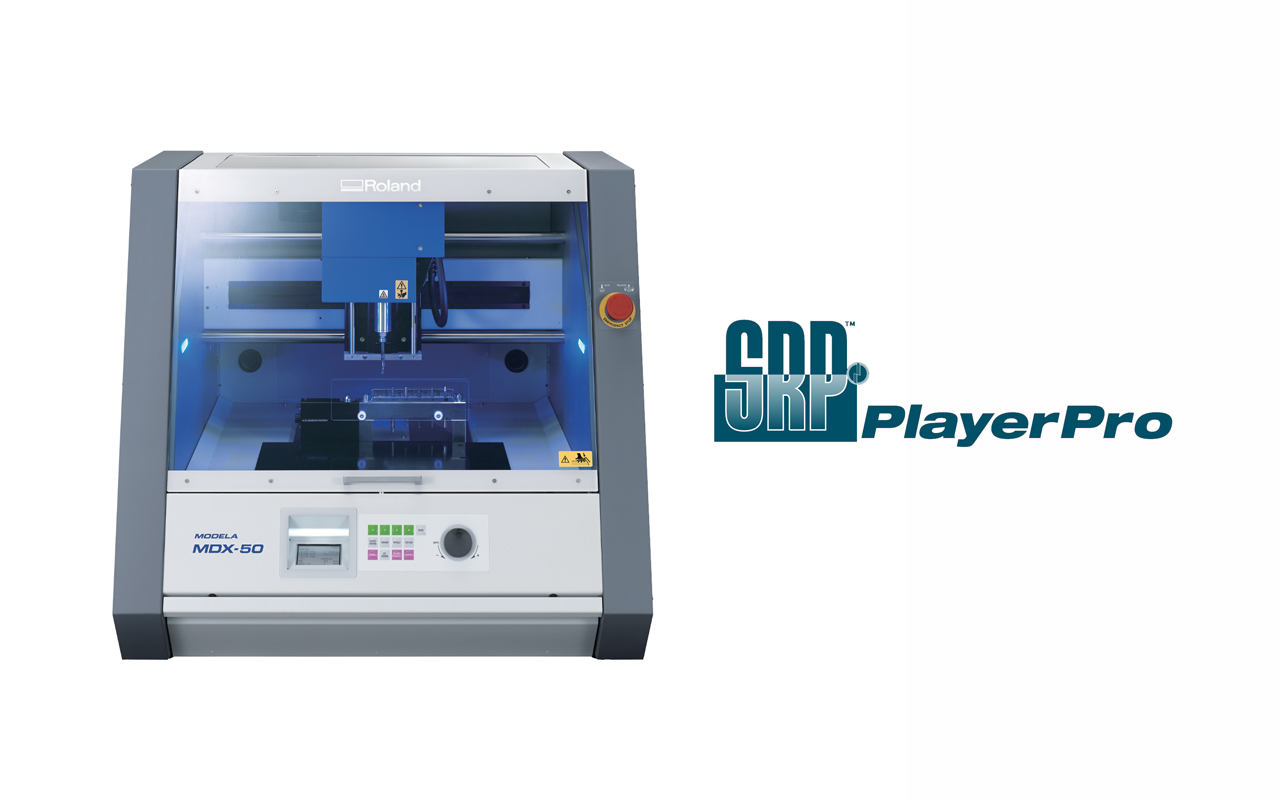
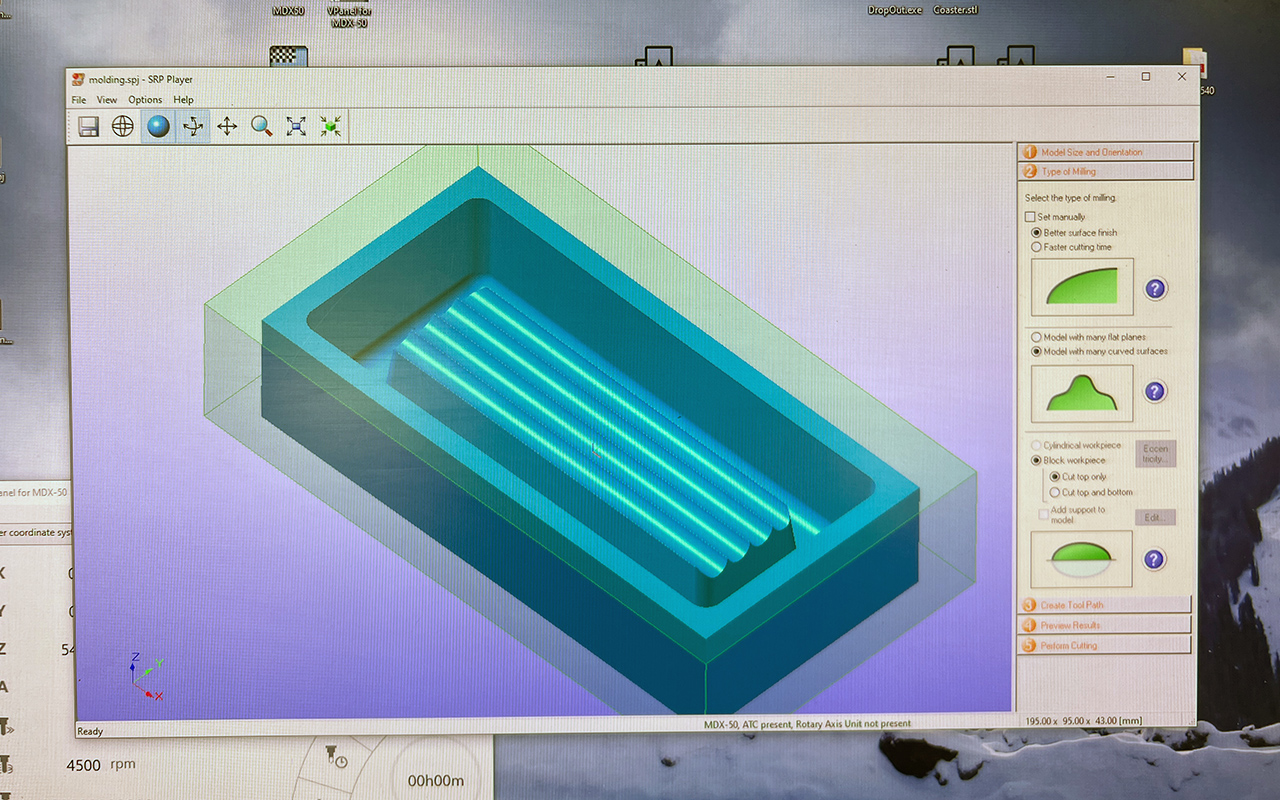
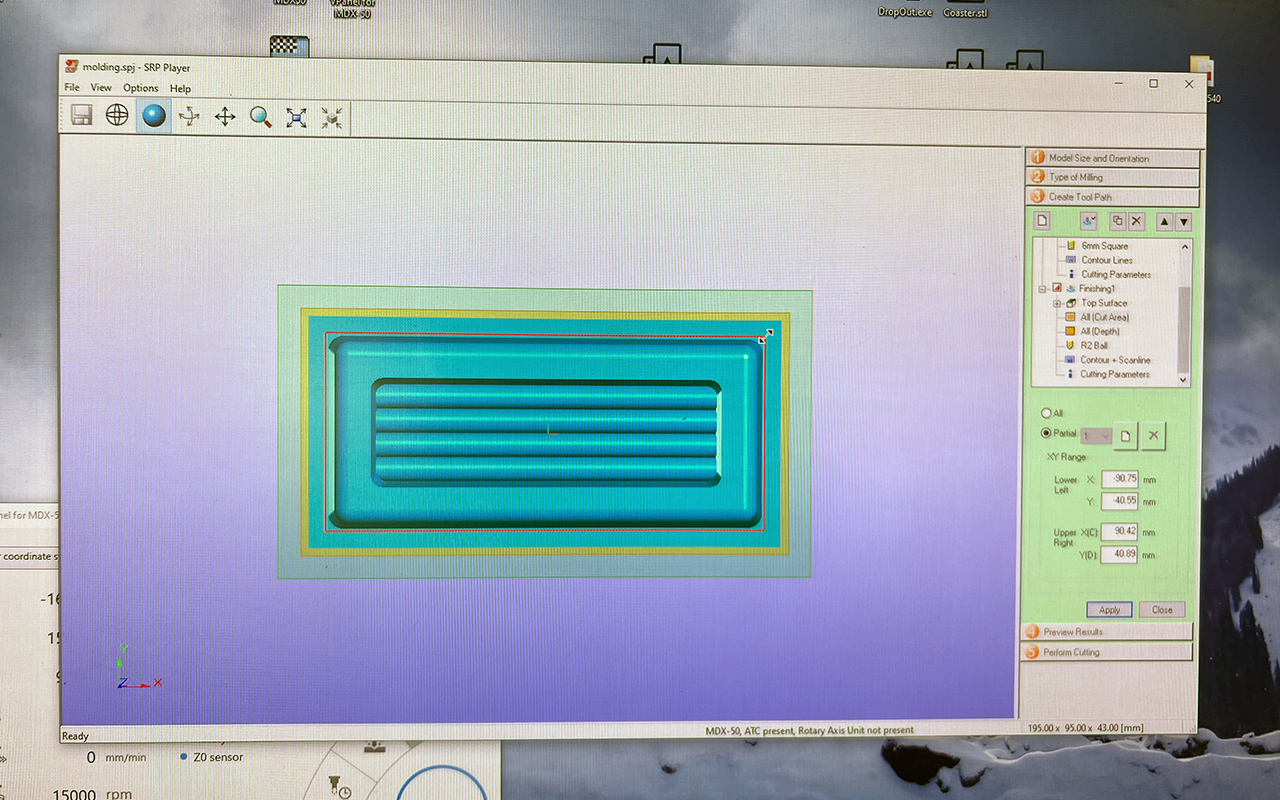
So once I am done with my model, I went to send the file to Roland MDX 50 and uses the delicated software from Roland which is SRP Player to fabricate my mold design. Upon launching the SRP software and uploading the file, this is the user interface that you should see in the screen. The SRP player is a very simple software to use for CNC milling as user will just need to go through the flow of procedures according to the number i.e, the First step is Model Size and Orientation whereby this segment show information of your model's size and dimension. You could actually scale them here if needed as well as oriented the direction. Once you are done with the first segment, you may select the Second segment which is Type of Milling.

After selecting the second segment which is Type of Milling, you should see various options for you to choose in terms of how you want your milling to be done base on Speed and Quality. So naturally, we will choose the best finishing we can so that our molding and casting will be good, hence, we will select Better Surface Finish and Model With Many Curved Surfaces. Also, we will need to select Cut Top Only since we are just doing a single side milling.
Once we are done with the second segment, we may proceed to the Third segment which is Create Tool Path. Under this segment, we will choose the correct milling parameter settings for both Roughing and Finishing such as:
- Cutting Area - Where do you wish to cut; all or partial
- Cutting Depth - What is the depth you wish to mill; full or partial
- Types of Milling Bits - What is the type and diameter of your milling bits; Flat or Ball-Nose bits
- Types of Milling Profile - Which type of milling operation do you wish to choose; Contour or Scanline/Parallel
- Cutting Parameter Settings - Set the parameters; Feedrate, Spindle RPM, Cutting Amount, Path Interval and Margin
So I started to proceed with the Roughing first and have my cutting parameter settings as stated below:
- Feedrate - 2700 mm/min
- Spindle RPM - 15000 RPM
- Cutting-In Amount - 4.1 mm
- Path Interval - 3.6 mm
- Finish Margin - 0.5 mm
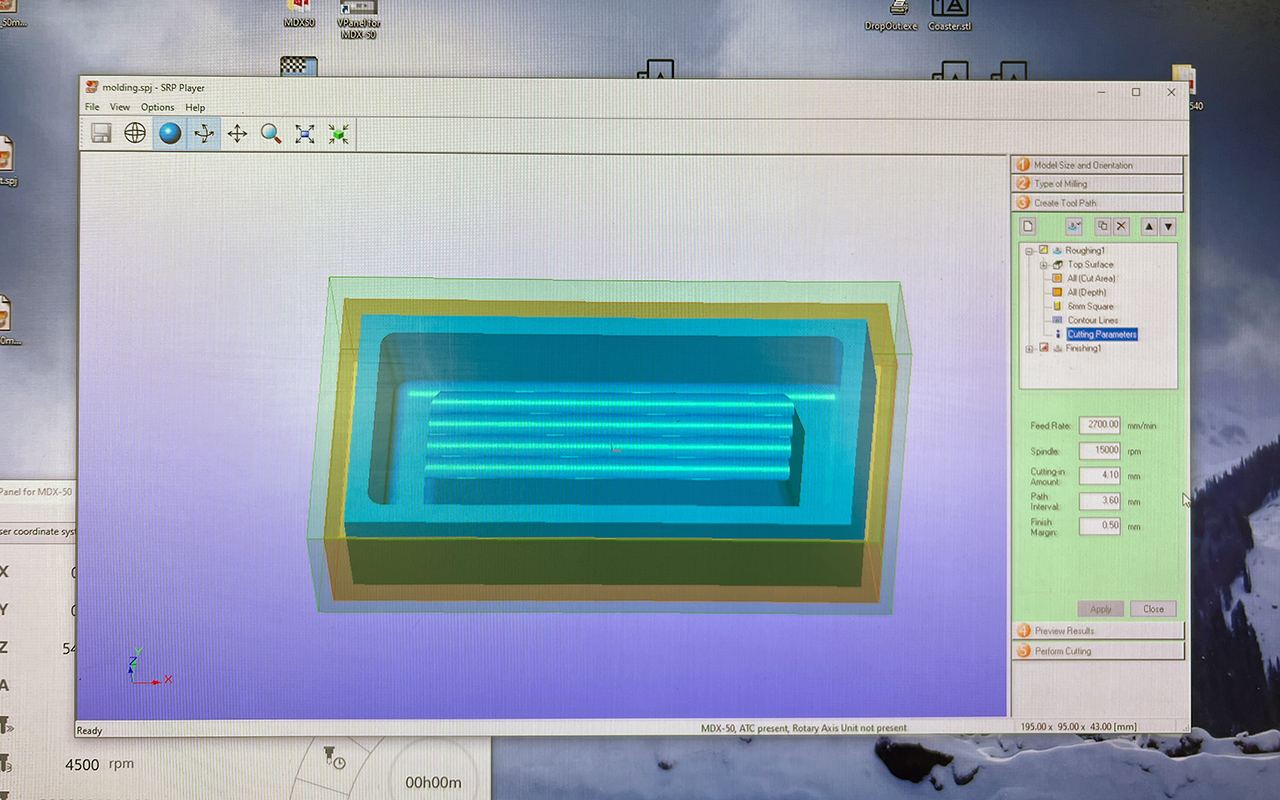
After all the settings are done, I will select the Apply button and we may proceed to Create Toolpath by selecting the create toolpath button and then we can move to the Fourth segment which is Preview Results.
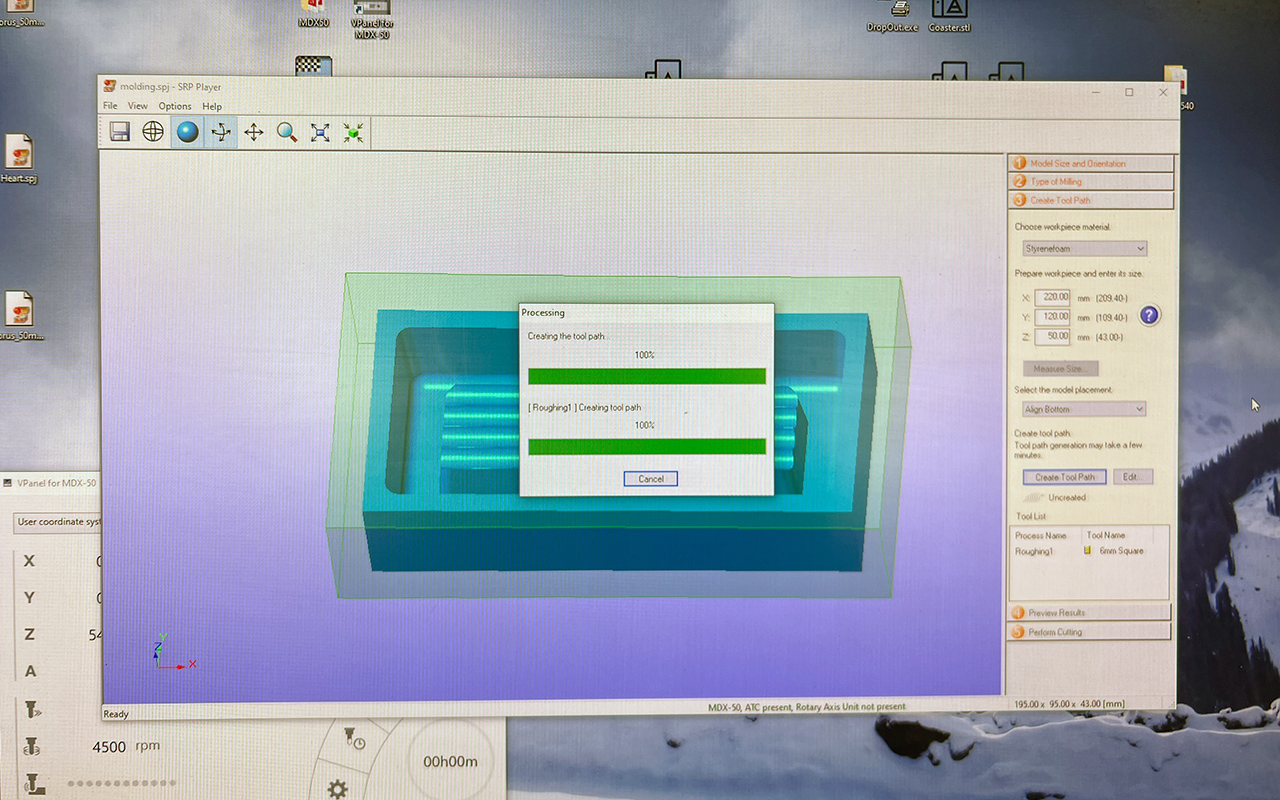
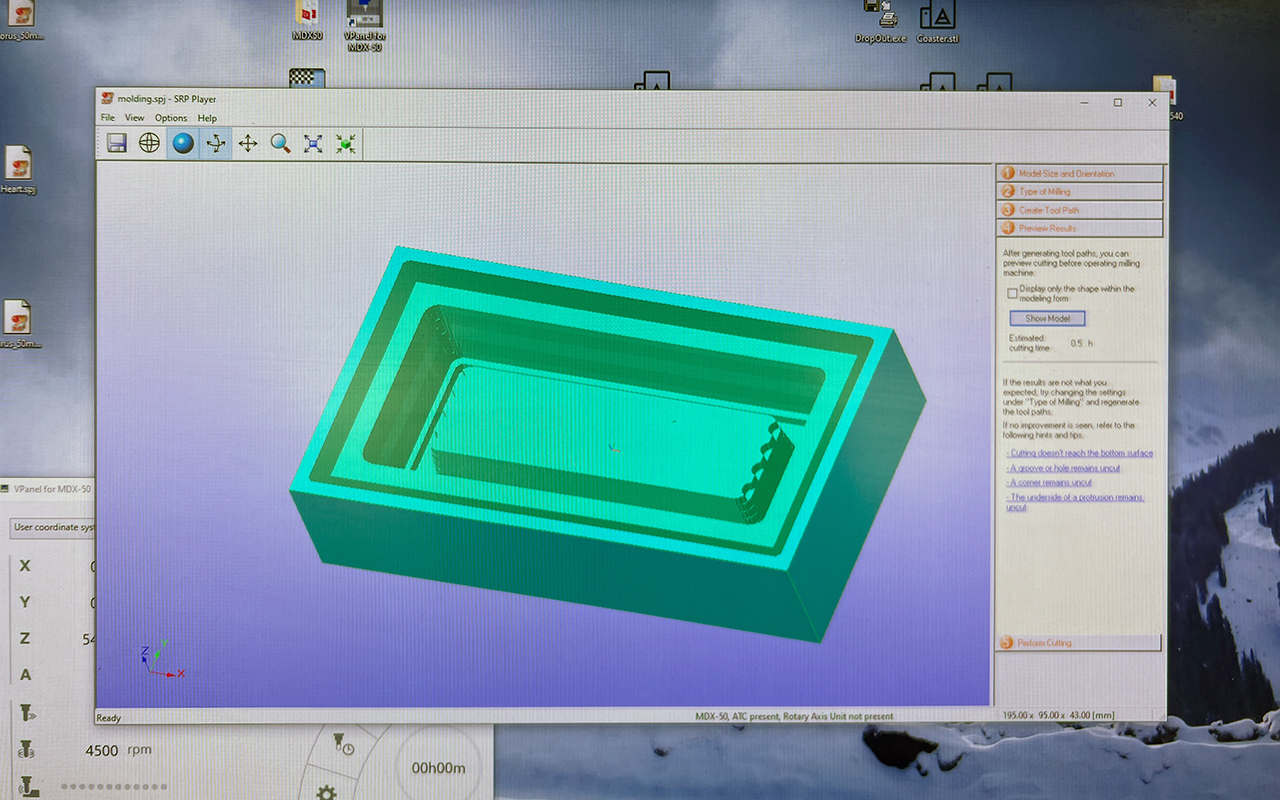
Under the Fourth segment which is Preview Results, we will be able to see a preview of our milling so that we can check if the milling and settings are correct. Should there be something wrong with the settings, we can always amend it and recreate the toolpath. We will also see an estimated timing for the milling job to be done.
Lastly, the Fifth segment which is Perform Cutting, will be the last step of the program setting whereby we will start the milling process. But before we press the Start Cutting button, we will first need to make sure that our Tool List matches the milling bits that are located in the machine ATC magazine. This is important because should we choose the wrong tool list /stock no., our milling will be wrong. So to ensure that we have selected and chosen the right tool list, we can always go to Configure Magazine to do a double check. And if all is good, we can start the CNC milling job.
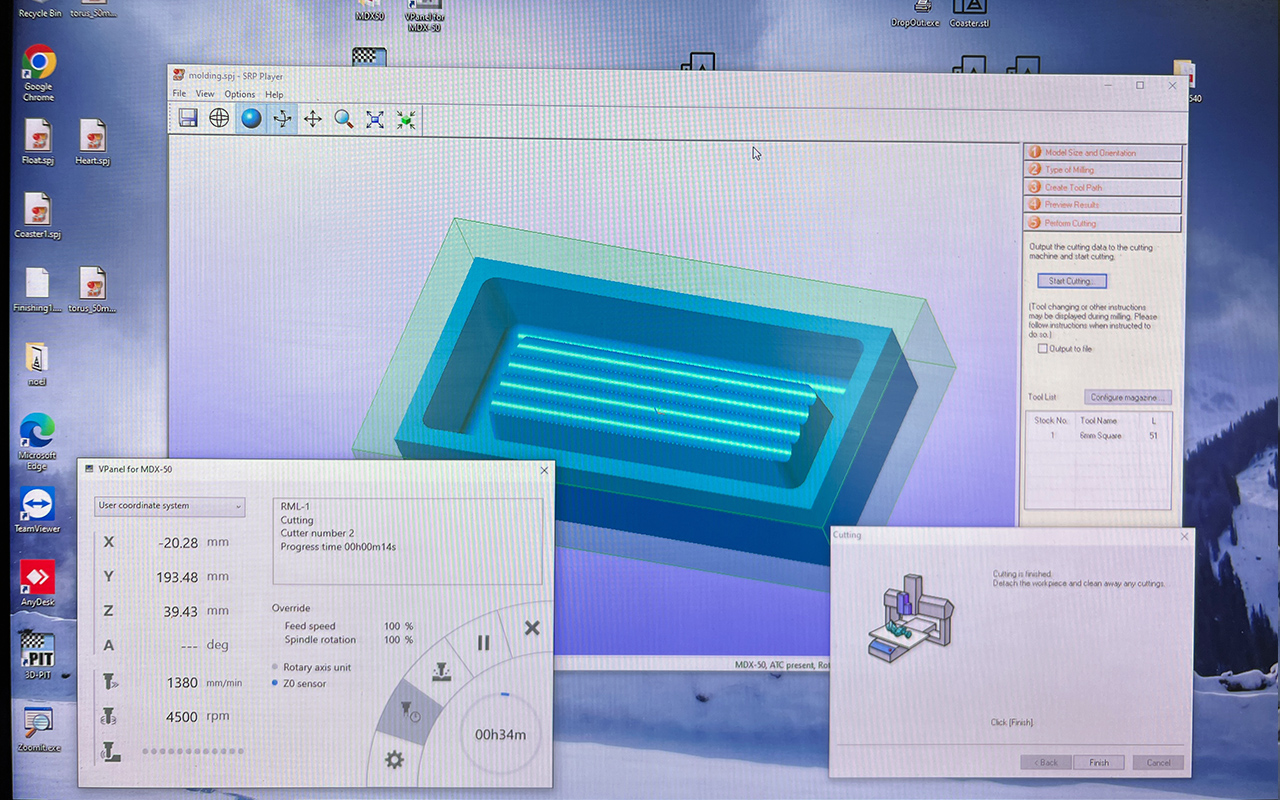
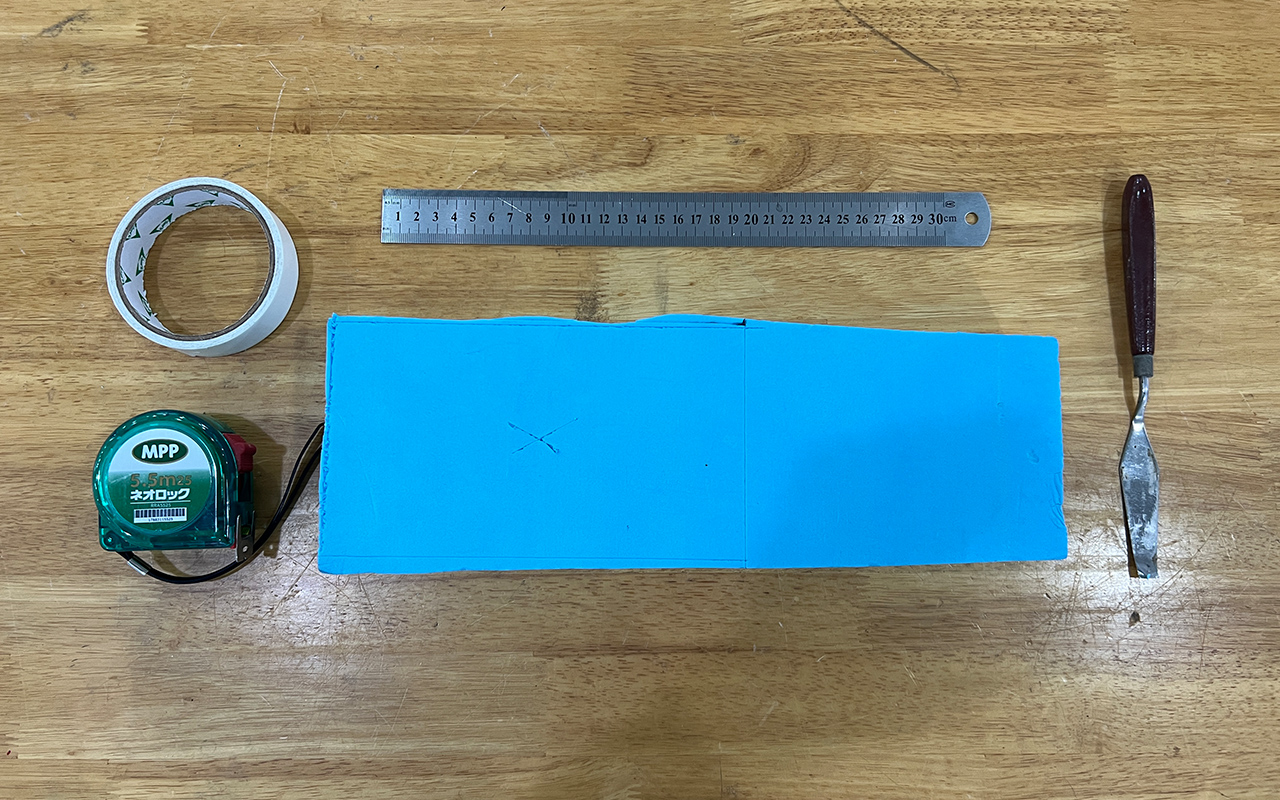
But before we actually start the cutting, we will first need to prepare the material and do a XYZ zeroing of the machine. The XYZ zeroing process is silimar to the StepCraft Milling Machine therefore, I shall not further elaborate here. What is important to note is that we need to make sure that our origin point is correct i.e if we assign the origin point in the centre of the material (in my case, I am using Blue Foam) as seen in the blue foam with the X Mark, then we will need to select the Centre as Origin when we start to mill the part otherwise the axis of milling will be wrong.
Below is the video of the roughing milling process.
This is how my model looks like after roughing. It looks pretty fine for a rough cut.
So once we are done with roughing, we can proceed to do our finishing. We can actually set both roughing and finishing as a single process but due to the fact that I wanted to do a check on my roughing to see if it is fine before I actually proceed with finishing so as to reduce the chances of error and redoing. Next, we will proceed with the same steps as what we have done for roughing but with a different parameter settings:
- Feedrate - 1270 mm/min
- Spindle RPM - 15000 RPM
- Cutting-In Amount - 0.15 mm
- Path Interval - 0.2 mm
- Finish Margin - 0.0 mm
The reason for these setting is because we need to do a very fine finish so as to achieve a good mold for casting.
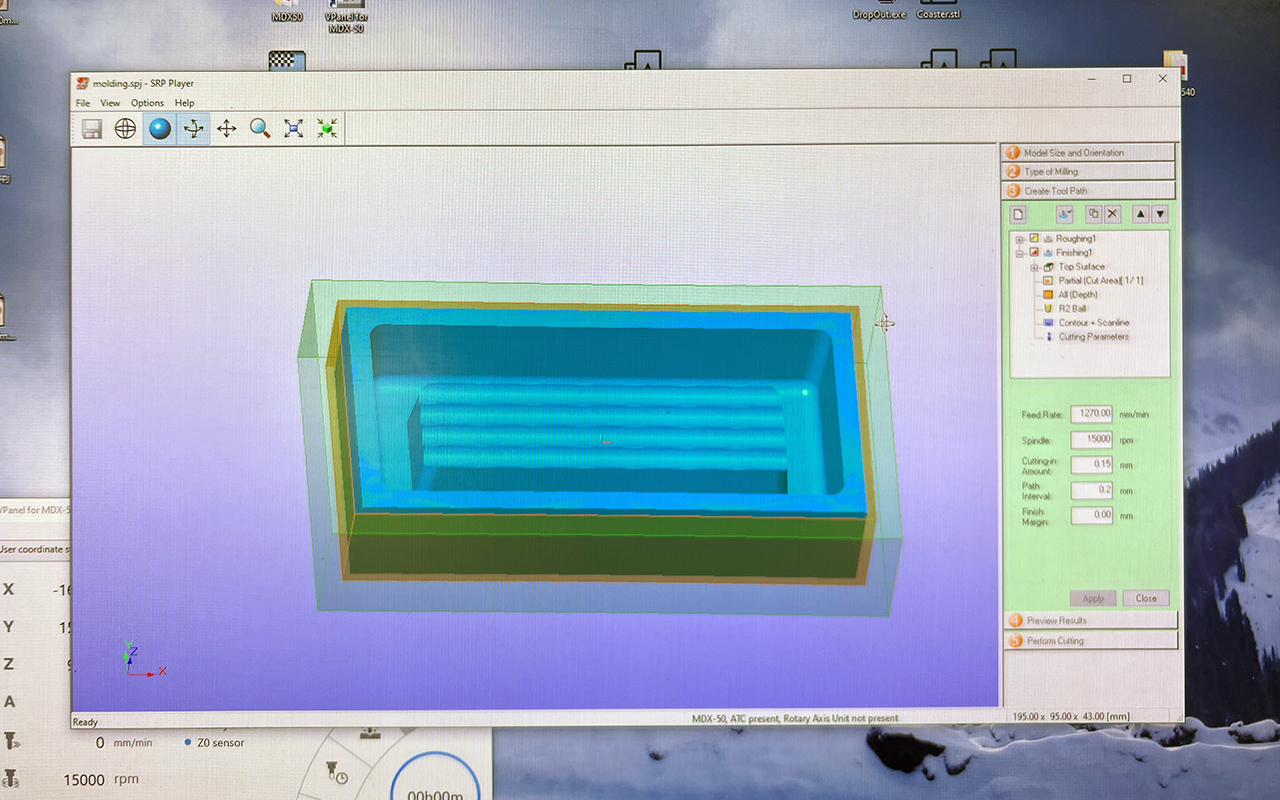
Also, to save time, I have decided to do partial milling (as shown in the image below where the Red Border is) instead of milling the entire model. Last but not least, we will need to change the milling bit to a Ball-Nose bit so that it will achieve a nice cutting finishing. In my case, I have selected a diameter 4mm ball-nose milling bit.
Below is the video of the finishing milling process.
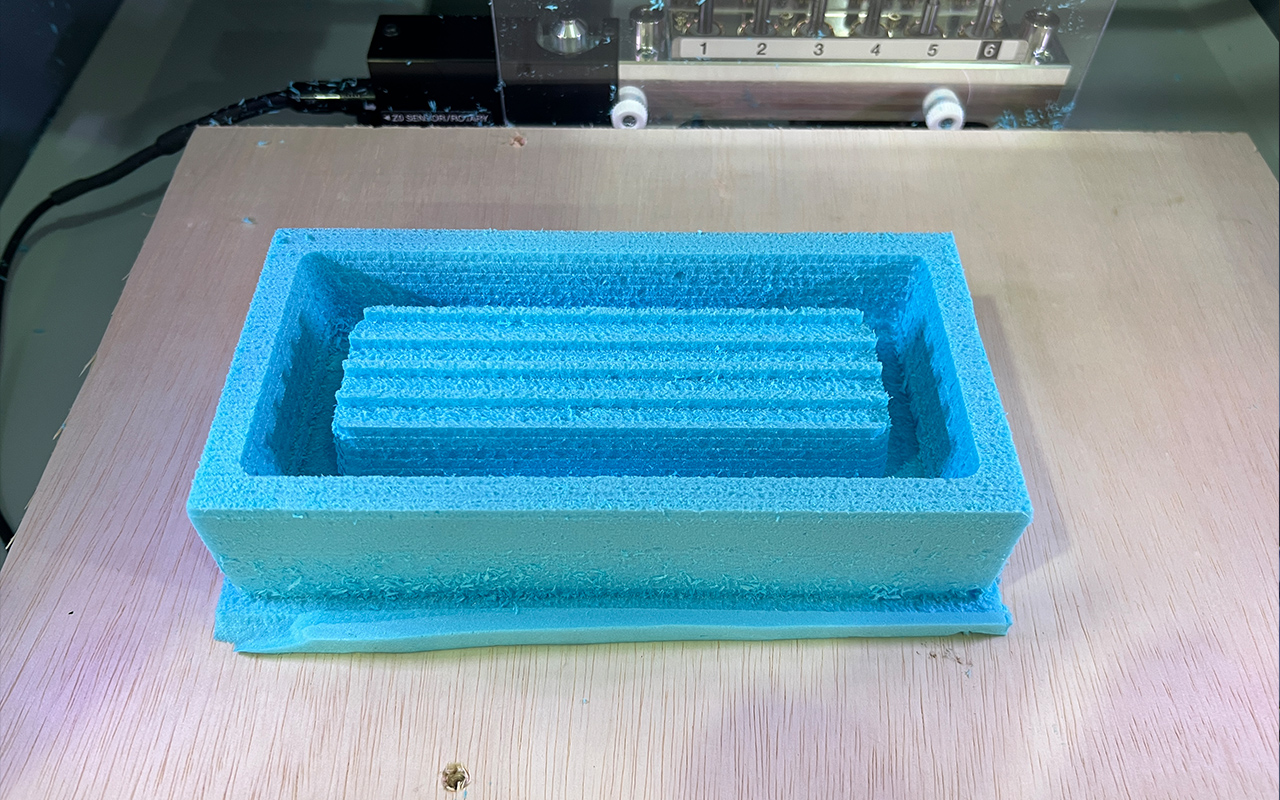
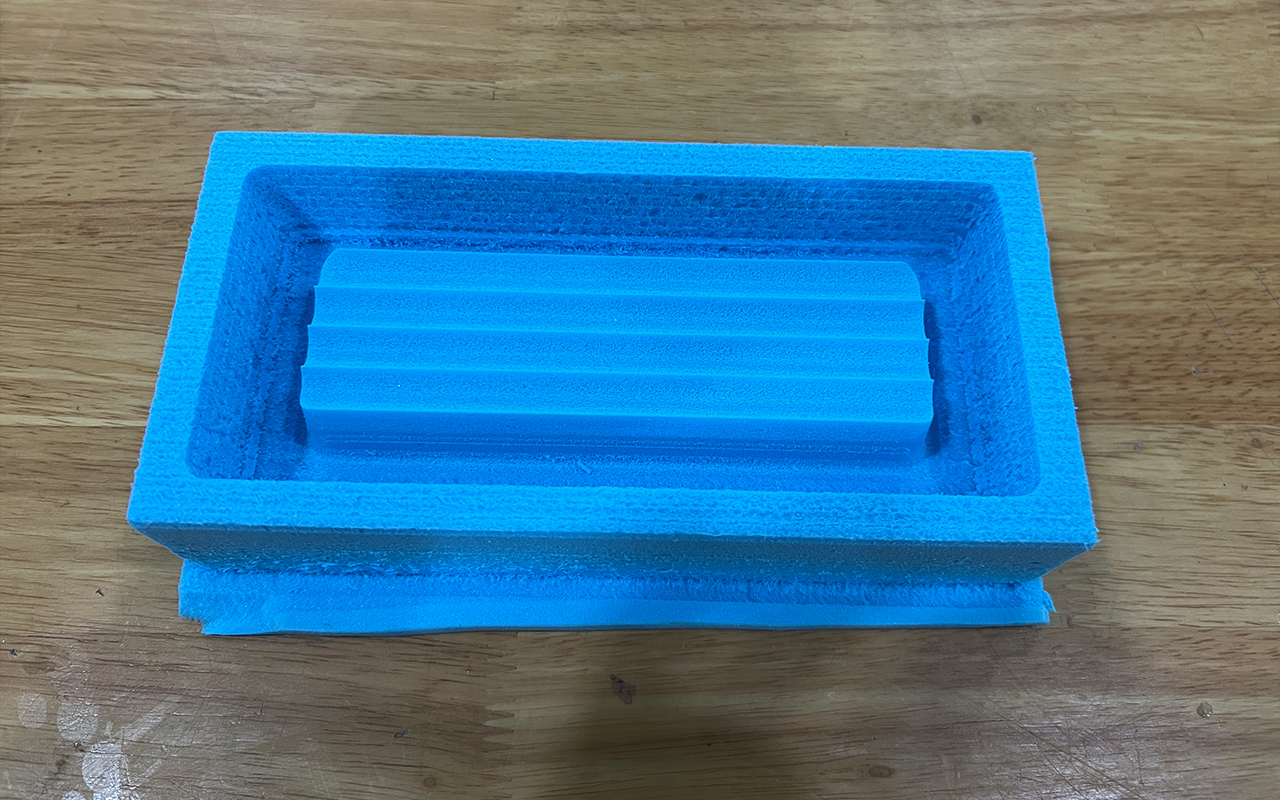
This is the outcome of my final holder design after all the milling processes. It looks very refine for a milling done on blue foam material. Hopefully the molding process will goes well later.
Silicon Casting - Rubber Mold
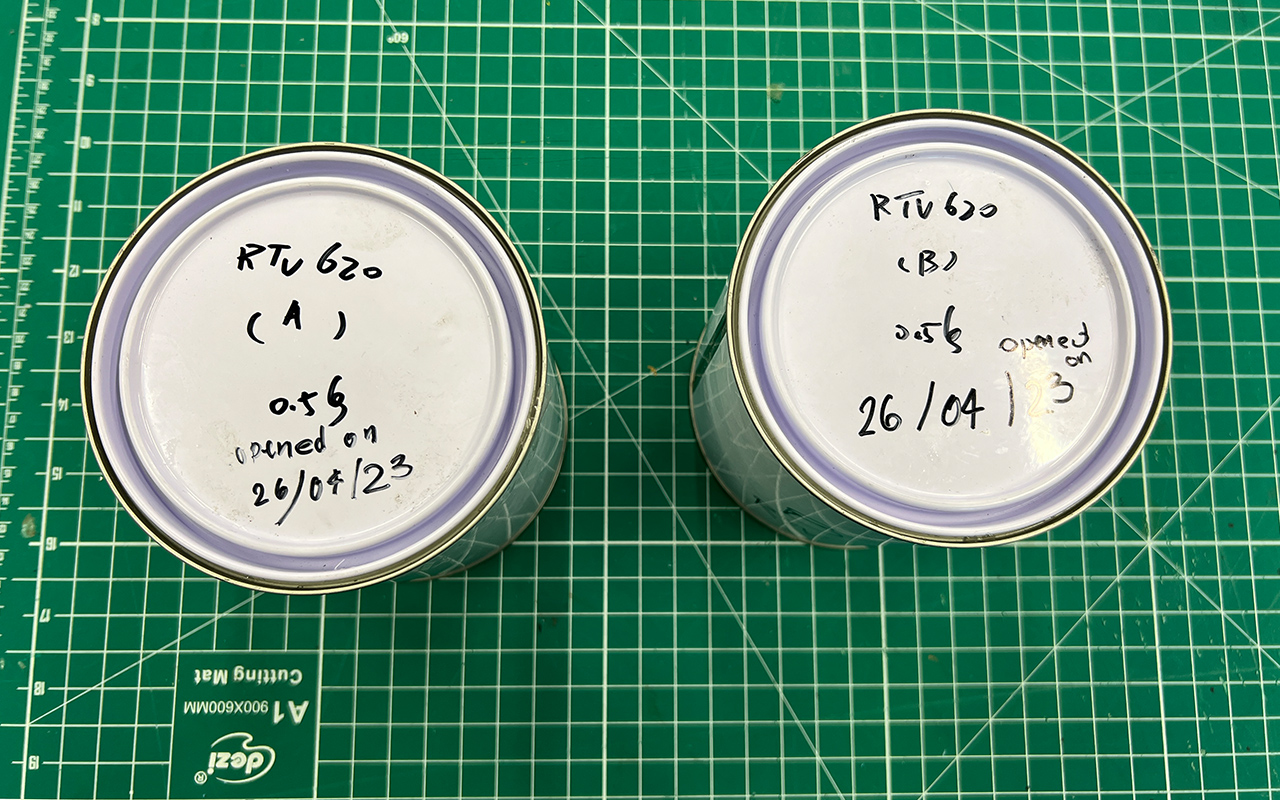
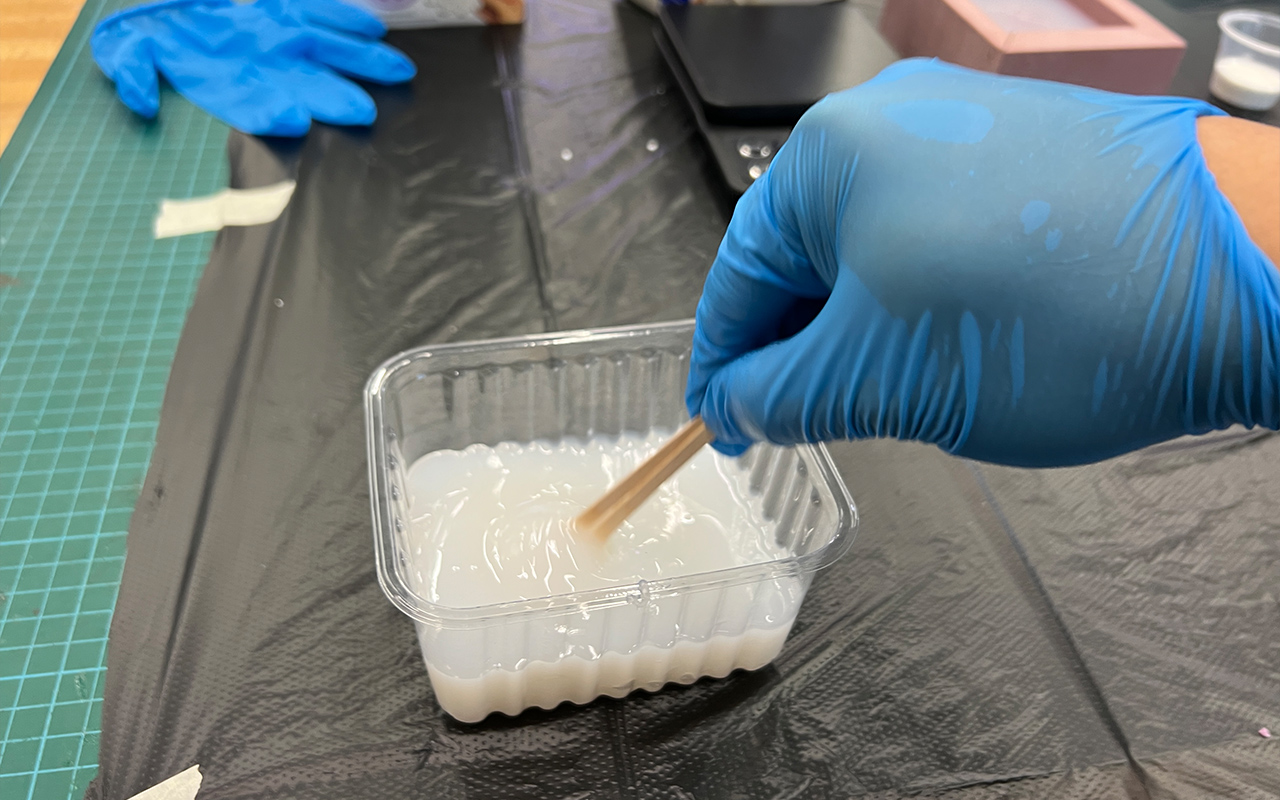
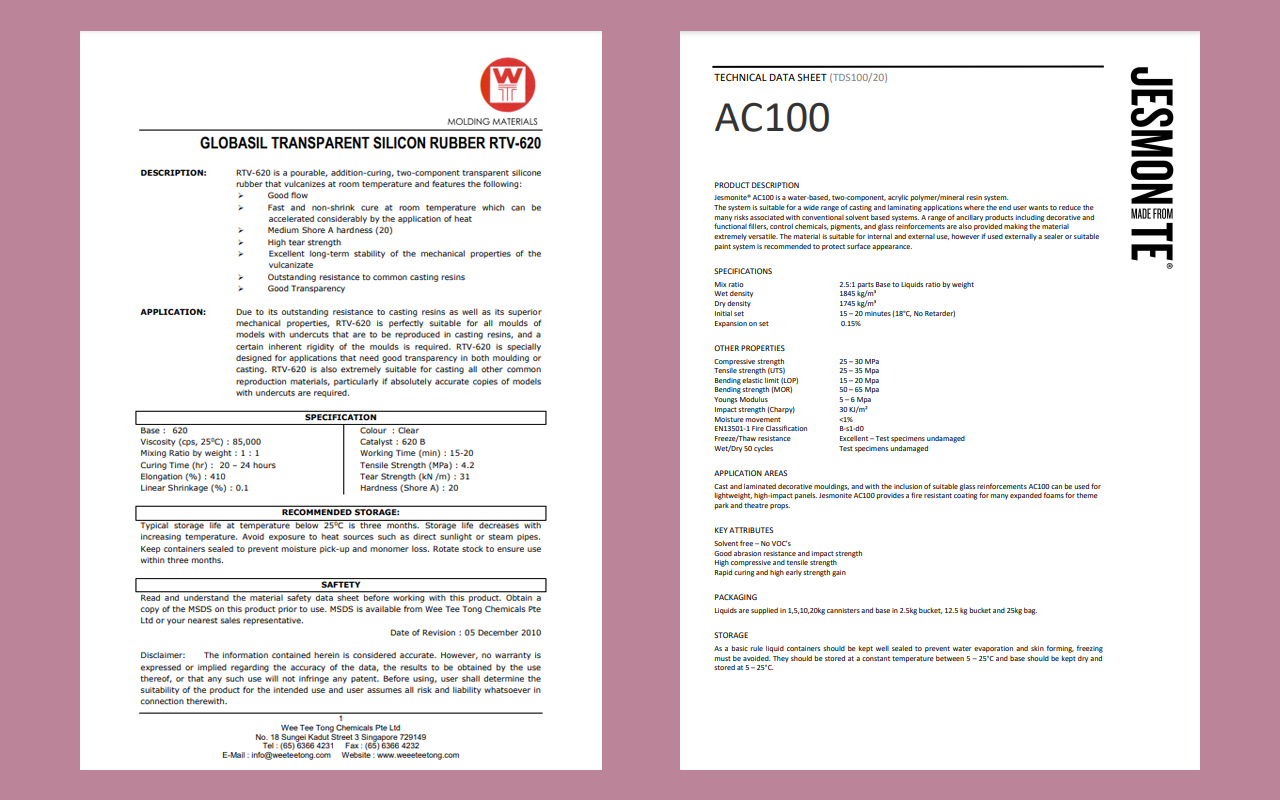
After completing the CNC milling of my mold design, we shall proceed to do our Silicon Casting. For my casting, I am using the GLOVASIL Transparent Silicon Rubber RTV-620 as shown in the image below with the Part A & B resins.
So the first step of casting is to know how much resin we should mix. As mentino earlier, I have already gotten the volume figures and with that, I can easily calculate the mass of the resin required for the mold with a weighing scale as shown below:
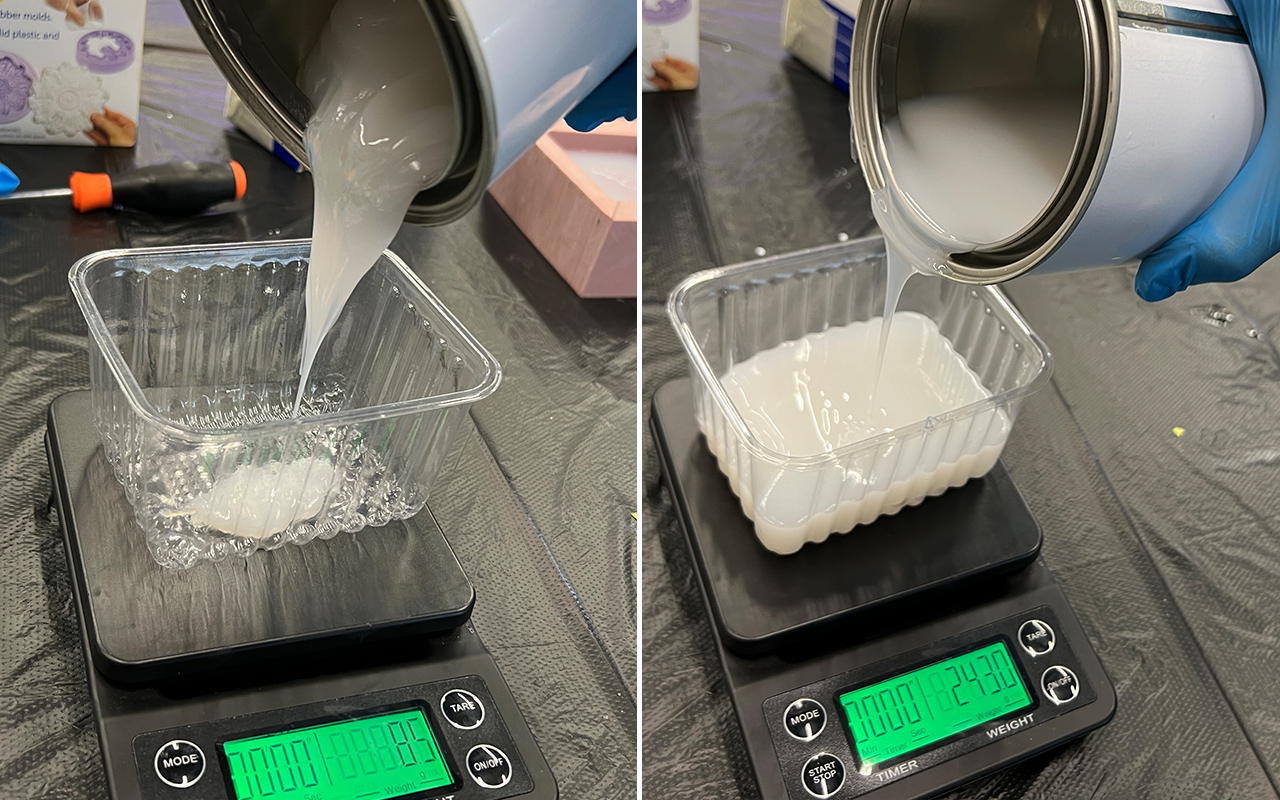
After pouring the required amount of both resin A & B, we will need to start mixing them fast as the pot life of the resin is only 20 mins, however, the curing time is 20 - 24 hours!
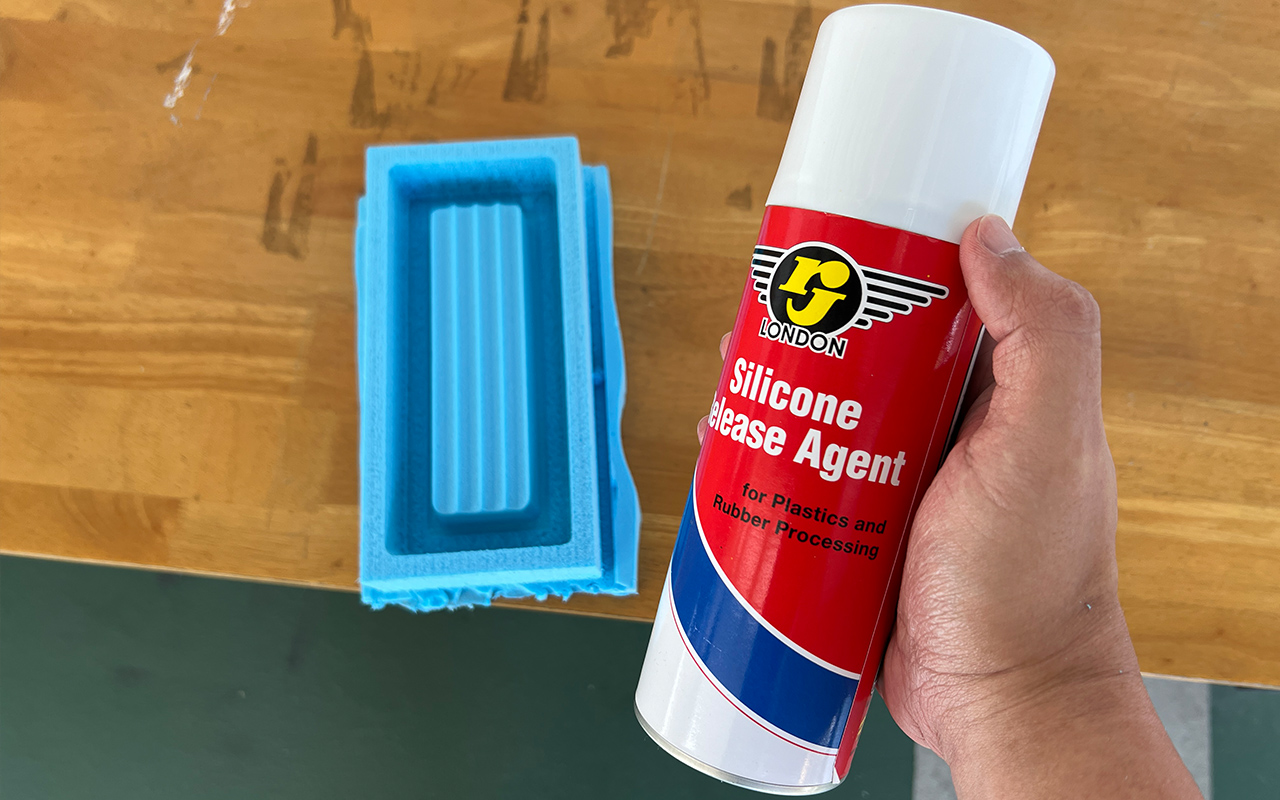
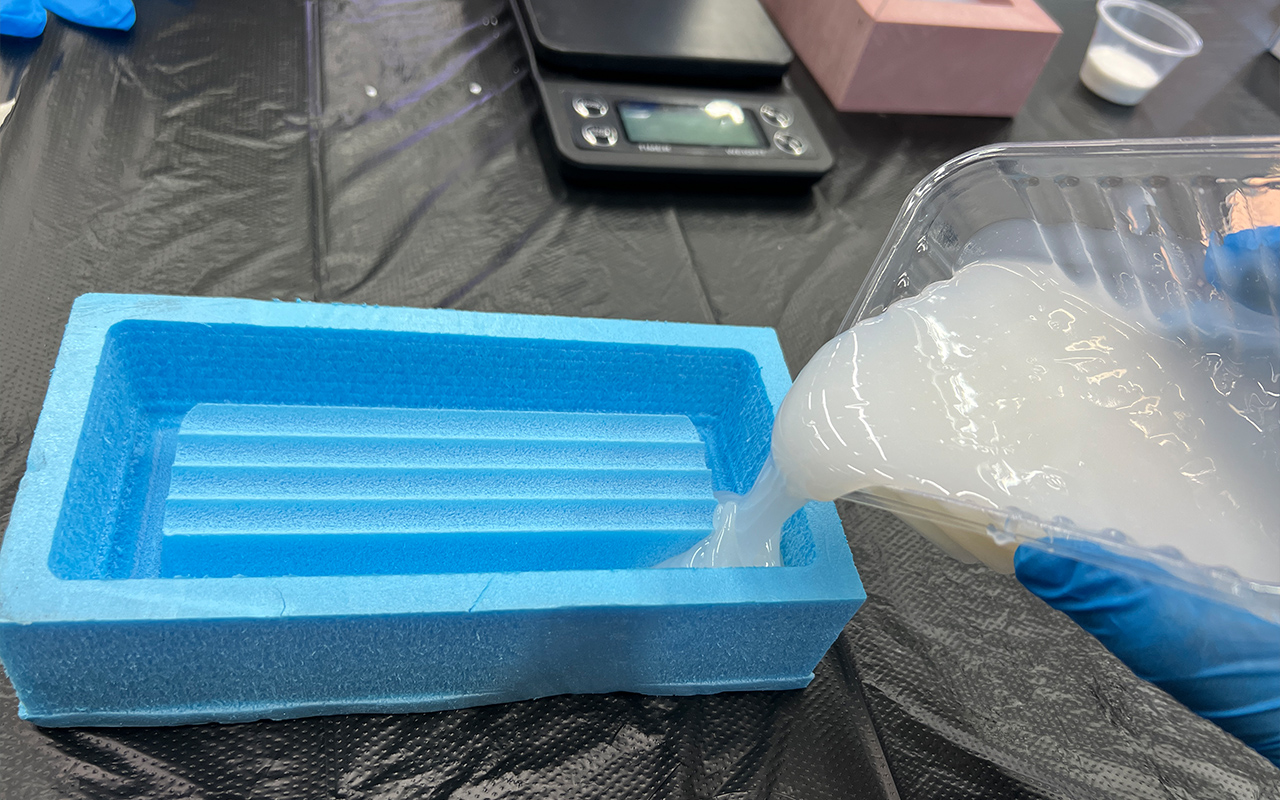
Once the mixing is done, we shall pour the resin into the mould immediately. But before that, it is good that if we spray some mold release agent onto the mold so that it is easier for us to remove it later. Below are the images of the mold release agent and the pouring process:
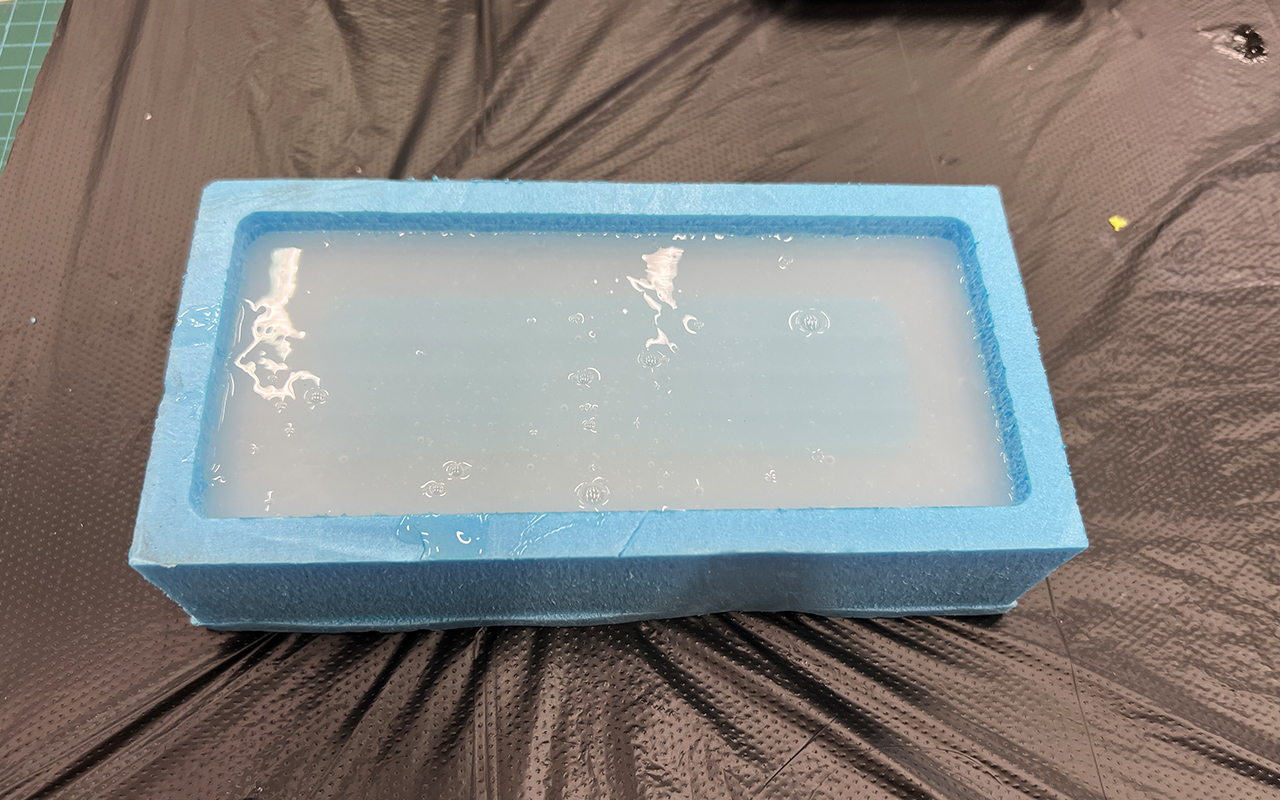
After pouring, this is what it looks like of my mold. If you look closely, there are many bubbles that are trapped in the silicon.
So in order to remove the bubbles, what we can do is to use the Degassing Chamber to vacuum out the air and bubbles:
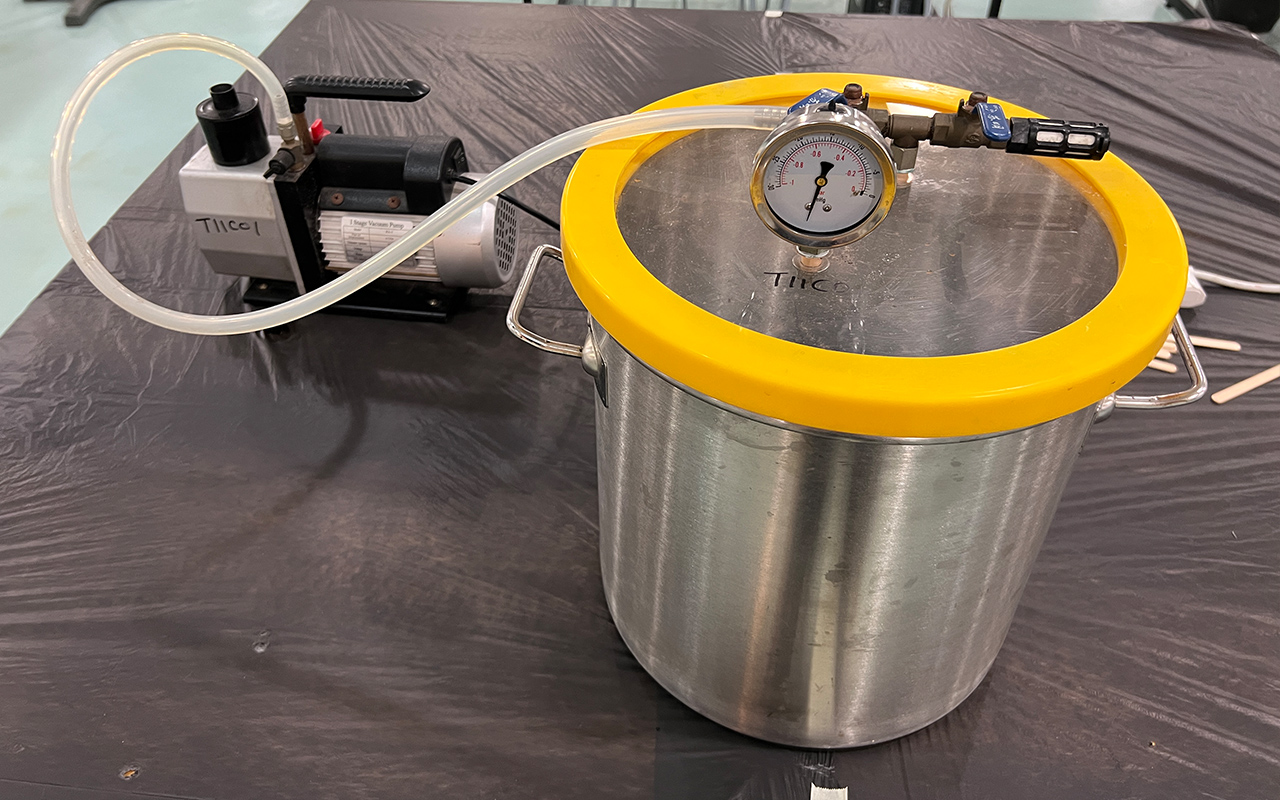
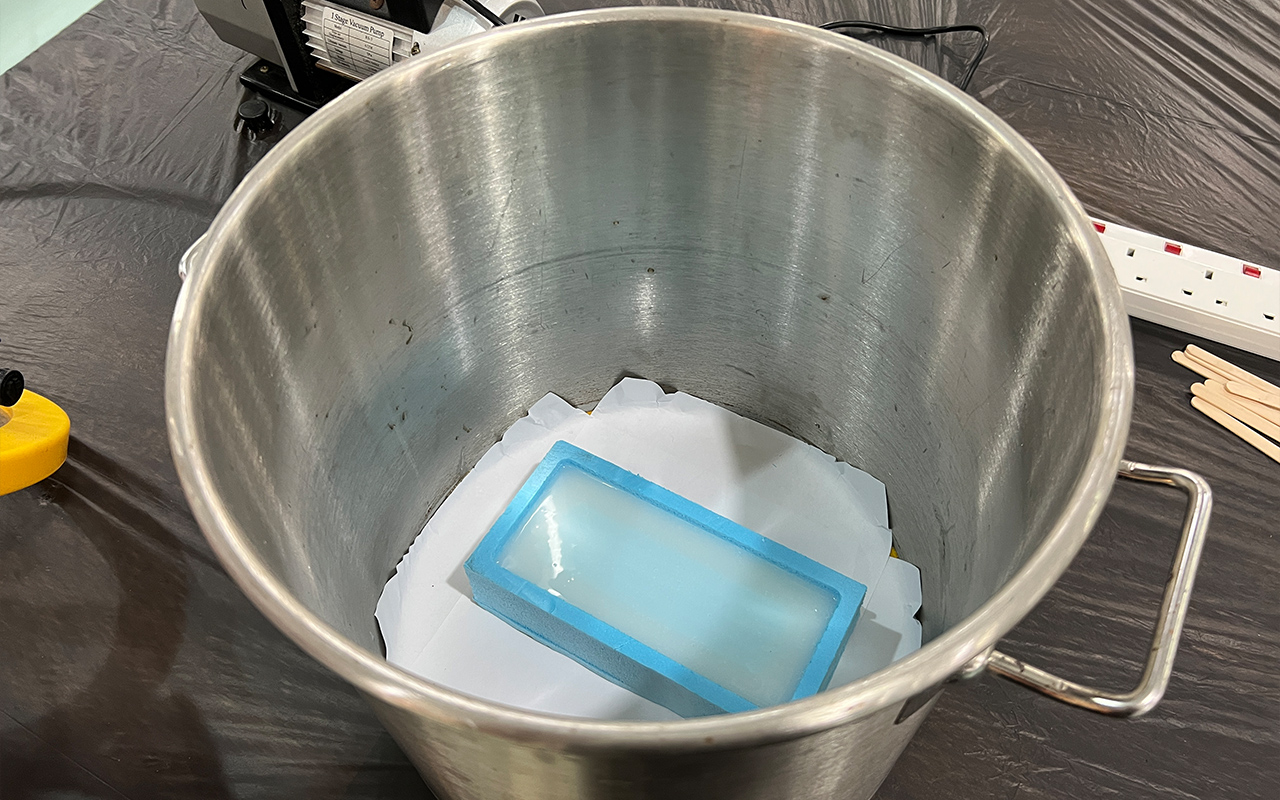
I then placed my mold into the chamber and starts to degas my mold by turning on the air compressor.
Below is the video of the degassing process:
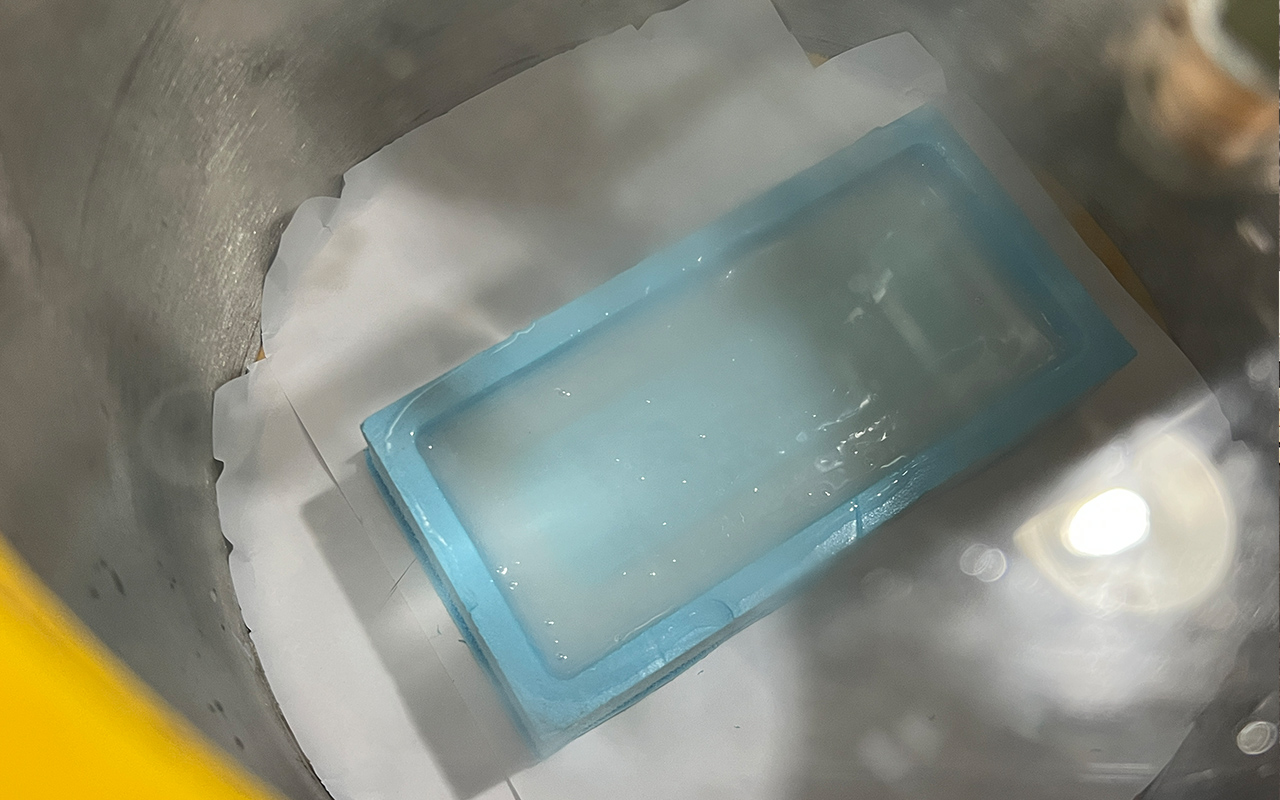
In the video, we can see very clearly that the air and bubbles are begin extracted. The process of using the degassing chamber is that we will first need to create a vacuum environment within the chamber by turning on the air compressor to extract the air within it and let this process continue to a point whereby you do not see visible bubbling effect. Once the bubbling effect diminishes, we can slowly turn on the valve to allow air to pass through the chamber. And when air starts to enter the chamber, it will creates a phenomenon whereby the silicon starts to smoothen by itself with reduced bubbles that were initially trapped within it. This is what we want to acheive so that our mold will not have (or reduced) bubbles holes after curing. As you can see in the below image, within 5 mins of degassing and allowing some air to enter the chamber, the air bubbles are lesser as compare to before.
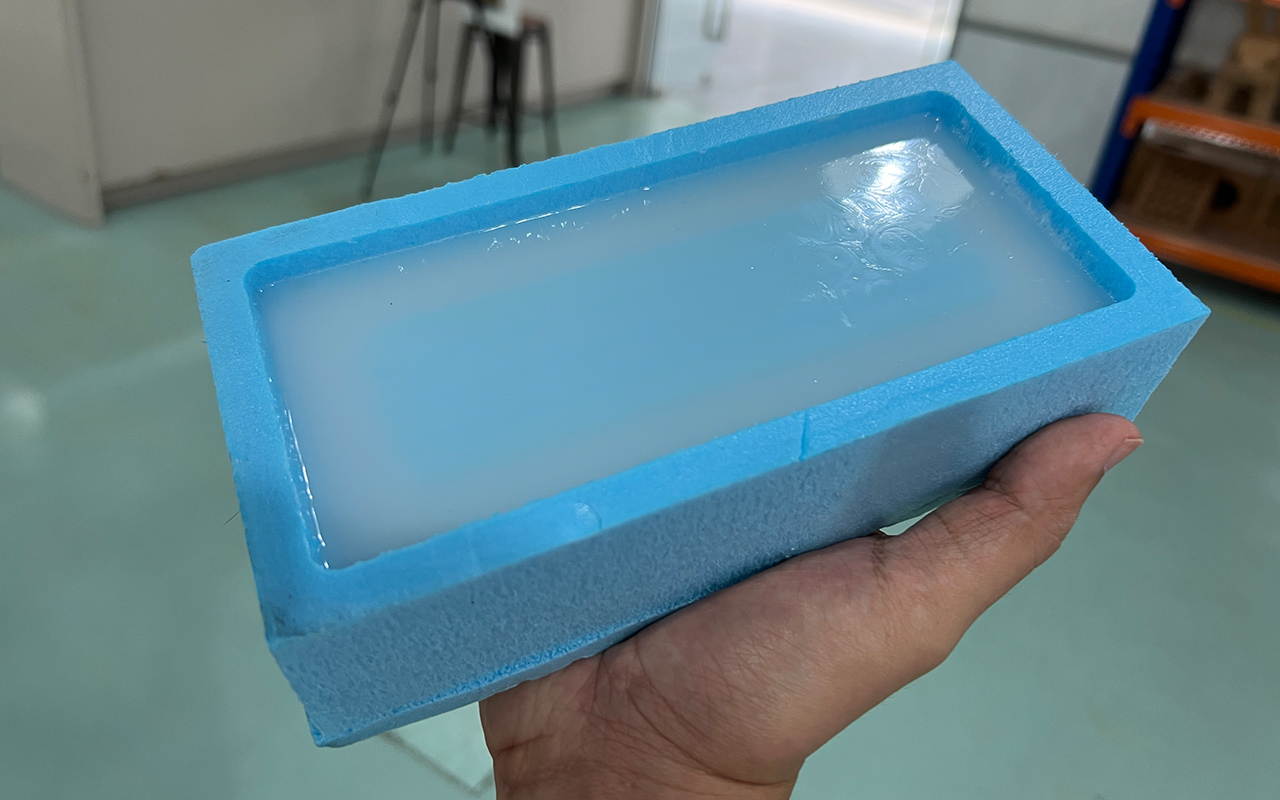
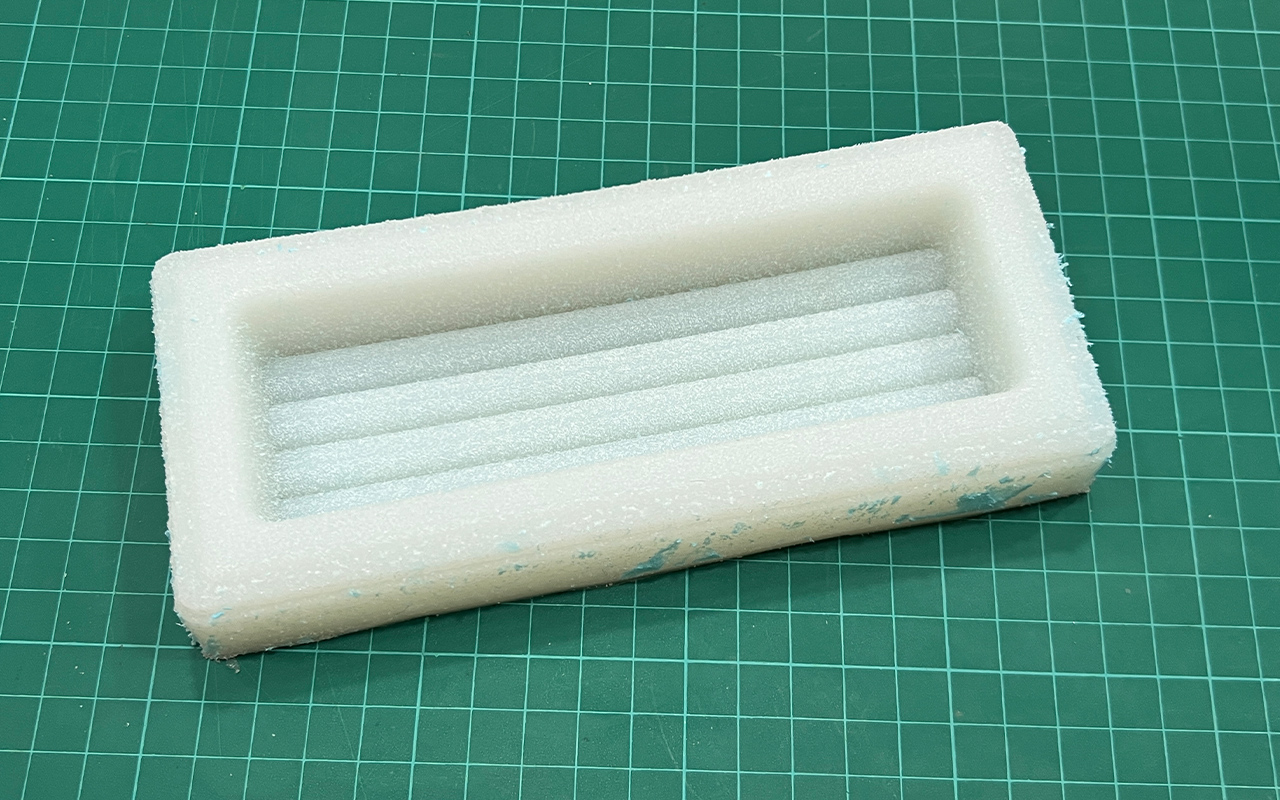
The last step of the casting is to allow it to cure for a day. We will come back the next morning to see how well the mold is going to be. After curing for a day, the mold looks fine with very little visible bubble holes within the silicon rubber. I suppose it is good to remove the mold now. Below is the image of how my mold looks like:
However, I had an issue when trying to remove the silicon rubber mold as it seems that I did not spray enough mold release agent. Therefore, you could see that some blue foam particles are kind of stuck on to the sides of the silicon rubber mold. But fortunately, the internal part of the silicon rubber mold looks fine and relatively clean so I can still do my casting without any post-processing required.
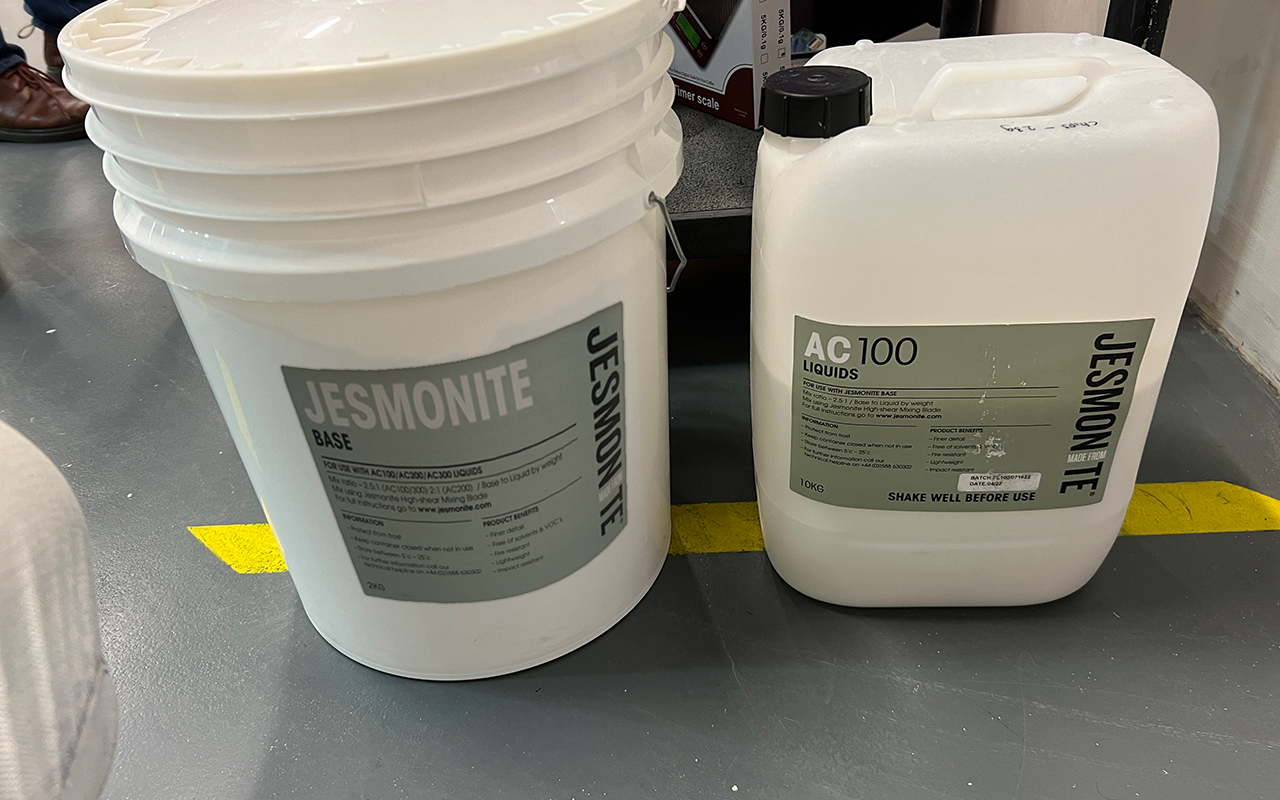
The next step is to start our casting. But before that, I would like to introduce a material called - Jesmonite which I will be using to cast my design. Jesmonite is a versatile composite material used in a variety of applications, including art, design, and construction. It was developed in the 1980s as an alternative to traditional gypsum and resin-based materials. Jesmonite consists of a gypsum-based powder and a water-based acrylic resin that are mixed together to create a paste. This paste can be molded into any shape and can also be reinforced with various fibers, such as glass or metal, to increase its strength and durability. Jesmonite can also be pigmented to create a range of colors and finishes, from matte to glossy. Most importantly, it is a non-toxic and environmentally friendly material that can be used for casting, laminating, and coating. It has become popular in recent years for creating decorative objects, furniture, and architectural features due to its versatility, durability, and aesthetic qualities.
The first step in casting Jesmonite is to know the mixing ratio. The mixing ratio of Jesmonite is 2.5:1 part of Base Powder to Liquid Resin by weight respectively. Also, you may use the online Jesmonite calculator to calculate your mixing quantity with ease as shown in the image below:

Once I know my mixing ratio quantity by weight, I proceed to prepare all the required tools and material as shown in the image below:
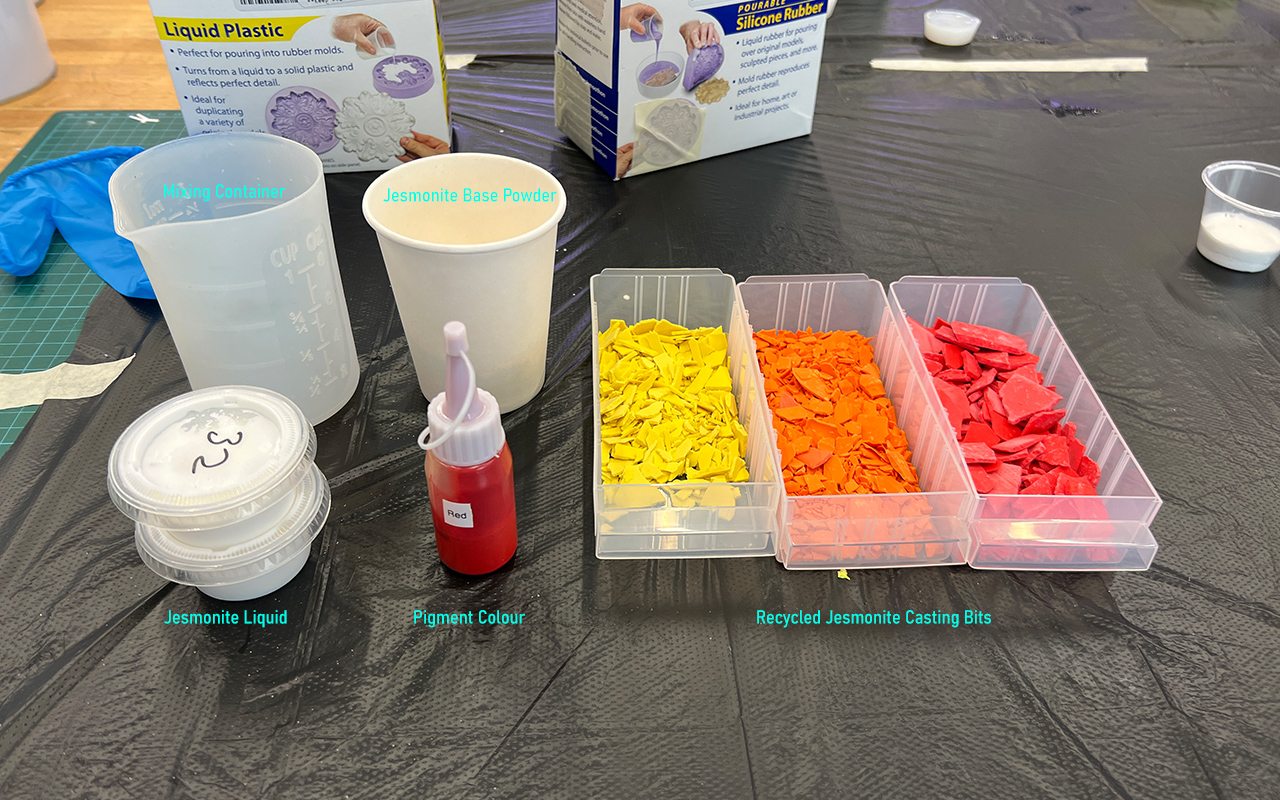
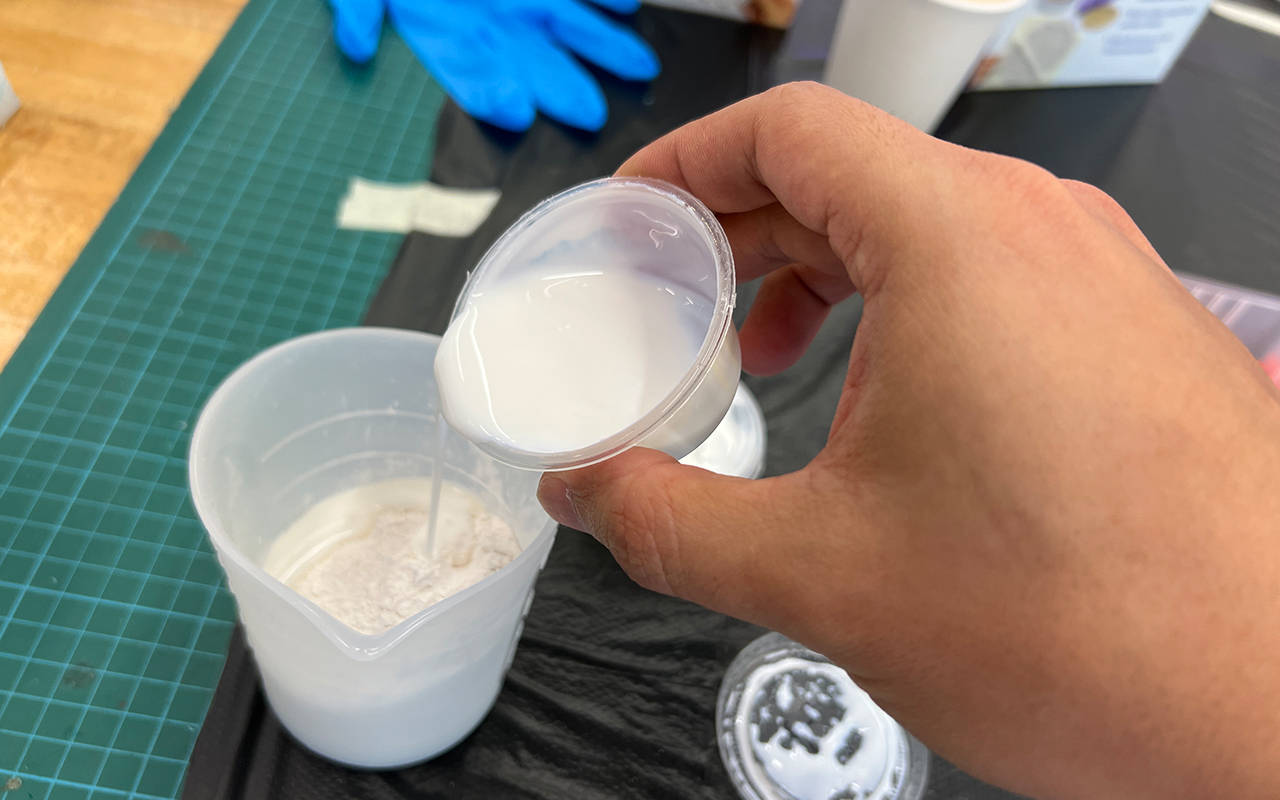
Initially, I wanted to use some of the recycled jesmonite casting bits in my mold mixture so as to make it more colourful but then I decided to scrap that idea and just keep it simple with a single solid colour. I then started off with weighing the base powder and liquid resin using a weighing scale and then pour them into the mixing container.
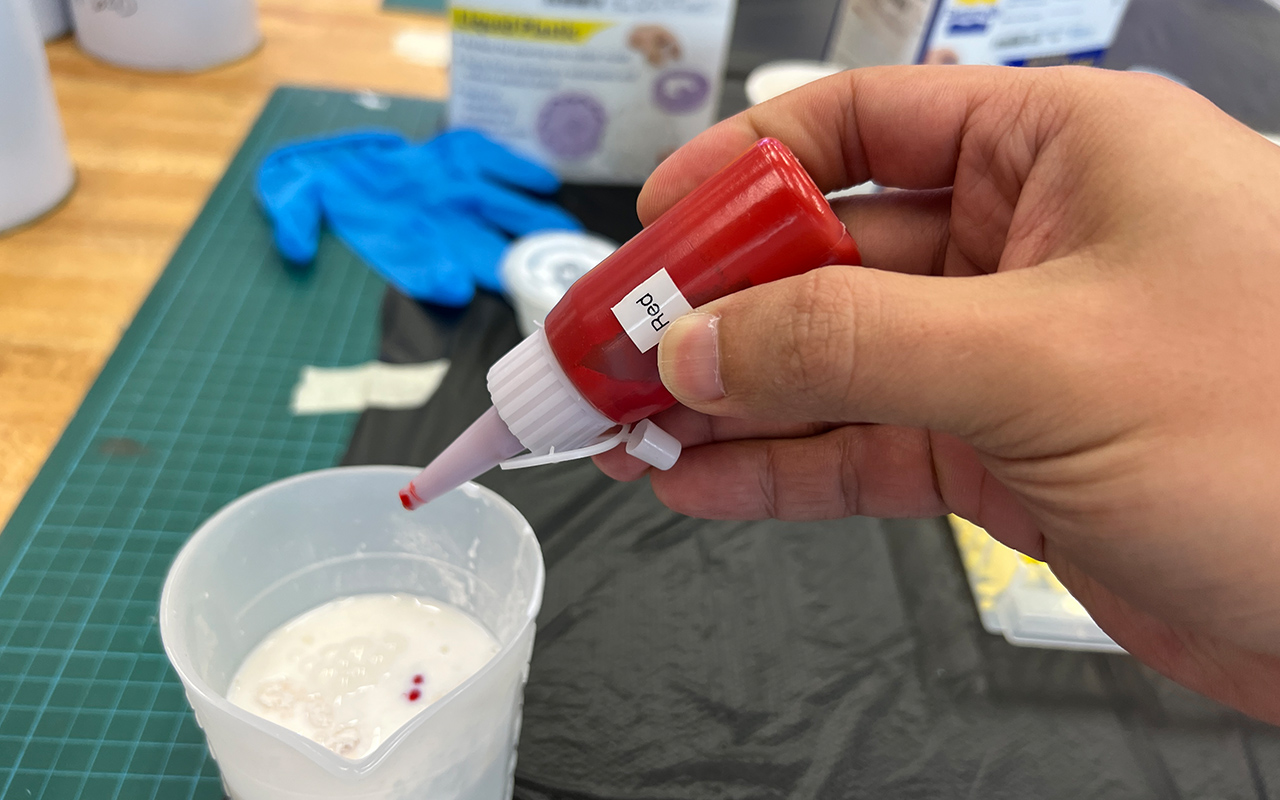
Next, I added colour pigment to the mixture to acheive the colour that I want which is Soft Red and then continue to mix them thoroughly. One important thing to note is that please do not squeeze too much color pigment into the mixture as it will disrupt the mixing ratio and also difficult to control the colour that you want. A good way to do it is to first squeeze 1-3 drops of colout pigment into the mixture and see the result after mixing and then add drop by drop to acheive the color that you want.
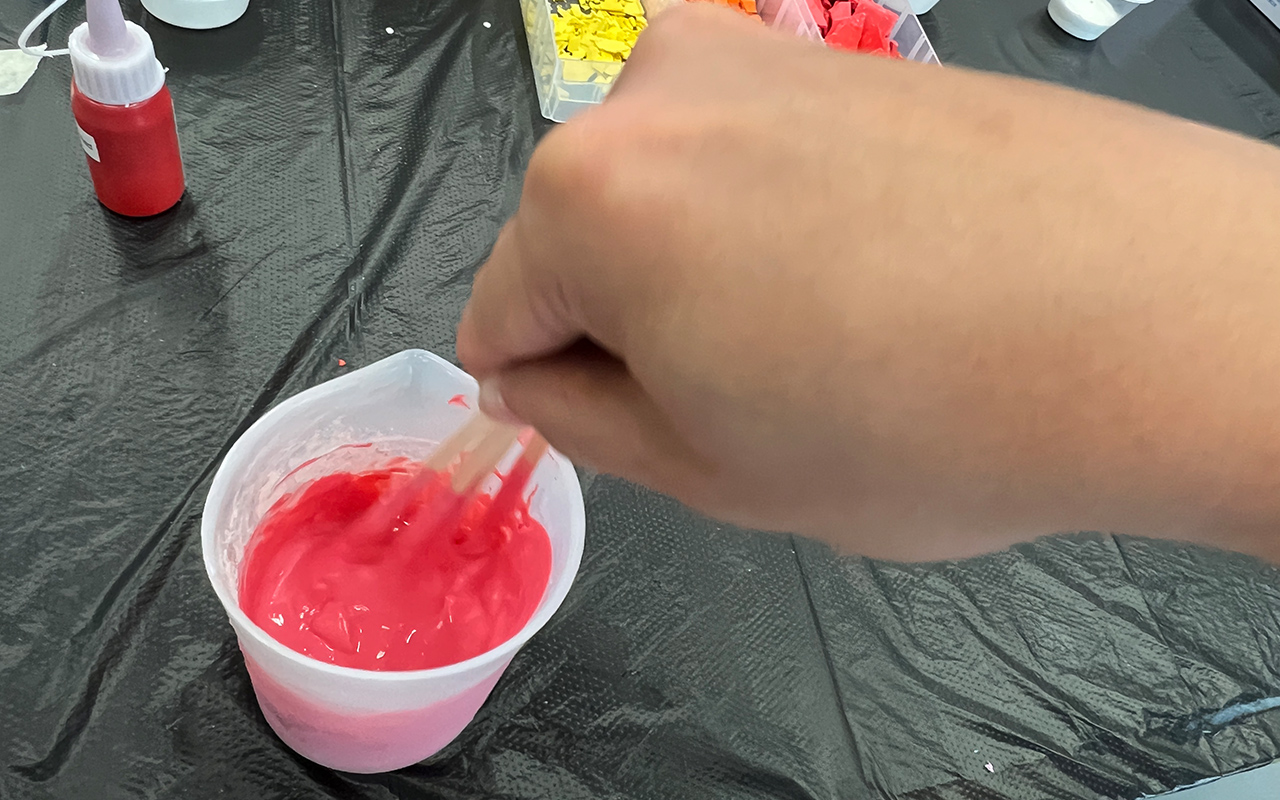
After mixing for around 5-7 minutes, this is what you should get, a solid and rich colour paste which you will need to pour it into the silicon rubber mold later.
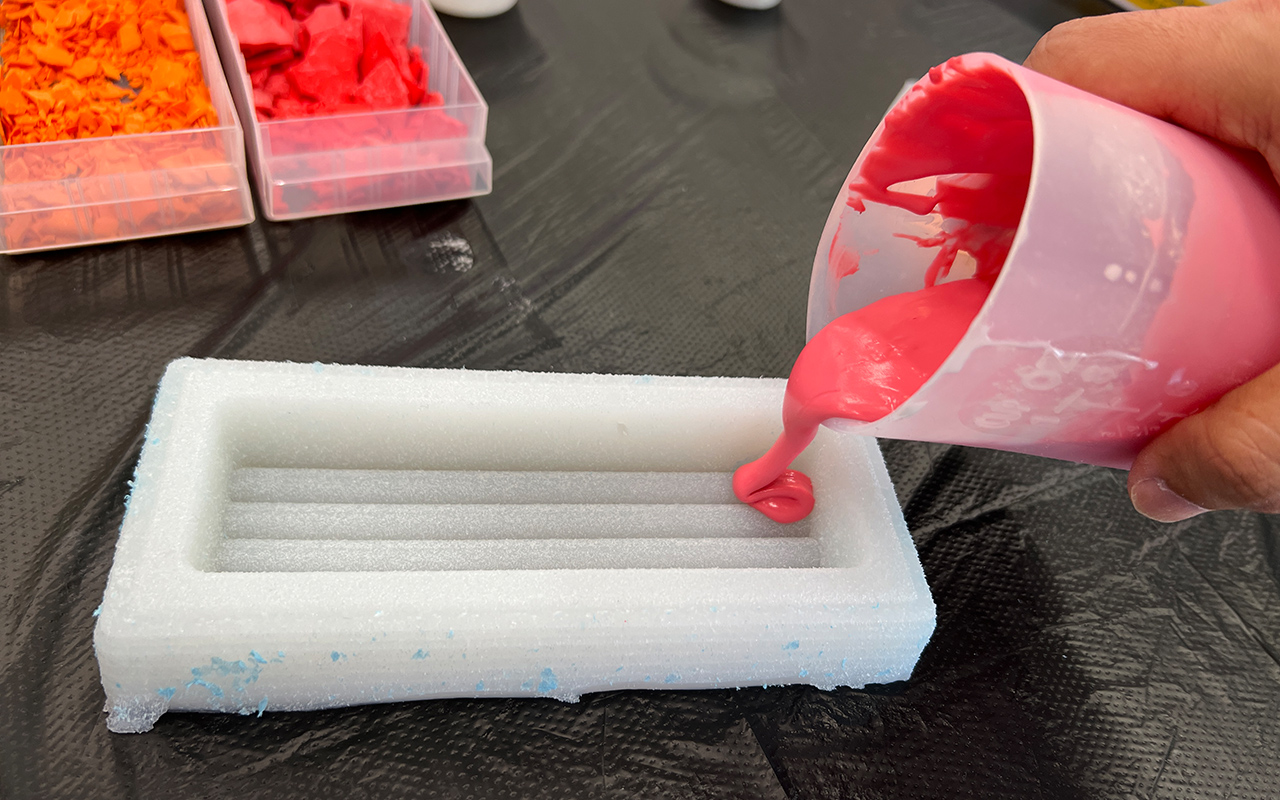
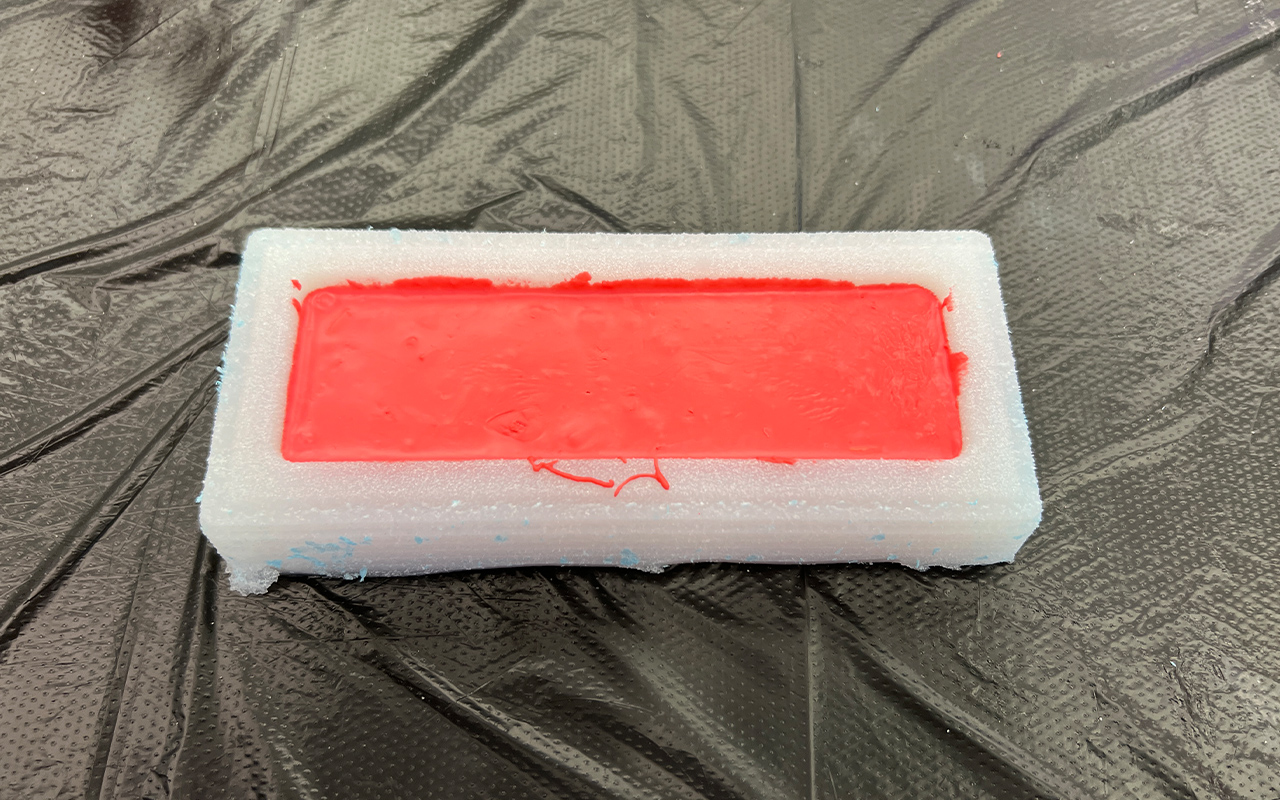
The next step is rather striaght forward which is to pour your paste into the silicon rubber mold. There is a technique in pouring so that you will reduce the amount of air bubbles begin trapped in the silicon mold. You will need to slowly pour the paste on one corner of the silicon rubber mold and allow the mixture paste to flow slowly on its own to fill up the entire silicon rubber mold. What you should not do is to pour and move together just to be fast as this will increase the amount of air being trapped in-between the paste and silicon mold.
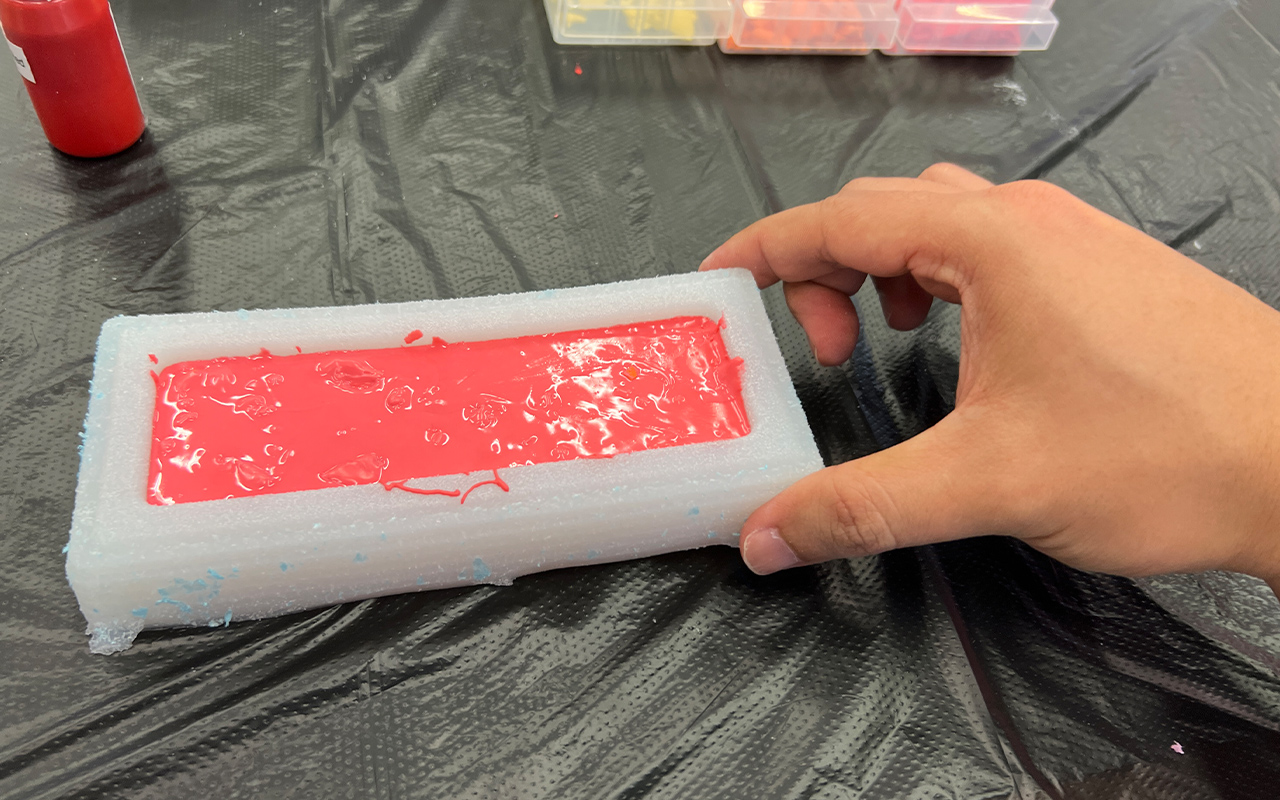
After pouring, you should shake and tap all the sides of the silicon mold so that any air that was trapped within the silicon mold will start to surface up. After shaking and tapping for a few minutes, you can allow it to cure. A thing to note is that you may demold after 2 hrs of curing but you should not start to sand it immediately as it is still not fully cured according to the data sheet of AC100 Jesmonite.
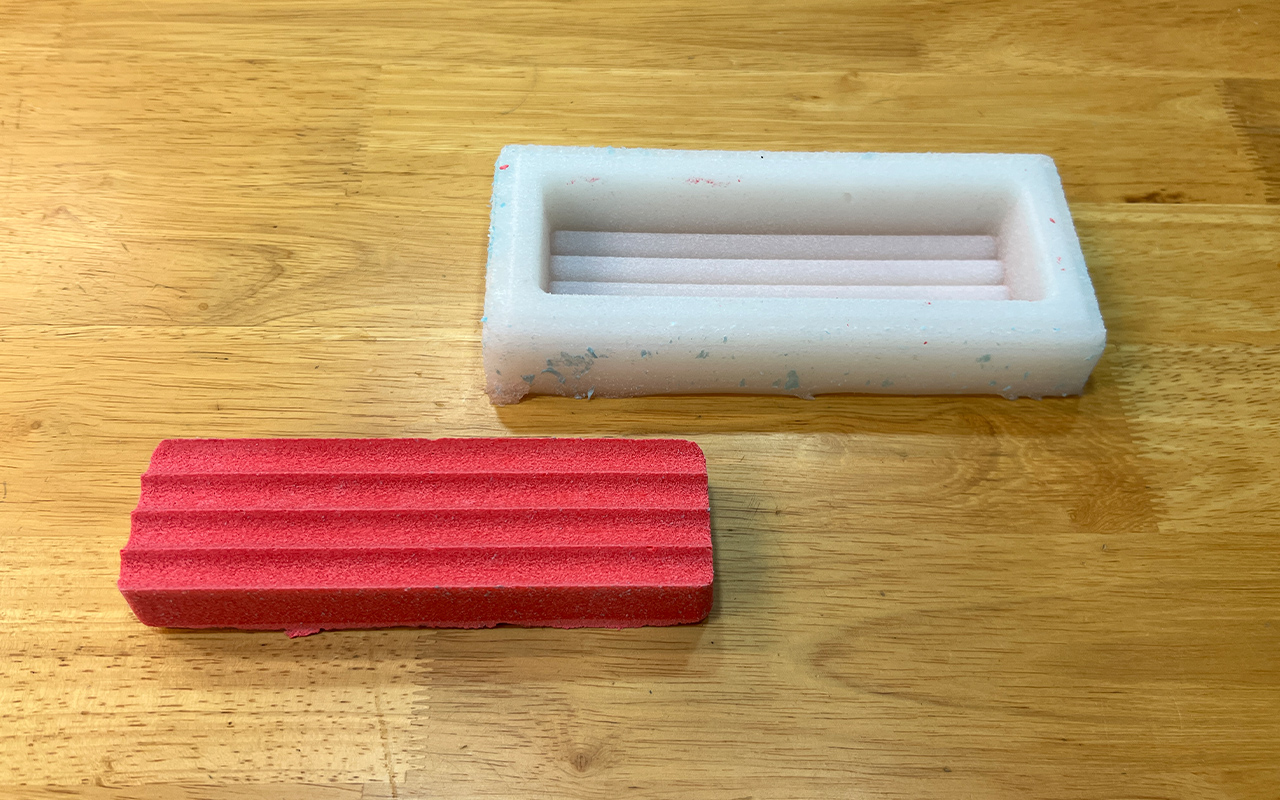
So I actually waiting for about 6 hrs before I demold the cast. Below is the image of the cast after 6 hrs of curing:
Due to time constriant, I cannot afford to wait for 24 hrs (which is the stated requirement timing for curing of jesmonite) to allow the cast to cure fully hence, I actually demold the part after 6 hrs of curing as shown in the image below which looks fine:
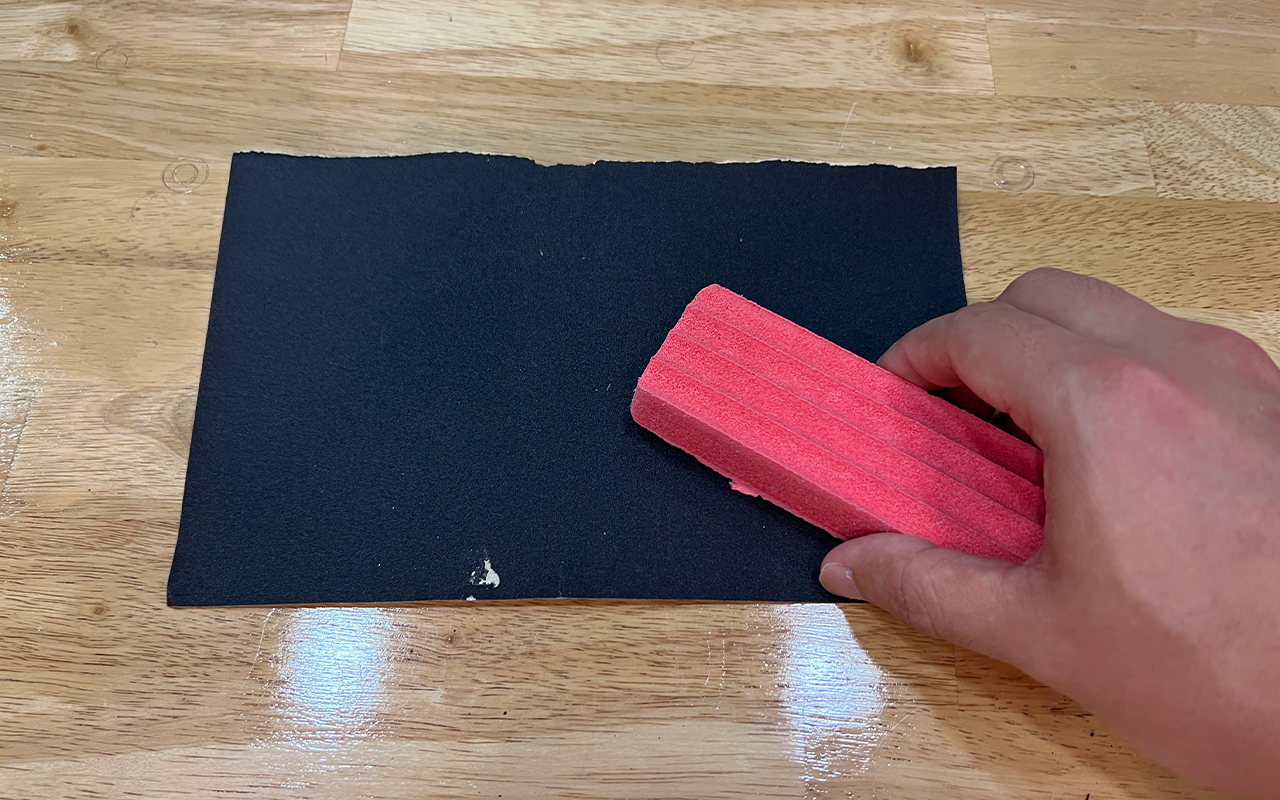
I then proceed to sand the cast with a 320 grit sand paper so as to acheive a smoother finishing and to remove some blue foam residue that are stuck on the surface of the cast.
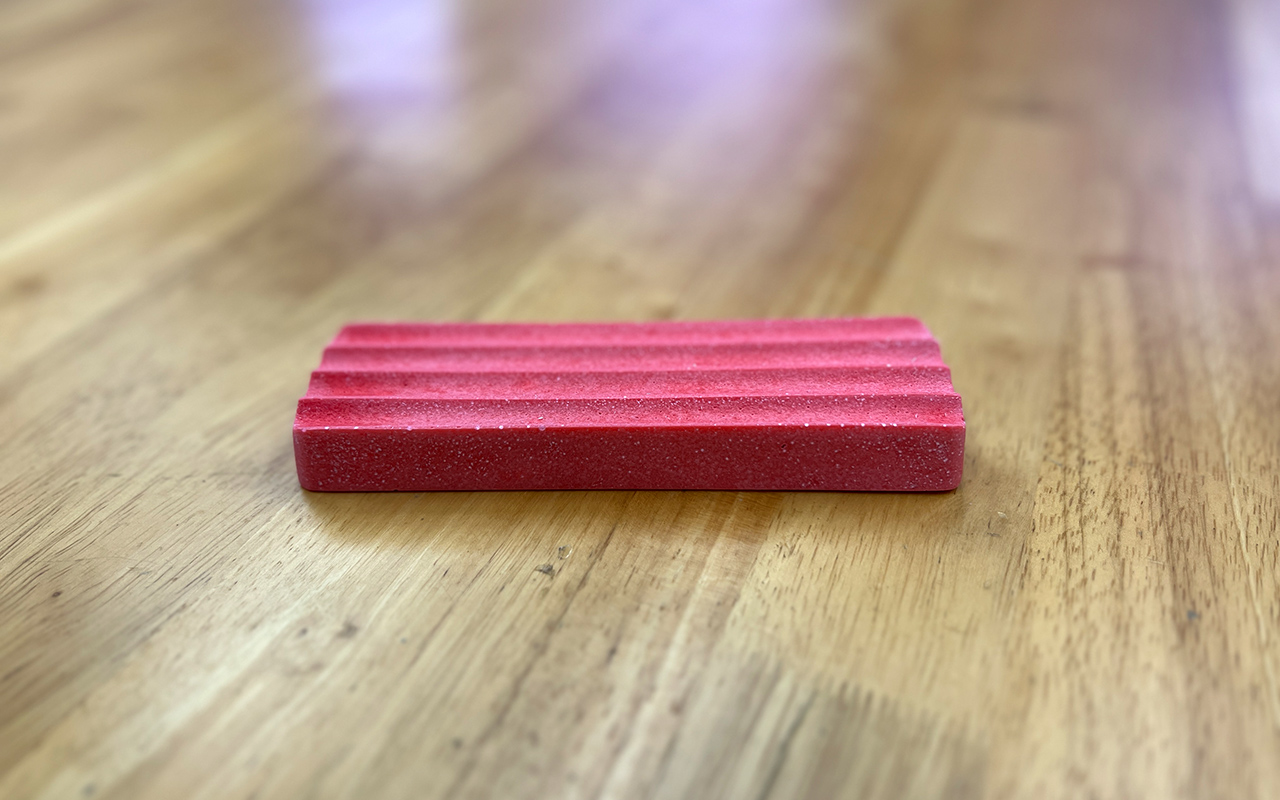
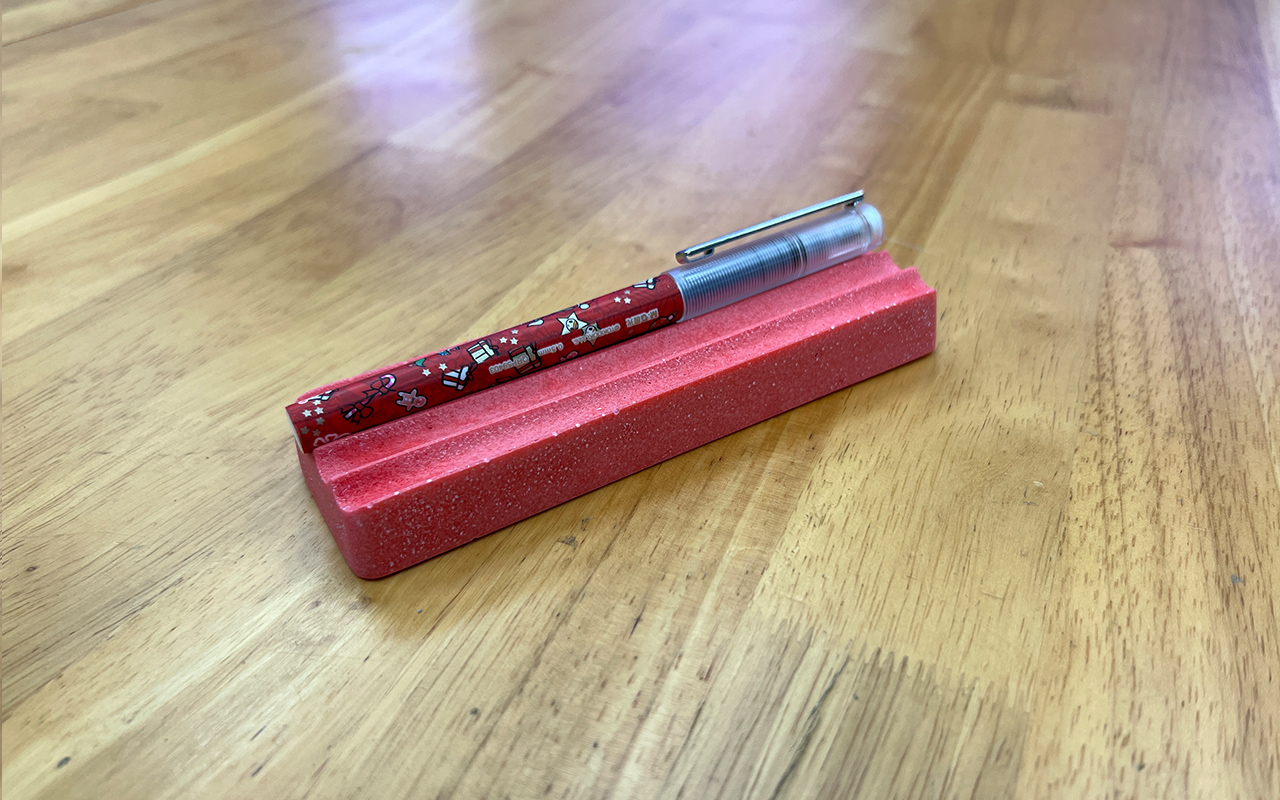
After sanding, this is how my pen/pencil holder looks like. It look pretty amazing after the sanding. I really like the texture of Jesmonite as it portrays a natural look, similar to the texture of a Quartz and Marble stones.
And this is my pen/pencil holder in action. Probably a nice idea for sourvenir gifts with different colours and texture effect.
Last but not least, I am attaching the MSDS of Silicon Rubber as well as Jesmonite that I have use for this week molding and casting assignment for references:
Reflection
It was a fun week in playing with CNC milling and casting Silicon but due to a shortage of time, I did not manage to finish the casting before the start of week 13 but eventually finish it after another 4 days. I hope I have more time to test with various casting materials such as Smooth-On Silicons and even chocolates! But nonetheless, it was a fruitful week of jesmonite casting.