4. Embedded Programming
This week I started to work on embedded programming that includes using Seeed Xiao RP2040 Micro-Controller and Arduino Processing Language. The group assignement for this week is to compare the performance and development workflows for different micro-controllers architectures. There are 4 members in my group and each of us are working on a different micro-controller.
You can access the group assignment HERE.
Seeed Xiao RP2040 Micro-Controller
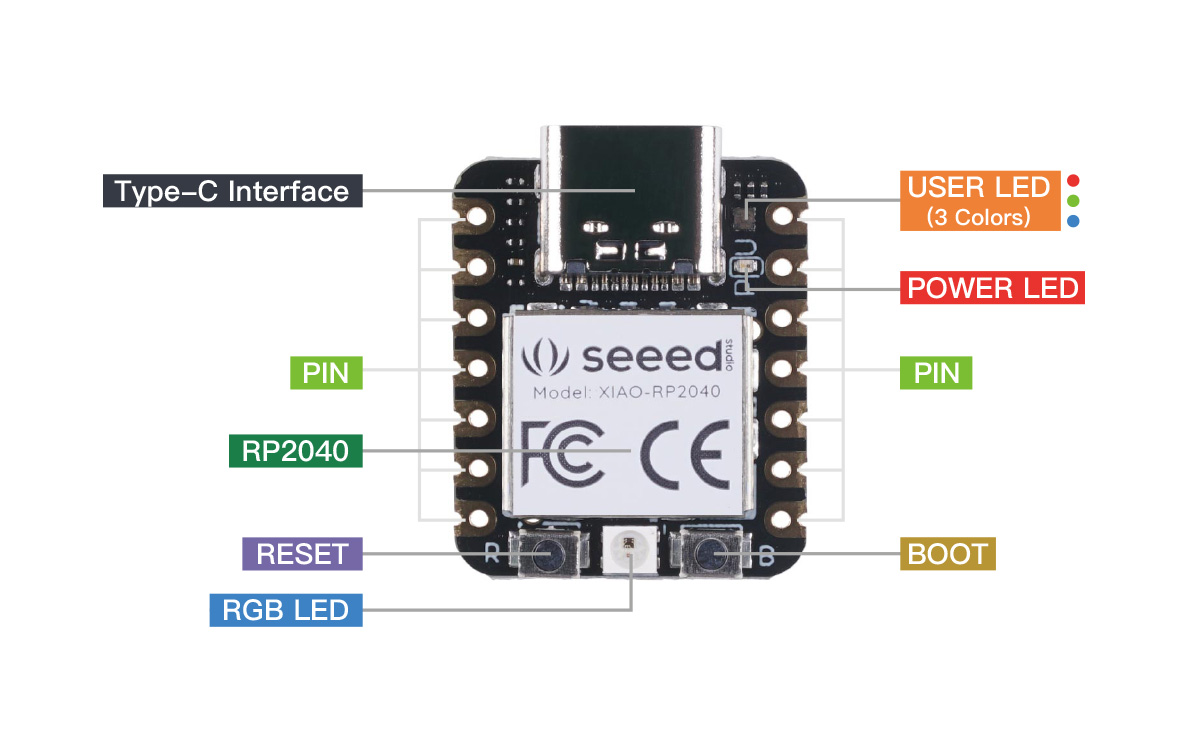
Today I am going to kickstart on learning more about embedded programming which is not something new to me as I have some prior experiences in Arduino programming but have not really go in-depth into it. Base on the assignment, I am suppose to read up the data sheet on the micro-controller that I am going to work on and in this case, I am going to use the Seeed Xiao RP2040 micro-controller and below is an anatomy image of the micro-controller with its components:
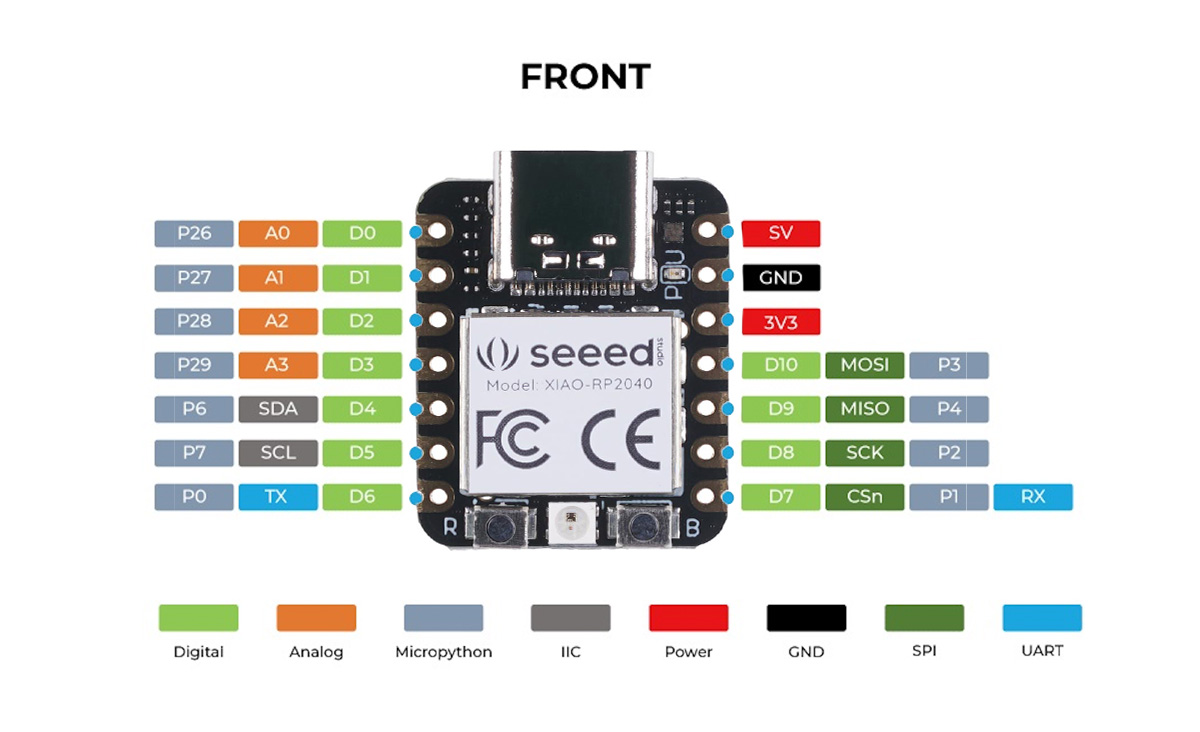
It has the following specification as stated in the table below:
| Parameter | Description |
|---|---|
| CPU | Dual-core ARM Cortex M0+ processor, flexible clock running up to 133 MHz |
| Storage | 264KB of SRAM, and 2MB of onboard Flash memory |
| I/O PINs | 11 digital pins, 4 analog pins, 11 PWM Pins |
| Interface | 1 I2C interface, 1 UART interface, 1 SPI interface, 1 SWD Bonding pad interface |
| Power Supply & Downloading Interface | USB Type-C interface |
| LEDs | 1 user LED, 1 power LED, two LEDs for serial port downloading, 1 RGB LED |
| Button | 1 RESET button, 1 BOOT button |
| Power Pads | For the battery power supply |
| Software Compatibility | Support Micropython / Arduino / CircuitPython |
| Dimensions | 21mm x 17.5mm |
| Interface | 1 I2C interface, 1 UART interface, 1 SPI interface, 1 SWD Bonding pad interface |
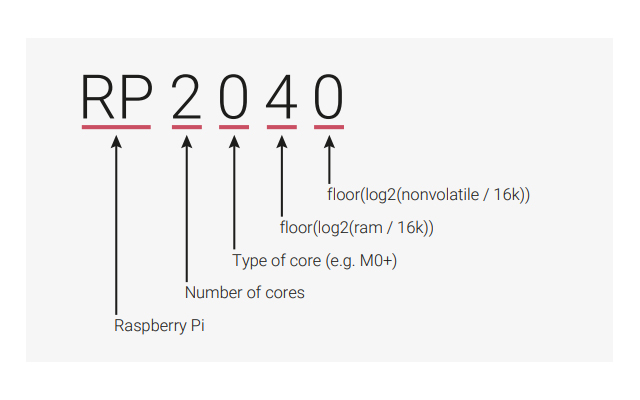
It is interesting to understand why the micro-controller chip is called RP2040 even though I do not fully understand all of it. They are actually base on a post-fix numeral on RP2040 which represent the following as shown below and in the image:
- Number of processor cores (2)
- Loosely which type of porcessor (M0+)
- Floor(log2(ram / 16k))
- Floor(log2(nonvolatile / 16k)) or 0 if no onboard nonvolatile storage
I then read up and realize that RP2040 is a low-cost, high performance micro-controller device with flexible digital interfaces with many key features such as:
- Dual Cortex M0+ processor cores, up to 133 MHz
- 264 kB of embedded SRAM in 6 banks
- 30 multifunction GPIO
- 6 dedicated IO for SPI Flash (supporting XIP)
- Dedicated hardware for commonly used peripherals
- Programmable IO for extended peripheral support
- F4 channel ADC with internal temperature sensor, 0.5 MSa/s, 12 bit conversion
- USB 1.1 Host/Device
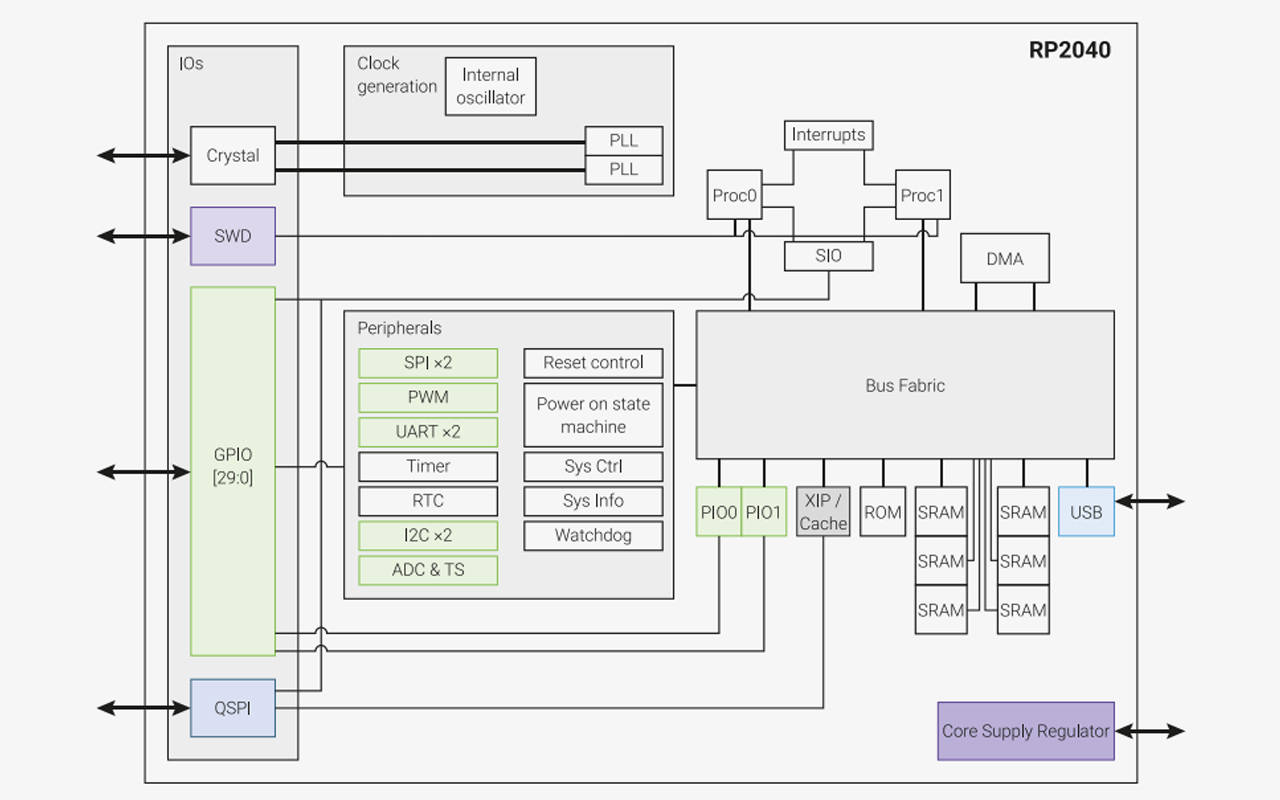
The RP2040 chip has a dual M0+ processor cores, DMA, internal memory and peripheral blocks connected via AHB/APB bus fabric as shown in the schematic drawing:
There are actually a ton of information stated in the data sheet of the RP2040 micro-controller and to be frank, more than 90% of the information are foreign to me. Nevertheless, I still manage to understand the basic in terms of the correspondence pin assignment of Xiao RP2040 for arduino IDE processing programming. Next, I will try to do a simple program code that uses Adafruit Neopixel with Xiao RP2040. But before that, I will need to install the arduino IDE software first.
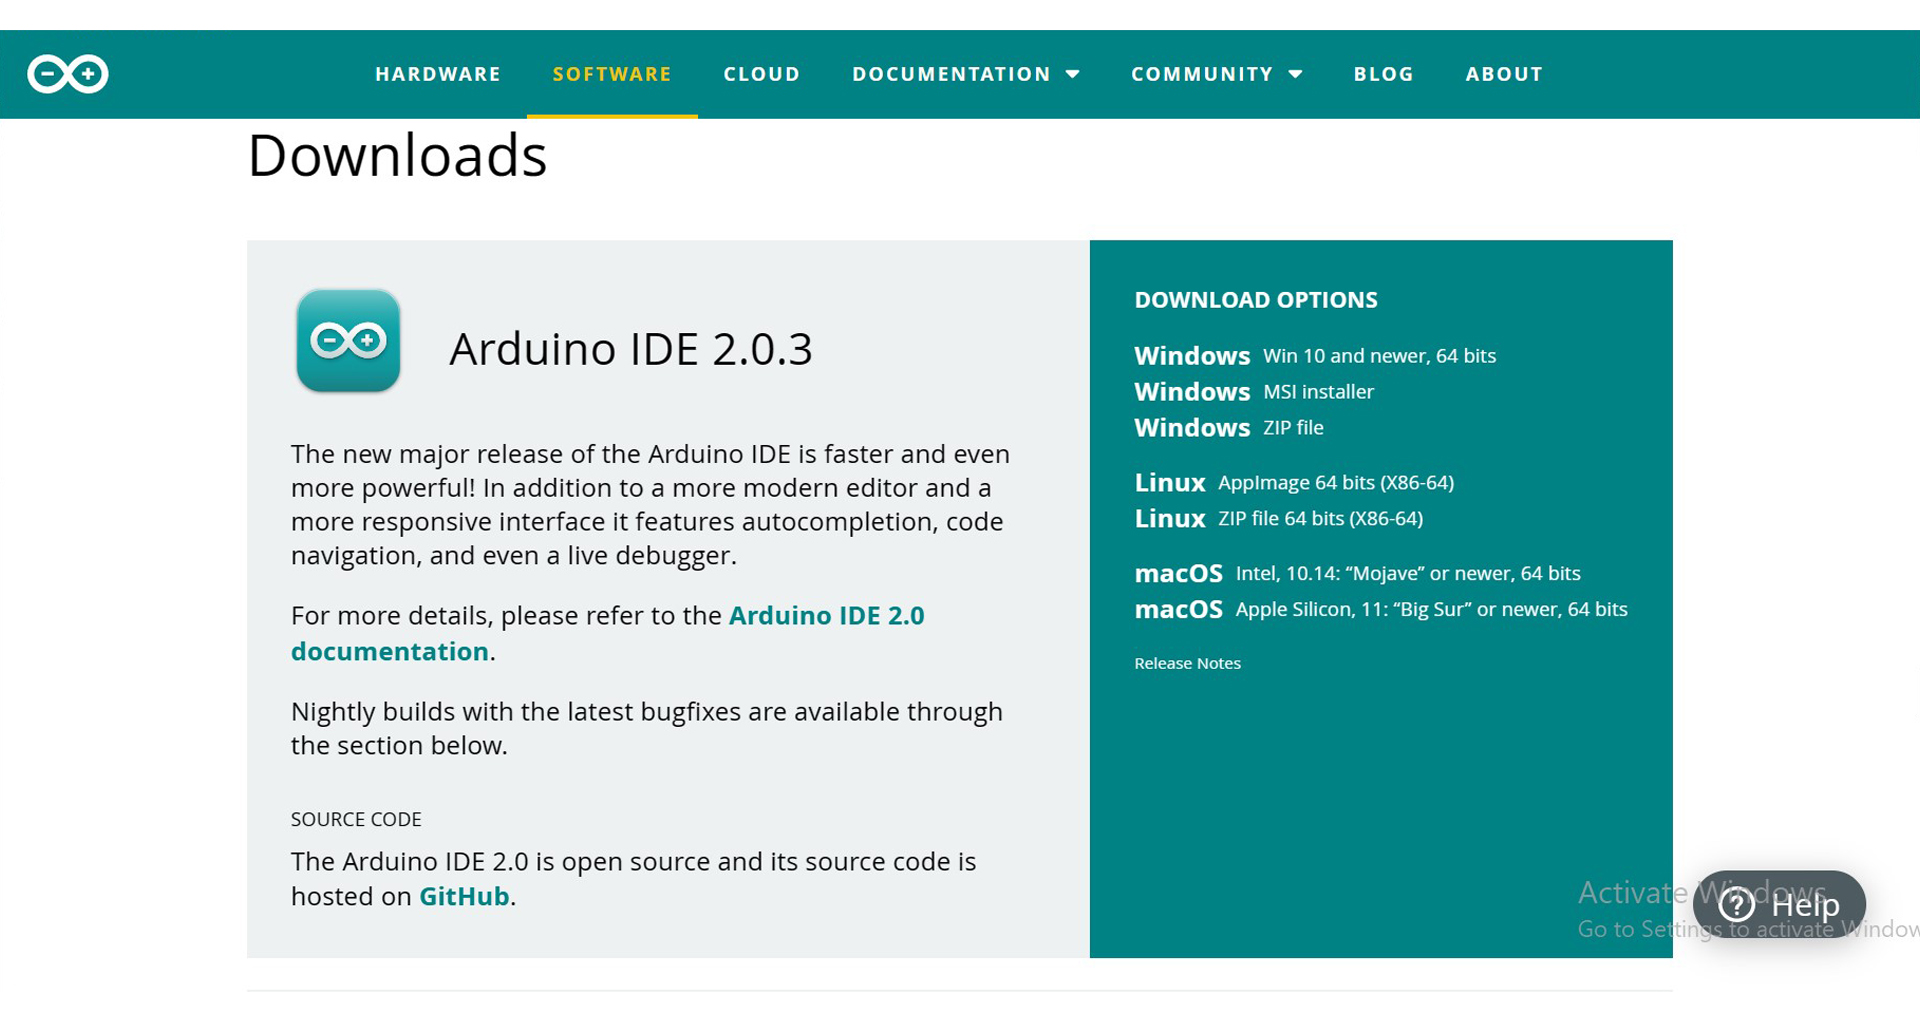
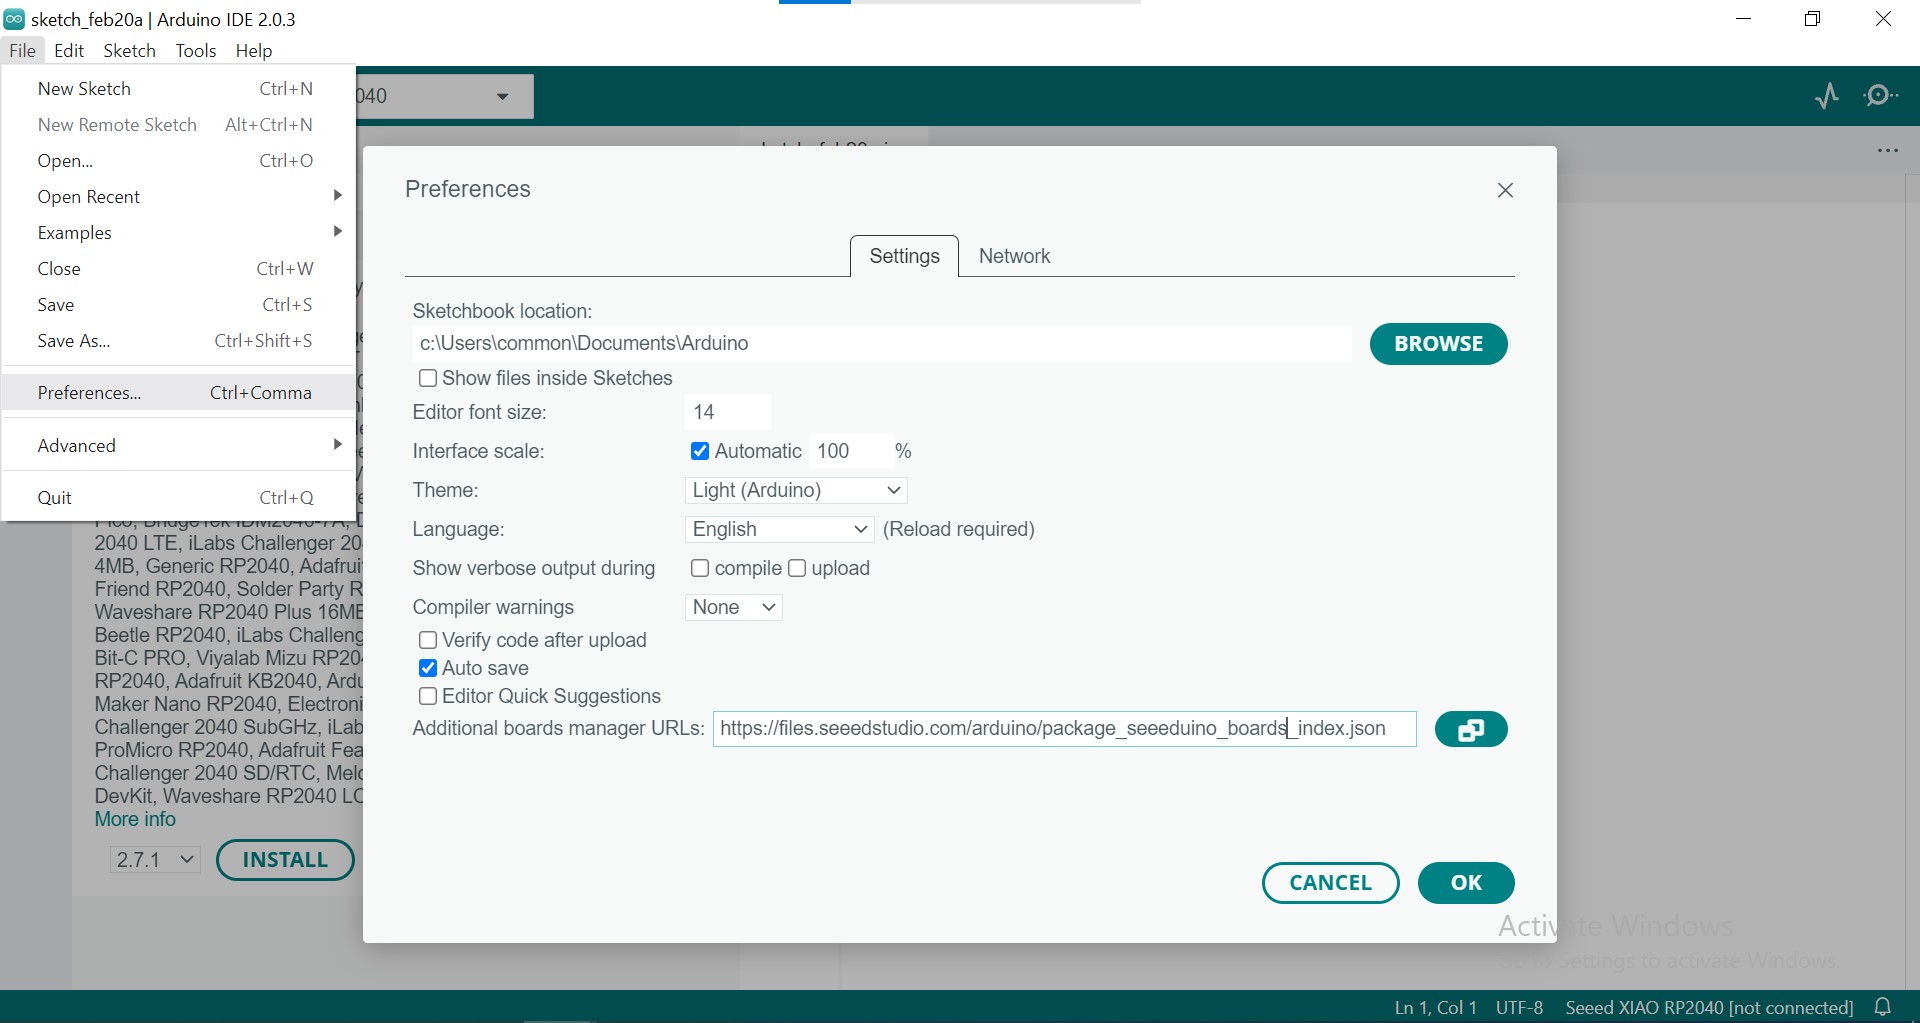
After Installing the arduiono IDE software, I need to go to the File Tab and look for Preferences and then add the Seeed Xiao RP2040 board URL so that I am able to install the board and use it for programming.
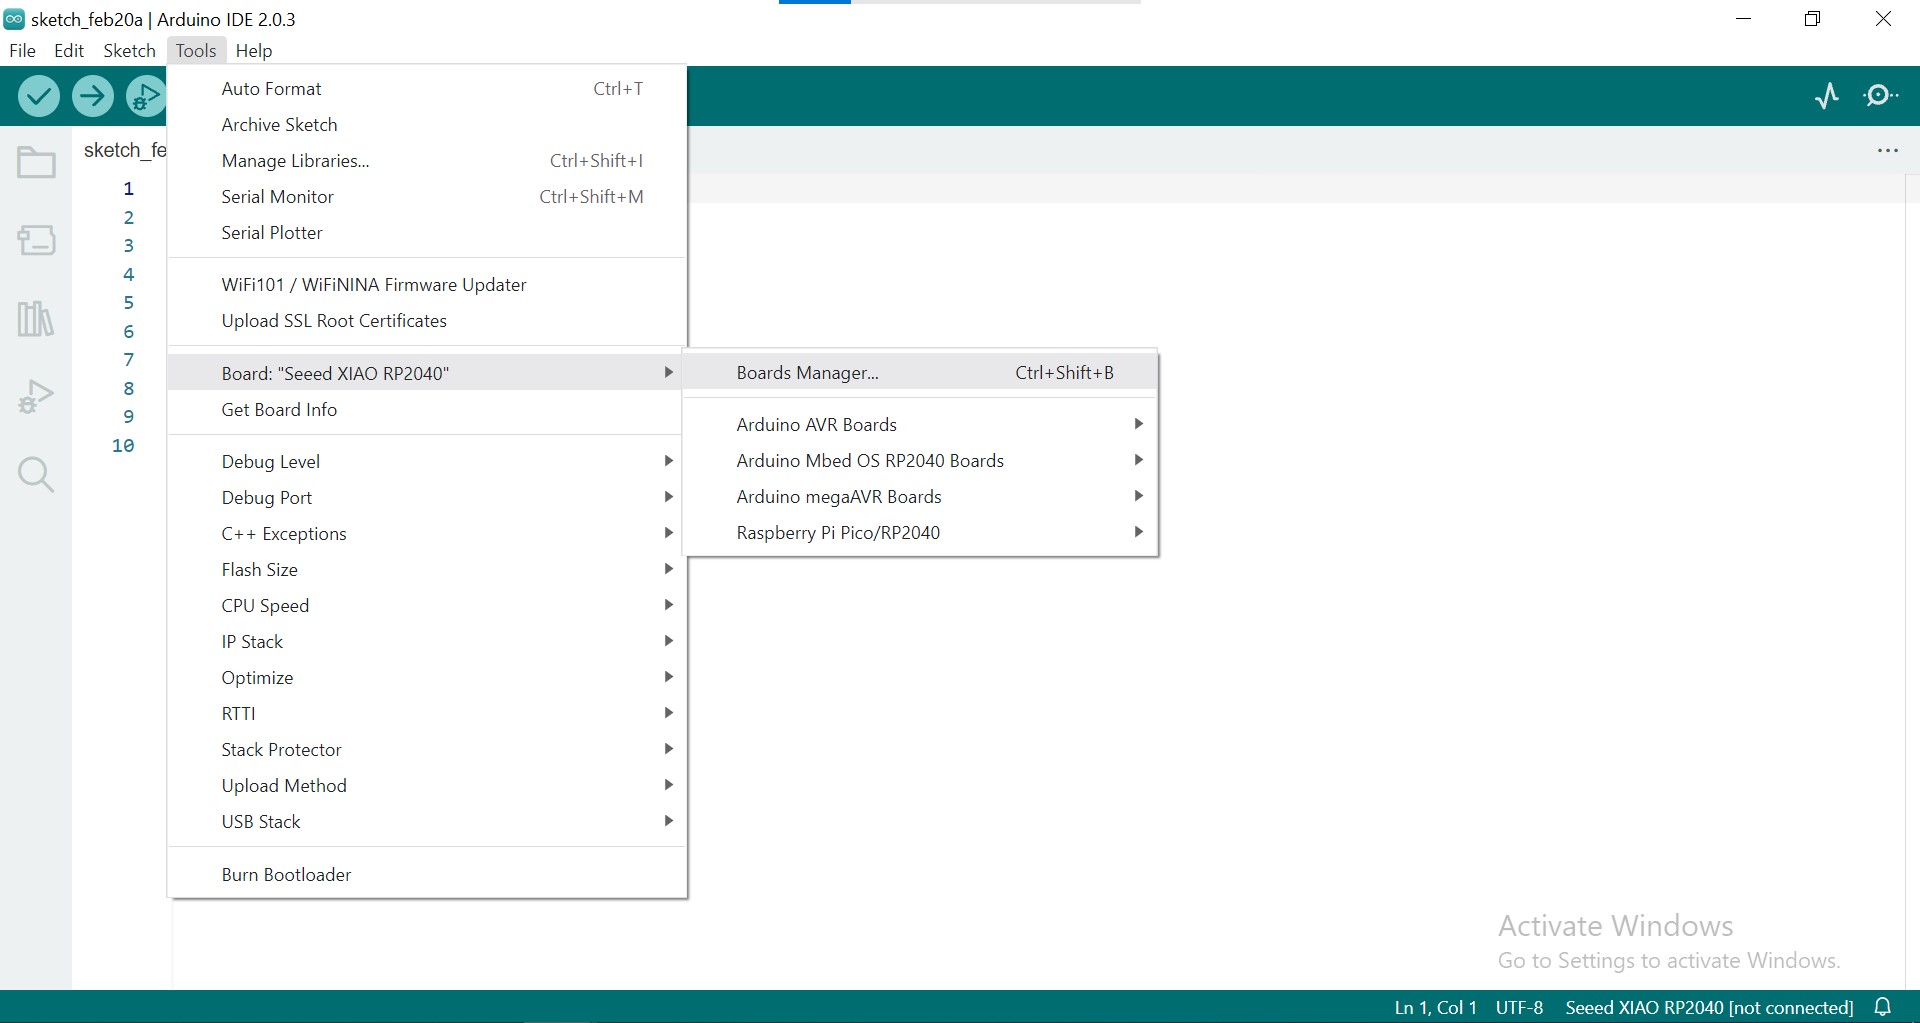
Once I have added the URL link, I am able to go to the Board Manager under the Tools Tab and look for Xiao RP2040 board and install it, afterwhich I will be able to see a new board "Seeed XIAO RP2040" appear and eventually select it to start my programming.
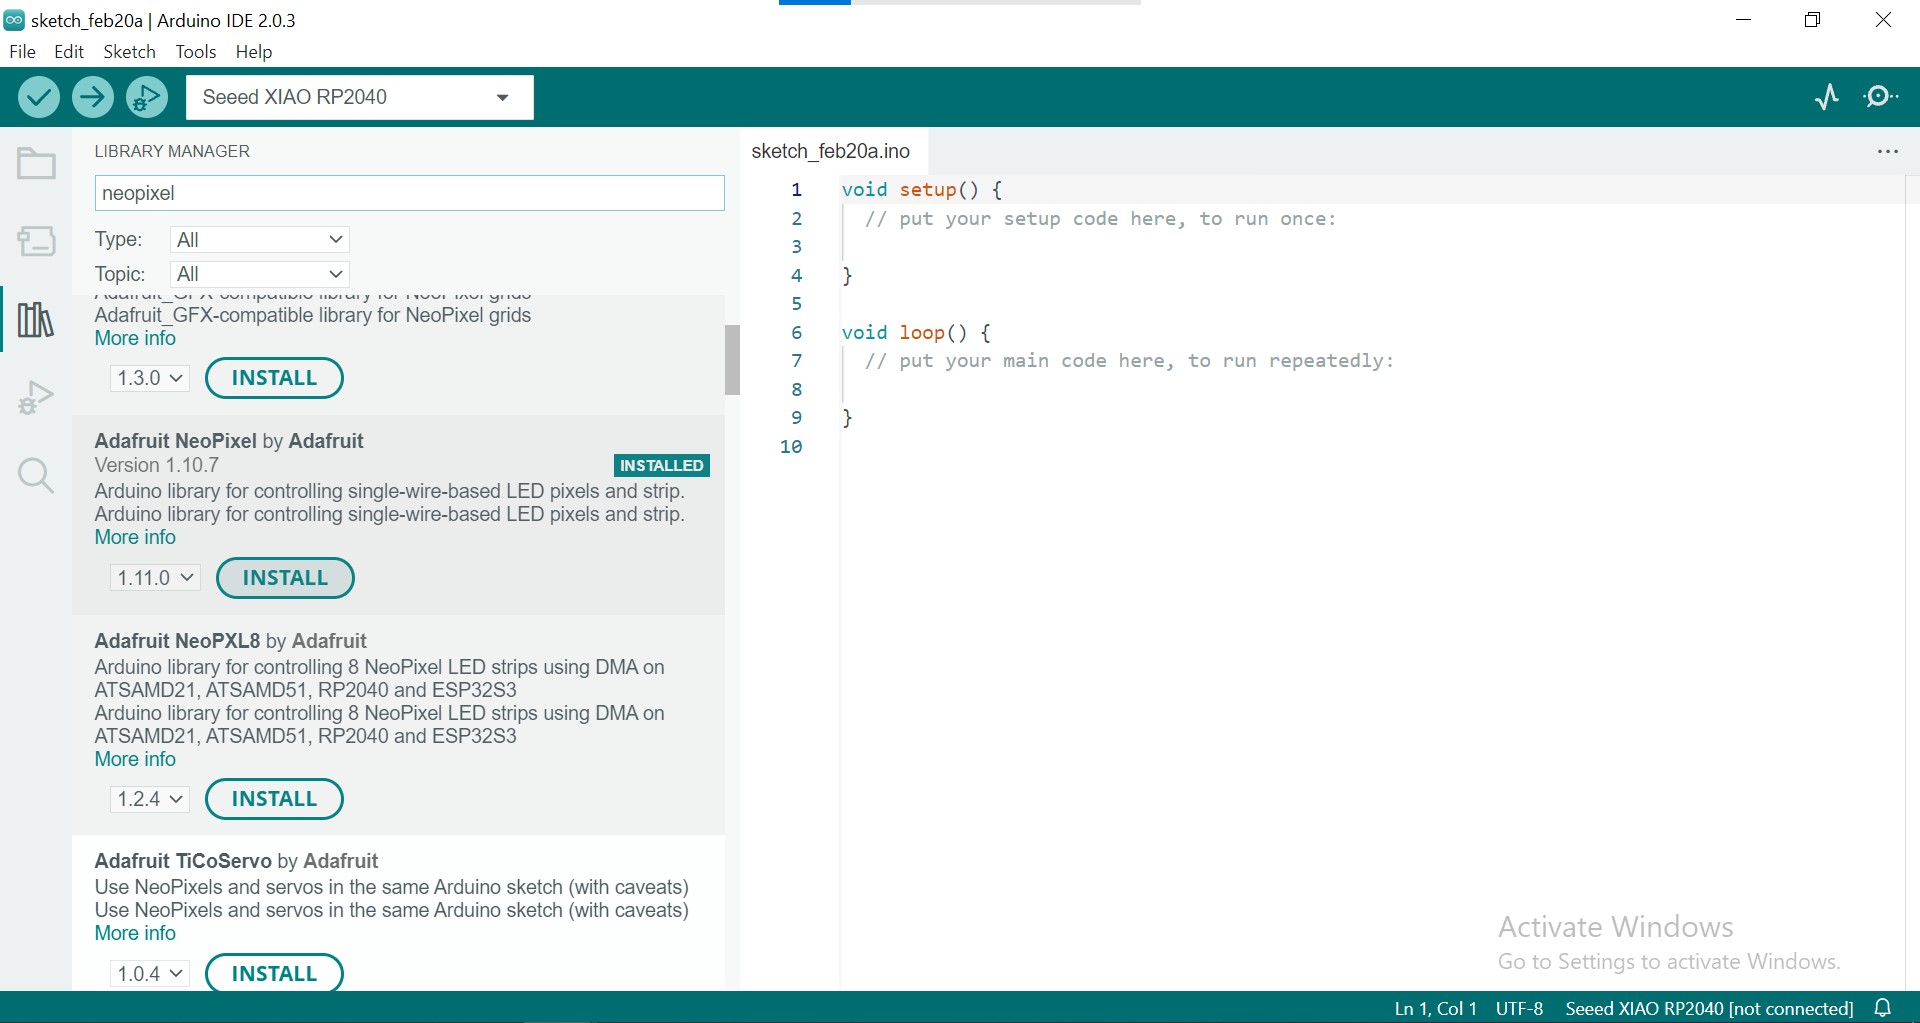
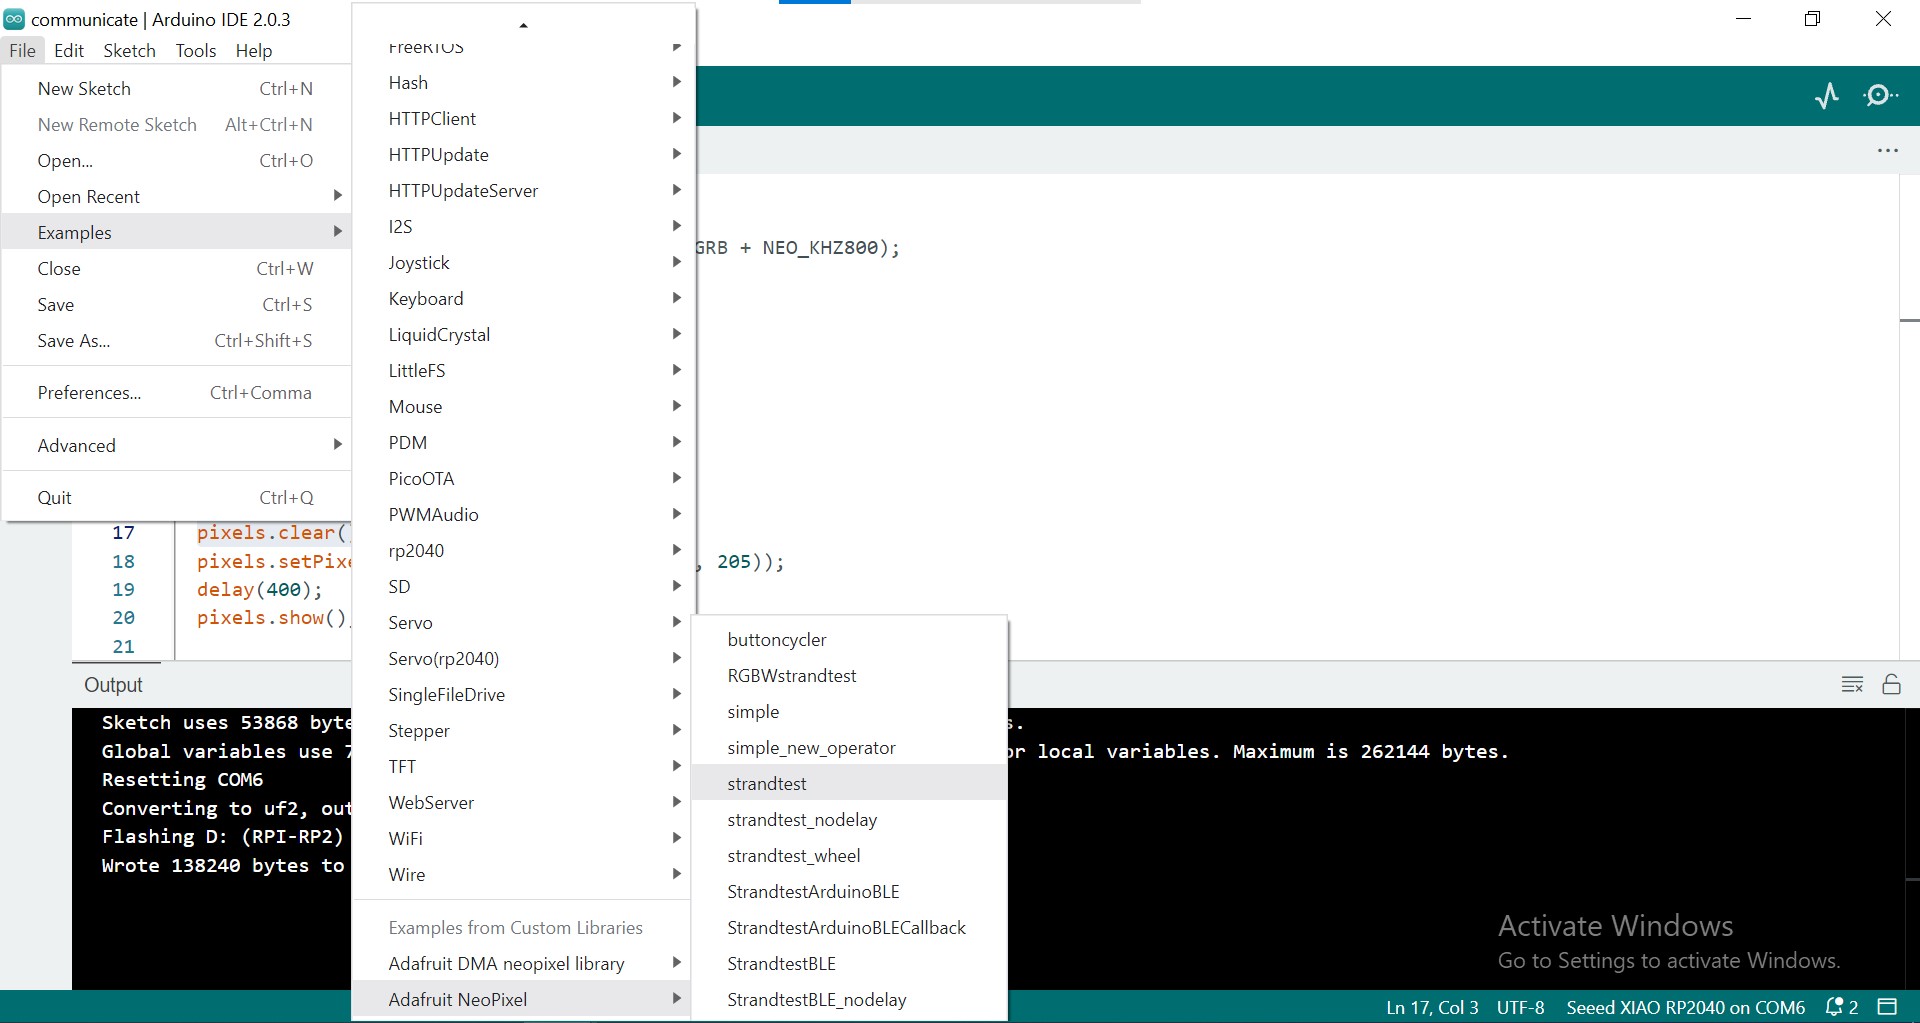
last but not least, I will also need to install Adafruit NeoPixel under Library Manager which can be found under the Tools Tab. The reason that I need to install the Adafruit Neopixel library is because I will be going to use one of the Neopixel Strandtest example as a stepping stone for my programming journey and eventually going to use it in my final project too which is to incorporate NeoPixel into my headphone design.
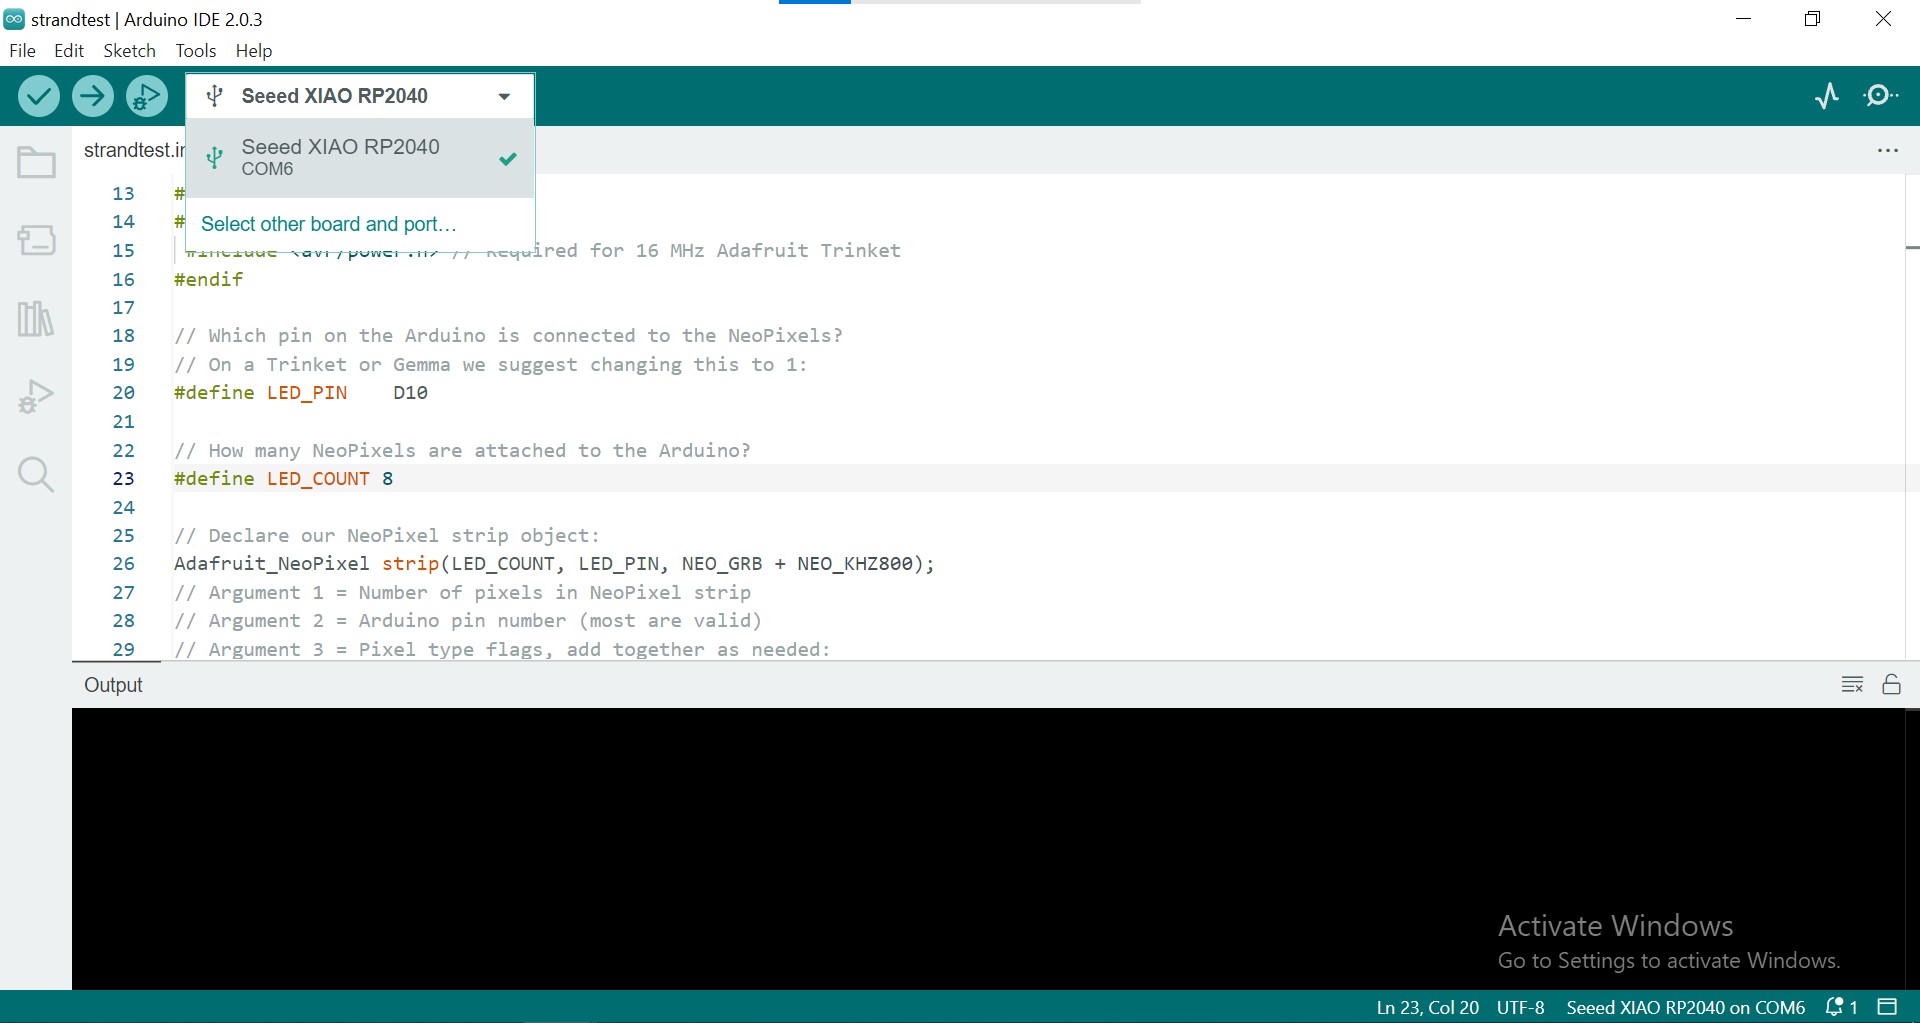
The next step is to select the correct Port otherwise your code will not be loaded to the micro-controller. Usually, when you connect your micro-controller to your computer, it will auto-detect the port and appear in the Board and Port Box. However, if it does not appear, you can still manually select the Port under the Tools Tab.
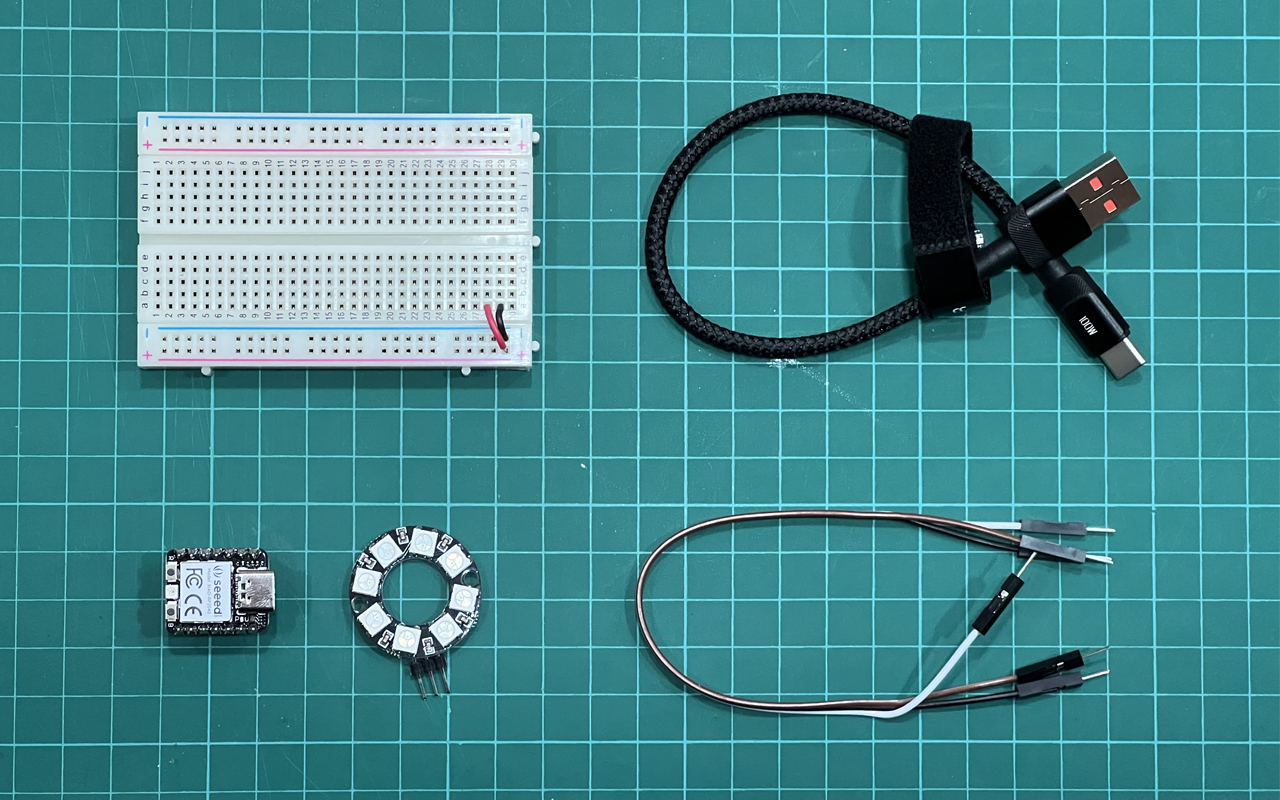
Prior to connecting the micro-controller, I have already prepare all my circuit components as shown in the image below:
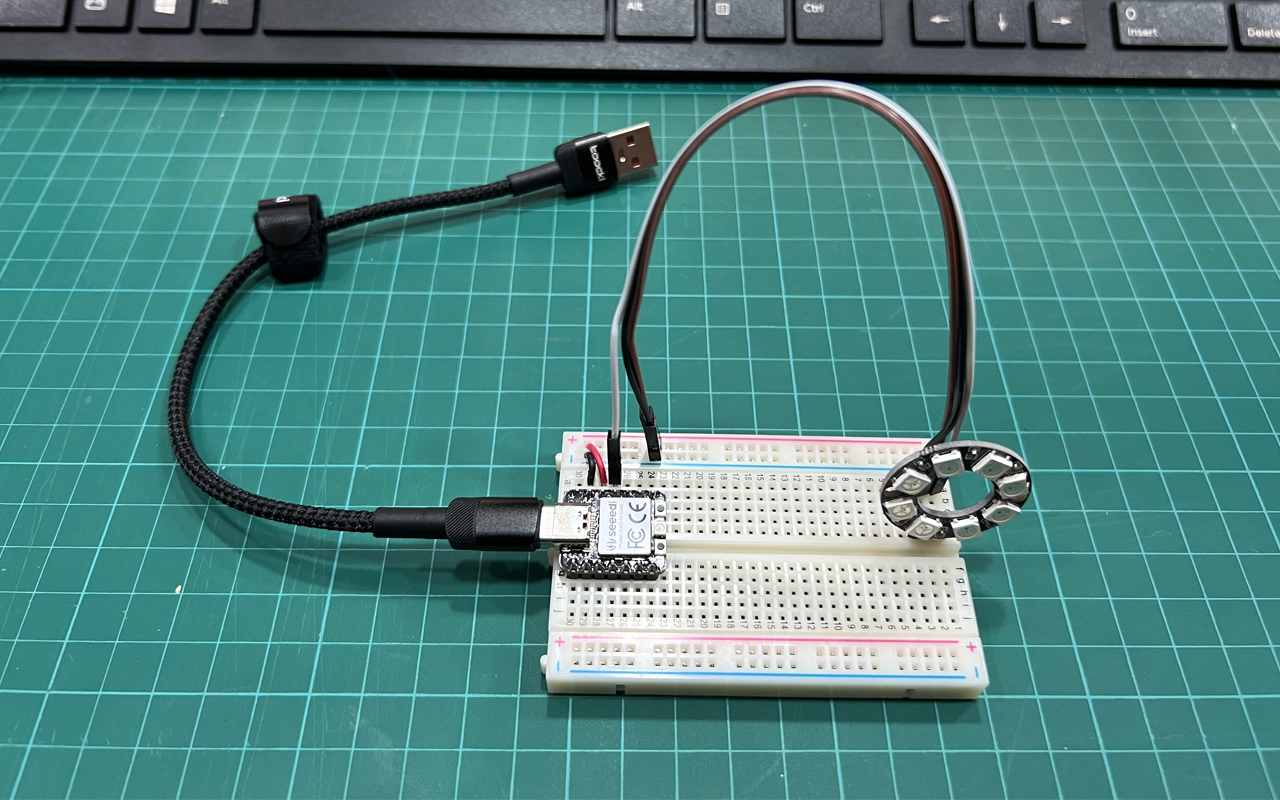
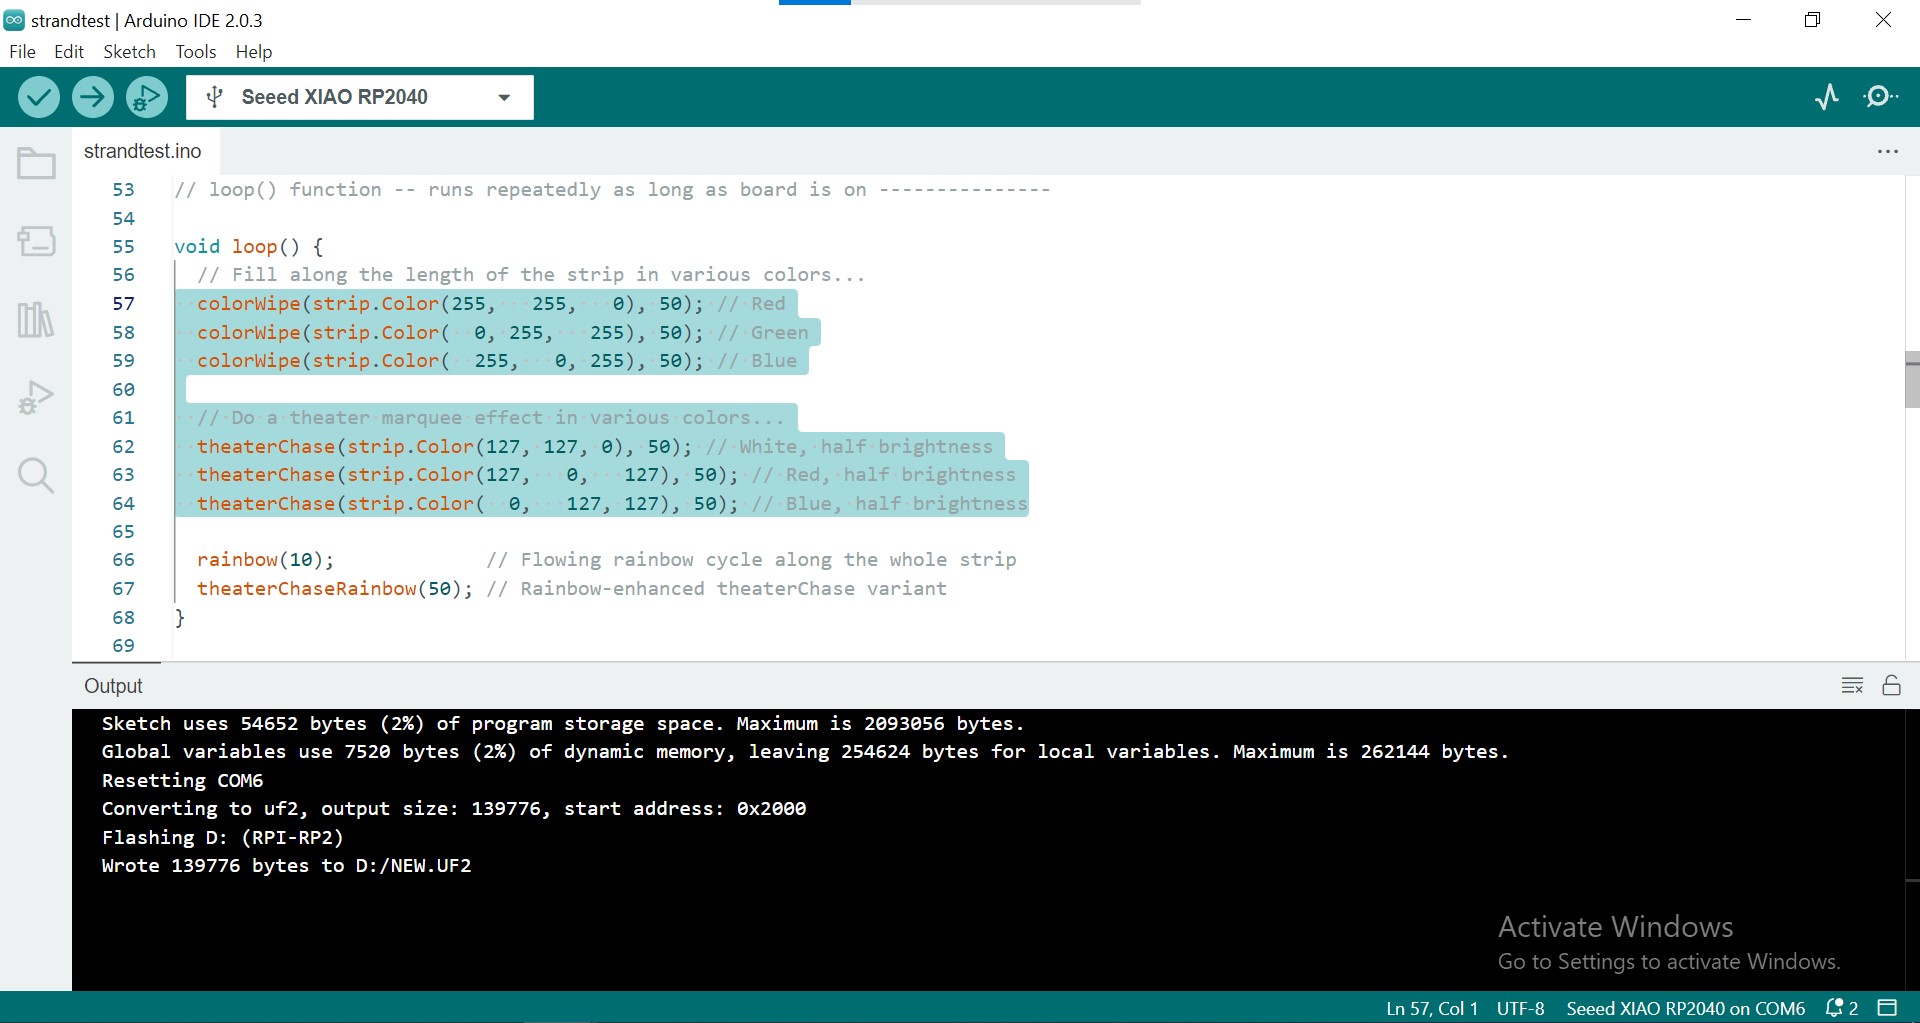
I then connect the NeoPixel to the Xiao RP2040 micro-controller using a breadboard. I have assigned the digital Pin 10 to my NeoPixel for the Strandtest and upload the code. What appear next is that the NeoPixel will light up and flashes in RGBW raindow color.
I then tried to understand how the code works and play around with the color values of the NeoPixel and change it from RGBW (Red, Green, Blue, White) to YMCW (Yellow, Magenta, Cyan, White) and the code works well too.
After playing around with the code using NeoPixel, I began to understand better on how the programming construct works. I then decide to work on my final project coding which is to use NeoPixel and a Sound Sensor that reacts to the beats of the music that was produce out of my headphone design. I thought it will be cool to have a lighting effect on my headphone while it blinks & fades according to the music rhythm & beats. So I manage to get a Sound Sensor as shown in the image below:
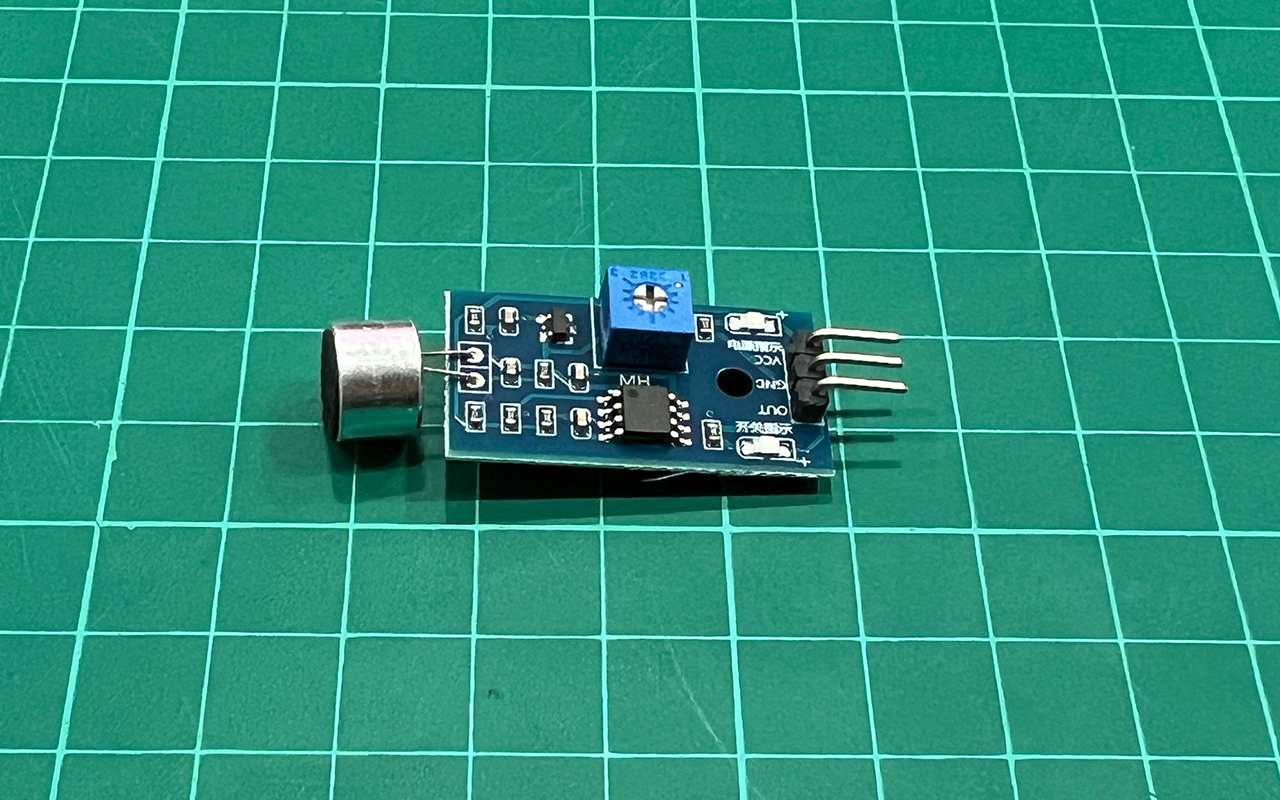
This Sound Sensor is a high sensitivity sound detection module and it is good for my headphone project. It also has the following features as stated below:
- Can detect the intensity of the sound environment
- Working voltage is 3.3V to 5V
- Output form: Digital switch output (0 and 1)
- Has a fixed bolt hole
- Easy to install
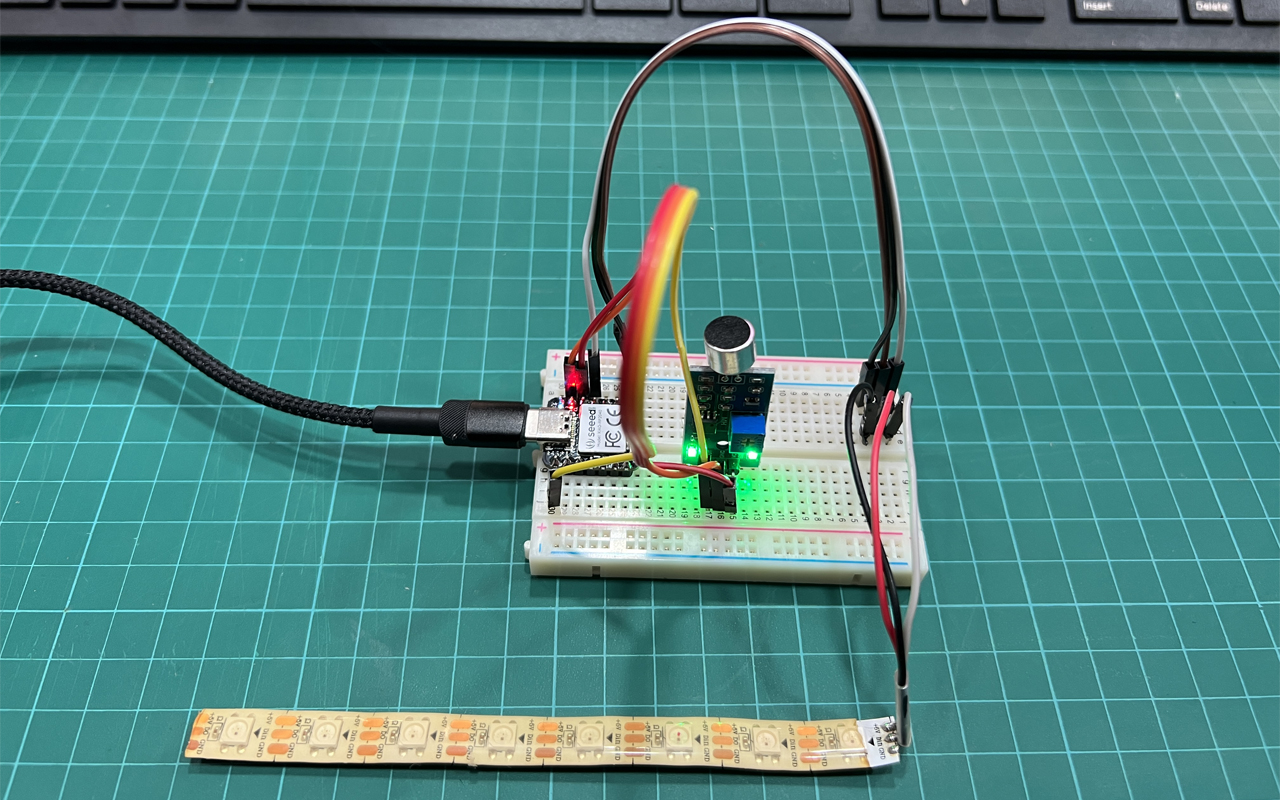
I then started to wire the Sound Sensor Module to the Xiao RP2040 micro-controller through the breadboard. I use back the same digital Pin D10 for my NeoPixel LED strip and assign the analog Pin A0 to the Sound Sensor's Signal Out Port.
The next step will be the most important of all, writing the code. To be frank I do not know where to start to make the Neopixel LEDs blinks and fades according to the music. I then seek references online to see if I can get any help and fortunately, I manage to come accross a simliar project code in Adafruit, an online resources website on arduino programming. I began to copy down the code and made some modification to it so that it suits my program and task that I wanted for my headphone project.
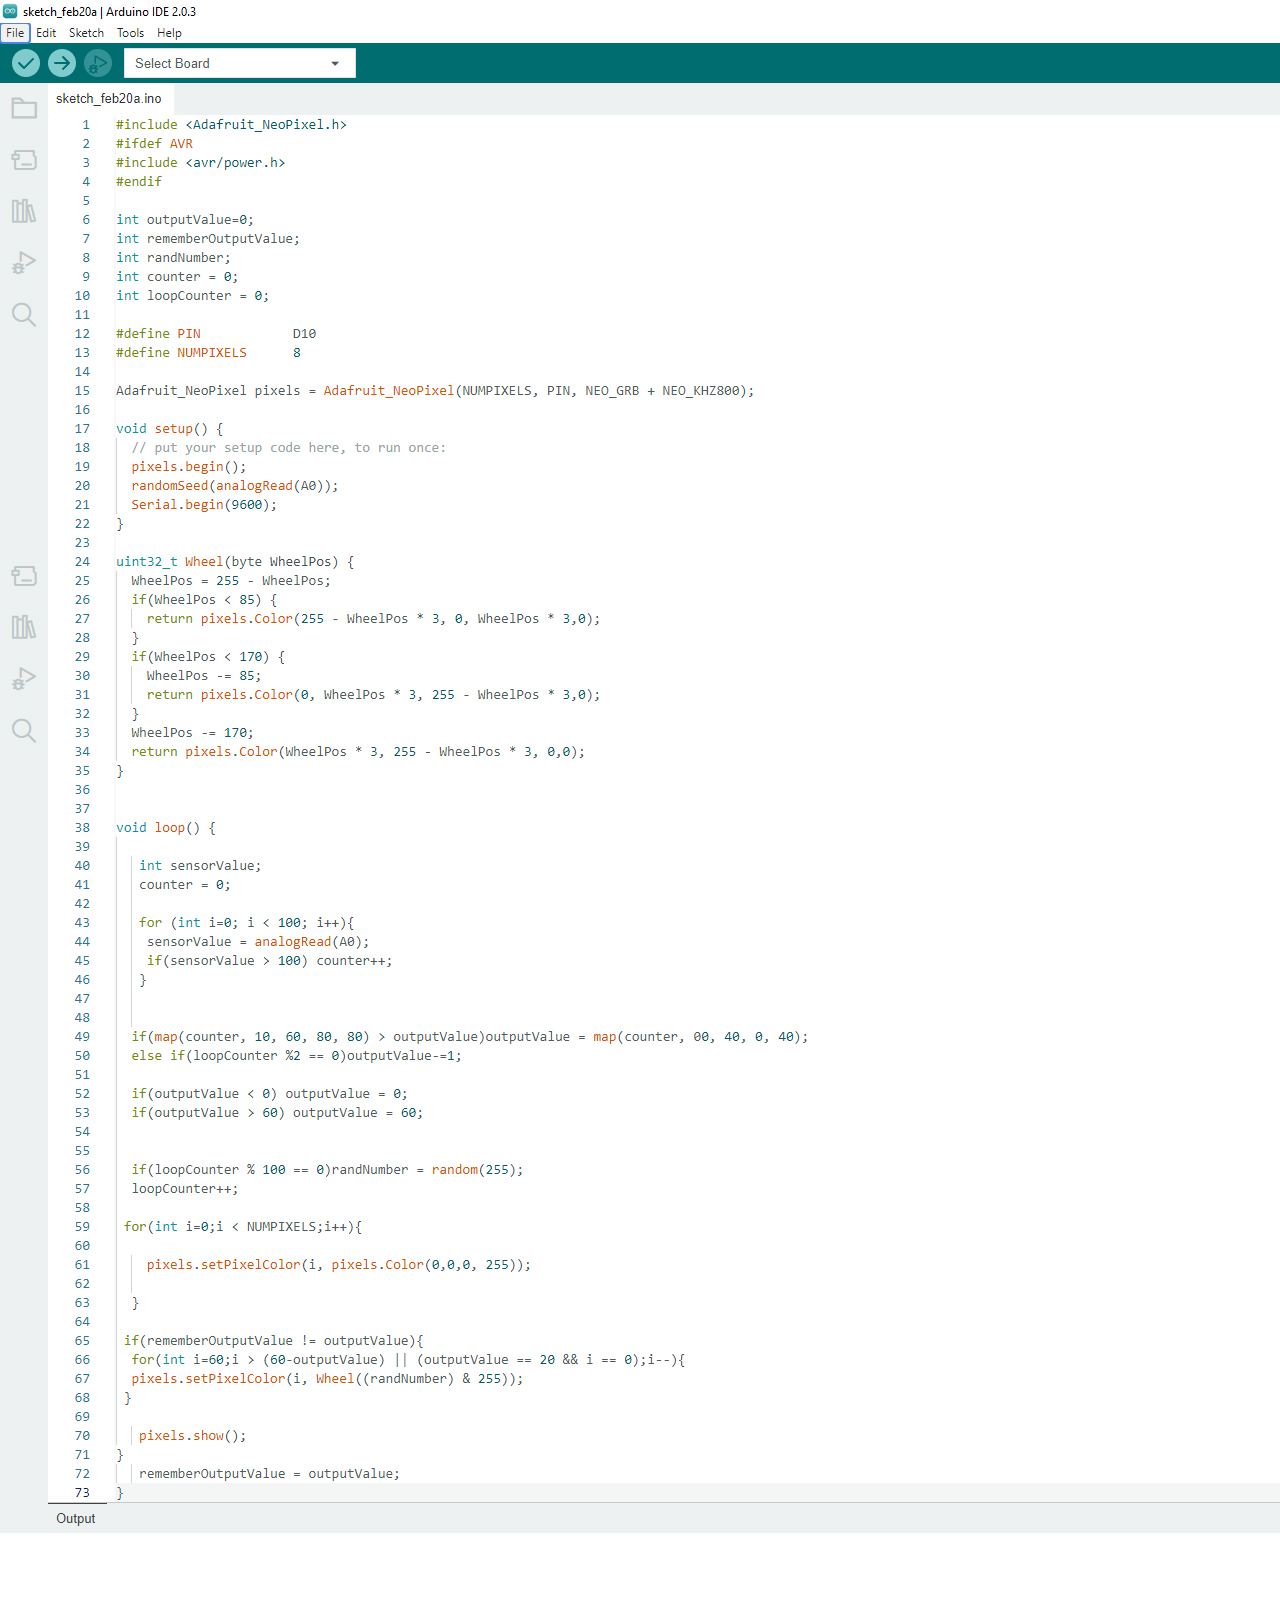
Lastly, its time to test my code and fortunately my code works PERFECTLY!
You may download the arduino IDE processing code HERE.
Reflection
It was so cool that I can get the Neopixel reacts to the beats of the music. I will probably need to adjust the code a bit more so that it is more sensitive to the music but for now it is all good. I really learn alot in terms of programming but I know that I have a long way to go. Nevertheless, It is still a work well done as I am able to continue improving on my knowledge for programming and hopefully capable to do more complicated stuff.