This week we will explore the different ways to program a Seeed Studio XIAO RP2040 Microcontroller and compare them.
This microcontroller has high performance because of its fast processor, it is low cost, and ease of use, and it is very small (according to the manufacturer). It can be used for AI projects, its Peripherals are programable, they can be customized.
We will compare how a given code in C++programming language done in Arduino, will compare to different language codes like:
Arduino is programmed primarily with text languages, whereas Micro:bit can also be programmed with block-based languages which are more suitable for kids or new code learners.
Microbit is coded via web or mobile apps. It can be programable with Make code, Python and JavaScript. They can be switched instantly in the same window.
The images below show the code for a Neopixel Rainbow, one in Arduino, the other in Micro:Bit Blocks.
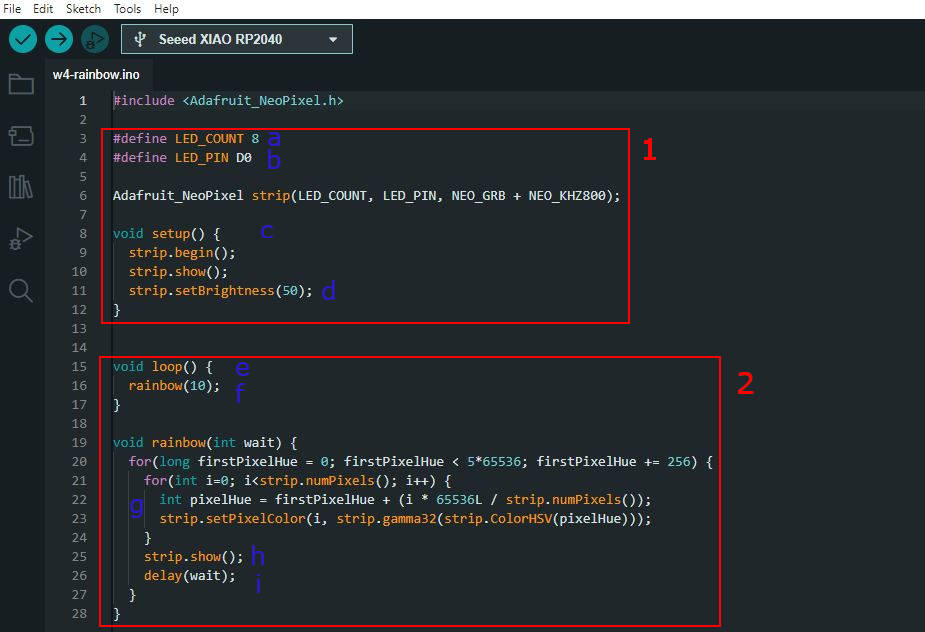
Neopixels Rainbow in Arduino
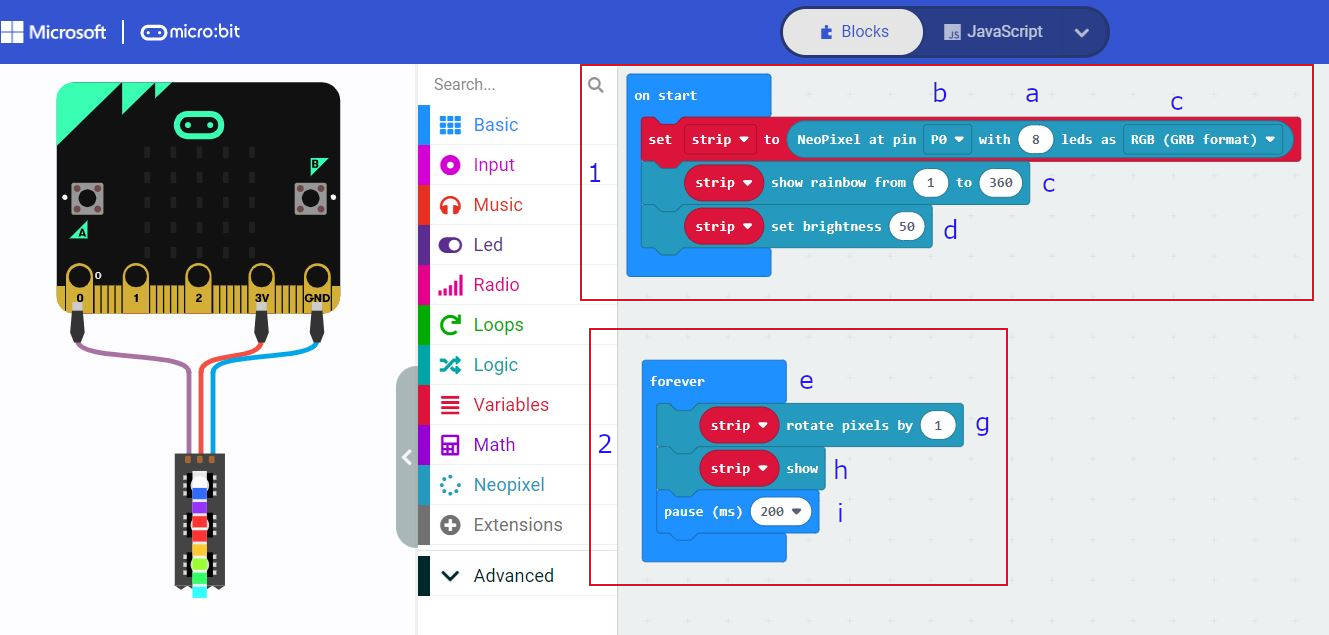
Neopixels Rainbow in Micro:Bit
Both programs have the same general structure:
CONCLUSION
Micro:bit Blocks is more intuitive as we don't have to write anything, we just have to drag the blocks from the menu on the left to the working area, then we play around with them to set the programming sequence of our project.
This interface has a visualizer where we can see the coding way before downloading it into the Microcontroller. It can be good for simple projects and useful for newbies in coding.
Arduino is a more advanced program and requires a bit more knowledge of the coding language, some of the command sets are defined by maths equations, so knowledge of them is very helpful, and it seems required.
Although Micro:bit has some blocks for maths too but again they are a bit more intuitive.
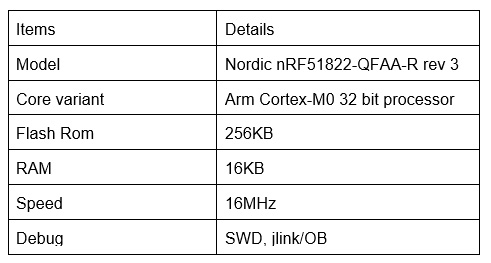
The specifications of micro:bit v1.5 is as shown below:
To create a project for micro:bit, we can go to the MakeCode website to create a project:
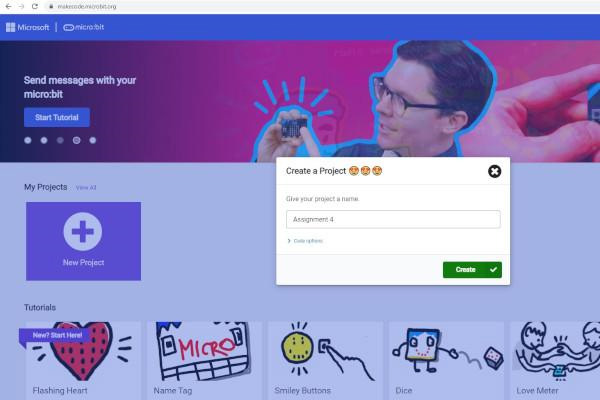
Once a new project was created, we were brought to the coding interface, where there was a choice to code in Blocks or JavaScripts. There was also a Micro:Bit simulation on the left side of the interface, allowing us to test the results of the code.
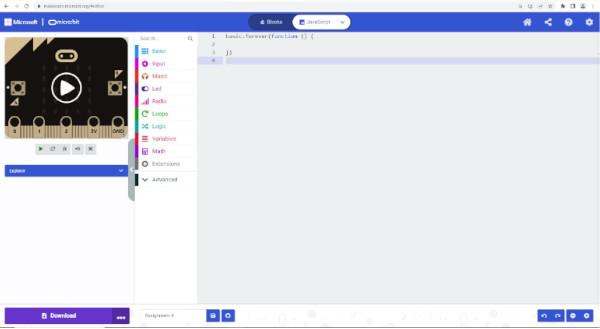
In this case, we decided to code in JavaScript. The interface provided a selection of pre-written codes that were categorized by functions. This made the coding easier as we did not have to code from scratch.

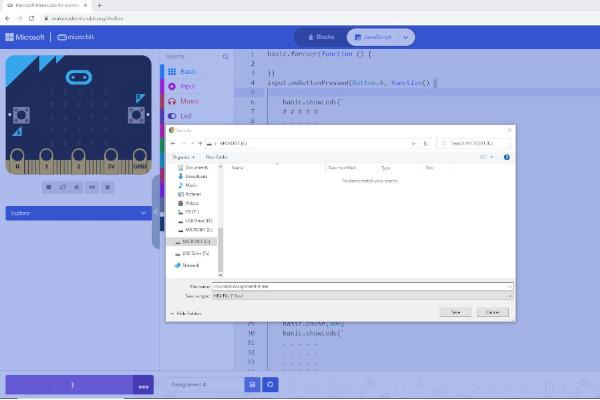
We coded for the LEDs on the Micro:Bit to “move” from the top row to the bottom row on the press of the button A. Once we were done coding, we downloaded the code as a .hex file onto the Micro:Bit that was connected to the computer via USB. The interface is able to detect the Micro:Bit and download it directly onto the board. The Micro:Bit in turn was able to detect we were downloading the .hex onto it and flashed its memory
After the downloading was completed, we tested the Micro:Bit. It worked according to how we coded:
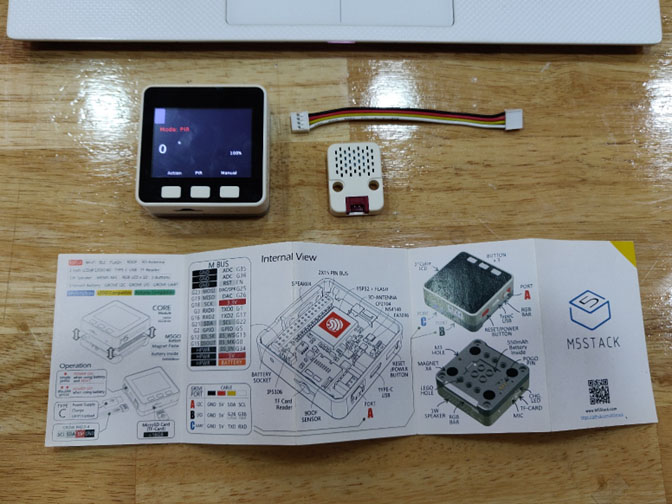
What is M5Go? It's a product manufactured by M5Stack- a technology company producing open-source development toolkit, including hardware, programming solutions and IoT platforms. It's relatively new to the industry founded by Jimmy Lai in 2017 based in Shenzhen. For a beginner like me, I find M5Stack is easy to jump right in and experimenting with your ideas by modifying the code in the plenty examples provided on UIflow (flow.M5Stack.com). The site is also developed and maintained by the company as part of the package.
The name M5Stack comes from the first major product they released- “5cm x 5cm” in dimension and “stackable” modules. Modules are just sensors and/or actuators put together by the company in the form of “5cm x 5cm block”. They have since moved on to even more compact (and lower cost) design- M5StickC and M5Stamp. The M5Stamp is like the Seeed Studio RP2040 in term of form factor.
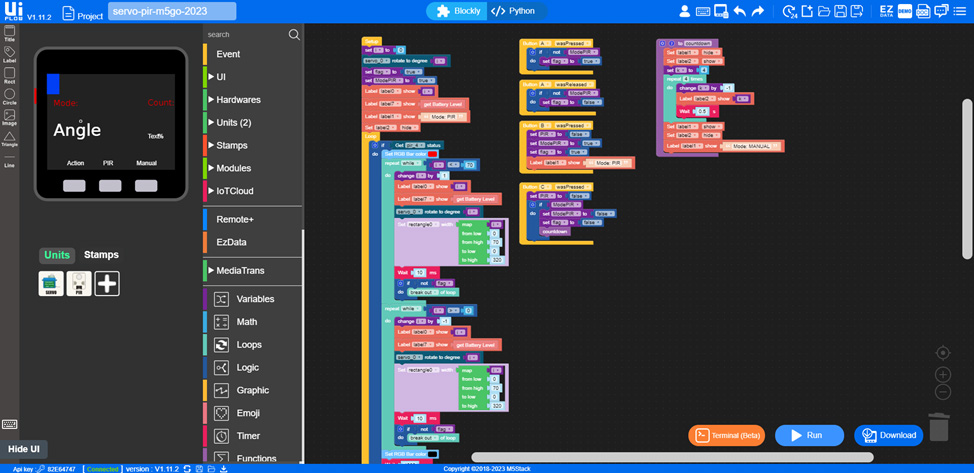
Uiflow is an online visual coding platform developed by M5stack. It's very similar to Makecode. It's one of easiest way to load code into the development kit. Below is the code I put together for the Panda (eating Bamboo). It reacts to people approach the cardboard panda (PIR sensor) and then send a signal to the other M5Go (Blinking). You could press the button on the second M5Go to trigger the Panda eating bamboo.
For the following exercises I am just going to demo how easy it is to light up an LED that come with M5Go. No jumper wire is required.
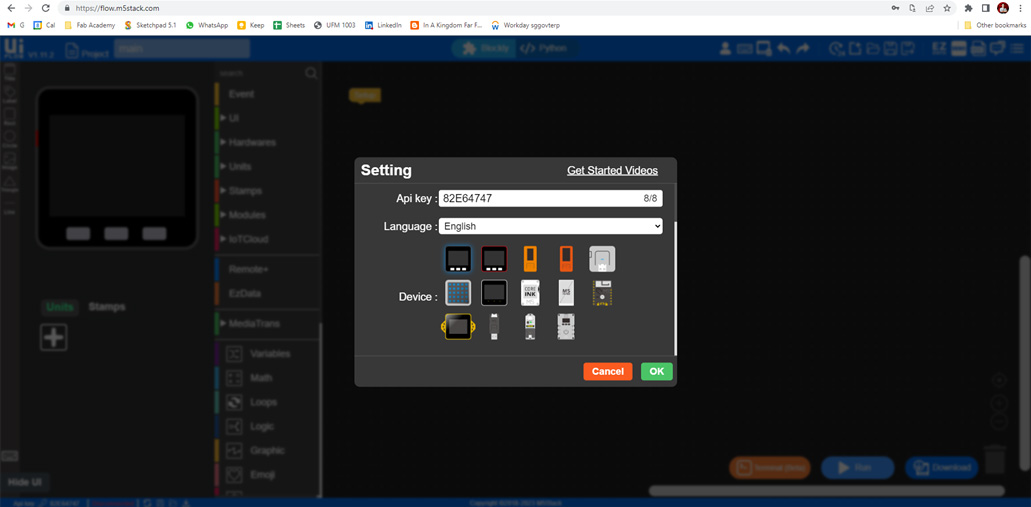
First setup your M5Go to connect to the WiFi, I use my hotspot from my mobile phone. Once it's connected, it will display a unique API key (8-digit: ****4747). Then go to the browser and key in the address “flow.m5stack.com”. Click on the bottom left of “API key” to key in the respective 8 alpha-numeric numbers shown on the M5Go. Click “OK” and your UI Flow is connected to your hardware.
Next load example code from the library (or you could just drag and drop any of the visual block to start if you are confident enough).
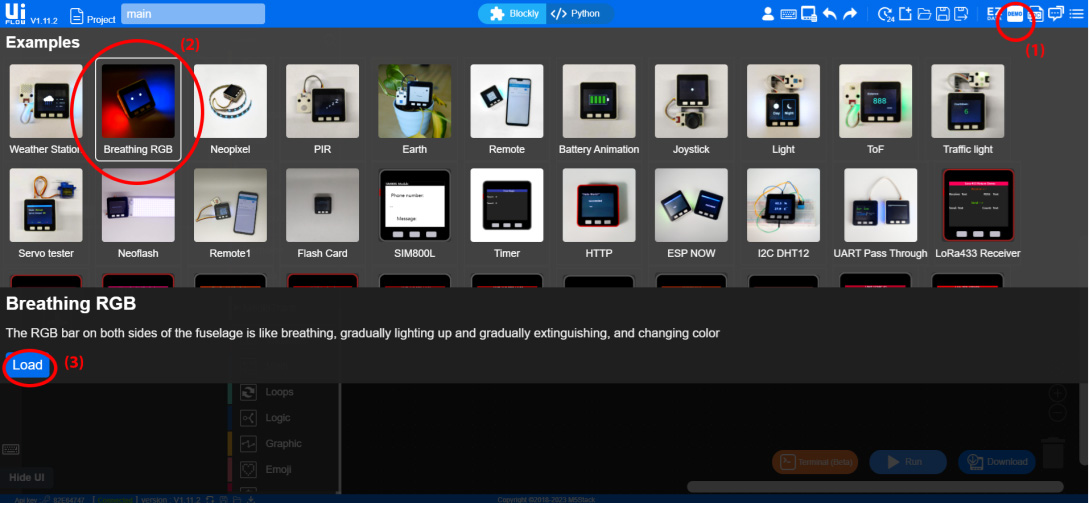
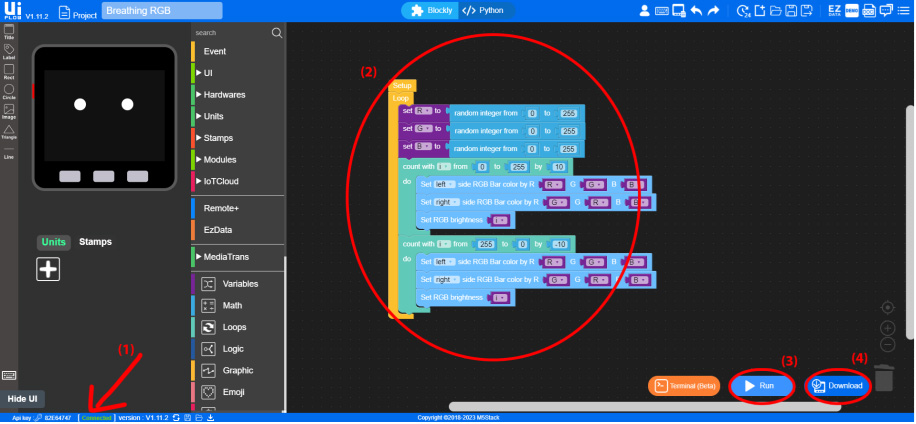
You should see your M5Go is “connected” (Green words on the bottom left of the browser). The example “Breathing RGB” code should be loaded into your main working window. Next, click on the “Run” button and temporarily load the code into your M5Go. “Temporarily load” in the sense that once the hardware is reset, the code would be wiped out. During this stage you still have the WiFi connection and you could play with the parameters and just pushing the changes through “Run” button. Once you are happy with the final results, you could click “Download” to “burn” the code into the hardware. M5Go (hardware) would reset (restart) and run the code as intended every time you reset the hardware.
Here is a video of the result.
Below is an image of the Arduino UNO R3 micro-controller with the required components such as breadboard and Neopixel.

I started to write a simple code using processing language in arduino to run the Neopixel from R to G and then to B with a transition time / pause of 2 seconds.
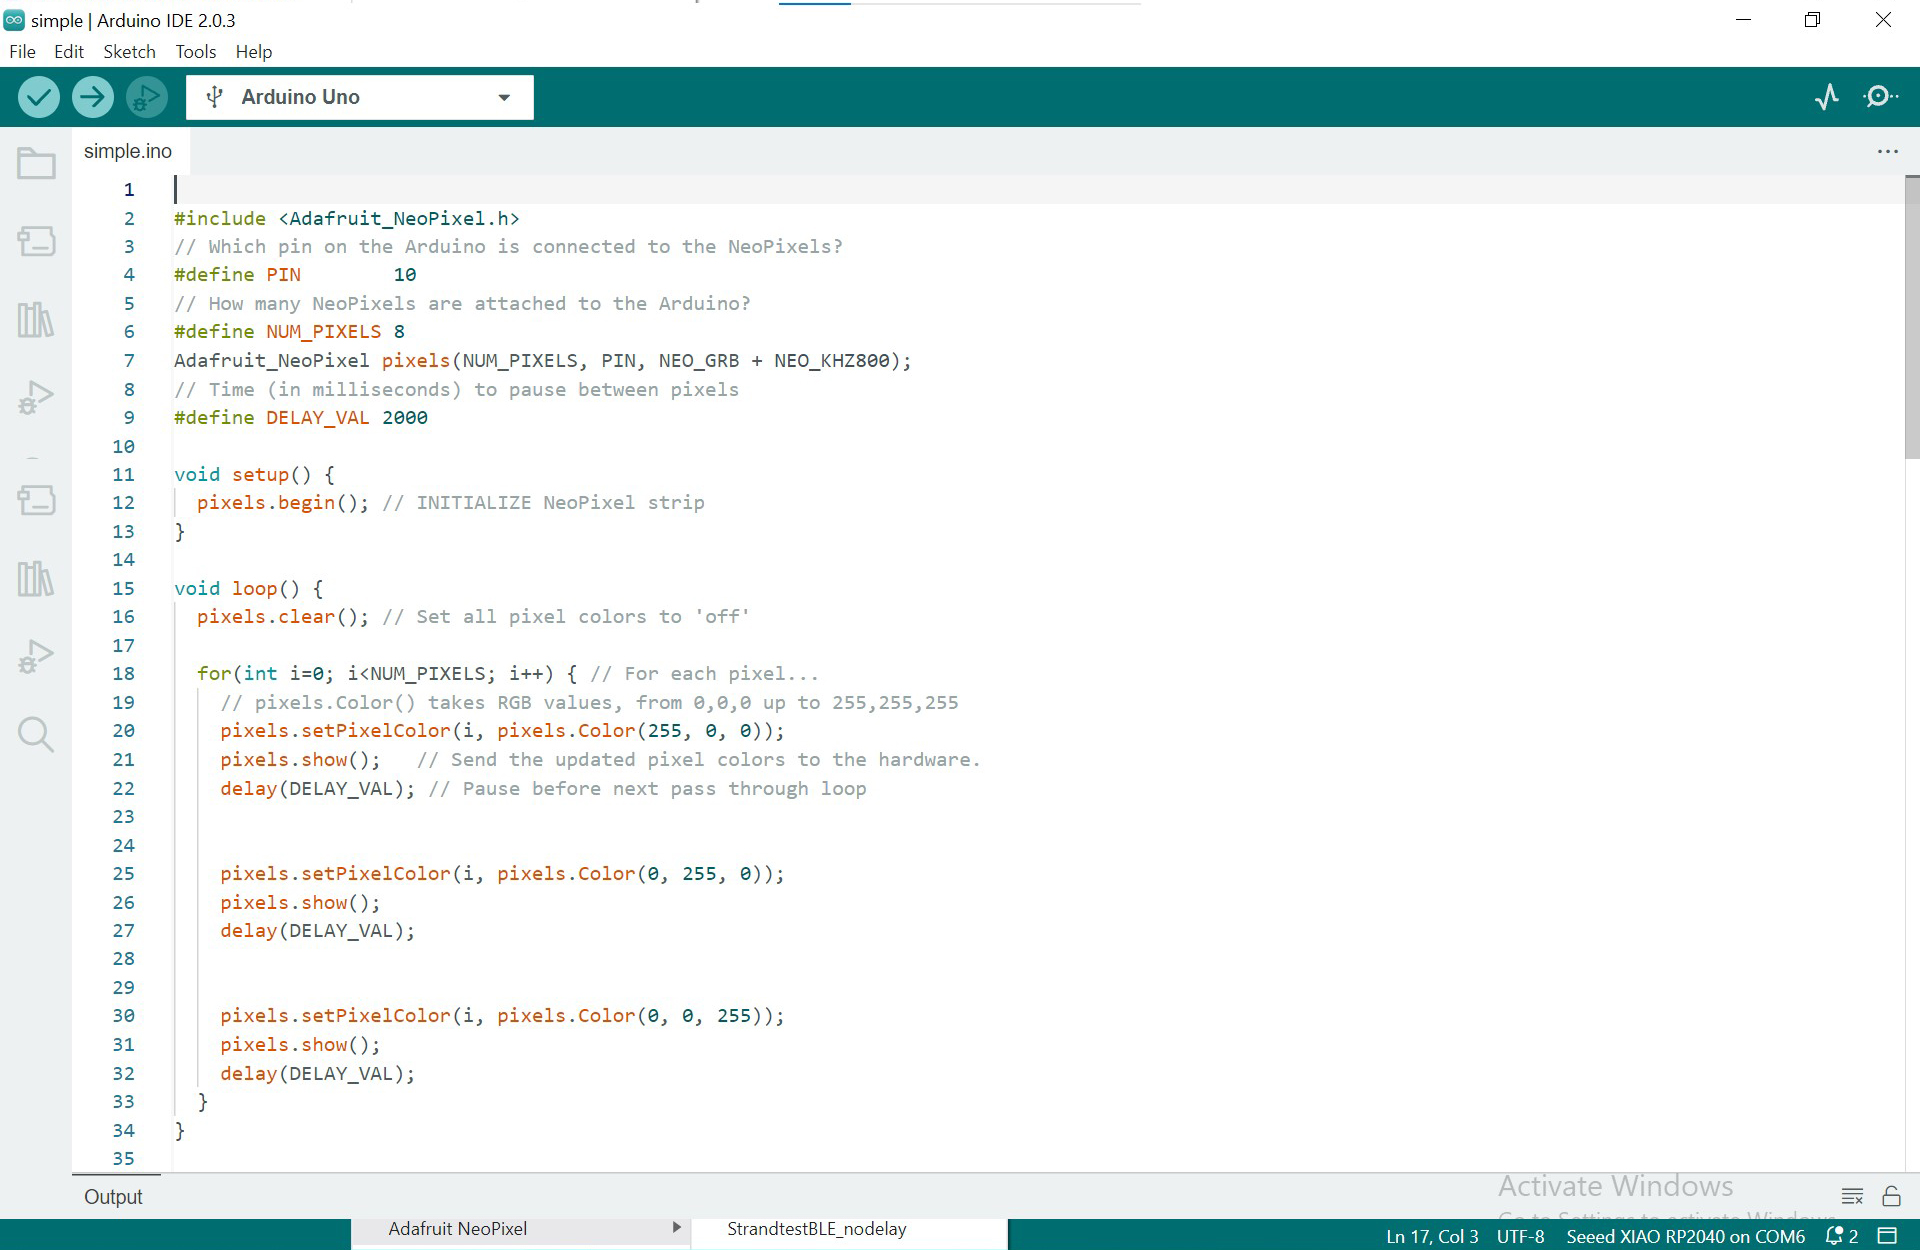
The steps in uploading the code to the arduino UNO R3 micro-controller is rather straight-forward with just a click on the uploading button on the arduino IDE software and it will be sent to the micro-controller that is connected to your working terminal port. After the code is uploaded, you will see how the Neopixel function as shown in the video below:
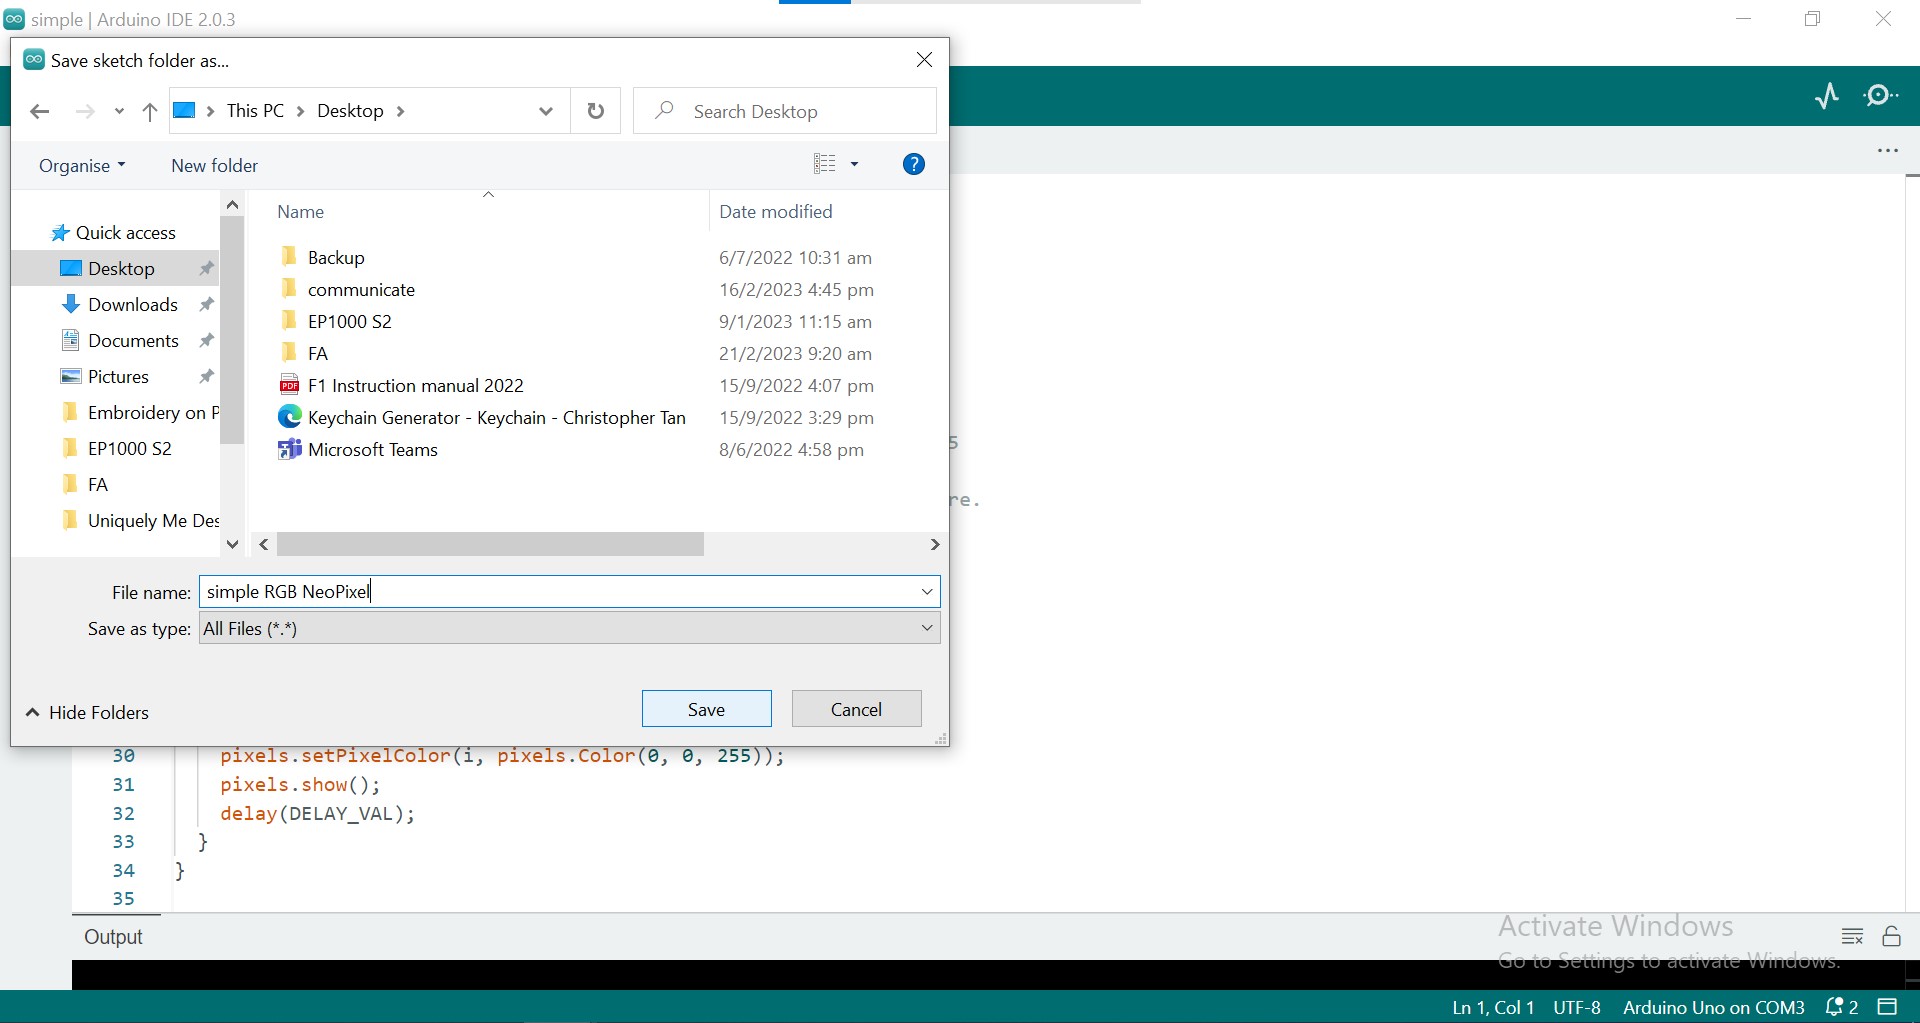
Your code is accessible once you save them in your computer under whichever folder that you may want to name.
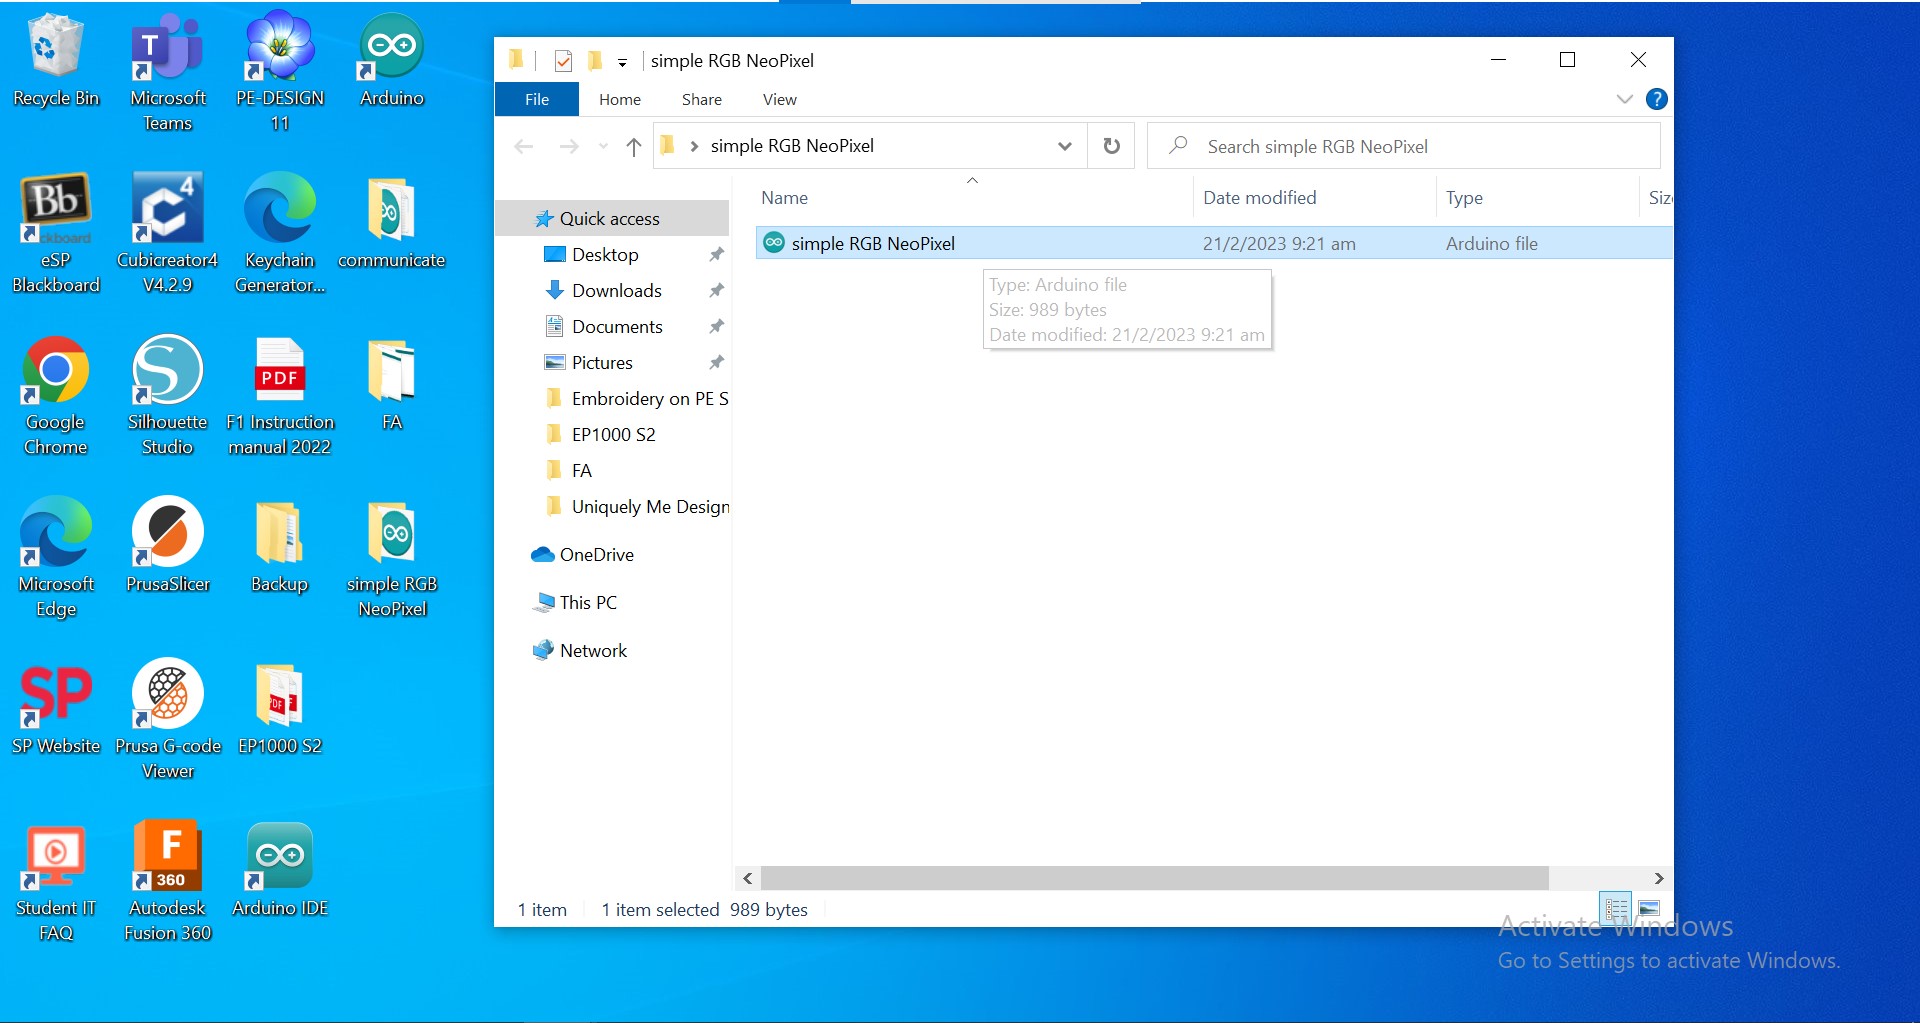
You should be able to find and access your saved file in the desktop or whichever location that you intend to save at.
And that is all for our week 4 group assignment on embedded programming.