Node-RED is a programming tool for wiring together hardware devices, APIs and online services in new and interesting ways. It provides a browser-based editor that makes it easy to wire together flows using the wide range of nodes in the palette that can be deployed to its runtime in a single-click. for more details click here
To install the red node, we’ll use a Raspberry pi.
To connect to the raspberry pi with ssh we used windows powershell.
connection to the Raspberry pi
1234
ssh <username>@<host_ip_address> -P <port_number>

# For example
ssh pi@192.168.1.210 -P 1022
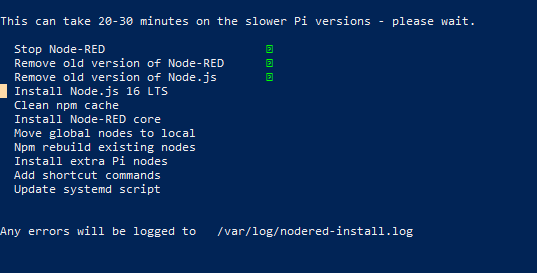
now that we are connected to the raspberry pi we will update the pi before any other command.
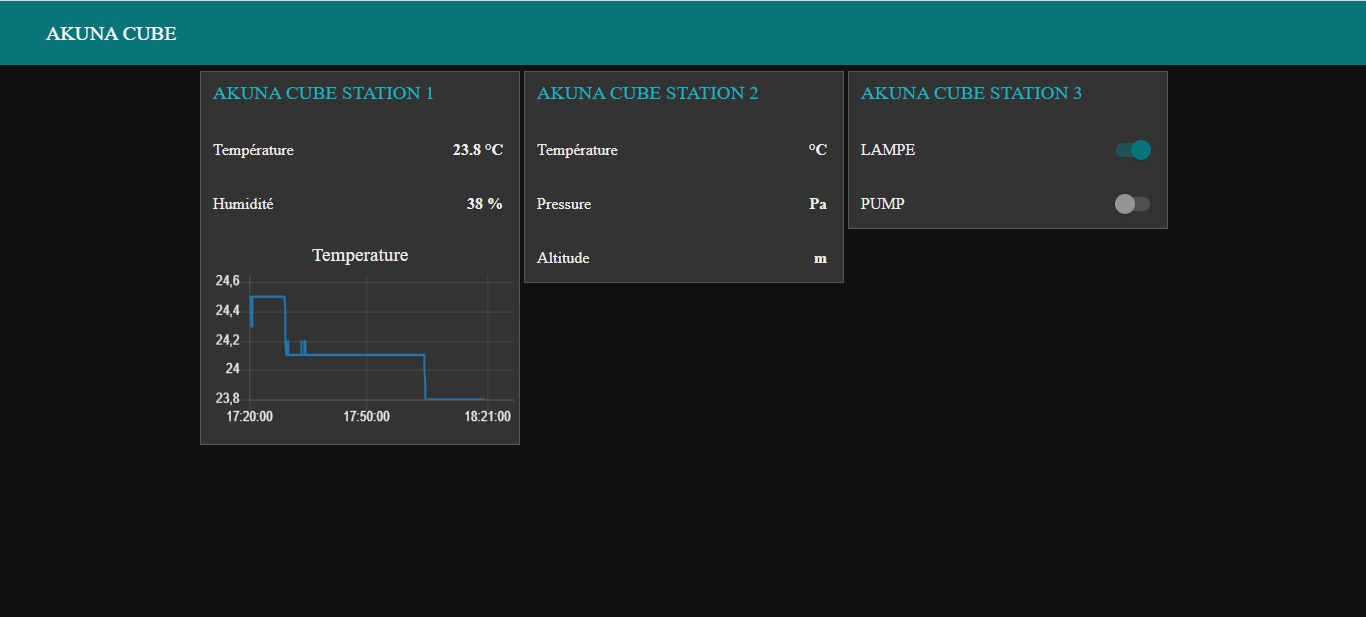
For the programming of the node red interface, we’ll use switches to control a lamp, a pump and a solenoid valve. To display temperature and humidity values, we’ll use an input field.
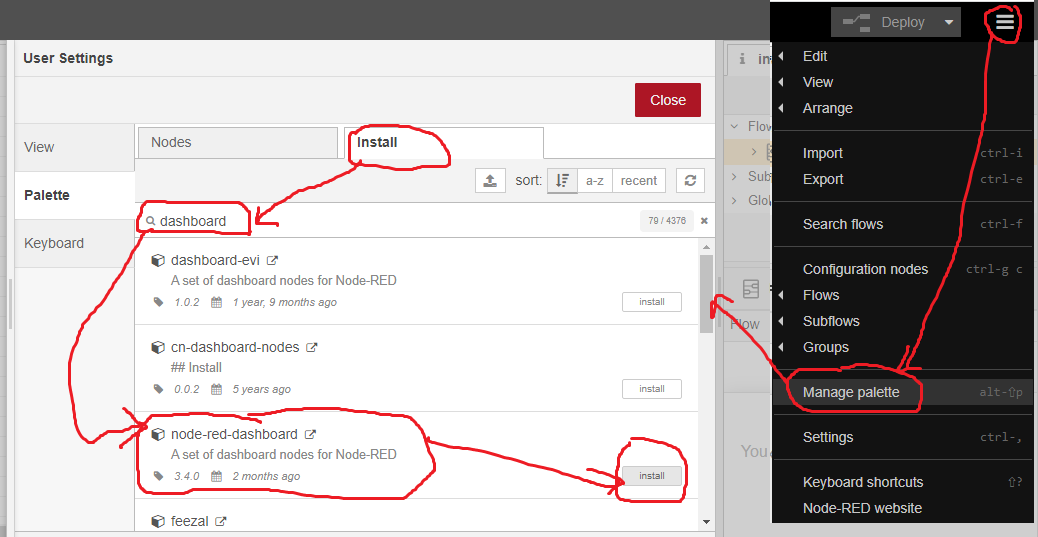
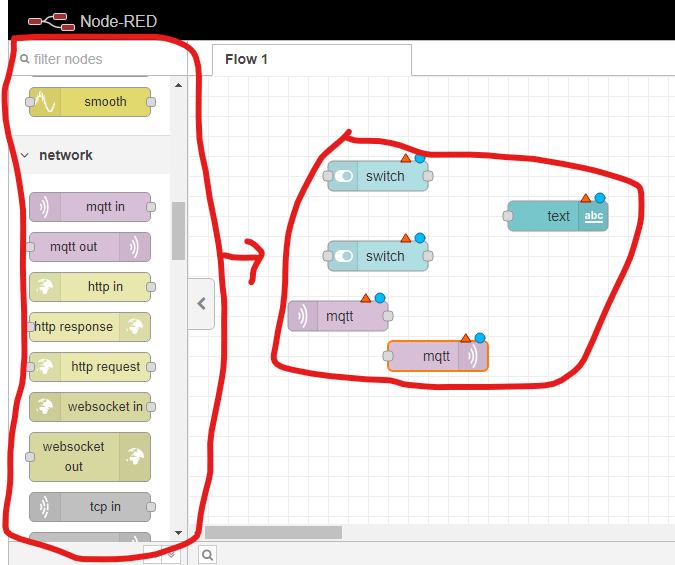
We chose the modules we were interested in from the palette on the left of the screen and made a click and drag as shown below.
In order to set the different nodes, double click on them and the settings window will appear as shown below.
once the nodes are set up we click on deploy and we should have the following result
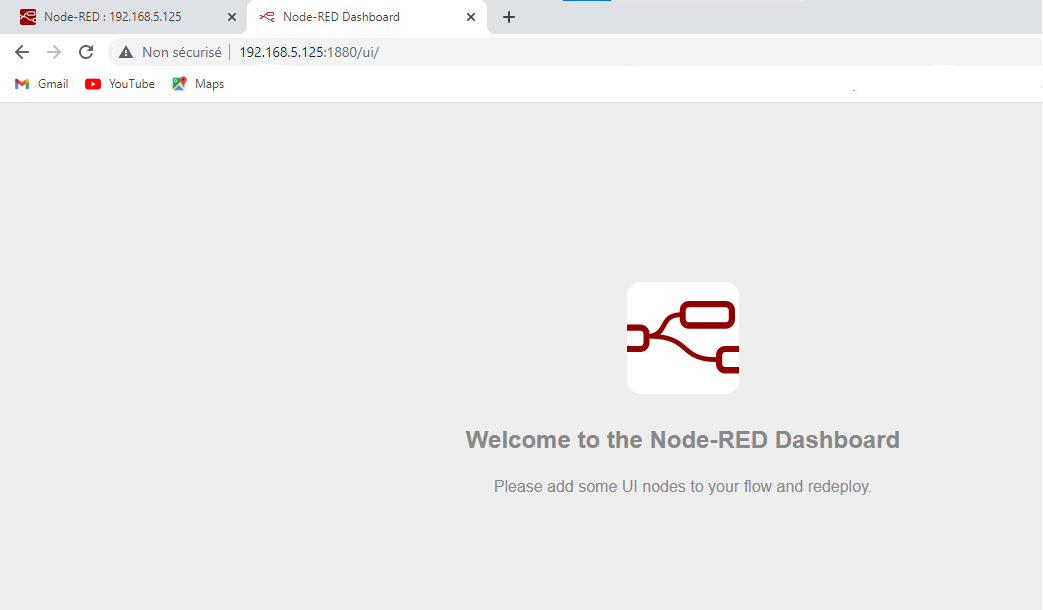
Now we can visualize our interface by entering the IP address of the raspberry pi followed by “:1880/ui”.
Here is our interface.
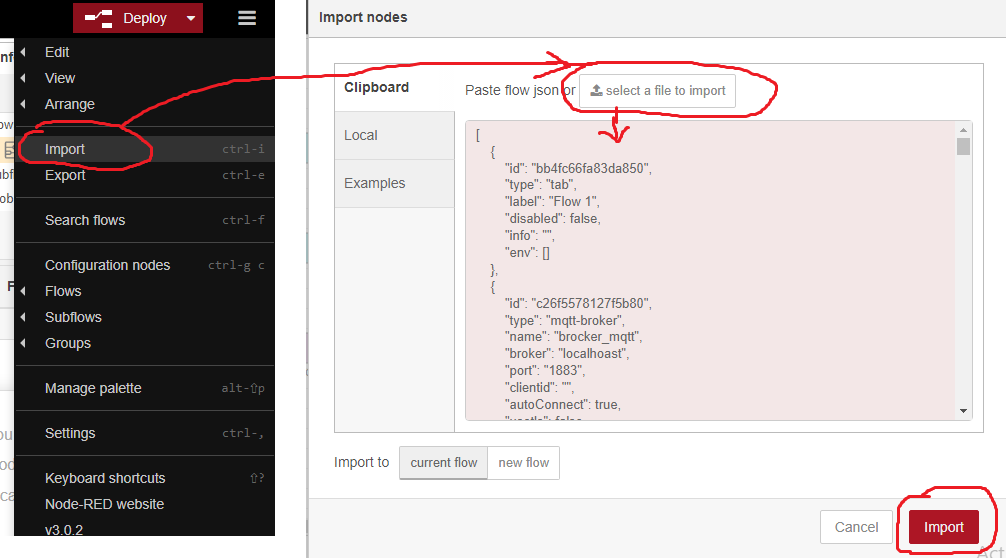
I know more than one person is wondering but how to reproduce the interface don’t worry you just need to download my source file and go to the node red menu and click on import as shown below.
#include<WiFi.h>#include<PubSubClient.h>#include"DHT.h"constchar*ssid="...............";constchar*password=".............";// Add your MQTT Broker IP address, example:constchar*mqtt_server="................";WiFiClientespClient;PubSubClientclient(espClient);#define DHTPIN D10#define DHTTYPE DHT11DHTdht(DHTPIN,DHTTYPE);// Variables to hold sensor readingsfloattemp;floathum;#define LEDPIN D1#define RELAY_1 D2#define RELAY_2 D3unsignedlongpreviousMillis=0;// Stores last time temperature was publishedconstlonginterval=3000;// Interval at which to publish sensor readingsvoidsetup_wifi(){delay(10);// We start by connecting to a WiFi networkSerial.println();Serial.print("Connecting to ");Serial.println(ssid);WiFi.mode(WIFI_STA);WiFi.begin(ssid,password);while(WiFi.status()!=WL_CONNECTED){delay(500);Serial.print(".");}randomSeed(micros());Serial.println("");Serial.println("WiFi connected");Serial.println("IP address: ");Serial.println(WiFi.localIP());}voidcallback(char*topic,byte*payload,unsignedintlength){Serial.print("Message arrived [");Serial.print(topic);Serial.print("] ");for(inti=0;i<length;i++){Serial.print((char)payload[i]);}Serial.println();if((char)payload[0]=='1'){digitalWrite(LEDPIN,HIGH);// Turn the LED on}elseif((char)payload[0]=='2'){digitalWrite(LEDPIN,LOW);// Turn the LED on}elseif((char)payload[0]=='3'){digitalWrite(RELAY_2,HIGH);// Turn the LED on}elseif((char)payload[0]=='4'){digitalWrite(RELAY_2,LOW);// Turn the LED on}elseif((char)payload[0]=='5'){digitalWrite(RELAY_1,HIGH);// Turn the LED on}elseif((char)payload[0]=='6'){digitalWrite(RELAY_1,LOW);// Turn the LED on}}voidreconnect(){// Loop until we're reconnectedwhile(!client.connected()){Serial.print("Attempting MQTT connection...");// Create a random client IDStringclientId="XIAO_55";clientId+=String(random(0xffff),HEX);// Attempt to connectif(client.connect("XIAO_45")){Serial.println("connected");client.subscribe("XIAO_45");}else{Serial.print("failed, rc=");Serial.print(client.state());Serial.println(" try again in 5 seconds");// Wait 5 seconds before retryingdelay(5000);}}}voidsetup(){Serial.begin(115200);pinMode(LEDPIN,OUTPUT);pinMode(RELAY_2,OUTPUT);pinMode(RELAY_1,OUTPUT);setup_wifi();client.setServer(mqtt_server,1883);client.setCallback(callback);dht.begin();}voidloop(){if(!client.connected()){reconnect();}client.loop();unsignedlongcurrentMillis=millis();if(currentMillis-previousMillis>=interval){// Save the last time a new reading was publishedpreviousMillis=currentMillis;// New DHT sensor readingshum=dht.readHumidity();// Read temperature as Celsius (the default)temp=dht.readTemperature();// Check if any reads failed and exit early (to try again).if(isnan(temp)||isnan(hum)){Serial.println(F("Failed to read from DHT sensor!"));return;}client.publish("yello_lab/salle_2/humidite_dht11",String(hum).c_str());client.publish("yello_lab/salle_2/temperature_dht11",String(temp).c_str());}}
#include<WiFi.h>#include<PubSubClient.h>#include<Wire.h>#include<Adafruit_BMP085.h>constchar*ssid="...............";constchar*password="..................";// Add your MQTT Broker IP address, example:constchar*mqtt_server="...............";WiFiClientespClient;PubSubClientclient(espClient);#define RELAY D10Adafruit_BMP085bmp;unsignedlongpreviousMillis=0;// Stores last time temperature was publishedconstlonginterval=3000;// Interval at which to publish sensor readingsvoidsetup_wifi(){delay(10);// We start by connecting to a WiFi networkSerial.println();Serial.print("Connecting to ");Serial.println(ssid);WiFi.mode(WIFI_STA);WiFi.begin(ssid,password);while(WiFi.status()!=WL_CONNECTED){delay(500);Serial.print(".");}randomSeed(micros());Serial.println("");Serial.println("WiFi connected");Serial.println("IP address: ");Serial.println(WiFi.localIP());}voidcallback(char*topic,byte*payload,unsignedintlength){Serial.print("Message arrived [");Serial.print(topic);Serial.print("] ");for(inti=0;i<length;i++){Serial.print((char)payload[i]);}Serial.println();if((char)payload[0]=='1'){digitalWrite(RELAY,HIGH);// Turn the LED on }else{digitalWrite(RELAY,LOW);// Turn the LED off }}voidreconnect(){// Loop until we're reconnectedwhile(!client.connected()){Serial.print("Attempting MQTT connection...");// Create a random client IDStringclientId="XIAO_72";clientId+=String(random(0xffff),HEX);// Attempt to connectif(client.connect("XIAO_752")){Serial.println("connected");client.subscribe("XIAO_ESP_7");}else{Serial.print("failed, rc=");Serial.print(client.state());Serial.println(" try again in 5 seconds");// Wait 5 seconds before retryingdelay(5000);}}}voidsetup(){Serial.begin(115200);pinMode(RELAY,OUTPUT);setup_wifi();client.setServer(mqtt_server,1883);client.setCallback(callback);if(!bmp.begin()){Serial.println("Could not find a valid BMP085/BMP180 sensor, check wiring!");while(1){}}}voidloop(){if(!client.connected()){reconnect();}client.loop();unsignedlongcurrentMillis=millis();if(currentMillis-previousMillis>=interval){// Save the last time a new reading was publishedpreviousMillis=currentMillis;floattemp=bmp.readTemperature();floatpressure=bmp.readPressure();floataltitude=bmp.readAltitude(102000);client.publish("temperature",String(temp).c_str());client.publish("pressure",String(pressure).c_str());client.publish("altitude",String(altitude).c_str());}}