Final Project
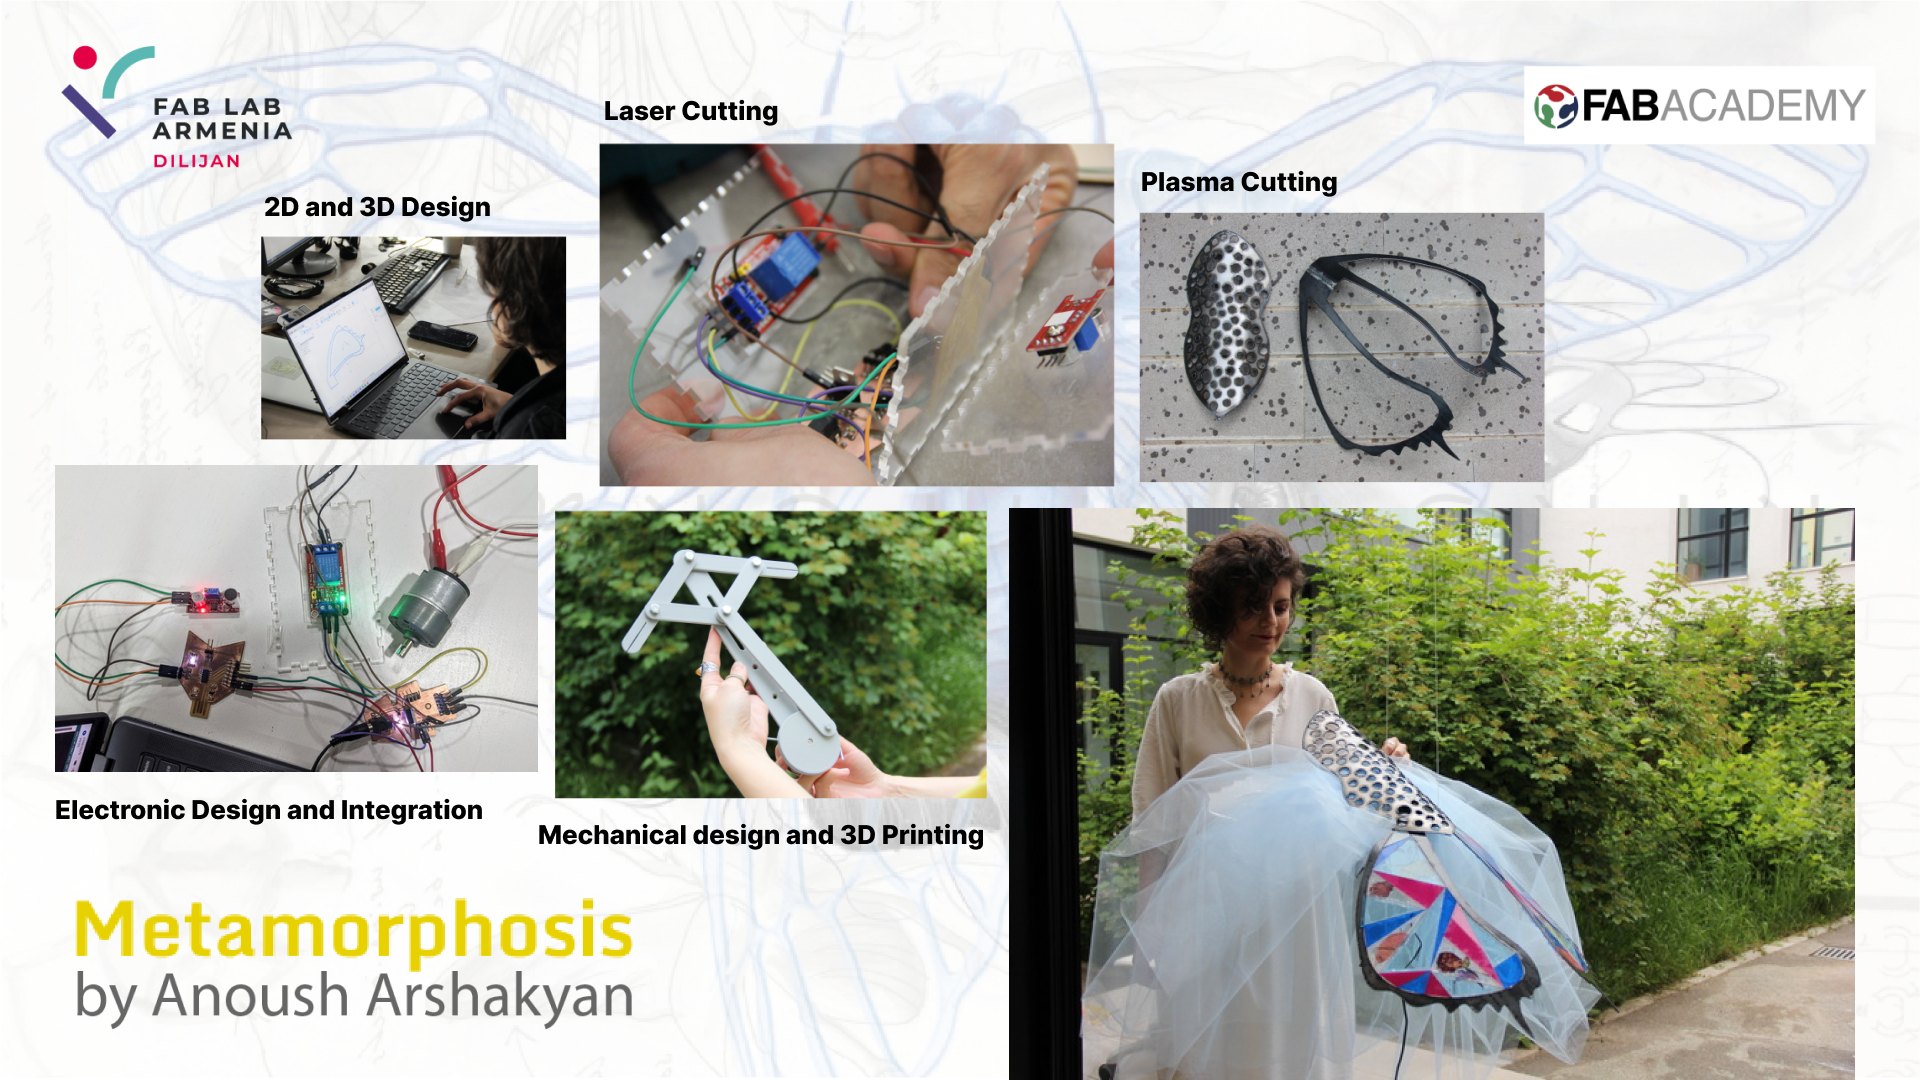
We all know that a butterfly emerges from a cocoon, but what many don’t realize is that it also requires the essence of fire.
My own butterfly came into being within the confines of a steel factory—a powerful symbol of my personal metamorphosis over the past months. Each week at the Fab Academy, I experienced a transformative journey akin to a butterfly emerging from its cocoon. Sometimes I soared freely, fully embracing my newfound self, while other times I found myself suspended midway, still undergoing my metamorphosis.
This enchanting odyssey served as the wellspring of inspiration for my final project—an exquisite moving sculpture.
When considering the purpose of this butterfly, I didn’t deliberate for long. Fluttering wings were an absolute necessity. But what would motivate her graceful motions? Residing in Dilijan, Armenia’s most captivating and verdant city, I imagined she would revel in the gentle touch of raindrops. However, as I envisioned her residing in the school garden, nestled within the Fab Lab, not everyone would be inclined to venture out into the rain to admire the installation.
Then, a memory surfaced—the joyful laughter and exuberance of children as they played in this tiny garden, defiantly rebelling against the organized tranquility of their school days. In that moment, inspiration struck—a sound sensor would be the key. Yes, this butterfly thrives on the blissful symphony of playful interactions!
This art installation seamlessly combines the realms of digital production and handicraft.
Allow me to introduce the newest inhabitant of the Fab Lab—a vivacious being who finds boundless delight in the resounding joy of their spirited play!
Research
There are various art installations and projects that incorporate elements of interactive and kinetic sculptures, each creation is unique and can differ in terms of design, materials, and concept.
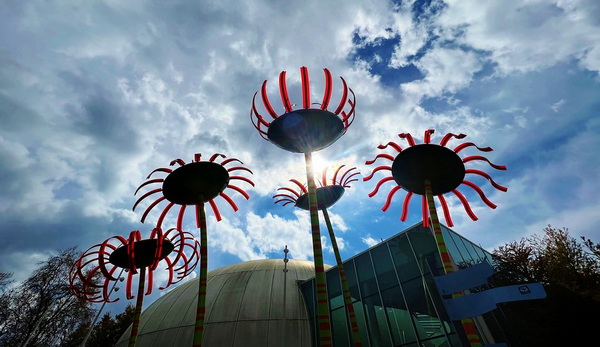
- “Sonic Bloom” by Dan Corson: This project consists of sculptural flowers that respond to sound. Each flower’s petals move in response to ambient noise, creating a synchronized dance of light and motion. The installation aims to engage and inspire viewers through the interaction of nature, technology, and sound.
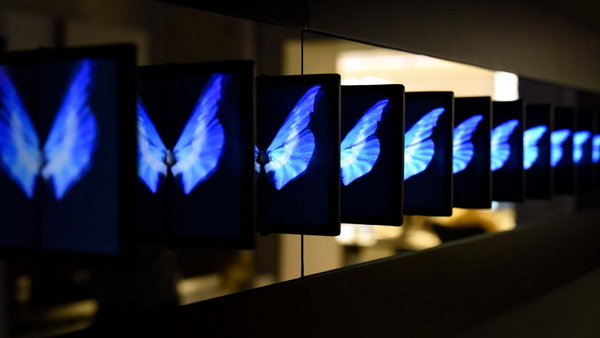
- “Flutter” by Cinimod Studio: This installation features a collection of illuminated butterflies on display. The butterflies are equipped with sensors that detect the presence and movement of viewers. As viewers approach, the butterflies respond by fluttering their wings, creating an enchanting interactive display.
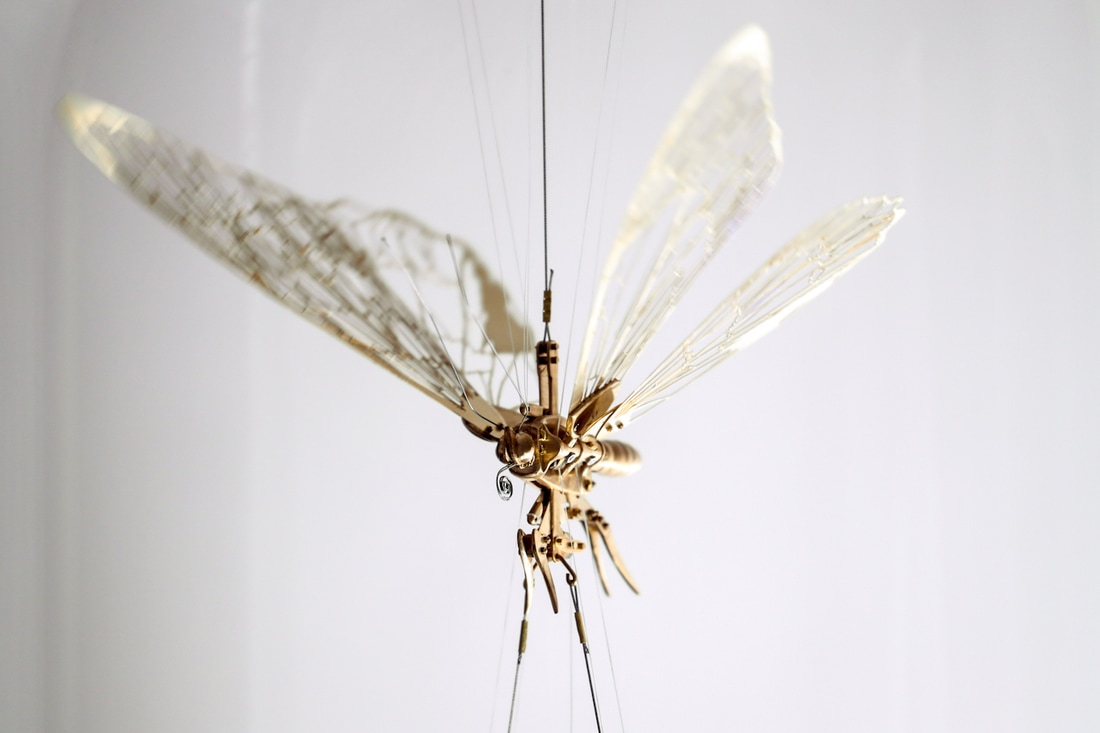
- “Flight is a Waltz - Puppet Flutter” is a captivating art installation created by the talented artist Dominic Harris. The installation features a collection of intricately designed butterfly puppets suspended from delicate strings. Each puppet is a meticulous recreation of various butterfly species, adorned with vibrant colors and patterns that mirror the beauty of nature. The puppets appear to float effortlessly in mid-air, seemingly animated by an unseen force.
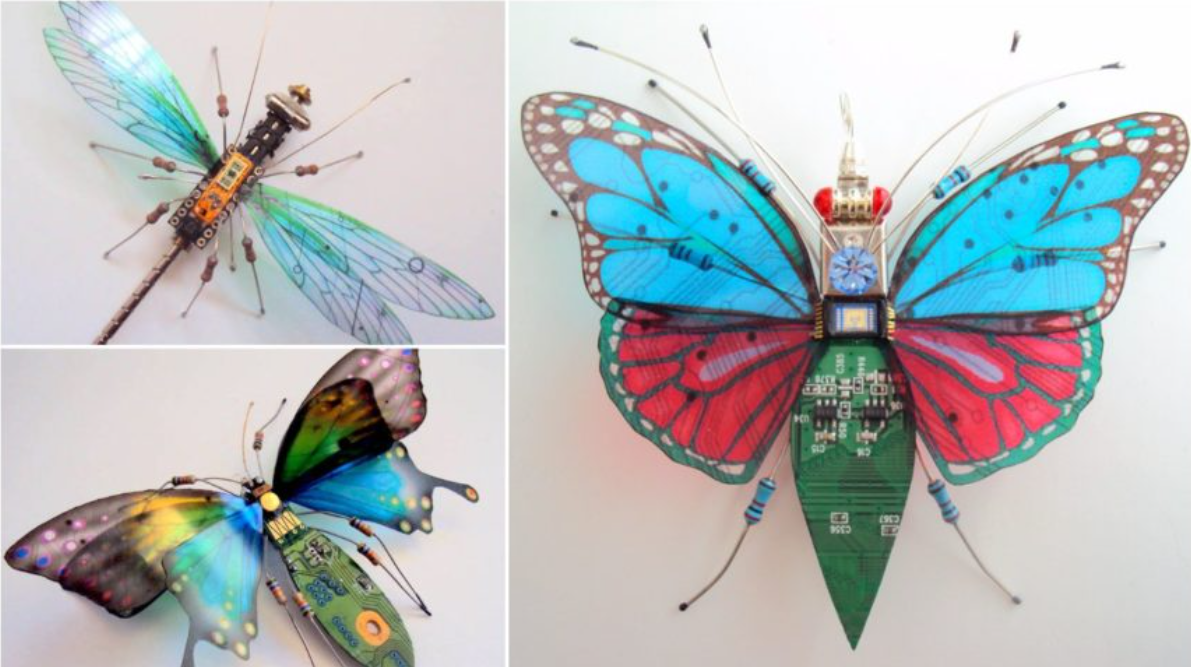
- The artwork by Julie Alice Chappell, featured in this link, is a stunning fusion of nature and technology. Chappell intricately crafts delicate and ethereal insects using discarded circuit boards, breathing new life into electronic waste. These “Dew Leaf” insects exhibit intricate details, from their wings formed by intricate circuit patterns to their delicate bodies adorned with tiny electronic components. Through her art, Chappell highlights the juxtaposition between the beauty of the natural world and the pervasive presence of technology, prompting us to reflect on our relationship with the digital realm and the impact it has on the environment.
All these projects i found during my research, which served as a great inspiration for me to create my installation.
I am back: Steel Factory
Before the Wild Card week in Fab Academy, I found myself contemplating my final project and the idea I wanted to bring to life. I aimed to make the most of this week and work on something that would tie in with my final project. That’s when the concept of creating butterfly wings from steel took hold of my imagination. It was a spontaneous decision, but one that I felt compelled to pursue further.
Visiting a steel factory proved to be a truly life-changing experience for me, as it opened my eyes to new horizons in digital fabrication and introduced me to a wealth of fascinating materials. The sheer power and precision of the CNC machines and the mesmerizing plasma cutter left me in awe. Witnessing the capabilities of these machines ignited a spark of inspiration within me.
In my Wildcard Week documentation, I delved into the intricate details of this remarkable experience. I poured my amazement onto the pages as I described the profound impact the factory visit had on me. I shared the process of our work and the incredible possibilities that emerged from working with such robust machinery and innovative materials.
After that, I couldn’t help but eagerly await another chance to be in that amazing atmosphere once more.
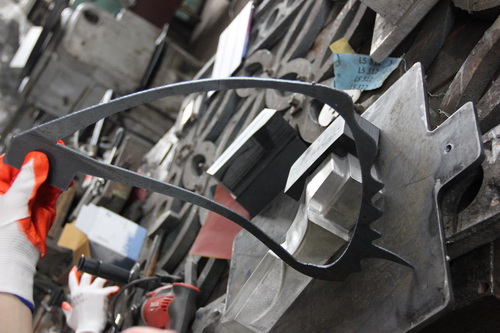
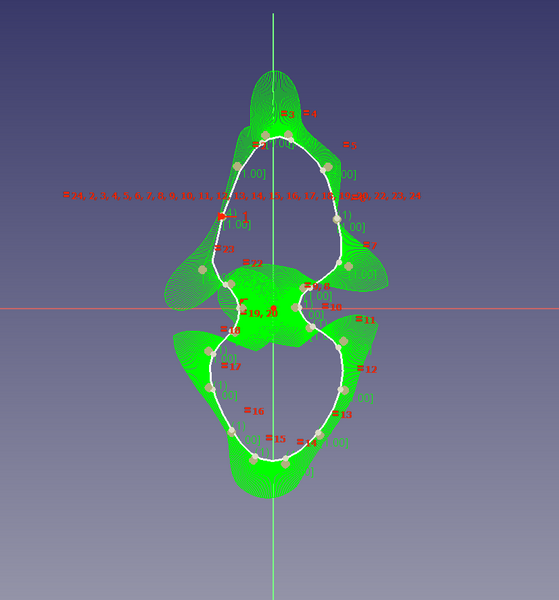
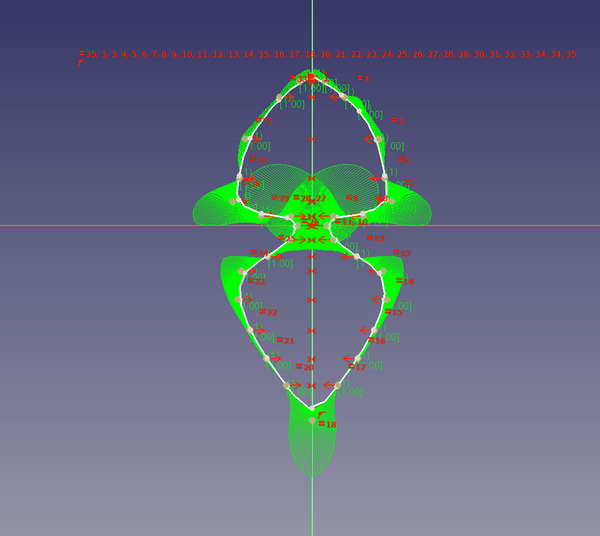
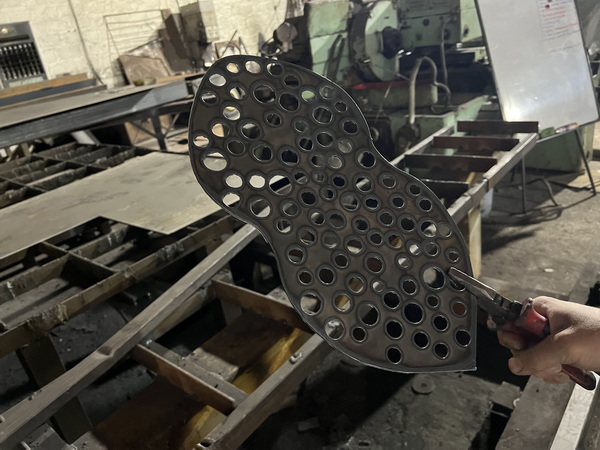
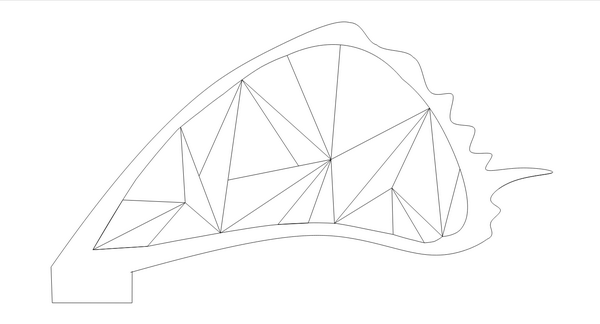
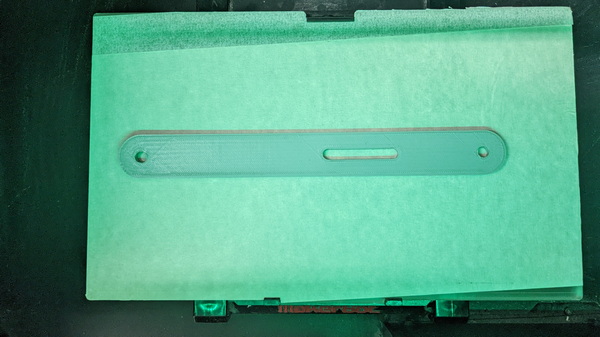
To continue with my final project, I decided to revisit my favorite place to create another part of the butterfly, this time using steel. To plan and guide the fabrication process, I utilized FreeCAD to draw a detailed design.
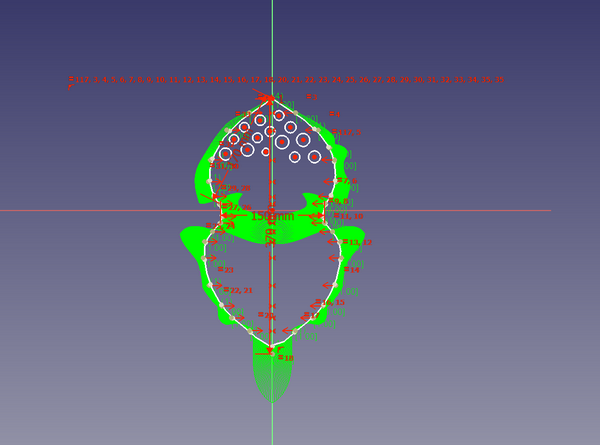
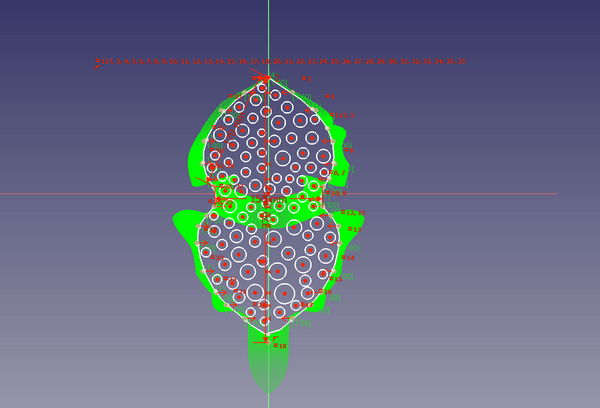
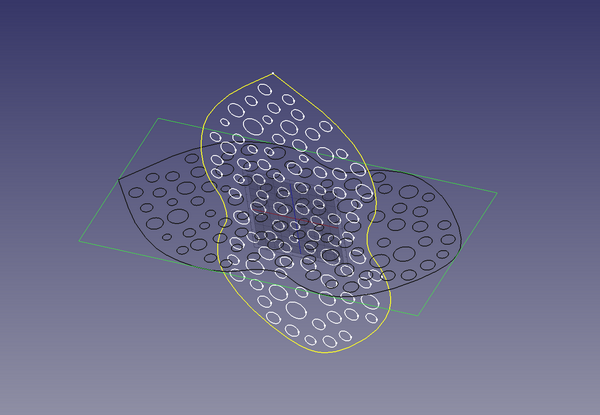
The real metamorphosis of the drawing!! :)
To cut the design part at the steel factory, I followed the same process that I used for cutting the small wings in the previous step. The steps for preparing the drawing for cutting can be found here, where you can follow along and see the detailed process. By following this familiar path, I ensured consistency and applied the knowledge gained from the previous cutting experience to achieve accurate and precise results for the new design part.
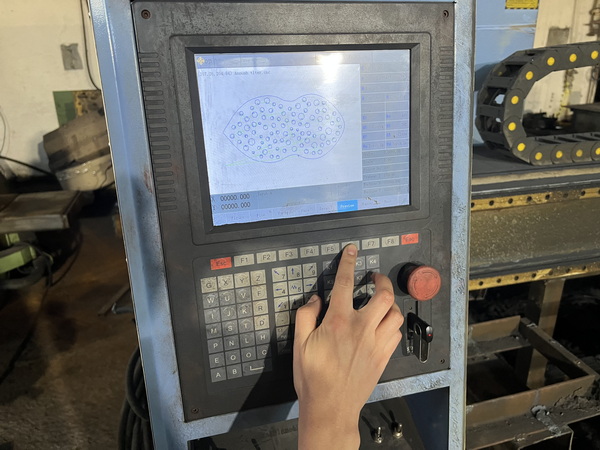
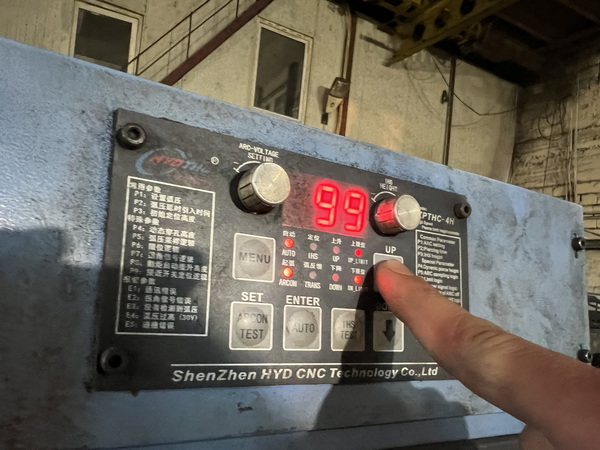
I began by setting up the plasma cutter for cutting, making sure to adjust the voltage and amperage settings accordingly. For this particular project, we opted for a 1.5-millimeter thick steel material. As the cutting process commenced, I was amazed to witness the steel appearing as though it was melting before our eyes. This captivating sight left me both impressed and deeply inspired to explore the entire process that breathes life into my designs.
I am grateful to Ashot Margaryan and Mkhitar Evoyans for their invaluable assistance during my time at the steel factory. Their expertise, guidance, and support were instrumental in helping me navigate and explore the world of steel fabrication.
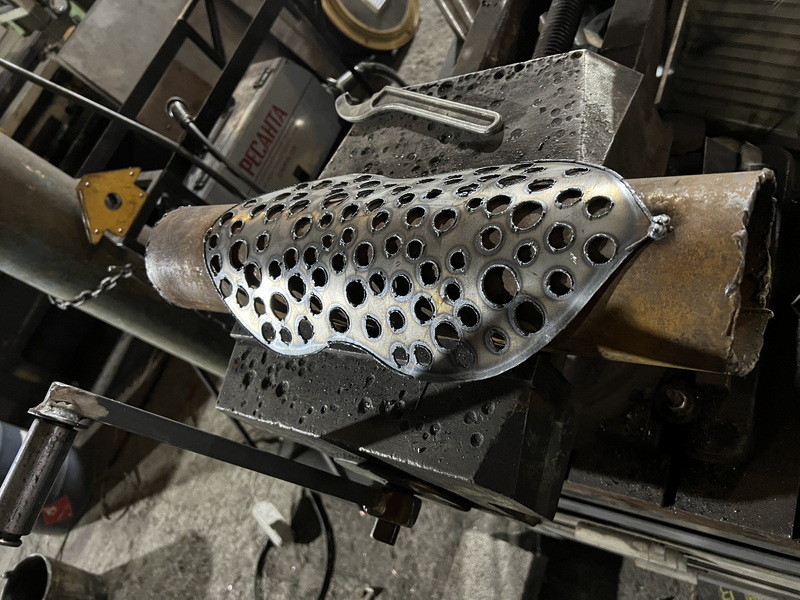
Beautiful together

Mosaic
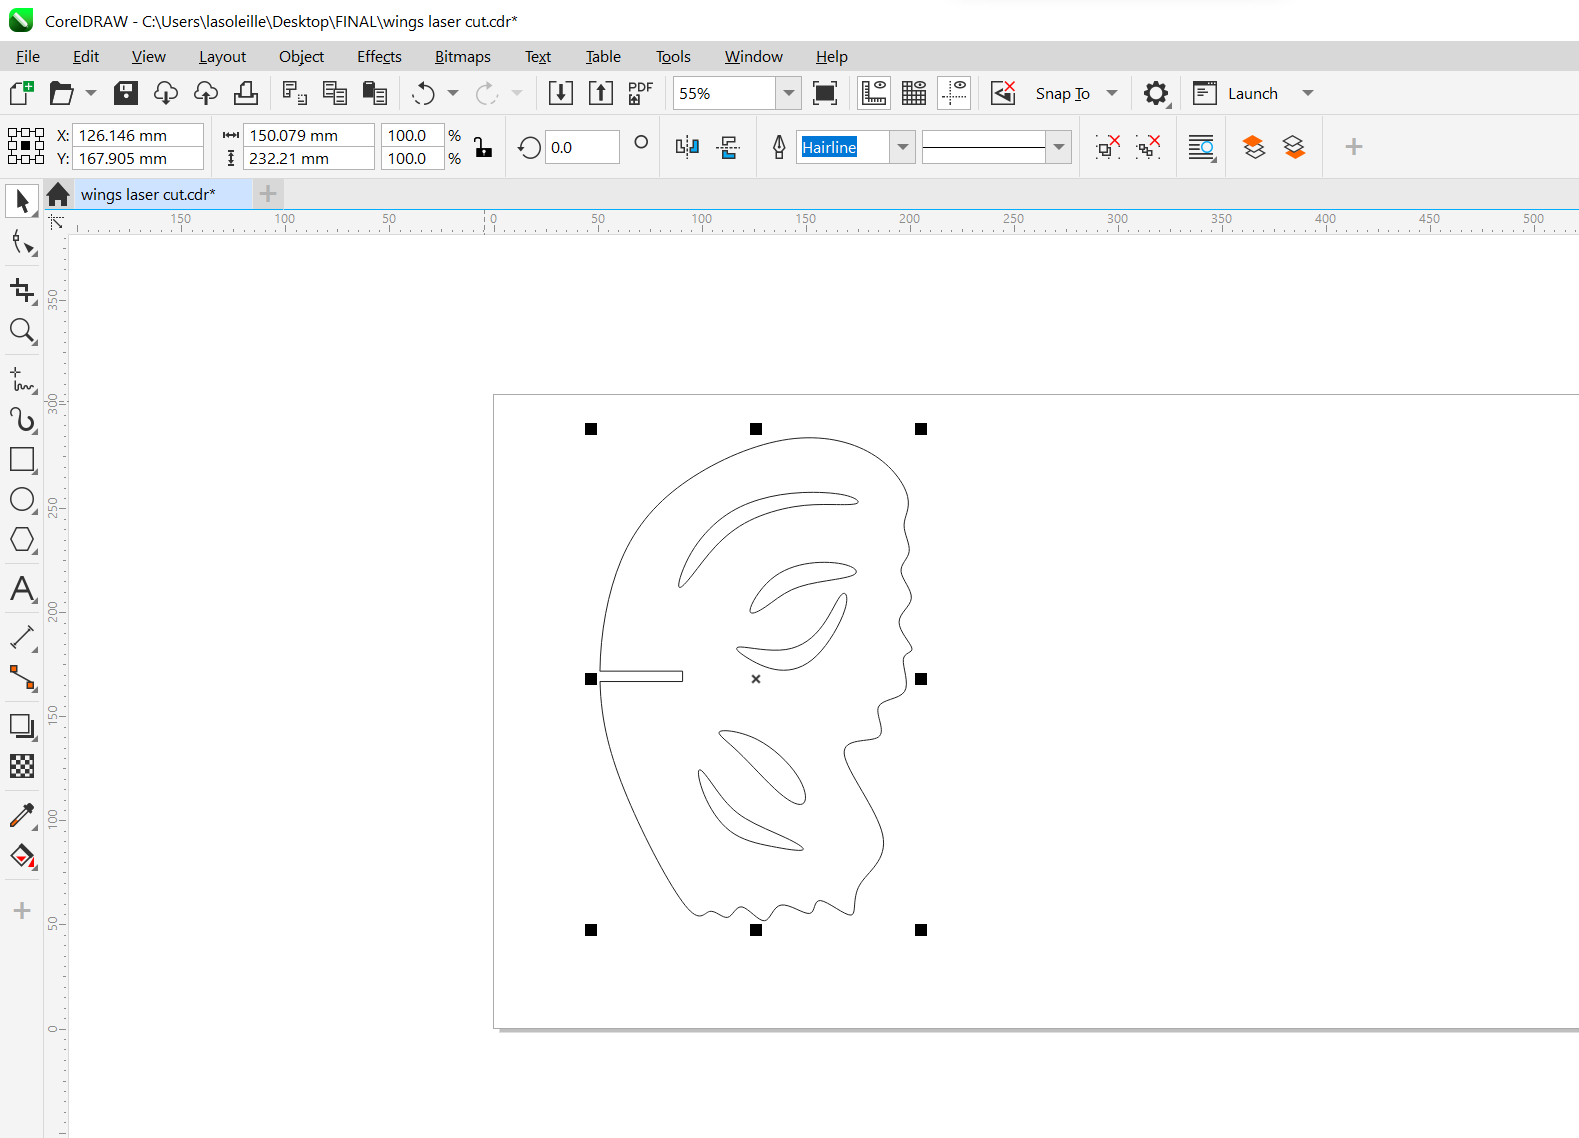
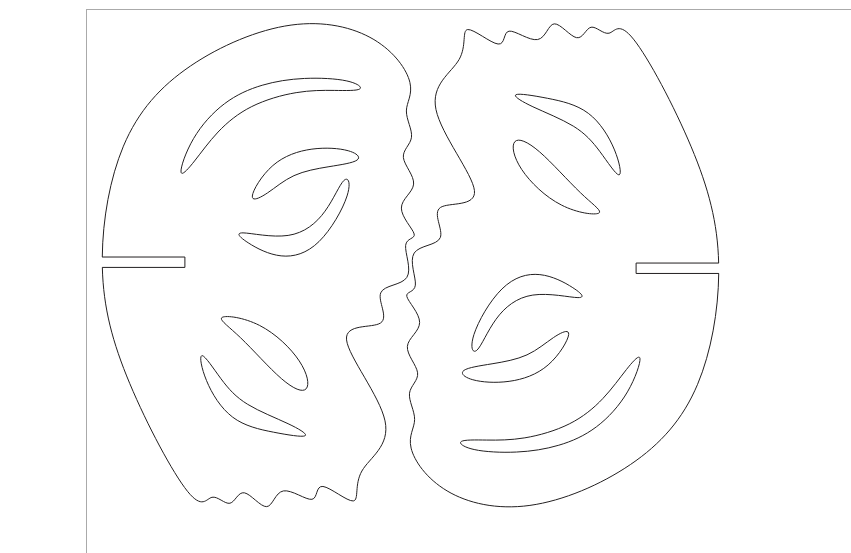
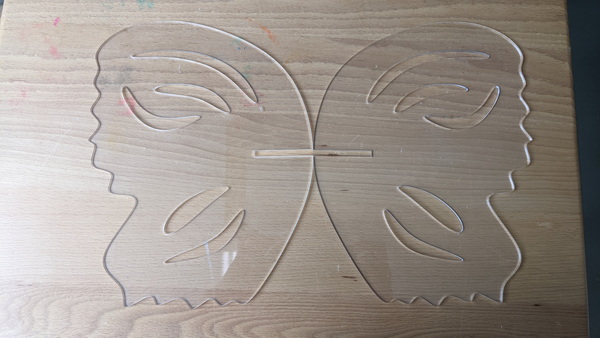
I made the creative decision to add vibrant colors to the steel wings by using colorful acrylic mosaic created from leftover materials at the Fab Lab. Using CorelDraw, I carefully designed a drawing that specified the parts for each color. Utilizing the laser cutter, I cut out all the mosaic details, and then began the assembly process.


To secure the mosaic, I opted to use silicone as an adhesive. This ensured a sturdy and durable bond between the steel wings and the colorful acrylic pieces. Looking ahead, I plan to explore the possibility of incorporating support structures made from biodegradable materials for the mosaic.


In an exciting twist, I had a sudden inspiration to further enhance the aesthetic appeal by decorating these parts with dry flowers. This unexpected addition added a touch of natural beauty and uniqueness to the overall design. The combination of the colorful acrylic mosaic and the delicate dry flowers created a visually captivating and truly one-of-a-kind artistic piece.

Flapping Mechanism (2D and 3D)
To understand how the wings move, I watched many videos. There were different mechanisms to choose from, with and without gears. I opted for the option that made the most sense to me.
This option seemed very interesting to me. In the future, I will definitely use it to create new installations, or to improve this one.
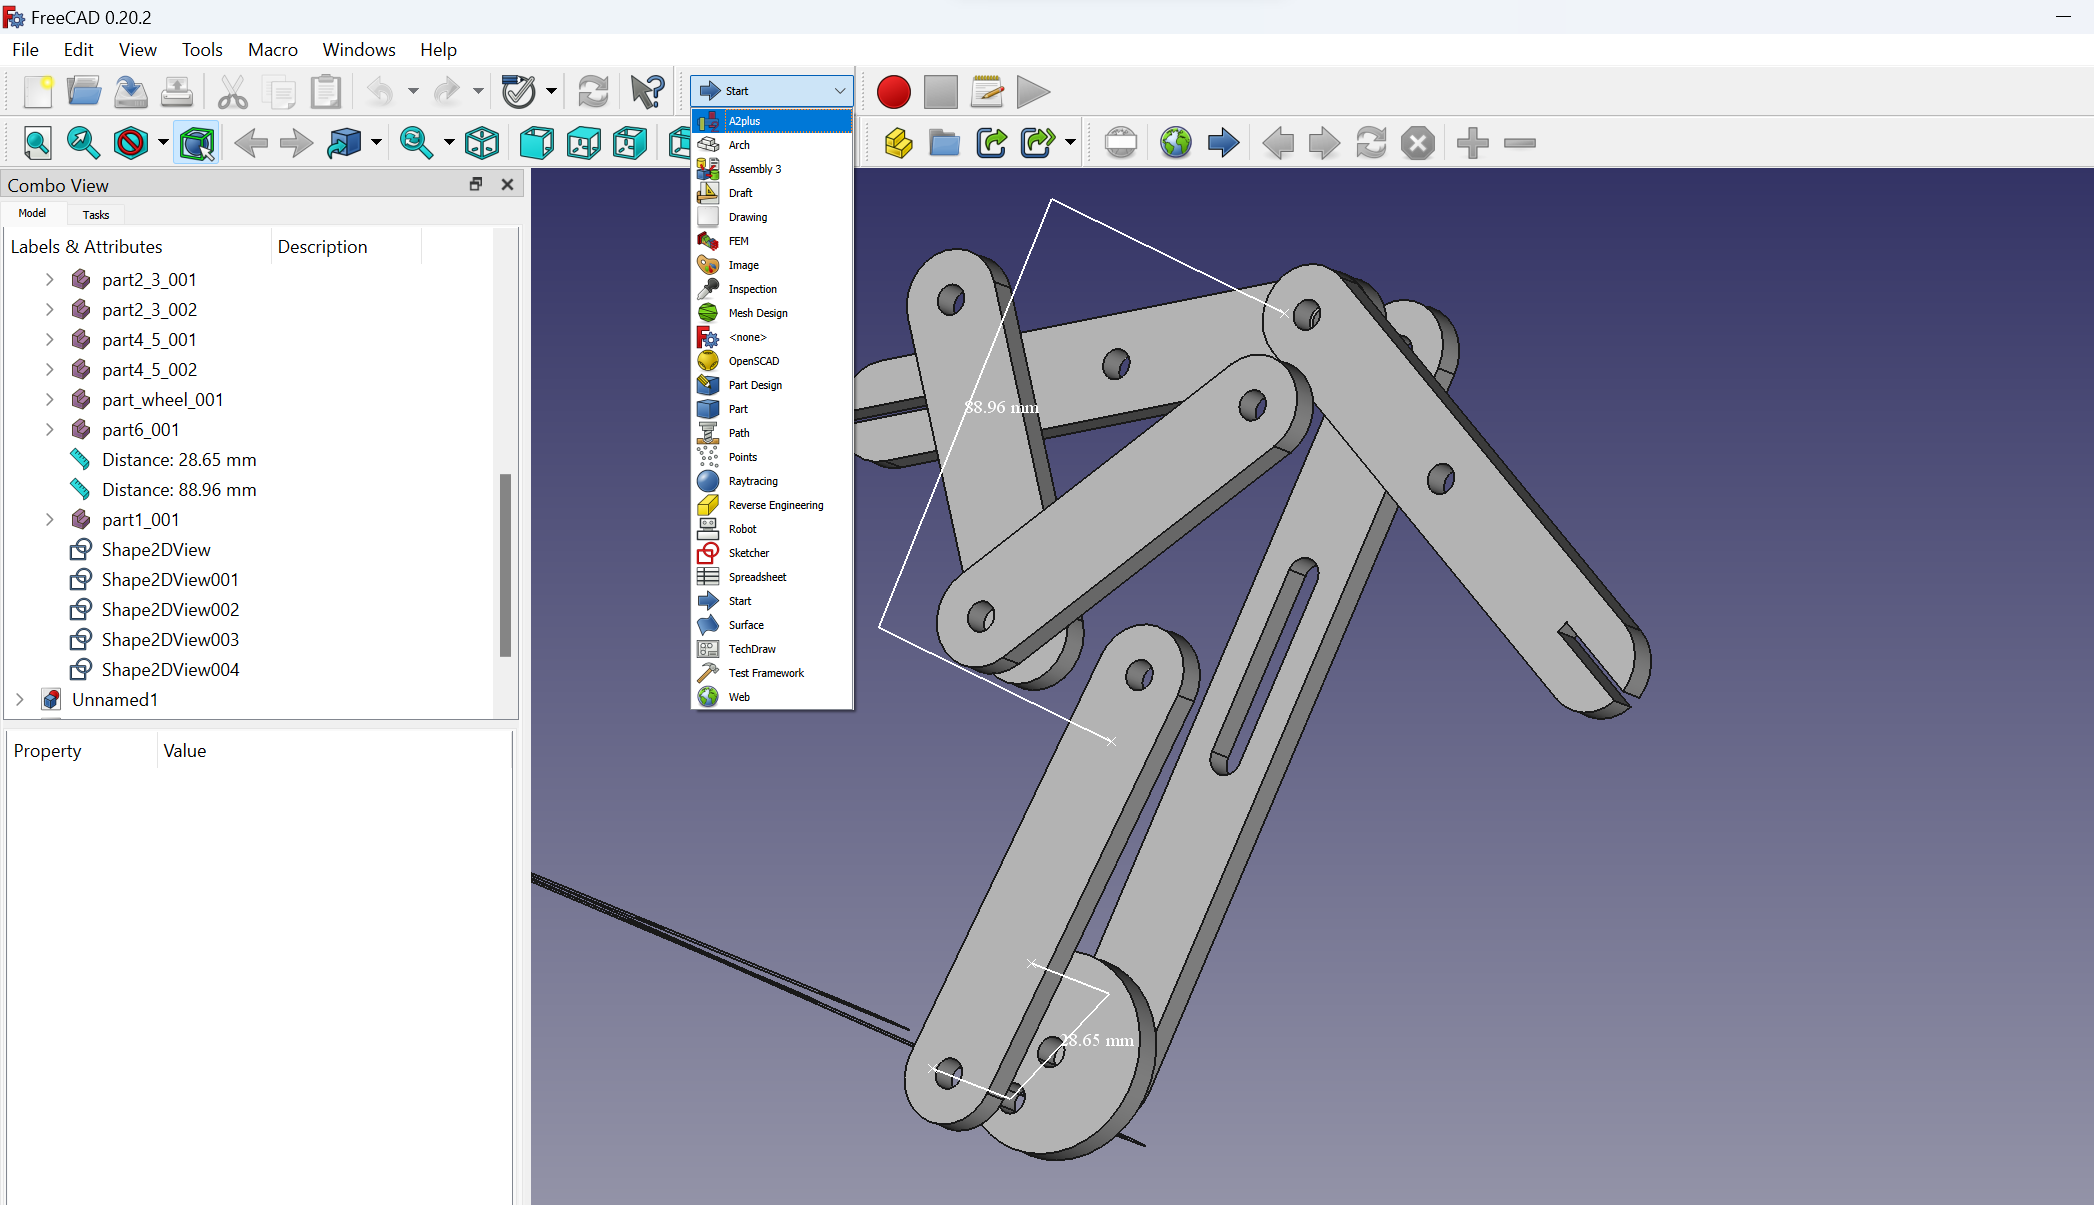
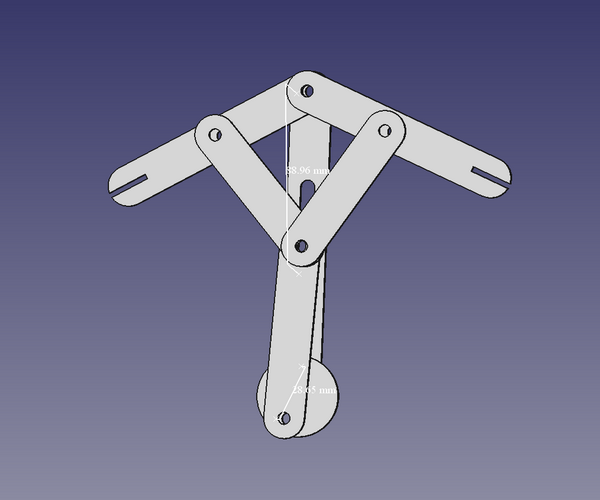
I used FreeCAD to create a model of the mechanism. To better comprehend how the different parts work together, I initially designed everything on a single sketch. Each part is clear and straightforward, combining to form a simple yet effective mechanism.
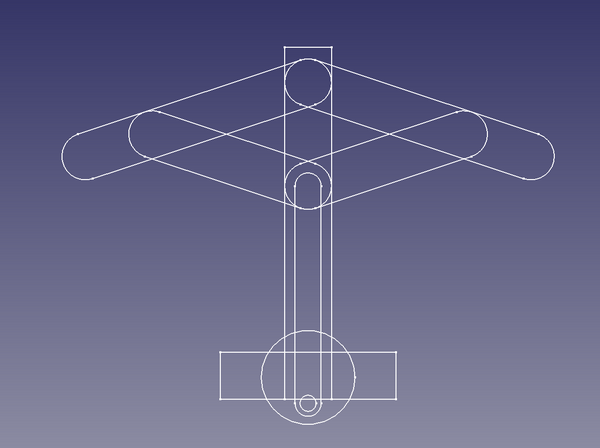
This allowed me to move certain parts and observe the movement of other parts, helping me grasp the overall scale of the mechanism.
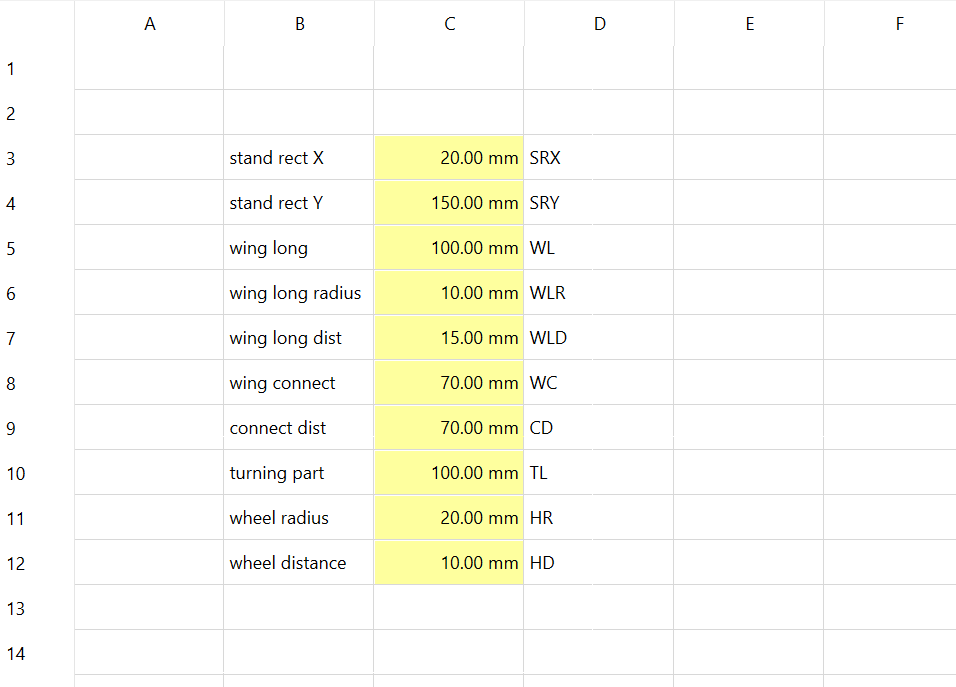
Since the model is parametric, I can easily modify the values of various parameters as needed.
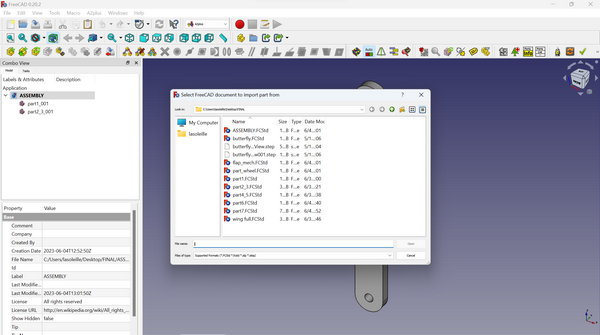
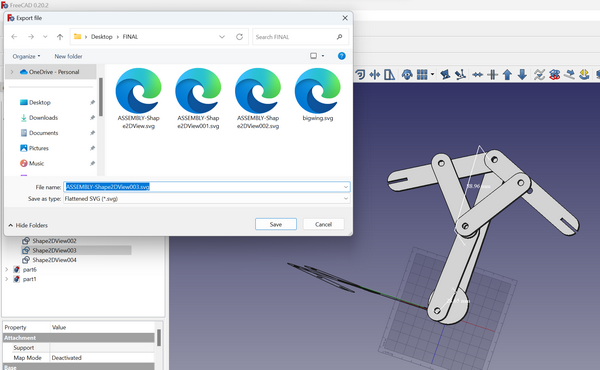
After that, I proceeded to create separate models for each individual part of the mechanism.
To ensure efficient assembly and easy organization, I saved each part separately. This allowed me the flexibility to utilize the A2plus Assembly workbench effectively.
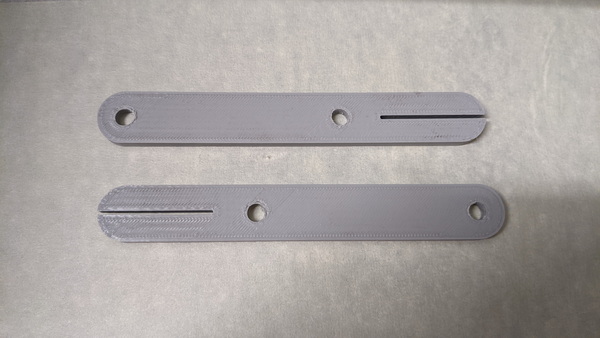
Prototyping
Before proceeding with the printing of the parts, I opted to test the mechanism’s functionality by cutting it out using a laser cutter.

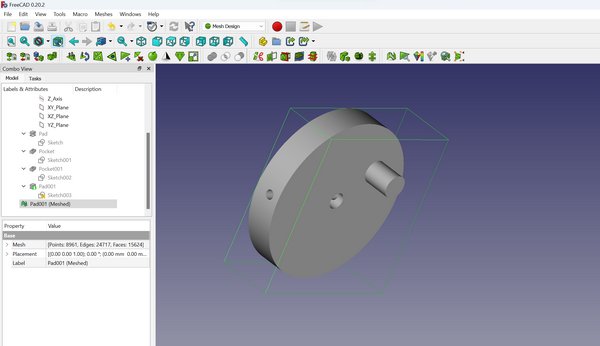
3D Printing
Before initiating the printing process, I made some essential modifications and generated the meshes for each component of my flying mechanism.
It looks great! :)
Electronics
For my final project, I made the decision to incorporate the PCB that I created earlier in the development process during Networking and Communications week.
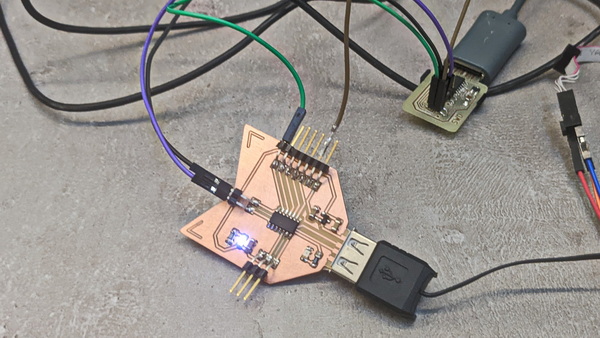
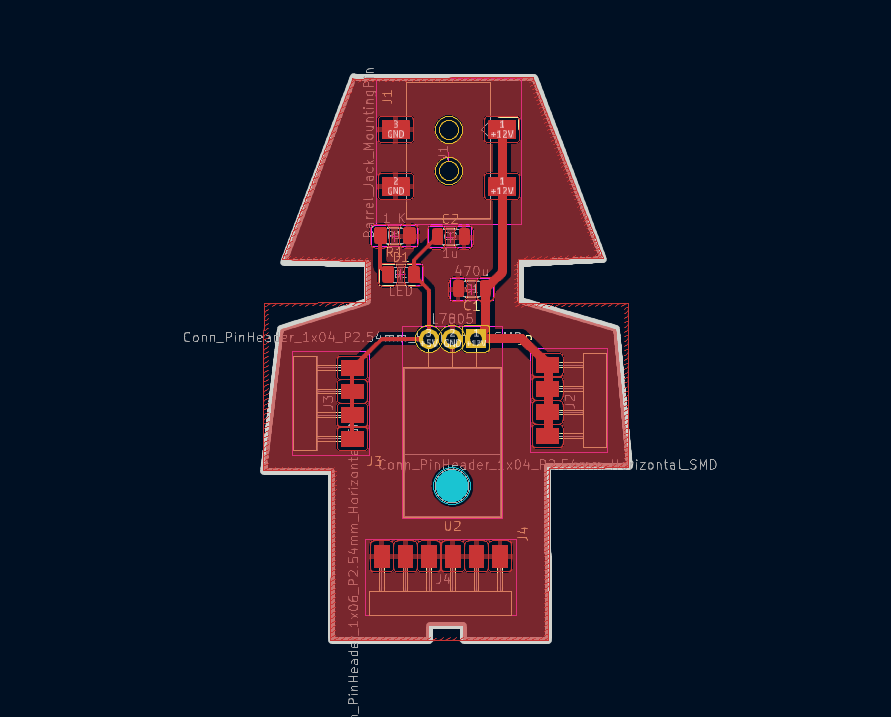
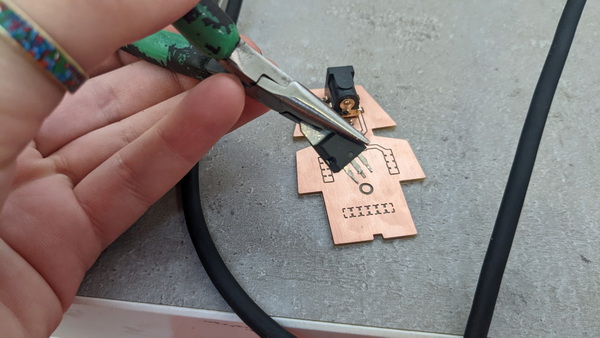
In this particular scenario, I realized the necessity of fabricating an additional PCB. This new PCB serves the purpose of enabling a 12V input connection to the relay and includes a voltage regulator to transmit the appropriate current to my board.

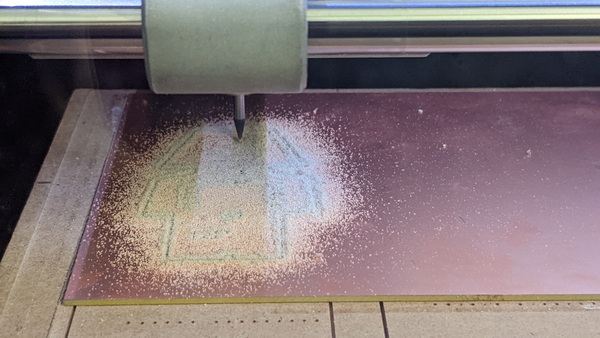
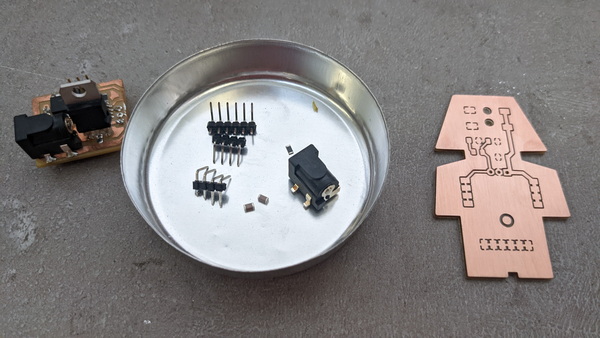
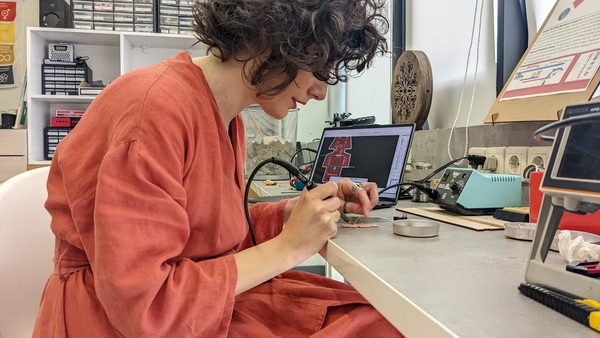
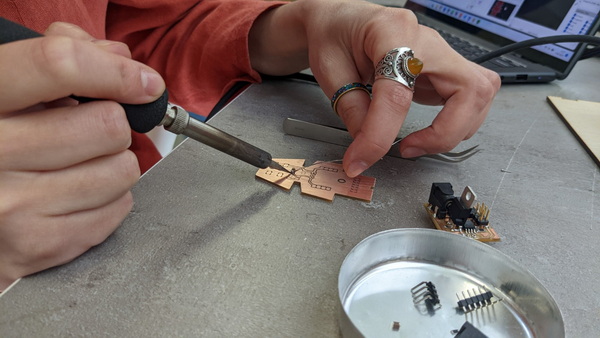
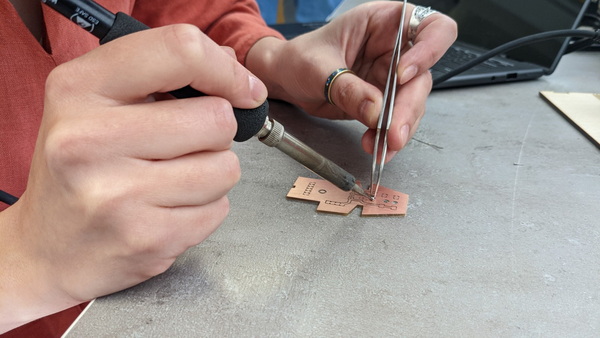
Throughout my journey in Fab Academy, I discovered a newfound enjoyment in the process of milling PCBs and, in particular, soldering. Despite the inherent challenges and the inability to guarantee a flawless outcome, I found this process to be liberating, as it allowed me the freedom to work on diverse projects and design custom PCBs for specific use cases. The ability to create my own PCBs has empowered me to pursue various ideas and explore unique solutions.
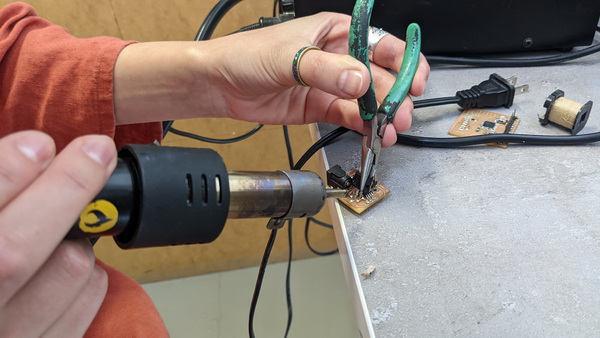
For my project, my instructor Babken Chugaszyan recommended using the LM7805 voltage regulator. He kindly permitted me to salvage this component from an old PCB, which was a great opportunity to reuse and repurpose electronic parts effectively. This suggestion not only saved costs but also aligned with the principles of sustainability and resourcefulness emphasized in the Fab Academy.
I used the hot air to take it off.
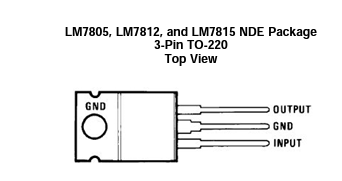
The pinout of LM7805 from datasheet:
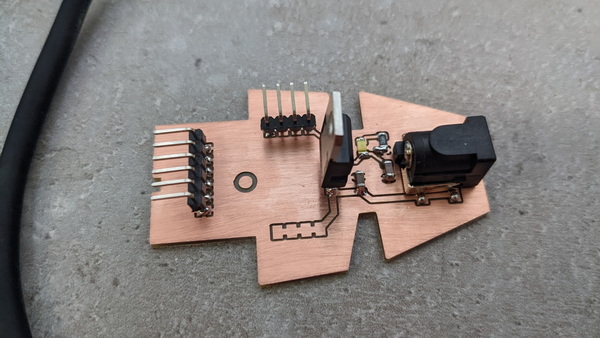
The LED on my board and the tester brought a smile to my face. It was a moment of joy and satisfaction to see the components come to life and witness the successful functioning of my creation. :)

Connections
Sound Sensor
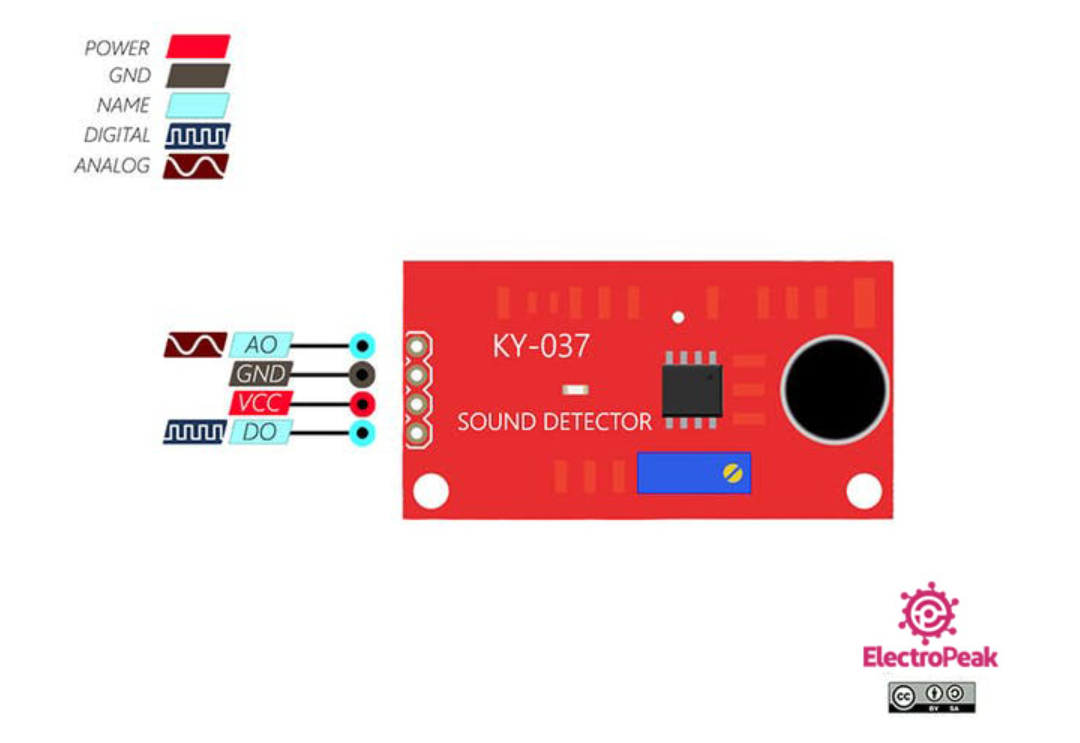
For my project I used KY-037 Sound Sensor.
The KY-037 analog sound sensor is a remarkable component that detects sound levels in its surroundings. With its built-in microphone, it can convert sound into an electrical signal that can be measured and processed by a microcontroller or other electronics. The analog output of the KY-037 provides a varying voltage level corresponding to the intensity of the sound detected.
This sensor is highly versatile and finds applications in various projects, including sound-activated systems, voice-activated devices, music visualization, and noise monitoring systems. Its sensitivity can be adjusted using an onboard potentiometer to suit different sound environments and requirements.
Here is the Pinout:
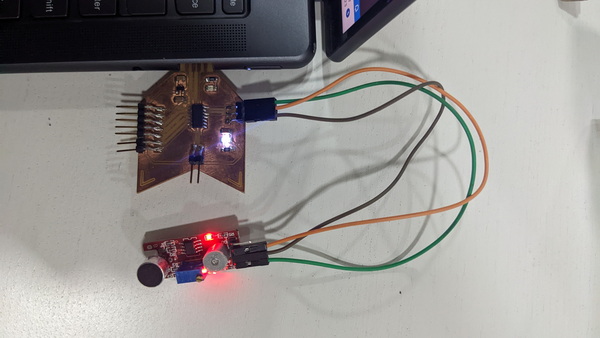
To connect the sensor properly I opened the schematic of my PCB and the pin map.
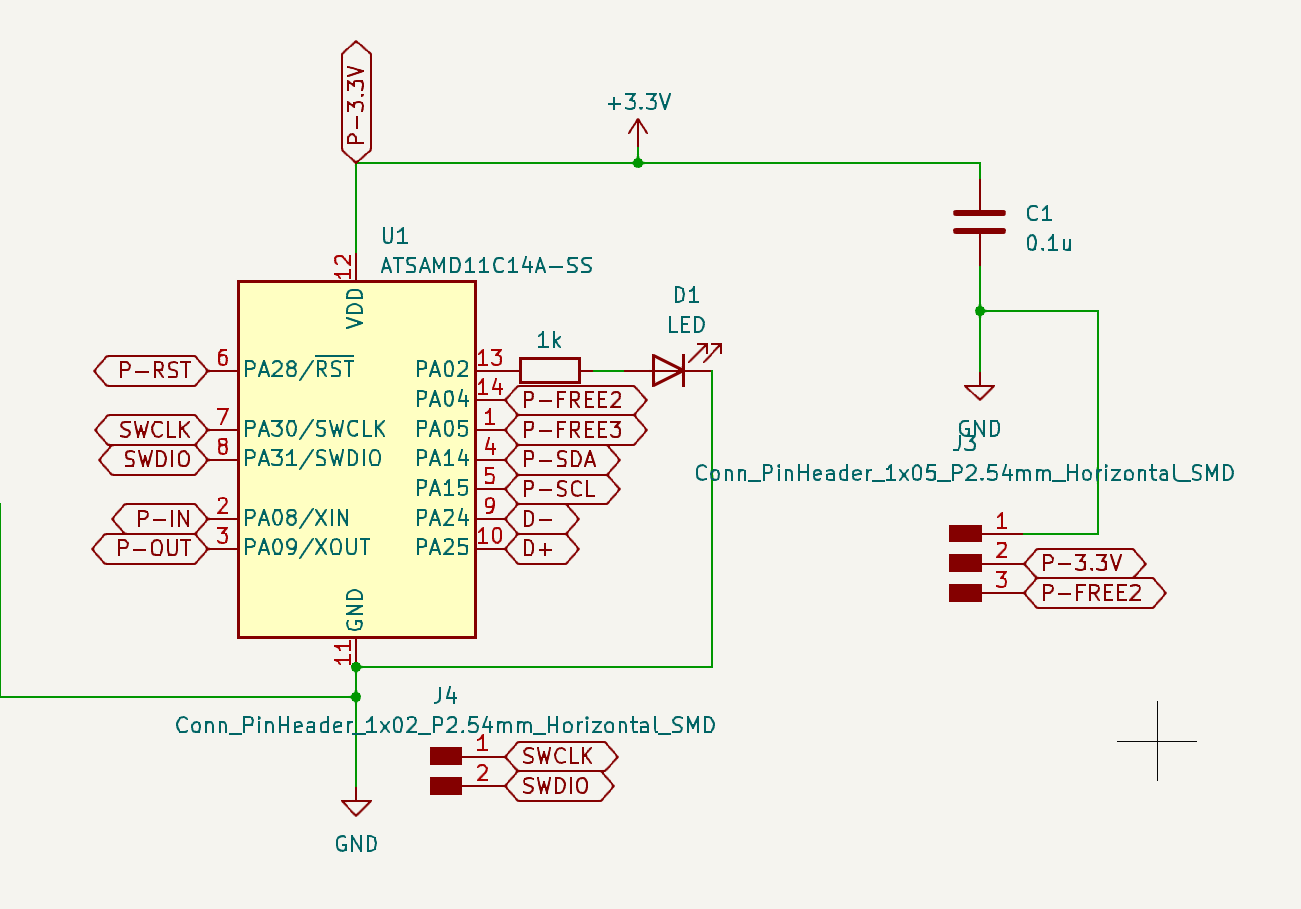

I decided to use the analog pin of the sensor and choose pin 4 to get analog signal.
const int soundOutPin = 8;    // Digital output pin from sound sensor
const int soundInPin = 4;    // Analog output pin from sound sensor
const int ledPin = 2;        // Digital pin for LED


const int soundValueThreshold = 100;  // LED activation
const int blinkDuration = 200;        // Blink duration

void setup() {
  pinMode(soundOutPin, OUTPUT);
  pinMode(ledPin, OUTPUT);
  digitalWrite(ledPin, LOW);
  Serial.begin(9600);
}

void loop() {
  int soundValue = analogRead(soundInPin);  // Read sound sensor value

  if (soundValue > soundValueThreshold) {
    digitalWrite(ledPin, HIGH);  // Turn on the LED
    delay(500);
    digitalWrite(ledPin, LOW);
    Serial.print("Loud sound detected! Sound value: ");
    Serial.println(soundValue);
  }
}
This code continuously reads the analog input from the sound sensor and checks if the sound level surpasses the predefined threshold. When a loud sound is detected, the LED is briefly turned on to provide a visual indication, and the detected sound value is printed to the serial monitor for further analysis or monitoring purposes.
Relay + DC motor
For my project I used a DC motor connected to a 5V Relay Module.
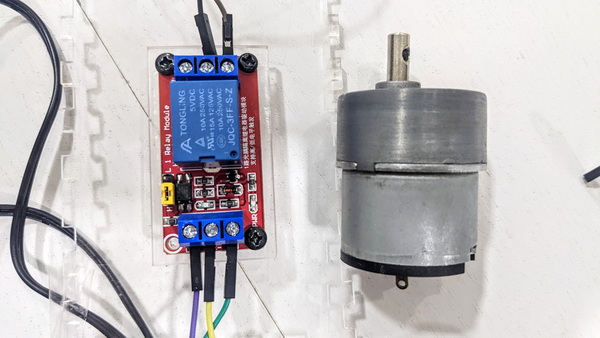
This module is an essential electronic component that allows low voltage control signals to switch higher voltage circuits. It acts as a switch that can be controlled by a microcontroller or other digital devices.
The relay module operates on a 5V power supply, making it compatible with common microcontrollers and digital systems. It consists of an electromagnet that, when energized, triggers the switching mechanism, allowing current to flow through the relay’s contacts.
To connect the relay to the DC motor, I followed the steps from this video:
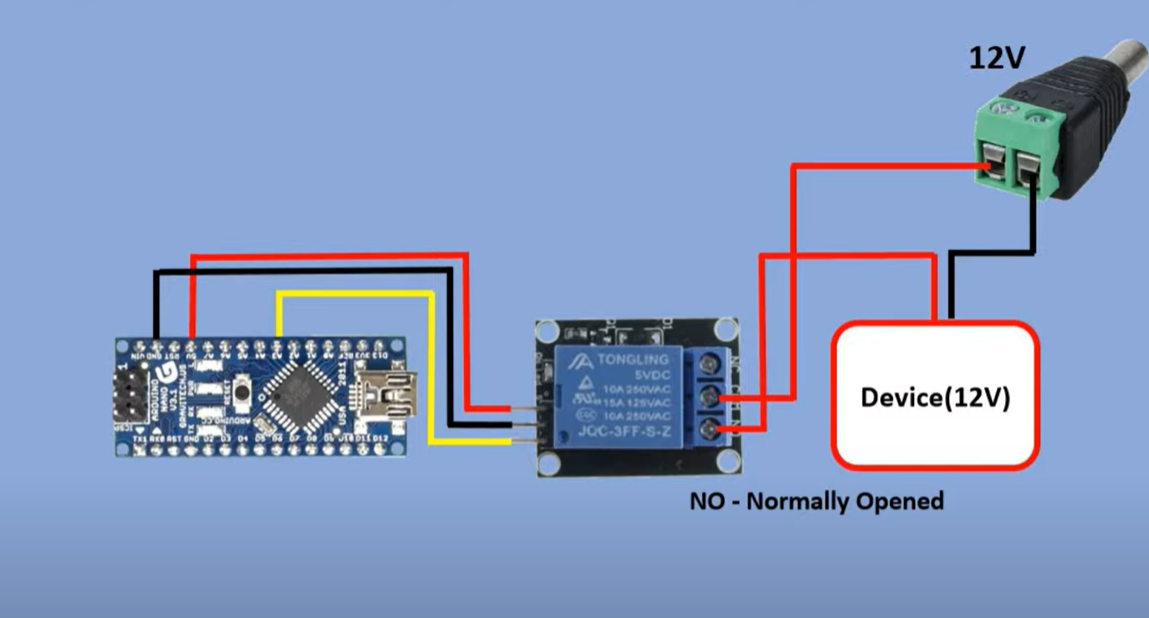
- Connect the motor’s positive terminal to the relay’s common terminal.
- Connect the relay’s normally open (NO) or normally closed (NC) terminal to the positive terminal of the power supply.
- Connect the motor’s negative terminal directly to the negative terminal of the power supply.
- Apply the appropriate control signal from a microcontroller or switch to the relay’s control input to activate or deactivate the motor.
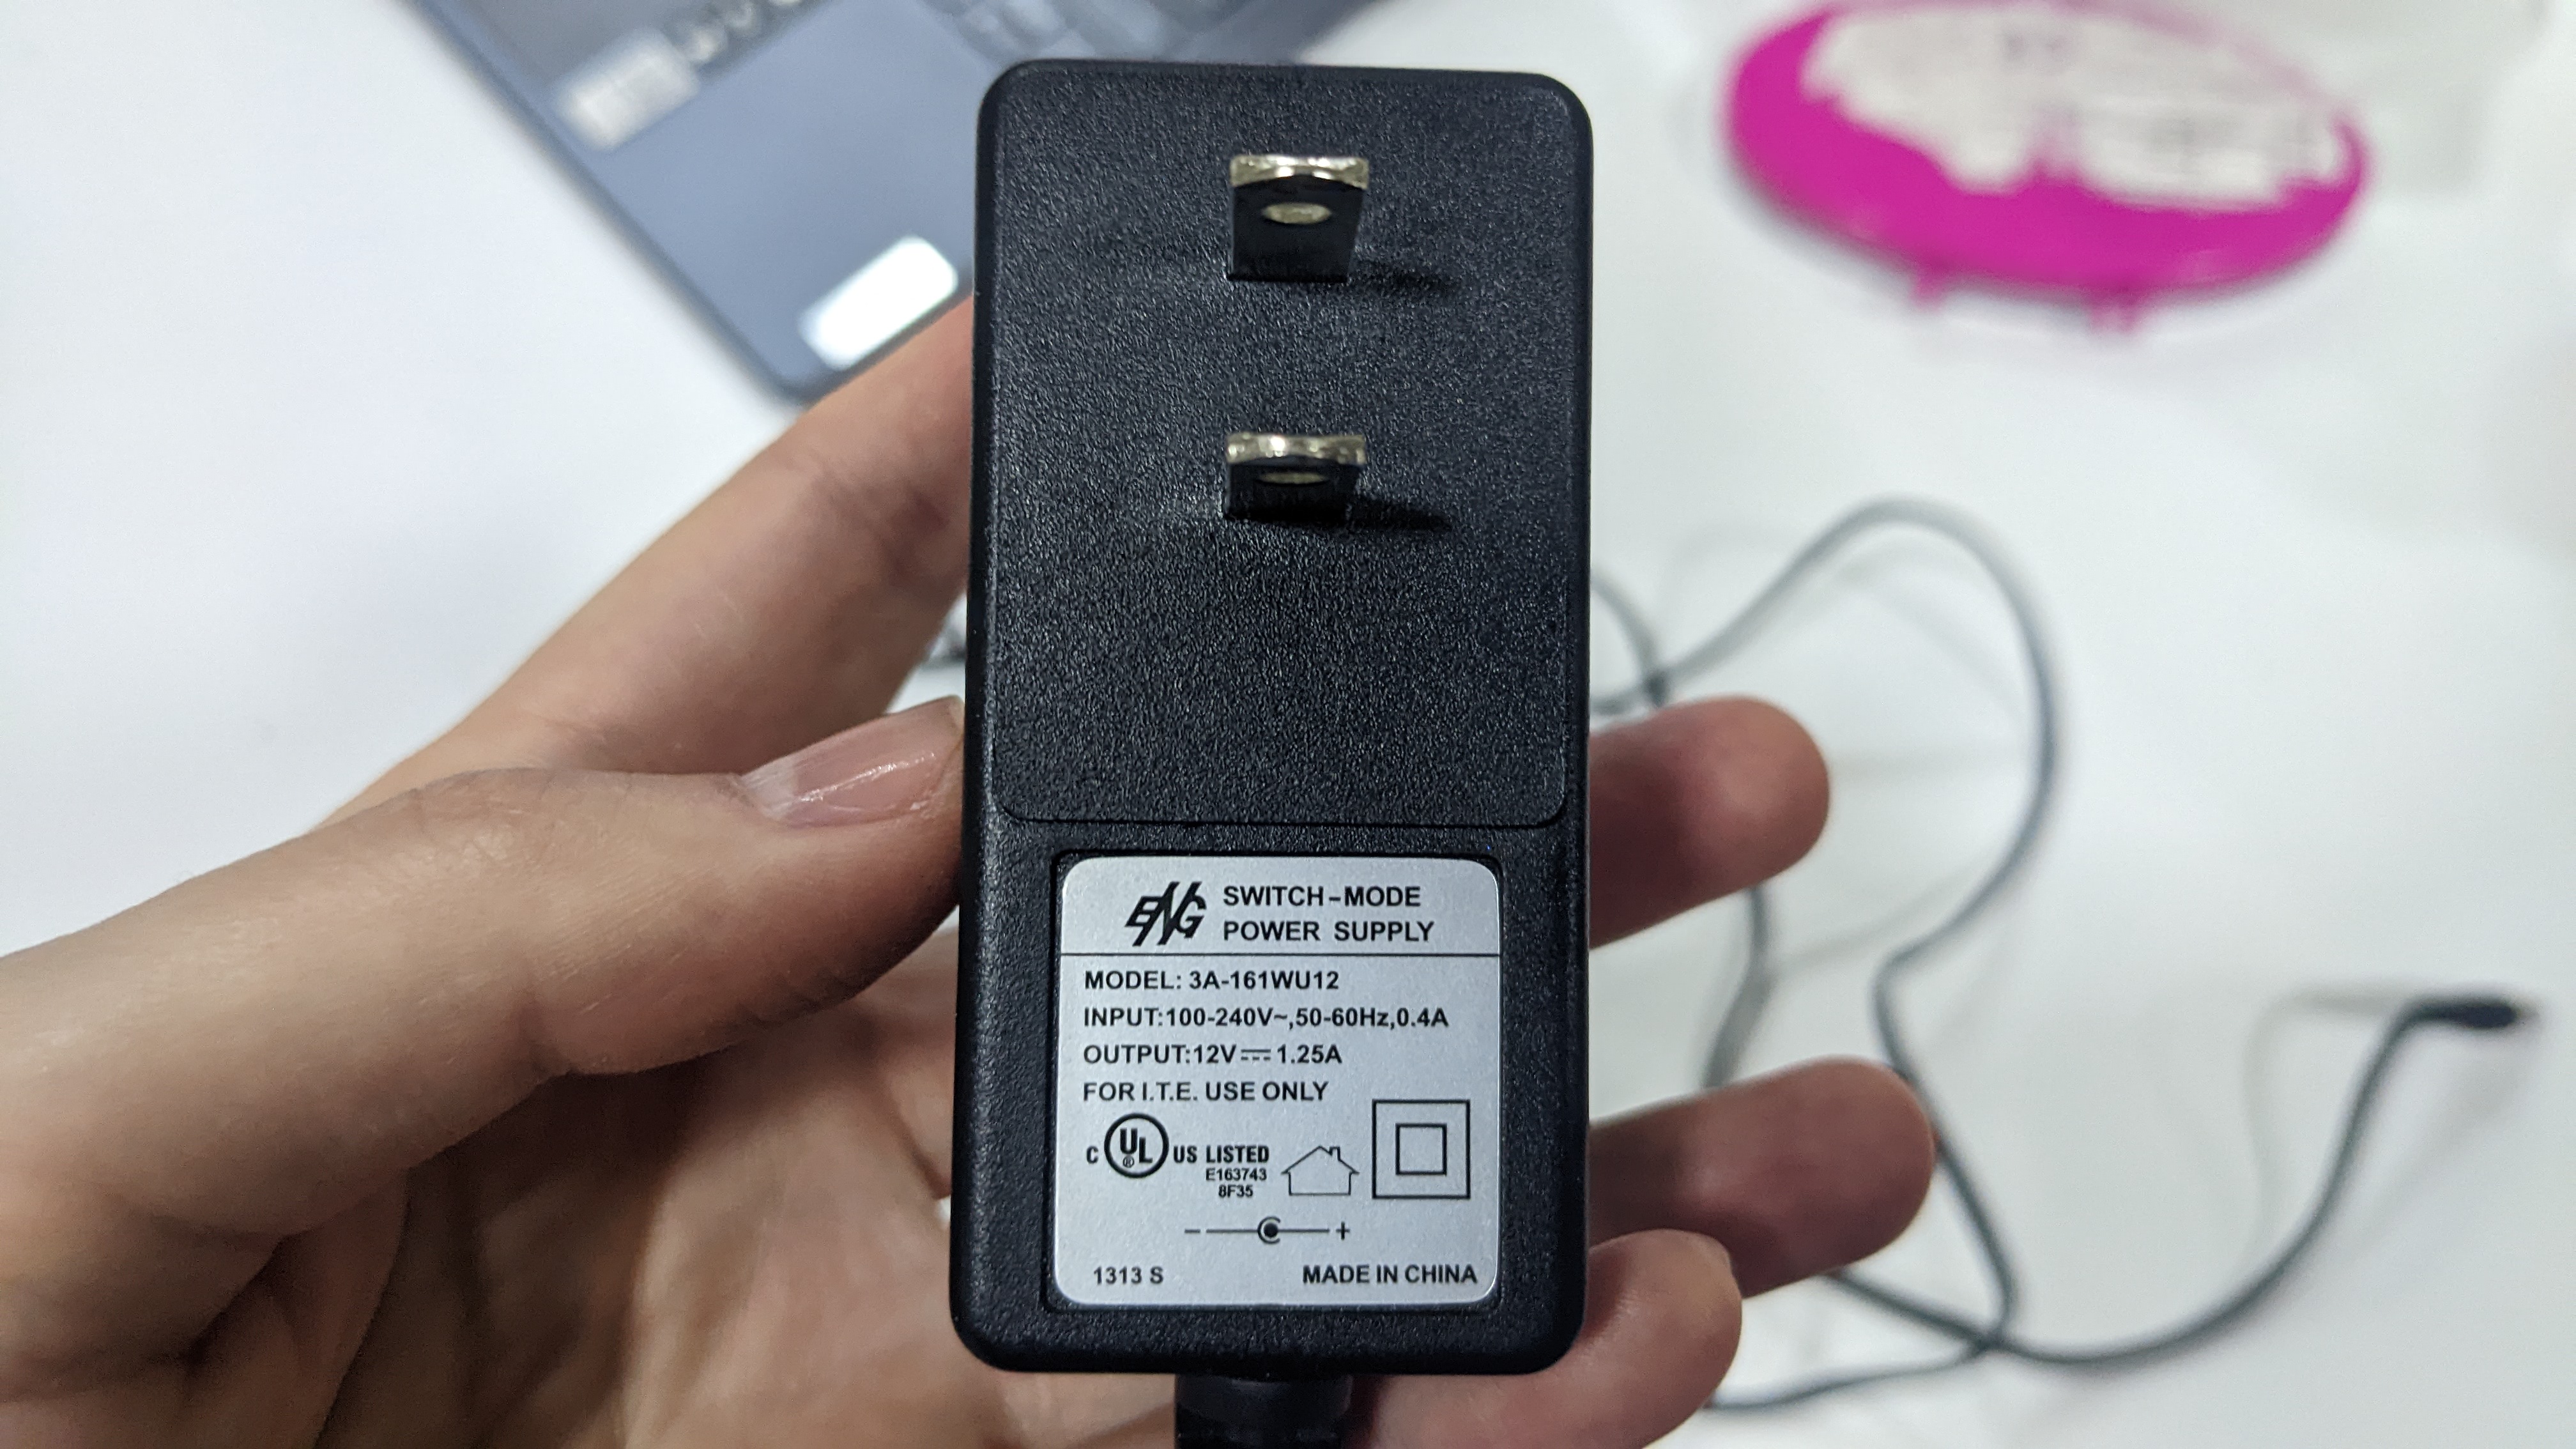
As a power supply I used 12V Switch - Mode Power Supply.
const int soundSensorPin = 4;  // Connect the sound sensor to pin 4

const int motorPin = 9;  // Connect the relay module IN pin to pin 9

void setup() {
  Serial.begin(9600);

  pinMode(soundSensorPin, INPUT);

  // Set motor control pin as output
  pinMode(motorPin, OUTPUT);
  digitalWrite(motorPin, LOW);
}

void loop() {

  int soundLevel = analogRead(soundSensorPin);
  Serial.println(soundLevel);
  // Check if the sound level is higher than 50
  if (soundLevel > 50
  ) {
    // Turn on the motor via the relay
    digitalWrite(motorPin, HIGH);

    delay(5000); // Motor runs for 5 seconds

    // Turn off the motor
    digitalWrite(motorPin, LOW);
  }
}
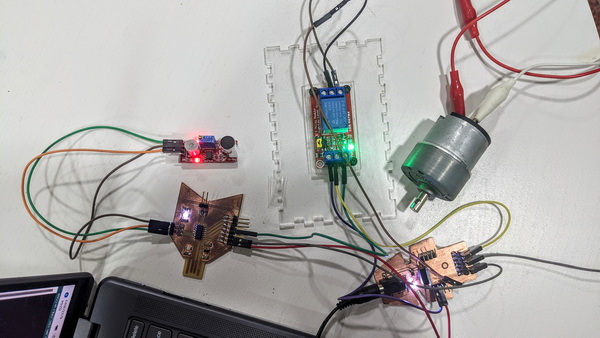
This code continuously checks the sound level from the sensor and activates the motor via the relay if the sound level surpasses the threshold of 50.
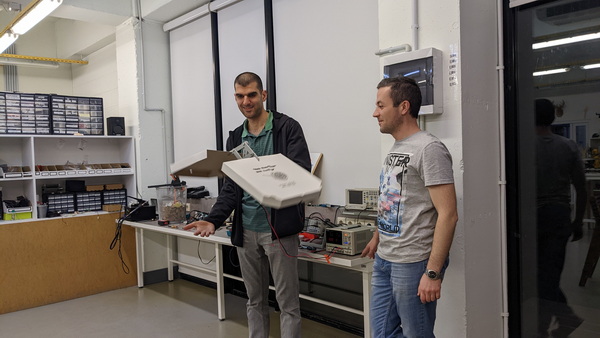
Babken and Rudolf had a great time experimenting with the flying mechanism while connected to a power supply. They decided to get creative and use pizza cardboard to construct the wings. The experience was incredibly amusing and brought a lot of laughter and enjoyment to the process.
Few finishing details!
Acrylic wings
I utilized CorelDraw to design acrylic wings that would seamlessly integrate with the 3D printed mechanism. Those laser cutted wings will be covered with fabric, adding an extra touch of aesthetic appeal to the overall design.
Acrylic box
I discovered the Box generator for laser cutting.
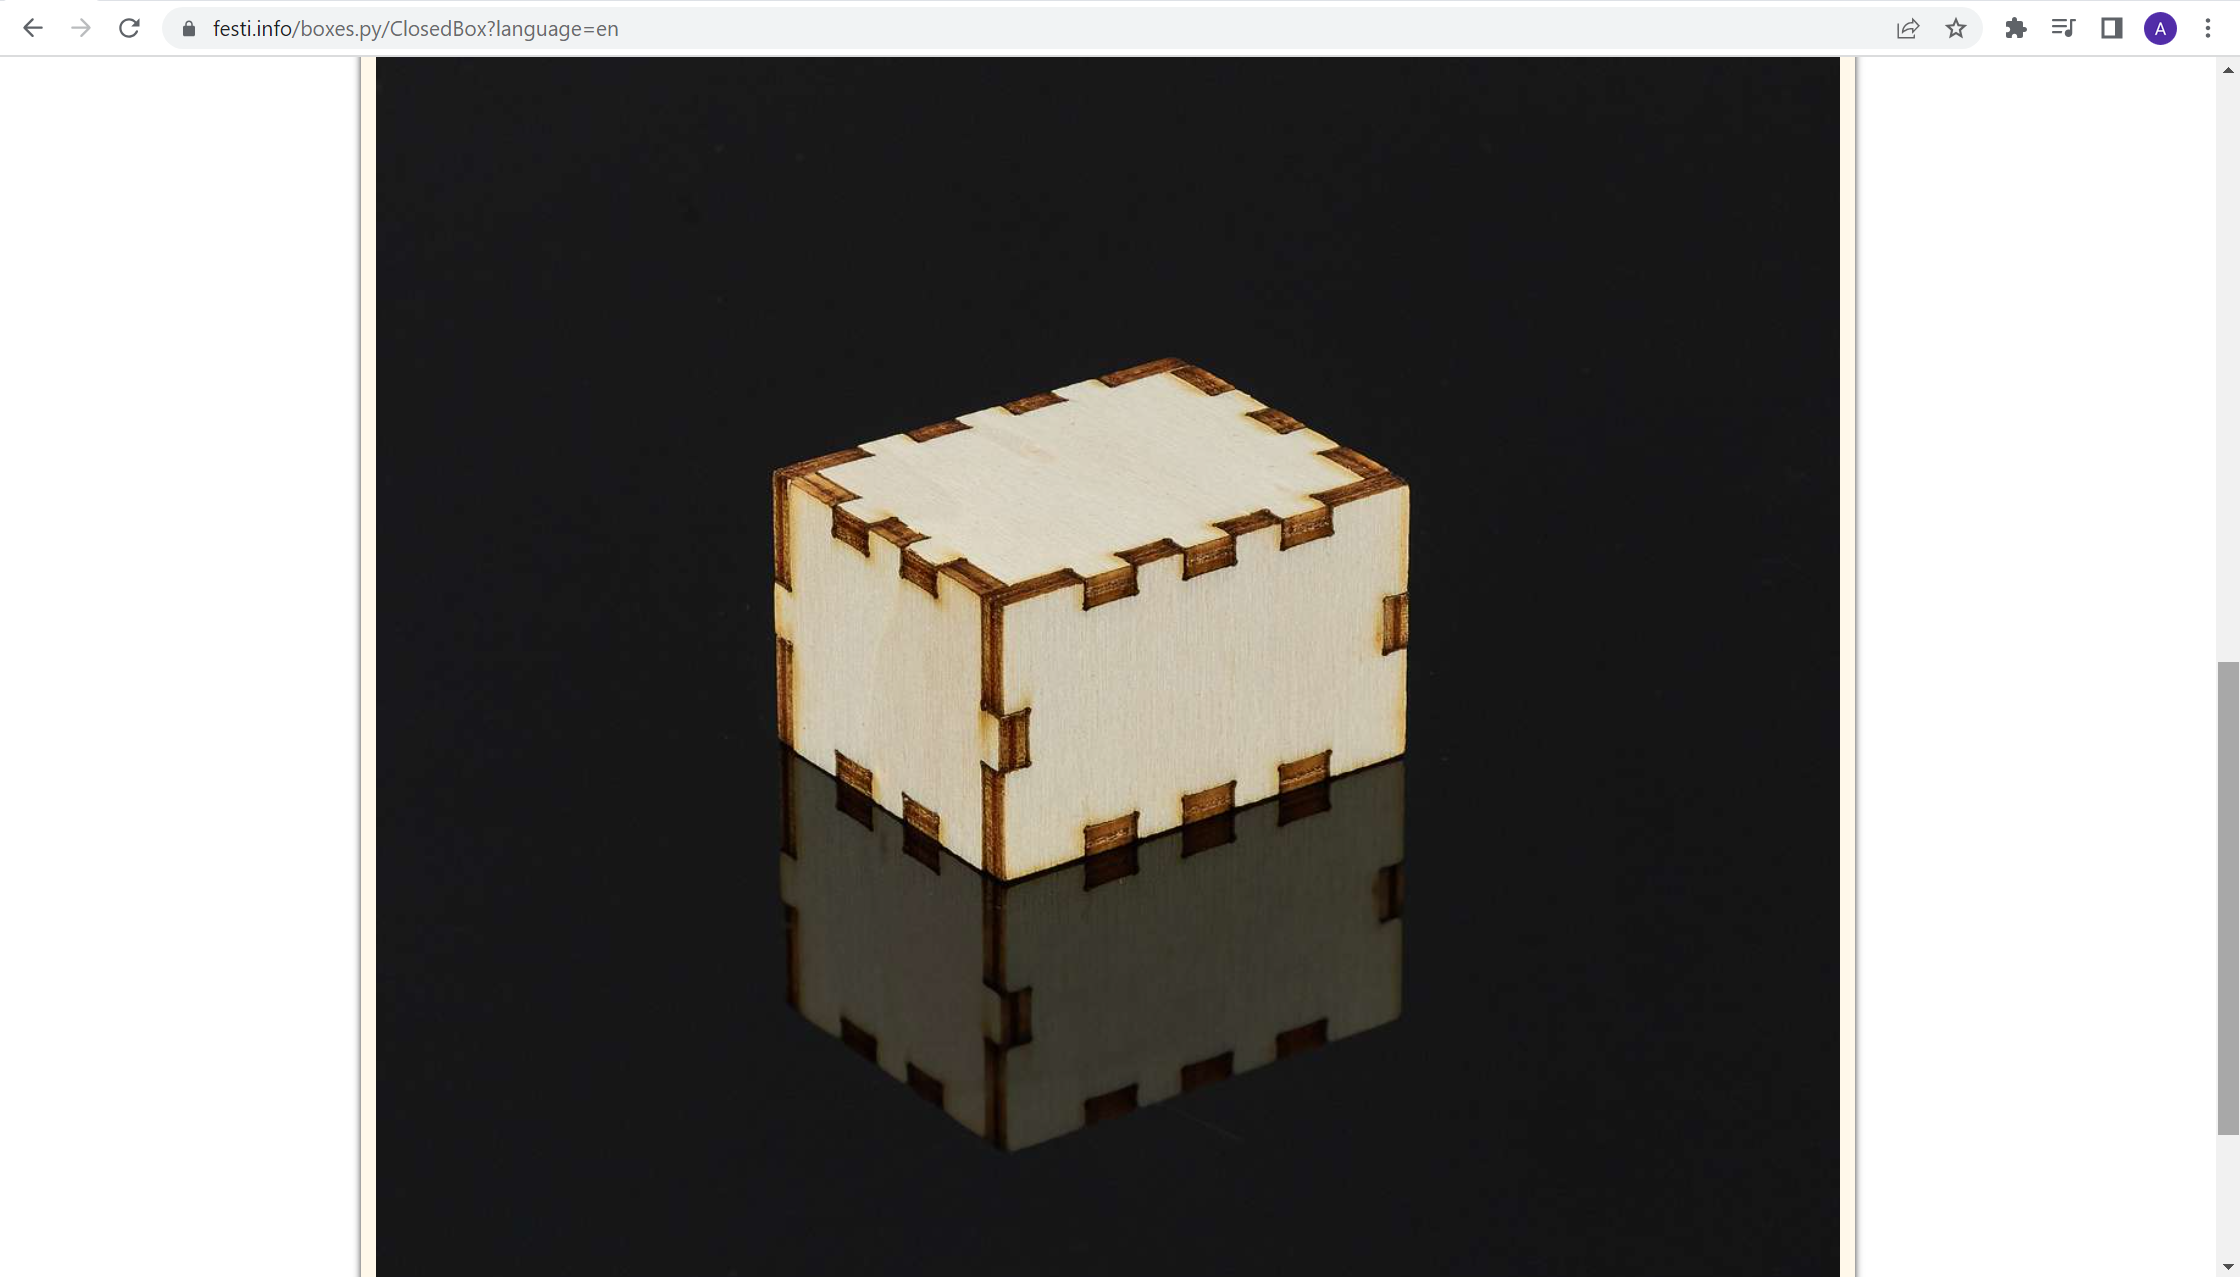
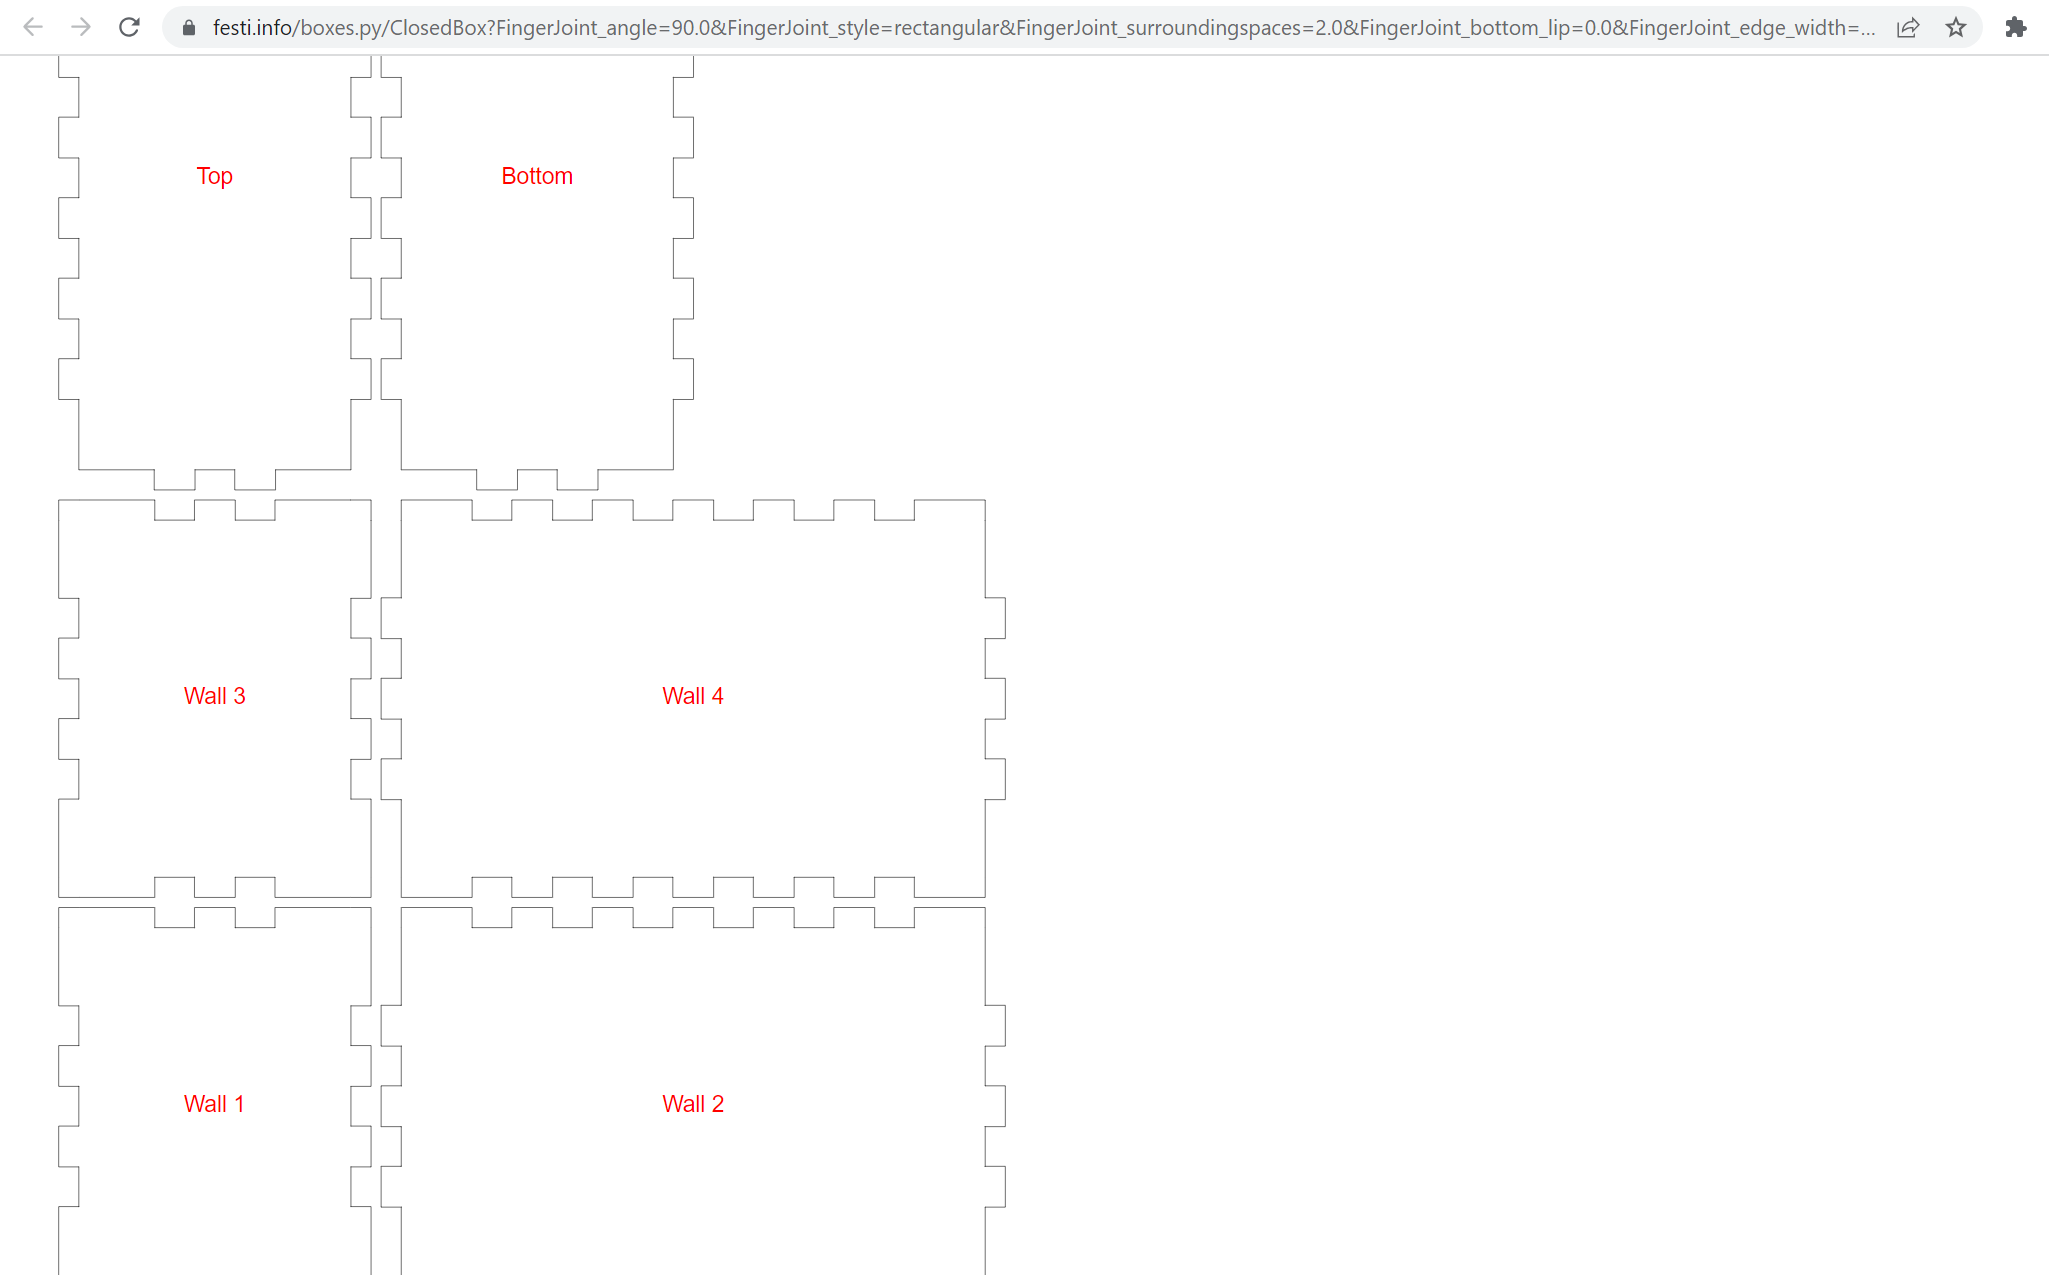
After making a few adjustments in CorelDraw, I successfully obtained the desired design that accommodates all the electronic components. Each part now has its designated spot, ensuring proper placement and organization within the overall assembly. This meticulous arrangement ensures optimal functionality and ease of access when working with the electronic elements.
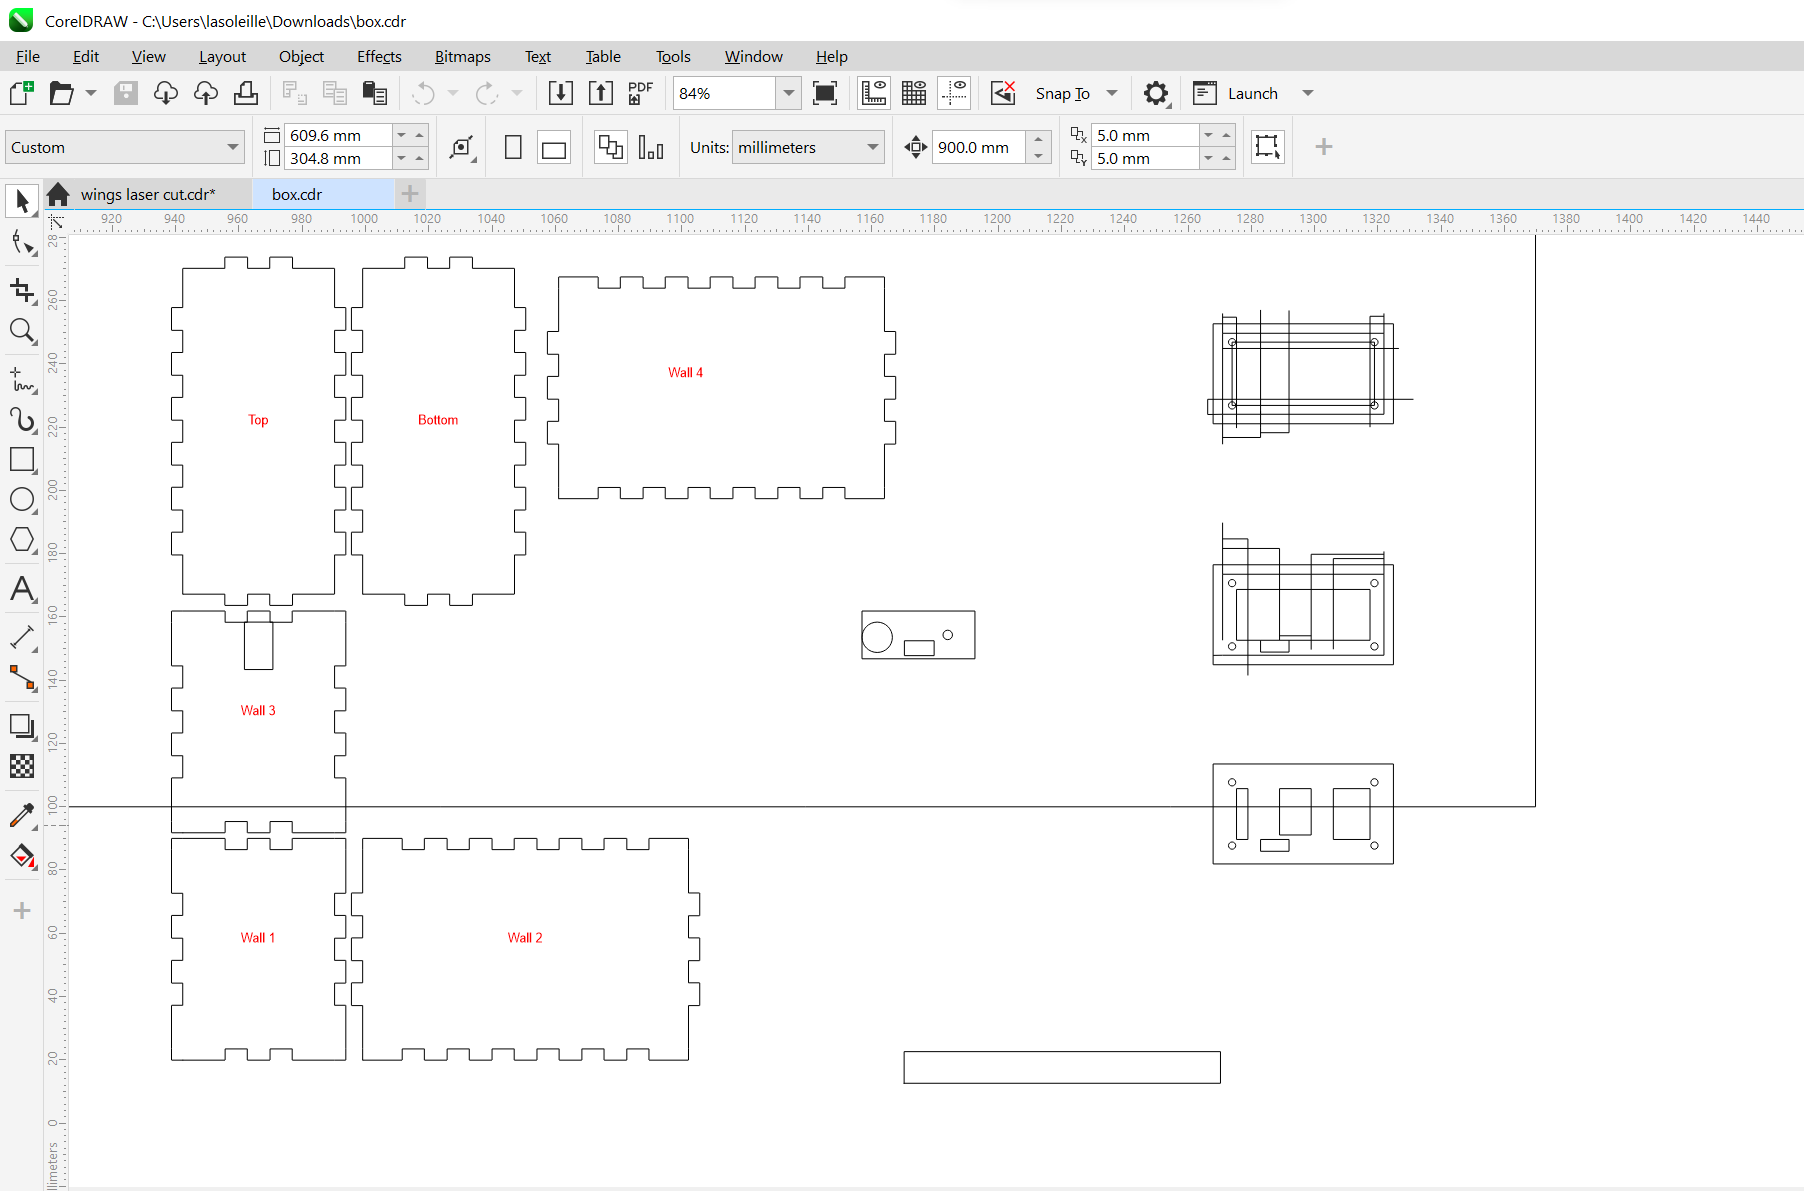
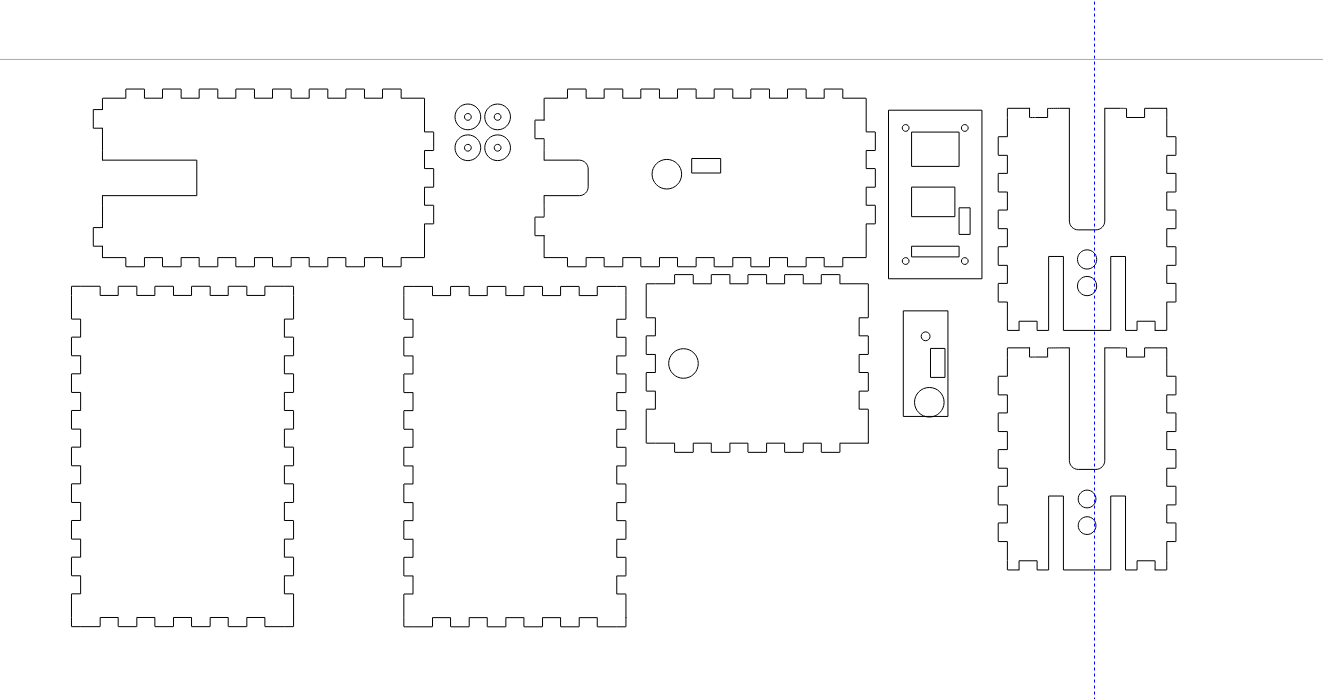
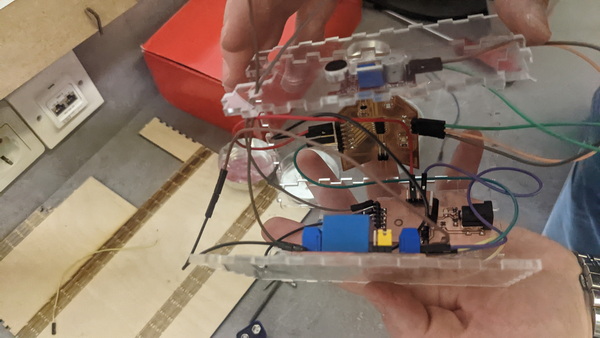
With the great help of Rudolf Igityan I successfully managed to fit all of my electronic components within a beautiful transparent box. This accomplishment not only showcases the organization and careful arrangement of the parts but also adds a visually appealing element to the overall design. The transparent box allows for easy visibility and access to the components, making it both functional and aesthetically pleasing.
The Joy
Now, both you and I can share in the joy of witnessing the happiness of my daughter and her friend as they play with the large moving butterfly. Their excitement grows as they cry out louder and louder, causing the butterfly’s wings to gracefully flutter.
In the midst of this delightful moment, my daughter turns to me and asks, “Mom, are we pretending to scare a real butterfly?” It’s a heartwarming question that reminds us of the magic and wonder that can be created through art.
Inspired by this joyful experience, let’s embrace and nurture this happiness. Let’s harness our creativity and imagination to create a living art that captivates and inspires others. Together, we can continue to explore new ways to bring joy and wonder to the world through our artistic endeavors.
Materials
| Qty | Description | Price | Source | Notes |
|---|---|---|---|---|
| 1 | Steel | 0 $ | Steel factory | leftovers |
| 1 | Used Acrylic | 0 $ | Fab Lab Armenia | leftovers |
| 1 | Silicone | 7 $ | Market | |
| 1 | Components for PCB1 | 15 $ | Fab Lab Armenia | |
| 1 | Components for PCB2 | 7 $ | Fab Lab Armenia | |
| 1 | Acrylic for big wings and electronic box | 5 $ | Fab Lab Armenia | |
| 1 | PLA for 3D printing | 10 $ | Fab Lab Armenia | |
| 1 | Fabric | 5 $ | Market | |
| 1 | Relay | 1,5 $ | Fab Lab Armenia | |
| 1 | DC motor | 3,5 $ | Fab Lab Armenia |
Total 54 $
Patent vs Copyright
I have considered two primary methods for protecting my creation: patent and copyright.
A patent is an intellectual property right granted to inventors, providing exclusive rights to their inventions. It offers legal protection for novel and non-obvious inventions, granting the inventor the sole right to produce, use, or sell their invention for a specified period. By obtaining a patent for my creation, I can prevent others from utilizing or profiting from my invention without my permission, thus safeguarding its commercial value.
On the other hand, copyright protects original works of authorship, including artistic, literary, and creative expressions. This form of protection is automatic and applies to various forms of artistic and creative works, such as music, literature, paintings, and sculptures. By acquiring copyright for my creation, I can assert my rights as the creator, controlling how it is reproduced, distributed, and displayed, and preventing unauthorized use or copying.
While patent protection is more commonly associated with technological inventions, copyright is often utilized for artistic and creative works.
For my creation, I consider copyright protection to be of utmost importance. However, to ensure certainty, it is essential to consult with legal professionals and intellectual property experts to determine the most appropriate and effective strategy for safeguarding my work.
Useful links
Original Files
Plasma cutting
Laser cutting
Acrylic box for Electronics label
3D printing
Parts of Fly Mechanism (FreeCAD)
Electronics
PCB with ASMD11C:
PCB for 12V: