Computer Aided design
This week we are exploring the tools for creating new realities, and this is what I love! Since I had never studied 2D and 3D modeling before, I had a chance to discover new talents in myself and new opportunities for creativity.
About Raster and Vector
 Source: https://www.coreldraw.com/en/learn/guide-to-vector-design/vectorizing-images/
| Raster | Vector |
|---|---|
| Comprised of pixels, arranged to form an image | Comprised of paths, dictated by mathematical formulas |
| Constrained by resolution and dimensions | Infinitely scalable |
| Capable of rich, complex color blends | Difficult to blend colors without rasterizing |
| Large file sizes (but can be compressed) | Small file sizes |
| File types include .jpg, .gif, .png, .tif, .bmp, .psd; plus .eps and .pdf when created by raster programs | File types include .ai, .cdr, .svg; plus .eps and .pdf when created by vector programs |
| Raster software includes Photoshop and GIMP | Vector software includes Illustrator, CorelDraw, and InkScape |
| Perfect for “painting” | Perfect for “drawing” |
| Capable of detailed editing | Less detailed, but offers precise paths |
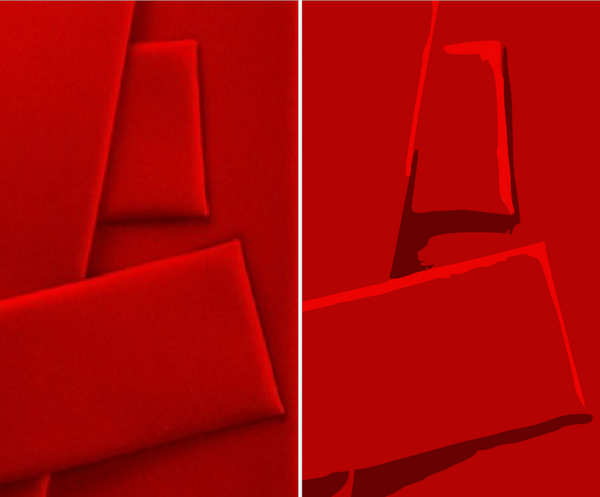
Since I have worked with Figma and Corel Draw before, I am familiar with the concepts of raster and vector. For clarity, I created an example in Corel Draw to convert a raster to a vector. I chose one of the works of my favorite Armenian contemporary artist Kevork George Kasabyan.
 Overlapping Lines, 2019
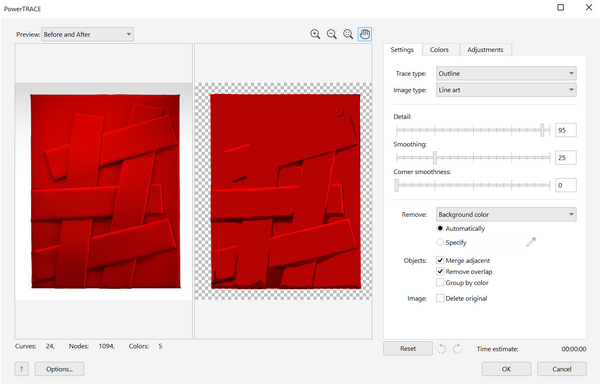
In order to get a vector file, we need to select Trace Bitmap>Outline trace>Line Art on Corel draw head control panel. If you chose to work with a logo raster file, it’s better to select Trace Bitmap>Outline trace>Logo… or Detailed logo…. How clear and detailed the vector file will be after conversion depends on the quality of the raster file.
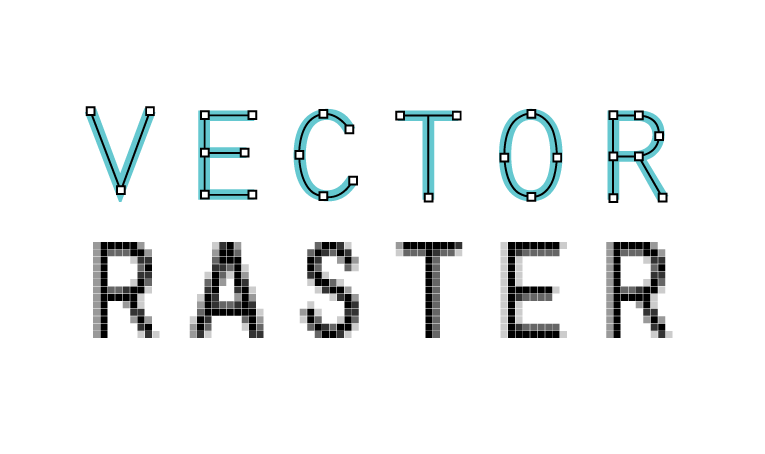
You can play in the right control panel to get the desired result. In the case of images zooming in, it is obvious that on the right side we have a raster file (pixels are clearly displayed), and on the right side a vector (with clear lines).
About 2D
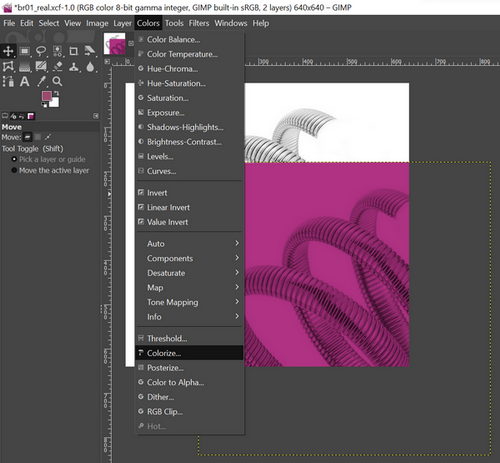
To study GIMP, I found a photo online that looks like the snake bracelet of my final project. I decided to play around with it a little, and here’s what I came up with (on the right).
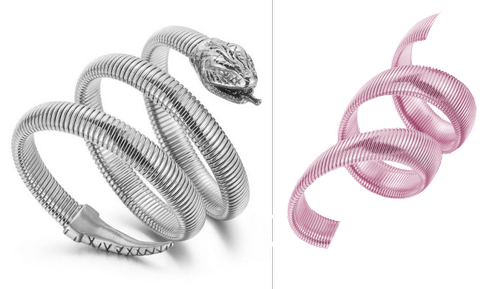
To transform the image on the left, I first used the Iraiser Tool and removed the head and tail. Then I decided to paint it. To do this, choose Colors > Colorize from the top control panel.
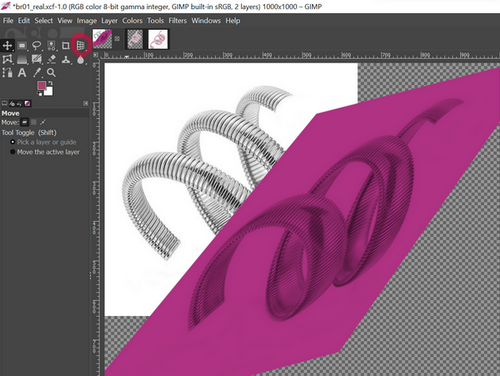
As you can see, my picture is cropped. This problem can be easily solved: Image > Canvas Size from the top control panel. In the window that opens, we can select the size of the canvas we need and click Resize.
To reshape the bracelet and give it a more 3D reality, I used the Shear Tool and 3D Transform Tool from the same tool group in the top left corner.
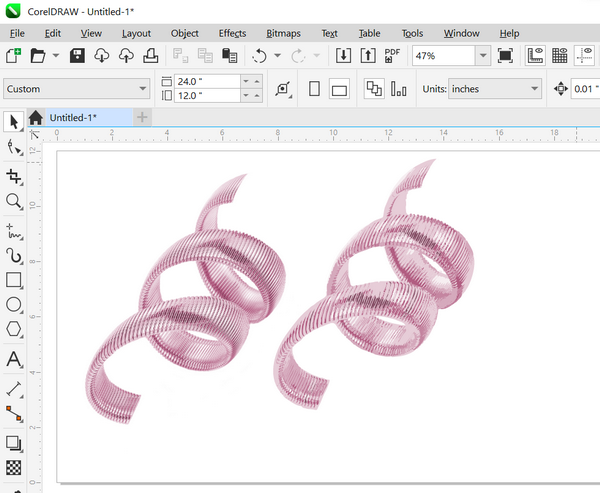
After I cleared the background with an eraser and played with colors, I decided to also render it into a vector file in CorelDrow.
I want to note that I already have the experience of creating sketches on CorelDraw and a bit on Inkscape, so I wanted to quickly move on to softwares, which became a discovery for me.
About 3D
Blender
As an artist, I was very interested in the possibilities of Blender. As soon as I opened the program, I immediately chose Sculpting.
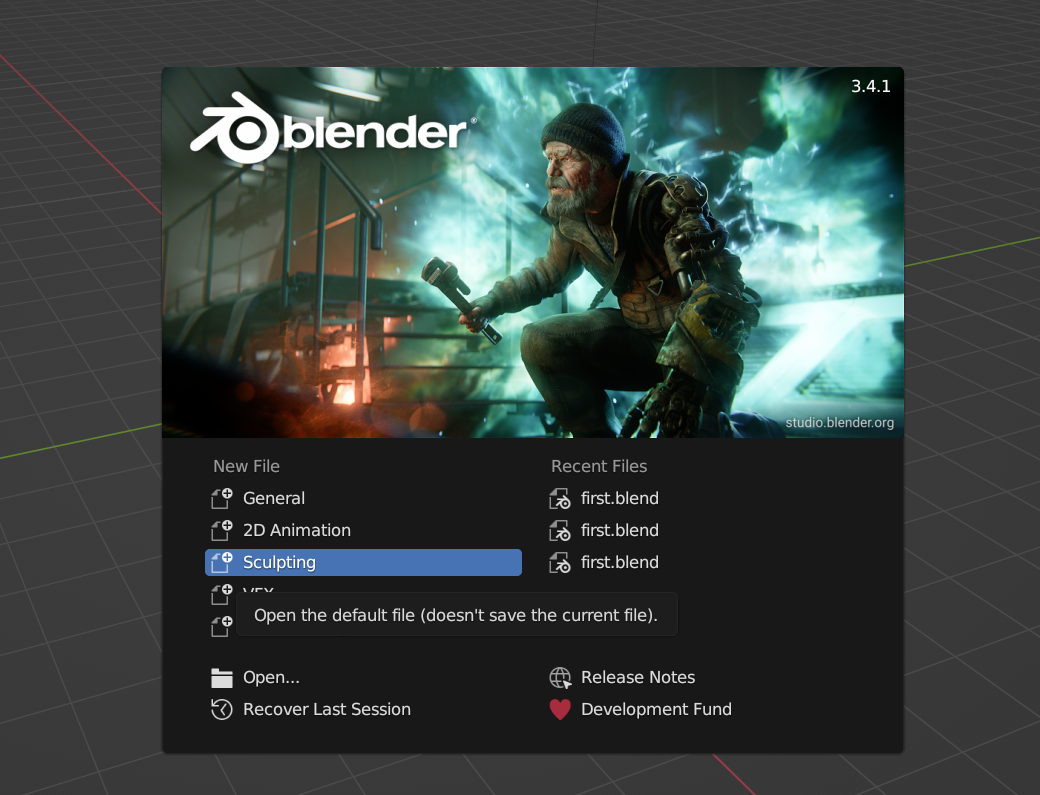
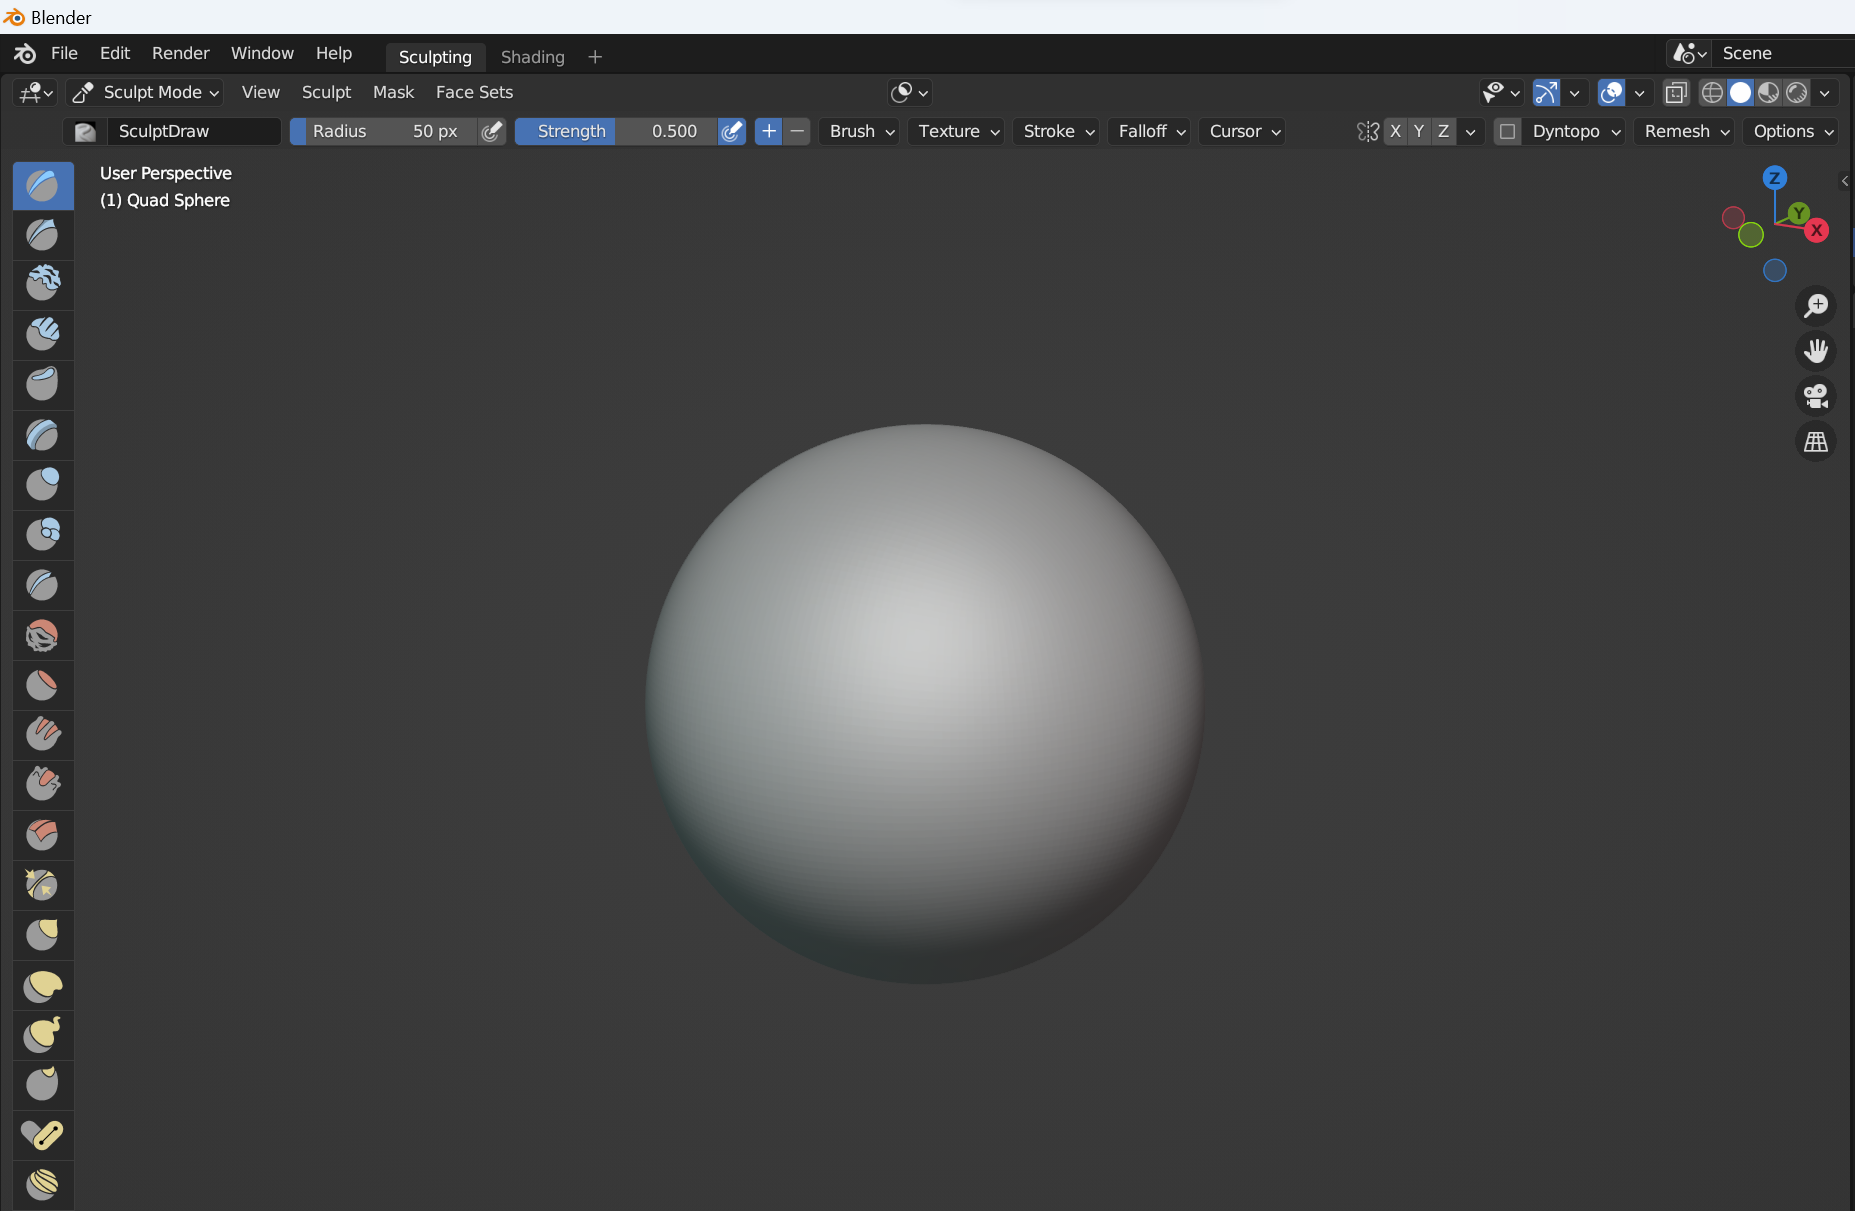
А beautiful, smooth ball opened up for me, on which I began to experiment and use all the tools on the left panel in turn. Here’s what I got:
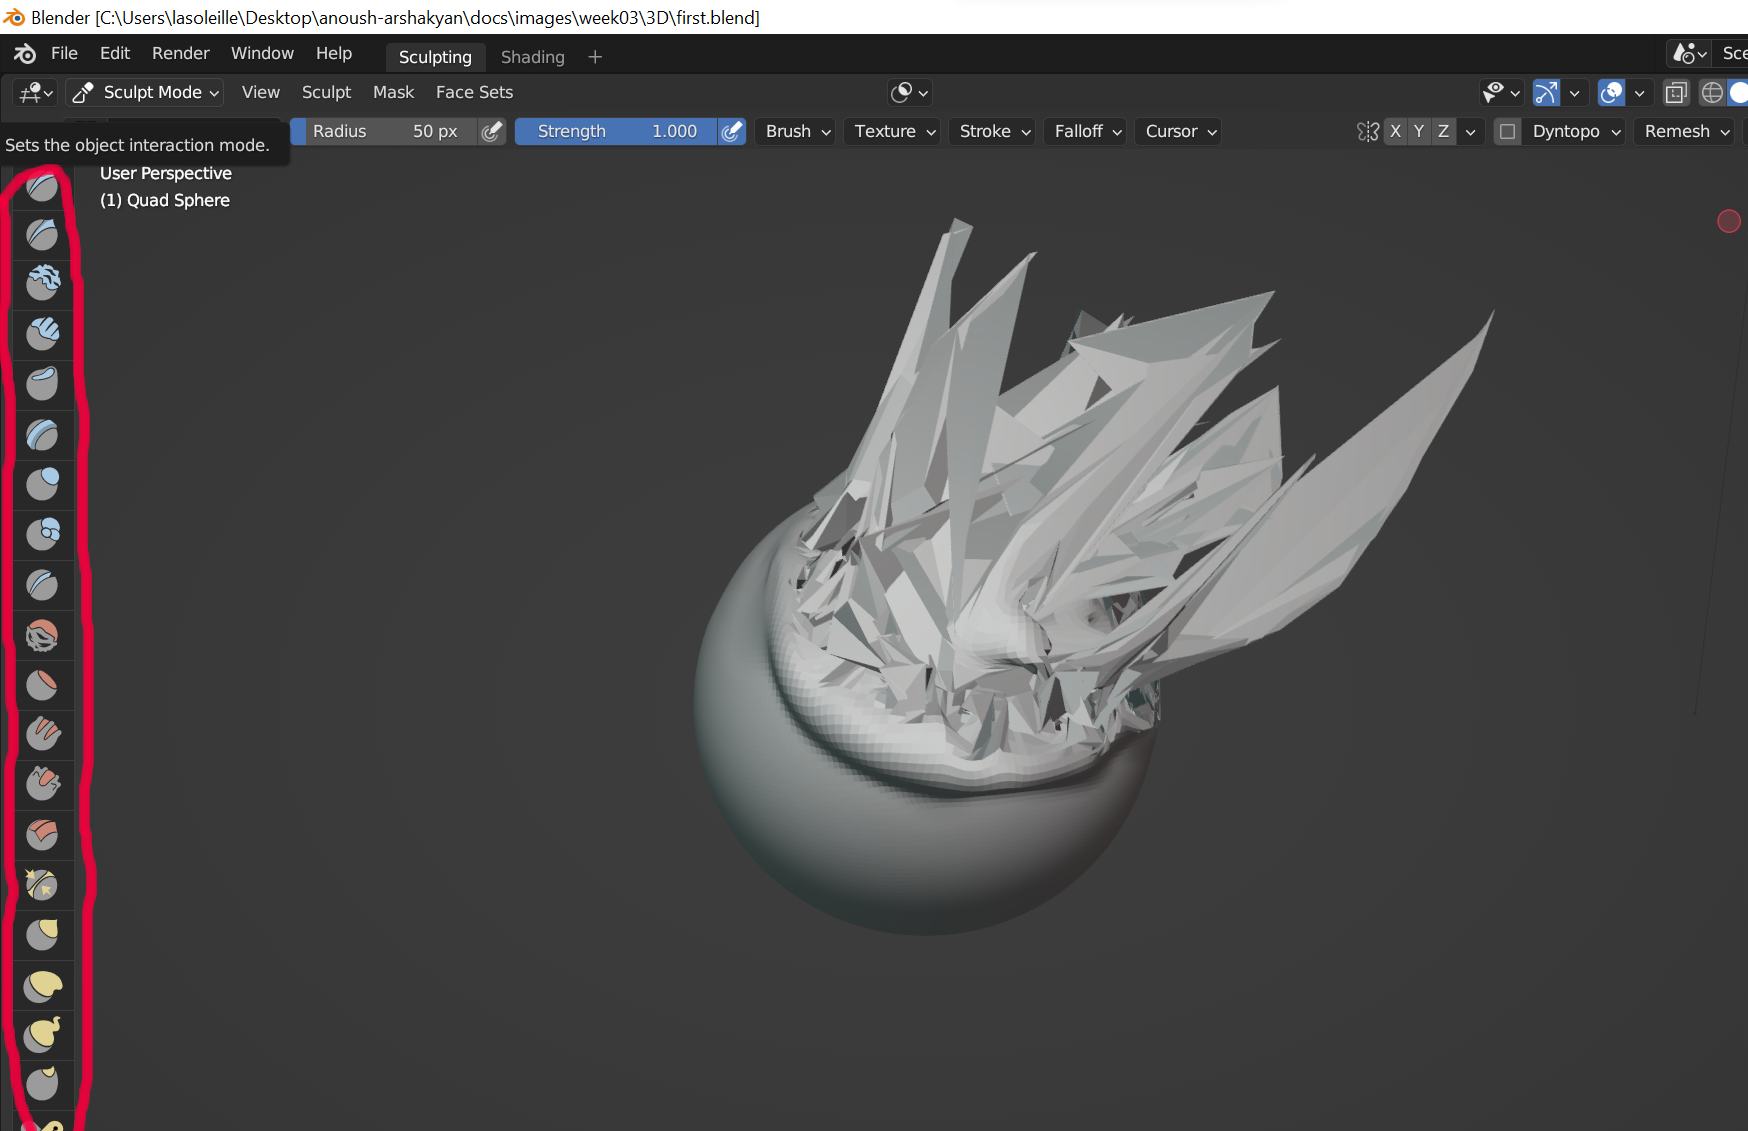
After my “masterpiece” was finished, I found a very interesting video tutorial and I will definitely use the knowledge gained here in creating the next sculptures.
FreeCAD
My first steps in FreeCAD
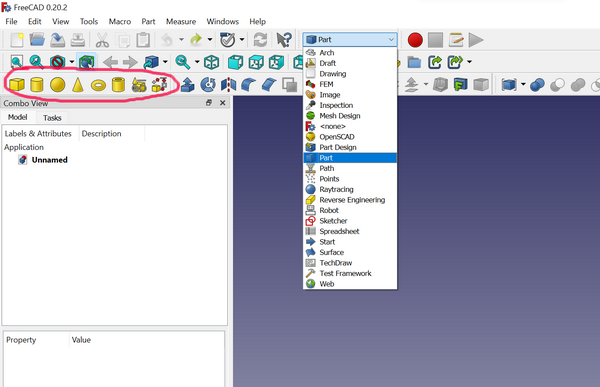
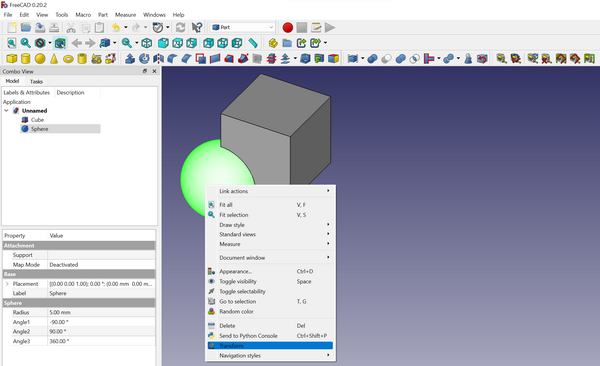
After I watched a few videos on YouTube, I started experimenting with instruments and got this composition by learning the simplest tools.
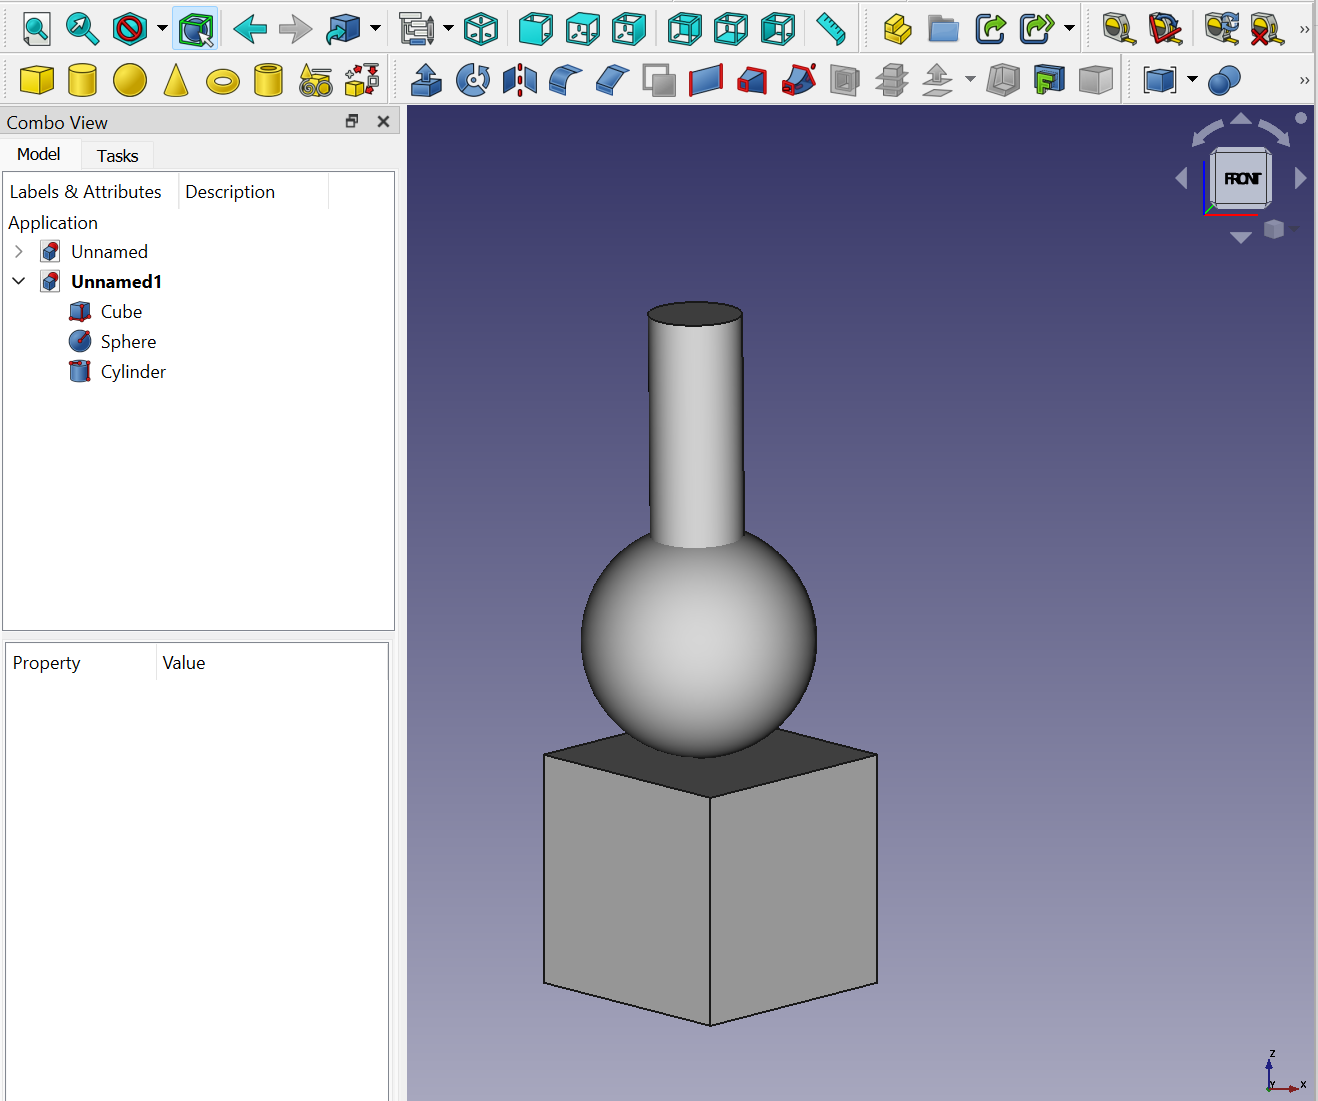
To start to create, we need to selecte Part and choose a figure.
To separate the figures and transfer them in space, we need to select the option Transform.
Something like a bracelet
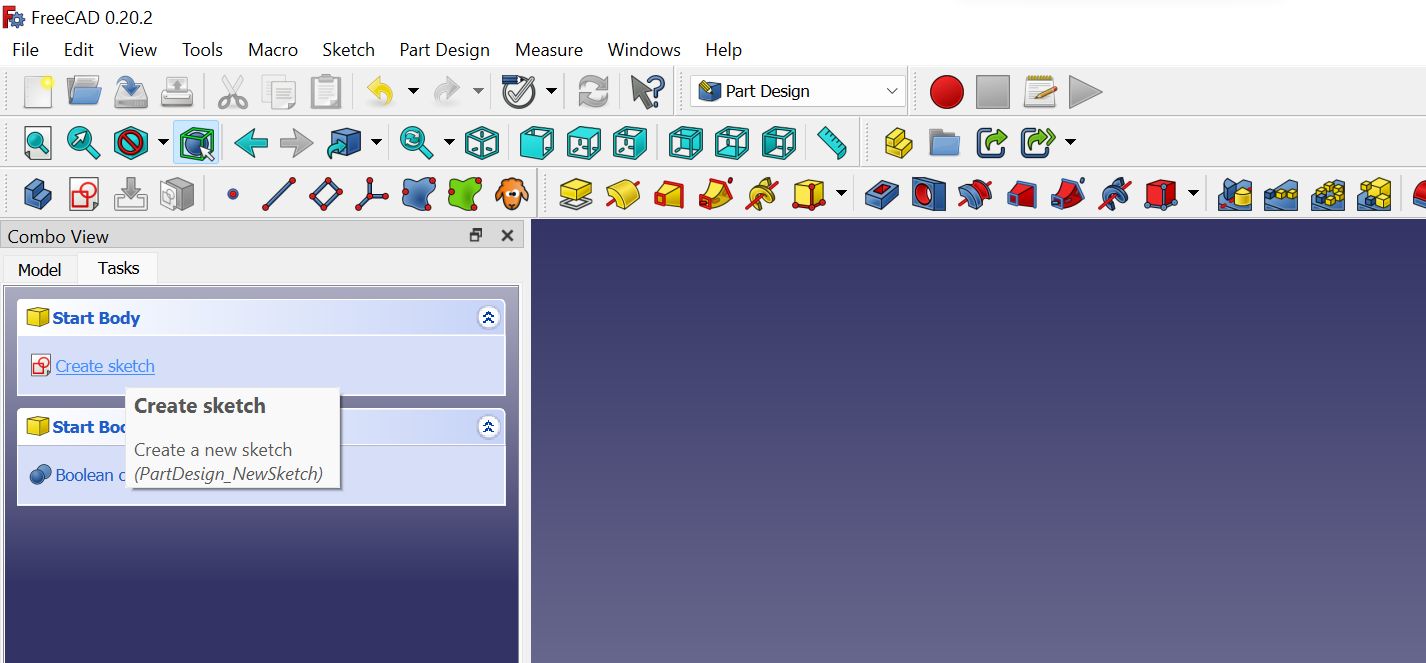
For my final project I nedded more tools and I started from Part Design and creating the Sketch
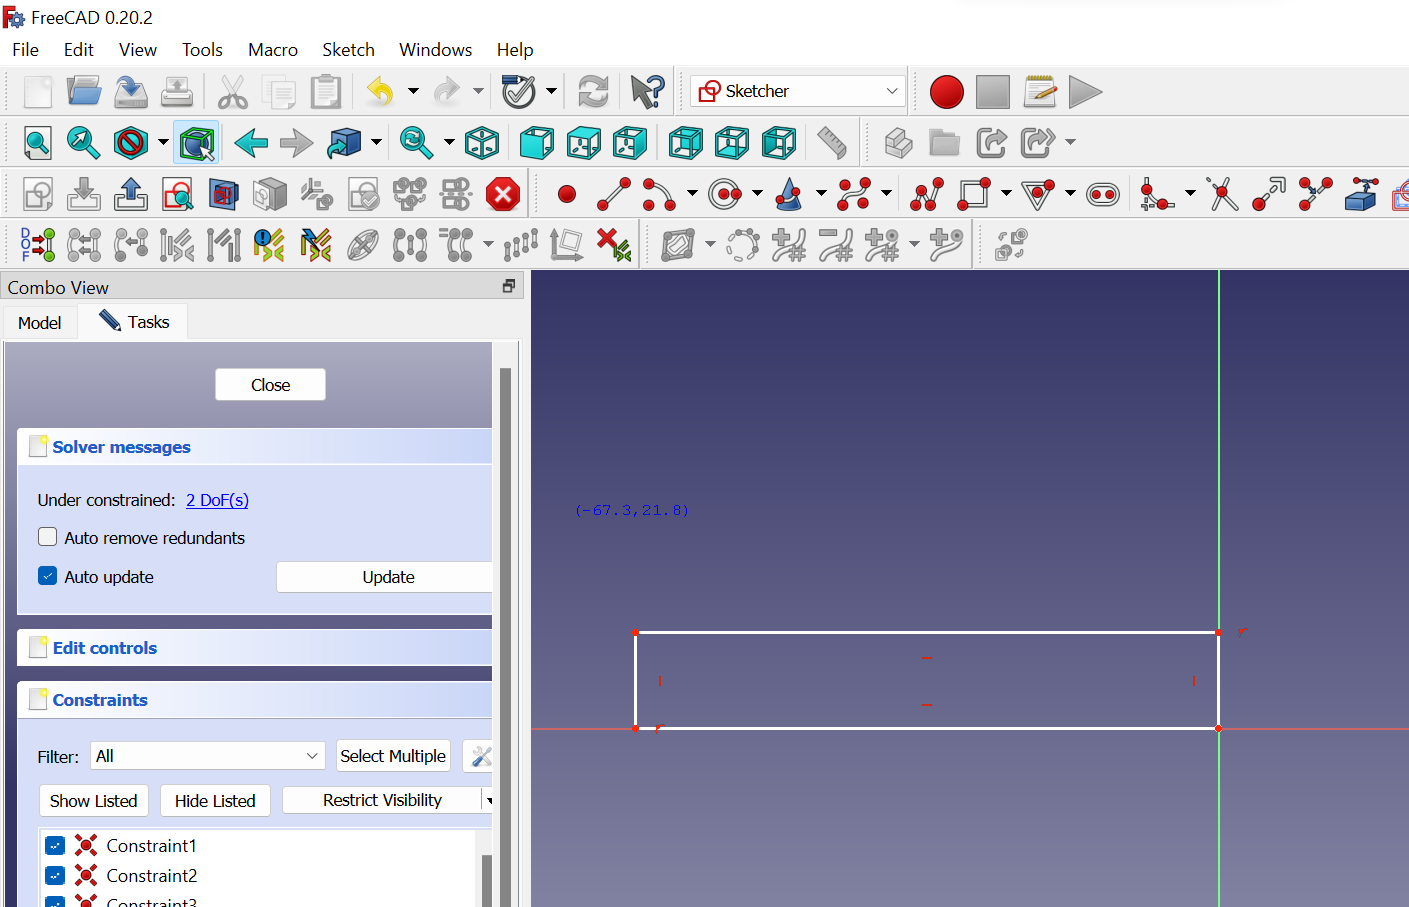
I added in my sketch 6 hexagons that I thought to use for electronic connections.
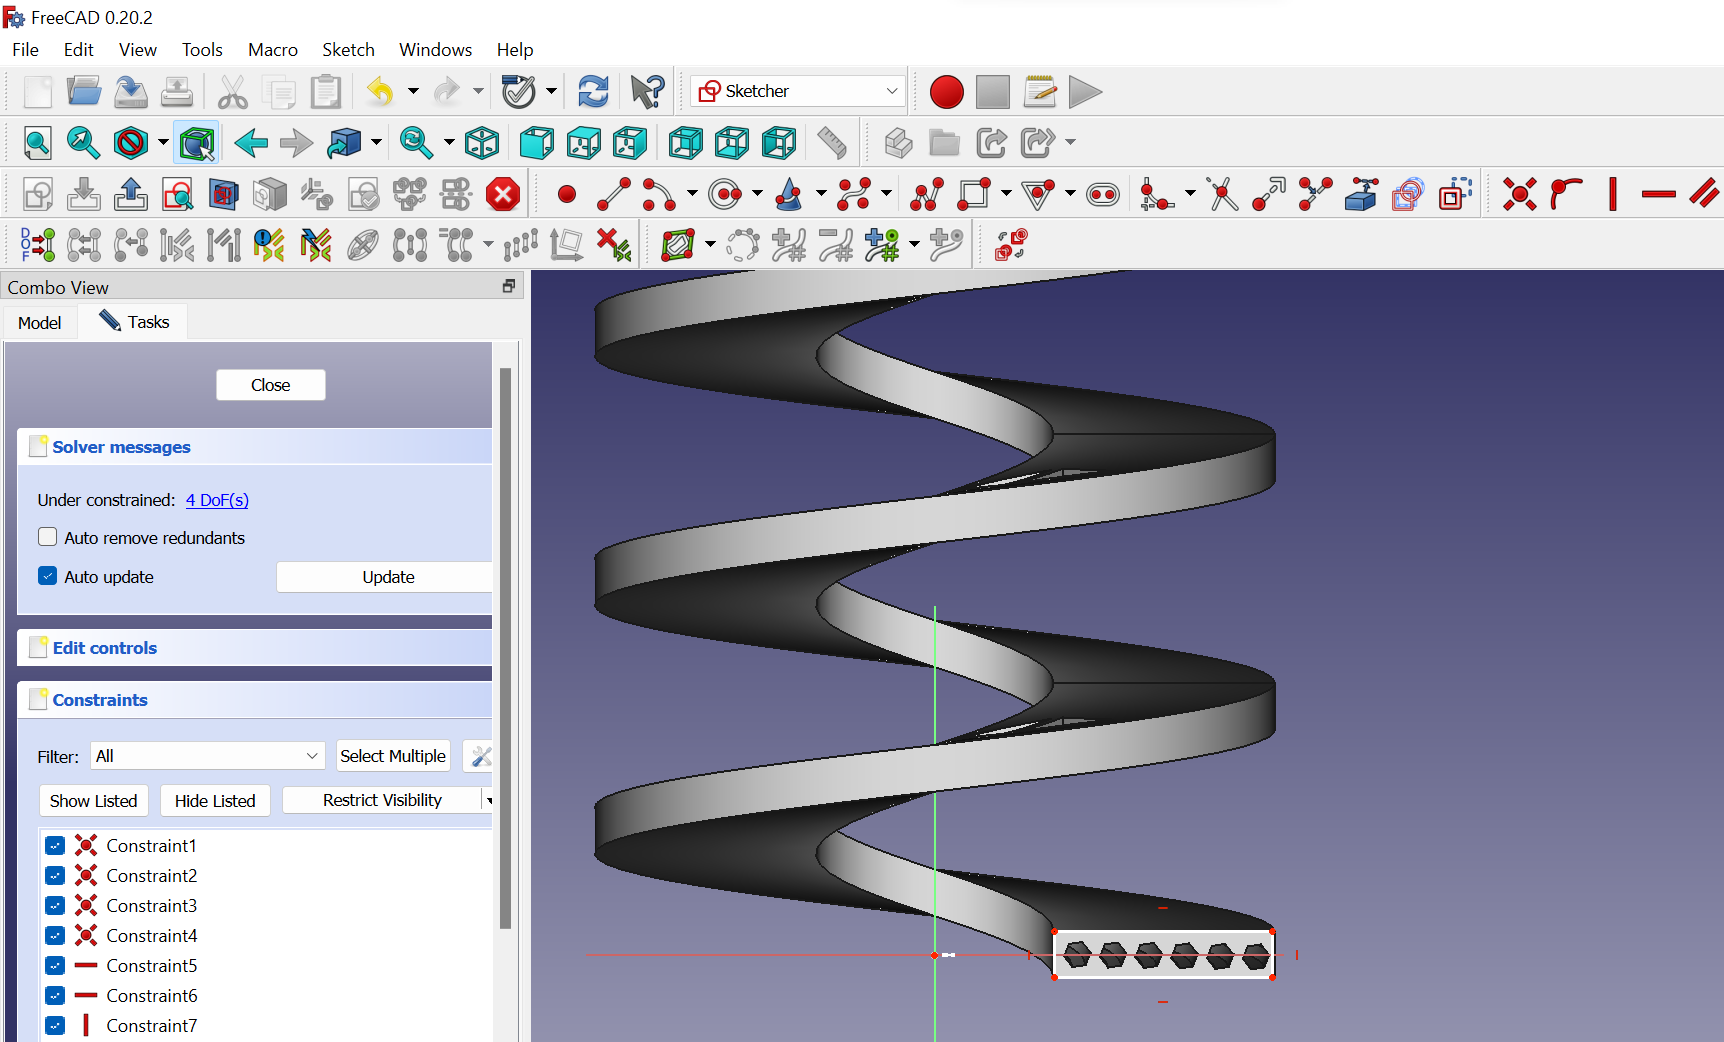
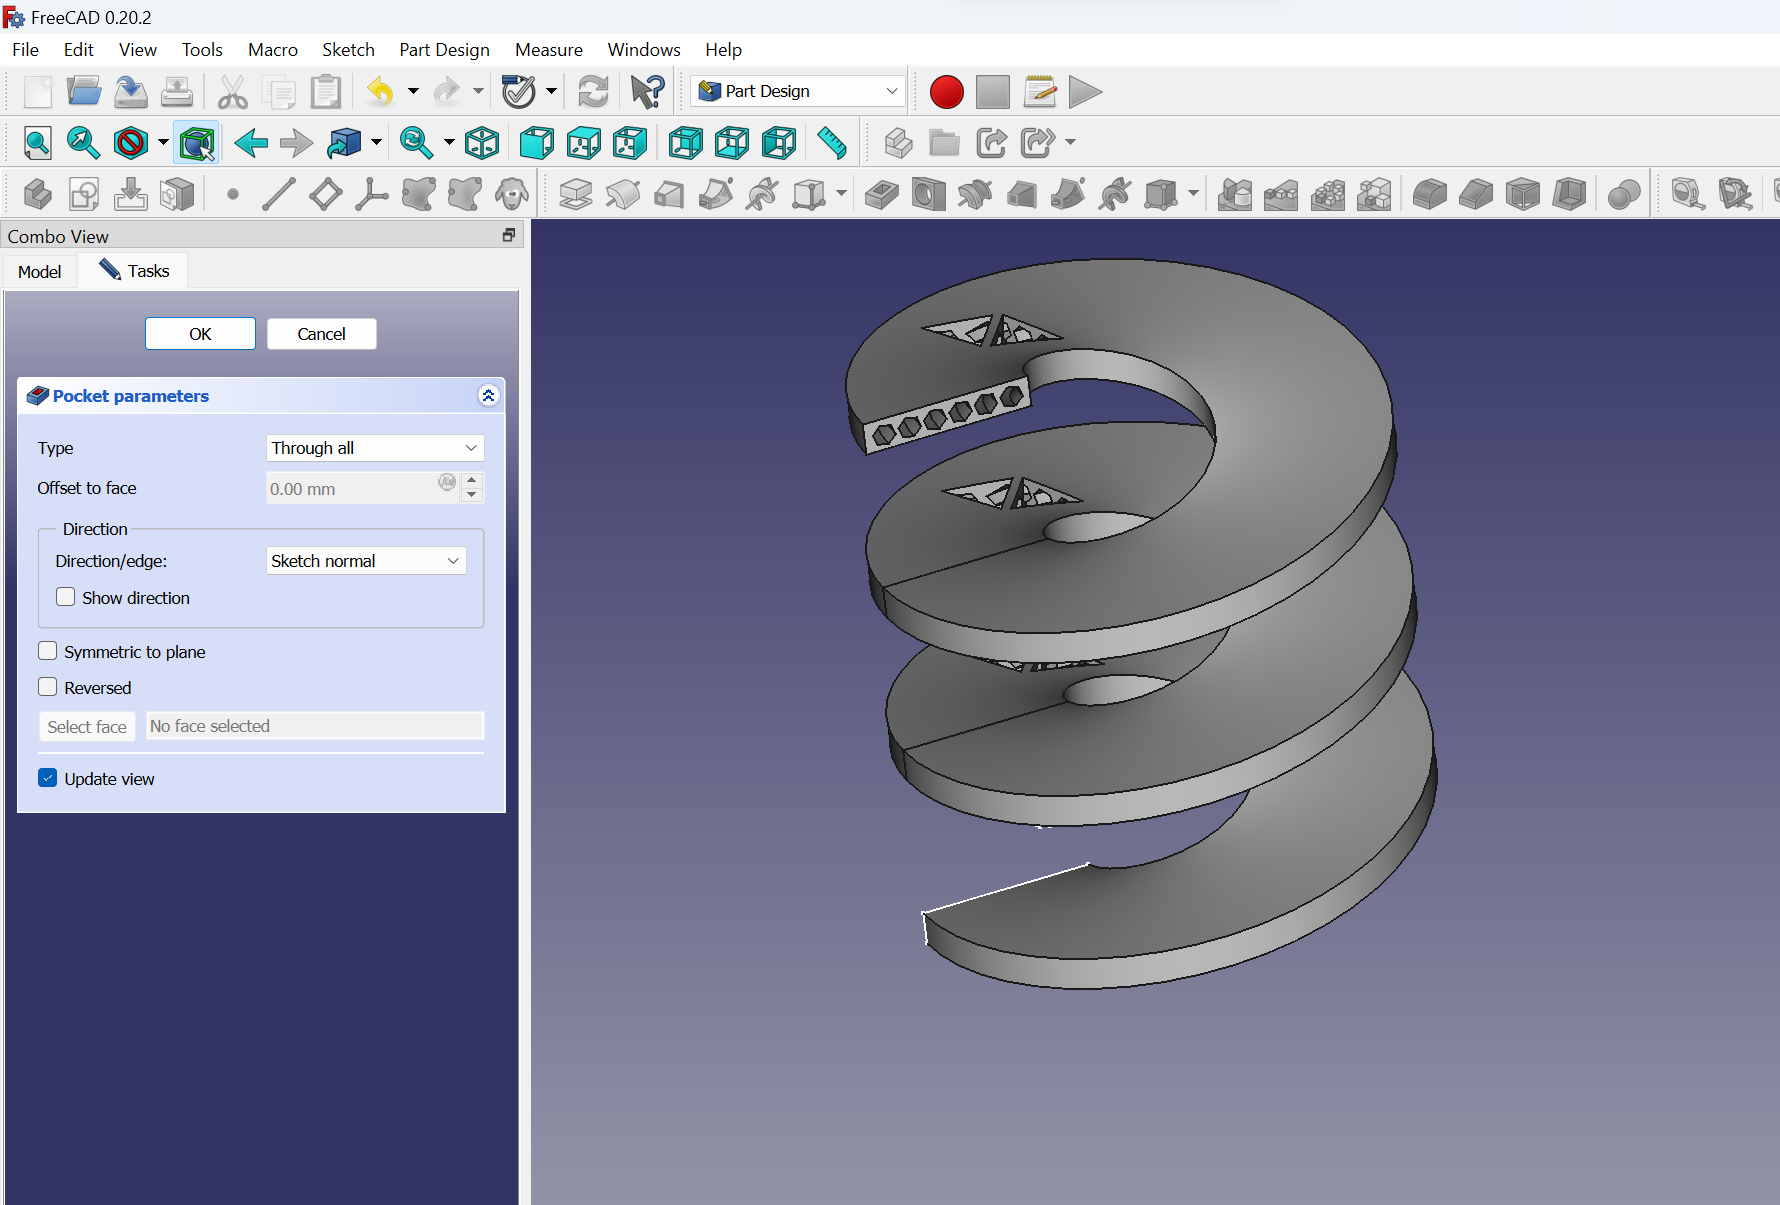
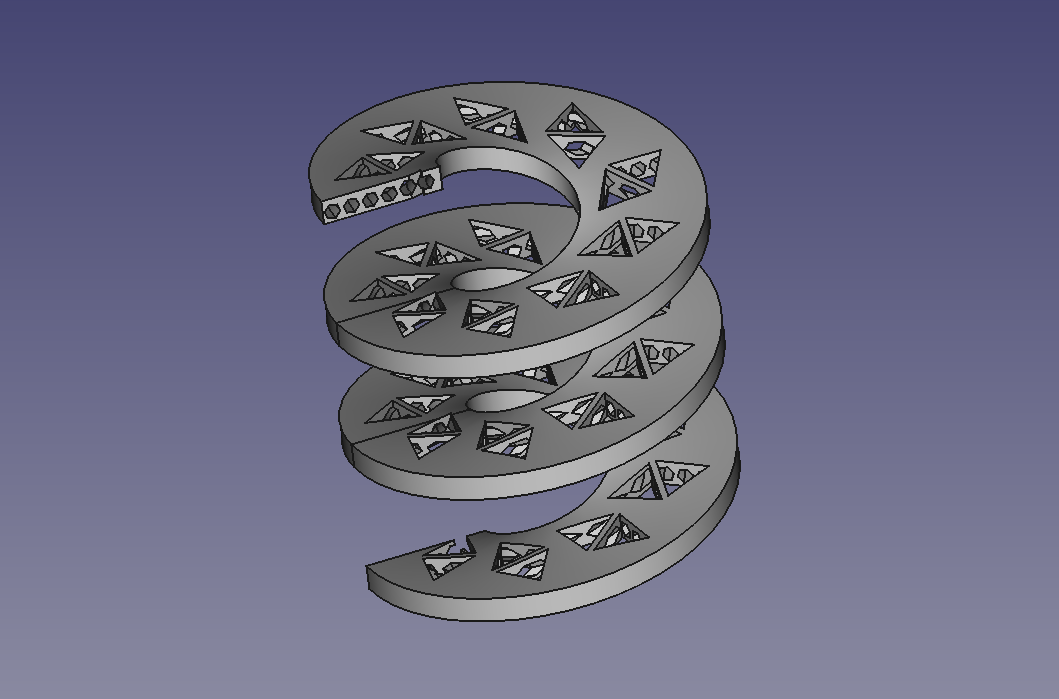
After I started playing with the design, I thought that I could add some triangles. After drawing the sketches, I selected the Pocket function and on the Type line I selected Through All. This will give us the opportunity to have a triangular cut at all levels of the spiral.
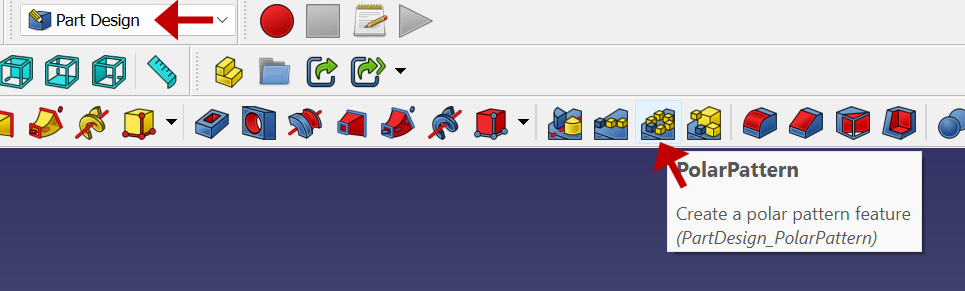
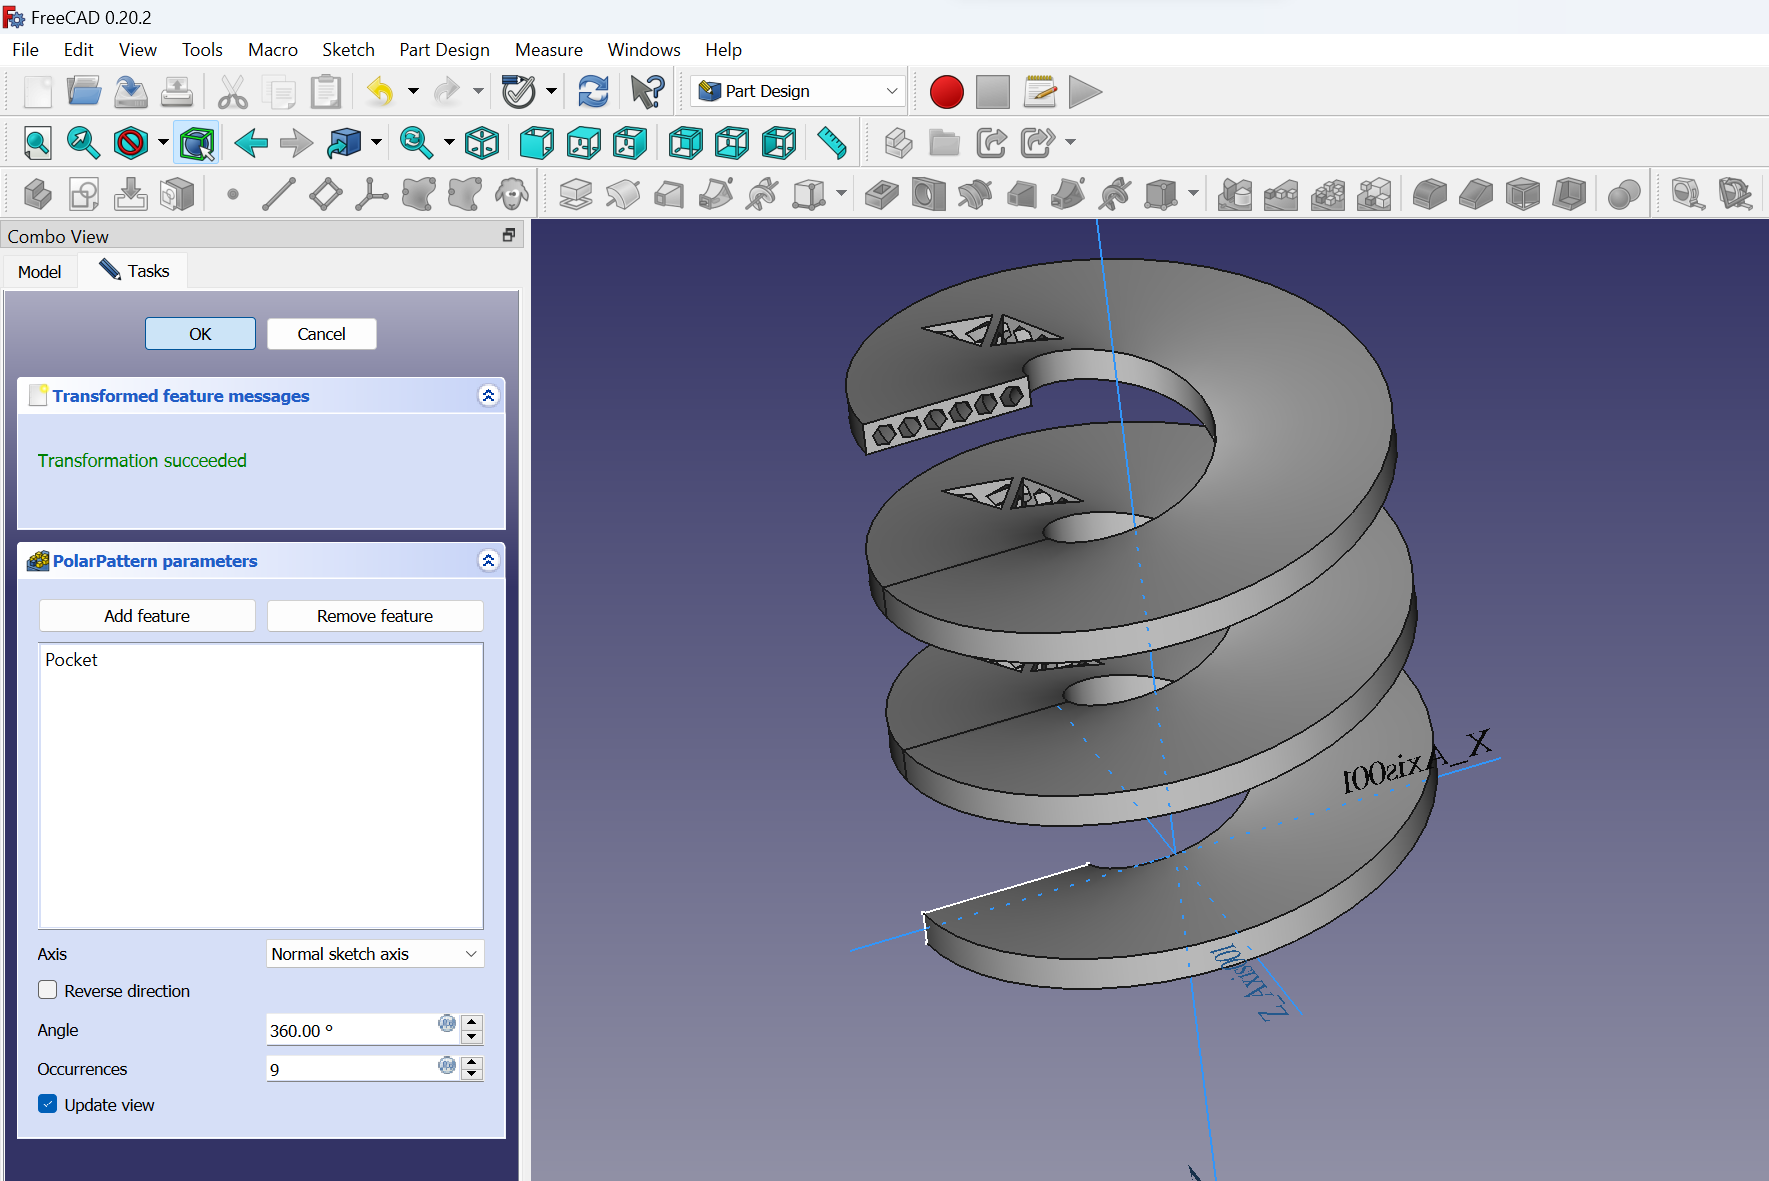
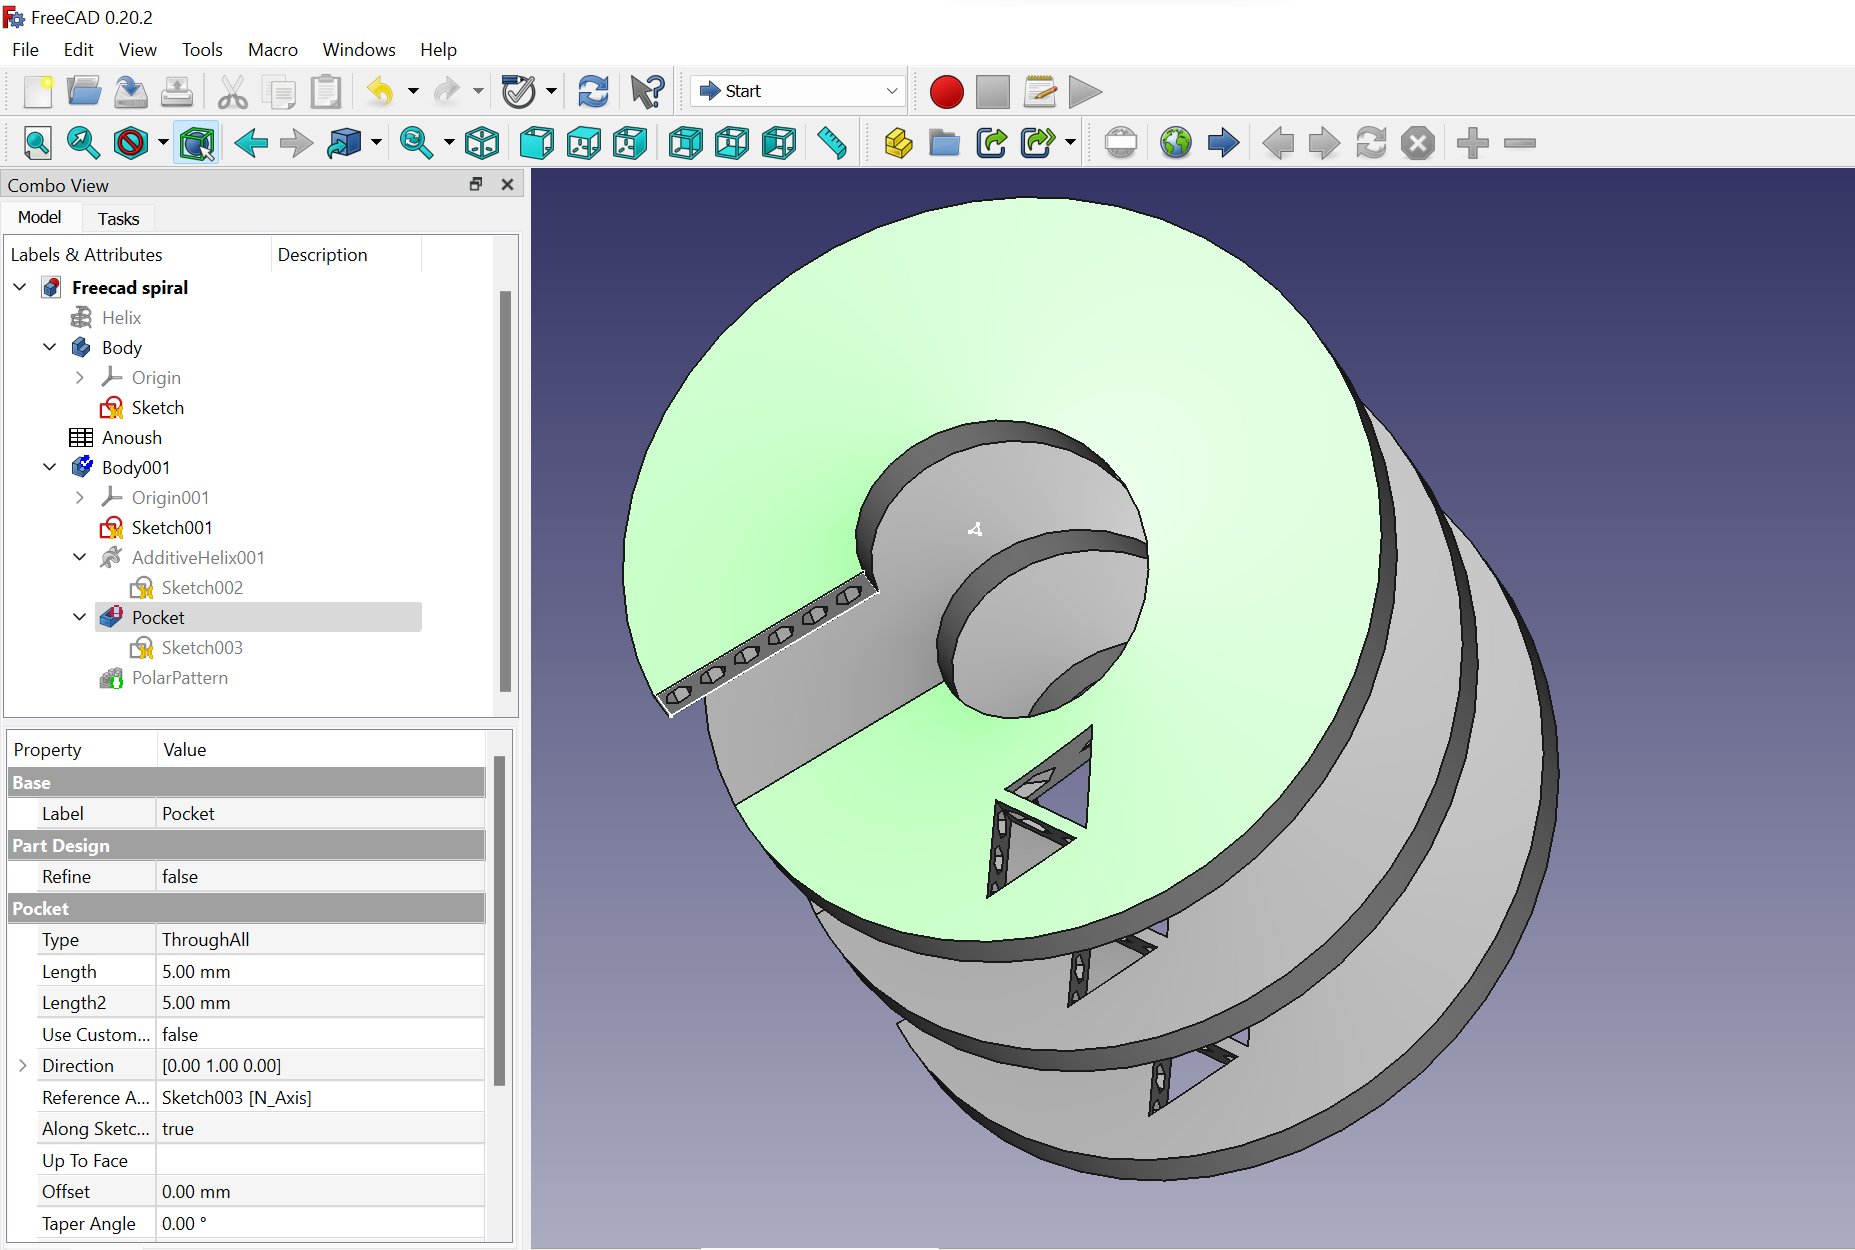 So that on an imaginary bracelet (which looks more like a part of mechanical engineering) such beautiful bireses were beaten along the entire length, I needed to make a pattern of triangles. I chose the Polar Pattern in Part Design workbanch:
After I got rid of the unnecessary sketches and “tails” that appeared during the study of FreeCad (I remind you that this is the first time I discover this software), I got a result that I consider quite good for the first time, although it is not even a little looks like a bracelet.
Parametric design
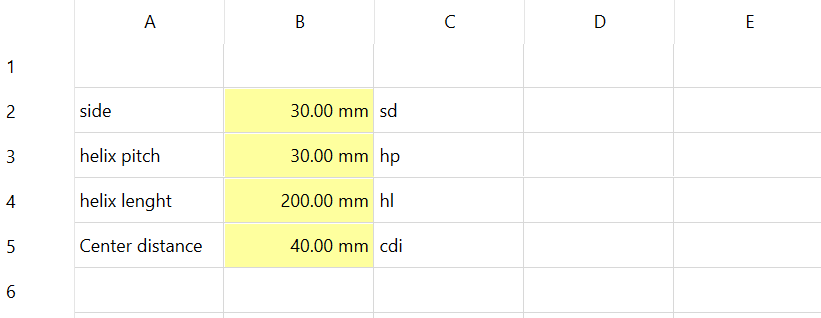
I confess that this time I didn’t manage to apply the Spreadsheet data to my model very well, but I tried to figure out exactly how to create it and give values.
To create the Spreadsheet we need to choose the corresponding line of Workbench.

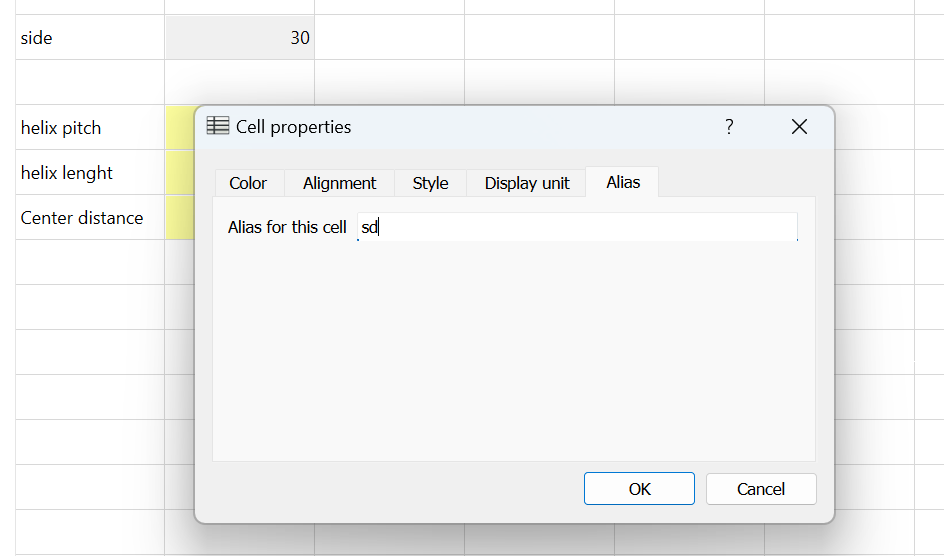
After writing the parameters we need and specifying their value, we need to right-click on the value to go to Properties.
Here we are interested in specifying two parameters: Display unit

and Alias (the short name of Parameter to connect it easily to the model)
Here’s what I got:
Fusion 360
This week I wanted to try another software: Fusion. Here are the results. I think the process is a little more obvious here.
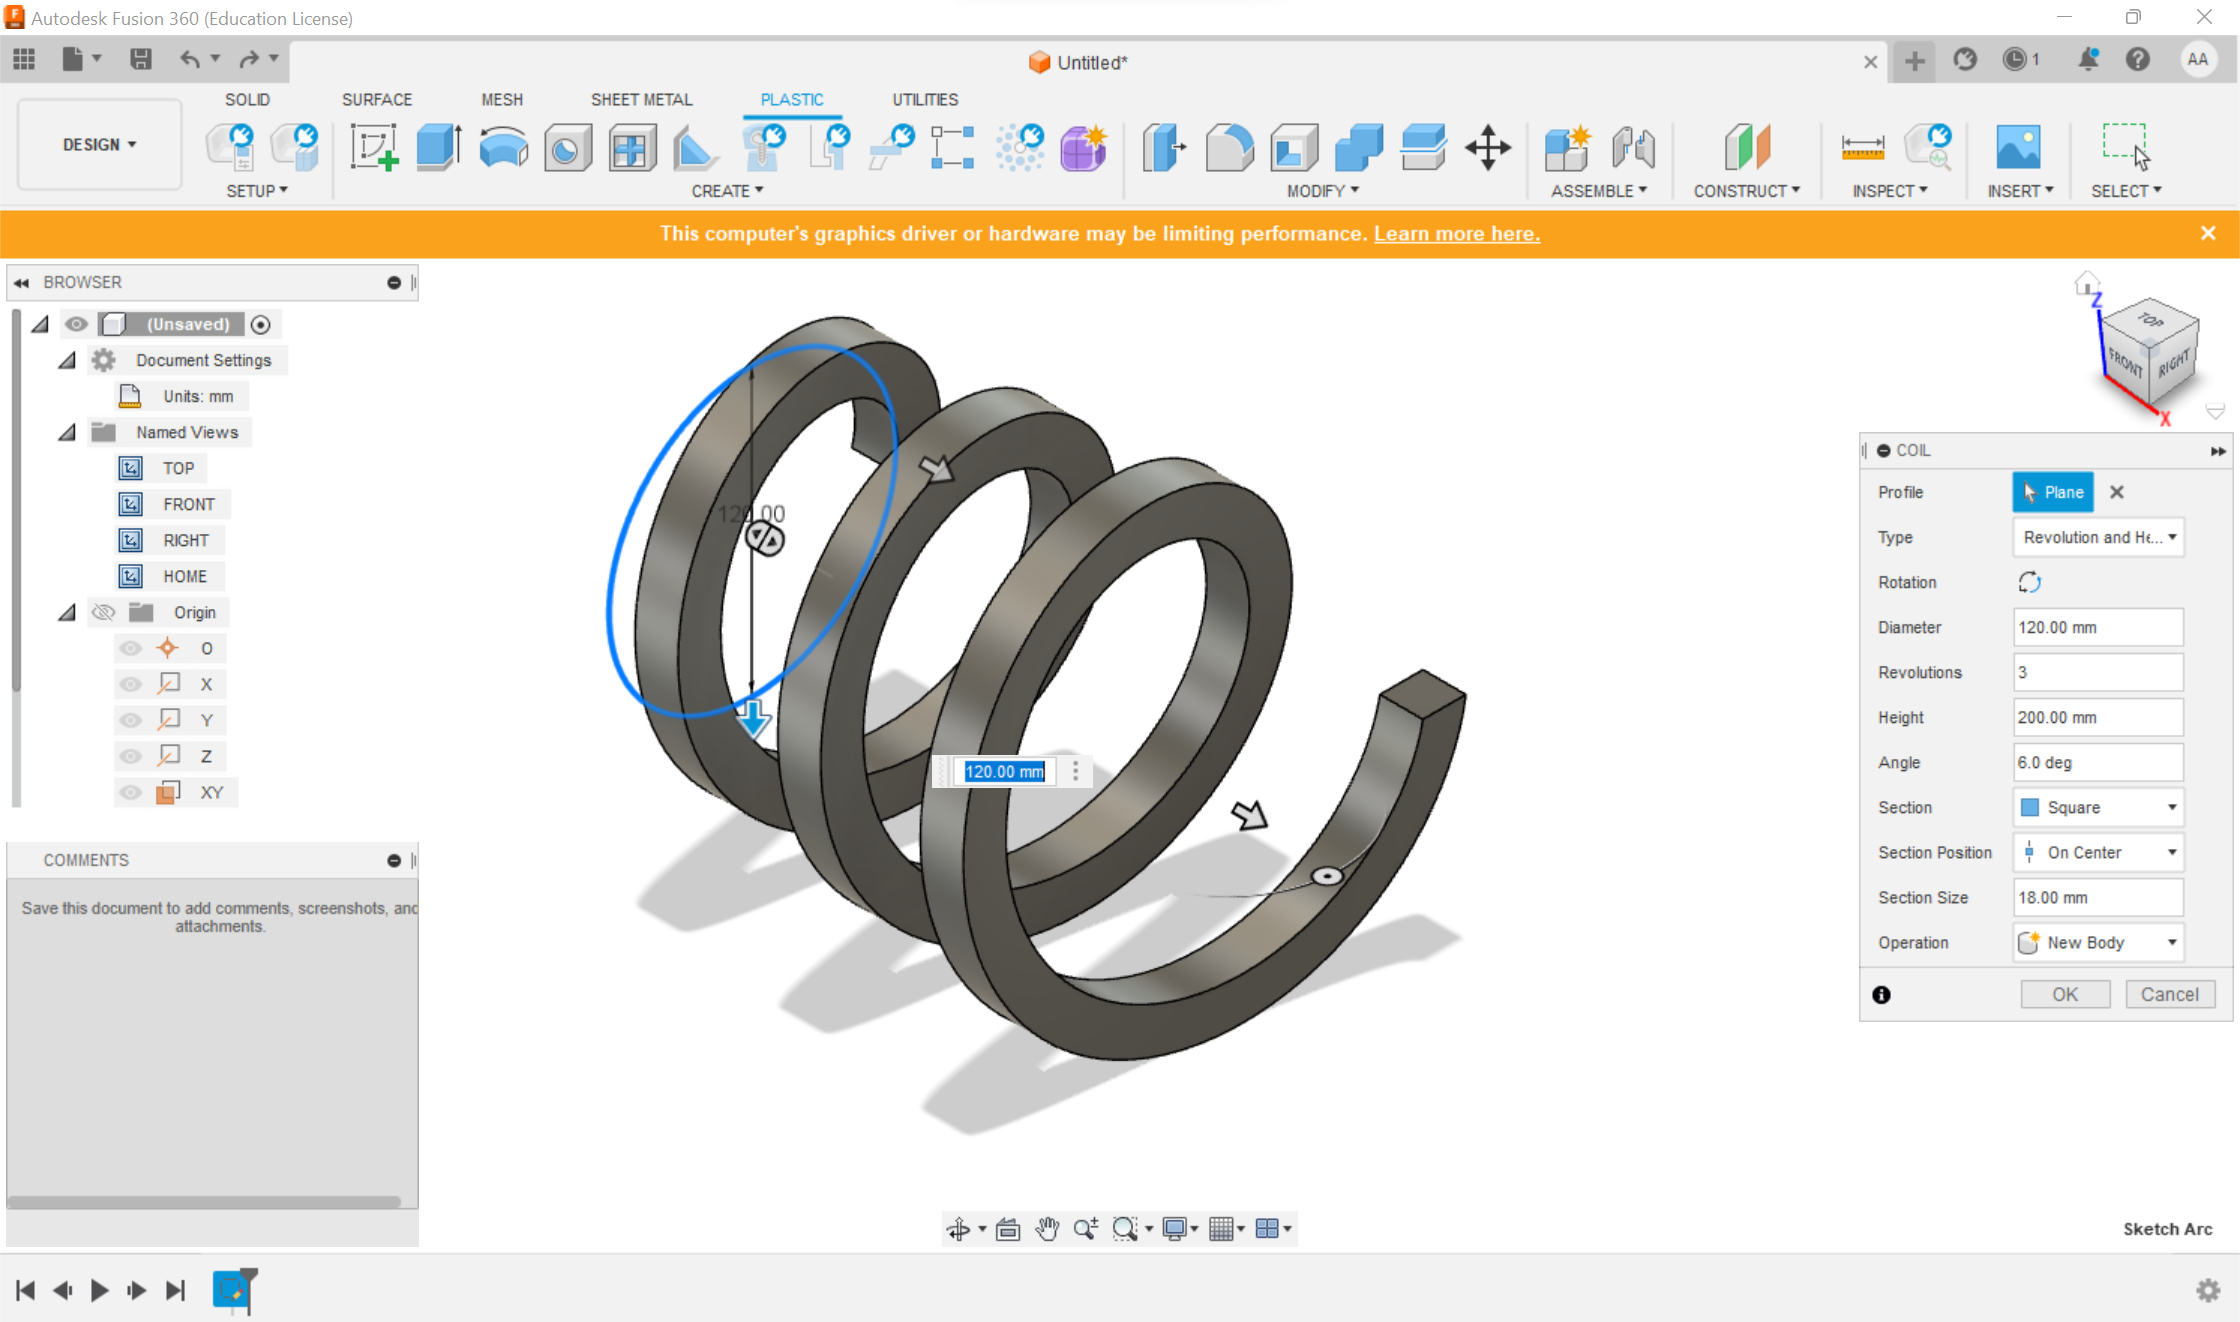
I started by creating a Coil.
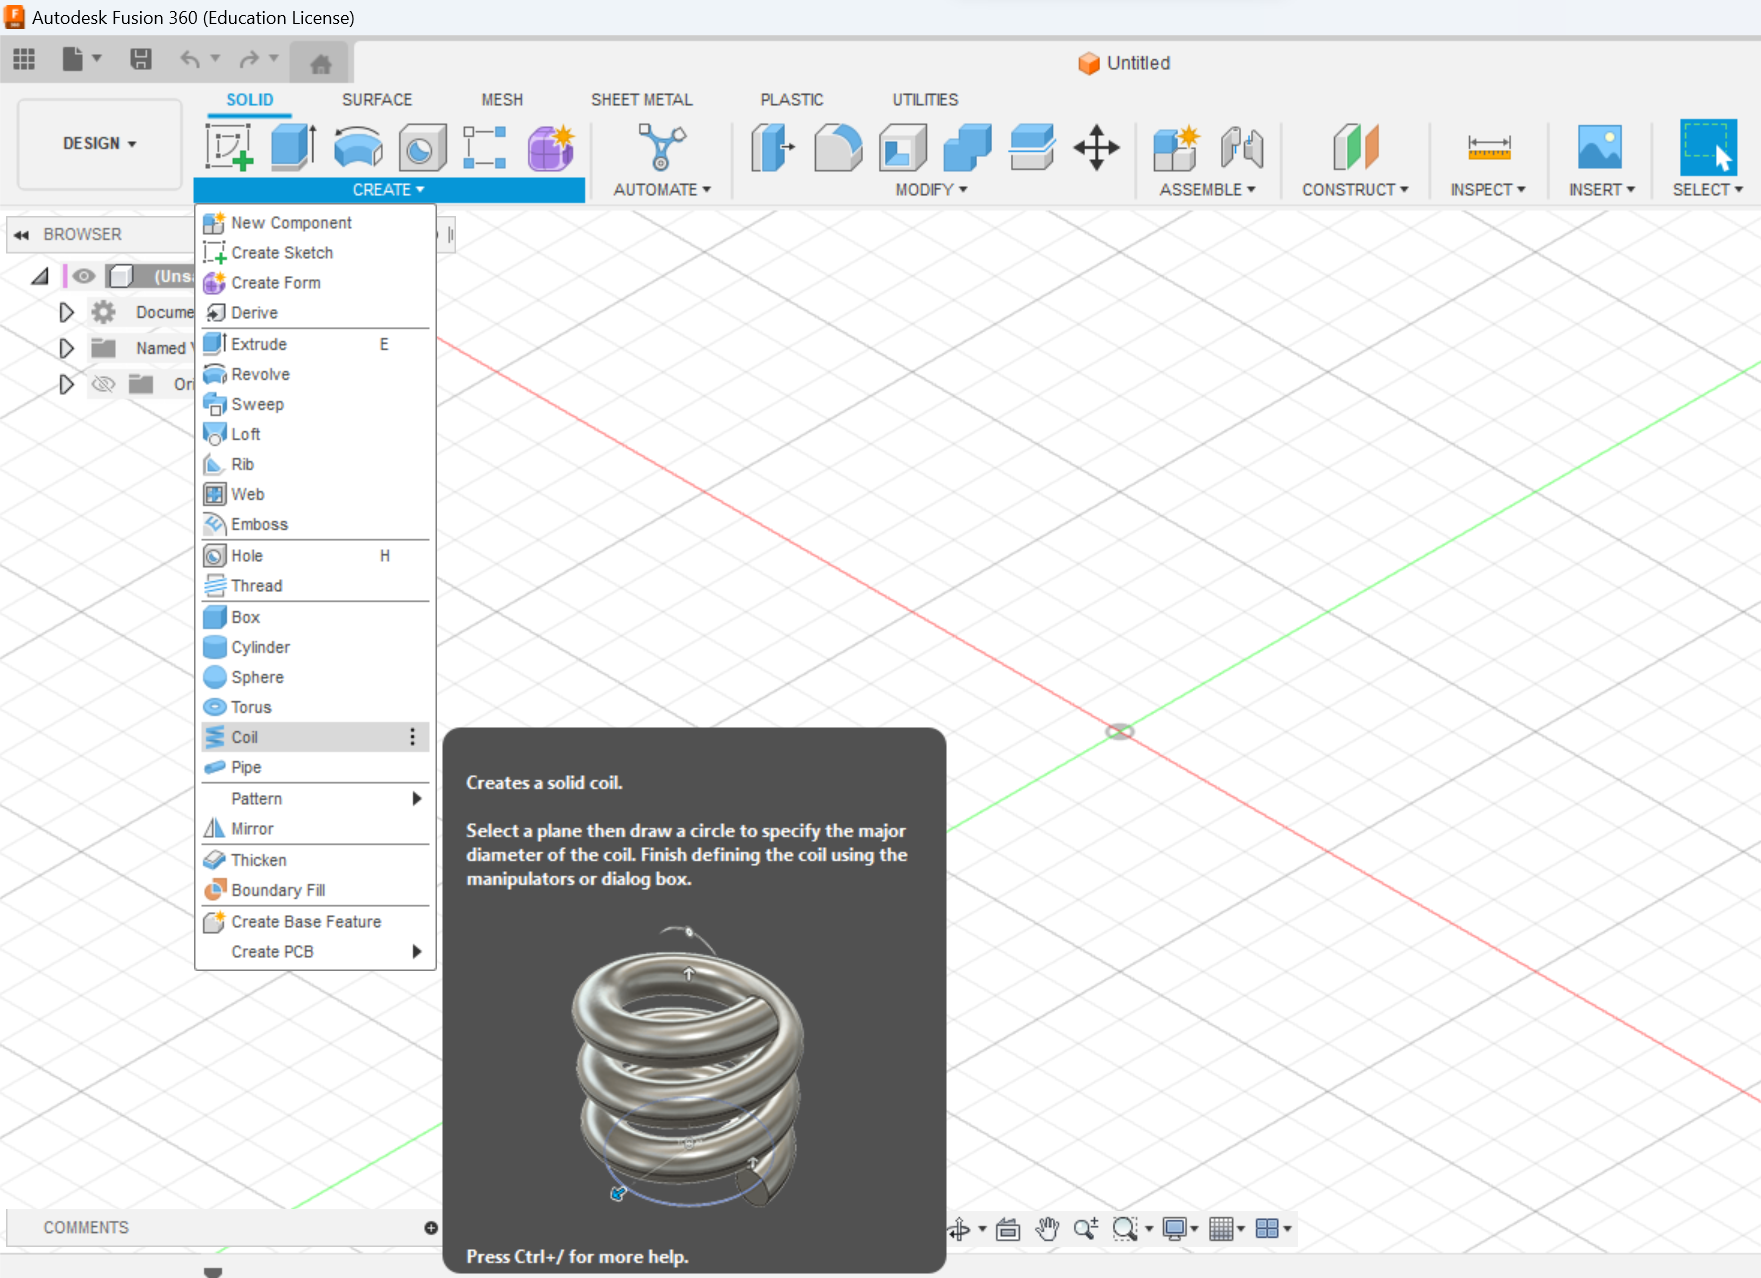
We can manage the parameters of coil: Diameter, Revolutions, Angle, Section etc.
After I created a sketch circle and used the Extrude tool to give me the 3D shape I wanted.
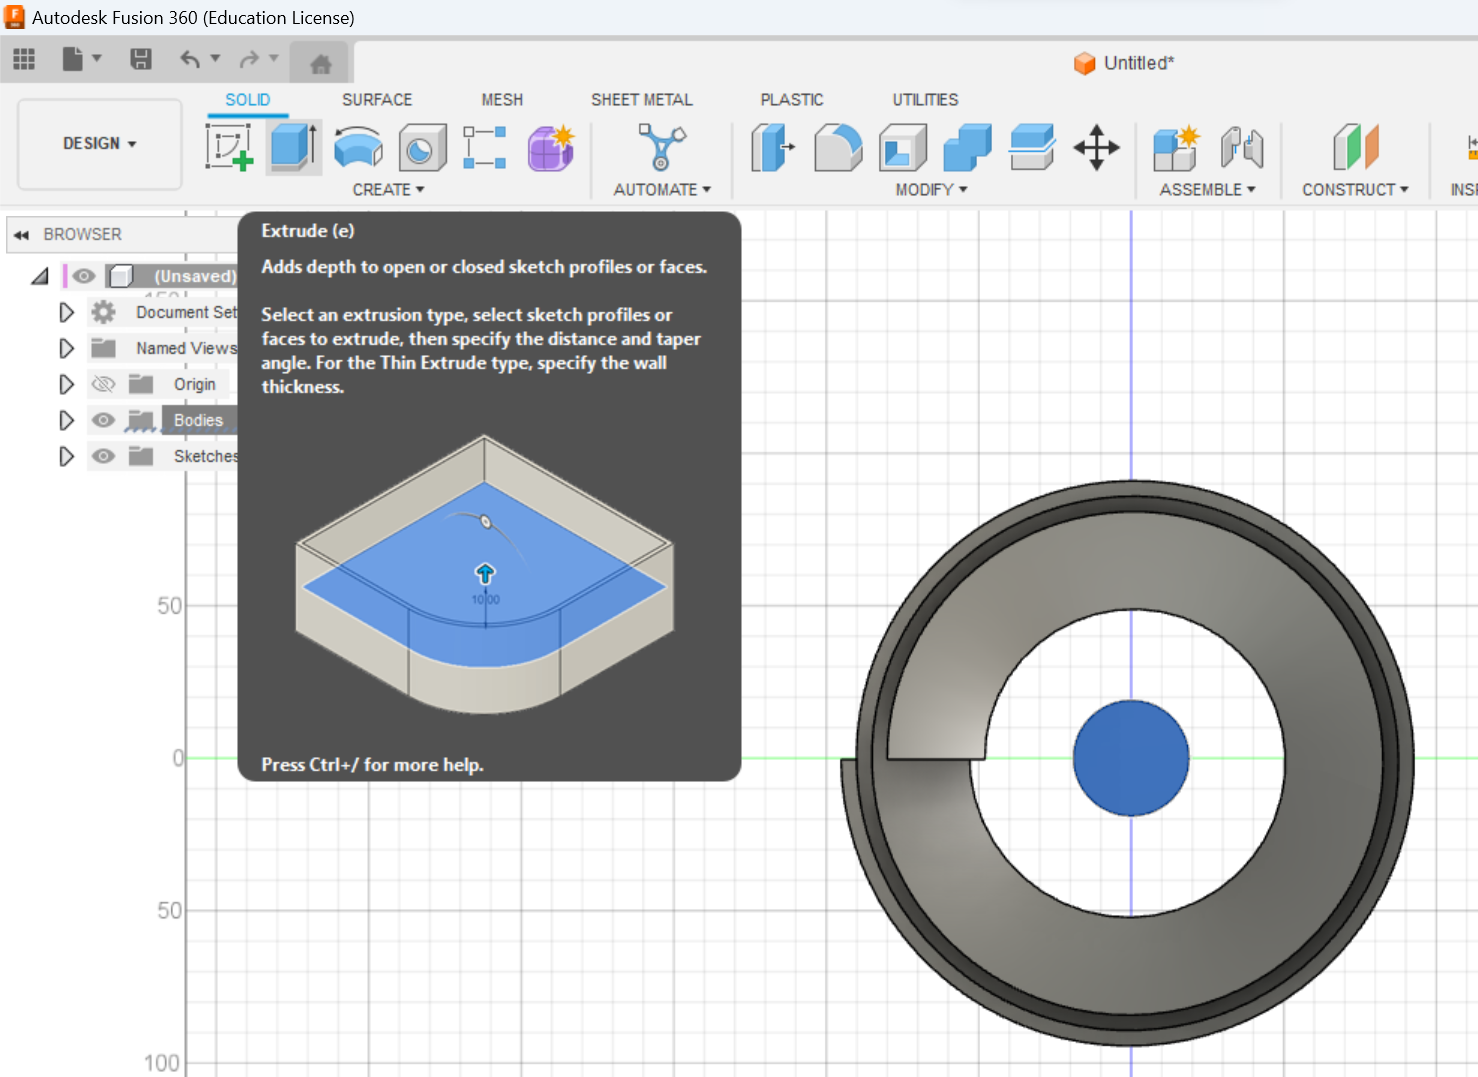
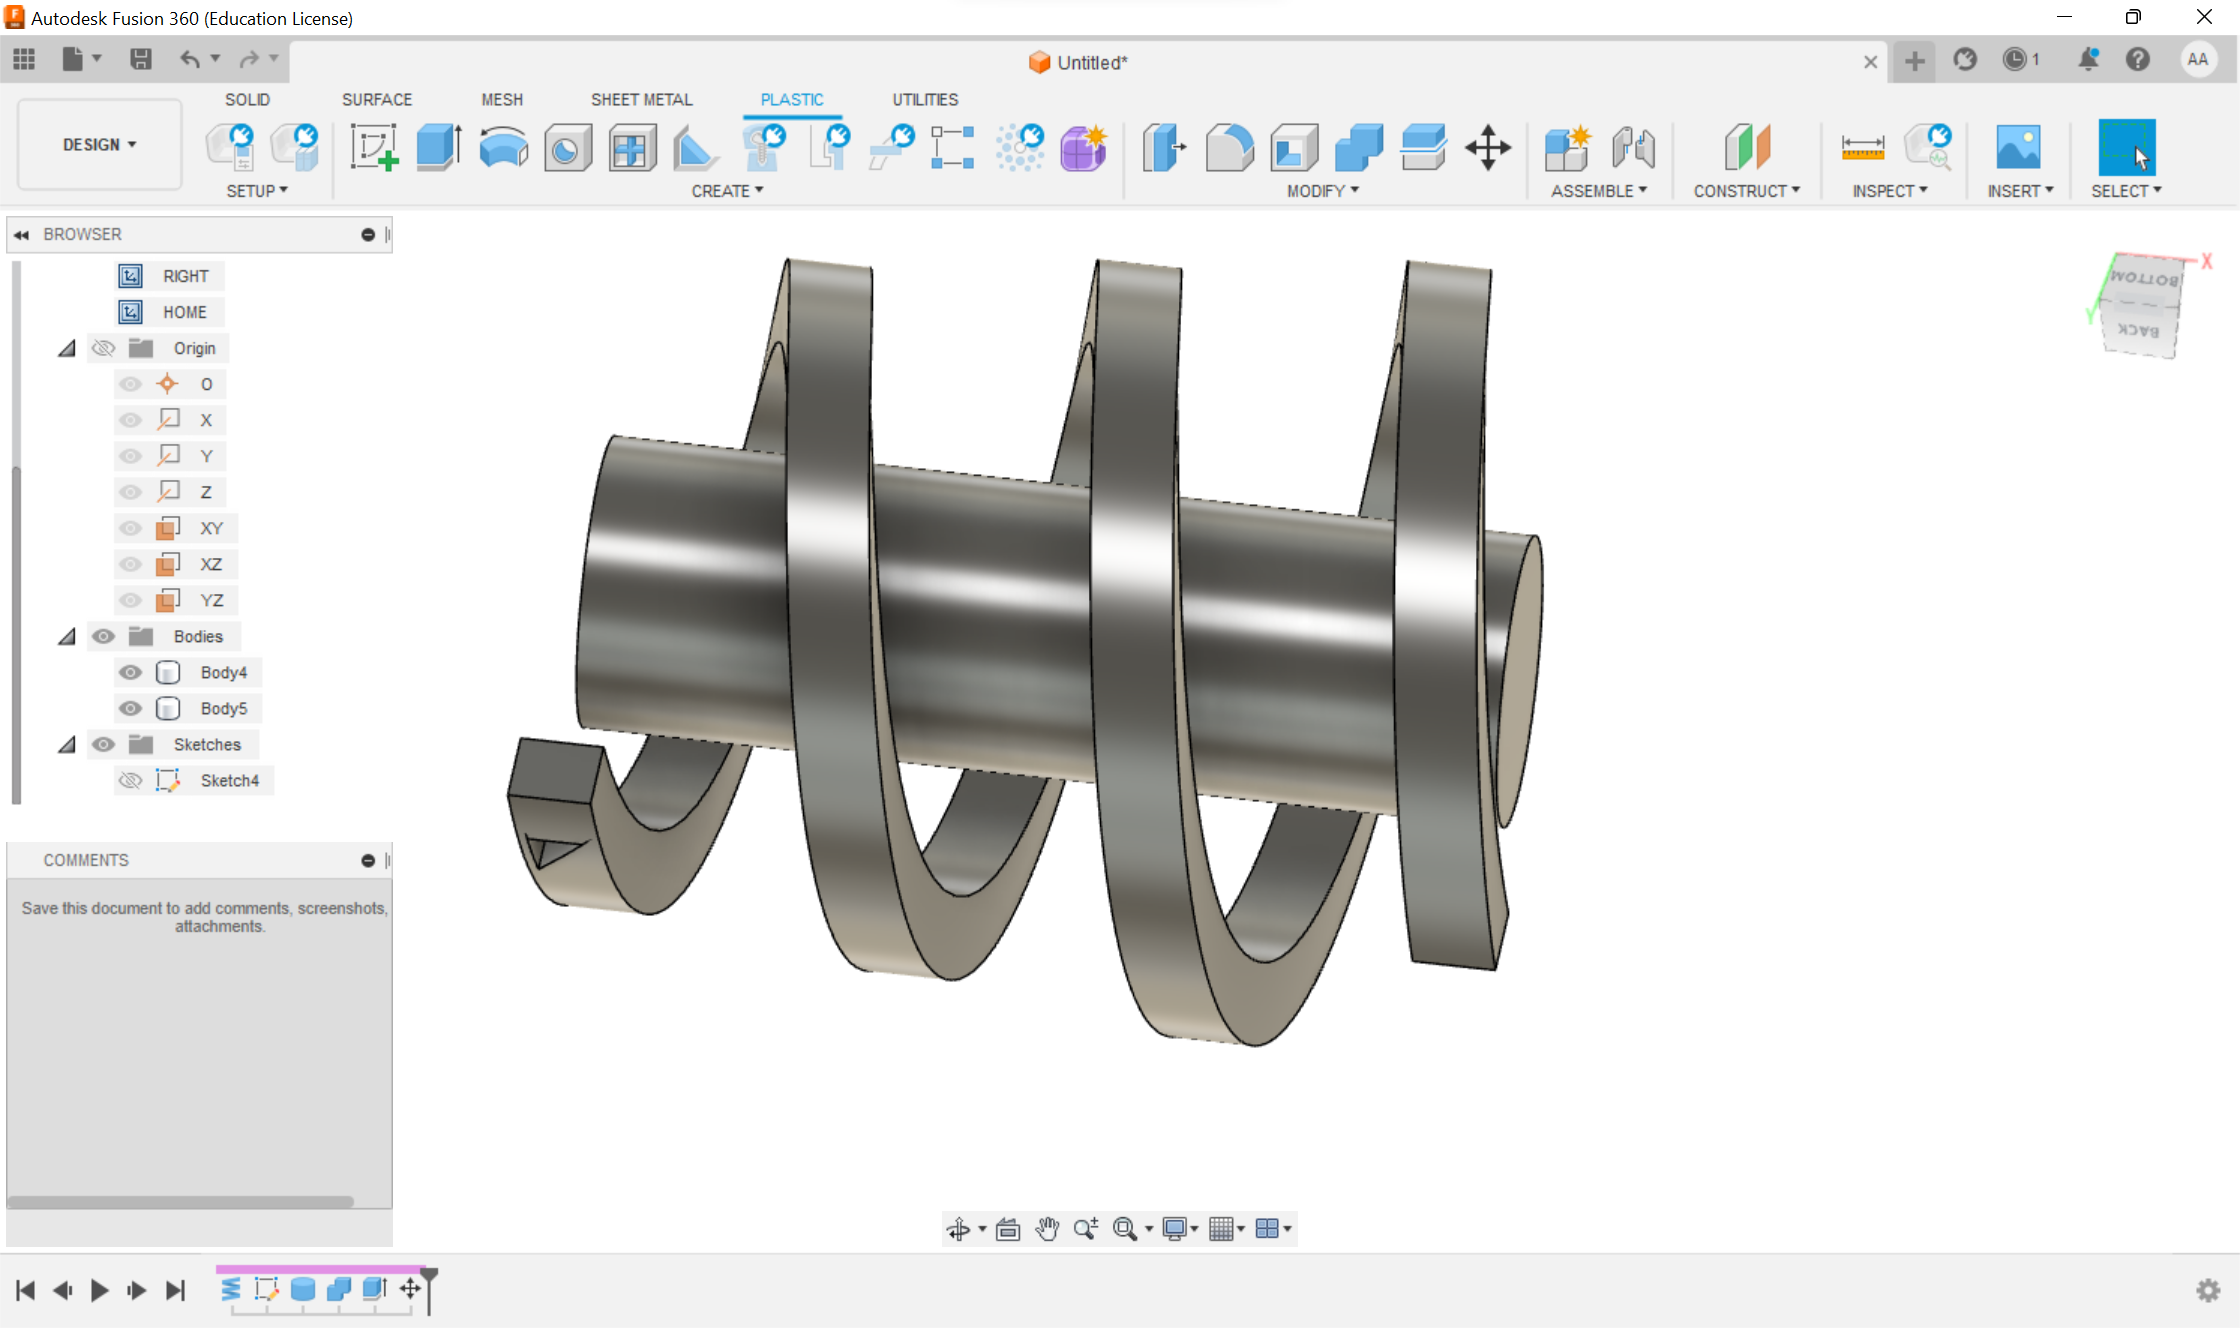
I matched 2 models so that the “pipe” was in the middle, as an interpretation of the hand and bracelet.
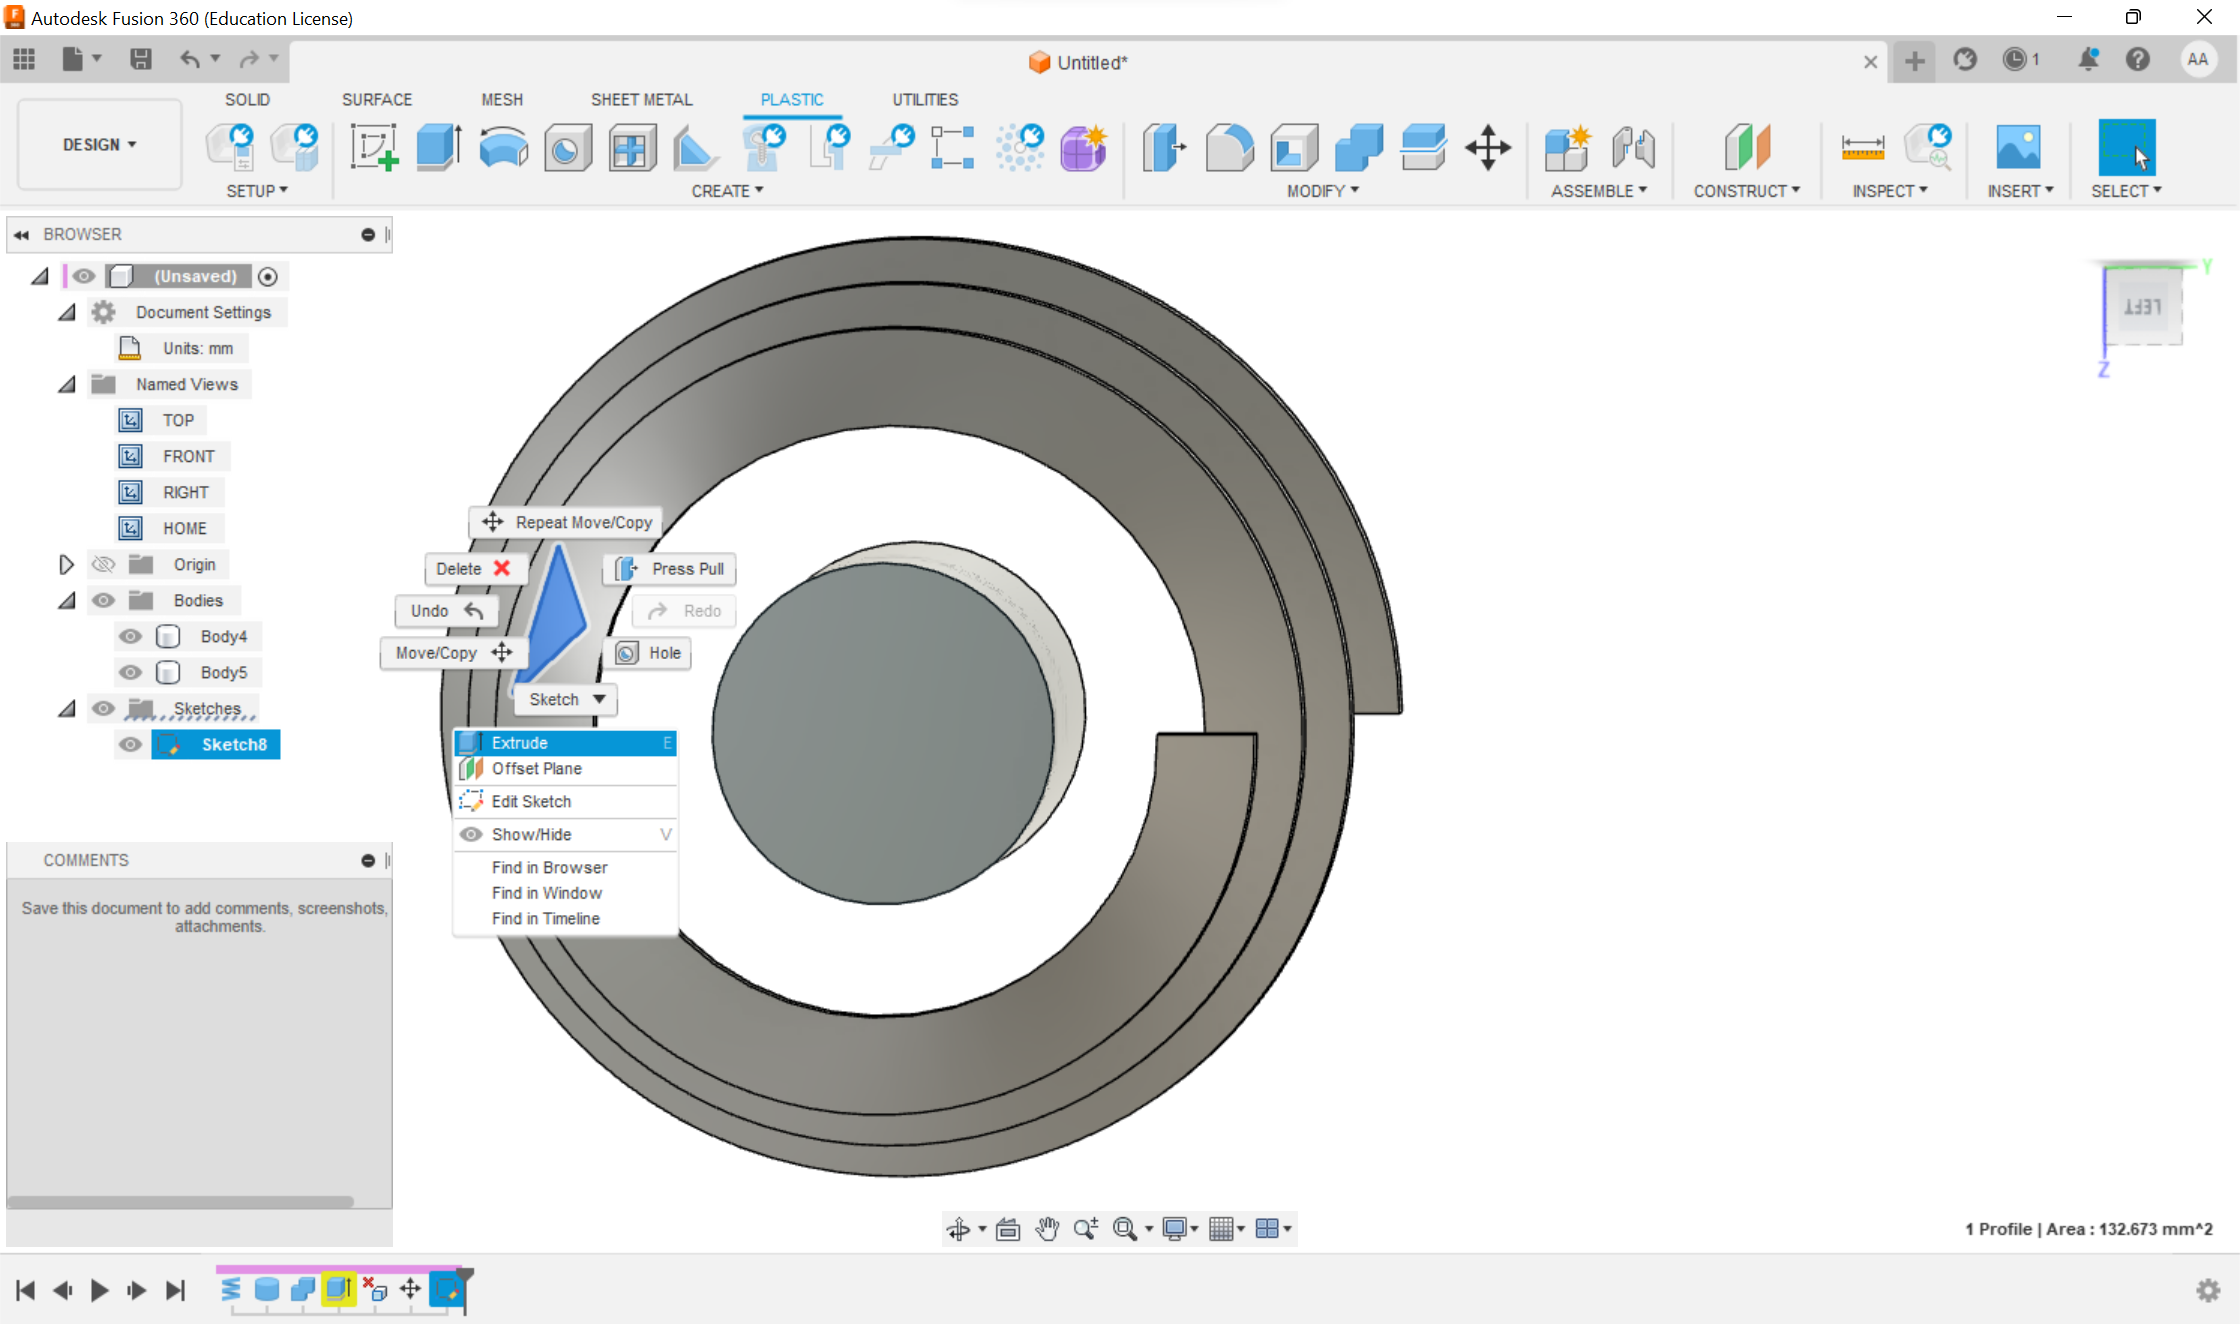
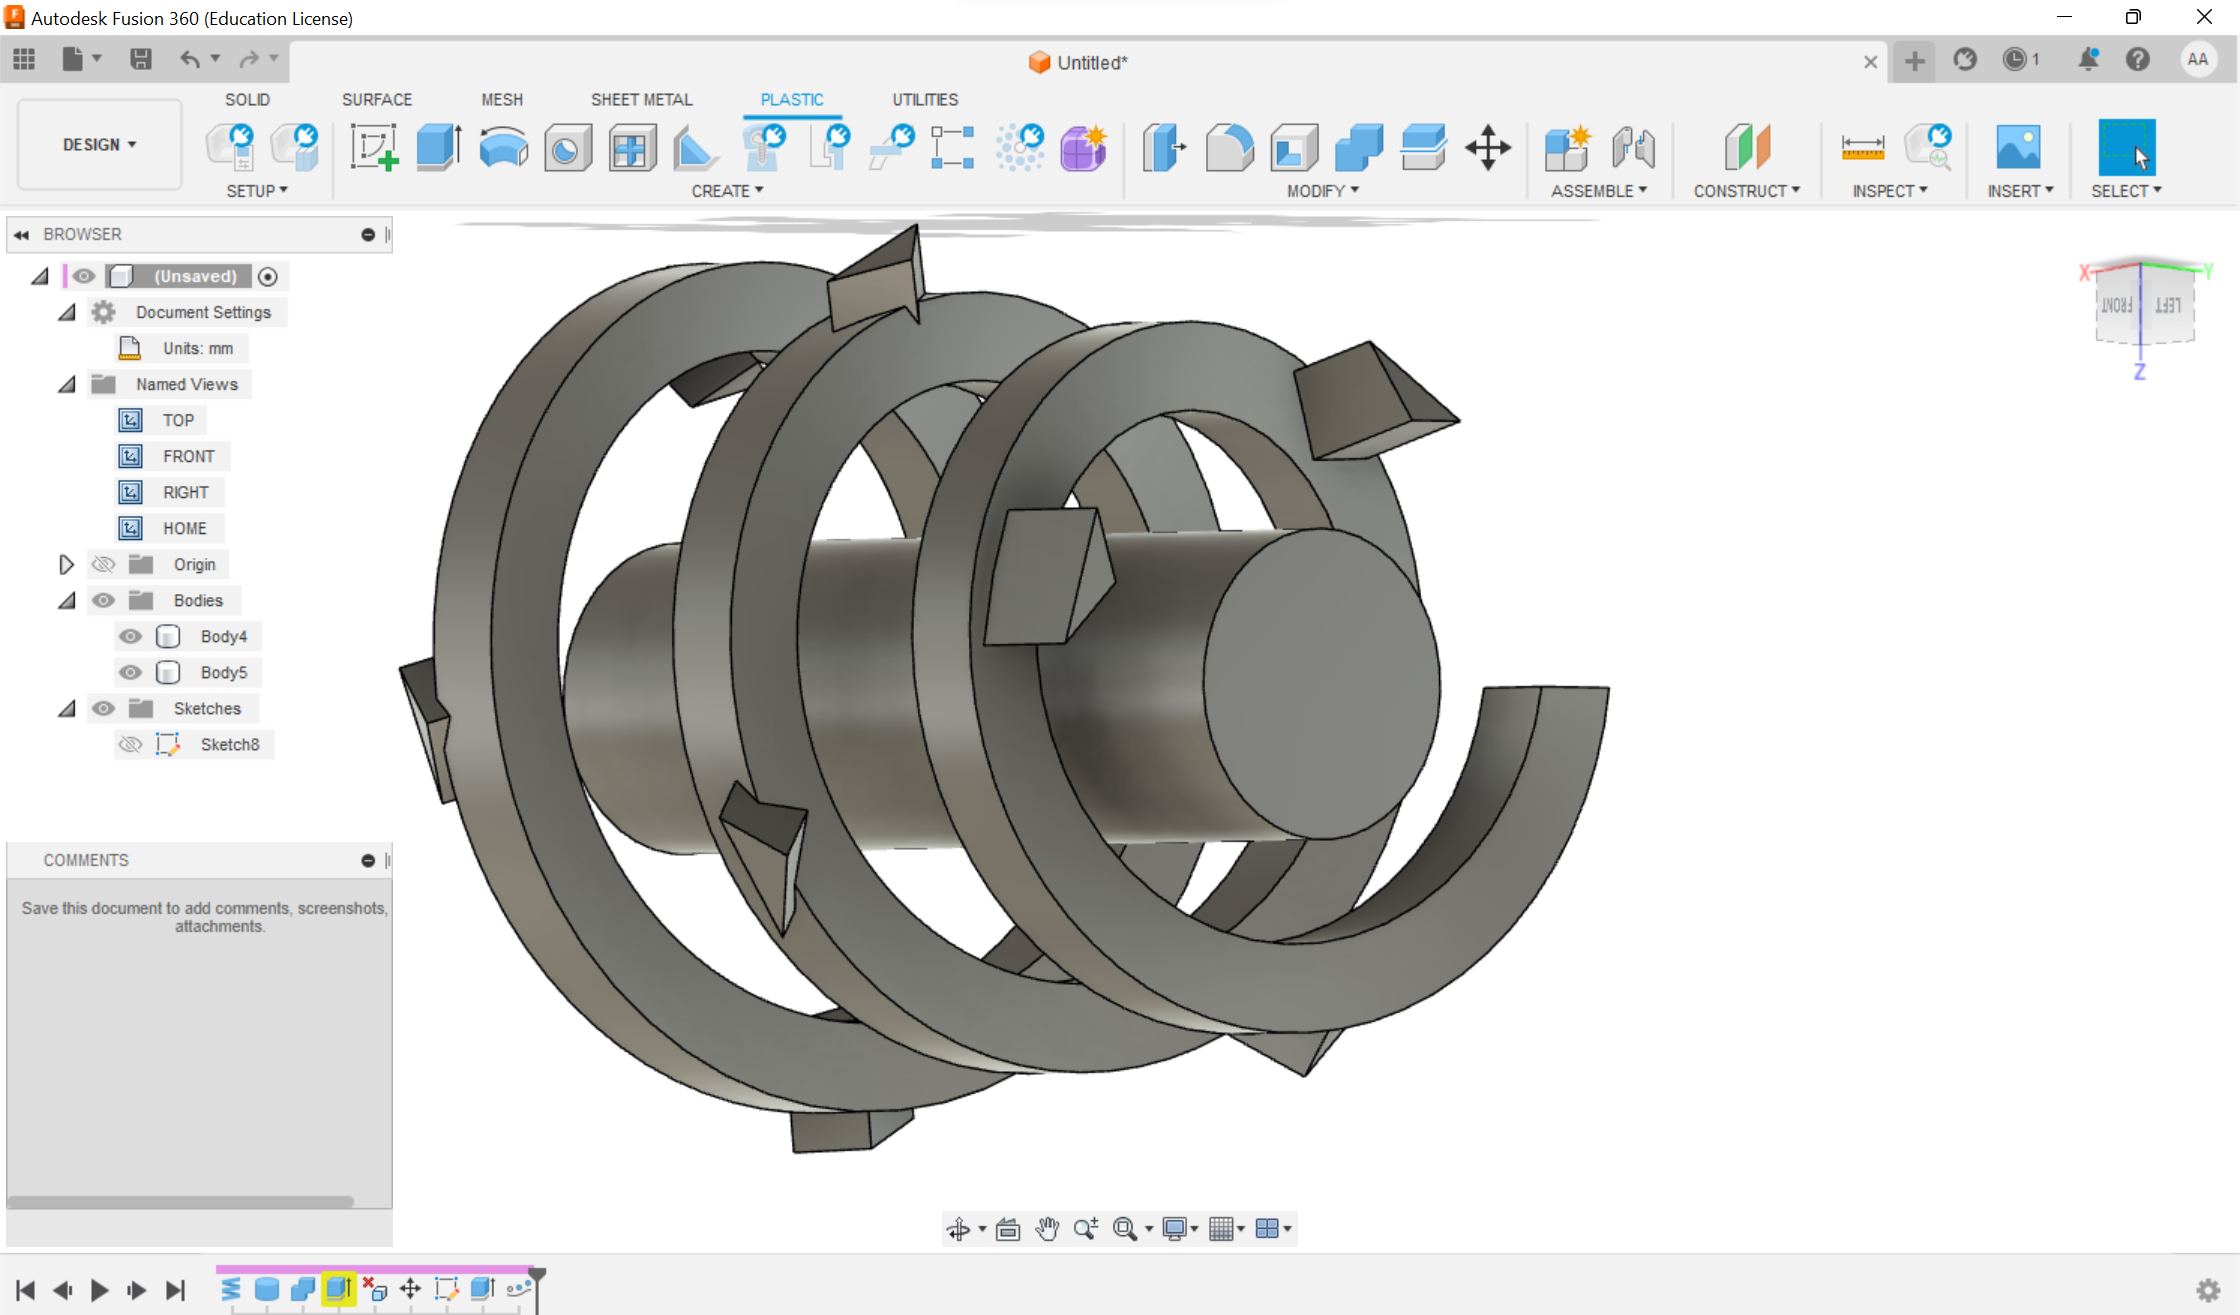
After that, I moved on to my triangles. I made a sketch on the surface of the spiral.
To “distribute” the triangles throughout the spiral, I selected the option Pattern on Path. Look what a monster I got…
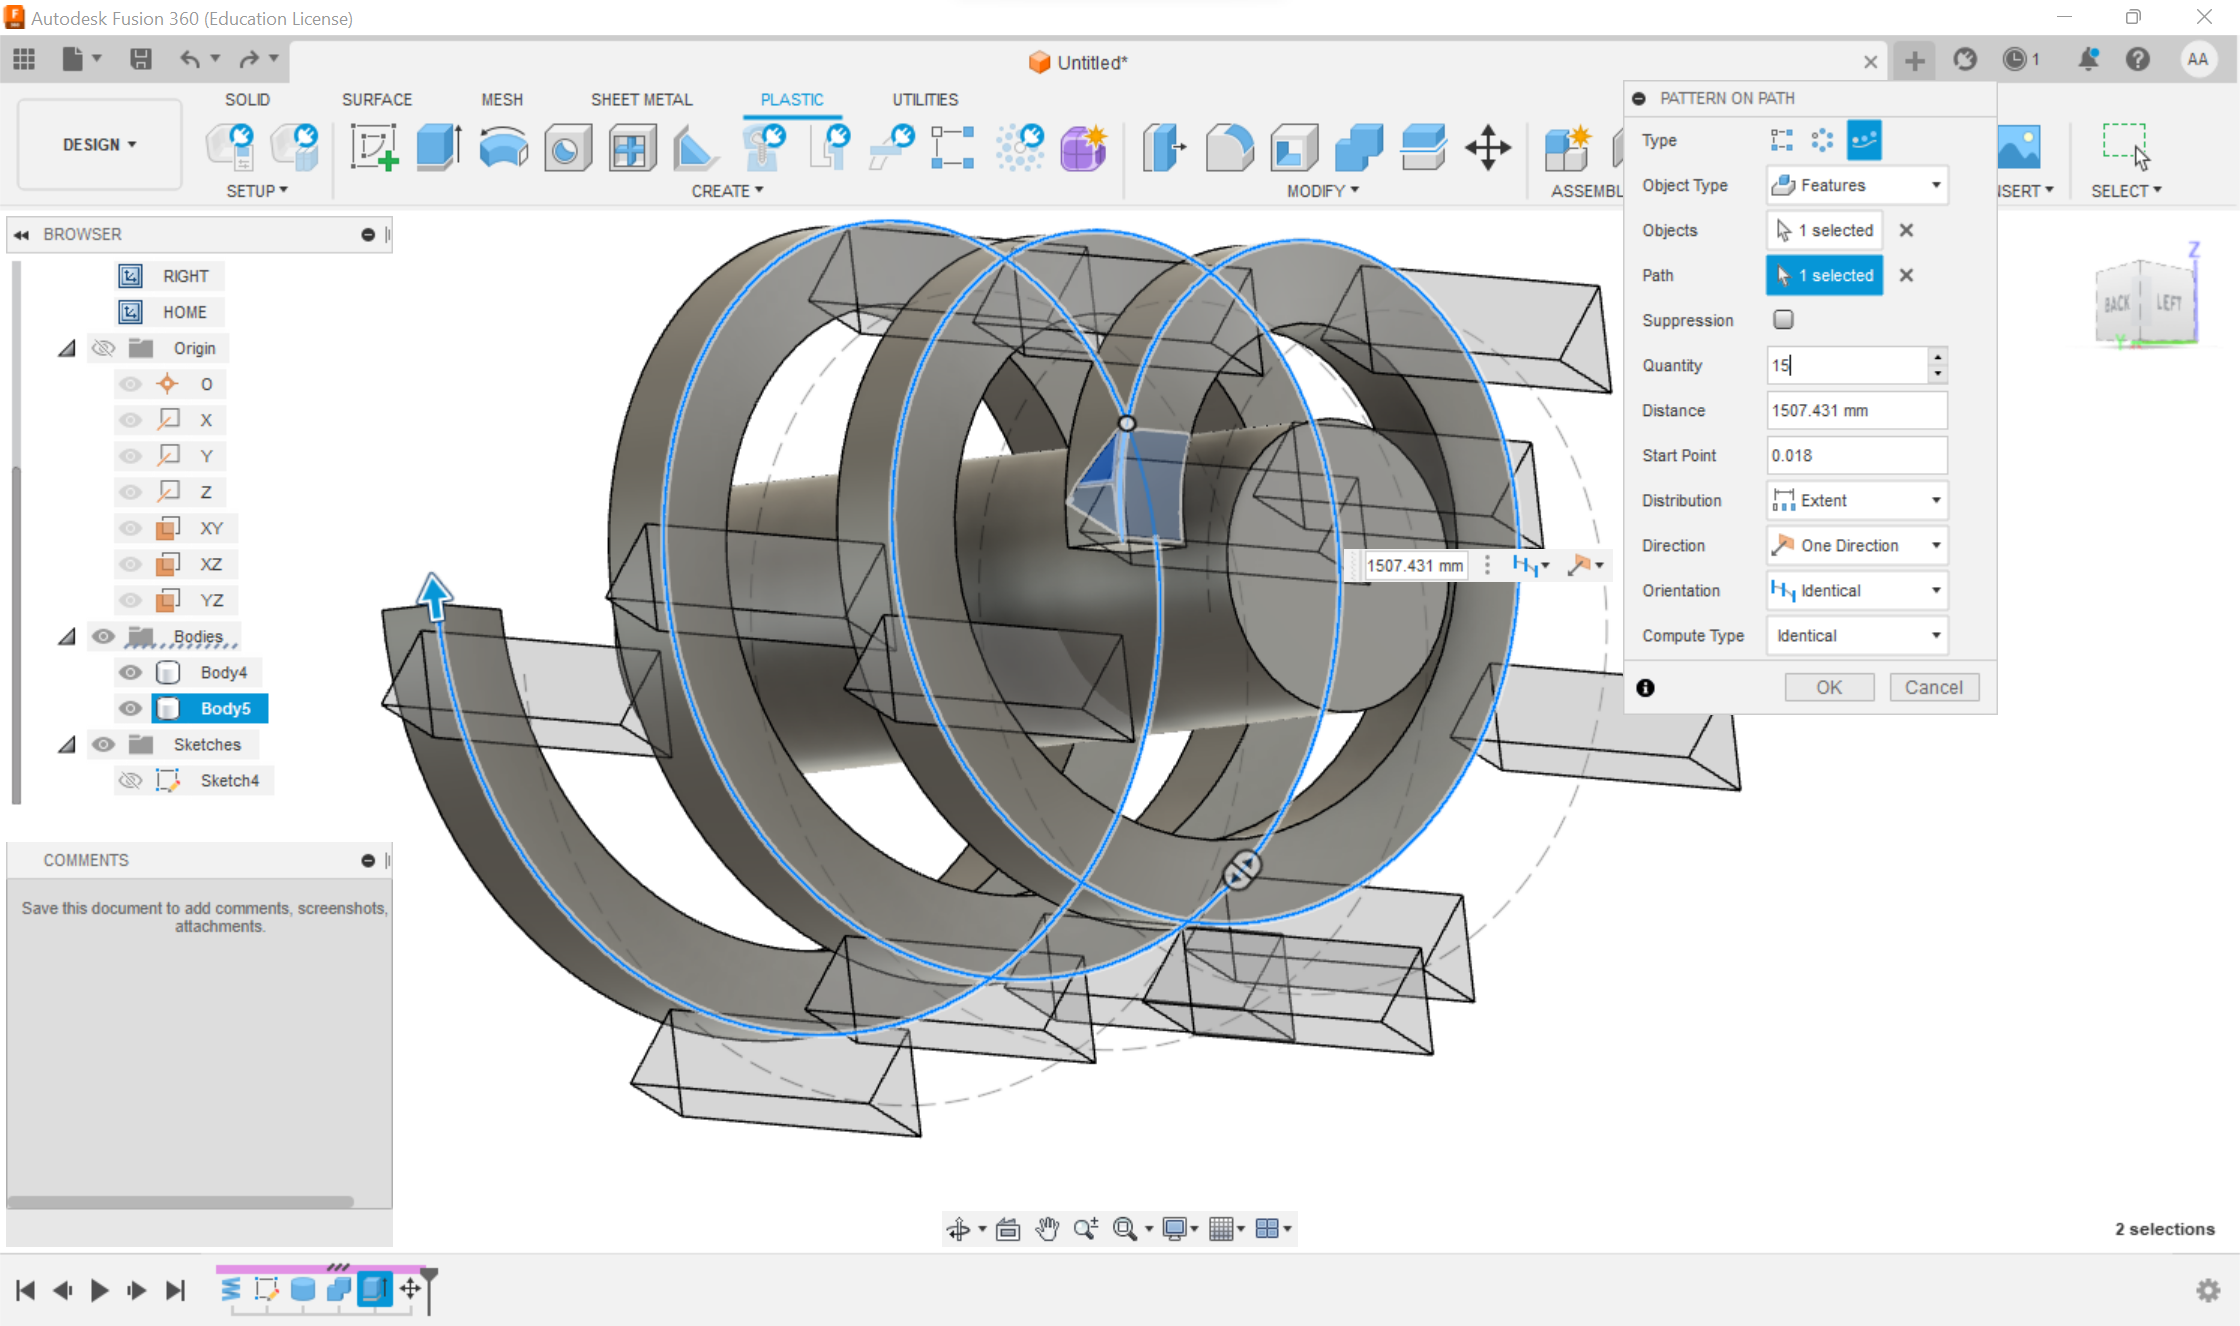
Sometimes errors like this happen..
I tried to go the other way and created a sketch on the other path of the spiral:
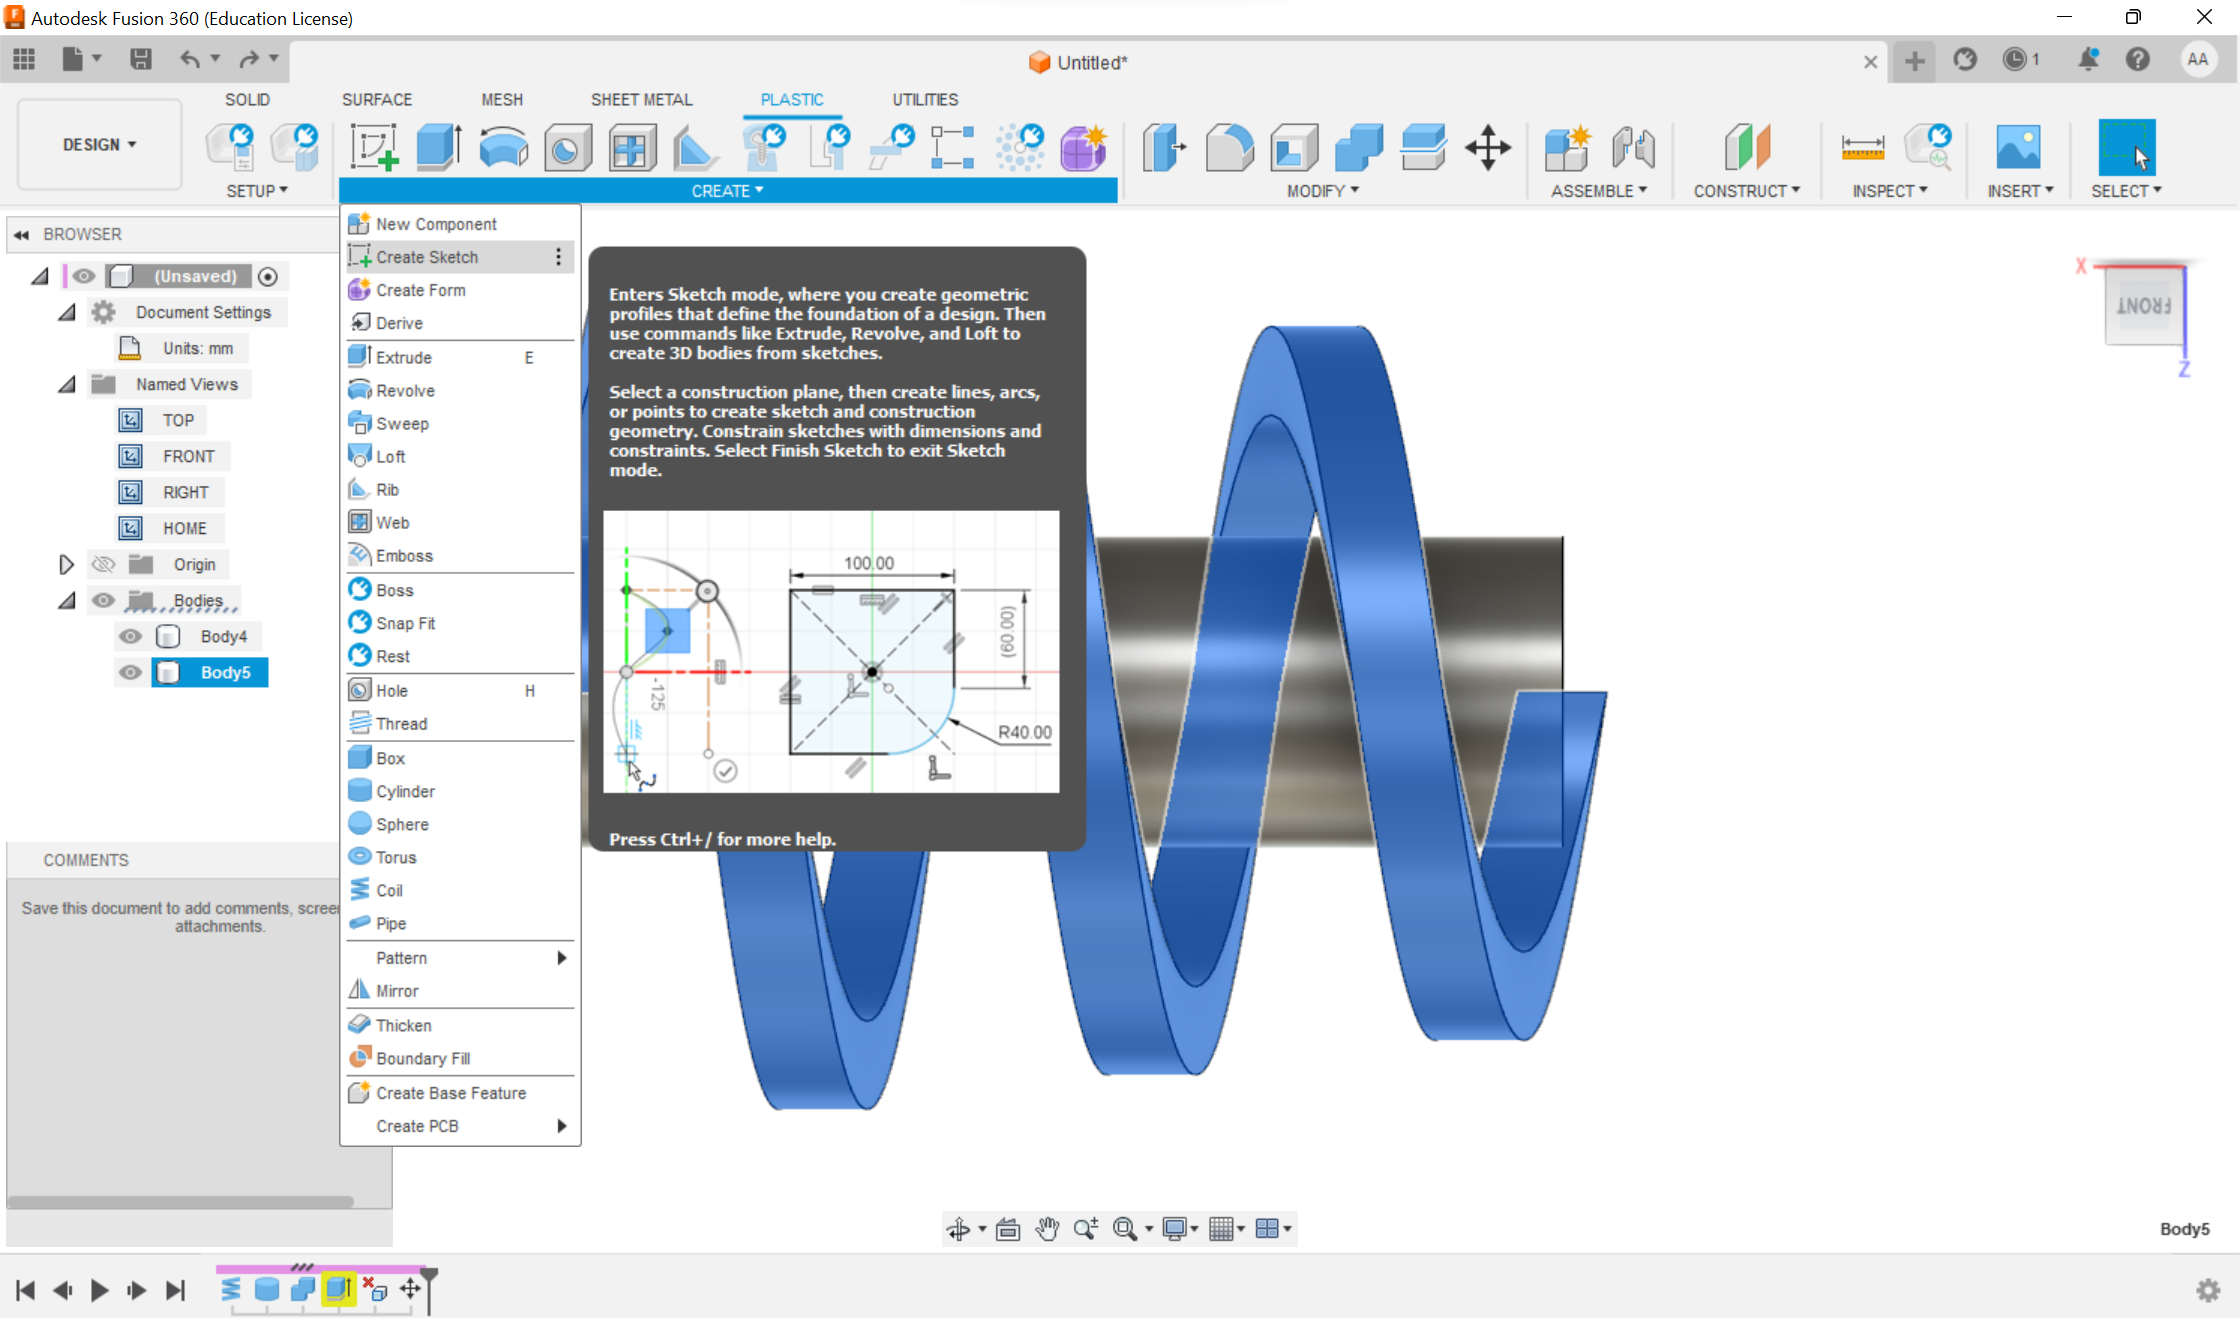
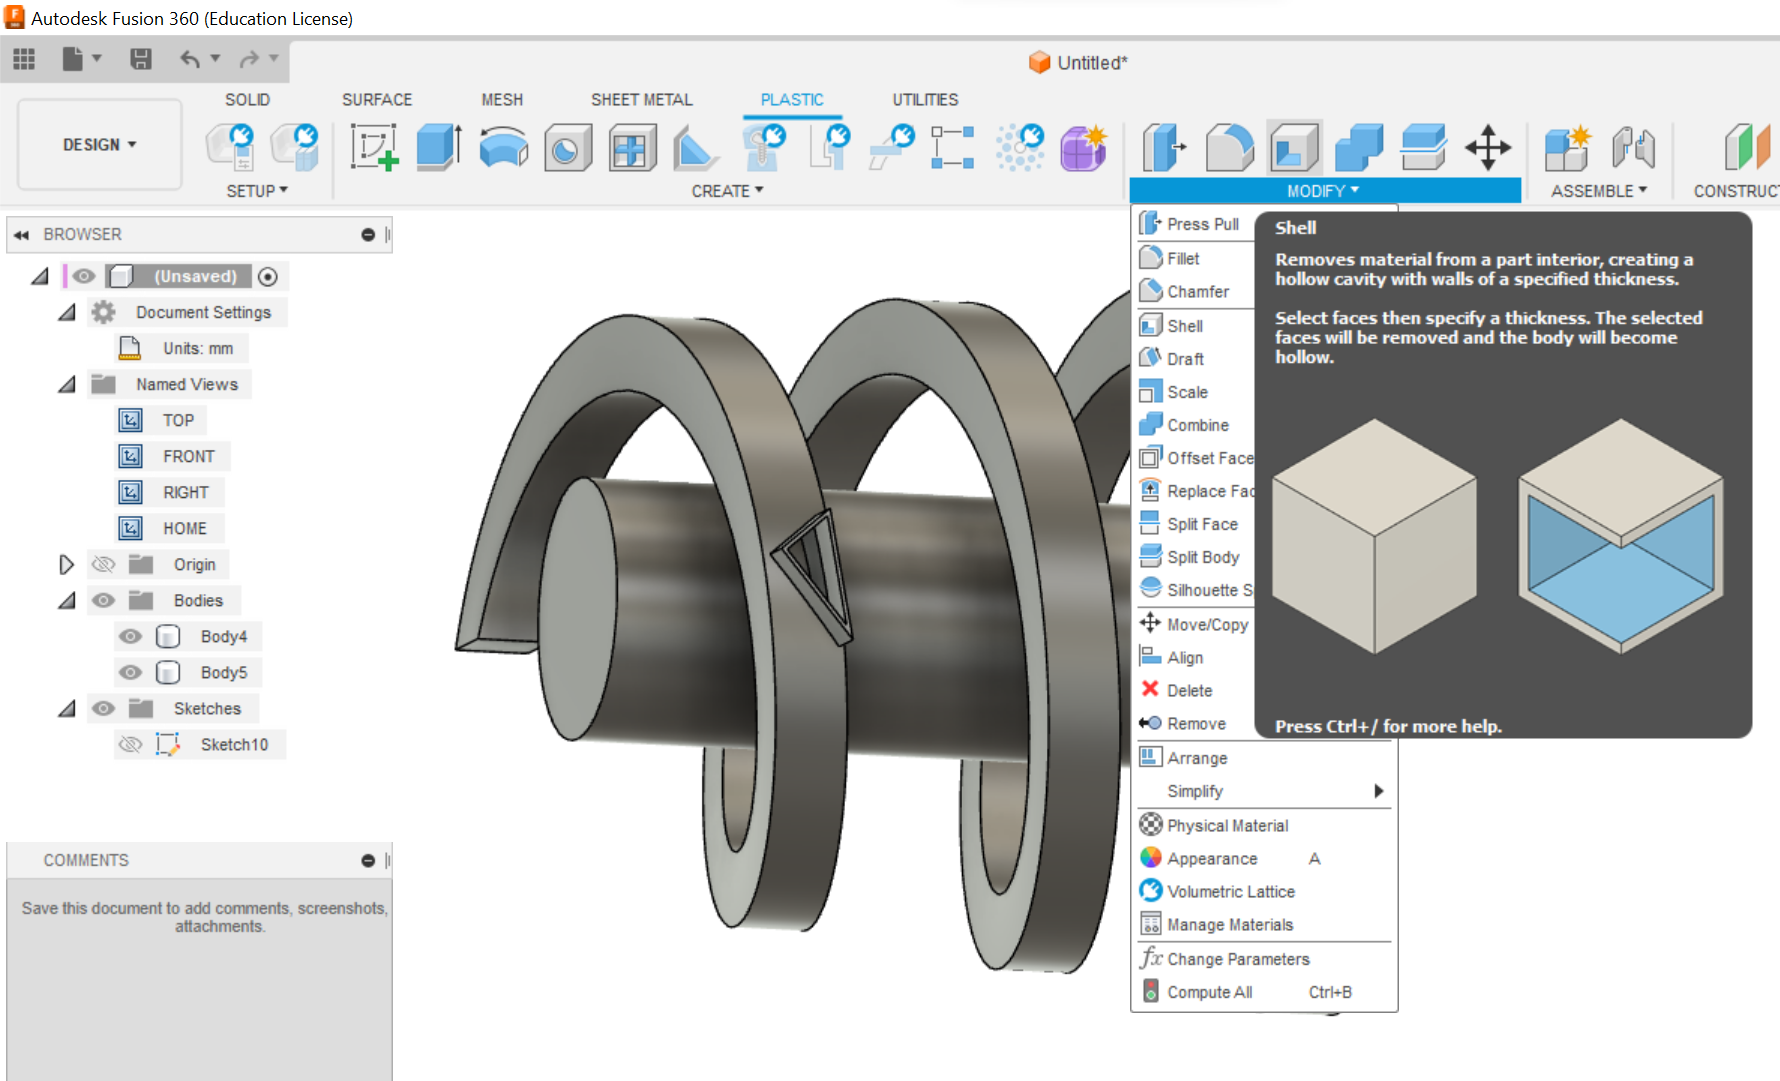
I used the options Extrude and Shell… what a beauty!
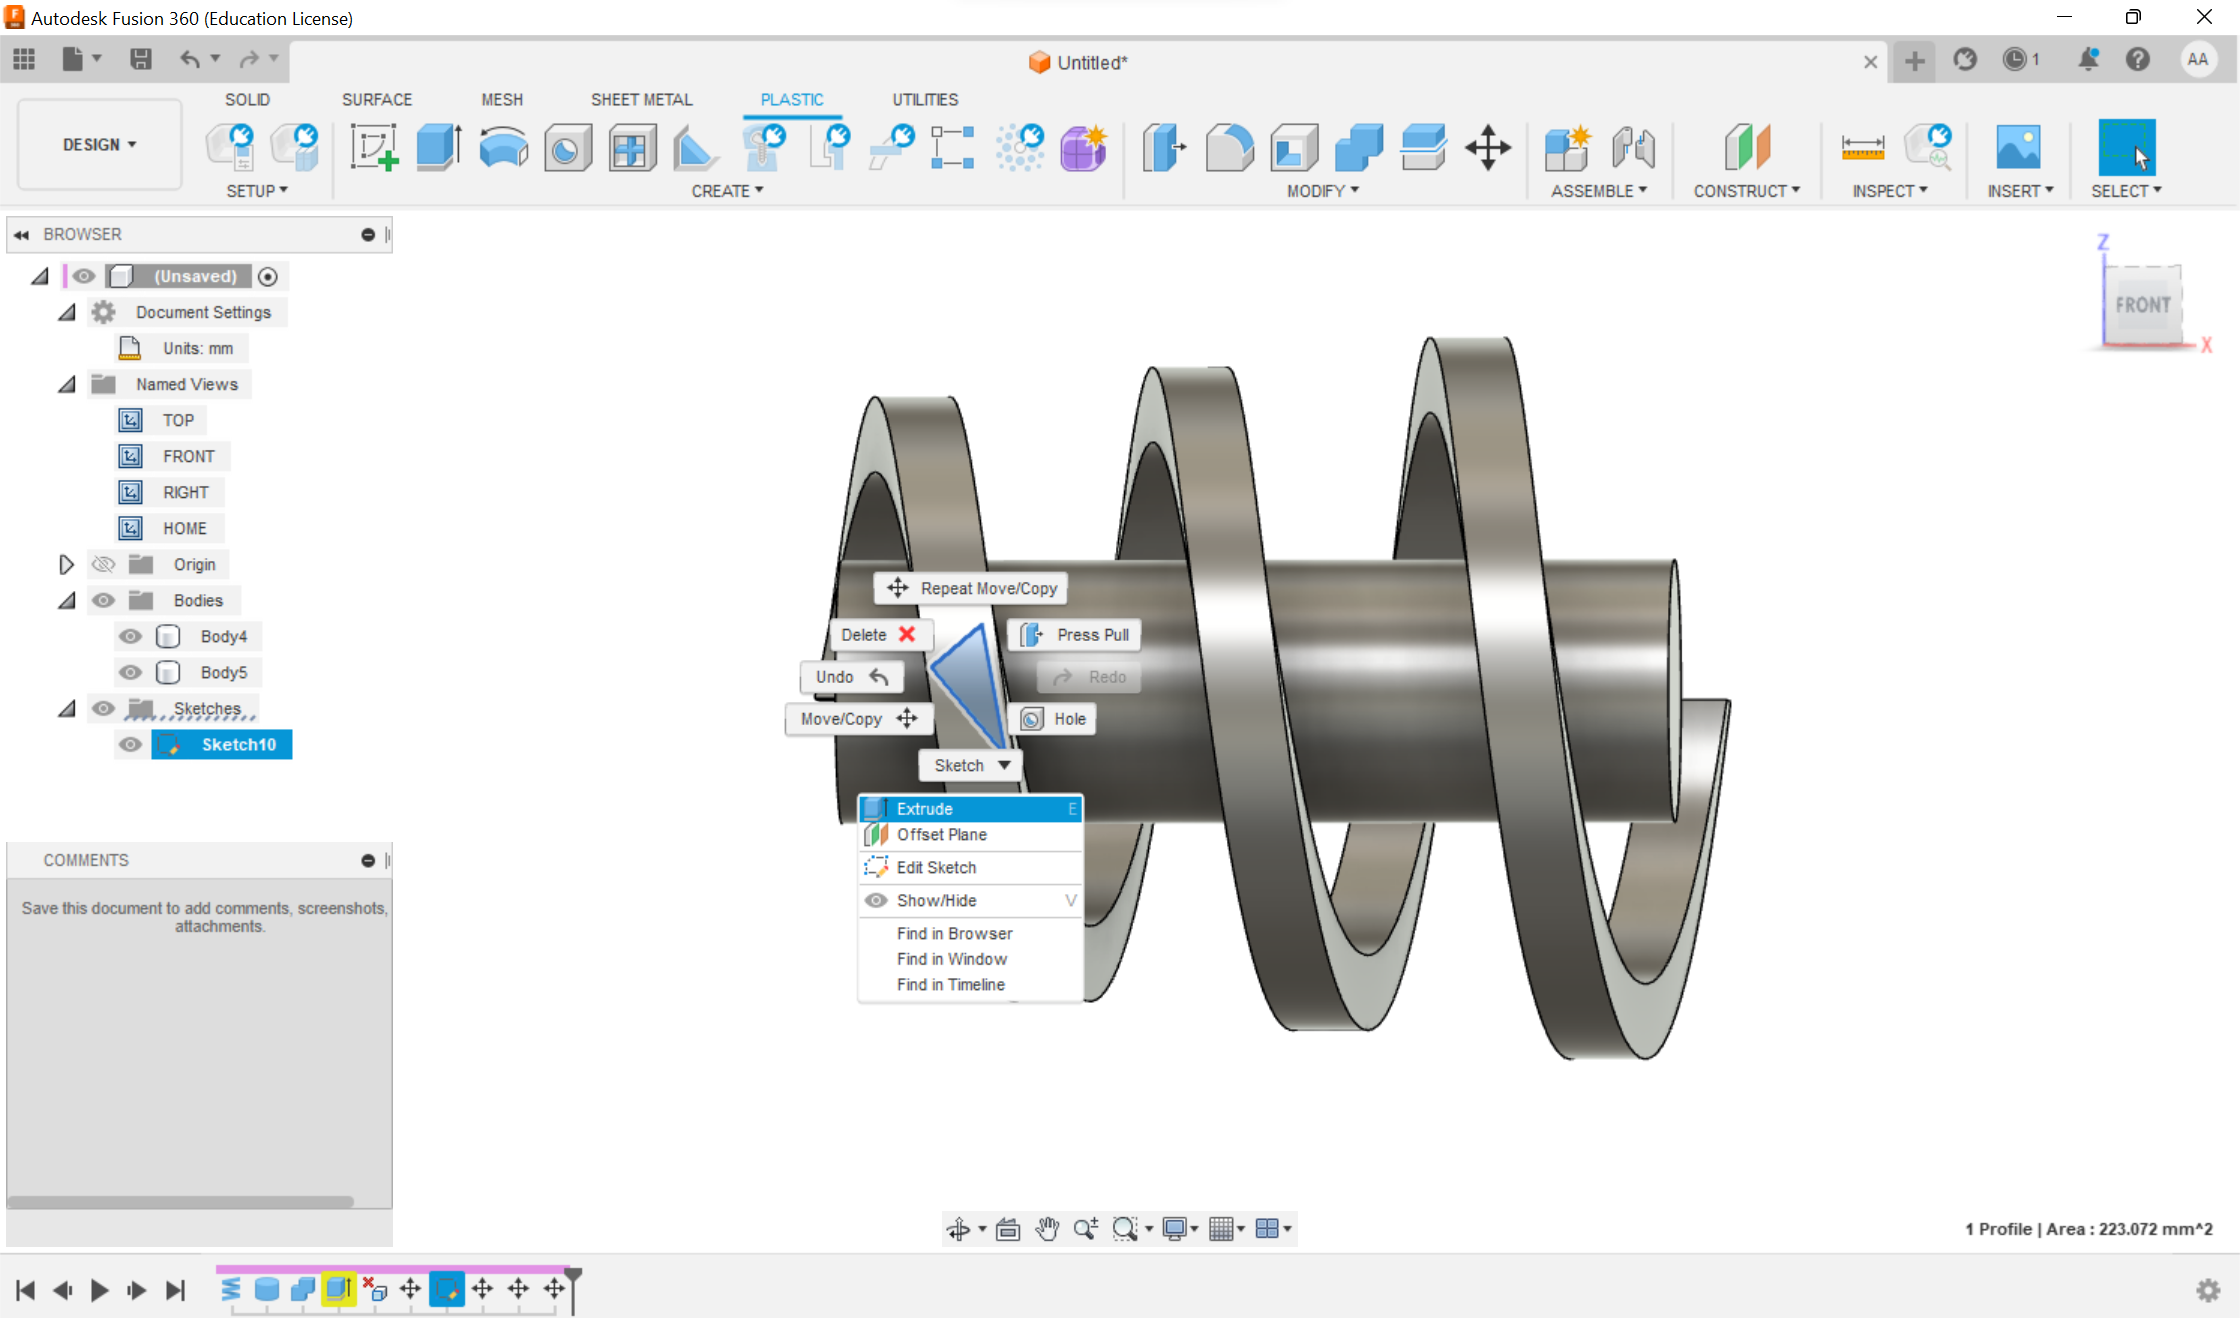
After that I came up with a solution, the result of which was more or less satisfactory. I tryed Geometric pattern…
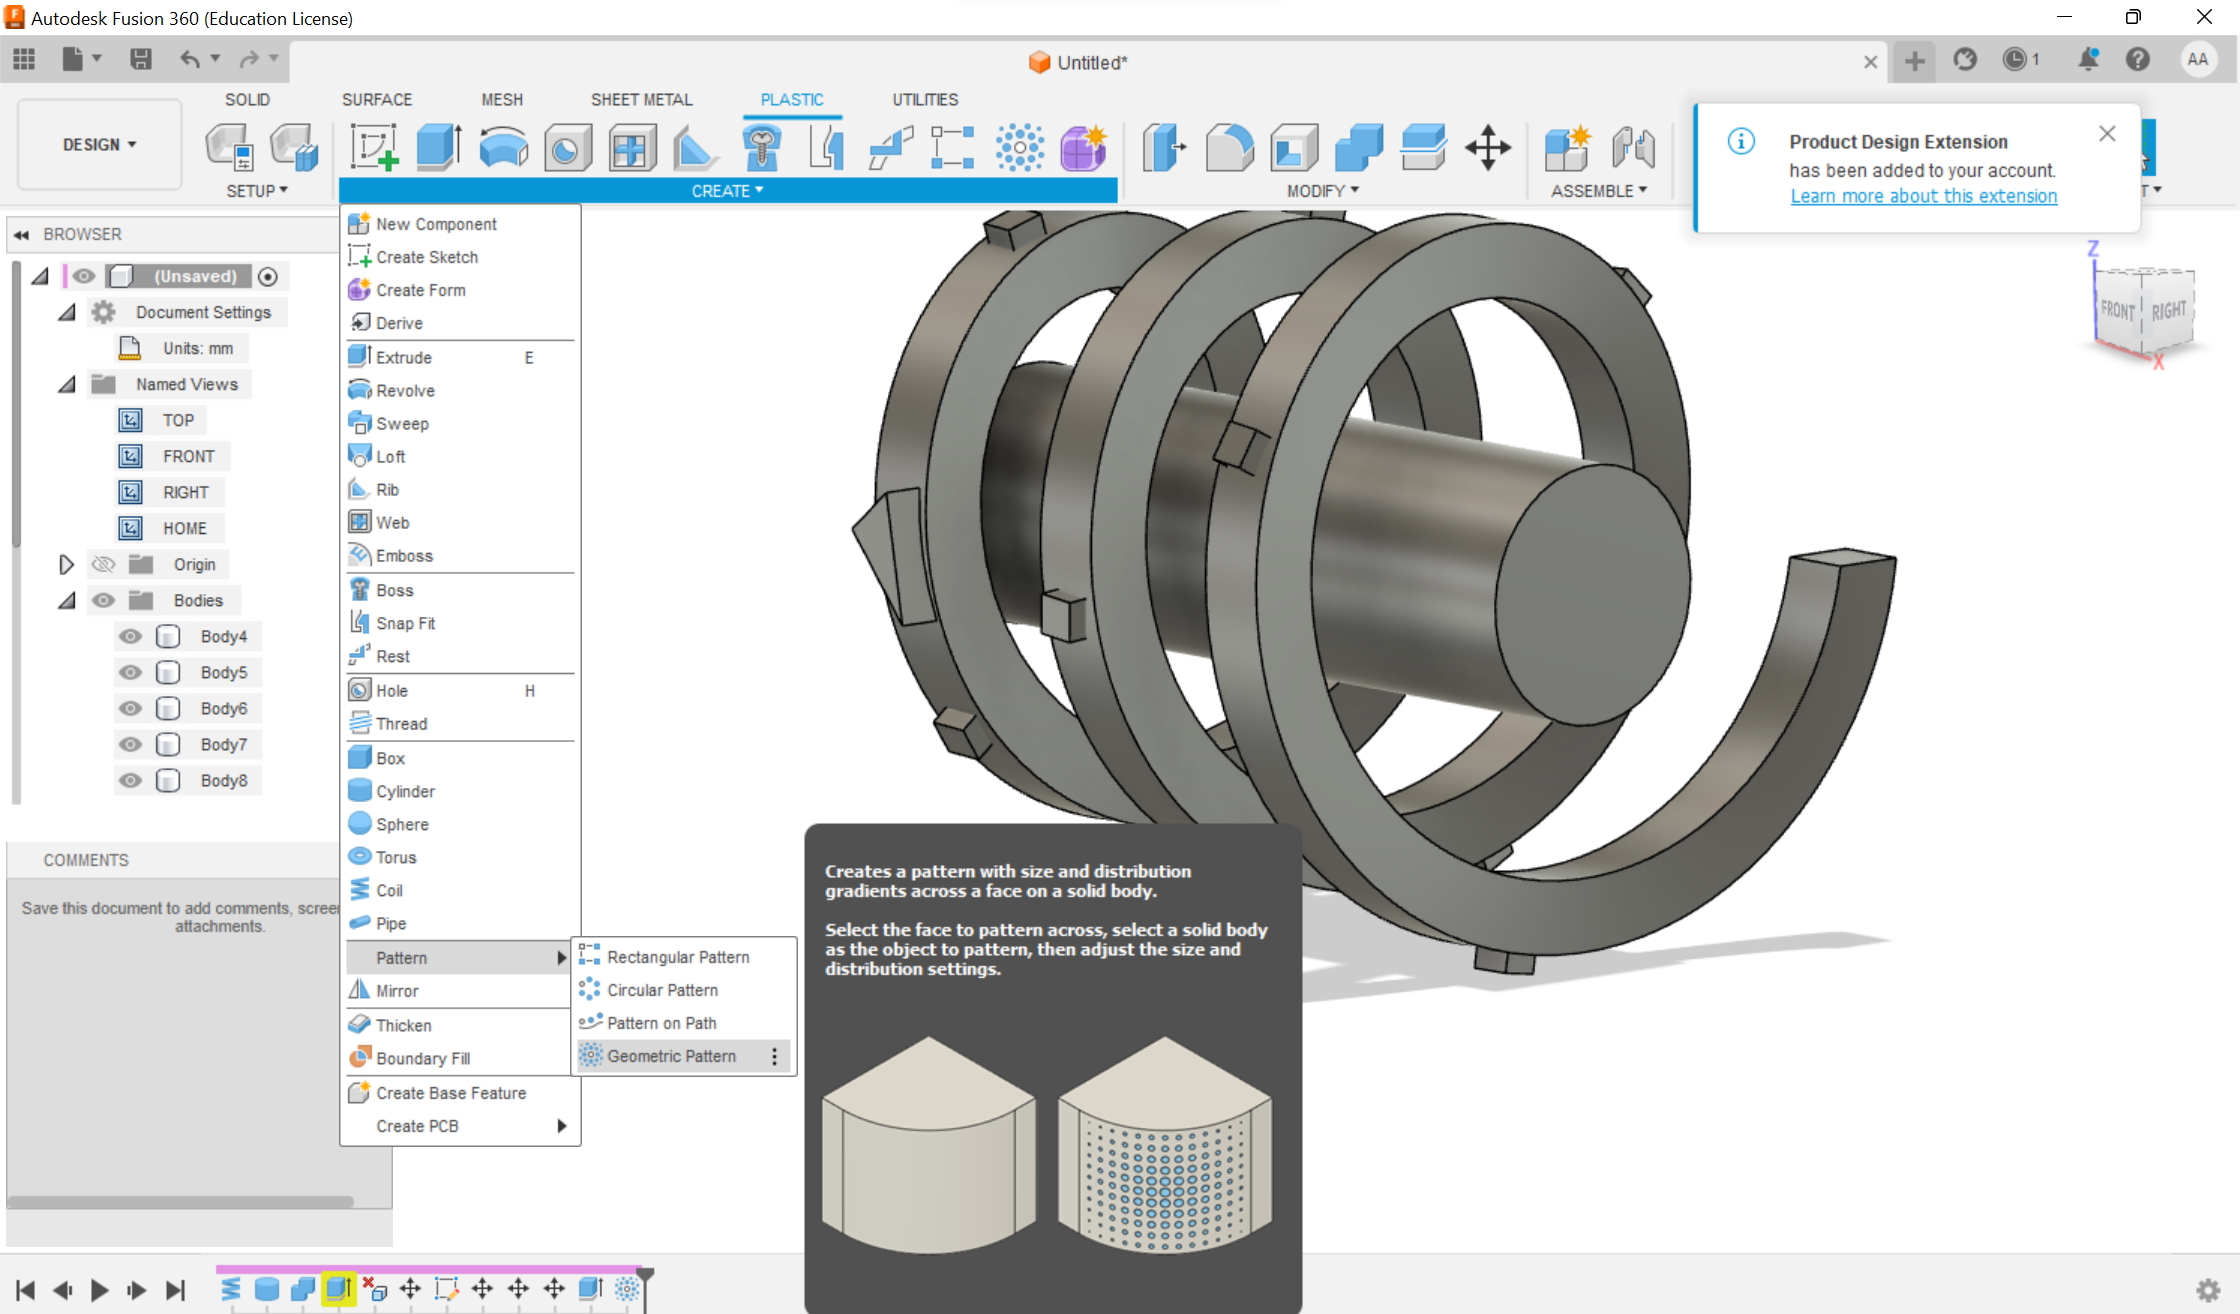
It seems that I’m not very good at creating a bracelet yet, but I already create parts of mashines quite well! :)