Interface and Application Programming
Task: Interface and Application Programming
Group assignment:
- Compare as many tool options as possible.
- Document your work on the group work page and reflect on your individual page what you learned.
Individual assignment
- Write an application that interfaces a user with input and/or output device(s) on a board that you made.
Group assignment:
During our group assignment, we embarked on a quest to explore different tools for visualizing data collected by a sensor. Our primary focus was on the DS18B20 digital temperature sensor. As we delved into the task of transmitting the data to a computer via serial communication, we discovered that the process closely resembled our familiar debugging procedures.
Our first endeavor led us to Processing, a versatile programming language and sketchbook software. Processing proved to be an excellent choice, offering a straightforward approach to creating visually captivating graphics. We started by developing a basic line graph that showcased the temperature data’s evolution over time.
e found that Processing offered a seamless experience, enabling us to create compelling graphics effortlessly. On the other hand, Matplotlib, once we overcame the initial hurdle, provided us with a wealth of functionality for crafting detailed and informative graphs.
You can discover more about our group work here
Learning Python

Download Python.
Python is a programming language that has several characteristics. First, it is strongly typed, which means that the type of a variable is enforced, and cannot be changed without explicitly converting it. Second, it is dynamically typed, meaning that variables do not have to be declared with their type ahead of time, but rather are inferred at runtime based on their assigned value. Additionally, Python is case-sensitive, so variables with different capitalization are considered different variables. Finally, Python is an object-oriented language, meaning that everything in Python is an object, and that objects can be used to model real-world concepts and problems.
Python has a unique syntax compared to other languages. One of the most noticeable differences is that it has no mandatory statement termination characters. Instead, blocks of code are specified by indentation. This means that to begin a block of code, you indent it, and to end it, you dedent it. Statements that belong to a block end with a colon.
In addition to this, comments in Python start with the pound (#) sign and are single-line. For multi-line comments, Python uses multi-line strings.
In Python, values are assigned to variables using the equals sign (=). This actually binds objects to names. Equality testing is done using two equals signs (==). You can also increment or decrement values using the += and -= operators respectively, by the right-hand amount. This can be done on many data types, including strings.
Another useful feature of Python’s syntax is the ability to assign multiple variables on one line. This can save time and reduce the amount of code needed to accomplish a task.
Overall, Python’s syntax is designed to be easy to read and write, making it a popular language for beginners and experts alike. Its unique block structure and other syntax features make it a powerful language for a wide range of applications, from data analysis to web development.
Python full course
PyCharm
 Download PyCharm.
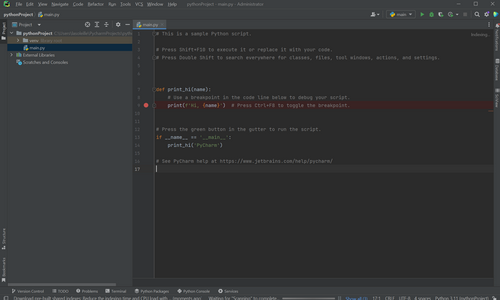
About PyCharm video
Python in VS Code
Using Python in VS Code - here
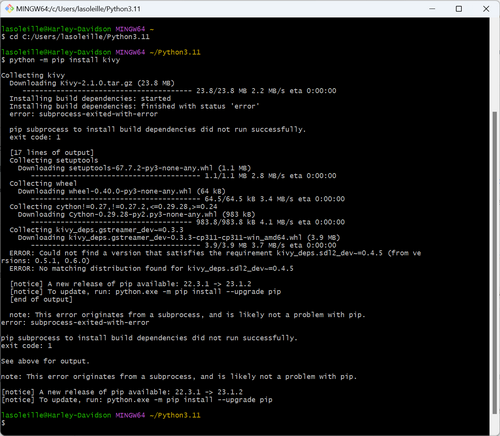
Kivy

Installing Kivy.
First I needed to understand what is pip and what are wheels.
Python provides a package manager named “pip” that makes it easy to install and manage external packages. One popular package is Kivy, which can be installed using pip. However, some packages, like Kivy, require additional steps like compilation when installing from source. This can make installation more complicated for some users.
To simplify the installation process, pre-built distributions of packages are available in the form of “wheels” (.whl files). These wheels contain pre-compiled versions of the package and can be installed easily using pip. This saves time and effort compared to compiling from source.
When installing a package with pip, it first looks for a wheel file on the Python Package Index (pypi.org). If a wheel is available, pip will automatically download and install it. For example, running
python -m pip install kivy
will automatically download and install the appropriate Kivy wheel from PyPI.
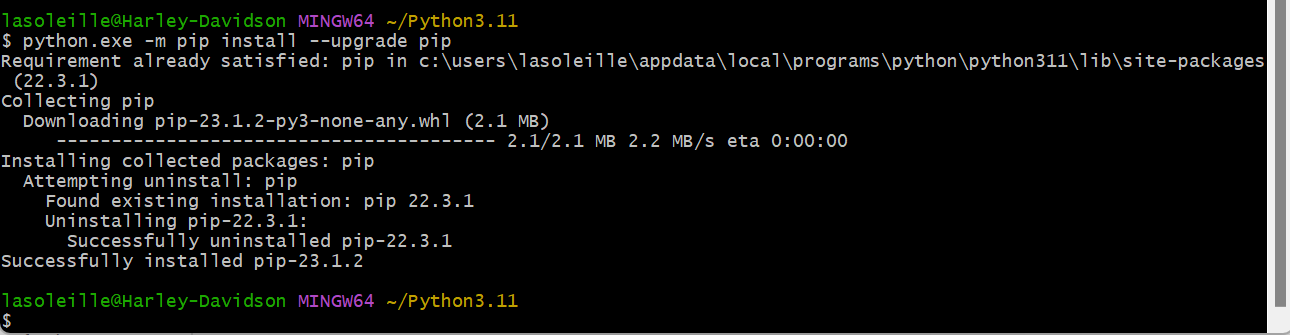
To installing packages, pip can also be used to manage dependencies, upgrade packages, and uninstall packages. It’s an essential tool for Python developers and makes it easy to get started with external libraries and frameworks.
python.exe -m pip install --upgrade pip
Python - turtle library

About turtle library.
The Python Turtle library is a built-in module that provides a simple and interactive way to create graphics and animations using turtle graphics. It is part of the standard Python distribution, so there is no need to install any additional packages.
Key features include turtle graphics, turtle objects for movement control, the turtle screen as a graphical canvas, drawing and control commands, and event-driven programming support. Python Turtle is beginner-friendly and widely used for teaching programming and exploring visual designs.
Processing
After watching Ivan Sanchez Milara’s informative video lecture from 2022 I have decided to dedicate more time to exploring Python after and to use Processing as my tool for the upcoming week.
I downloaded Processing here for Windows.
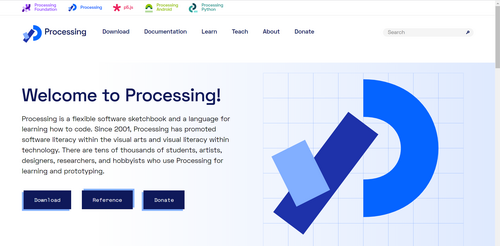
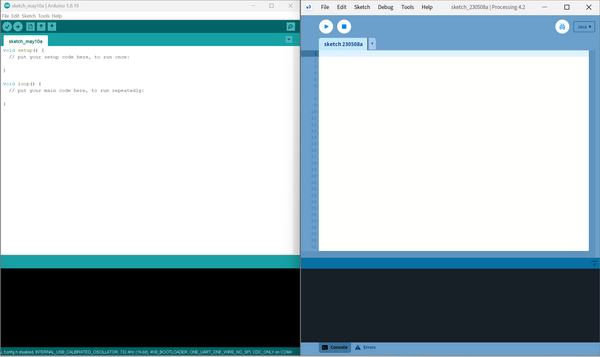
The interface of Processing is very simple and it reminded me of the Arduino IDE. Both programs have similar menus, which was a big advantage for someone like me who was not familiar with programming before starting Fab Academy. Seeing a familiar interface made it easier for me to get started with Processing.
Processing is a powerful tool for creating interactive multimedia applications, animations, and visualizations, and it is widely used by artists, designers, and researchers to create dynamic and engaging visuals.
Here are some advantages of Processing:
-
Simple to learn: Processing is designed to be easy to learn and use, making it an ideal programming language for beginners who are new to programming.
-
Visual Programming: Processing is a visual programming language, which means that you can see the results of your code immediately, making it easier to understand how your code works and to create visual effects.
-
Cross-platform: Processing is cross-platform, which means that it can run on Windows, Mac, and Linux operating systems.
-
Large Community: Processing has a large and active community of users, which means that there are plenty of resources and tutorials available to help you learn and develop your skills.
-
Libraries: Processing has a large number of libraries that make it easy to create complex graphics and animations, and to work with data and other programming languages.
-
Open-source: Processing is open-source, which means that the source code is available for anyone to view, modify, and distribute.
More about Processing you can find here.
I started to explore the code Examples from Flile -> Examples.
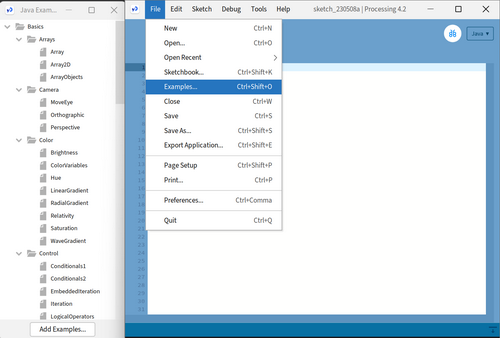
Here are some examples that I found more interesting.:
Processing is based on the Java and Python languages. I have begun to explore Java and its syntax.
I have found two interesting sources for exploring the basic syntax:
Java vs Python
During my exploration of Java, I noticed a few differences compared to Python. Firstly, Java is a statically typed language, whereas Python is dynamically typed. This means that in Java, variable types need to be declared explicitly, while in Python, variable types are inferred at runtime. This distinction affects the way code is written and how errors are caught and handled.
Also I discovered differences in syntax:
- Variable Declarations: In Java, variables must be declared with their specific types before they can be used. For example:
java

int age = 25;
In Python, variables can be assigned without specifying their types explicitly:
python

age = 25
- Code Blocks and Indentation: Java uses curly braces to define blocks of code, while Python uses indentation. For example, a conditional statement in Java looks like this:
java

if (condition) {
    // code block
}
The equivalent code in Python uses indentation:
python

if condition:
    # code block
- Method Definitions: In Java, methods are explicitly defined within classes using a specific syntax. Here’s an example:
java

public void greet(String name) {
    System.out.println("Hello, " + name + "!");
}
In Python, method definitions are similar but don’t require the visibility modifier or return type declaration:
python

def greet(name):
    print("Hello, " + name + "!")
- String Concatenation: In Java, string concatenation is typically done using the + operator:
java

String message = "Hello, " + name + "!";
In Python, string concatenation can be achieved using the + operator as well, but it also supports a more concise syntax using f-strings:
python

message = f"Hello, {name}!"
- Looping Constructs: Java has several looping constructs, such as for and while loops, which require explicit initialization, condition, and increment/decrement statements. Here’s an example of a for loop in Java:
java

for (int i = 0; i < 5; i++) {
    // code block
}
Python’s for loop syntax is simpler and more intuitive:
python

for i in range(5):
    # code block
These are just a few examples of the syntax differences between Java and Python. While both languages share some similarities, understanding these distinctions is essential when transitioning between the two.
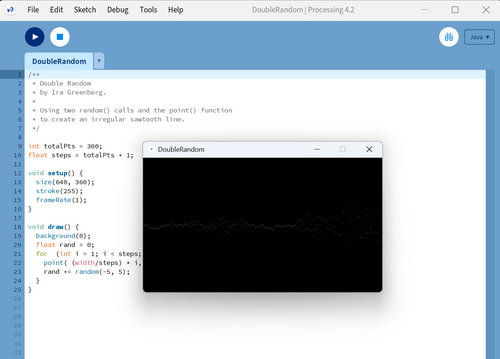
Playing “Processing”
I have recently started exploring Processing and requested a simple example from ChatGPT.
void setup() {
  size(800, 600); // Set the size of the Processing window
}

void draw() {
  background(255); // Clear the background to white

  // Draw a shape
  fill(0, 0, 255); // Set the fill color to blue
  rect(100, 100, 200, 200); // Draw a rectangle at (100, 100) with width 200 and height 200
}

From what I have learned so far, I have come to realize that writing code on my own based on the materials I have learned is not difficult.
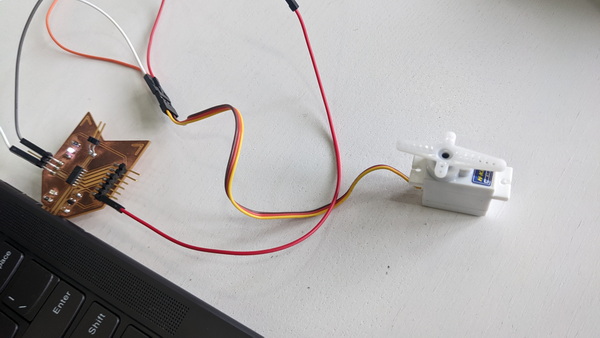
Control the Motor or “The wipers on the bus go “Swish, swish, swish”!!”
While working on my research for this week’s assignment, I noticed in the documentation of several students that using ControlP5 library significantly simplifies the work process. I decided to make a button and control a stepper motor just like in the car. :)
The ControlP5 library is a powerful tool in the realm of Processing. It provides a wide range of user interface controls that can be easily integrated into your projects. With controlP5, you can create buttons, sliders, text fields, checkboxes, and more, allowing for intuitive user interaction and control over your visualizations or applications
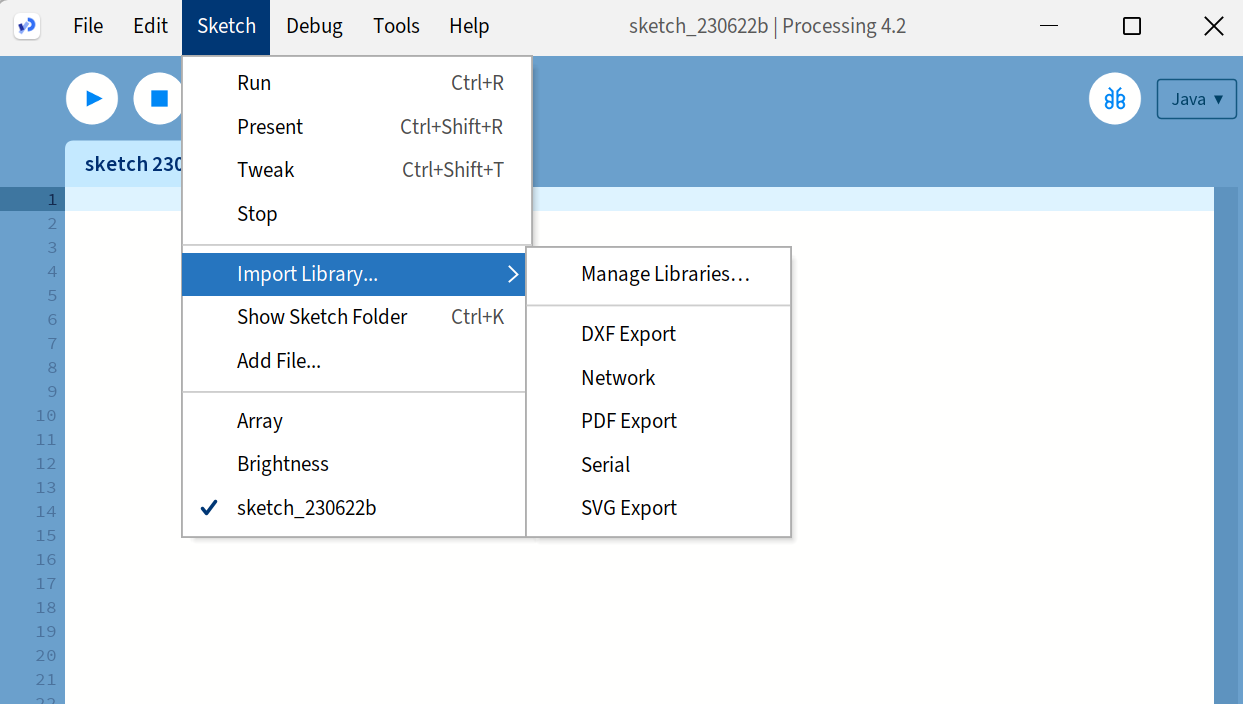
To install this library I went Sketch ->Import library -> Manage libraries

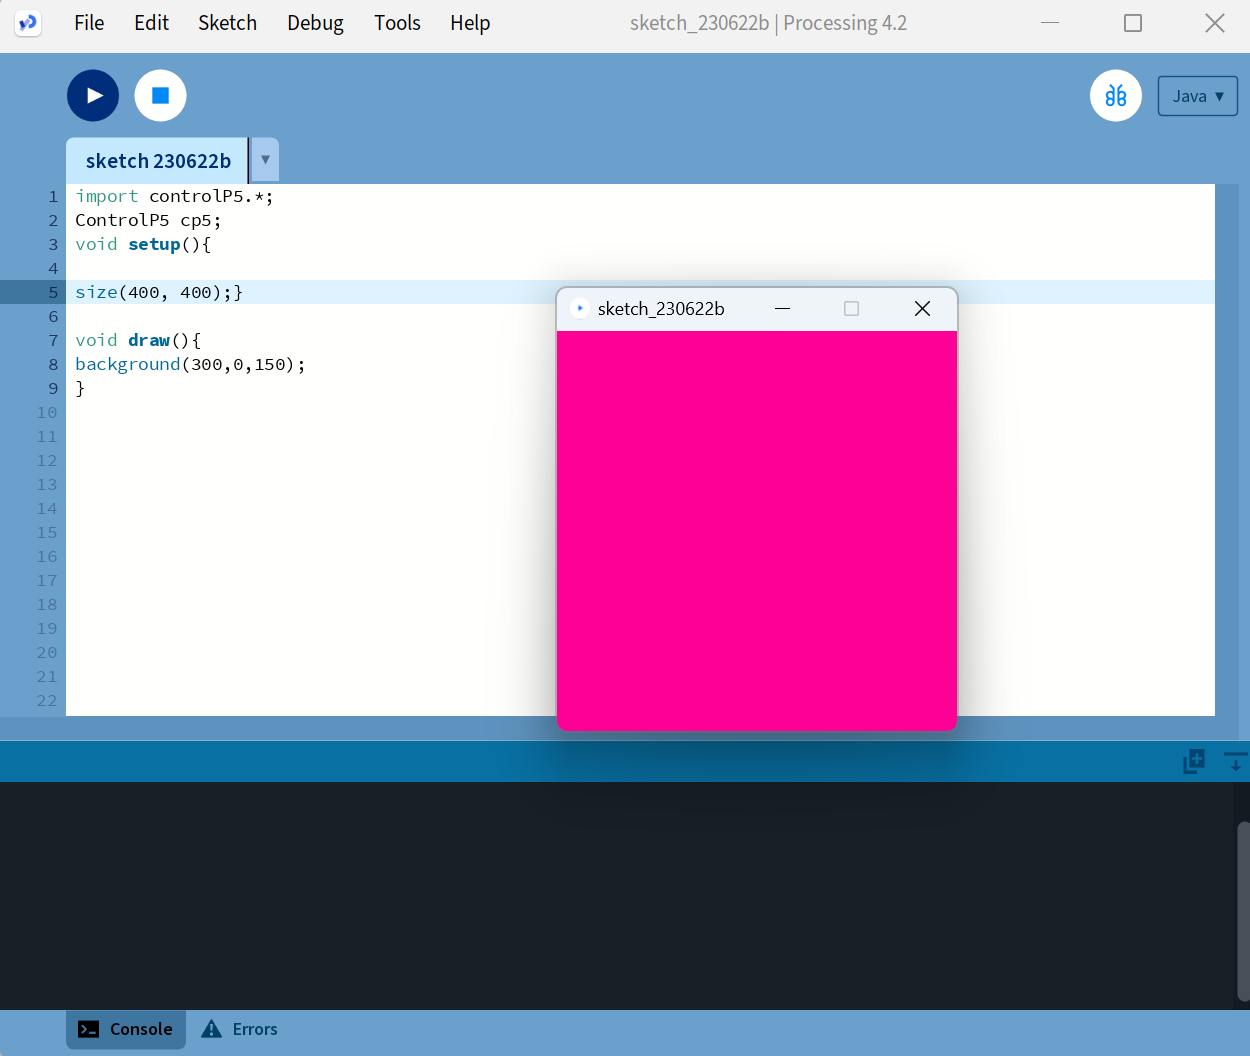
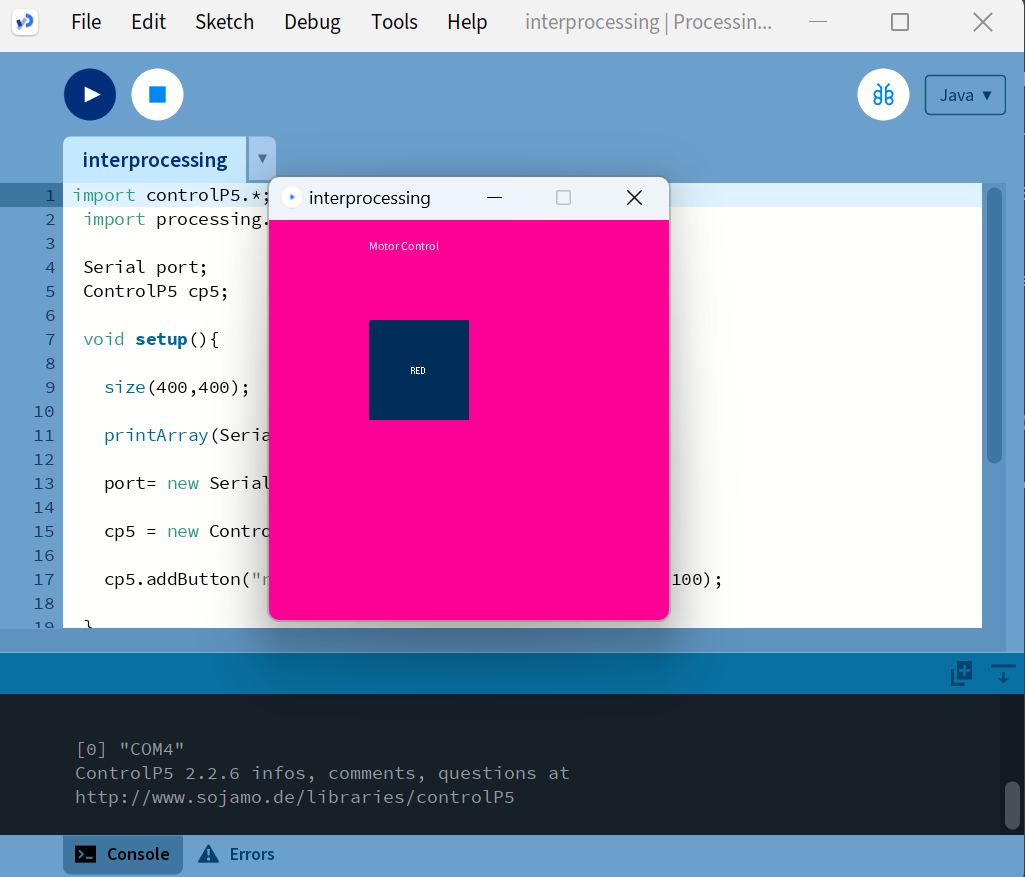
I started to make a pink square. Few lines and, Voila!, I already created in interface. :)
import controlP5.*;
ControlP5 cp5;
void setup(){

size(400, 400);}

void draw(){
background(300,0,150);
}
The complete code for Processing
import controlP5.*;
import processing.serial.*;
Serial port;
ControlP5 cp5;
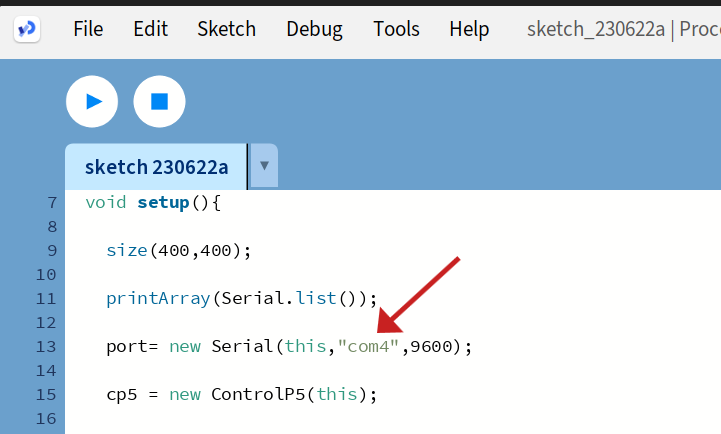
void setup(){
size(400,400);
printArray(Serial.list());
port= new Serial(this,"com4",9600);
cp5 = new ControlP5(this);
cp5.addButton("red").setPosition(100,100).setSize(100,100);
}
void draw(){
background(300,0,150);
text("Motor Control",100,30);
}
void red(){
port.write('r');
}
This code imports the ControlP5 library and the processing.serial library. It initializes a Serial port and creates an instance of the ControlP5 object. The setup() function sets the size of the square, prints the available serial ports, establishes a connection with the specified port (“com4” at a baud rate of 9600), and creates a button using ControlP5 at position (100,100) with a size of 100x100.
Lastly, there is a custom function called red() which is triggered when the “red” button is pressed. Inside the red() function, it sends the character ‘r’ to the serial port using port.write().
This code sets up a basic GUI interface using ControlP5 in Processing, allowing control over a motor through the serial port.
Code for Arduino
To connect Processing interfaces with a device connected to your board, you may need to use Arduino software and create code specifically for your device.
By combining the Arduino software and Processing, you can create an interactive system where your Processing interface communicates with the device connected to your PCB.
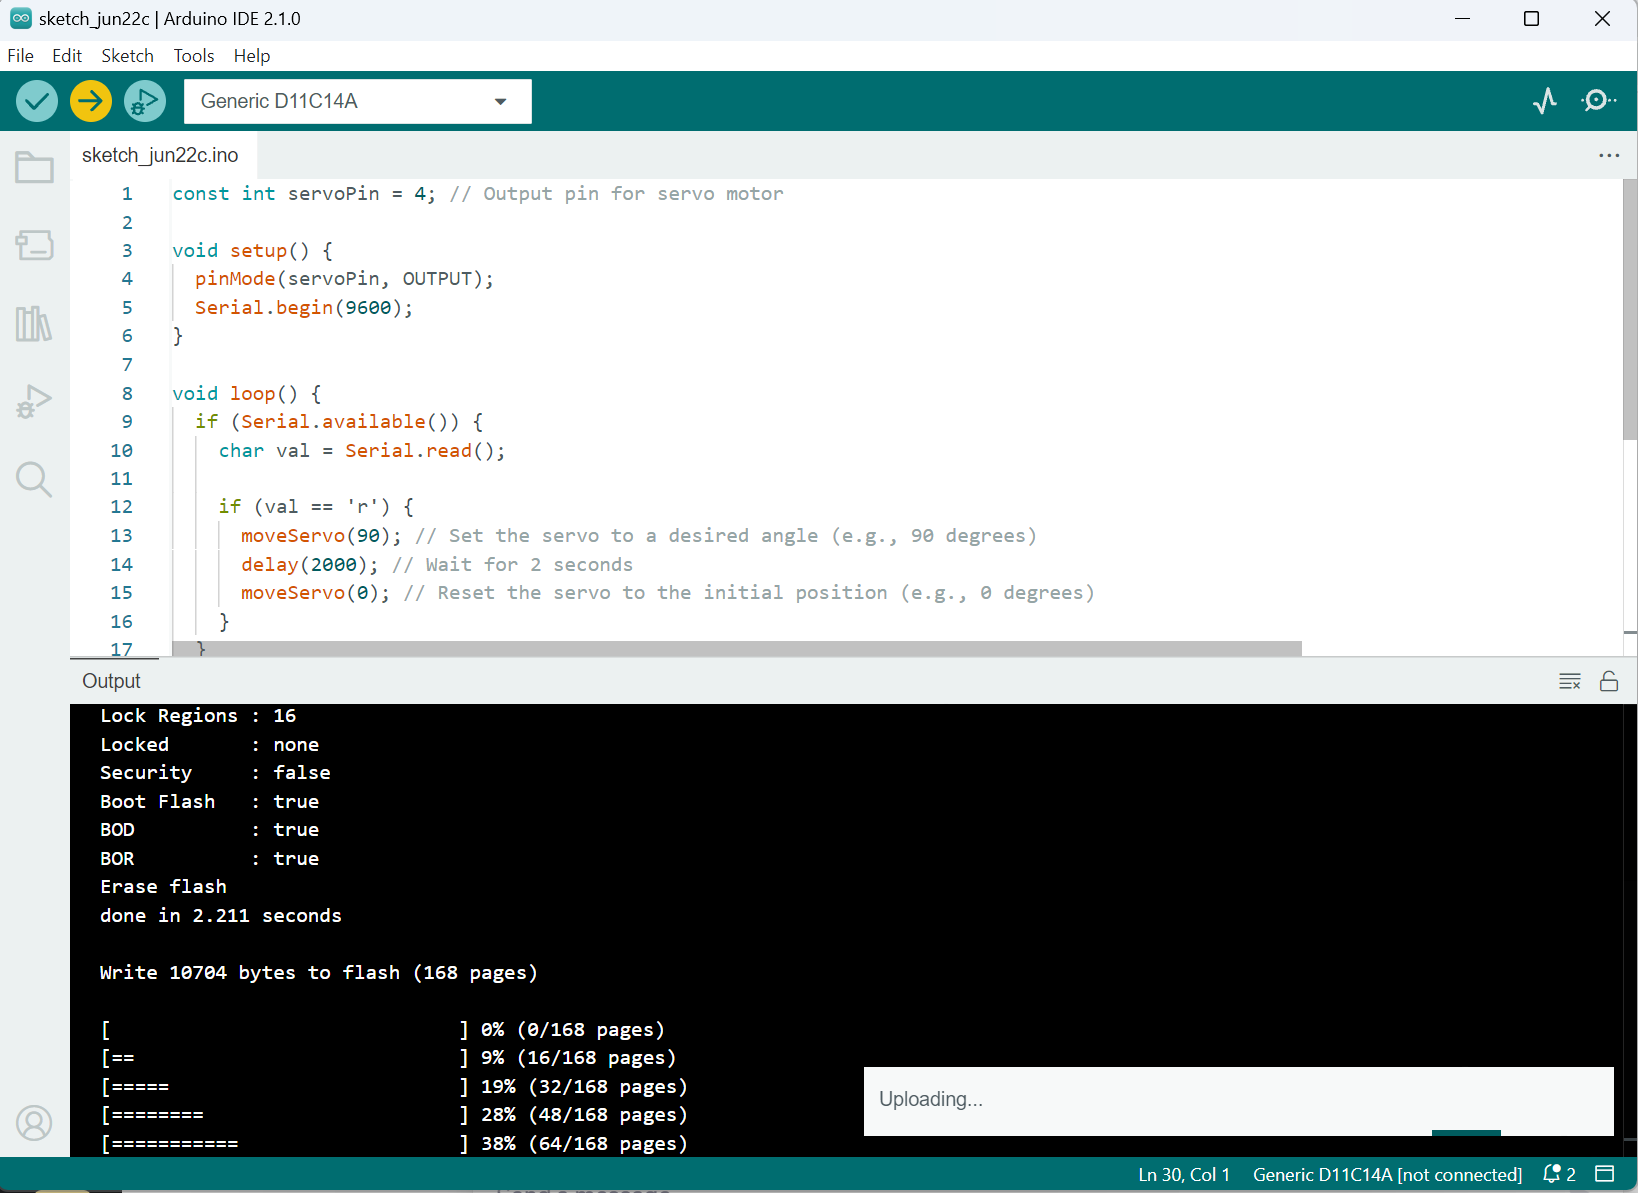
const int servoPin = 4;
void setup() {
  pinMode(servoPin, OUTPUT);
  Serial.begin(9600);
}

void loop() {
  if (Serial.available()) {
    char val = Serial.read();

    if (val == 'r') {
      moveServo(90);
      delay(2000);
      moveServo(0);
    }
  }
}

void moveServo(int angle) {
  int pulseWidth = map(angle, 0, 90, 1000, 2000);

  for (int i = 0; i < 10; i++) {
    digitalWrite(servoPin, HIGH);
    delayMicroseconds(pulseWidth);
    digitalWrite(servoPin, LOW);
    delay(20);
  }
}
In the loop() function, the code checks if there is any data available from the serial communication using Serial.available(). If data is available, it reads the incoming character using Serial.read() and stores it in the variable val.
If the received character is ‘r’, the code proceeds to execute the following steps: It calls the moveServo() function with an angle of 90 degrees, causing the servo motor to move to the corresponding position.
This code enables you to control a servo motor position based on the character received through the serial communication. For example, sending ‘r’ causes the servo motor to rotate to 90 degrees and then return to 0 degrees after a delay.
Few Important remarks
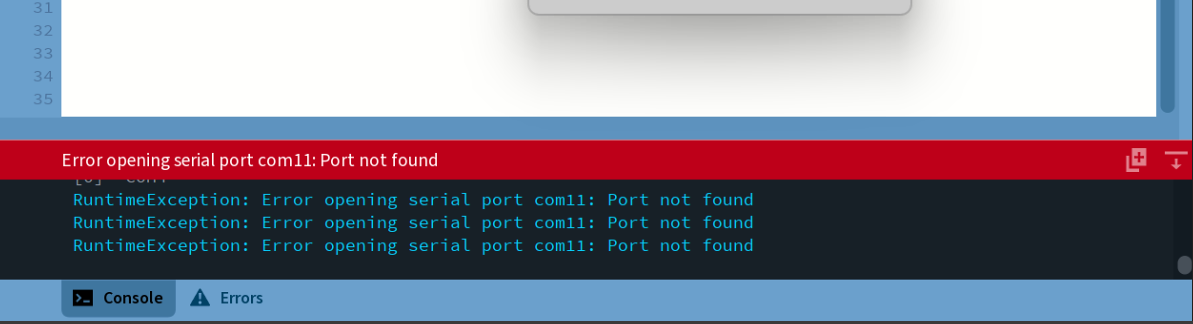
- The order of manipulations is important. First, you need to run the code in the Arduino software, making sure to select the appropriate board and, importantly, the correct port from the “Tools” menu.
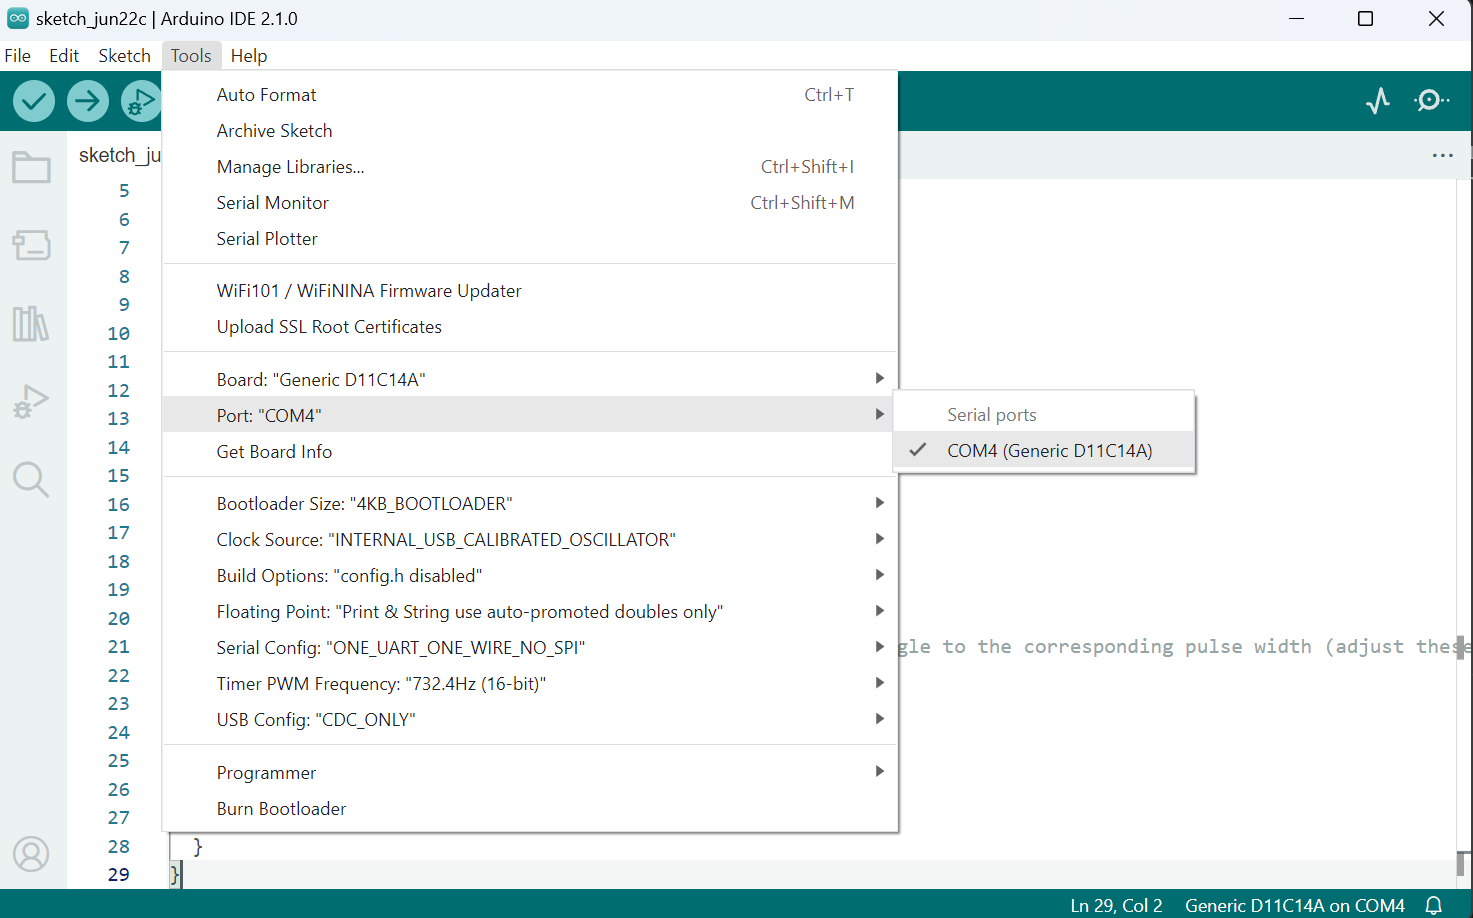
- In Processing, it is indeed important to mention the same port as the one you selected in the Arduino software. This is crucial for establishing communication between your Processing sketch and the Arduino board.
When using the Serial library in Processing to communicate with the Arduino, you need to specify the correct port in your Processing code.
- It is important to note that when using the same port for both the Arduino software and Processing, you may encounter errors or issues if the Arduino software is not closed before running the code in Processing. This is because the port can only be accessed by one software program at a time, and keeping the Arduino software open may cause a conflict when Processing tries to establish a connection.
Conclusion
Throughout this week, I learned several key concepts and tools. I delved into Python and its syntax, discovering its simplicity and flexibility compared to other programming languages. I explored PyCharm and Visual Studio Code as integrated development environments (IDEs) for Python coding. Additionally, I learned about Kivy, a Python framework for developing multi-touch applications, and the turtle library, which provides a user-friendly way to create graphics and animations.
I also dedicated time to understanding Processing, a powerful tool for creating interactive multimedia applications and visualizations.
It was engaging and productive week of immersive learning, experimentation, and exciting new discoveries in the dynamic realm of programming.