Molding and Casting
Task: Molding and Casting
Group assignment:
- Review the safety data sheets for each of your molding and casting materials
- Make and compare test casts with each of them
Individual assignment:
- Design a mold around the stock and tooling that you’ll be using, mill it (rough cut + (at least) three-axis finish cut), and use it to cast parts.
Group assignment
Ashot in Fab Lab Armenia
This week we had an incredible guest: a former Fab Academy student Ashot Margaryan, who currently works in a steel factory and possesses extensive knowledge about various molding techniques.
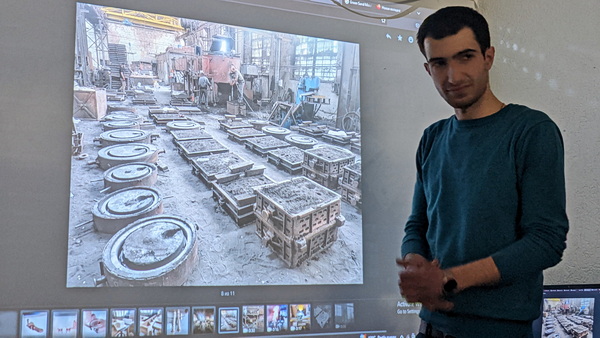
He shared insights into the intricacies of mold creation, showcased different types and technologies, discussed the melting process of various metals, and emphasized the importance of safety precautions. Additionally, he extended an invitation for us to visit their factory.
We eagerly hope for the opportunity to explore it firsthand.
Diversity of materials and creations
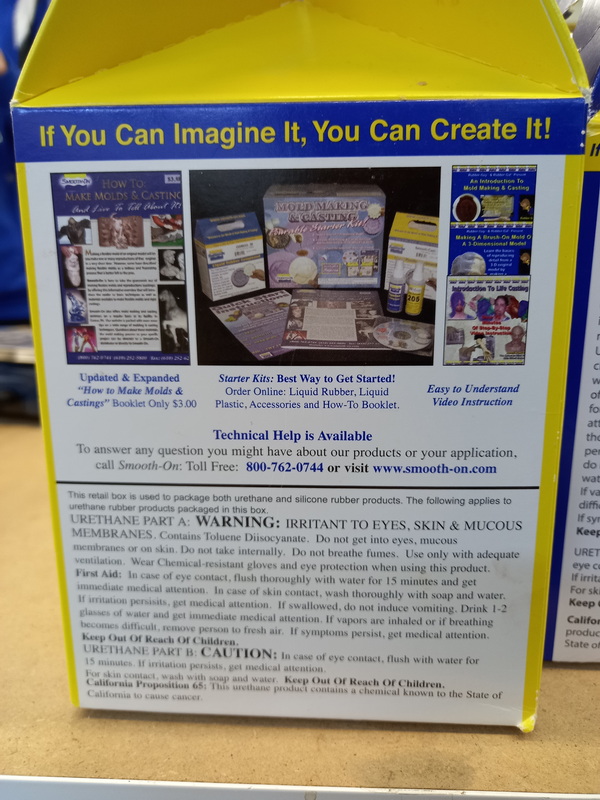
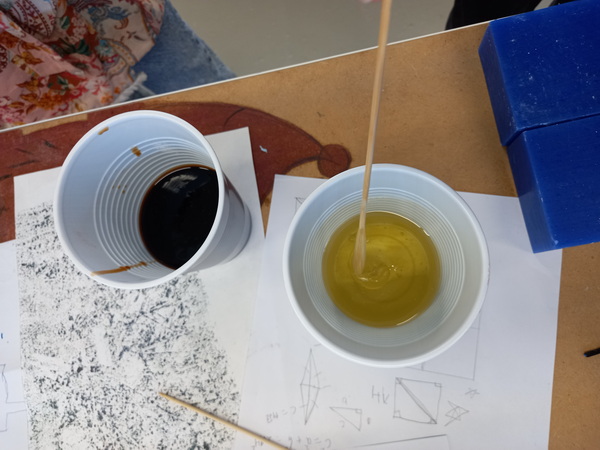
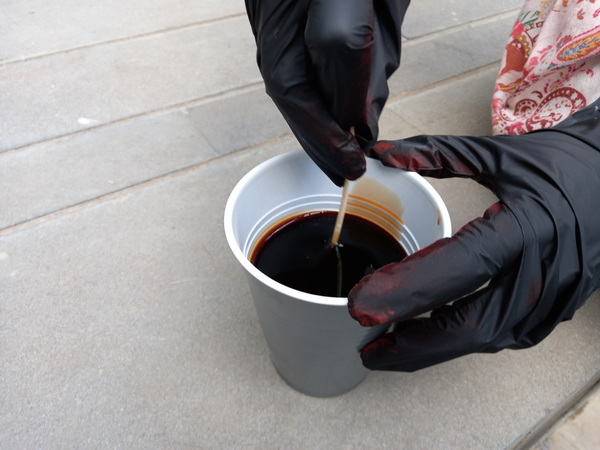
In Fab Academy, safety always comes first! This week was no exception as we delved into the importance of wearing glasses and gloves, and avoiding direct contact with the resin or rubber ingredients when working with molding and casting materials.
When working with liquid resin or rubber, it is important to follow the manufacturer’s instructions carefully, including the correct mixing ratios and curing times. Failure to follow these instructions could result in a hazardous or ineffective end product.
Finally, it is important to properly dispose of any leftover materials and clean up the work area thoroughly after use. This will prevent any accidental exposure to the materials and ensure the safety of those who may come into contact with the area later on.
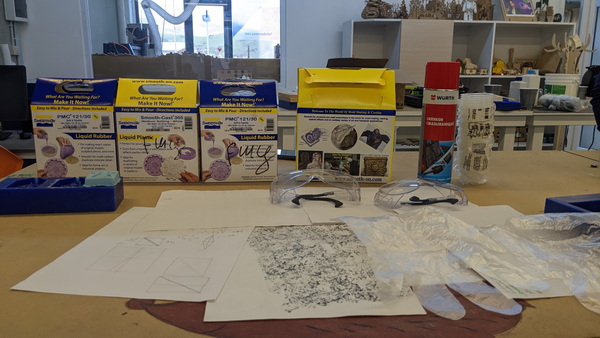
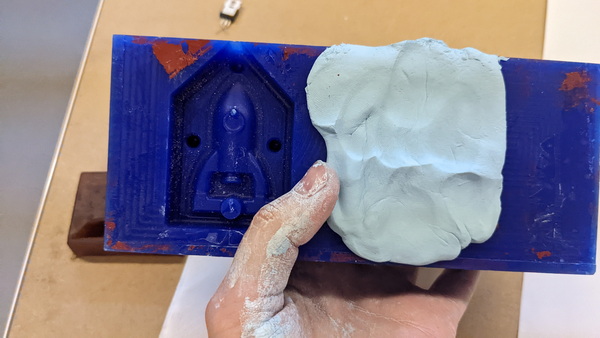
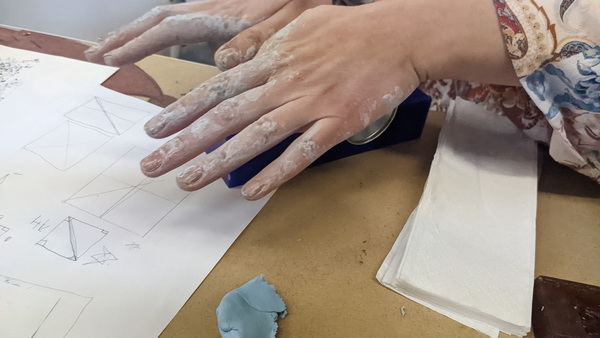
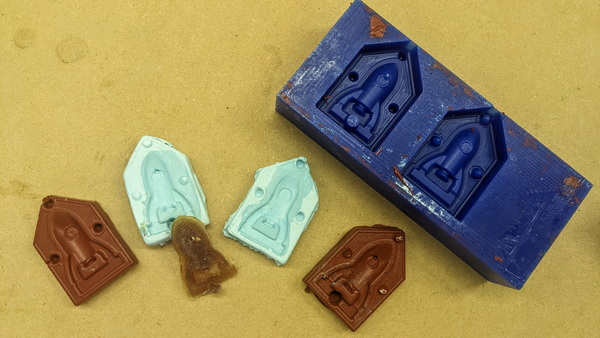
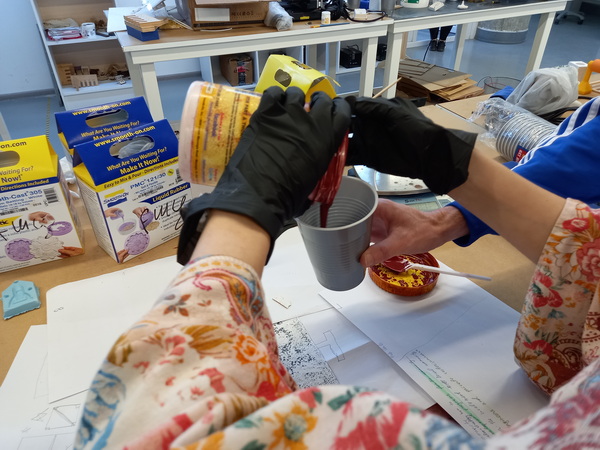
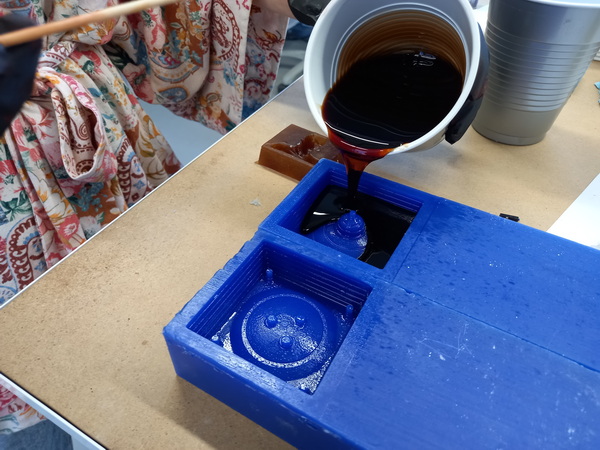
During our group assignment, we had the opportunity to work with various materials such as liquid rubbers, plaster, and clay. I had the pleasure of working with air-dry clay, using milled details created by a past student. In this experience, I was able to successfully create a mold while adhering to safety protocols and procedures.
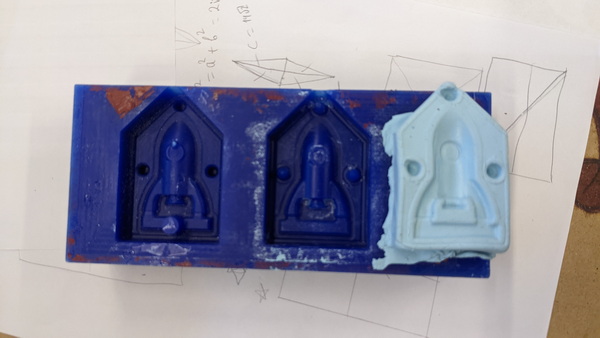
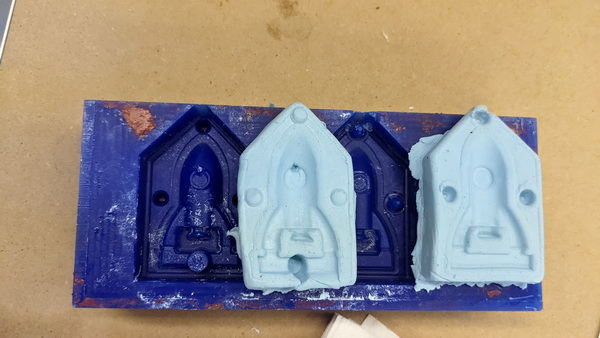
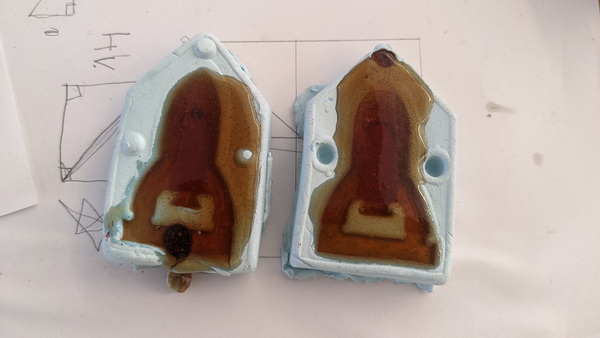
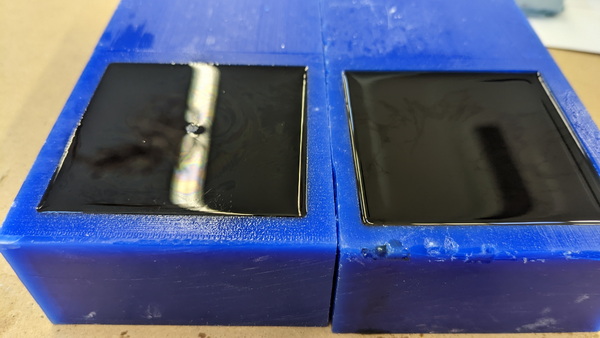
We filled the mold with liquid resin:
More about our Group Assignment you can discover in this page.
An Alien is comming
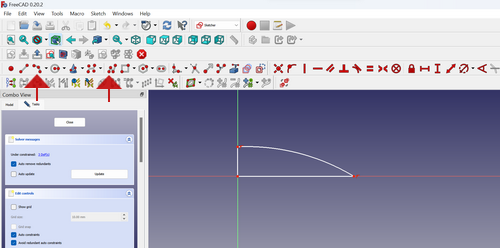
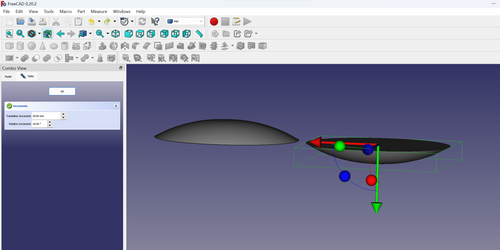
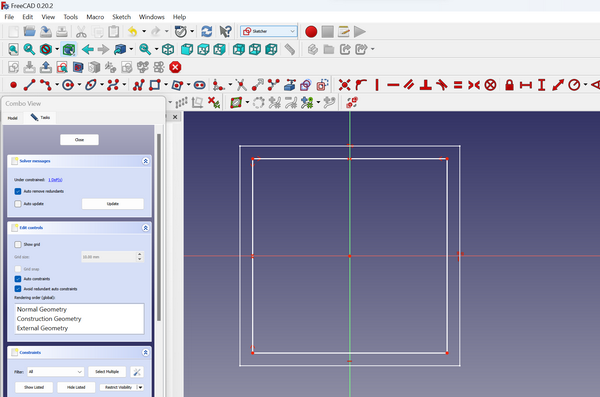
As a model for Molding and Casting week, I decided to “build” a flying saucer and create 2 parts mold. I started designing my reverse mold it in FreeCAD. And I started by creating a simple sketch using these two tools.
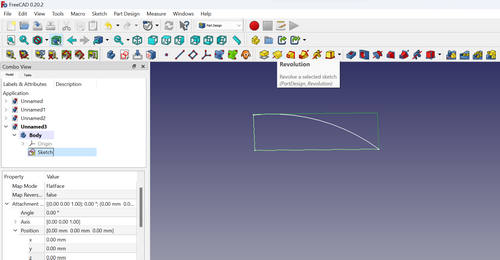
After I chose the tool Revolution, to get the semicircle I need:
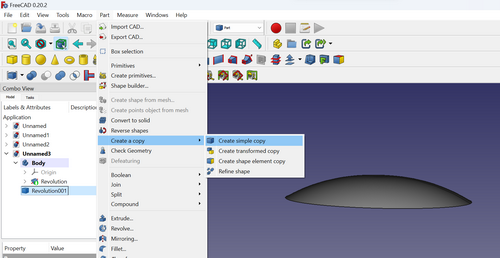
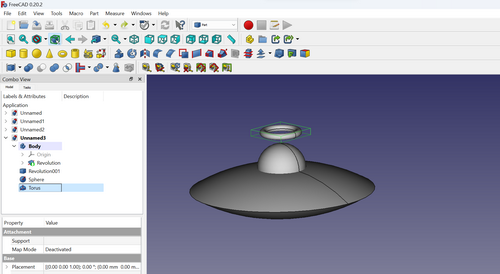
Now chosing the workbench Part, and we follow Part -> Create a copy -> Create simple copy to have the bottom part of my saucer.
I added a Sphere and a Torus for constraction (“Part” workbench)
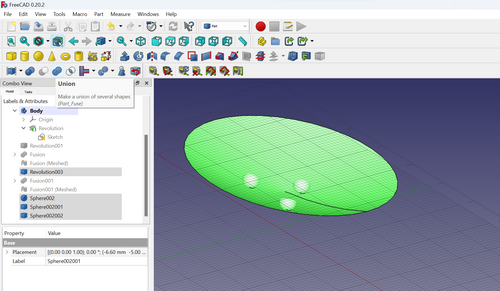
And three more “Sheres” for the bottom part:

Now that I have the two main parts of my model, it’s time to construct the base. To create the mold, we need to have a draft angle to make the process of taking out the inverse molding easier. In this video you can discover more about the inportence of draft angles.
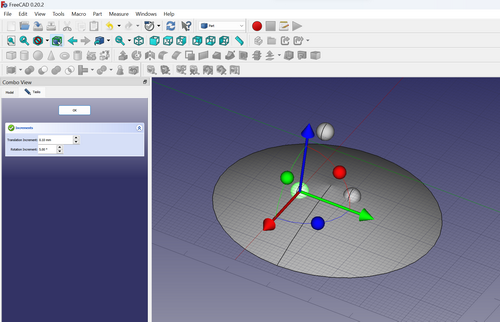
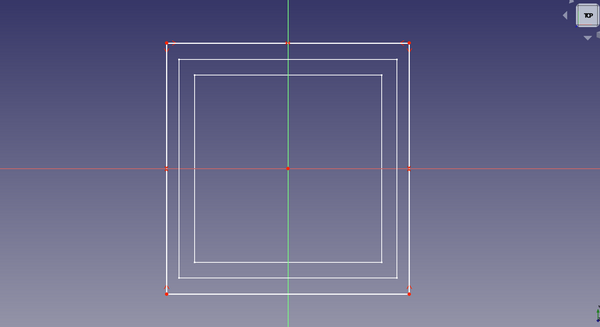
As you can notice, I drew 2 sketches that are proportional to the x and y axes.
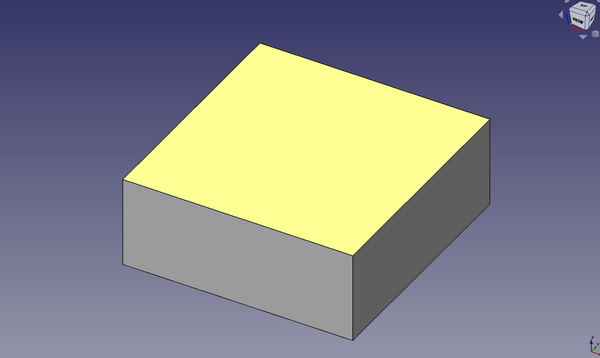
After that, I changed the z-axis parameter of one square as shown in the picture:
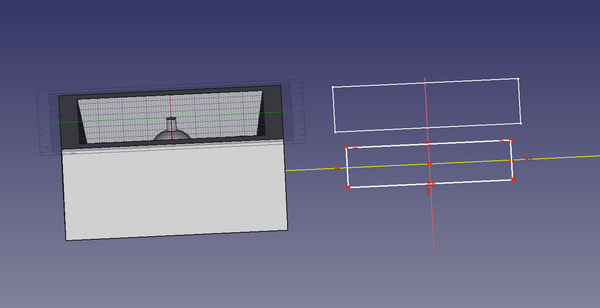
On the left side you can see the finished result, and on the right side - the beginning of work:
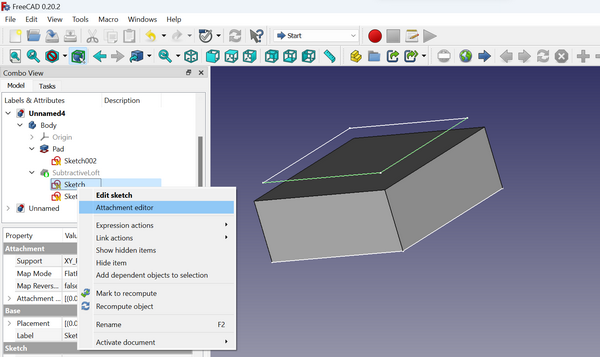
I need another sketch, for the external wall of the base:
I pad it:
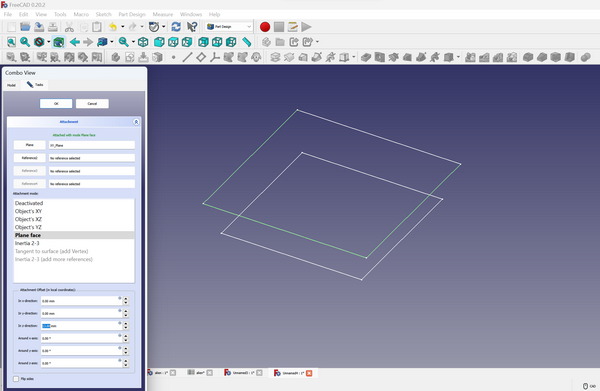
Right click on the sketch, to setup the z axis: it will be a bit higher then the surface of the pad:
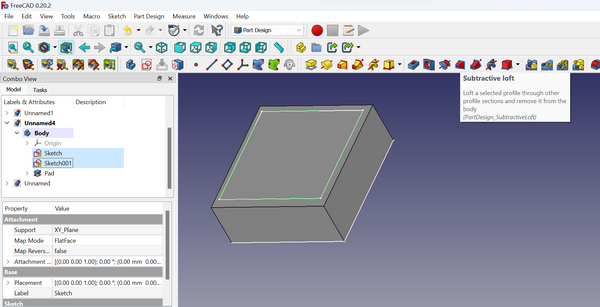
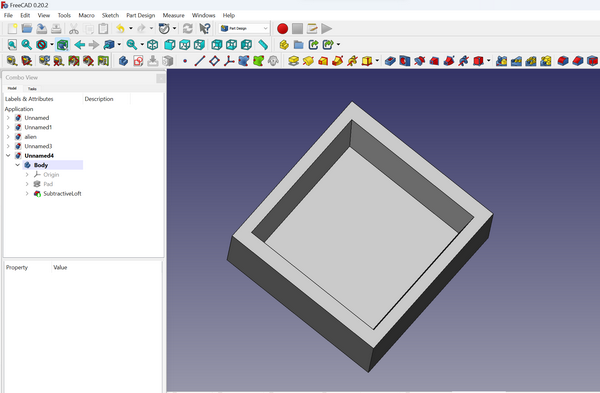
Now I chose 2 skatches and apply the tool Substractive loft:
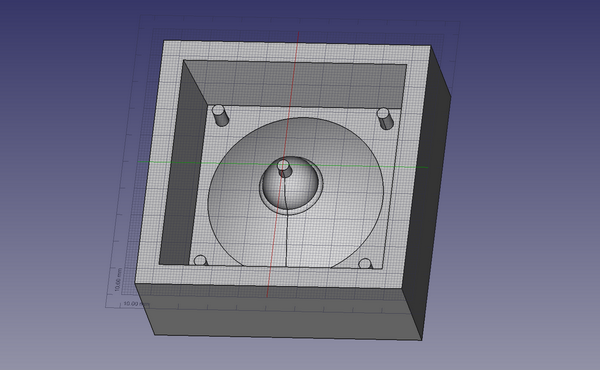
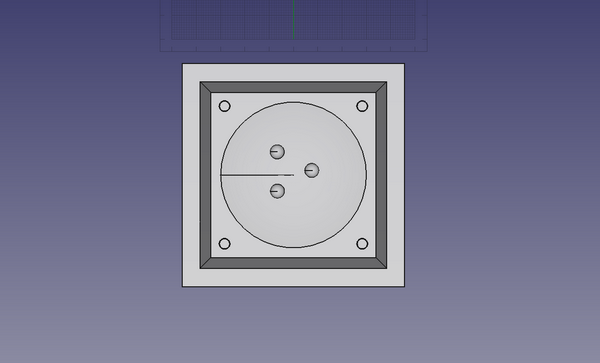
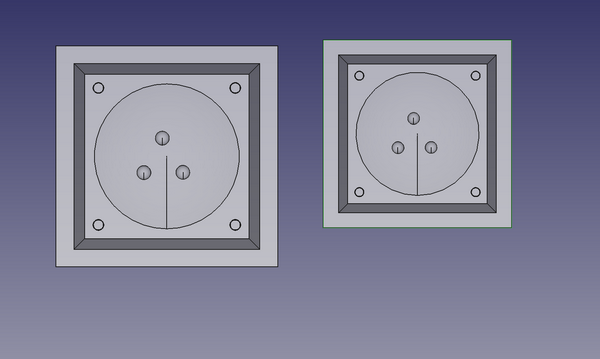
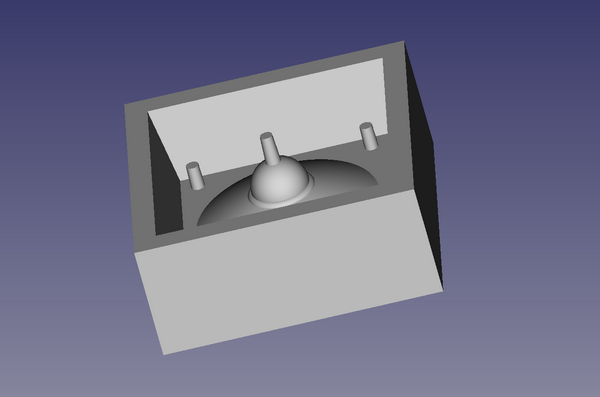
Here is the base where I put my model for the milling:
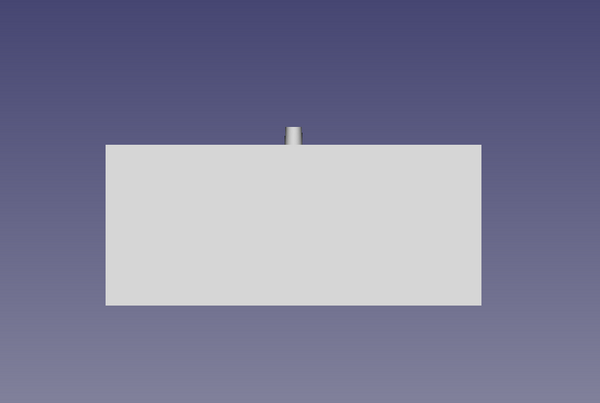
I added the registration points and a pin to the top to pour the material into the mold after:
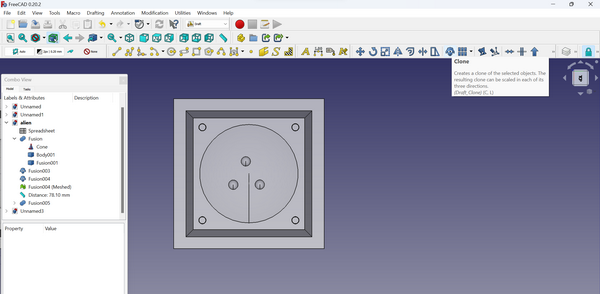
While generating G-code, I realized that I had made a mistake in the size of my model. The dimensions of my wax were:
- x: 34.7 mm
- y: 180 mm
To correct this error, I needed to scale my model. I did this by accessing the “Draft” workbench and selecting the Scale tool. It’s important to note that this tool doesn’t work with Fusion, so we need to create a Clone before scaling the size of the clone:
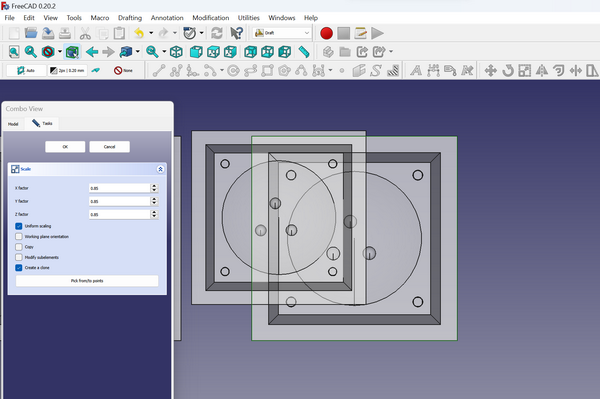
Now I can generate the G code and move on to milling.
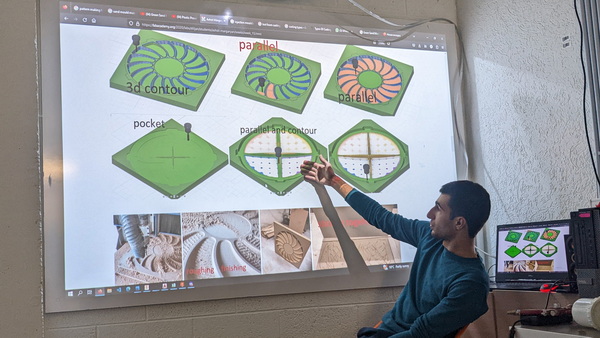
Machining
G-code
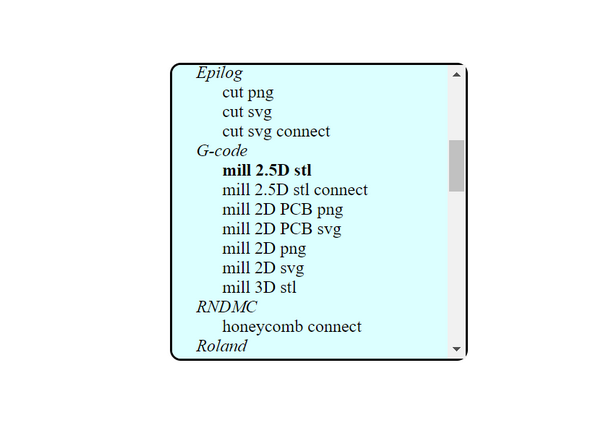
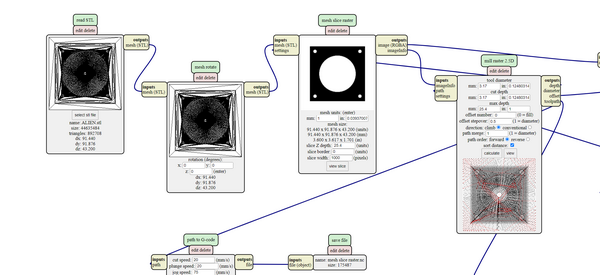
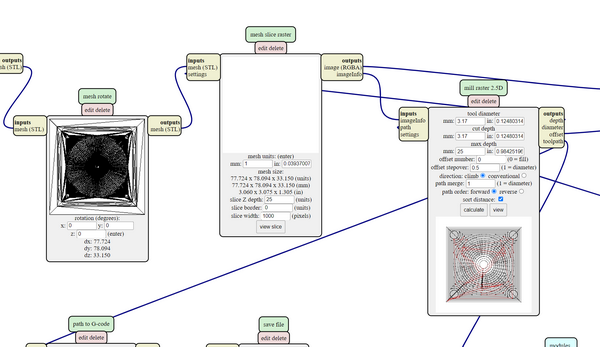
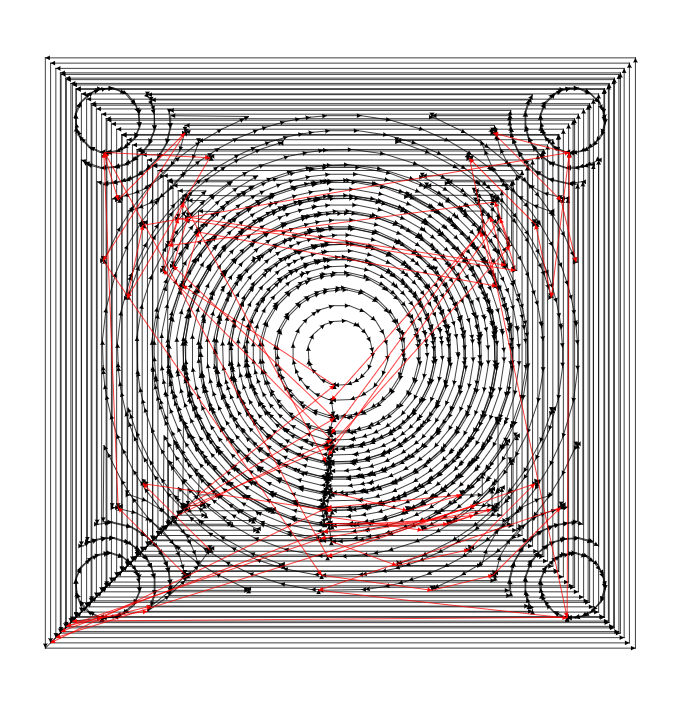
I generated the G-code using Mods. For the Rough cutting I went Programs -> Open server program -> G-code and chose mill 2,5D stl.
After uploading the .stl file of the top part of my model, I nedded to setup the parameters: the tool diameter, offset number.
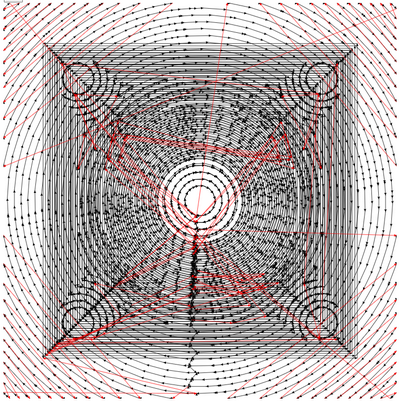
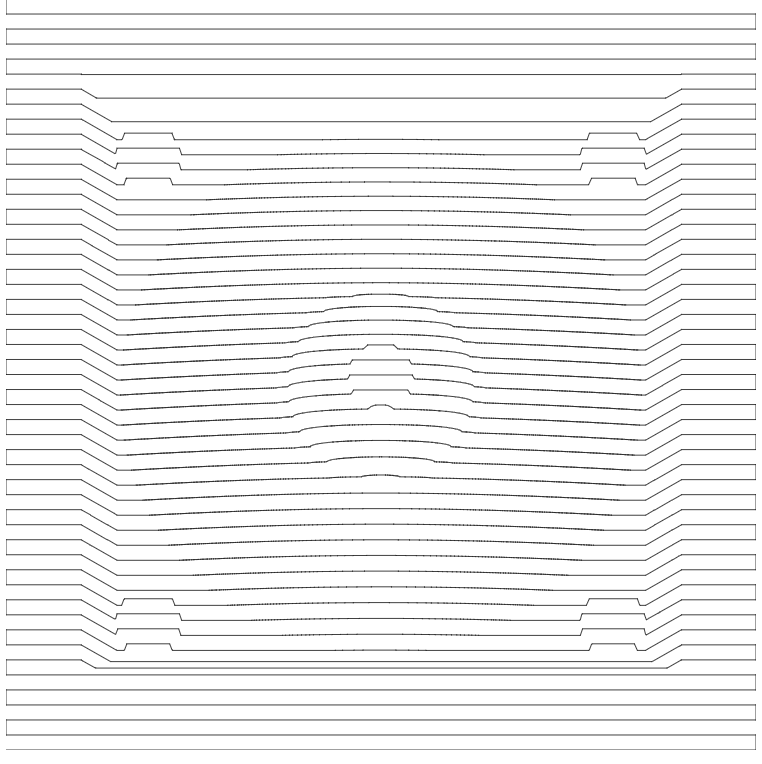
After Calculating I saw a strange “drawing”, but the problem came up after I start milling my mold:
-
The first thing I noticed was the scaling issue. The 3D model of my form was larger than I expected. I solved this problem with the Scale tool in FreeCad, as I described earlier.
-
The second problem was not so obvious to me. After a few mistakes, I noticed that the pin on my flying saucer was higher than the wall surface of the mold.
After fixing this issue, I uploaded the new .stl file and had the right drawing for milling.
Milling: Rough cut
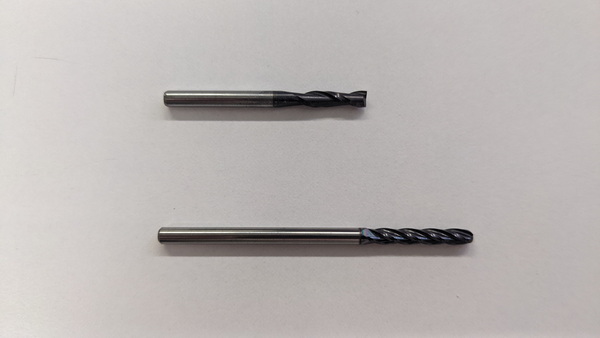
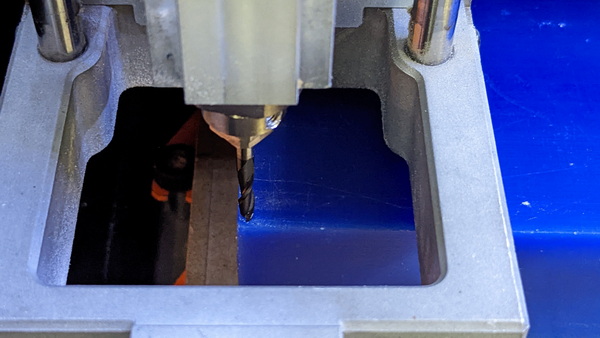
I attached the wax to the table with double-sided tape and changed the mill.
1/8 SE 2FL for Rough cut and 1/8 SE 2FL BN for Finish cut.


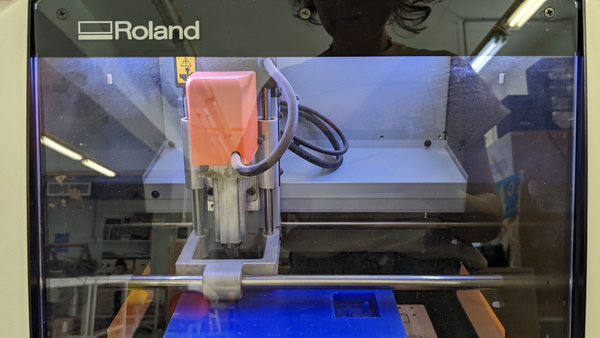
This is my second attempt at working with this CNC machine, and I thoroughly enjoy the experience. The software that operates this machine is VPanel for SRM-20.
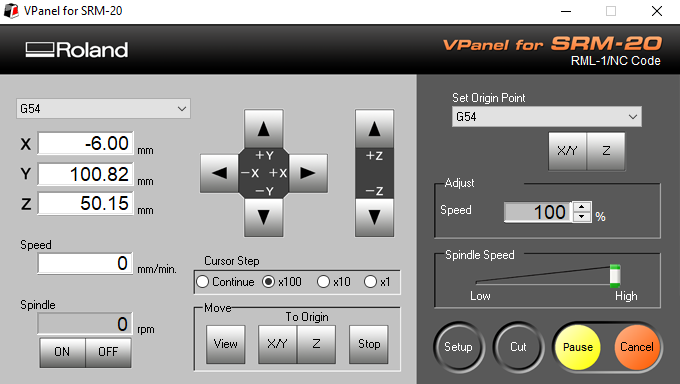
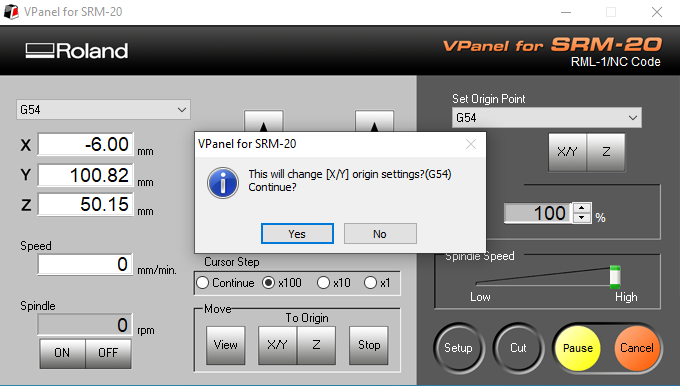
Now is time to find the zero point for X/Y and Z axis.
Using the arrows, we move the mill to the desired initial point. Once the mill is fixed in this position, we can adjust the values of the X/Y and Z axes.
To upload the G-code, we press the ‘Cut’ button. In the opened window, we locate the ‘Output File List’ and delete any existing lines. Then, we add the newly generated G-code file.
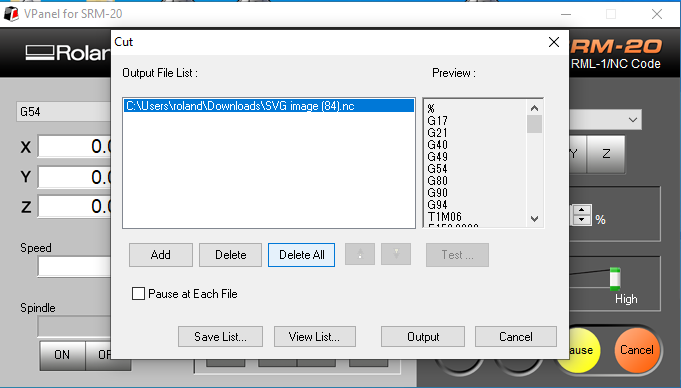
After pressing Output, the milling process will begin.
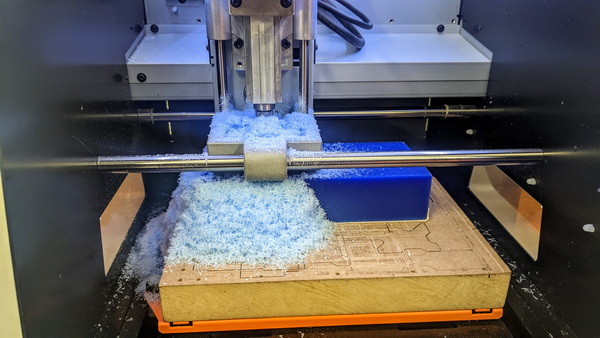
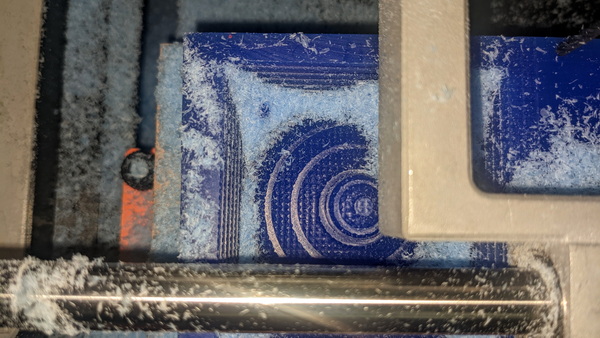
The initial version of the mold was hidden under a cloud of wax. When I saw this, I realized that in the settings in the mods it was necessary to change the parameter offset stepover, and 0.5 was very wide for rough cutting.
I decided to fix the case by finish cutting.
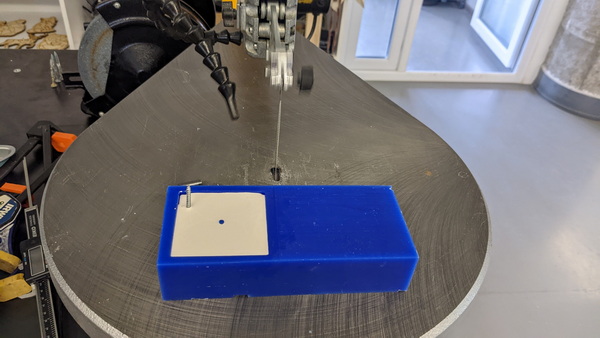
Milling: Finish cut
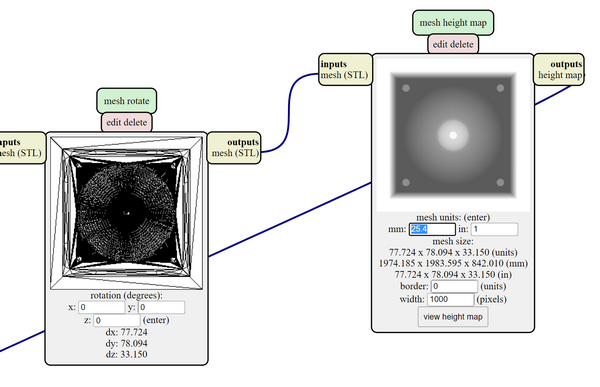
For the finish cut in mods I went Programs -> Open server program -> G-code and chose mill 3D stl.
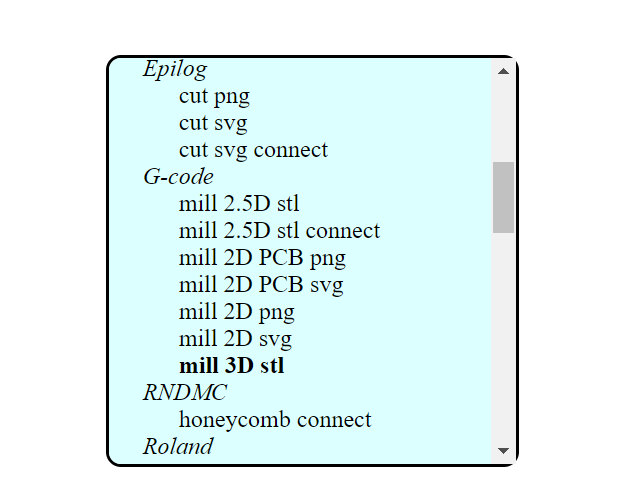
I uploaded the .stl file for the top of my mold. In order to obtain the correct G-code, I had to adjust the mesh units parameter in the mesh height map window. Instead of 25.4mm, I needed to input 1mm.
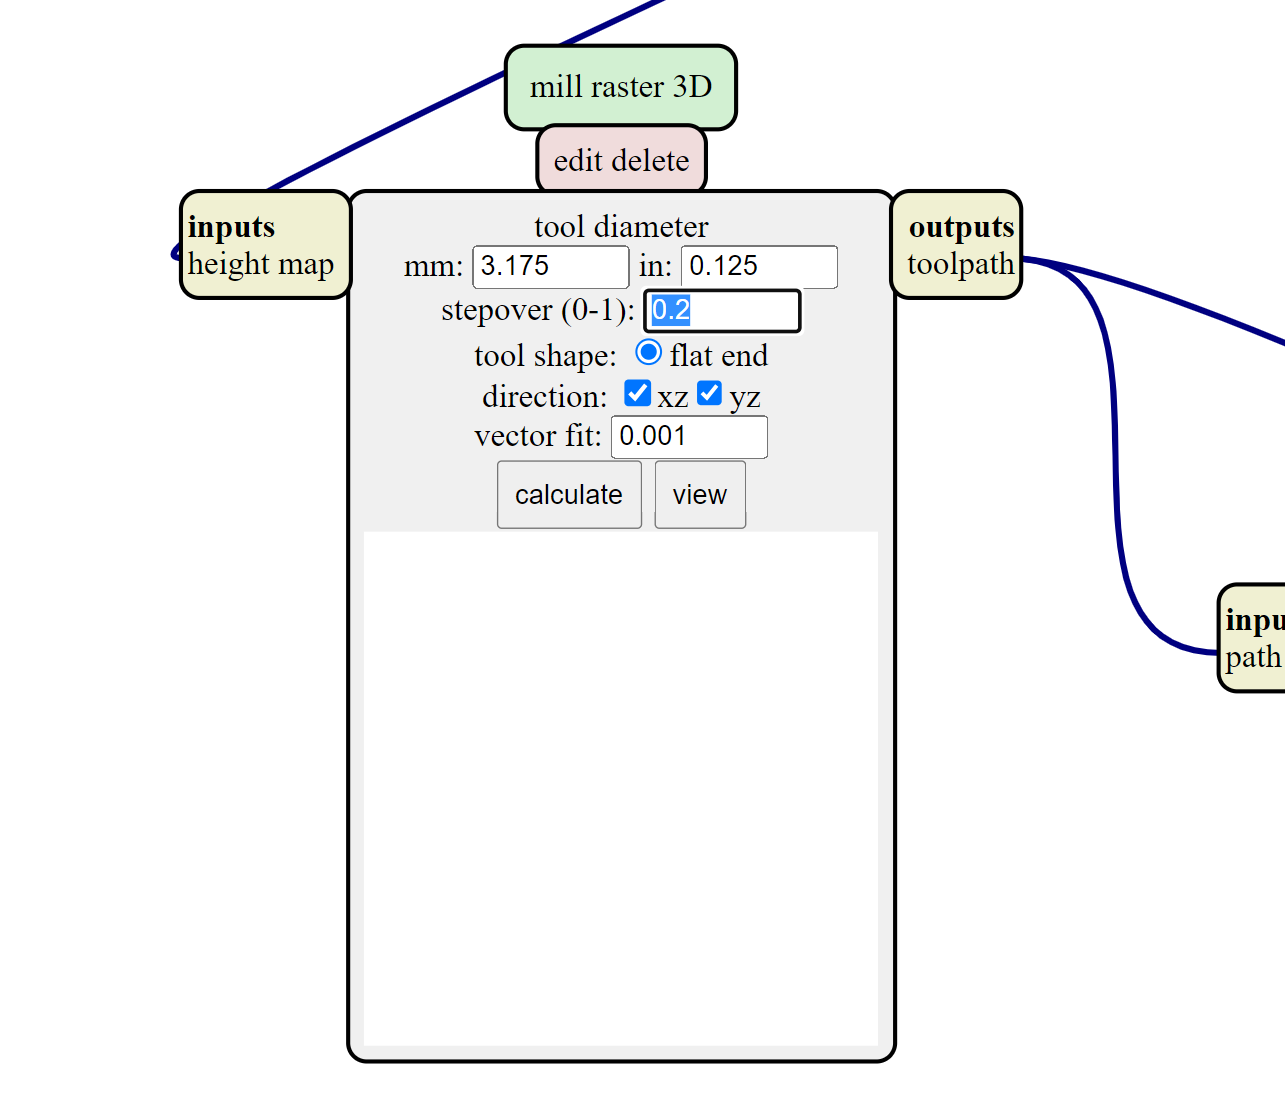
The other parameter I modified was the stepover value in the mill raster 3D window.
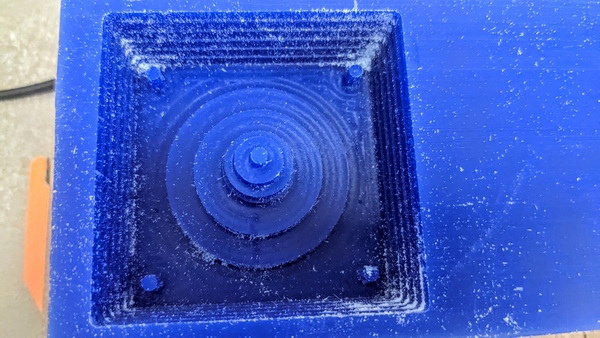
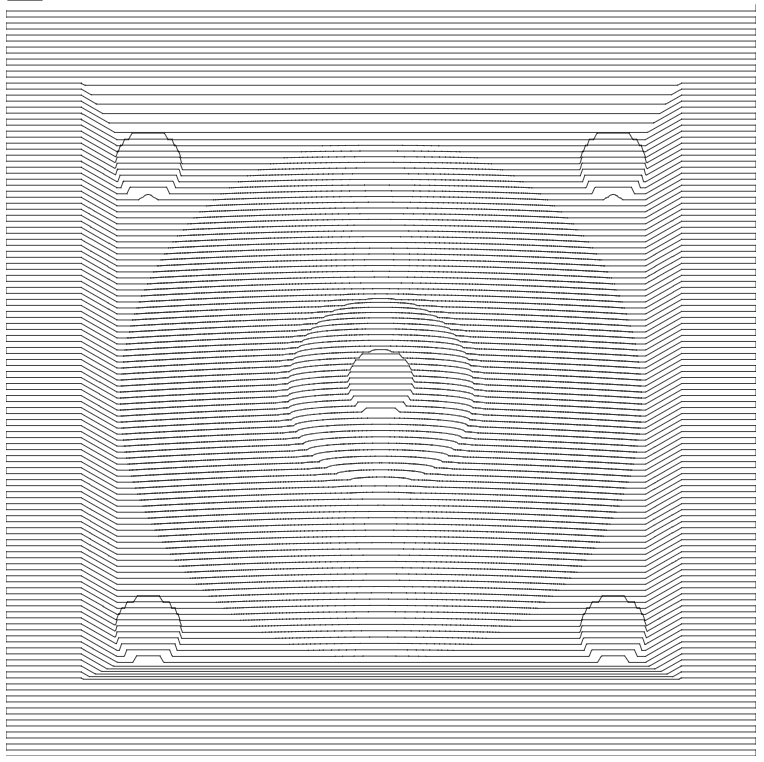
Here is the “drawing” for milling.
And here is what I got: I understand that the result may not be perfect based on what is visible.
To achieve a better result, I adjusted the stepover value. Instead of 0.2, I changed it to 0.1. The difference is clearly noticeable.
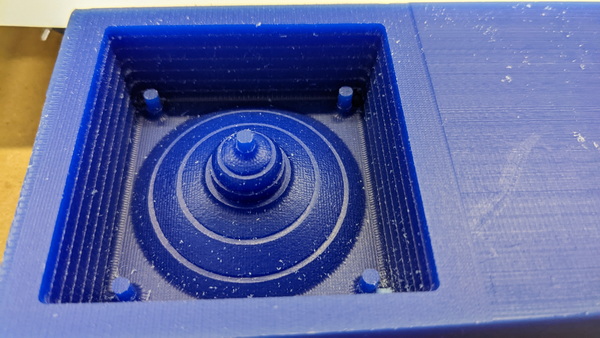
To remove wax “hairs” from the mold after milling, I worked the surface of the mold with hot air.
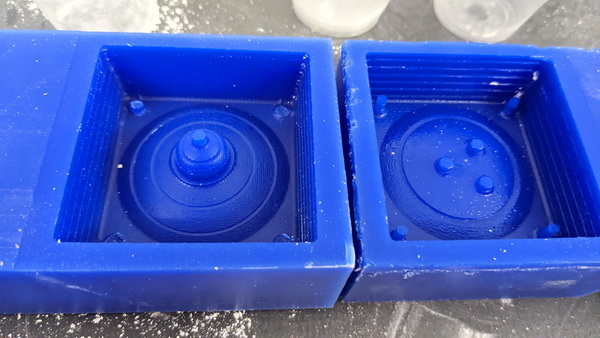
I repeated all these steps to get the bottom of the mold. Here is the result:
Molding
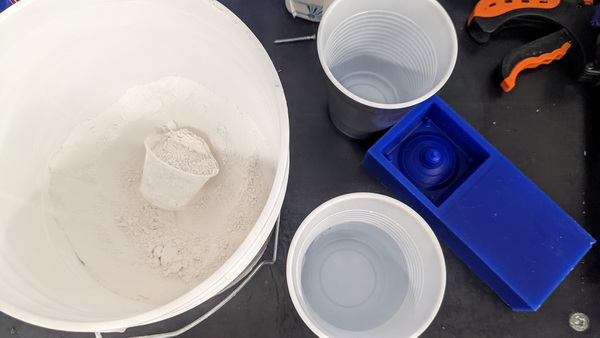
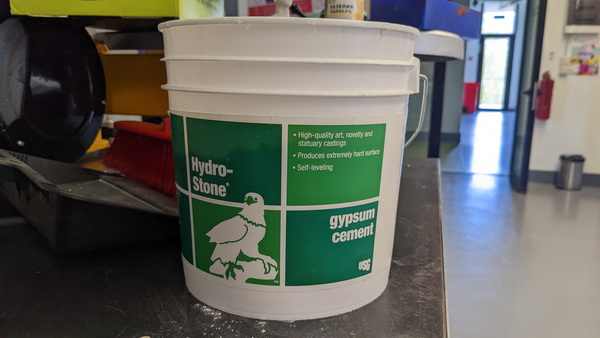
To create the mold, I selected plaster as the material of choice. Plaster offers versatility as it can be used with various materials, including metals with low melting points. Additionally, it provides several other advantages.
-
Cost-effectiveness: Plaster is a relatively inexpensive material, making it an affordable option for mold making compared to other materials such as silicone or urethane. This makes it accessible to artists, hobbyists, and students who may be working on a limited budget.
-
Detail Reproduction: Plaster has excellent flowability, which allows it to capture intricate details of the original object. It can reproduce fine textures, surface patterns, and even subtle undercuts, resulting in highly accurate replicas.
-
Quick Setting Time: Plaster of Paris has a relatively fast setting time compared to other mold-making materials. It typically sets within 15 to 30 minutes, allowing for quicker production of molds and reducing the overall waiting time before demolding.
-
Versatility: Plaster molds can be used for a wide range of applications. They are suitable for casting various materials, including resin, concrete, wax.
-
Availability and Ease of Use: Plaster is widely available in art supply stores and online. It is easy to mix and work with, requiring minimal equipment and expertise. The simplicity of the plaster molding process makes it accessible to beginners and those without specialized training.
-
Durability: Plaster molds, when properly cared for, can be durable and long-lasting. They can withstand multiple casting cycles, allowing for the production of multiple replicas from a single mold. With proper reinforcement and maintenance, plaster molds can be used repeatedly over an extended period.
-
Customization and Modification: Plaster molds can be easily modified and customized to suit specific needs. If adjustments are required, the plaster mold can be trimmed, sanded, or reworked to accommodate changes or create variations of the original design.
-
Compatibility with Other Materials: Plaster molds can be combined with other mold-making materials to create composite molds. For example, silicone or rubber can be used to create flexible mold sections that can be embedded in plaster molds, providing the benefits of both materials.
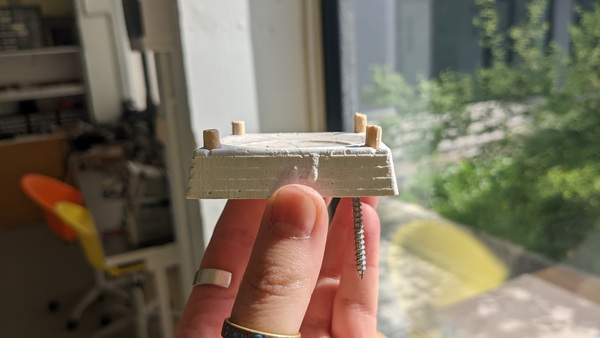
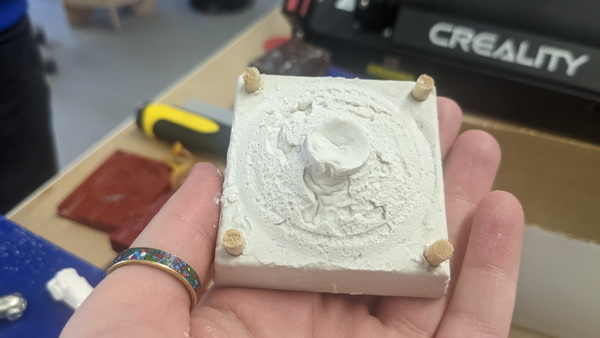
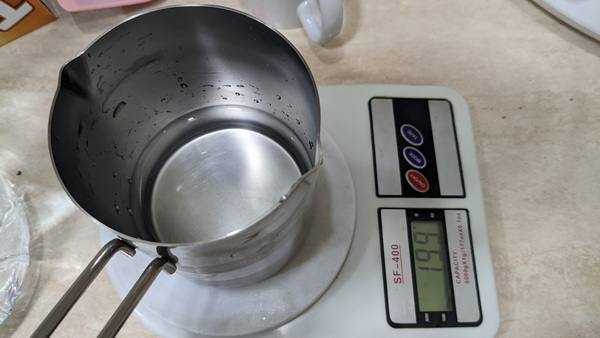
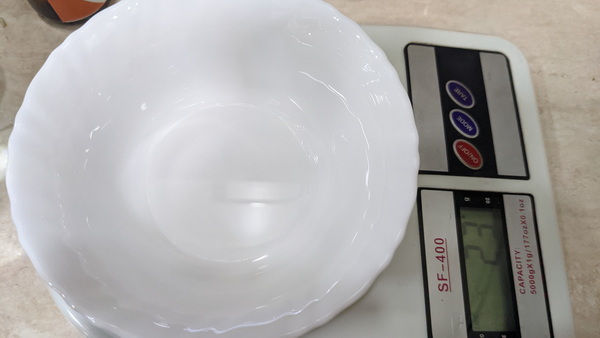
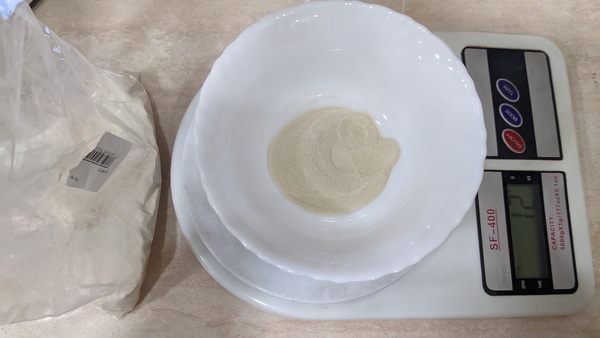
To mix gypsum with water in the correct proportions, I used the instructions on the container:


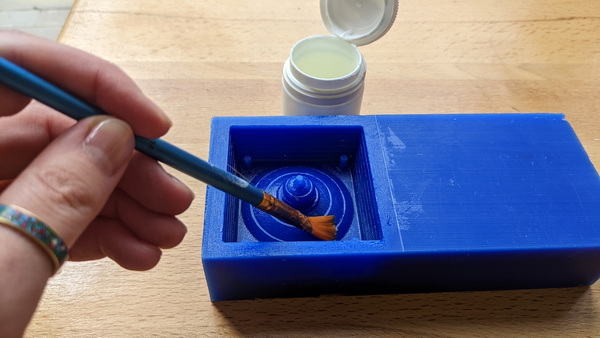
To make it easier to separate the plaster from the wax, I treated the wax with petroleum jelly (vaseline).
I utilized vibration to remove any bubbles present in the plaster.
And of course 4 wooden sticks as fixing pins:
Another Mold
To make another mold, I used the resin.
I needed to mix 2 components 1:1.

I mixed it for more than 5 minutes:
I was pleased to observe a smooth surface without any bubbles. However, I encountered an issue where the material remained in a liquid state even after 2 days. This led me to conclude that the two substances did not mix properly. In summary, it is crucial to mix the two substances for an extended duration and always in a well-ventilated room or in an area with fresh air.
Casting
Melting metal is beautiful
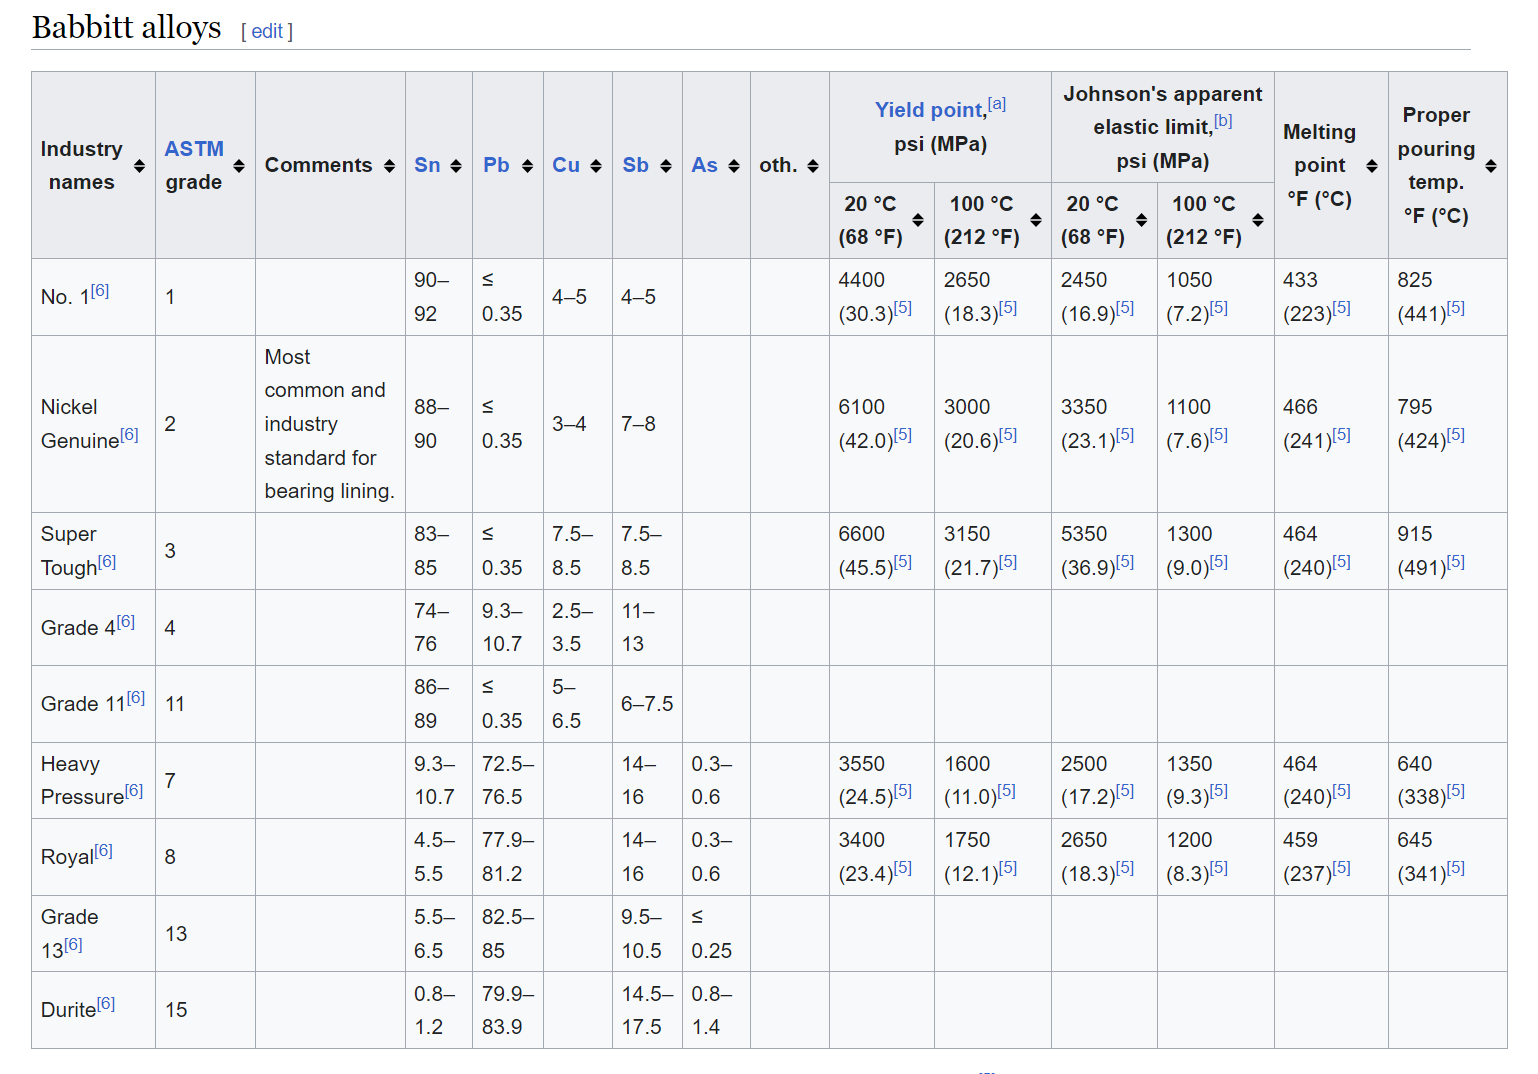
For casting I used the Babbitt metal.
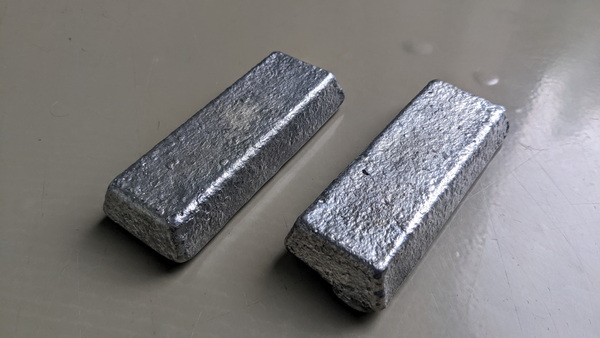
Babbitt metal is comfortable to use for casting due to its low melting point, self-lubricating properties, high load-carrying capacity, conformability, resistance to seizure and galling, and repairability.
Babbitt metal has a relatively low melting point compared to other alloys, which makes it easier to work with during the casting process. The typical melting range for Babbitt metal is between 223°C and 325°C, depending on the specific composition. This lower melting point reduces the energy required for melting and casting, as well as the risk of overheating the surrounding components.
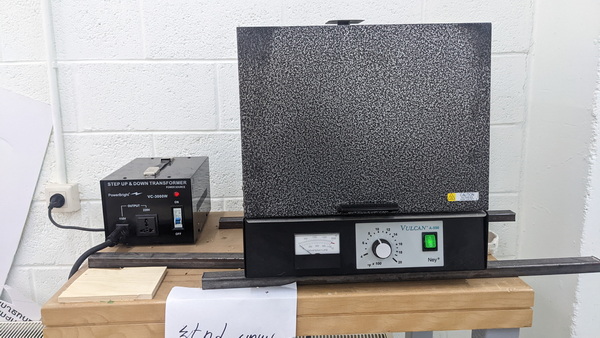
Our oven is VULCAN A-550.
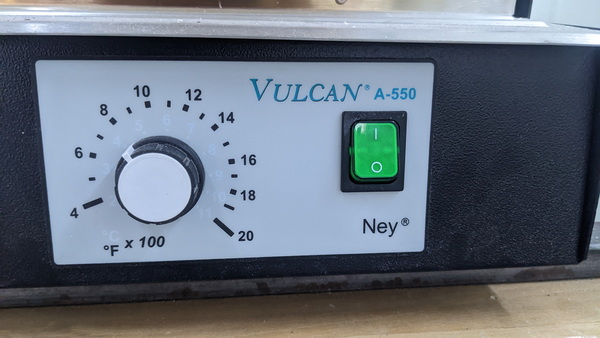
In order to melt the babbit, we need no more than 400 degrees.
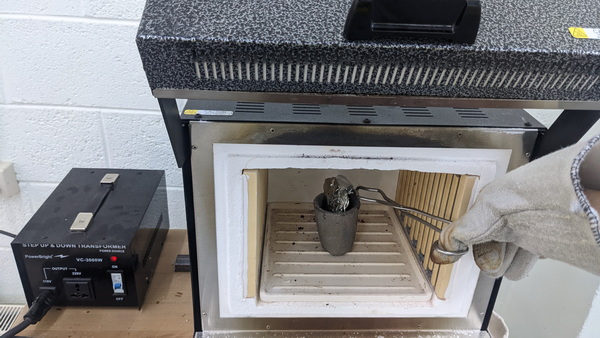
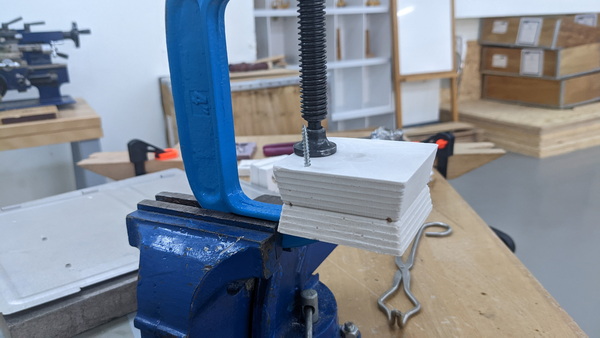
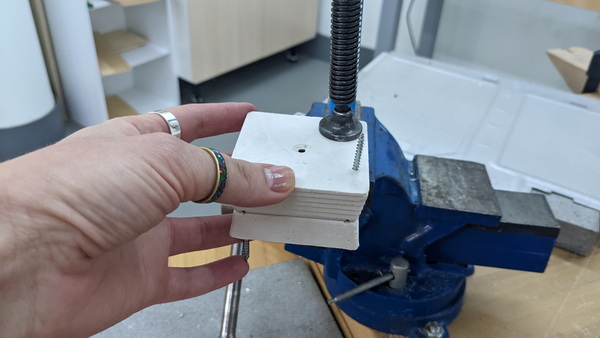
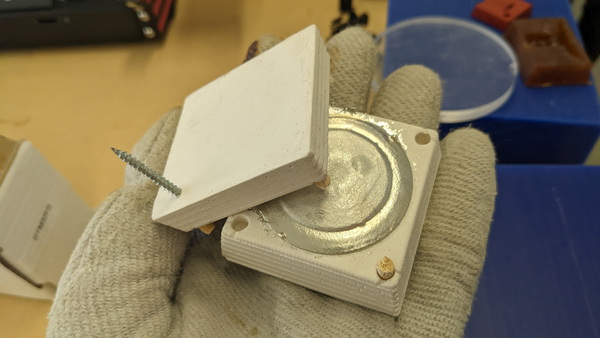
I am fixing my mold and аfter 30 minutes, the molten metal is ready to be poured into a mold:
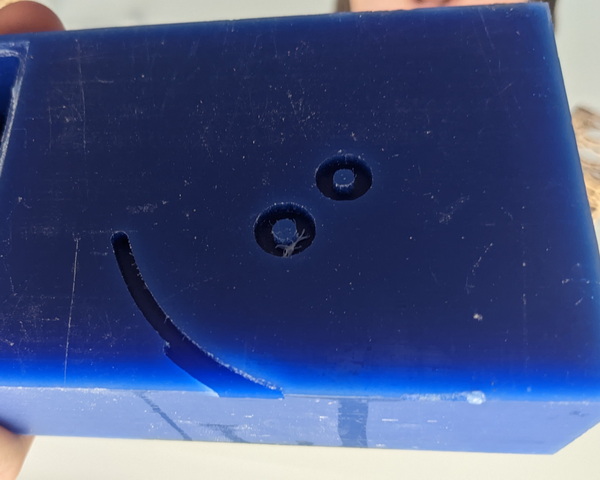
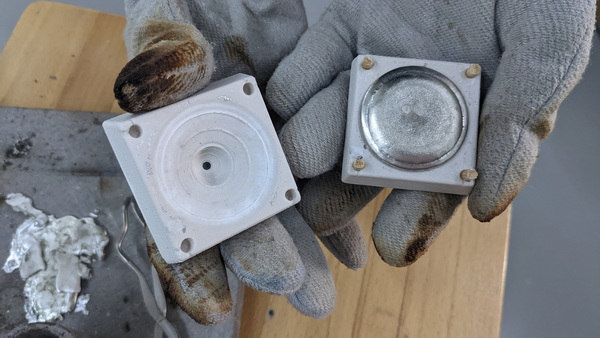
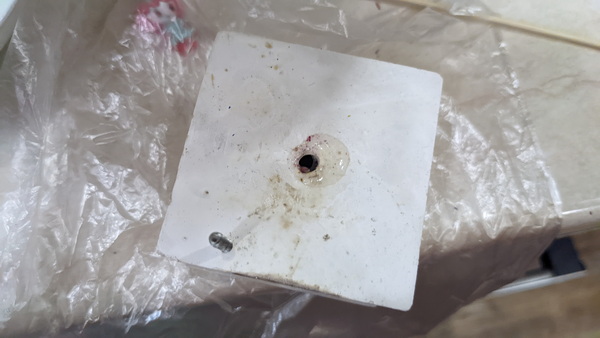
This was my initial attempt, and I had apprehensions about pouring molten metal. Unfortunately, due to the small hole on the mold and the accumulation of air during the metal injection process, I did not achieve the desired outcome. As you can observe, the flying saucer lacks a “head”.
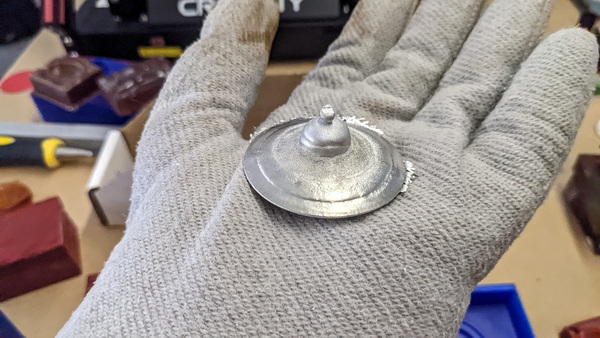
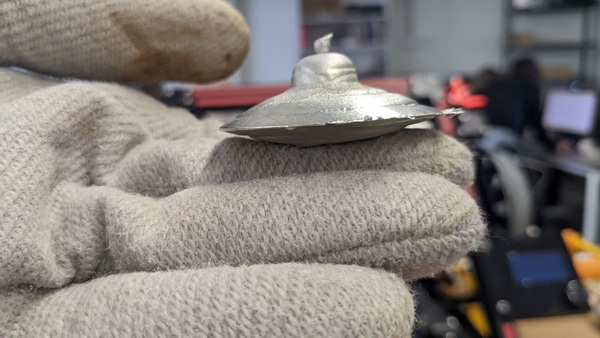
I had to repeat the process, but this time I used a drill to widen the injection hole on the mold.
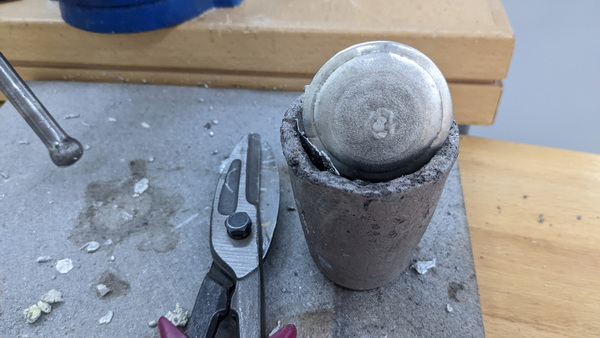
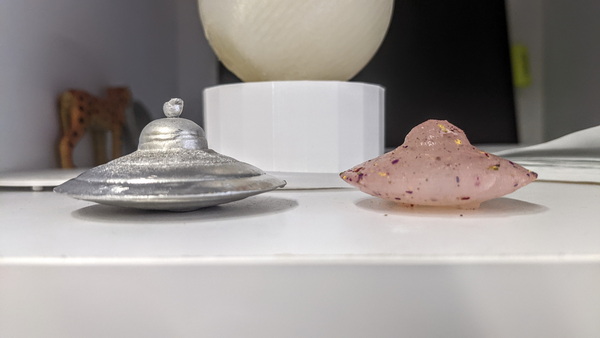
Et voila! The flying saucer is ready to travel to other planets!!
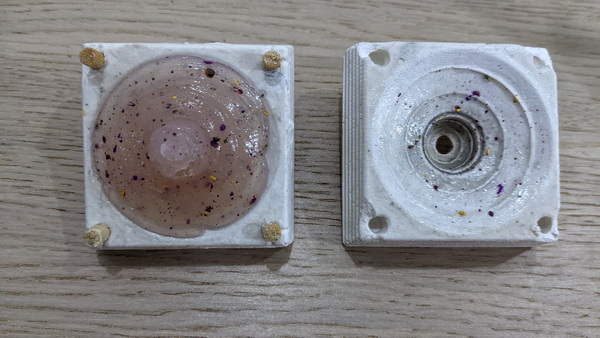
Plaster + Plaster - bad idea
The other experiment was to make cast from plaster in the plaster mold. As you can notice, it was not the best idea!
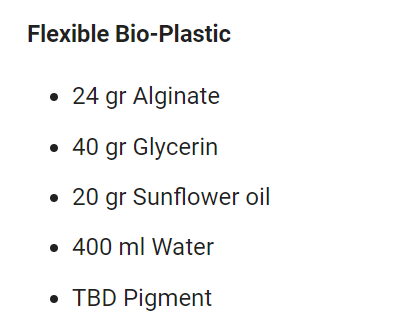
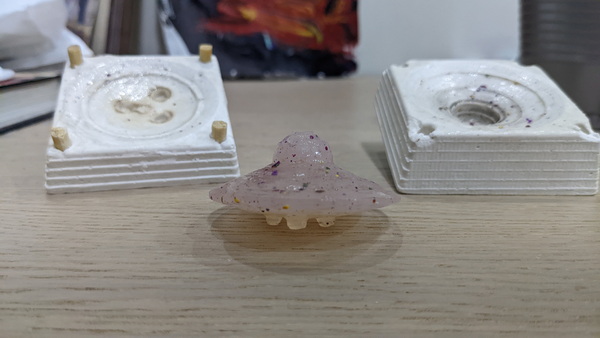
Bio Plastic
For my next experiment, I decided to explore working with biomaterials. I began my research to find a recipe for creating bio plastic. There are various sources available on Google that provide different types of biomaterial recipes. While I was familiar with materiom, I wanted to seek inspiration from another source. That’s when I came across the recipes shared by Carolina Delgado, a student from the 2020 Fabricademy.
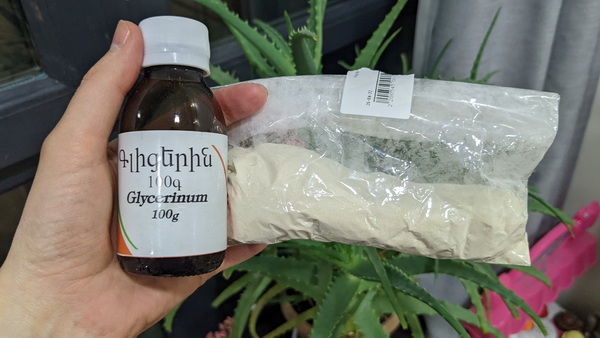
Here is the recipe she suggests for making flexible bio plastic:
I made the decision to omit the oil from the recipe and added my daughter’s pencil shavings to give my flying saucer a touch of cosmic charm.
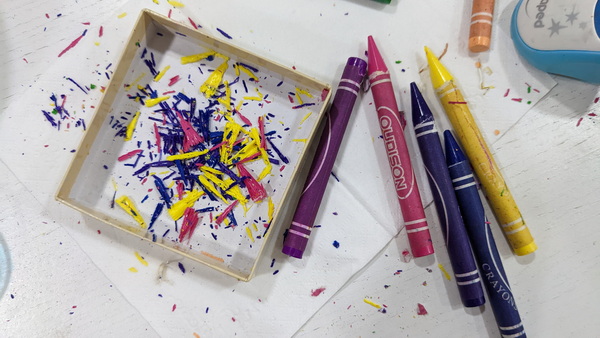
This is what the hot mix looks like before pouring it into the mold.
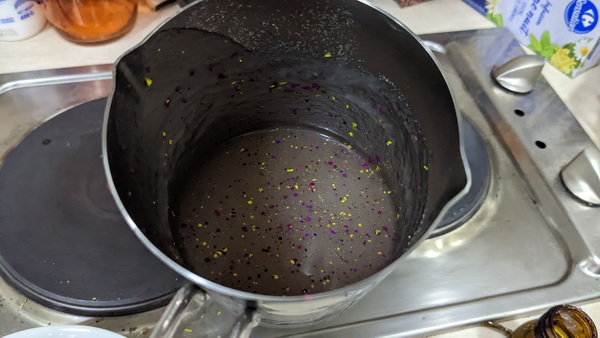
This translucent and playful flying saucer was formed after ten minutes of curing:
Here are my eclectic creations for this week:
Conclusion
During this week, I focused on exploring and advancing my skills in various aspects of fabrication. I researched and experimented with different techniques, materials, and tools to create a simple and unique design. One notable highlight was the guest lecture from a former Fab Academy student who shared valuable insights into molding techniques, showcasing diverse examples and discussing safety measures.
I also delved into the realm of biomaterials, seeking inspiration from alternative sources such as the recipes shared by Carolina Delgado, a Fabricademy student from 2020.
The week was filled with a diverse range of creations, demonstrating my willingness to explore different materials and techniques. Additionally, the opportunity to visit a steel factory, extended by our guest speaker, holds the promise of further expanding my understanding of molding processes and metals.