Week 3: Computer Controlled Cutting
This week we used the laser and vinyl cutters to make a sticker and a press-fit toy.
Laser Cutting
Designing
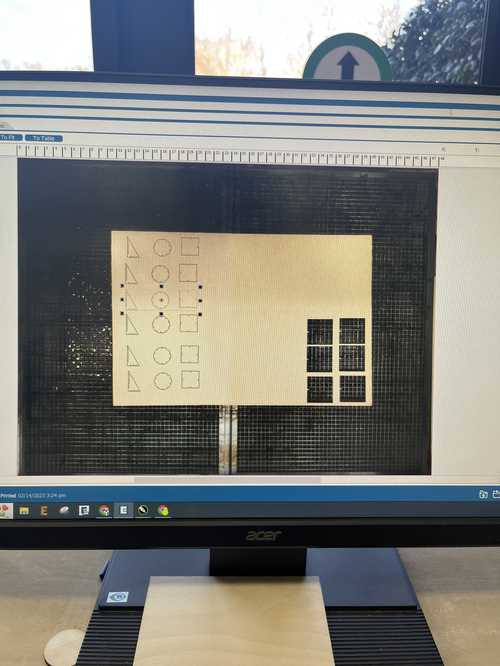
First I designed my files in Fusion 360. I made new parameters called Material Thickness and Depth material thickness affects the thickness in the design, and the width of the holes, the depth affects how deep the holes go, I made them both 3mm.

The first shape I made was the triangle. I made a triangle that was 60mm tall and had a 30-degree angle to the bottom edge.
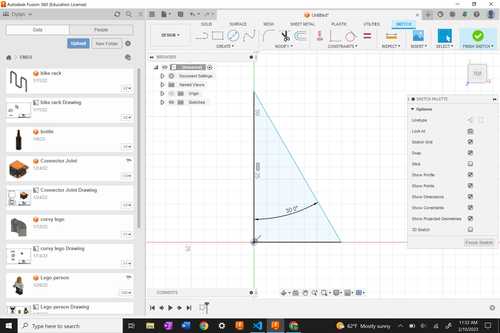
Next, I made a line that was perpendicular to the center point of the base of the triangle and dimensioned it depth. Then I made a line above the tip of that one and dimensioned it material thickness. Then I made a center point and a perpendicular constraint to the depth line.
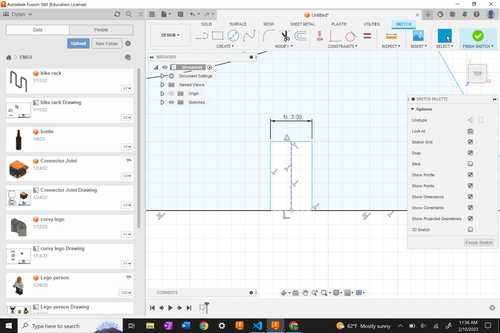
I took all this geometry and made a rectangular pattern along the bottom edge. I made it symmetrical and made 3 copies.
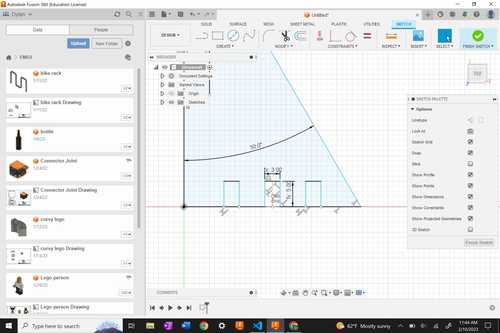
Next, I exited the sketch and made a new one. This time I made a circle 50mm in diameter, made the same edge as before, and did a circular pattern around the center of the circle.
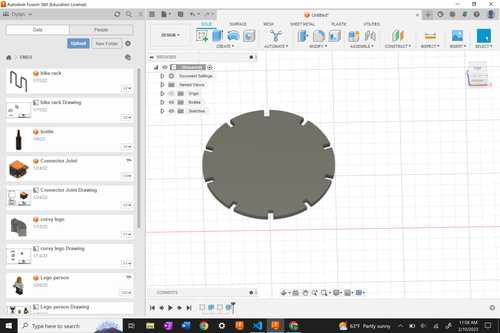
Finally, I did the same with a 50mmx50mm square, made the edge notch, and a circular pattern around the center 4 times. Next, I extruded all the shapes by the material thickness for an accurate representation.
Cutting
To cut the prints, it was fairly simple, I exported my file as a DXF, opened it in Corel Draw, and pressed print to send it to my laser cutter. I made 5 copies of the 3 pieces, selected cut cardboard as my material, and pressed cut, then I cut them out.
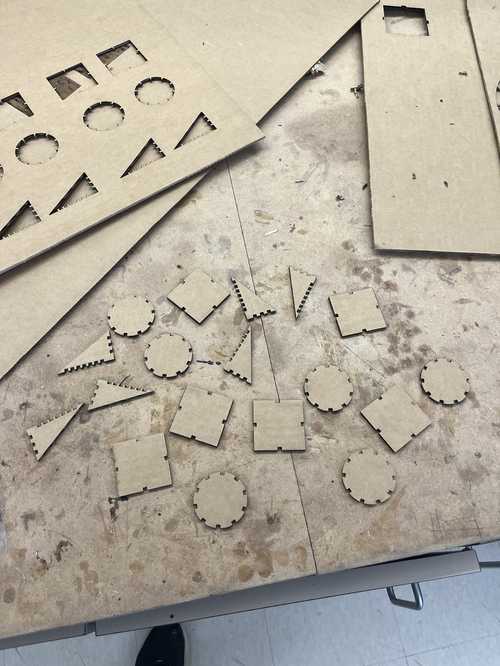
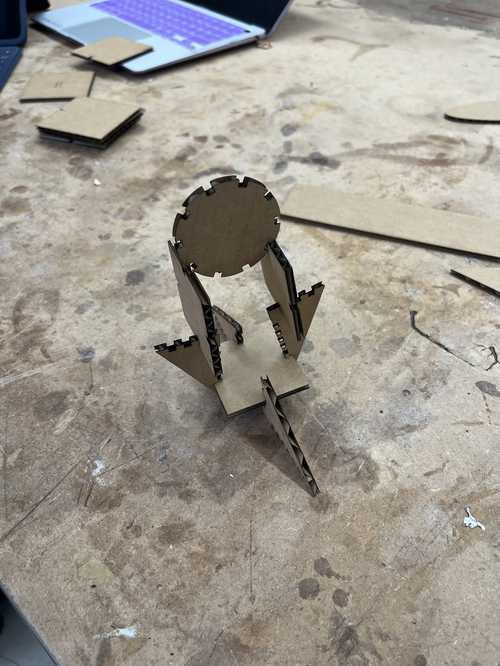
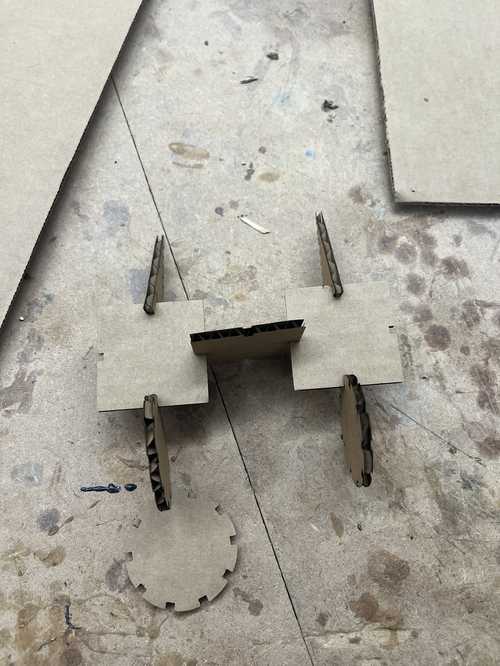
Here are two of the many things I can make with my kit:
Vinyl Cutting
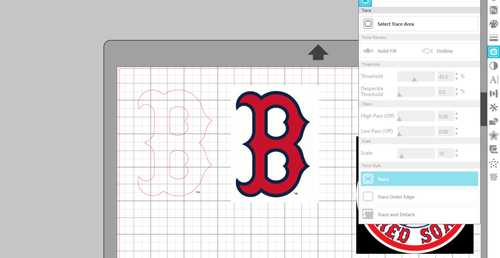
For my vinyl cutting project, I made a 3-layer sticker with the Silhouette Cameo vinyl cutter. I also used Silhouette Studio to design my sticker. The first step I took was choosing my image, I chose the Boston Red Sox logo and I would add a white background. I googled red Sox logo png and chose the logo I liked best. It ended up being this. Then I opened Silhouette Studio and imported my image. I left the dimensions as they came. The next step I took was using the Trace tool, (looks like a butterfly in a box) and selecting the whole image. I pressed a trace and dragged the PNG away to show my newly made outline of the image.
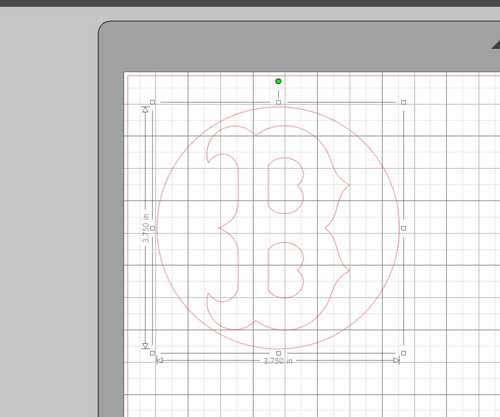
Next, I made a 3.75-diameter circle around the center point of the logo.
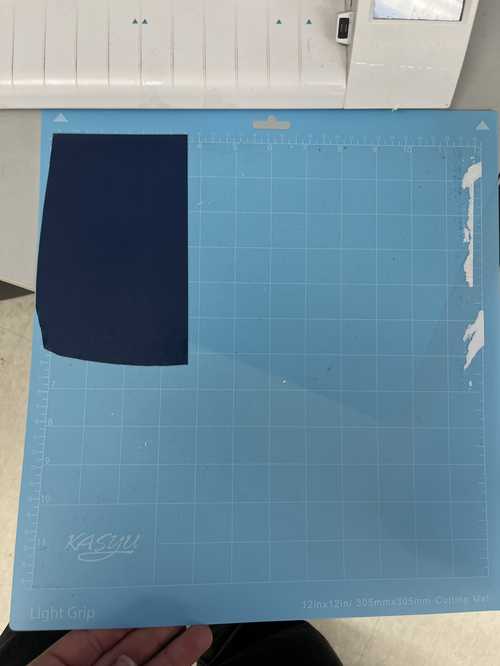
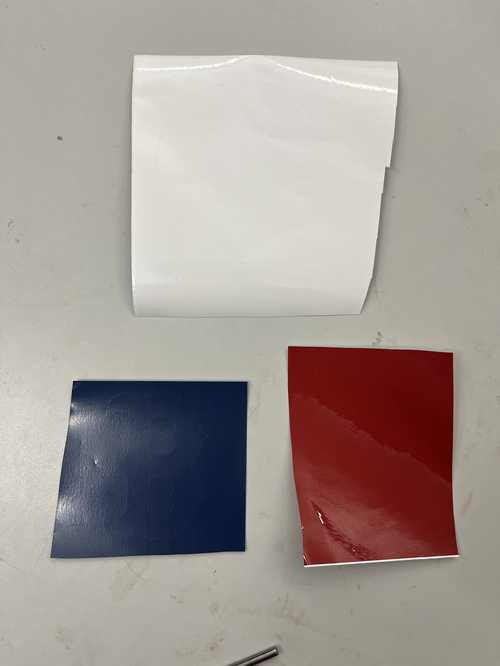
Next, I separated the circle and the logo into two separate documents by copying the circle and pasting it onto a new document. Now I am ready to print. I chose my materials: navy blue, red, and white vinyl. I positioned an approximate sized piece on the top left corner of my sticky pad,
and pressed Load Cut Tray with the sheet near.
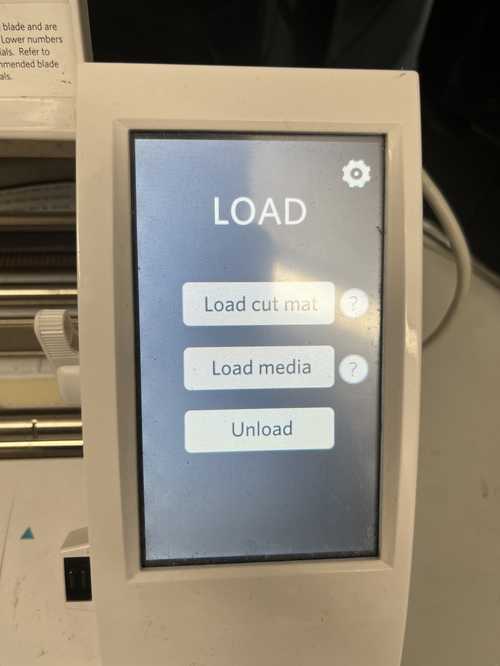
It pulled the sheet into the machine to be cut on. I opened the send page in the silhouette studio app, chose vinyl, and glossy as my material, and pressed send. I repeated this process with red on a second logo, and white on the circle.
Next, I removed the unwanted parts of my sticker with a process called weeding. I removed the extra outside layer of the logo by peeling away and removed the inside of the B by picking away the inner sticker.
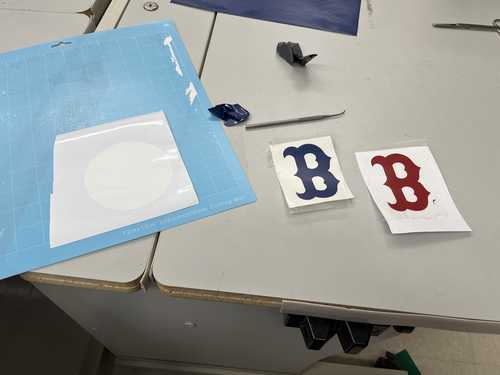
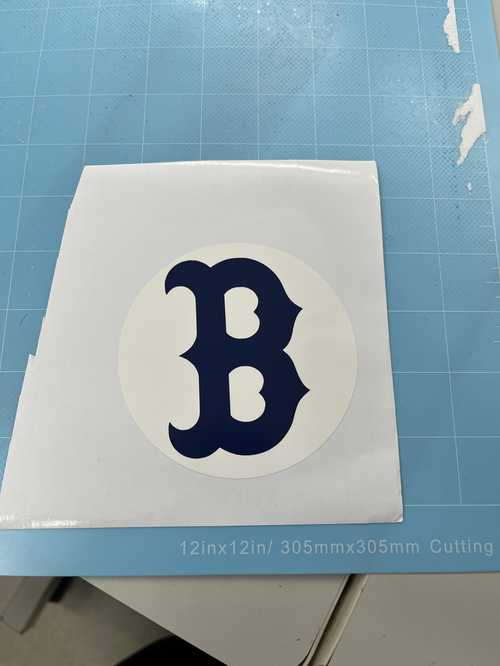
Next, I peeled away the blue B placed it a bit to the left of the white circle, and pressed down with a squeegee to remove air bubbles.
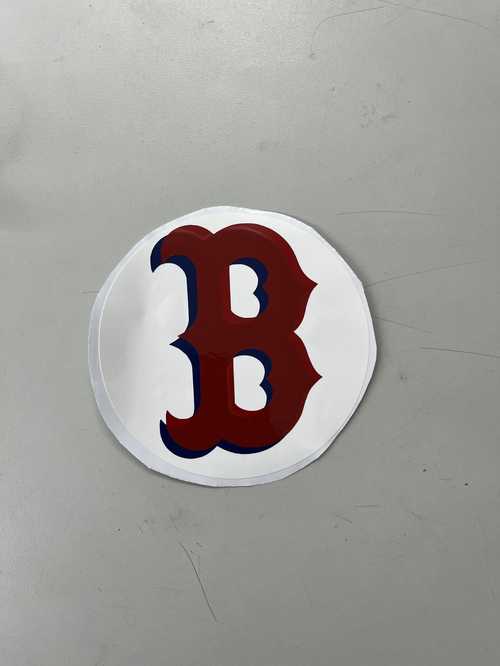
Finally, I did the same with the red B but placed it a bit to the right to create a 3D effect with the sticker.
Group Project
For my group project, visit here. This week I did the dithering tests for our laser cutter on cardboard, wood, and acrylic. I designed and cut these files.