Week 2: Computer-Aided Design
This week we worked on designing possible parts or components of our final projects.
2D CAD
Vector software 1: Cuttle
I used these tutorials by Cuttle, here is part 1, and part 2. The first step in the tutorial was creating a polygon.
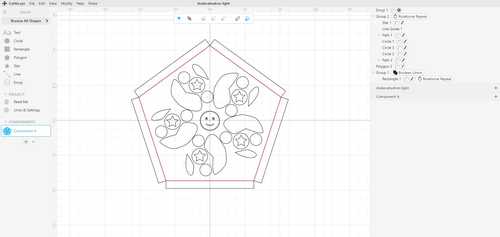
The first step I took in Cuttle was to make a five-sided polygon centered on the center of the grid. I then made a rectangle connected to one side of the polygon. The next tool I used was the rotational repeat under the modify dropdown menu to make 5 copies of the rectangle around the polygon.
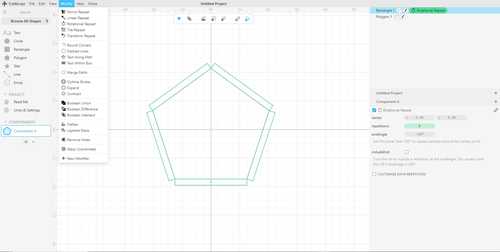
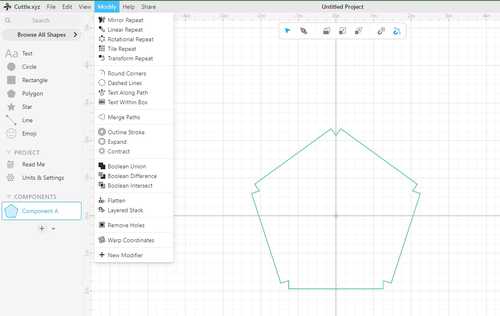
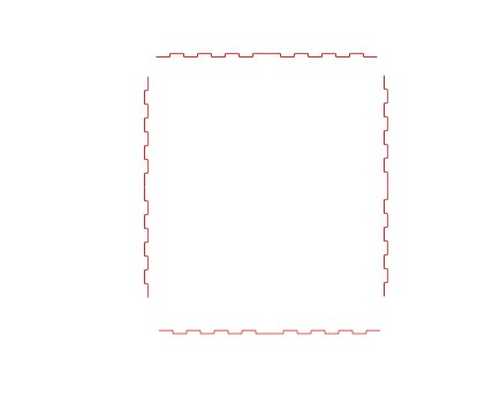
Next, I selected the polygon and rectangles by dragging my mouse across the screen and using the Boolean union tool, it merged the shapes to make this one:
Next, I used the path tool to create a shape similar to a tear. The path tool is located on the top of the screen to the right of the cursor. When using the path tool, you must hold down the left click as you drag your mouse to create curved lines rather than straight ones. After this, I used the rotational repeat tool again to make 5 more copies.
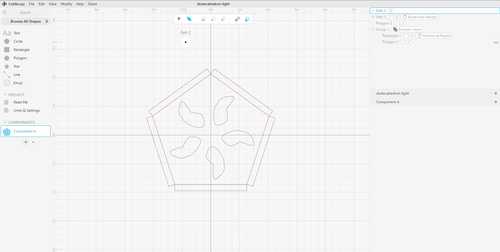
On the right side of the screen are your recent actions, I took the rotational repeat I made on the tear, and dragged it to the group everything else was in. Now whenever I make a shape under this group, it is rotated around the shape making more copies
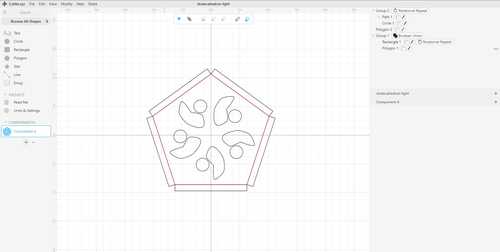
After adding more details, circles, tears, and a smiley face, I was finished with my design and saved the file as an SVG.
Cuttle Review
I think Cuttle is a great 2D design software that would fit most people in their designs. However, I think that Cuttle is a bit too simple for some complex designs. I will most likely be using Cuttle for my final project.
Raster Software: GIMP
As for my 2D raster design software, I tried GIMP for the first time. I used this tutorial by gimp to make a floating logo.
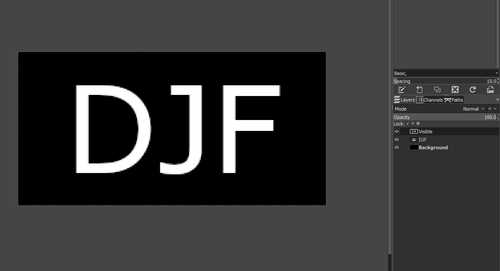
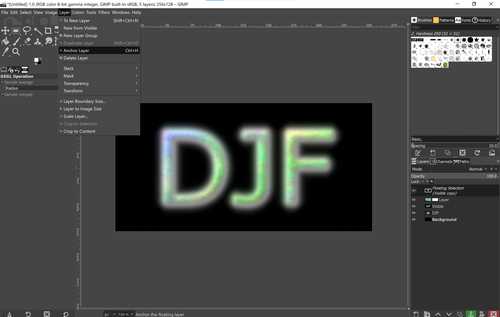
The first step I took was making a new project from the file dropdown menu. I dimensioned it to 256 x 128 pixels. Then I used the text tool (shaped like an “A”) to type my initials DJF.
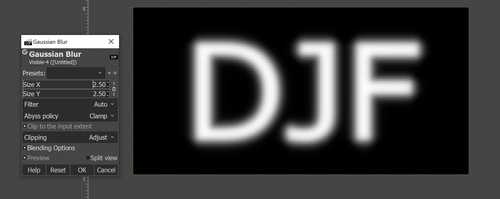
Next, I made a new form visible by right-clicking on my text in the right directory and choosing new from visible. I then selected the newly created visible layer and under the filters tab on the top, I chose blur>Gaussian Blur. In the tutorial they chose 7 as the value to blur, however, that seemed far too much for me, so I chose 2.5 instead.
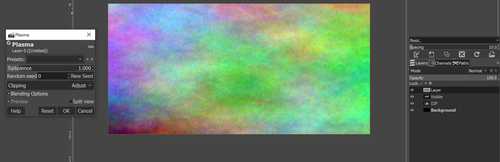
To make the text colorful, I made a new layer by selecting layer on the top, then I selected the layer by pressing filters>render>noise>plasma and then the OK button.
to make the text colored rather than the background, I used the bump map command. To do this I used filters>map>bump map. On the bump map page, I pressed the question mark selected the visible layer, and set the depth to 6. Then I added a layer mask by selecting layer>mask>add layer mask. Then I copied and pasted the entire visible layer onto the new layer I made in the last step. then I pressed layer>anchor layer
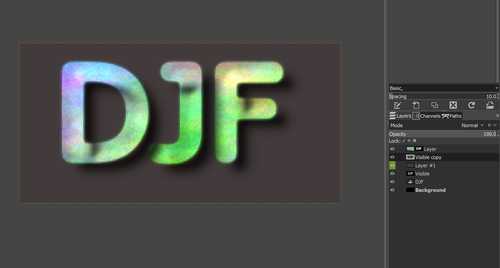
Then I made a new layer and made the background color dark gray with the fill bucket. For the final step, I made a shadow on the text by duplicating the visible layer then I clicked on that layer and used colors>invert the layer>transparency>color to alpha. This created a shadow. Then I used the move tool(four arrows in different directions) to move the text up and to the left a bit to make the shadow look real.
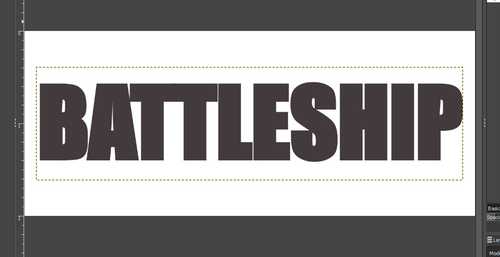
My attempt without a tutorial: My idea was to make a battleship logo in gimp, I started by creating a new file and typing battleship with the text tool.
Then I edited the background by clicking on it in the history bar. Then I chose the blue web design.
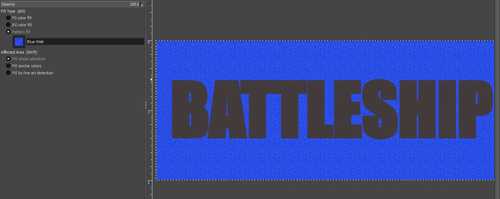
Next, I added a blur to the text and a white border. Here is the final image:

Gimp Review
I think gimp is a very complicated version of a simpler image editor. I find it far too complicated for anything I would use it for. The interface is packed full of buttons and tabs making a confusing workspace. Also for me on my Windows laptop, everything was shrunk down so small, it was almost hard to see. For these reasons, I will most likely not use GIMP any further for my final project.
Vector Software 2: Corel Draw
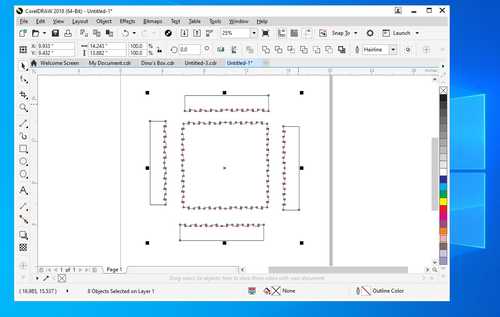
First I made a small line horizontal and one vertical and connected them. Then I copied and pasted them on top of each other until they reached 8in. Then I copied the entire thing and made 4 copies.
Then I made a copy of each side created two parallel horizontal lines and connected them.
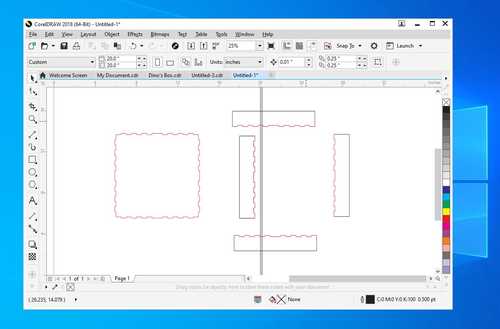
Then I moved everything to the work plane and grouped it and made it all hairline.
Corel Draw Review
I think Corel Draw is a good software for specific projects. The interface is a bit confusing however it has some features not present in Cuttle, such as the layers option. This makes corel draw better for some more complicated laser cuts requiring such features. Corel Draw is also very expensive and is not accessible to all people. I may be using Corel Draw in my final project depending on how complicated the cut needs to be.
3D CAD
Past Software
Before I learned how to use Fusion 360, I used Tinkercad, a basic web-based 3D design software. Here is some of my past work:
3D design software 1: Free Cad
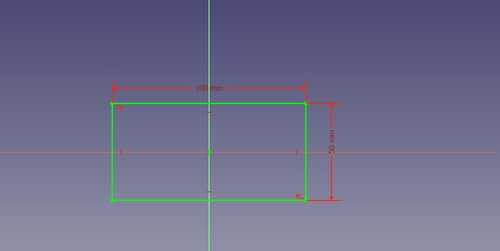
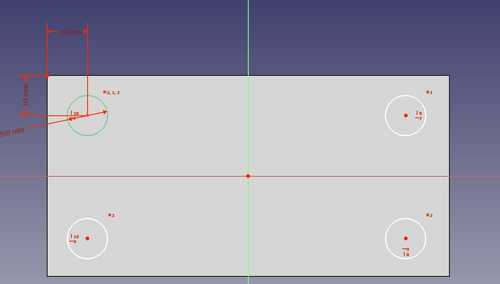
In my time taking engineering classes, I have used mostly Fusion 360, (with the first week or so starting in Tinkercad) I want to learn a new 3D design software. So as for my teachers and Dr. Because of Gershenfeld’s recommendations, I tried a free card. I learned the basics of free cad by doing part 1 and part 2 of these tutorials given to me by my teacher. In part one of the tutorials, he taught me how to navigate the free CAD software. In part 2, he taught me how to design a basic object. The first step I took in creating this object was making a new design. Then I opened the sketcher workspace and made a centerpoint rectangle centered on the origin. I dimensioned it 100mmx50mm
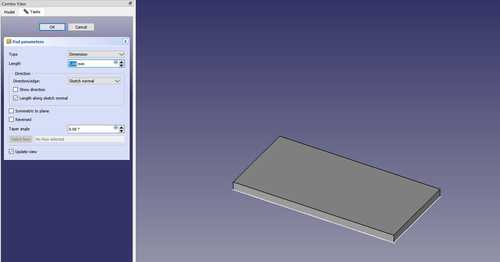
Next, I closed the sketcher workspace and used the pad tool to extrude the rectangle 5mm
Next, I selected the top of the box and created a new sketch with the sketcher tool. Next, I selected the center point circle and made 4 circles that looked good in each corner(don’t have to be exact, constraints will be added later).

Next, I selected all 4 circles pressed the circle diameter tool, and entered 10mm.
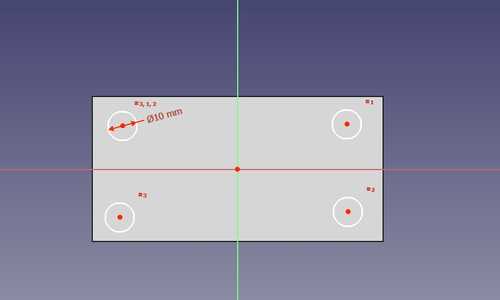
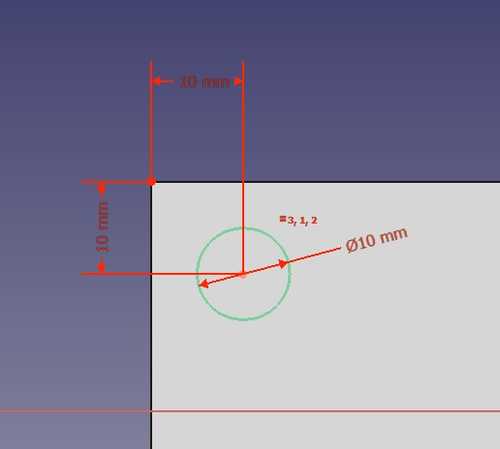
The next step I took was dimensioning the top left circle from the top left corner. First, press the external geometry tool and select the top left corner. Next right click away from the corner to get rid of the tool. Next, use the horizontal dimension tool and dimension the top left corner and center of the circle 10mm. Do the same vertically by selecting the top left corner and the center of the circle, then the vertical dimension, followed by entering 10mm.
Next, use the horizontal and vertical constraint tools to horizontal constraint the top two circles and the bottom two, and then vertically contain the left two and right two.
next repeat the same process in dimensioning the top left circle on the bottom right corner.
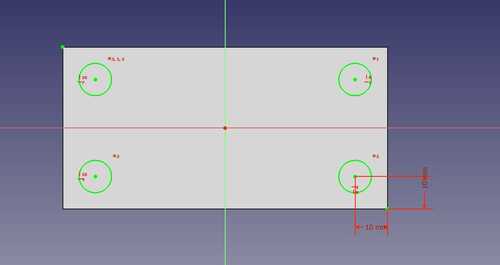
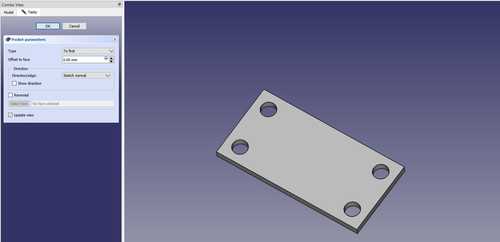
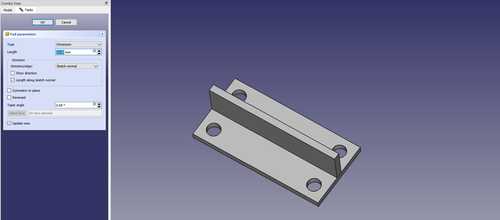
Next, close the sketcher tool and select the pocket tool. ensure the type is set to to first and four holes should be cut.
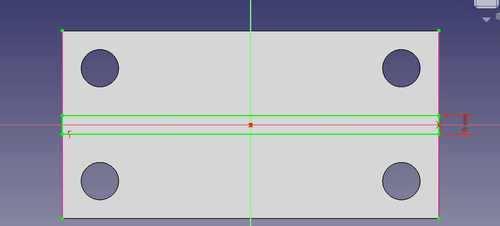
Next, create a new sketch on top of the box again and make a new rectangle containing it on the left of the box and the right of the box. Next select the top left point, bottom left point, and the center of the rectangle followed by the symmetrical constraint tool. next dimension the sides of the rectangle 5mm and exit the sketch.
next pad the new rectangle 25mm
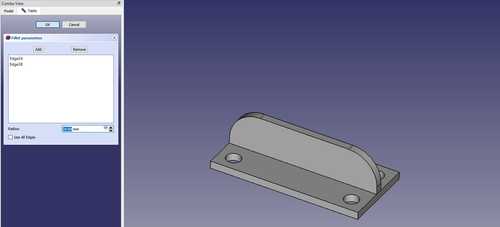
now select the top left and top right of the newly padded rectangle and select the filet tool. filet these corners 20mm
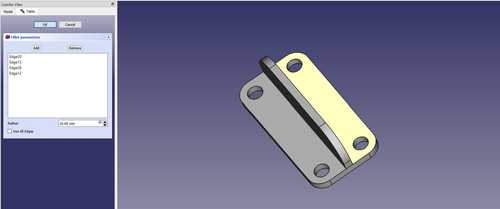
next, select the 4 bottom corners of the base rectangle and filet them by 10mm
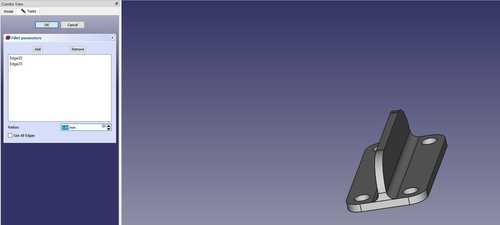
finally, select both sides where the two rectangles intersect and filet those edges 5mm
Free CAD Review
I think Free Cad is a great software for 3D designing. For me, however, it was hard to navigate and a bit confusing. I think Fusion 360 does almost every feature better except the cost. With CAD being free, it is the perfect software for anyone to use regardless of budget.
3D design software 2: Fusion 360
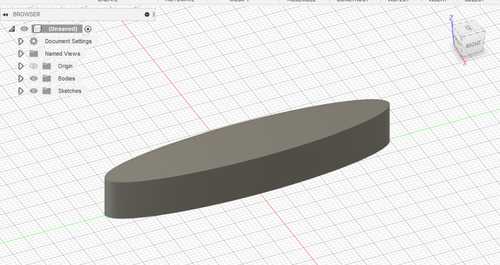
I have had a decent amount of experience using Fusion 360, I learned most of my designing skills from Product Design Online’s tutorials, mainly Fusion 360 in 30 days. With my prior experience in Fusion 360, I designed a boat to use in my final project, a single-player battleship game. I started by sketching on the bottom plane, and I made an ellipse with a 70mm length and a 14mm width. I then extruded the shape 10mm.
Next, I added a 2mm filet to the top and bottom edges of the shape. Next, I made one gun on the front end of the boat by making a long rectangle and two skinny rectangles on top of the boat. Then I extruded the big rectangle by 5 mm, then the small rectangles by 4 mm. Then I reopened the sketch and extruded the small rectangles by 2.5 to create the floating barrels of the gun. After that, I made a main control panel by sketching two rectangles in the middle of the oval and extruding one by 5mm and the other by 2.5mm
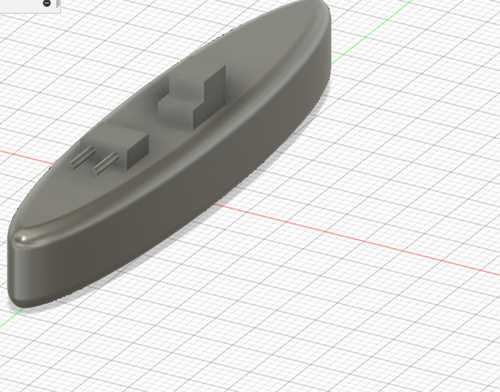
Next, I mirrored the gun(select it as a feature) over the halfway point of the boat.
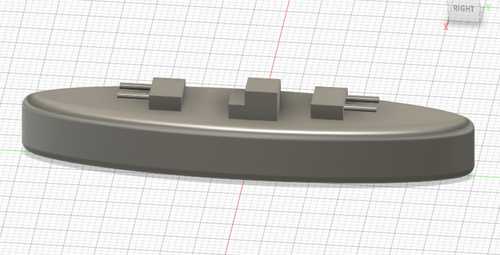
Next, I added some filets to the barrels of the gun, the back of the gun, and the control area.
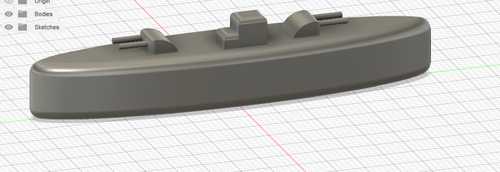
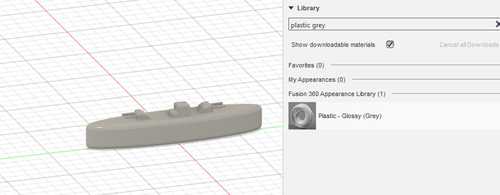
Finally, I changed the appearance to gray plastic for an accurate representation of the boat.
Simulate and render in Fusion 360
Since I already knew how to use the basics of Fusion 360’s design workspace, I wanted to learn how to use the simulation workspace to test designs before I printed them. I used these tutorials by Fusion 360 to learn the simulation workspace.
Fusion 360 review
In my opinion, Fusion 360 is nearly perfect. I think the only downside to Fusion 360 that I can see is the cost. I am using an education subscription so for me, the cost is minimal. Fusion 360 has a simple interface, and tons of features, in software rendering, animating, toolpathCNCeating for CNC, schematic drawings, 2D drawings, and many more workspaces that I have yet to use Fusion 360 for my Final project than I already have. Files