10. Molding and casting
This week we worked through the whole process of designing a mold, creating the mold with wax and the CNC and then making a silicone candy mold. I was so excited for this week because it was all brand new and seemed like something I had never thought about doing before. I appreciated that we used the CNC again so I am getting more comfortable with that. I also was happy to continue to improve my Fusion skills. It was a fun and satisfying week even though things didn’t go completely smoothly and I still don’t have all the answers as to why.
Goals for the Week
- Linked to the group assignment page and reflected on your individual page what you have learned
- Reviewed the safety data sheets for each of your molding and casting materials, then made and compared test casts with each of them
- Documented how you designed your 3D mould and created your rough and finish toolpaths for machining, including machine settings
- Shown how you made your mould and cast the parts
- Described problems and how you fixed them
- Included your design files and ‘hero shot’ of the mould and the final object
Group Work
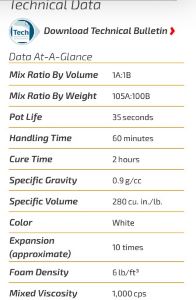
At our weekly lab we started with the end part of the molding and casting process. We used some molds from our instructors to cast objects. We used 2 different types of material in our casting: Smooth-Cast 300 bright white resin and FlexFoam-iT! 6 Pillow Soft flexible foam. We spent time looking at their safety data sheets. Instead of posing the photos of those here, I’m going to provide the links to the online pages: safety data sheet for Smooth-Cast 300 and safety data sheet for Smooth-case FlexFoam-iT! 6 Pillow Soft. On these sheets you find directions for the casting as well as information about the pot life, handle and cure time. Below are summaries of the features from the 2 different products on their webpages.
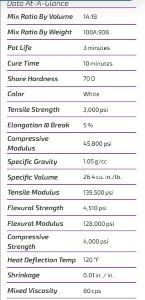
The instructors provided these 2 materials because they were very different. The Smooth-Cast 300 created fairly hard plastic objects from soft mold and the FlexFoam created soft, squishy foam objects from hard molds. As Neil said, cast hard in soft and soft in hard. This all made sense when we were handling the molds and the materials. Both materials were fairly quick to cure so that we could cast and see the results in our lab period. In both cases we were mixing some amount of 2 different substances. This was given in each case on the data sheets (as seen above too). We used the scale in the lab to try to measure accurately the given ratios, depending on how much of each mixture we wanted. This was largely a guessing game.
Safety first: we all wore gloves (not latex) and eyewear to protect our skin and our eyes. We are all still wearing masks because of COVID. Though our 2 types of material were fairly safe (), we still need to keep safety in mind and don’t want to expose our skin to the chemicals.
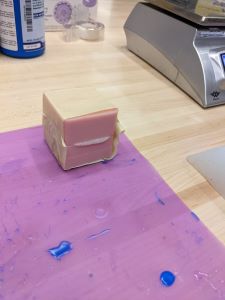
In the group we all split up and cast with one of the formulas. We had some interesting results. The FlexFoam material had an expansion of 10 times. We thought it would end up spilling over the cup we used for it, but in the end there wasn’t enough for that to happen. The first thing that was made as a group was a 2 piece helmet. You can see in the image below that the sides were just taped together. We assumed that because the FlexFoam expanded the process of filling one side and taping it would create a full object. That didn’t happen. See the image below and observe that the helmet was only full on one half and then sort of flat on the other side when it was done. NOTE: the pot time for the foam is only 35 seconds!! This was so super quick that we all struggled when we used it and really should have been timing ourselves.
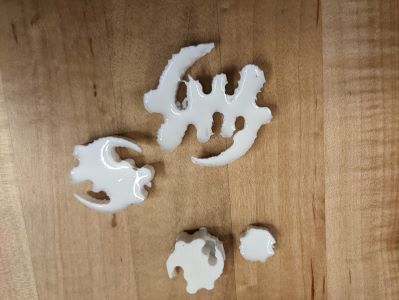
I used the Smooth 300 with Sarah to make some small plastic pieces. The group also used the same to make the wheel object below. These were semi-hard. I could see this resin being useful to make objects that you wanted to have some give to them.
Note: we did not use any release agents with either type of casting and they all worked out ok. Later I tried some cooking spray with my own mold and it impacted the outcome (negatively I thought). See below for more about that.
We used the vaccuum only for one casting. In the end we could see no real difference in the outcomes when the vaccuum was used versus not used. Here’s Spencer having vaccuum fun.
After the casting we went to use the Axis CNC to cut the mold out of wax. It was in that room we discovered we didn’t have the endmills that we needed. Spencer still wanted to model the process. So he made the cut for the block on the wood and then used VCarve to make a sample mold. As you see below, it was a bit of a disaster. Really the problem was that we had no upcut endmills. As predicted, there was a very rough cut and the wax went everywhere and even melted in the corner bc of the downmill. This is a MAJOR “what not to do”. Always a lesson in there!!
My work
Molding and Casting: my design and product
I decided to make a mold in Fusion 360. This mold would be used to make a silicone mold that was food safe so then I could make chocolates. So there are really 4 steps here.
- Design in Fusion 360
- Cut mold using CNC
- Cast silicone mold
- Make chocolates
Design in Fusion 360
Somehow I’m stuck in this plant/flower theme often. I think it’s partly because I like to use mathematical commands like rotate to make objects. Here I actually started with a fixed spline drawing. For some reason I’ve been avoiding trying to create objects this way. I tried it and I found I actually really liked it! I created a simple “petal” for my flower with just a few points. One thing I got better at this week was going back to steps in my design and changing sizes. In the end my original flower was too large to fit on my wax block, so I needed to move some of the points in a bit. The final design is below.

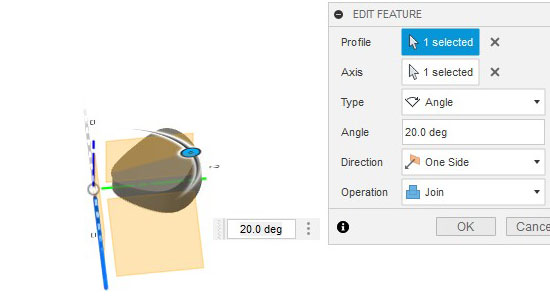
Then I had to try a few times to get the right order of operations so this came out well. In the end what worked best was to actually extrude the whole petal and then do a rotation to make the petal have varied depth. The first time I tried this I didn’t extrude and the whole object seemed a little shallow. So I extruded and then used the revolution command on the top of the extrusion. You can see this below.
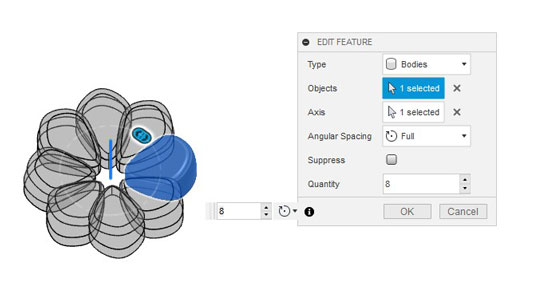
To finish the design of the object for the mold I just used the circular pattern feature as you can see below.
Once the object for my mold was done I had to put it inside 2 boxes. The wax block we were using was 3.47 inches wide, 5.88 inches long and 1.47 inches tall. We were told we should use only half the block in case the first design didn’t work. This was the first year that we used the CNC for this project. Last year’s fab academy students used the Roland Mill, so we still had some questions about the process and whether it would work as desired.
So I wanted the “mold” box to be a bit smaller than half of the wax block. In the end I made that box and then put it inside the larger rectangular box that simulated the wax block. I had to make sure things were aligned on the correct side and that I used correct bodies for “tool” vs “target” when I was combining. In the final situation, this is what my file looked like (included below).

Using VCarve and the Axis CNC to cut the wax mold
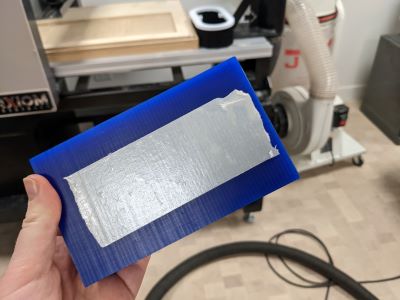
We used Vcarve (here’s a helpful tutorial site) to take our Fusion files and convert them into files for the CNC. Brandon helped out with this. There were 3 cuts to make. First: the cut of the wood so that our wax block could be placed securely in the wood. Brandon cut once for all of us. We used a 1/4 inch downcut endmill. Then I put double-sided tape on the block and placed it in the hole.
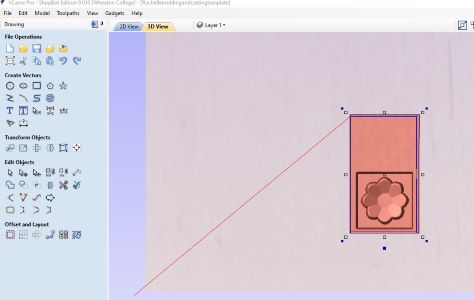
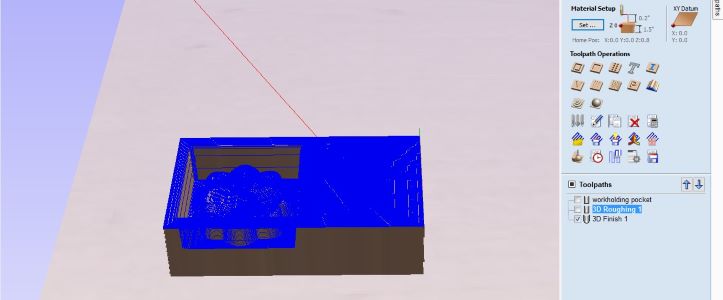
I opened the file in VCarve and looked at the 3d view, as below:
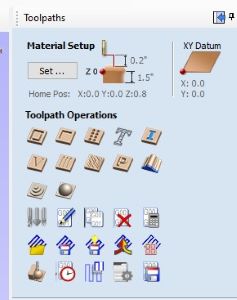
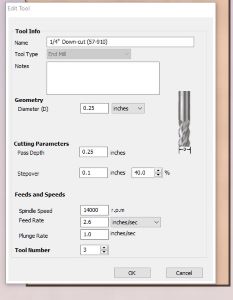
In VCarve you use the toolpaths menu to choose your options for cutting, pocketing, etching, etc. Here’s a screenshot of that menu.
Then we first planned for a rough cut to get rid of a lot of the wax before doing the final and finer cut. Here’s the rough cut menu window:
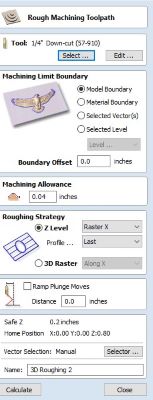
And then you make sure you have the correct speed, passes, depth, etc. Sadly I didn’t actually write down the info I used for the settings. You can find good info from other students here and here.
After this I switched to the finer cut and went through a similar process, making sure to use appropriate settings. Again, I didn’t take a screenshot. Not great documentation, but I don’t want to lie about that now! I should have done it, I didn’t do it, I can’t recreate it…
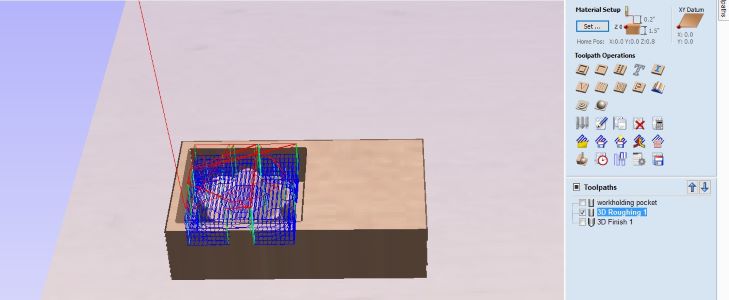
Here are the images from VCarve of the rough cut path and expected outcome. The rough cut came out exactly like the prediction. It looked SUPER WEIRD bc of the limitations of the space. We used a 1/4 inch upcut endmill here.
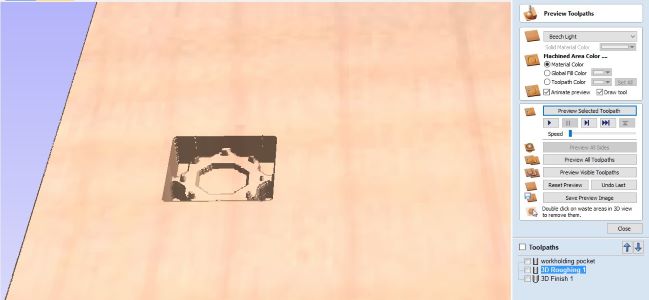
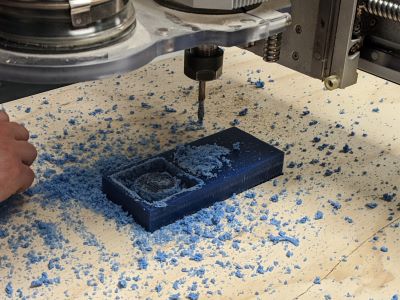
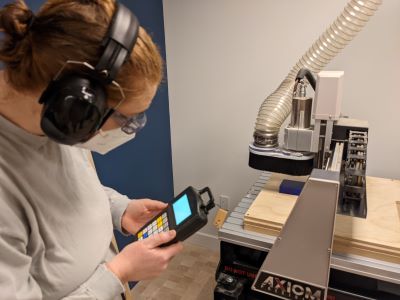
Then I changed the endmill to a 1/8 inch upcut endmill. Here’s the “action shot” of the wrenches, the beautiful 1/8 endmill and the axis. Here are images from VCare of the finishing paths and expected outcome.
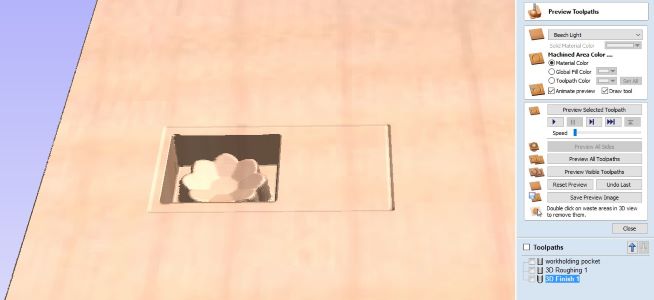
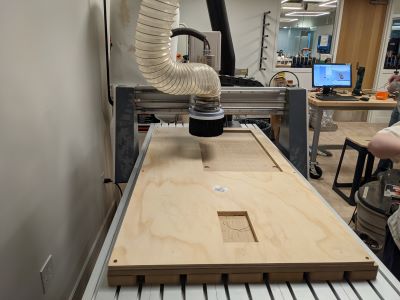
You can see the spiral path that it was cutting in this image of the CNC at work.
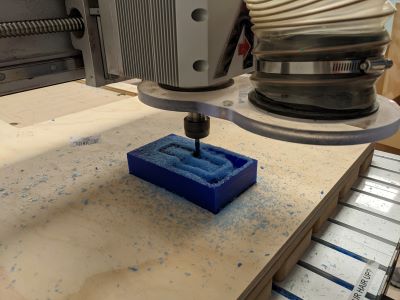
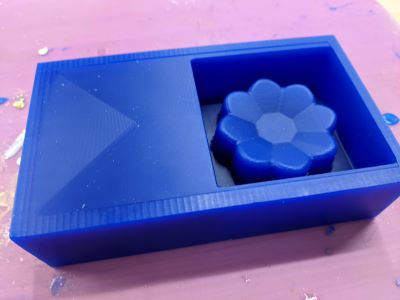
It was BEAUTIFUL!!! It turned out so smooth. I showed it to some of the students from last year and they were also admiring that a huge machine could make such a smooth and nice end result from the wax.
I held my breath for nearly 12 minutes (exaggeration - it was 12 minutes, but obviously I was breathing, though Stressed) watching the machine and it’s spiral path. It really seemed hard to believe that the end result was going to be what we wanted.
Casting Smooth On Sorta Clear 40
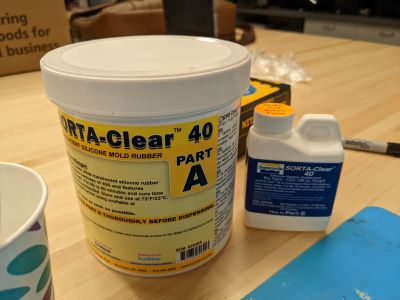
We used a new formula for the casting of our own molds than we used in the group lab. This time we are using a food safe silicone, Sorta Clear 40 This one was a MUCH longer cure time (16 hours). Here’s the same data info as above.
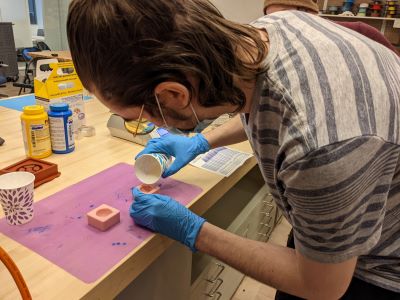
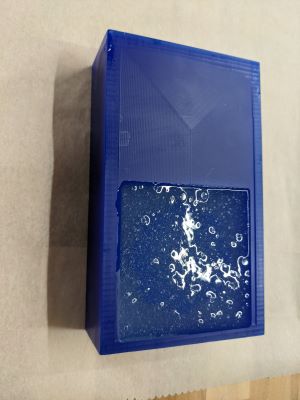
I cut my wax mold Sunday and then promptly made the silicone using the Sorta Clear 40. This was SO thick. Here it was a 10-1 ratio of materials.
It was extremely hard to mix and we had lots of bubbles in it when we poured the mixture into the mold, as you can see below.
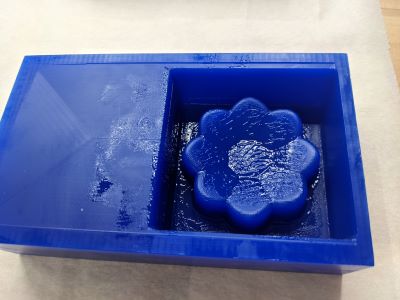
I left the mold to sit for about 21 hours because of when I left the lab on Sunday and when I had time to get back on Monday. I was so excited to take it out and ..... and ..... it was so GOOPY!!!! As you can see below, it looked like the silicone didn’t cure well enough.
Brandon told my classmate who had cast at the same time to not take hers out. They waited about 6 more hours only to find the same result!! So then the hypothesis was that maybe we didn’t mix enough because the A part of the solution was so thick. Also we didn’t use the vaccuum like the directions said we should. We didn’t use it bc it had been spewing a weird output and no one was sure it was supposed to. So our classmate Kobe did both really good mixing and vaccuum treatment. I went to the lab Tuesday and saw that his casting looked just about the same as ours. I had left mine to sit to see if it would cure as it sat in the air. It was much dryer about 22 hours later, but we weren’t so convinced of the food safety aspect of things. Late Tuesday morning I washed out my silicone cast so I could at least try to make a flower mold of something. Using dish soap it cleaned out pretty well.
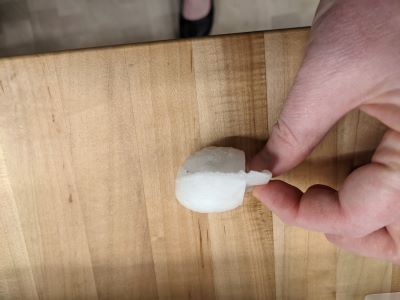
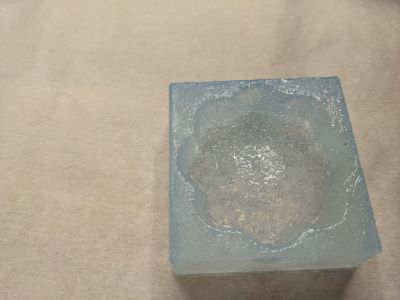
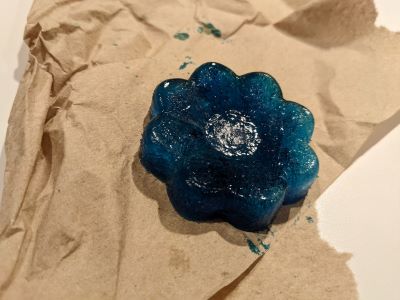
The first thing I tried to make was ice because I was at school and we have a freezer. I used food coloring to dye the water blue. It actually worked!
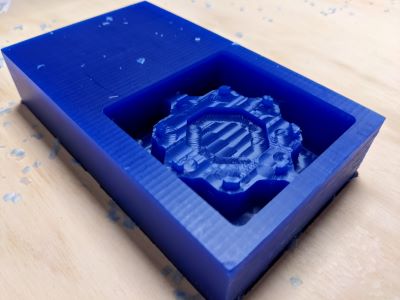
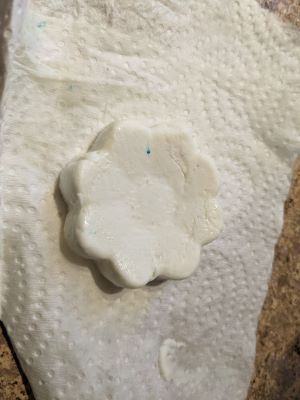
When I got home Tuesday I made several versions of chocolate flowers (which I will not eat!) The first one I used some cooking spray. Not a good idea. It make the shape not well-defined.
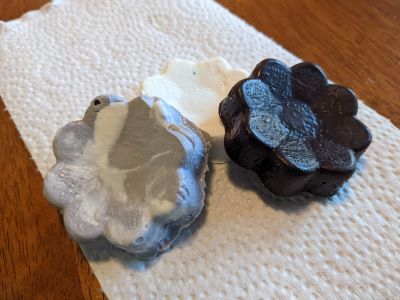
I wiped out the mold and tried to use some food coloring in the white chocolate. This was not a great idea because I think the food coloring impacted the structure of the choloate. Finally I made a dark chocolate flower and I think it actually came out pretty well.
The finish isn’t as smooth as I want it to be. I would really like to make a new mold with either the same silicone or try a different formula. I may also just ditch the foodsafe (since it’s not) and use the white resin we used in lab and make some cool plastic flowers. I still dont’ want them to be white though, so I have to figure out how I can dye the Smooth Cast 300.