15. Wildcard Week
It’s the week we get to try out some new machine and make something new! This is exciting. And of course frustrating too.... Read on for details.
Goals for the week
- Documented how you made your creation
- Described problems and how you fixed them
- Included your design files and ‘hero shot’ of the result
Useful websites
The work
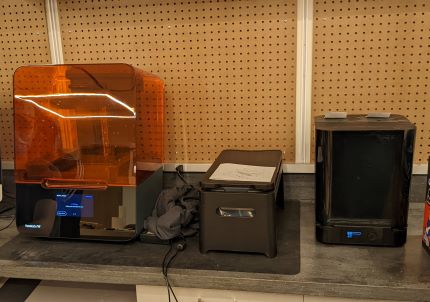
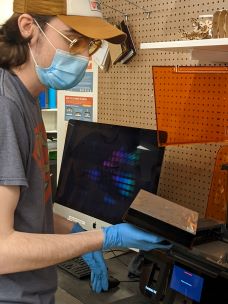
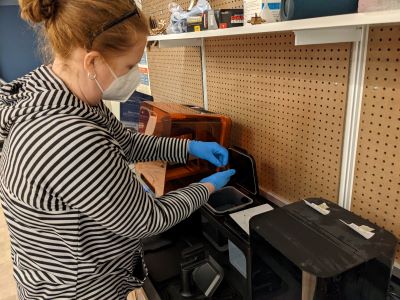
During our lab meeting Brandon demoed the resin printing set up. The process has 3 steps. You have to print using the resin, you have to do an alcohol wash to remove the excess liquid resin and then you use UV light to cure the resin. Here’s our setup and Brandon going through the steps in the following images. First is the arrangement of the printer (there’s a computer to the left), the alcohol bath and then the UV curer.
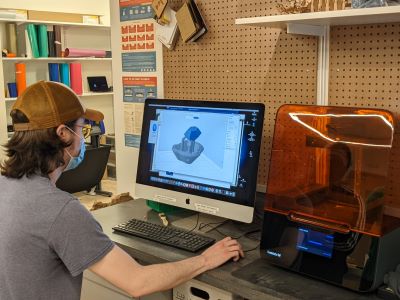
Here’s Brandon using FormLabs to set up the print object.
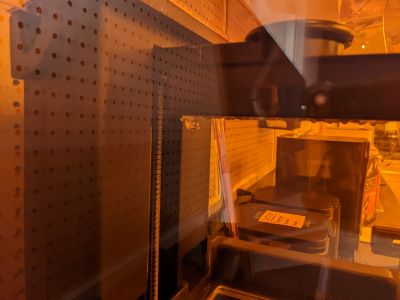
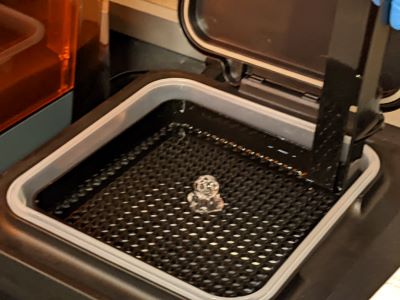
The print is in the top left corner of the following image. It IS tiny and it is hanging from the top.
Brandon is getting ready to wipe off the print surface to remove the excess resin that is on it before he puts it bakc into the printer. Note the object has been removed and is in the alchol - it just sits in the liquid for about 15-30 minutes. ALso note the gloves - no resin on Brandon’s skin!!
So I thought that was all cool, but not what I was going to do. I ended up doing it anyway and you can find more details about my individual process below.
I had done a digital embroidery training in the lab a couple of weeks ago. I thought this would help me be ready for wildcard week. Also, one of my classmates assured me that they knew how to use the digital embroiderer so we would make it work.
Friends, it did not work. I went in for 3 hours on Saturday just trying to print one of the sample files. We kept getting the error that the upper thread needed to be rethread. The machine would run for about 10 seconds and then stop. Every time the thread would cut and we would rethread it. It would start back up and then stop again. We ended up with a large knot on the bottom side of the embroidery after just rethreading and ignoring the warning about thread running out in the bobbin. So this was not great. We cleaned it out and then tried to set it up again figuring maybe that was the problem. Nope. Still not working. We tried different threads to see if it was just a thread issue. Nothing.
So on Monday I decided to switch to resin printing. But I needed help bc that stuff is toxic and we can’t use it ourselves. But Brandon was sick! So I went back to digital embroidery. Ok, I decided I was going to FIGURE IT OUT!!! Well, I learned a ton - how to thread the bobbin properly, how to replace a needle when it breaks (bc I broke a needle because the embroidery arm was all messed up and not aligned and the needle ran into the hoop). So I’m going to detail the process of digital embroidery below. I hope that someone can help me figure out what the mechanical issue is with the machine at some point soon. However I’m also going to outline the resin printing process because that may end up being successful before the embroidery is. Ain’t this all so fun.... I should have stayed home and graded my calc final projects today. At least something would have been finished.
Digital Embroidery
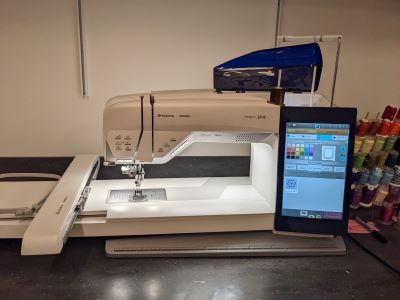
We have a Husqvarna Viking Designer Epic embroidery machine. It can either sew or do digital embroidery. When I did the training a couple of weeks ago the student showed me both. I took my teenage nieces with me because they are crafty and one of them embroiders by hand!! Maybe someday if this machine actually works we can come back to campus and make some projects together. Someday.
One of the really nice features of the machine is that it has lots of short video tutorials. I watched these repeatedly - like how to thread the upper thread of the machine, how to use the automatic needle threader, how to load the bobbin, .... They were actually very helpful. Here’s the machine with the screen on the right.
So the set up process of the machine involves 3 large steps:
- Load the upper thread
- Load the bobbin for the lower thread
- Set up the hoop (the plastic holder for the fabric)
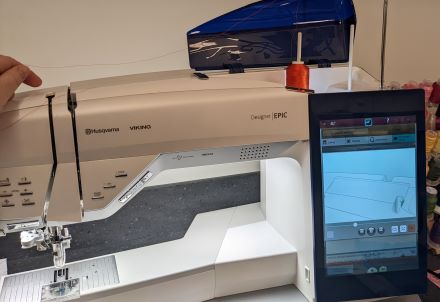
Here is an image of me working on loading the thread - you can see the screen going through the steps off to the side as well. The final step once you thread the thread all through the machine is to get the needle threaded. There is an automatic threader. Sometimes it doesn’t work and you have to just try it again. Usually on the 2nd go it works. This is a button on the machine directly, not thtough the interface.
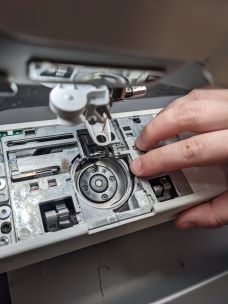
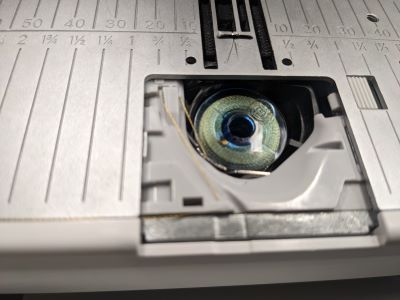
When you do digital embroidery there is embroidery done on both sides of the material. So this is where the bobbin comes in. In the series of photos below you can see the empty space where the bobbin (the small spool of thread, the encasing and the lid goes) goes, then a photo of it set up wrong. I had not fully wrapped the thread around the lower metal part and then up and around the plastic pieces. The final photo is correct. Again, the built in tutorial videos here were super helpful (watched 5 times).

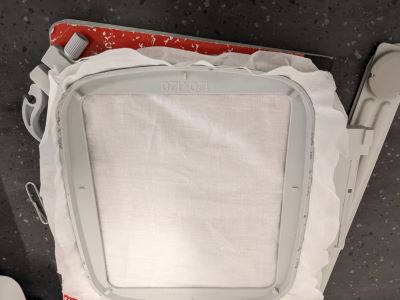
The hoop we used was 120x120 mm. There are multiple sized hoops and this was a relatively small one. The hoop comes in 2 pieces and needs to have a layer of paper and a layer of fabric laid down on the outer ring. The paper goes down first so that it is on the bottom and you are embroidering directly on the fabric. You want to layer the paper and fabric and then put the top piece in place. Before you tighten it you have to pull the fabric taut so that it doesn’t get all loose while embroidering. The image below has the lower layer of paper, then the top layer of fabric (which is also white, so hard to see the difference) and the hoop is all set up. You can see the bottom right is the lever that tightens the 2 pieces of the hoop together.
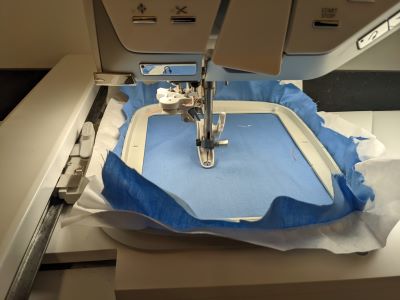
The hoop is attached to the arm of the embroidery machine when the machine is ready to go. If you put it on before the machine is ready you get asked to take it off so the arm can calibrate. Then you have to slide it under the embroidery head to attach it to the arm.
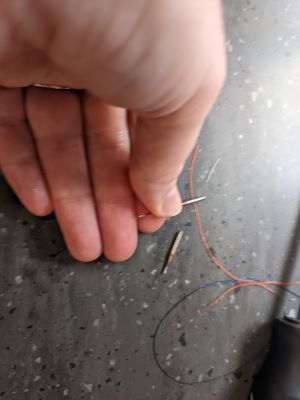
While trying to embroider I broke a needle. It snapped because the arm was not aligned properly (not sure why) and the needle ran into the hoop. So it just SNAPPED. You can see in the photo below. So I ended up having to replace the needle. This was a pretty simple process where you just loosen the screw holding the needle in place and pull out the broken needle. The new needle needs to be aligned properly, but they are cleverly designed to have one flat side, so they are aligned automatically. Done. One more thing I figured out.
Design and embroidery
The machine takes jpgs and pngs. However we never got to the design phase since we were practicing using the samples in the machine. The goal was to pick small files that were quick to just see if we could make it work.
During my training a couple of weeks ago the embroidery took about 20 minutes. However about 15 minutes in it just quit and there was an error. The student who was helping us just said we were done. So I don’t actually know what that error was and had no help trouble shooting at that point.
This time around the error was the persistent thread cutting. I tried all the different kinds of threads and I tried googling and really I came up with nothing useful. A student stopped by who was going to work on embroidery that she had started last week and she had never seen the error and helped me try to sort it out. We changed the speed of the embroidery (another button ON the machine) and that seemed to be hopeful, but then stopped working again.
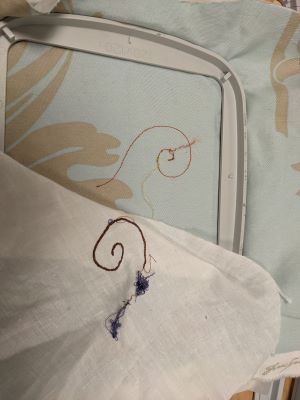
This is what happened in the end with all the thread issues on the first day:
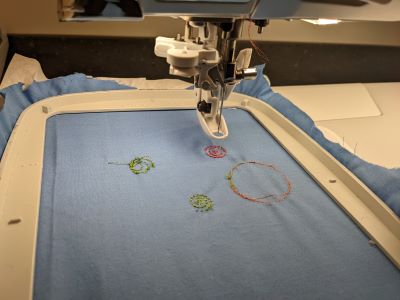
Here’s a whole bunch of tries of making a circle and a couple of swirls when I went back in and tried it again:
Things I learned through all my trial and error on day 2:
- I learned how to use the buttons on the screen from the print to return to an earlier part of the print. There are just +/- buttons on the screen that literally move you forward or backwards along your design. This is helpful when your thread is cut.
- I learned how to replace the needle because I broke one. One nice feature of the needles is that they have one flat side so they only go in a certain way. This should make them already aligned for the auto threader. Of course the first one I put it still didn’t work, so I tried a second one.
- I learned how to change the type of fabric through the settings in the embroidery program.
- I learned how to change the bobbin.
- I learned how to take off the embroidery base when the thread gets all caught up in there.
- I learned a lot more than I had when I was working with someone else
- I learned I really am a bad Googler because I just couldn’t come up with the solution to the thread problem.
Resin printing
So back to the process of resin printing. You need an STL File to use the resin printer. The printer is a formlabs printer and it uses Preform software. This software is analogous to Prussa slicer in that it allows you to set your print.
Some interesting things about the resin printer:
- it prints upside down
- it can print very detailed objects
- it’s toxic and if you get resin on your skin it can penetrate your skin and dry inside and you’ve got a resin patch (no thank you!)
- there are 3 stages: printing, alcohol bath and UV curing
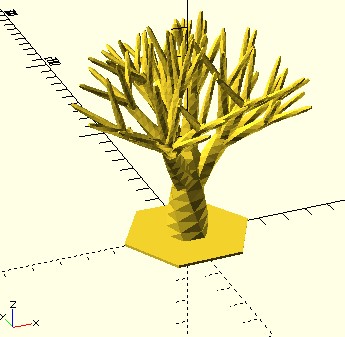
So there was some disagreement in our lab about what was required of this week. Did we have to design our own object or not? I went to Thingaverse to see if I could find something interesting to print, still not sure that would be sufficient. I found this cool tree generating program (link same as above) that was written in OpenSCAD. The output looked something like this:
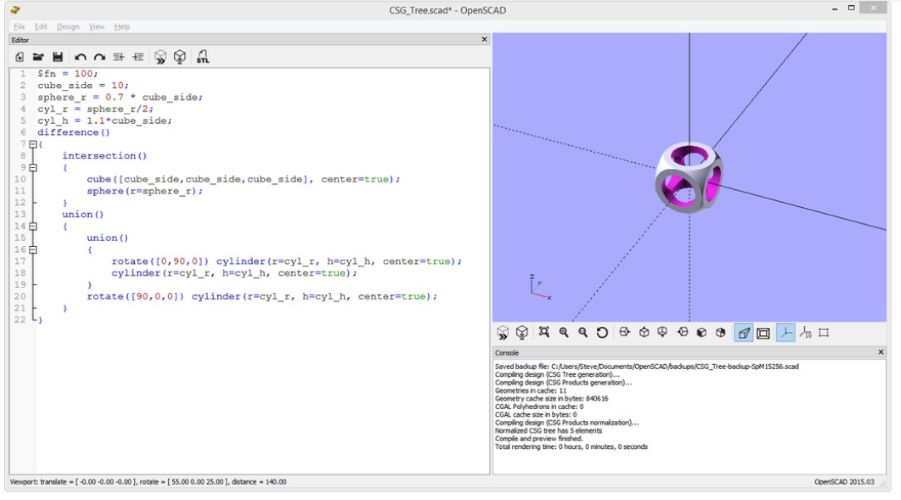
I thought then that maybe I should just design something in OpenSCAD since this was a program we used in my Geometry class in the fall and I knew the basics. I found a cool object with unions, differences, etc at this site, also listed above. It looks like this:
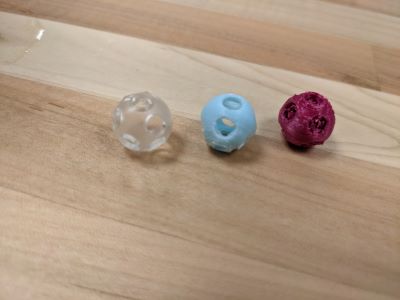
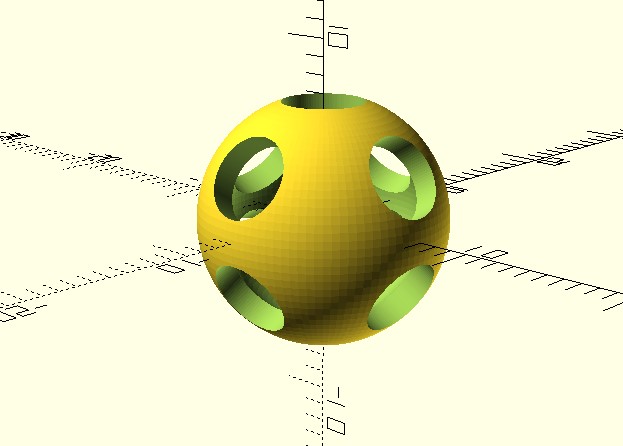
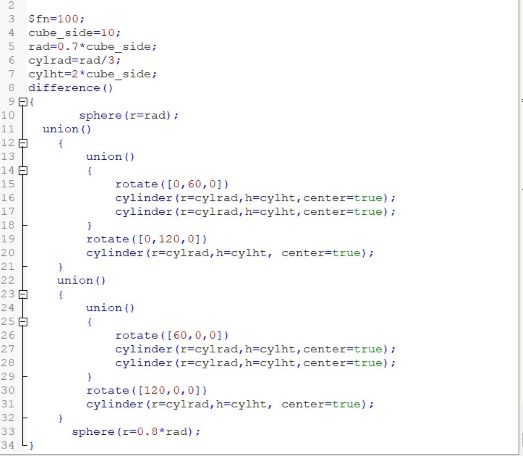
Recalling earlier feedback from my global evaluator I wanted to make this my own. Also I am going to print this with clear resin, so I think this is a cool type of object - a solid with holes and a hollowed out inside. So I did away with the intersection of the square and the sphere that created the cool die-like shape (that is really cool though) and decided to remove cylinders from a sphere and different angles. I also subtracted a smaller sphere to make the inside smooth (hoping not to trap any wet resin!!). I* feel that this is sufficently my own since I had to create shapes the right size, know how to translate and rotate to make them work and understand and use the union and difference commands to make this all come out with some cool symmetry. The final design looks as follows, with the openSCAD code after:
Preform
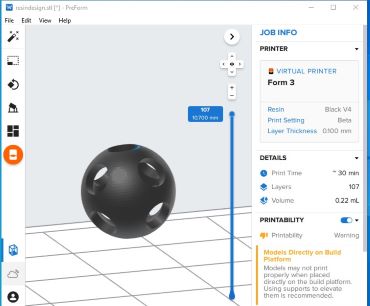
As in Prusa Slicer, you can control various options for your print in Preform. Here is just my object in the program:
Then I added supports using the support option (the funny looking things with legs off to the side):
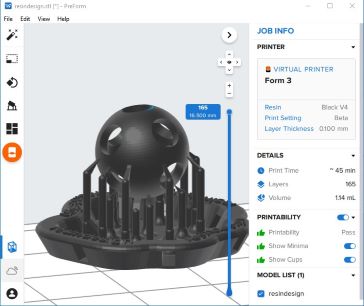
NOTE: it adds a “raft” as part of the support. Remember that since the print happens upside down you need something that will adhere to the plate as it creates and holds your object. You can see how the supports come up out of the raft and will support the sphere with the holes.
Note also that the original print time for just the object was 30 minutes and adding the support added an additional 15 minutes. This is also the way I prepped the file on my computer, but on the resin printer at the Fab Lab we will use clear resin and these settings will change.
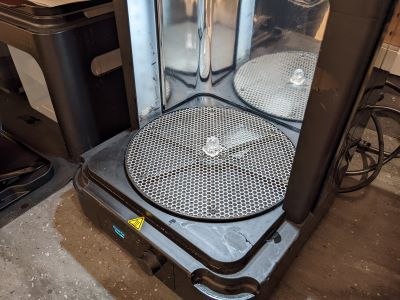
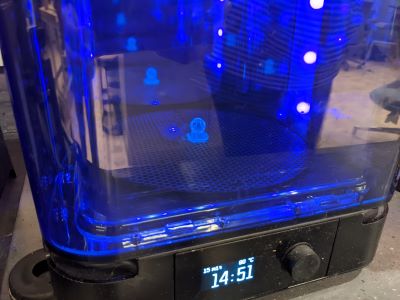
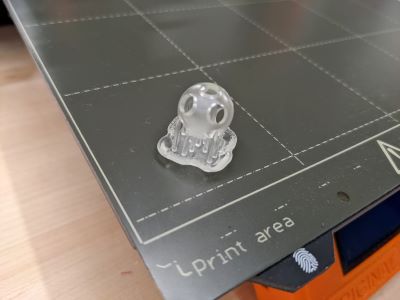
Here are images of the process: The resin printer, the finished output, the object in the alcohol bath and then the final step of curing:
Finally, here’s the output with the support.
I decided to 3d print the same object so I could see the difference in outputs. I added supports and it was a MESS!! See the image below with all the additional support. I also couldn’t get to the support inside the sphere, so it was pretty gross.

Then I decided to print without support and it looked much better, but still not as smooth as with the resin printer. So you can definitely see that resin is a better process for certain desired outcomes - especially objects that are small, details and smooth.