2,5D Machining: PCBs
Week 4: next up is electronics production. But this name is misleading, because it’s actually 2½D machining. The assignment is to mill a circuit board and than solder the components on it. This chapter is about the machining part. For the soldering part there’s a separate page in the Electronics section called Electronic Connections.
Milling Circuit Boards
The milling machine in FabLab Waag is a Roland Modela MDX-20. The driver is made in mods and can take svg files or png files as input. We have used mainly png files. The files were preepared by our instructor, so we only had to load them, put the setting of the machine right and start milling.
Some aspects of this workflow should be taken into account and set in the right order:
- start the machine
- launch mods (in the mods folder)
- close socket and port and open them again to do a reset
- load the default settings for either trace or outline milling
- adjust settings if necessary in the mill master window
- set the origin in the Roland MDX window on a suitable spot for Z-axis leveling
- set the origin to the disired bottom left corner of your board
- remember the origin for milling the traces, so you will use the same when milling the outline
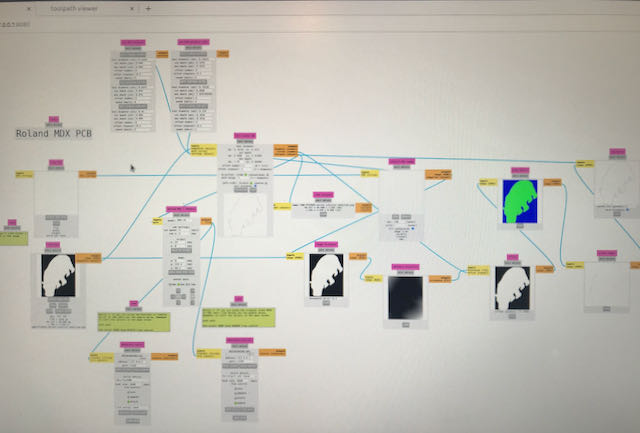
Here’s a picture from the mods screen with the different setting windows. Unfortunately the quality is very bad, but you can recognise the hippos. The block at bottom left is the one to close and open the socket and port. The two blocks at the top are the default settings for milling the traces and for the outline. You can use the presets there or adapt them a bit according to your specific job.
For my own convenience I’ve made a list with settings on the mechanics overview page:
Overview – Machine Settings – Modela MDX-20
Group Assignment
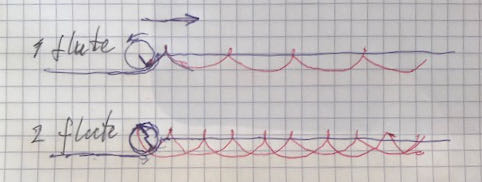
With the group we investigated what the difference in result is between using a one flute and a two flute milling bit. Here’s a picture from the two flute.
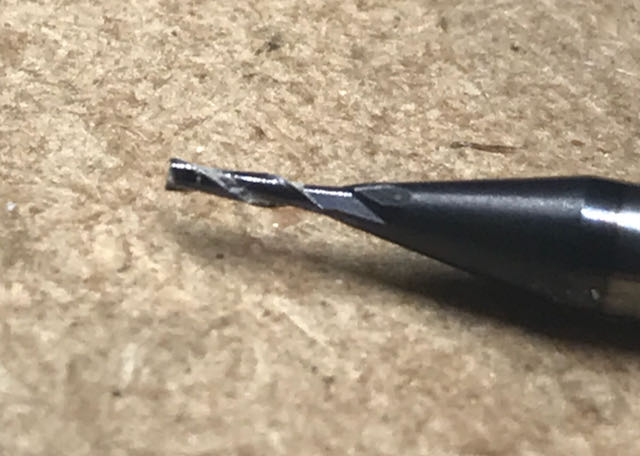
As you can see below, the two flute has finer edges.
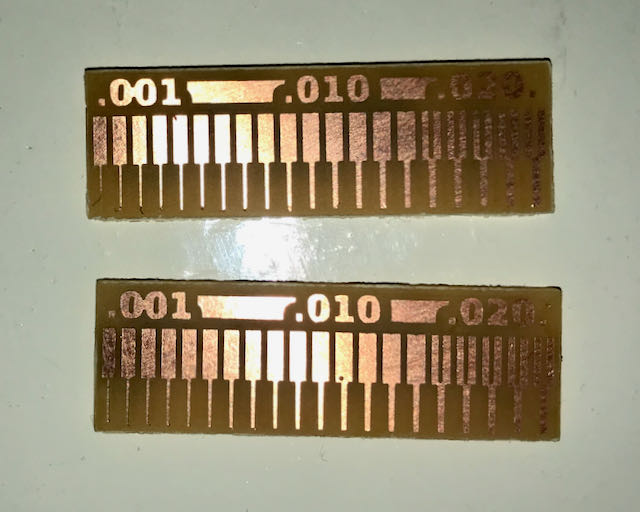
The explanation is just logical. When milling with the same rotational and traveling speed the 2 flute wil cut twice as often as thhe 1 flute milling bit.
Mistakes to learn from
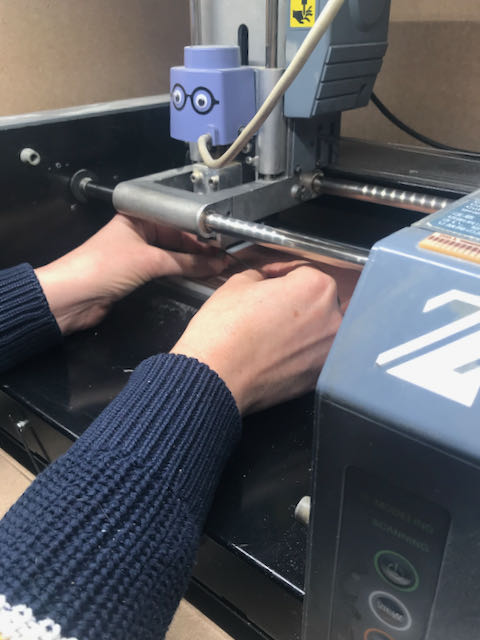
In the Z leveling two things went wrong in my case: - after leveling I touched the manual Z-axis button - the Z-level was not correctly set - the bit was broken because the board wasn’t perfectly horizontal
Z-axis button
When leveling for Z after you change the bit, you manually lower the bit to just above the surface of your board. You release the screw and lower the bit gently to the surface and tighten the screw again. My assumption was that after that it wouldn’t make a difference if I drove the Z-axis by and or by mods. Wrong! After manually moving the bit up, my traces where milled somewhere high in the air.
After setting the Z-level again I started milling. First part went right, but at the front the bit only scratched the surface. In the short footage below you can see what happened.
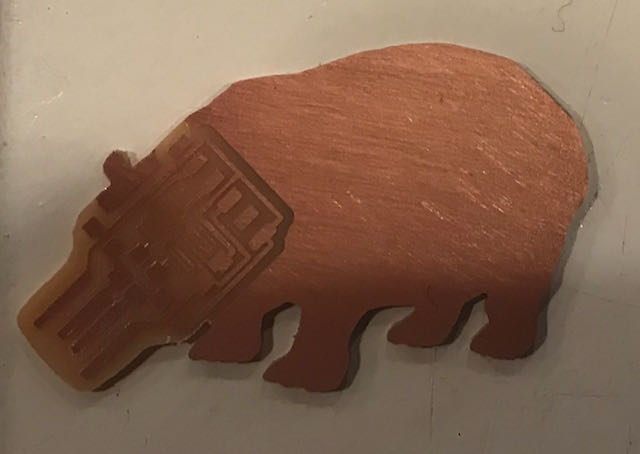
I wanted to change the outline for one of the boards and make it personal. It happens that I like hippos, so I used a hippo image to change the shape and used the nose for the USB connector. The change was easily made in GIMP by importing the image and use separate layers for the traces and the outline. This is the result.
| traces | outline |
|---|---|
 |
 |
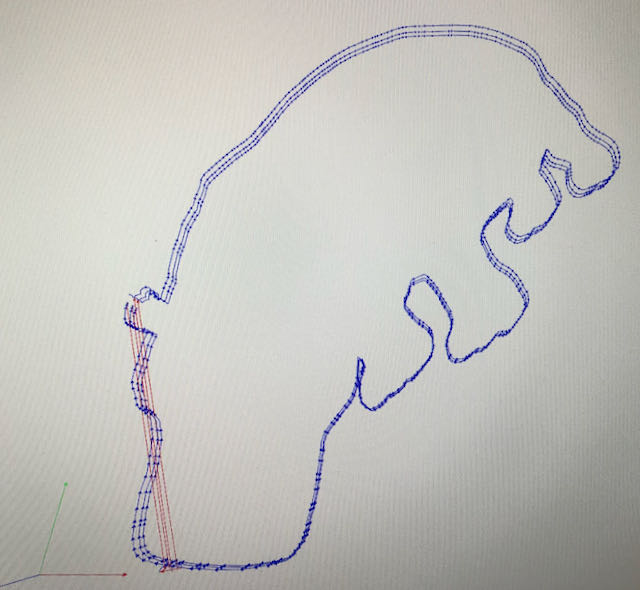
After feeding all to the mods for the Roland MDX-20 the milling could start. Here’s a picture of the toolpath I checked for the outline.
And this was the end result for my changed FT230XS board.
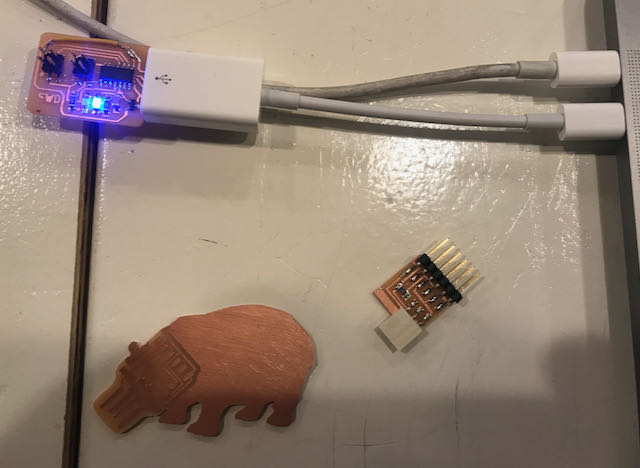
Results
Here’s the result for all boards, two of them already soldered. For the soldering I made a separate page. And for the programming and final shots of the soldered boards, you can have a look at the Hello World page
New Mistakes
Because the FTDI board didn’t go well with MacOS Big Sur, I decided to make a SAMD based programmer and had to mill this board. I was not taking good care in setting up the machine up and didn’t have a good overview of the settings to rely on. Making the mistake of milling 0,5 mm in stead of 0,05 mm costed me 2 milling bits before realising.
So that’s why I decided to make an overview of all settings of all machines for future reference on a separate page. If I have to retrieve that from within my account of what I tried to make, there’s still a big chance of making unnecessary mistakes. A clear separate overview is much better for that purpose. BTW, you can find them all here: