Moulding & Casting
Subject for week 9 is moulding and casting a 3D design. It’s mandatory to make three way mould, meaning that we should mill a positive on the ShopBot, cast a negative mould from that and use that again to make a positive end product.
Group assignment
For the group assignment we did some experiments with different materials and moulds from previous years. Togerther with Benthe I did a casting with Urebond-60. We did a bad job, first of all by not reading the datasheet careful enough. Urebond is actially an adhesive and not very suitable for casting.
But we did a nice experiment by putting it in the vacuum chamber. Urebond produces a lot of bubbles, so we tested if vacuum could extract them faster. What happened was that the amount and size of the bubbles even increased. And when the model was dry it turned out it caused also large cavities on the bottom. The explanation is that Urebond is too thick to let the bubbles migrate to the surface and because of the lowered pressure they expand. A small cup that we filled with the Urebond had some bubbles, but was far better than the vacuumed one.
Mould Design
My idea for the end product was to produce rubber tyres to fit on my balance bike. The size of them was however too big for this week, but it was a good opportunity to make a trial version.
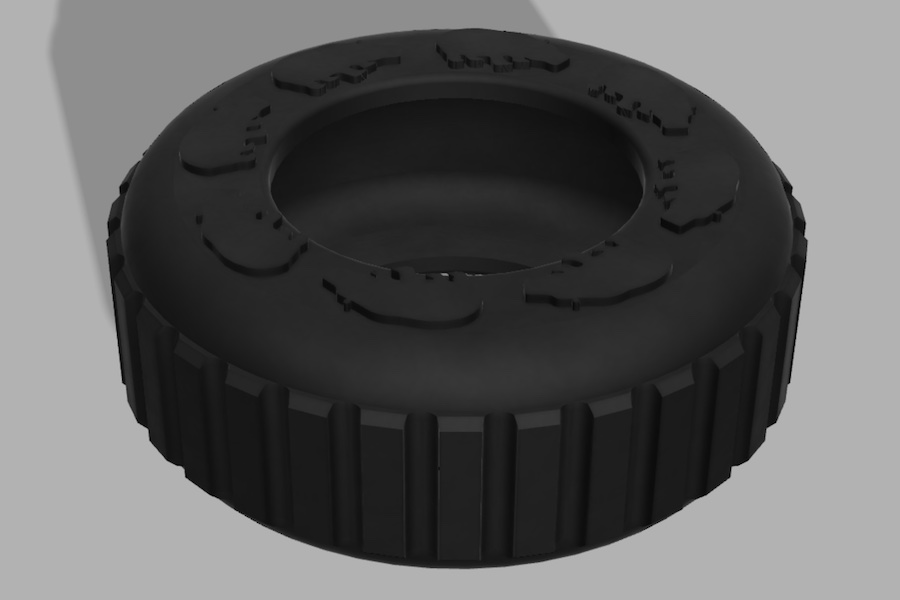
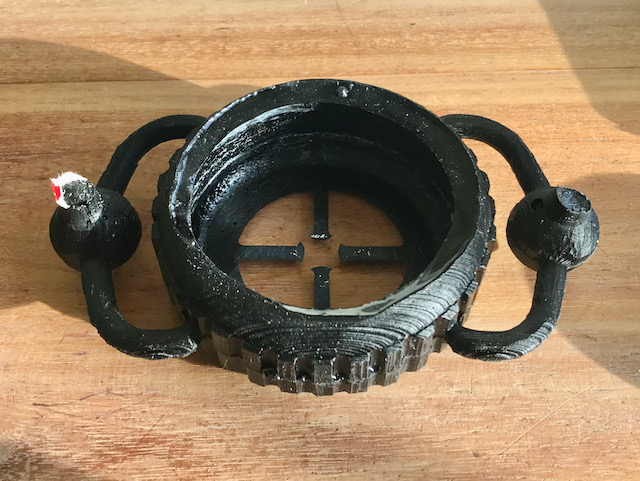
So I started to design a small tyre that would fit into the wax block of 145 x 95 x 40 mm that we were going to use. To make it big enough to work I decided to design it in such way that by making two copies from one positive, I could make a complete tyre. Just for fun I wanted some hippo figures on the side. The end result should look like the picture below.
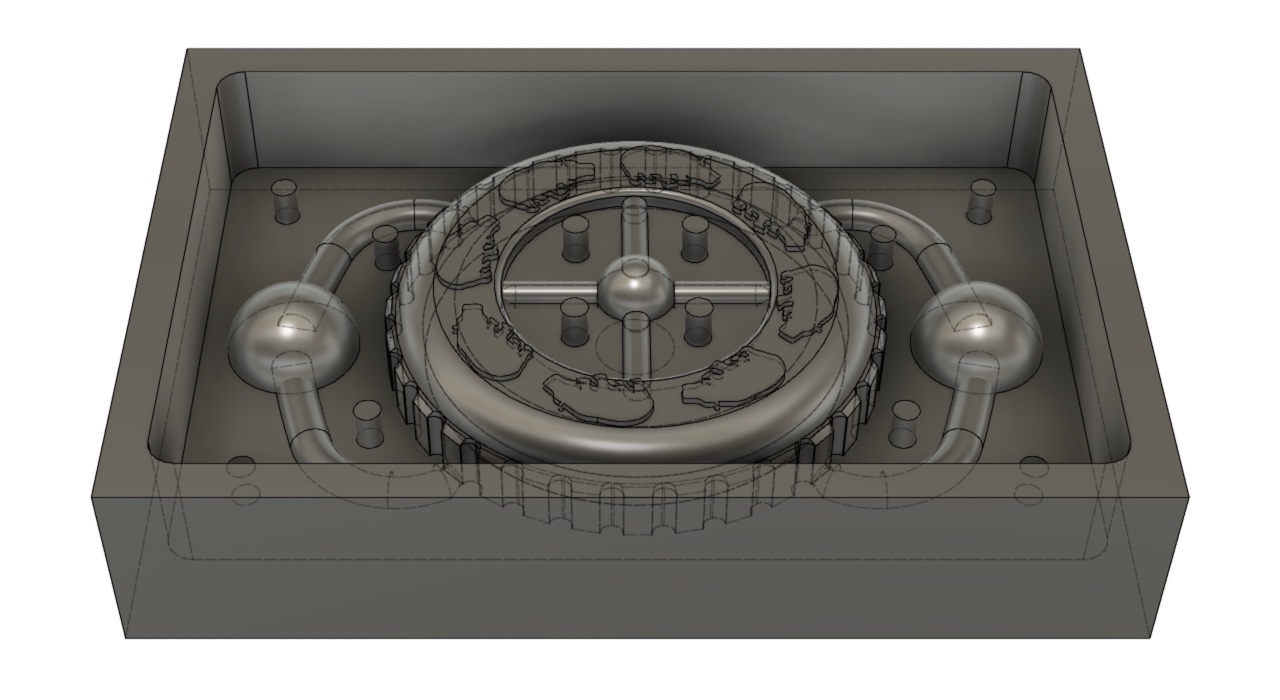
For the design of the mould itself, I turned to customary set-ups of industrial casting moulds. They usually add runners and vents to the design. I created vents on the inside from four points and ceated runners also to four points at the outside but 45° rotated. On each side the runners come together in one gate to wich I wll add a downsprue and pouring cup later. That has to be done afterwards, because this one positive mould is going to be used for both the top and the bottom mould. The result to be milled looks like this:
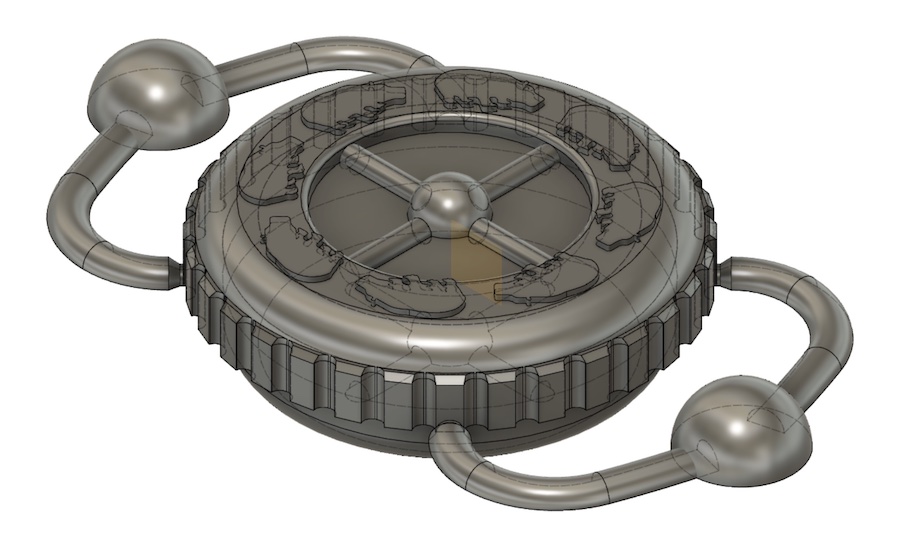
This model is just one half of the tyre and you can see below this half some disk is visible. Because the tyre has to be hollow I needed a core to insert between the top and bottom part. It’s a simple disk of ø 62 mm with a hole in the middle to connect the vents from the bottom half to the top half.
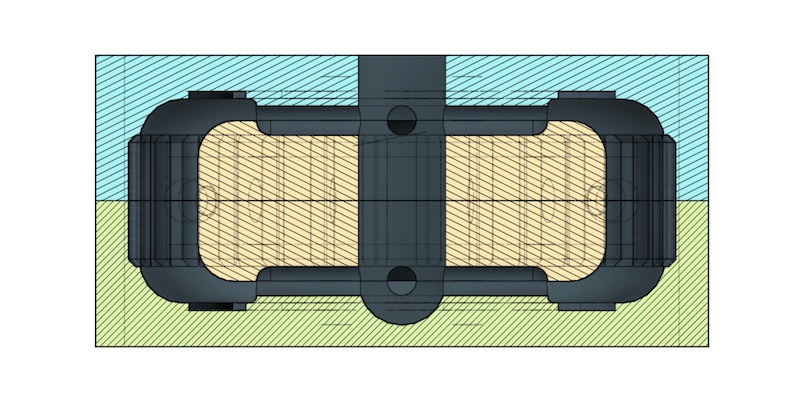
I also checked the section of the tyre shell to be sure it has a more or less uniforme thickness.
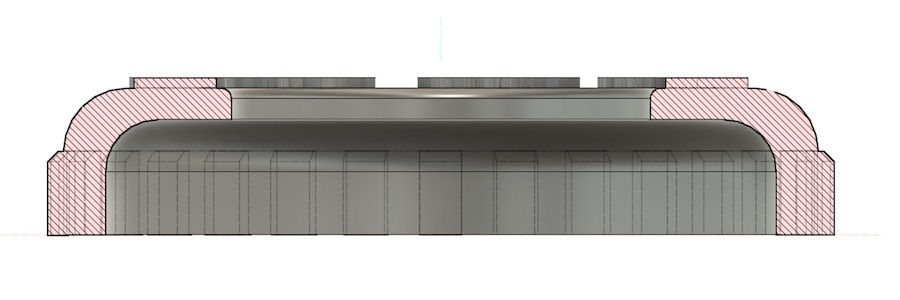
Because this positive model is used as a mould I added also side walls to it. And because it’s used as both the bottom and the top I added some notches to align them. I will make some retaining pins later to fit in the holes that result in the mould from those notches. The final model looks like this:
After finishing my desig I was able to set up the toolpath. See the mechanical section for that:
The files for the mould are downloadable here:
Material Selection
The information from both the fabacademy site and from Henk was too much to make up ones mind right away. There is an abundance of materials and browsing the datatsheets is unworkable for selection purposes. In a quick guess I asked Henk to arrange Smooth-On KX Flex 60 and some black pigment for the tyre. Later I discovered a very handy comparison page on the Smoot-On website:
Some requirements I had to dweal with are:
- Mould material and tyre material should not bond
- The tyre material should have a low viscosity, becuase it’s a model with thin walls and tiny features
- The tyre material should be able to be coloured black
- It’s a tyre, so it should be strong material
- It has to fit on the wooden wheel of the balance bike, so it should be flexible as well
My inclination was at first to use a rigid mould material, because the tyre is flexible. But that would make it a bit difficult to release it from the positive milled mould. So in the end I turned to standard Oomoo 25, that has a wide range of apploications and advantages. The tyre material is going to be KX Flex 60, which is a Urethane rubber with a low viscosity and high strength and being a Urethane, it will not stick to the Oomoo silicone rubber of the mould. Biggest question is if it’s flexible enough to remove it from the core. But that’s what a try out is for, isn’t it.
Making the Mould
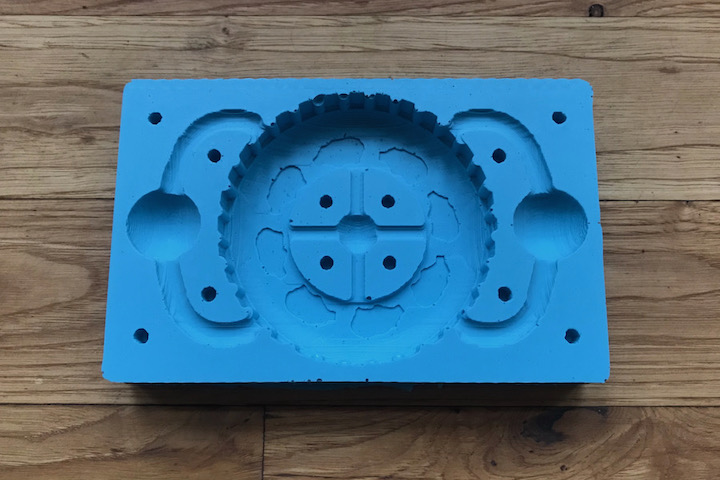
From this positive I had to cast the negative mould two times, one for the top half and one for the bottom half. The result with Oomoo was quite good with all details visible including holes for the retaining pins. For the volume I put water into the wax model, measured it and poured half of that with a bit extra into a paper cup. The A and B part of Oomoo have to be used in equal volumes, so I used two other cups to be able to compare it with the water height.
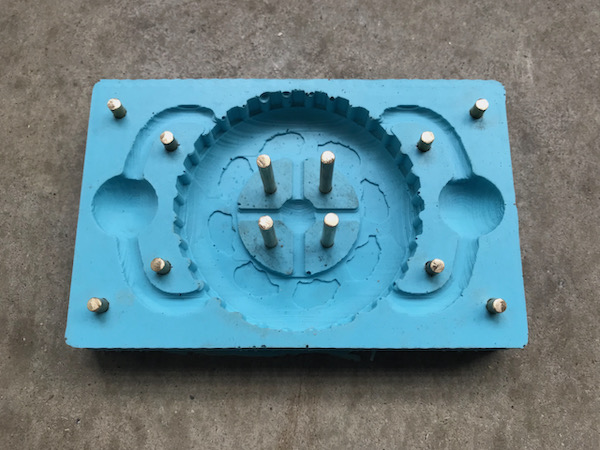
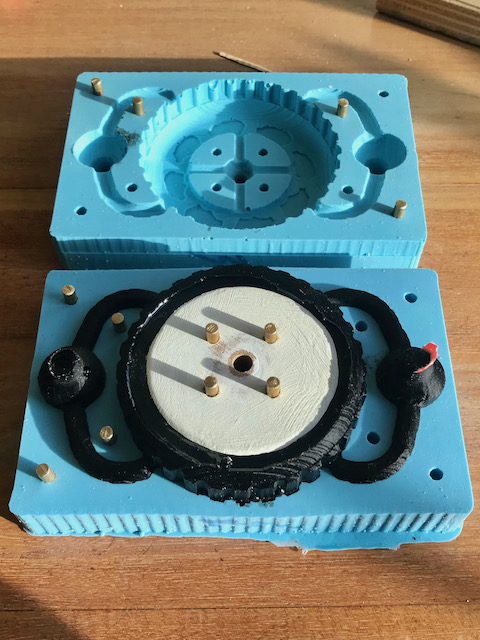
Then I made the retaining pins and the core. The retaining pins are simply made from a round bar of brass I had available in my workshop and made them in length roughly around 0.1 mm shorter than the required length. Notice the 4 long pins in the centre where the core has to be placed.
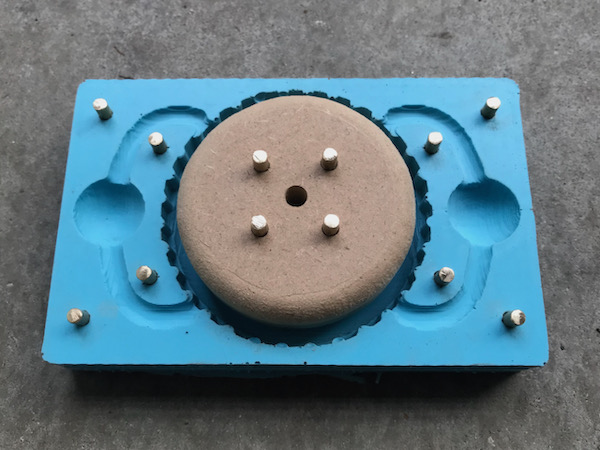
The core was made from MDF board of 22 mm. If I had the time I could have milled it on the CNC also, but using my drilling machine and my table saw was quicker and accurate enough. Risk of using MDF is that it’s will stick to the rubber. To prevent that I will paint it. But I deliberately used MDF and not e.g. PMMA, because The core might be too big to get out of the tyre. If the rubber end product is not flexible enough I can just cut the core to pieces to get it out.
| mould with retaining pins | mould with pins and core |
|---|---|
 |
 |
Casting the End Product
For the volume of the end product I took the volumes of the relevant parts from the Fusion design. The total volume of tyre, vents, runners and gates is 36 ml. I will need some extra for the parts that are not in the model: the connecting centre channel of the vents, the downsprue and the pouring cup. They can make up quite some vlume, so to be on the safe side, I made 100 ml of KX Flex 60. Tyres should be black, so I added also black pigment to part B (as prescribed) before mixing. BTW: the core was sprayed with release agent, the silicone wasn’t.
To be able to cast the rubber in two hole simultaneously I made 2 paper funnels to function as downsprue and pouring cup. I used a wooden base and a wooden top with holes for pouring and venting and pressed them lightly together with two bar clamps. Poured the rubber in very quickly, it has only 2,5 min pot life and then I had to wait for 24 hours.
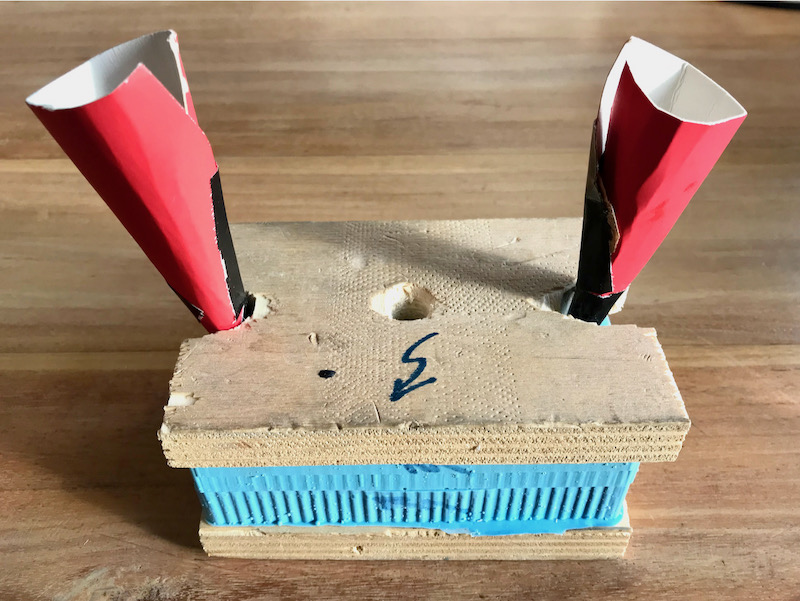
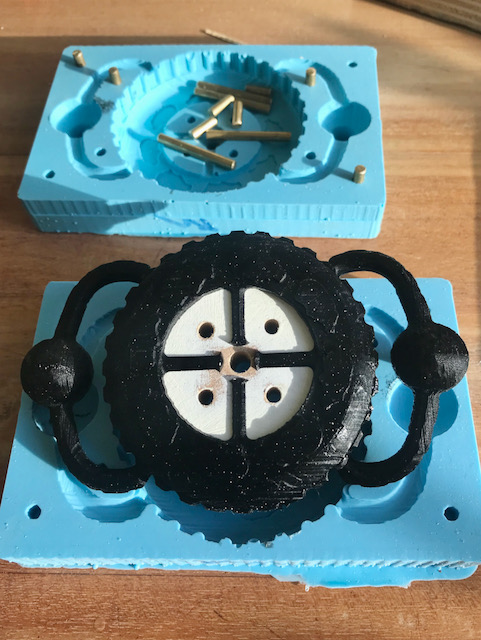
Because I was a bit impatient, I opened the mould the following morning, which is a bit too early, but it had been curing on the heating radiator for some time, so I didn’t expect problems. When I poured the rubber in, the downflow in the sprue stopped quite early, so I expected to find only a little blob inside. But it turned out better than I expected. The bottom was complete and only the side of the tyre in the top mould was missing.
| opening the mould | removing tyre and core |
|---|---|
 |
 |
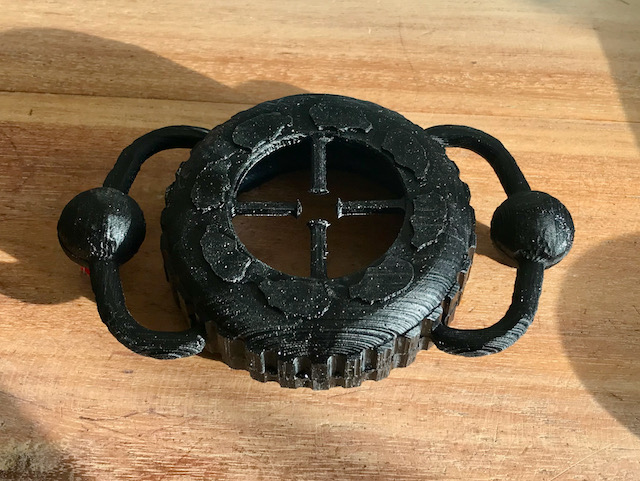
| result bottom side | result top side |
 |
 |
The result was not a good product, but as a test for a final version at the scale of the balance bike it was a success. It made me learn how to approach this if I’m going to persue the idea in the wild card week:
- The viscosity is raising quickly after mixing and to help the flow into the mould I will use in the final version dosing syringes.
- Because the final version is larger, I will ask someone to help me inject the compound, so it will be done quicker.
- The runners ended in a neck, because I wanted it to be smaller than the profile of the tyre, but that probably also prevented a good inflow of the rubber. I will make the dimensions of the runner a bit bigger.
- I needed a core to cast this product as a tyre. For the balance bike I realsied that I could just use the wheel itself as a core. When I don’t use release agent it probably is also glued firmly enough to the wheel.
Wild Card Group Work
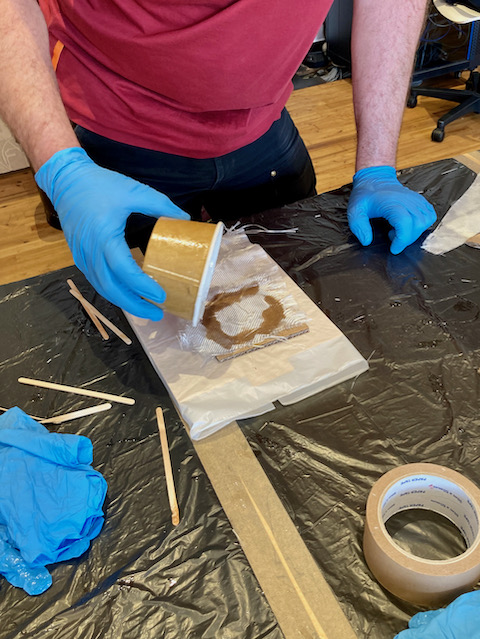
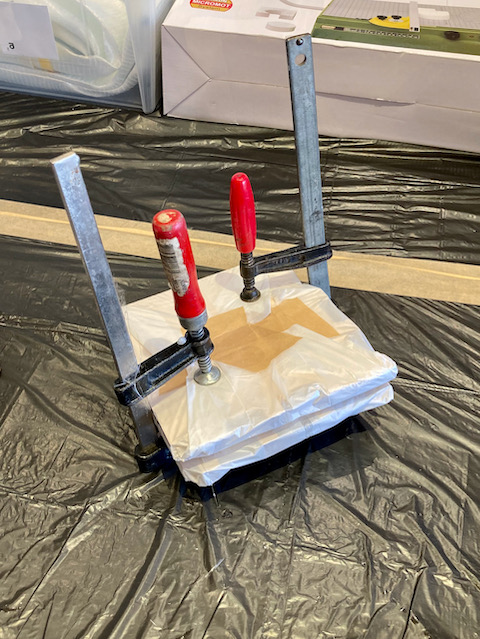
For the wild card week we started with a group assignment to investigate composite materials. Together with Ben I used Tarbender epoxy raisin to create some shapes. Below you can find some pictures. Most interesting part was to check if a clamped version of a cardboard plate would be any different from an un-clamped one.
| pouring raisin | clamping cardboard |
|---|---|
 |
 |
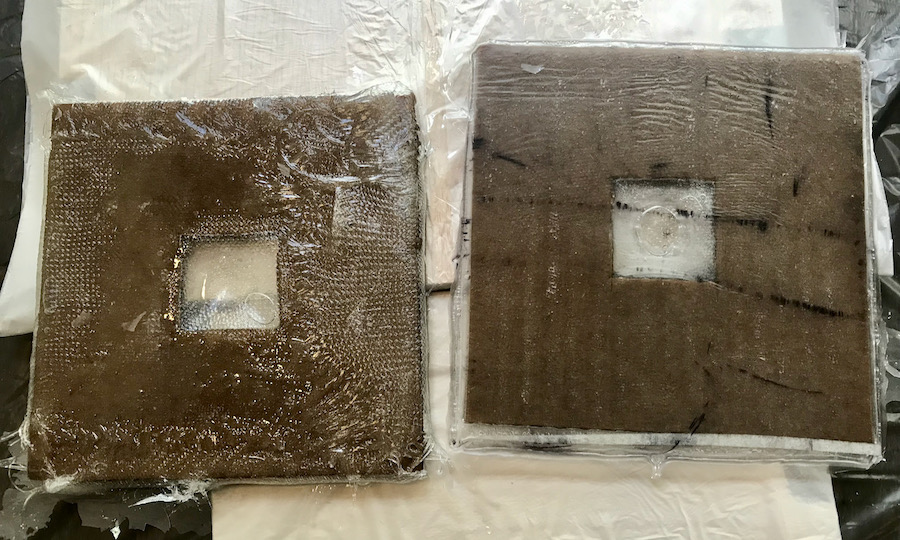
It turns out that the strenght seems not very different, but the clamped version does look better.
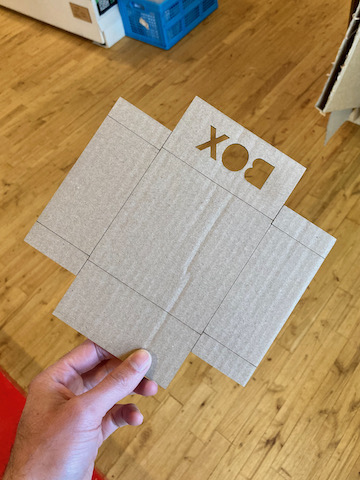
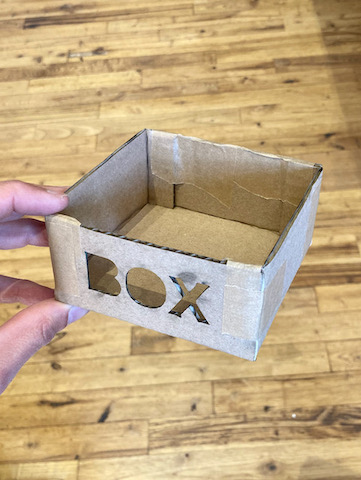
We also tried a box version.
| flat box | folded box | finished box |
|---|---|---|
 |
 |
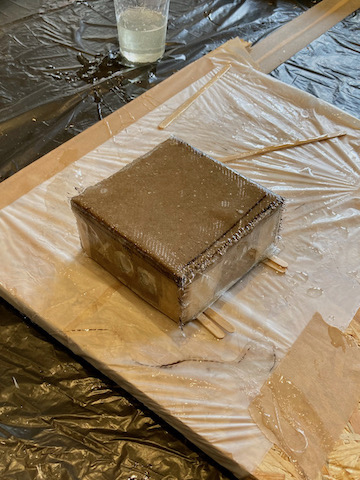 |
Later I found out that Tarbender isn’t the right material to make composite materials. Check my documentation on the Balance Bike page to read all about it.