10. Molding and casting
Instruction
group assignment:
- review the safety data sheets for each of your molding and casting materials,
- then make and compare test casts with each of them
- extra credit: try other molding and casting processes
individual assignment:
- design a mold around the stock and tooling that you’ll be using,
- mill it (rough cut + three-axis finish cut),
- and use it to cast parts
- extra credit: use more then two mold parts
What I did in this week
- Review the safety data sheets for molding and casting →Group Assignment
- test casts →Group Assignment
- Design data in Fusion 360 →in this page
- Molding and Casting →in this page
Design data in Fusion360
What I want to make by molding and casting
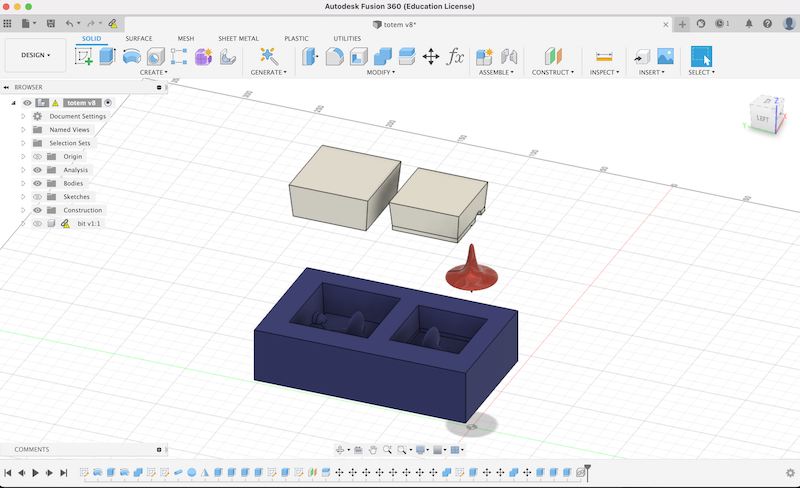
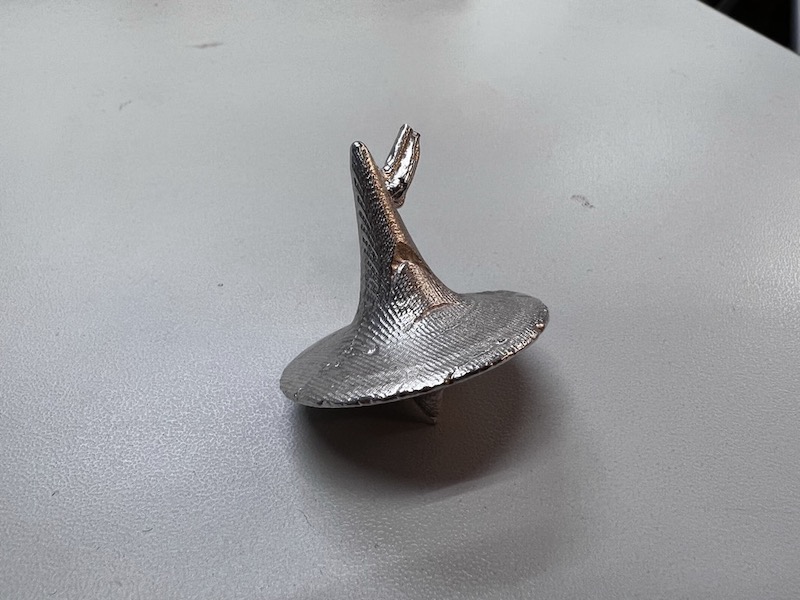
I wanted to make the totem from the movie Inception which is one of my most favorite movies in the world.

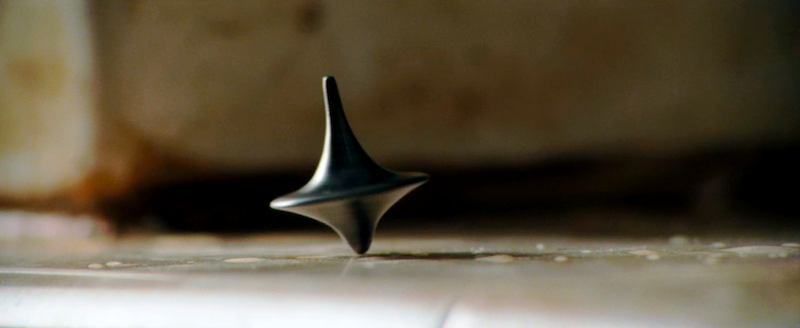
The workflow on this week is as follows: you mill out your design from the block of wax, then you pour a rubber substance into the wax to make a mold, then finally you pour a third substance into your rubber mold to make your object.
Design Process in Fusion 360
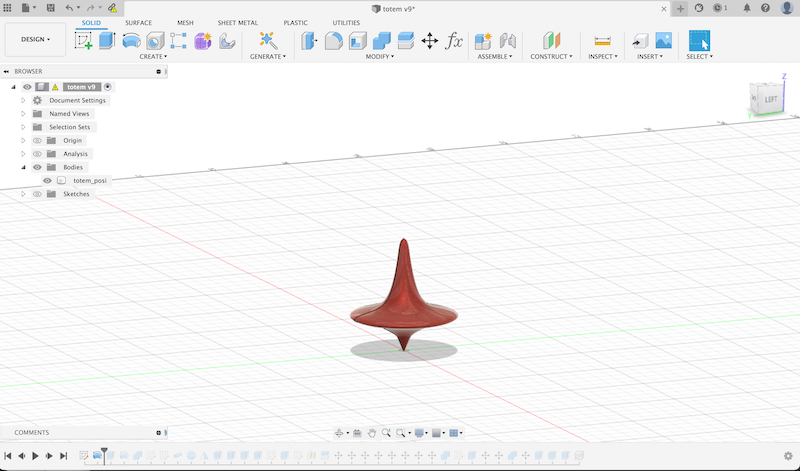
- design posi which is final parts
-
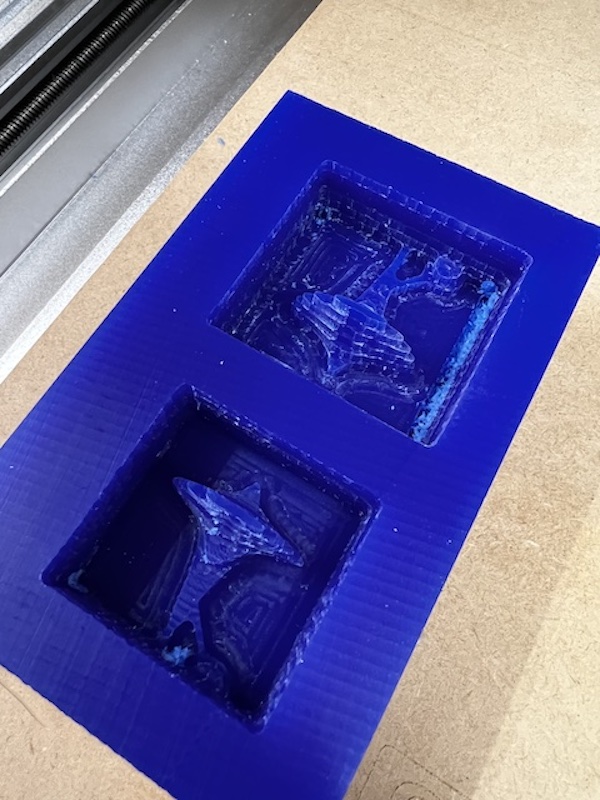
Create nega parts which can be fit to the final parts. After that, create pouring spout and air ventilation for pouring the material. Nesting for assembling 2 parts is created.
-
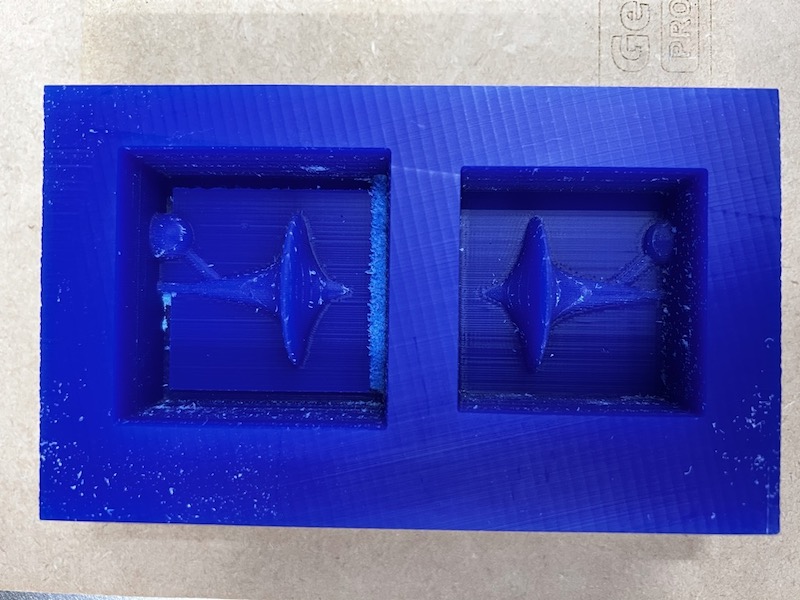
It was careful for the endmill not to intervene the object in a milling process. Actually, it is careated frustum of a square pyramid instead of rectangular in order not to intervene the endmill.
-
create the block of WAX which can be fit to the nega parts
-
design process is here
fusion data is here
- final model
https://gmail2336817.autodesk360.com/g/shares/SH9285eQTcf875d3c539359aaa1123c15606
-
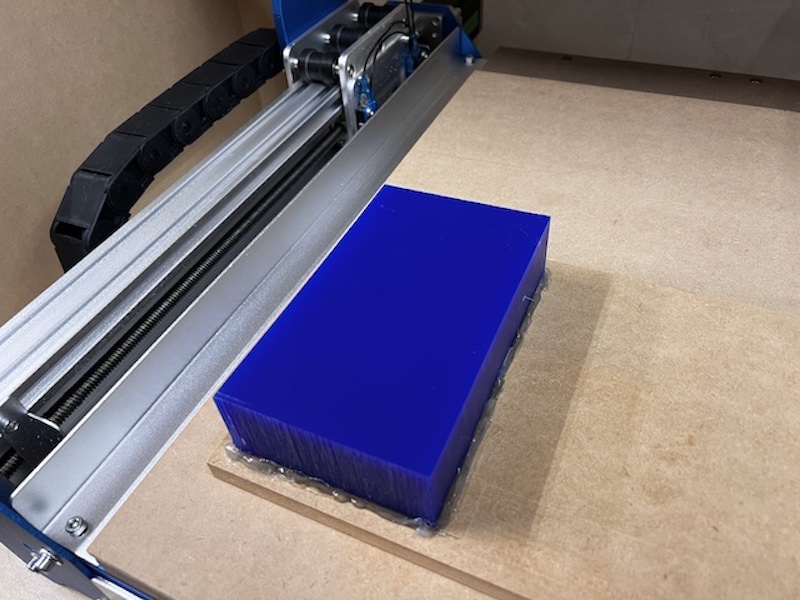
take measure of Machinable wax
- catalog size: 152mm x 92mm x 39mm
- real size is smaller
-
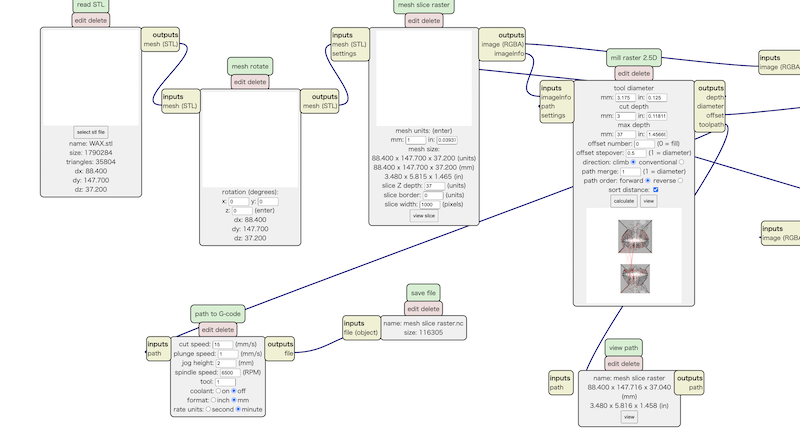
save the body of WAX as mesh to .stl
Milling TIme!
Rough cut
-
open the mods to select the file of the WAX .nc data
-
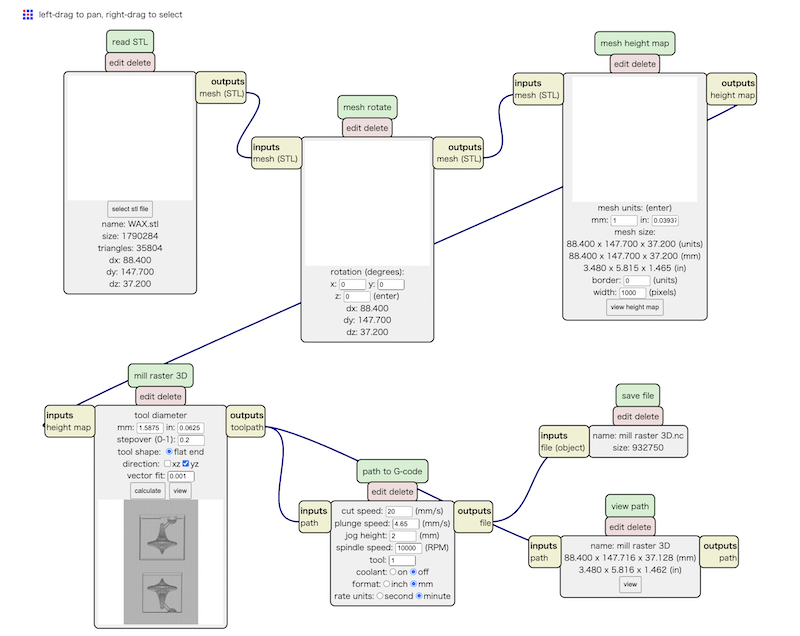
2.5D setting is here
- edit the path to G-code
- set the cut speed
- culculate → nc file downloaded
-
check the preview site by loading the above .nc file.
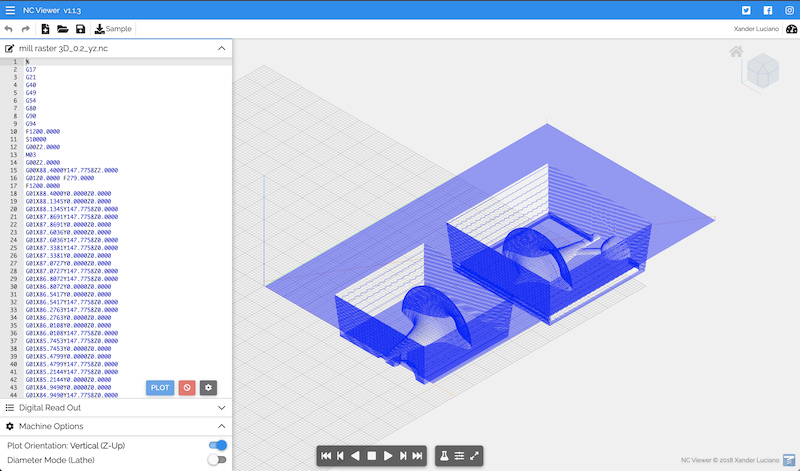
move on to the step of Gsender
- Determine the cut parameters, checking the milling time
- tool diamater 3.175 mm
- cut depth 3mm
- max depth 37mm
- cut speed 15 mm/s
- plunge speed 1mm/s
- jog height 2mm
- spindle speed 6500 RPM
- set and calibrate the position of xyz
- load the rough.nc data to Genmitsu
-
set the WAX on the milling position
-
finish to mill in 40min
-
done
Finish cutへ
-
setting the mods
-
Determine the cut parameters, checking the milling time
- tool diamater 1.5875 mm
- stepover 0.2
- direction yz only
- cut speed 20 mm/s
- plunge speed 4.65mm/s
- jog height 2mm
- spindle speed 10000 RPM
- Load the finish cut .nc data to Gsender
- Milling and finish to mill in 45min-1h
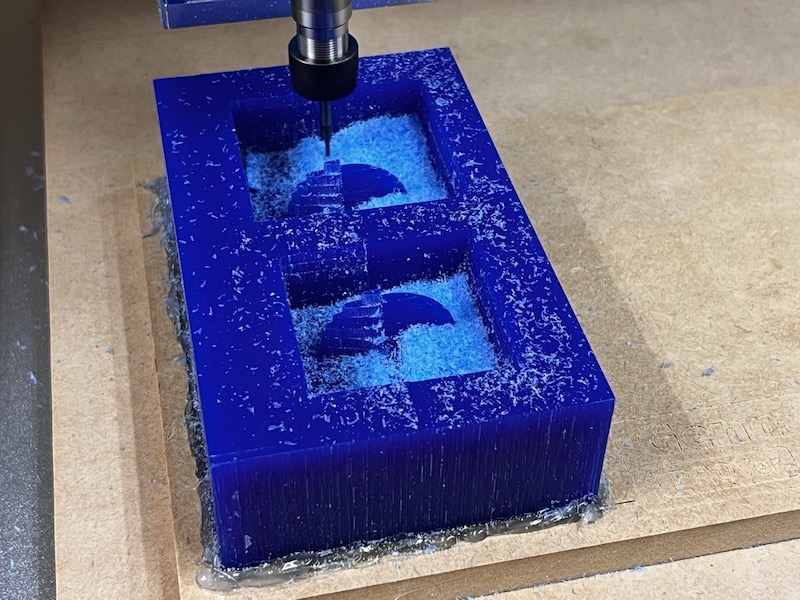
- done
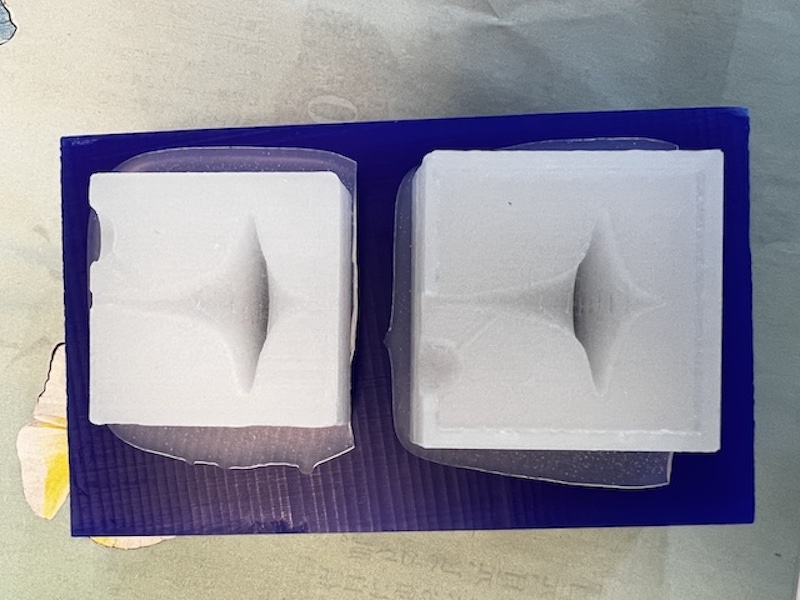
Casting Silicone mold
- measure the volume of silicon in fusion360
- bigger nega parts:58.99 ml
- smaller nega parts:43.45 ml
- specific gravity 1.08 g/cc
- estimated total weight of substances is 112g
-
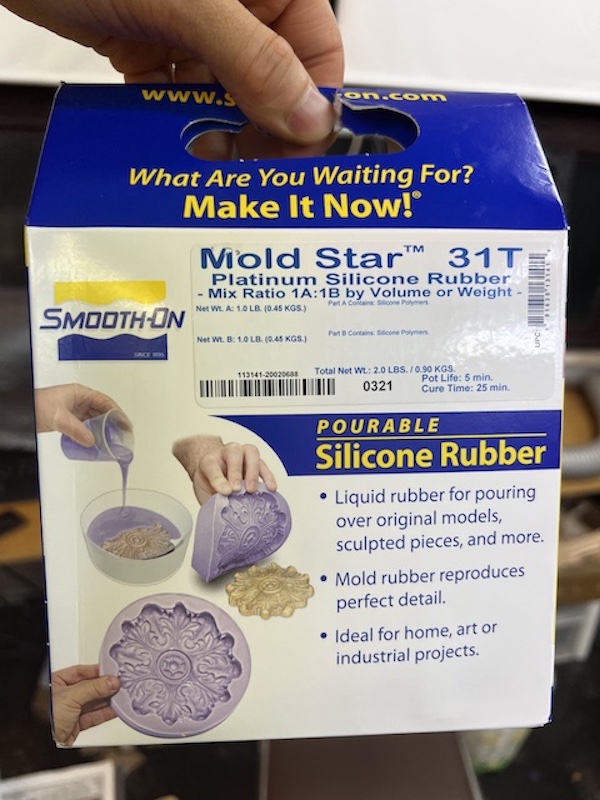
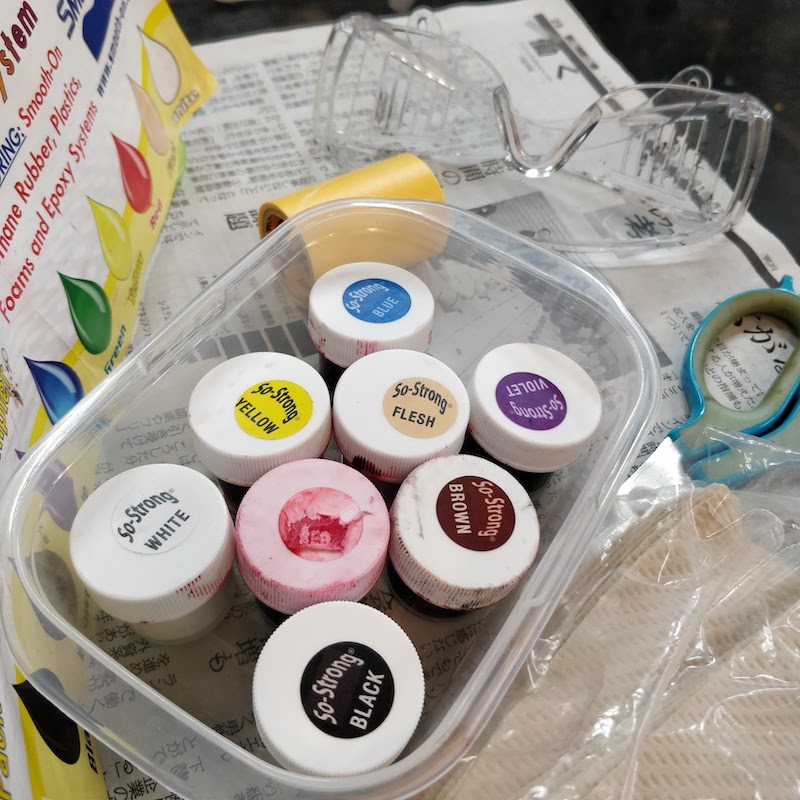
the substance is below. safety check is written in group assignment page
-
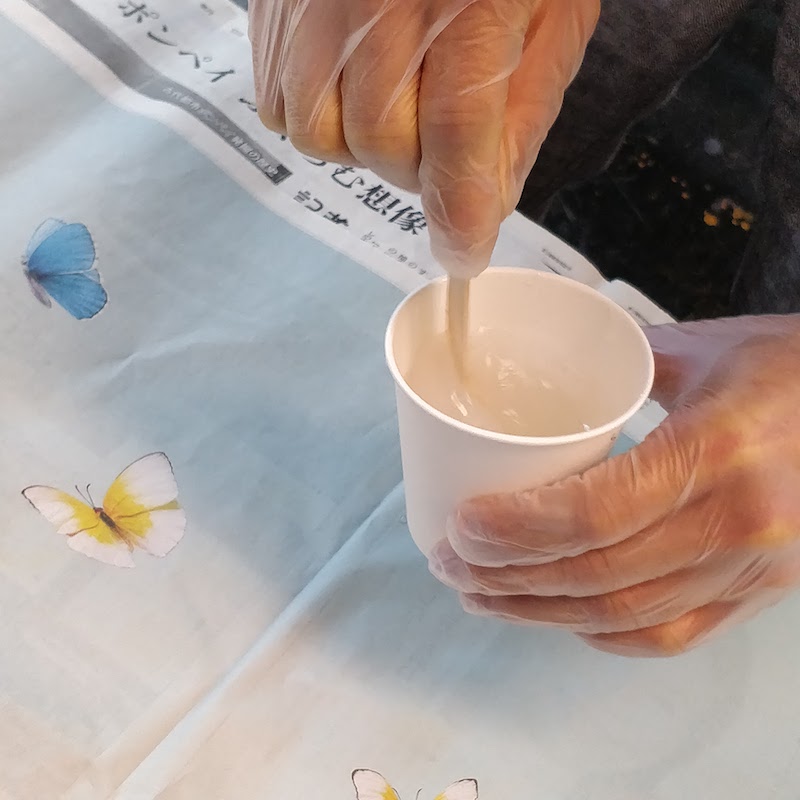
Measure 60g each of A and B. Wear gloves and protective glasses. Ensure good ventilation. Be careful not to touch here and there with hands that have been touched.

-
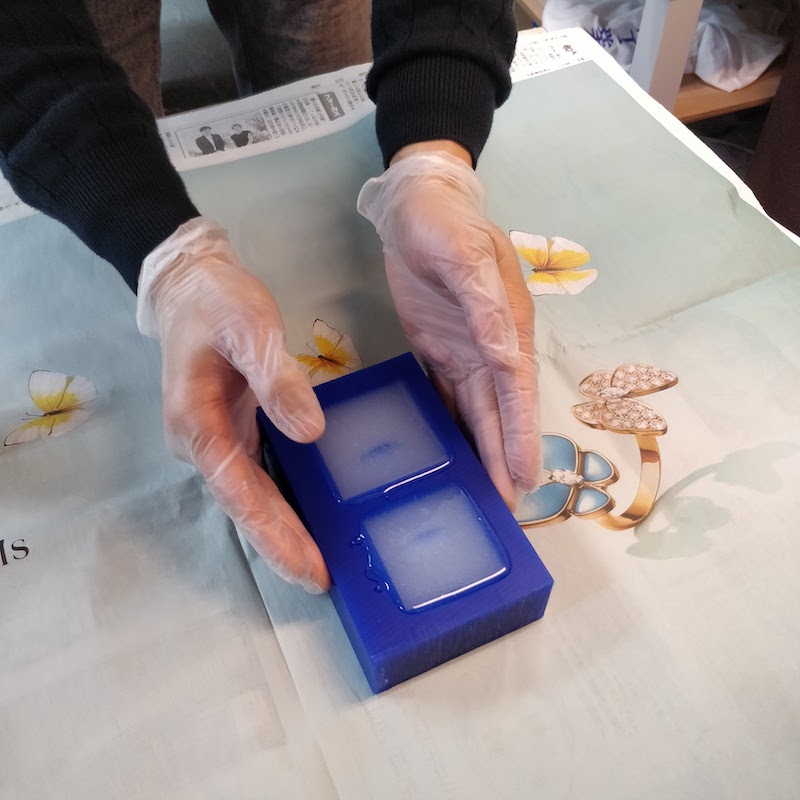
Since pot life is 5 min, mix and pour within 5 min. After mixing, pour the mixture into the WAX from the top.
-
I waited for more than 45 minutes because the cure time is 23 degrees and 25 minutes, and today it is 18 degrees.
-
fixed
-
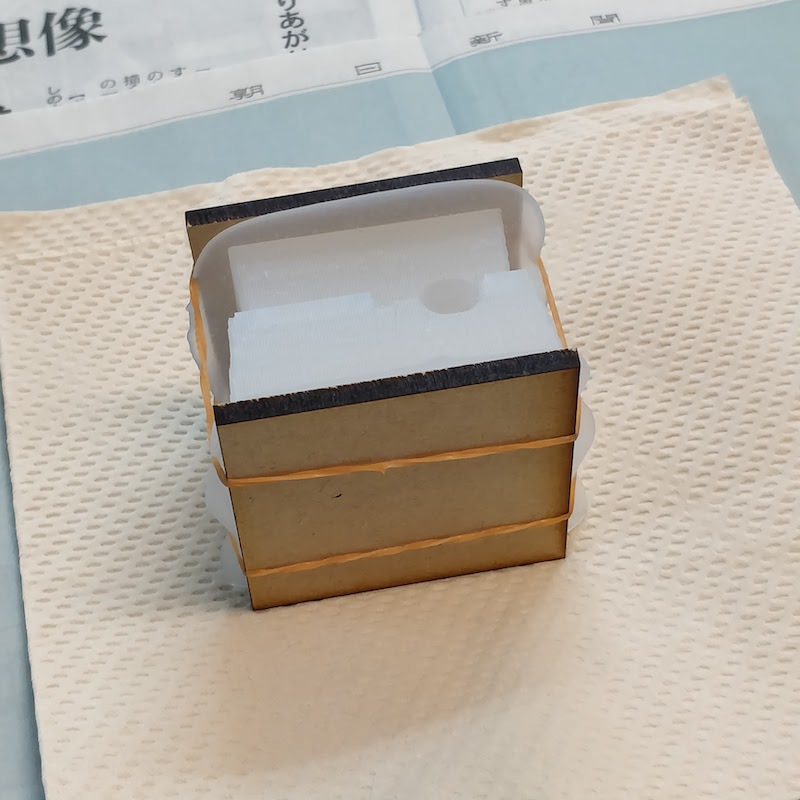
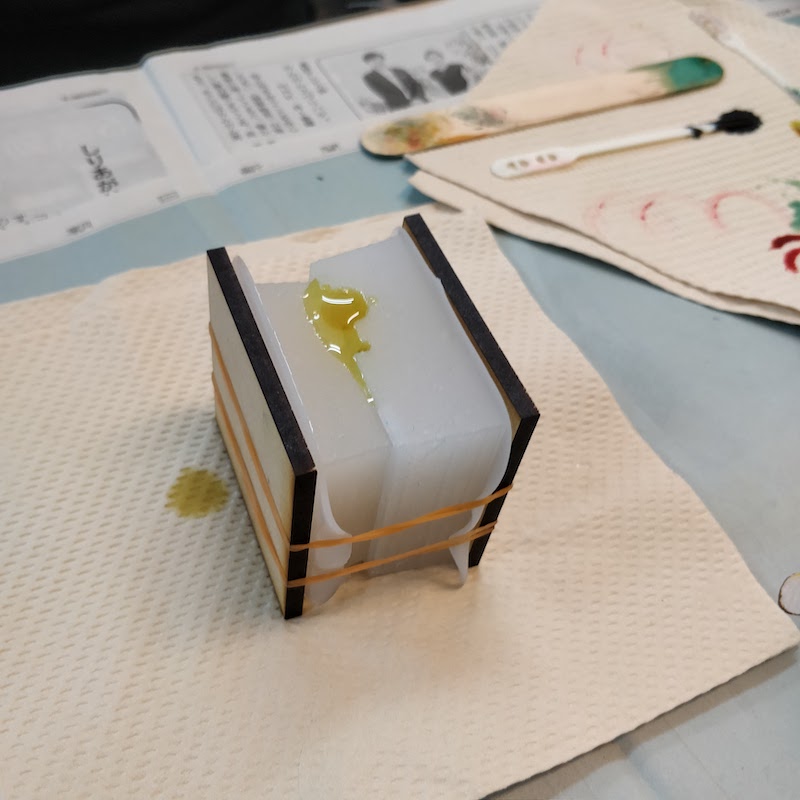
When silicone is ready, sandwich it between and MDF and apply rubber bands.
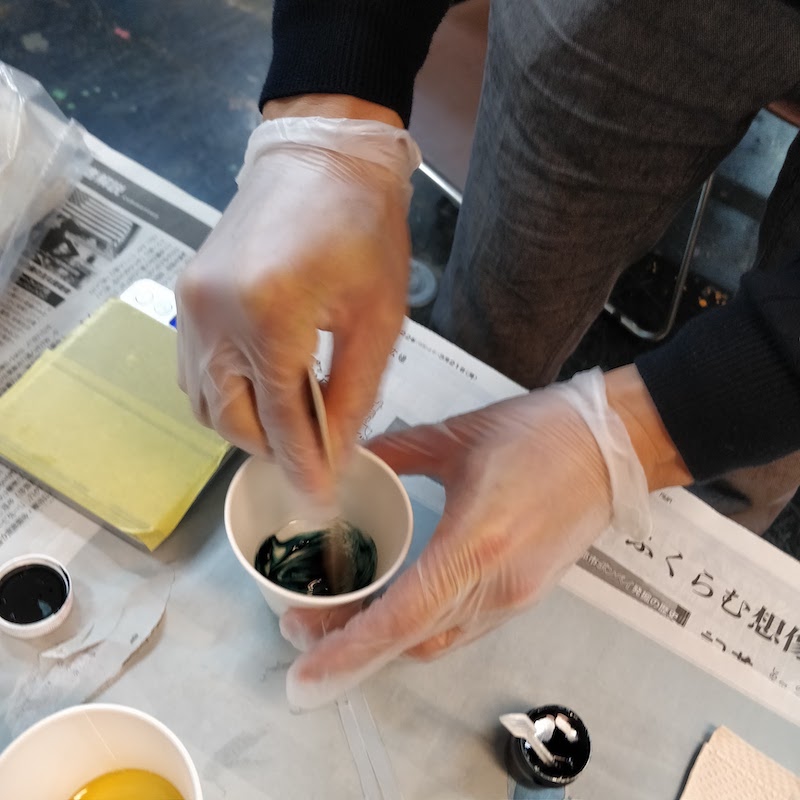
Casiting Trial1: Smooth Cast 320
- the pouring substance is Urethane resin: Smooth-Cast™ 320
- Weight 100A:90B
-
Mix A and B, colored with green So Strong
-
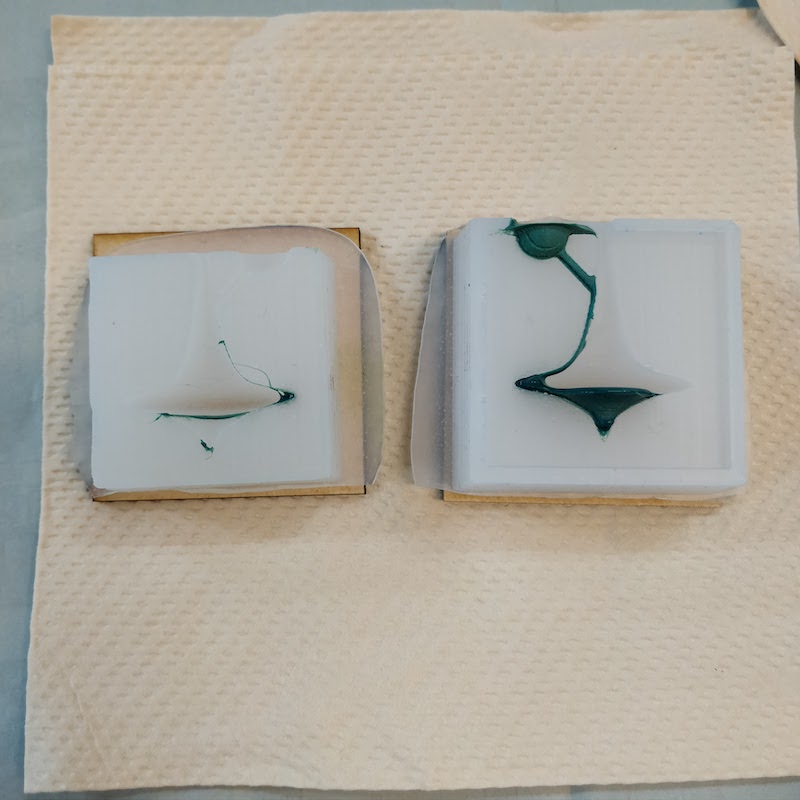
I tried to pour quickly, but the pipe was too thin and would not go in.
-
As a result, only about a quarter of the planned amount went in.
Casting Trial 2 : Retry the Smooth Cast 320
-
To solve the slow pouring problem, we now operate on the pipe with a cutter to spread it out.
-
Mix quickly and pour quickly.
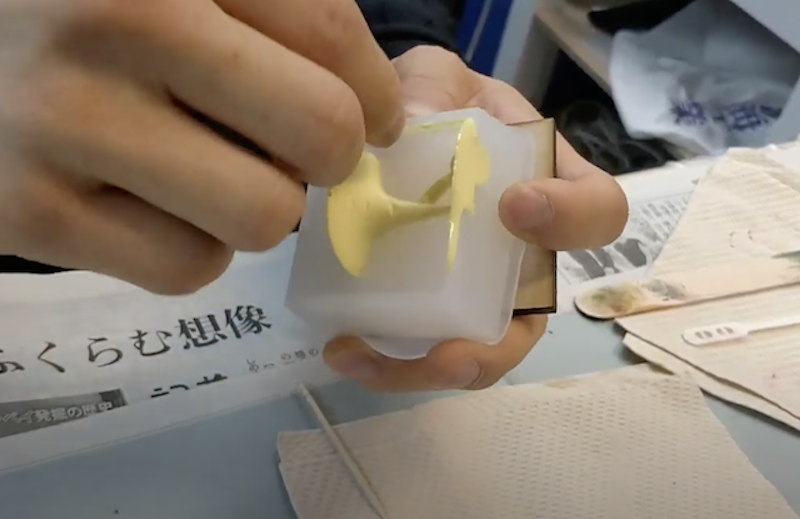
- Mix A and B. Put in yellow So Strong and color it.
- This time I was able to get all the liquid in
-
done
CastingTrial 3 : Metal
- the pouring substanve :
- Bismuth Based Low melting point alloy bullion : Sn + Bi
- melting point : 138 °C
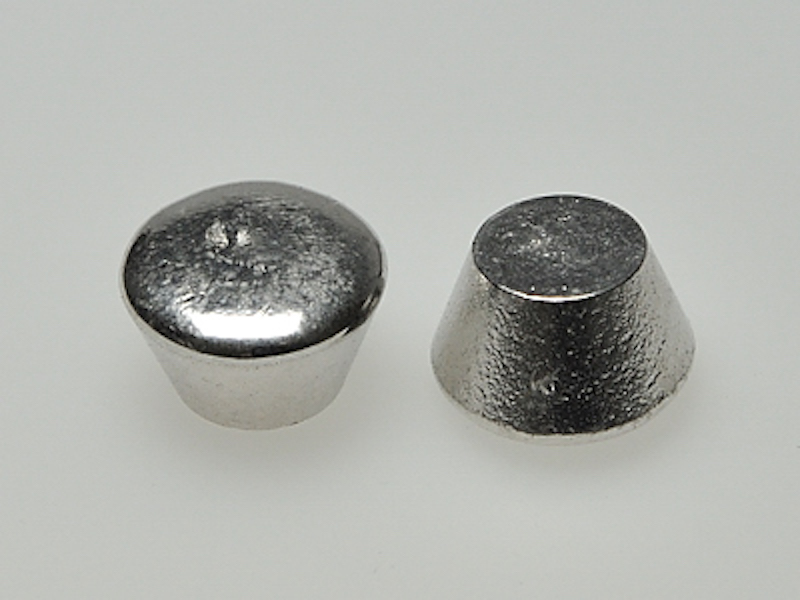
- heating the metal to be liquid and pouring
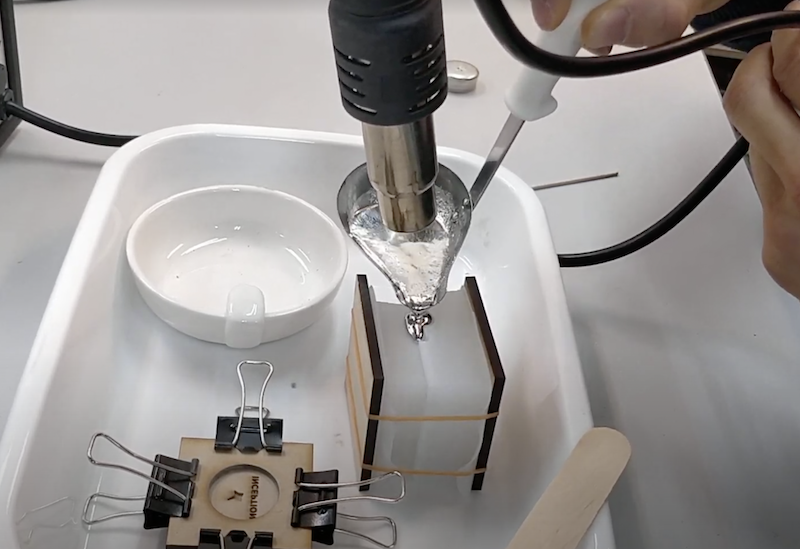
-
waiting to be cold
-
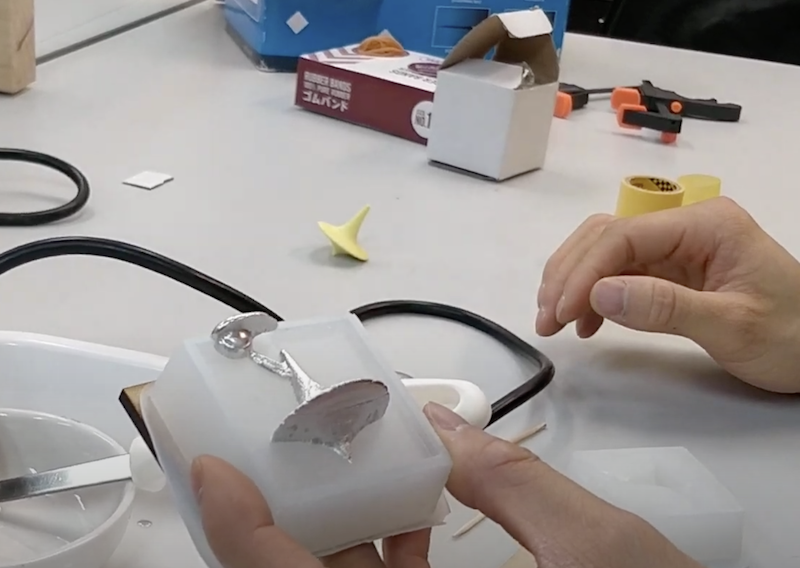
done
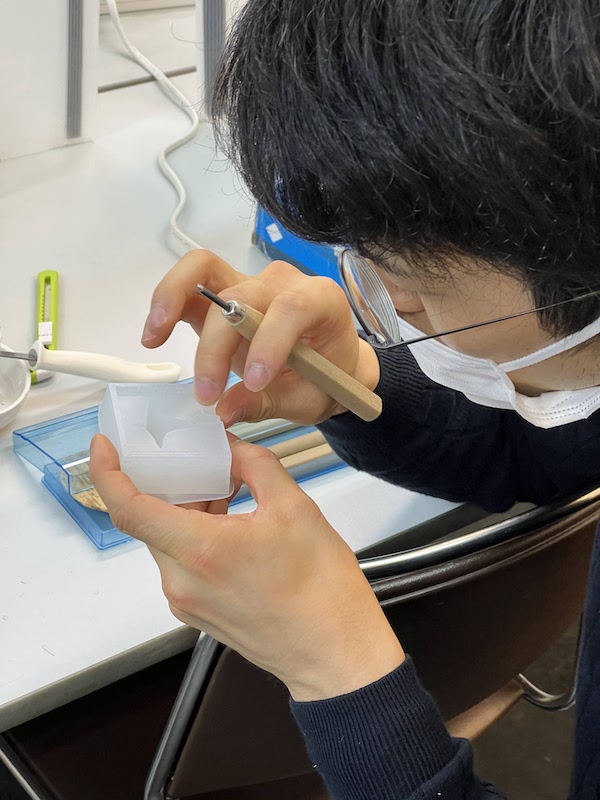
- cut off the extra parts and sandering
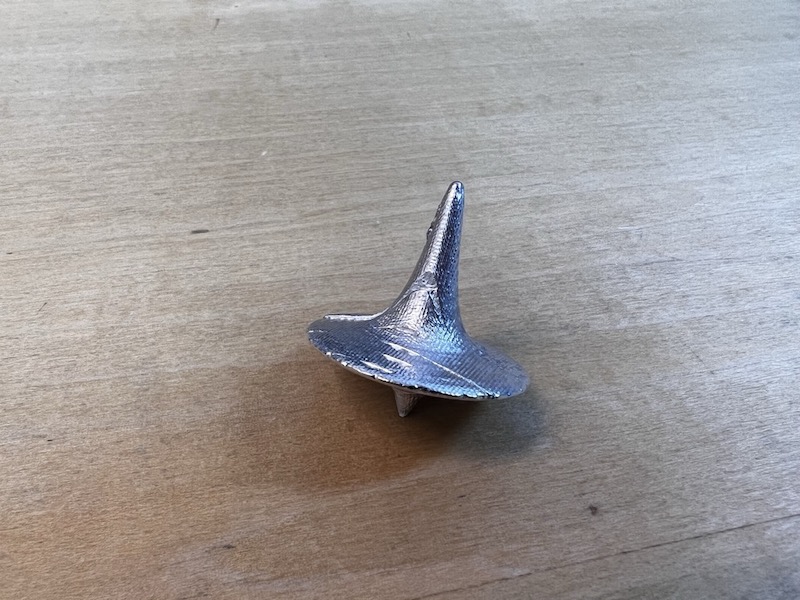
-
finishing
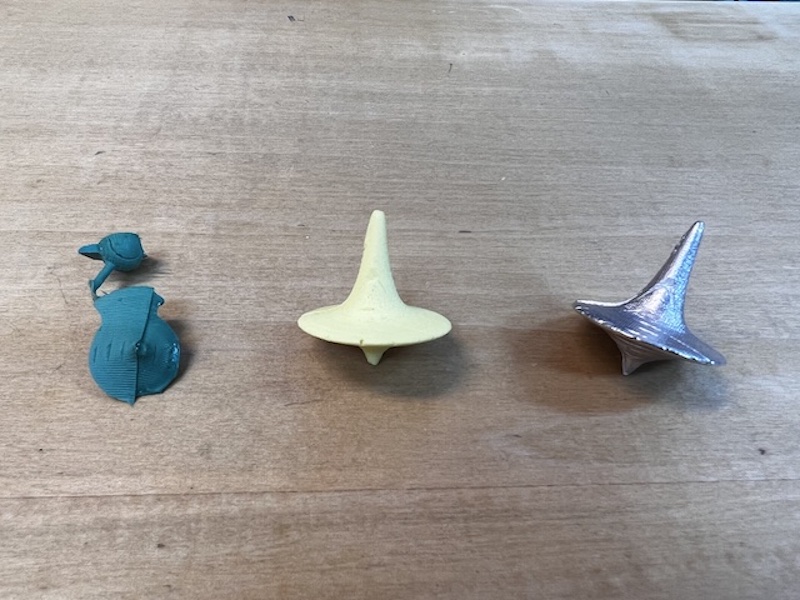
-
spinning the totem to chech whether this world is in dream or not…
movie
What I learned in this week
group assignment and individual assignment
- Complex three-dimensional objects can be created by making molds.
- The same mold can be used to create shapes in a variety of materials
- This week is very enjoyable to make something new :)
file
Acknowledgement
Mr.Tamiya and Ms.Kamei as supportive instructors in Fablab Kannai
and
http://fab.cba.mit.edu/classes/863.18/EECS/people/zhang/portfolio/week8/index.html
and You!