3. Computer Aided design
Introduction
Model (raster, vector, 2D, 3D, render, animate, simulate, …) a possible final project, compress your images and videos, and post a description with your design files on your class page
My Work in Week2
-
2D Modeling Tool Tutorial
-
Vector : inkscape
-
Vector : illustrator
-
Raster : gimp
-
3D Modeling Tool tutorial
-
Model a possible final project
I have used Illustrator a few times before but it is first time for me to use the other tools. So, I tried to use very basic function, checked their feature and utilize that to create stuff mainly related in my project.
2D Modeling tool
Vector vs Raster
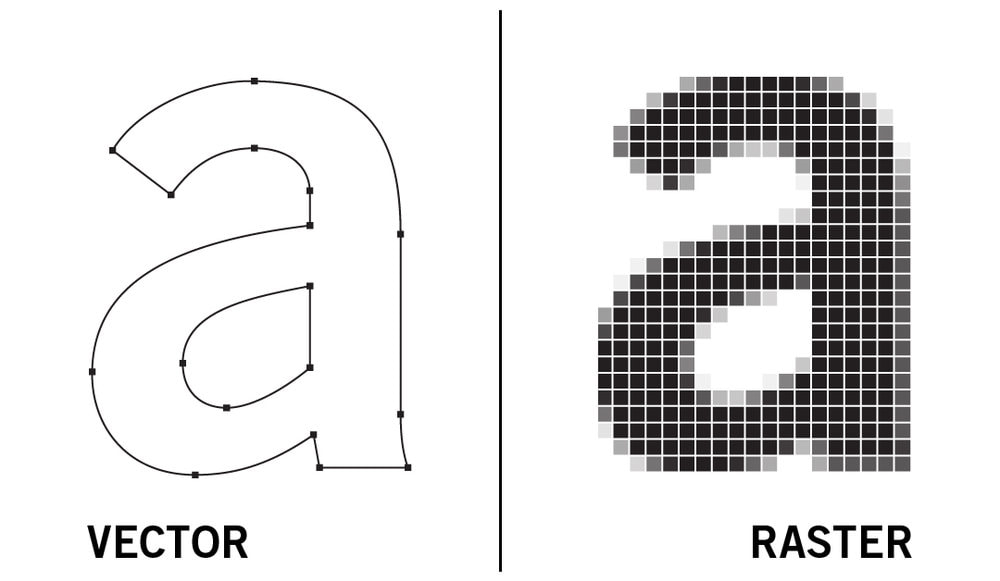
image: source
–
| Vector | Raster | |
|---|---|---|
| comprise of | multiple reference of points and curves | pixels |
| scalability | scalable with quality loss | loses quality when scaled |
| convertibility | convertible to raster | not convertible to vector |
| file format | eps, ai, svg, pdf | bmp, jpg, gif, png |
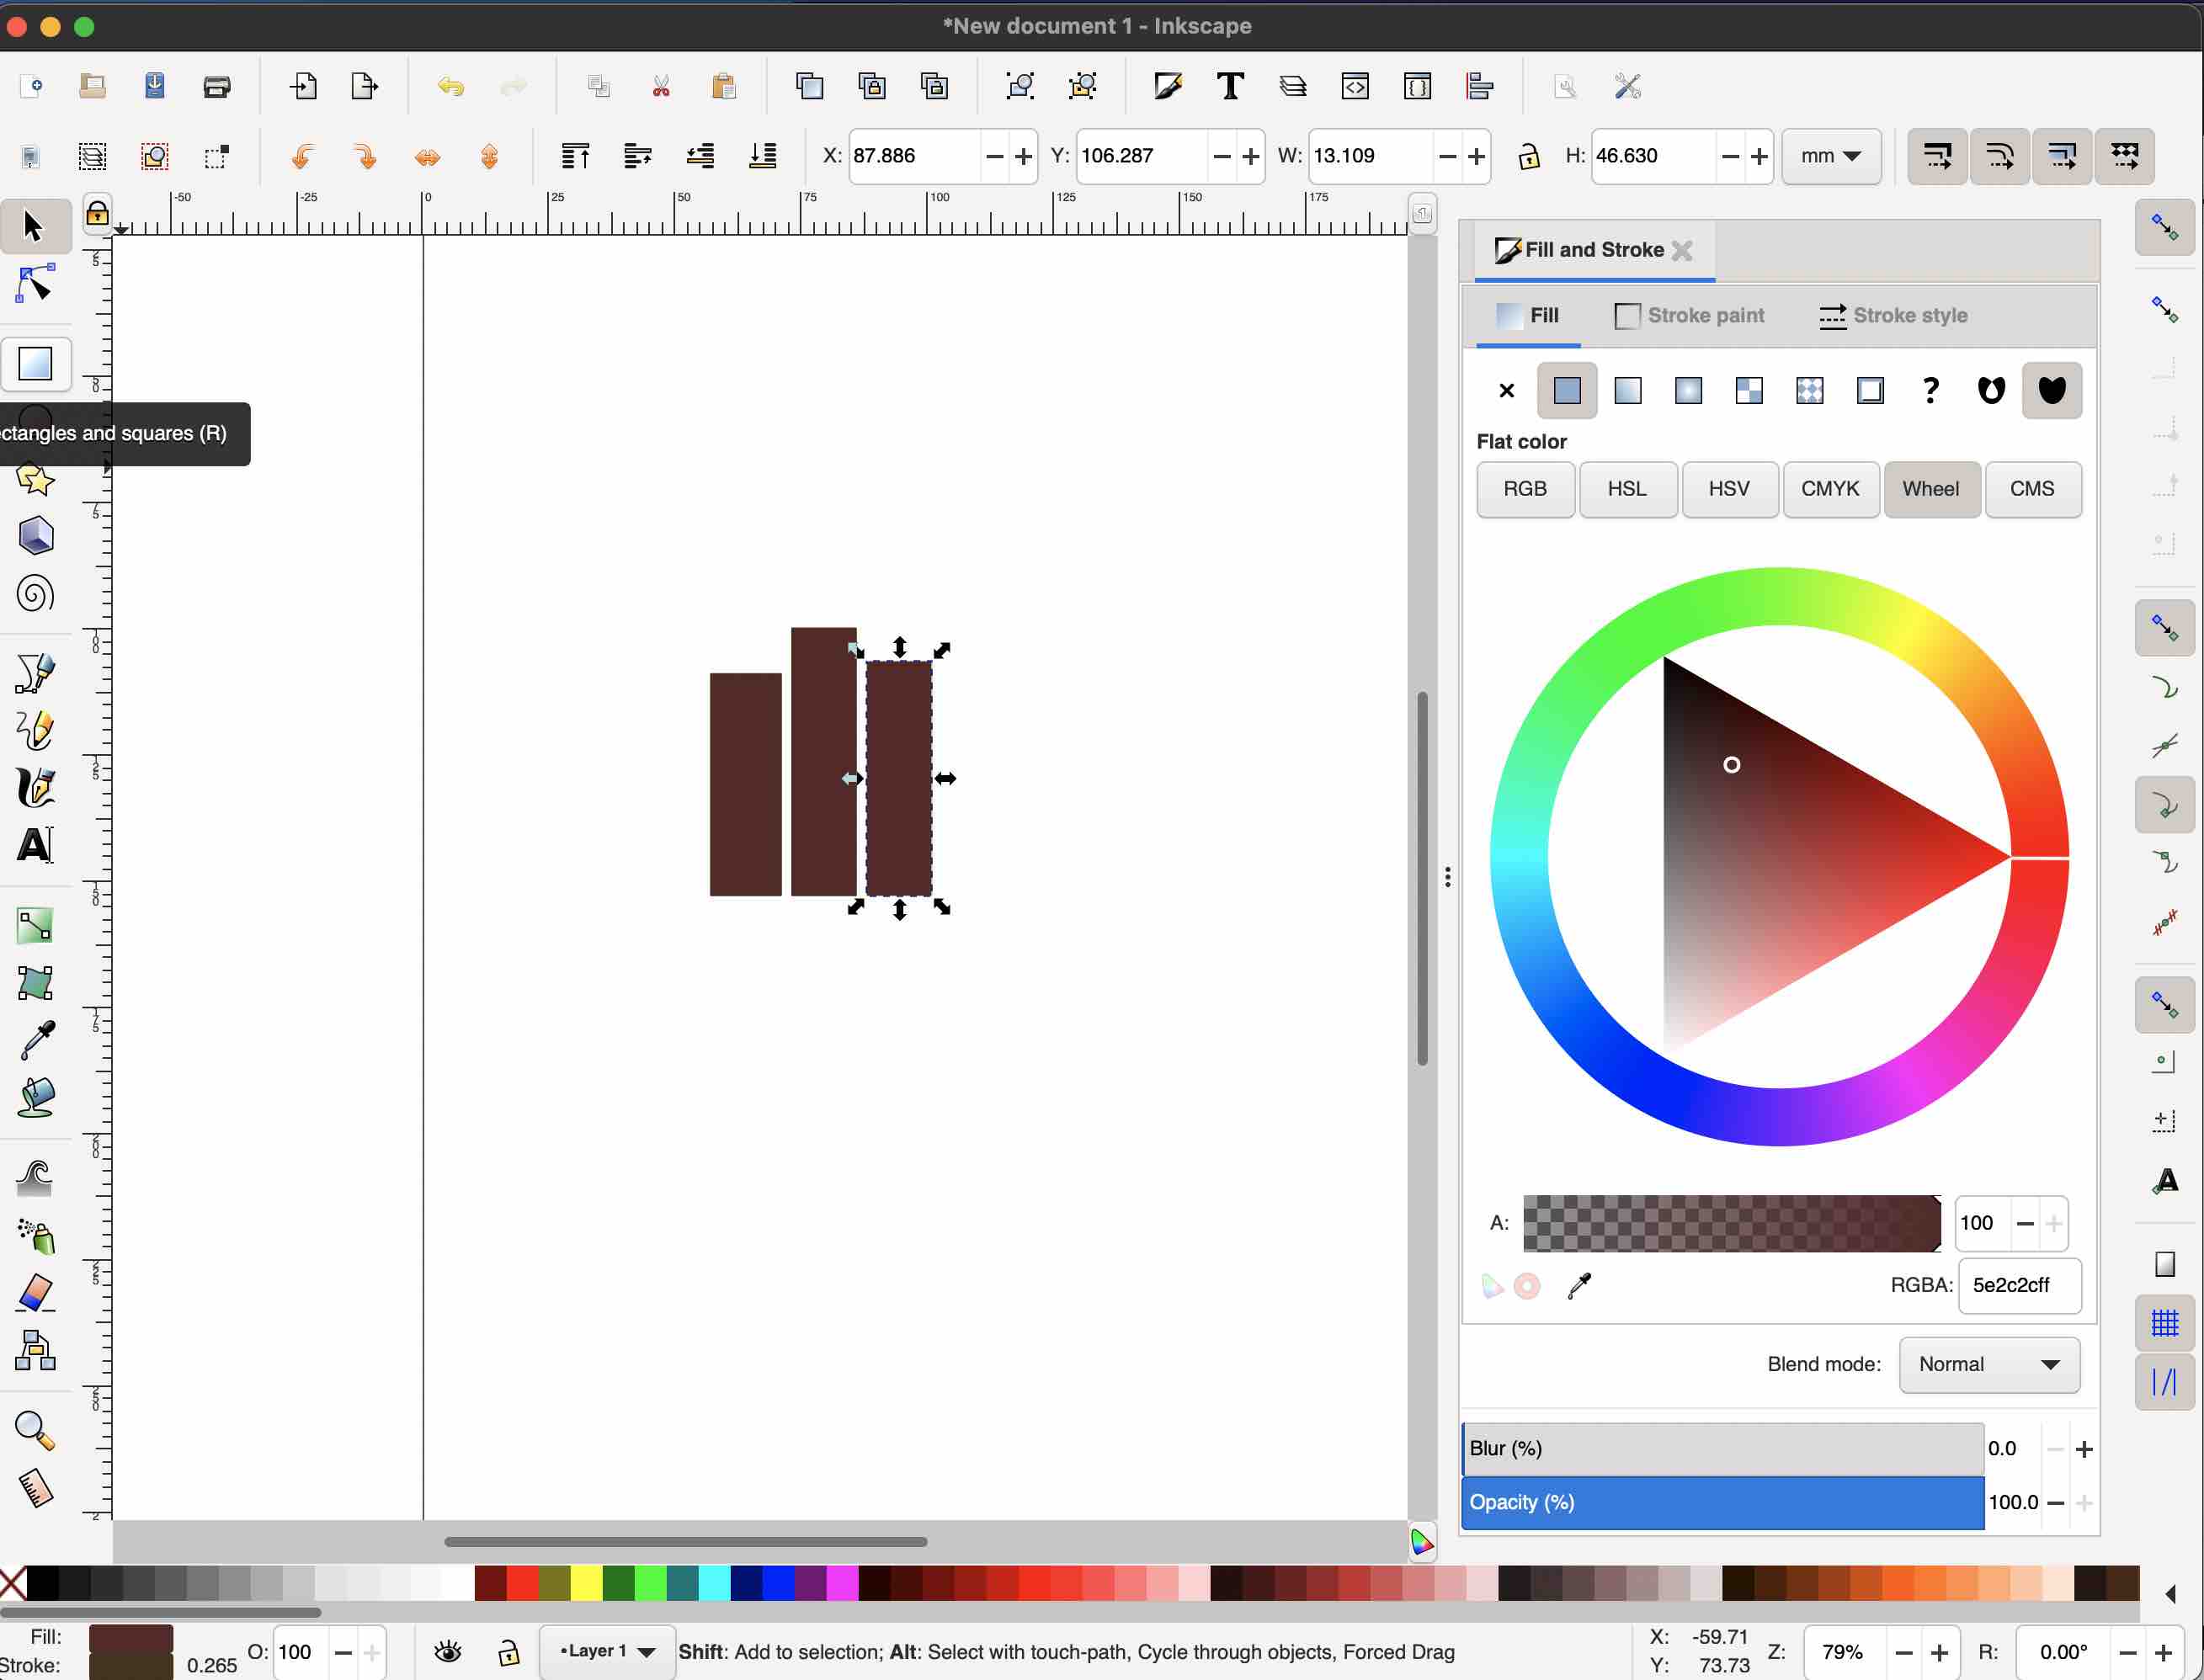
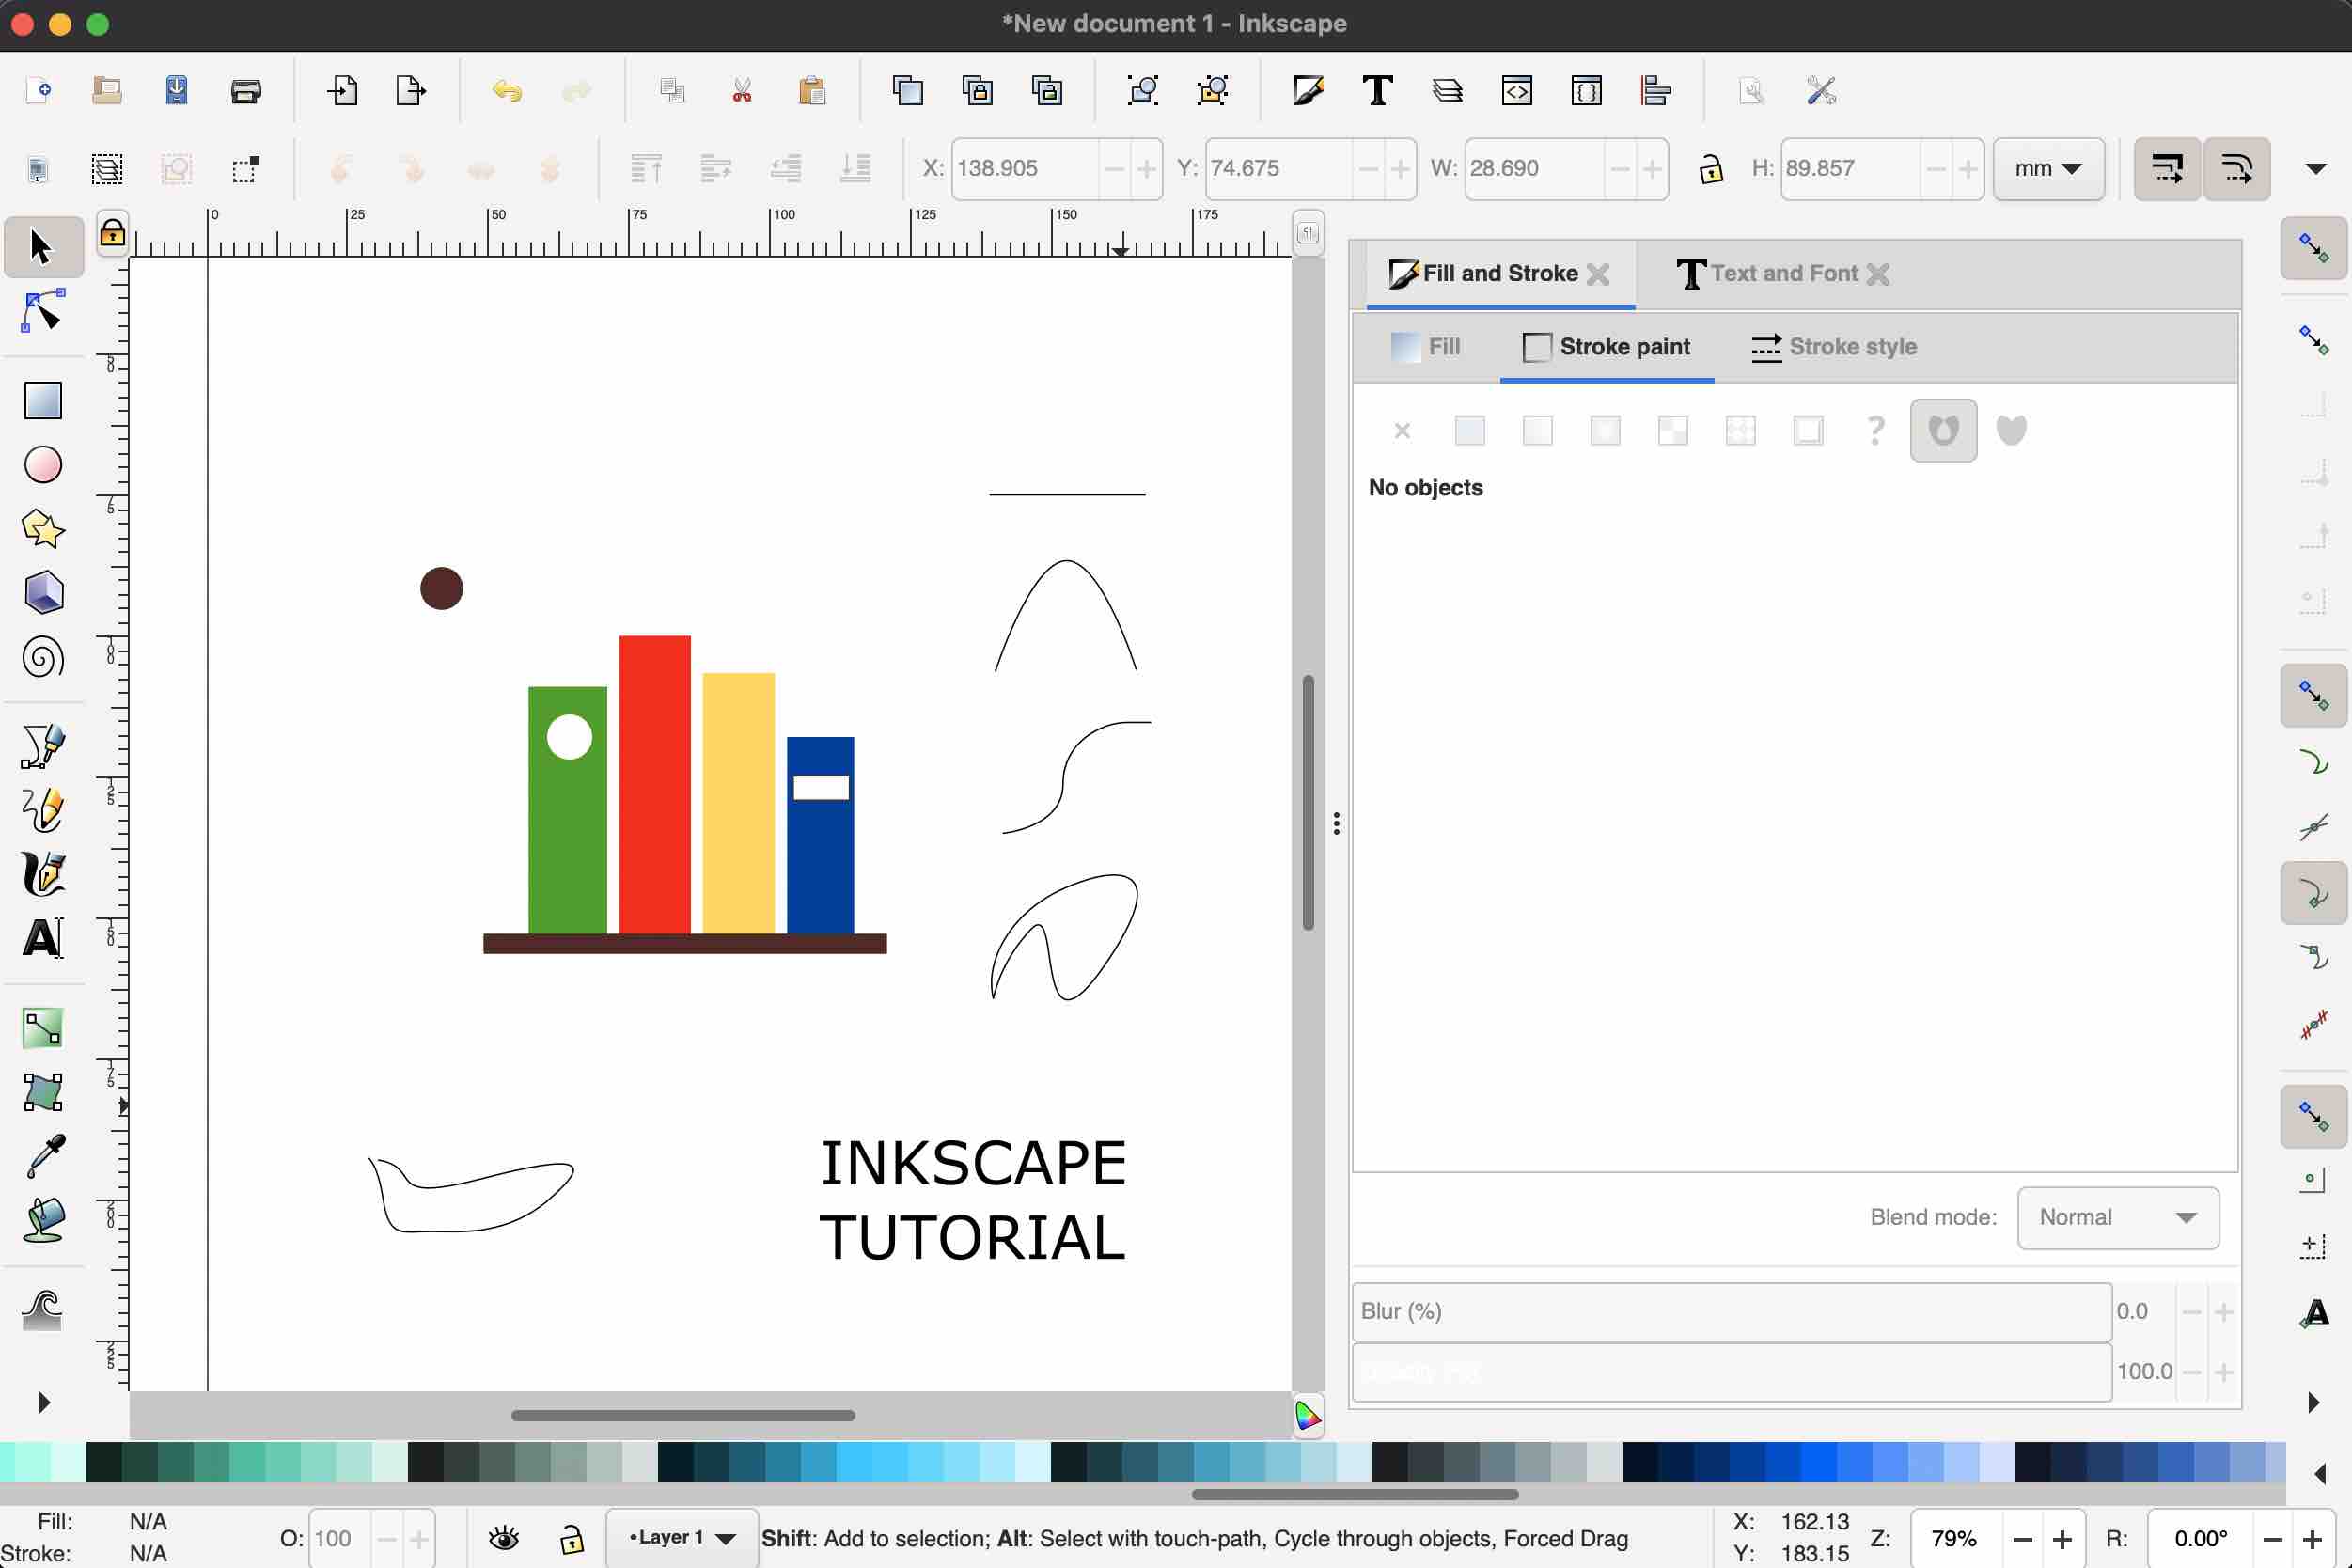
Vector-1 : Inkscape
Inkscape is a free and open-source vector graphics editor used to create vector images,
This is my first time to use the inkscape so try to use basic drawing function. It is a little difficult to use multiple function but I am surprised that inkscape has too many tools in spite of open source free software.
-
draw rectangle by “create square and rectangle tools” on the left-side toolbar
-
draw text by “text tool” on the left-side toolbar
-
change color of the rectangle by “fill and stroke” on the right-side

There are rich color palette on the bottom side.
- create and practice curve by using “bezier curve” on the left-side toolbar
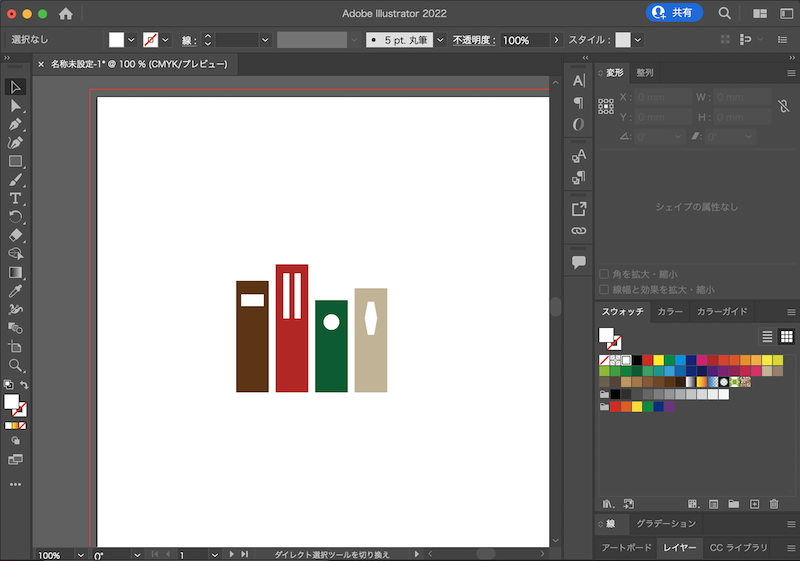
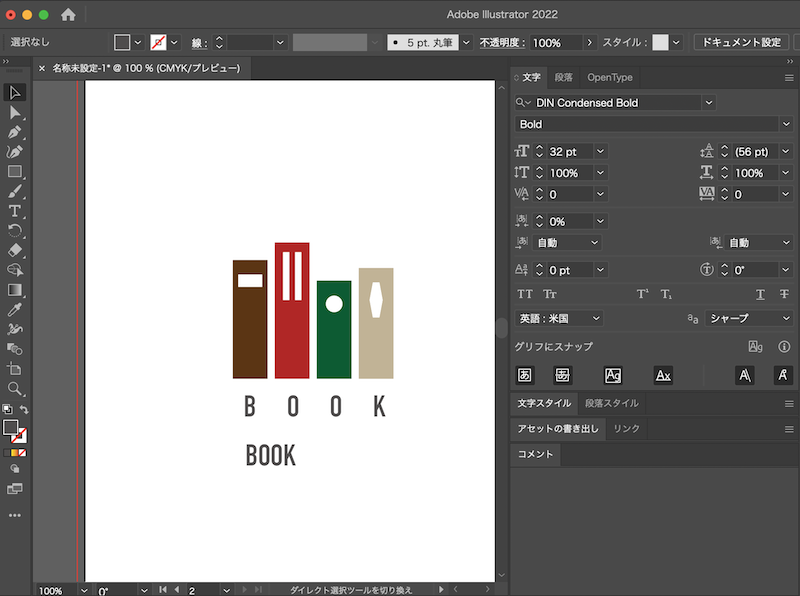
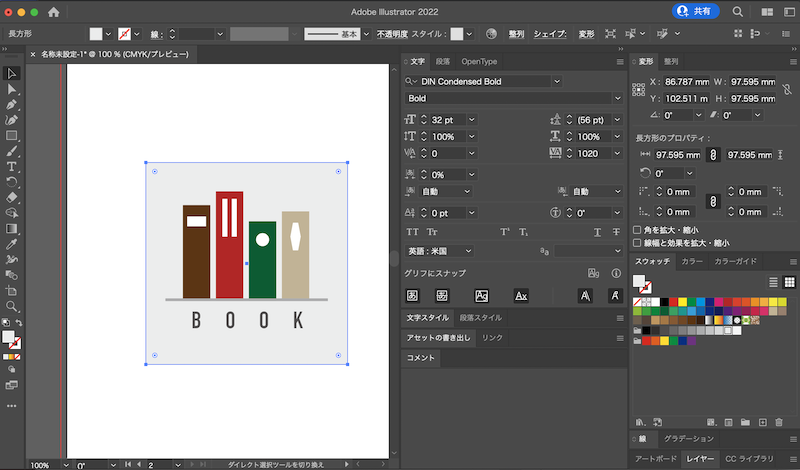
Vector-2 : Illustrator
Adobe Illustrator is a professional vector-based design and drawing program. Used as part of a larger design workflow, Illustrator allows for the creation of everything from single design elements to entire compositions.
I have used Illustrator some times before so I was more used to Illustrator than inkscape. I try to create logo of the potential final project.
-
draw 4 rectangles by “create square and rectangle tools” on the left-side toolbar and change color by select to color palette.

-
draw figures and adjust the overlap by using stacking order.(command + shift + [)
-
draw text by “text tool” on the left-side toolbar and adjust character spacing by using “kerning”.
-
create square as the background
-
finalize and export to png file from the artboard.
potential logo
![]()
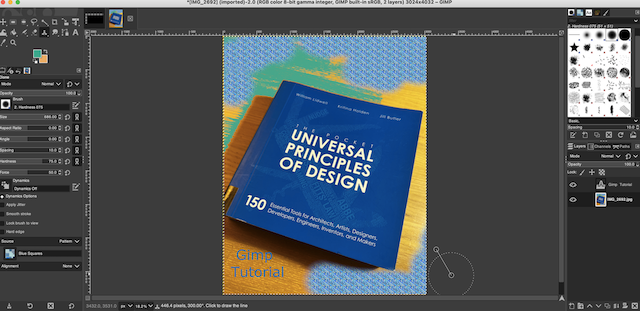
Raster-1 : GIMP
GIMP is one of the most popular drawing tools. It’s very powerful to edit layers of image. This is my first time to use the inkscape so try to use basic drawing function.
-
choose the area by using free select tool
-
change the color of pixels by using bucket fill tools
-
insert text by using text tools
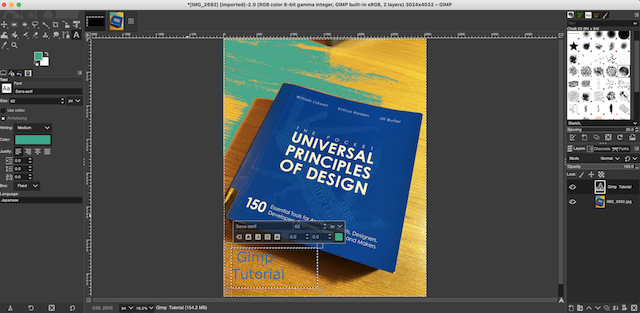
-
draw a brush of a certain pattern by using clone tool
3D Modeling tool
Fusion 360
Fusion 360 is a cloud-based 3D modeling, CAD, CAM, CAE, and PCB software platform for product design and manufacturing.
I try to model a possible final project by Fusion 360.
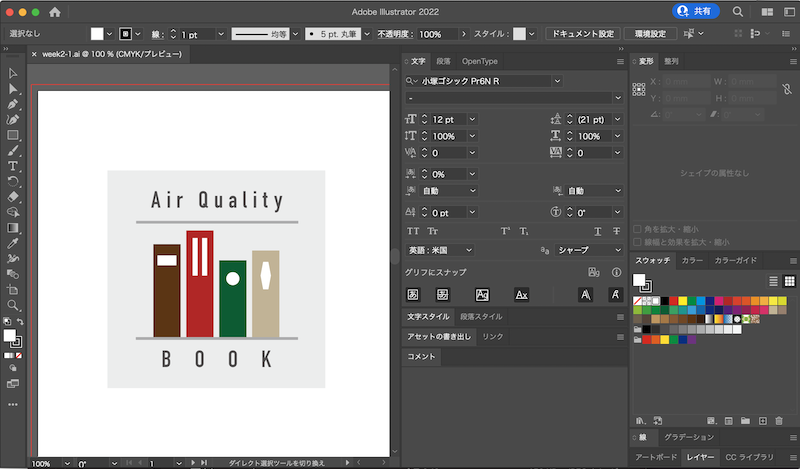
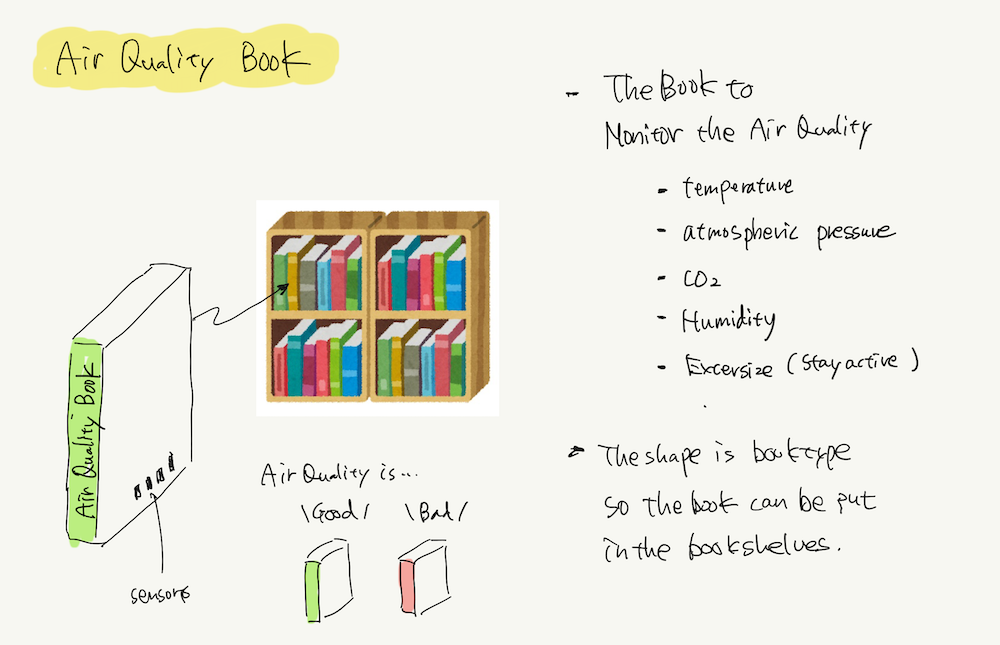
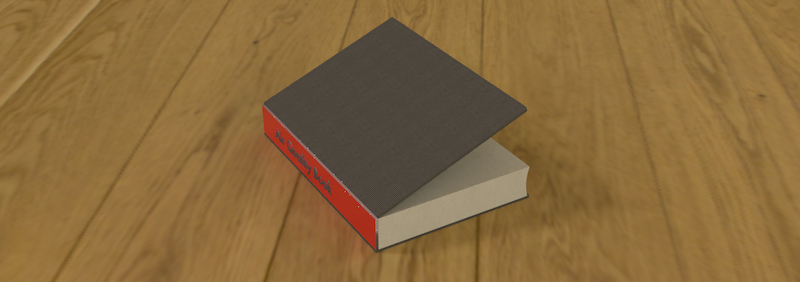
“Brain Awere” I was thinking of in Week1 turned out to be difficult to make 3D model of my own brain, so I changed the plan and sketched it again. I decided to make Book-type device to monitor the air quality.
Design by Fusion 360
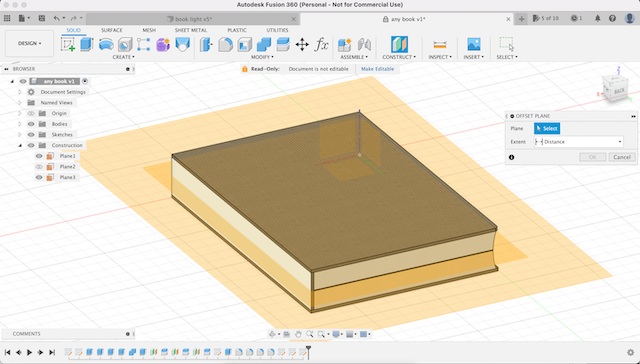
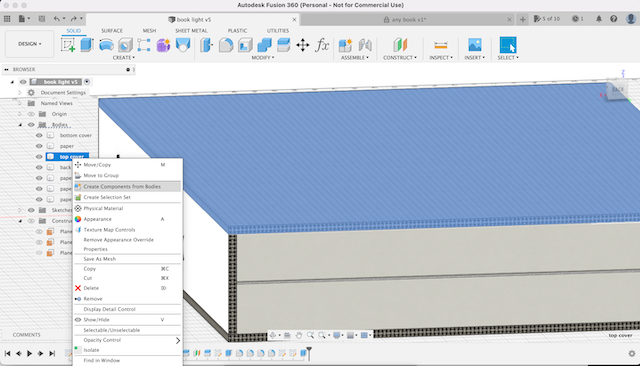
The mechanism of the device was not decided, so only the exterior was created.
- sketch the rectangle and extrude the cube of “Book”
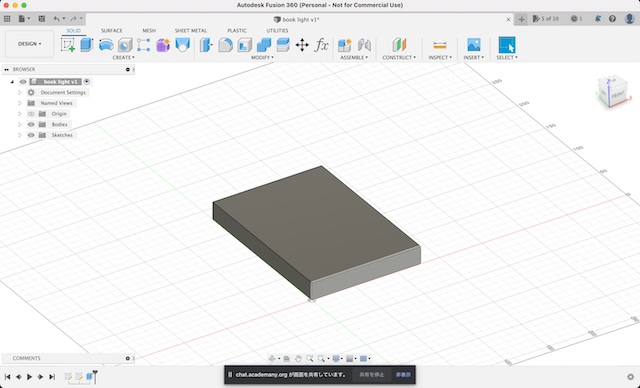
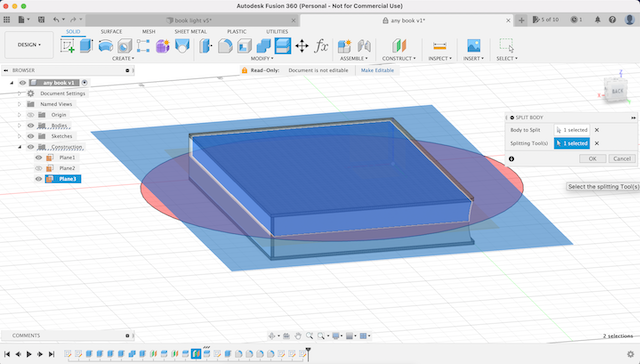
- select the plane between Book : construct > offset plane
- cut the book : split body
- insert text and extrude
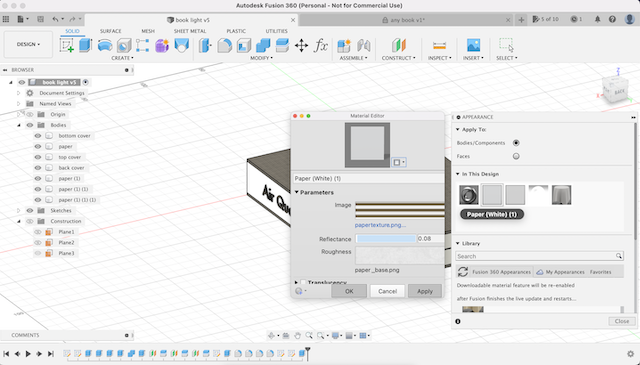
- assign “paper(white)” by drug and drop : modify > appearance
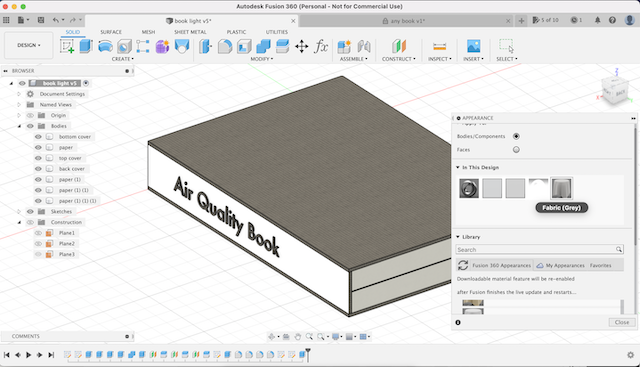
- create texture of the Book’s fore-edge : by iknscape
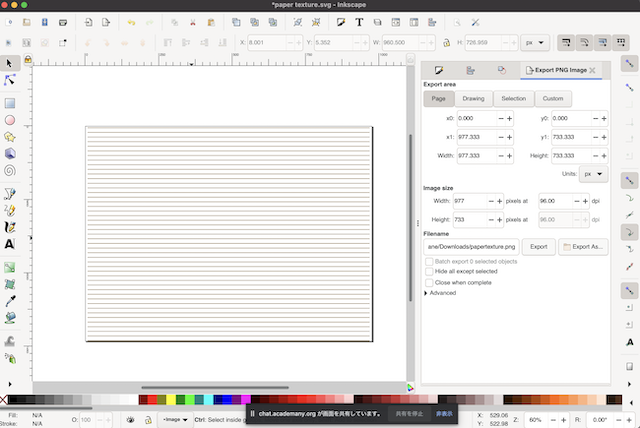
- export to png image
- apply the texture into material editor in appearance
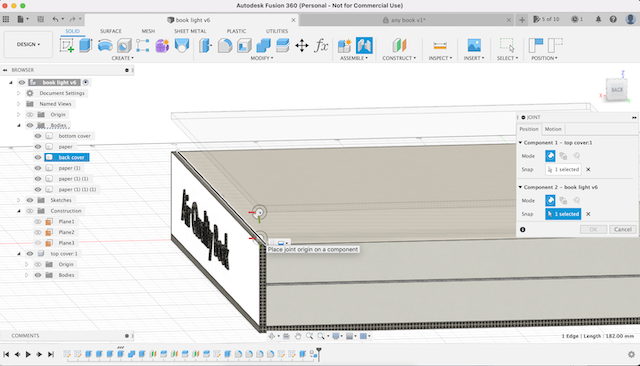
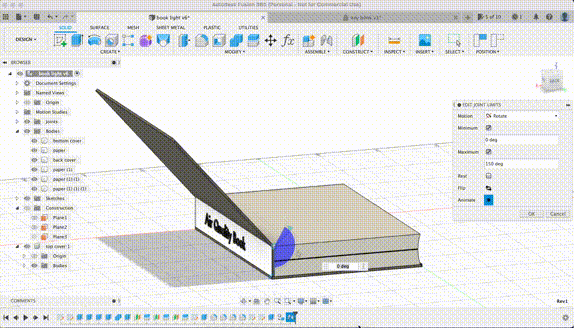
The shape is almost complete. Next step, I want to put in an axis and move the cover.
- create components from body
- Place joint origin on a component
- as the cover takes a full rotation, set the angle by “edit joint limit”
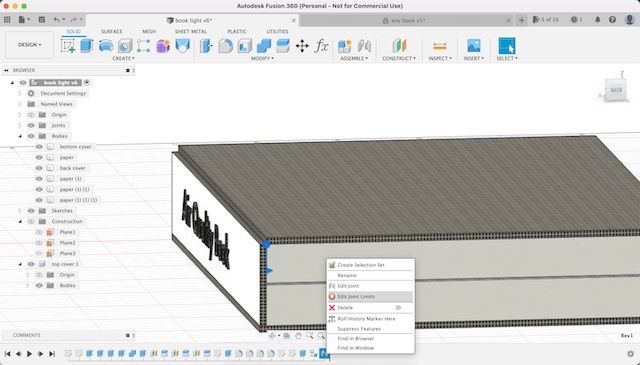
- simulate motion by specifying the axis from Motion Study and setting the angle for each time.
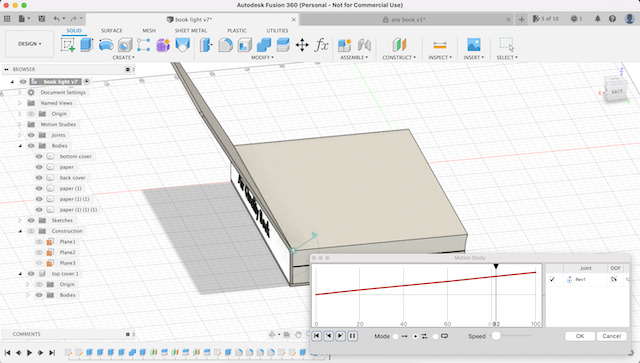
MOVIE
Render
-
Render > scene setting > environment
-
choose the HDR file as “background / Environment”
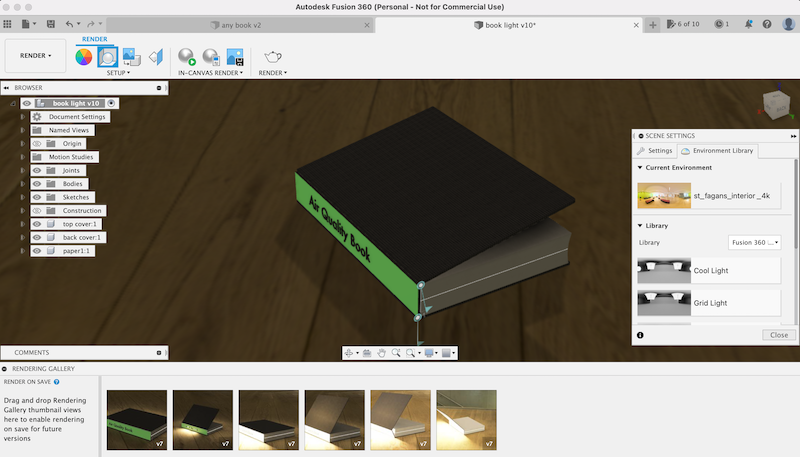
- save to my local computer
rendered image
When the Air Quality is good (CO2 is low, temperature is comfortable…), the light turns green..
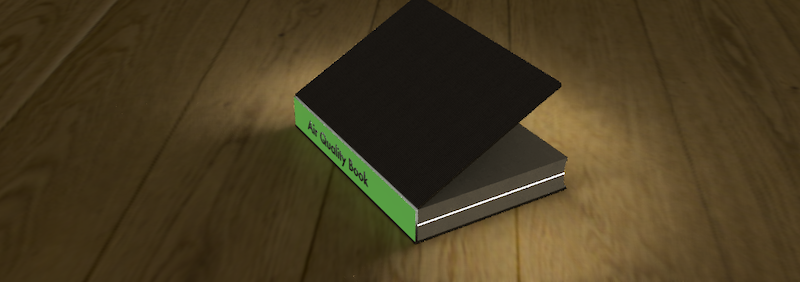
When the Air Quality is bad (CO2 is high, temperature is too hot or cold…), the light turns red..
What I learned this week2
-
Week2 really seems like a heavy week. We were introduced to many 2D/3D design software so I explored further by ourselves.
-
I became able to use the 2D/3D design softwares I’ve been wanting to use for a while.
Weekly Assignment Requirement
Modelled experimental objects/part of a possible project in 2D and 3D software -> done
Shown how you did it with words/images/screenshots -> done
Included your original design files -> done
files
Acknowledgement
Mr.Tamiya and Ms.Kamei as supportive instructors in Fablab Kannai
and YOU!