10. Molding and casting
This week I am super excited about. I molded and casted a lot in middle school and this is my first time designing something of my won so I am ready. I am a very big “Tyler, The Creator” fan so I decided to do a project based on his brand “Golf Le Fleur”. I wanted to do something related to this image:

This is the logo, pretty simple but very cute. I want to do a keychain or a necklace pendant so this will actually be useful.
Fusion360 Modeling
I started modeling this in Autodesk Fusion360 which I have used before for many projects but never to make a mold. I first started by inserting a canvas. I inserted this image:

I then traced it with the fit point spline tool. That was pretty quick and went smooth. Then I extruded it 0.13 inches. Because it is supposed to be a keychain or necklace pendant I did not want it to thick. Then I wanted to find a way to incorporate the words onto the pendant. I selected the inside profile of the pendant and used the Text tool. The text feature is relatively new and one of my favorite tools so far. I then typed out “Golf Le Fleur *” like the logo in the first image above. I changed the text height to 0.1. I wrote it twice so it would circle the pendant like I would like. I then extruded the letters -.03 so it would cut into the logo. Then I mode a small circle at the top with a diameter of 0.118” which is about the right size for a keychain or necklace. Lastly, I added a fillet around the keychain hole of .01. That was the easy part. Now onto the molding part which I have never done.
Next, I started on CAMing the model. I referred to the workflow provided to help guide me through the process. I followed these steps and generated my piece ready to mill. I made two toolpaths. I made a roughing toolpath with the “2d pocket” tool then a finishing toolpath with the “Flat” tool under the 3D dop down. I chose to use a 1/64th Flat End Mill Bit from the Bit Library located Here After I simulated it and made sure it would cut correctly I went ahead to Post Process it. I followed the post processing rules of the workflow and it looks like this.

Then after post processing it exported as a G.code so I put that in a google drive to send to the computer connected to the milling machine. I opened it in the Bantam Machine software then measure my wax and put the measurements into the material on the machine. Here is what the screen looked like:
3 Axis Milling
Although I made the mistake of not 3 axis milling this so I had to change this a bit. What I did to correct this was:
Setup
- Change workspace to Manufacture
- Click new setup in setup drop-down menu
- In the dialogue box, in the setup tab, select machine as Autodesk Generic 3-axis
- In the stock tab, change the mode to a fixed-size box
- Under height, change the model position to offset from the top
- Change the offset to 0
- Click ok in the dialogue box to complete the setup
3D Manufacturing
- In the toolbar, under the 3D tab, you can click pocket clearing
- In the dialogue box, in the tool tab, select the tool as “⅛’ R1/16” (⅛” Ball End Mill)” from the other mill tool library. You will need to install the other mill tool library. If you need to use a smaller bit (i.e. 1/64”) for finer detail, you will need to complete a second toolpath
- Click ok in the dialogue box to complete the pocket cleaning
- Click yes on the warning that appears
-
Under your pocket toolpath on the left side of the screen, you should simulate your pocket to see how it is going to work. Under the Info tab of the simulation window, you will see an estimated length of time for your file to be milled. Furthermore, you can uncheck the Machine view to get an easier view of your simulation too.
-
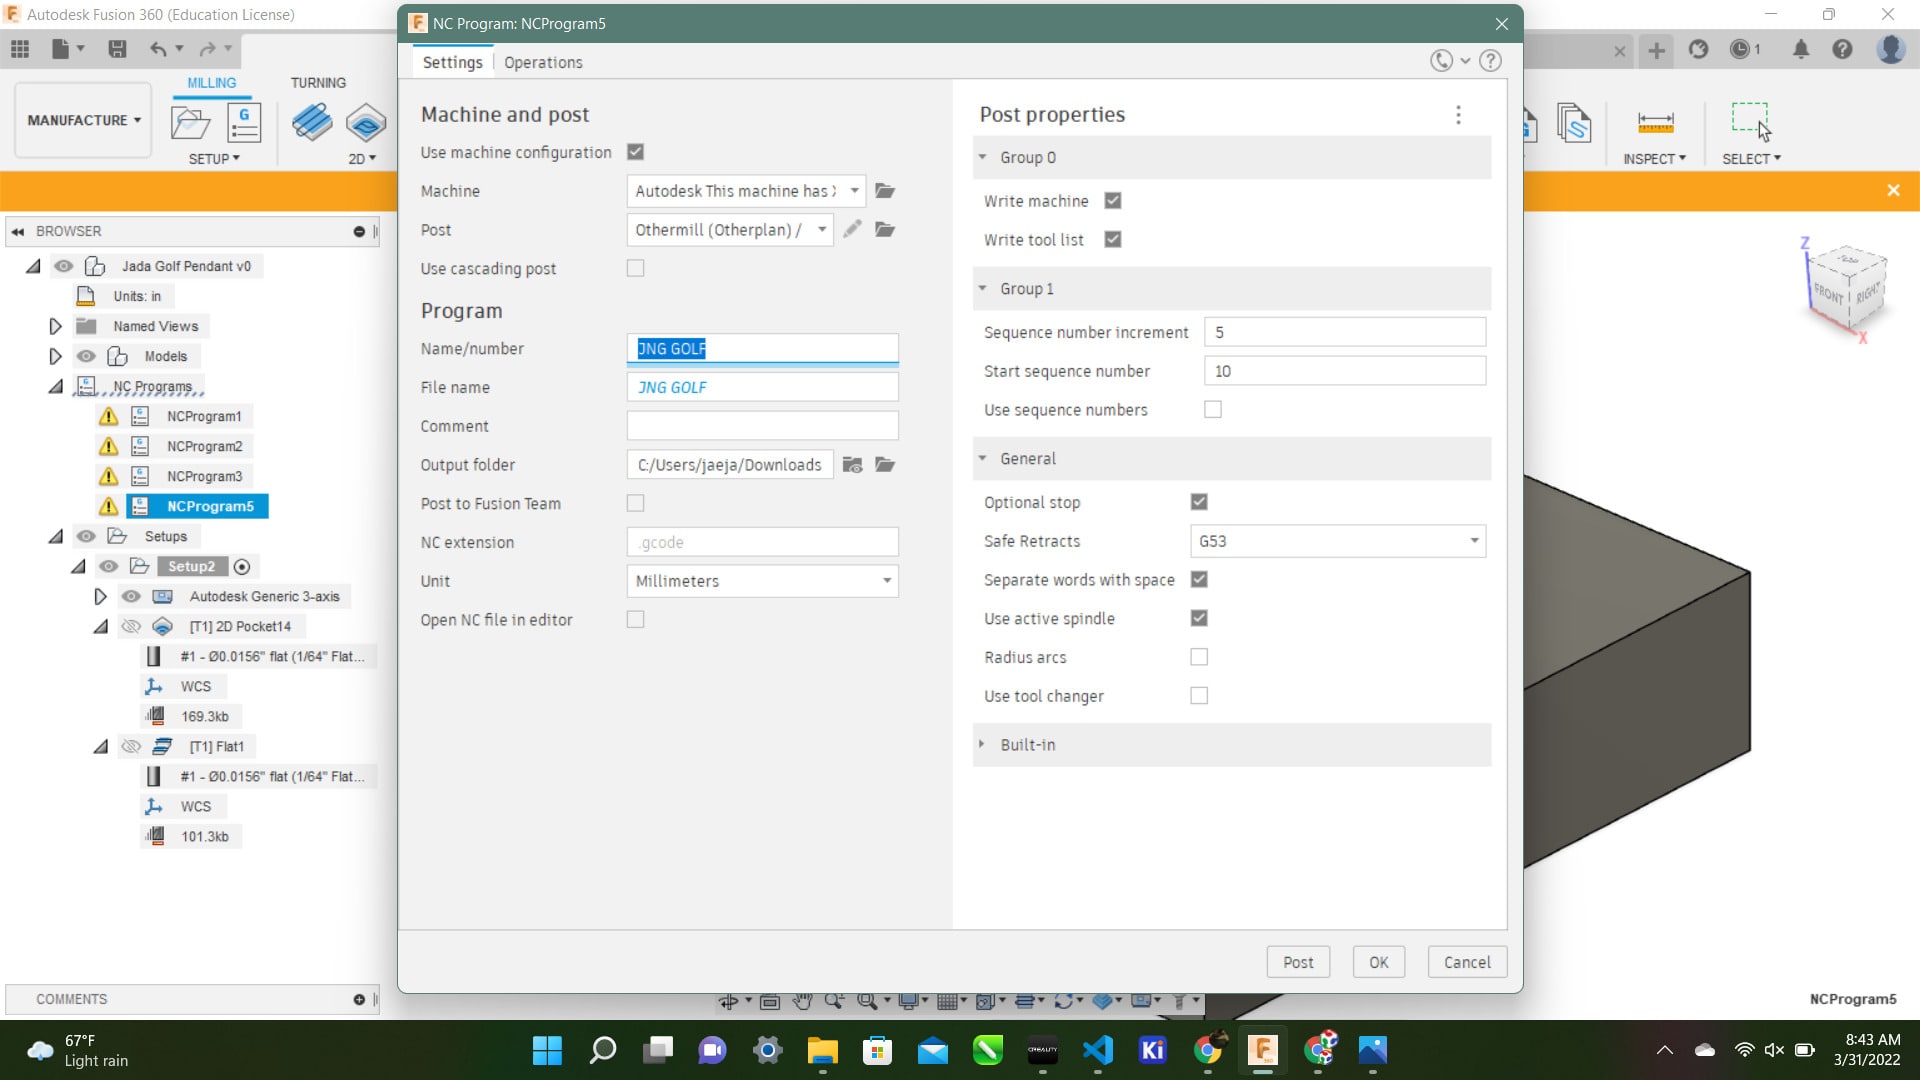
In the Action tab of the toolbar, you will choose Post Processing.
- Post Process will transform your file into .g-code, which is a computer numerical control (CNC) programming language. Under Post Process, you need to set the Post to Othermill (OtherPlan), you may need to select this using the folder. Next, name your file under the Program and make sure the Unit is Millimeters. Please pay attention to where the Output Folder (see image “b” below) is located due to this being the location your .g-code file will be saved. Please see the example image “a” below.
- Load your .g-code into engproj from your computer and then download the file onto an OtherMill desktop computer.
- Next, load your file in the Bantam Tools software.
- You need to put in the material sizes and move your file location to fit the center of your material.
- Select the appropriate “wax” bit.
- Check to see how long your estimate file will take to be milled on the OtherMill.
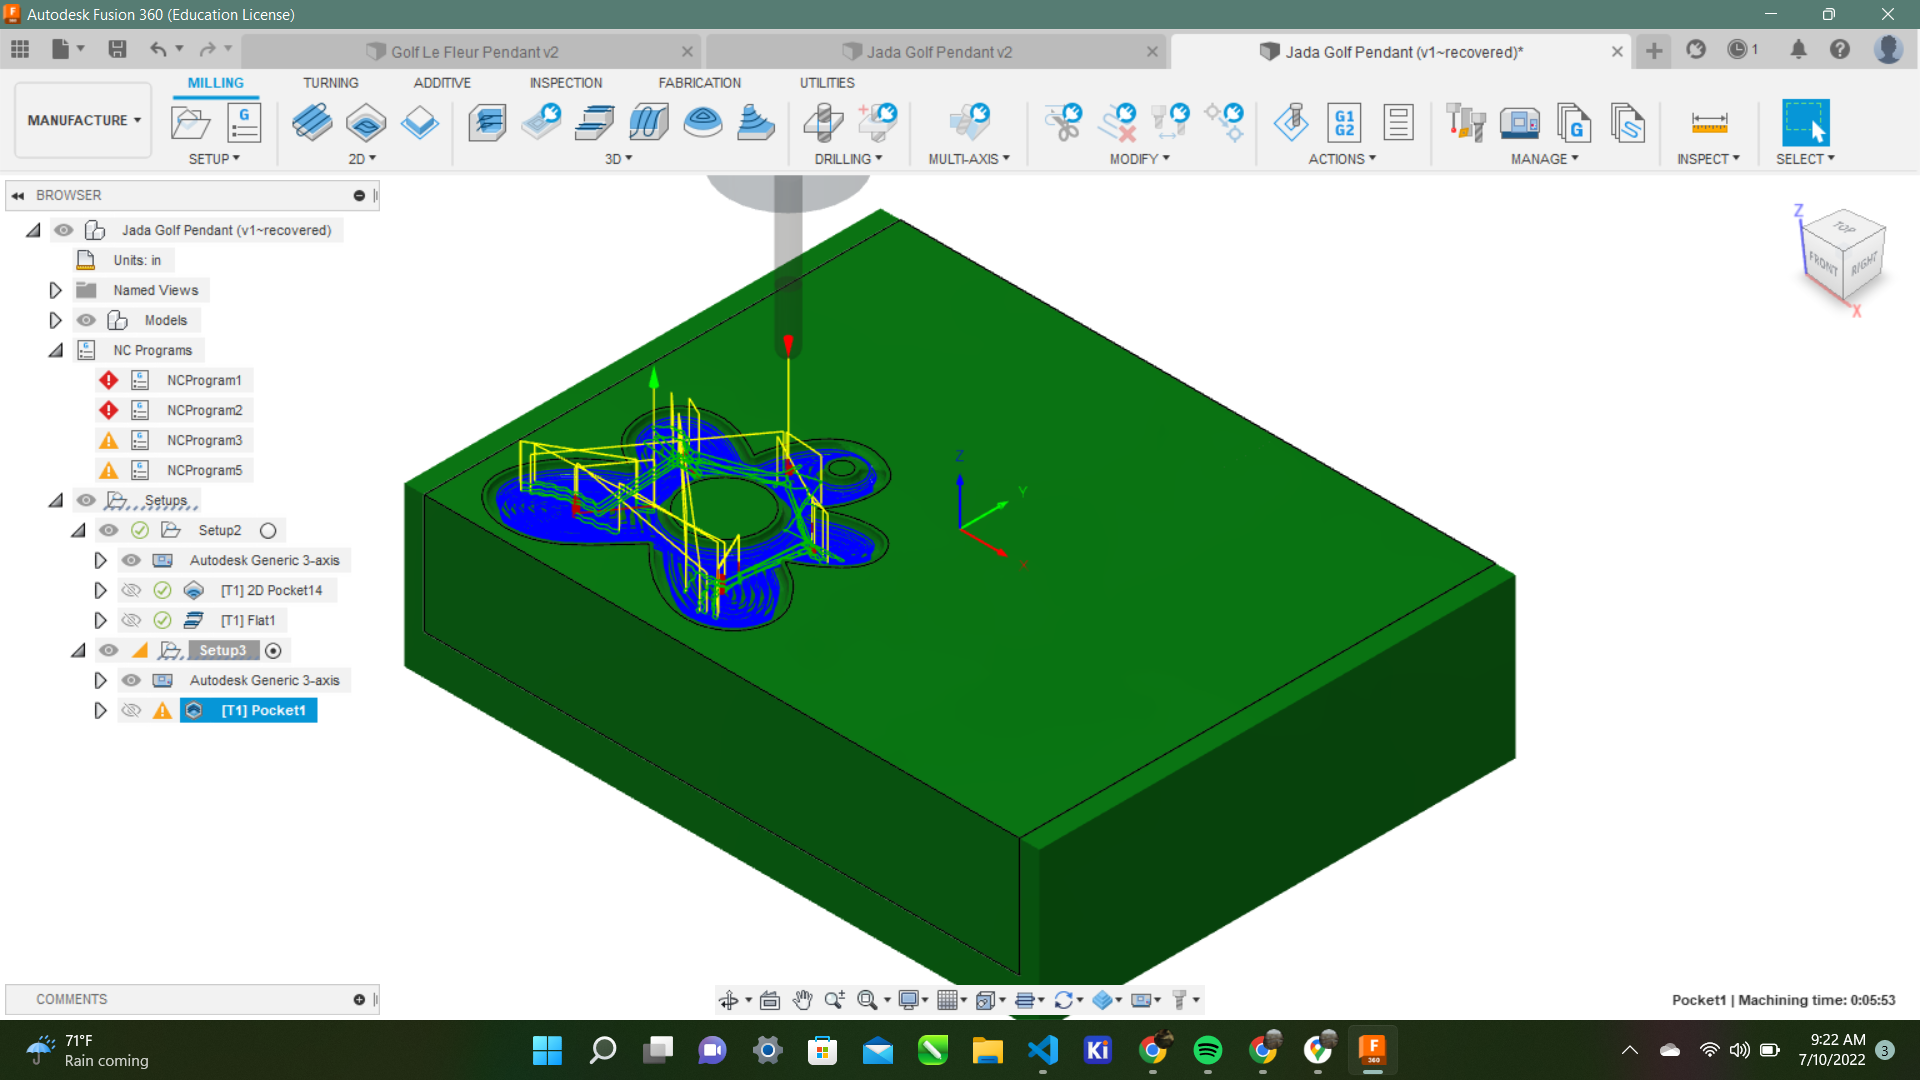
This is how I set up the 3 axis milling and this is how it turned out with the 3axis milling I followed in the steps above:
Casting
Then it took about half an hour but it was not too bad. The mold turned out great. I then used the “Moldstar 20T”. I first looked at this datasheet for the Moldstar 20T. This datasheet showed me the cure time I needed and the pot life. It also provided helpful safety instructions. It told me to wear “vinyl” gloved instead of “latex” because it will inhibit the cure of the rubber mold. The datasheet told me this had a pot life of 6 mins.
 Then so I mixed it then mixed some gold and green into it to make it pretty. I first used “Mann Ease Release 200” on the mold so I could take out the cast easier. I also used dixie cups and popsicle sticks to mix part A and B of the cast. Then I poured it into my mold. It had a cure time of 30 mins so I waited about 45 just to be safe then I removed it from the mold. It turned out like this.

It was very nice I like it a lot. It is soft and fun to play with. It could also be worn as an interesting ring. I poured the mold a little over so I had to use a razor to take off some the excess. Next time I am going to make the mold deeper than it has to be so I do not have to fill it to the brim.
What I learned
I had a lot of fun this week and I learned how to do so much. I learned how to use the “Manufacturing” workspace in fusion (Formerly named the CAM Workspace). I learned how to generate toolpaths and import different tools. Then I learned how to post process the whole design and export it directly as a G.code. This was a very exciting week. I already had a general idea of how to do the casting but I haven’t done it in years so this was a great refresher.
Groupwork
This week me and my small group characterized a few of the casting materials that we had in our FabLab. You can check that out on our Group Site.
Design Files
Here is my Design File found in my repo