15. Interfacing
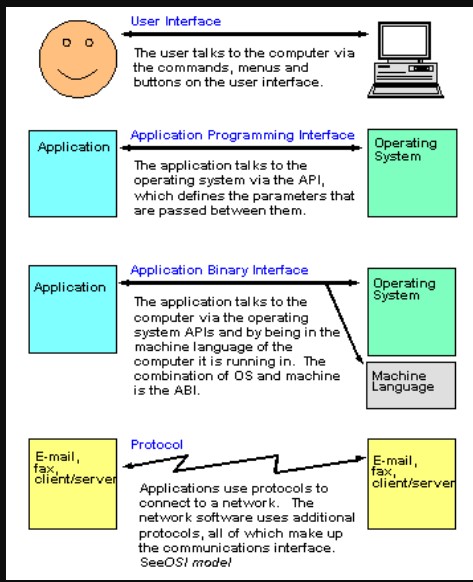
This week I am interfacing with my input device. I am using a KY-037 Sound Sensor to interface this week. I have never heard of interfacing before so I researched it a bit before I got started. After researching I got this, “The connection and interaction between hardware, software and the user. Users “talk to” the software. The software “talks to” the hardware and other software. Hardware “talks to” other hardware. All this is interfacing.” This was extremely helpful in understanding what I had to complete this week. I even found this image that explained the different types of interfacing.
Arduino
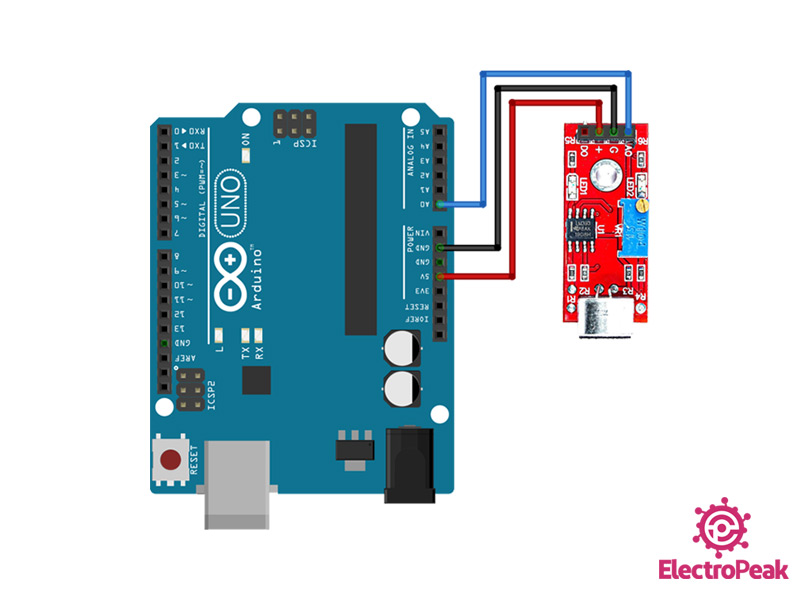
Next I started simply interfacing through the arduino. I connected the sensor straight to the arduino like this:
Then I uploaded this code:
void setup() {
  // initialize serial communication at 9600 bits per second:
  Serial.begin(9600);
}

// the loop routine runs over and over again forever:
void loop() {
  // read the input on analog pin 0:
  int sensorValue = analogRead(A0);
  // print out the value you read:
  Serial.println(sensorValue);
}
After I uploaded that I opened the serial monitor in arduino and I see this:
This worked! now it is time to create my own board for it.
Board
I am going to use the board I made during inputs weeks for this week. This board contains the Tx and Rx pins that I can use to read serial data. Tx is to transmit data and Rx is to Receive data. So with this I needed an FTDI board also. Luckily I had one so I connected the Tx pin on the FTDI to the Rx pin on the board and vise versa. I am also fortunate to have 3 USB ports on my computer so I can connect everything to my computer. I plug in the FTDI to one port then my programmer to the other with my board in the middle.


Then I Loaded the code above and since it contains no libraries I did not have to modify it. I uploaded it the first time it did not work. That is because I forgot to change the pin number so I changed the pins to the correct one in the code and uploaded again. This worked! I got everything uploaded and this is it running:
Also if you wanted to use a digital output you can use this code:
/*
modified on Spe 2, 2020
by MohammedDamirchi
Home
*/
const int mic =  8
void setup() {
  // initialize serial communication at 9600 bits per second:
  Serial.begin(9600);
  // initialize the digital pin as an input:
  pinMode(mic, INPUT);
}

void loop() {
  // check if the mic digitalout is high.
  if (digitalRead(mic) == HIGH) {
    Serial.println("hearing something");
  }
}
What I learned
This week I learned a lot. I learned how to use the serial plotter and the functionality of it with my sensor. I did not know that it could be so useful but it is. I also learned how to use an FTDI chip to read serial data from the Attiny1614. This is going to be extremely helpful for my final project. Lastly, I learned how to use the Tx and Rx pins more in depth. This with networking really drove the idea home for me.
Groupwork
This week Nick, Jack, Aarush, and I worked with a program called Unity for interfacing. You can see more of that here on our group site.