4. Computer controlled cutting
Vinyl Cutting
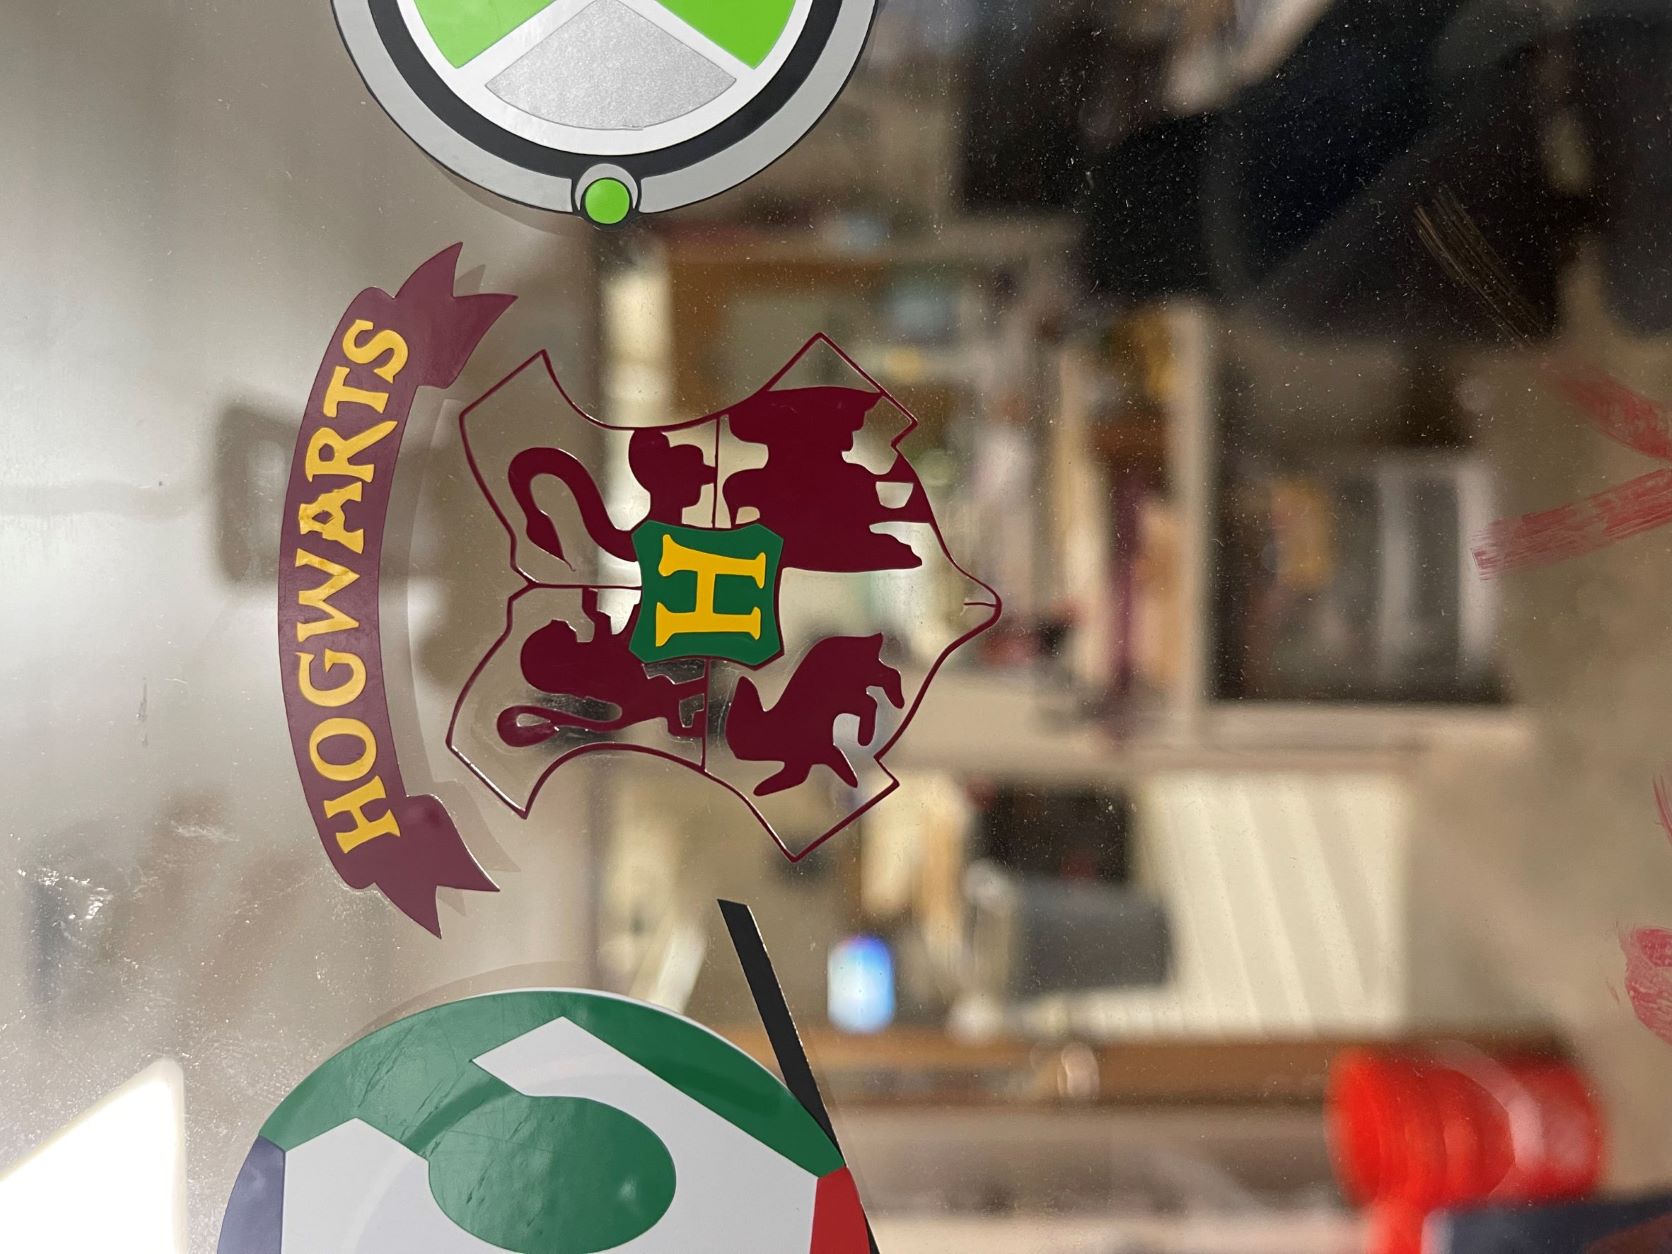
For my sticker design I was conflicted on what to do. I wanted to do something cool and complex but also something that I personally enjoyed. My first thought was to do something nature related like flowers but I couldn’t think of a complex enough design for that so I started to think about movies. I love Star Wars and Harry Potter but pinning the two logos against each other, the Harry Potter Hogwarts logo won. It is complex and could easily be made into layers. I used three different vinyl colors; burgundy, yellow, and green. I tried to match the colors with the school colors because it looked cooler that way.
First I found an image of the logo on google and I imported it into CorelDRAW. Then I traced the bitmap as a detailed logo and removed the background. Then I went to object properties and took out the fill and made the outline black. I had to make the sticker smaller than 3x3 so I made it about 2x2 inches.
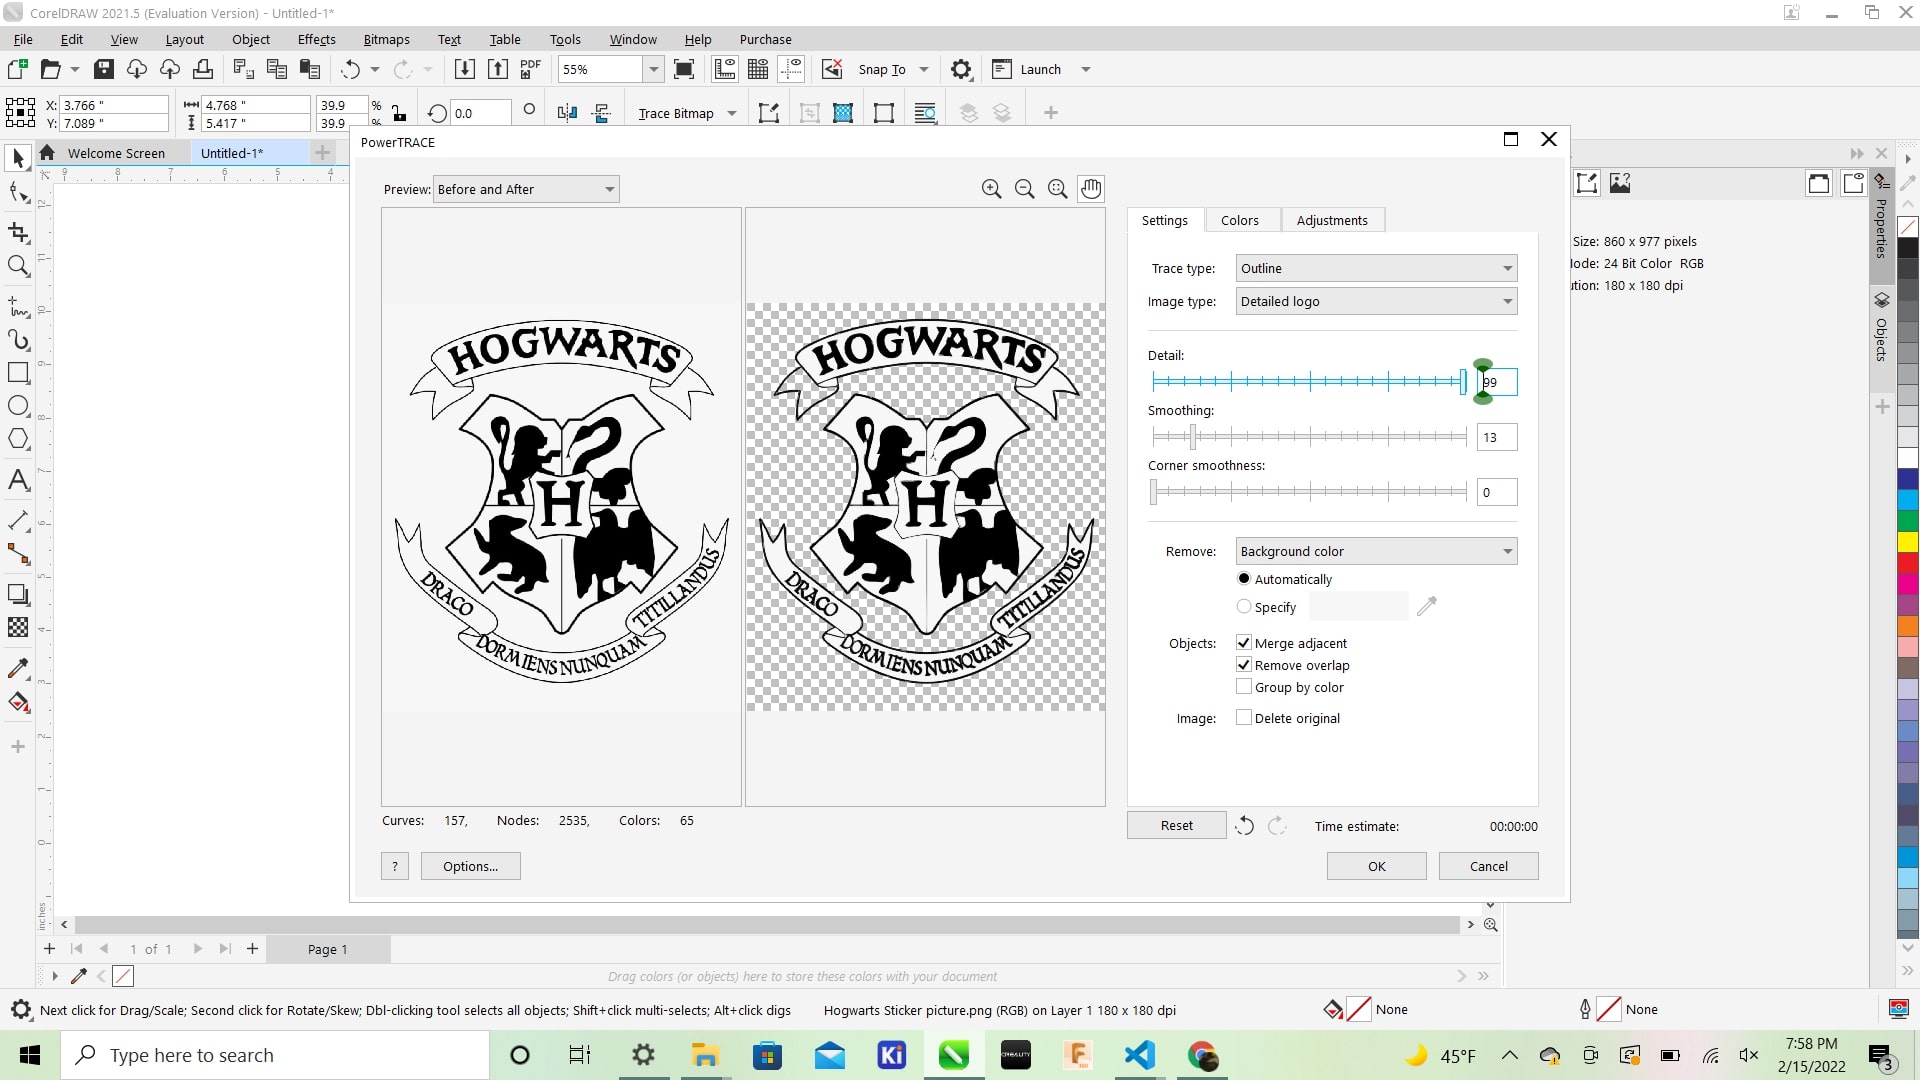
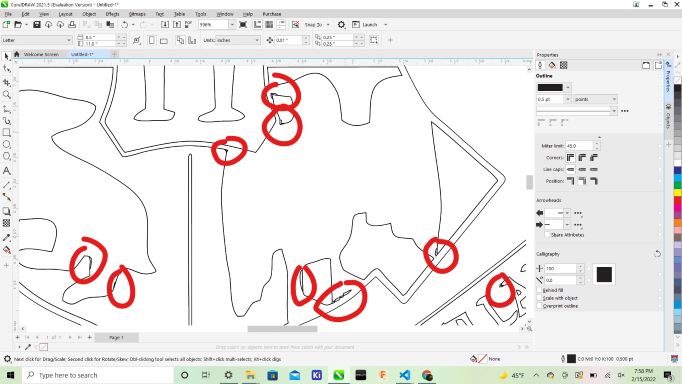
I also got the idea to use a reference point from my classmate Aaron Logan to match up the layers correctly. Then I noticed that after the trace in Corel that there were many imperfections in the logo. There were many holes and parts that would mess up the cut so I deleted all the bad nodes by hand and added a diamond at the top for the reference point.
Then I copy and pasted the logo five times to make five different layers. I then deleted the parts that were not needed in each layer then I grouped the layers by color. I had the word “Hogwarts” and the “H” in the center grouped for yellow, then the scroll and actual logo grouped for burgundy and the crest as green by itself. After that was all done I sent it to google drive so I could open it on the vinyl cutter.
Parameters
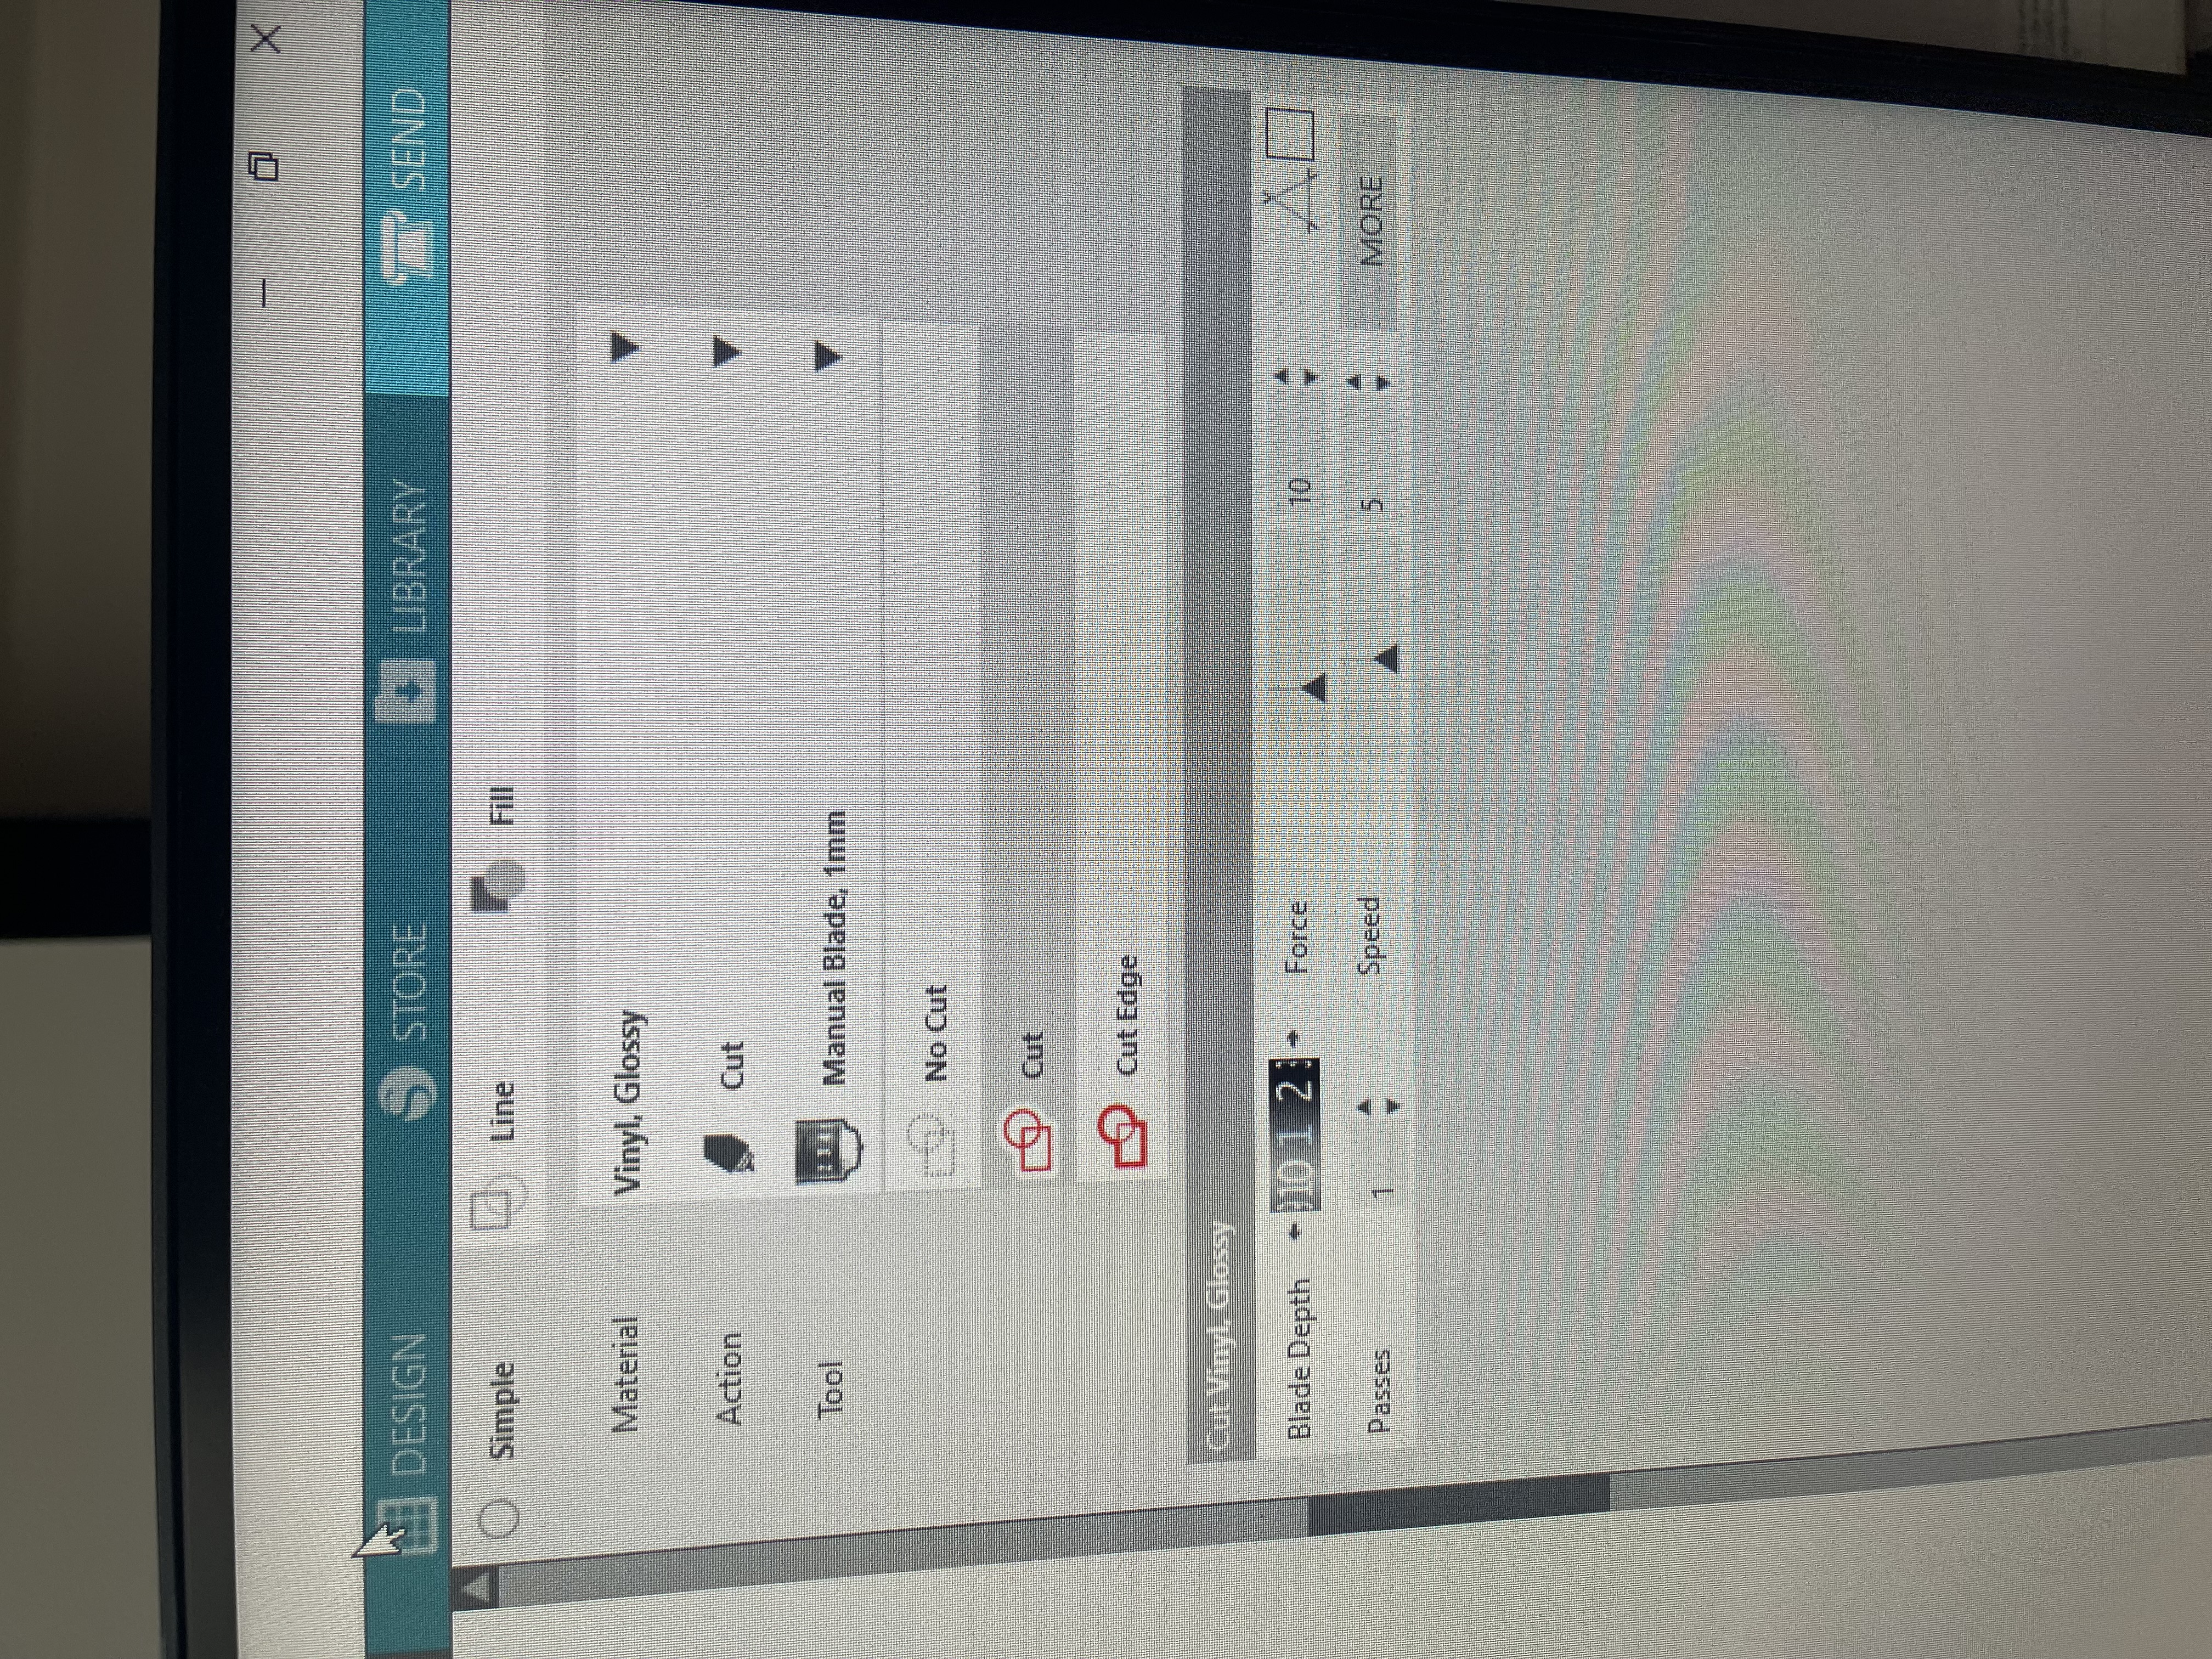
I set up the parameters of the vinyl cutter first. Here is the settings I used
-
Material: Vinyl, Glossy
-
Action: Cut
-
Tool: Manual Blade, 1mm
-
Blade Depth: 1
-
Passes: 1
-
Force 10
-
Speed: 5
Here is how it looked on the machine:
Next I found my colors, put them on the cut map one at a time and cut each respective layer with each designated color. I had no problems and all layers cut perfectly. Although the first logo I made I forgot tp weed it so I had to recut it.Then using the reference point I stuck it on the window perfectly. Although I was told it was in the wrong spot so I had to do it over. I did it all over and had almost no problems until I got to the yellow layer. The yellow words would not go onto the transfer tape at all. I didn’t know what the problem was because it always worked before but now it was messing up. So I did it again and used the tool to press the tool to the cut mat more firm because maybe the issue was that there was too much air between the cut map and the vinyl. I did that and it did not work again. On my last try I just double cut the sticker and after that it worked well enough. I had to give the sticker some pulling to get onto the transfer tape but it worked in the end. I then used the reference diamond and again stuck it on the right place on the window. It turned out really great and I am very proud of it.
Parametric Design Kit
For my parametric design I used Autodesk Fusion 360. Firstly, I Opened Fusion 360, then clicked Modify then Change Parameters. I entered the values in the table by using User Parameters +. With the use of parameters I am able to change the value of said parameters whenever I choose to make different sizes of the same design.
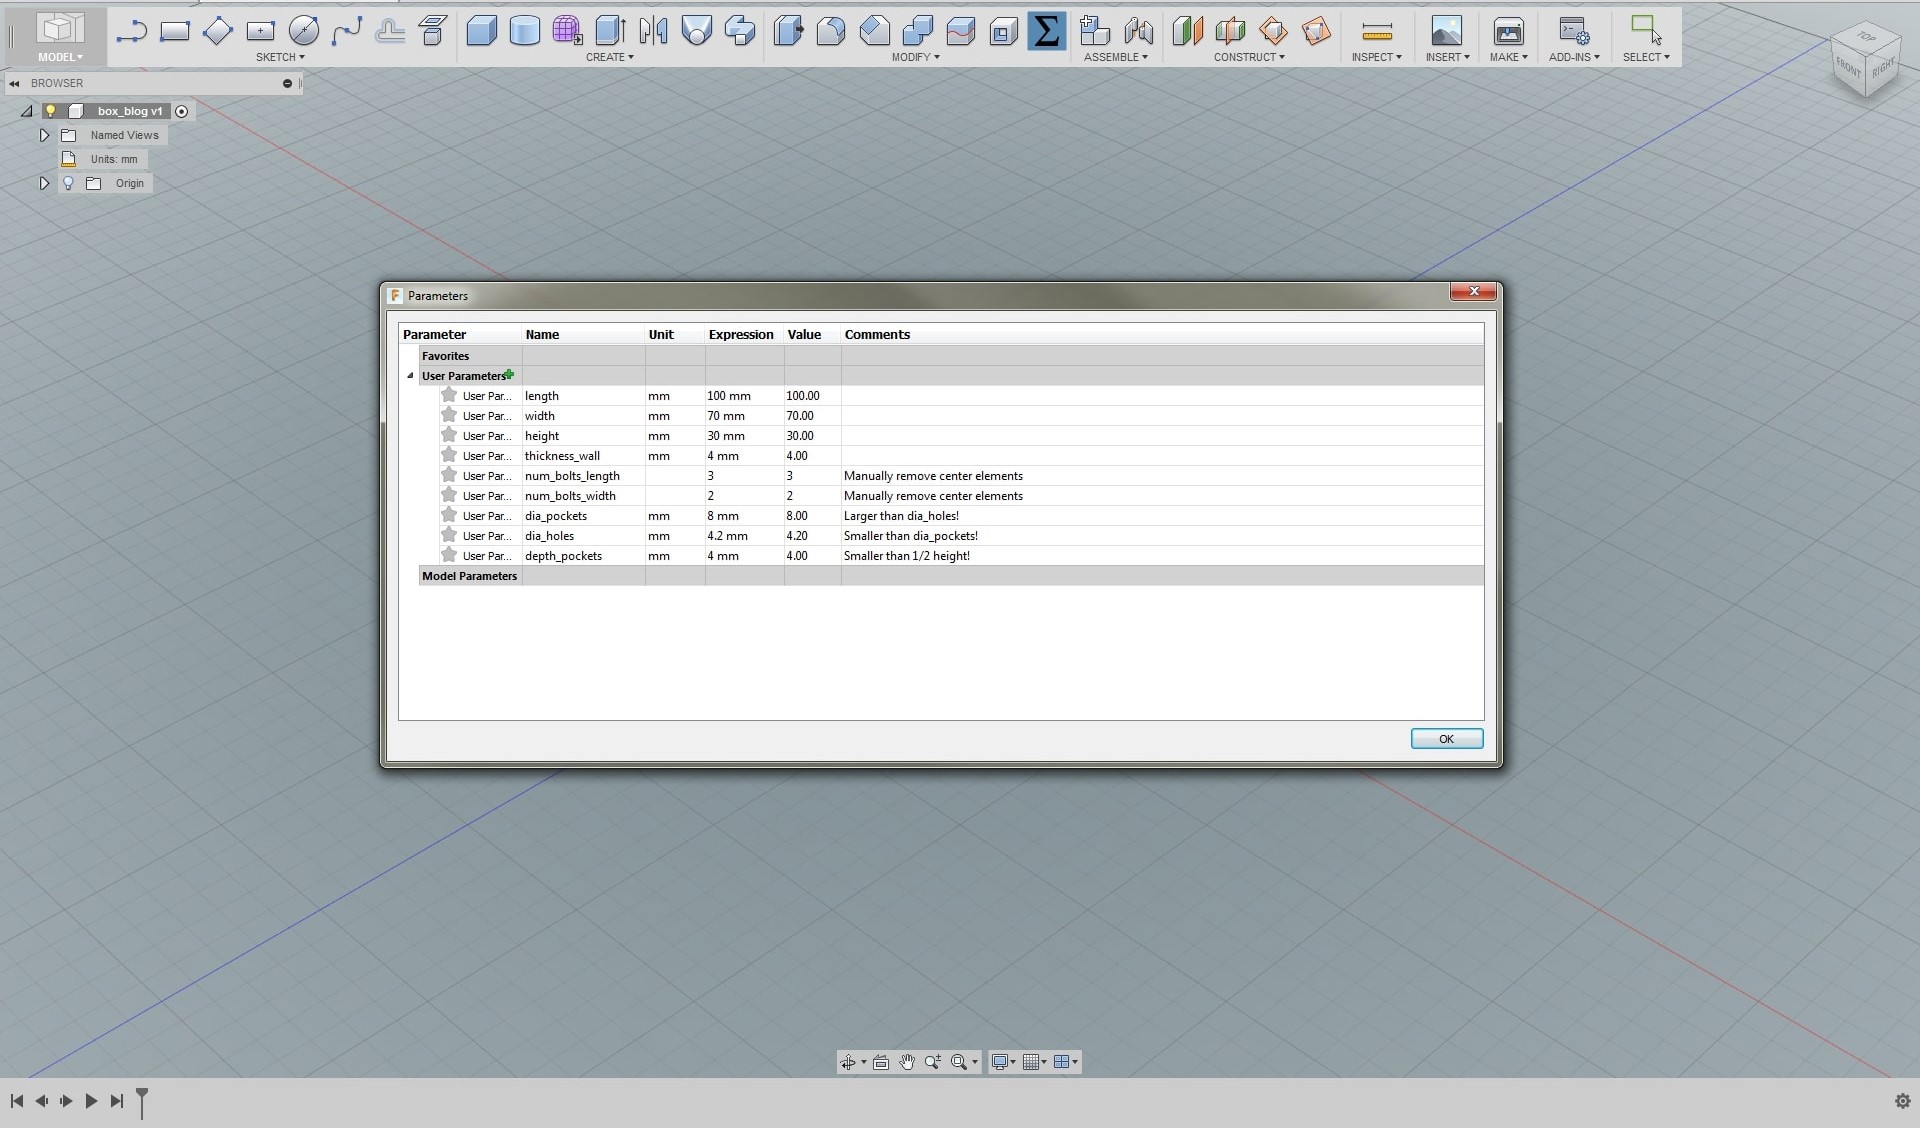
Here is an image of the parameters I created

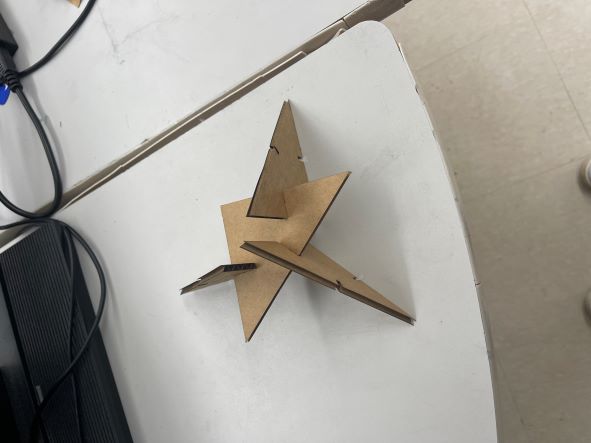
Next, I drew out a basic equilateral triangle. I thought it was more fun because it reminded me of the little triangle magnet toys I had when I was young. I then made three tabs in the center of each side. I had to play with the sizes of the tabs a lot to get it to a point to where it looked good to me. But using the parametric command made that very easy. I also had to account for the thickness of the cardboard. I used a caliber to calculate that easily. I used the parameters in the image above to make the size of the triangle and the size of the tabs. Then after I had everything right I exported it to google drive to open it on the laser cutters computer. I cut it out very quickly because I am accustomed to the laser cutter. I took out the pieces and they fit great. Maybe ever so slightly tight fitting but it turned out very good. I am able to make many fun things with these. I will print more in the future to create even bigger designs with the triangles.
Group Work
Lastly, for the group work, me and my partner Jack Donnelly worked on finding the speed, frequency, power, kerf, and rate on two of the laser cutters. Visit the group site to see more about this. I struggled a lot setting up the group site. Whenever I wanted to make a merge request I kept getting a weird error that said it could not merge automatically. That was the most vague error ever and I got very frustrated. But after looking into my merge request I couldn’t merge request because I hadn’t gone into VSCode with the clone and tried to push anything or commit anything. I then went into VSCode to do that and then it worked. I approved my own request and continued forward. I used Alaric Pan’s documentation, and I was able to get everything working correctly after I figured out the merge issue.