8. Computer controlled machining
Idea
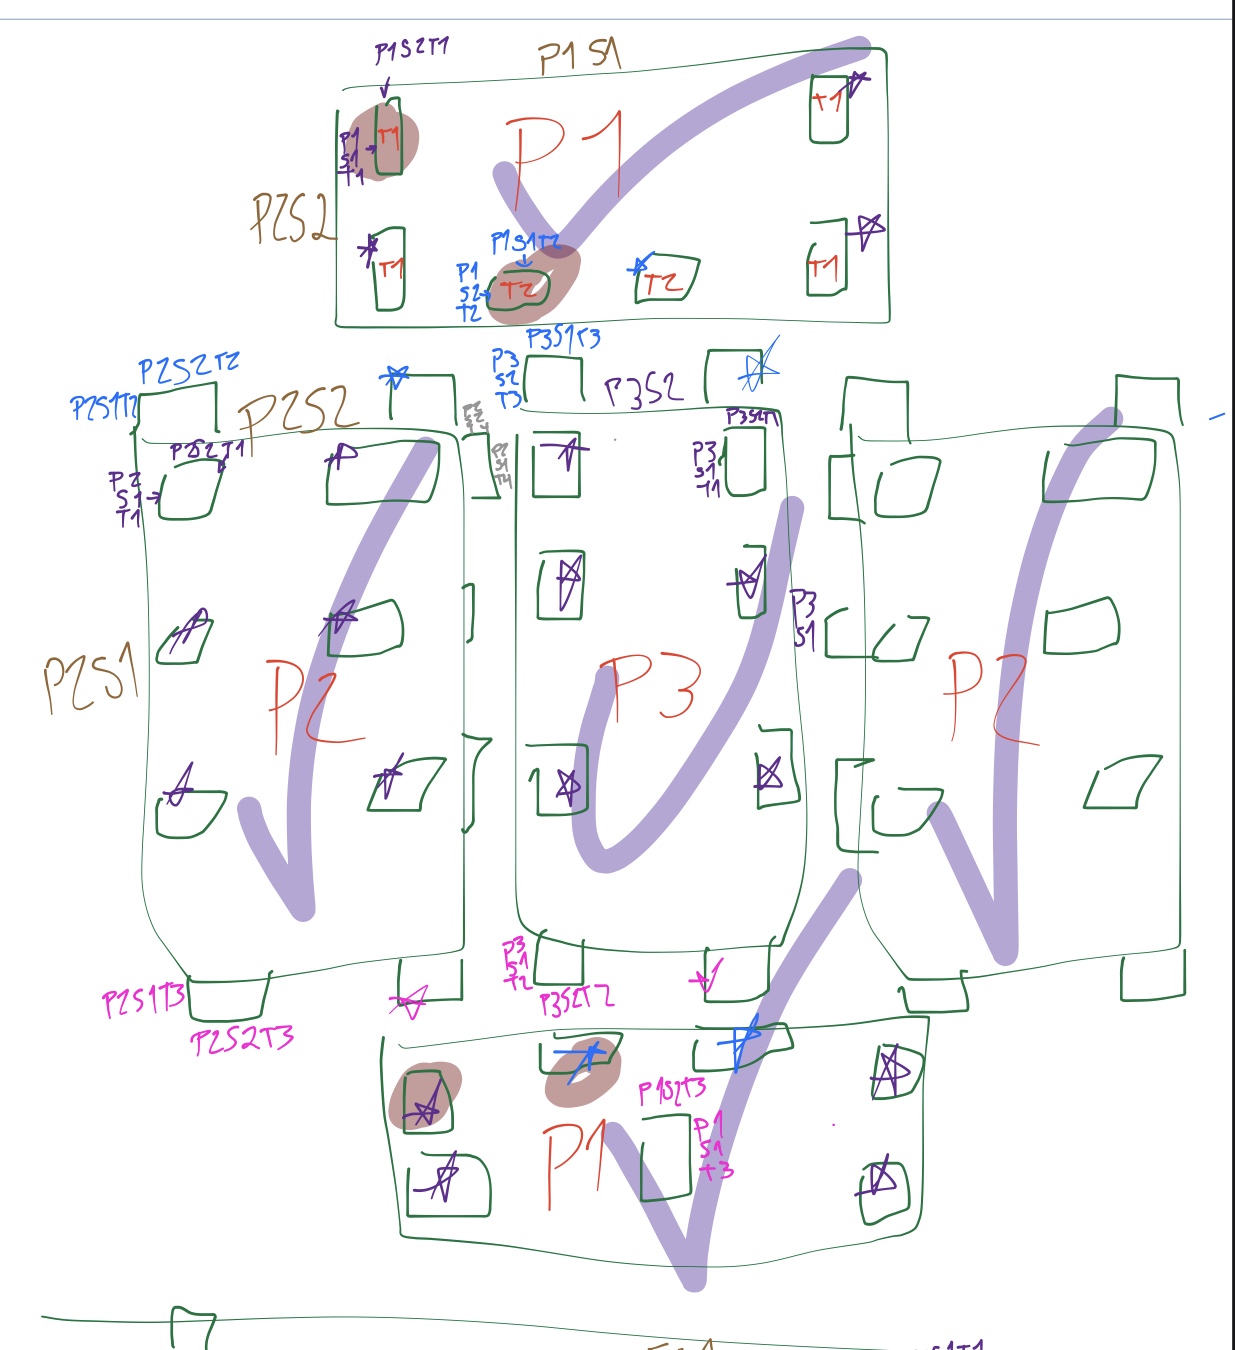
My idea was some sort of shelf. I realized I have a lot of plants at home so making a plant shelf for them all would be very cool. I started with drawing it out on Notability. The design I made up and I thought it looked pretty cool.

Modeling
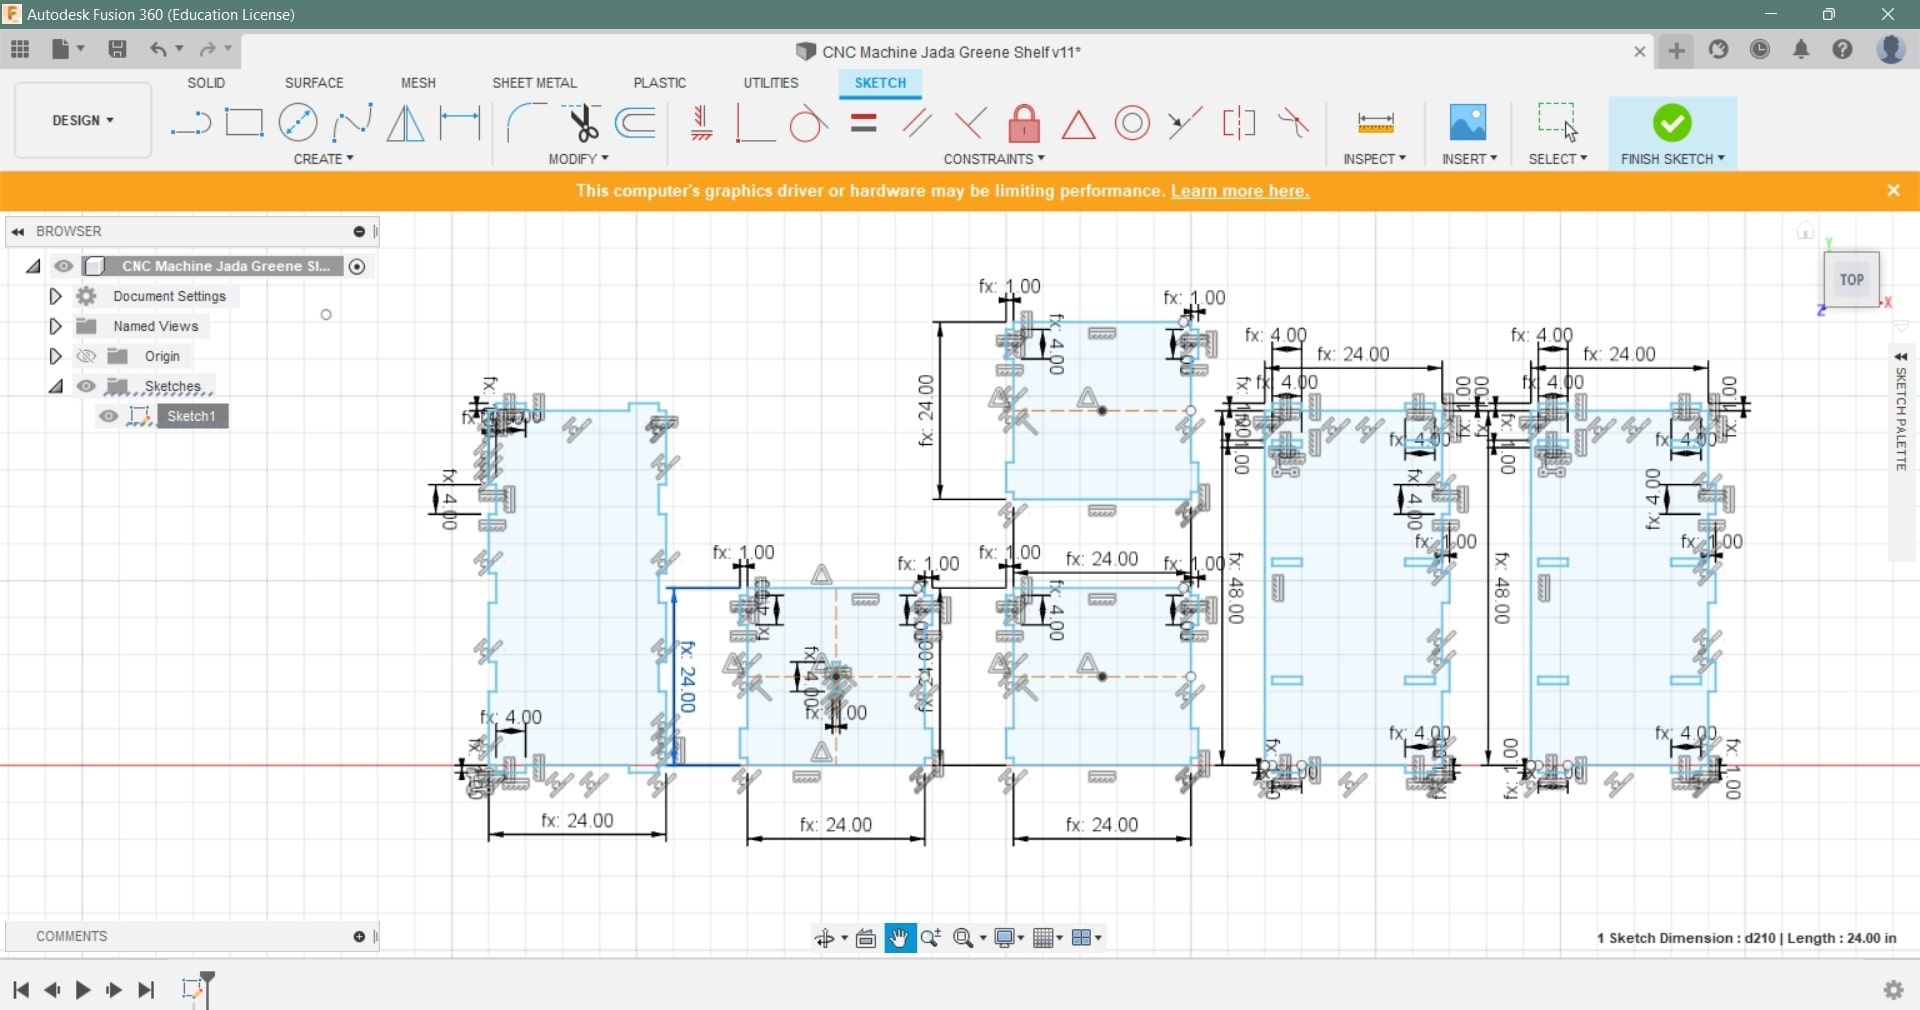
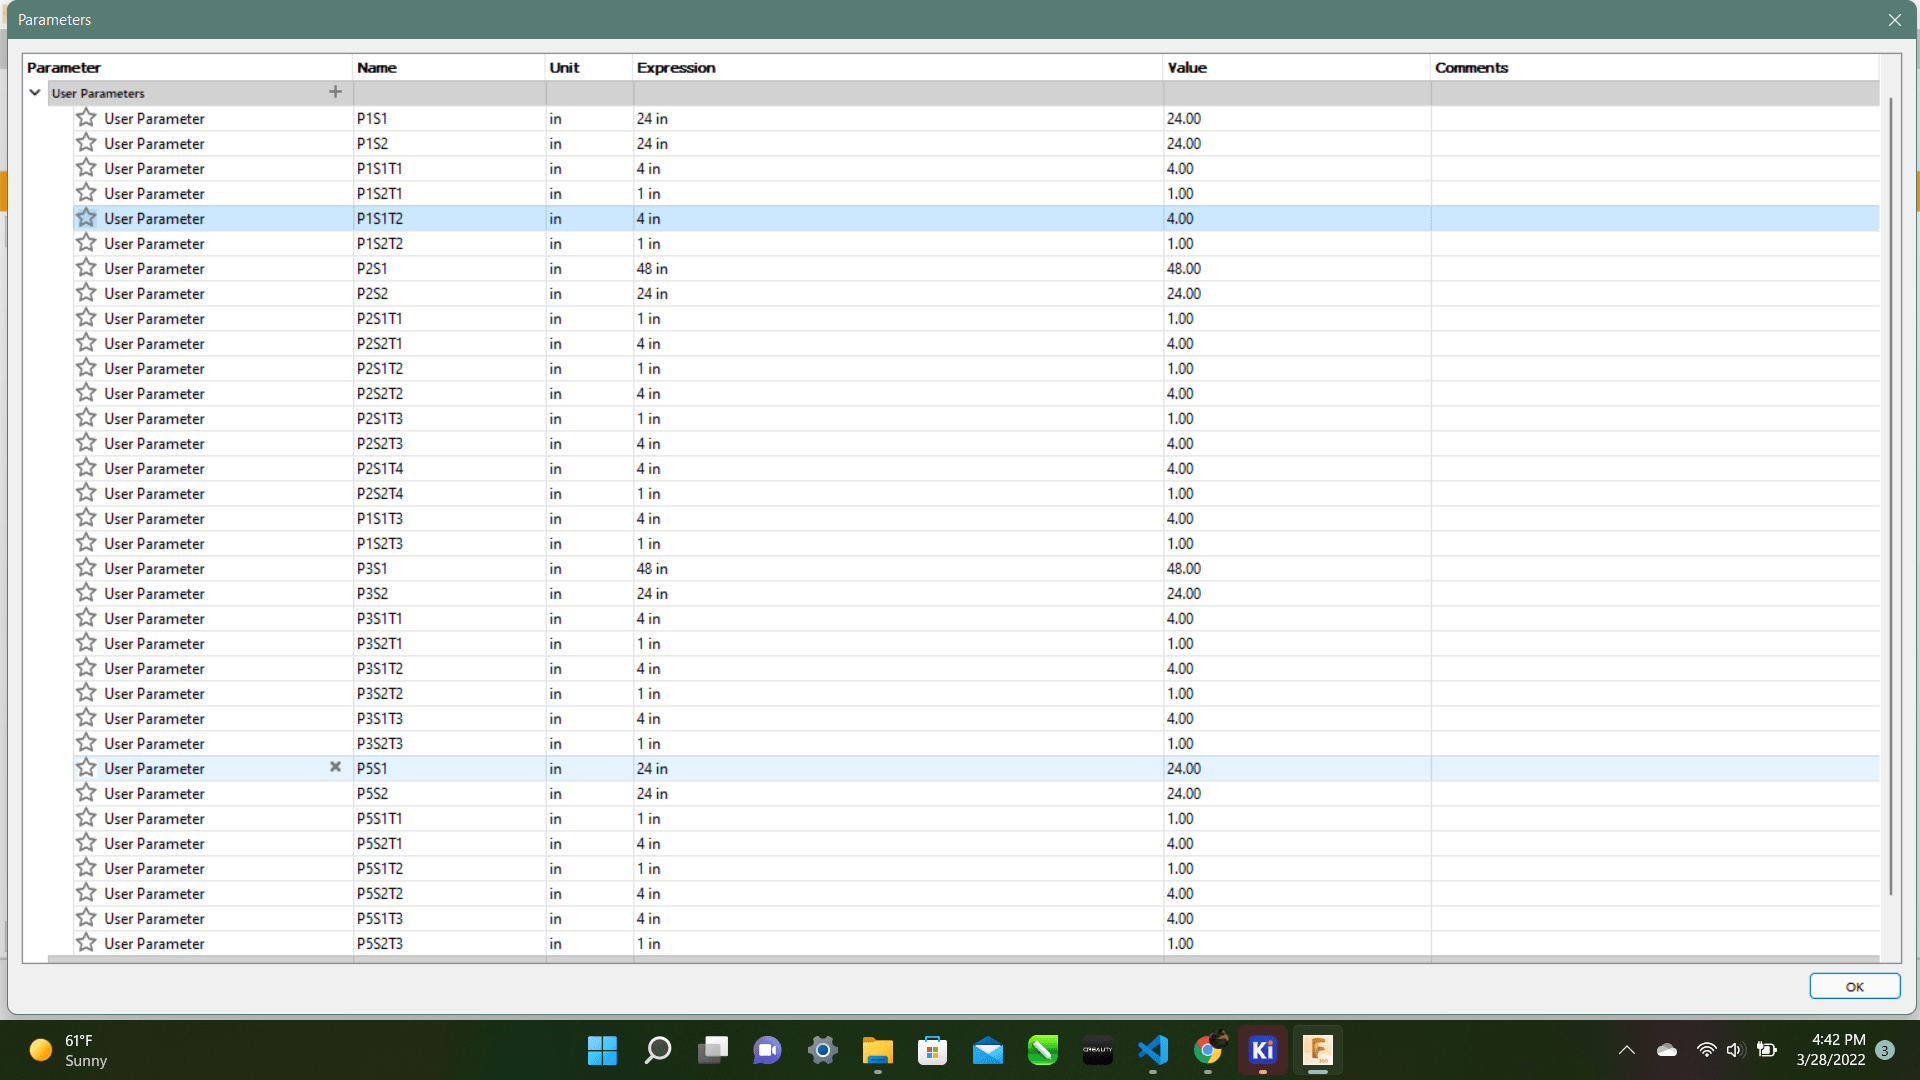
I first started modeling in fusion 360. This took me around 4 hours plus to get the parametric and everything right. Although using Fusion turned into one big constraint mess. The parametric stopped working and it was a mess.
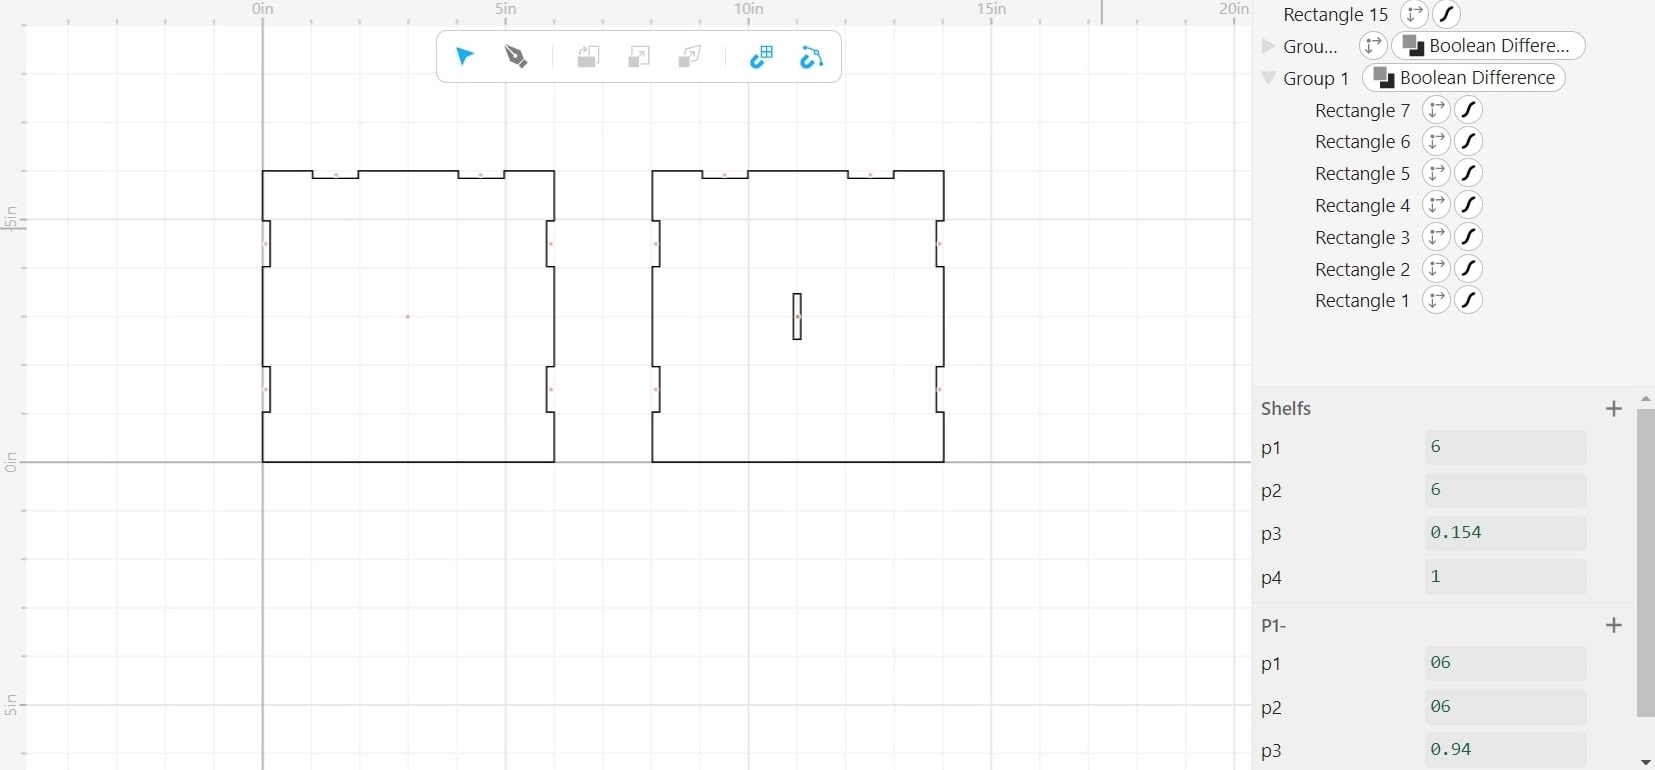
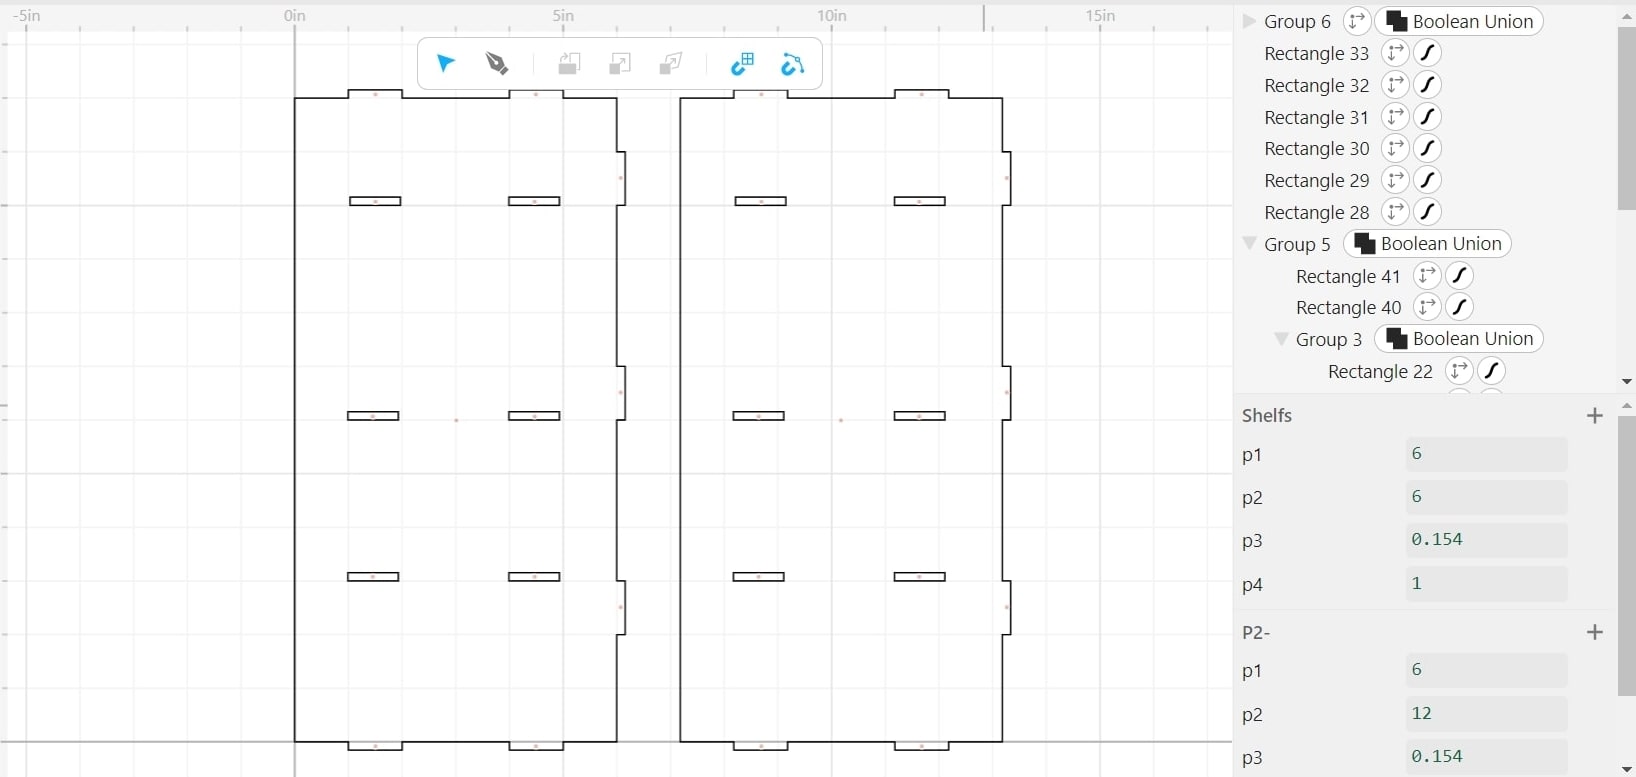
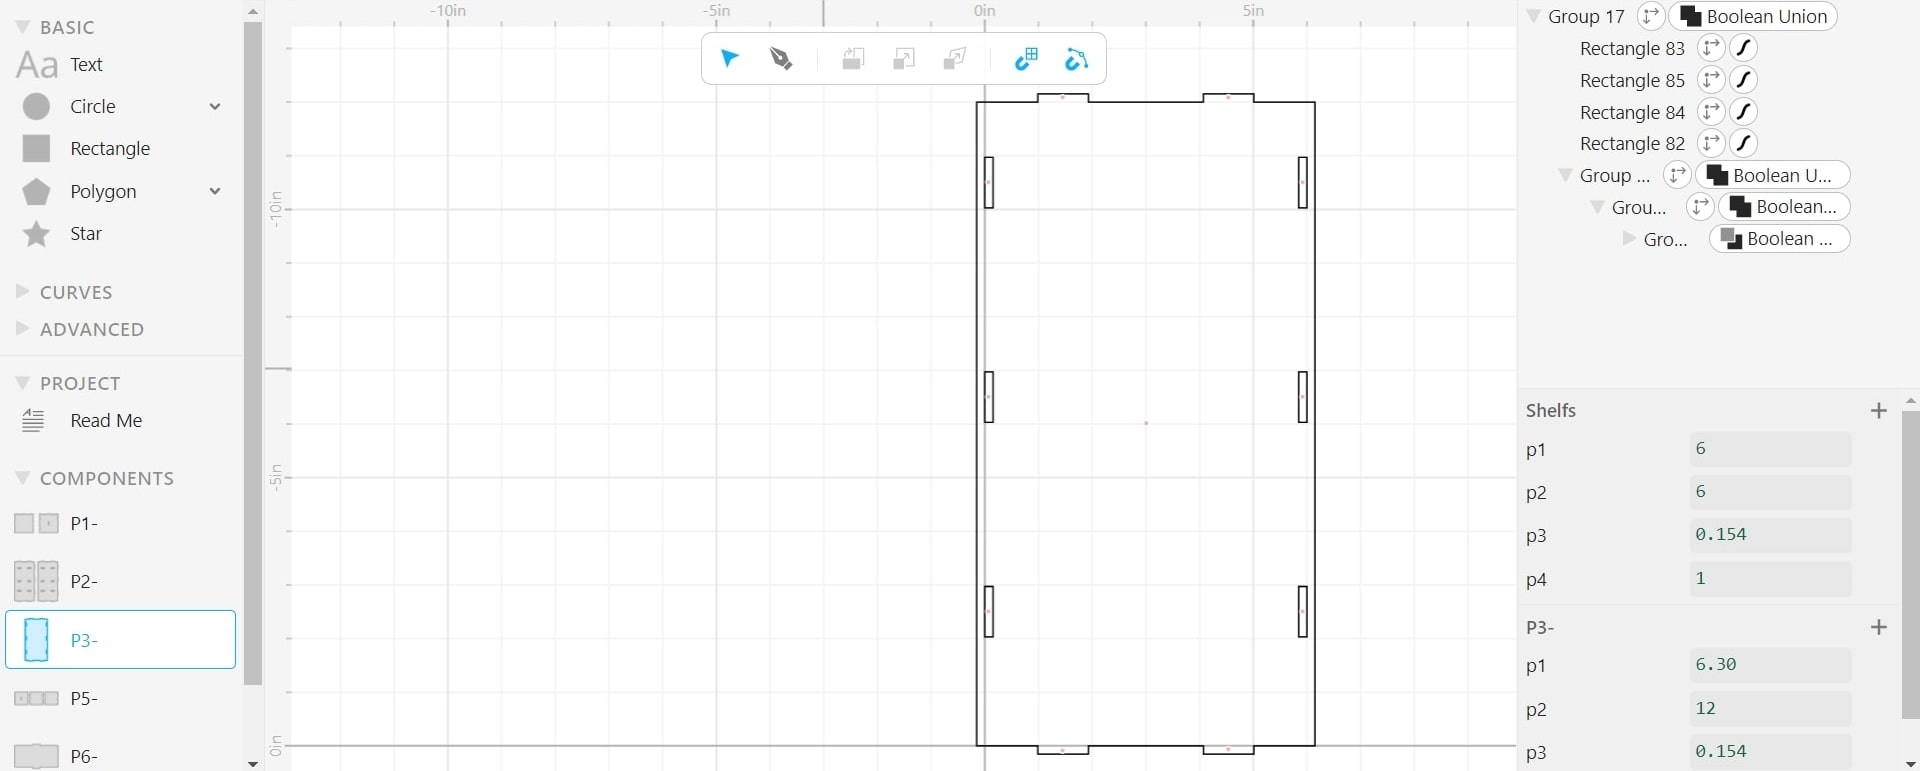
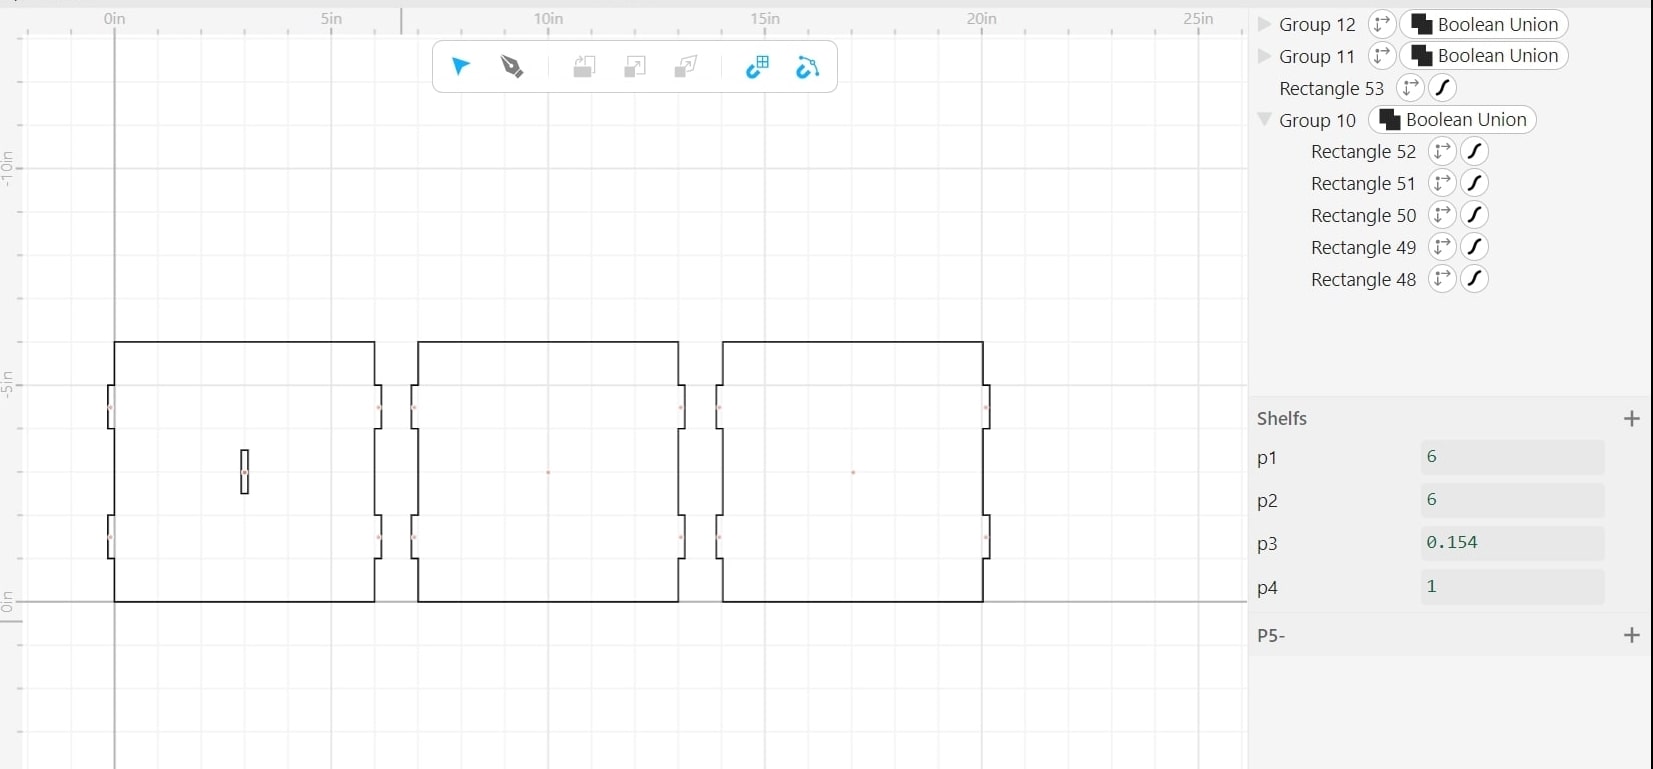
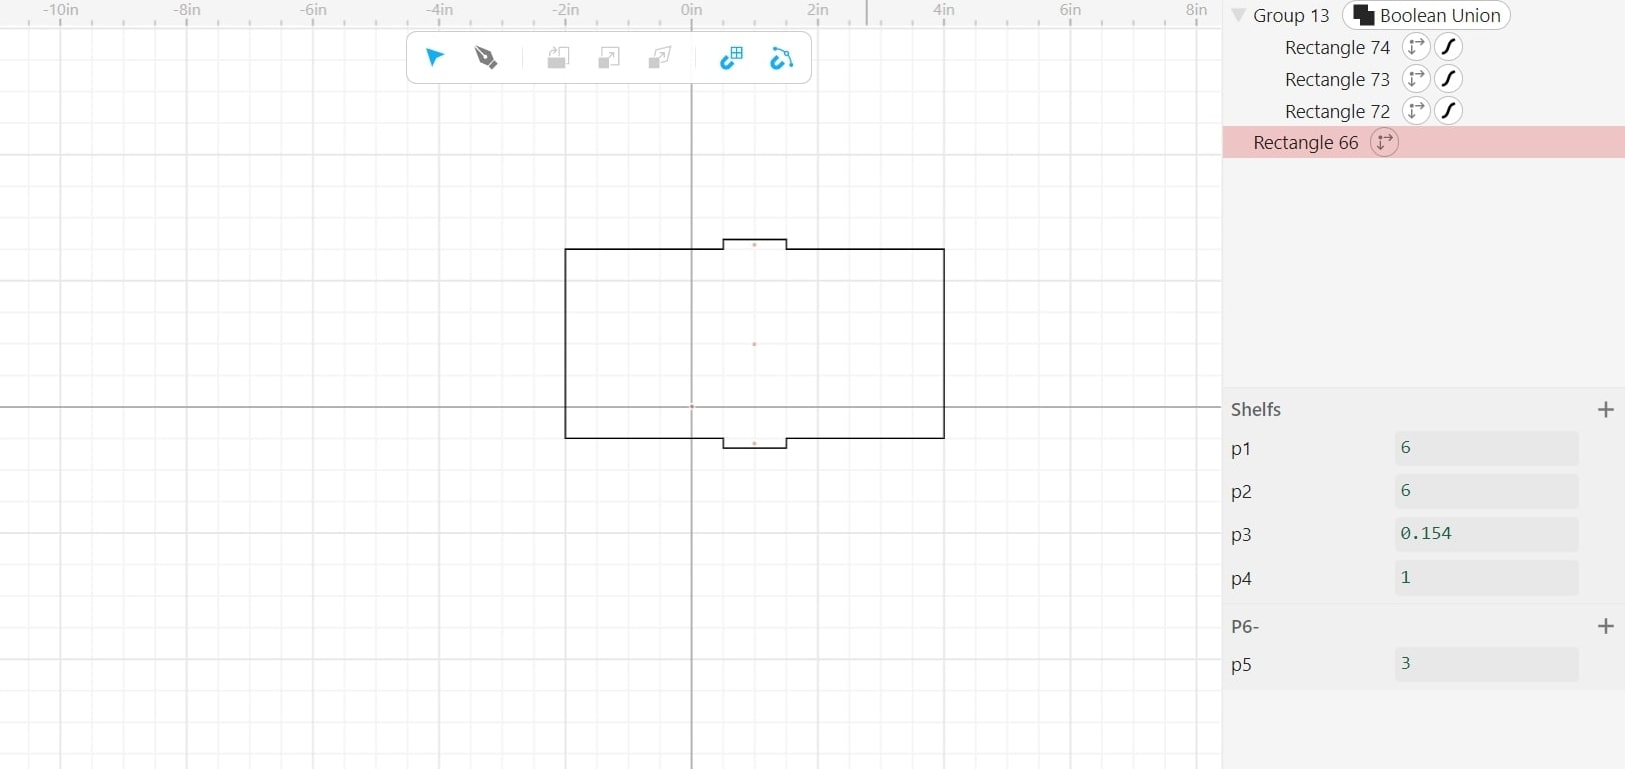
Then I remember we had another program named Cuttle that I heard could be cool. So I tried that instead. Cuttle worked for me amazing. I used it with parametric and finished my design in about half an hour. I made it all in different parts and this is how it turned out:
Cutting
Laser Cutter
I first did it in cardboard. I changed the parametric to respectively fit the cardboard dimensions and I exported it as a DXF then imported it into Corel draw. This is how it turned out in Corel
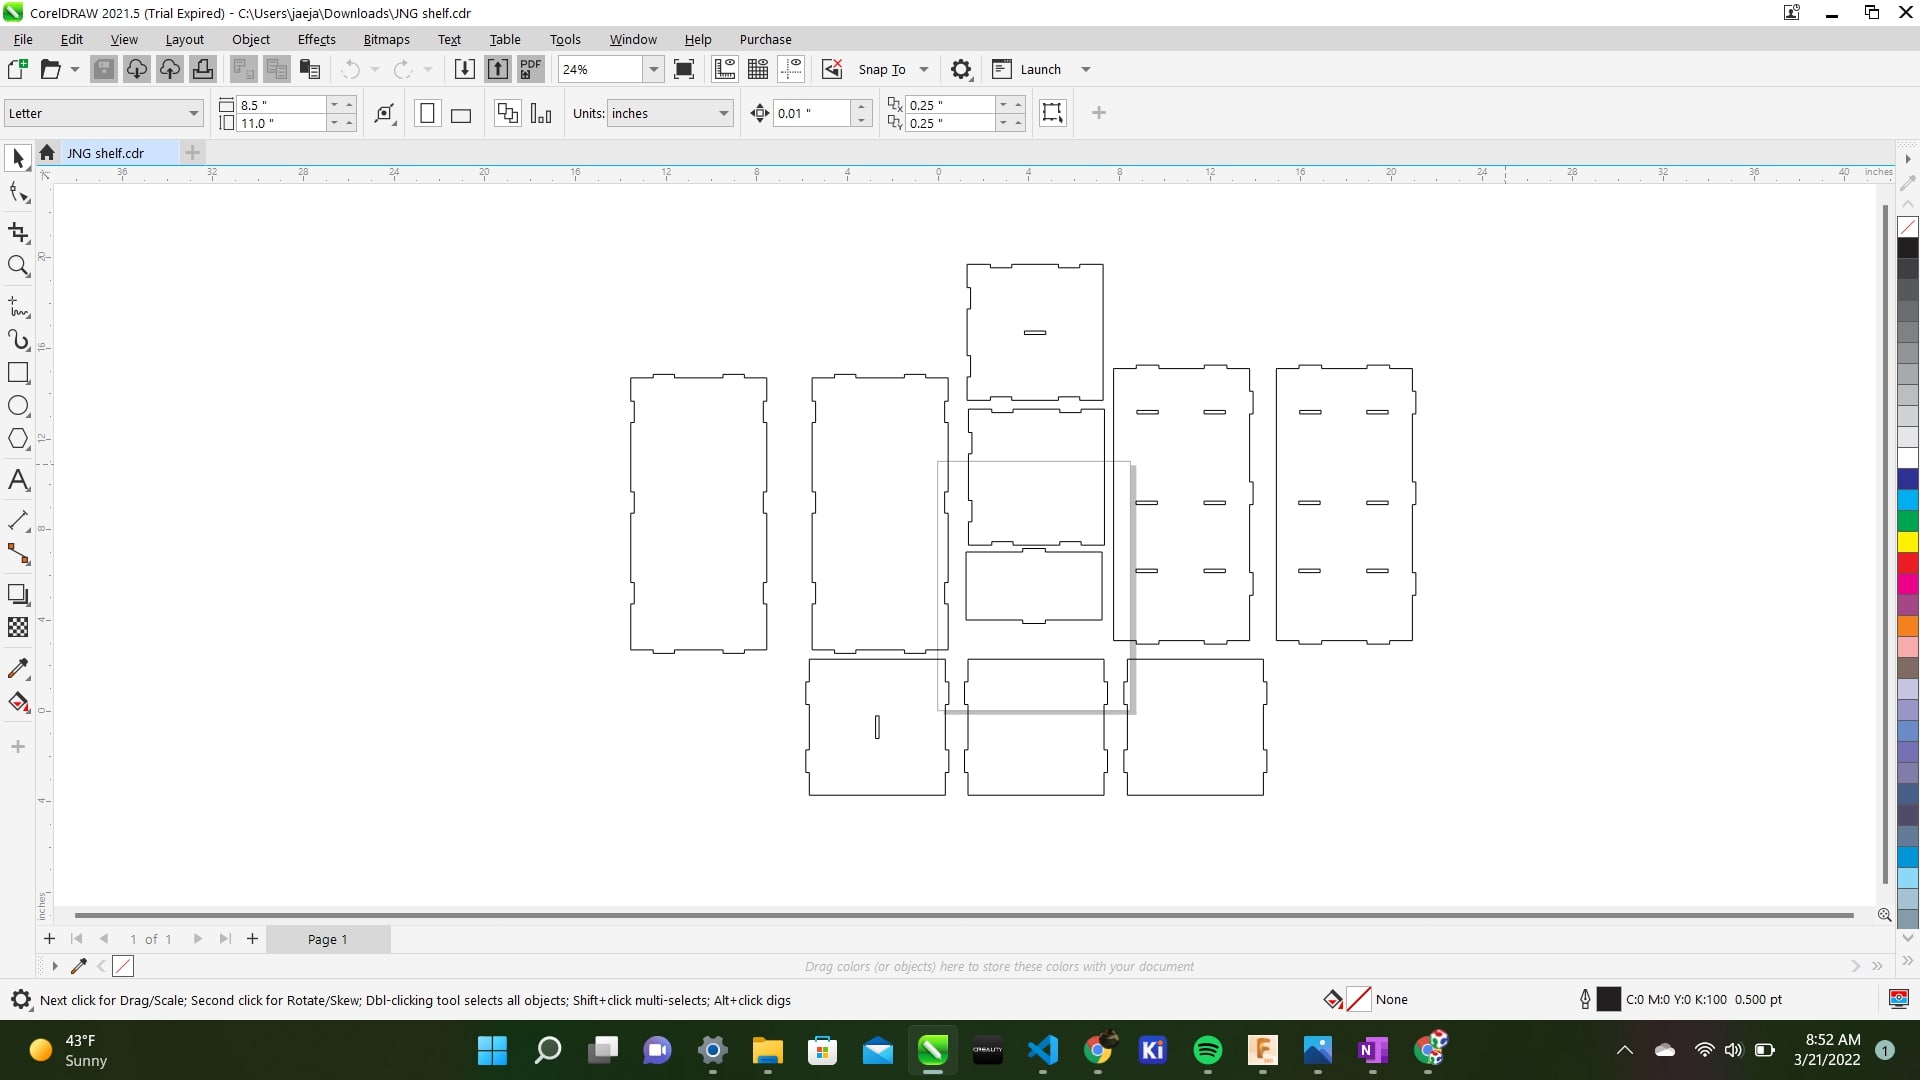
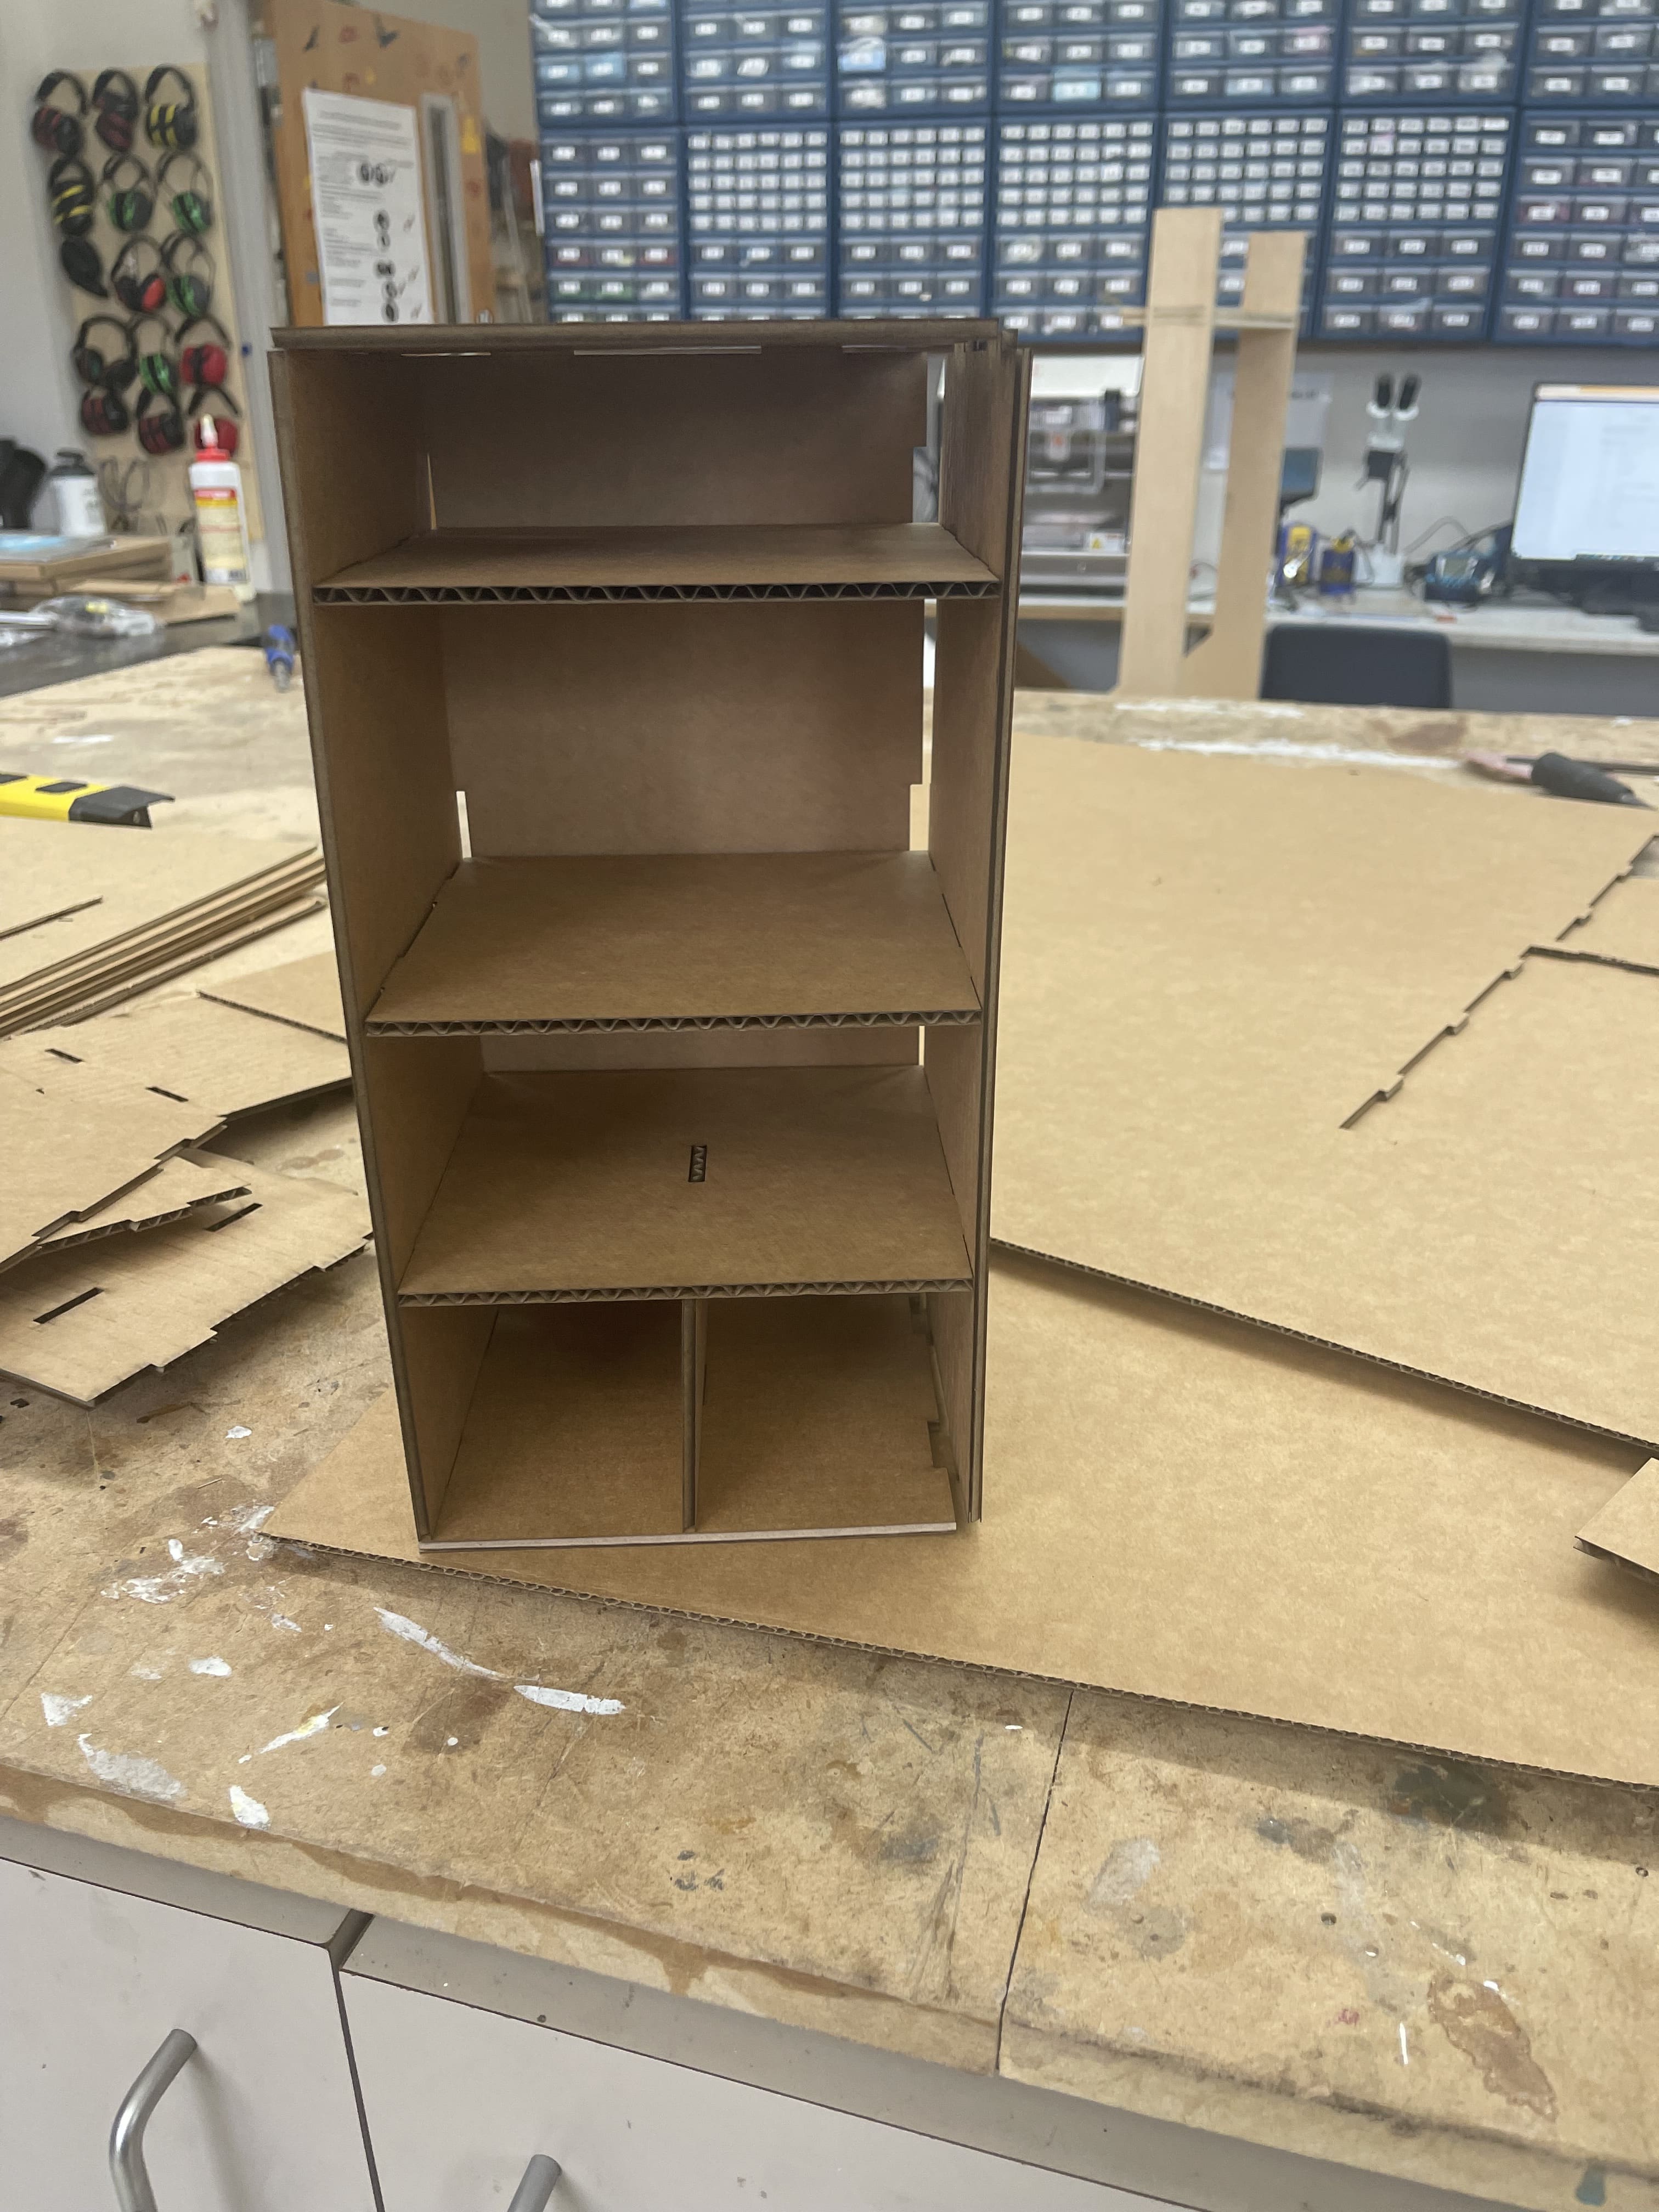
It cut out beautifully. This is what it turned out to be. I only missed one dimension of the back wall and I have to make that longer but that is an easy fix.
This is my design after I fixed the parametric.
CNC Machine
Design/CAM’ing
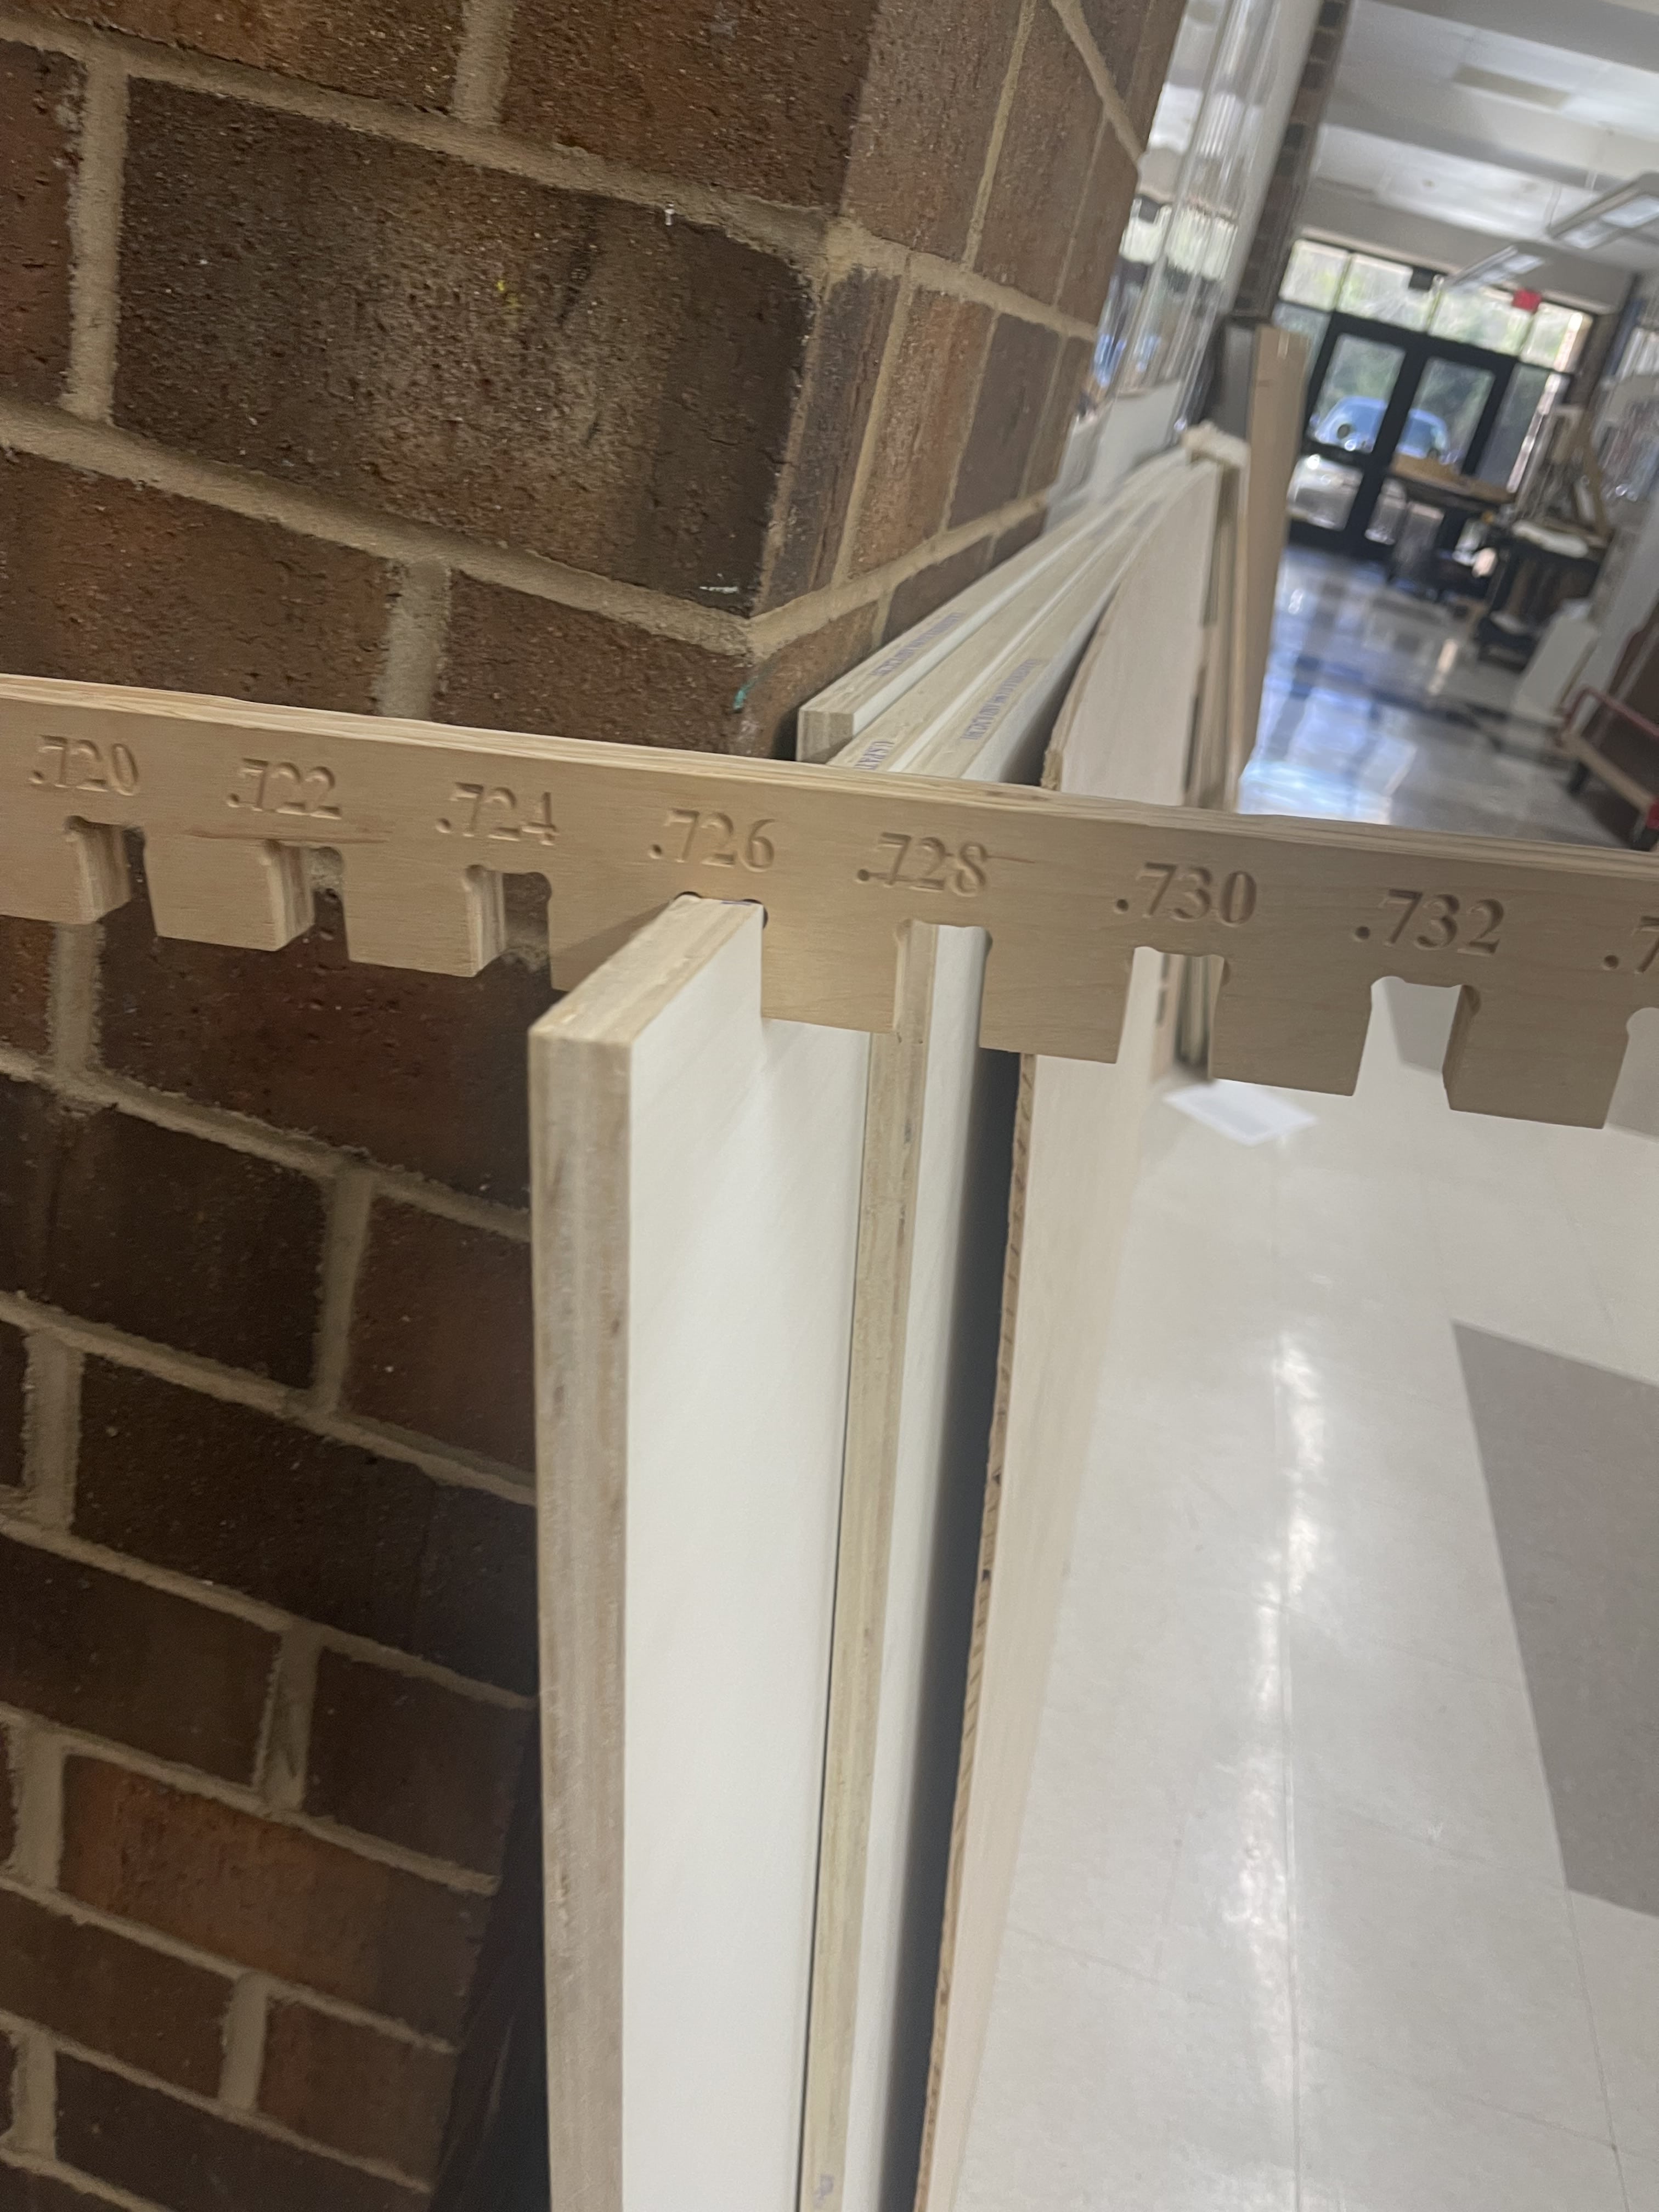
I first had to change my parametric to fit the real size of the project. I did that quite easily in cuttle then I had to measure the thickness of my wood. I used this tool to measure my wood:
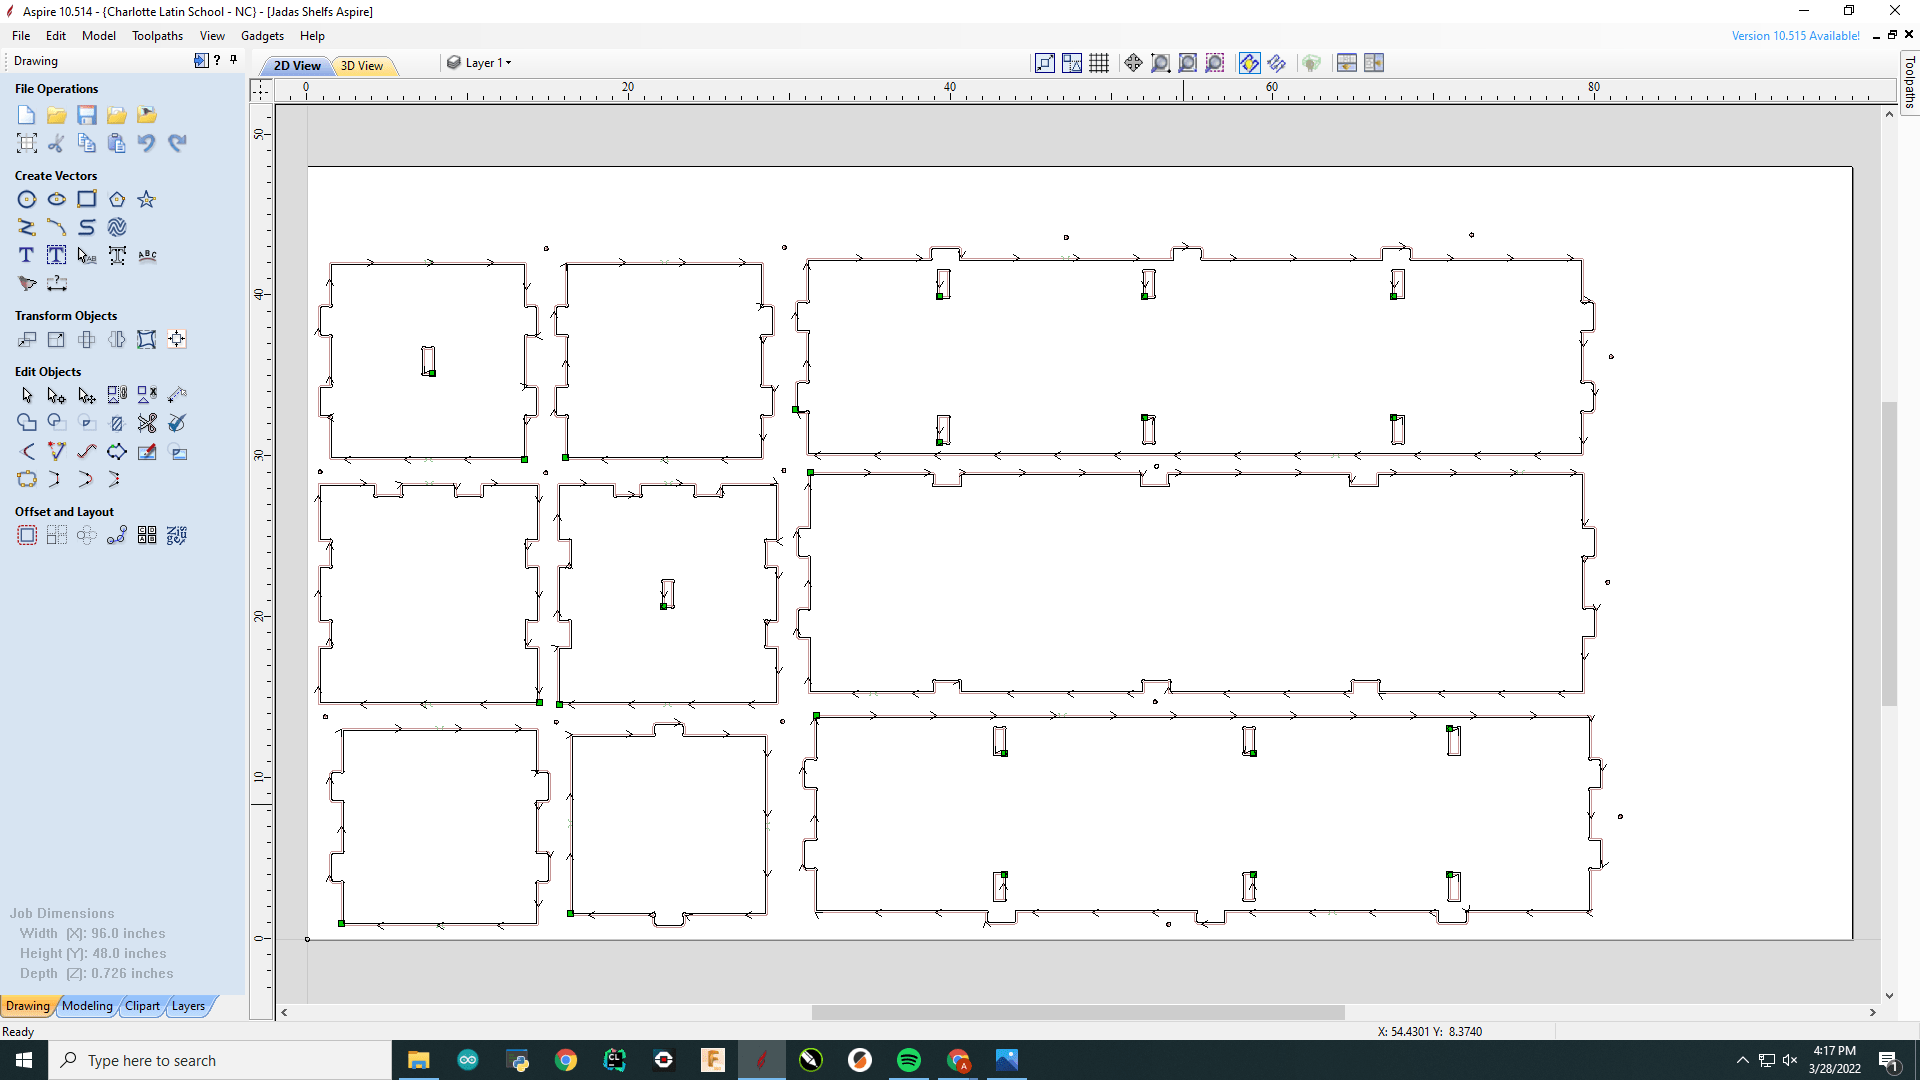
After that I exported all my cuttle design pieces as an SVG and imported them into Aspire. When in aspire I moved them all to fit the wood size of the bed of the CNC Machine. Then I added a lot of dogbones into my design in critical places to help my design fit well.
Toolpath 1
On toolpath 1 I used it to use it for my tab holes in the middle of my shelf design. I wanted to cut them all the way out that’s why I made it a “2D Profile Toolpath”. I set start depth at 0.0 and cut depth the thickness of my wood which is 0.726”. As my bit I used a End Mill 0.25 inch. I then selected 4 passes with the pass depth starting at 0.1815 then going to 0.726. I made it an “Inside Left” with a direction of climb on machine vectors because they are inside tabs. I did not add tabs because the piece cut out would be so small the vacuum connected to the machine would just suck it up. Then I named the toolpath “Jada G Inside Profile Cut” and Clicked calculate.
Toolpath 2
On toolpath 2 I did the actual cut of my shelves. I made it a 2D Profile toolpath cut again because I need it to cut all the way through. I set start depth at 0.0 and cut depth the thickness of my wood which is 0.726”. As my bit I used a End Mill 0.25 inch. I then selected 4 passes with the pass depth starting at 0.1815 then going to 0.726. That is the same as the first toolpath. Although for this one I selected “Outside / Right” under machine vectors. Then I added tabs because the pieces are very large and I do not want them to move around. The length of the tabs are 0.25” and the thickness is 0.125”. The tabs are added on the last pass. I autogenerated tabs and it put 2 on every piece and I thought that was good so I did not add any more. Lastly, I named it “Jada G Outside Profile”.
Toolpath 3
Lastly, I did the last toolpath as a “Drilling Toolpath”. I did the start depth again at 0.0 and the Cut depth at 0.125 so the hole is not deep at all but deep enough for me to see. I add these not because I have trouble drilling but so I can comfortably add screws onto the board without it being in the line of my cut which would be a big problem. I used the “End Mill 0.25” Bit for it but used a “0.250” Drill Bit” with wood screw to actually fixture the board onto the CNC. I named the Toolpath “Jada G Drill Cut”.
Also it is super important to click “Set Job Dimensions and Origin” on the left side of the screen and make sure the job type is single sided, the job size characteristics are X: 96.0 Y: 48.0 Z:(the thickness of your wood. mine was 0.726). The Z Zero position is machine bed and the XY Datum Position is bottom left where the machine starts.
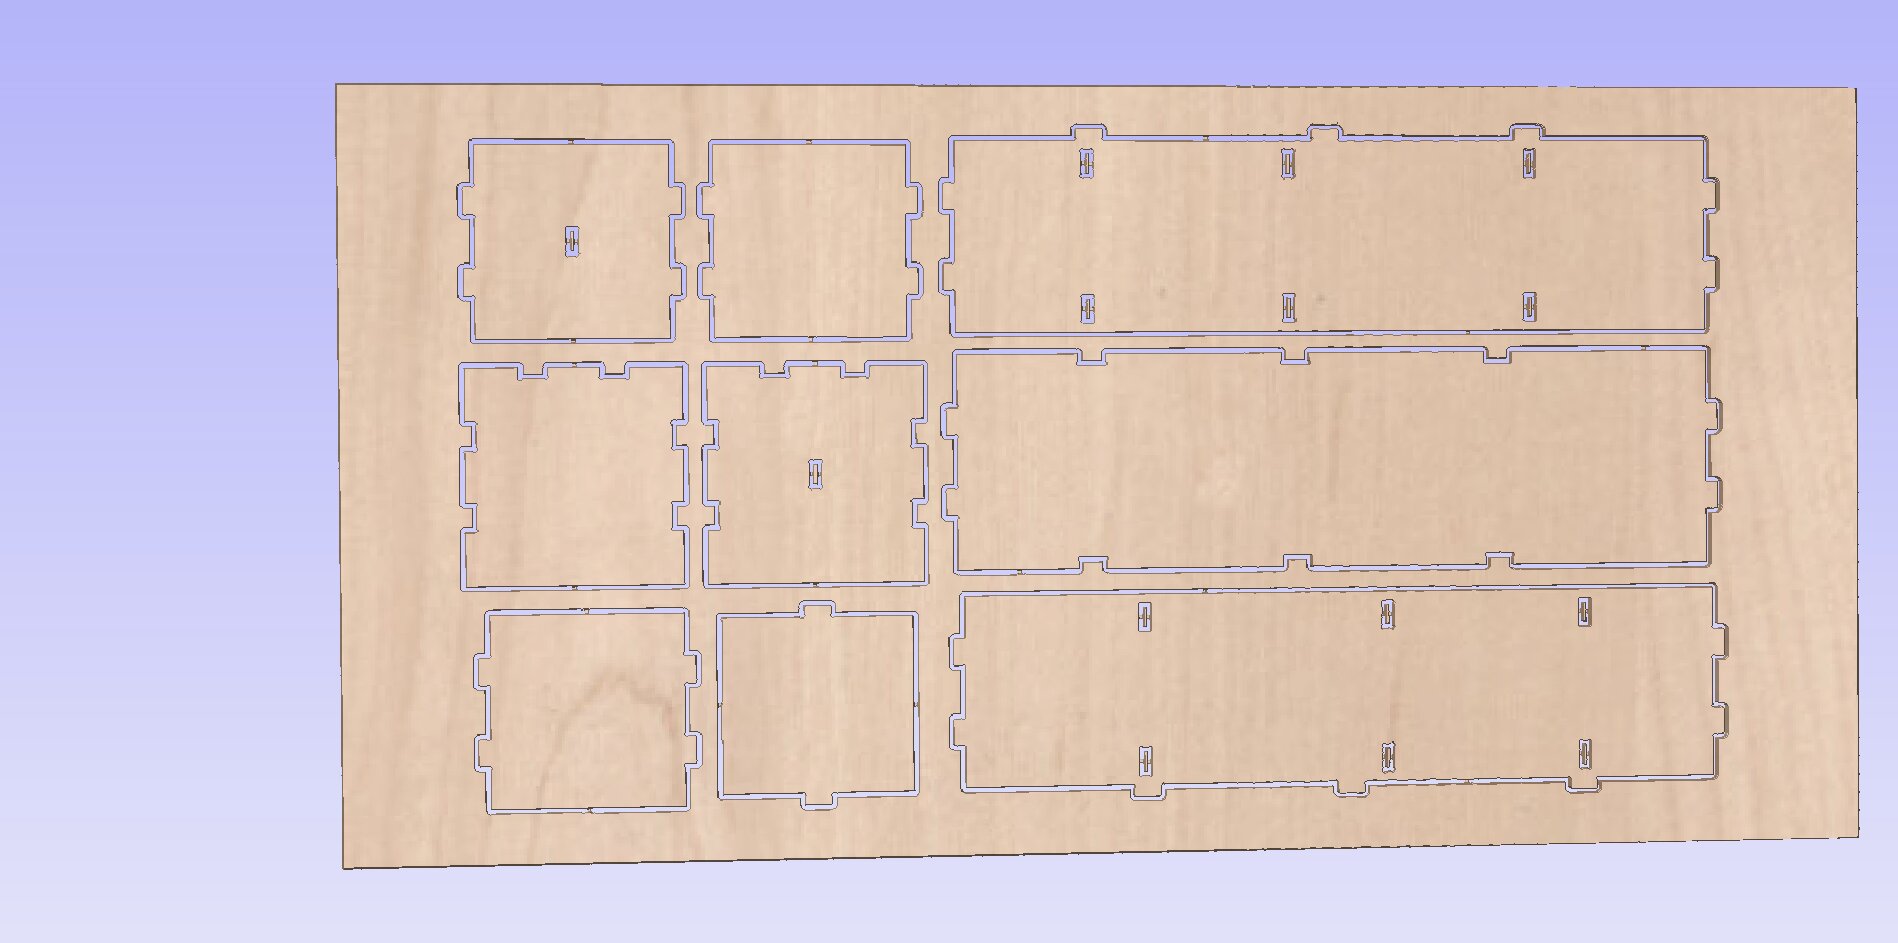
Here is how it looked in Aspire after adding the dogbones and the toolpaths:
I brought in the heavy board and put it on the machine. Then I screwed it in in places where I knew it would not interfere with the cut. Then I followed the workflow and started cutting. On my first try cutting it cut well but I made a mistake on the actual design.

In cuttle when I changed the parametric it messed up the length of the tabs so I had to change it manually which messed all the dimensions. It was inaccurate and I didn’t catch it and it completely failed. It was unfixable, that was a big mistake so I had to go back and fix it and re laser cut it out to see if actually fit.
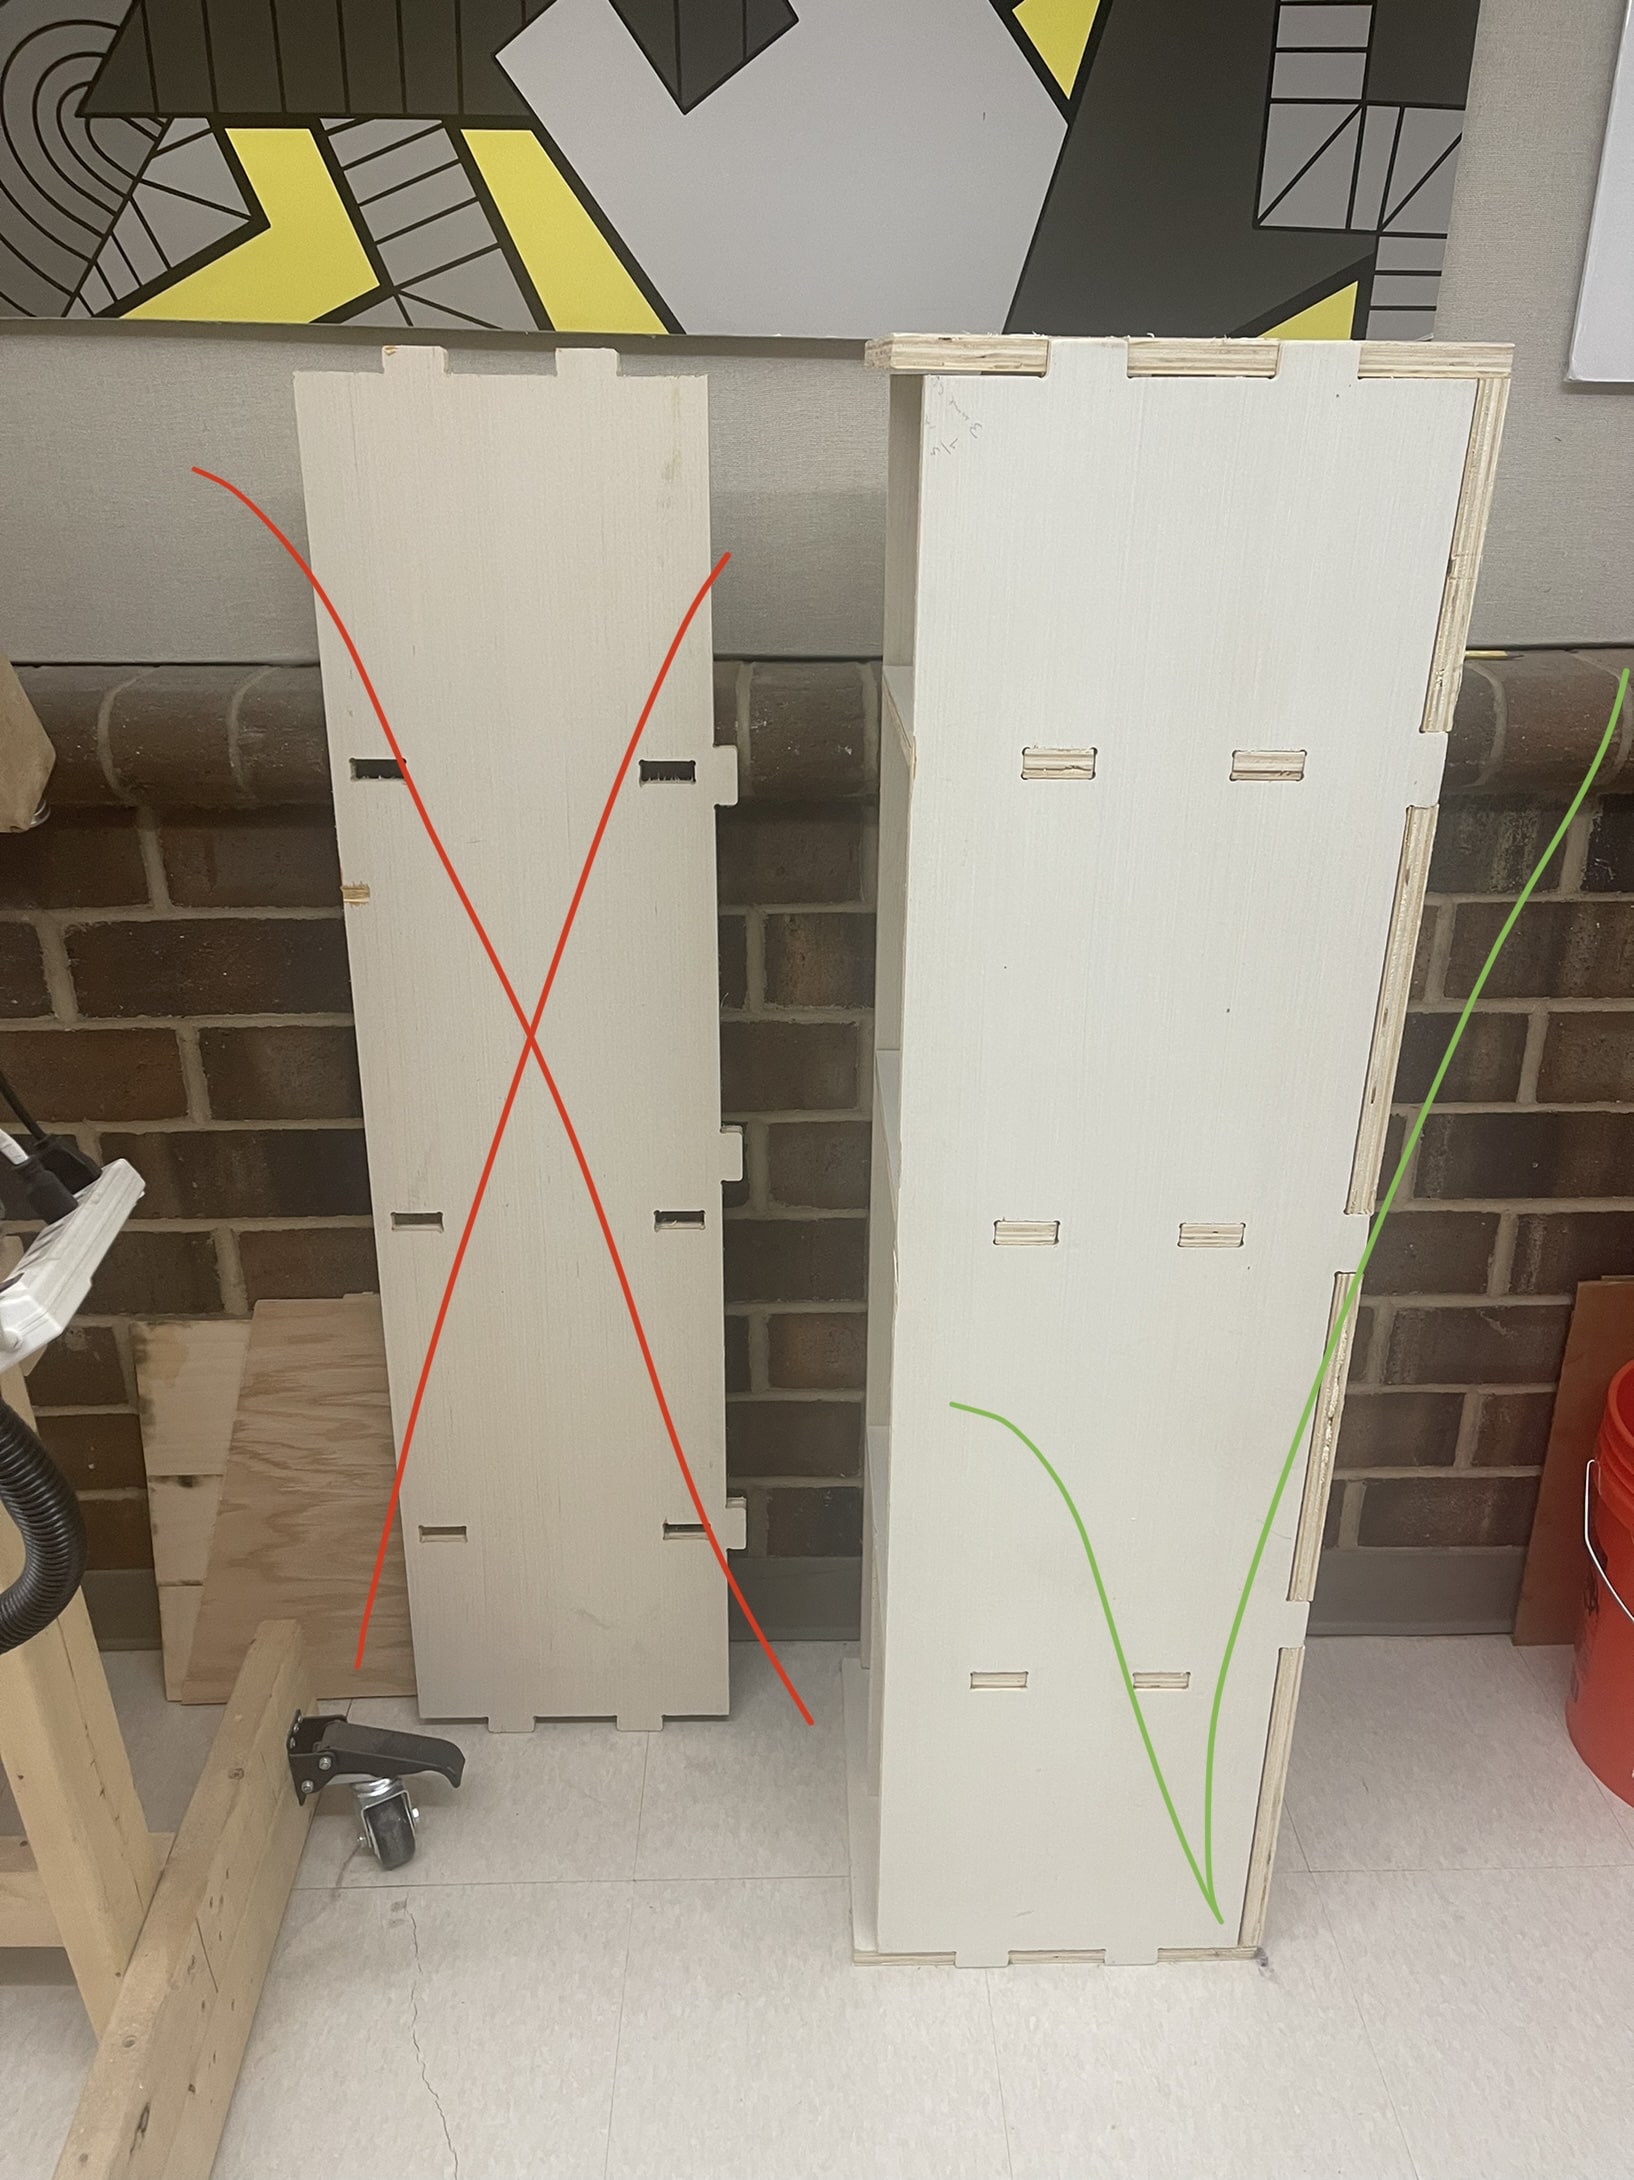
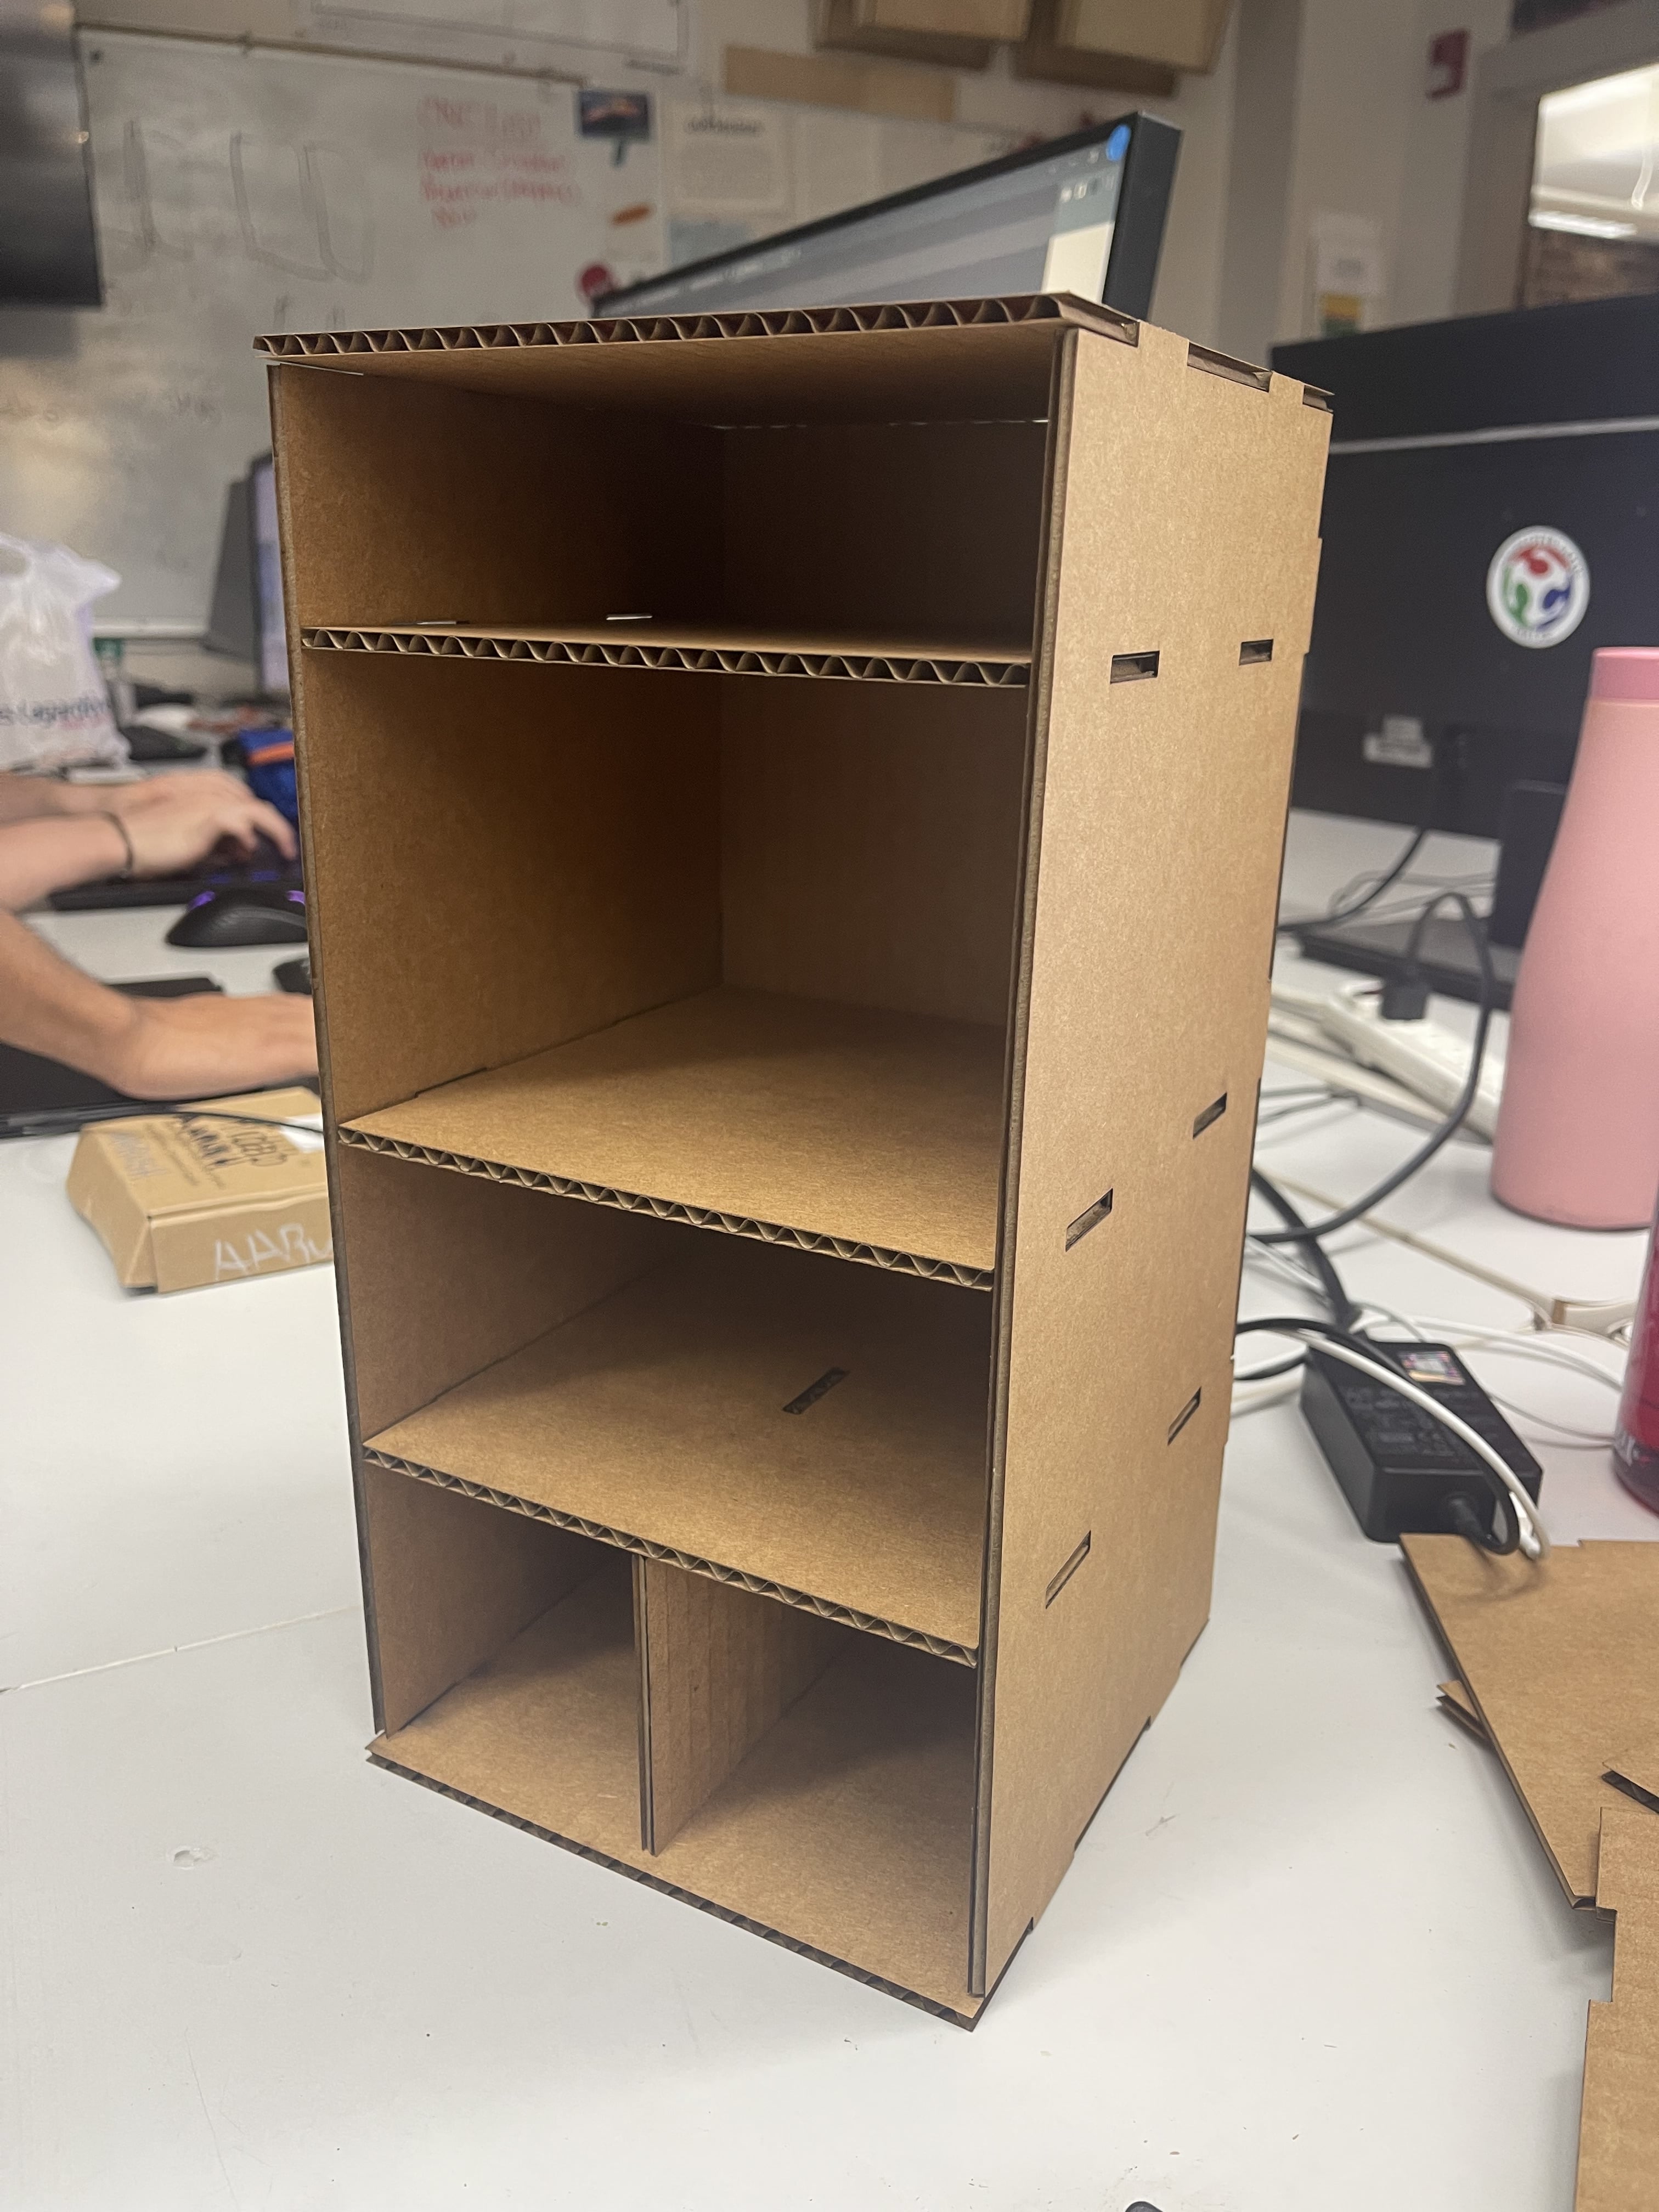
After Fixing the parametric in cuttle I finally got it cut out on cardboard. Then I put it back into Aspire and restarted it completely. Since I had already done it once before I went through that part relatively quickly. Then I started cutting again. Again, since I had done it before and had watched my peers do it, I went through it quickly, with the help of the workflow of course.
Here is how it turned out finally:
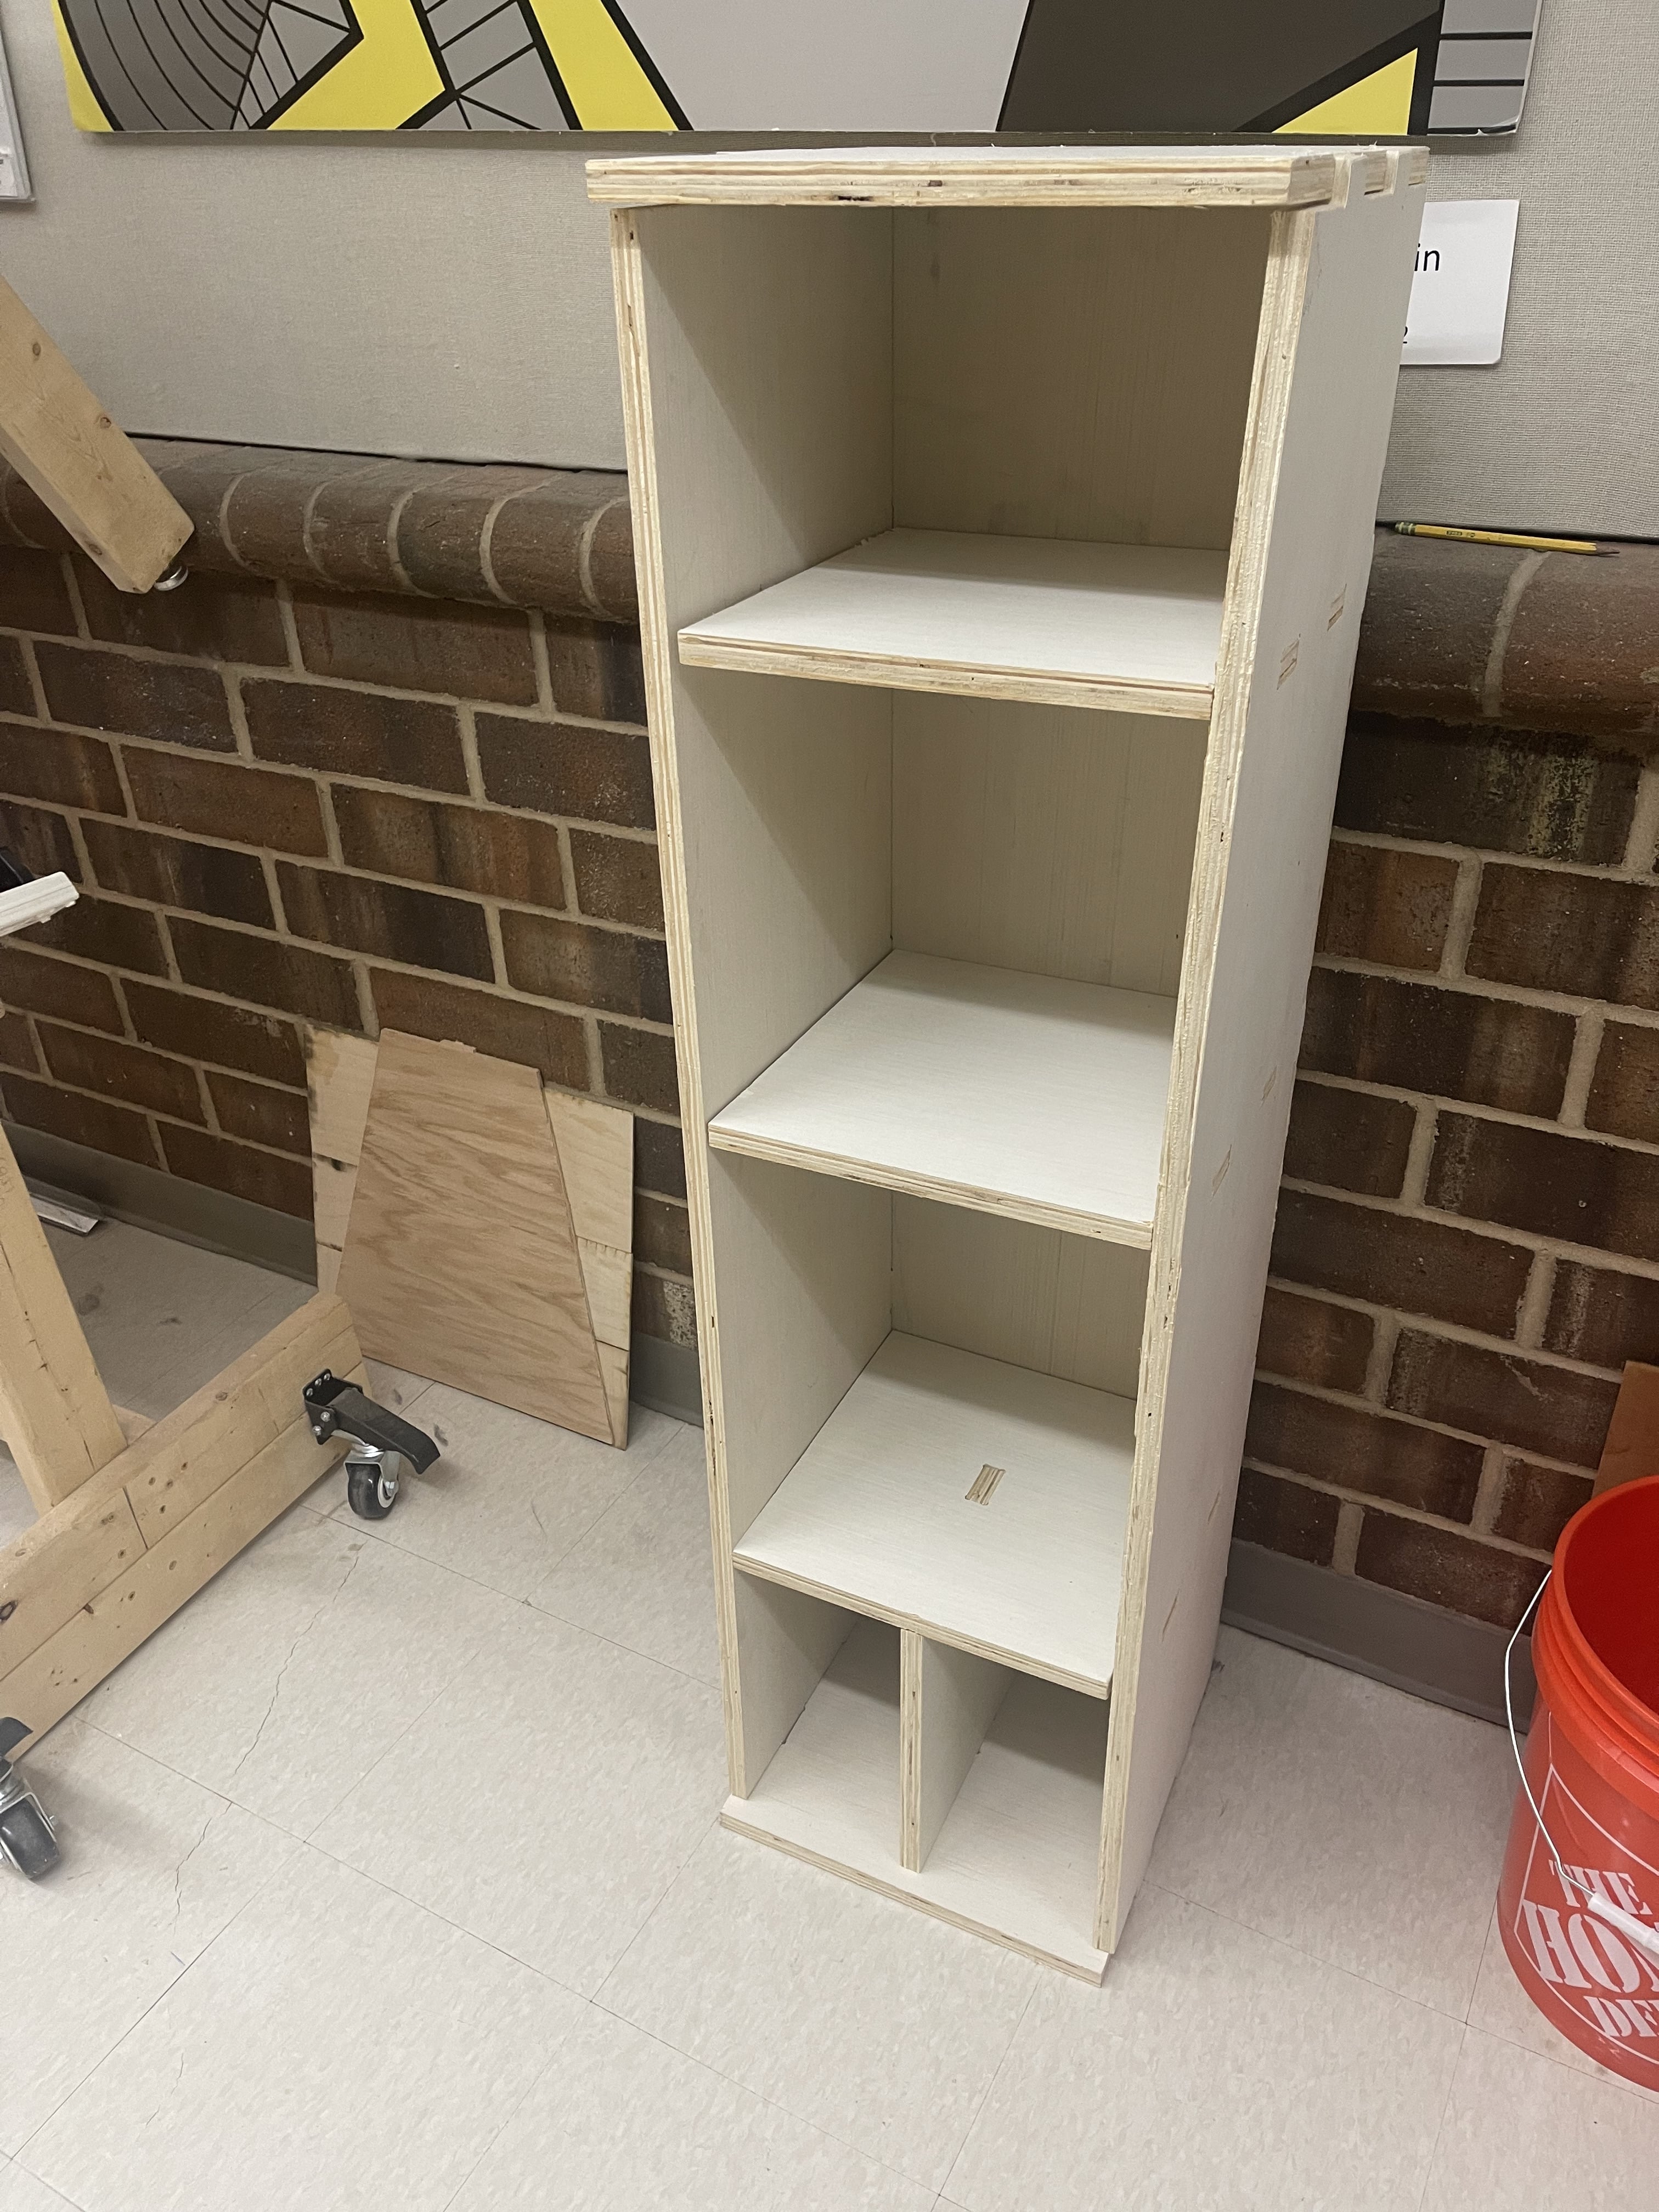
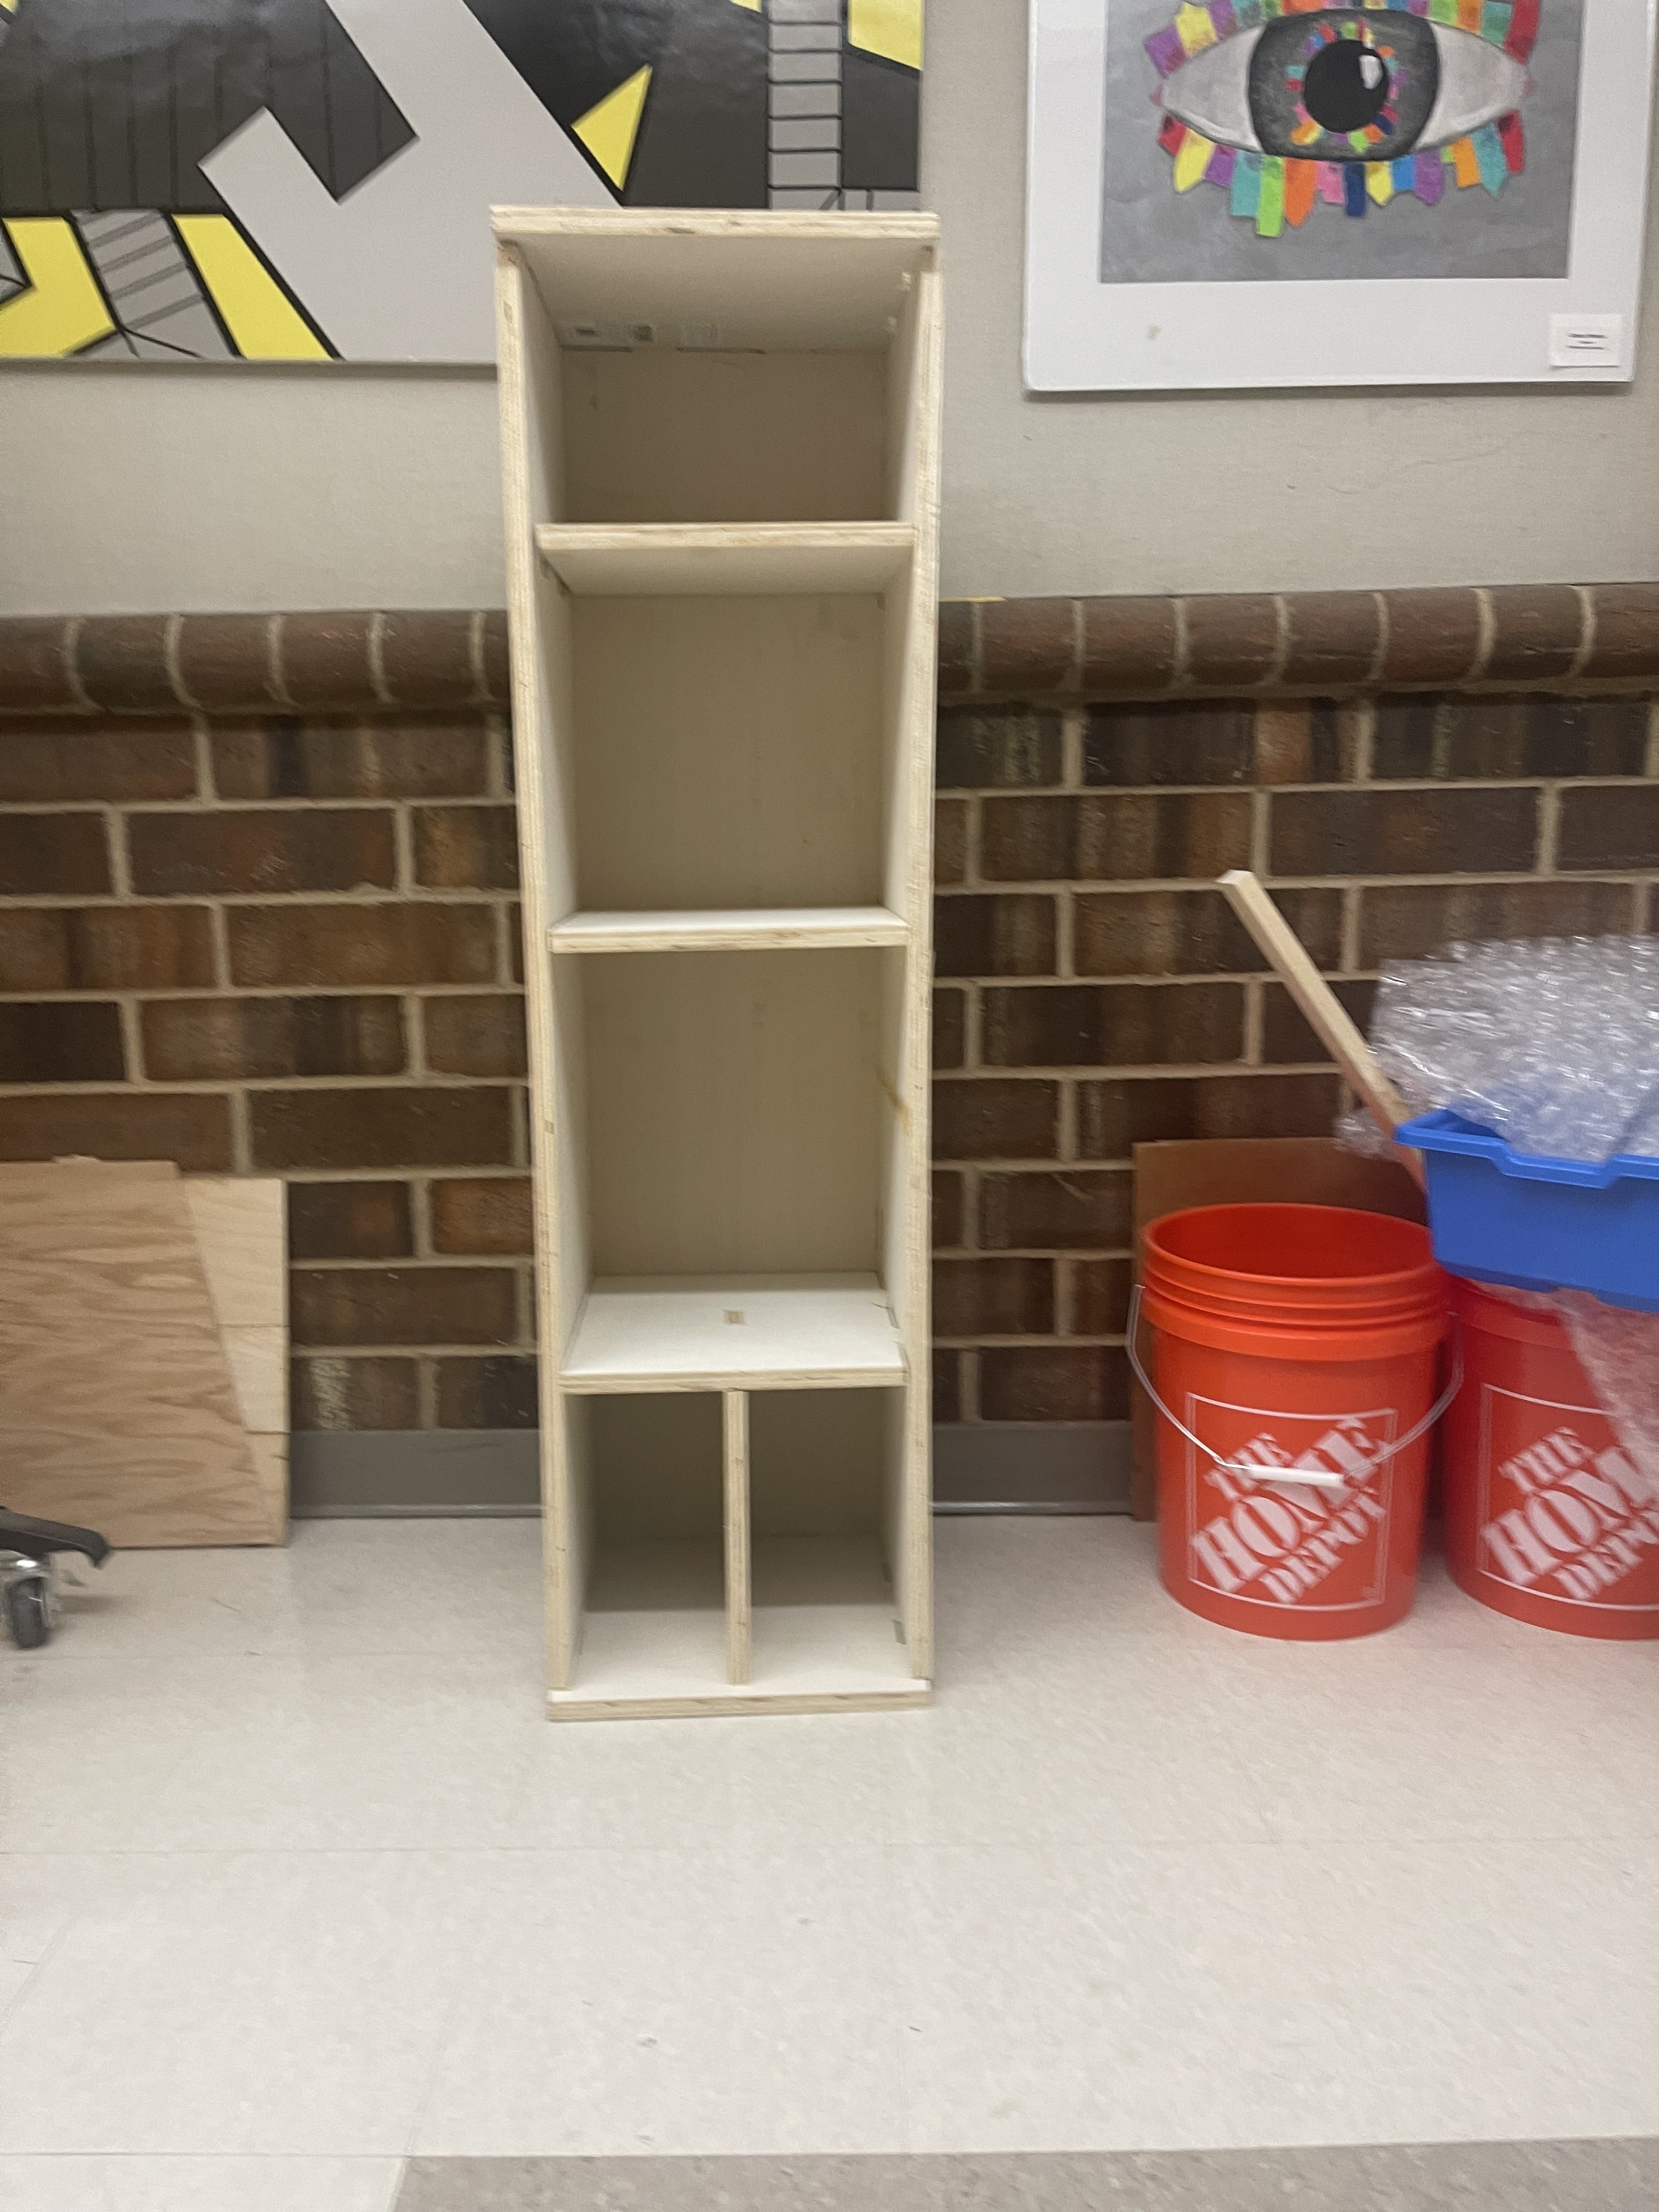
I would love to find a time to paint it or stain it. I love how it looks it will be perfect for my plants and books. Although the tabs were tight so it took a lot of sanding with the electric sanding machine for it to fit.
What I learned
This week was one of my favorites so far because I got to learn how to use a machine I haven’t used in years. I learned how to design it in Aspire and create toolpaths, and fillets when needed. I also learned how to use cuttle. That was extremely helpful in this project although my instructor recommended I used Fusion 360 which I had trouble in the beginning, I will do a better deep dive into that so I could get that working fully and figure out what I did wrong. Because there will be points where fusion will be more ideal than cuttle in any respect so it is important I figure out why it was over-constrained. Next, I learned how to fully use the CNC machine. I could run it perfectly always with the help of the wonderful workflow.
Group Work
This week me and my peer Pari researched the materials for the CNC Machine. You can see that on our Group Site.
Design Files
Here is my: