5a. Electronics Production (Students)
Milling Machine WorkFlow
Before Milling
1.Apply nitto tape to the bottom of a board and adhere it to the bed making sure to press it down
2.Open the file in bantam tools by going Files > Open
3.Add the following bits to the cut
A. 0.005” PCB engraving bit

B. 1/32 flat end mill

C.1/64 flat end mill
4.Put the 0.005” bit into the machine and change it in bantam tools and locate the bit
5.Under the advanced settings change the trace clearance to 1.5mm
6.Put the clip onto the board
7.Go bitbreaker > probe material thickness making sure to move the bit over the general area you are milling before having it go 8.down and get the thickness
9.Hit mill all visible to start milling
During Milling
1.While the machine mills the copper, keep an eye on the process to make sure it’s actually milling how you want it to be
2.Once the machine finishes milling the 0.005 PCB engraving part, take off the window, and use wrenches to take out the bit.
Replace it with the next bit (1/64 end mill)
3.Go back to the bantam software, re-locate tool, and continue the mill
4.Repeat steps 4-6 except this time swap the 1/64 end mill with a 1/32 end mill
After Milling
1.After milling, the first thing to do is get rid of all the excess copper shavings that build up during the milling process Do this with a vacuum so you don’t hurt yourself brushing the tiny copper shavings
2.After vacuuming, pry the board out of its position in the machine.
3.The milled board/material should either be completely separate from the board or be easy to pop out of the board.
4.Remove the nitto tape from the bottom of the milled board and rinse the board under water to remove any shavings left on it
5.Make sure to return all the bits to their cases and clean up your area once finished.
Characterizing Milling Properties
Definitions
Alaric worked on defining the terms.
Feed
Feed is the speed at which the machine moves the router bit through the material and must be right to have a clean cut edge.
Speed
Spindle speed is measured in rpms and should be set to a specific value for each type of bit and material. It is related to feed, and increasing speed can sometimes allow for increased feed. However, if it is set too high for the feed too low, there is a risk of overheating and burning.
Plunge Rate
Plunge rate is the speed at which the machine moves the bit down into the material and can vary depending on bit and material. Having it too high can damage the tip of the cutter.
Depth
Depth of cut is the tertiary cutting motion that determines how far the bit is pushed into the workpiece.
Tooling
Tooling refers to work holding fixtures (devices that keep the workplace in place while cutting), tool holders (devices that hold the bit on the machine), cutting tools (the bit used to remove material), or tool inserts (replaceable parts that do the actual cutting when affixed to the cutting tool).
Milling:
Since milling didn’t require a great amount of work for a group of 8, Nick’s job was simply to import the files from the Fab Schedule page of our previous Fab Academy student’s work. From here, after downloading, he imported the files into the Bantom Milling applcation and make sure everything imported correctly.
What was interesting is the file extension, something he nor the computer recognized, however the Bantom application understoon ending with the .nc and .interior.nc extensions.

For the group assignment Aaron worked on configuring the settings in the Bantam software. Aaron set the placement for both the trace file and the cut file. Aaron also inputted the bits for each mill. Setting a 1/64in Flat end mill as the engraver and the 1/32in flat end mill as the outline bit

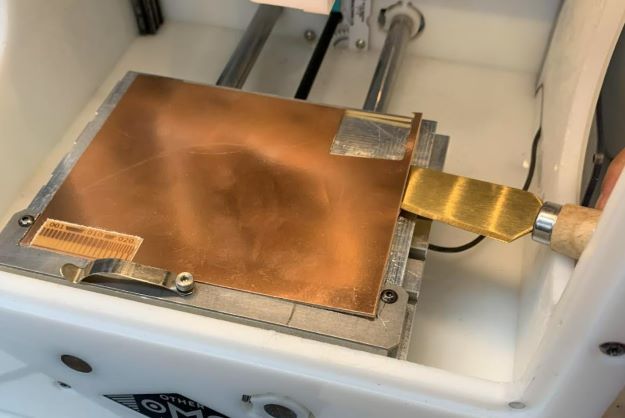
Jack worked on setting up the material. Jack used a single sided ganeral copper pcb board. He added several strips of nitto tape behind the plate to secure it to the machine bed. This was not to hard as it was just a simple task.
Andrew then worked on replacing the necessary bits when it was necessary to change them out. Our mill required two different bits, the 1/64 end mill for the traces and the 1/32 end mill for the outline. Since the machine always mills the traces before outlines, Andrew used the wrenches to put in the 1/64 bit first, and then when the machine was finished with that, he put in the 1/32 end mill. He also contributed to the “During Milling” section of the milling machine workflow.

This is the 1/64 bit

This is the 1/32 bit
Jada’s Work
Jada worked on taking out and preparing the bit for exchange after the milling machine finished the first cut with the first bit. The mill originally had a 1/64 end mill bit inside of it. This bit in particular is used to make the traces on the board. The next bit that is needed was the 1/32 end mill bit. This bit is the final bit used to create the outline of the board. So I started the process of replacing the small bit. I used the wrench to take out the 1/64 bit. I had to put a rubber cover over the bit so after it was taken out it wouldn’t fall and break. This rubber peice helped the bit as I unscrewed it from its holding place.

These are the two wrenches used to replace the bits in their designated spot on top of the bantam tool.
Pari’s Work
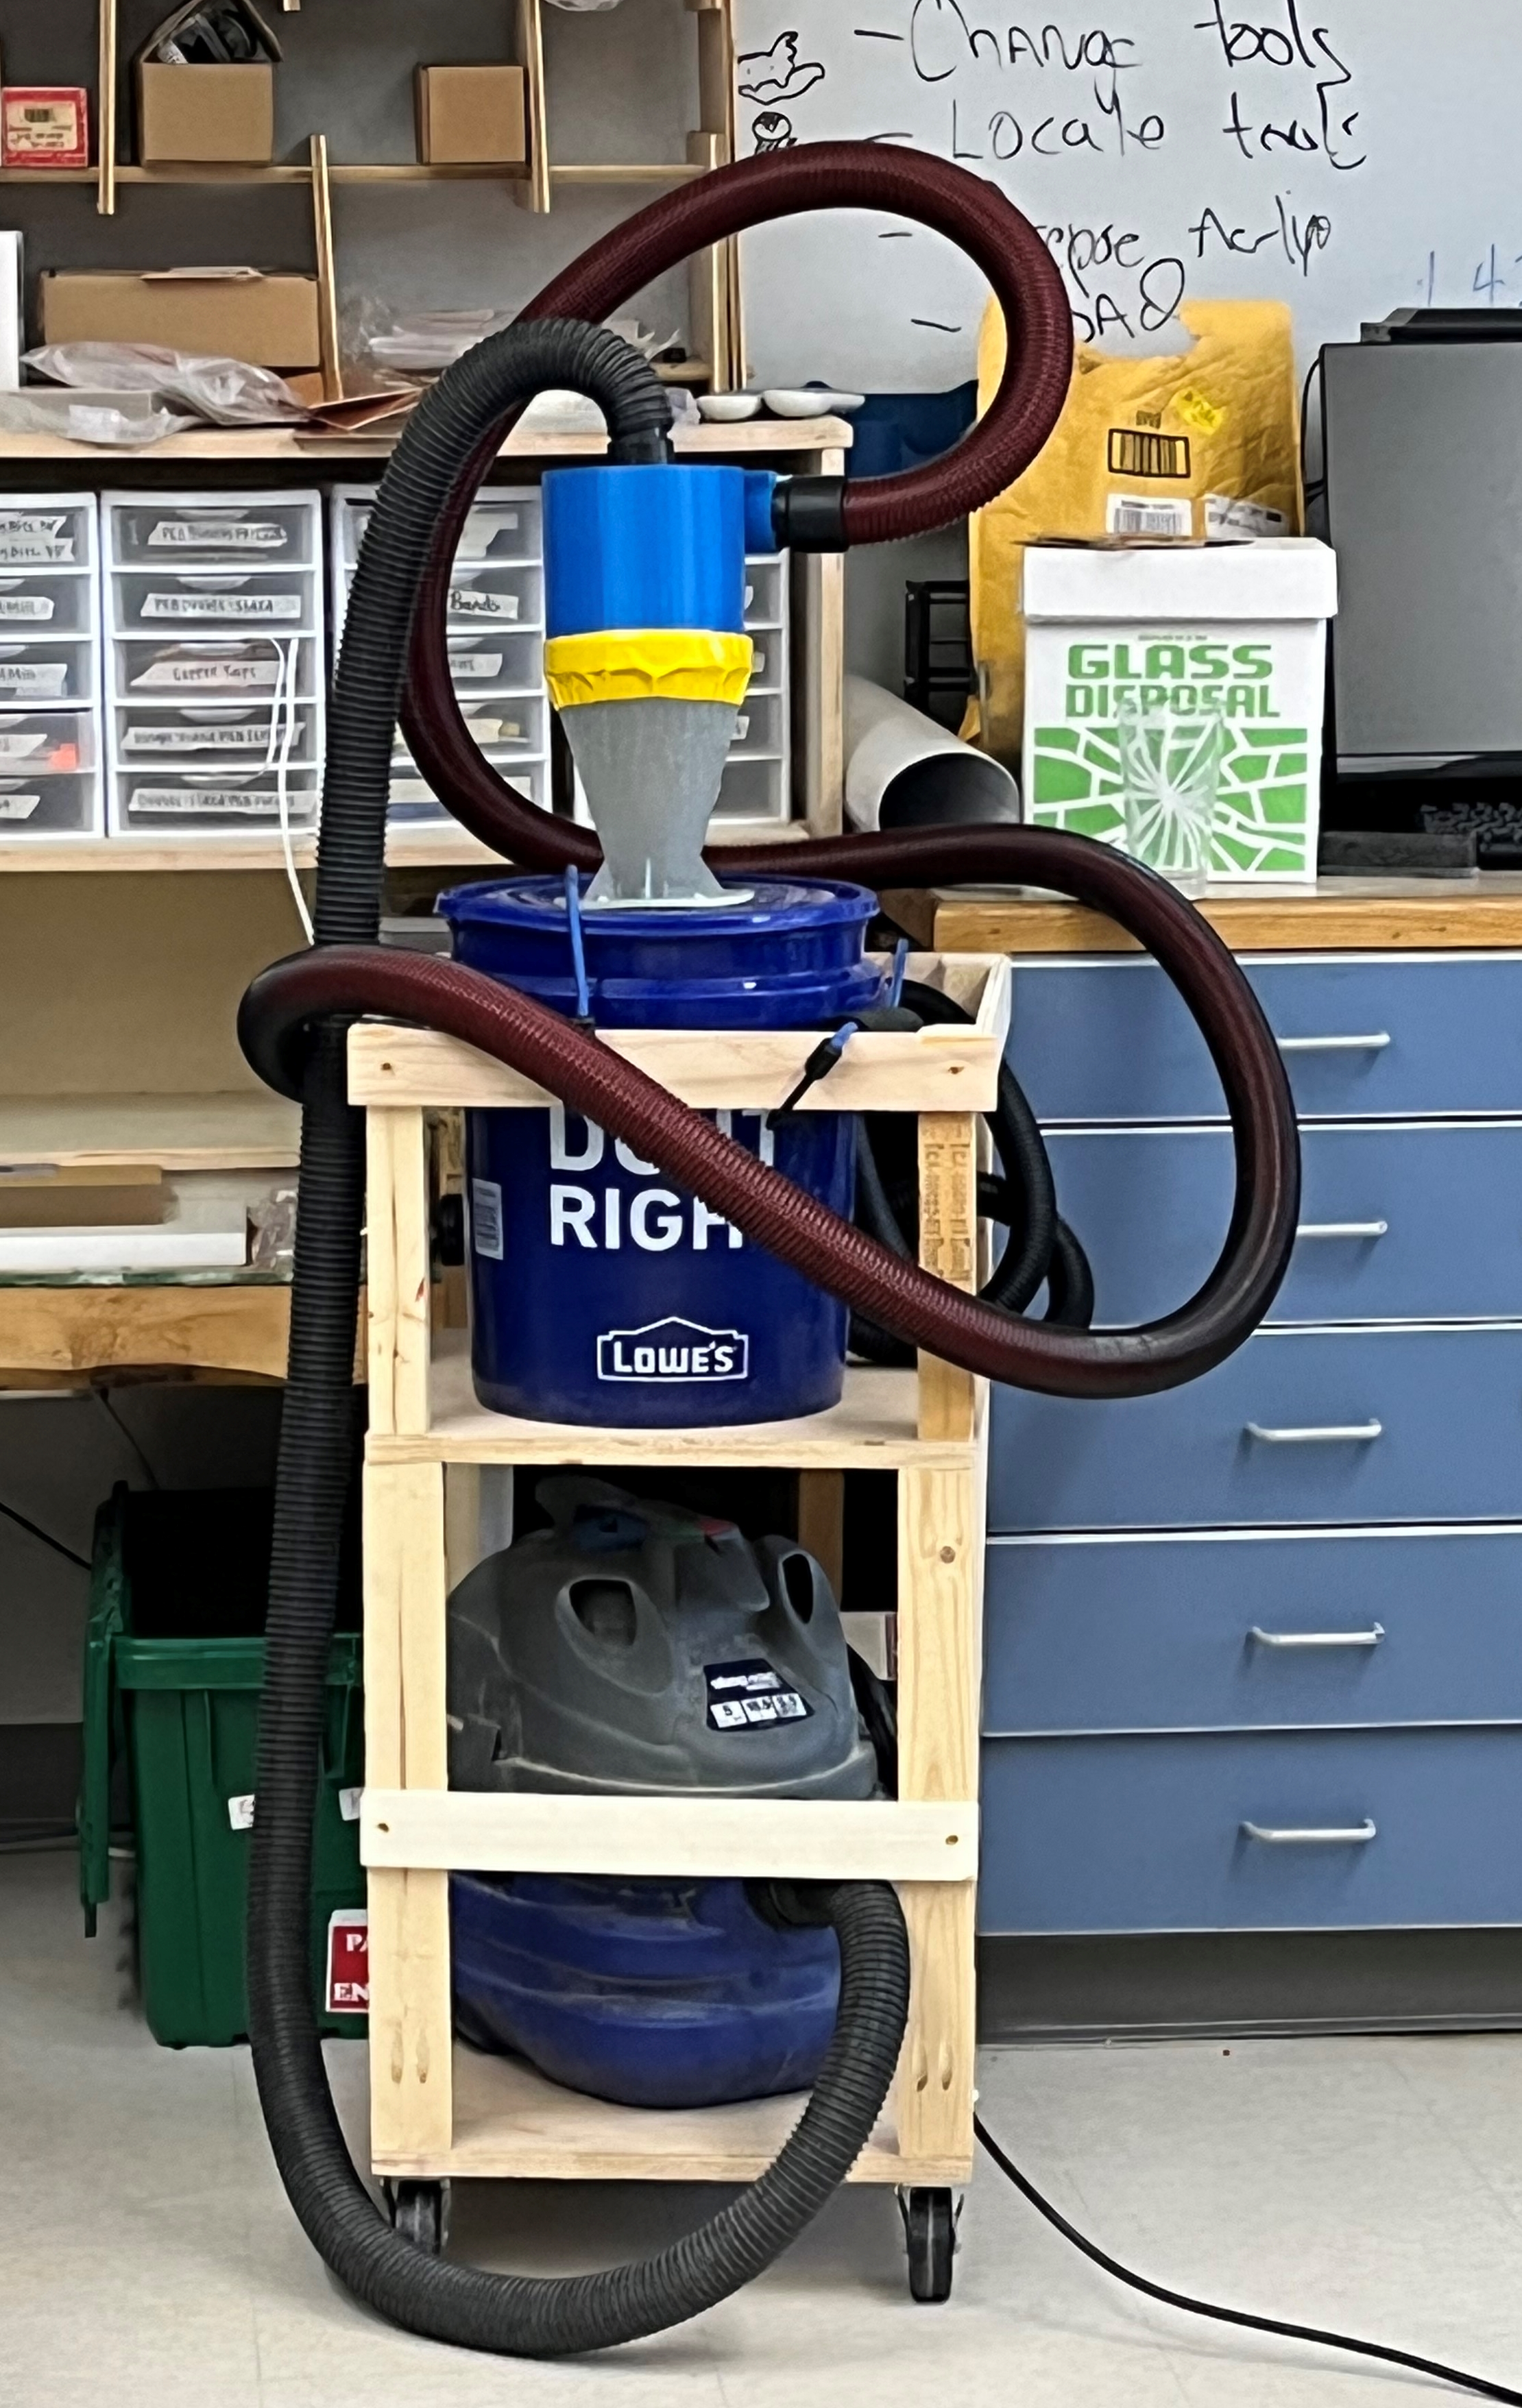
Pari then used the vaccum to clean the board before extracting the completed the board. She first opened all the doors of the Bantam Tool machine, and the utilized the vaccum to clean the excess dust around the board so taking the board out of the machine would be a cleaner and neater process. The vaccum also ensures that people do not get copper splinters when extracting the board. Moreover, the vaccum also helps clean out the dust from the posterior of the machine, so it is clean for others who use it in the future.
This is the vaccum she used:
After Pari vaccumed the board, Aarush came in to extract the board from the machine. Since the Nitto Tape was used to adhere the coppor board to the milling machine, it is best to use a sort of pry-bar instead of your fingers. Aarush slid the bar underneath the board and pushed up to get the board out.
The milled board/material should either be completely separate from the board or be easy to pop out of the board after the board is pryed out.
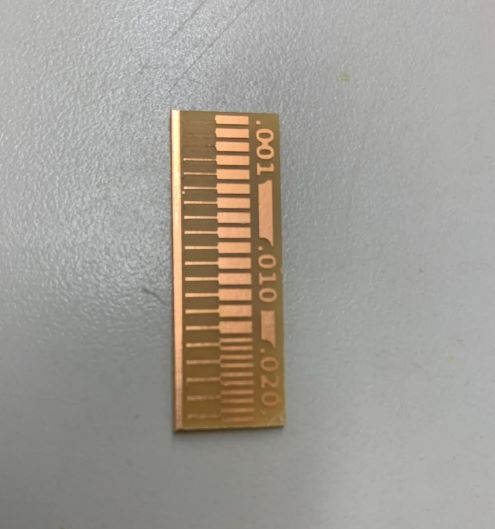
Once the cut peice is out, Aarush rinsed it under water and cleaned it to remove all the coppor shavings This is what the final piece looked like
After milling, Aarush returned all the bits to their cases and cleaned the area.